How to Fold an Origami Pigeon
Step 1
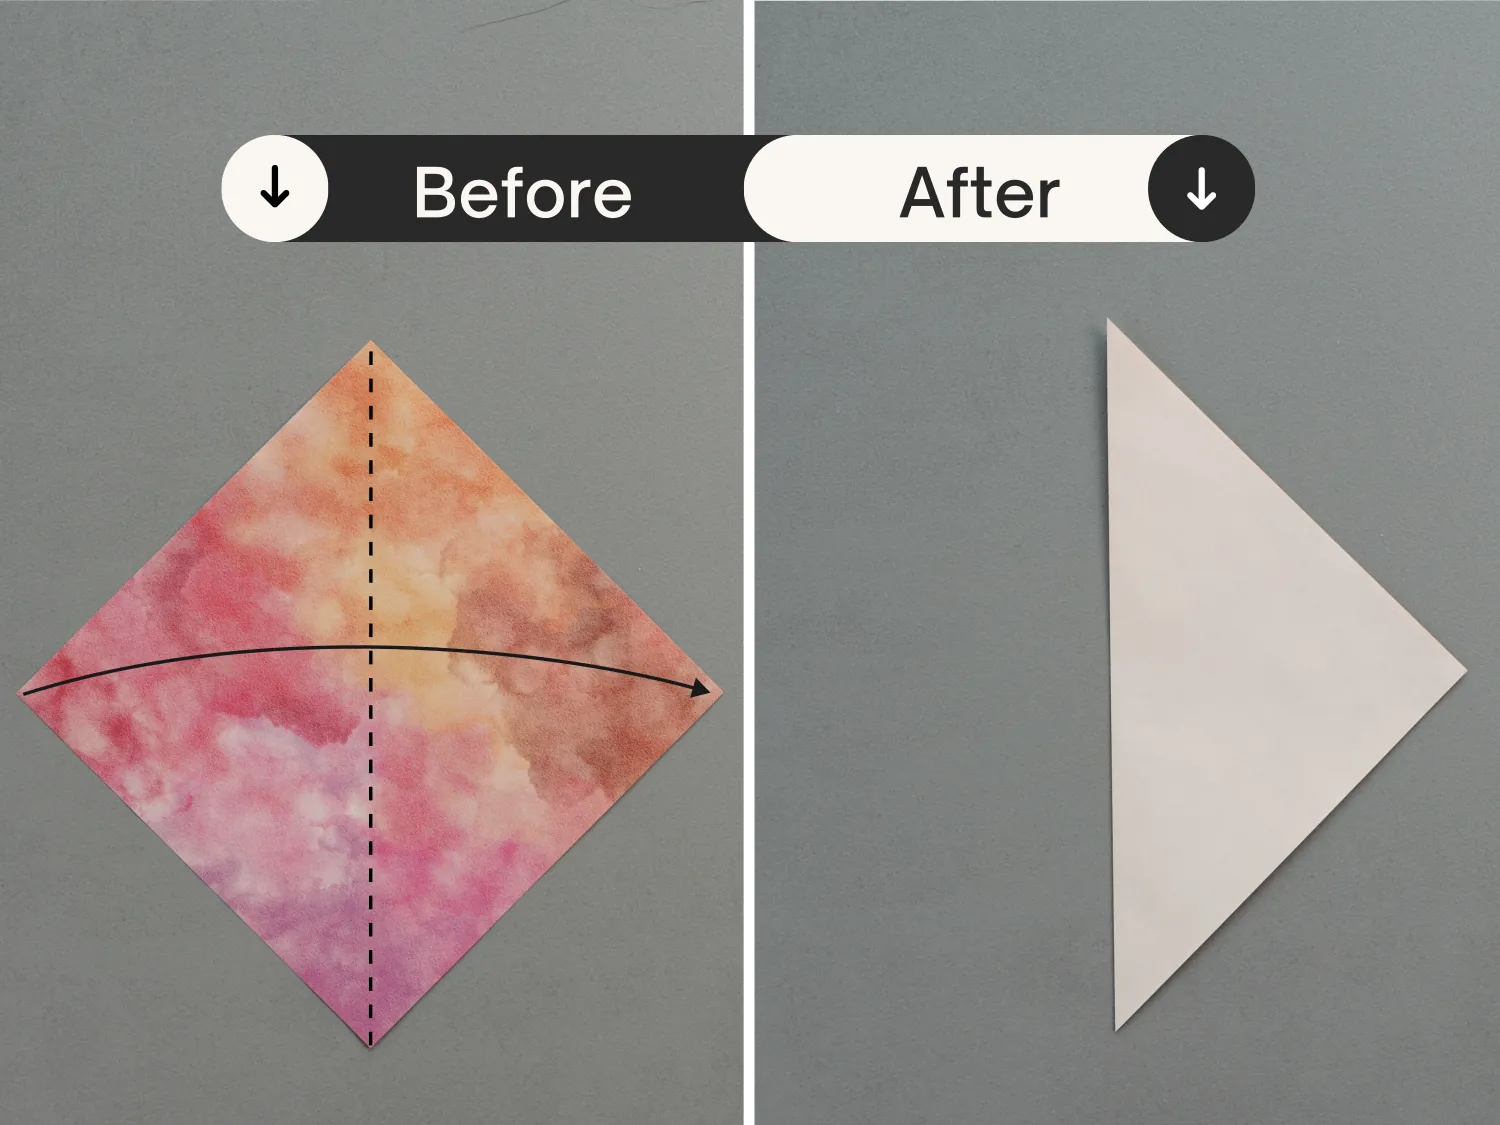
Start with the colored side of the paper facing up, and fold it in half vertically from the left to the right.
Step 2
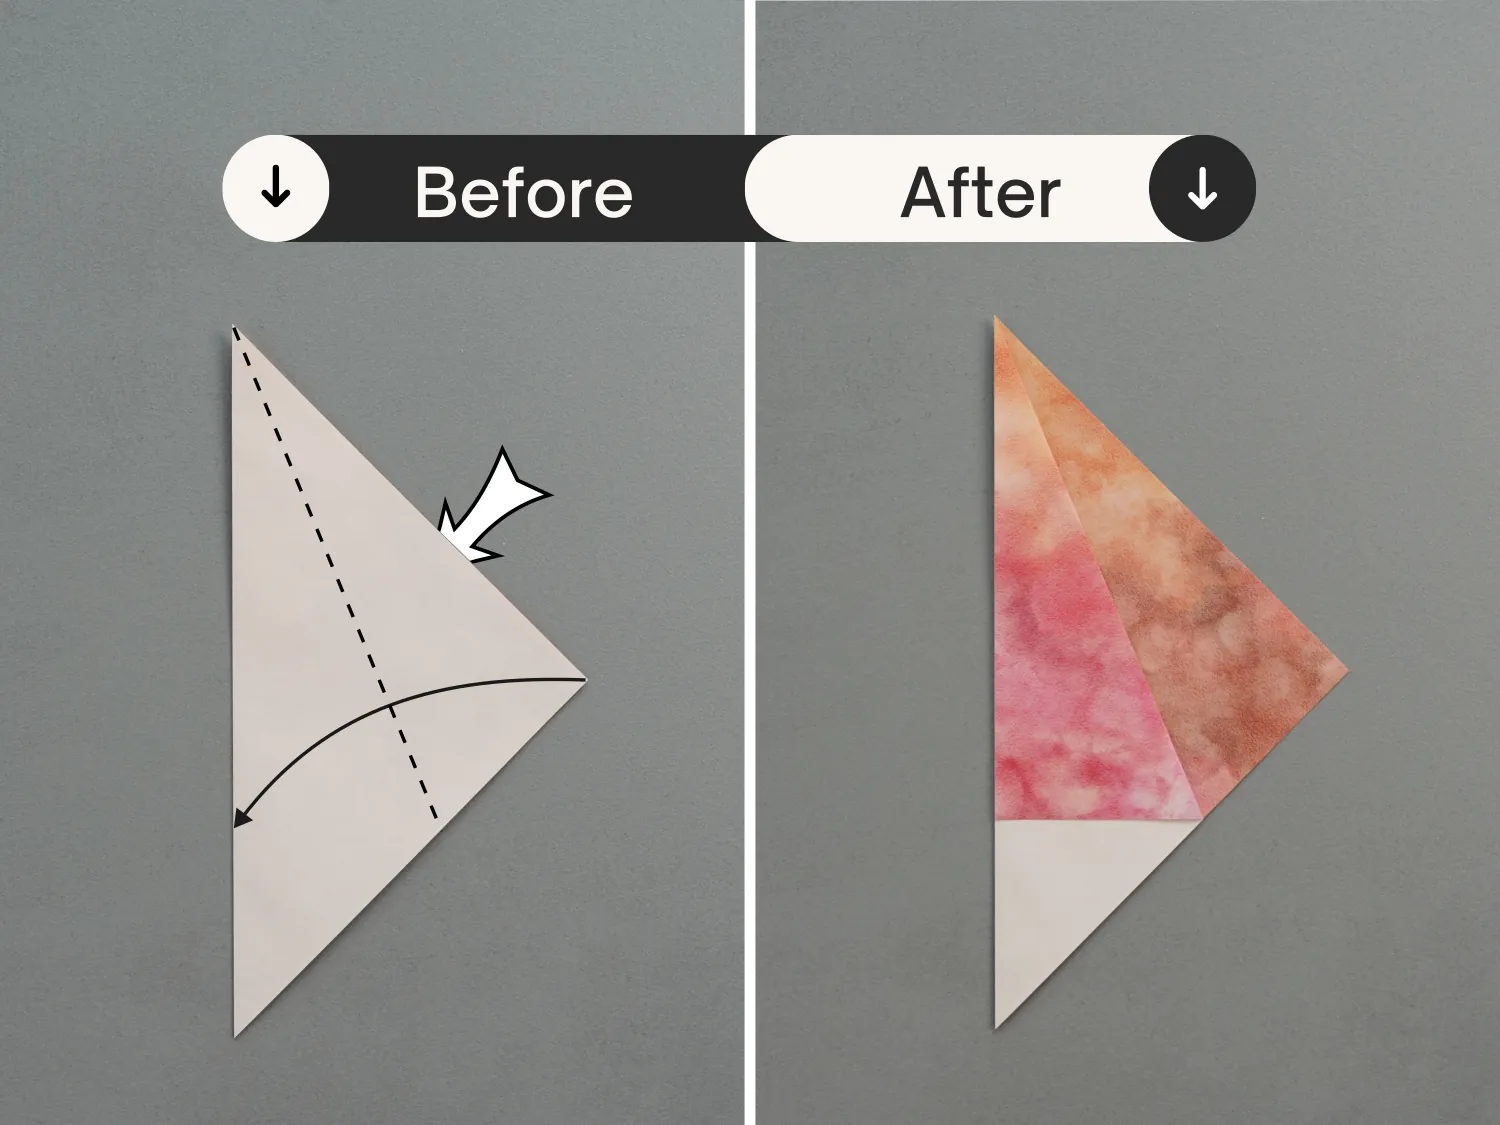
Fold the top right edge of the top layer to align with the left edge.
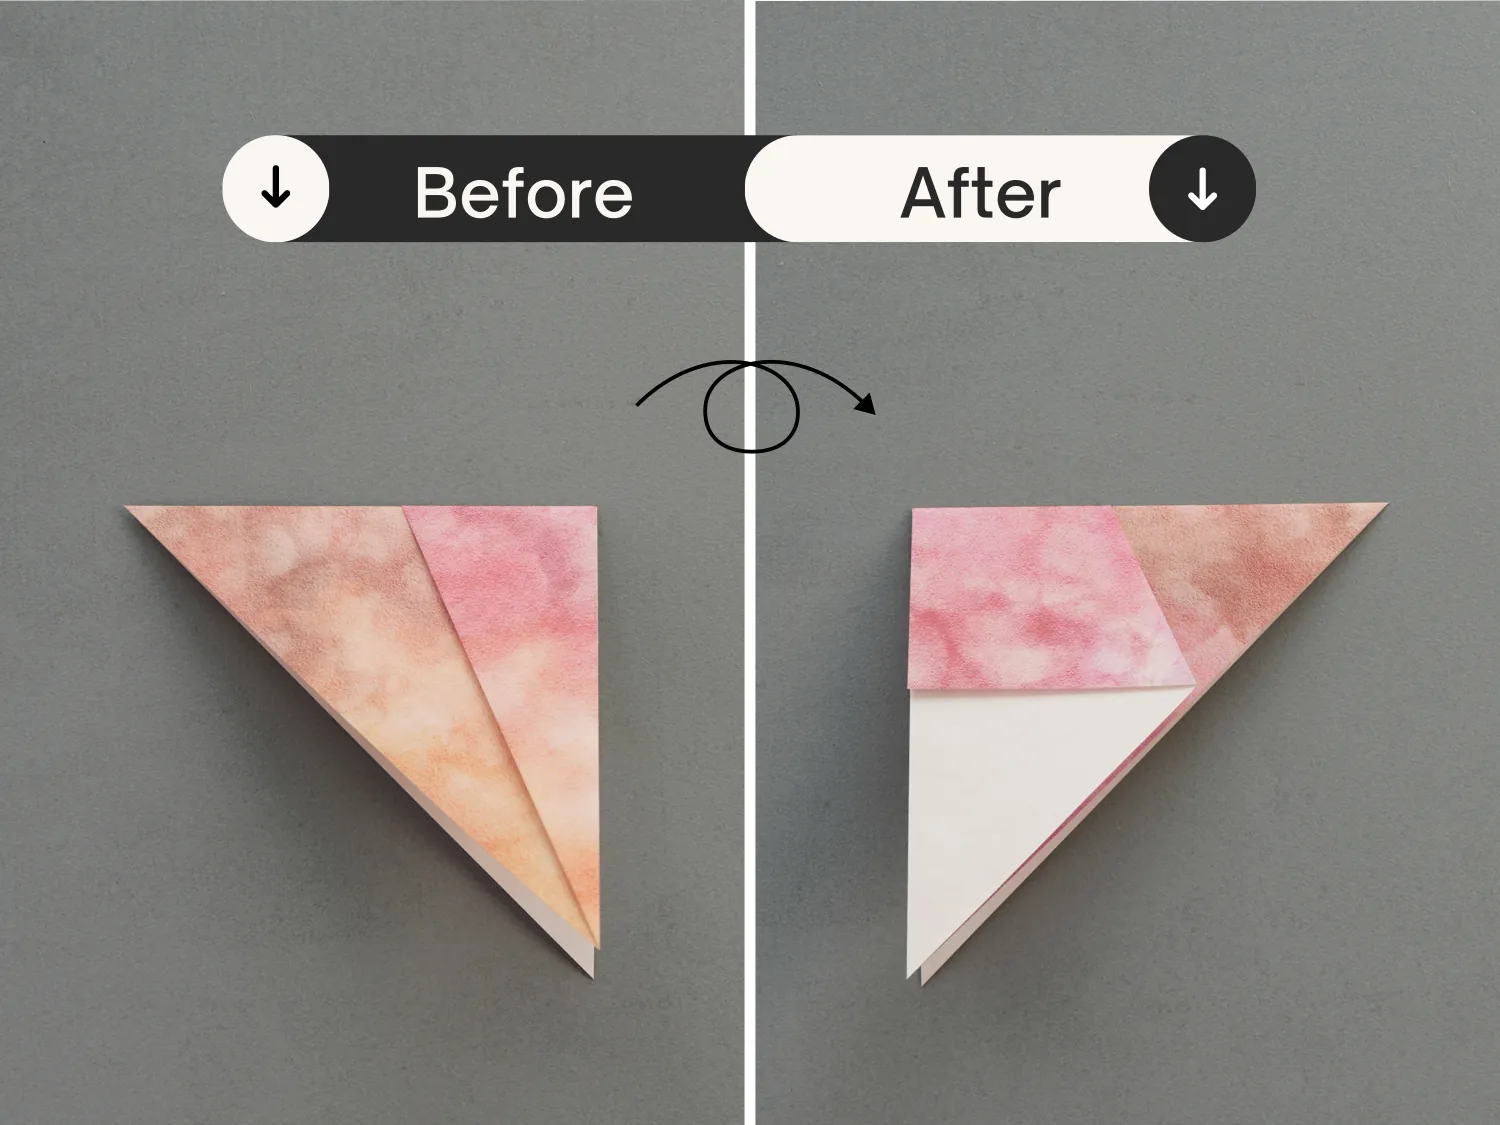
Step 3
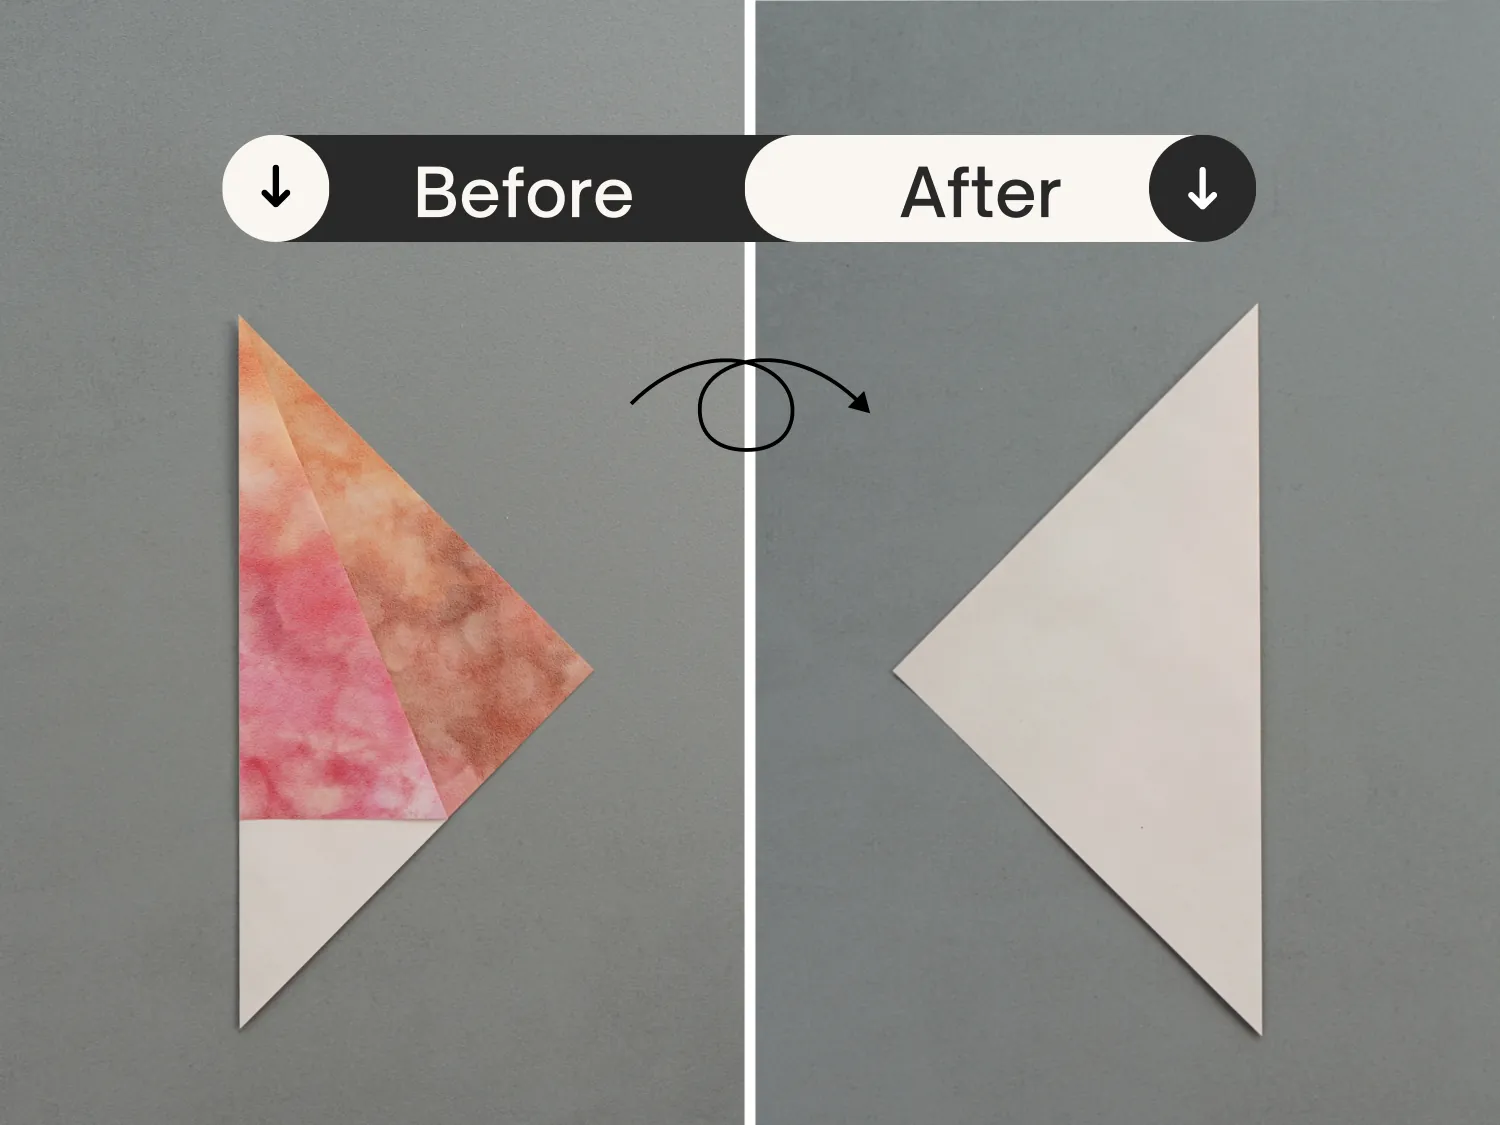
Flip the paper over.
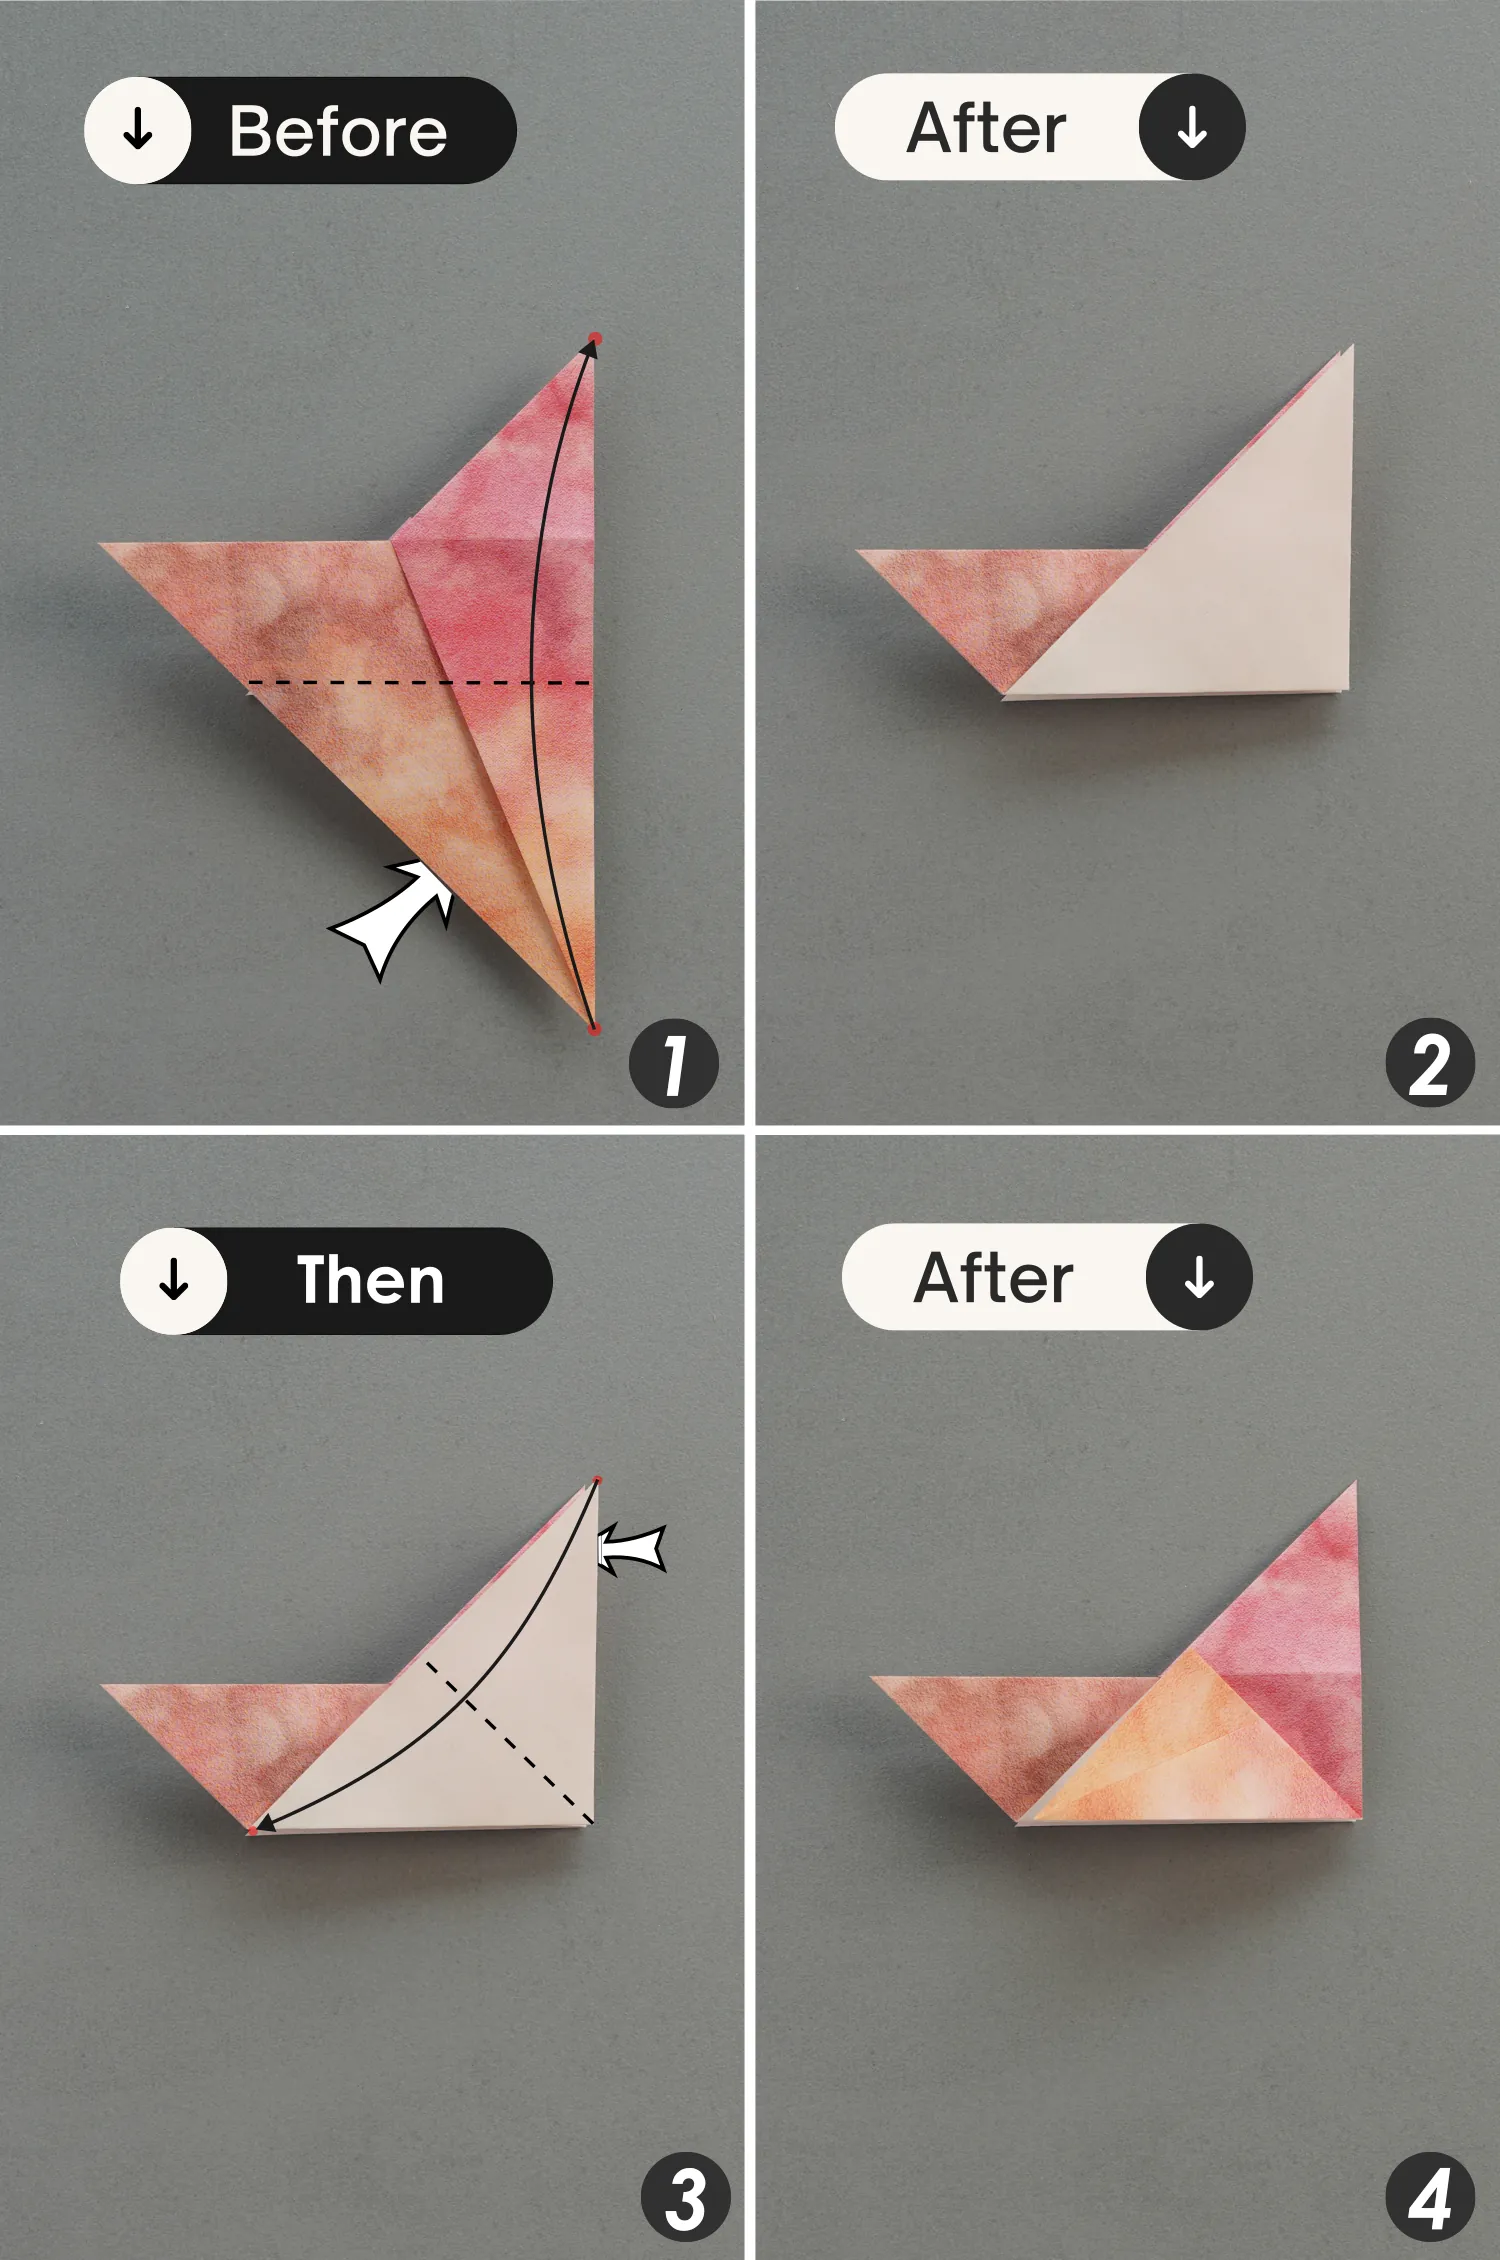
Step 4
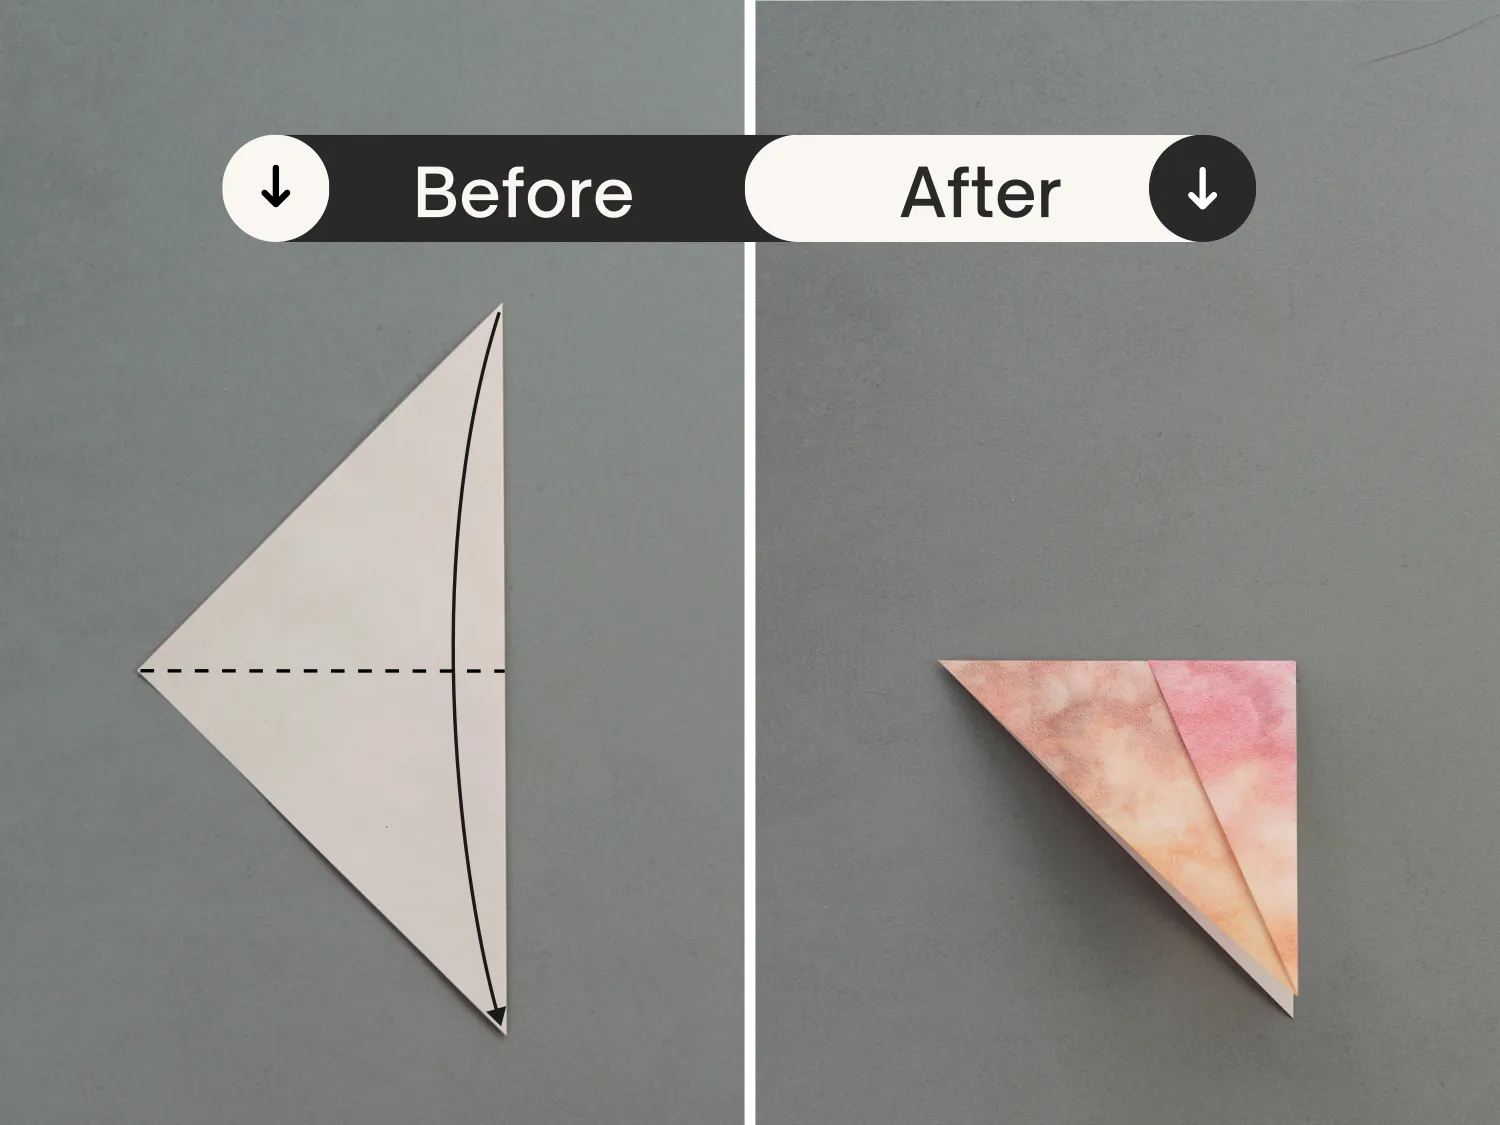
Fold the top corner to meet the bottom corner.
Step 5
Flip the paper over.
Step 6
Lift the top layer to open the pocket, then squash it.
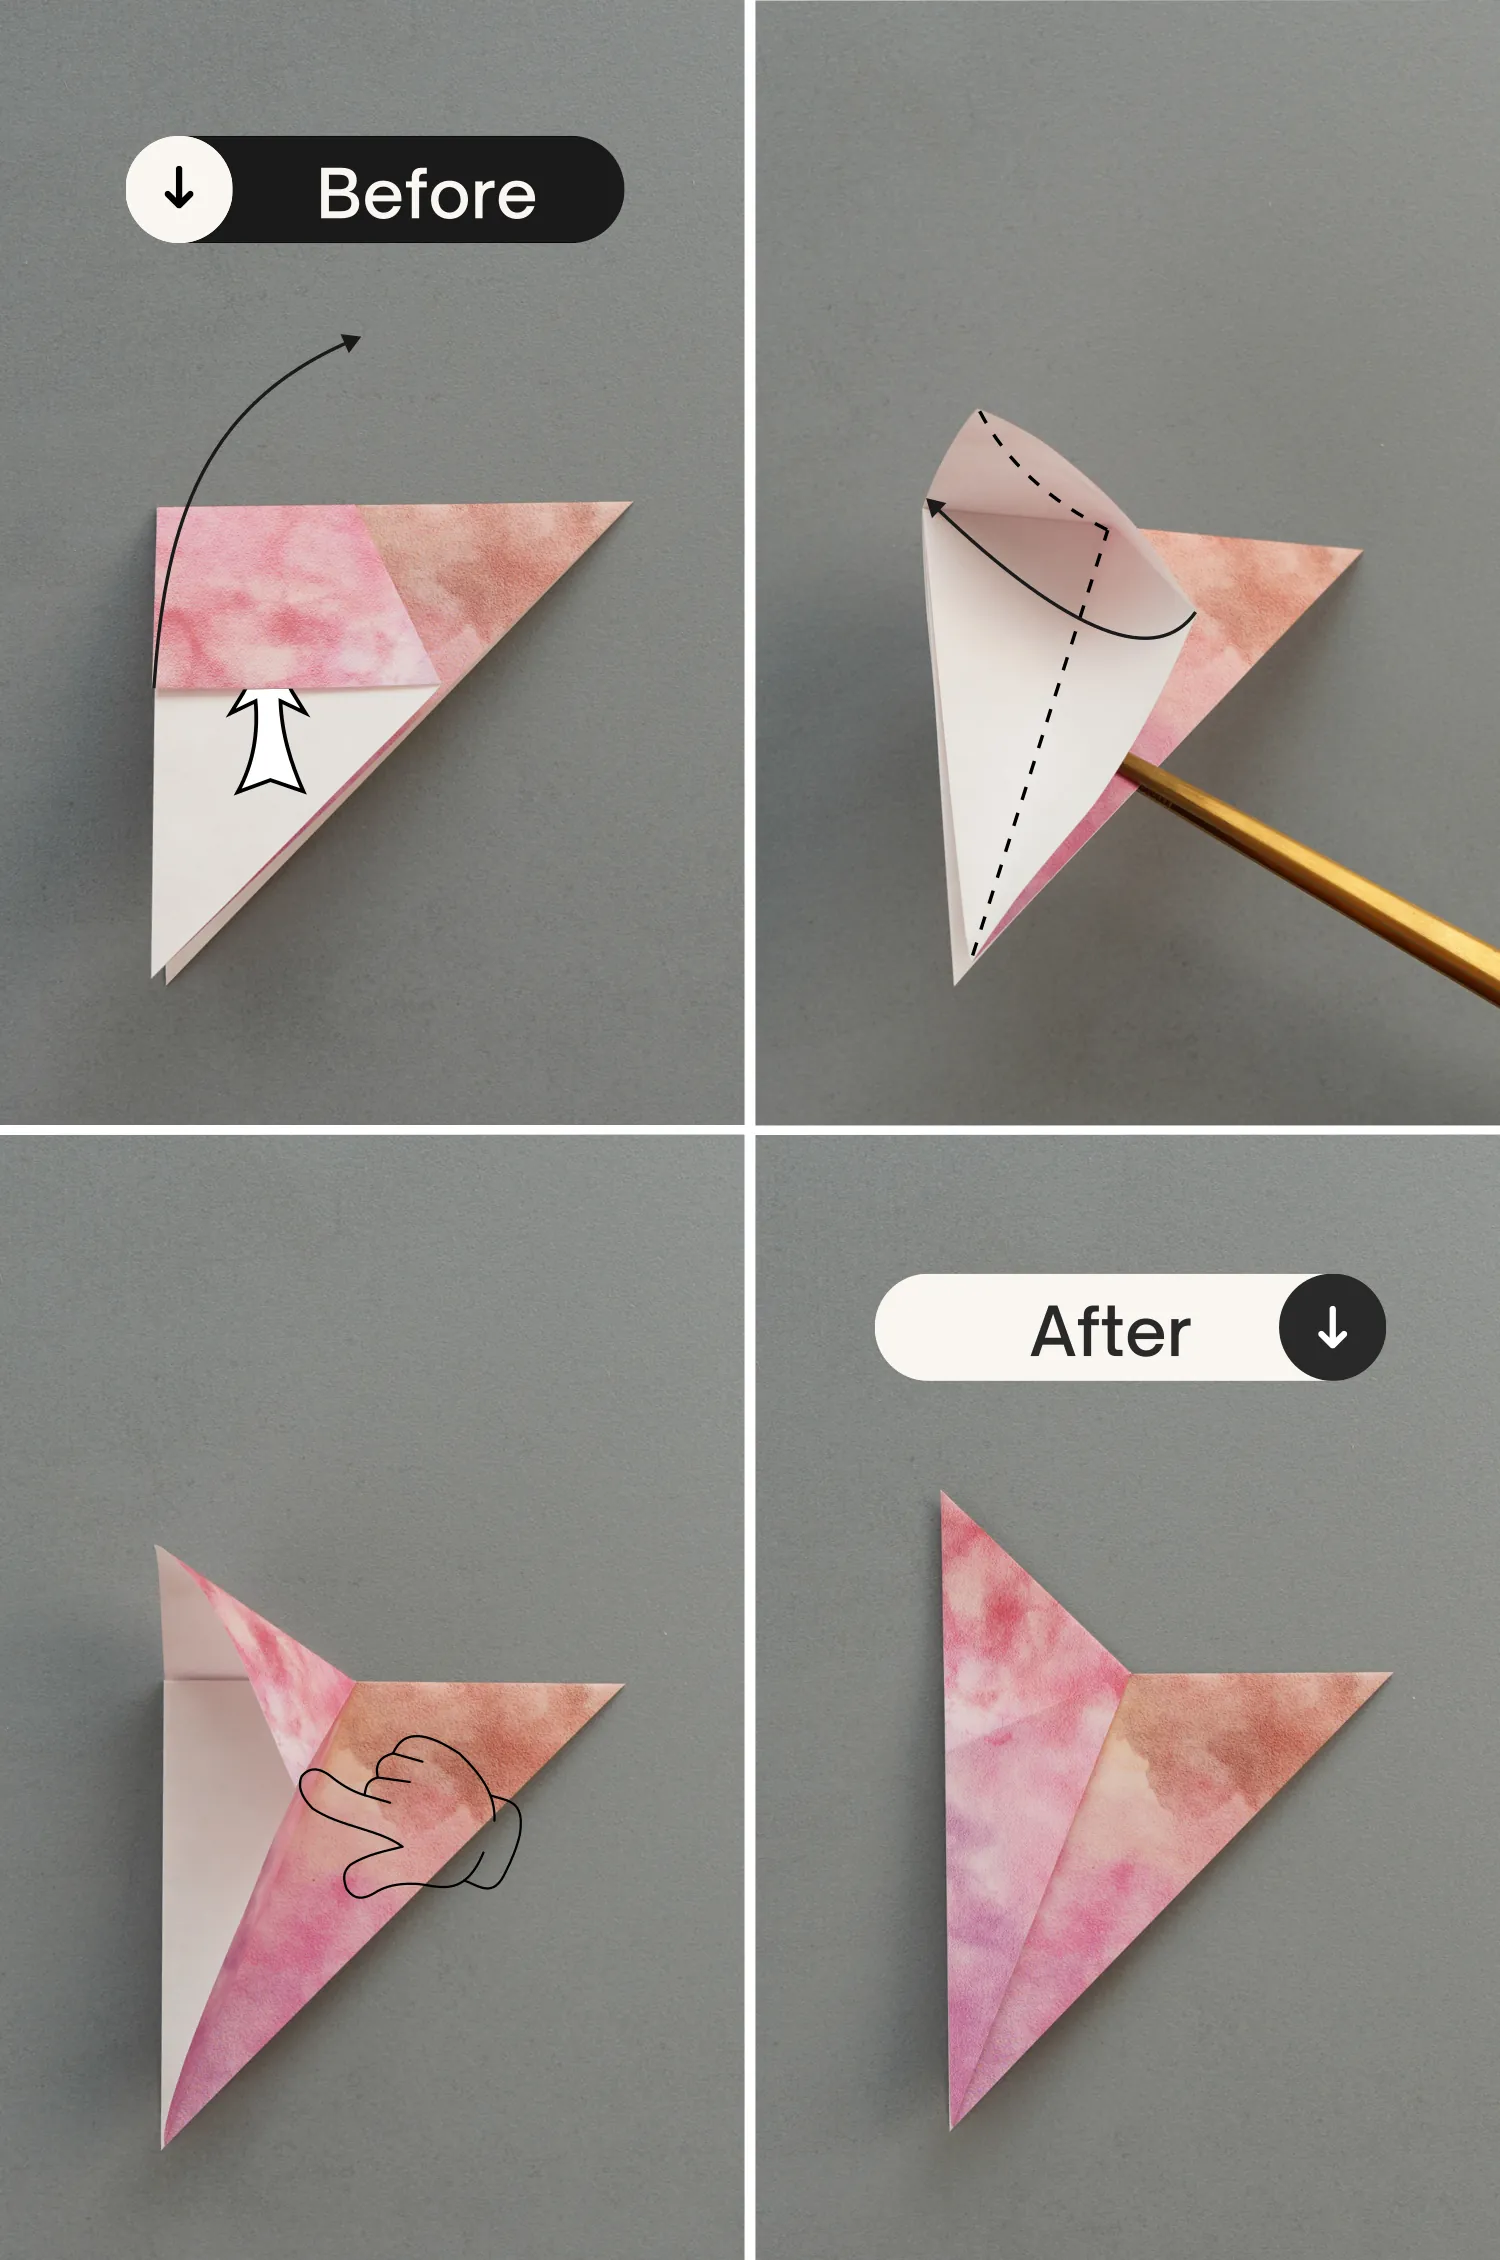
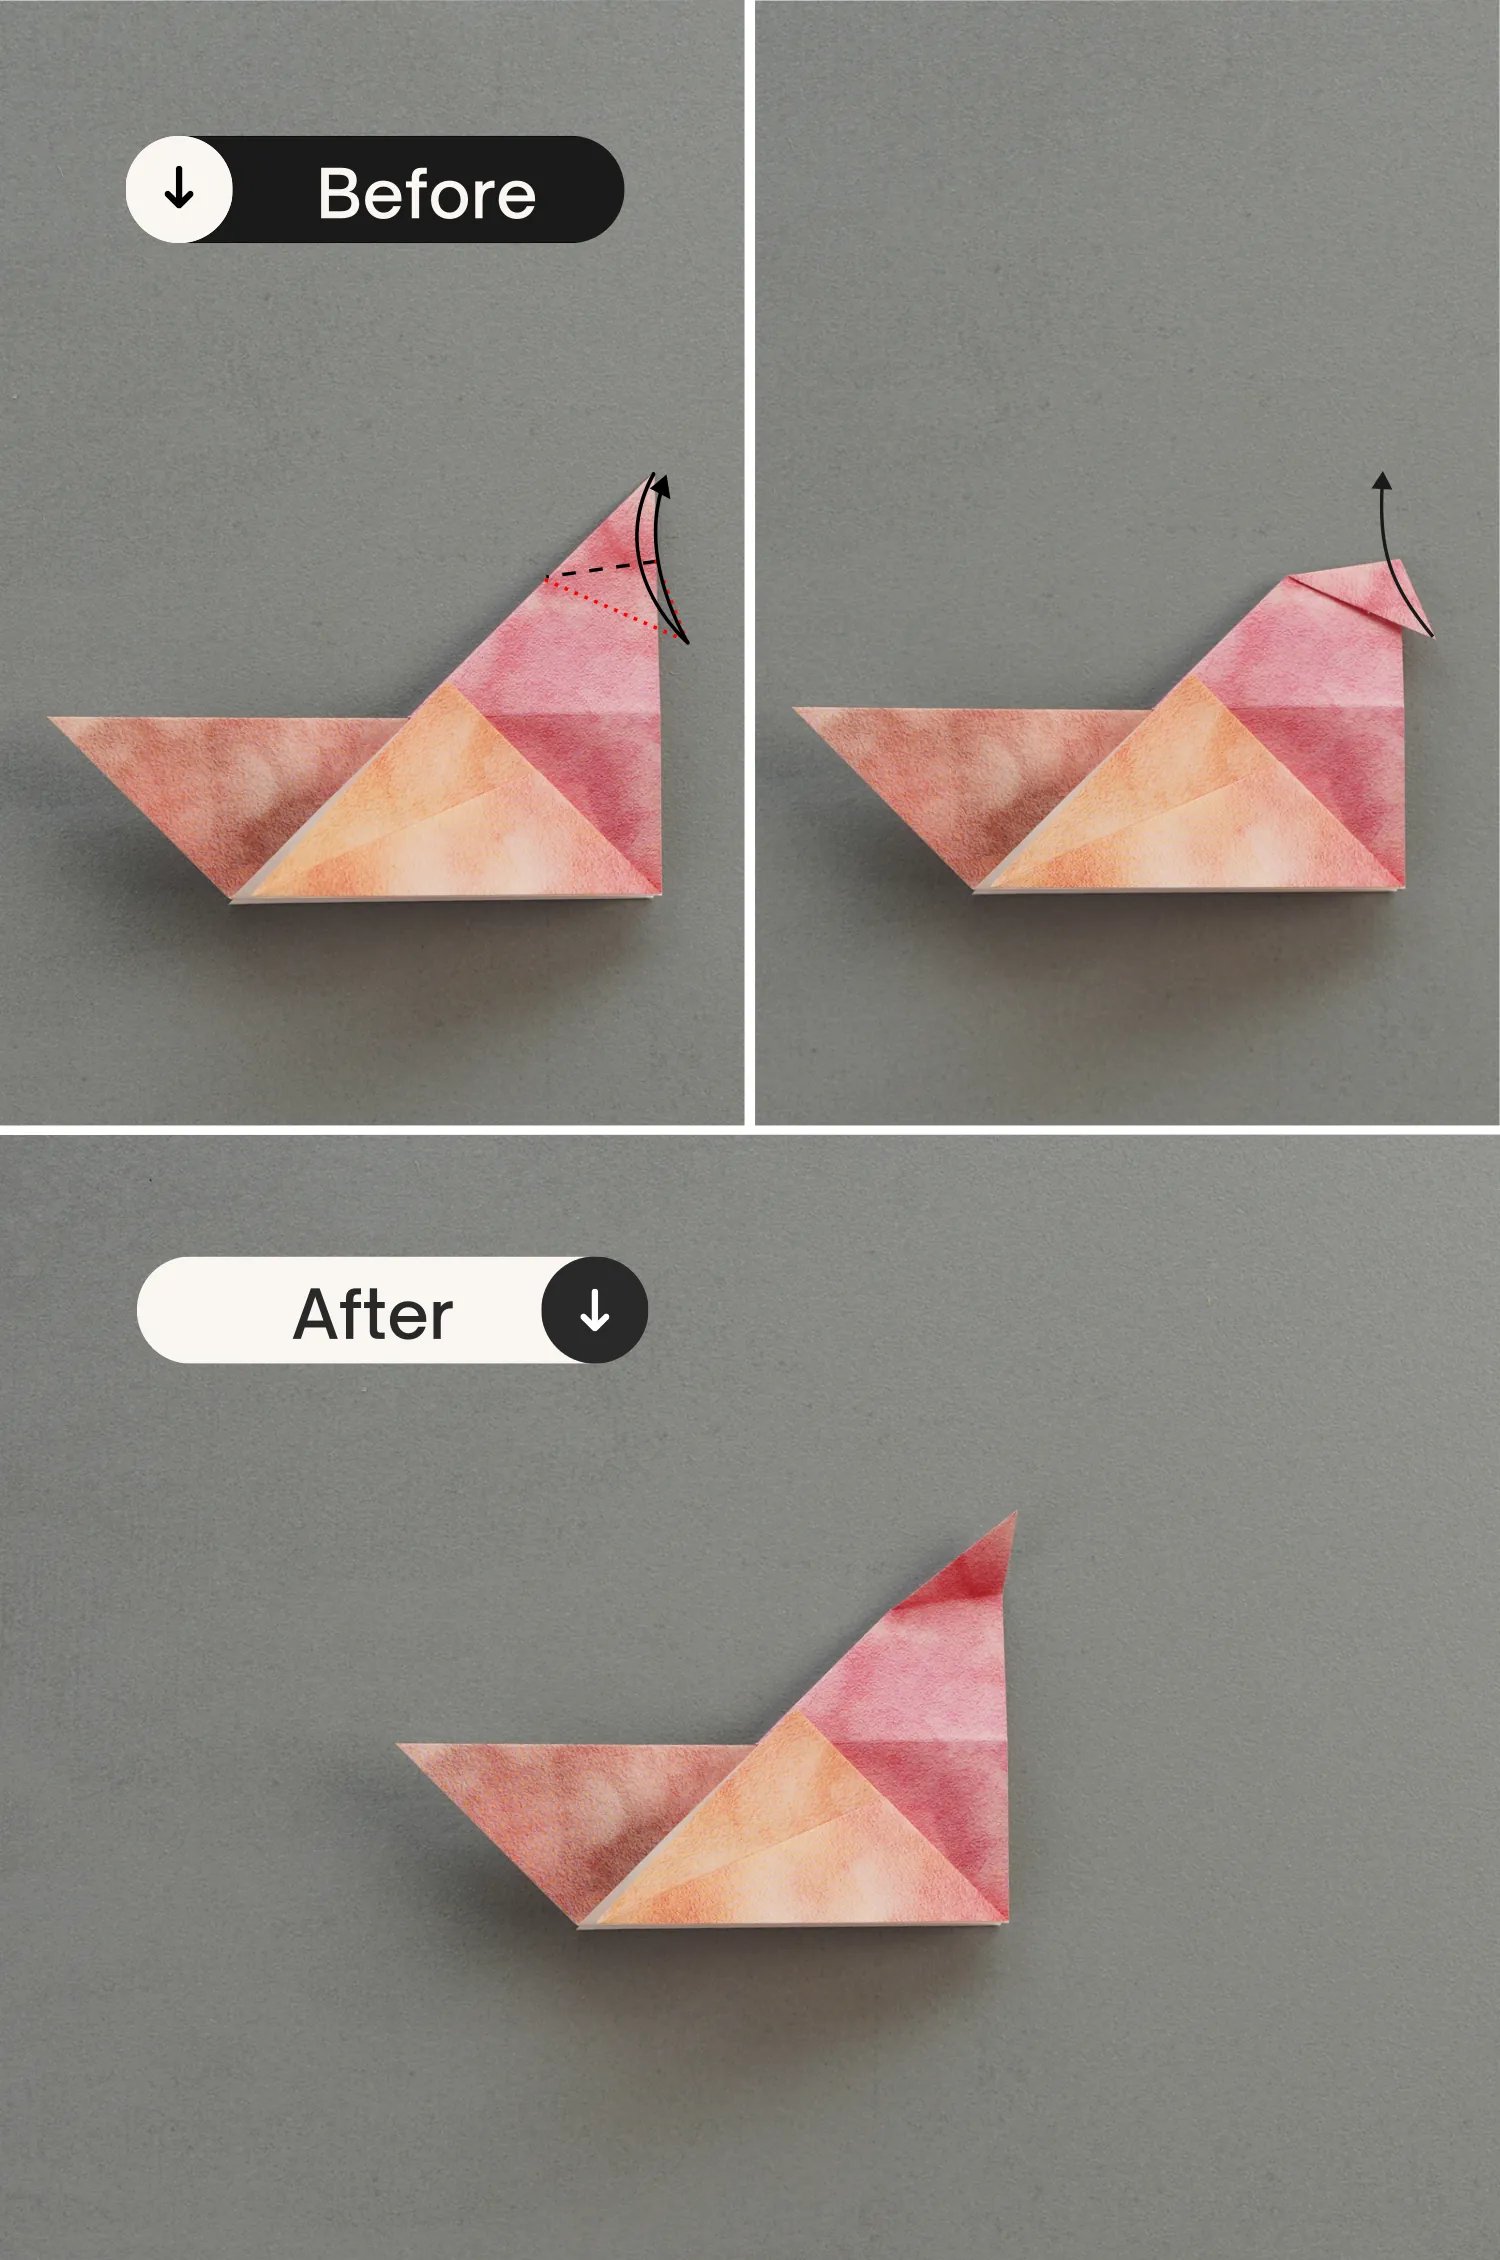
Step 7
Fold the bottom corner of the top layer up to meet the top corner on the left, then fold it down to the right along the dotted line diagonally.
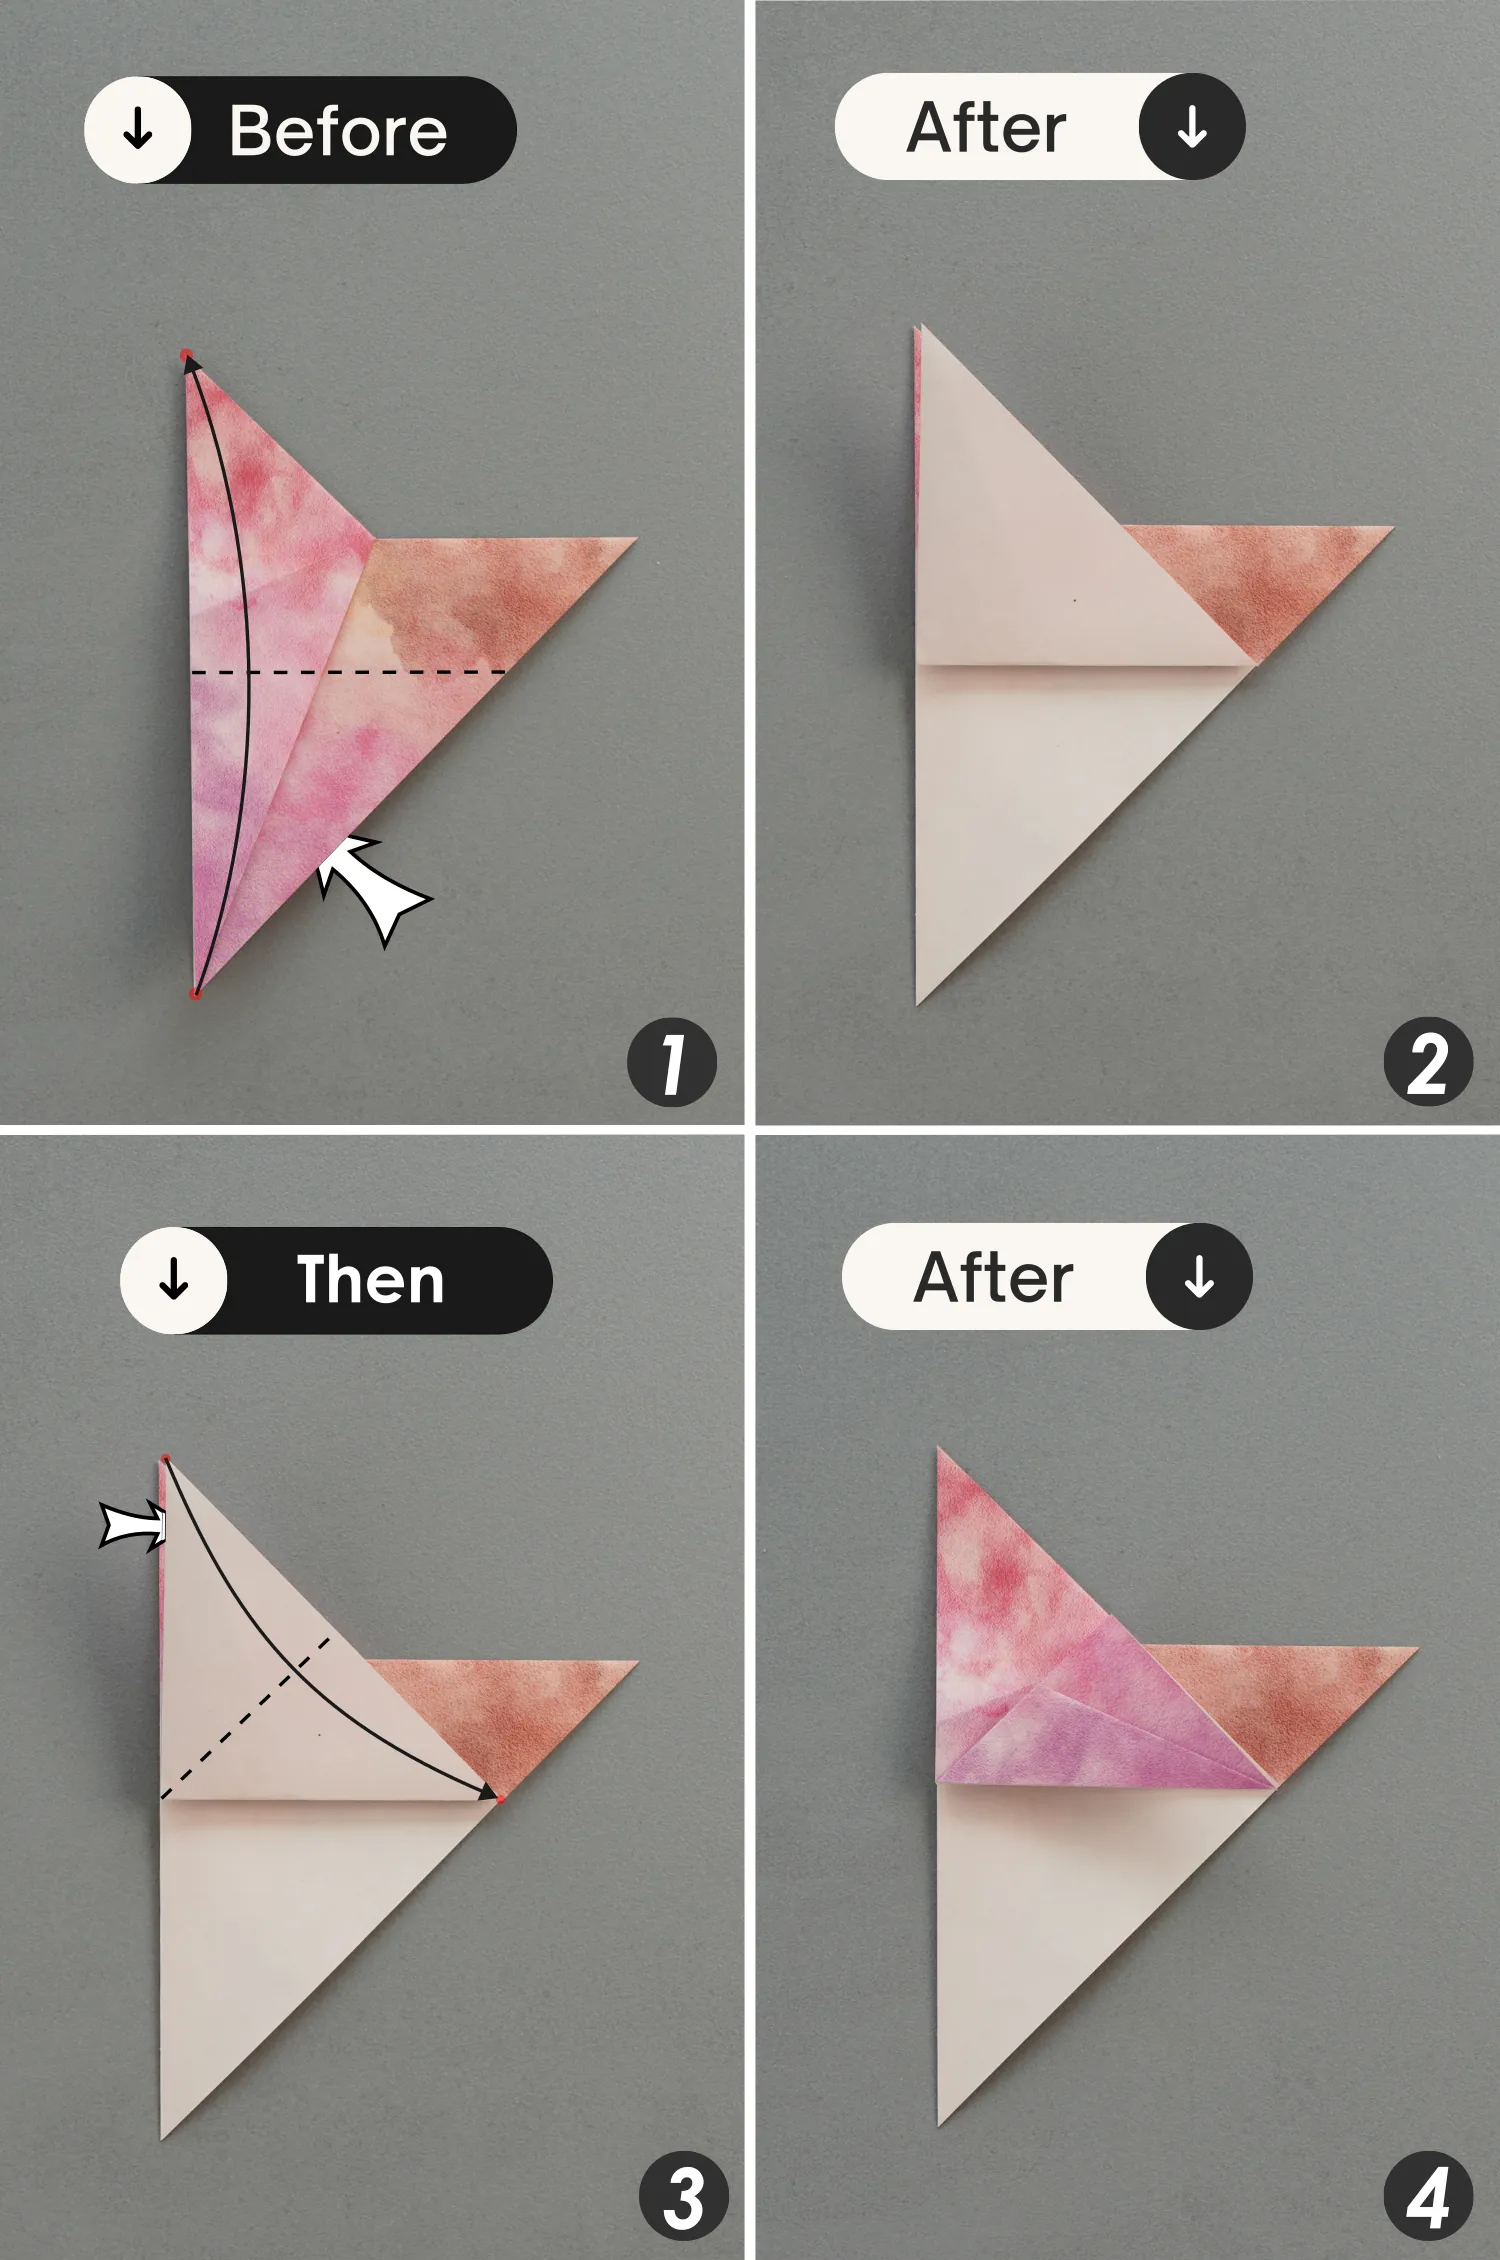
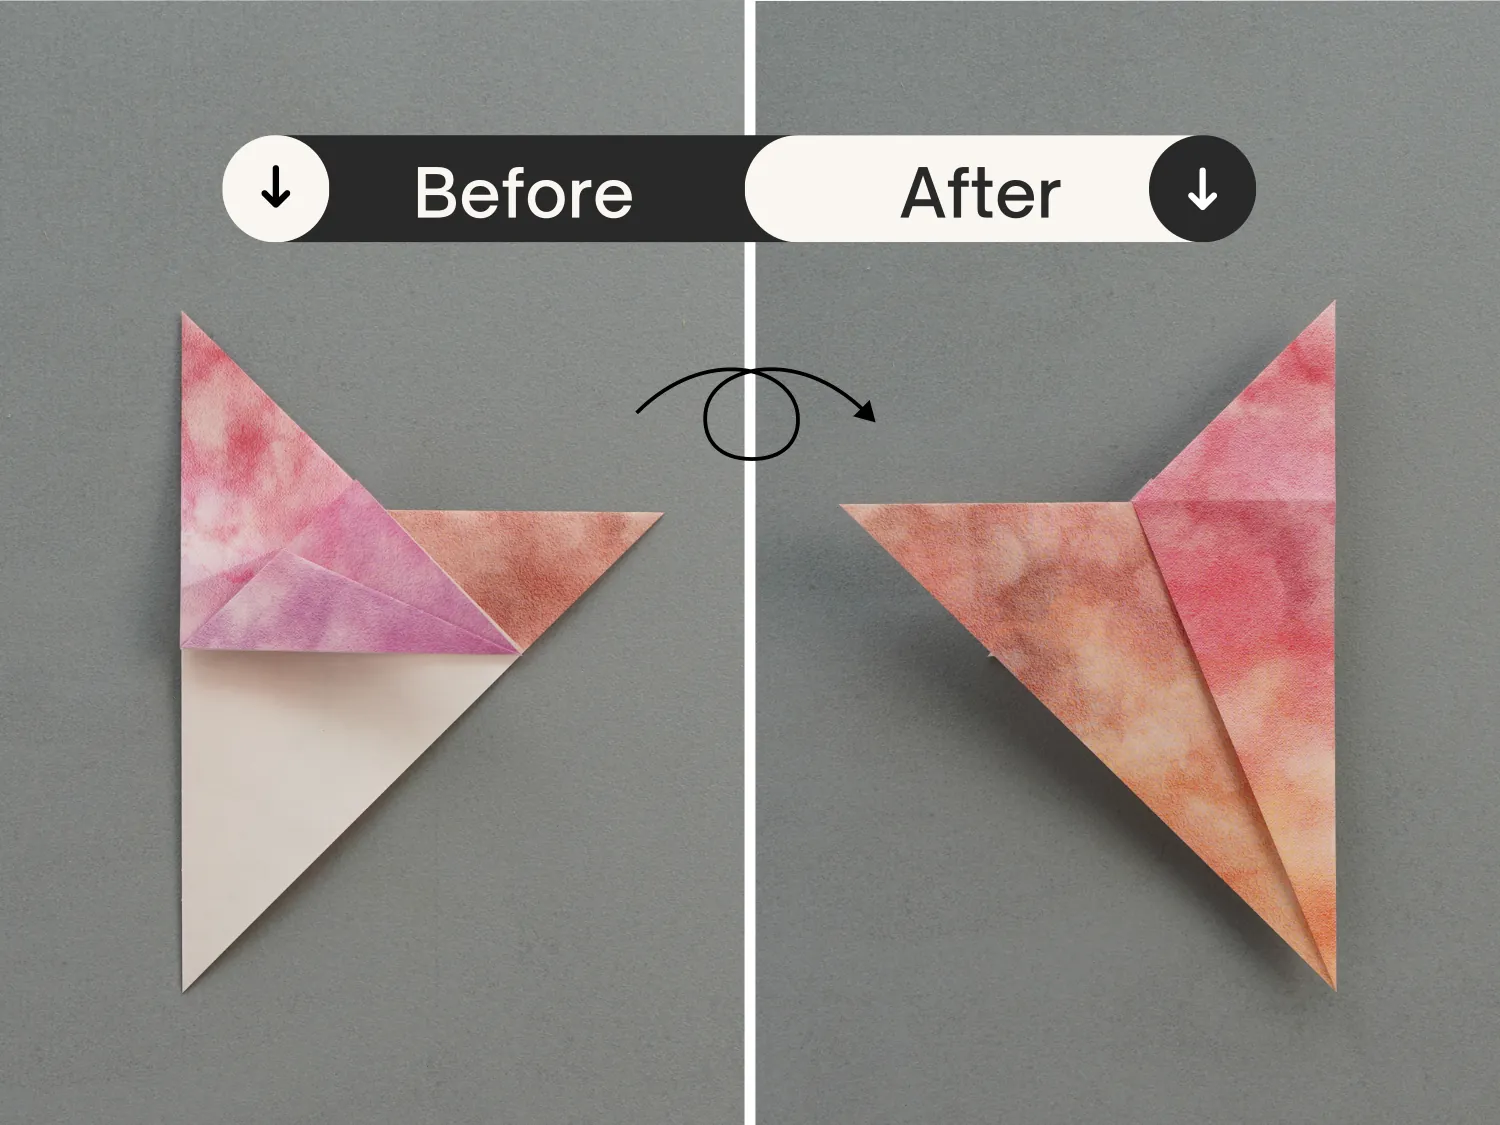
Step 8
Turn the paper over.
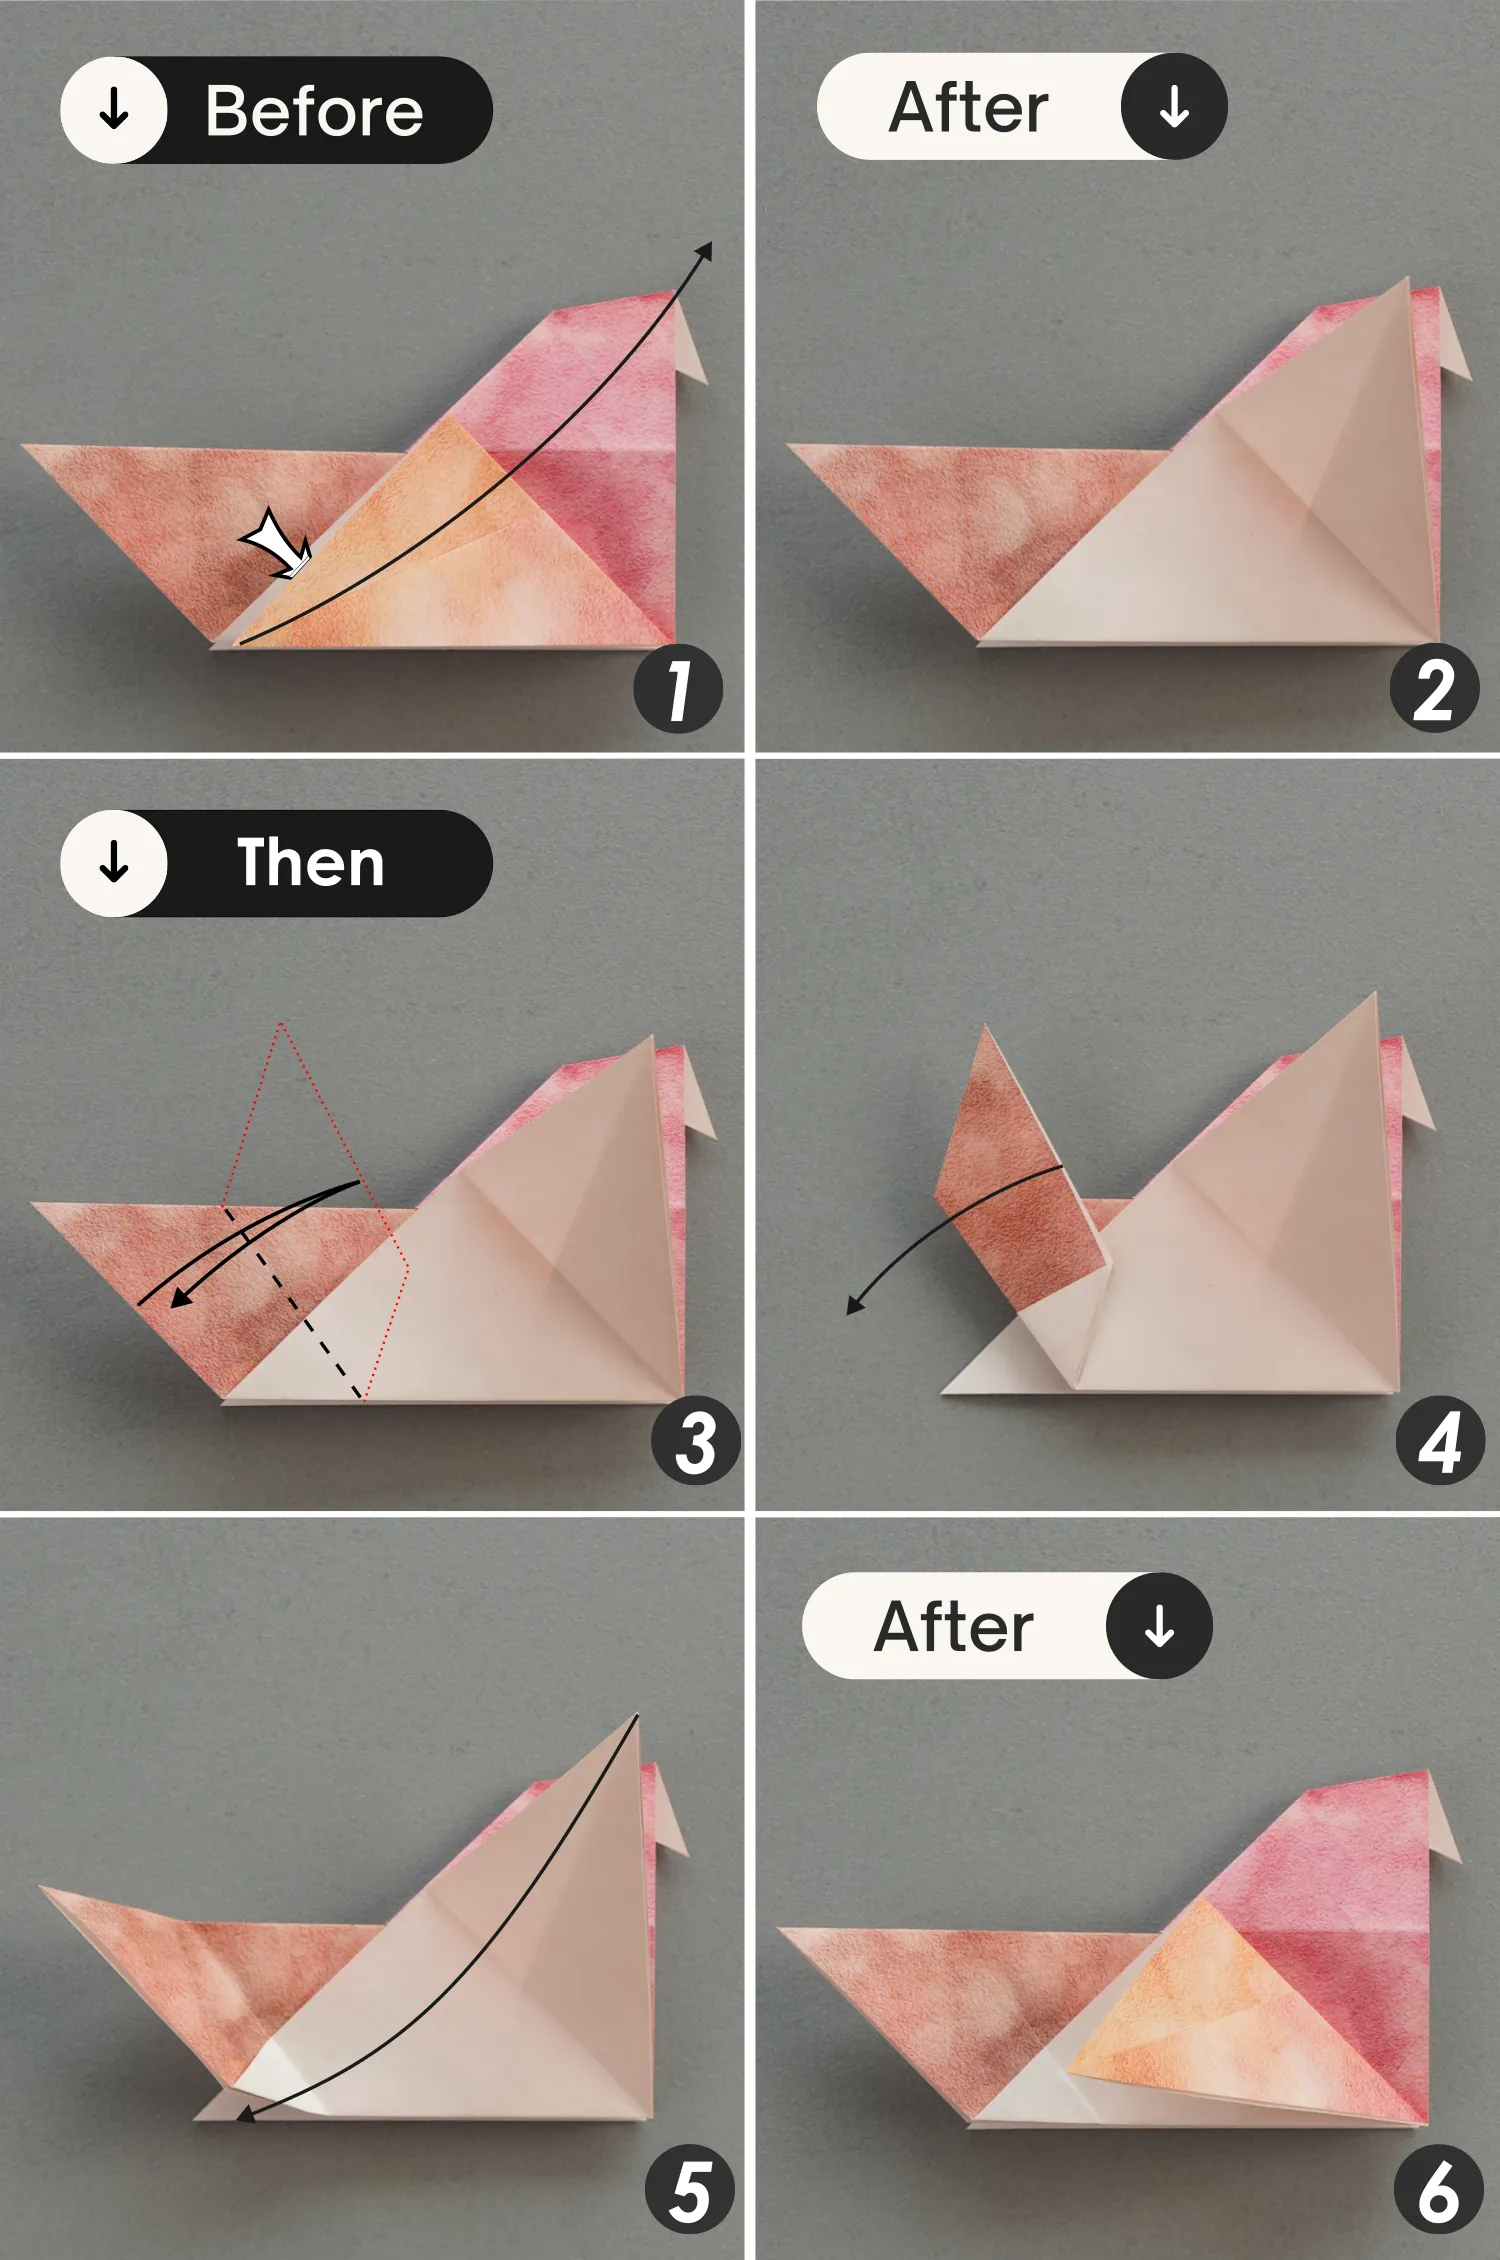
Step 9
Fold the bottom corner up to meet the top corner on the right side, then fold it down to the left diagonally along the dotted line, creating one of its wings.
Step 10
Fold the top corner down a little along the dotted line, and unfold it, this is the other wing.
Step 11
View the paper from the top left side, open the top corner, press down its middle crease, then shape the creases you made in the previous step, next flatten the fold and view it from the original side.
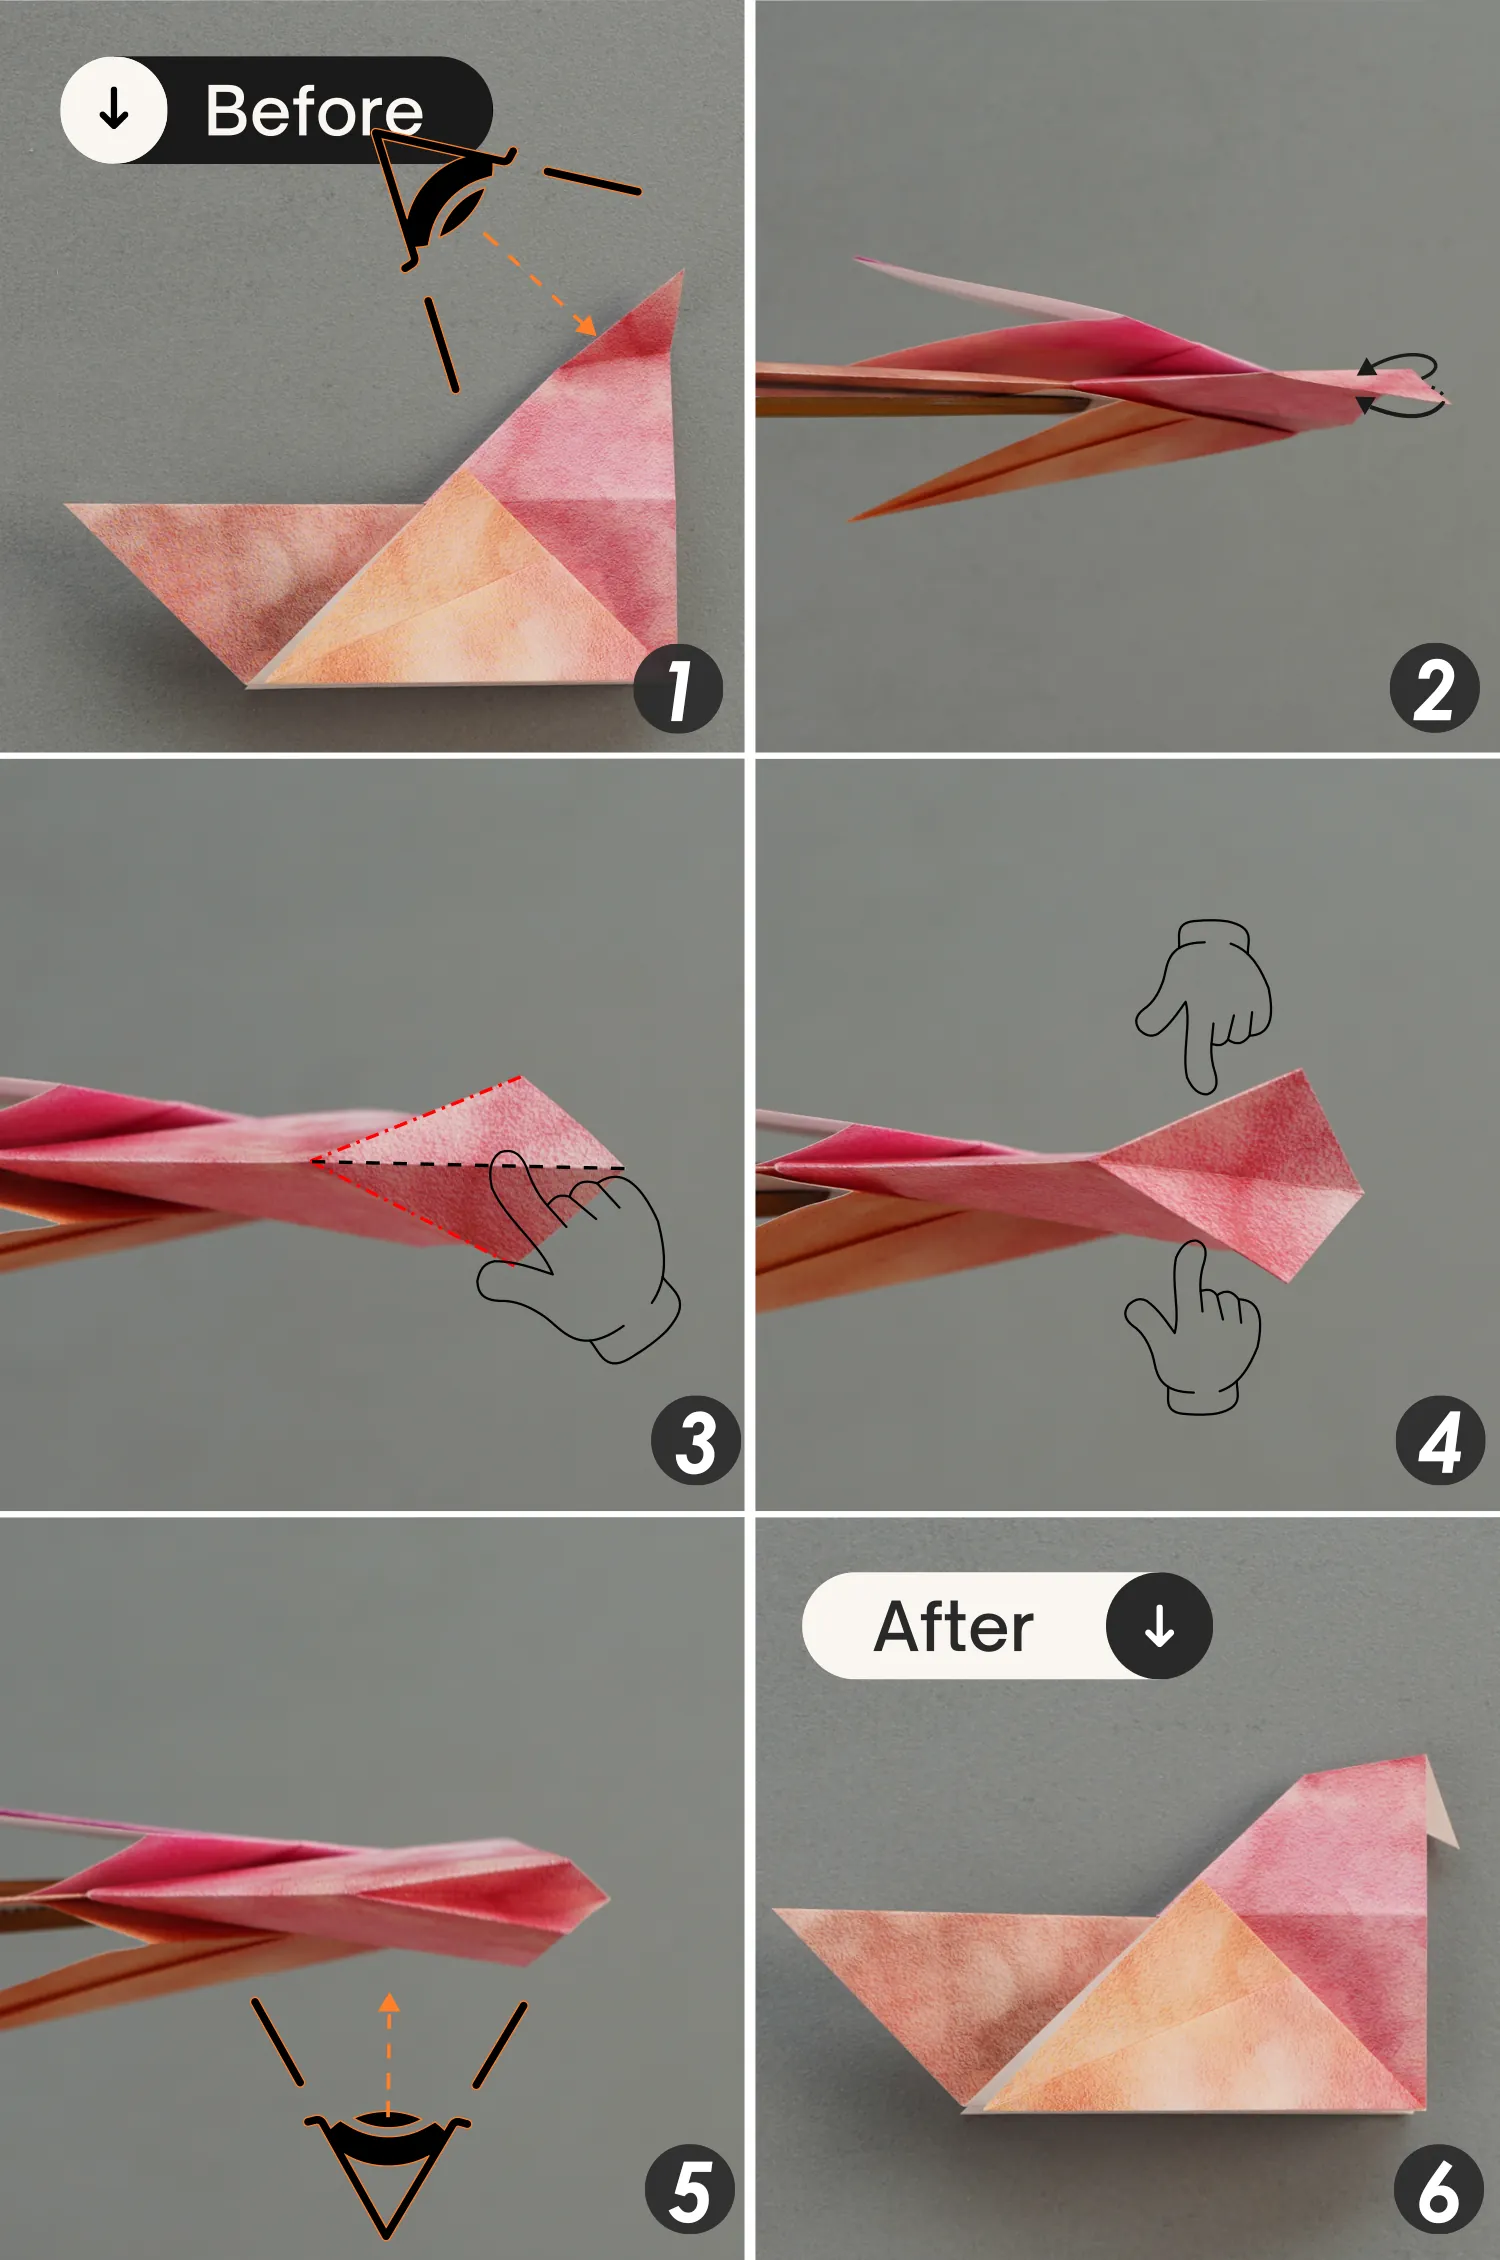
Step 12
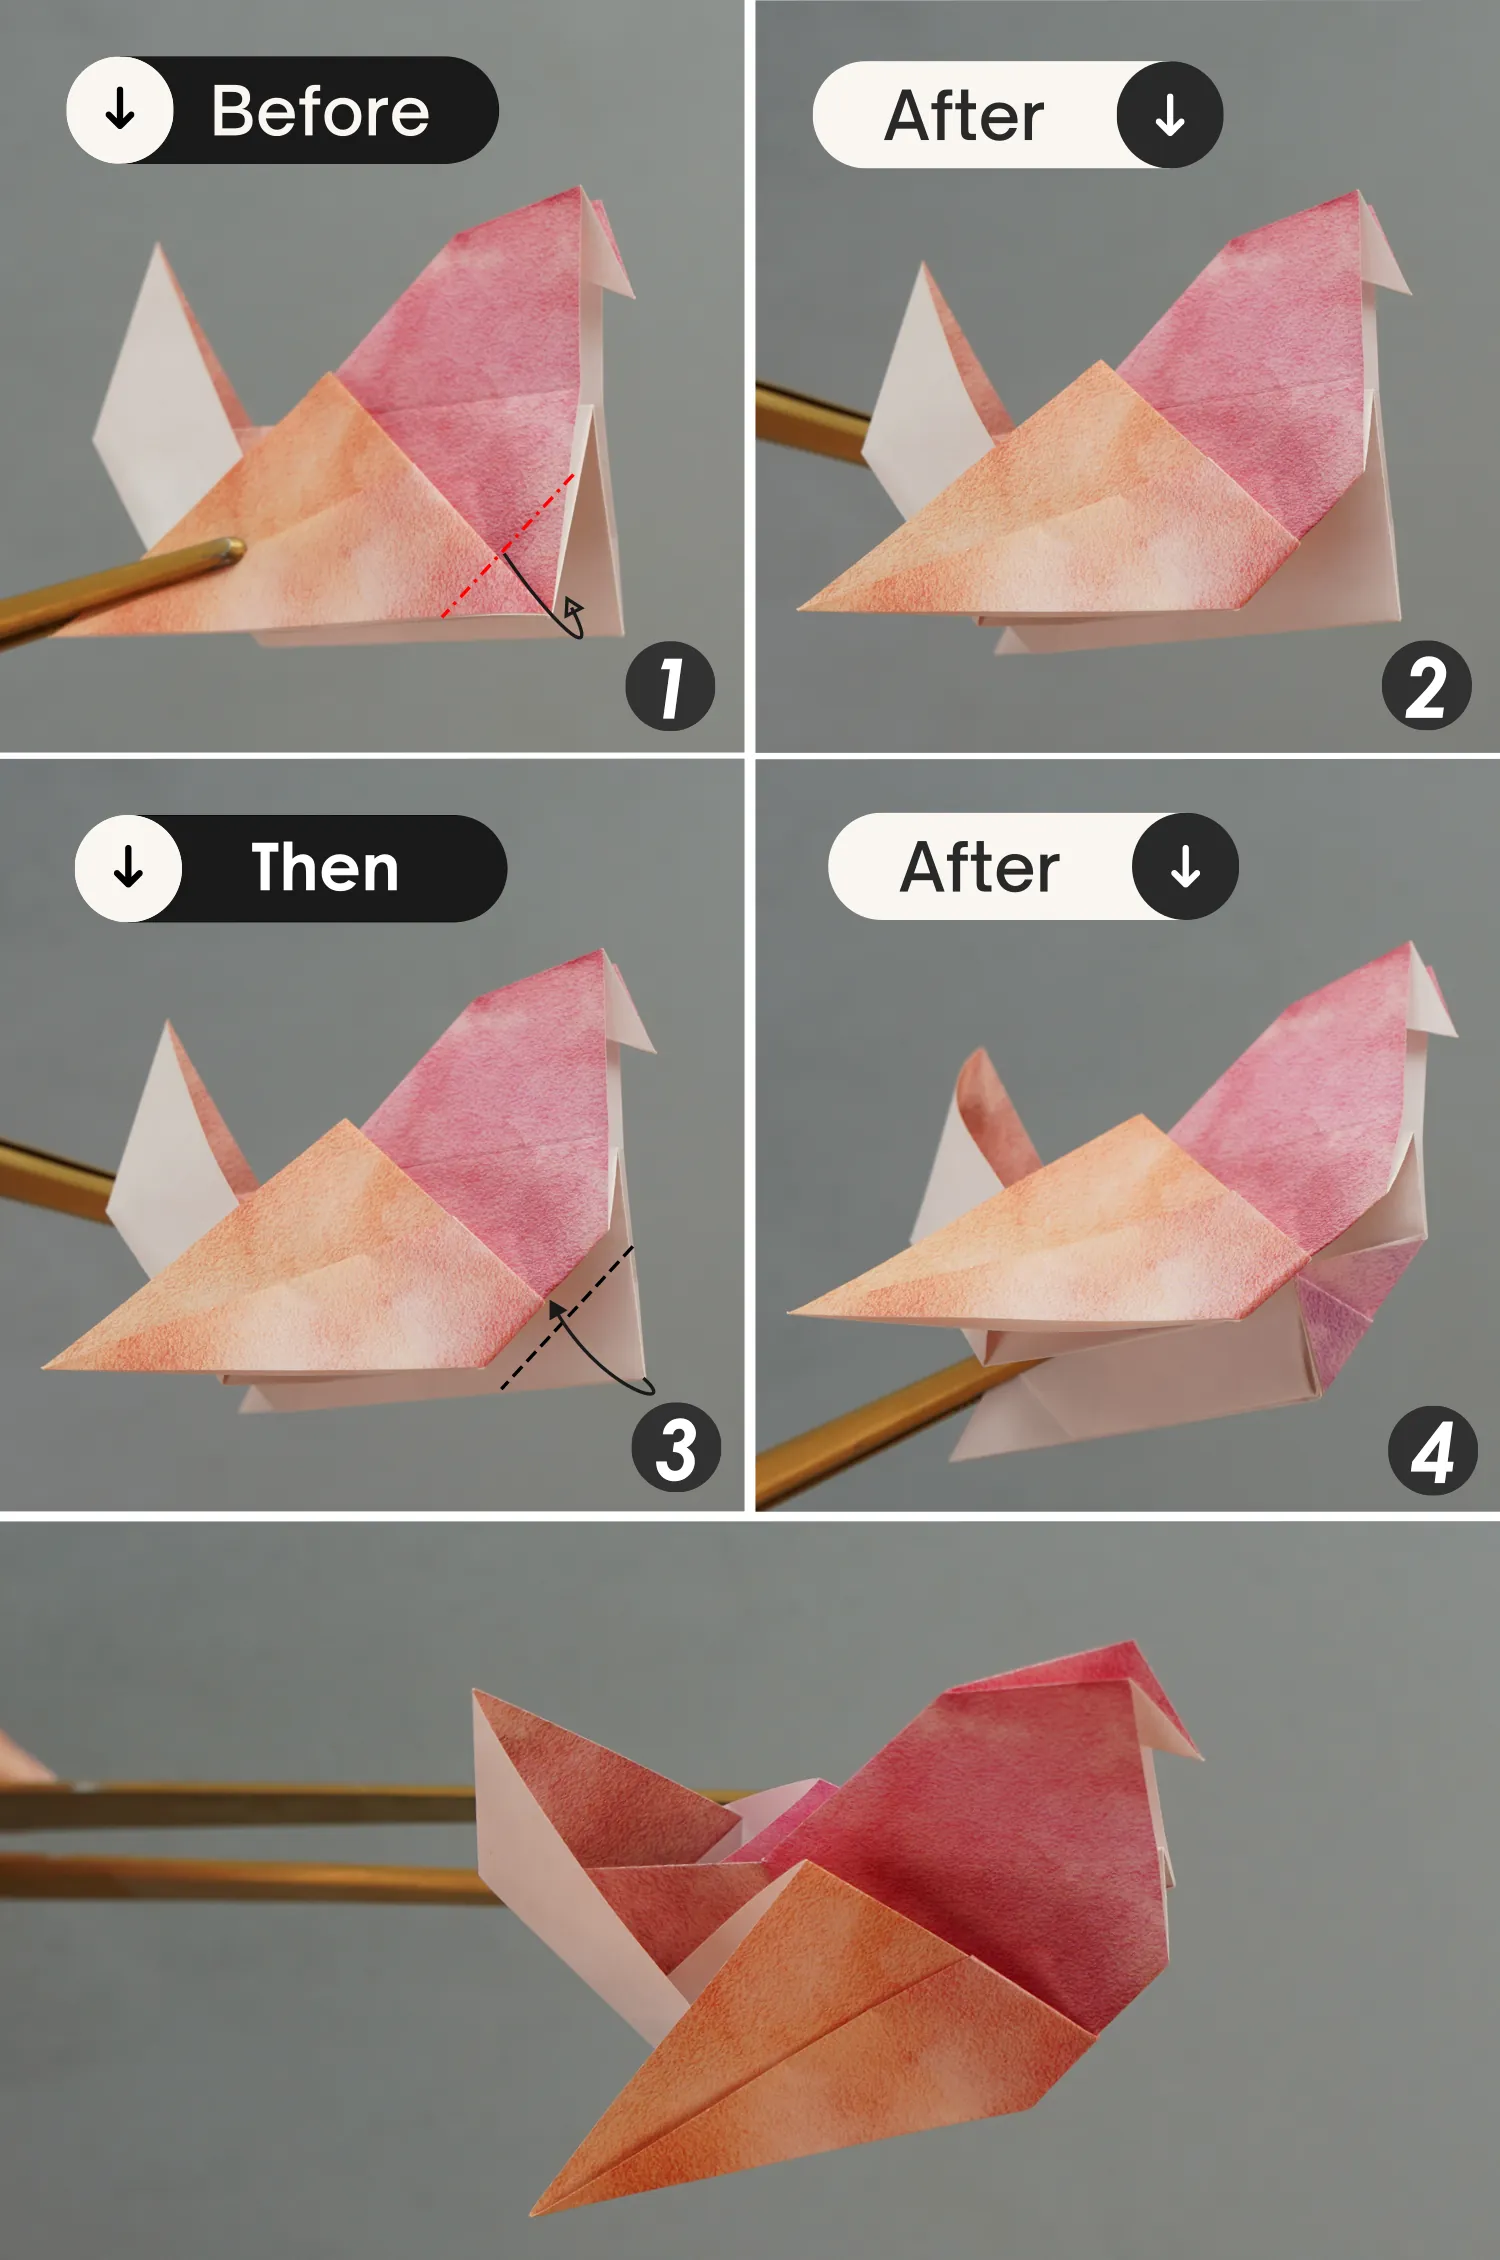
Lift the front wing, then fold the tail part to the right along the dotted line, and unfold it[pictures 3, 4]. Next, place the wing to its original position.
Step 13
View the paper from the top side, open the tail from the bottom, and bring up the left point of the tail, press down the intersection point of the two creases you made in the previous step. Next, flatten the fold along these creases and view it from the original side.

Step 14
Fold the bottom right corner of the top layer backward, then fold the bottom right corner of the bottom layer forward, making the two edges flush.
What’s Next
This is the final shape of this cute adorable origami pigeon. We also offer a variety of other easy origami bird instructions. Feel free to explore them, and we hope you will enjoy them!


