How to Fold an Origami Owl
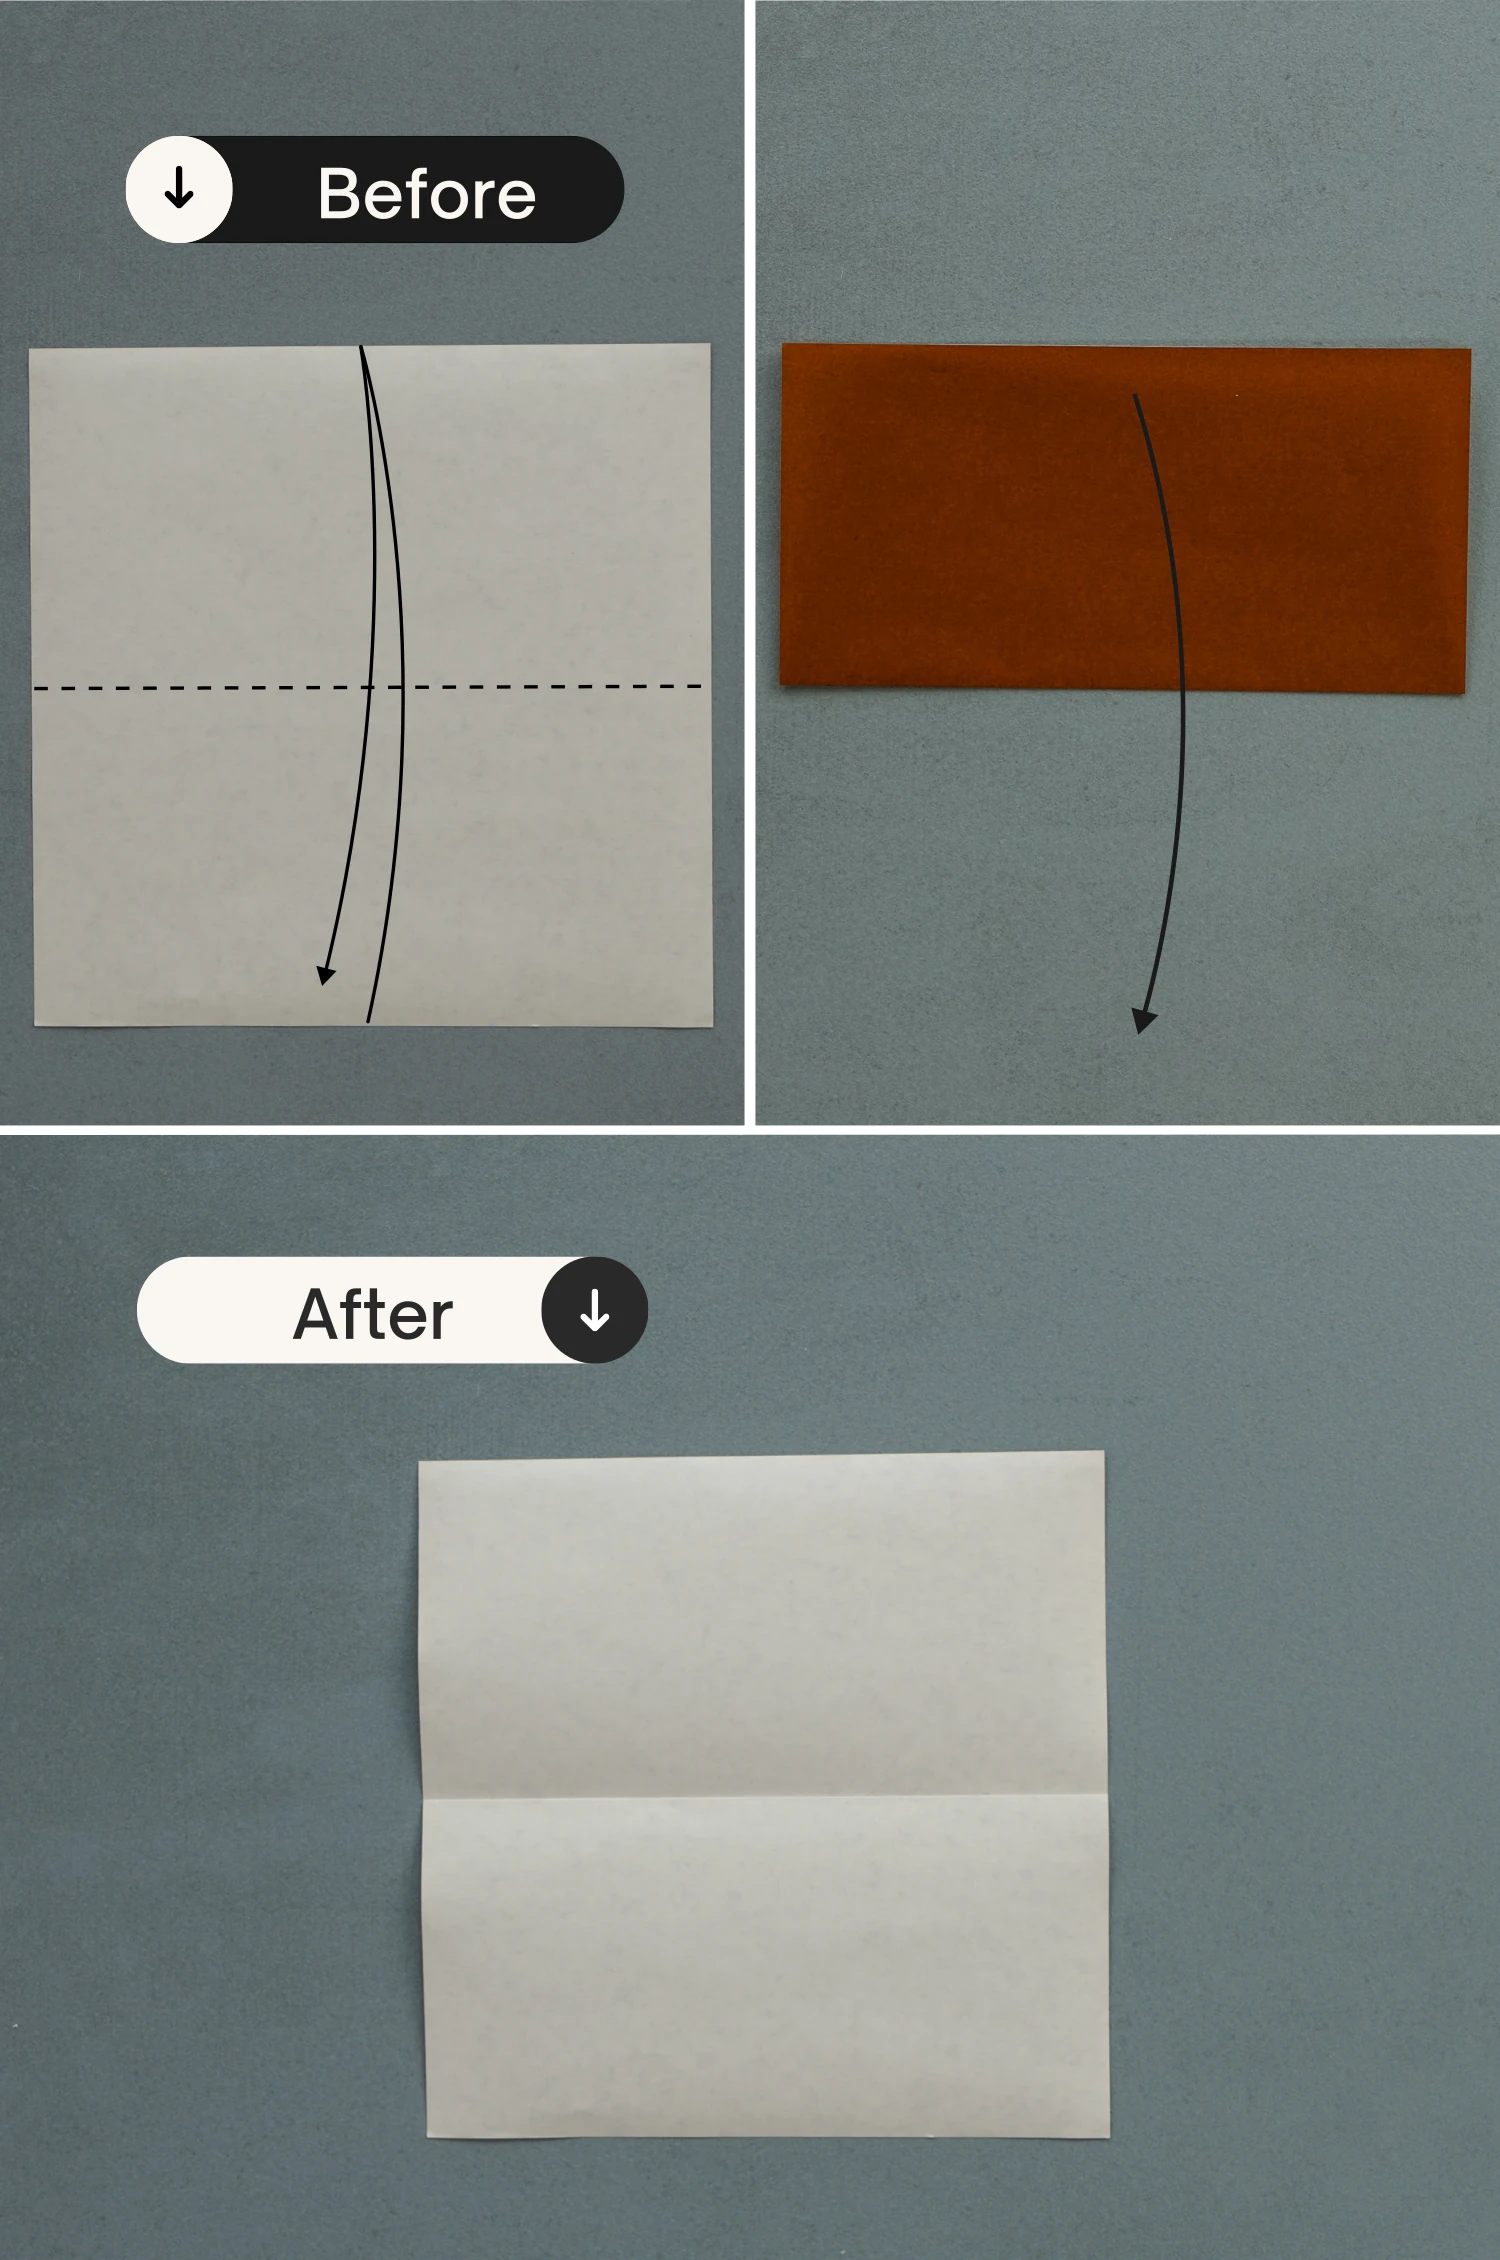
Step 1
Start with the white side of the paper facing up, fold it in half horizontally, and unfold it.
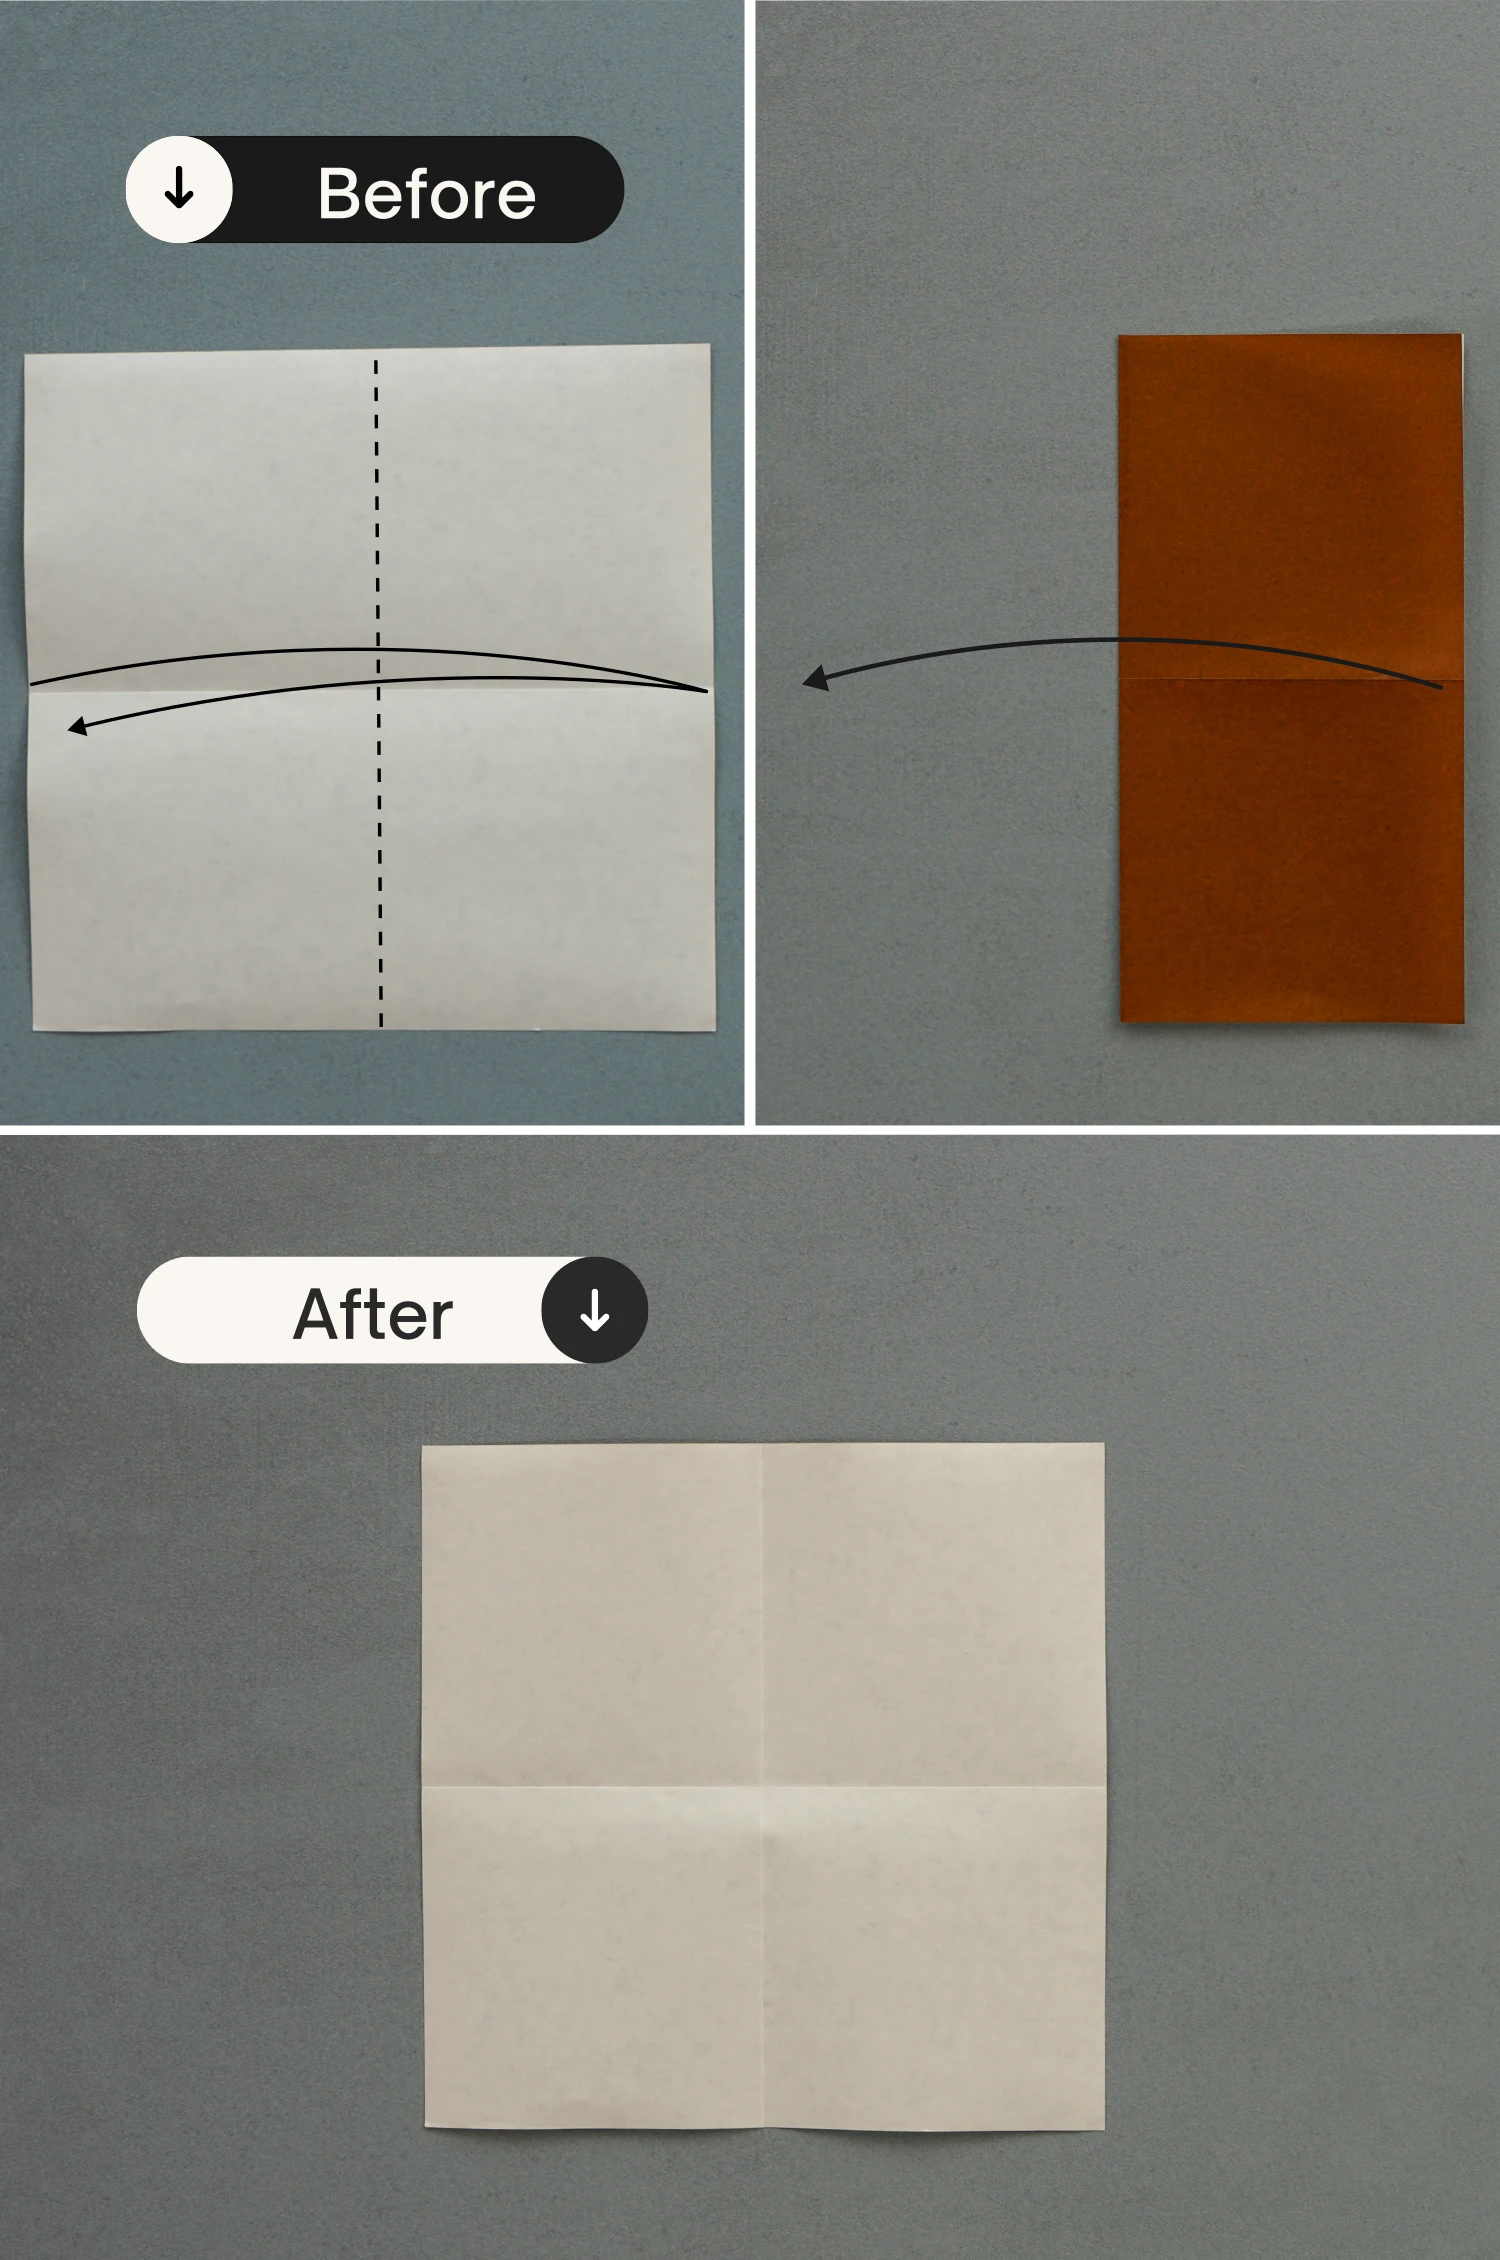
Step 2
Fold it in half vertically, crease it well then unfold.
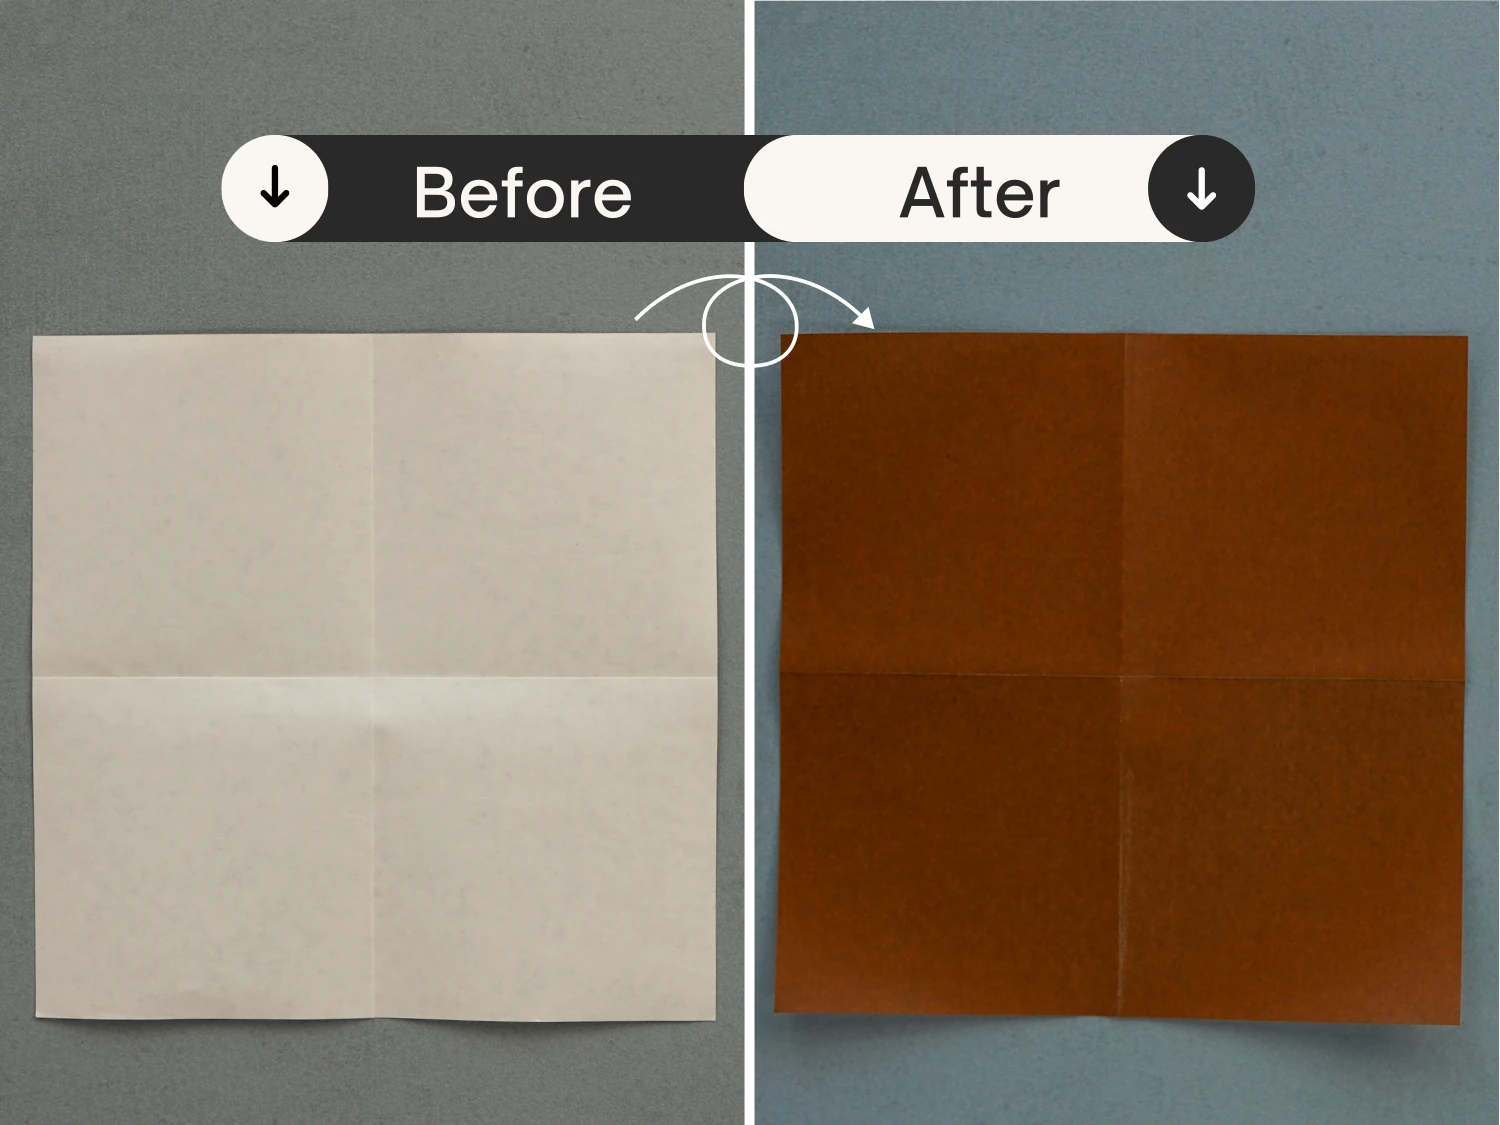
Step 3
Flip the paper over.
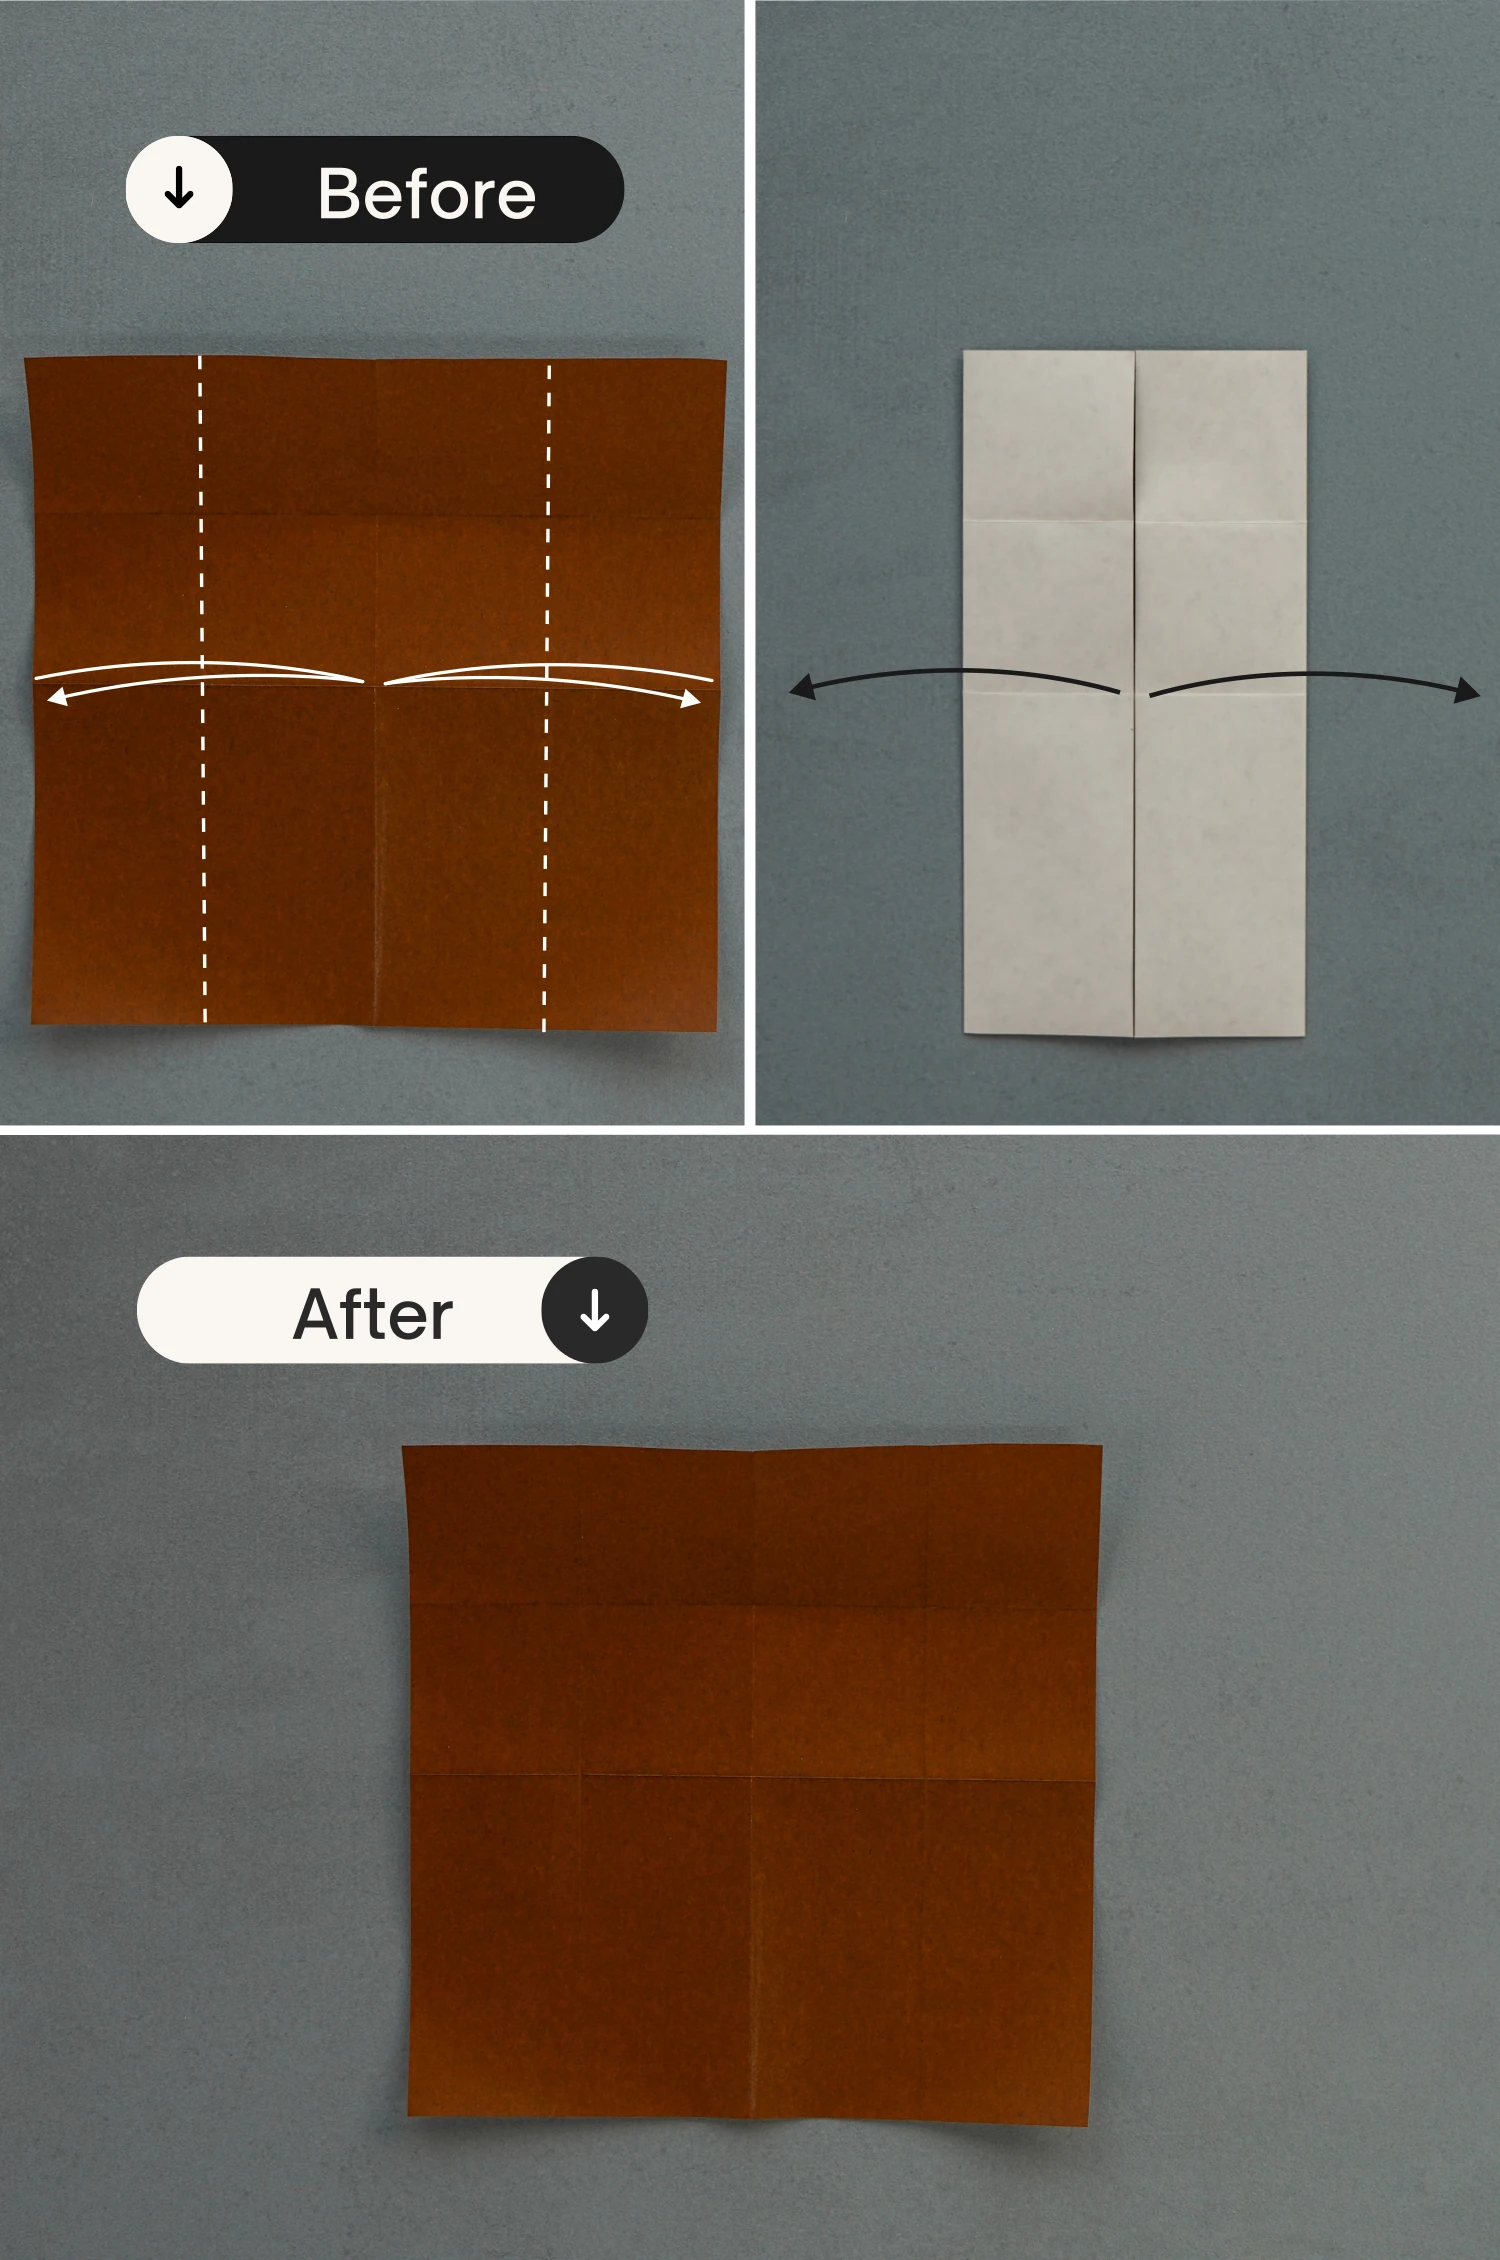
Step 4
Fold the top edge to align with the middle horizontal crease, crease it well then unfold.

Step 5
Fold the left and right edges to align with the vertical crease, leaving two creases then unfold.
Step 6
Fold the top left and right points diagonally to meet the intersection points, then flip it over.
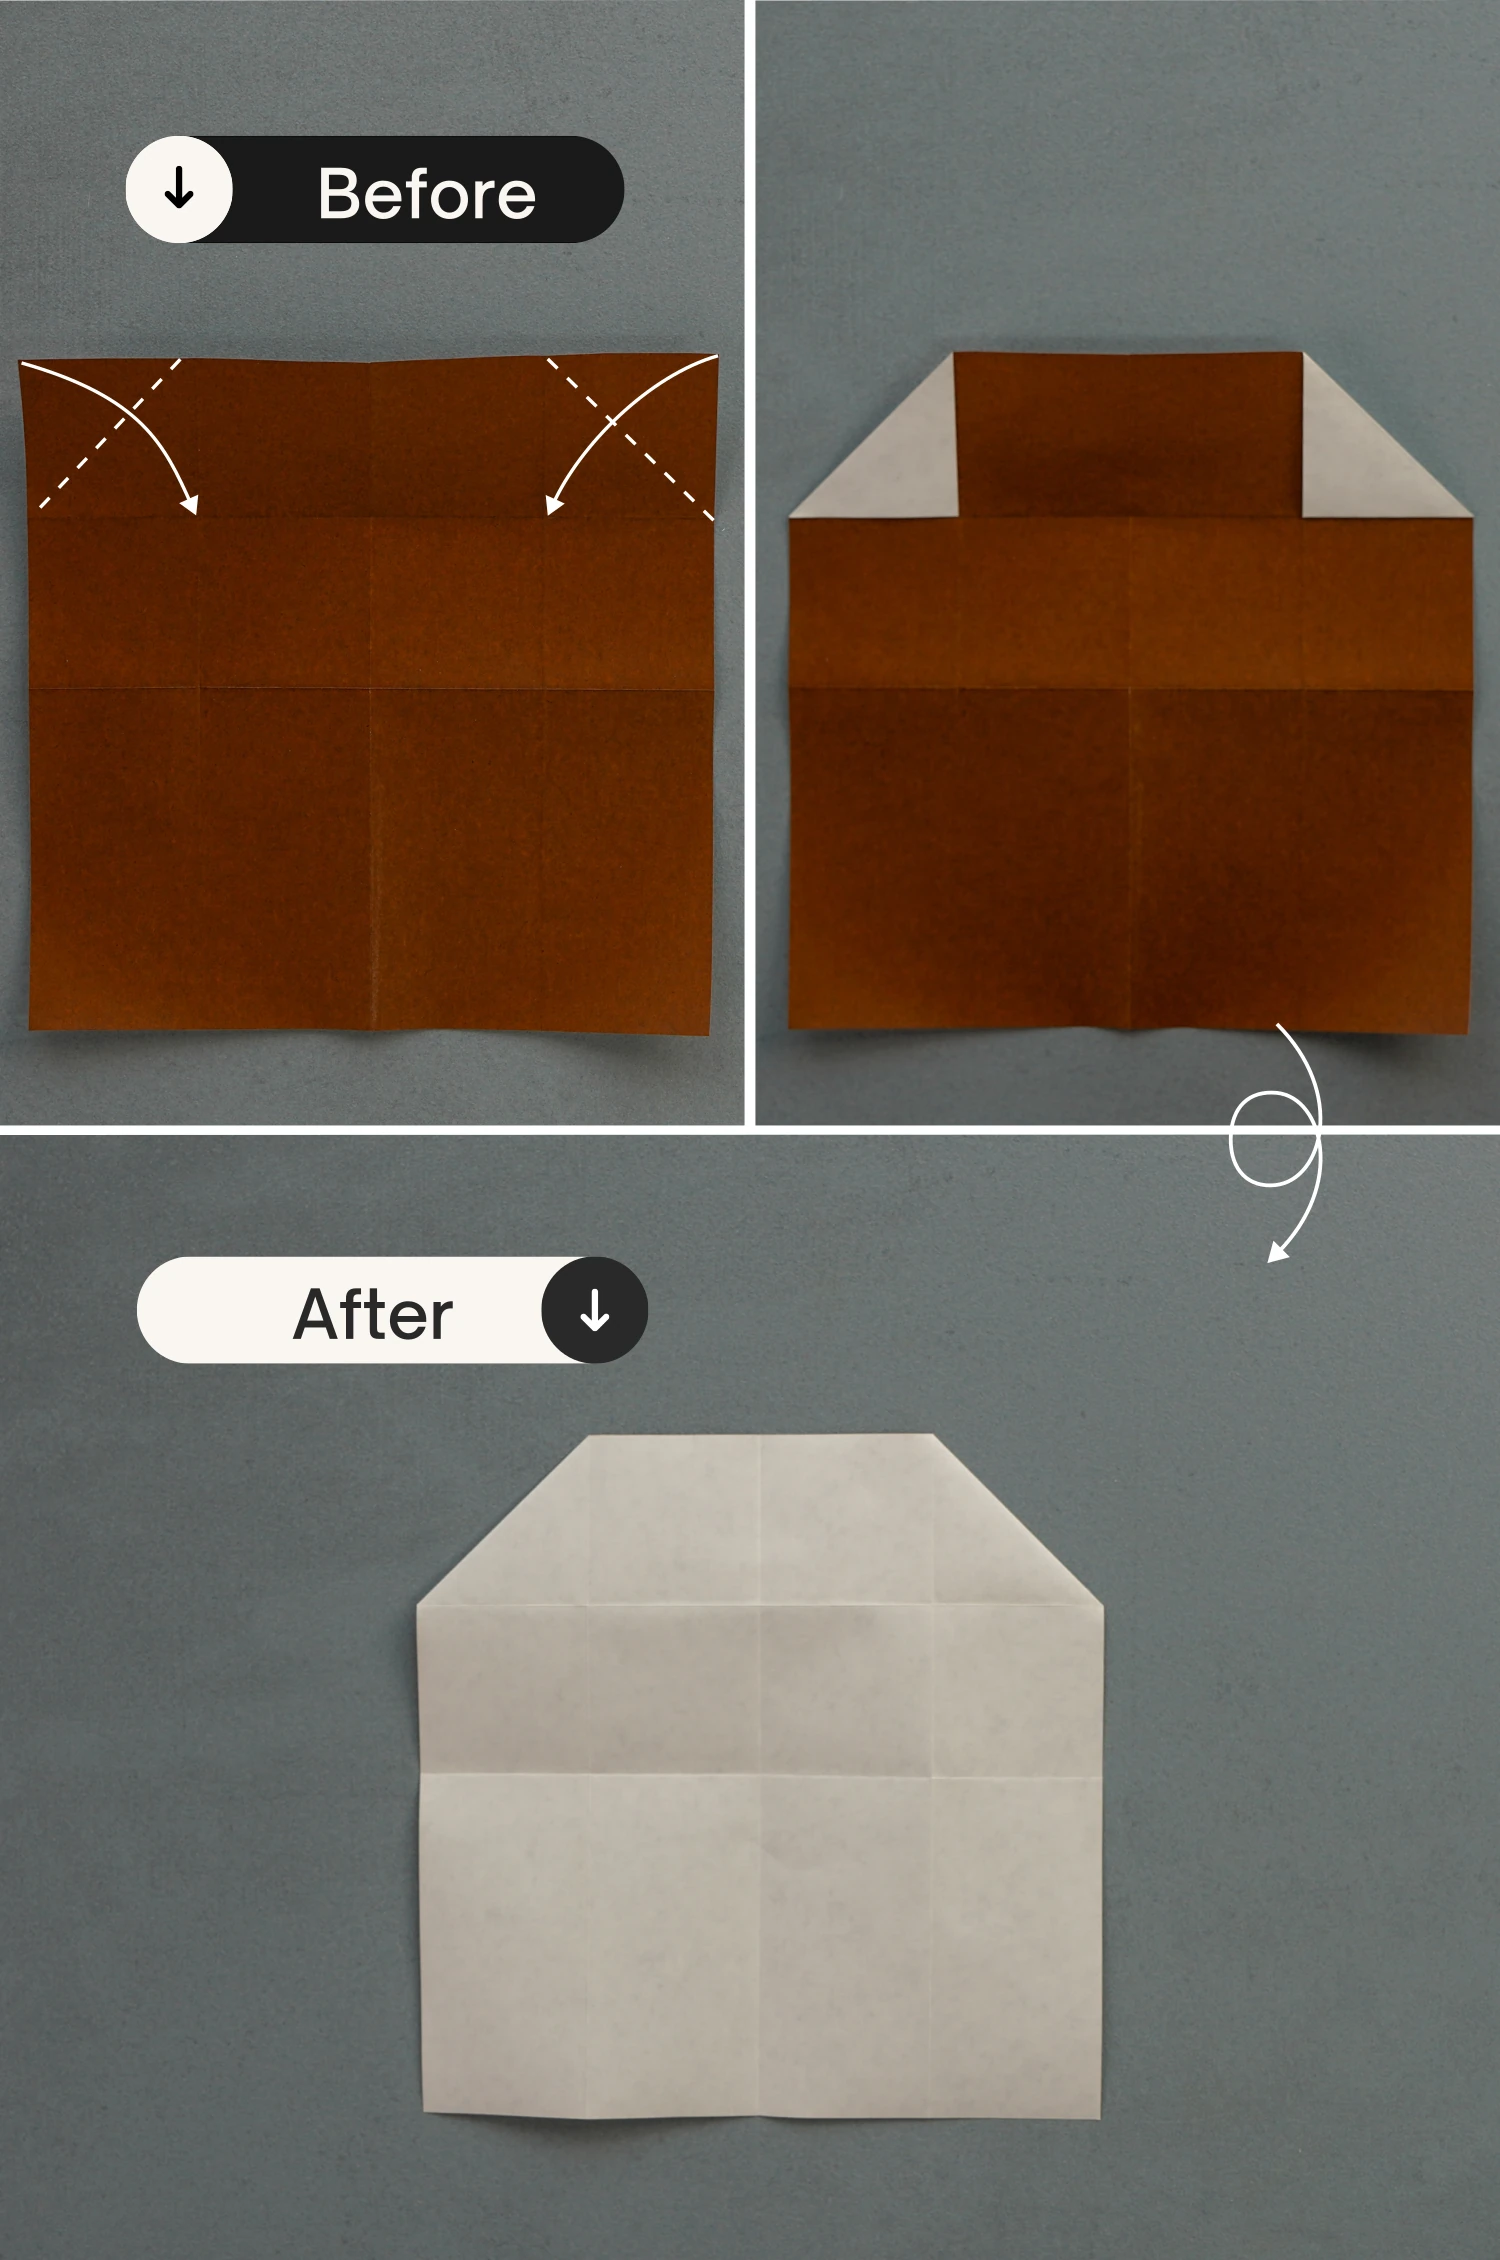
Step 7
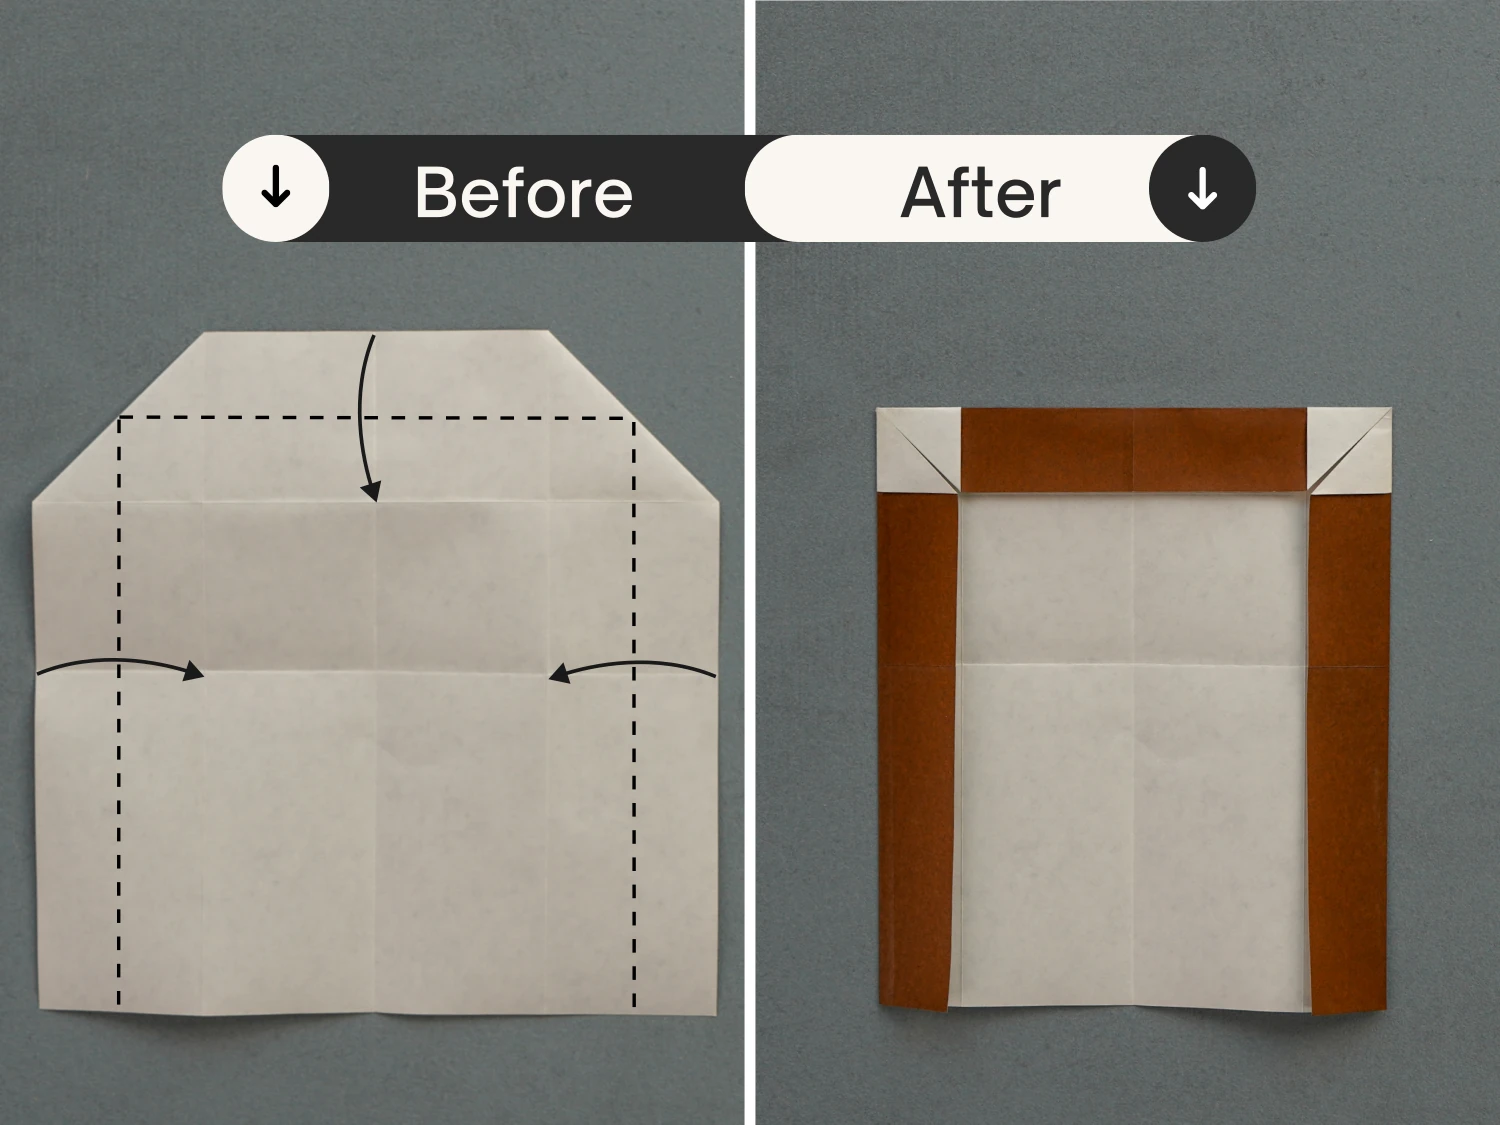
Fold the top edge down to align with the top horizontal crease.
Fold the left and right edges to align with the vertical creases on the left and right, creating a rectangle.
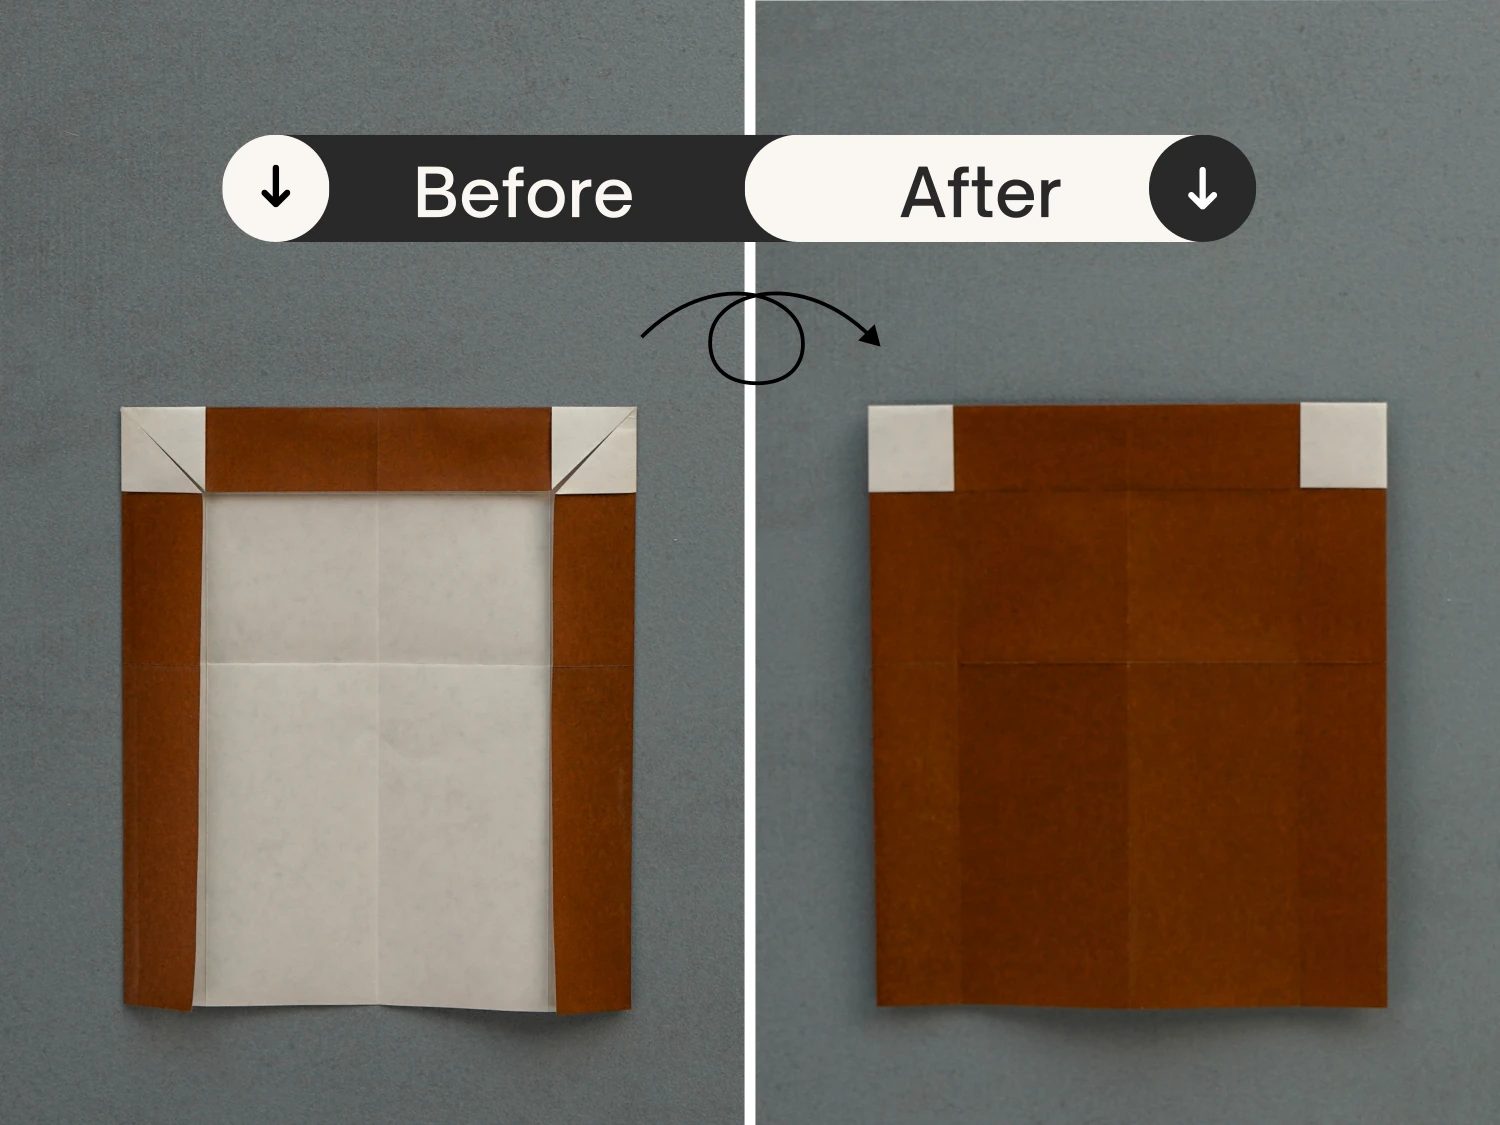
Step 8
Flip the paper over.
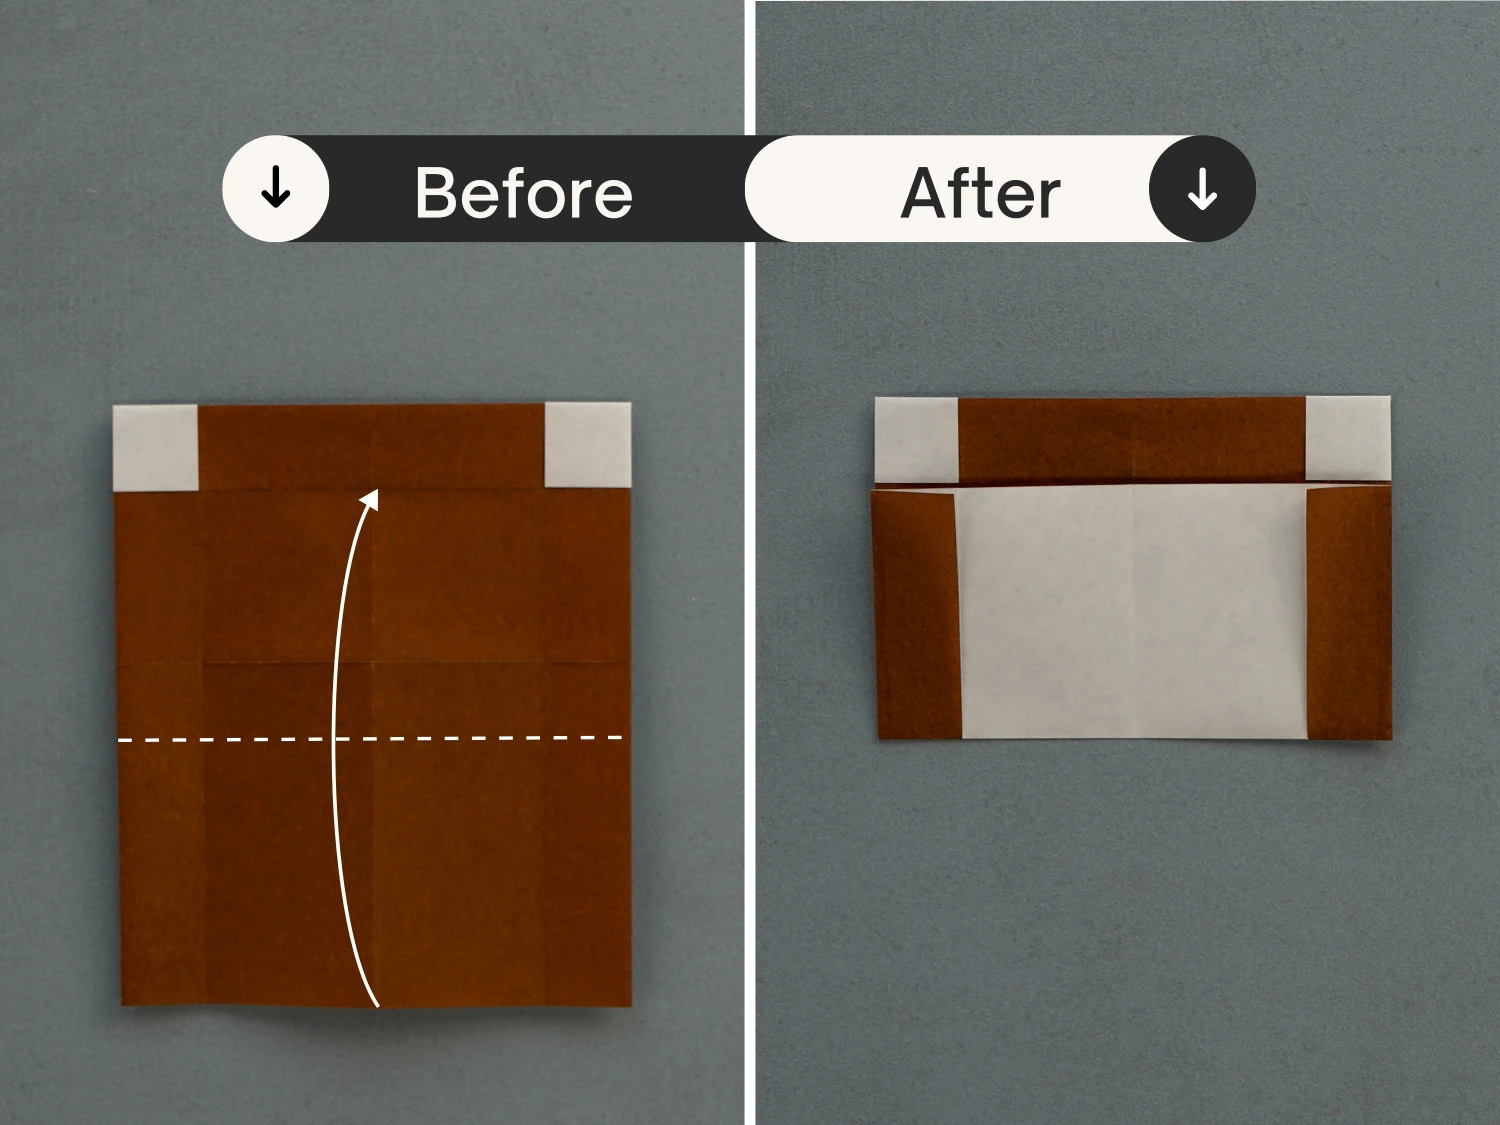
Step 9
Fold the bottom edge up to meet the first horizontal crease from the top.
Step 10
Take the top right corner of the top layer, fold it down diagonally to meet the midpoint of the bottom edge, crease it well then unfold.
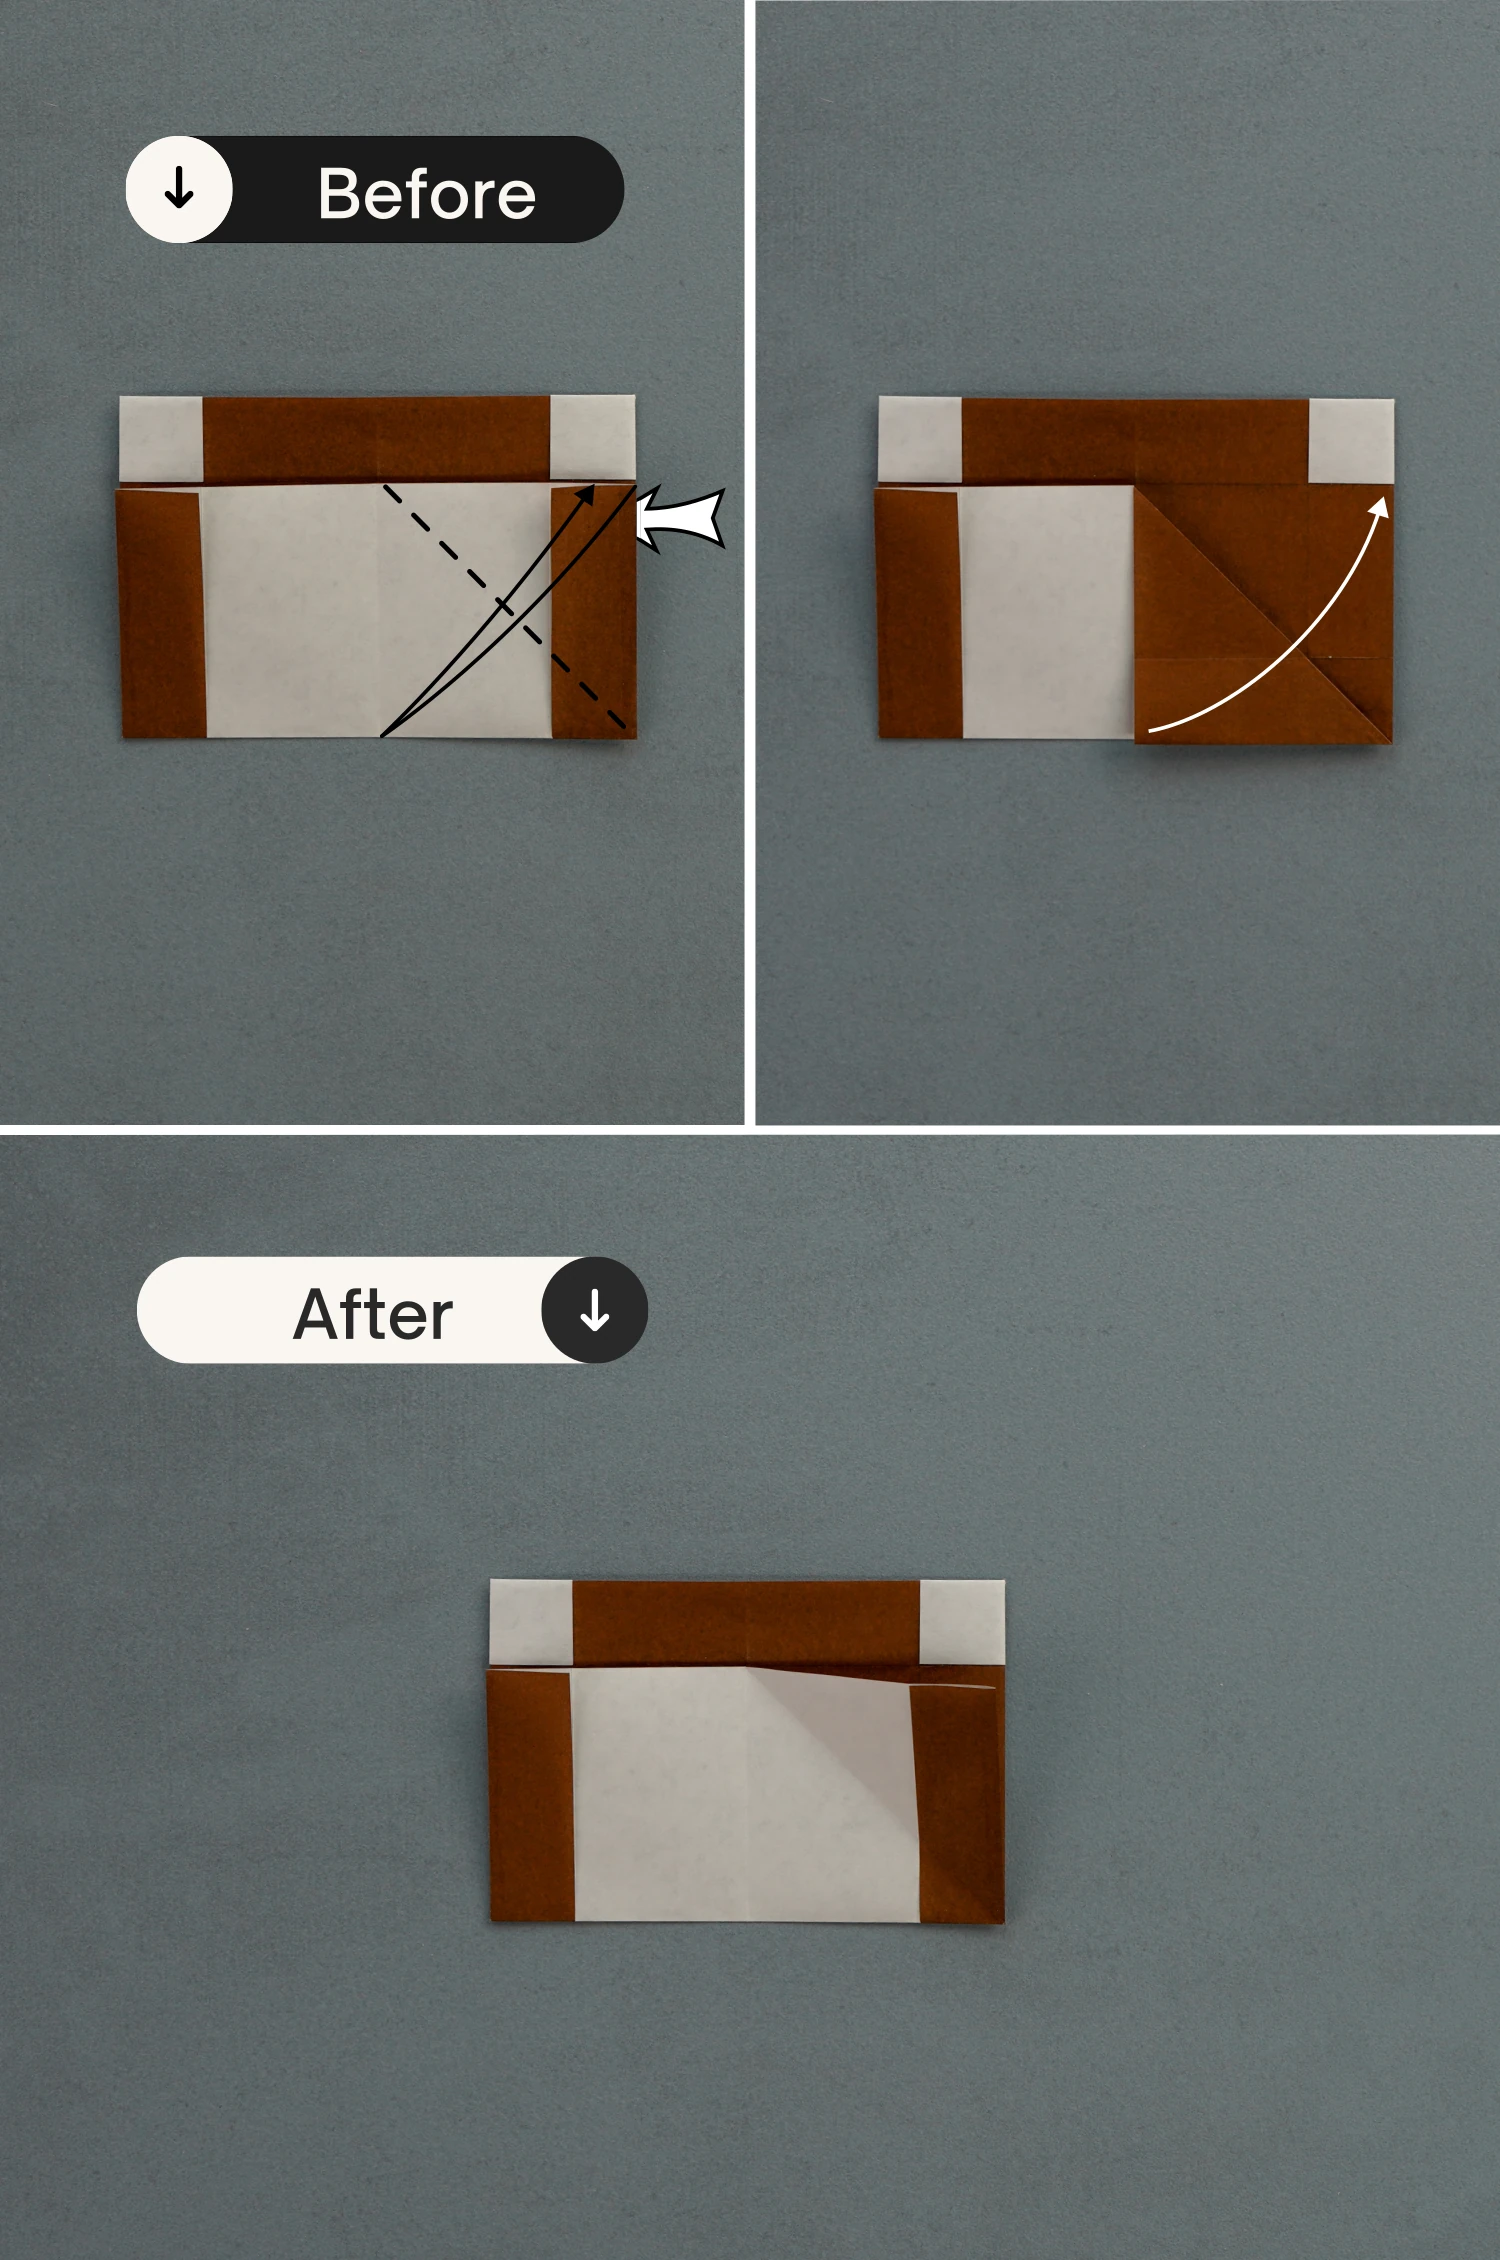
Step 11
Still this top right corner of the top layer, press it down diagonally again, but you should open this corner and expand the colored layer on the right, and finally, flatten it.
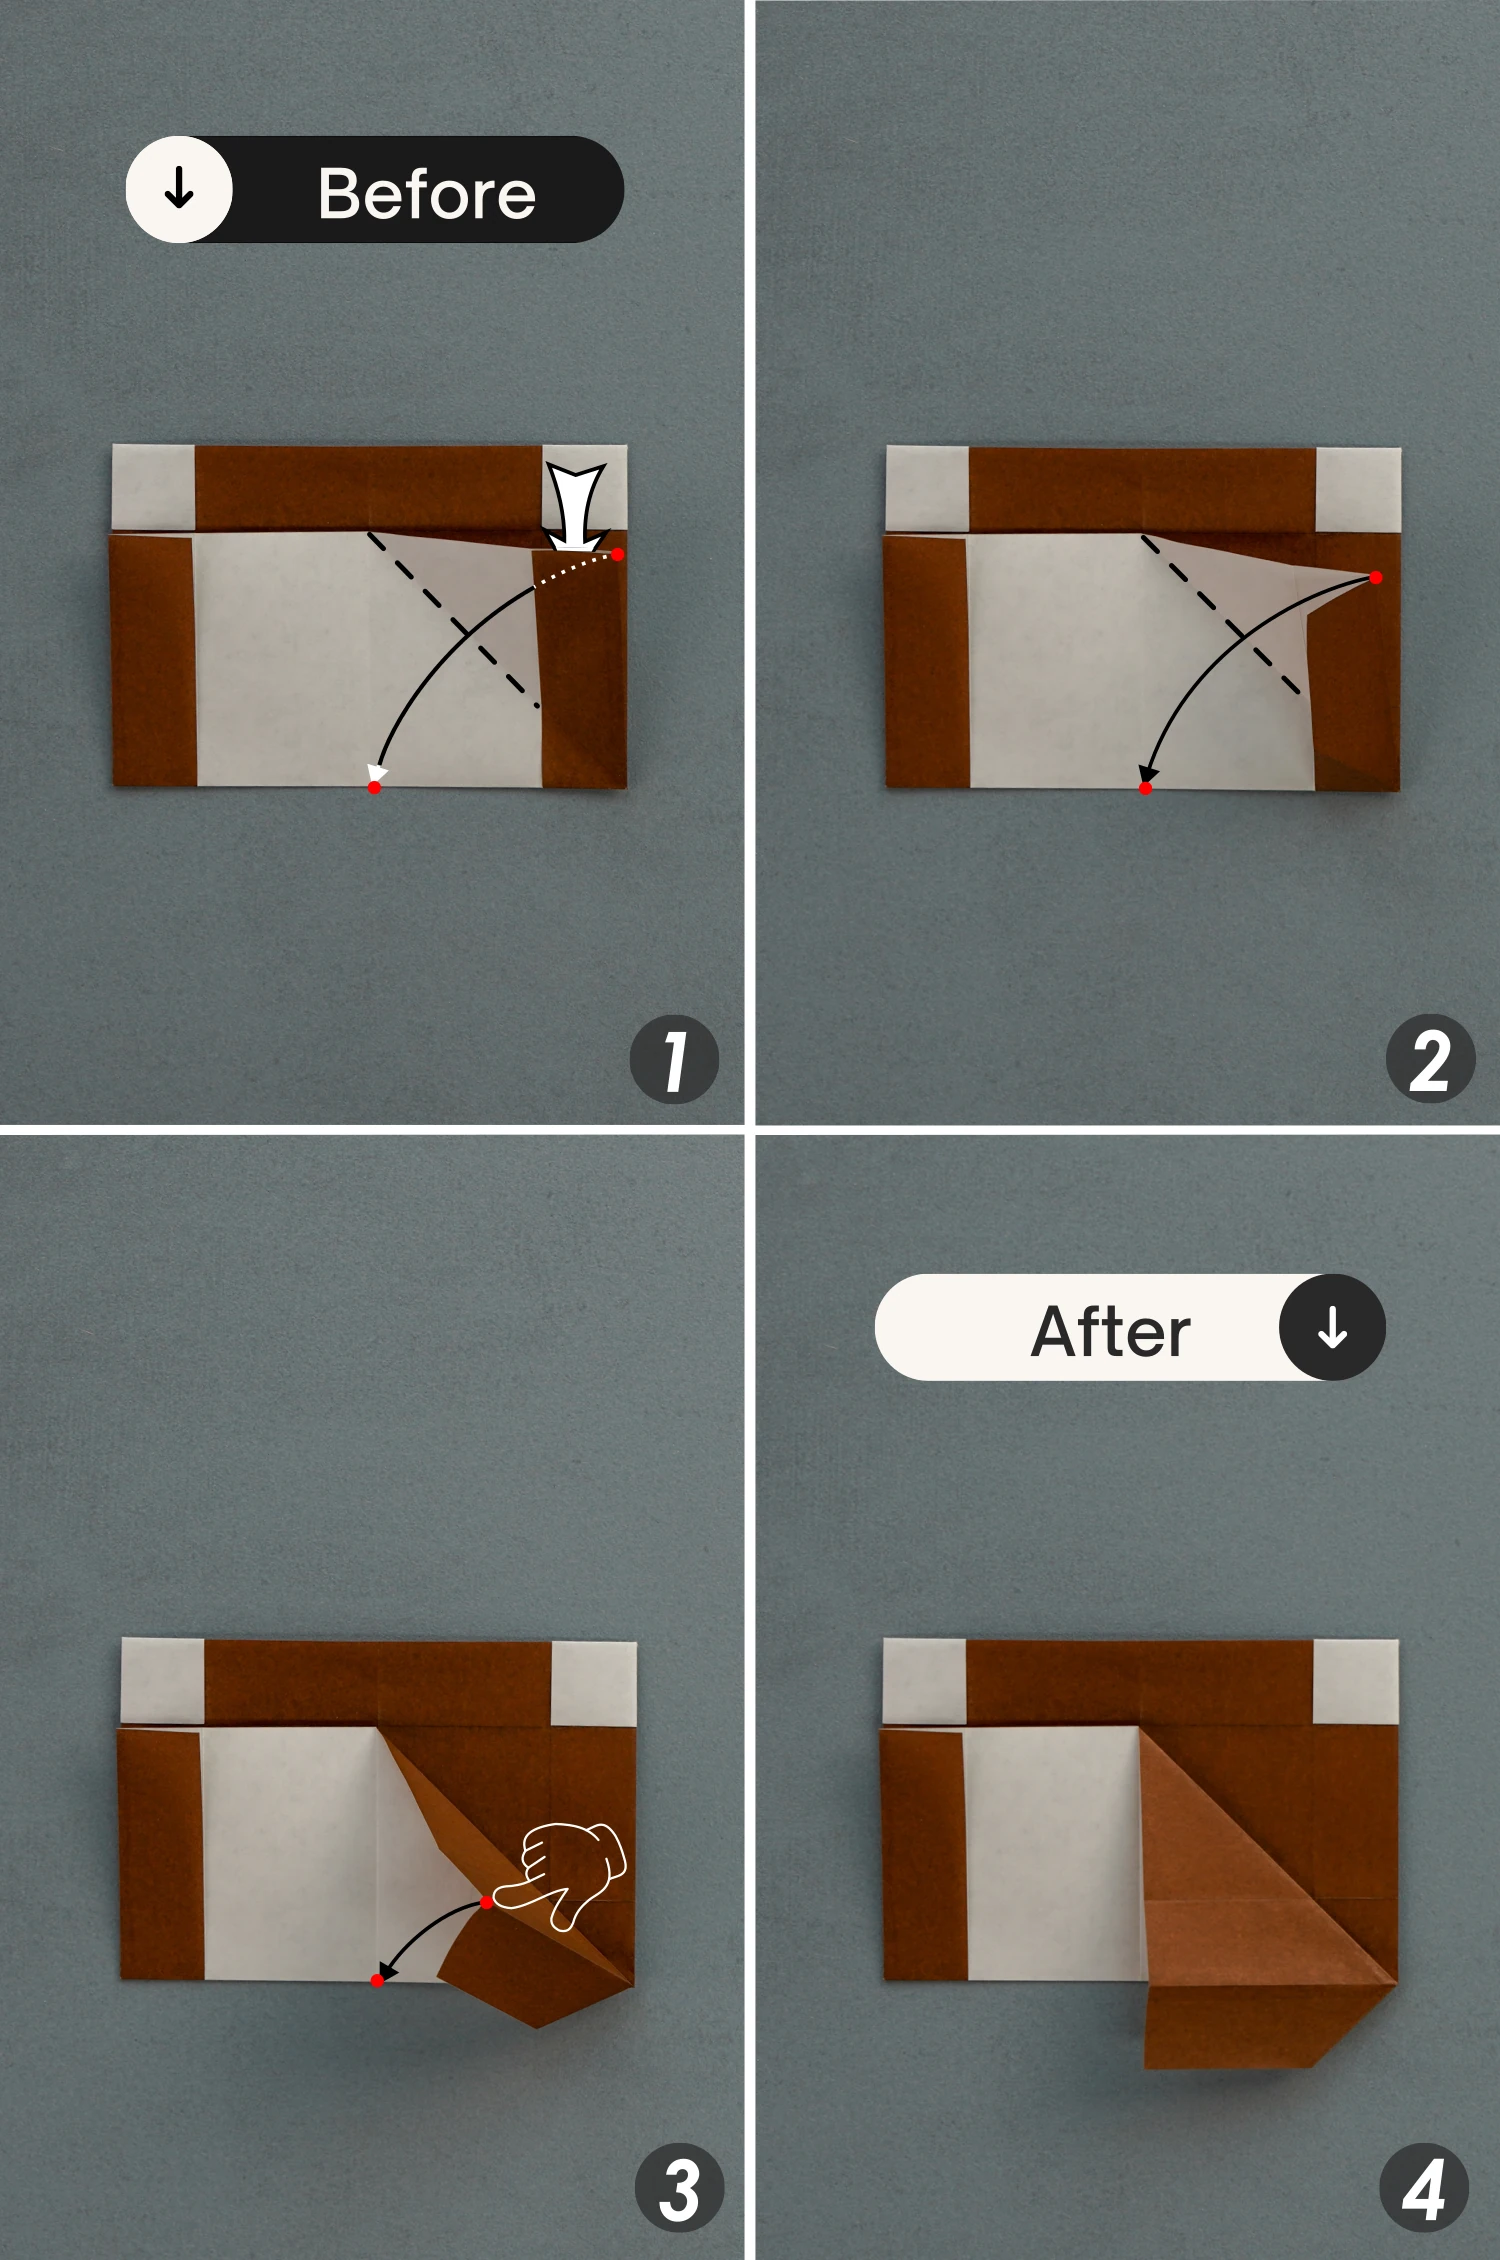
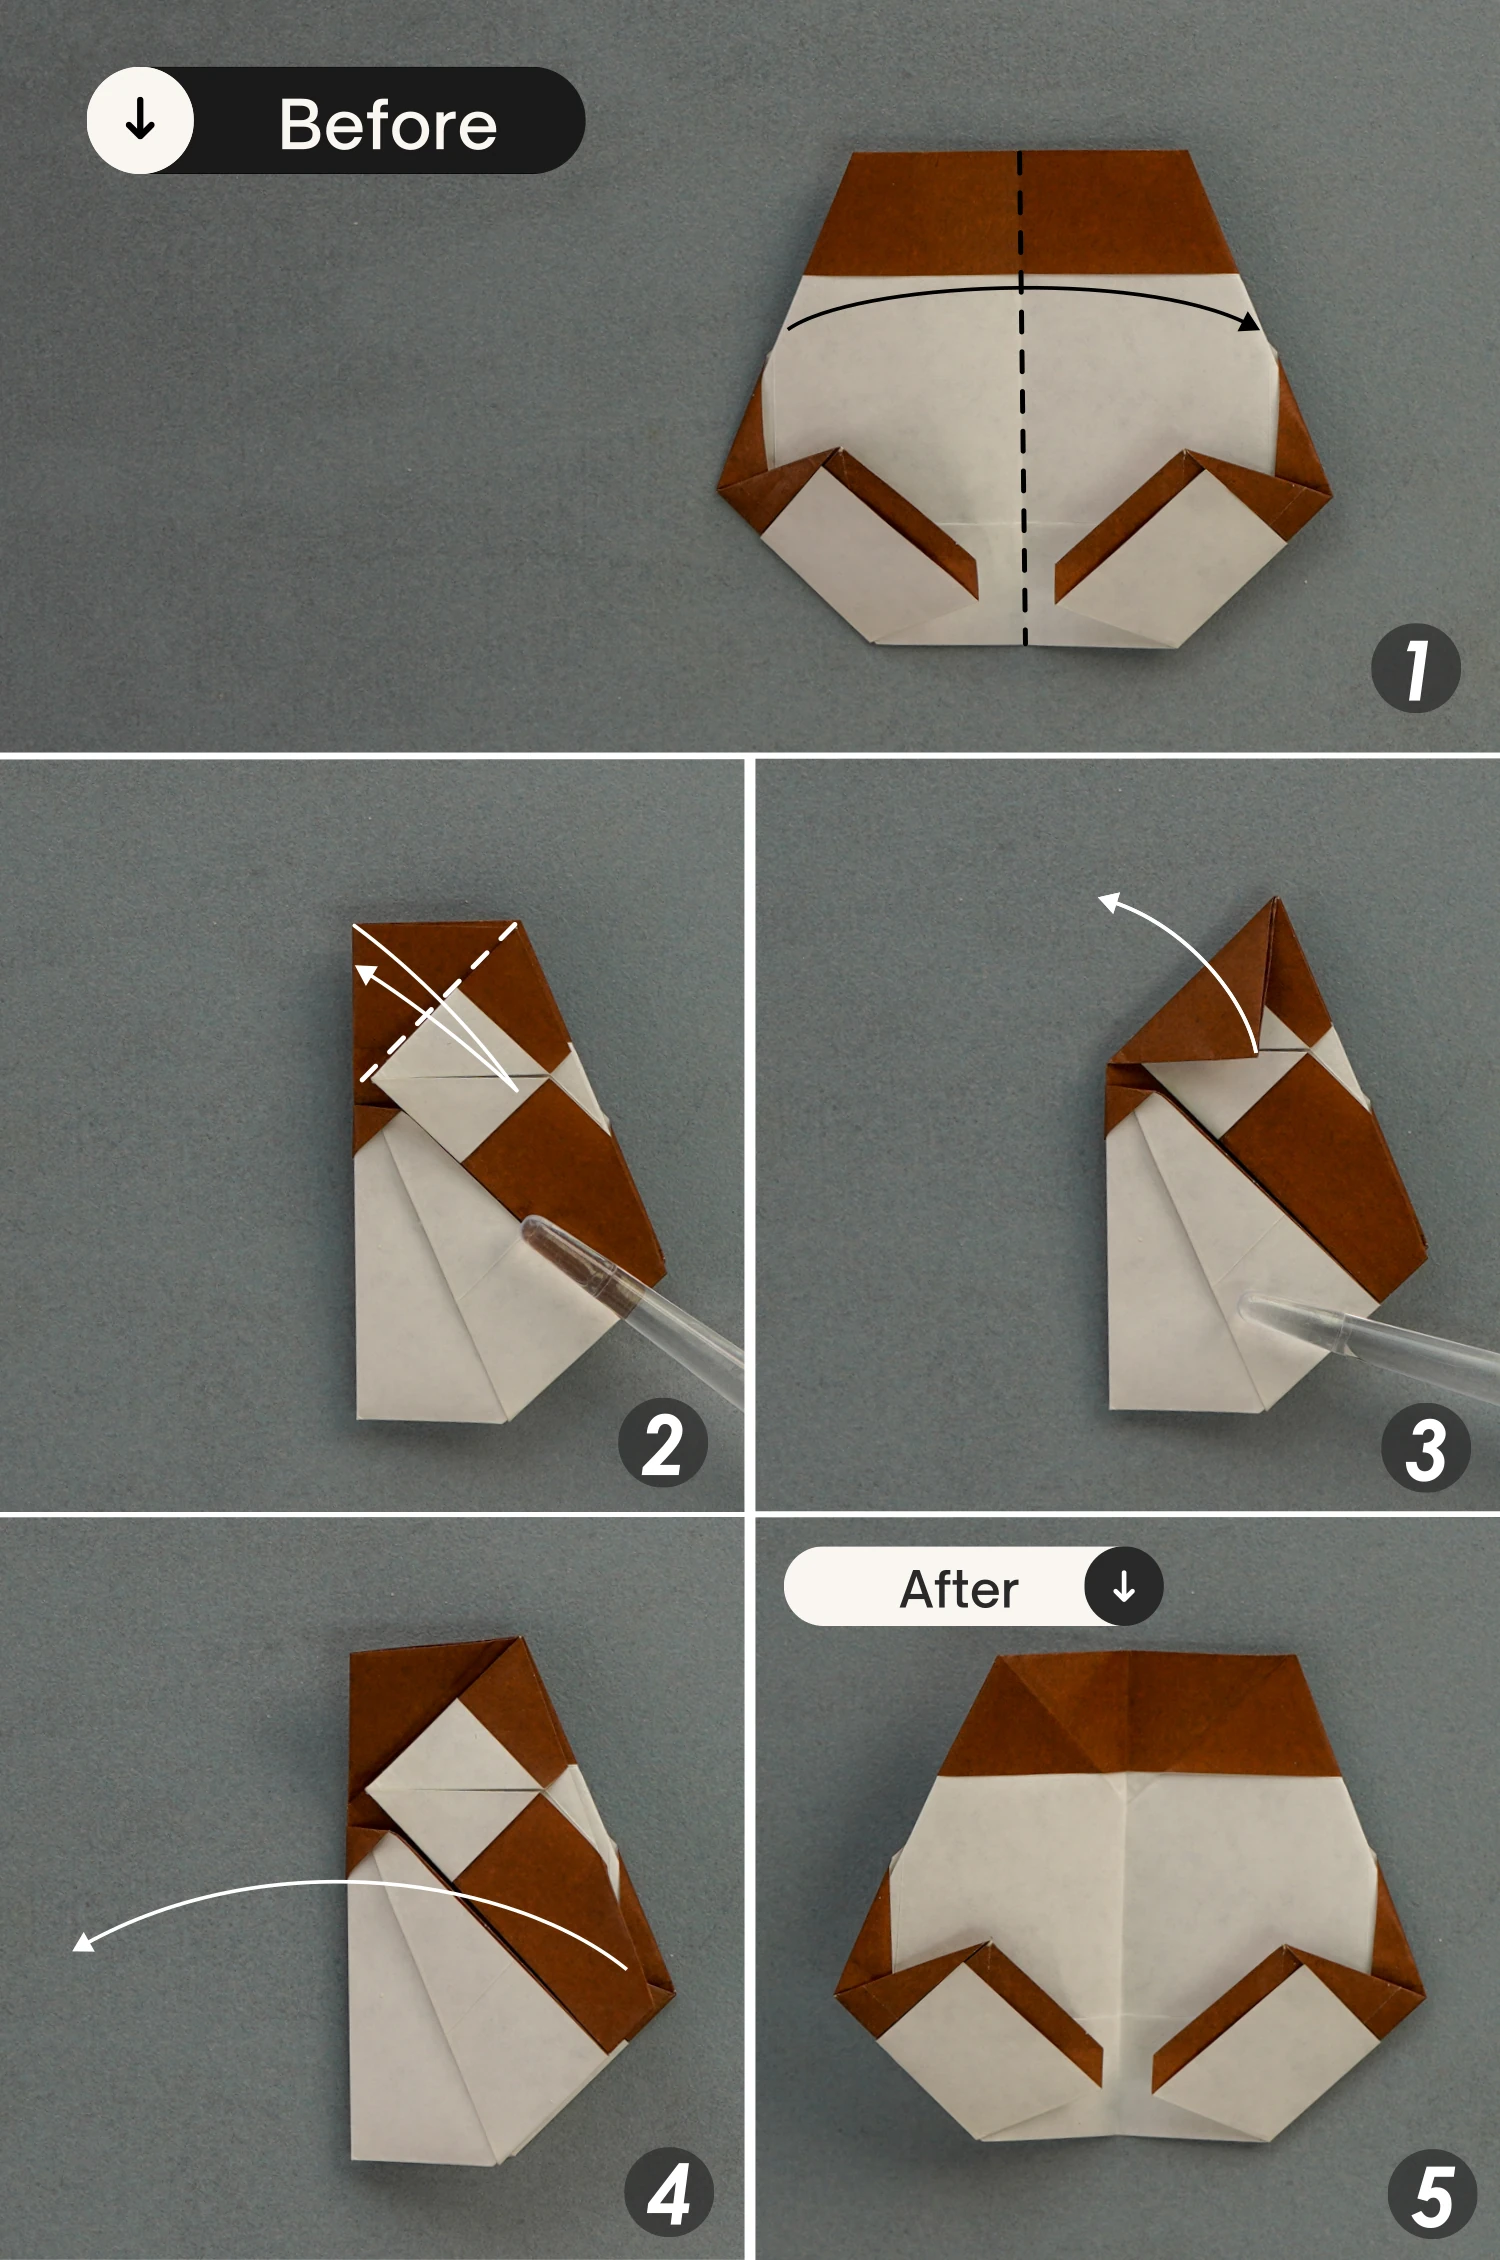
Step 12
Take the left edge of the right part, and fold it to its right edge along the dotted line.
Step 13
Fold the right edge of the model to the left along the dotted line to align with the right edge of its top layer.
Step 14
Fold the top left corner of the top layer down to meet the midpoint of the bottom edge, crease well then unfold.
Step 15
As you did in step 11, open this top left corner, and press it down again, expand the colored layer on the left, finally, flatten it.

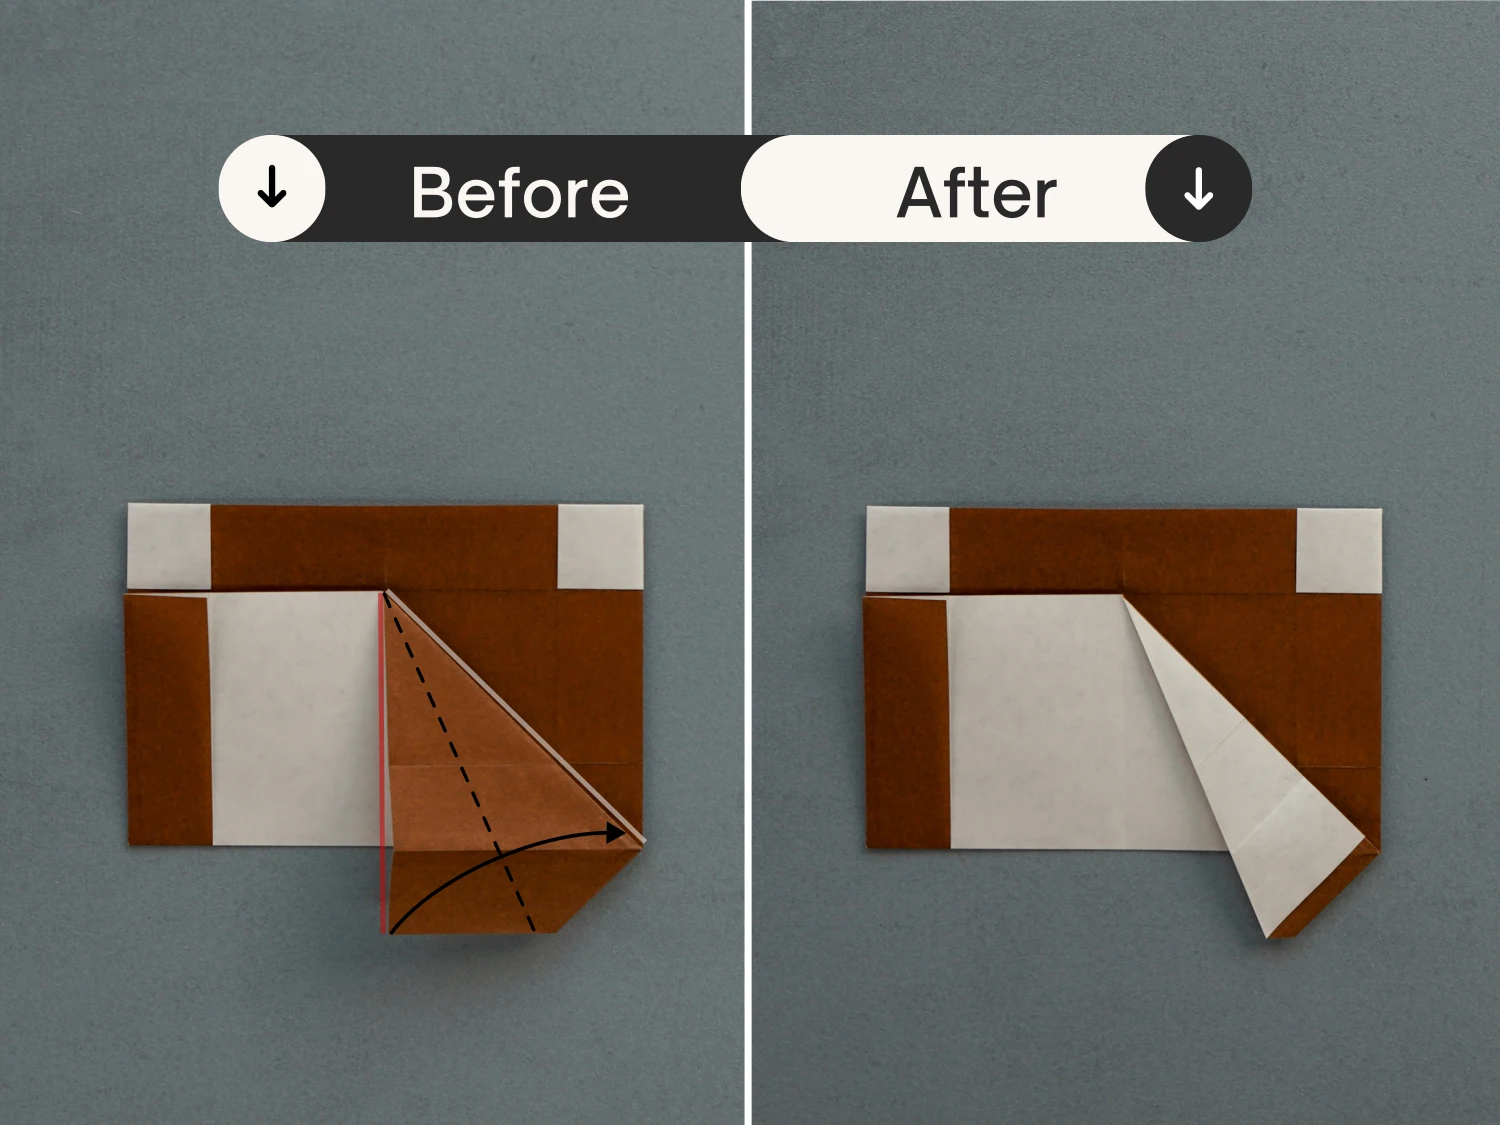
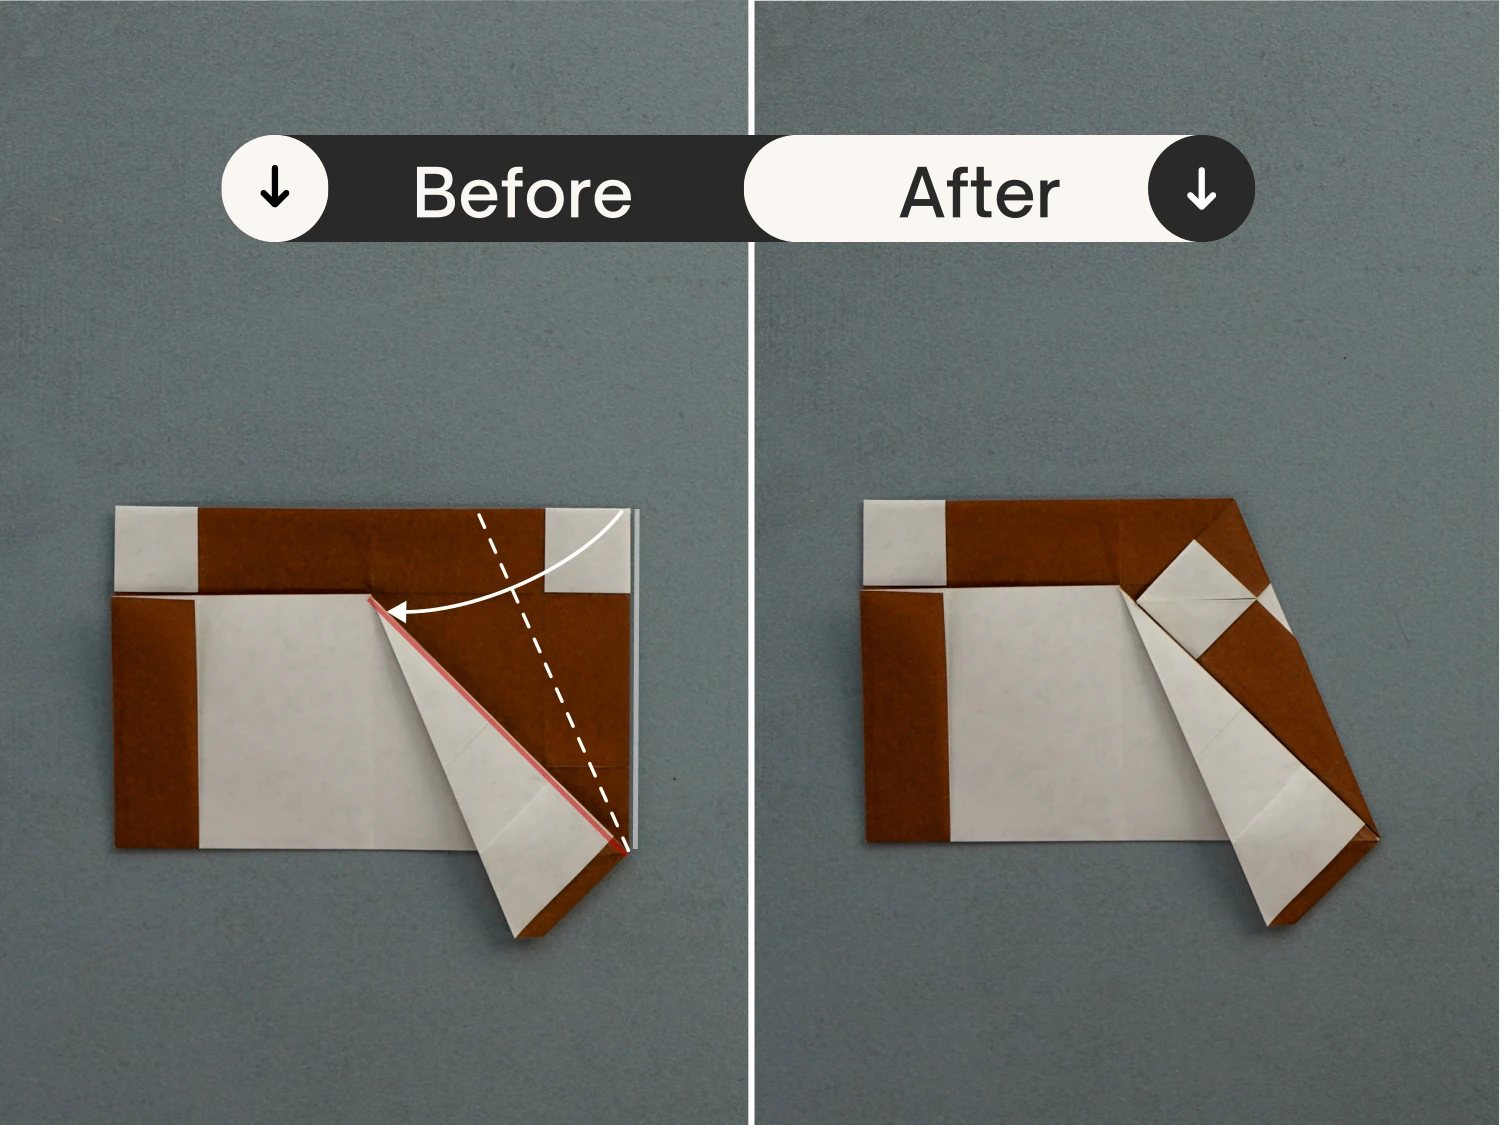
Step 16
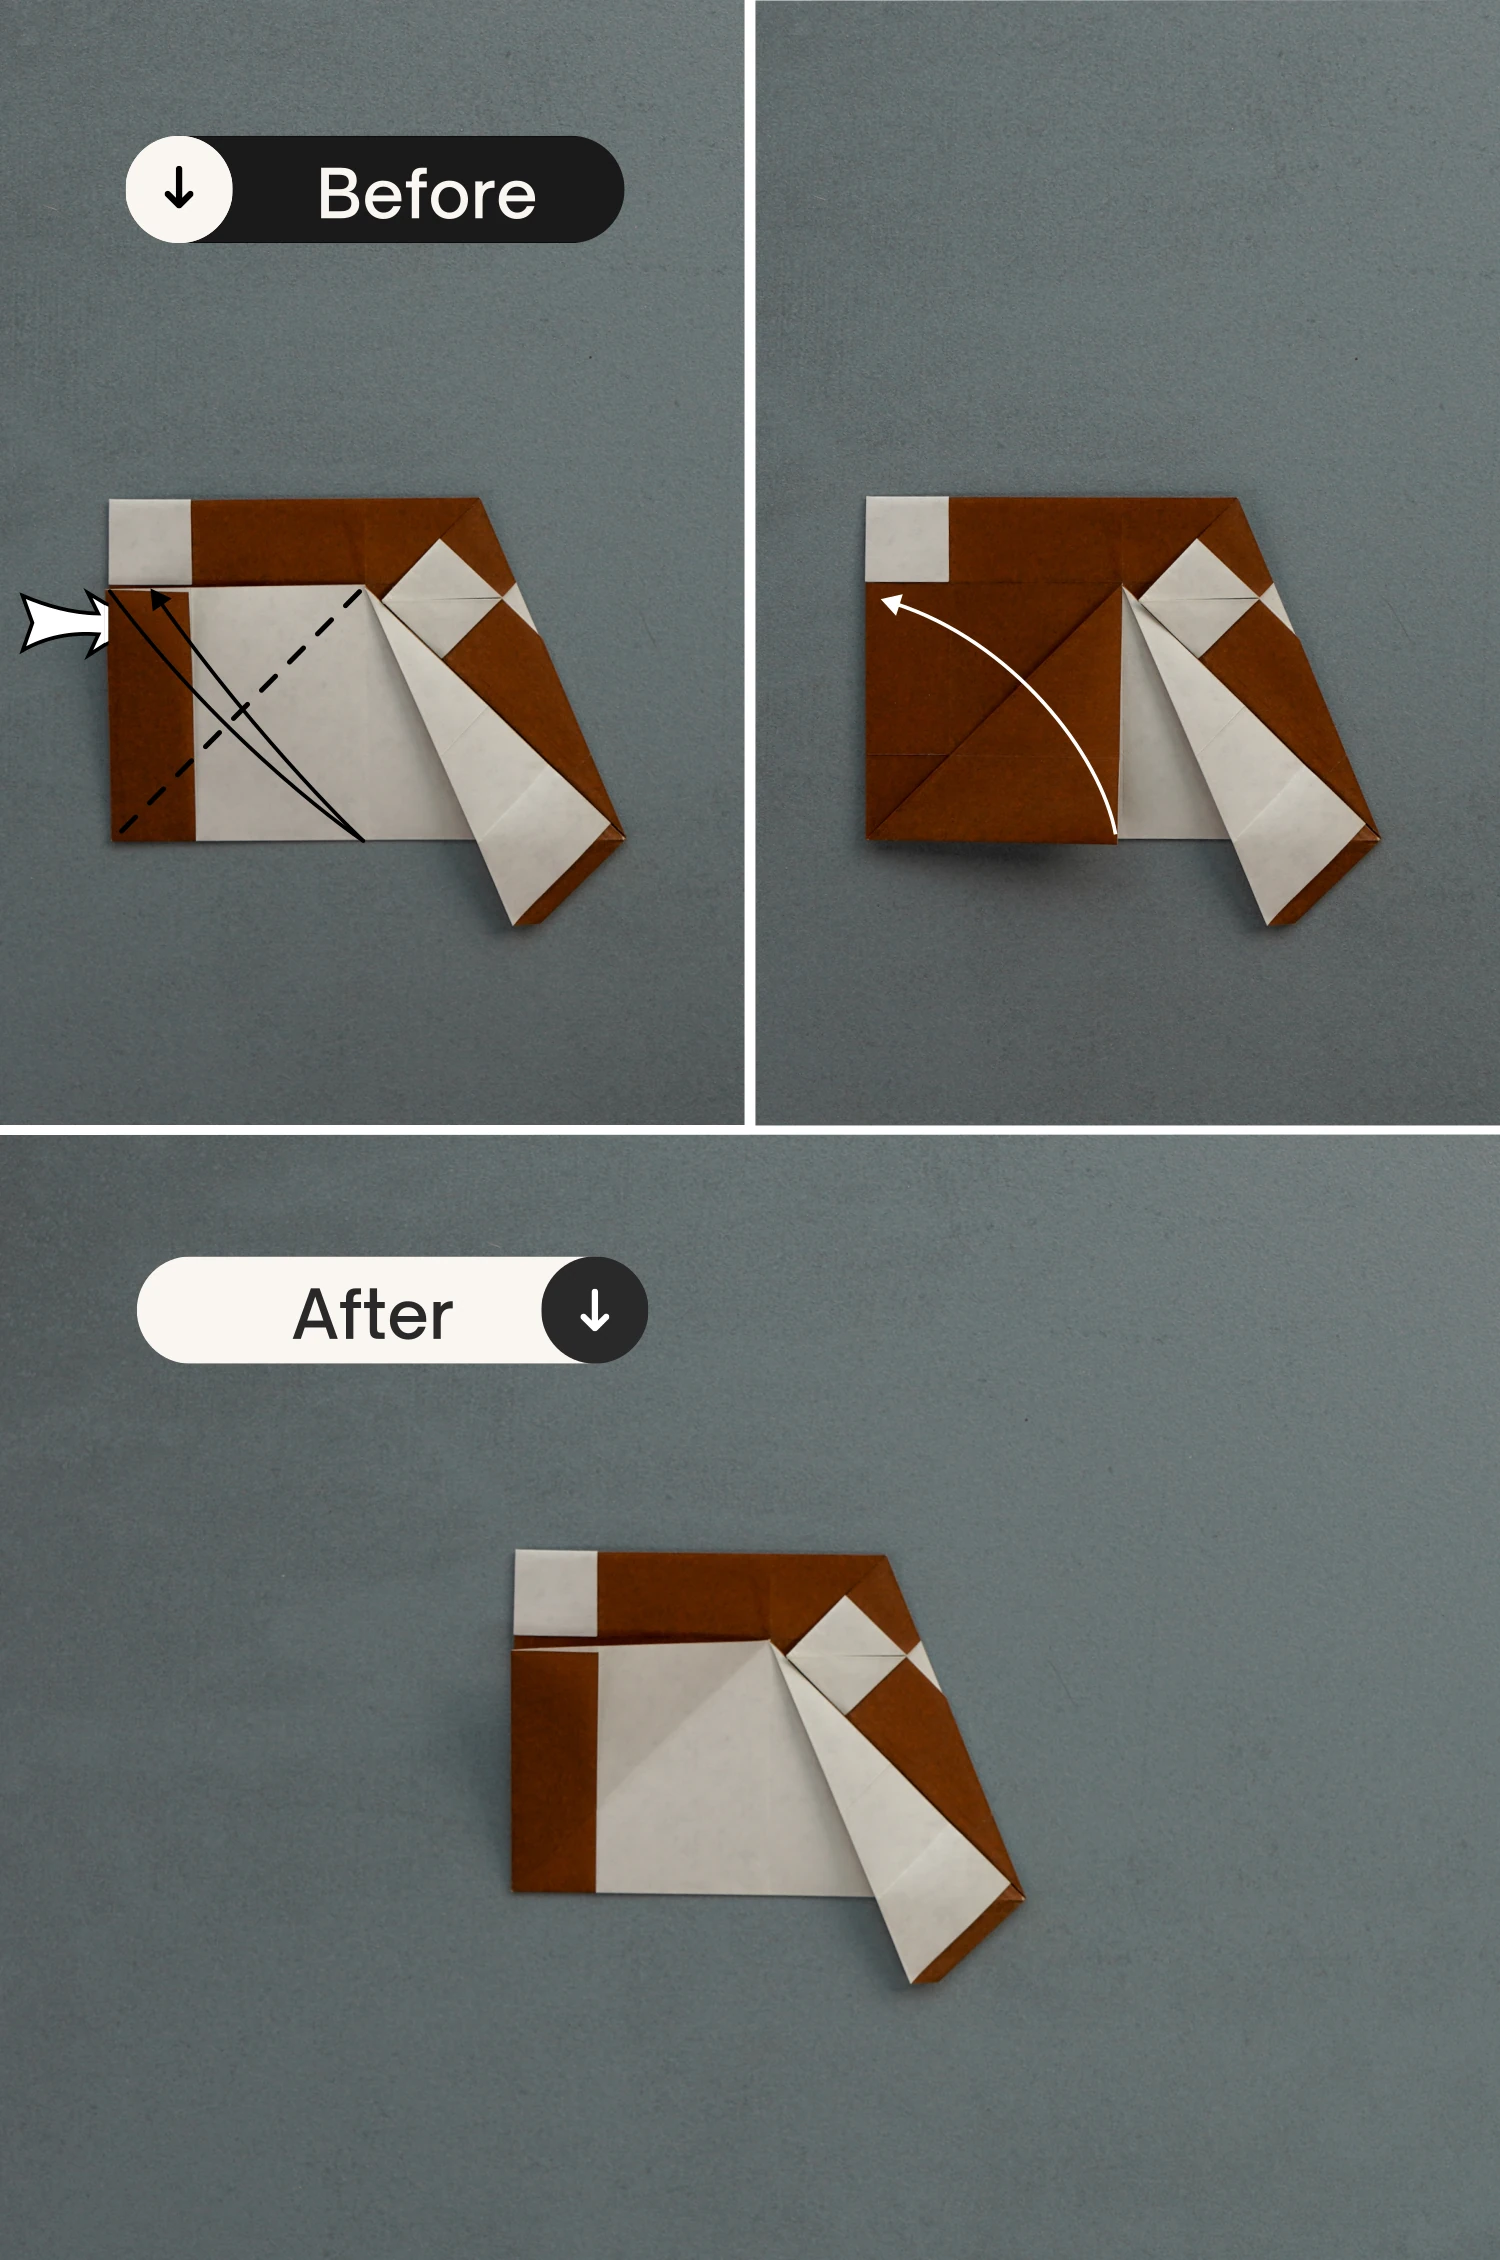
Repeat steps 12 and 13 for this side.
Fold the right edge of the top layer on the left to the left.
Fold the left edge of the model to the right to align with the left edge of the top layer.

Step 17
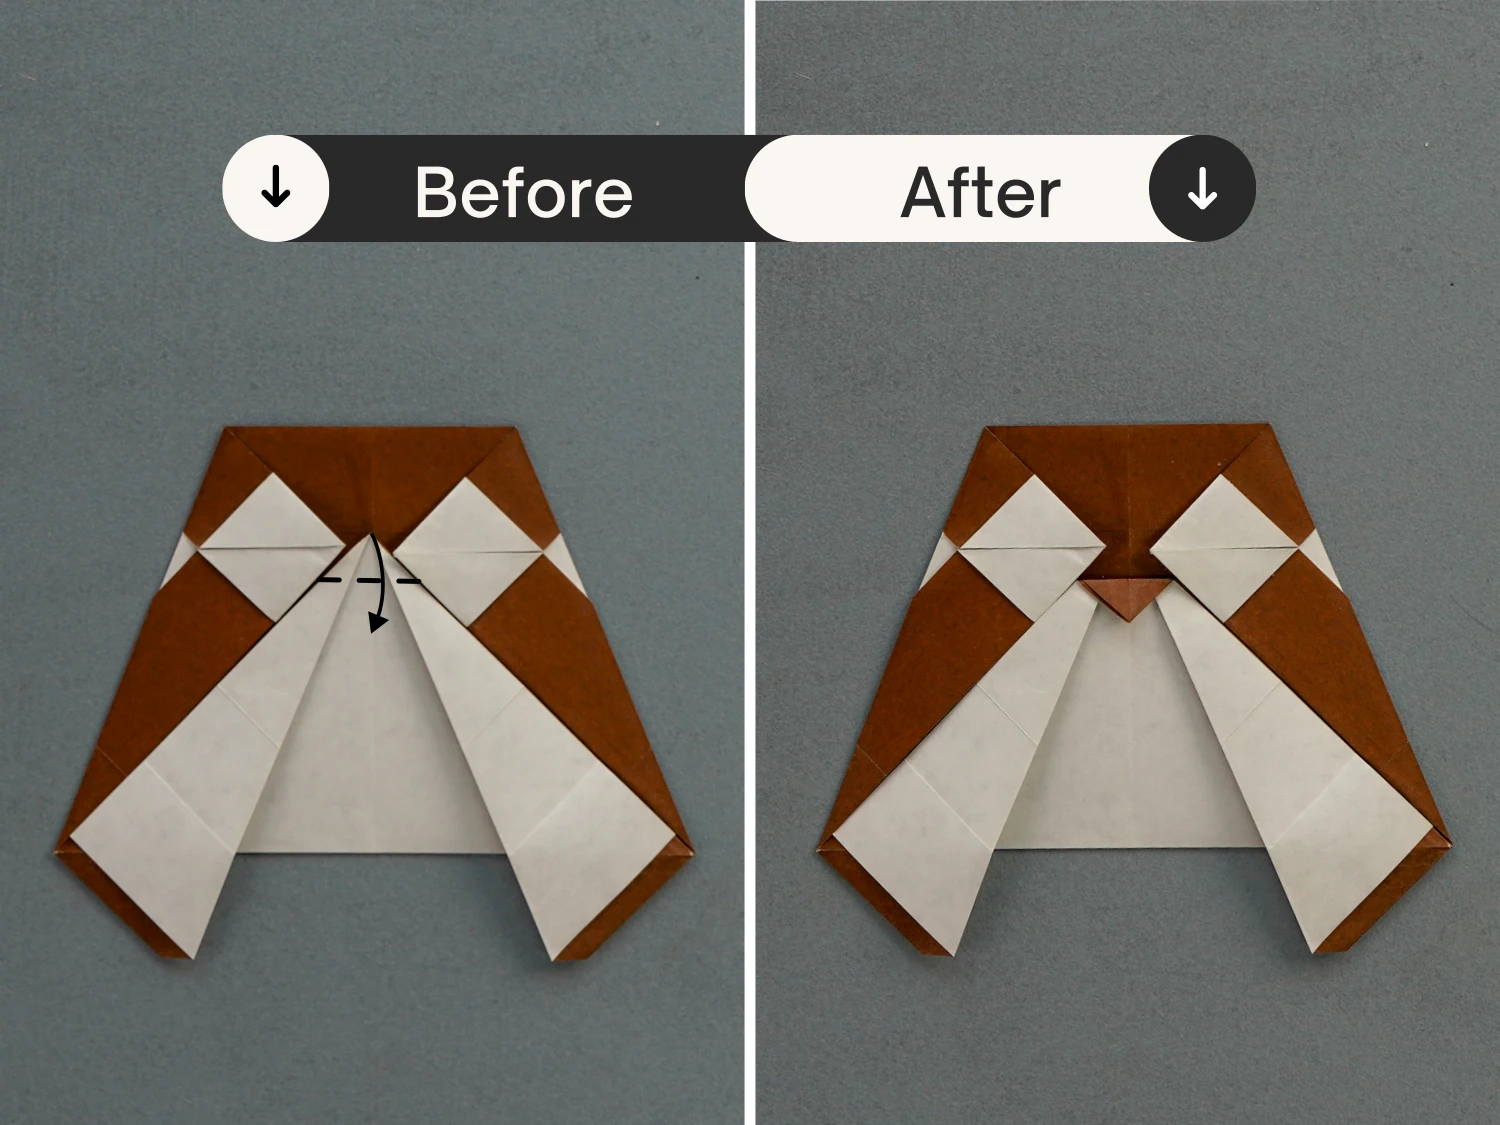
Fold the white sharp corner down a little to form the beak.
Step 18
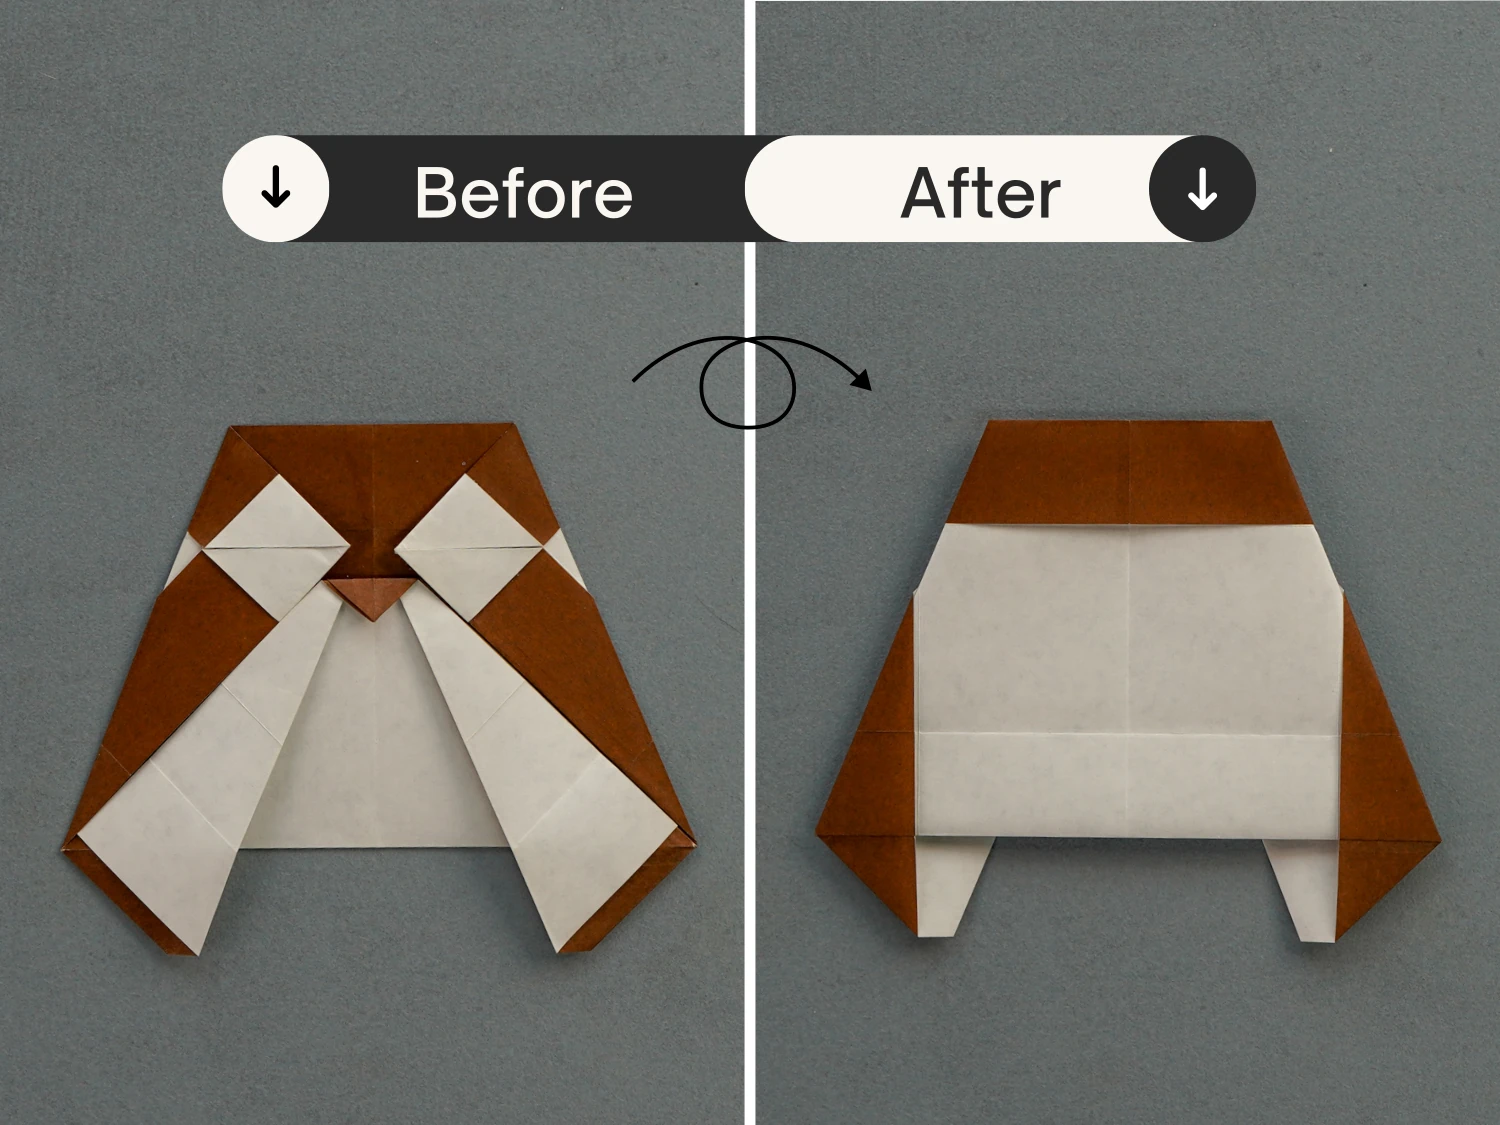
Turn over the model.
Step 19
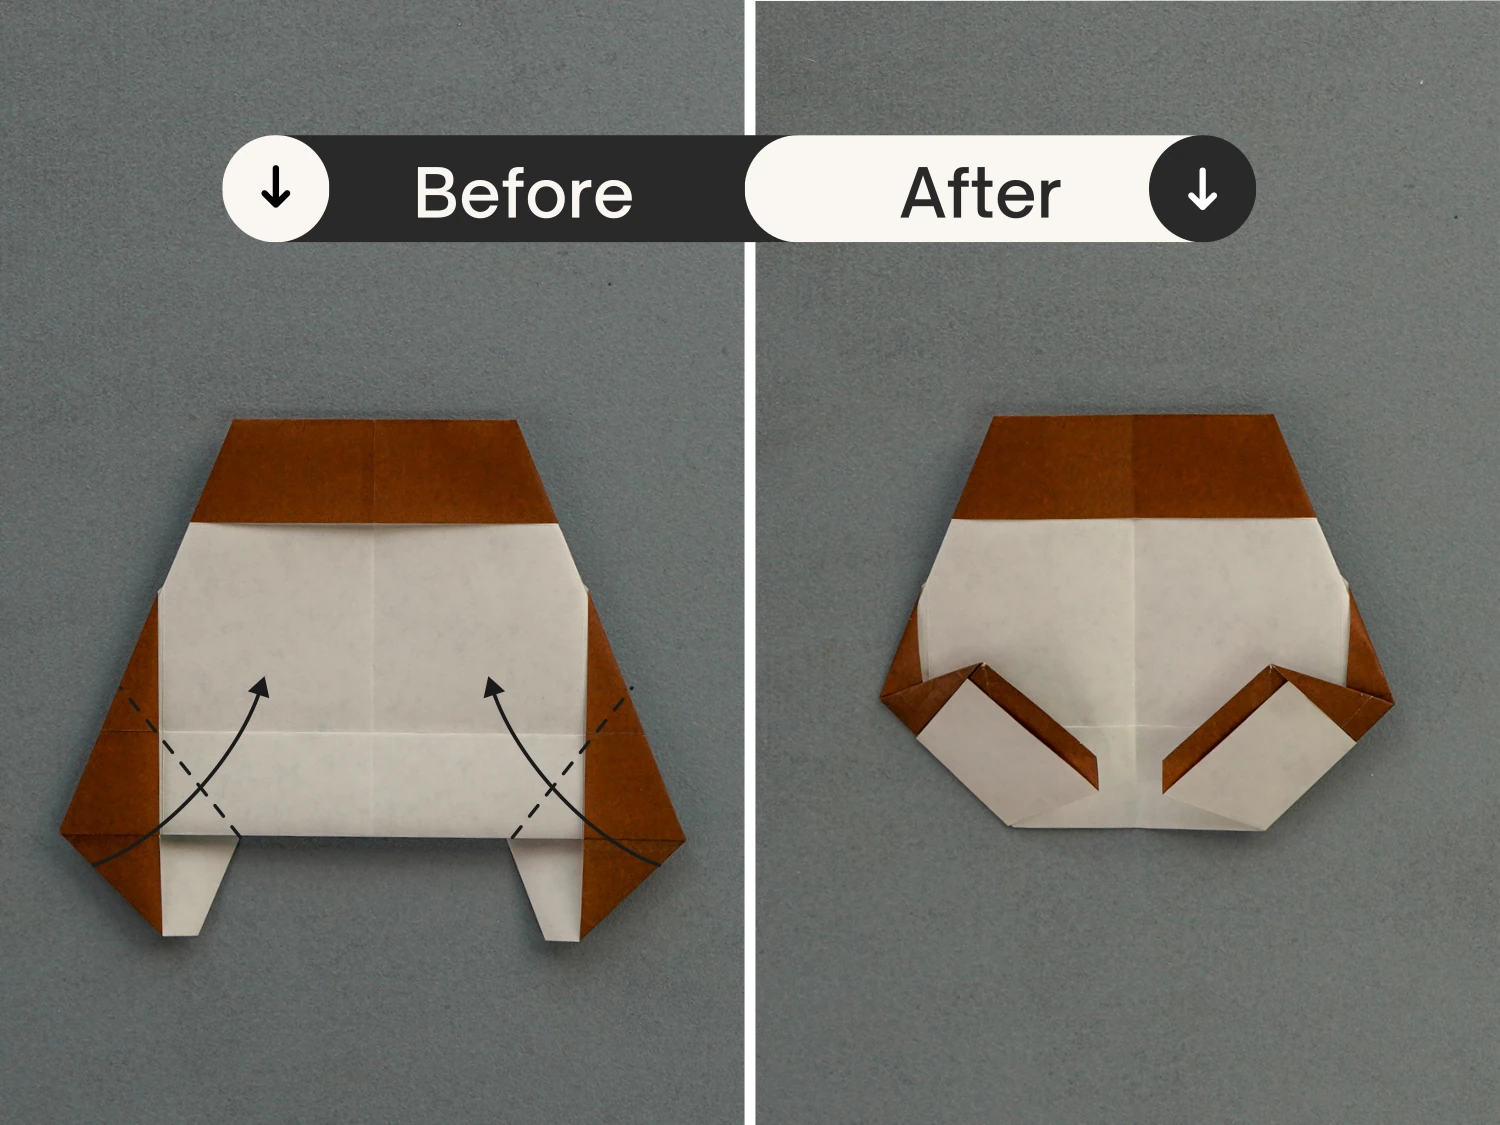
Fold the bottom left and right parts up along the dotted lines.
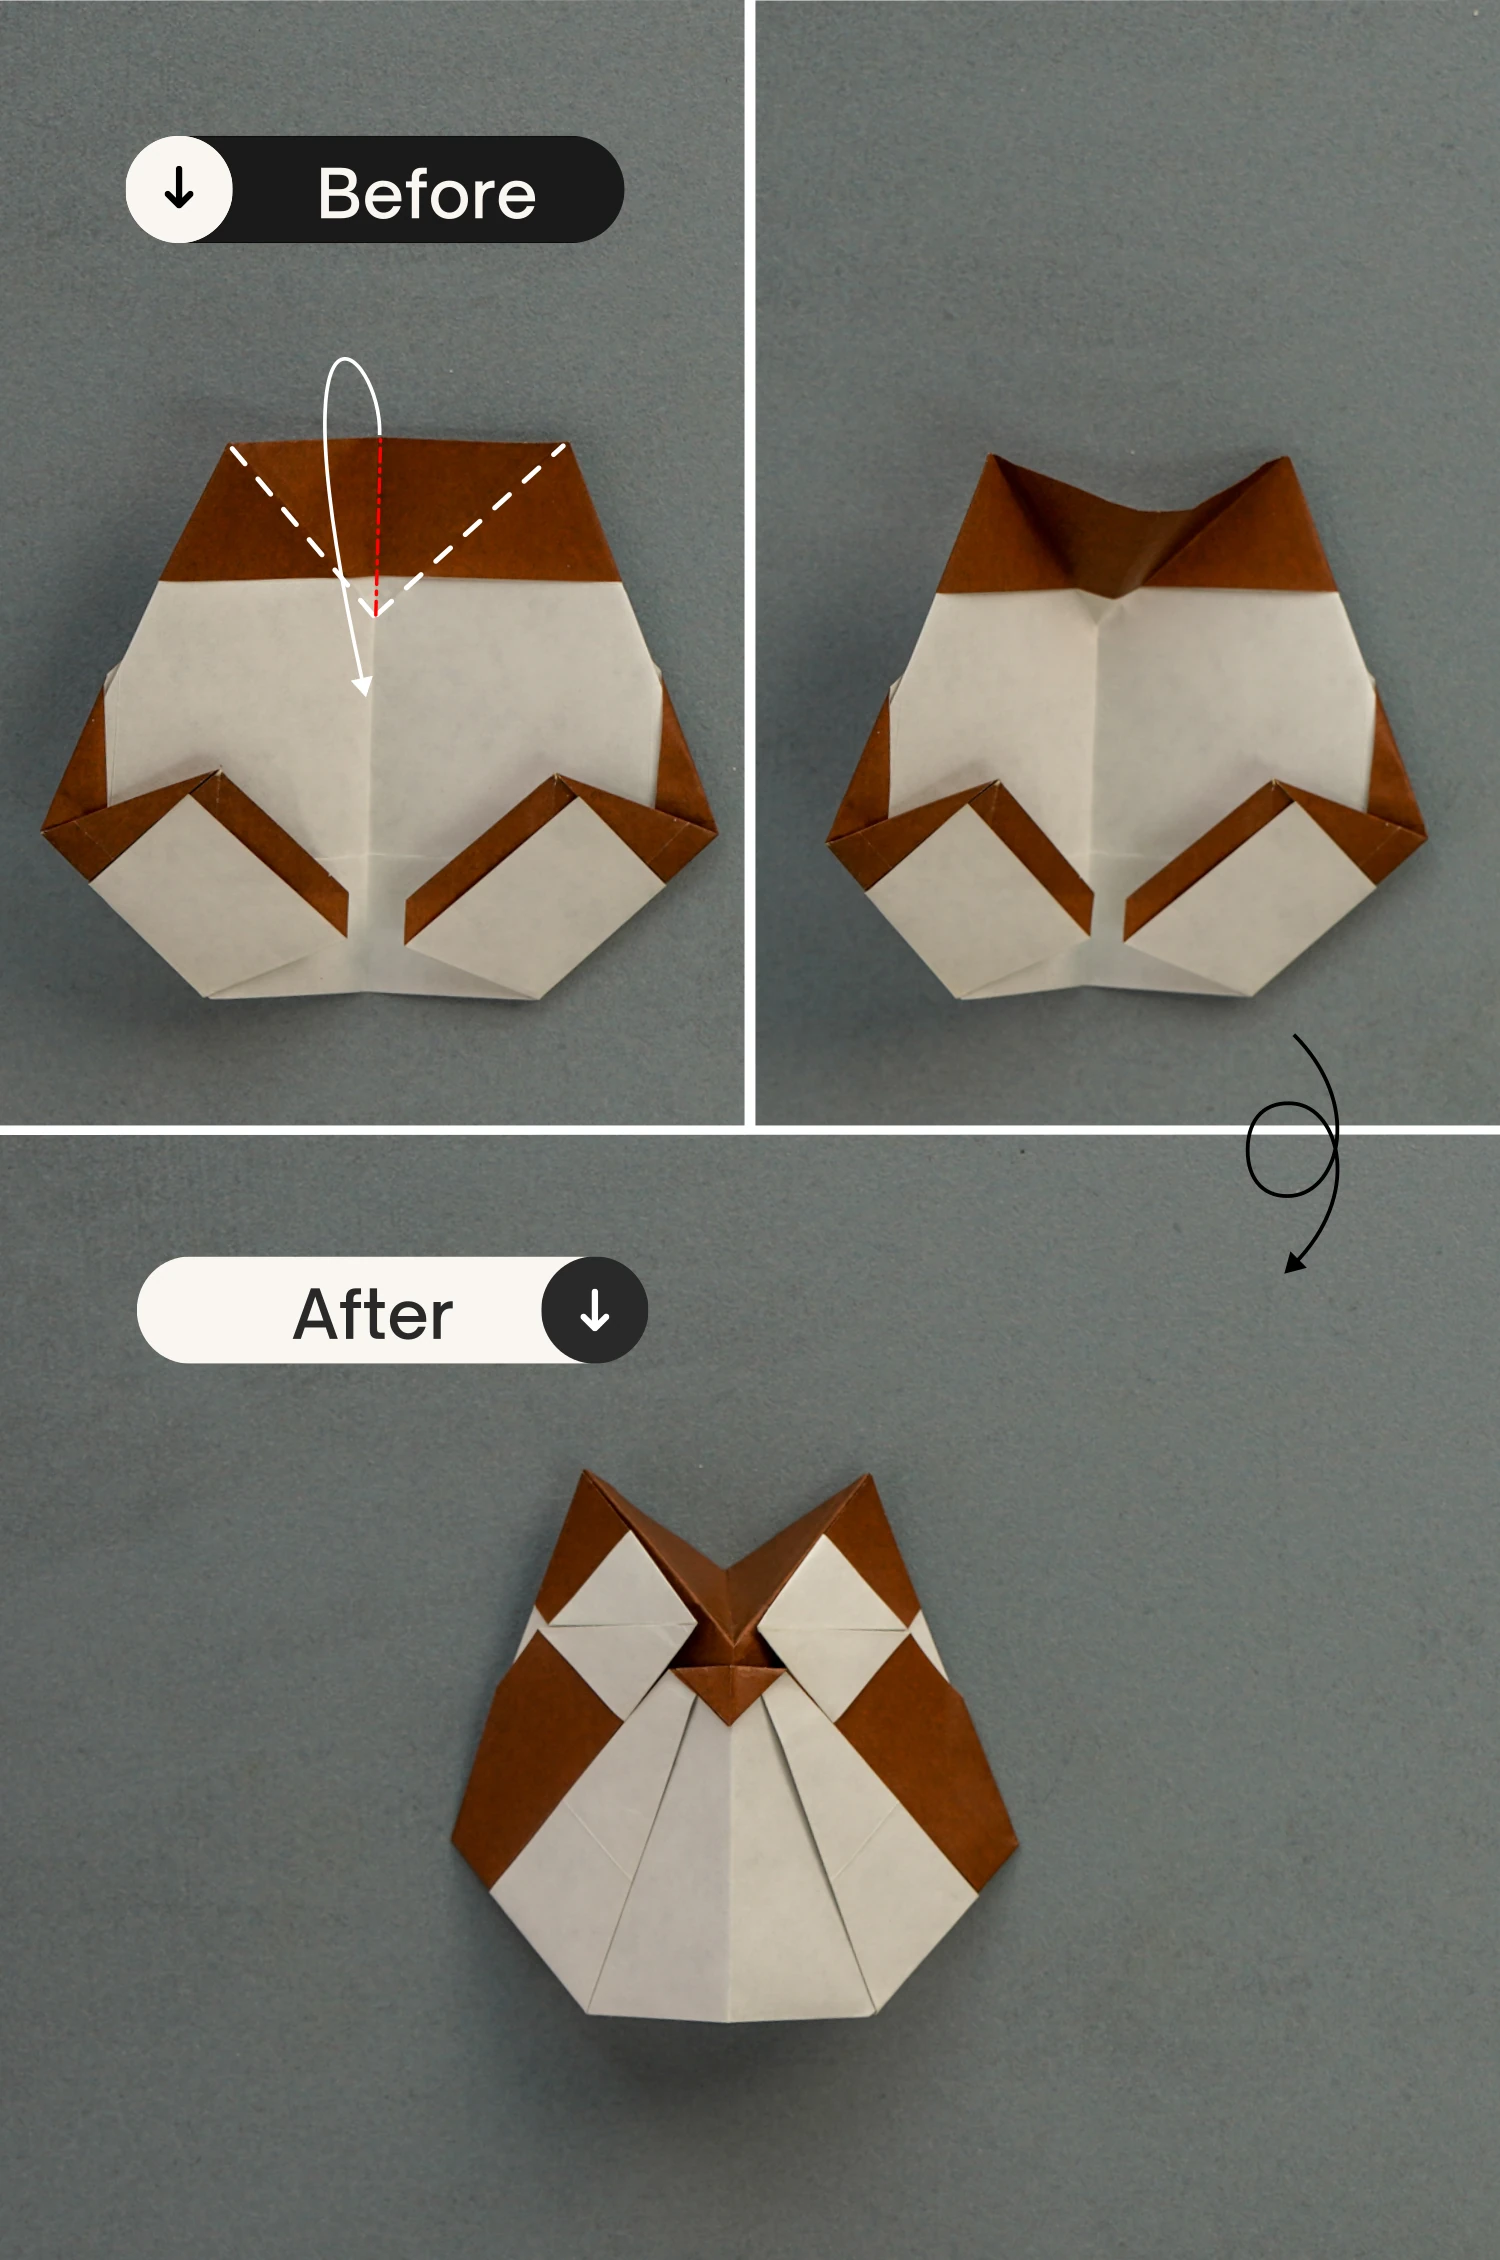
Step 20
Fold the model in half vertically from left to right, then fold the top left corner down along the dotted line, crease well, and unfold it.
Finally, unfold the model to the original shape in the first picture.
Step 21
Slightly press down the midpoint of the top edge and shape the creases on both sides you made in the previous step. You can fold it in half again and flatten it to better shape it.
Flip the model over, that’s your lovely owl.
What’s Next
Such a lovely owl is done, you definitely want more different origami challenges, so next you can explore other origami bird ideas. Enjoy folding!


