How to Fold an Origami Flamingo
Step by Step Instructions
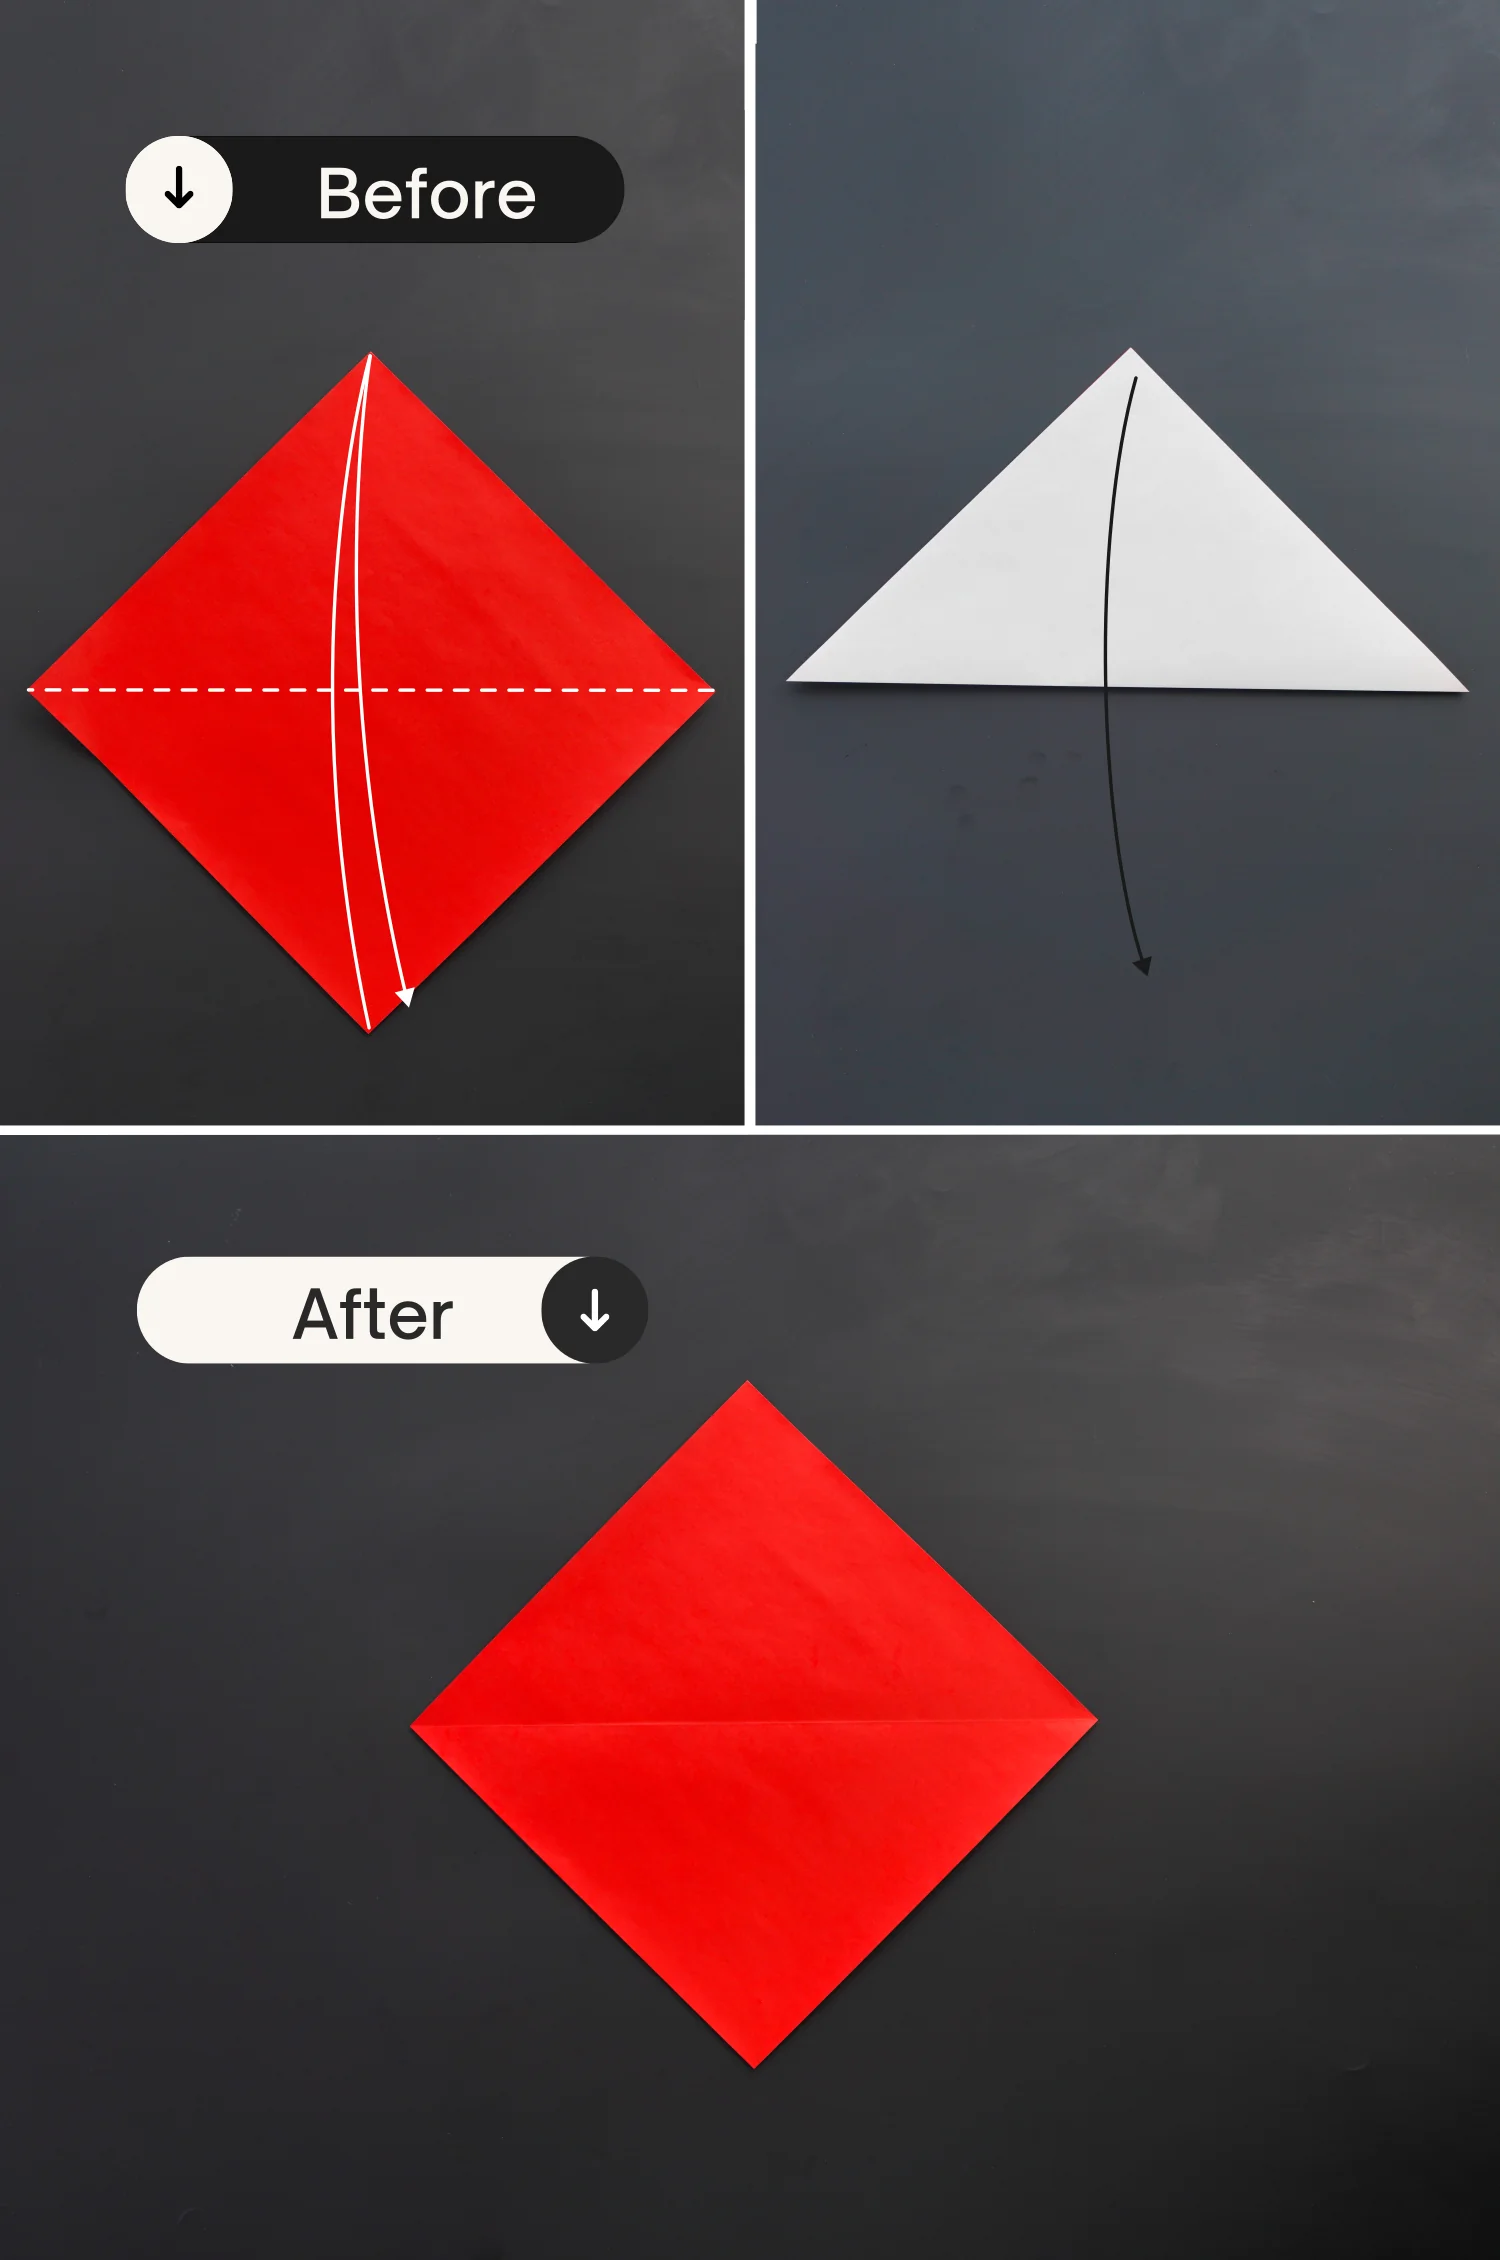
Step 1
Start with the red side of the paper facing up, and fold the bottom point to the top diagonally, crease it well then unfold.
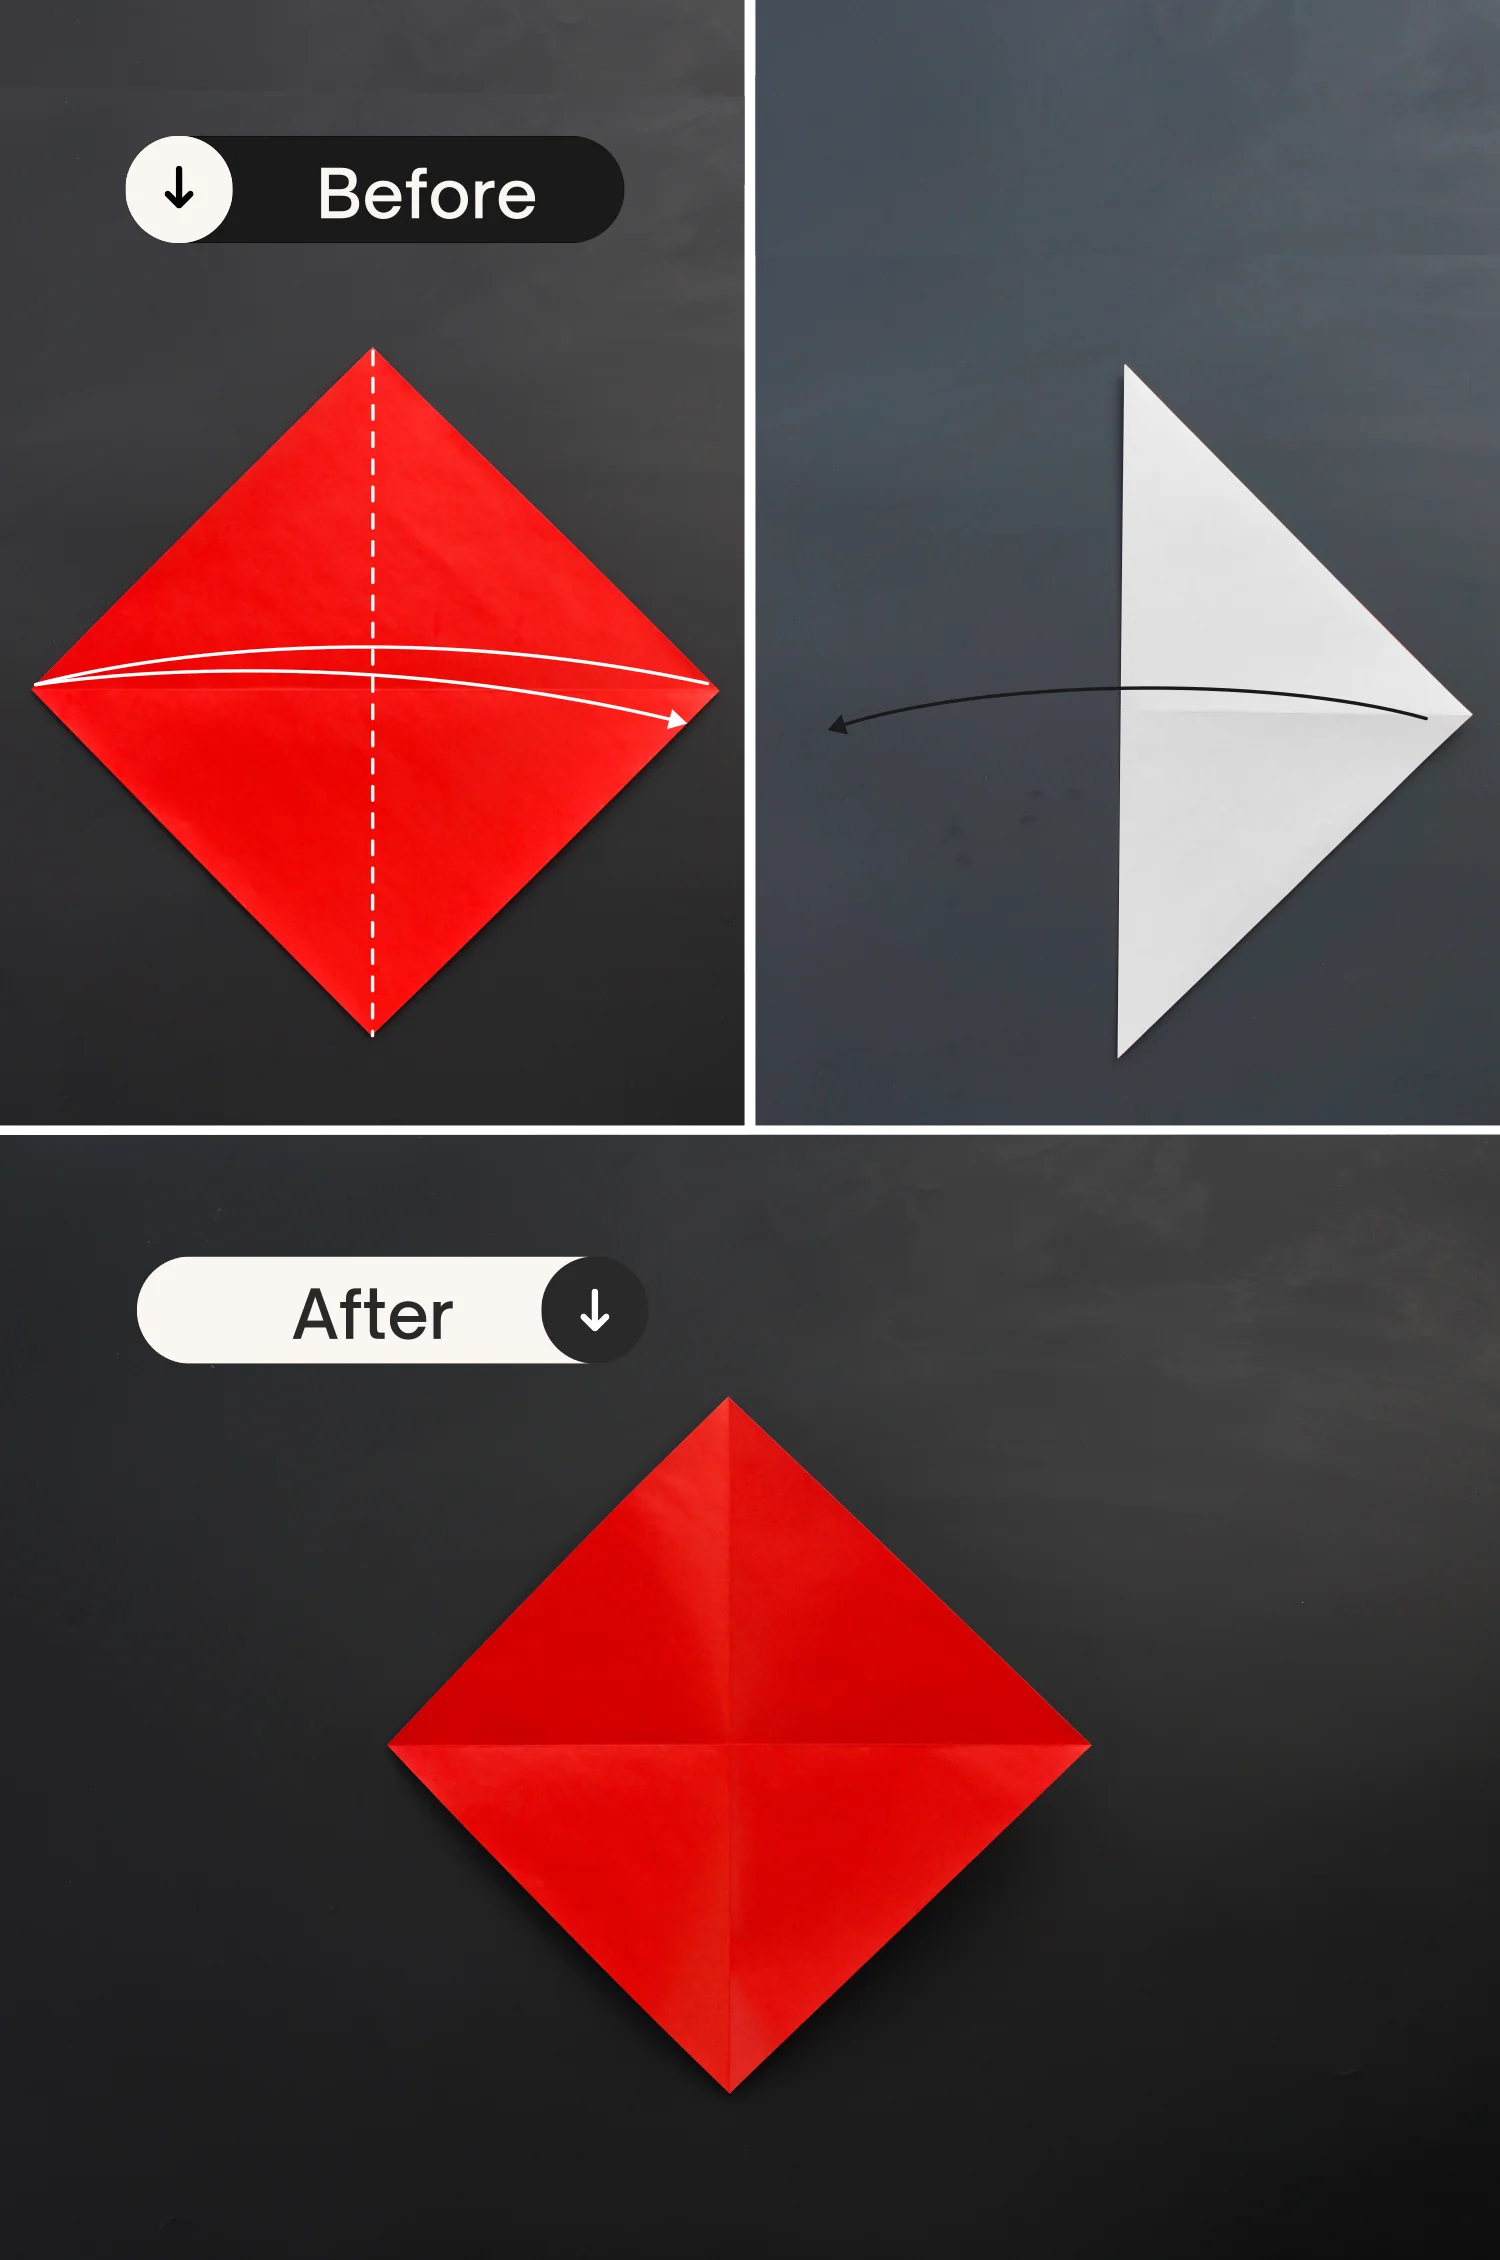
Step 2
Fold the paper in half vertically, and unfold.
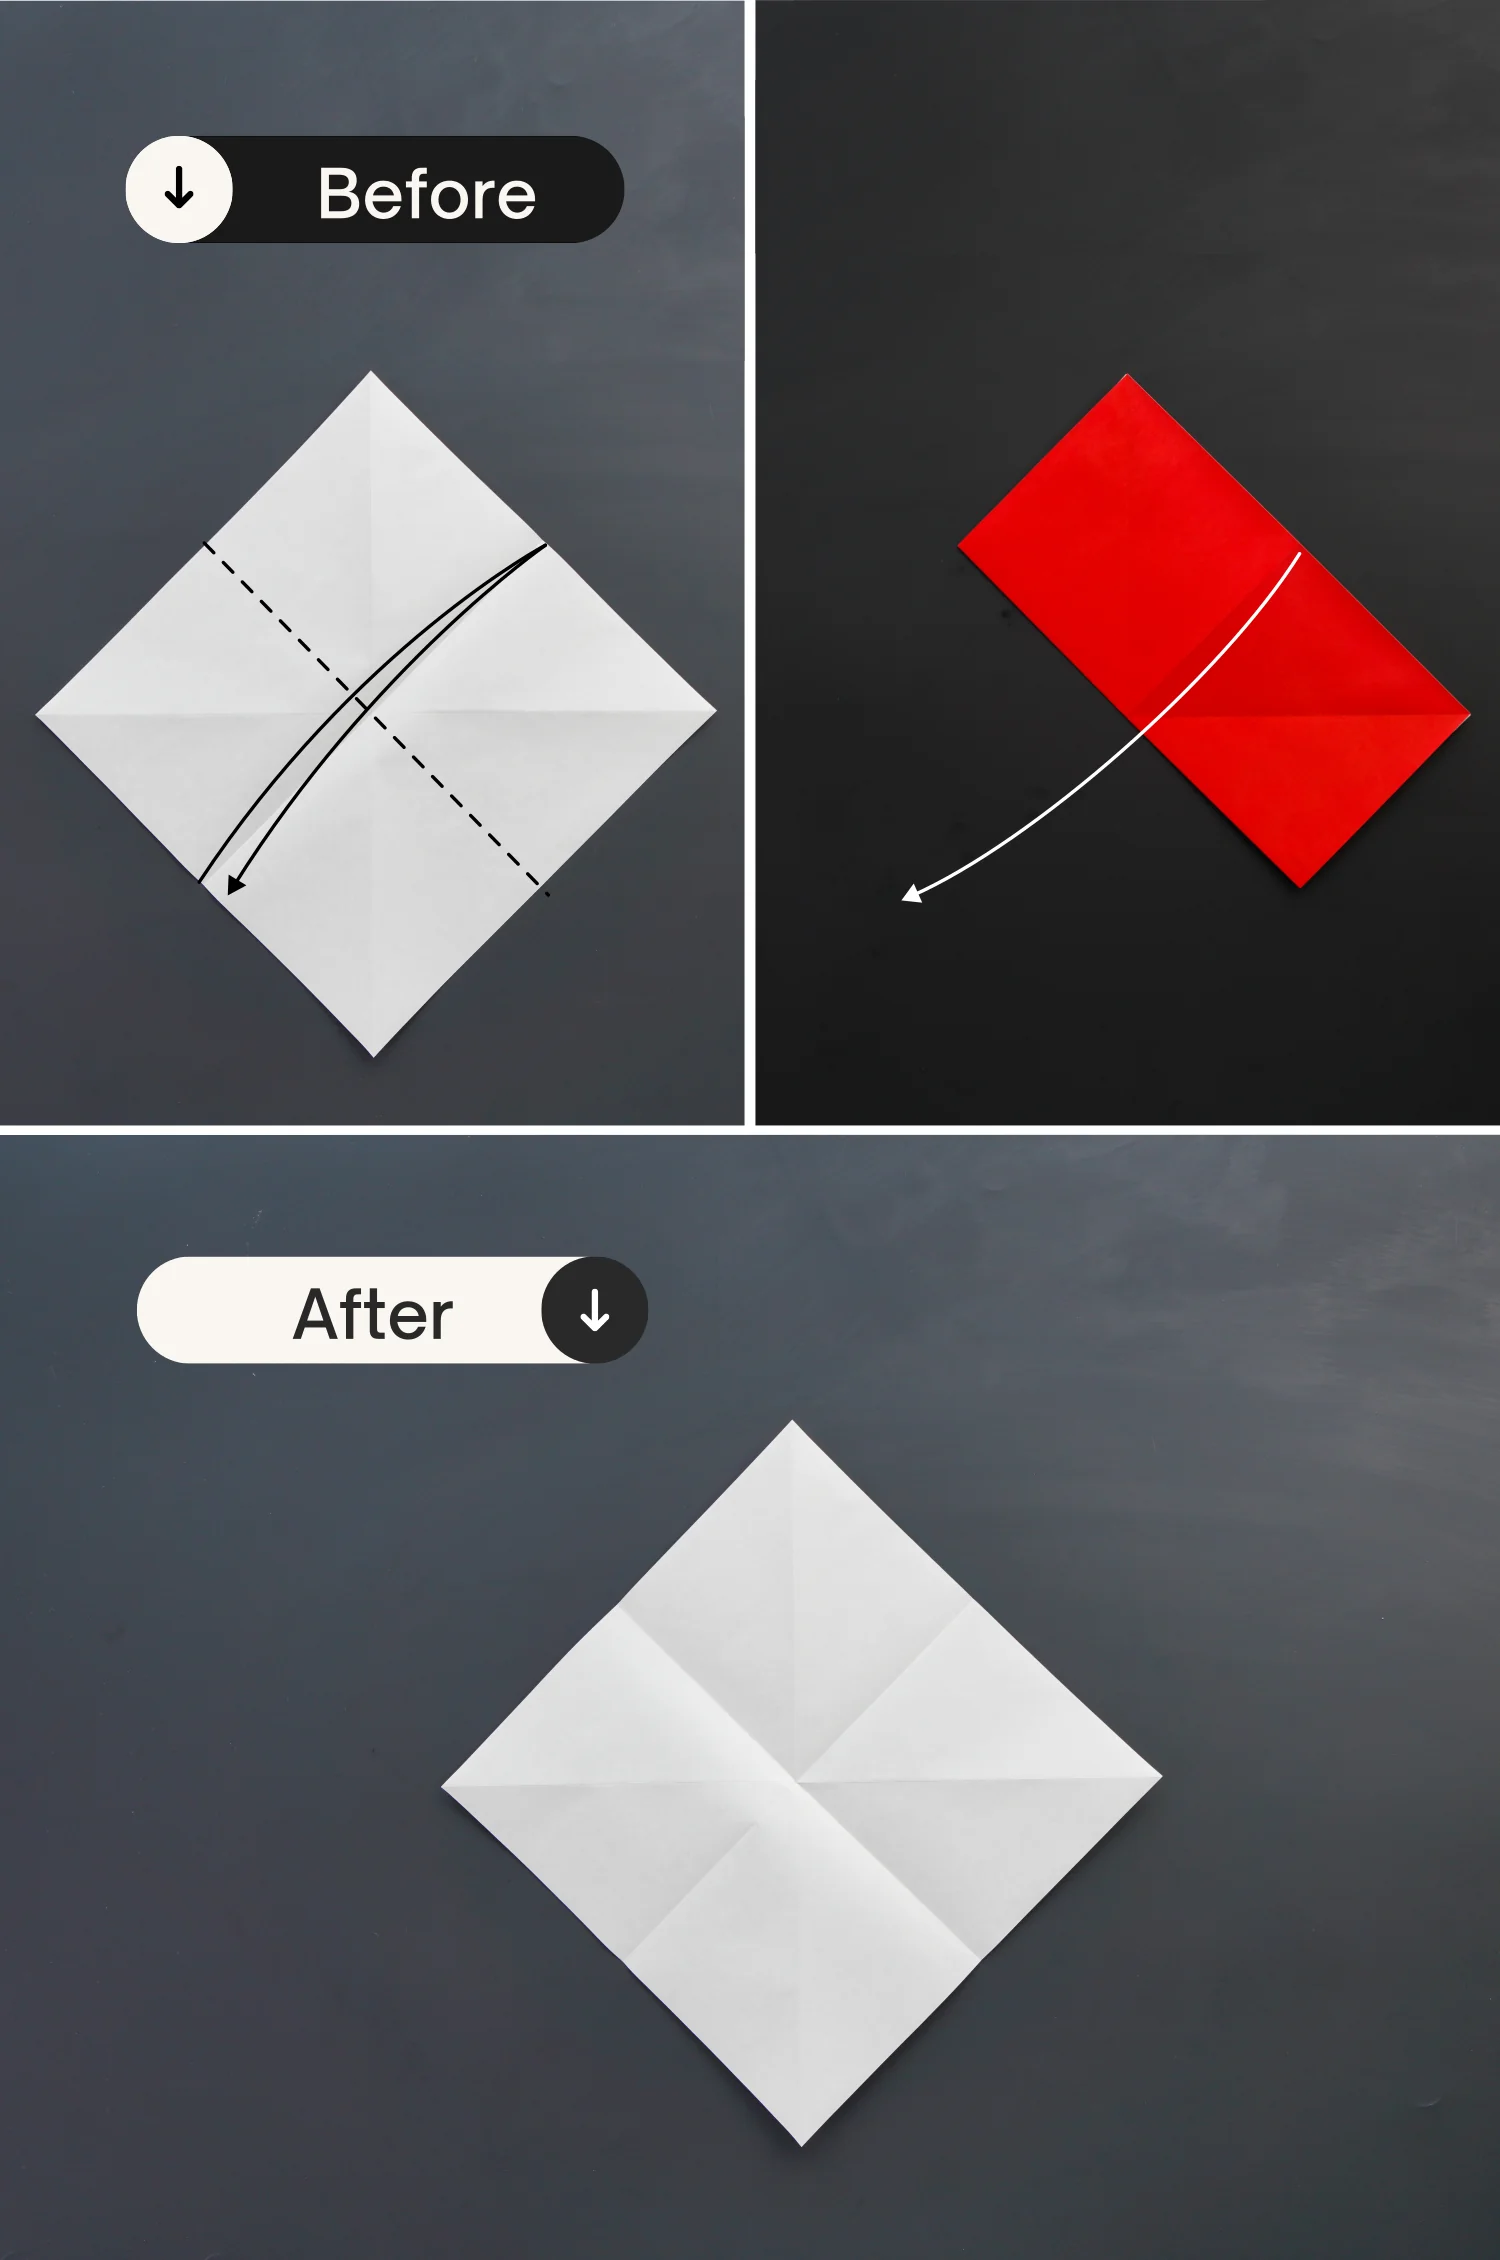
Step 3
Flip it over.

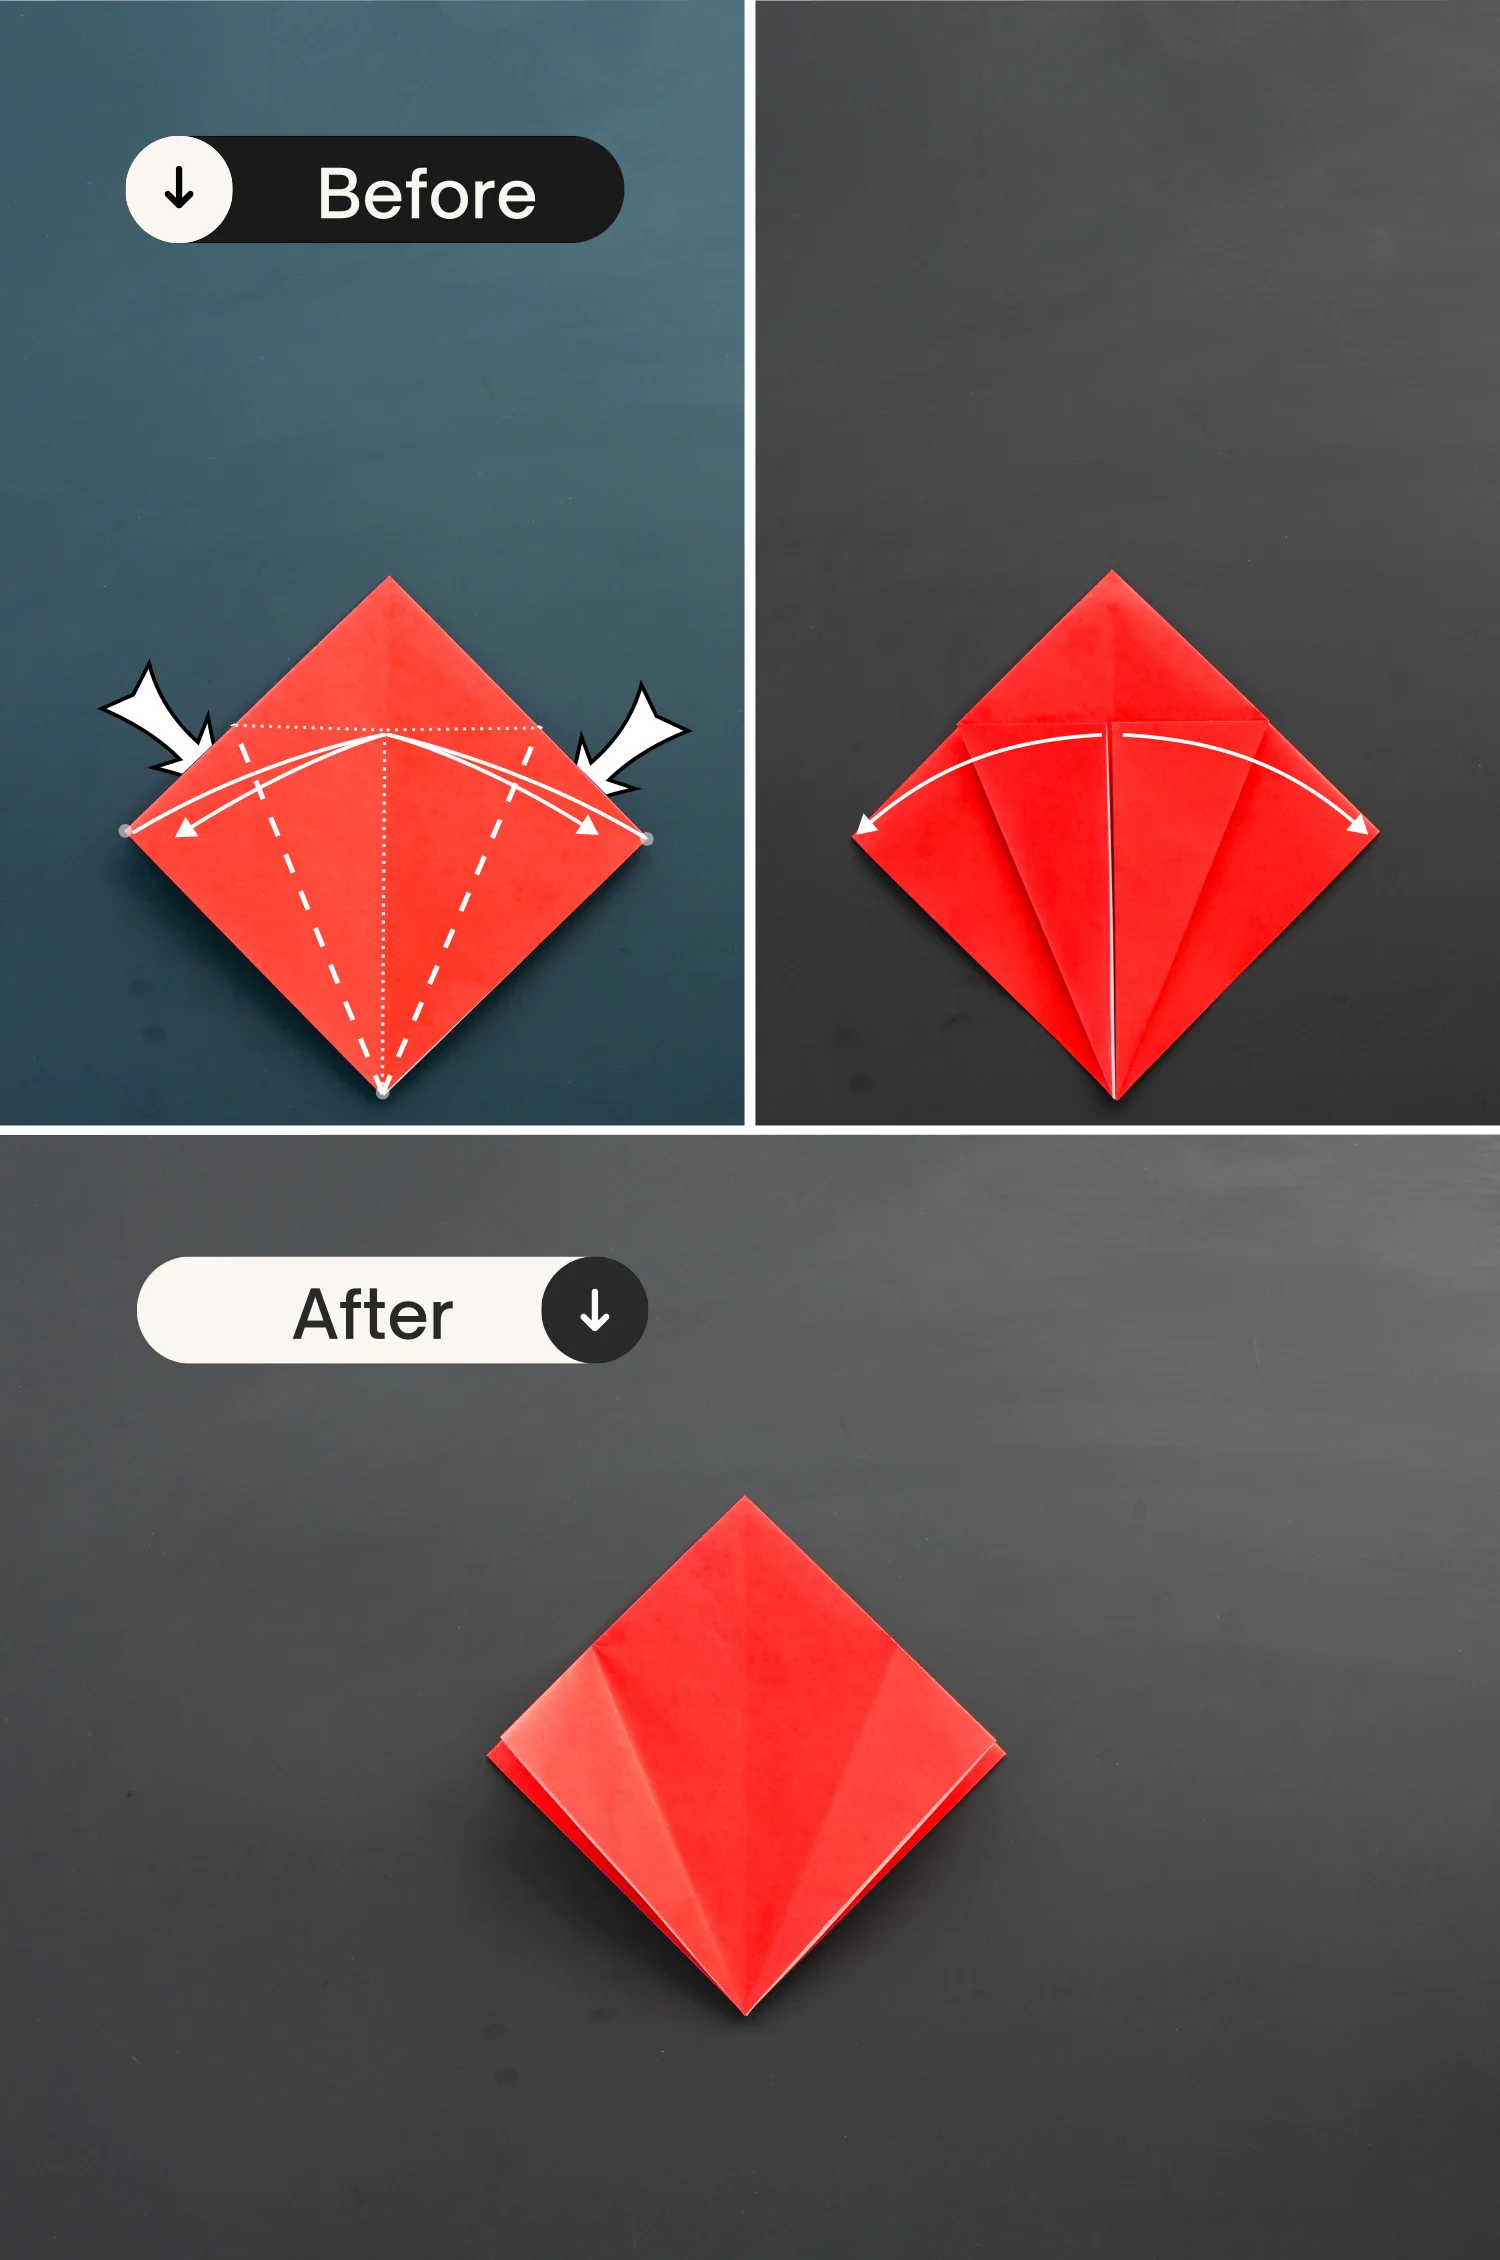
Step 4
Fold the bottom right edge to align with the top left edge, leaving a crease then unfold it.

Step 5
Fold the bottom left edge to align with the top right edge, crease it well then unfold.
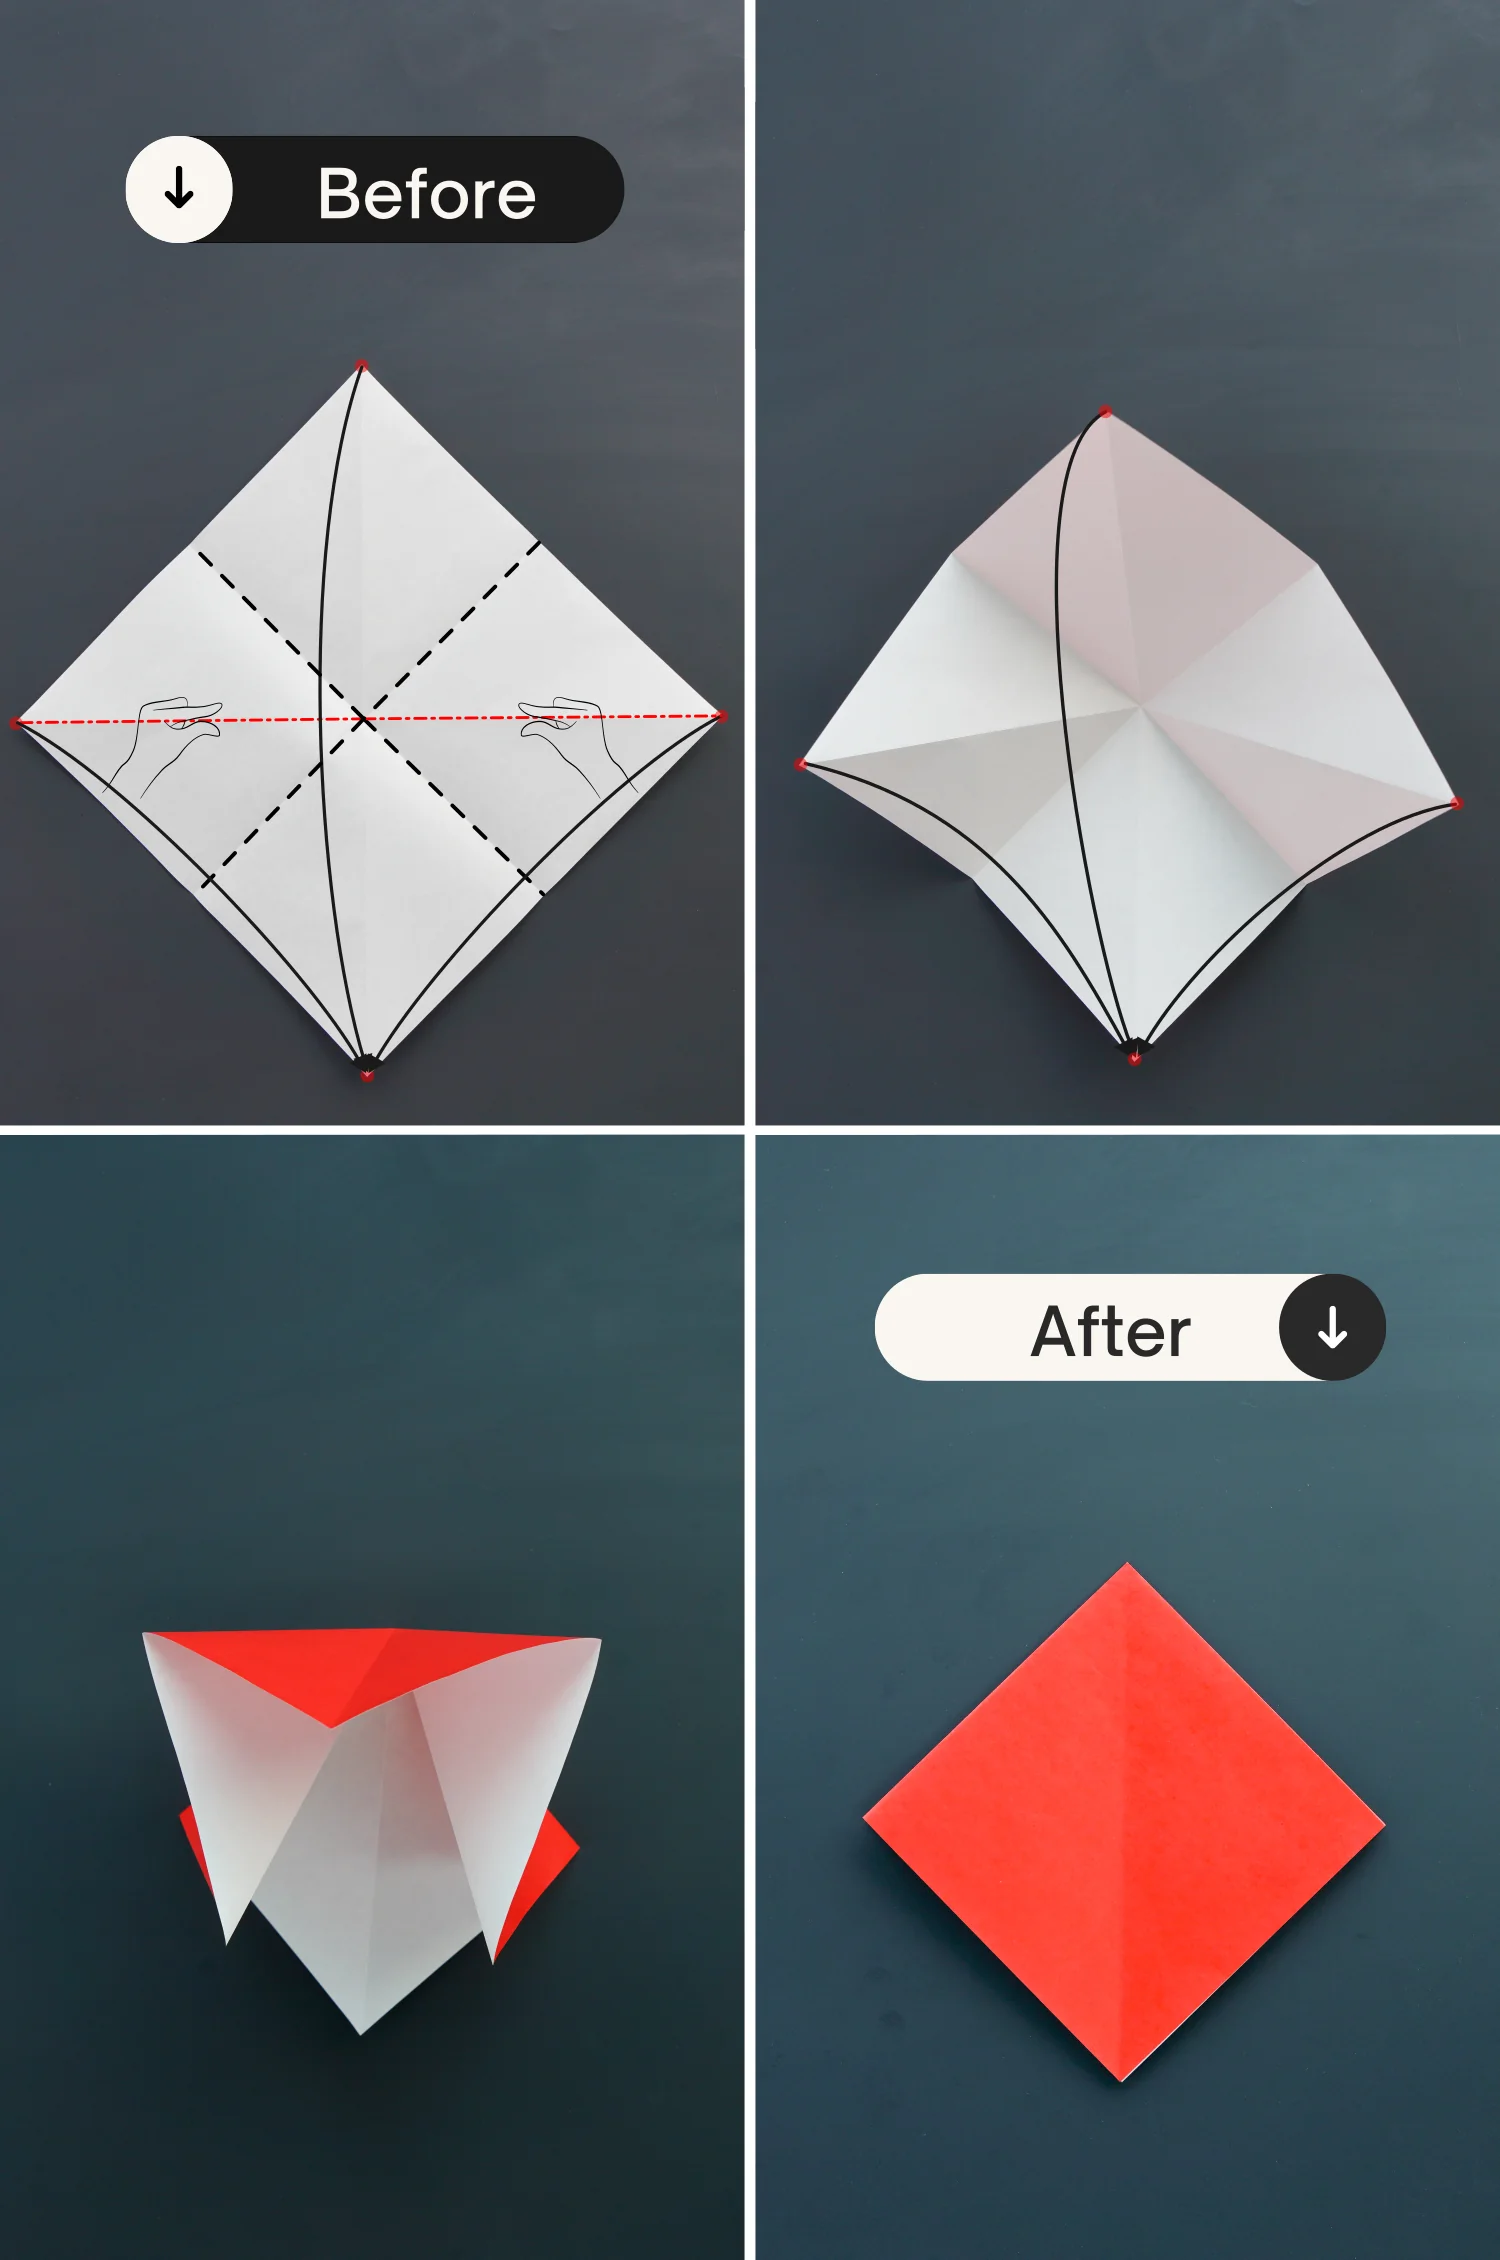
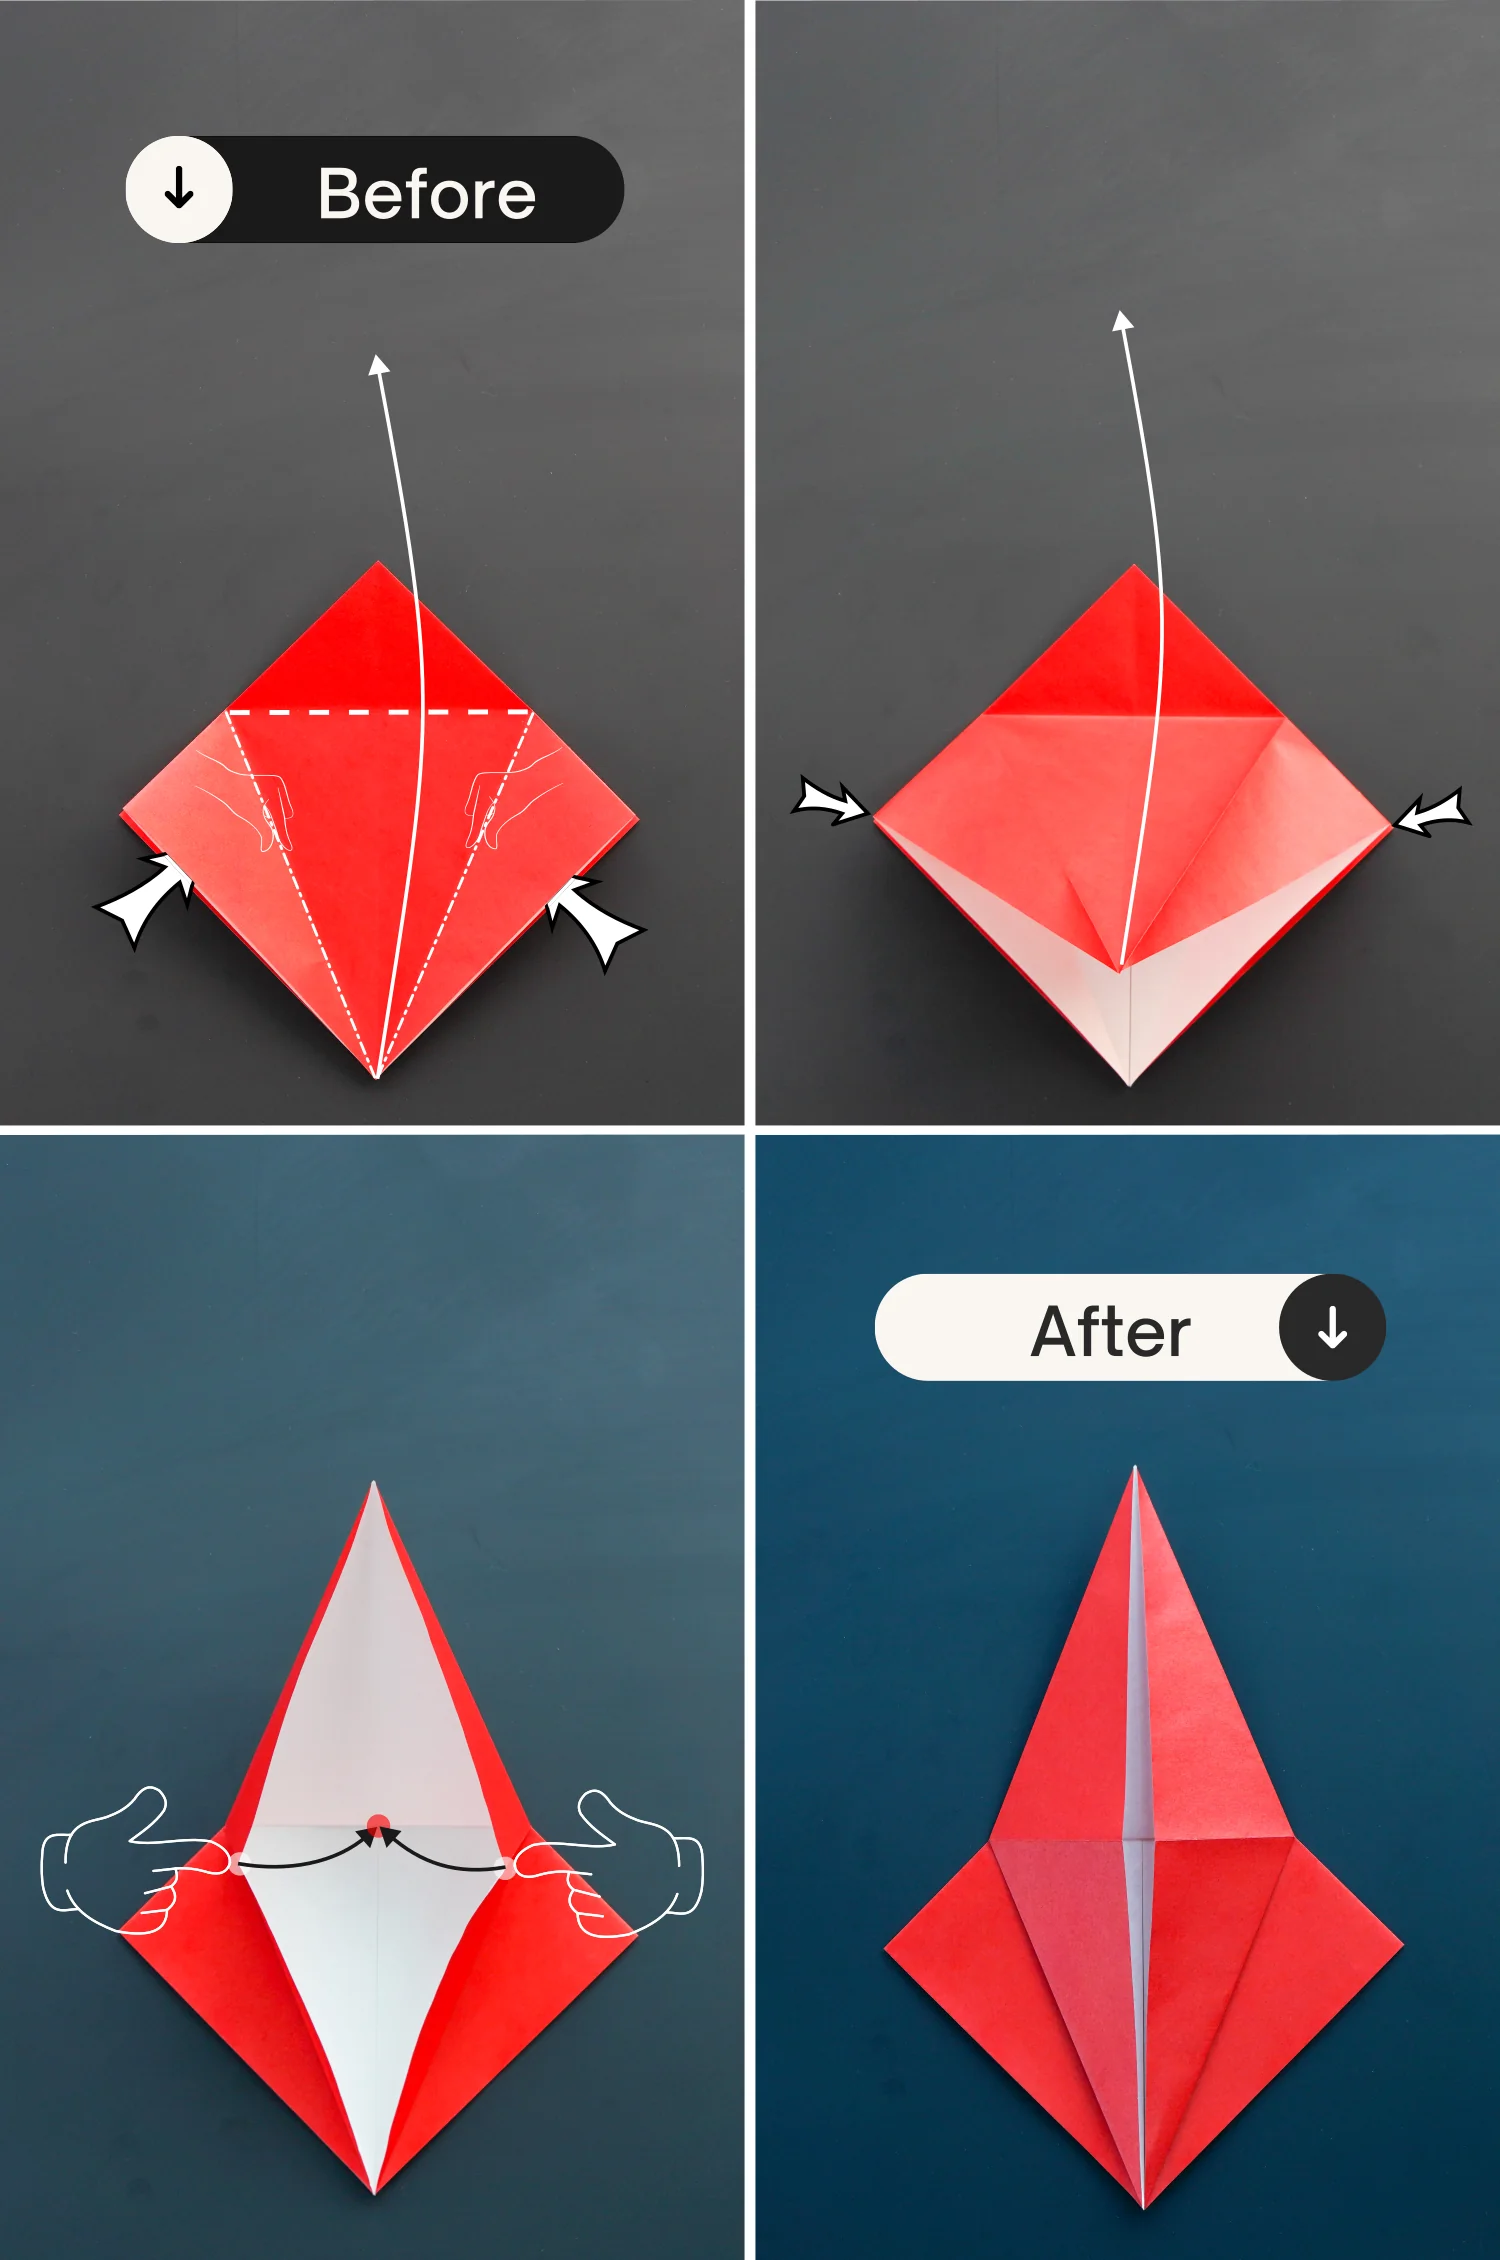
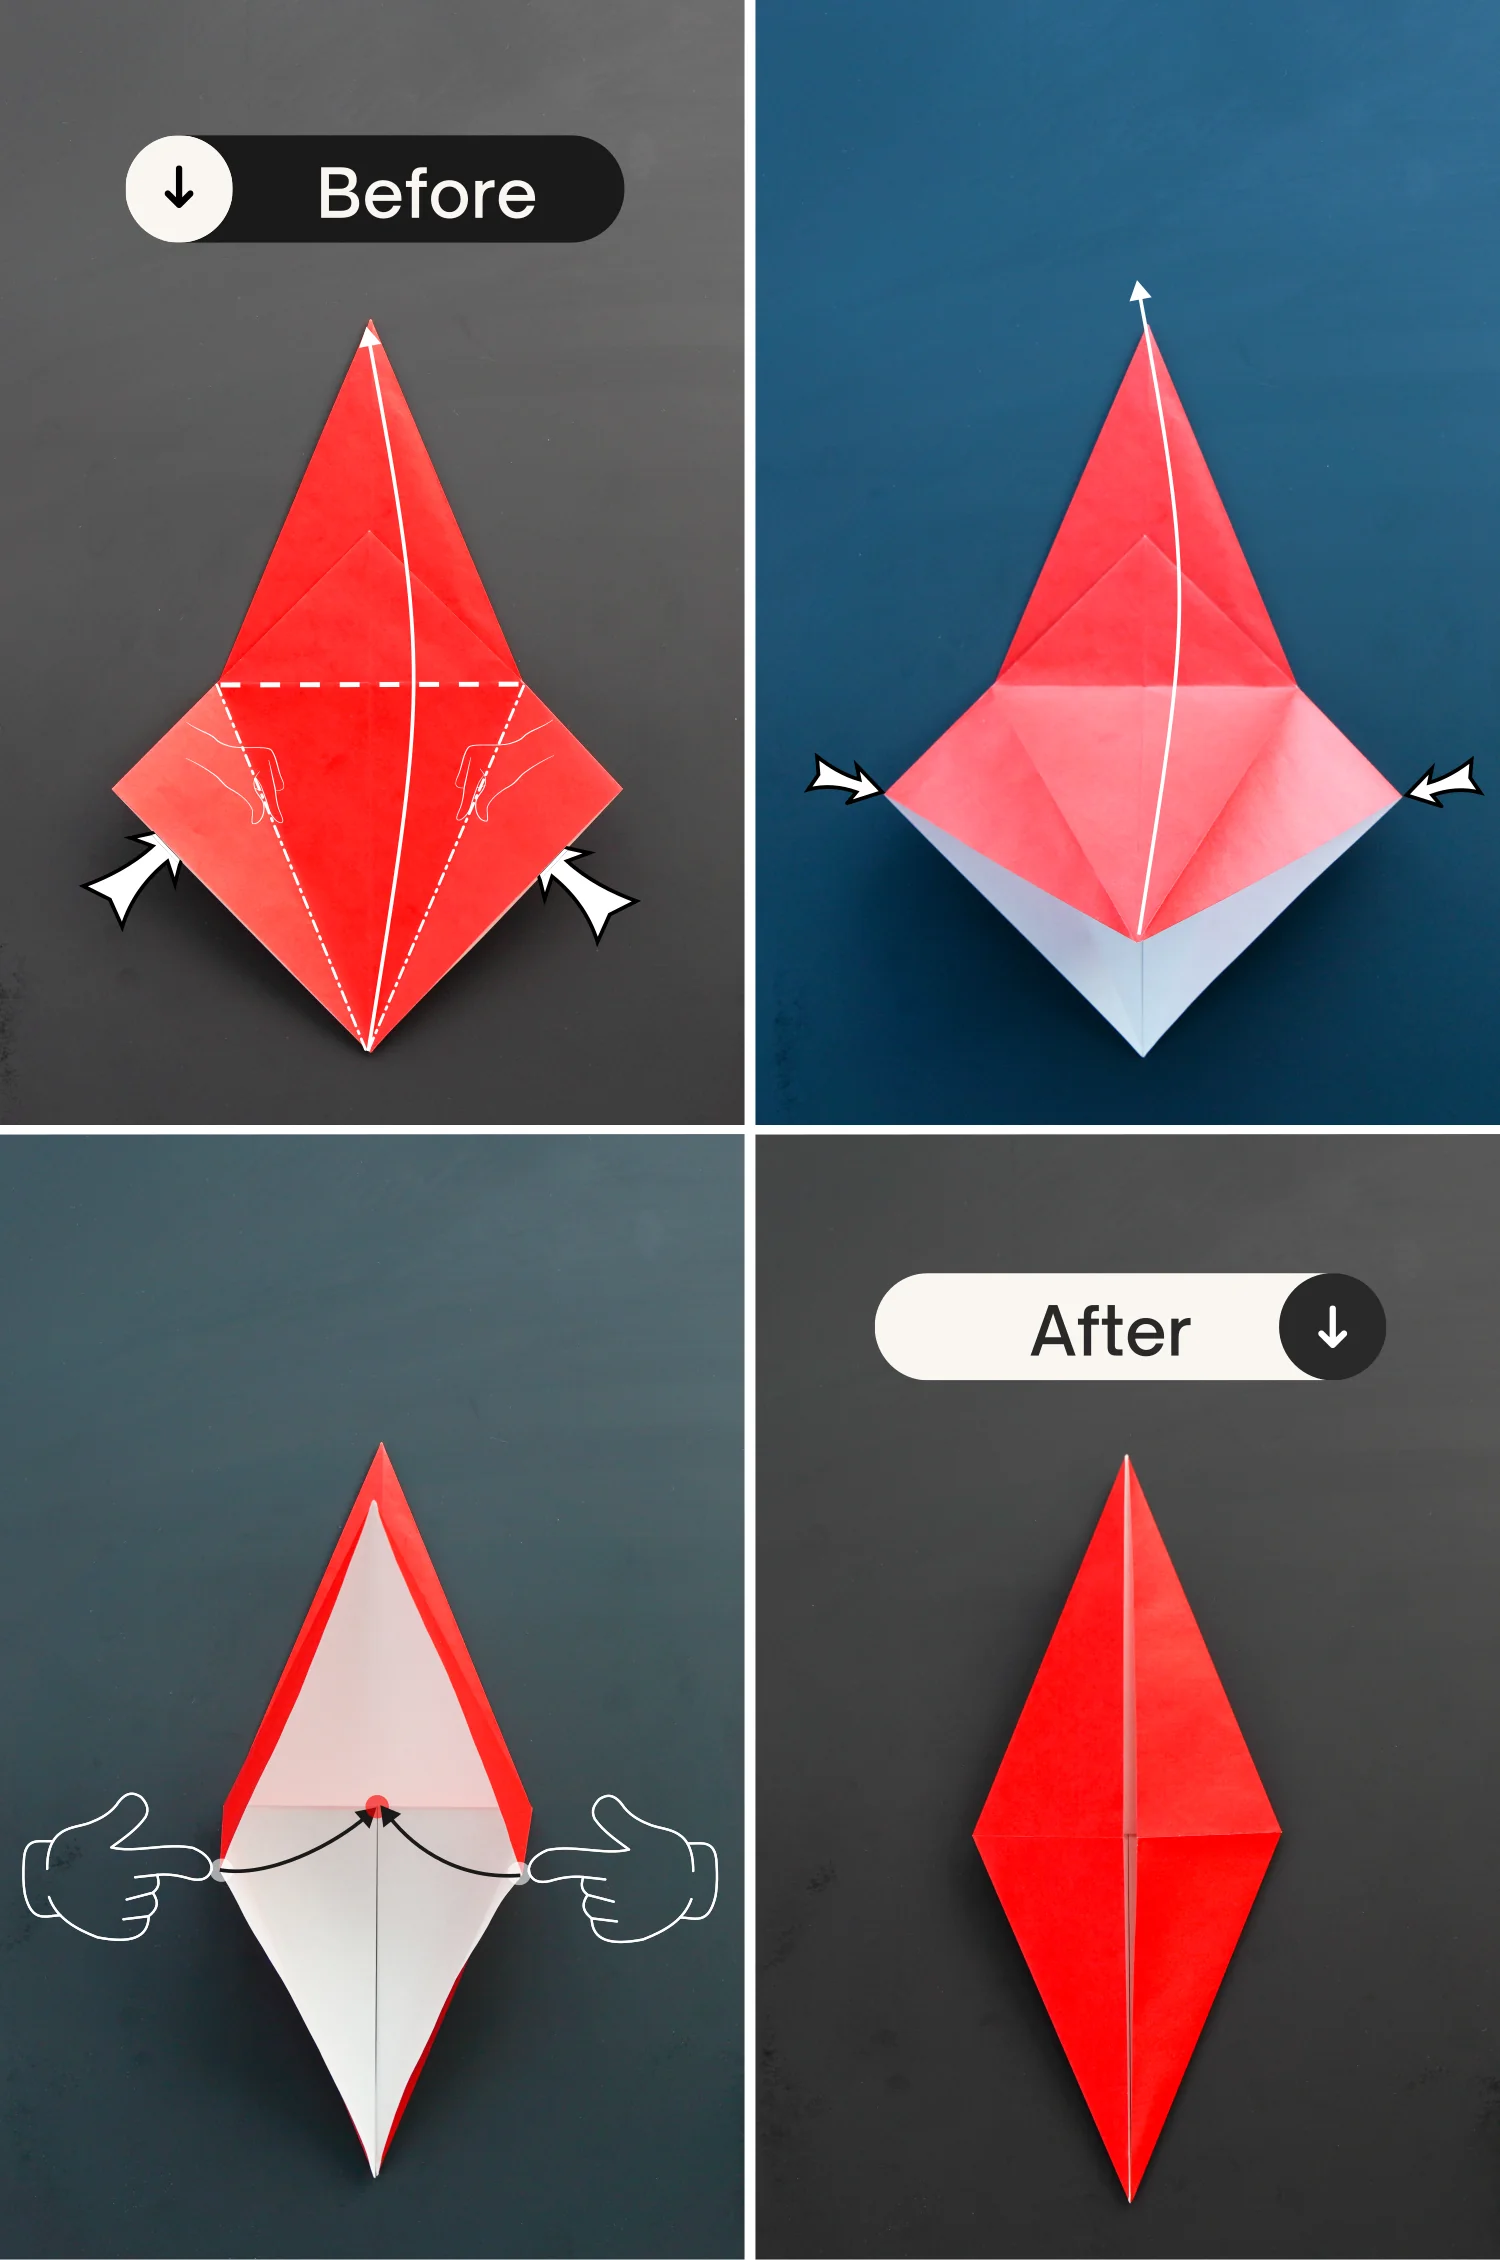
Step 6
Pinch up the left and right creases, and press the left and right points down to meet the bottom point, flatten the paper along the existing creases.
Step 7
Fold the bottom left and right edges of the top layer to align with the middle vertical crease, crease them well then unfold.
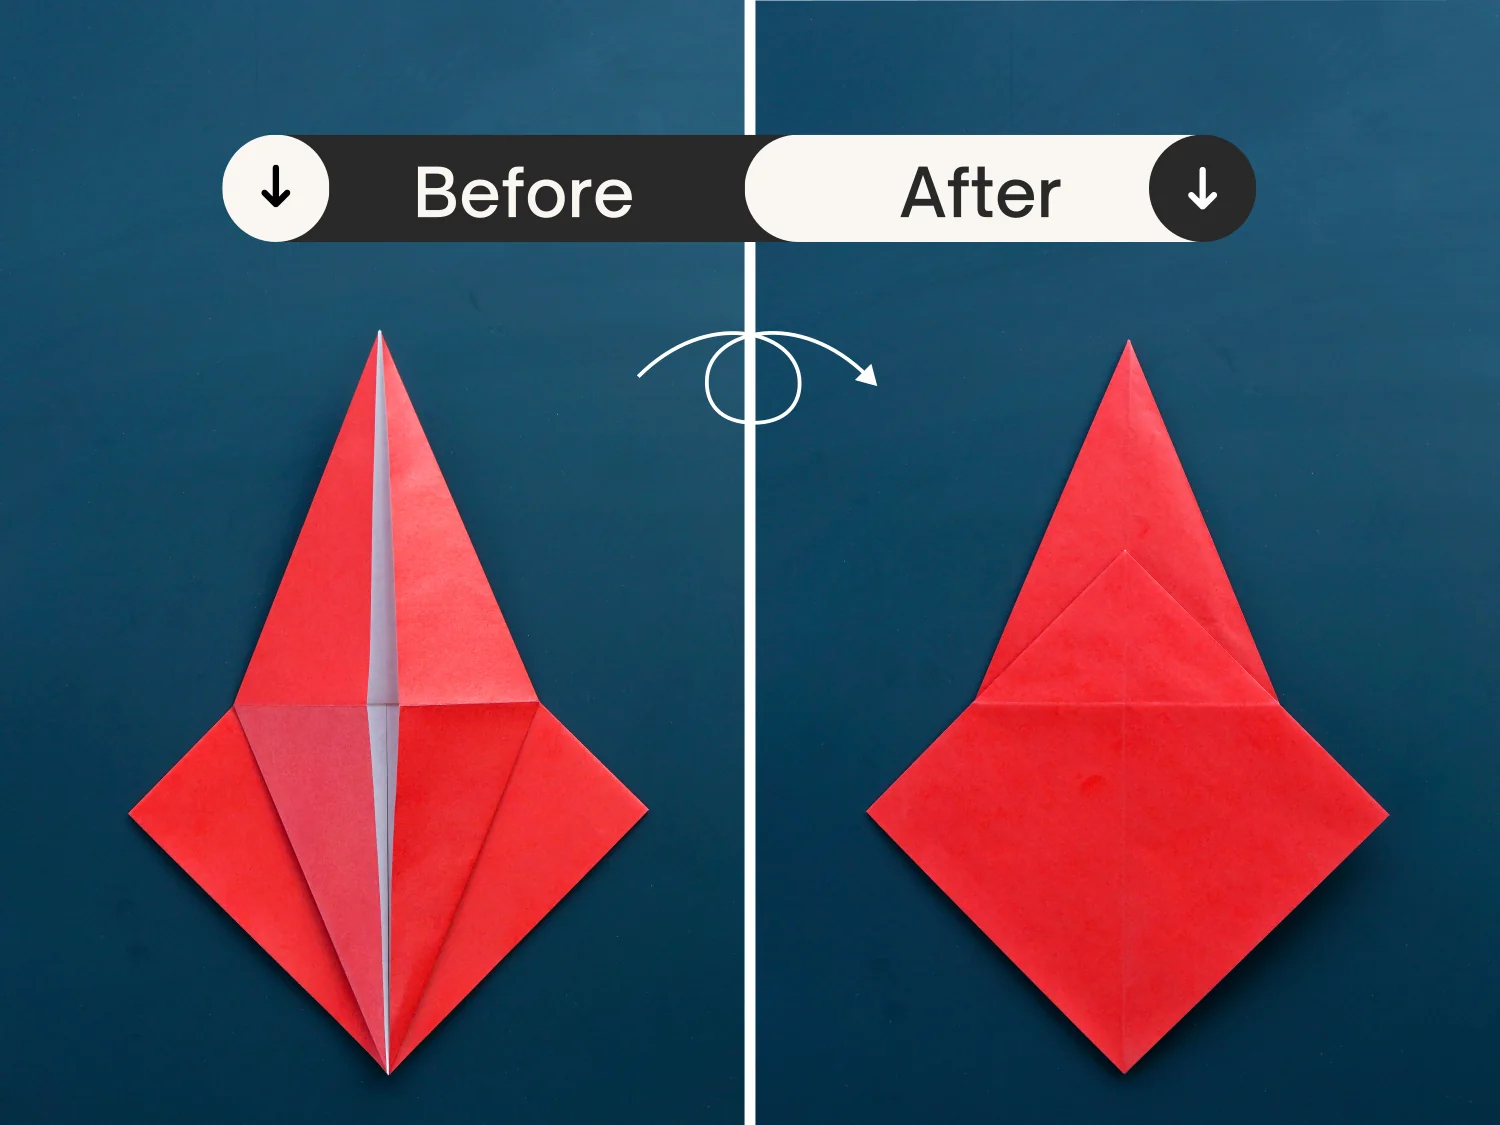
Step 8
Fold the top corner down along the dotted line, and unfold it.

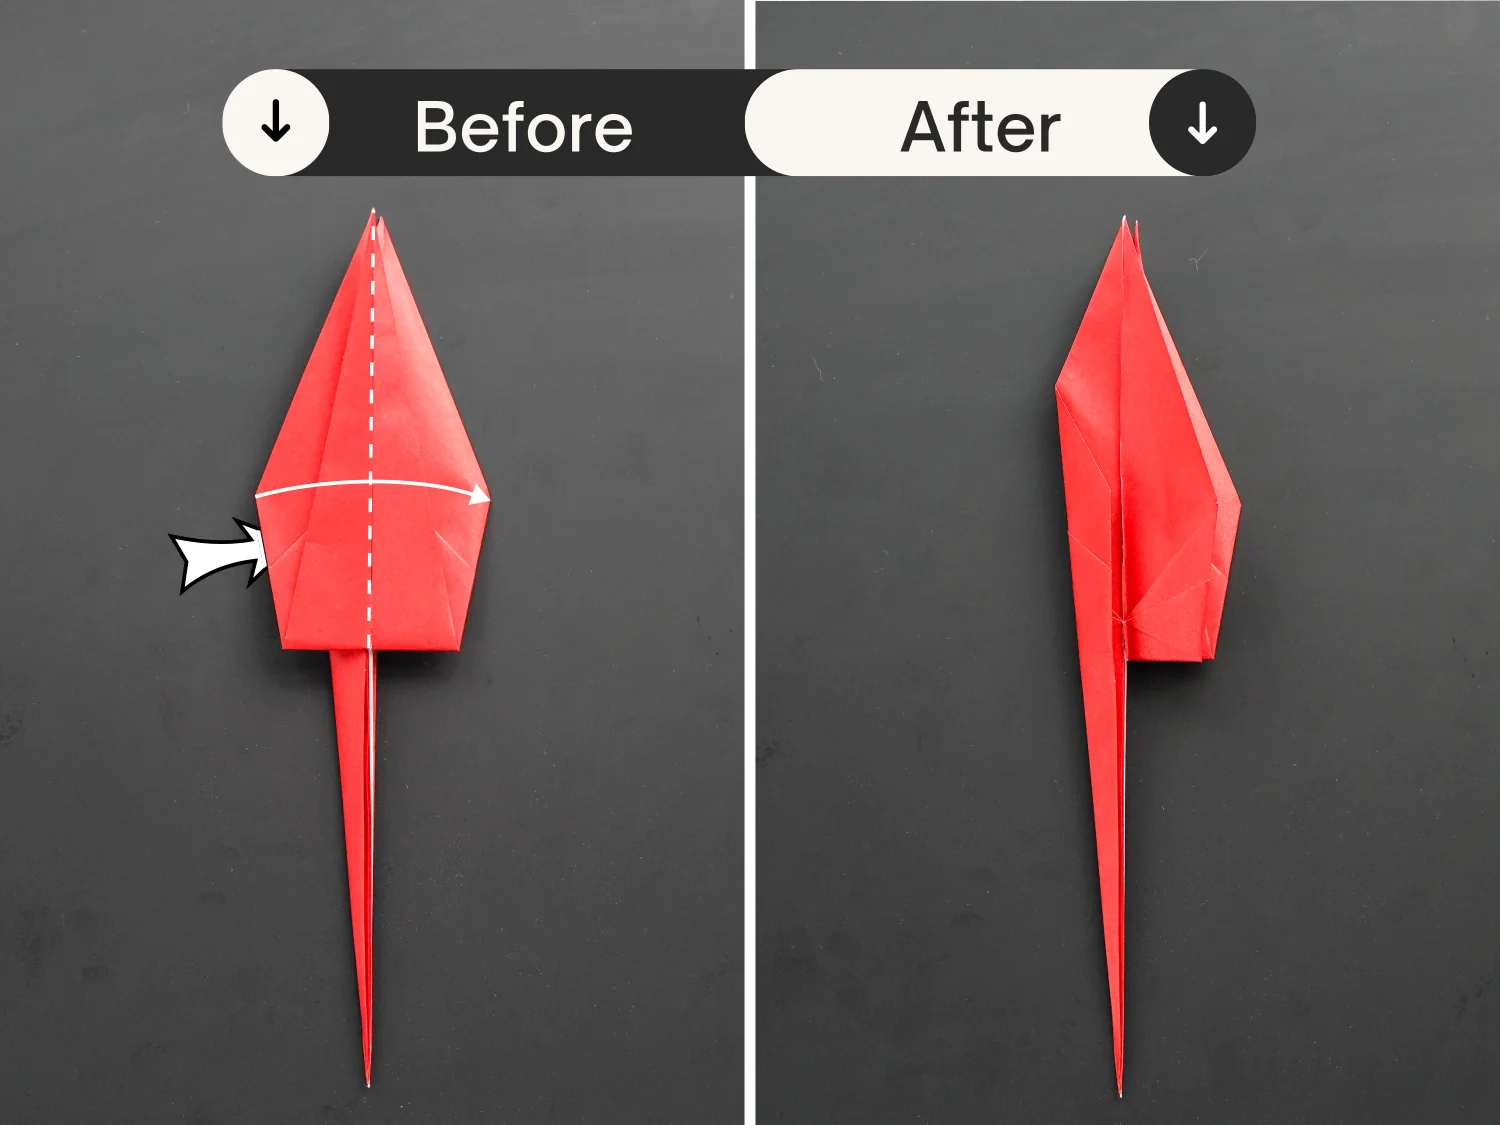
Step 9
Open the pocket based on the crease created by the previous step. Then lift up the top layer, push the left and right points to the center, and flatten the pocket.
Step 10
Turn over the paper.
Step 11
Fold the bottom left and right edges to align with the middle vertical crease, and unfold them.
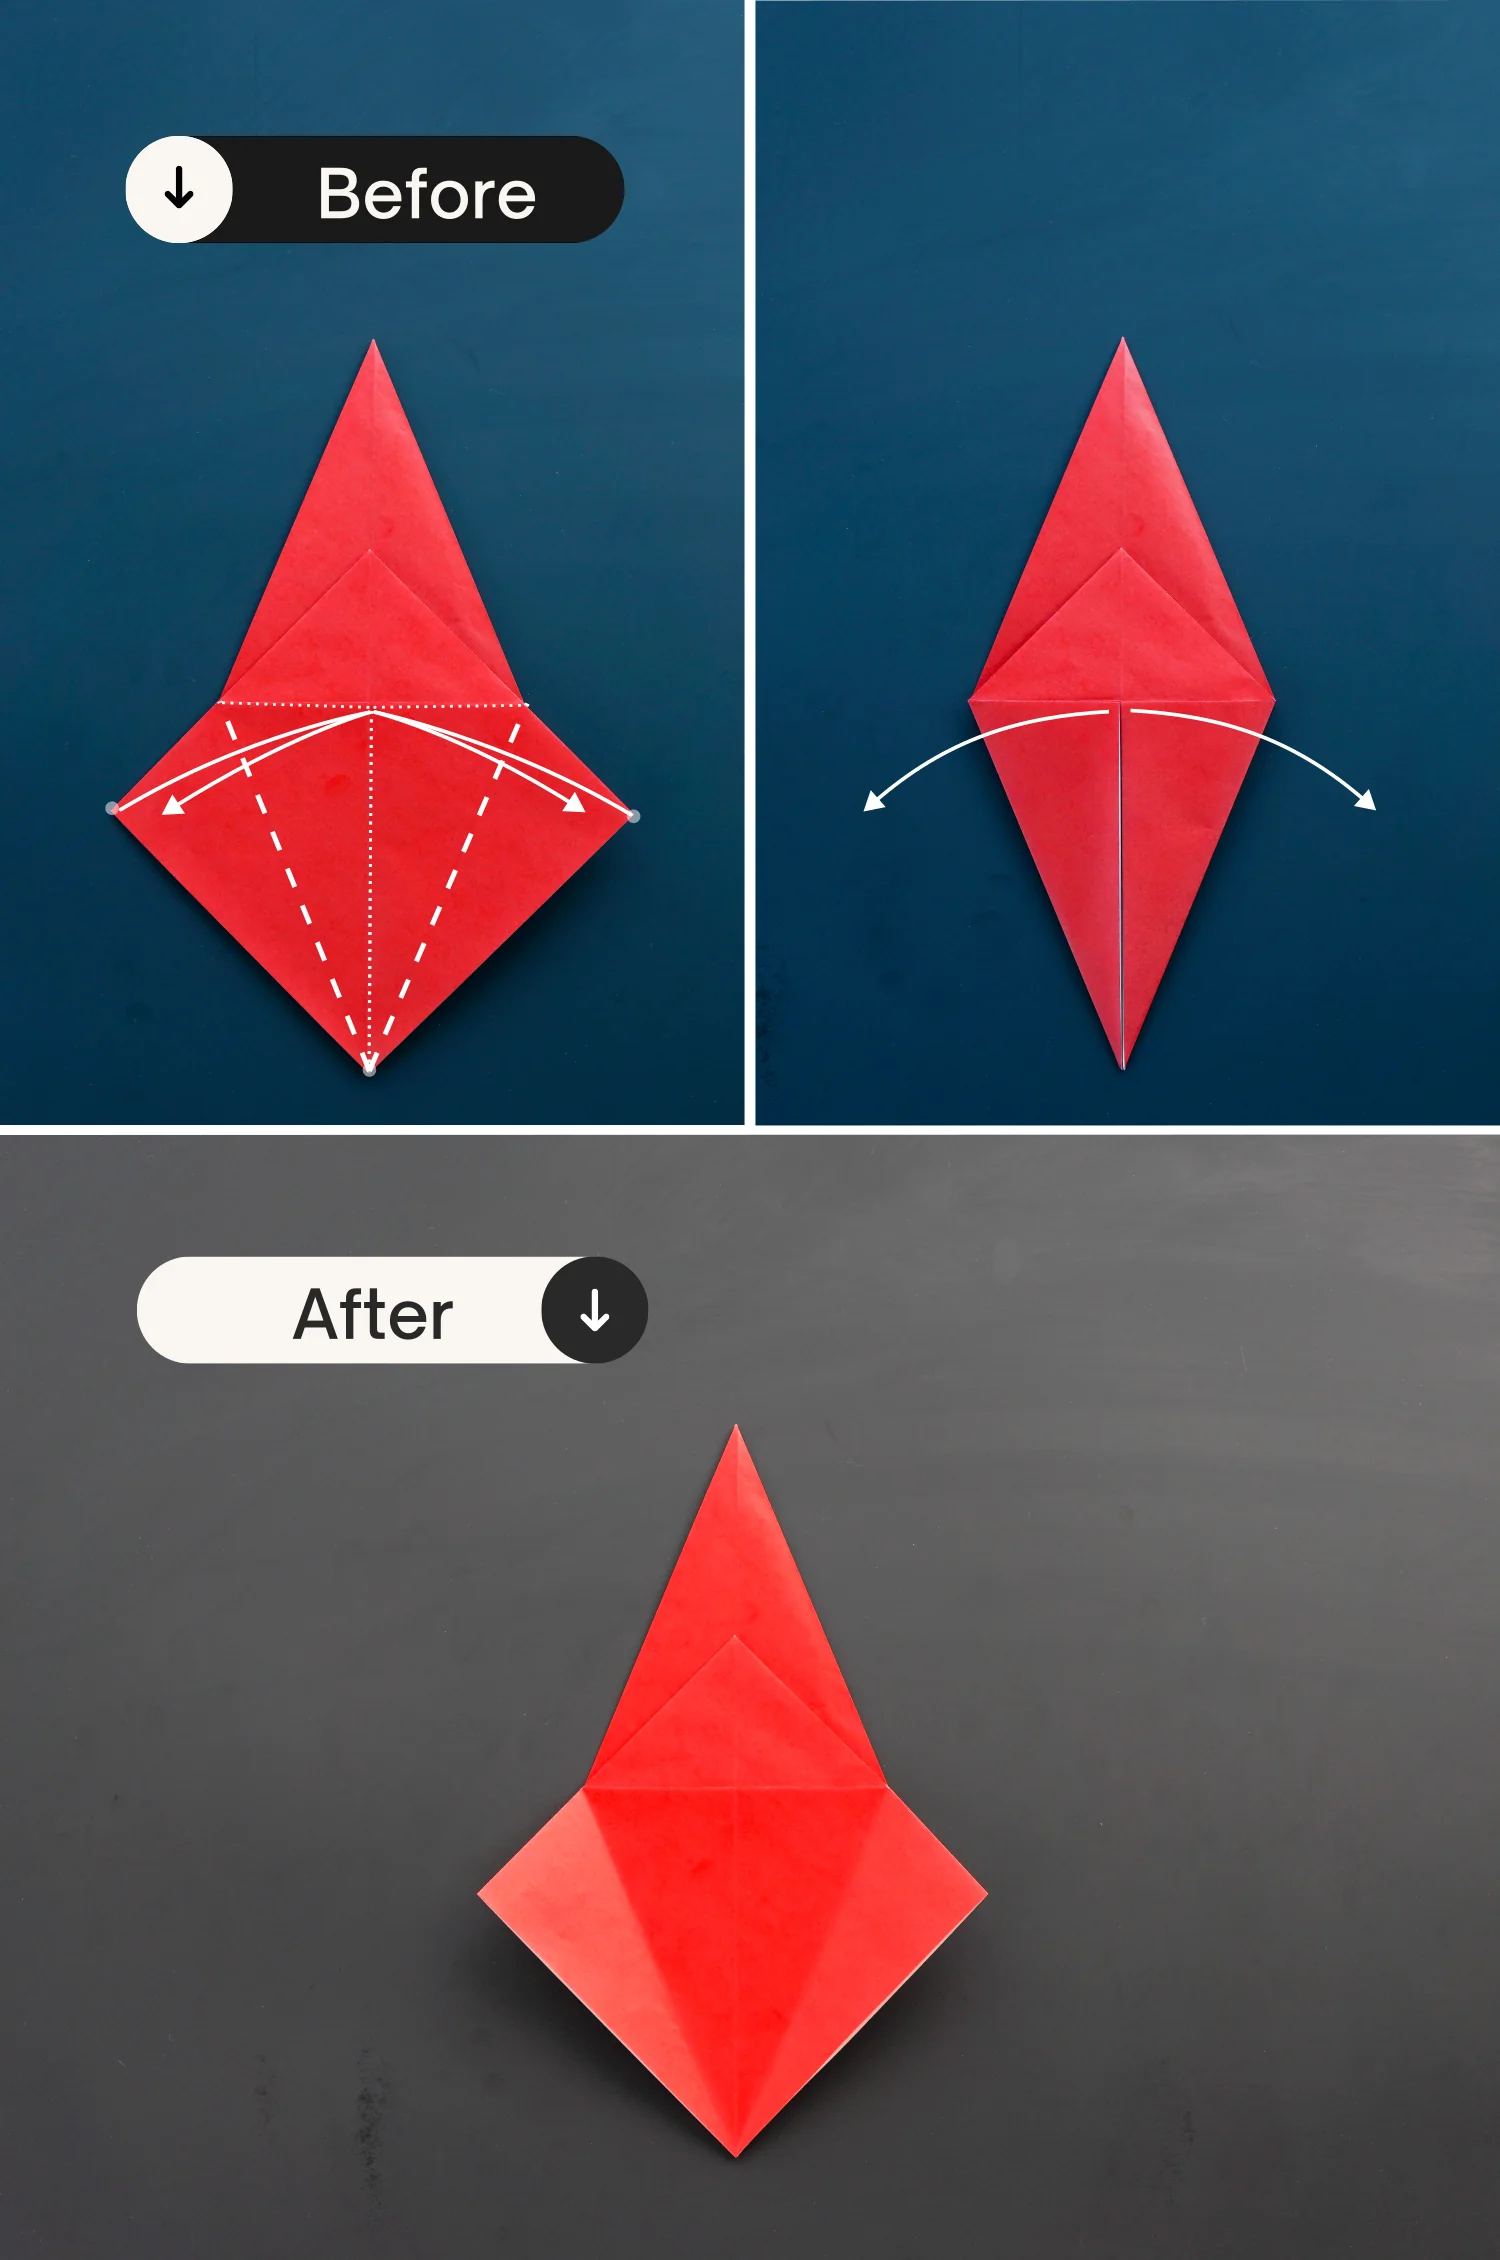
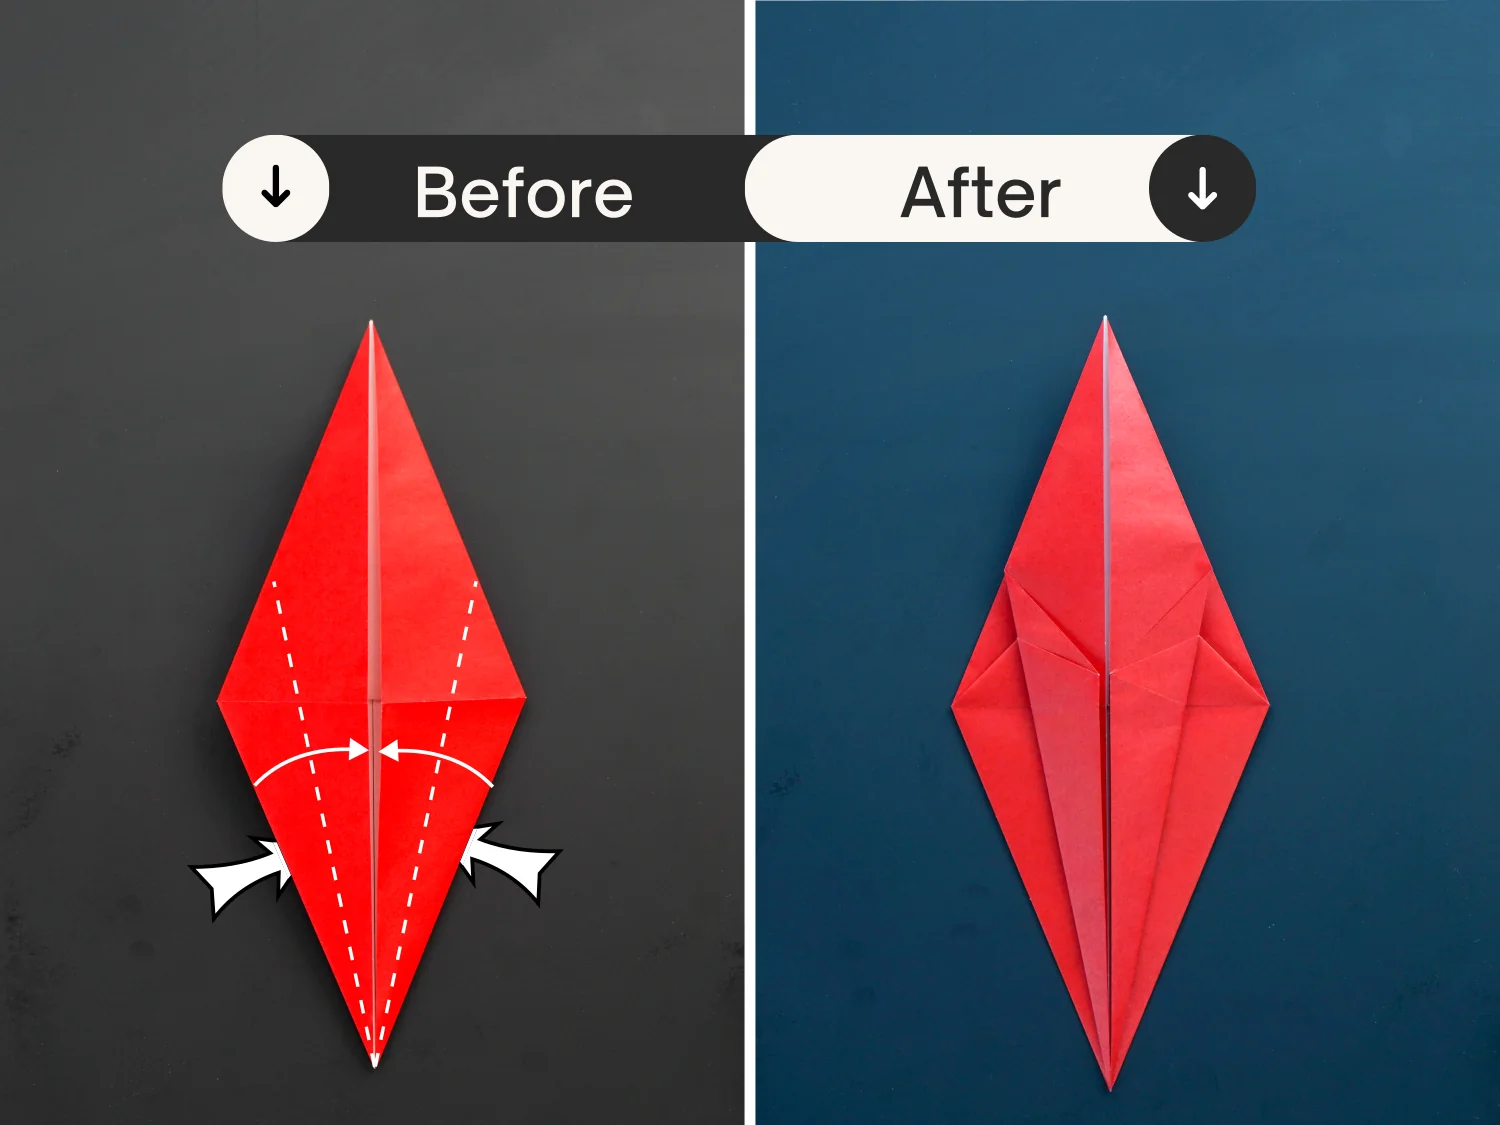
Step 12
like step 9, shape the creases you just made, lift the top layer to open the pocket, then push the left and right points to the center, and finally, flatten the fold.
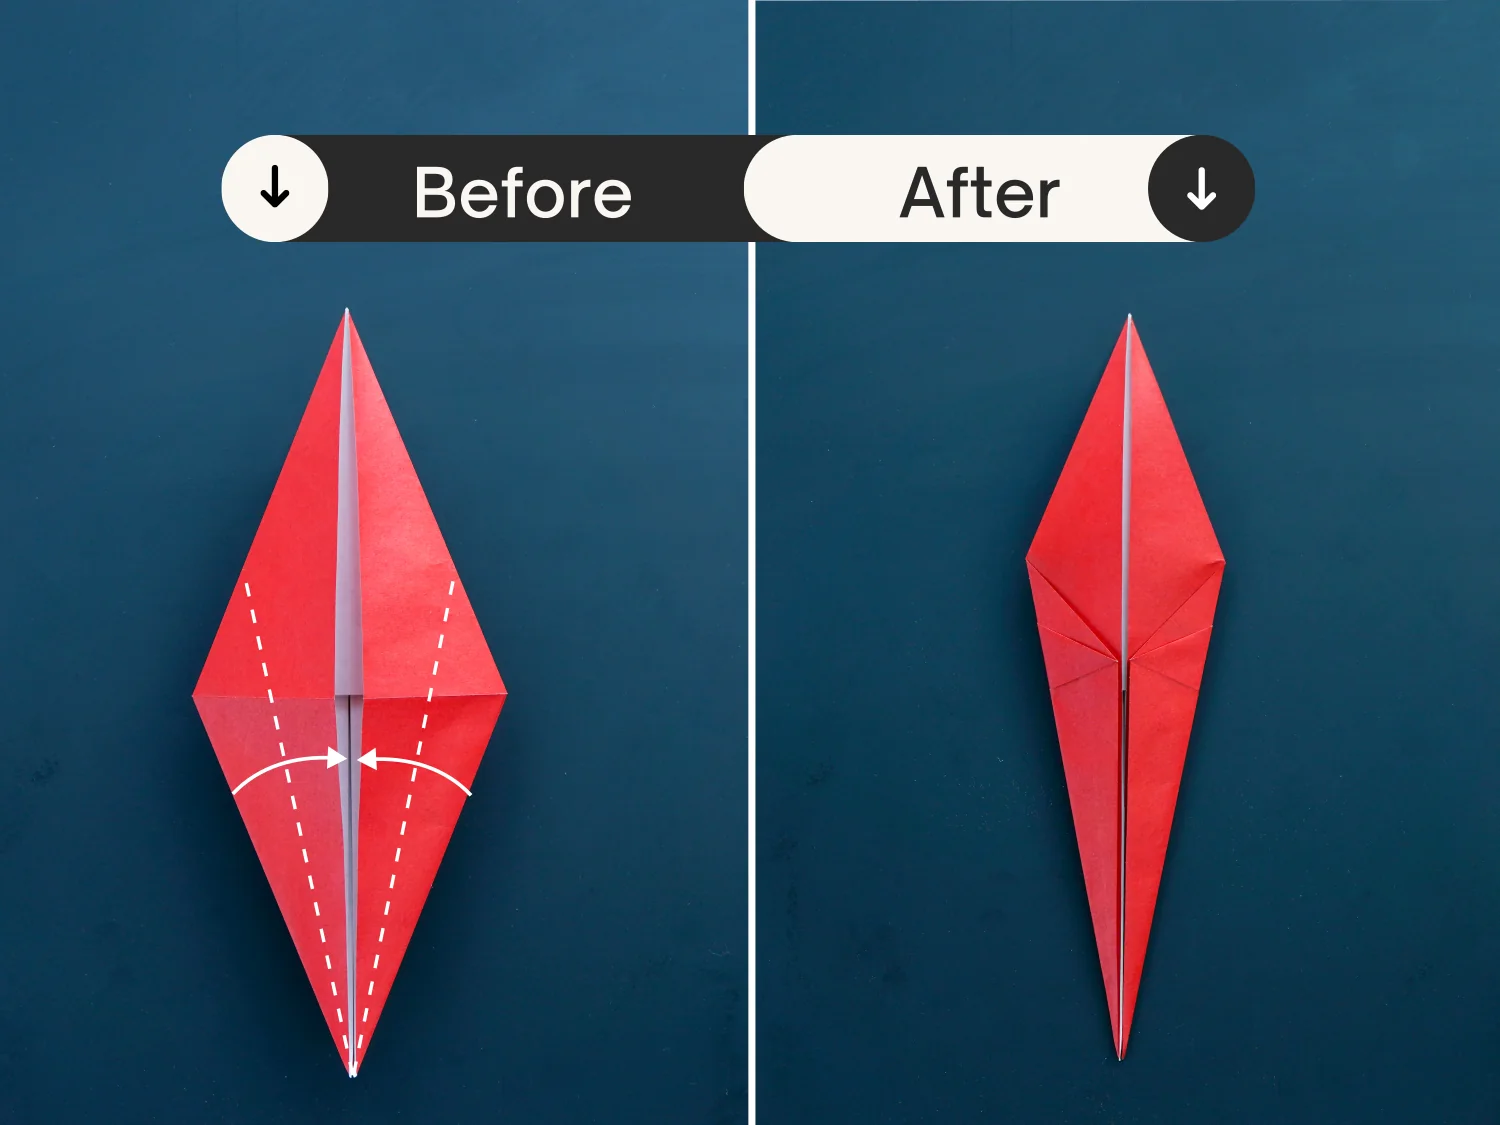
Step 13
Fold the bottom left and right edges of the top layer toward the center, to align with the middle vertical crease.
Step 14
Then, fold these two edges again in the same direction so that they meet the center vertical line once more.
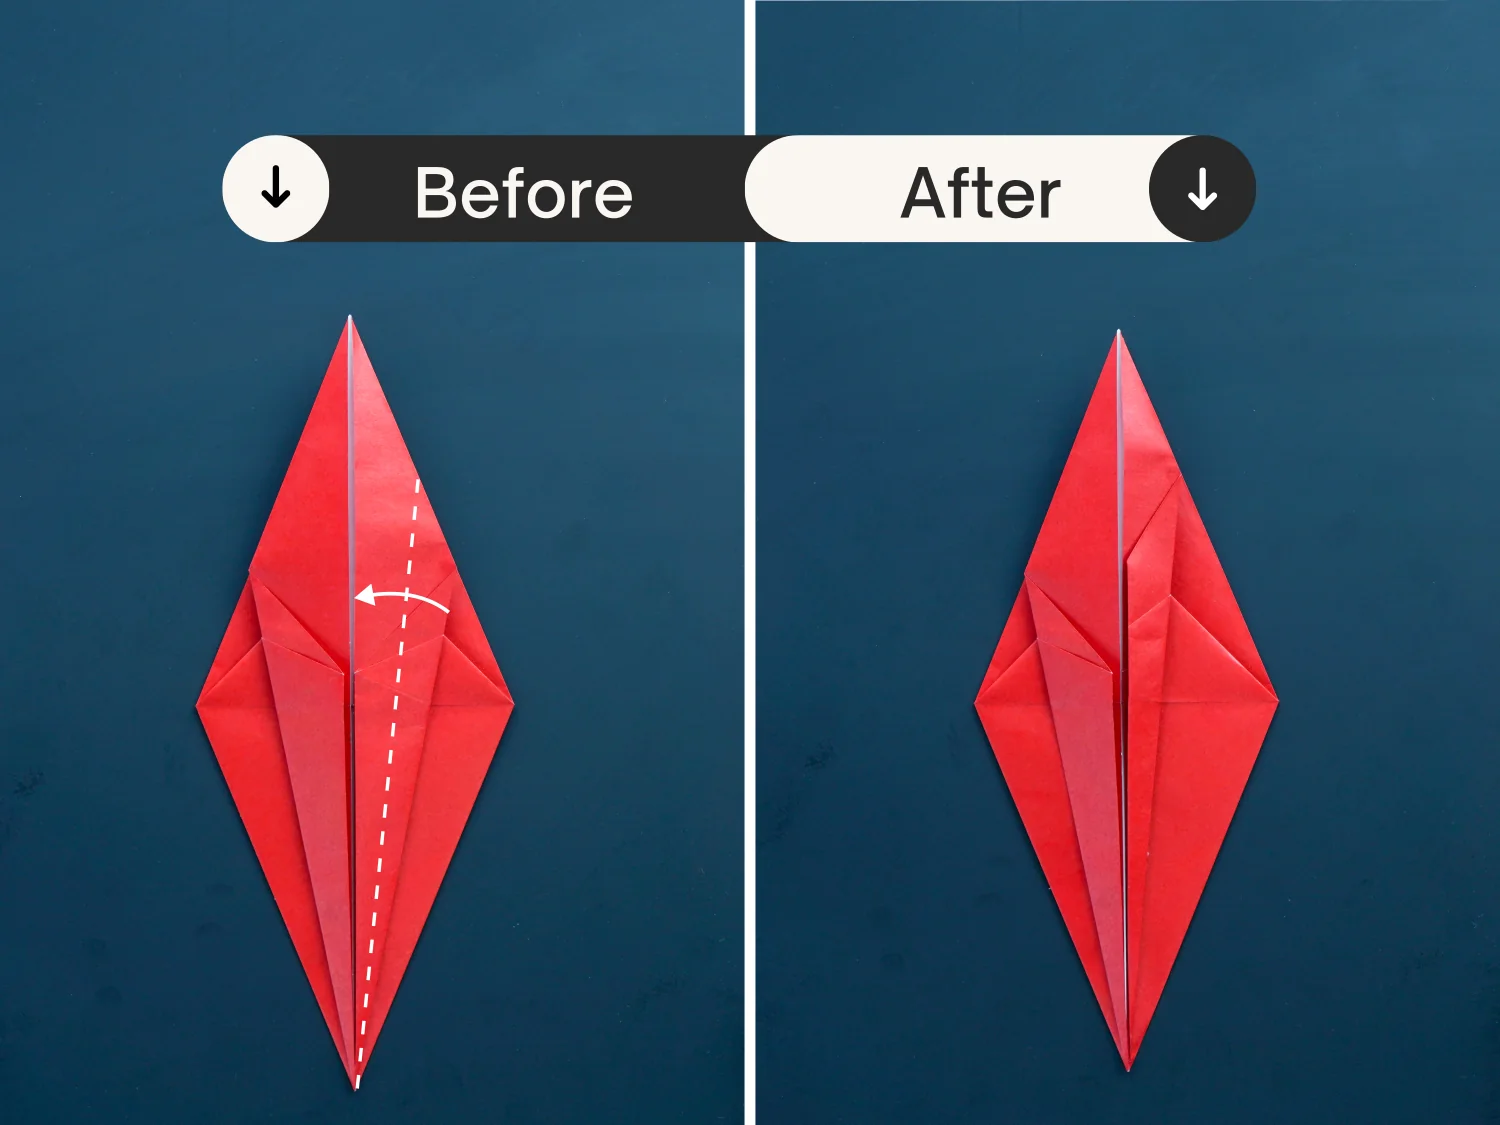
Step 15
Flip it over.
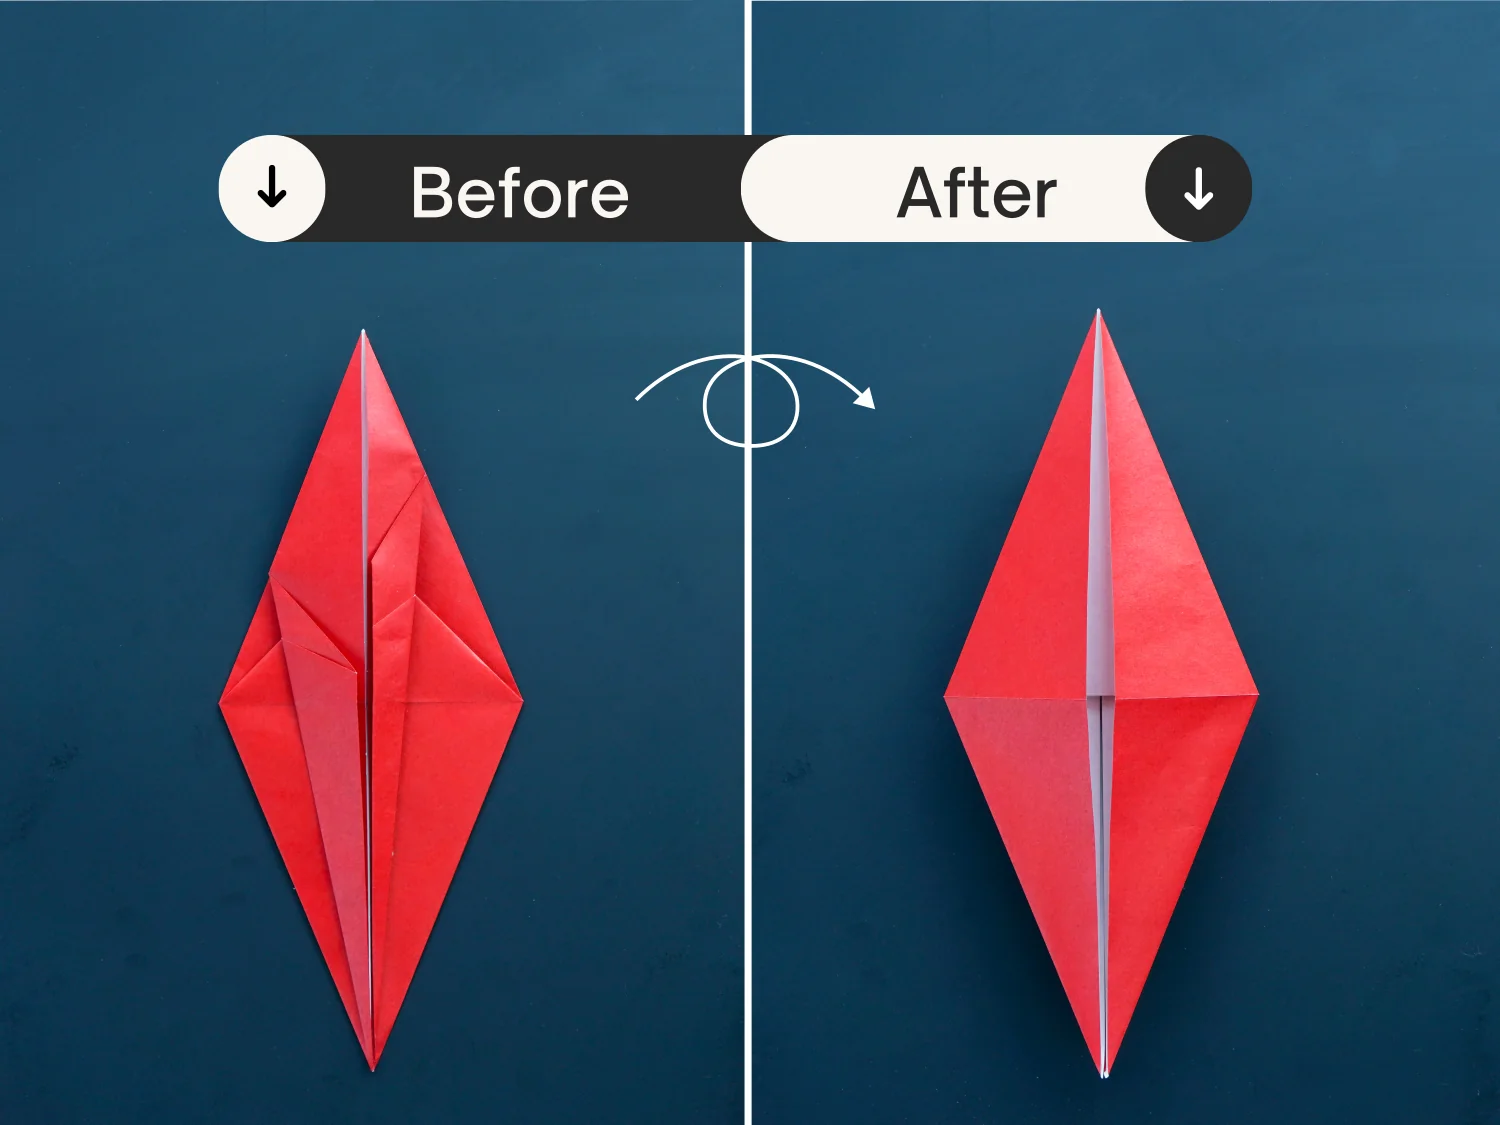
Step 16
Like before, fold the bottom left and right edges to align with the middle line.
Step 17
Fold the bottom left edge to align with the middle vertical crease.
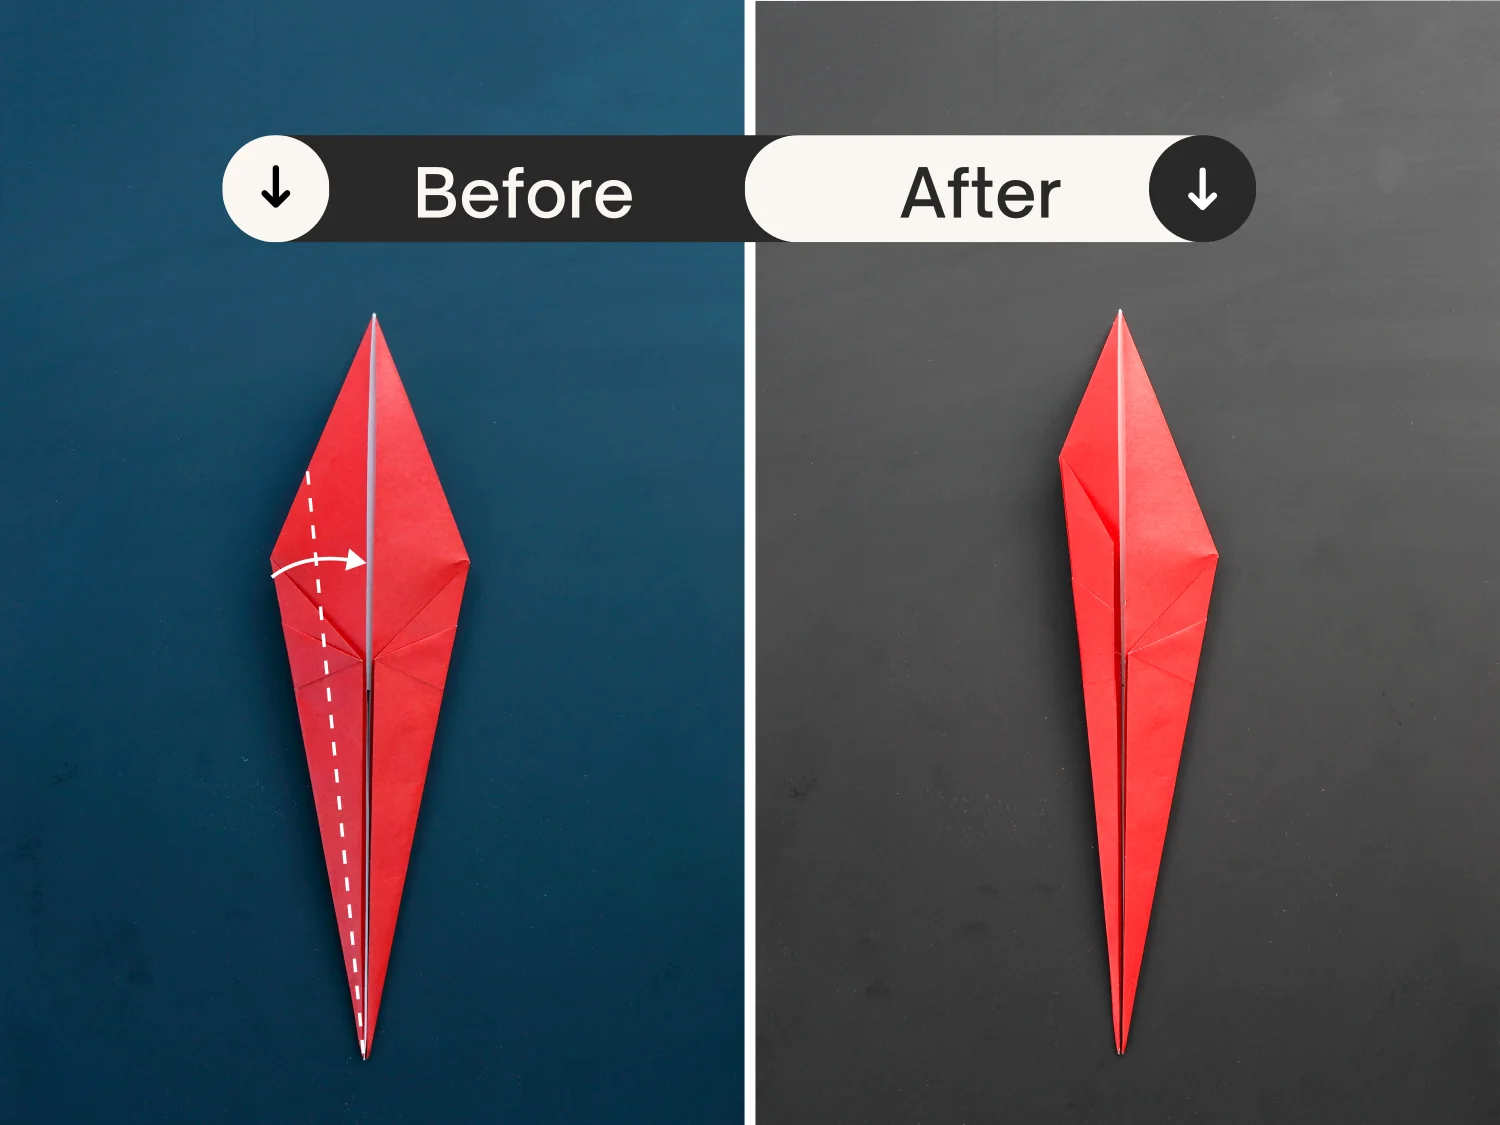
Step 18
Fold the right top layer to the left.
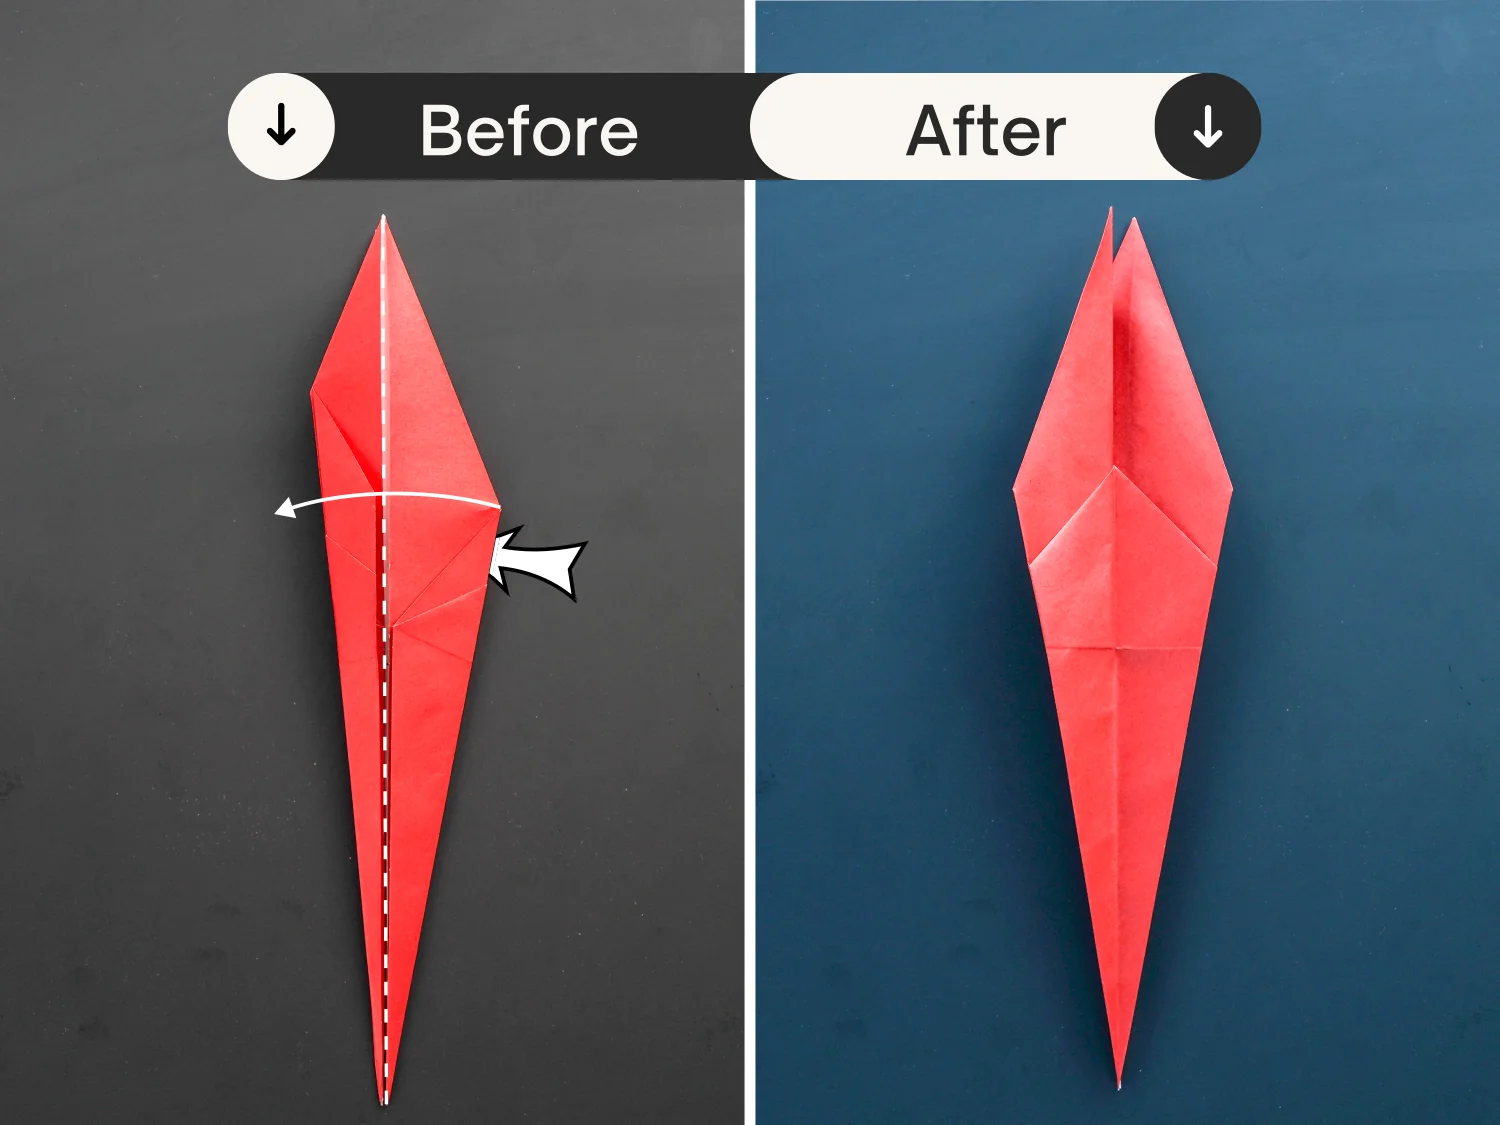
Step 19
Fold the bottom point of the top layer up.
Step 20
Fold the left point of the top part to the right diagonally.
Step 21
Open the opening on the right side, take the flap that tucks between the layers, pull it down a little, and then close and flatten this opening.
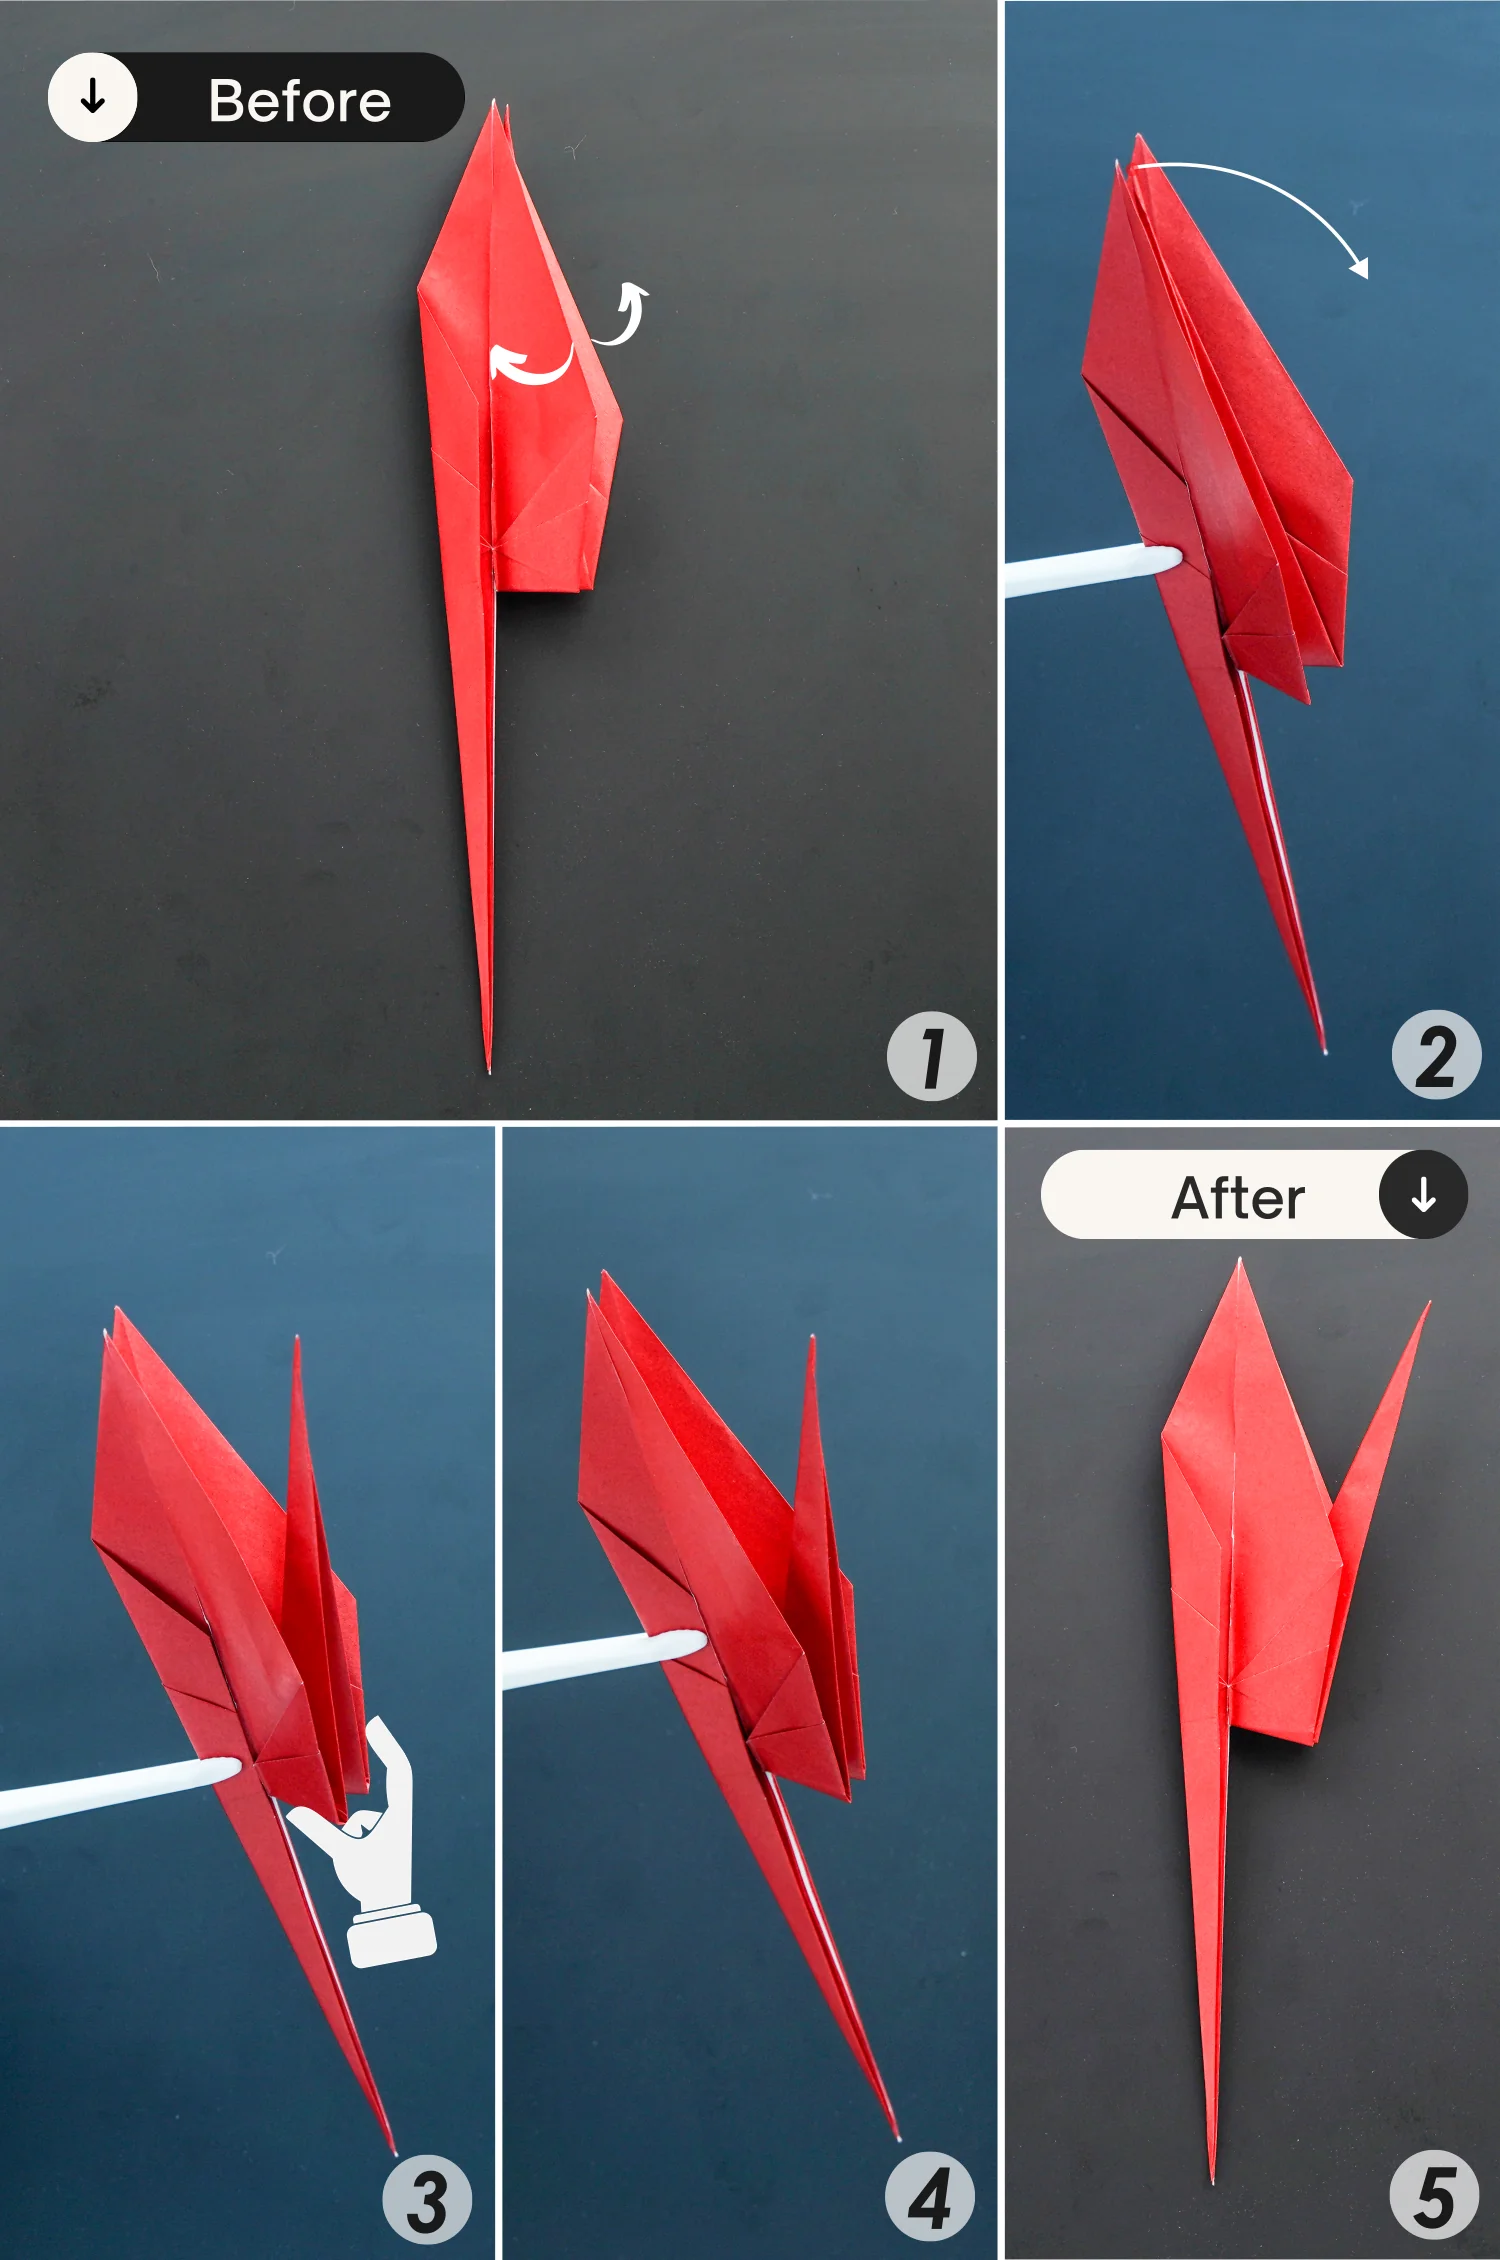
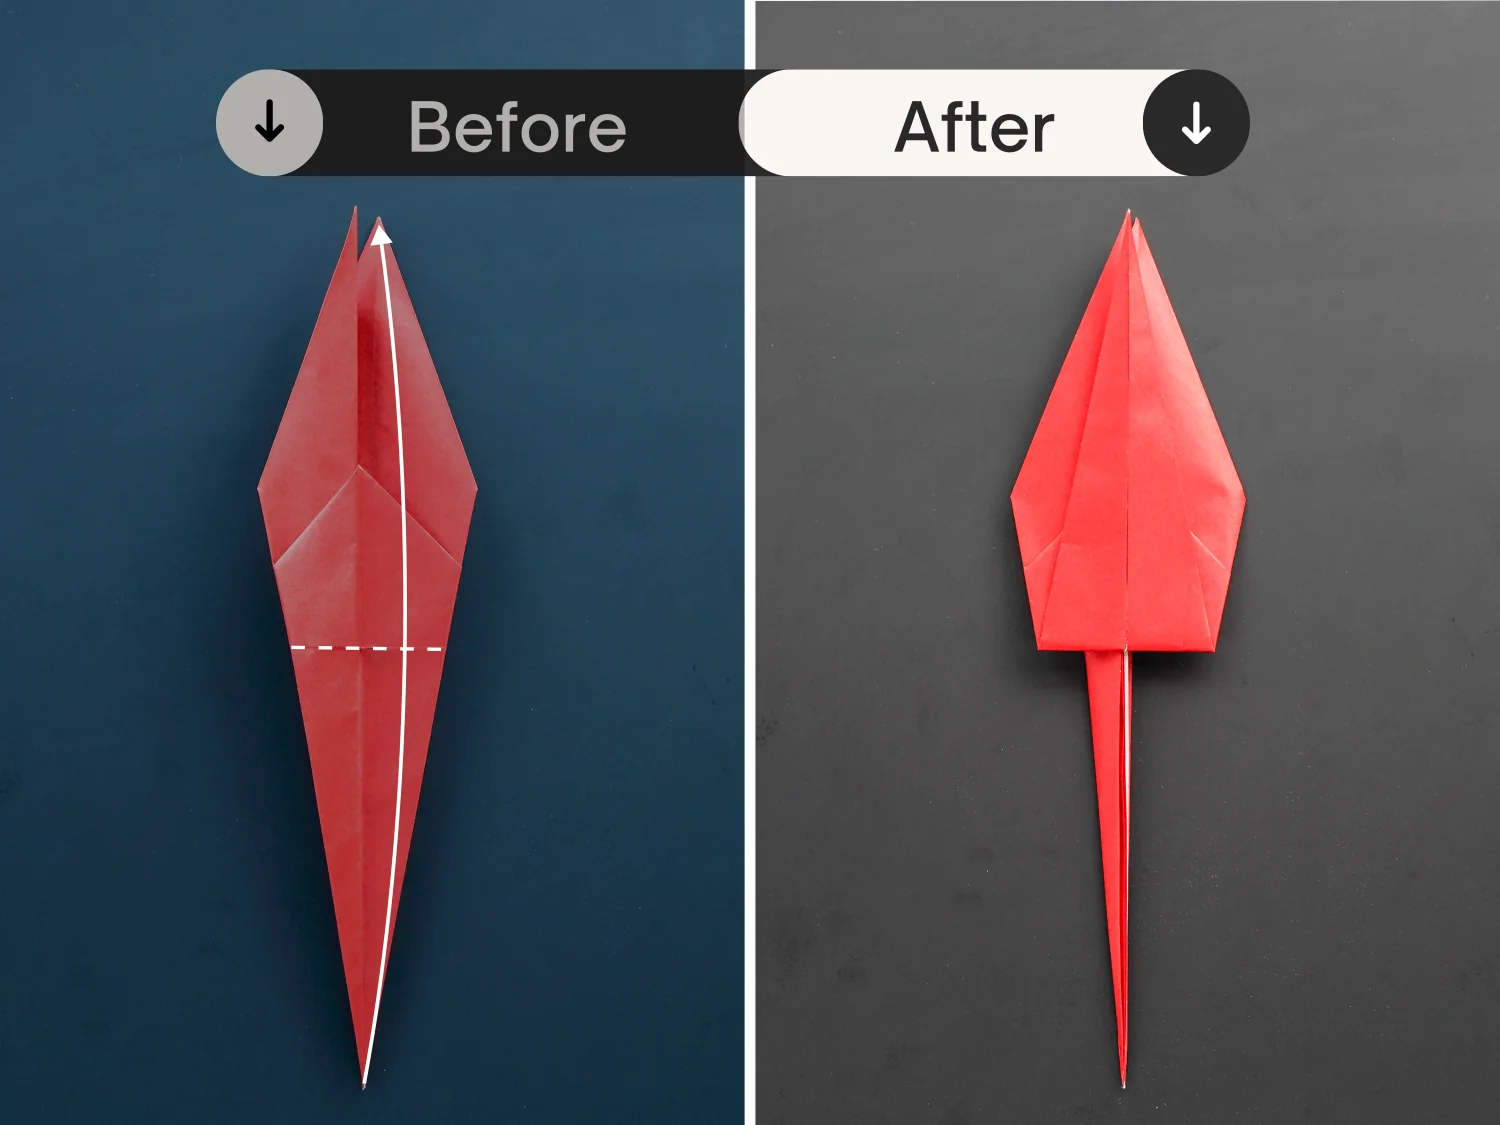
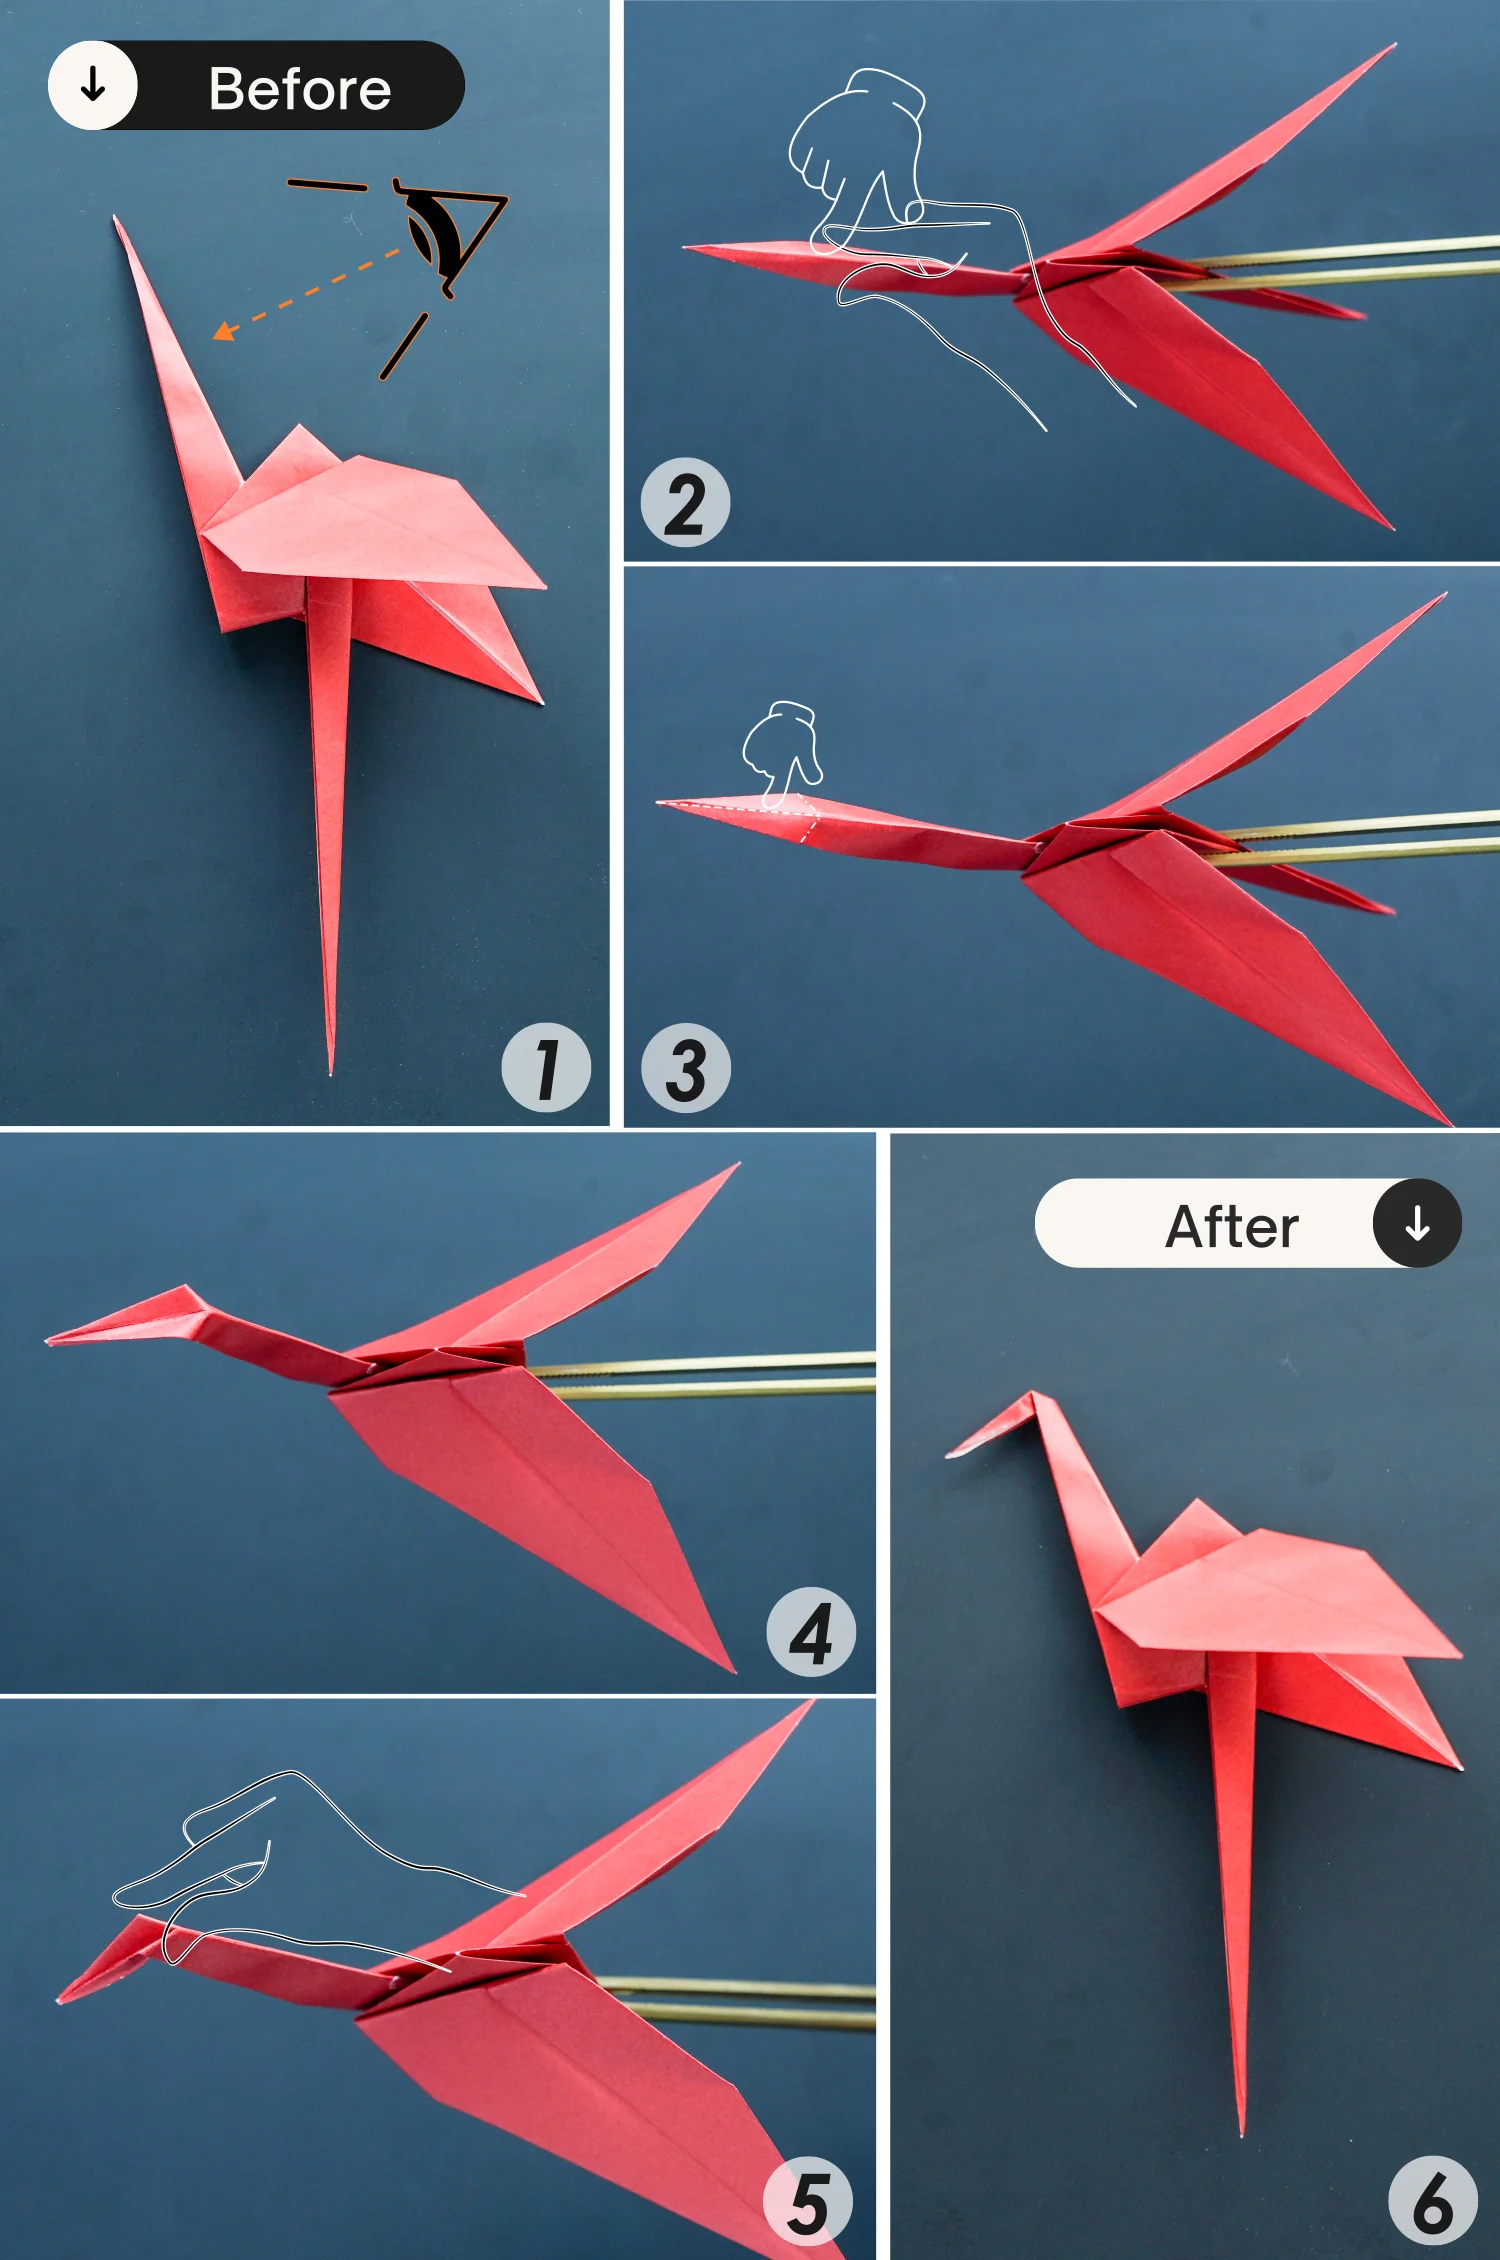
Step 22
Take the top point of the top layer, and fold it down along the dotted line, creating a wing of the flamingo.
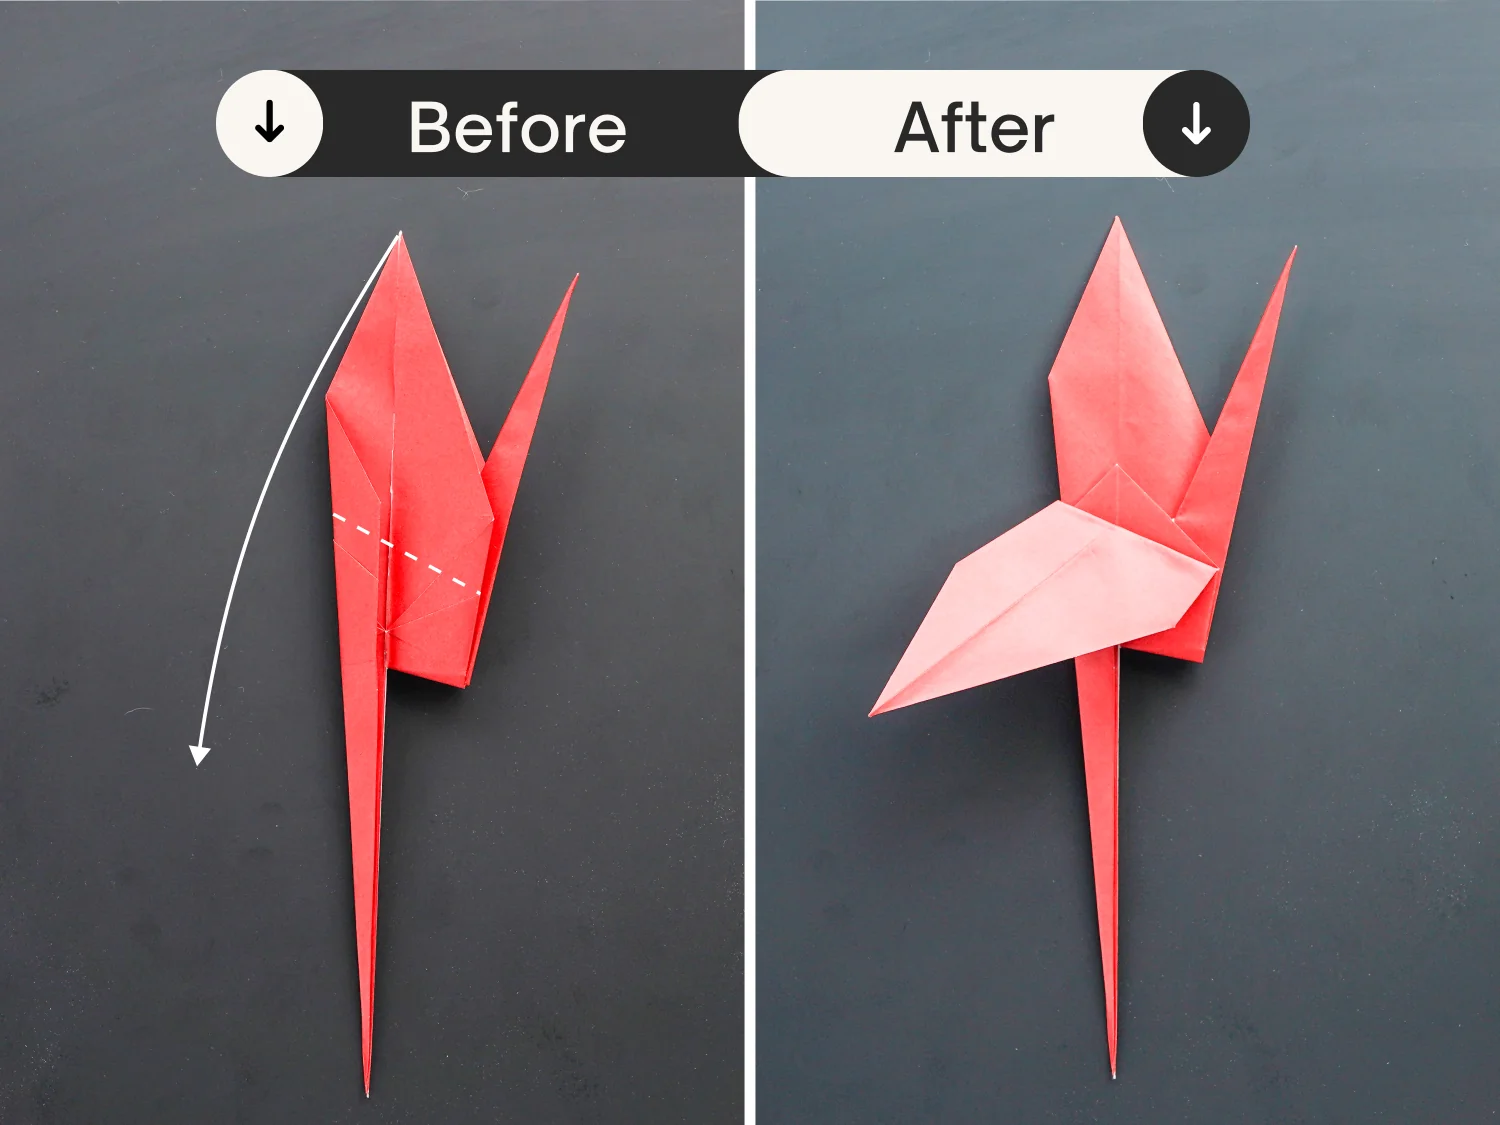
Step 23
Flip the model over.
Step 24
Fold the top point down along the dotted line to form another wing.
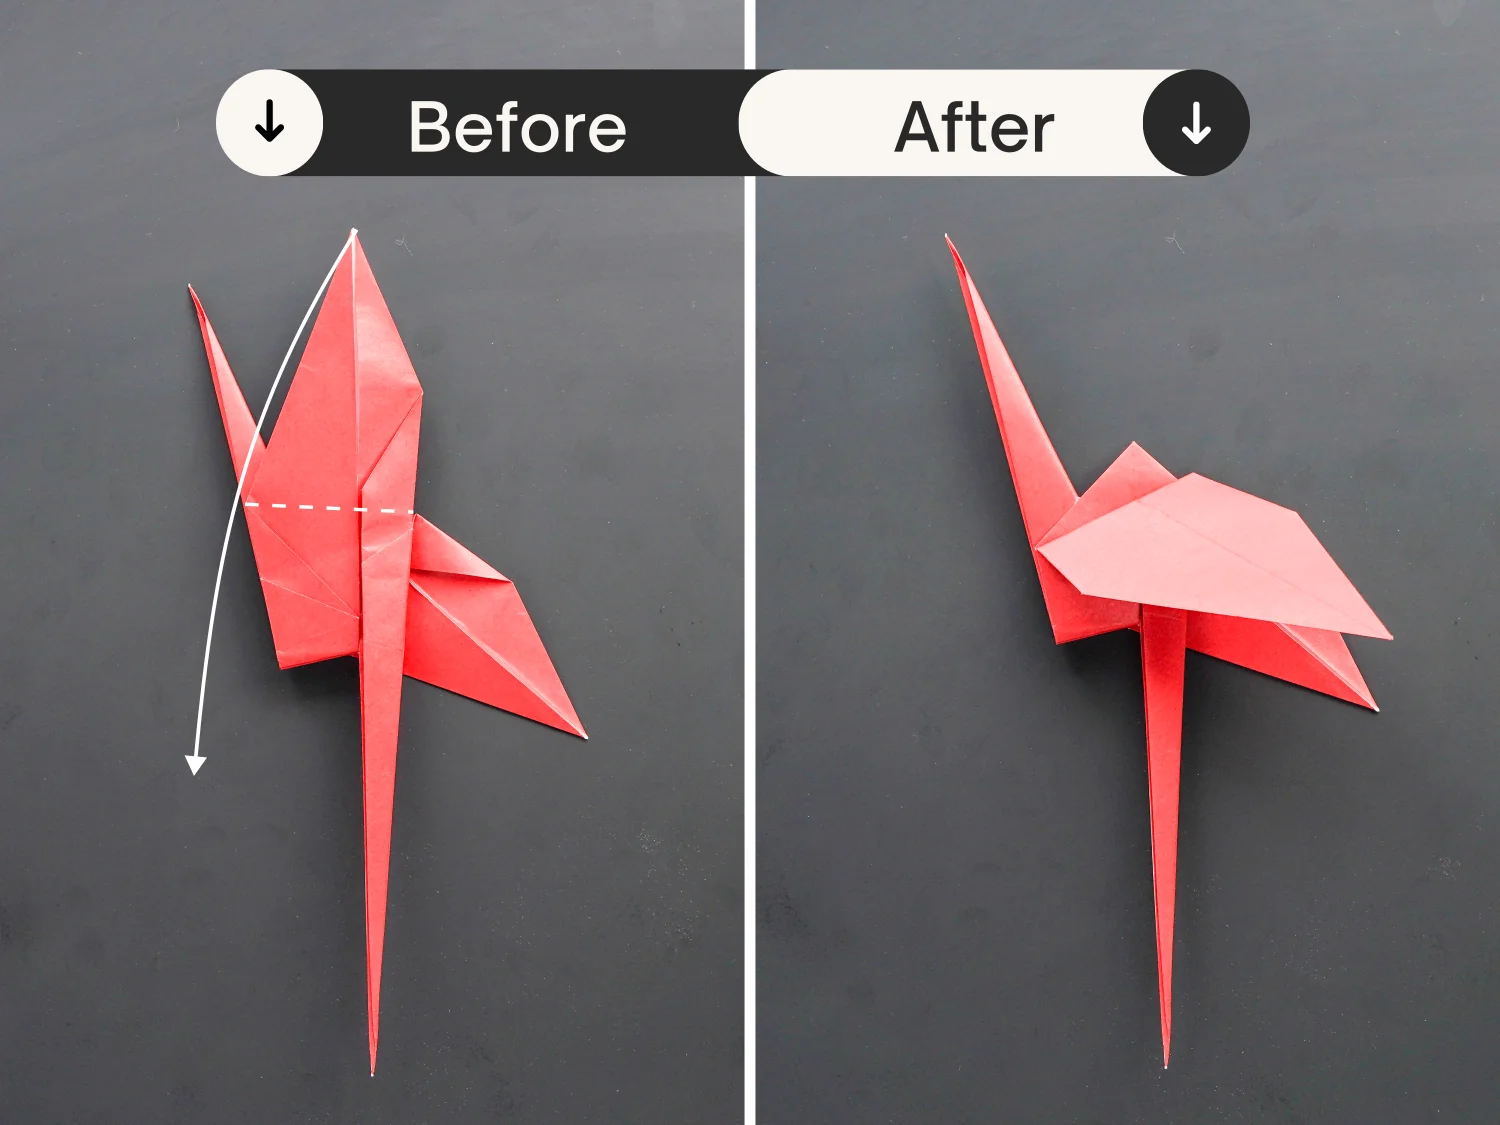
Step 25
Focus on the head part, slightly pinch the tip to flatten it, then press the tip down as the second and third pictures show.
Next, tuck the corner between the layers of the head as the fourth picture shows. Finally, flatten it to create a complete head.
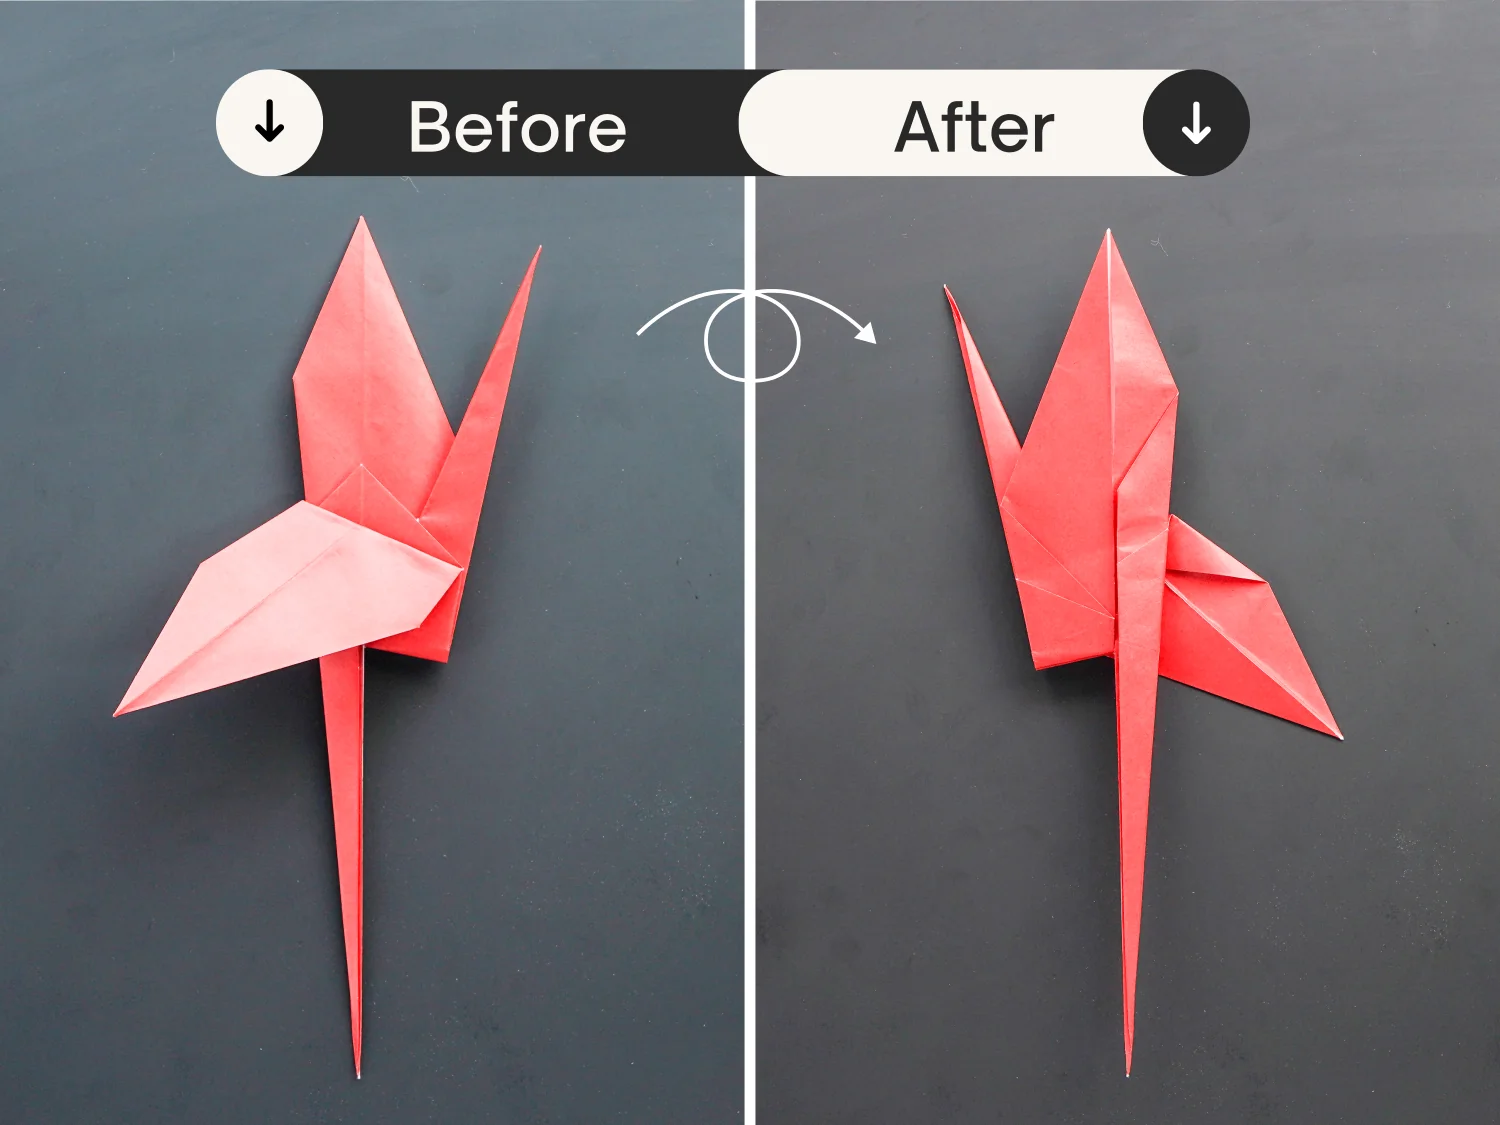
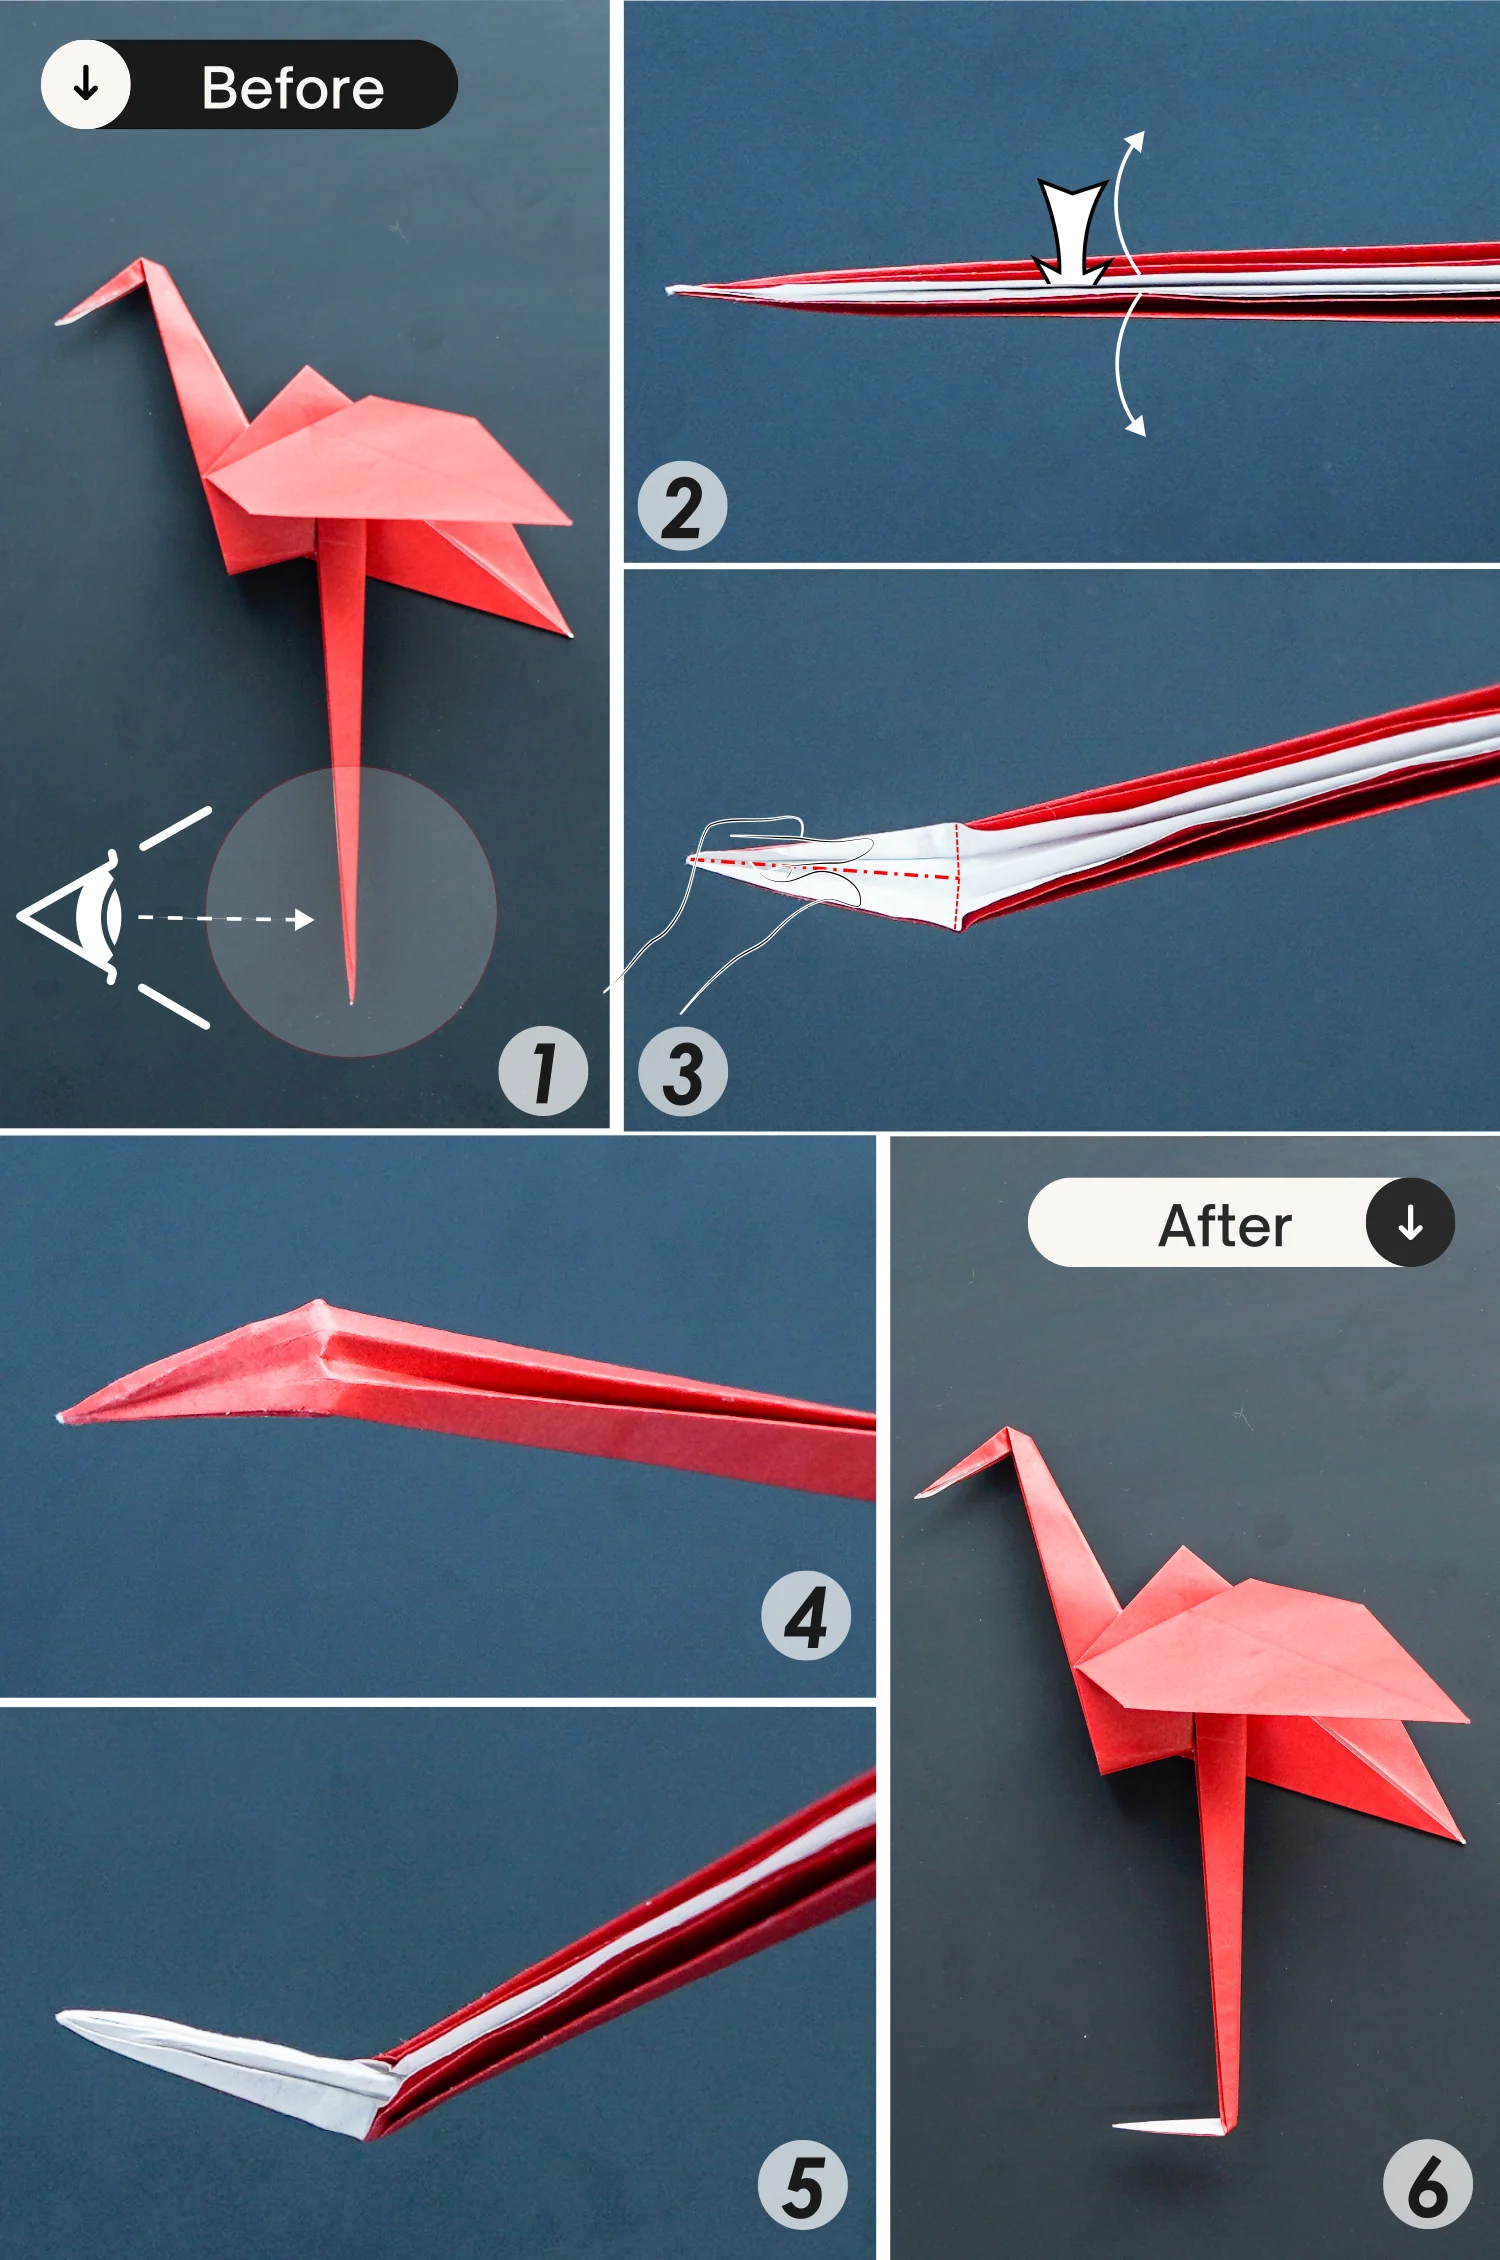
Step 26
View it from the left side and focus on its leg, spread out the tip part as the second picture shows, then fold it to close backward, creating the foot of the flamingo.
What’s Next
That’s your lovely flamingo, now please explore our other interesting origami bird tutorials, you will definitely immerse yourself in it, and hope you harvest joy on this trip.


