How to Fold an Easy Origami Fish
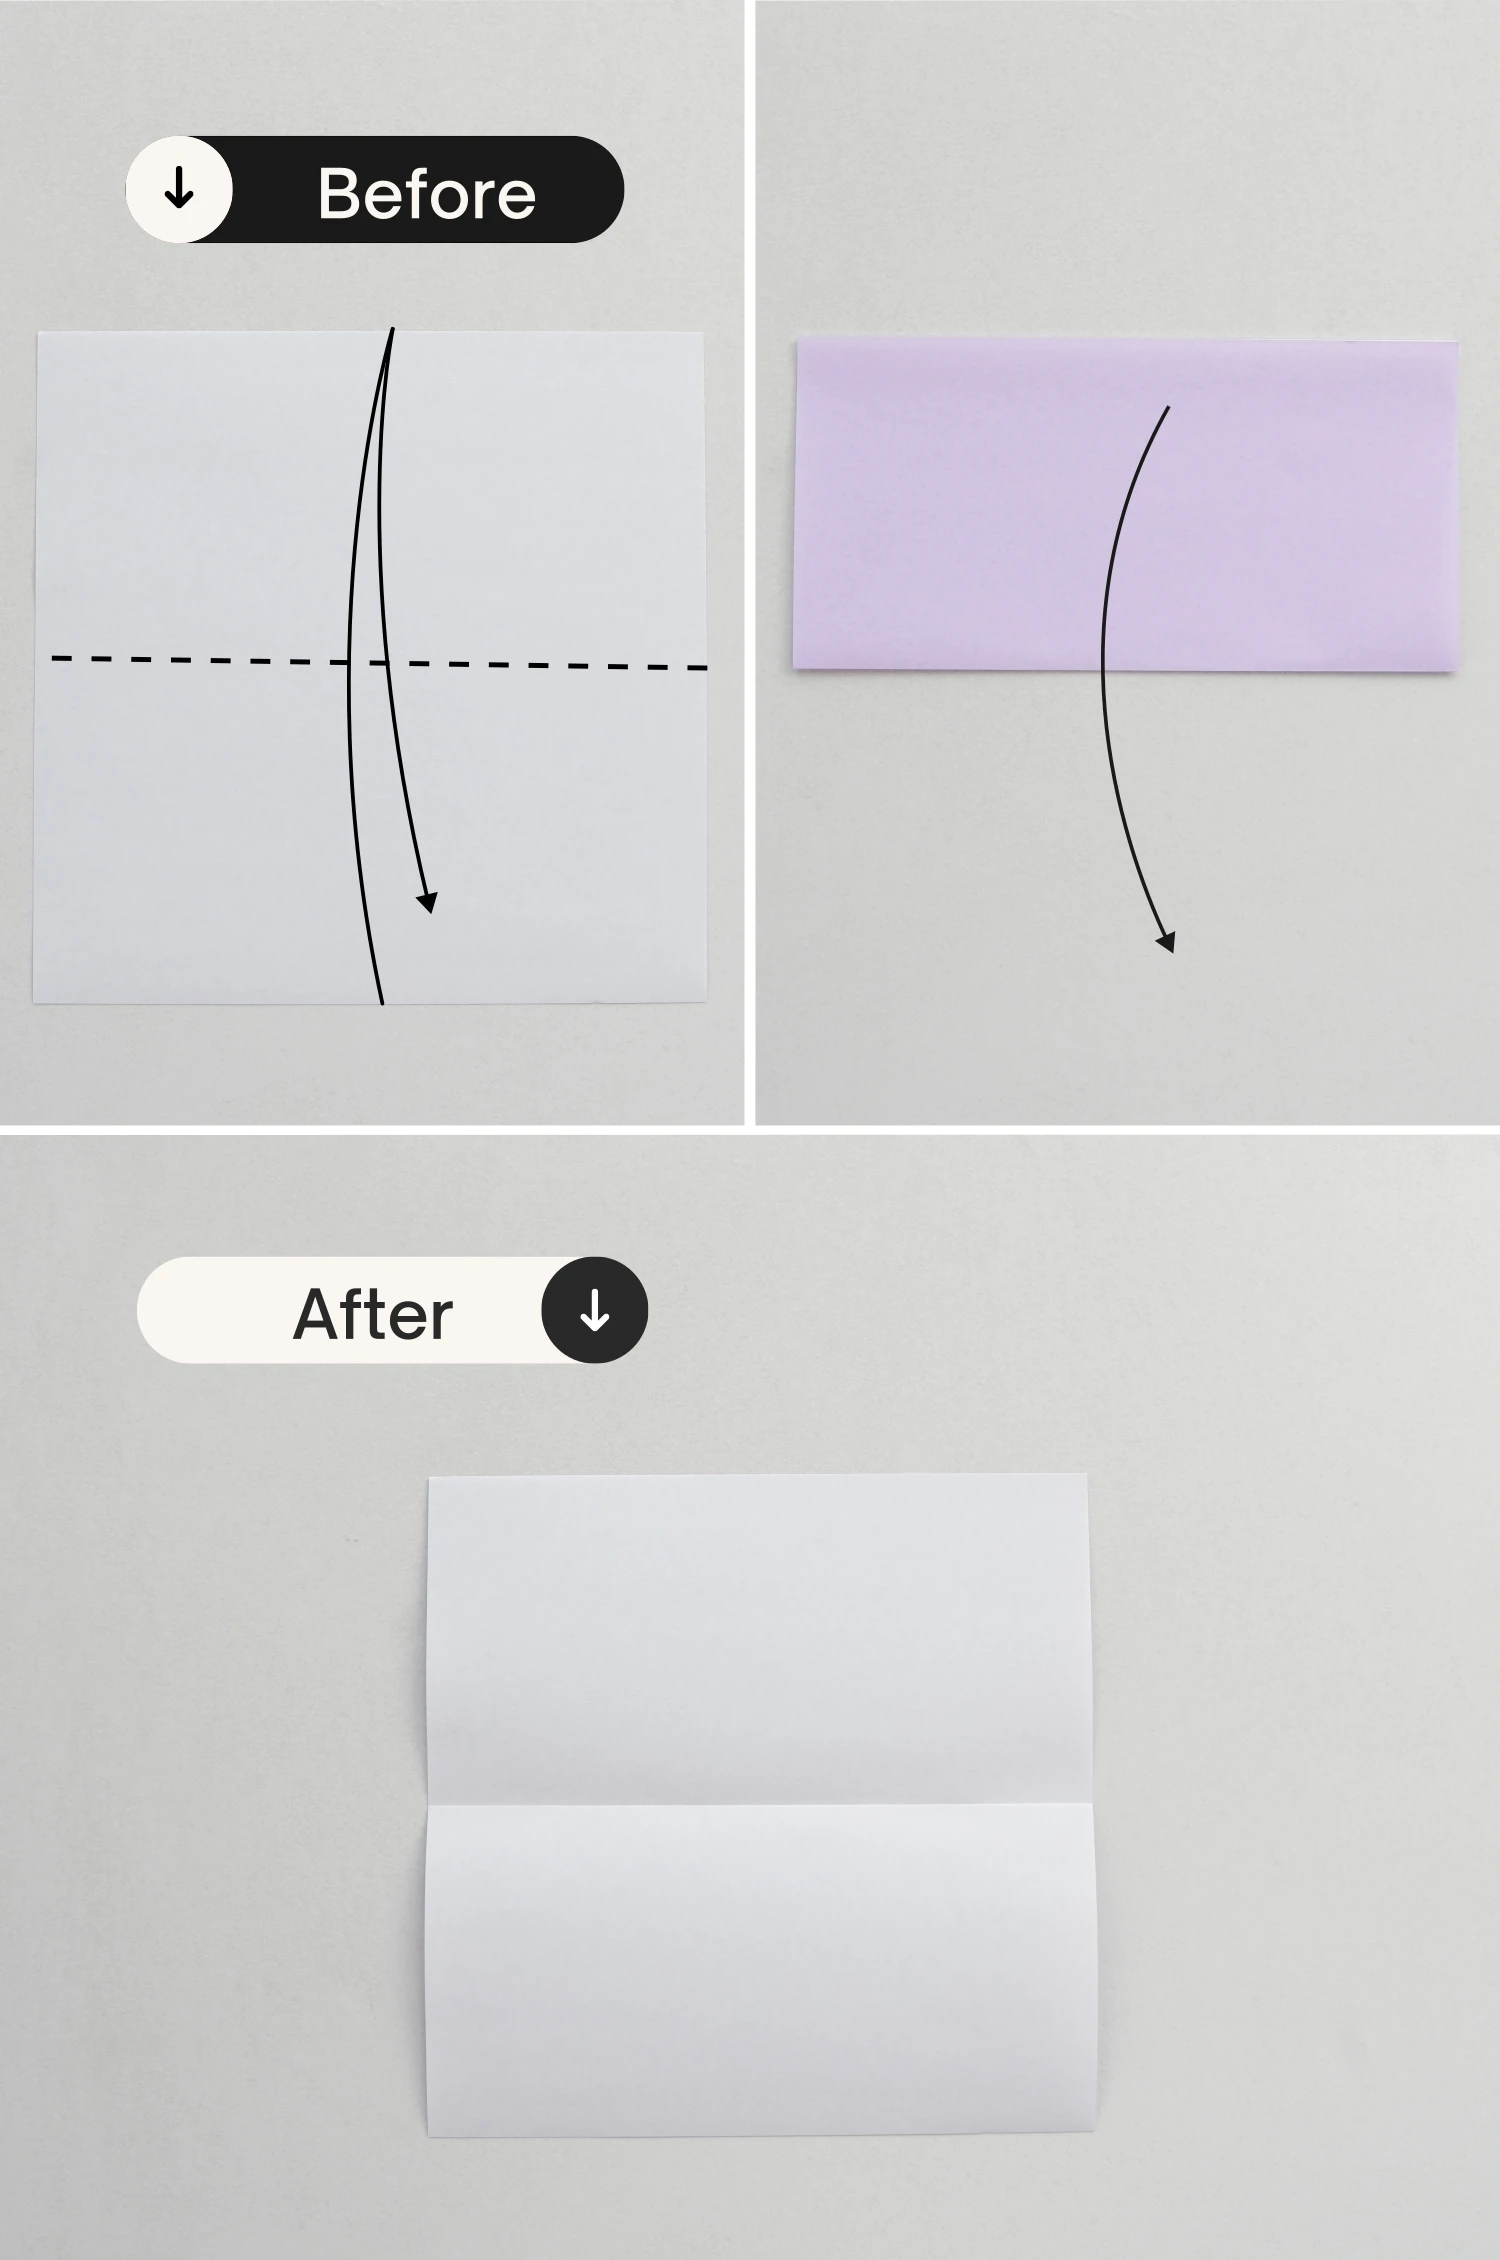
Step 1
Start with the white side of the paper facing up, fold it in half horizontally, crease it well then unfold.
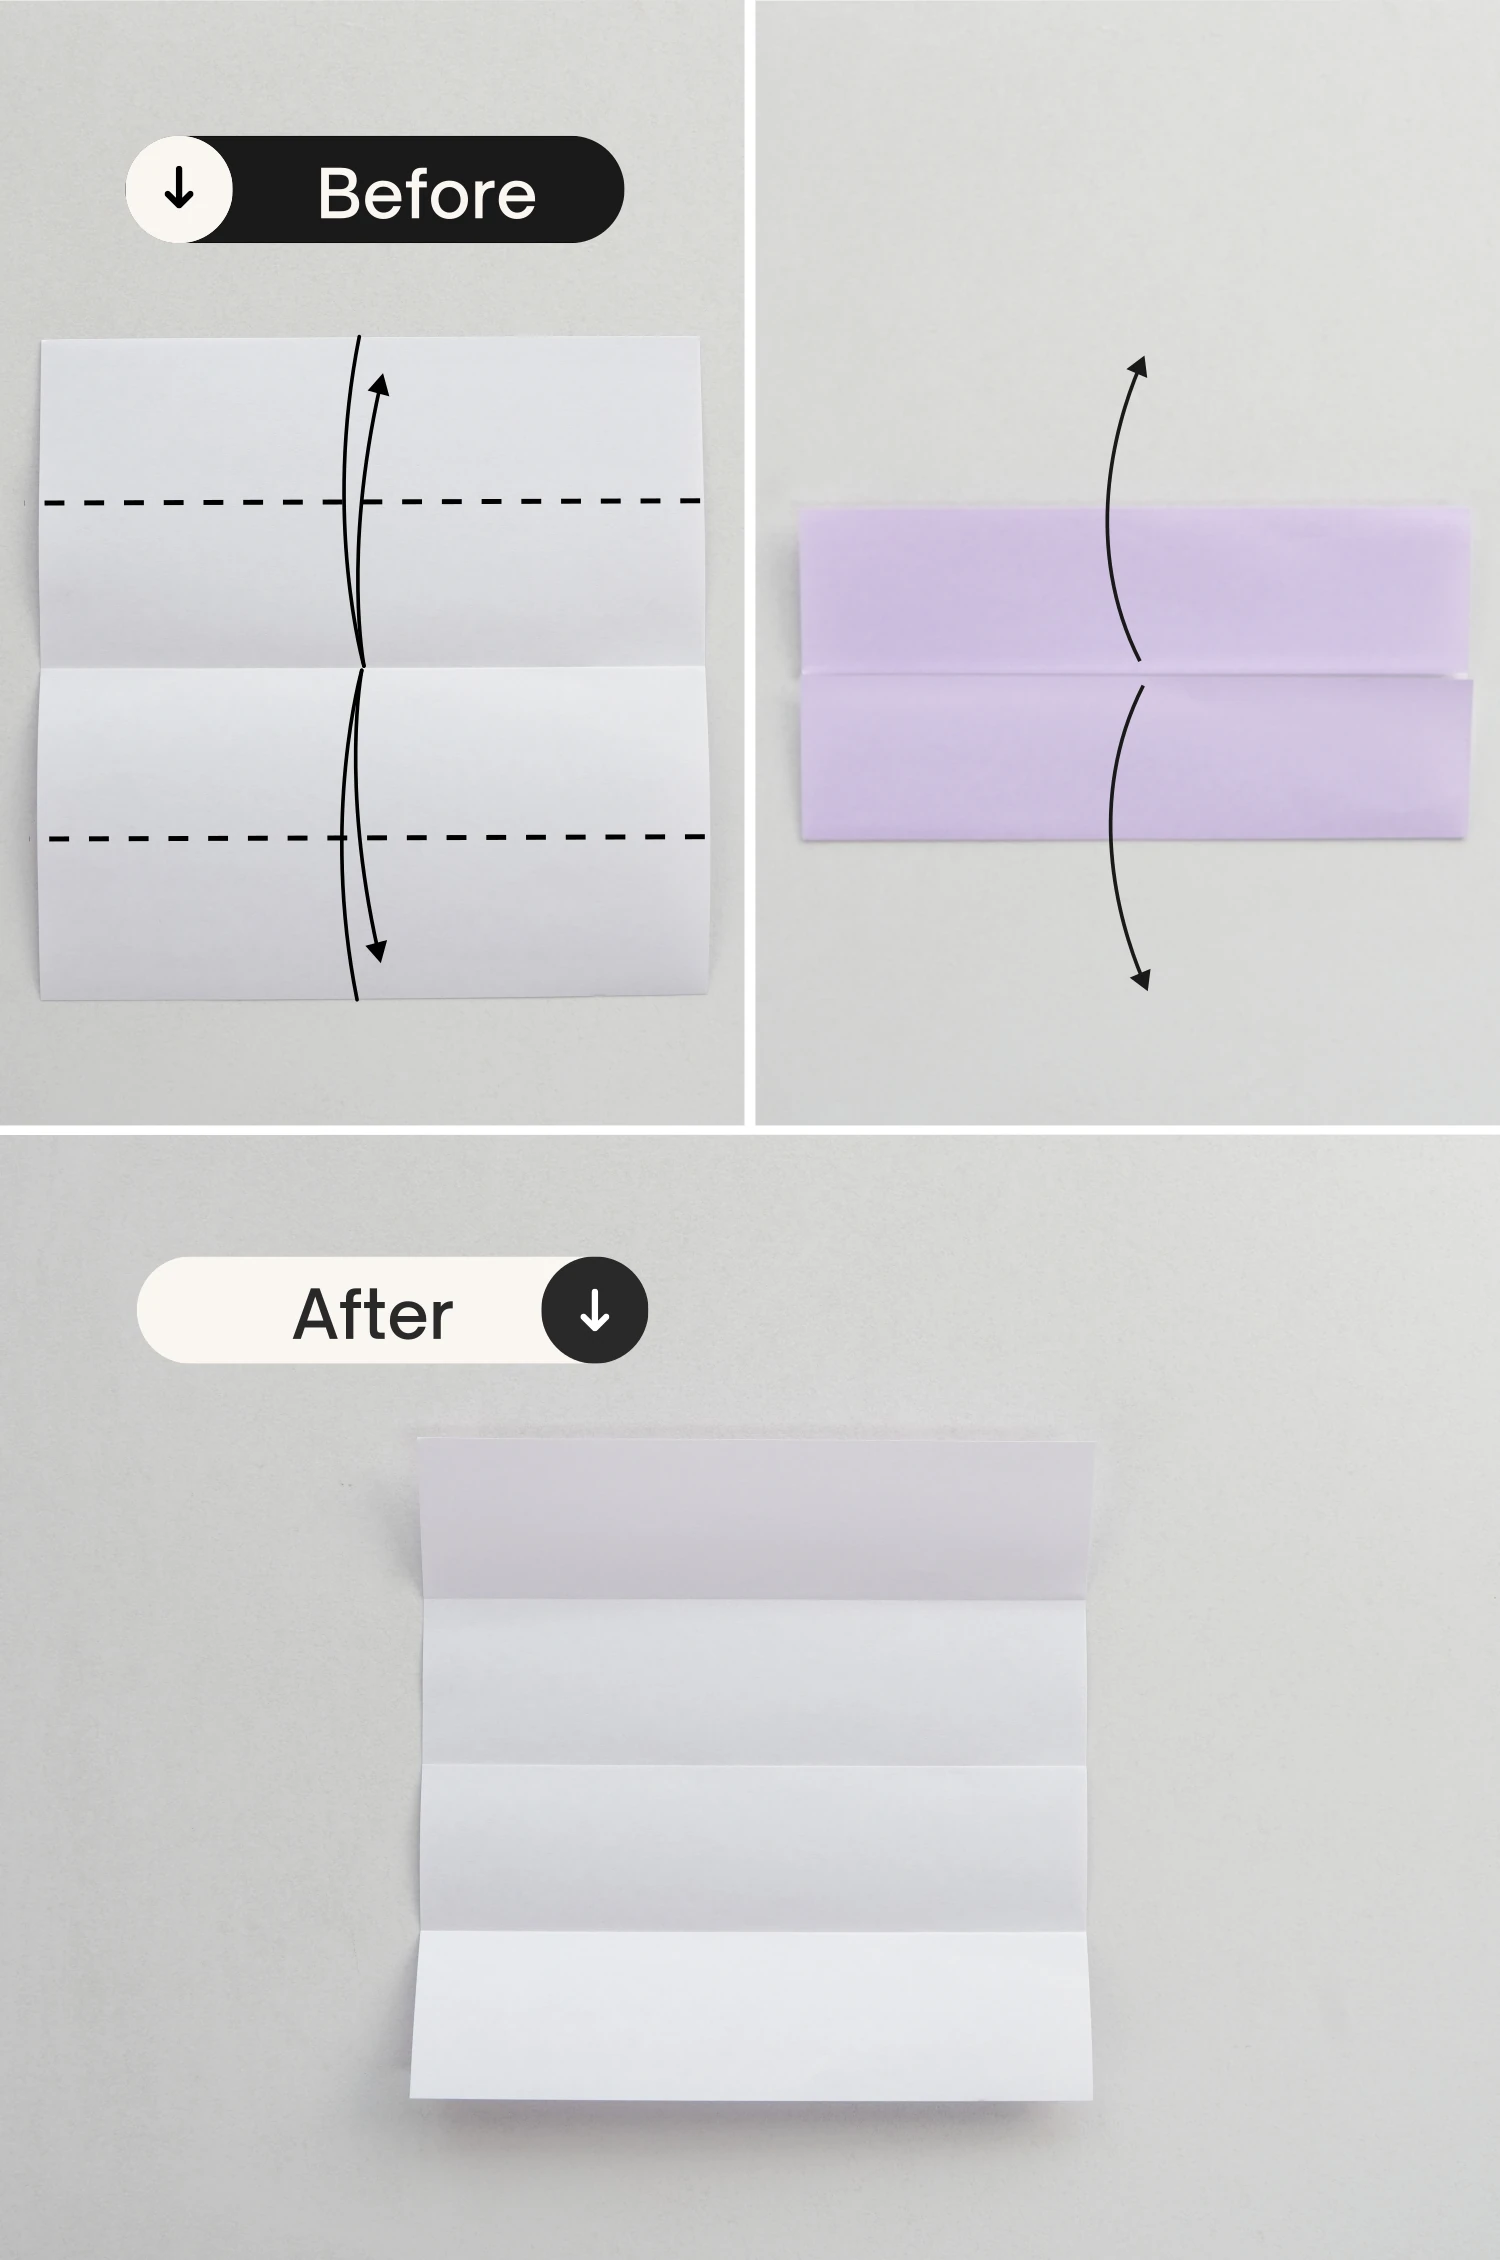
Step 2
Fold the top and bottom edges to align with the crease you just made, crease them well then unfold.
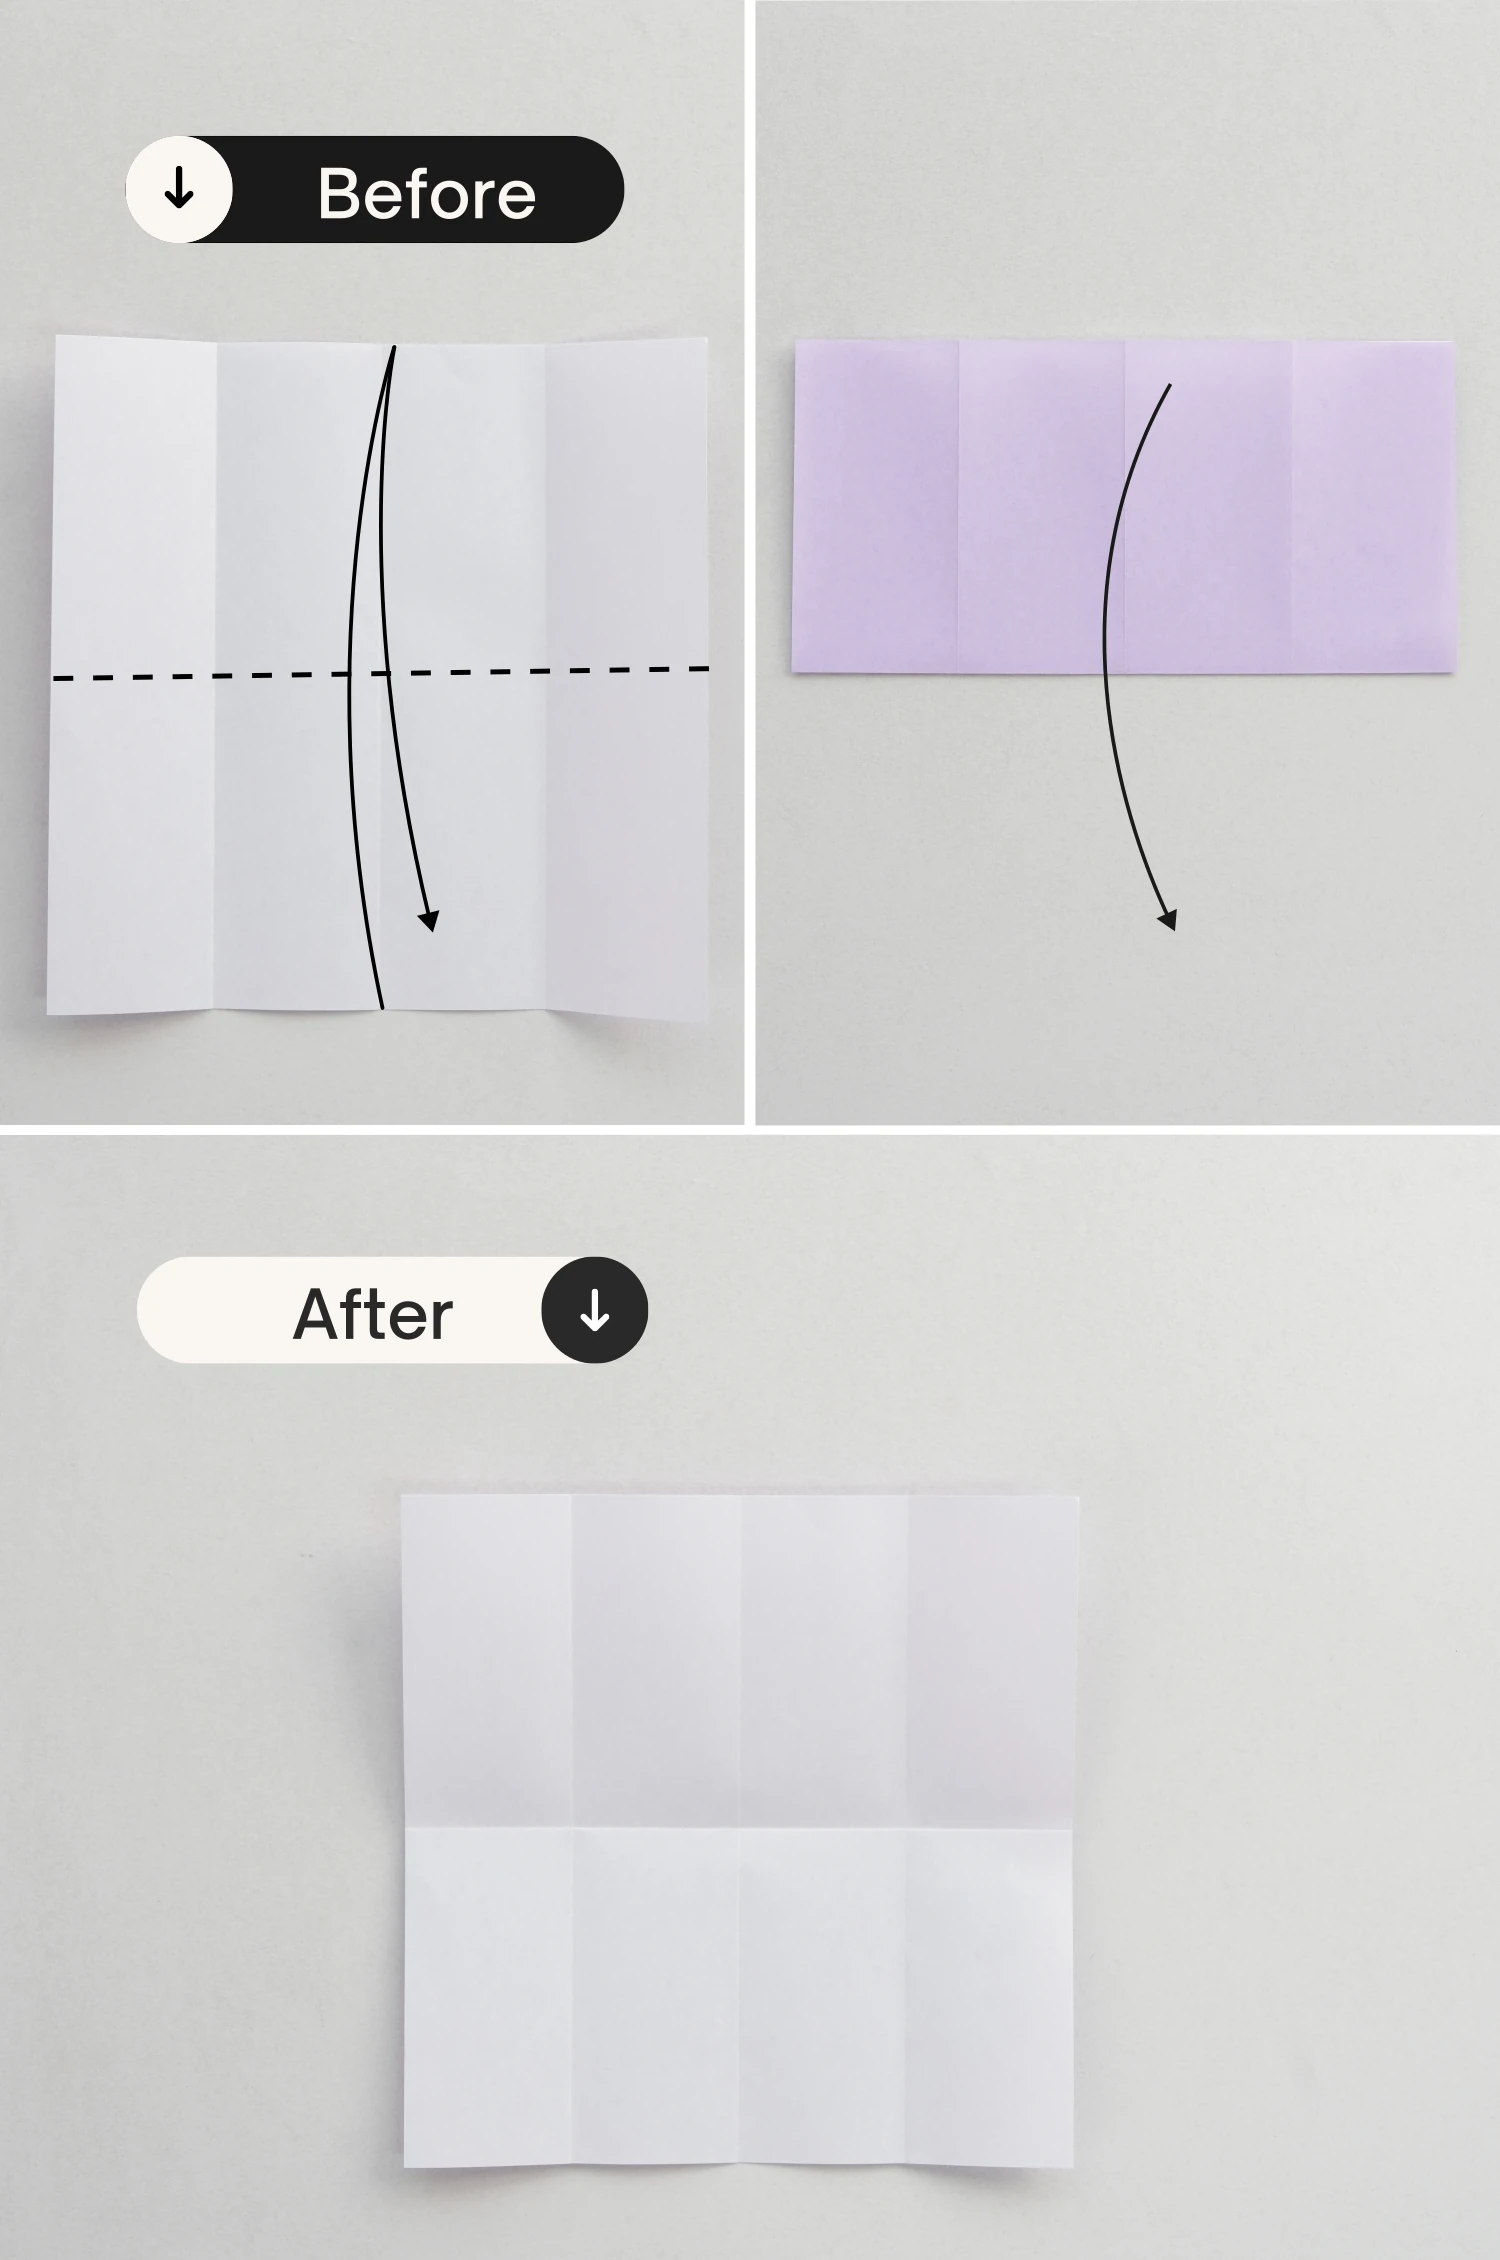
Step 3
Rotate it 90 degrees clockwise.

Step 4
Fold it in half horizontally, crease it well then unfold.
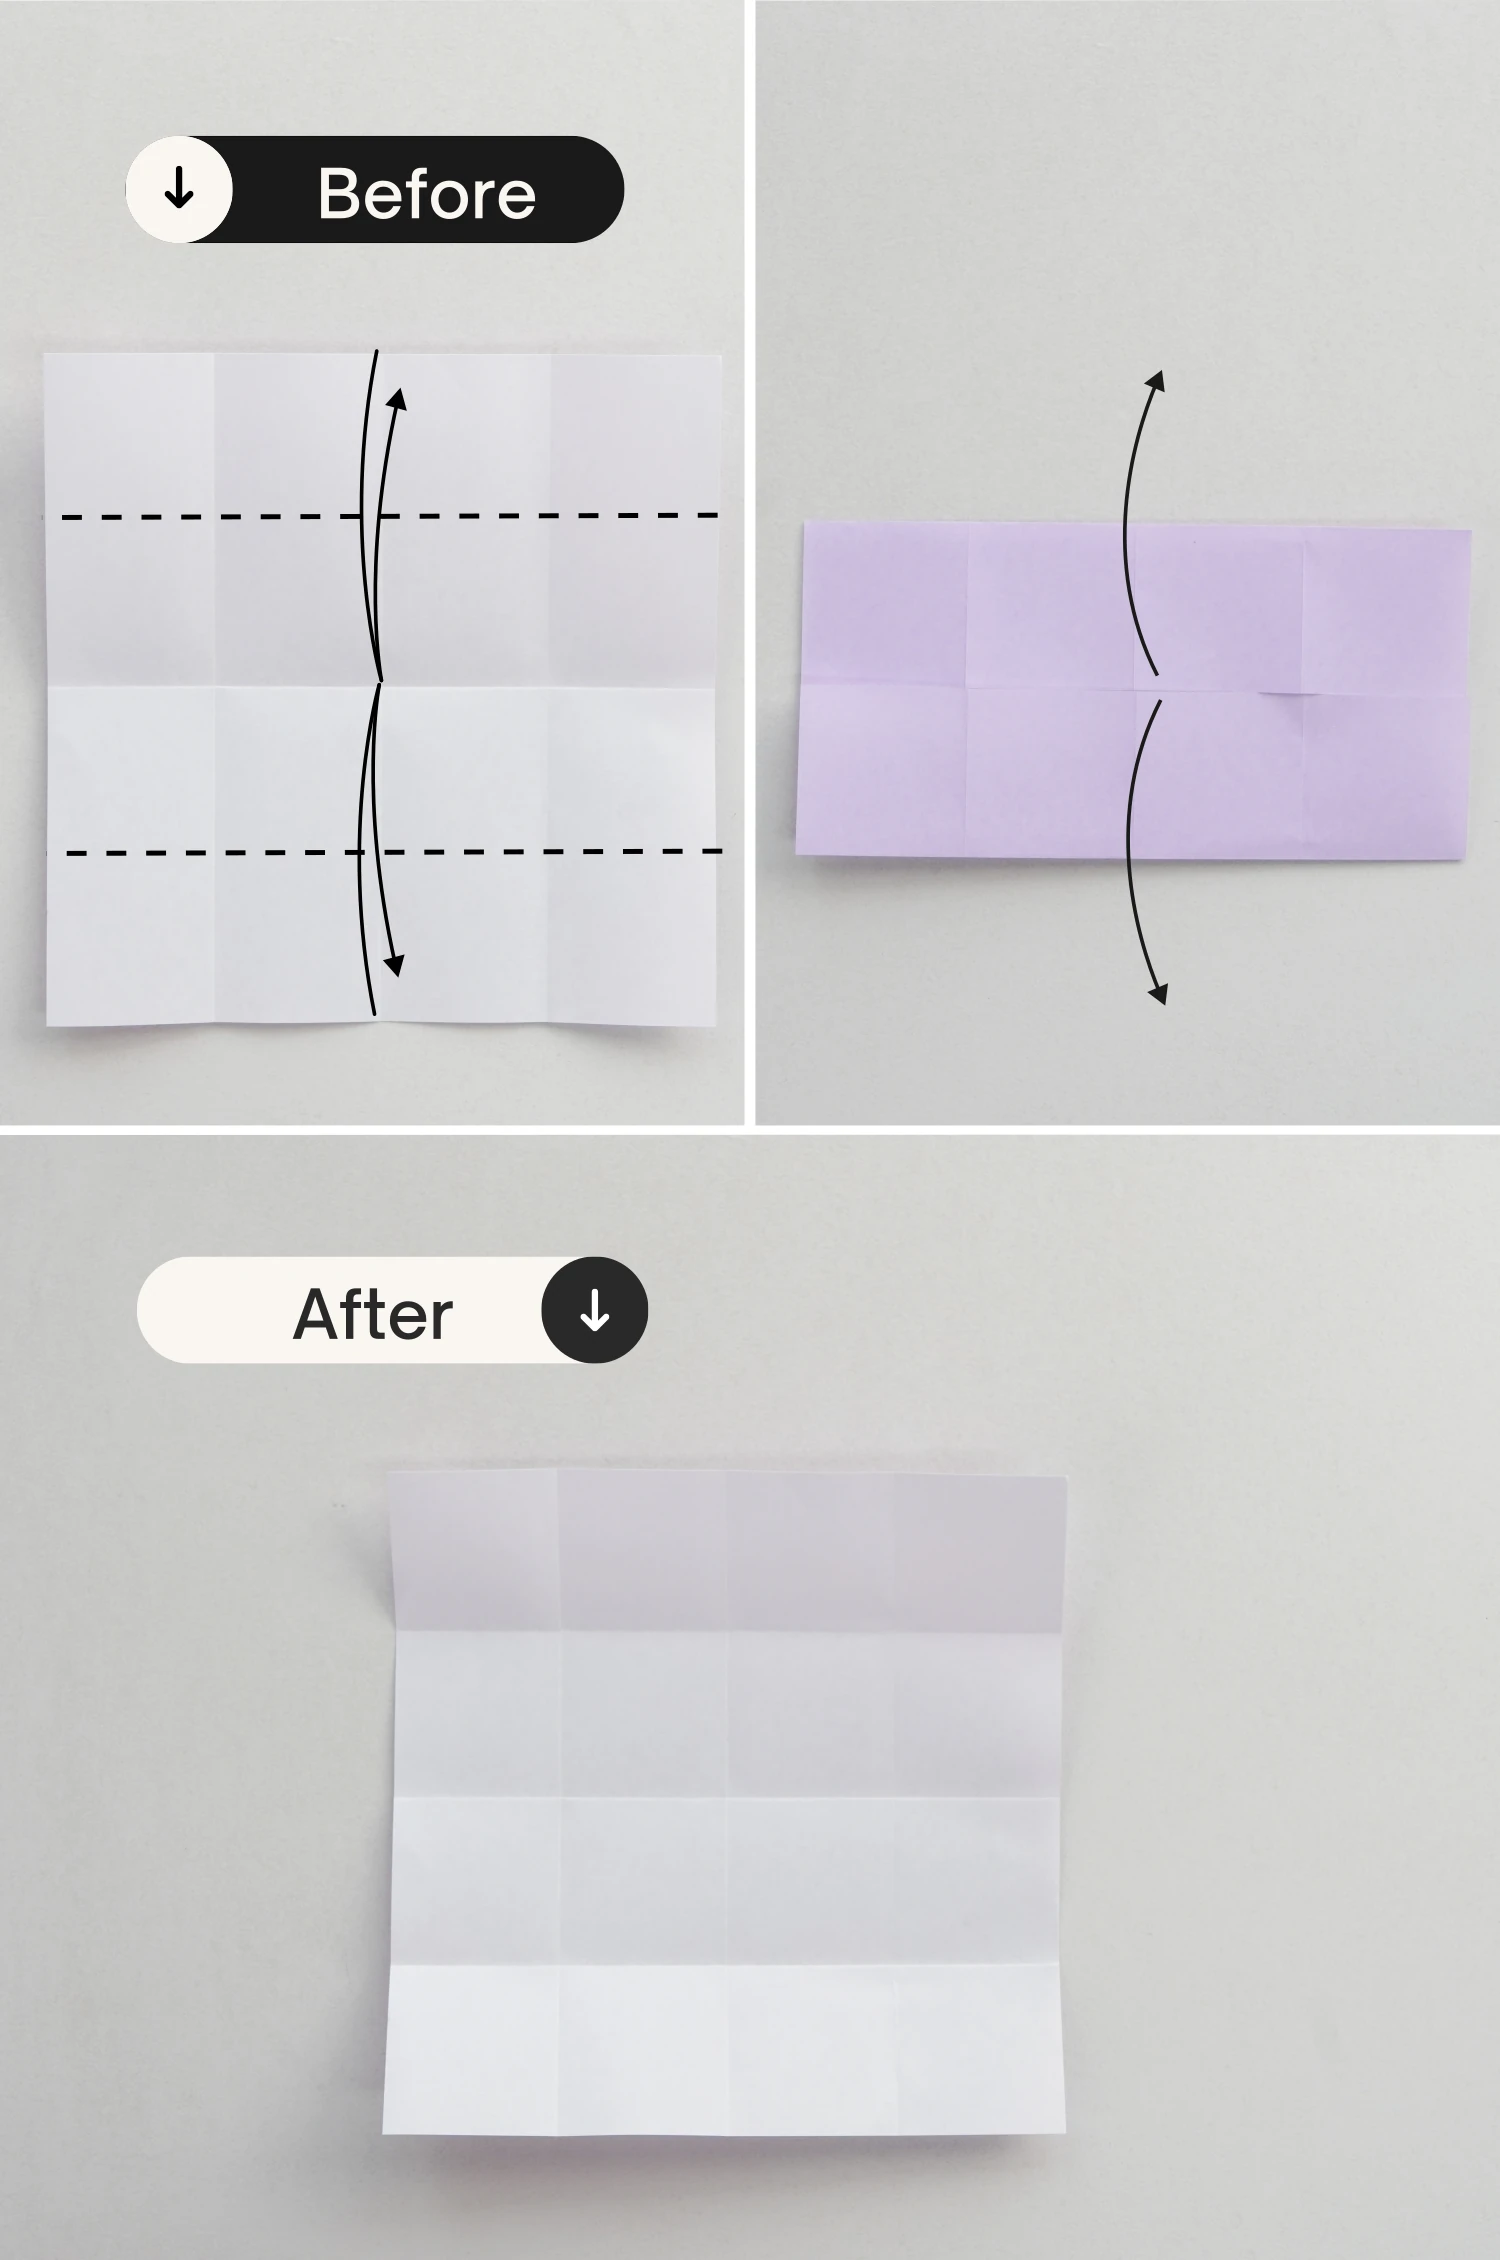
Step 5
Similarly, fold the top and bottom edges to align with the horizontal crease, crease them then unfold them.
Step 6
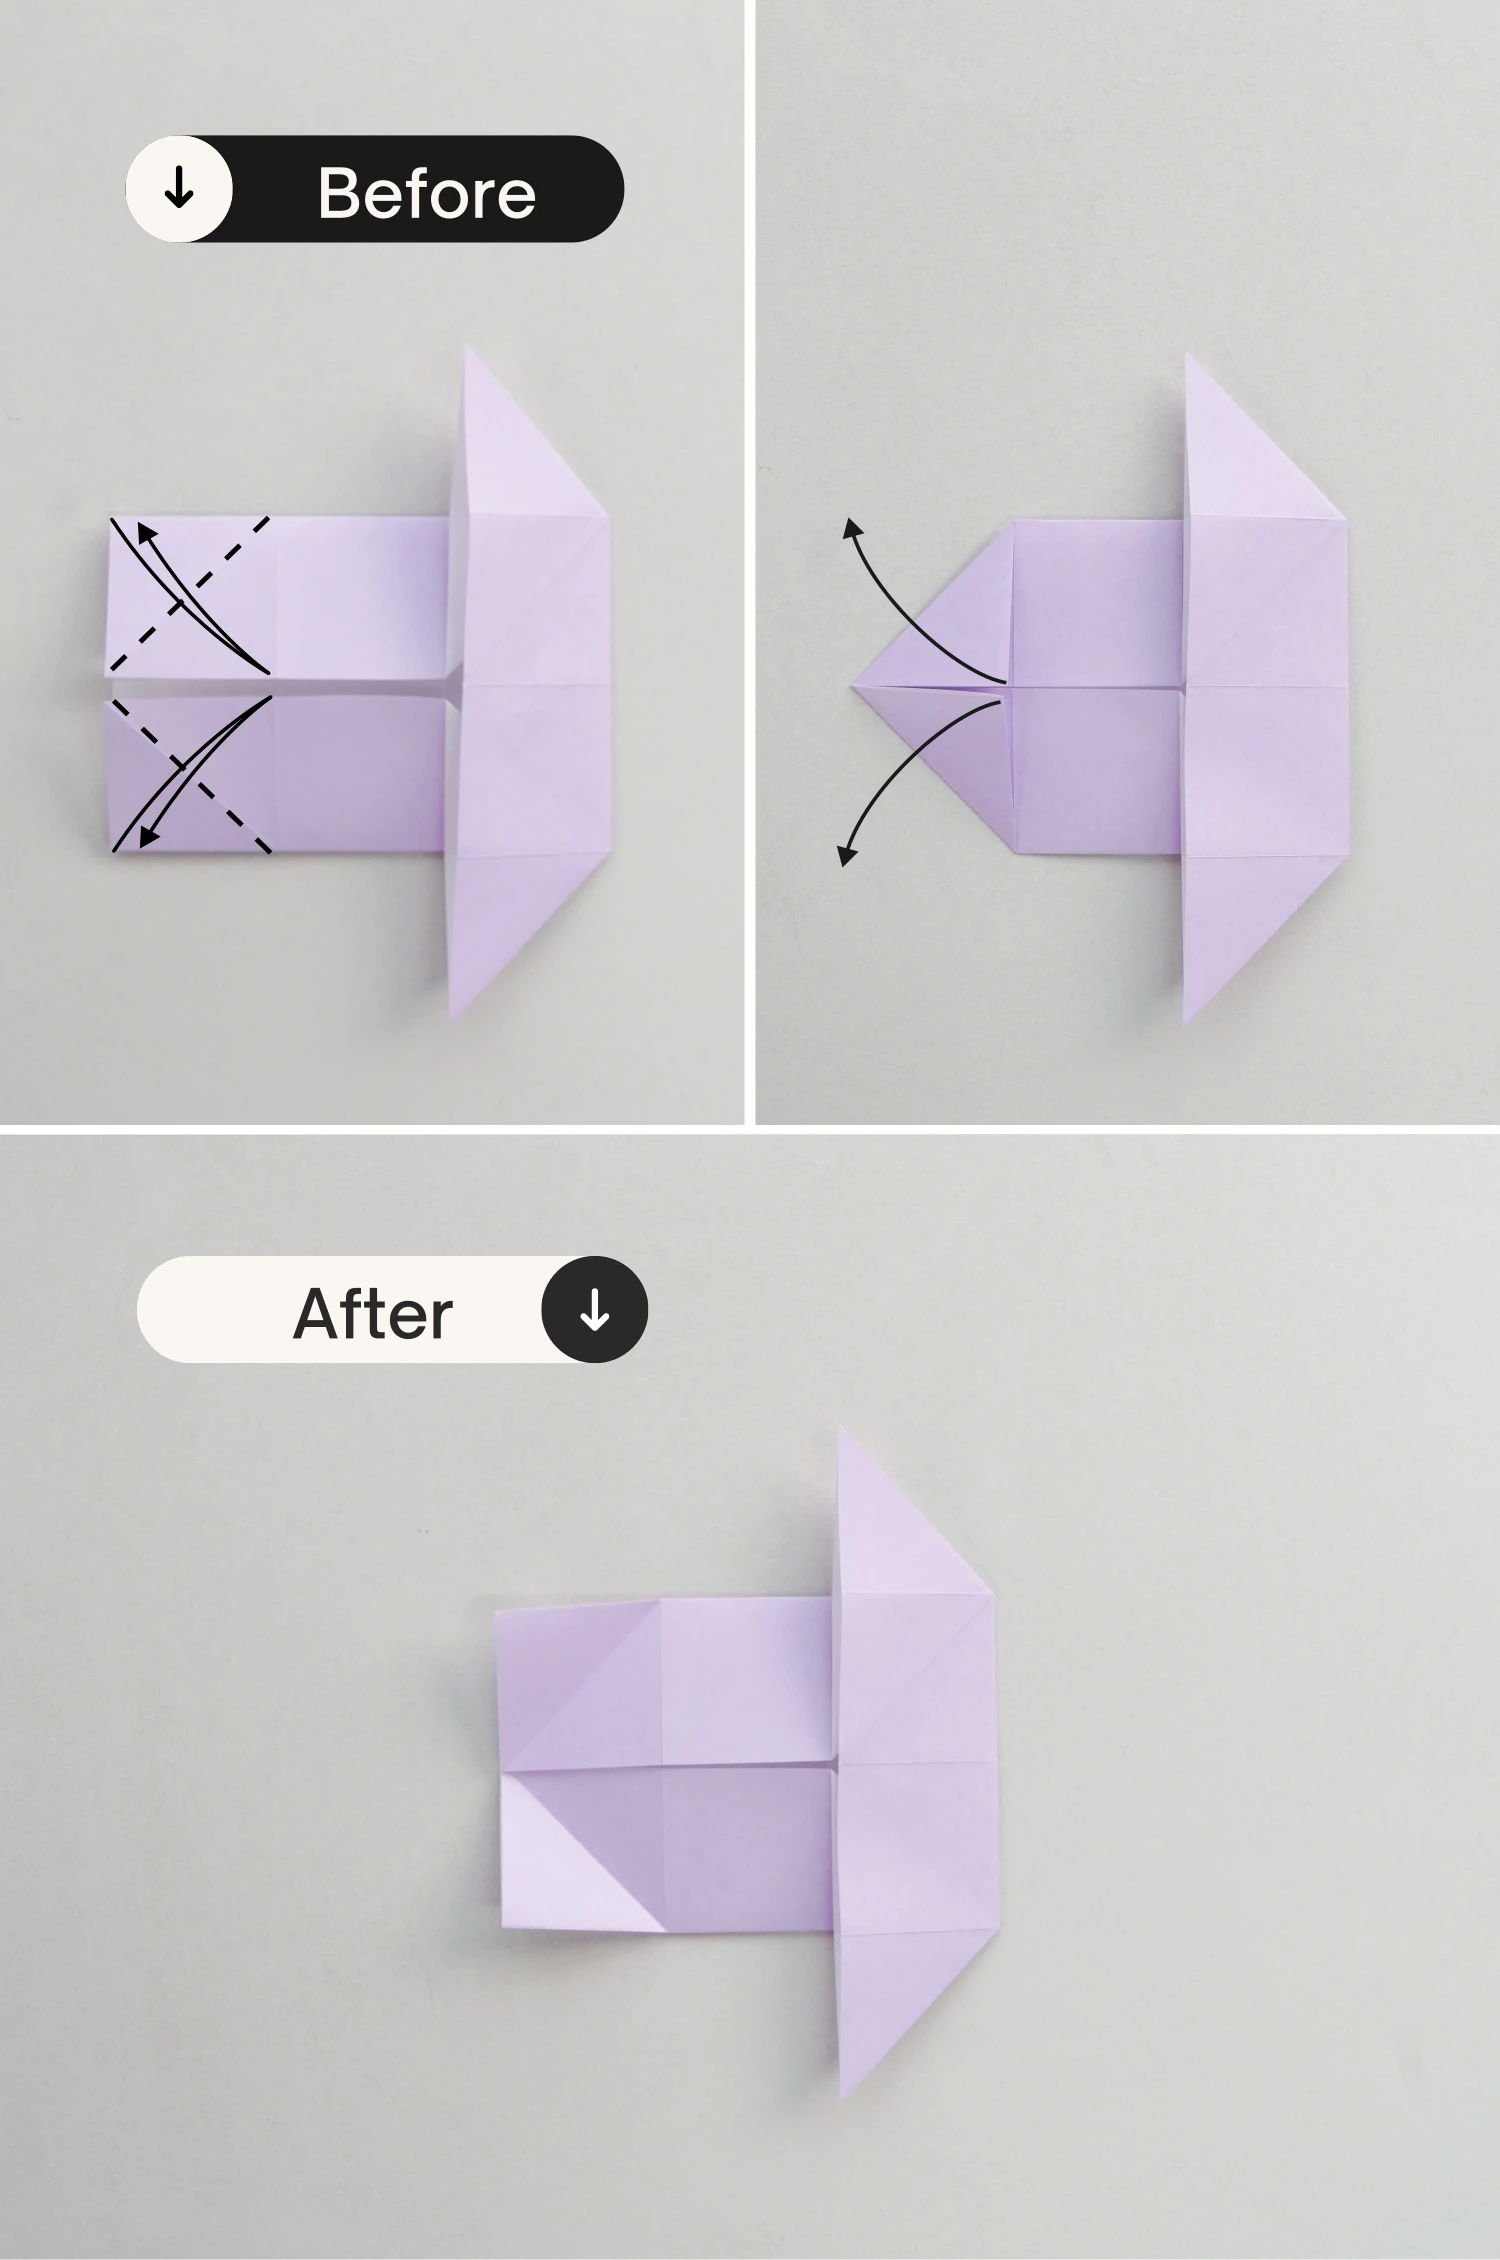
Fold the bottom right point to the top left diagonally, crease well then unfold it.
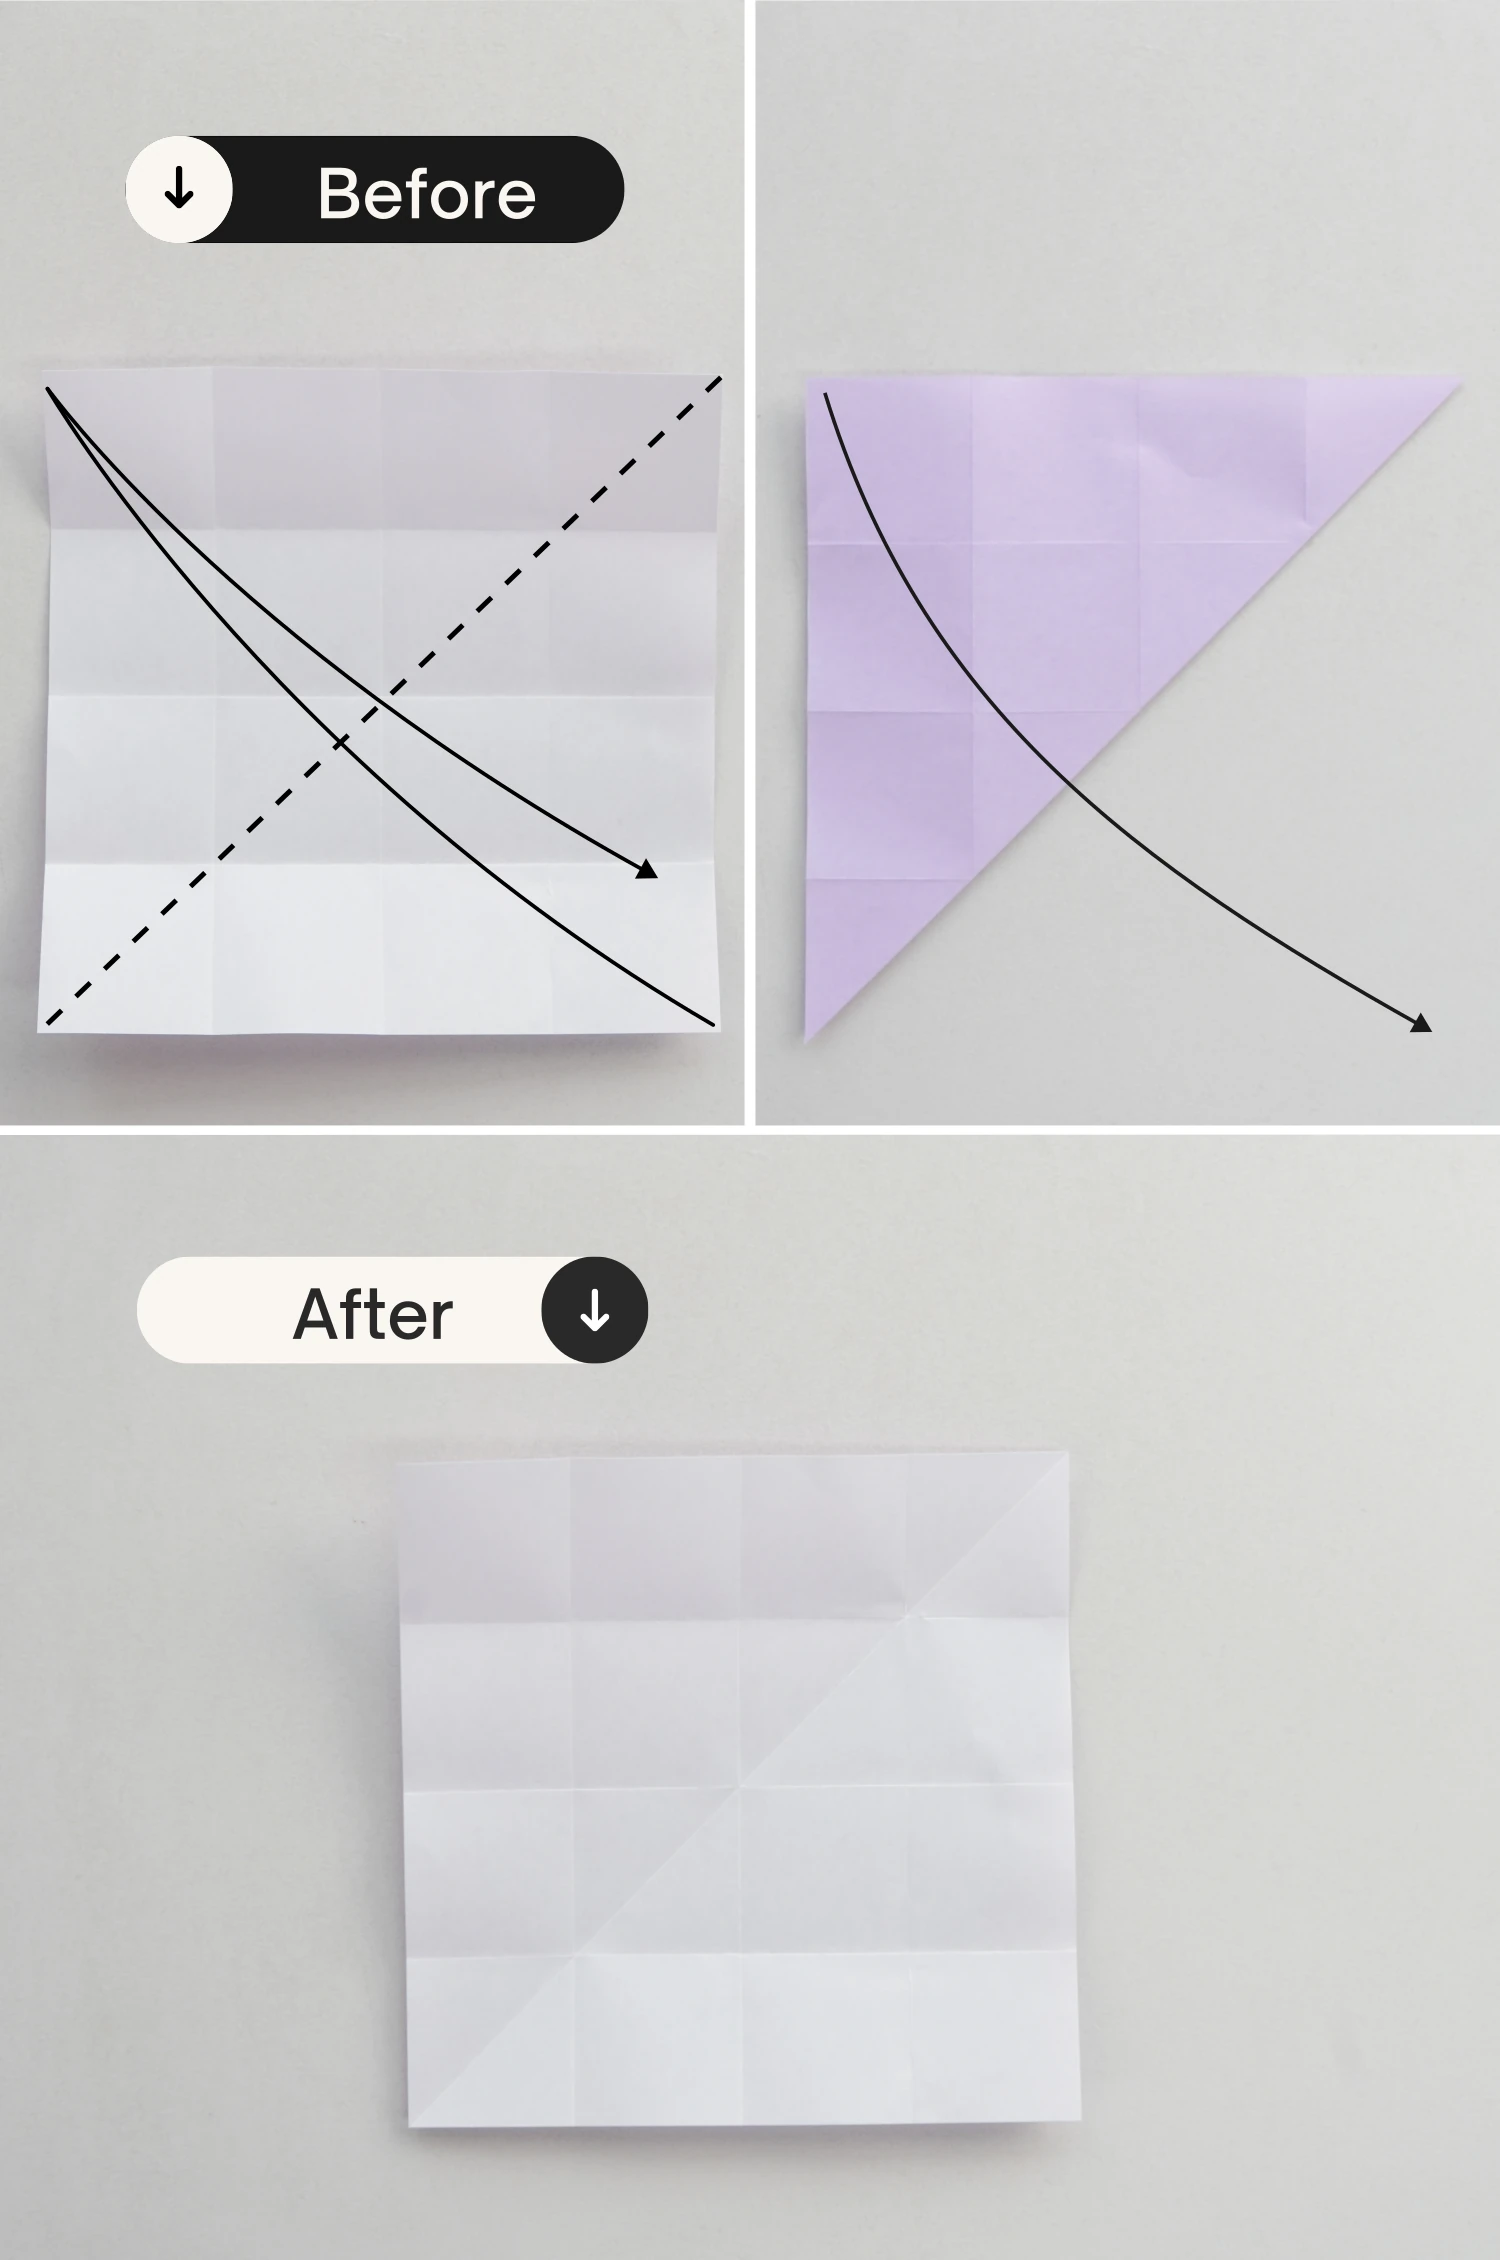
Step 7
Fold the bottom left point to the top right diagonally, crease it well, and unfold it.
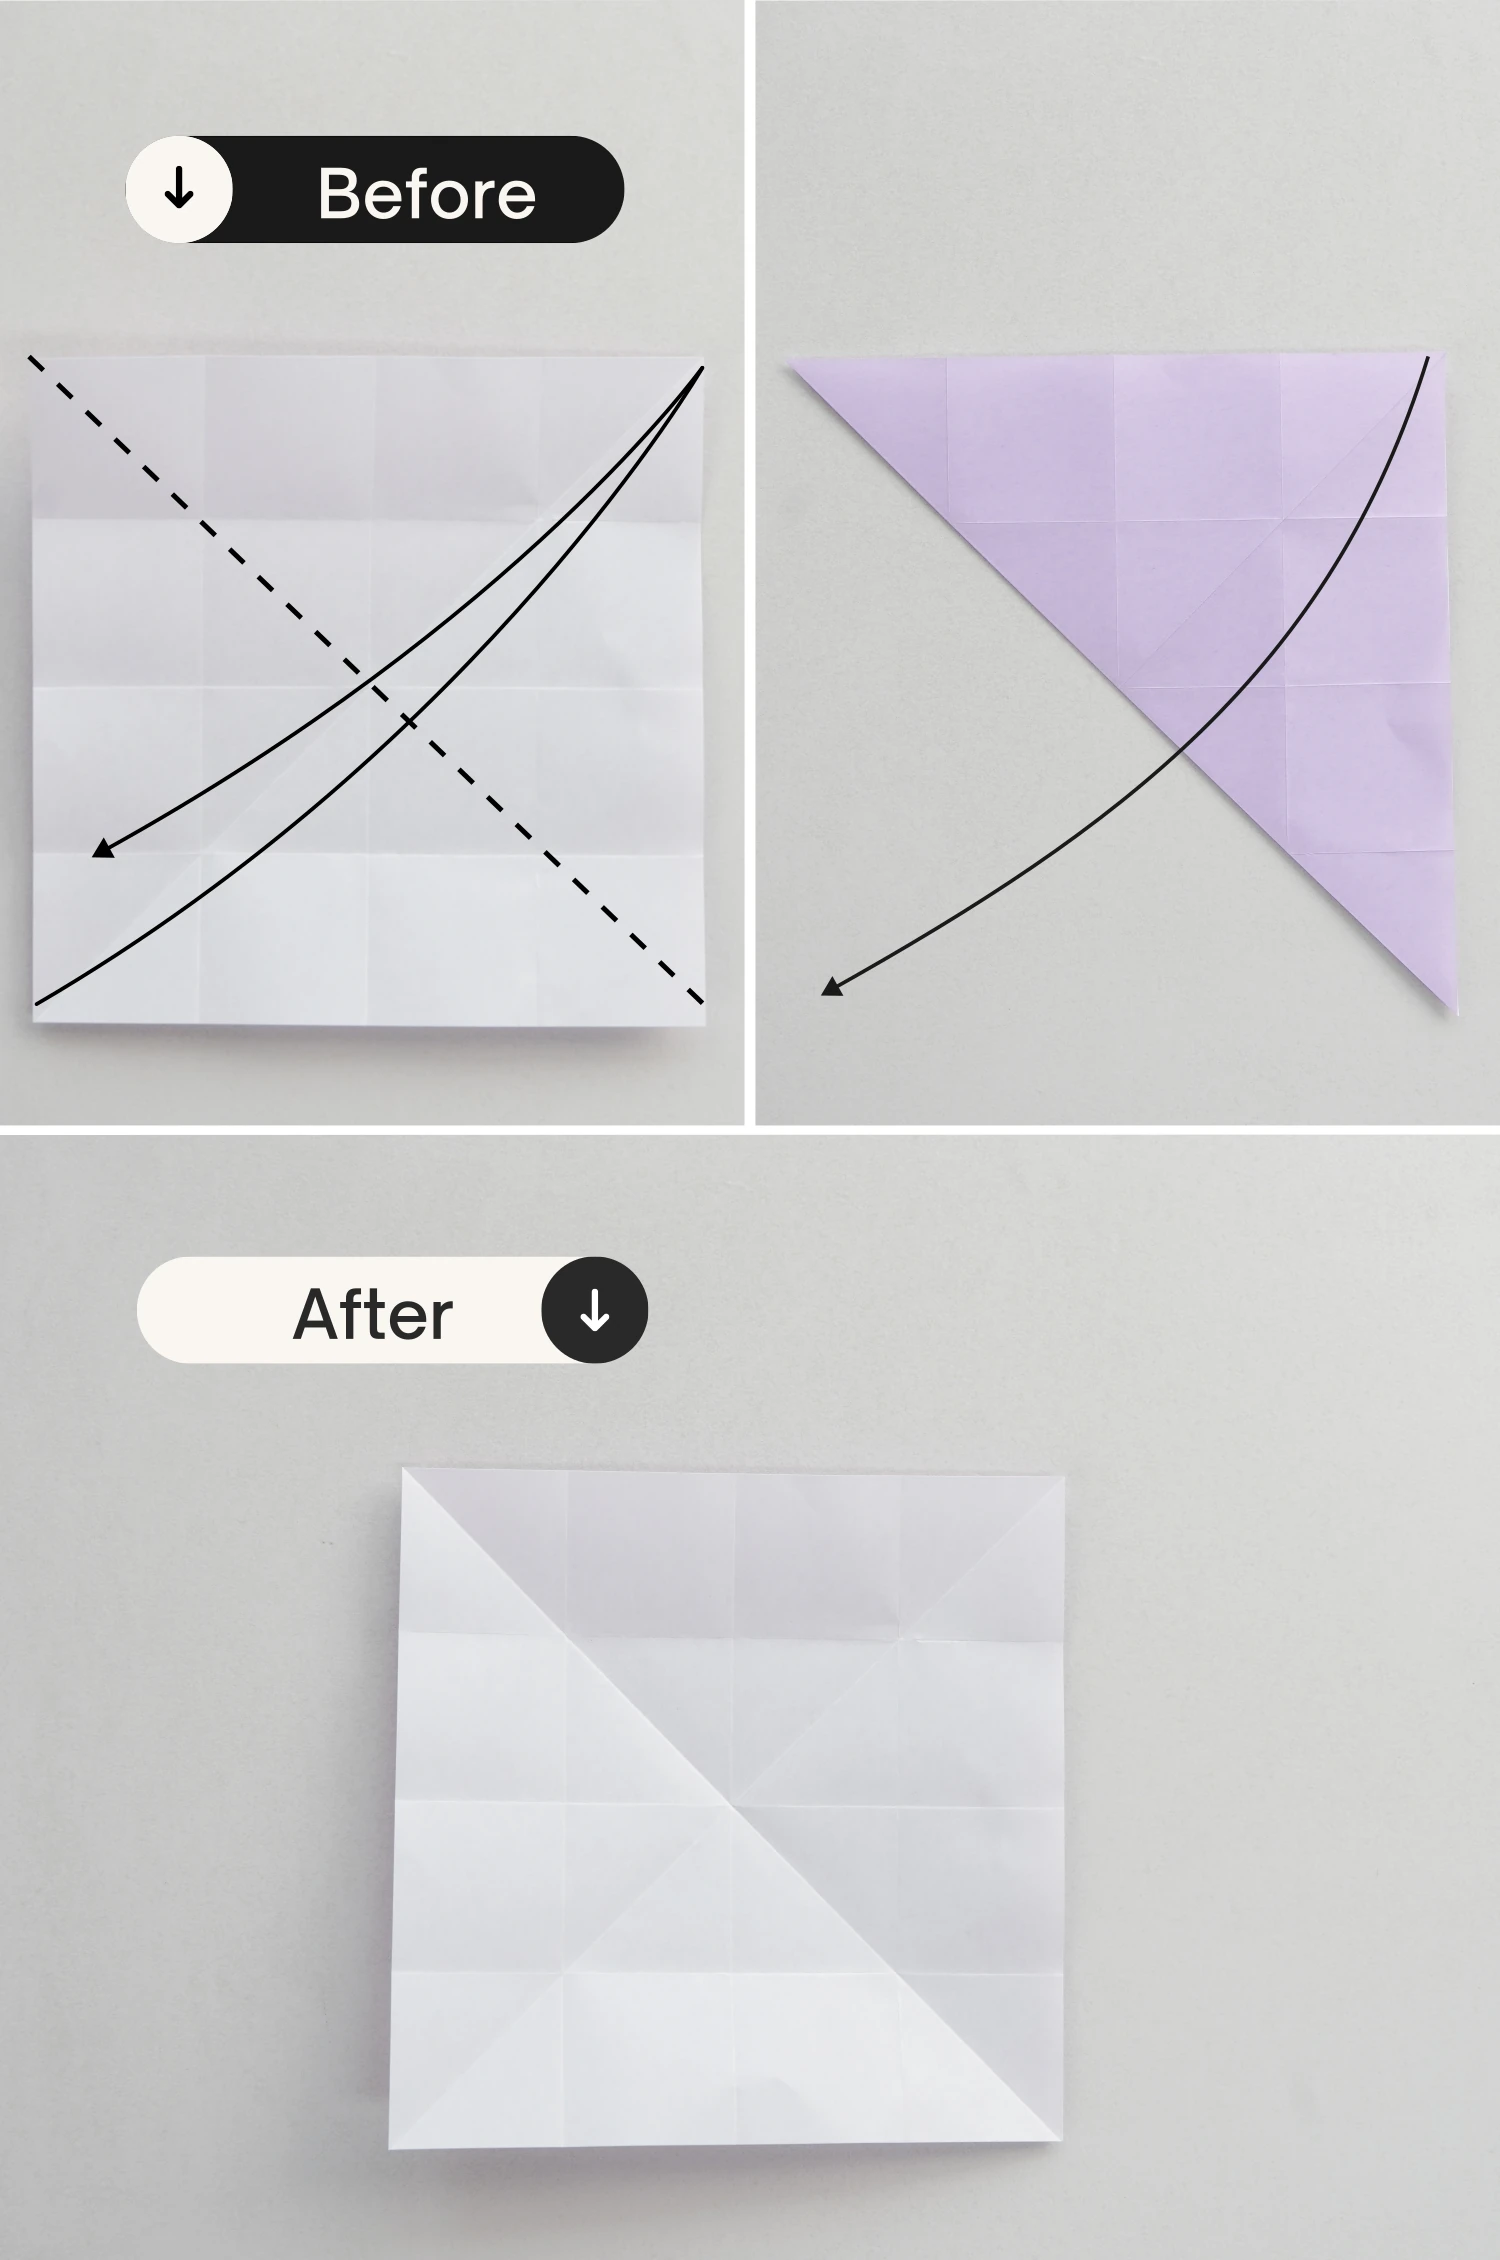
Step 8
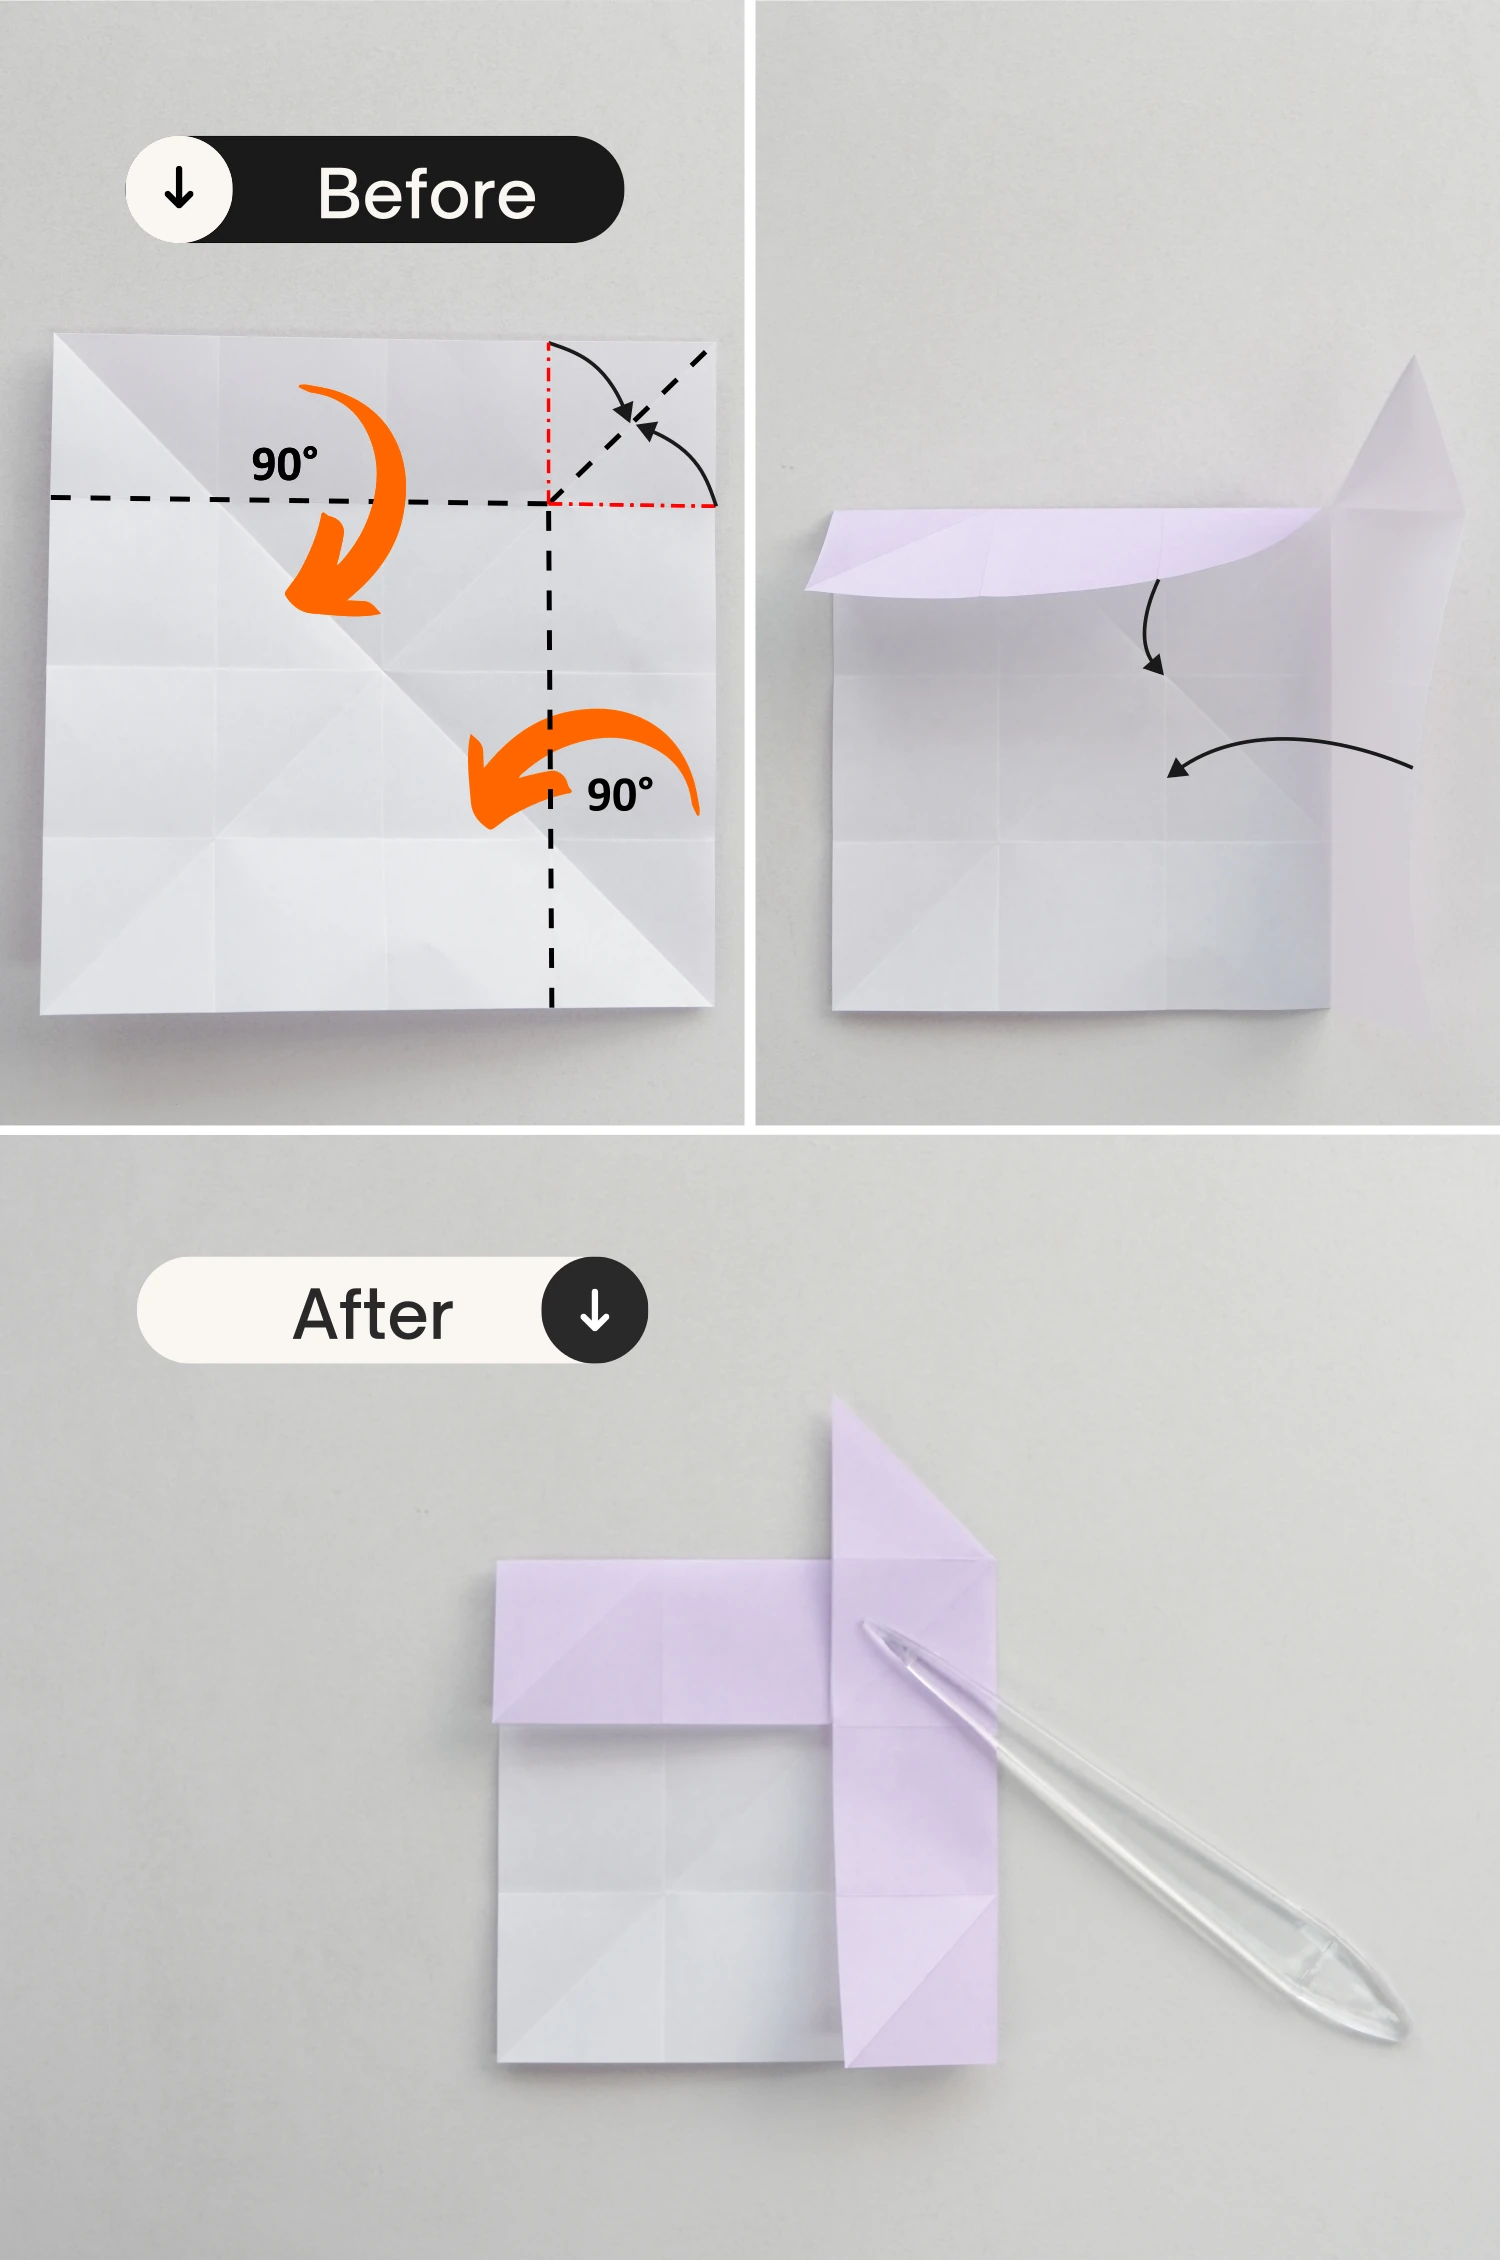
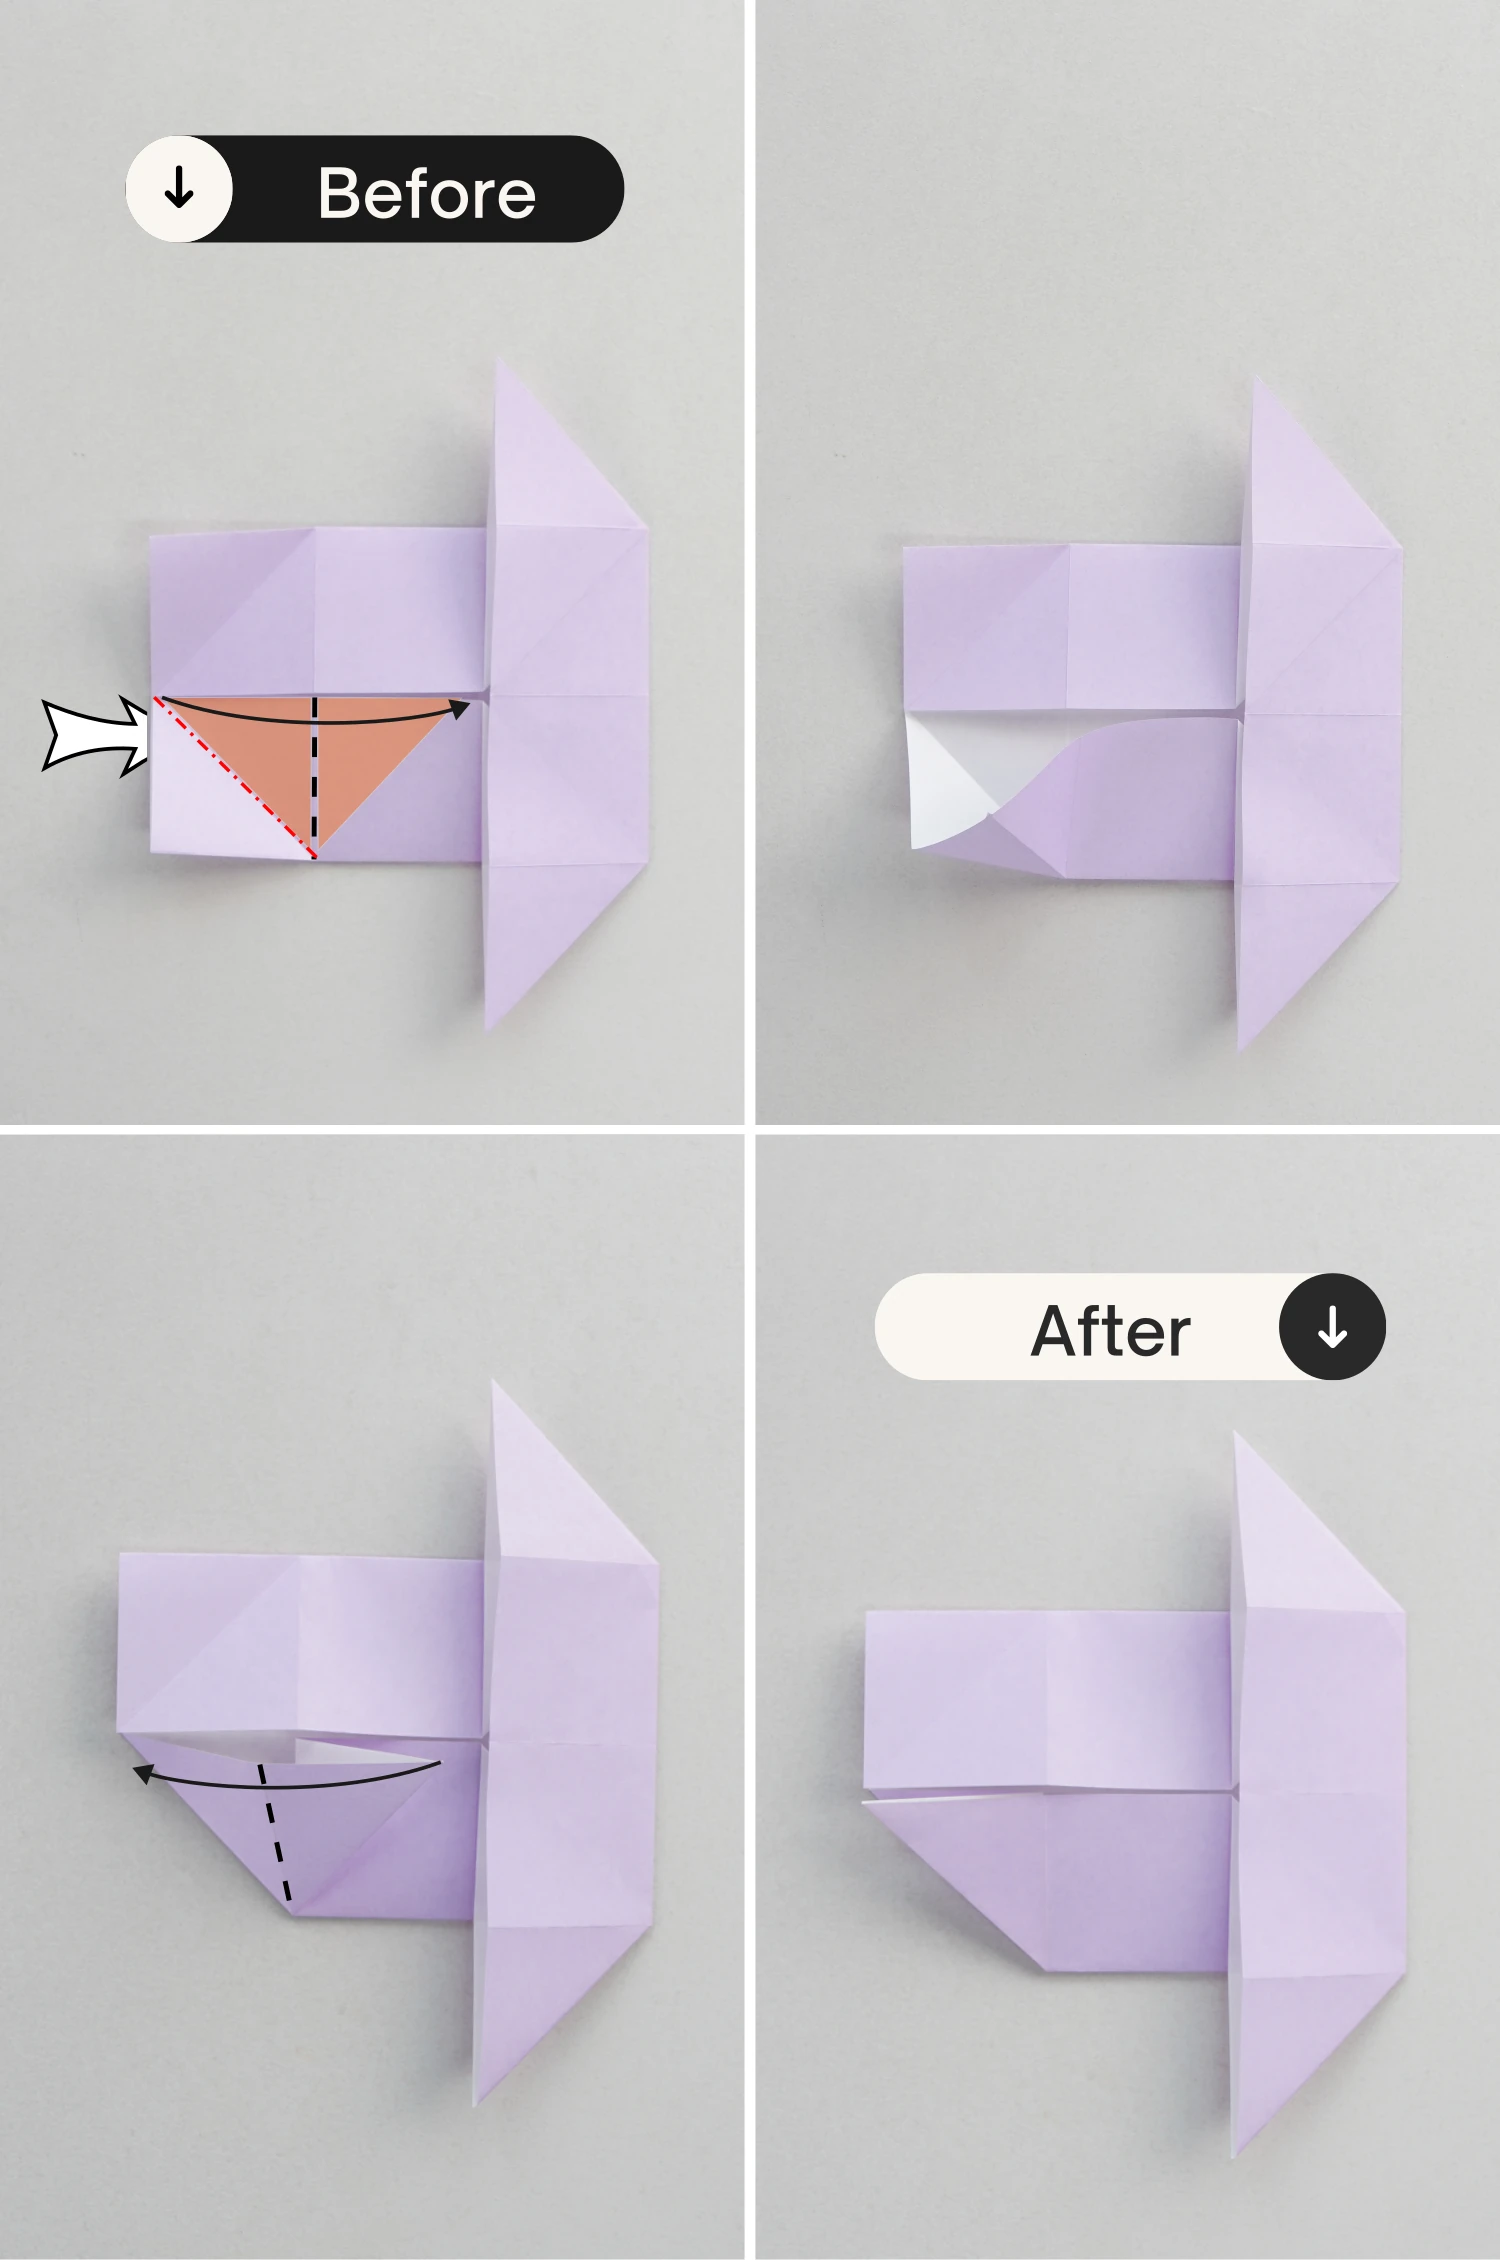
Lift the top and right edges, and make the two creases shown by the red dotted lines together to form a corner, then press it toward the left and flatten the paper.
Step 9
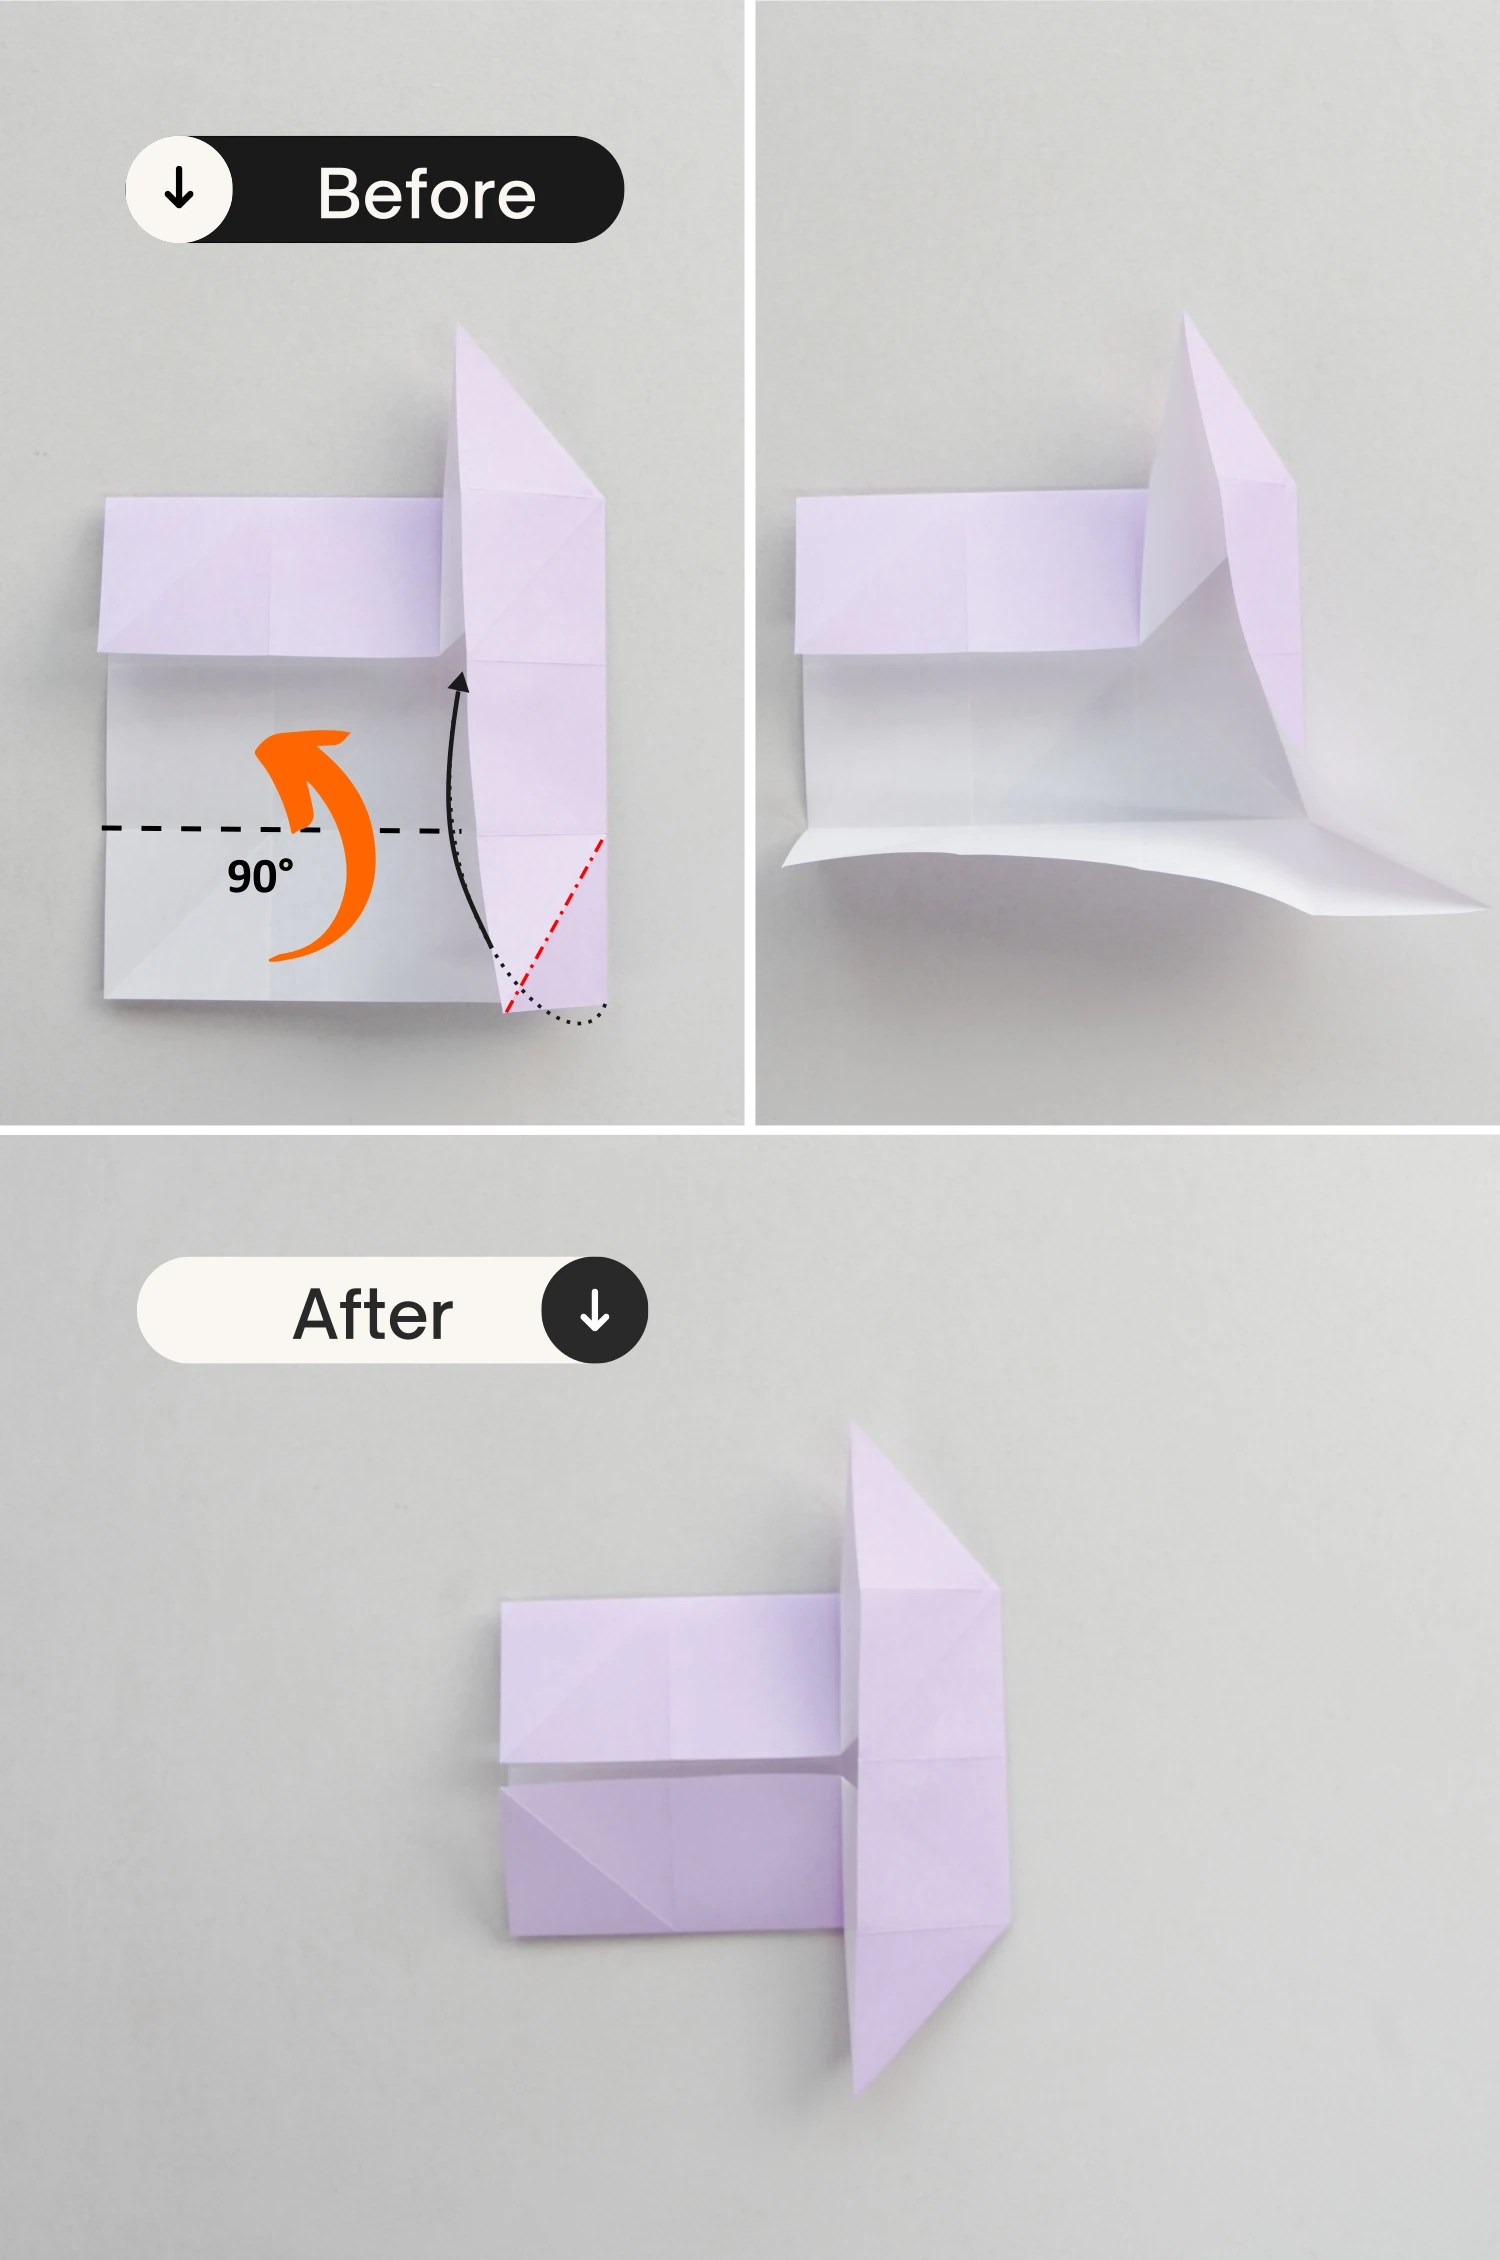
Lift the bottom edge along the existing crease, pinch up the crease shown by the red dotted line to create a corner, then flatten the lifted bottom edge, and press the corner down.
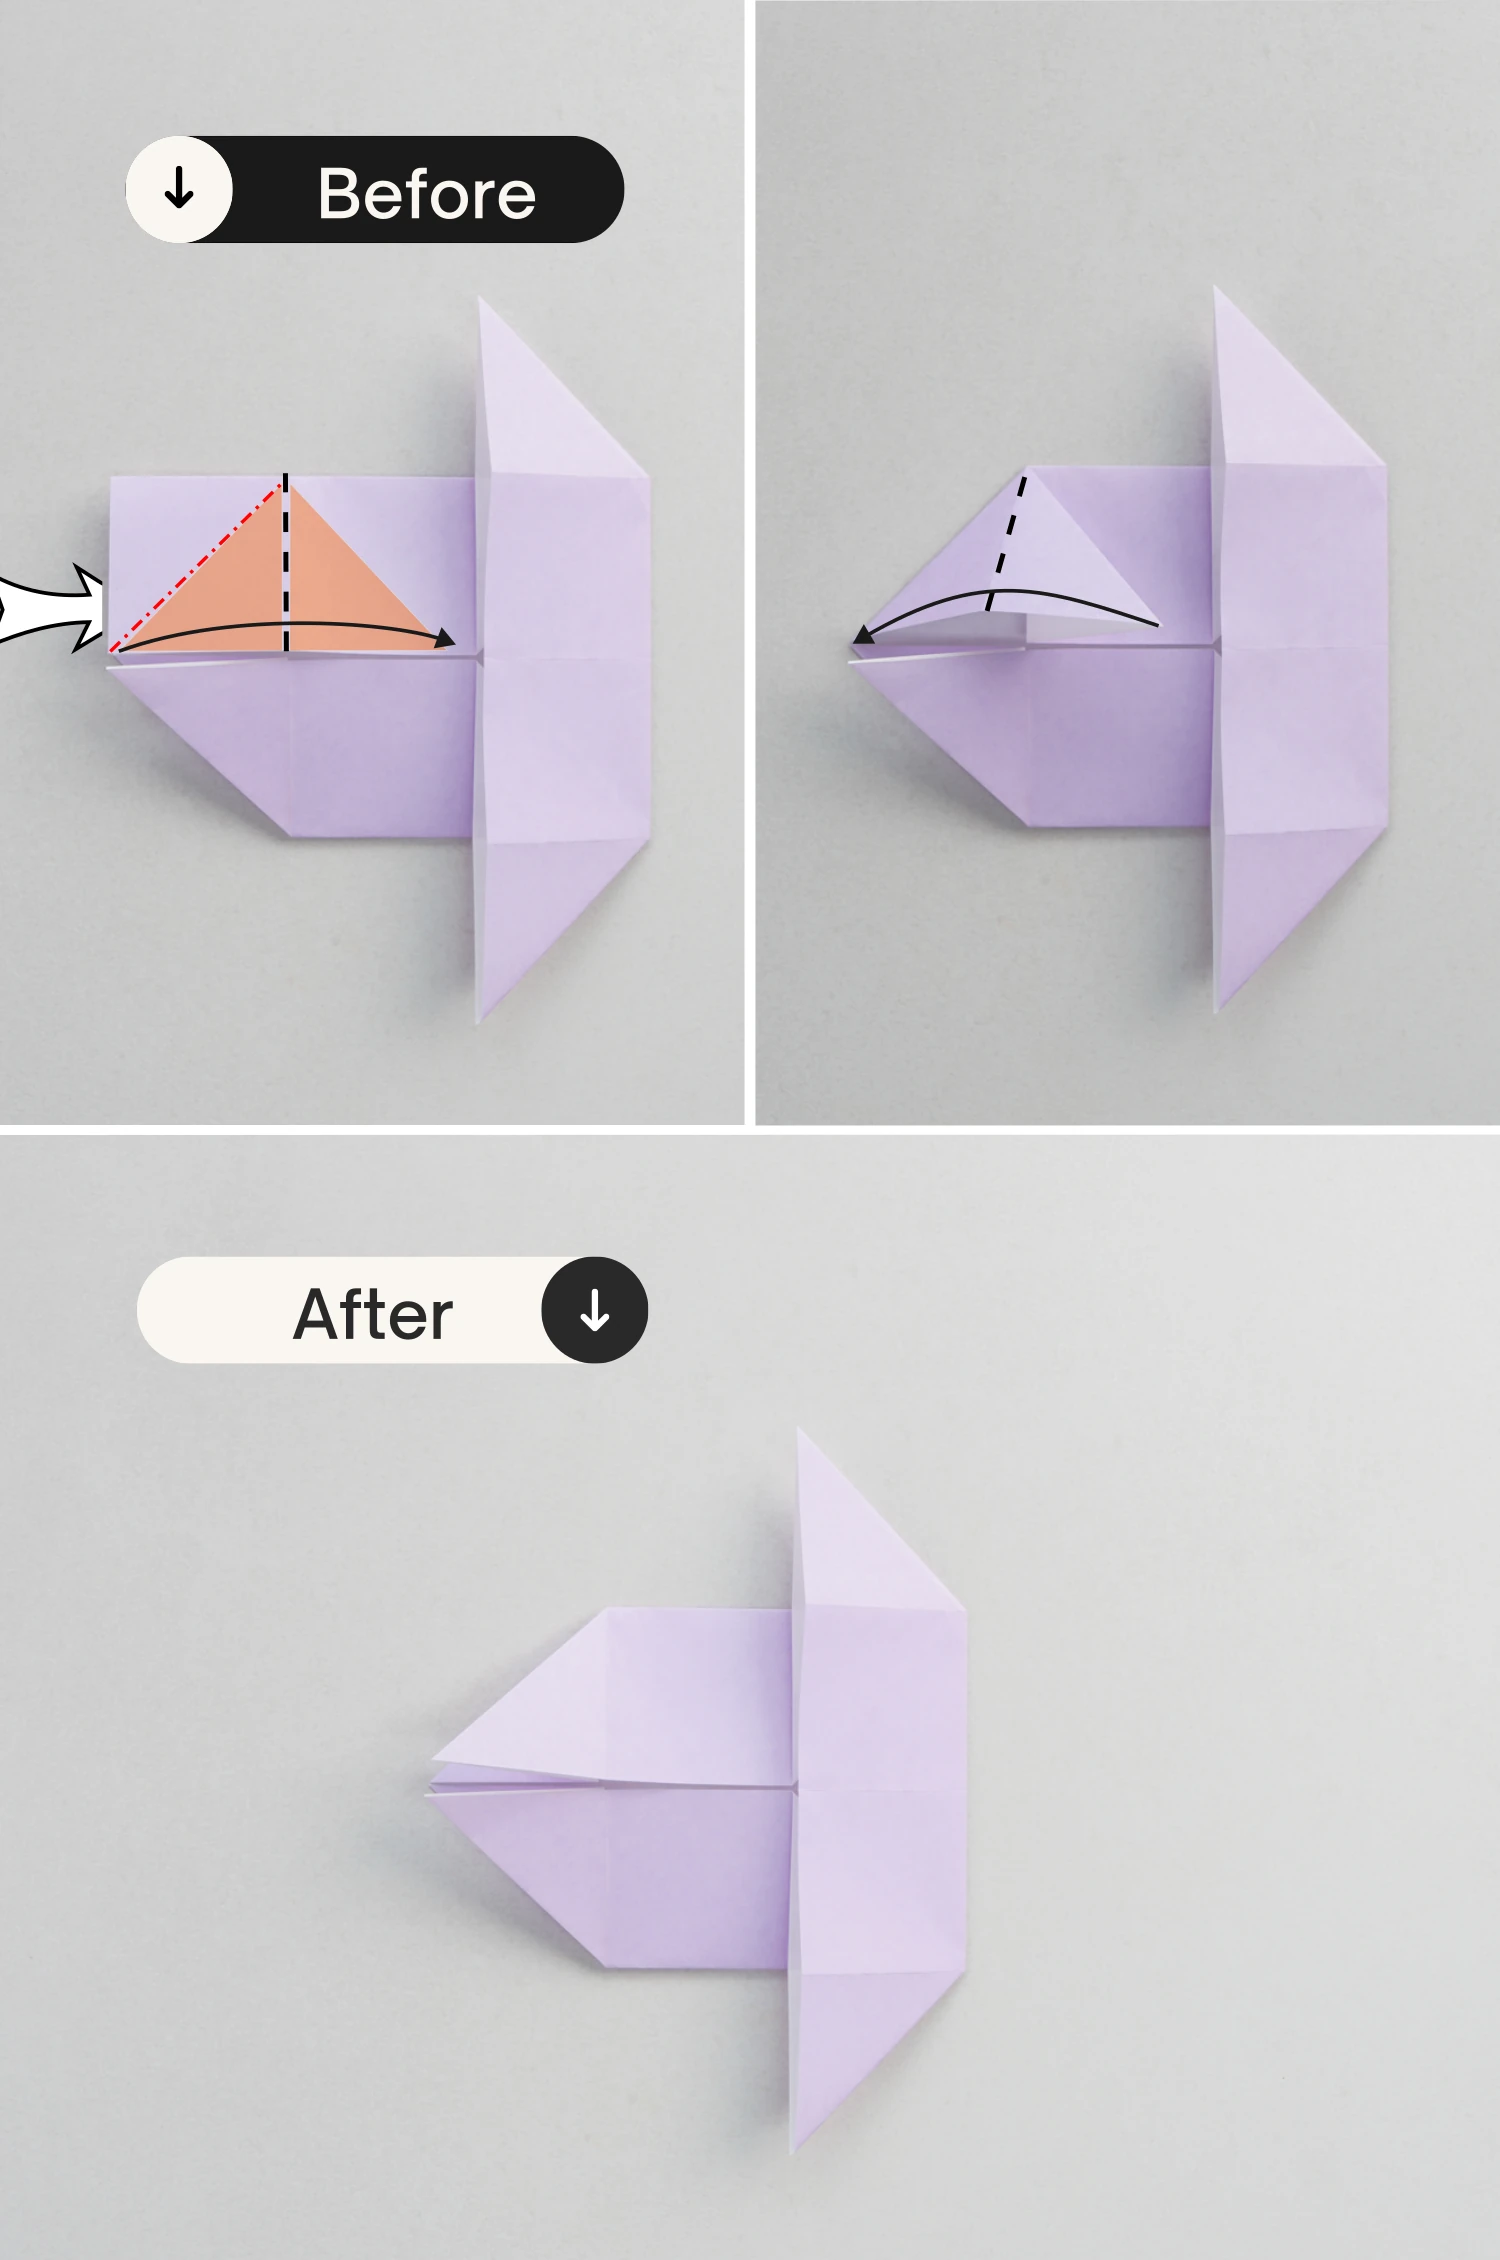
Step 10
look at the left square, fold the top left and bottom left corners to the center diagonally, crease them well then unfold.
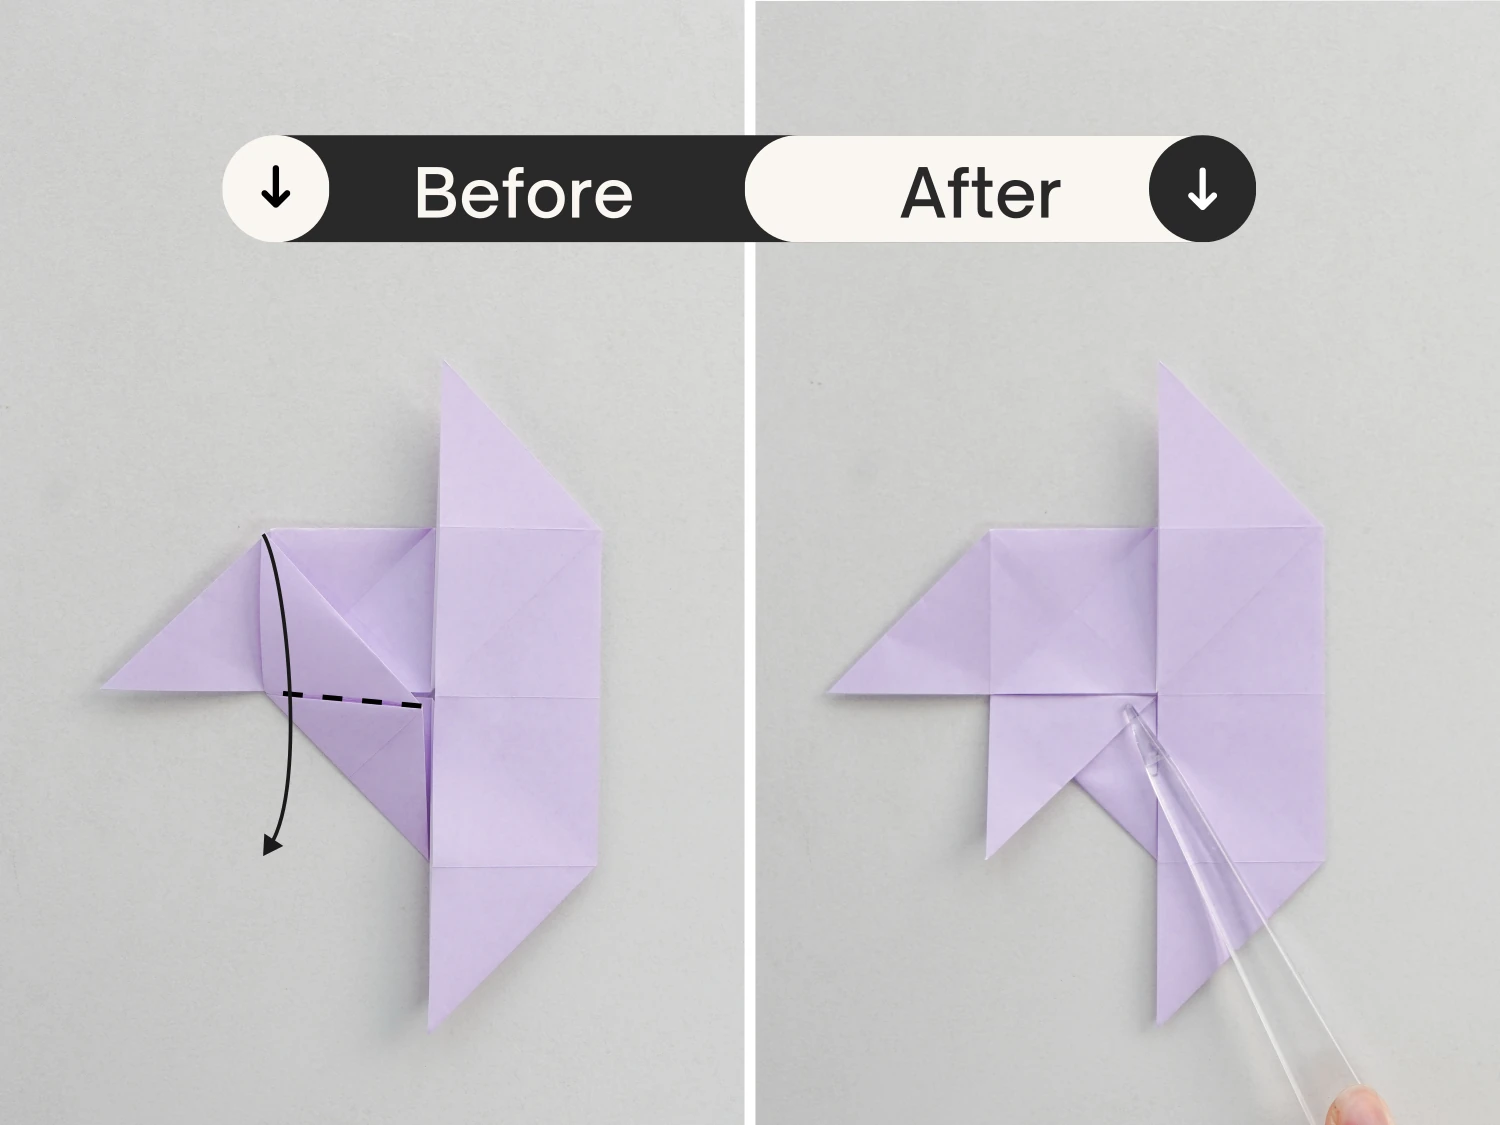
Step 11
Lift the lower top layer of the square, fold the crease shown by the red dotted line to the right, creating a small flap, then fold this flap to the left along the existing crease.
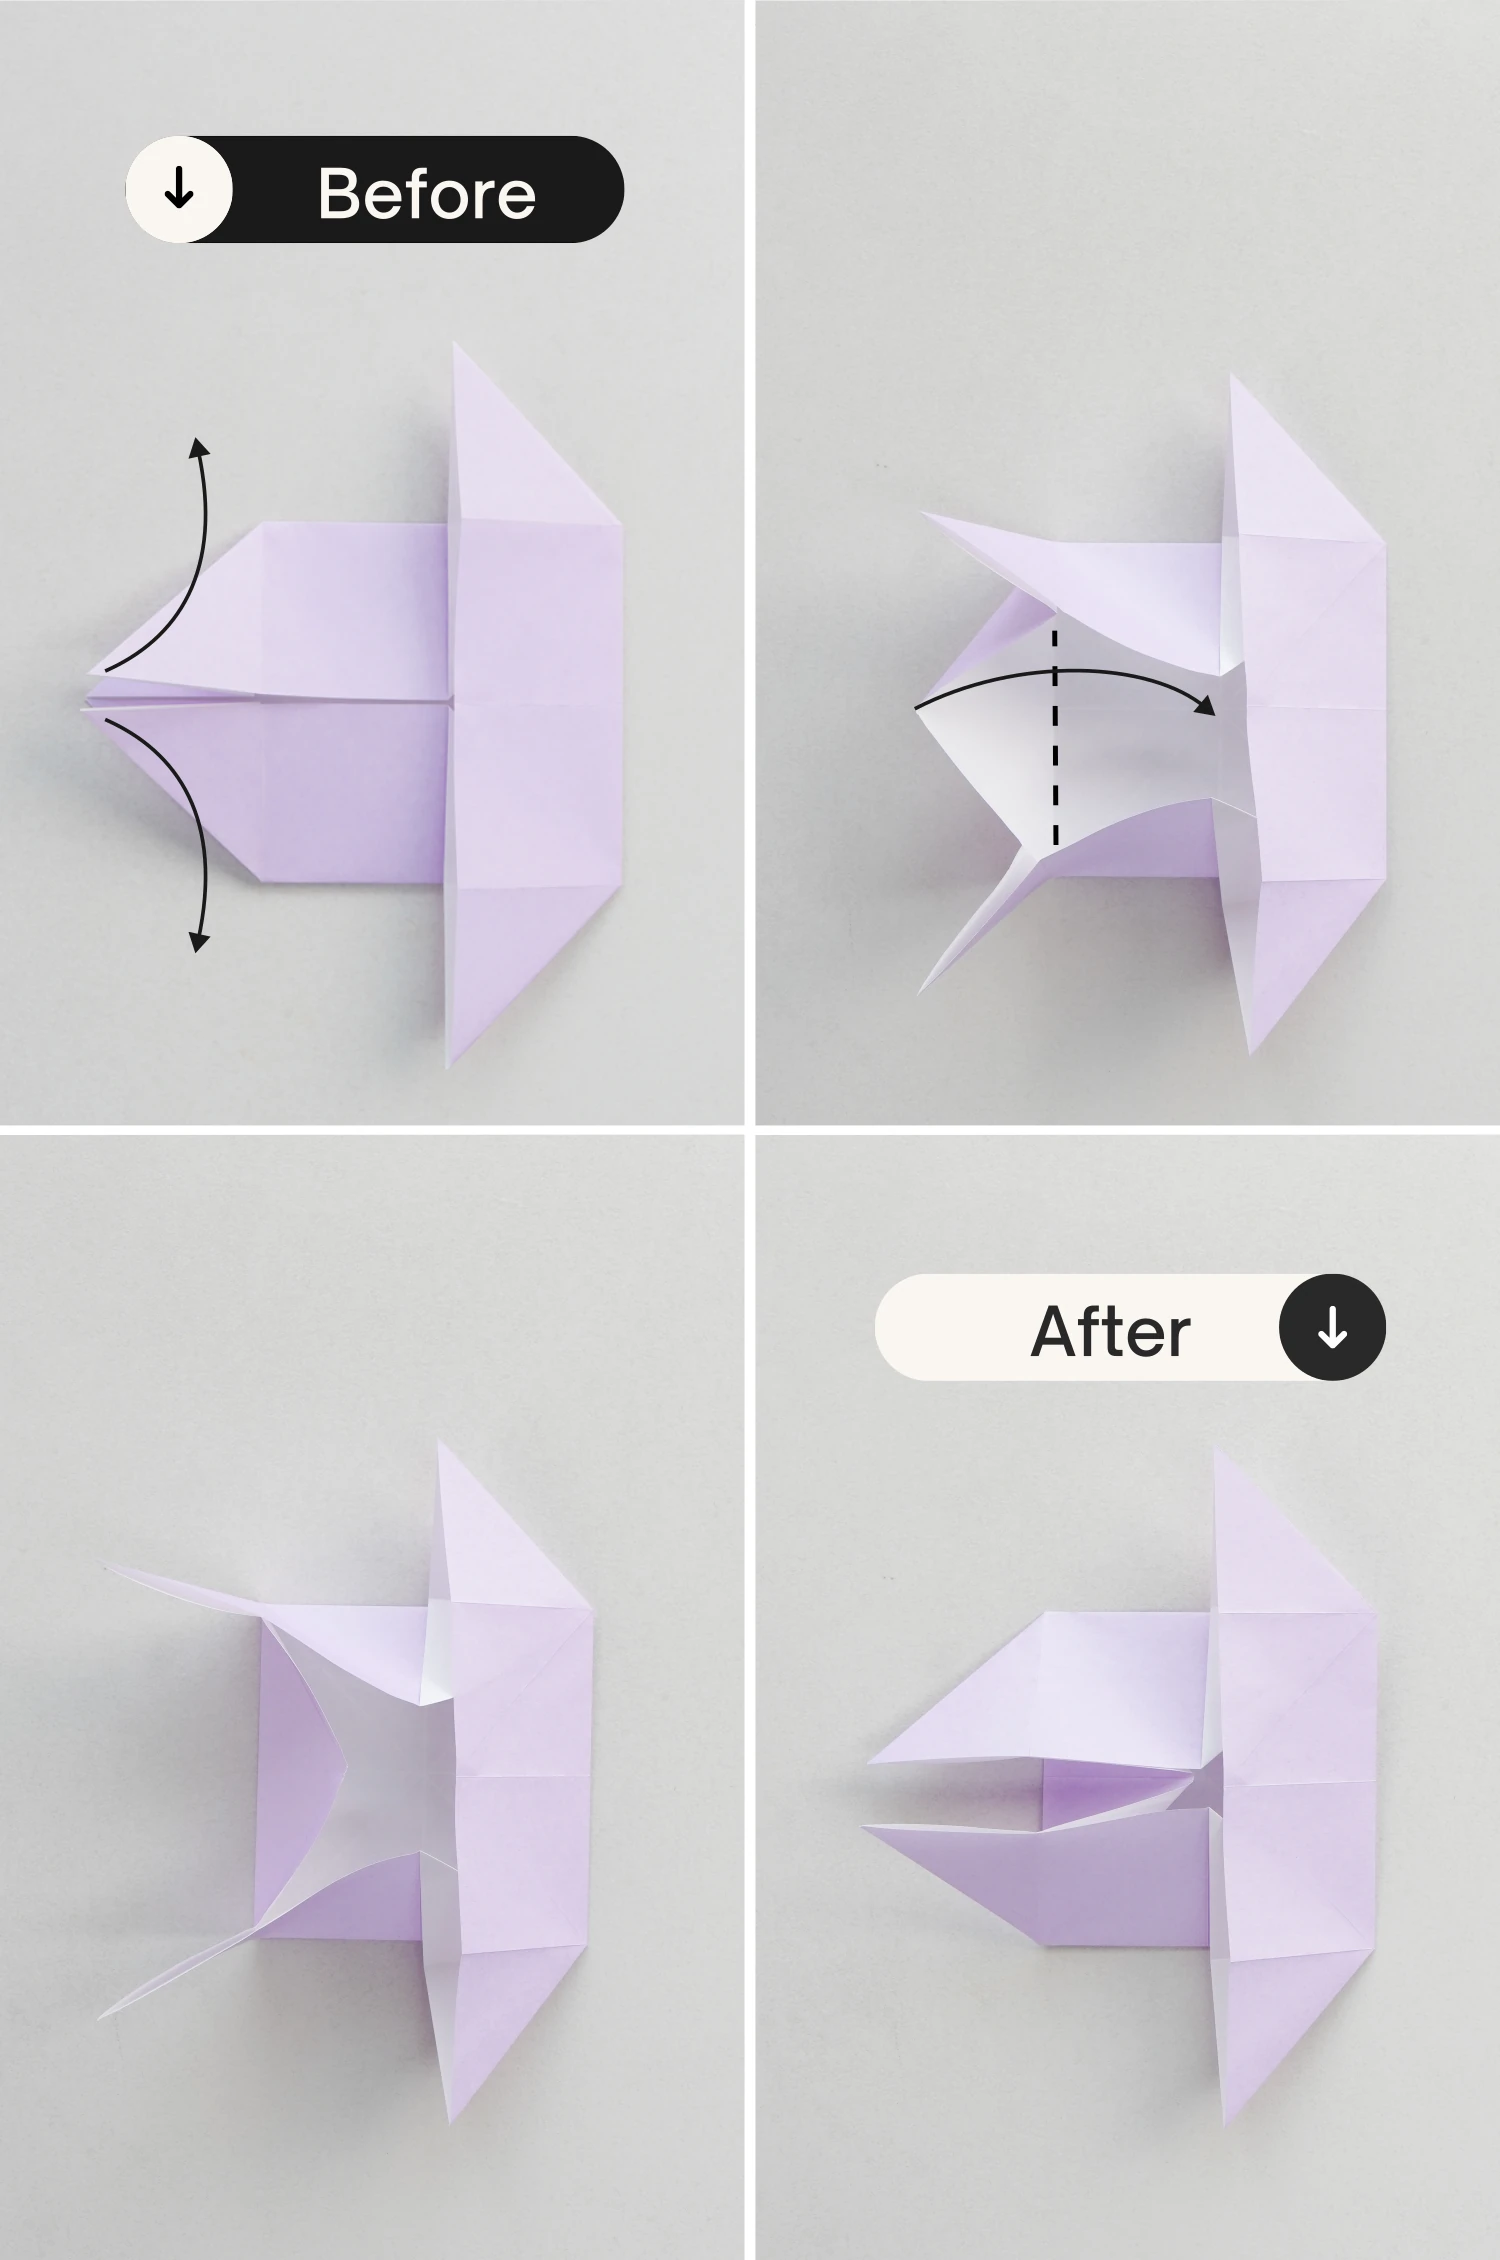
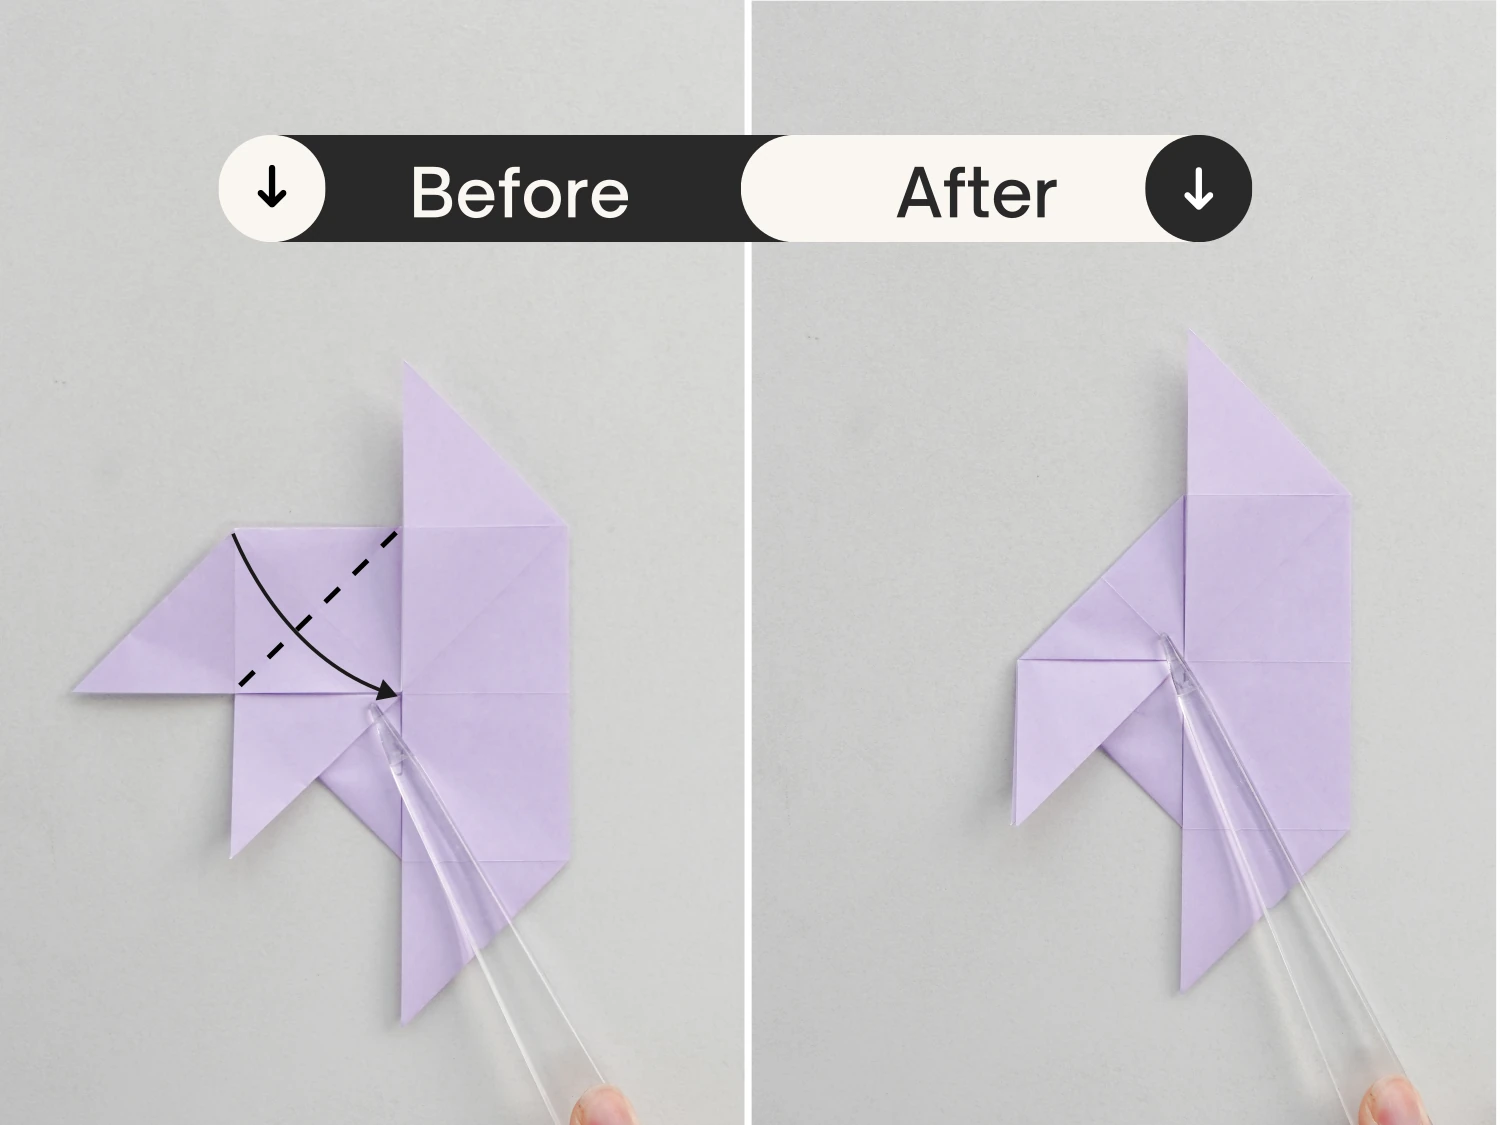
Step 12
Similarly, fold the red dotted line to the right, creating a flap, then fold this flap to the left along the existing crease.
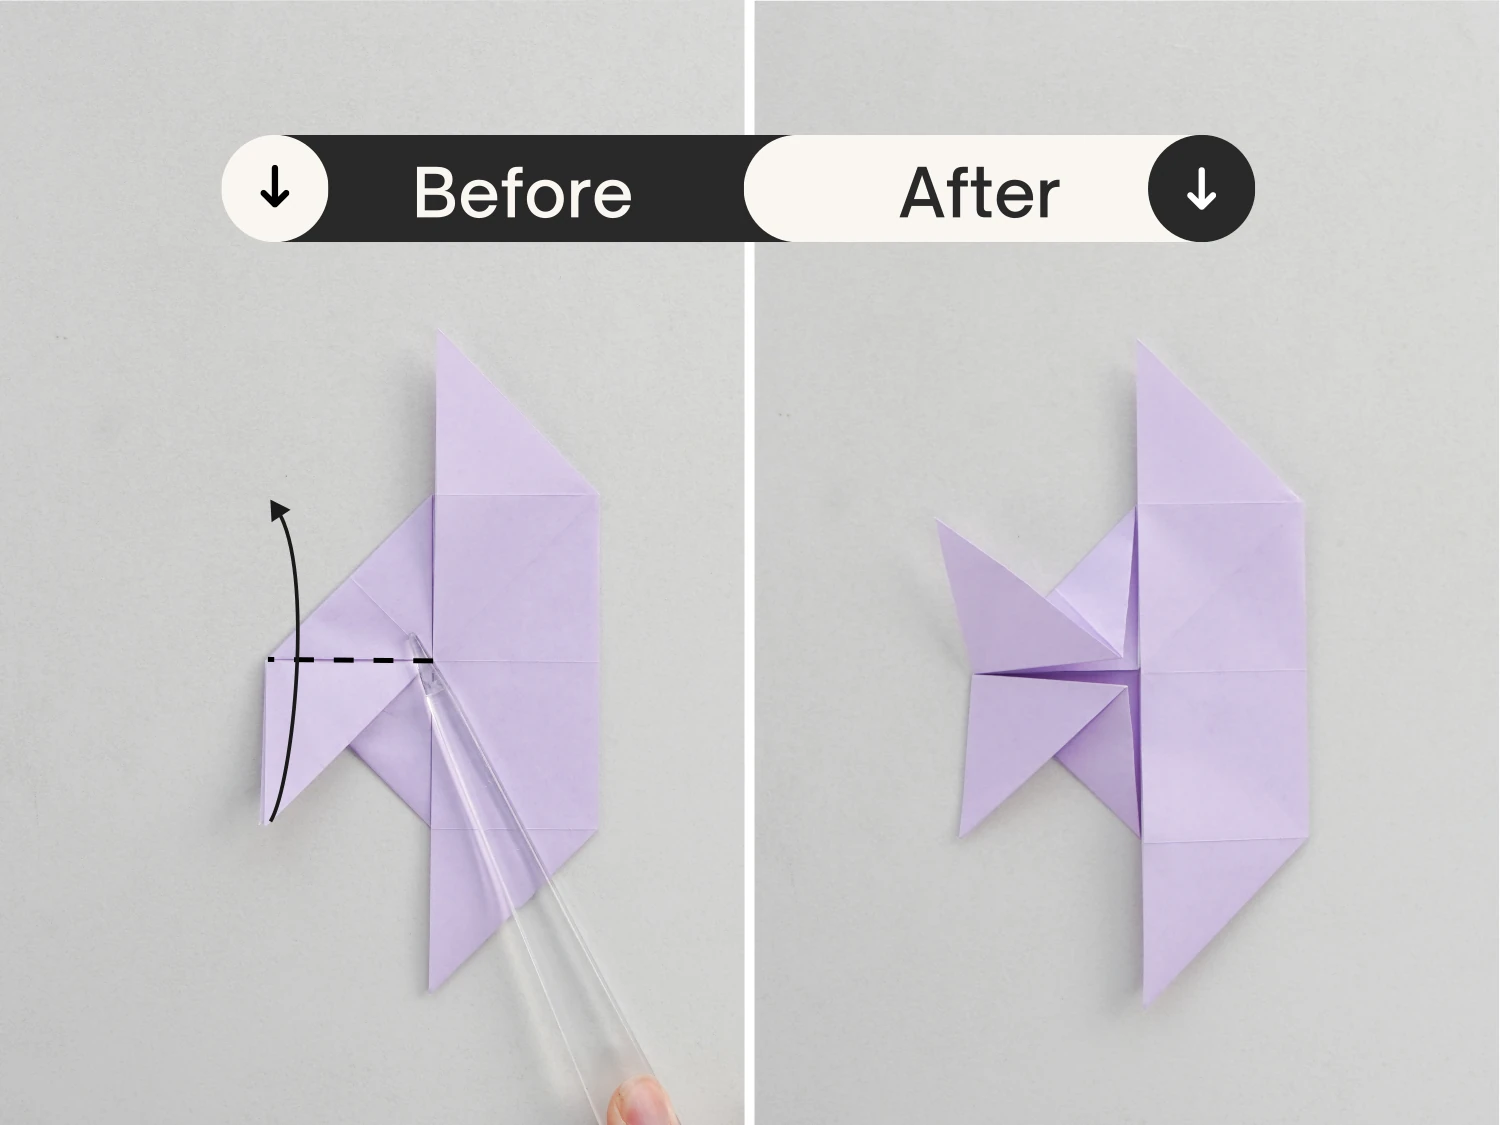
Step 13
Lift the left two corners and pull them to open the paper, then push the left center corner to the right. Finally, flatten it along the existing creases.
Step 14
Take the bottom left corner, and fold it to the top right diagonally along the dotted line.

Step 15
Take the triangle resulting from he previous step, and fold it down along the dotted line.
Step 16
In the same manner, fold the top left corner to the bottom right diagonally along the dotted line.
Step 17
Then fold the flap resulting from the previous step to the top along the dotted line.
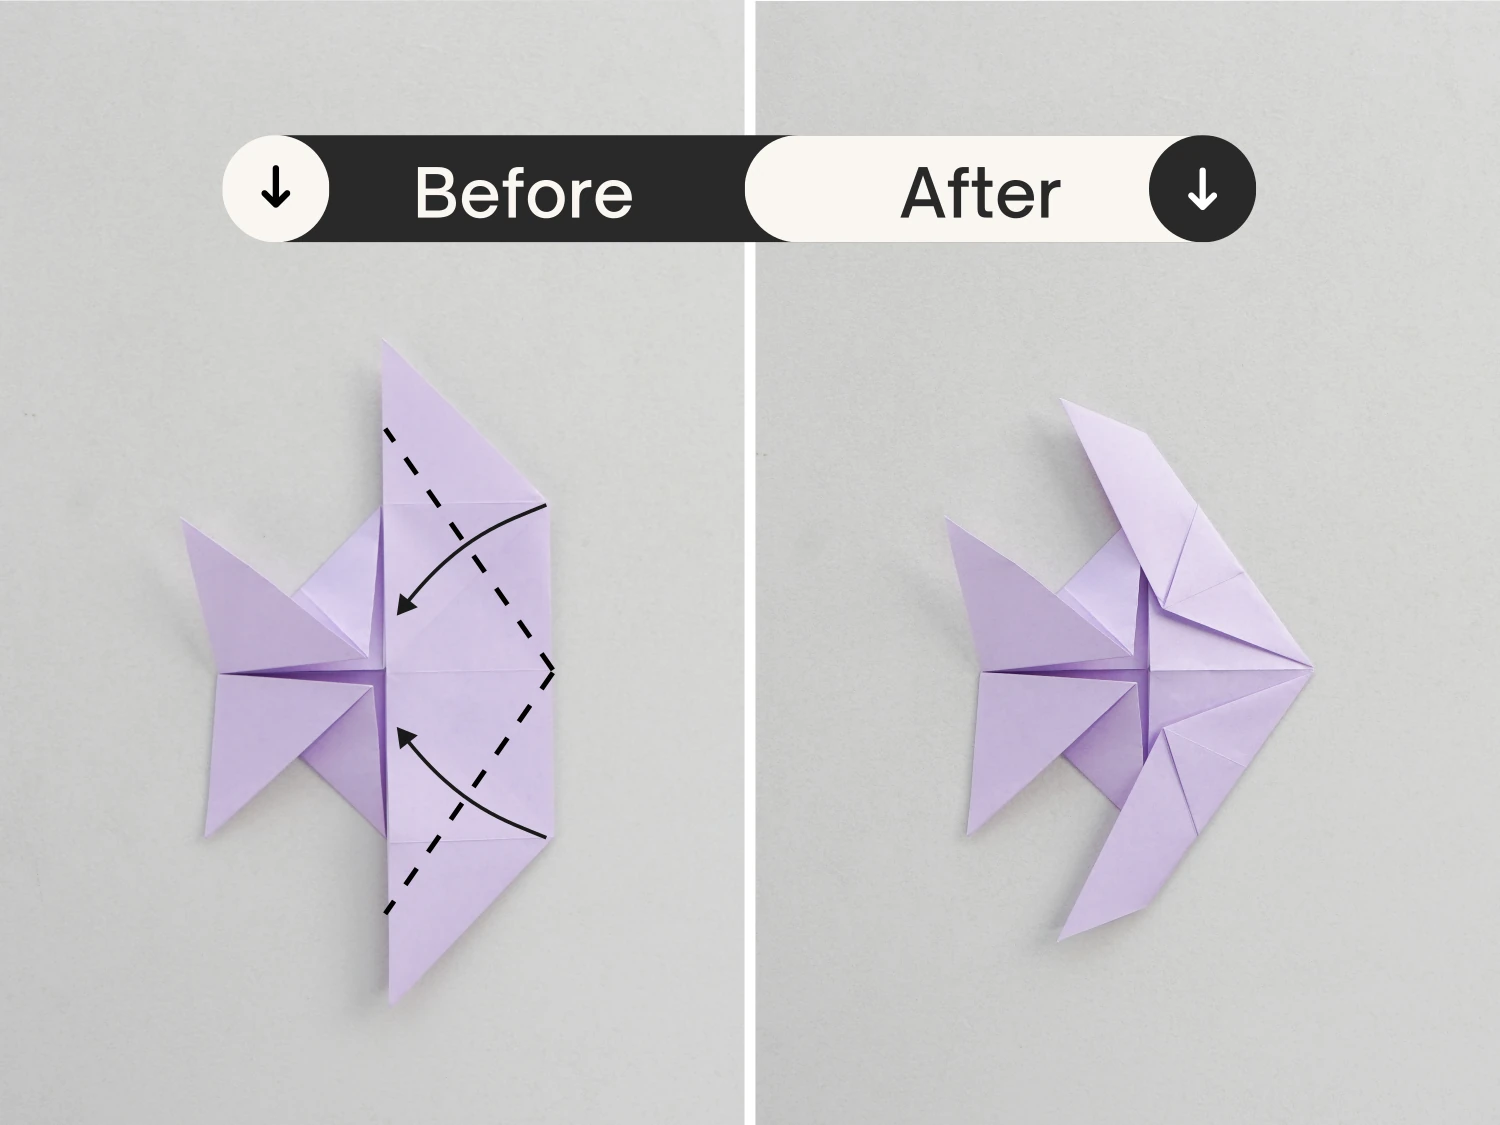
Step 18
Fold the top and bottom points of the right edge toward the center along the dotted lines to form the fish’s mouth.
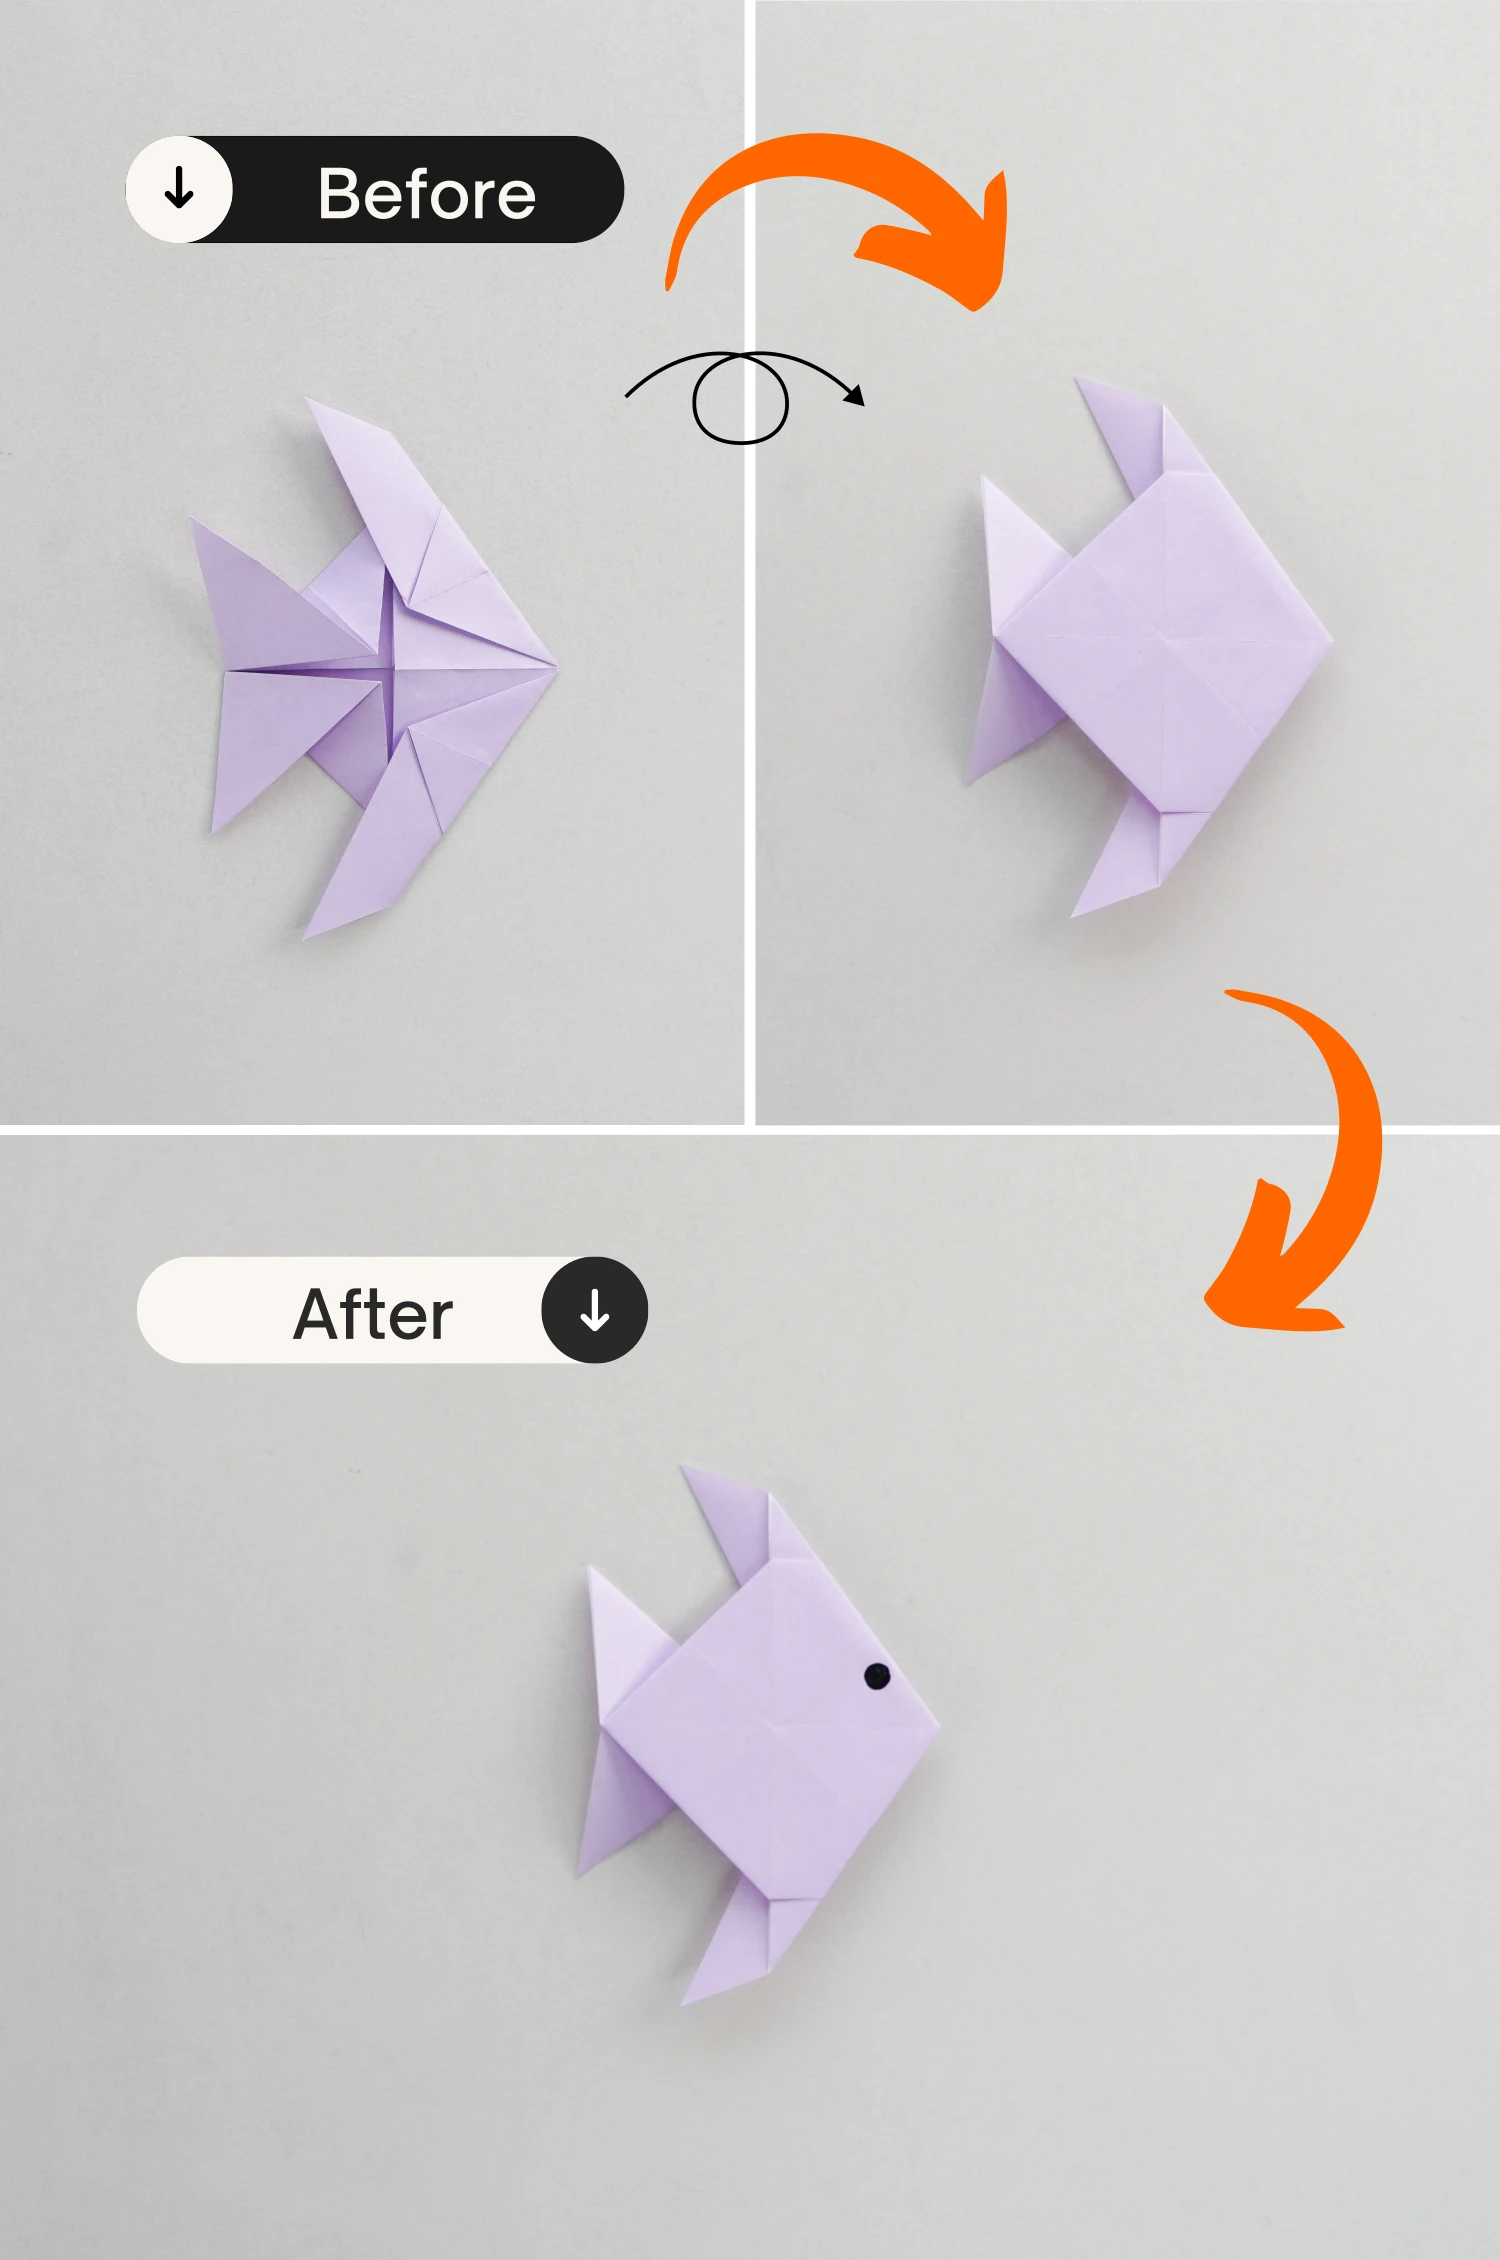
Step 19
Flip it over, this is the final shape of an origami sunfish, you can draw an eye for it to make it cuter.
What’s Next
We also offer many other origami fish instructions, which you can check and explore freely. Enjoy folding!


