How to Make an Origami Snake
Step by Step Instructions
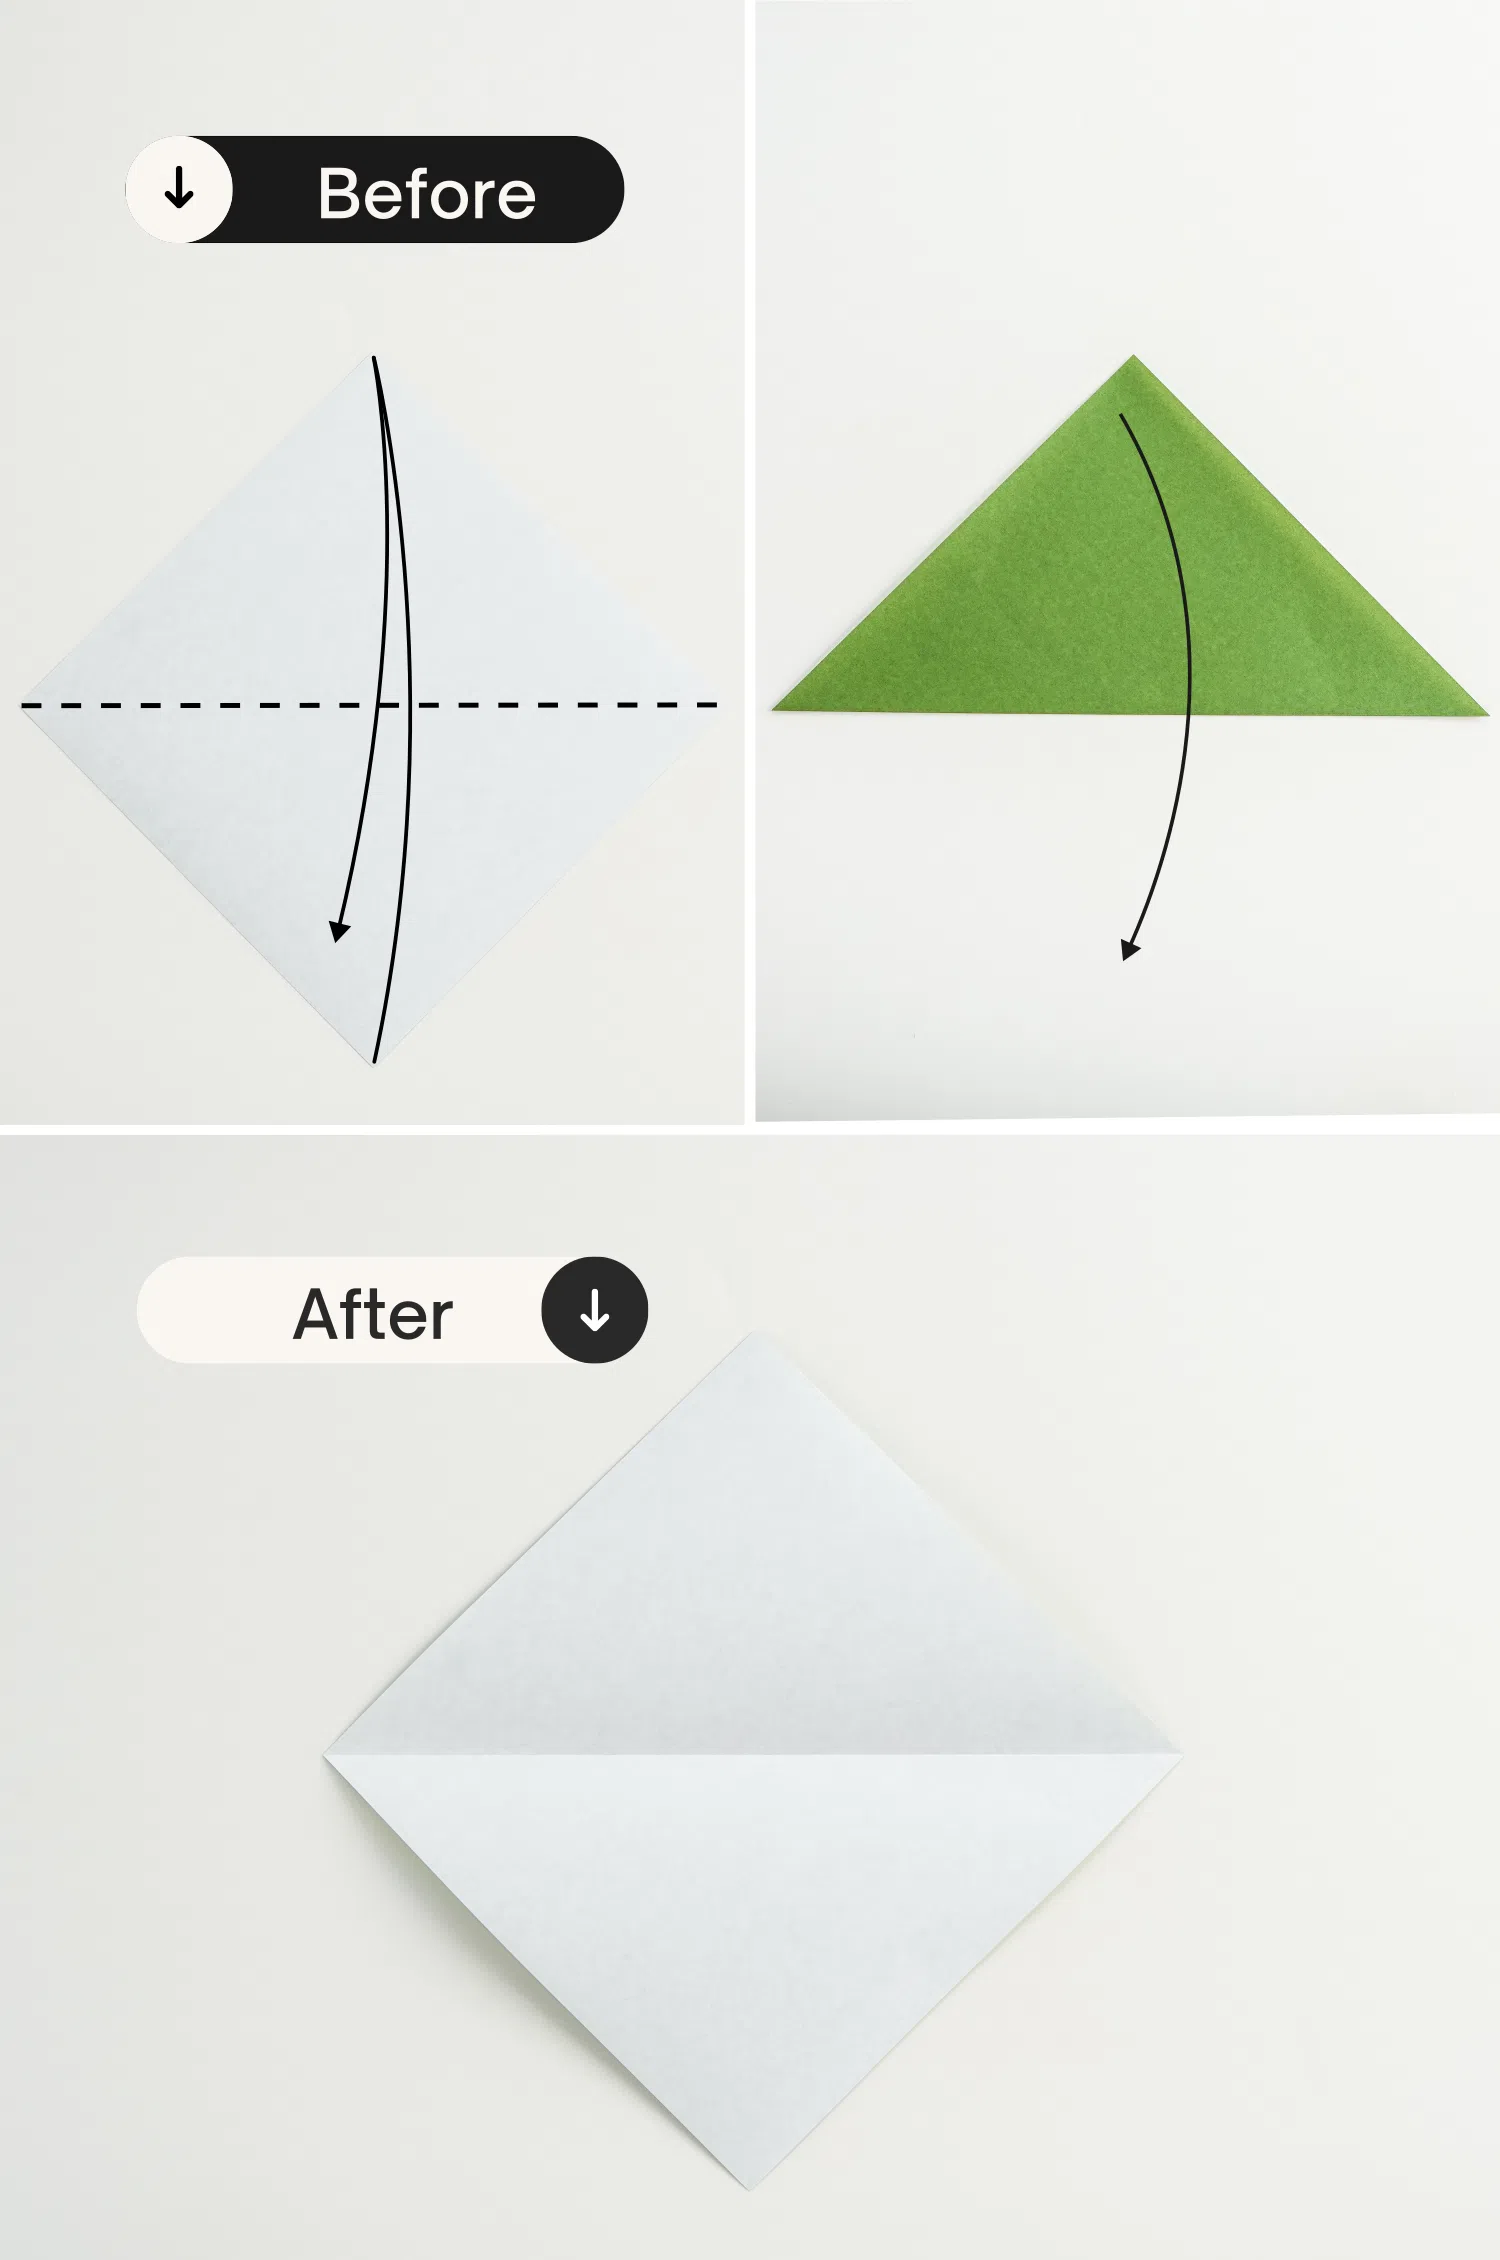
Step 1
Start with the white side of the paper facing up and fold it in half diagonally, crease it well then unfold it, getting a horizontal crease.
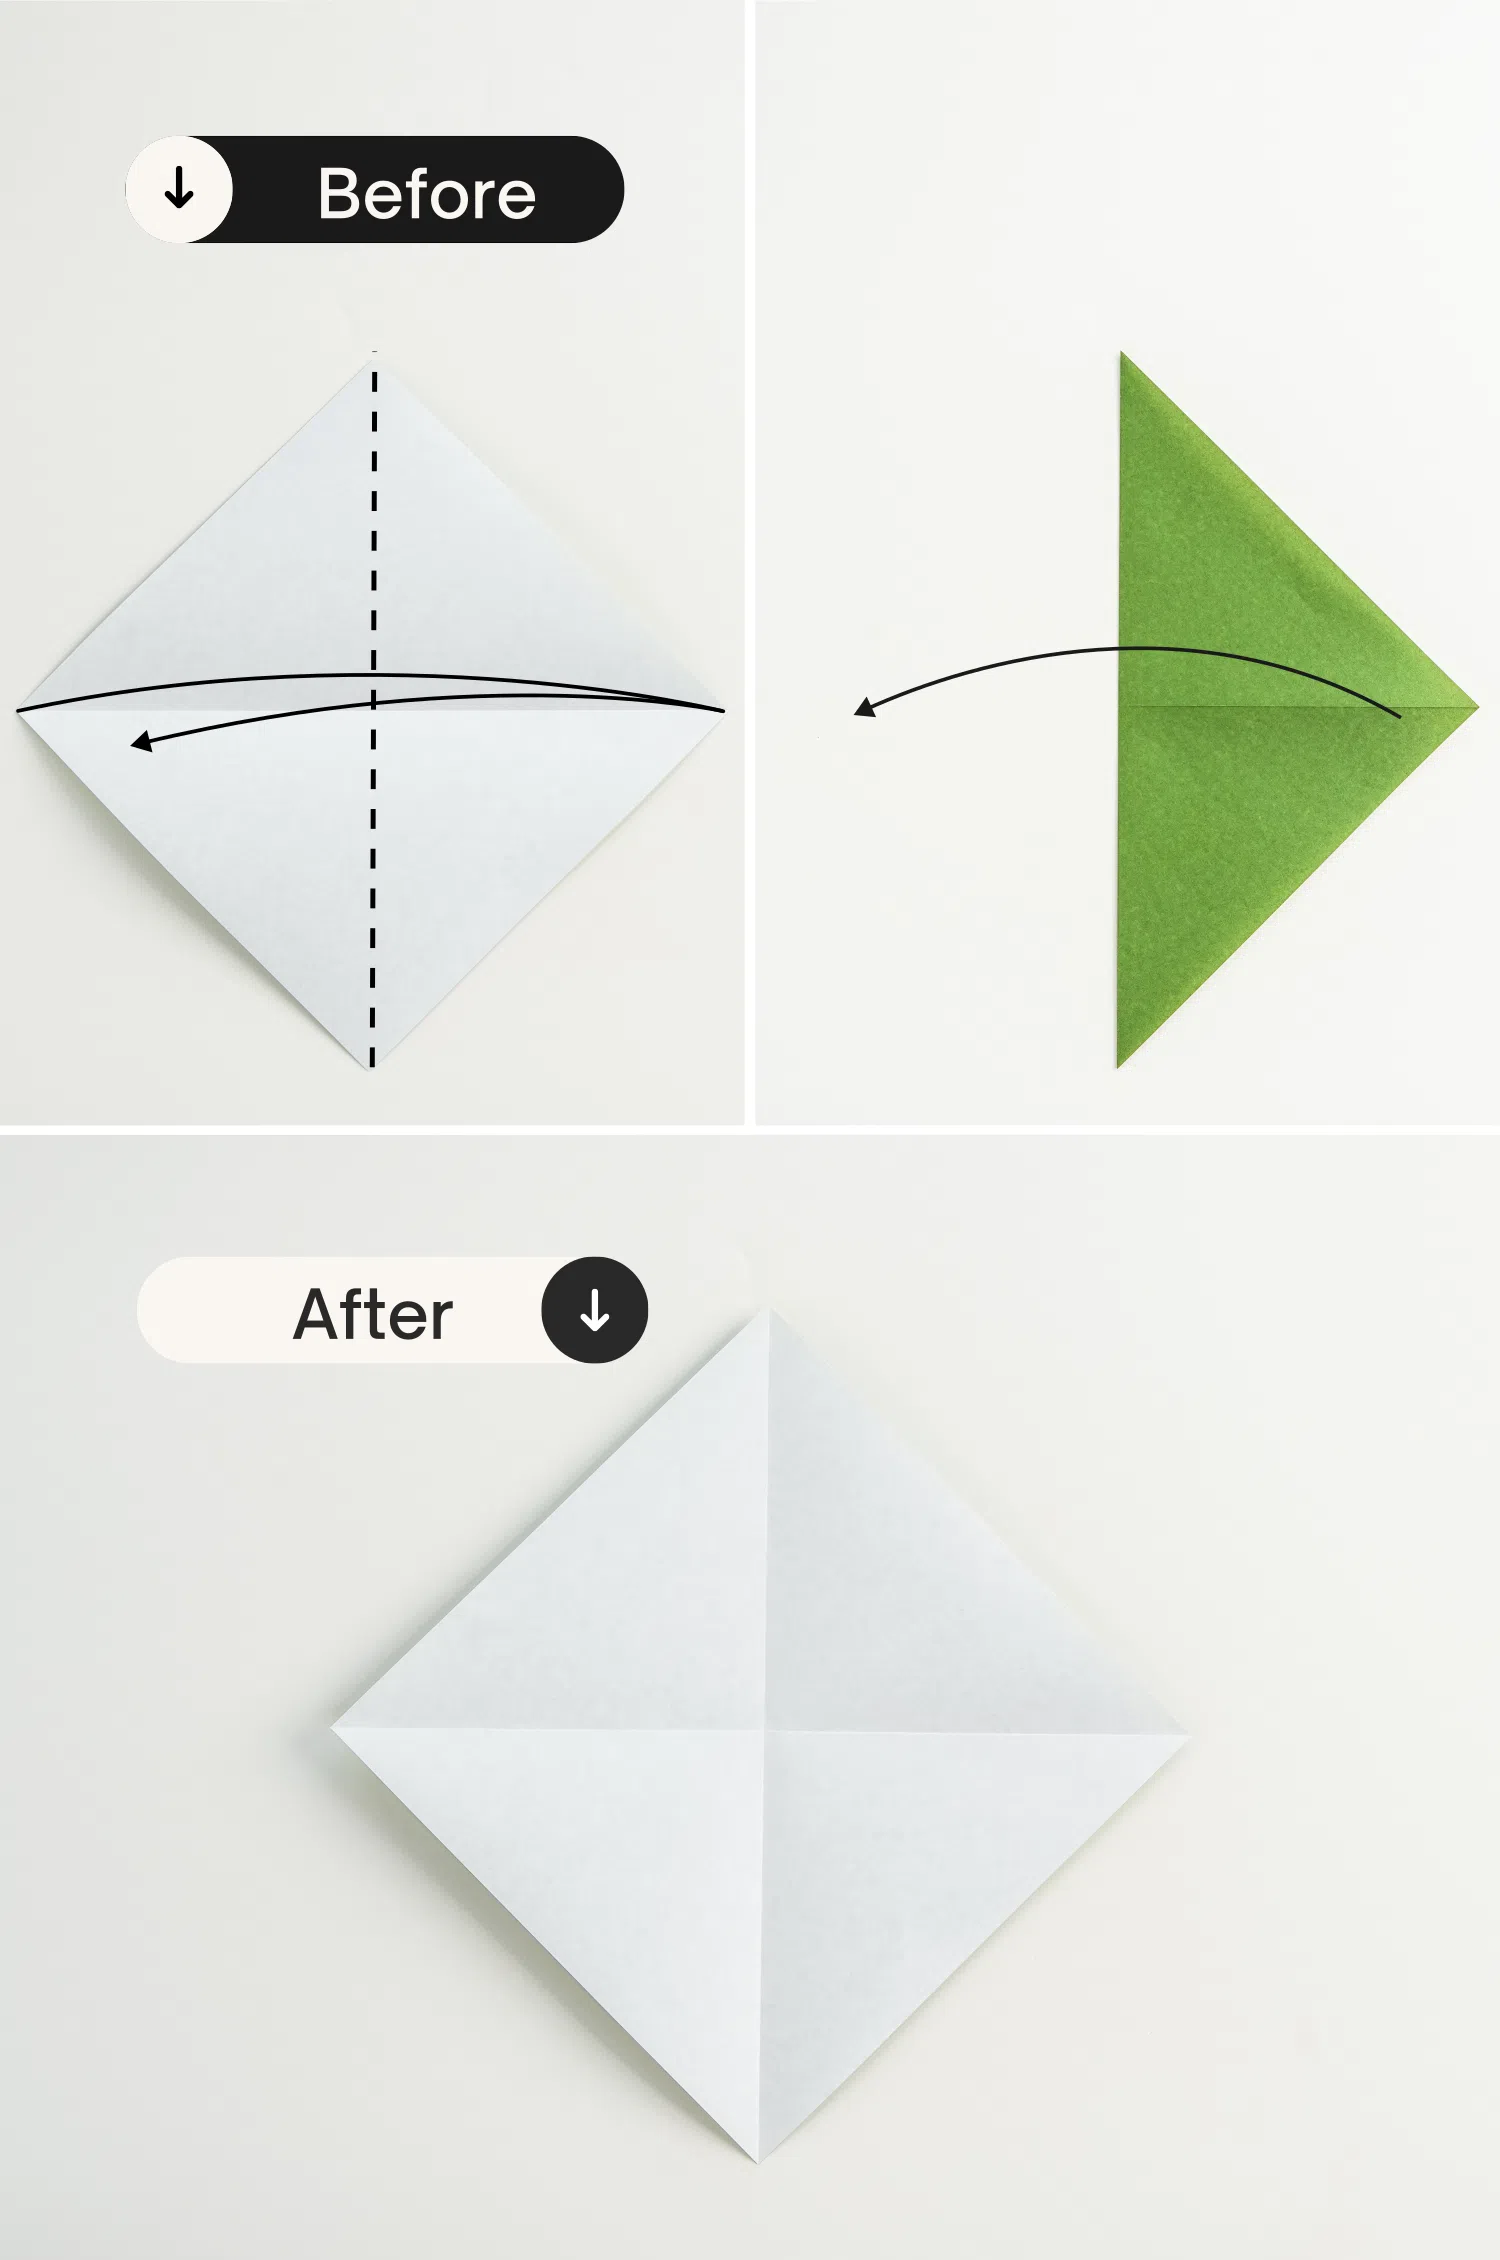
Step 2
Fold the paper in half horizontally and unfold it, getting a new crease that is perpendicular to the previous one.
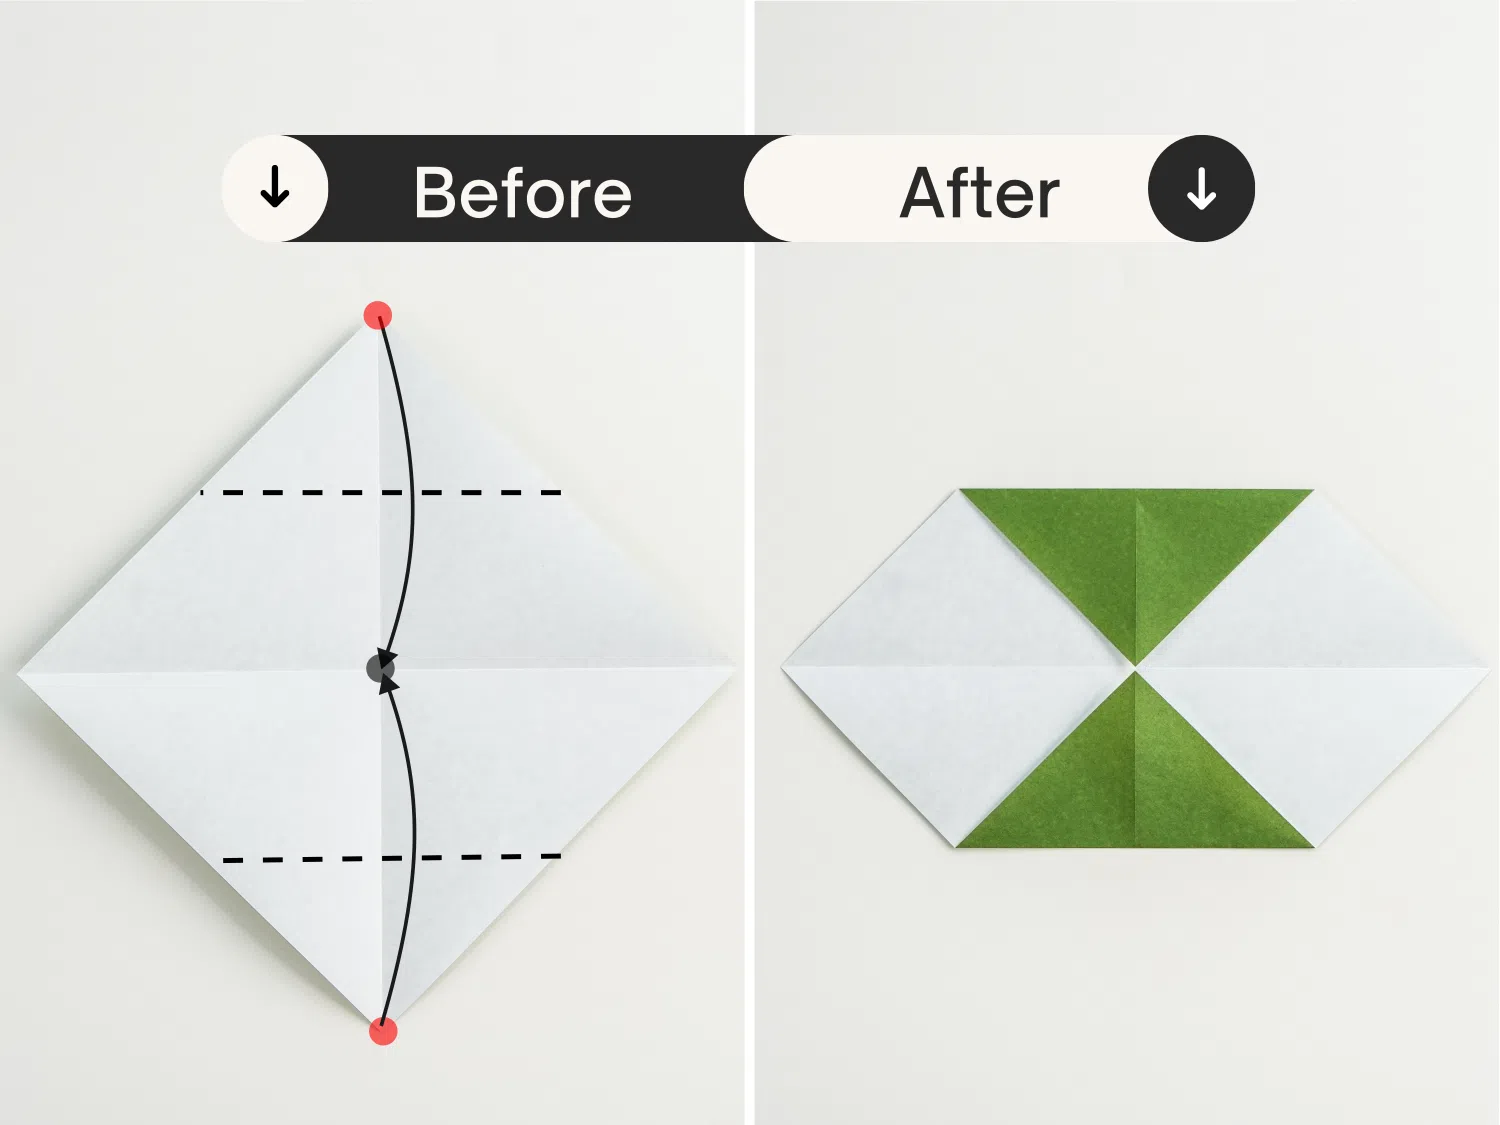
Step 3
Fold the top and bottom corners to meet the center point.
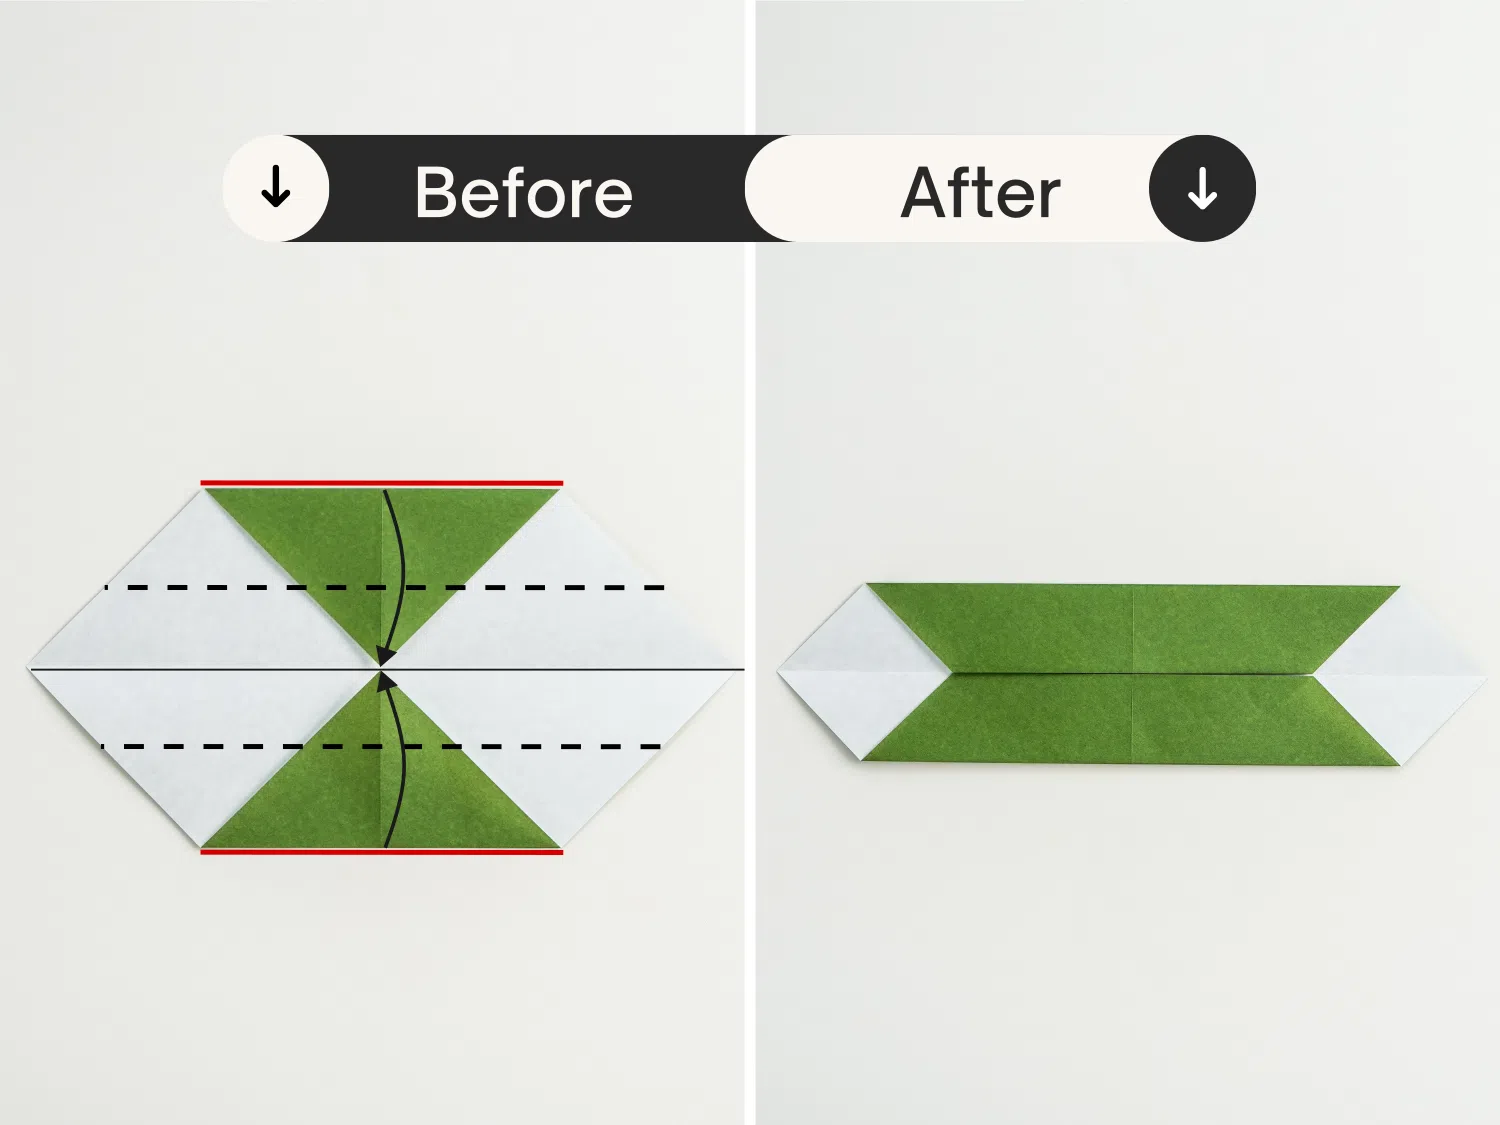
Step 4
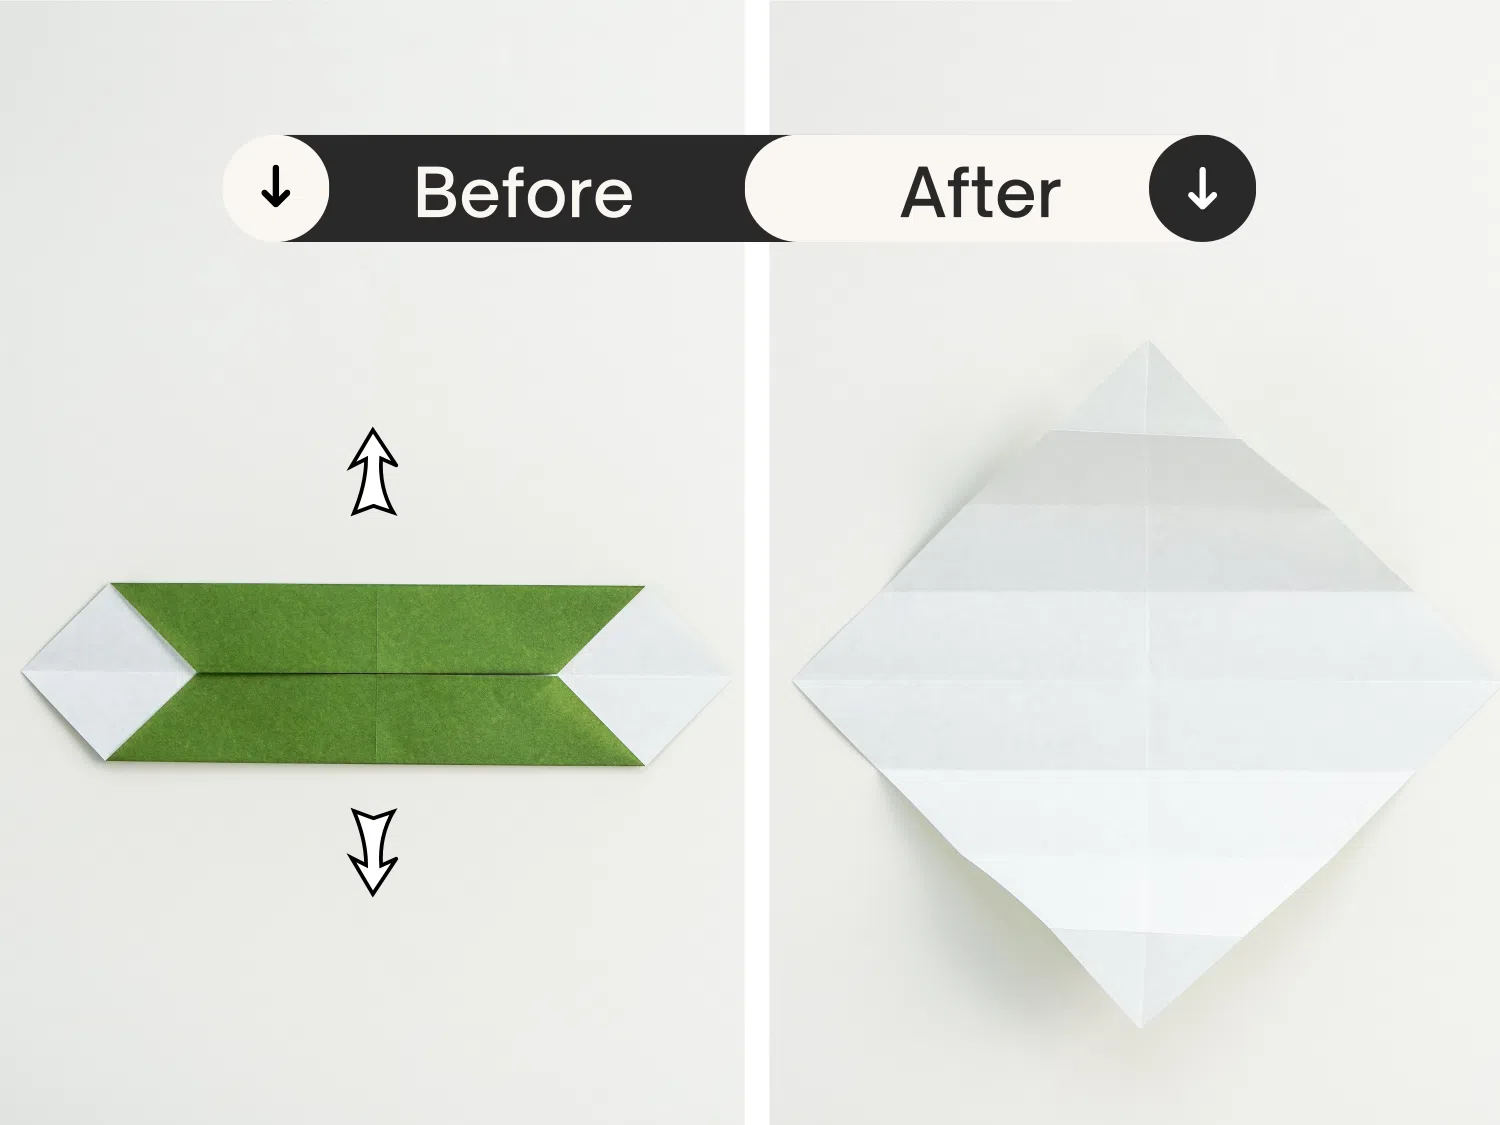
Fold the top and bottom edges to meet the center crease.
Step 5
Unfold the paper completely.
Step 6
Fold the left and right corners to the center.
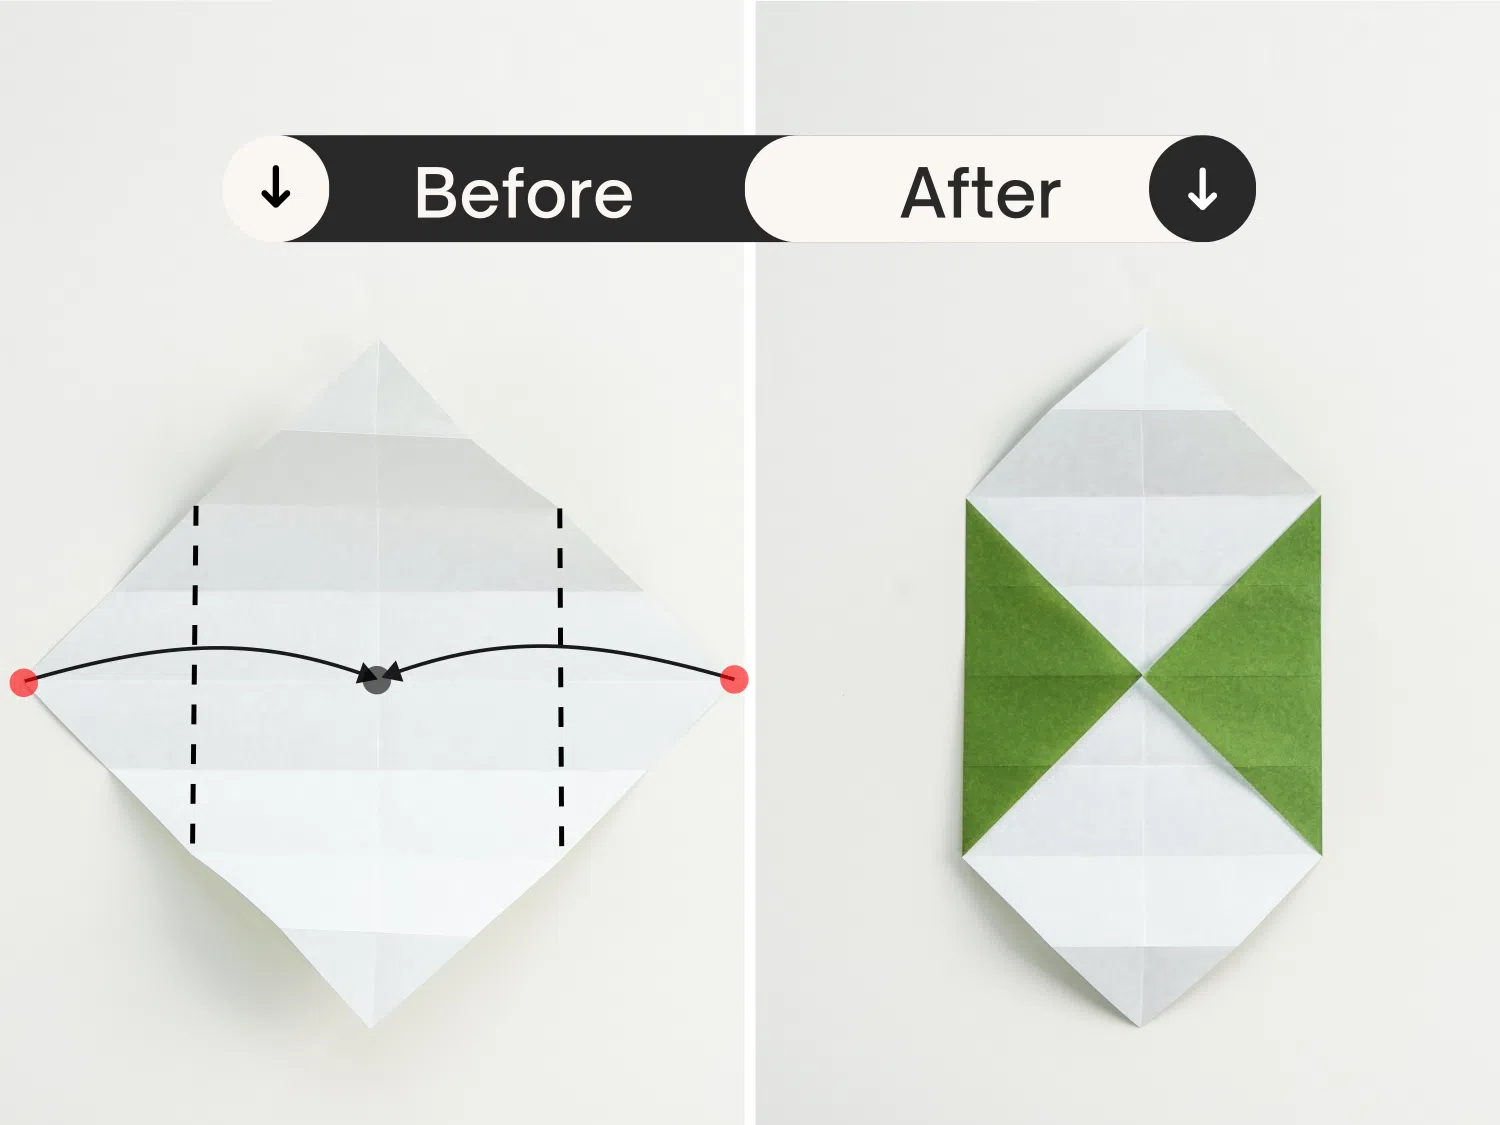
Step 7
In the same way, fold the left and right edges to meet the center crease.
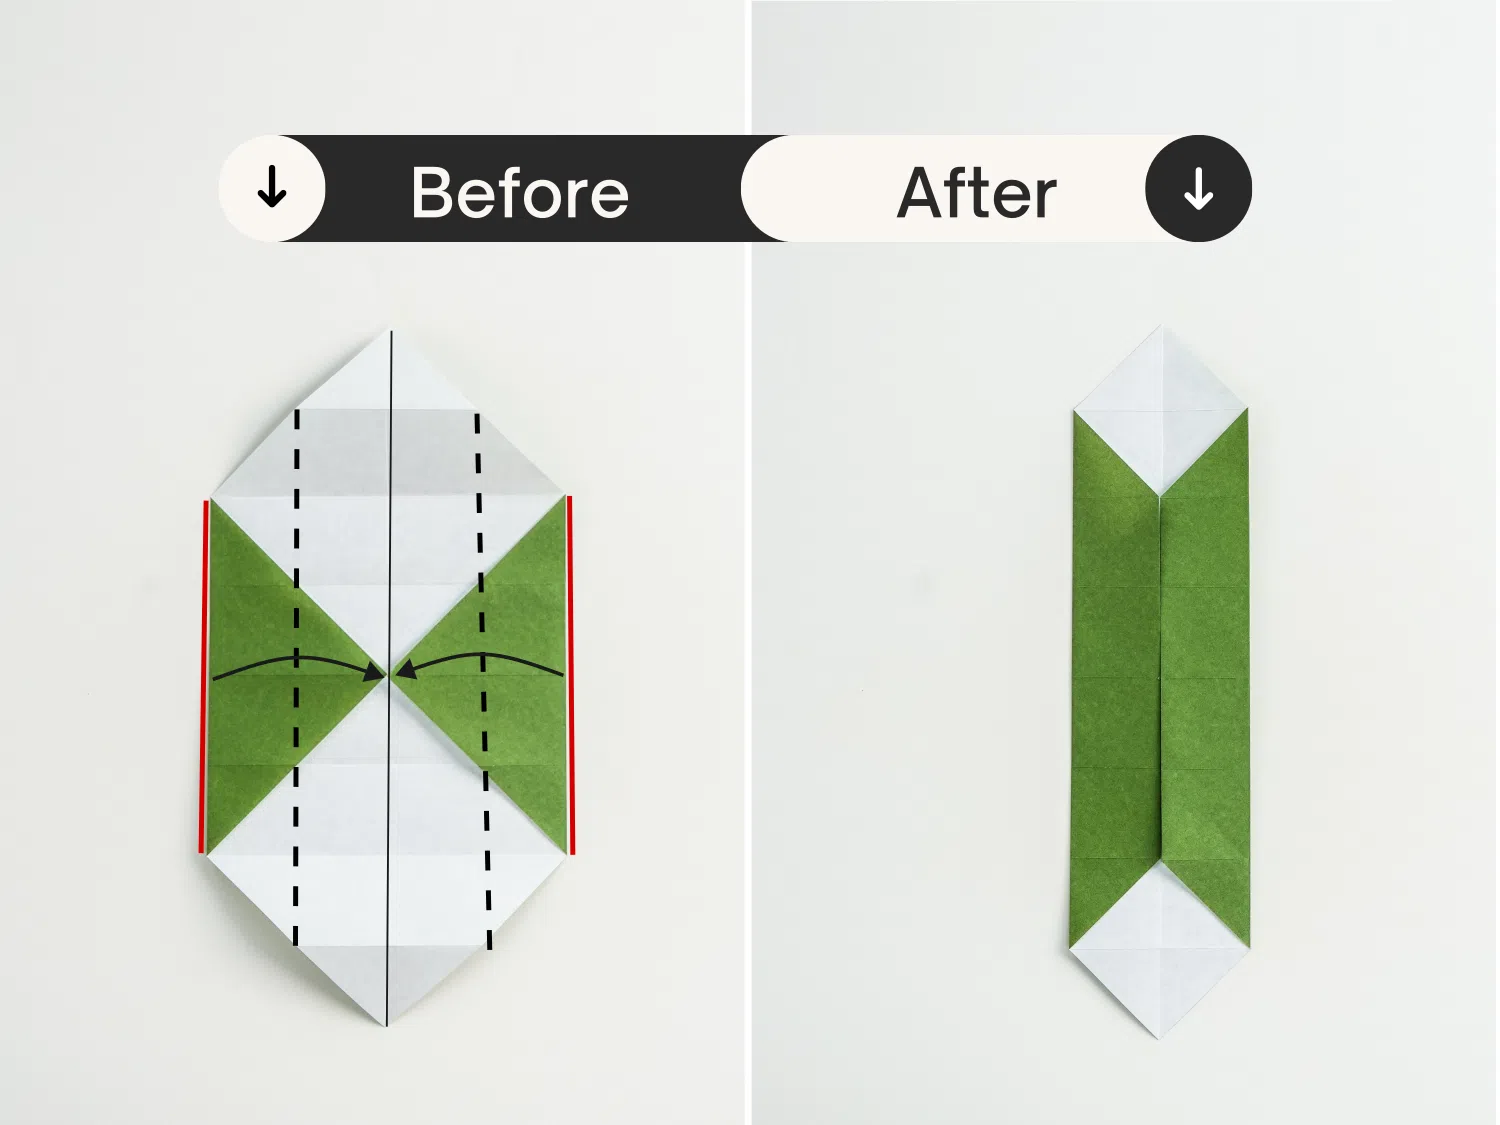
Step 8
Rotate the paper 90 degrees clockwise.
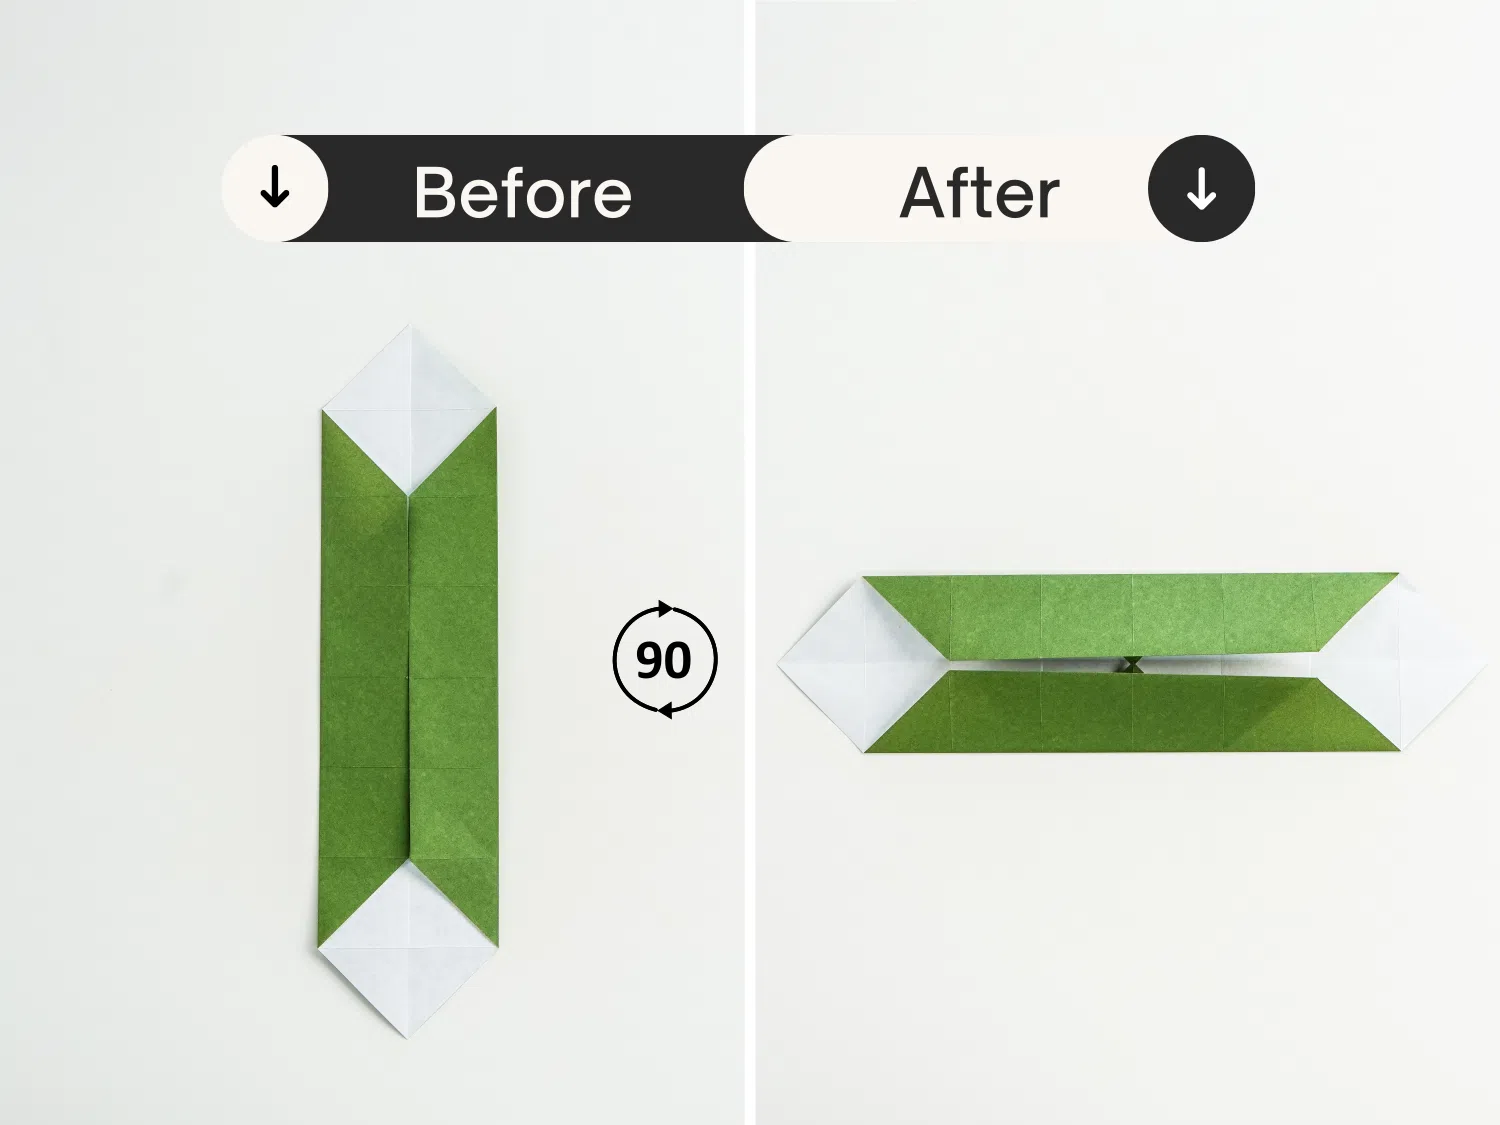
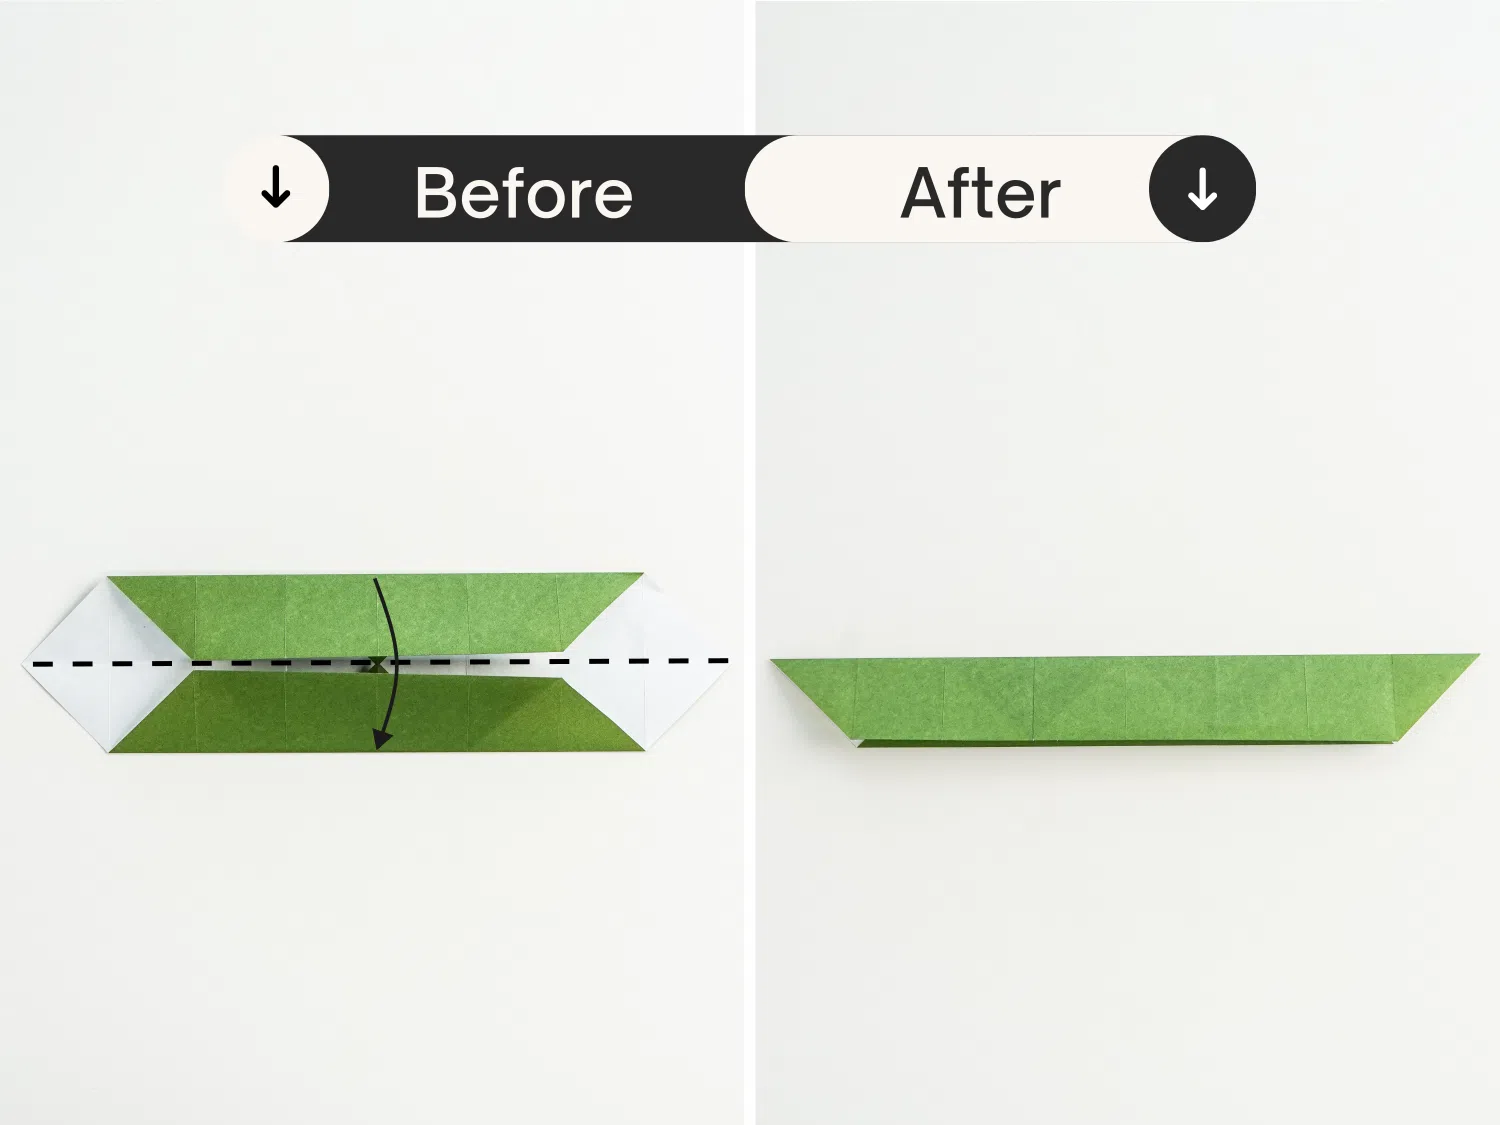
Step 9
Fold the paper in half along the center crease.
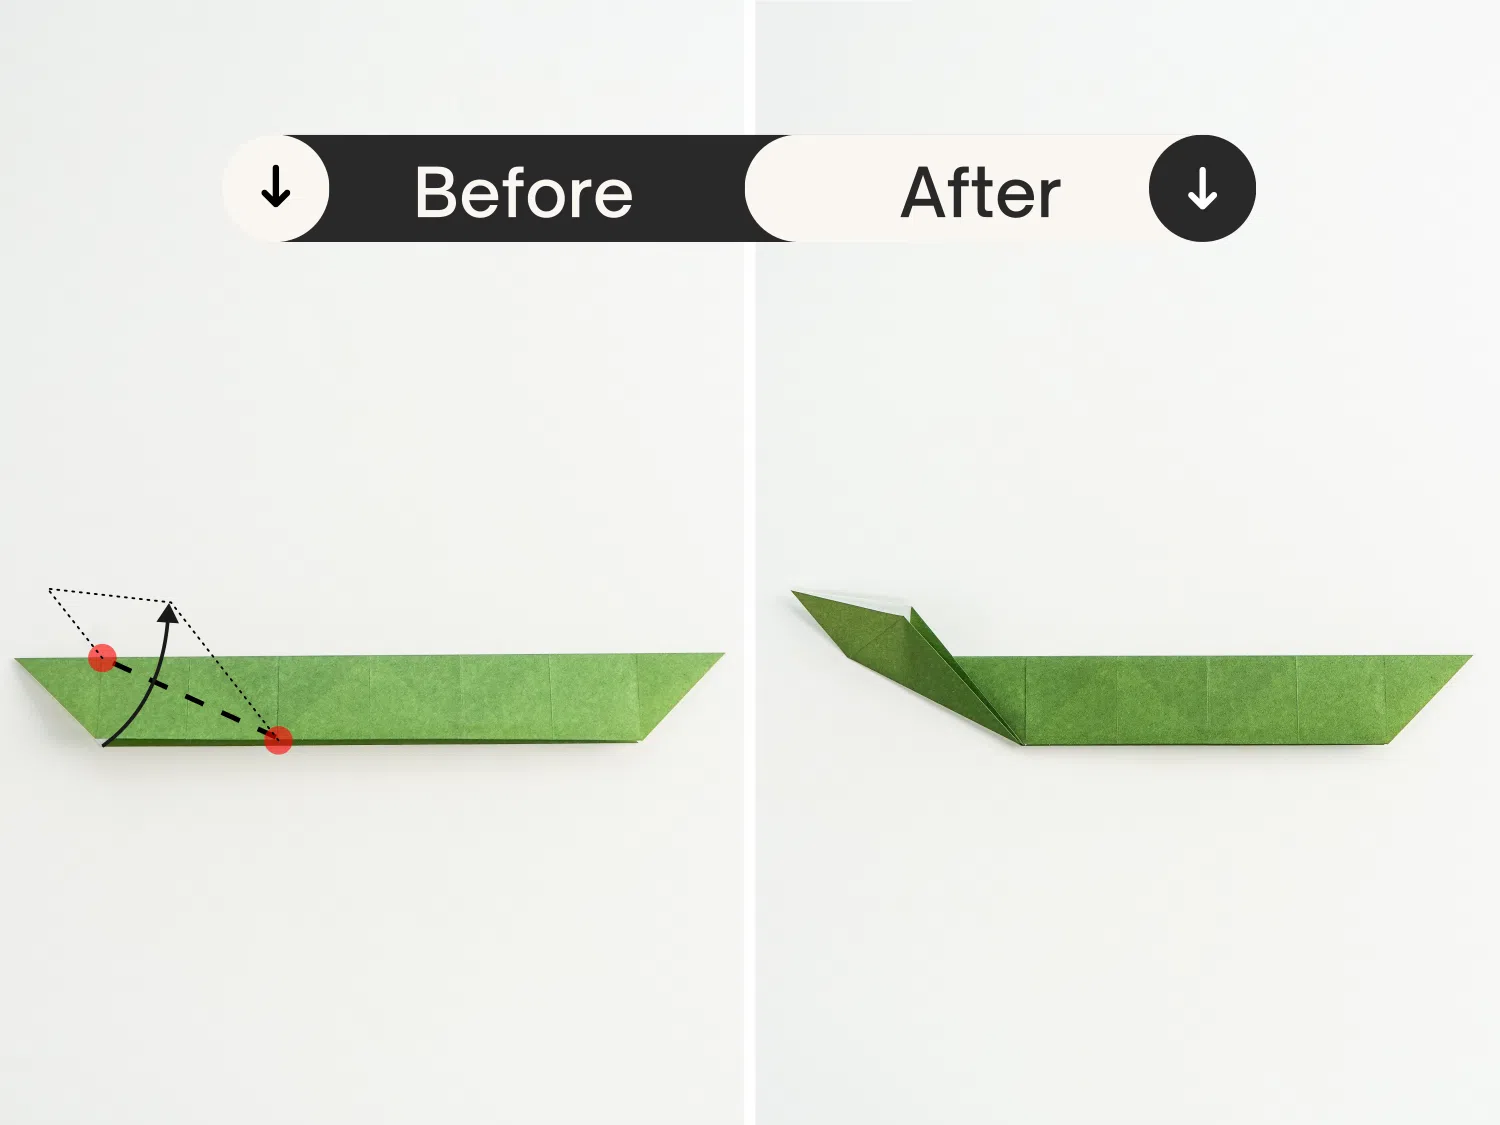
Step 10
Fold the bottom left corner up along the thick dotted line.
Step 11
Open this corner gently.
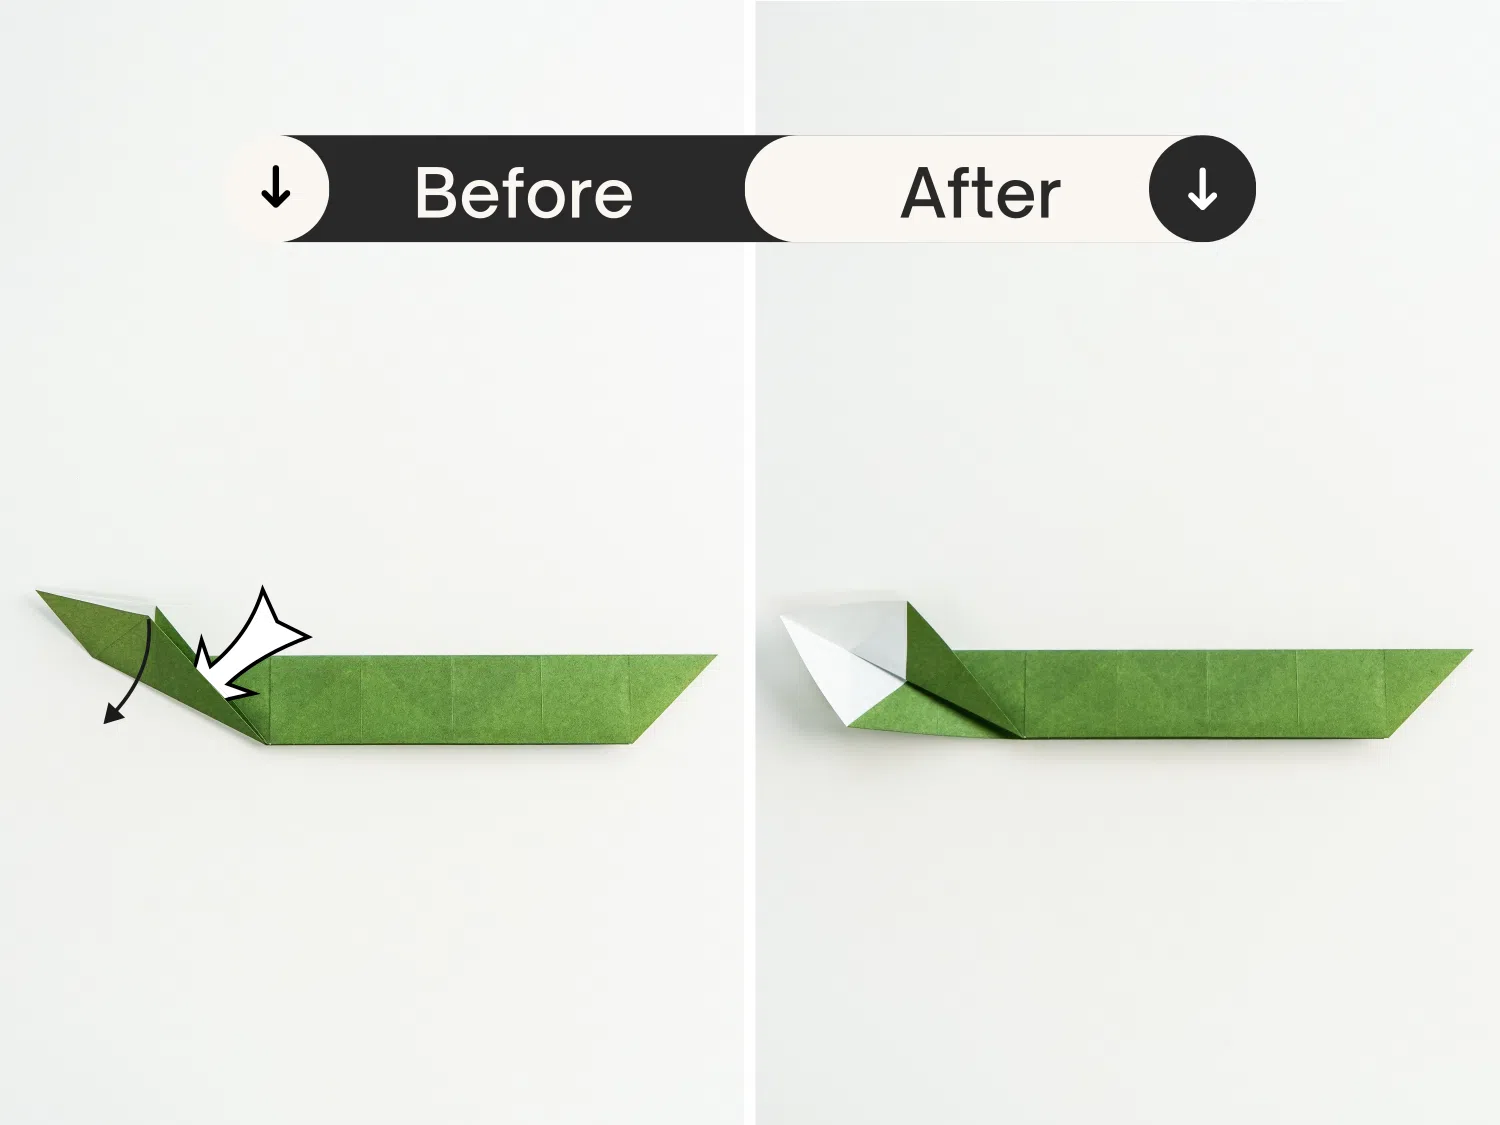
Step 12
Fold the left point forward a little, to form the snake’s head.

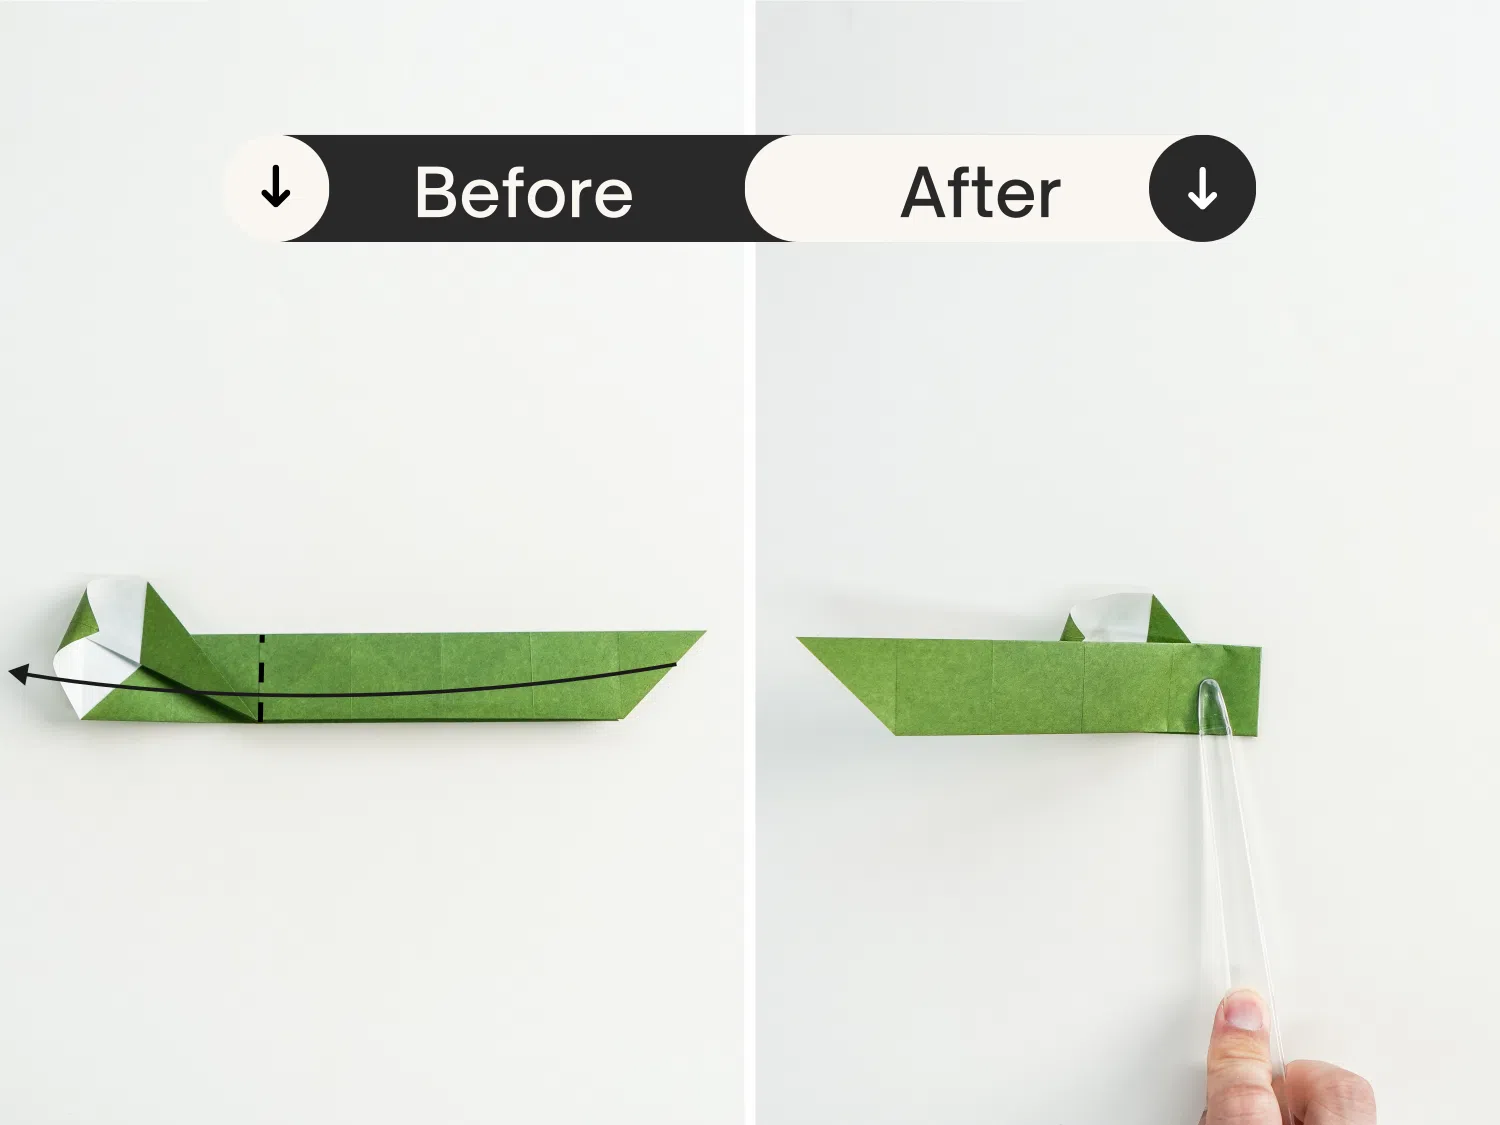
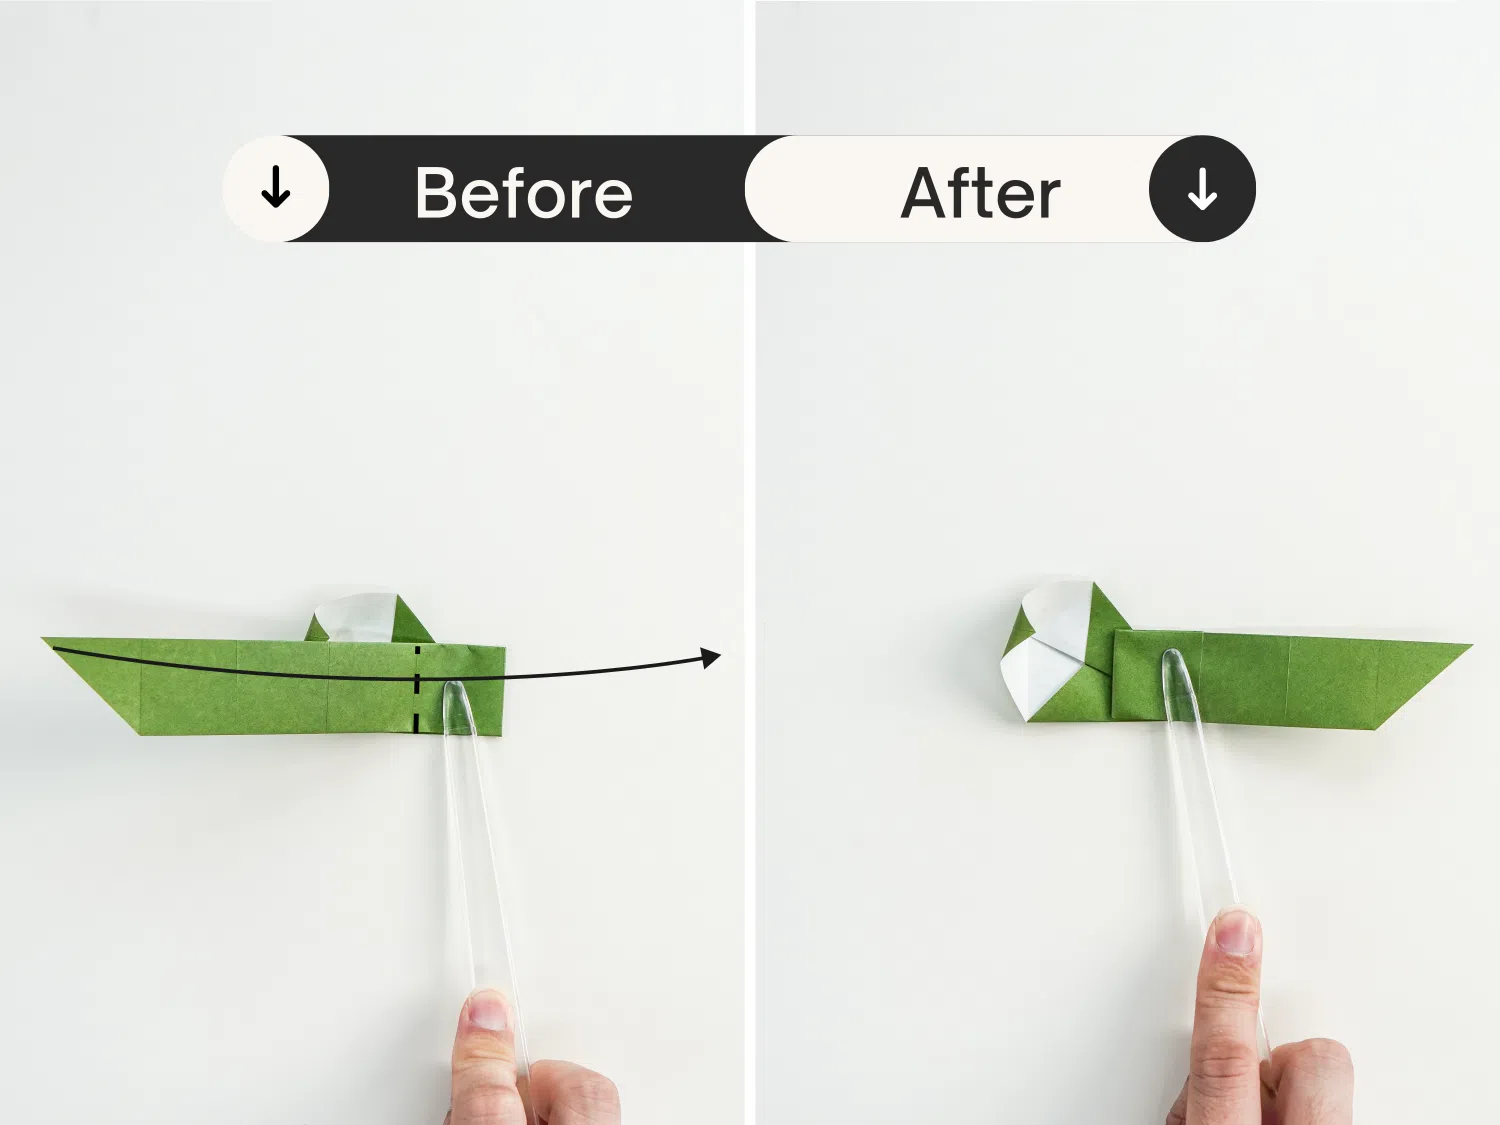
Step 13
Now let’s make the snake’s body.
The first fold: Fold the right corner to the left along the crease shown by the dotted line.
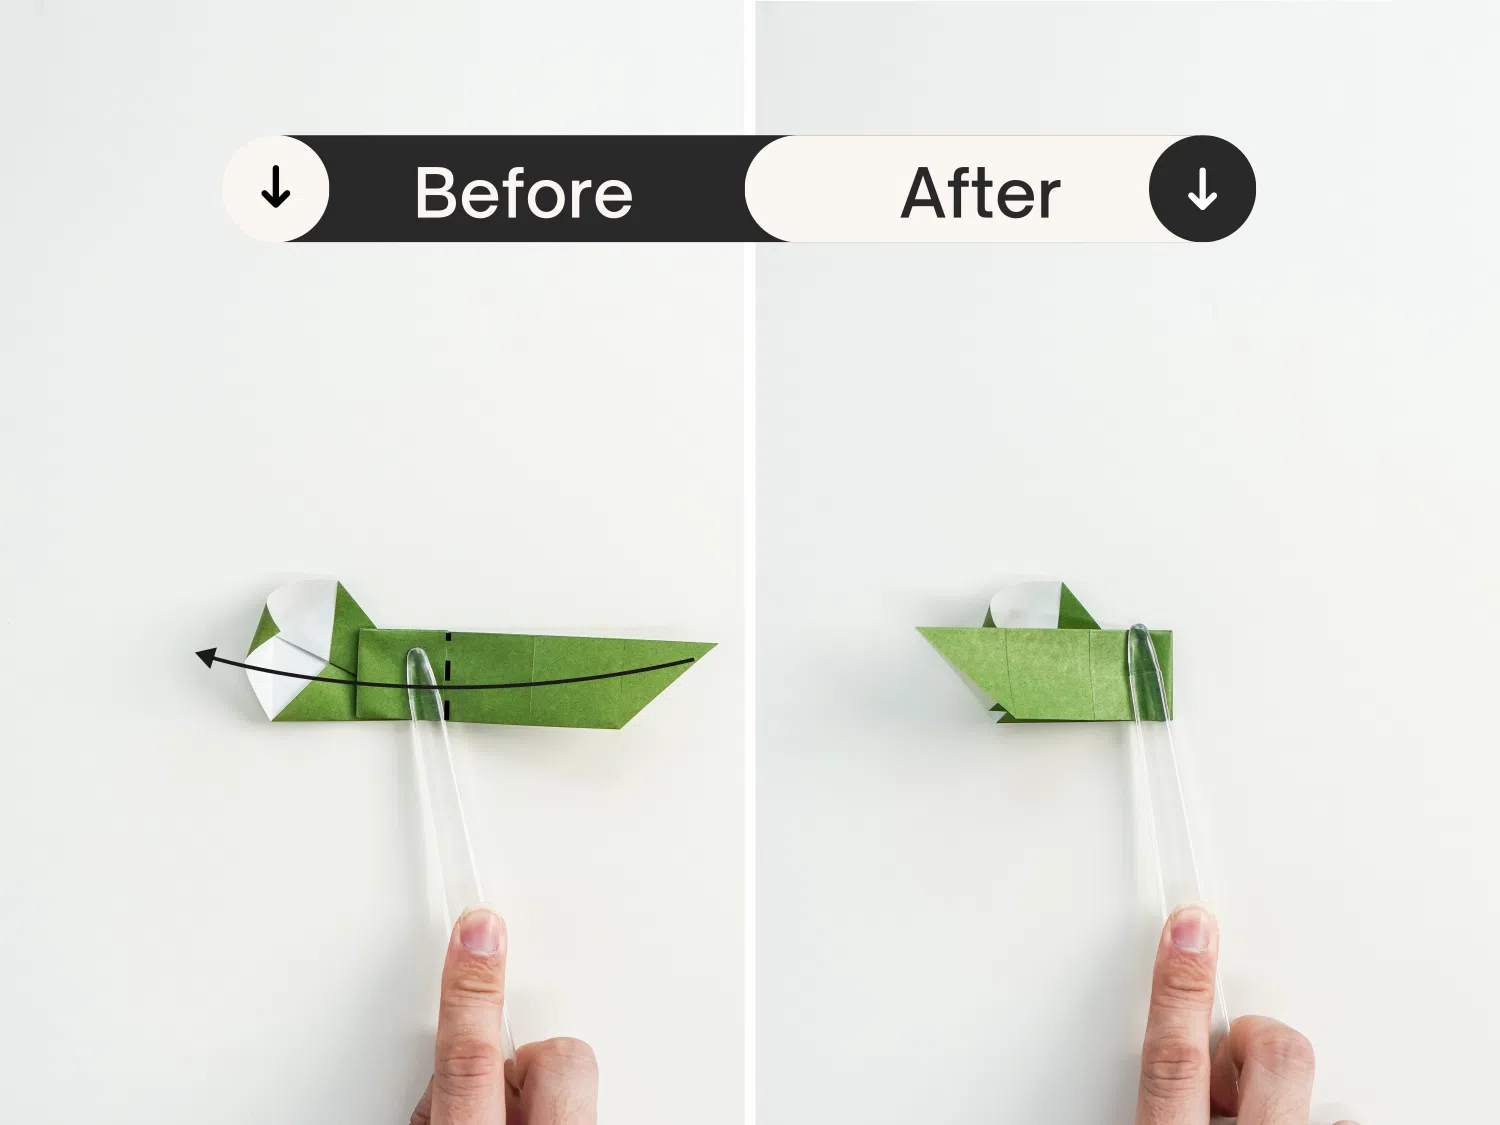
Step 14
Second Fold: Then fold it back to the right along the dotted line.
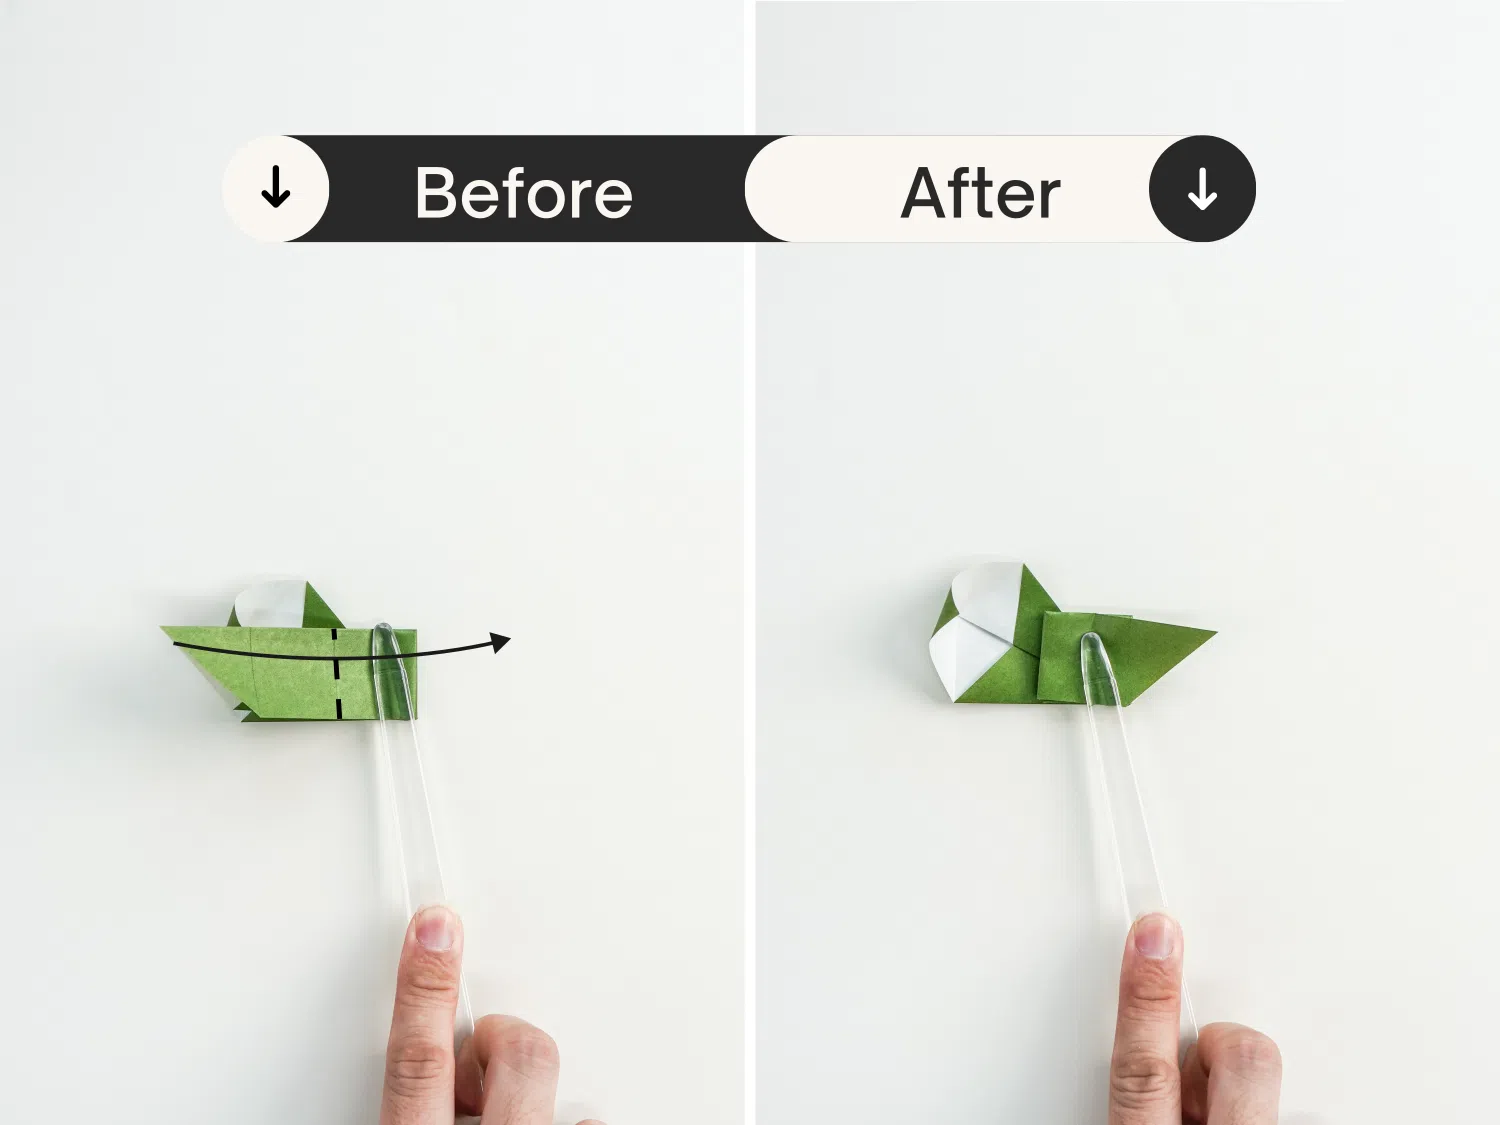
Step 15
Third fold: Fold it to the left side again along the dotted line.
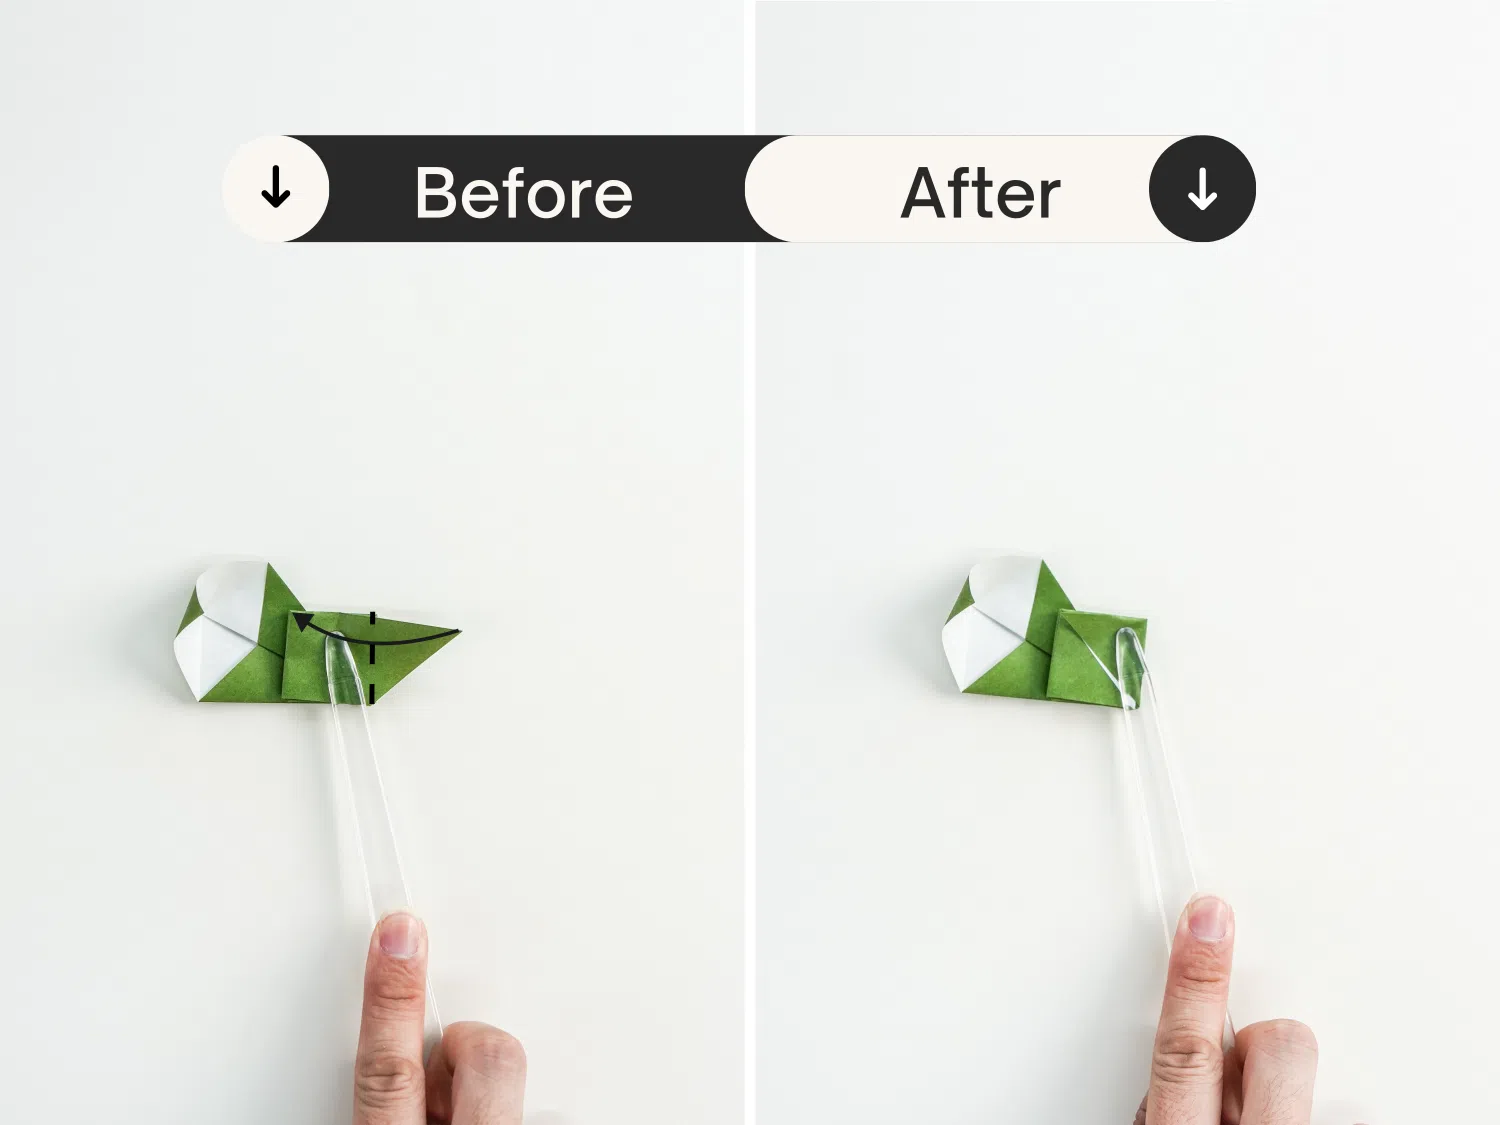
Step 16
Fourth fold: Then fold it back to the right side.
Step 17
Finally, fold the right point to the left diagonally, creating a small square.
Step 18
Unfold the right part completely, you have a zigzag pattern, that is snake’s curved body.

Step 19
Fold the right part backward along the red dotted line.
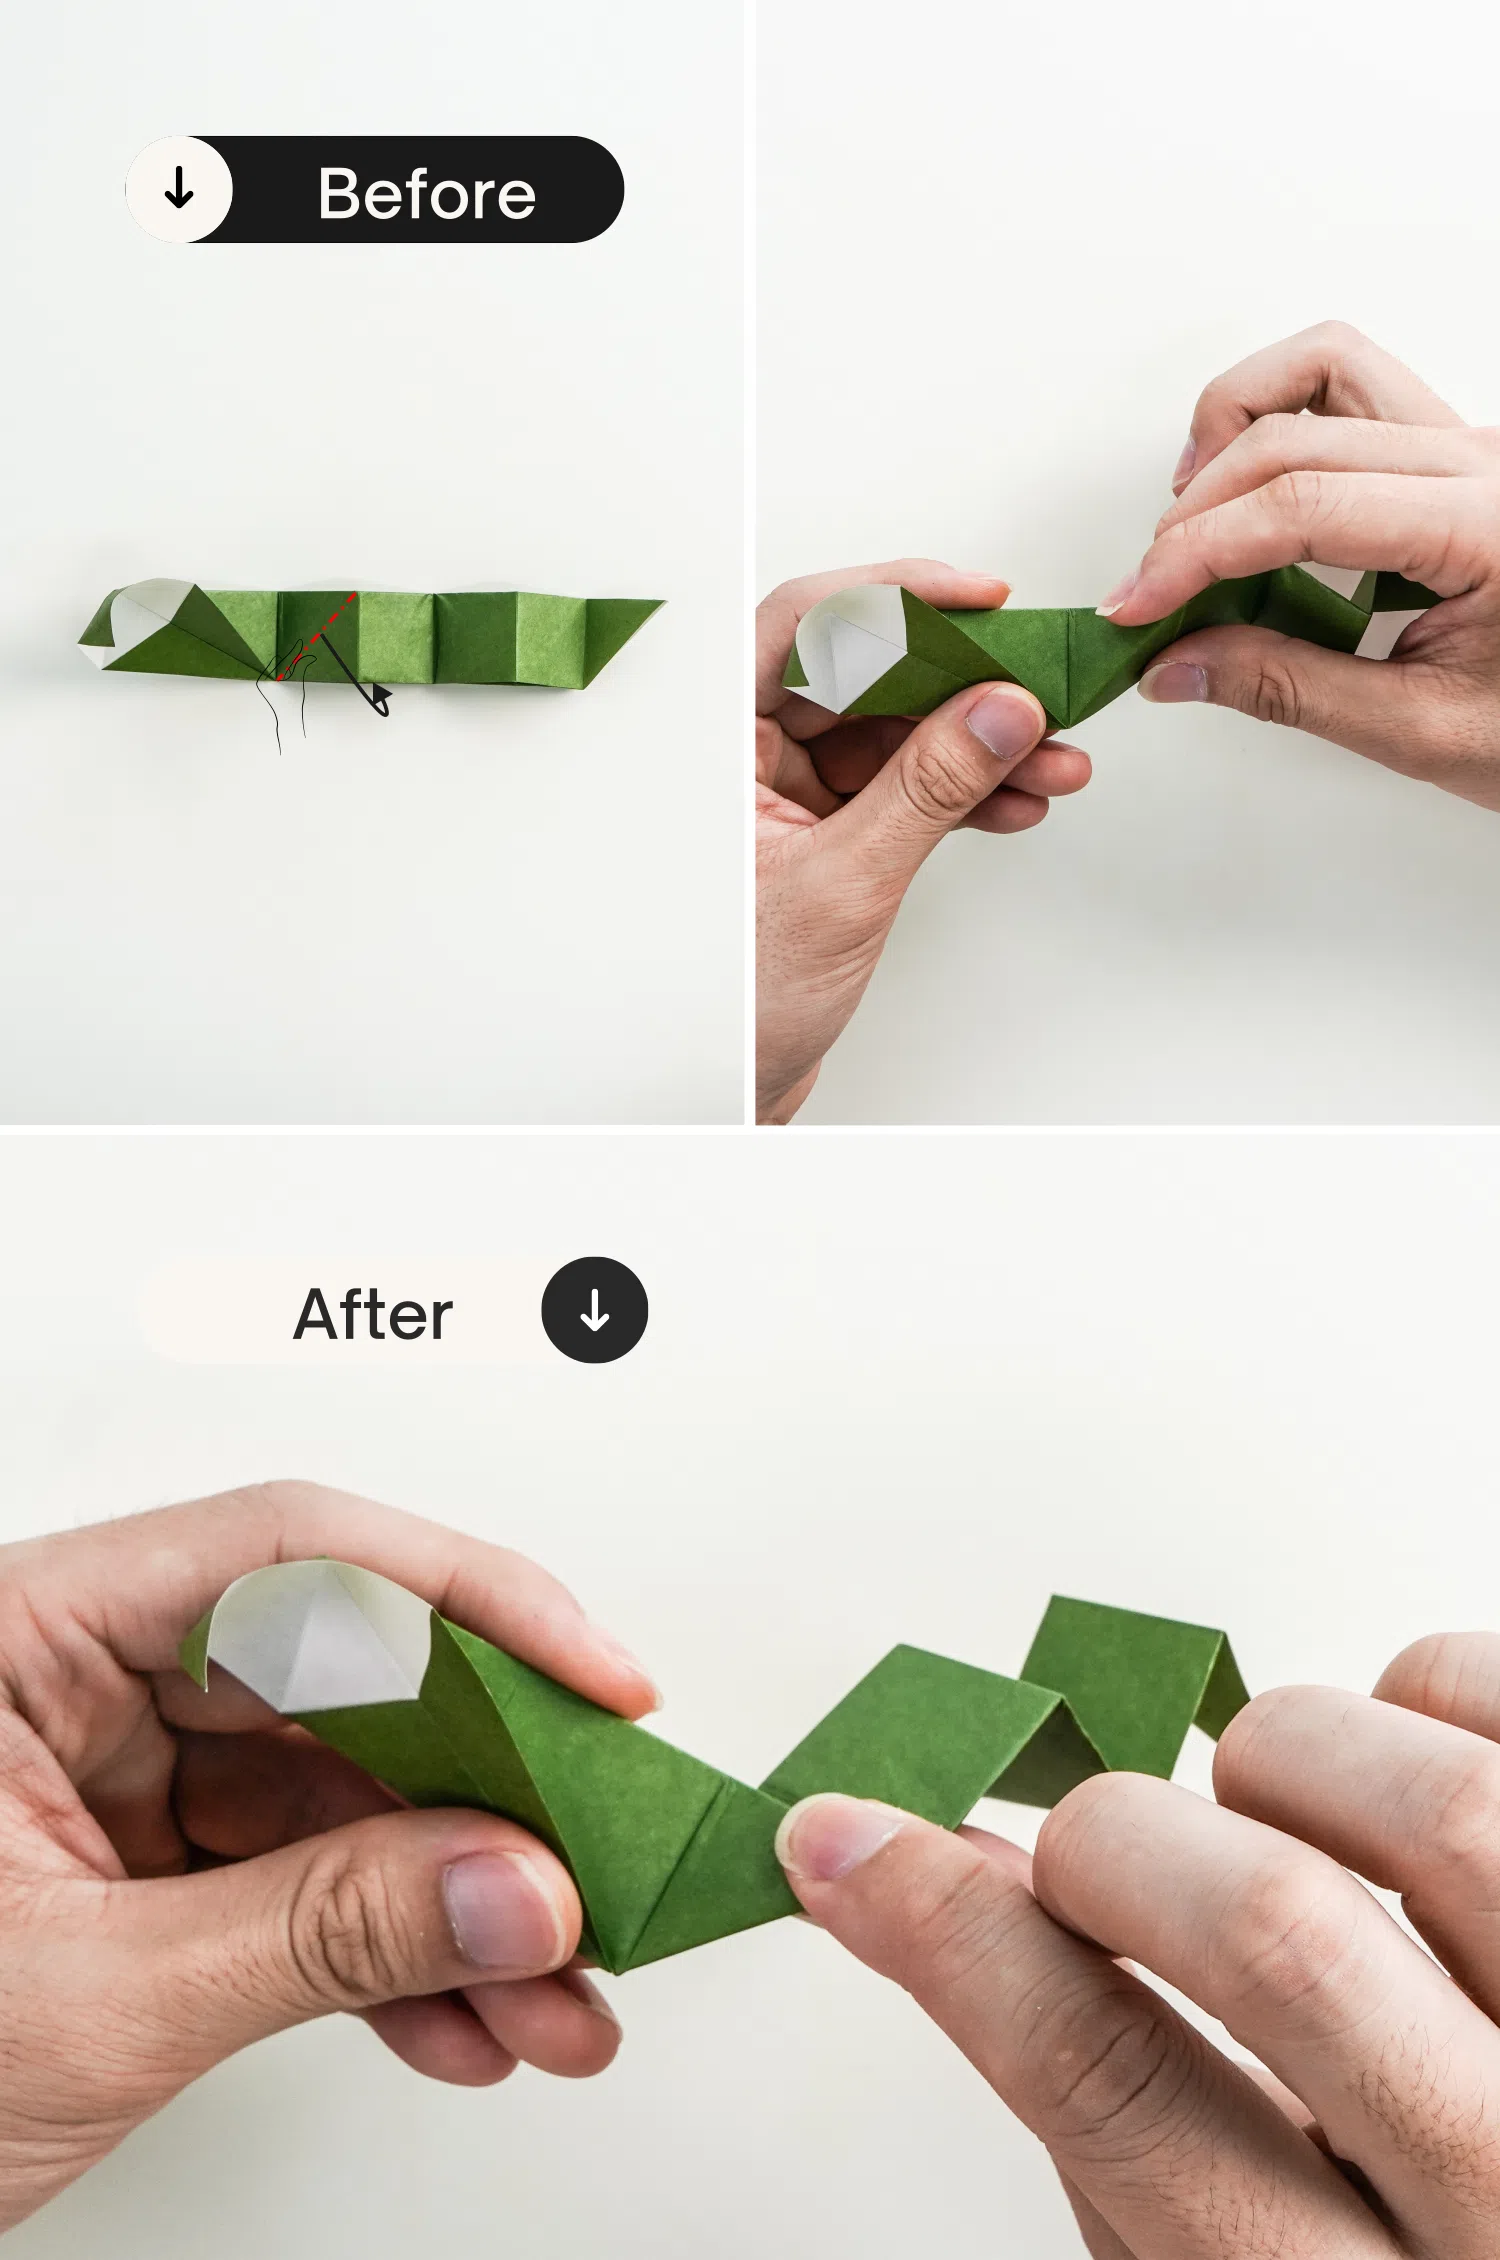
Step 20
Cover these two sides shown by these two triangles with glue.
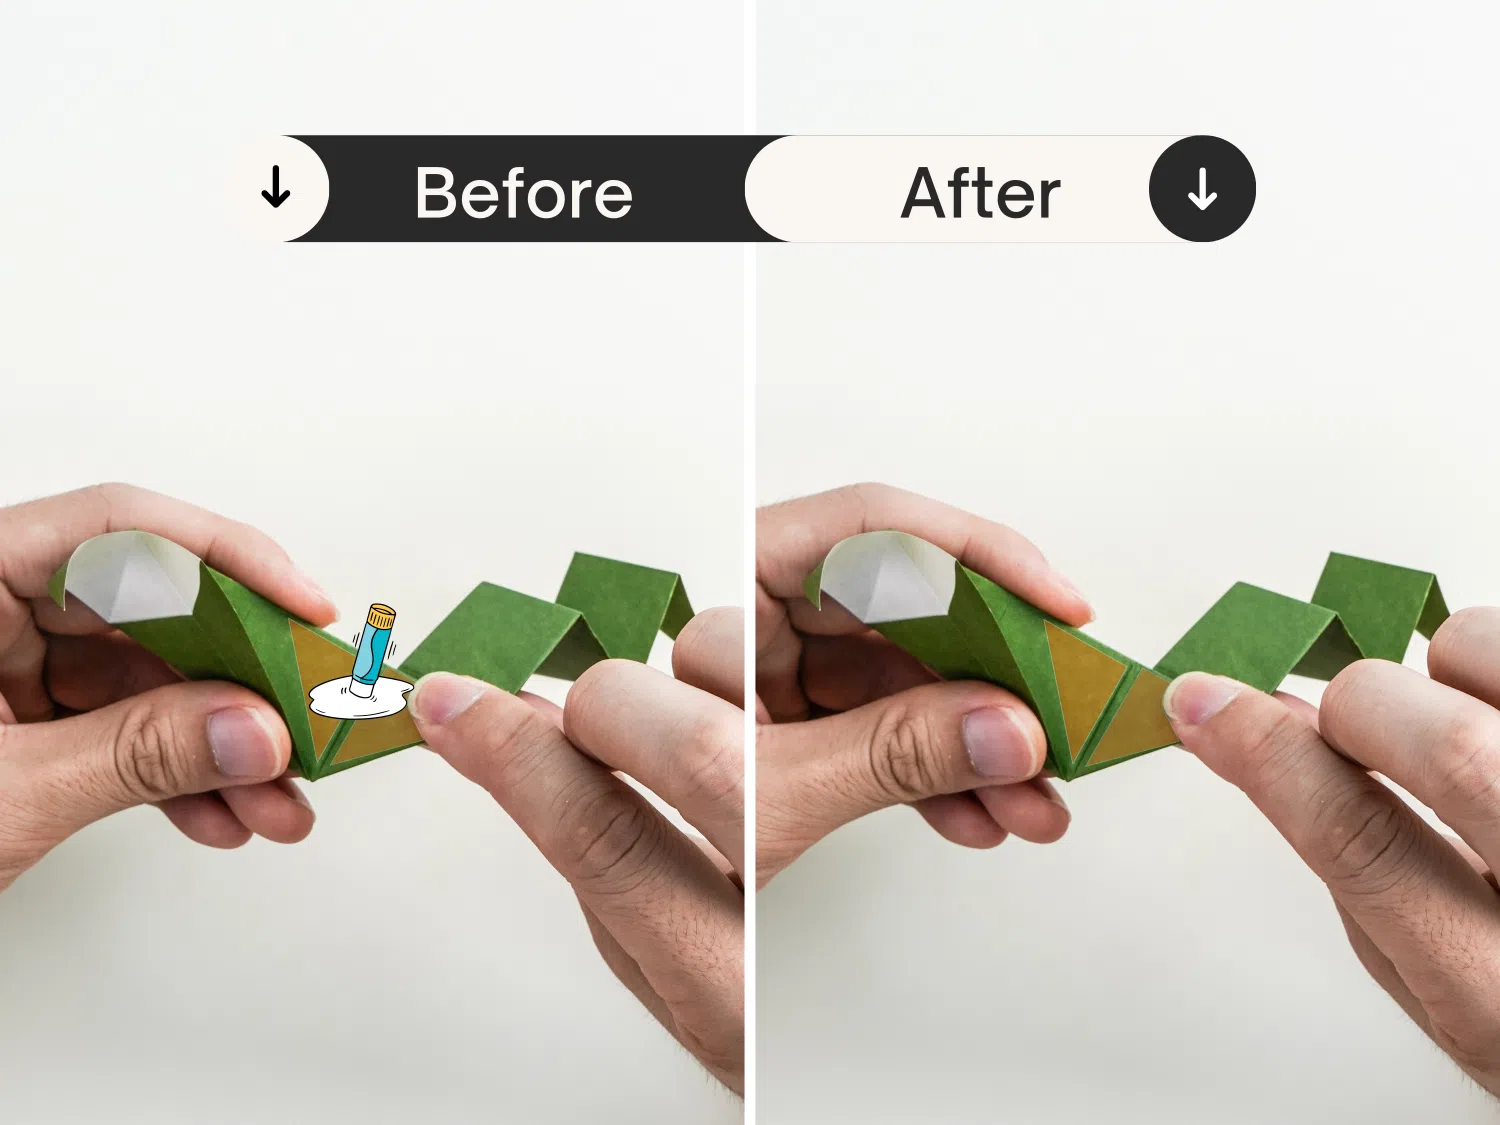
Step 21
Then glue them on.
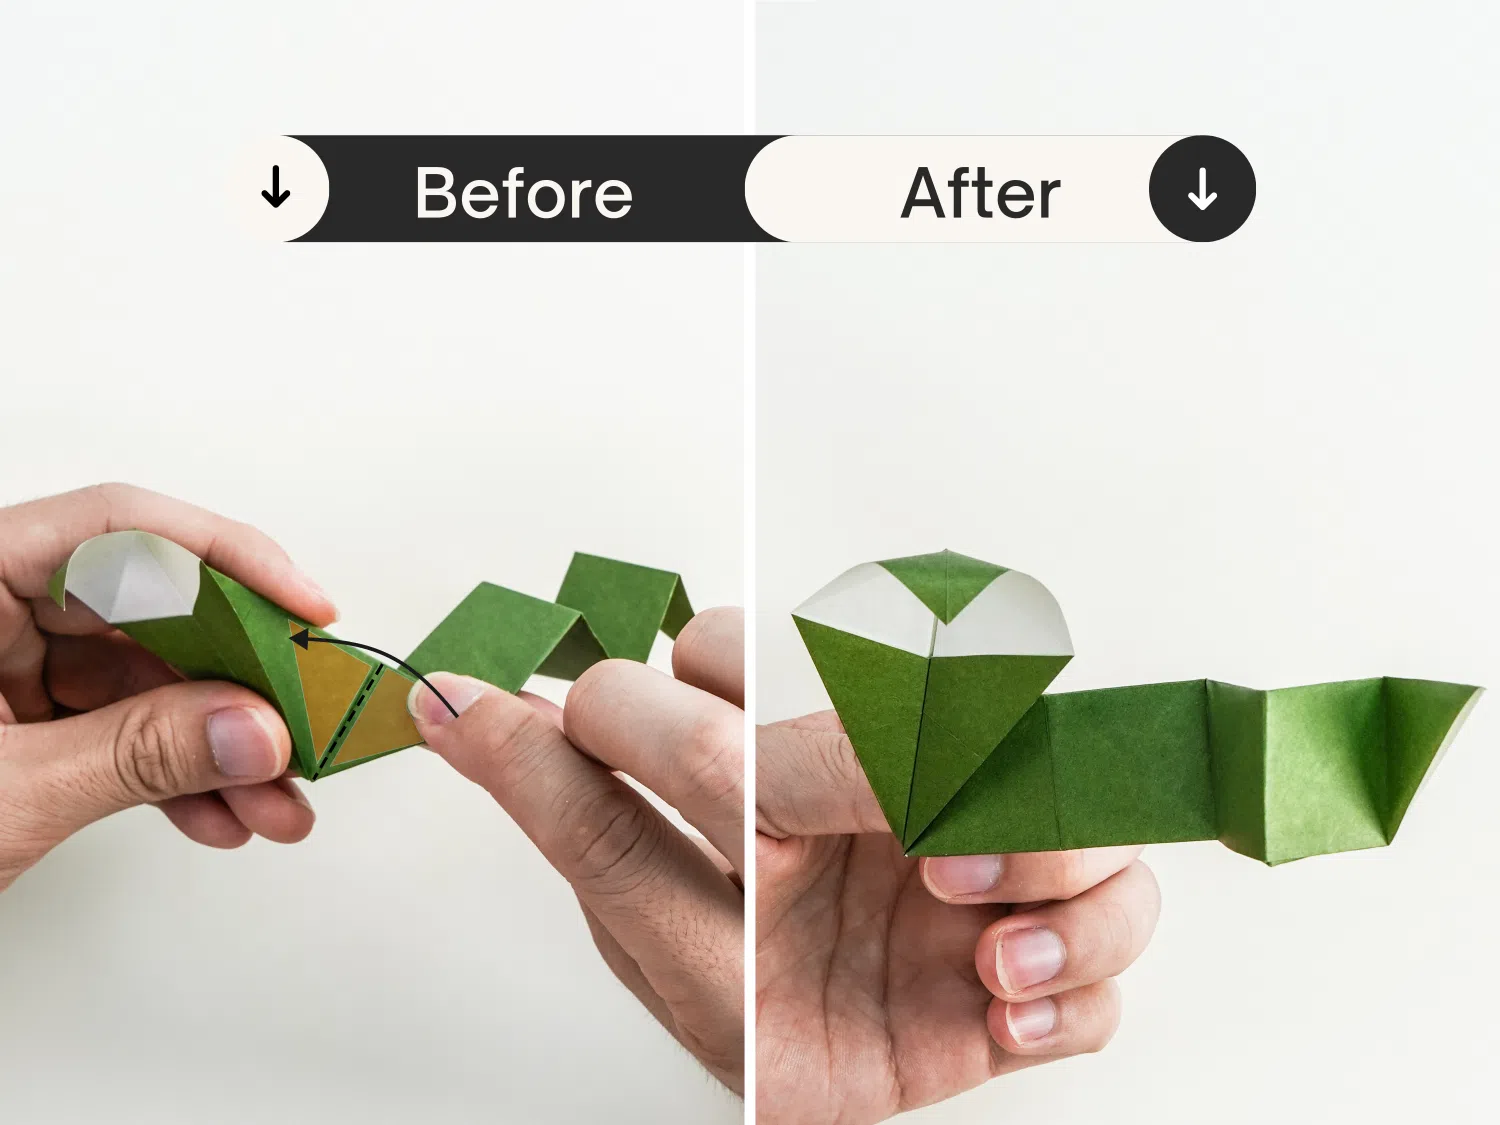
Step 22
Press it from both ends to adjust the shape of the snake, now you get this little cute snake.
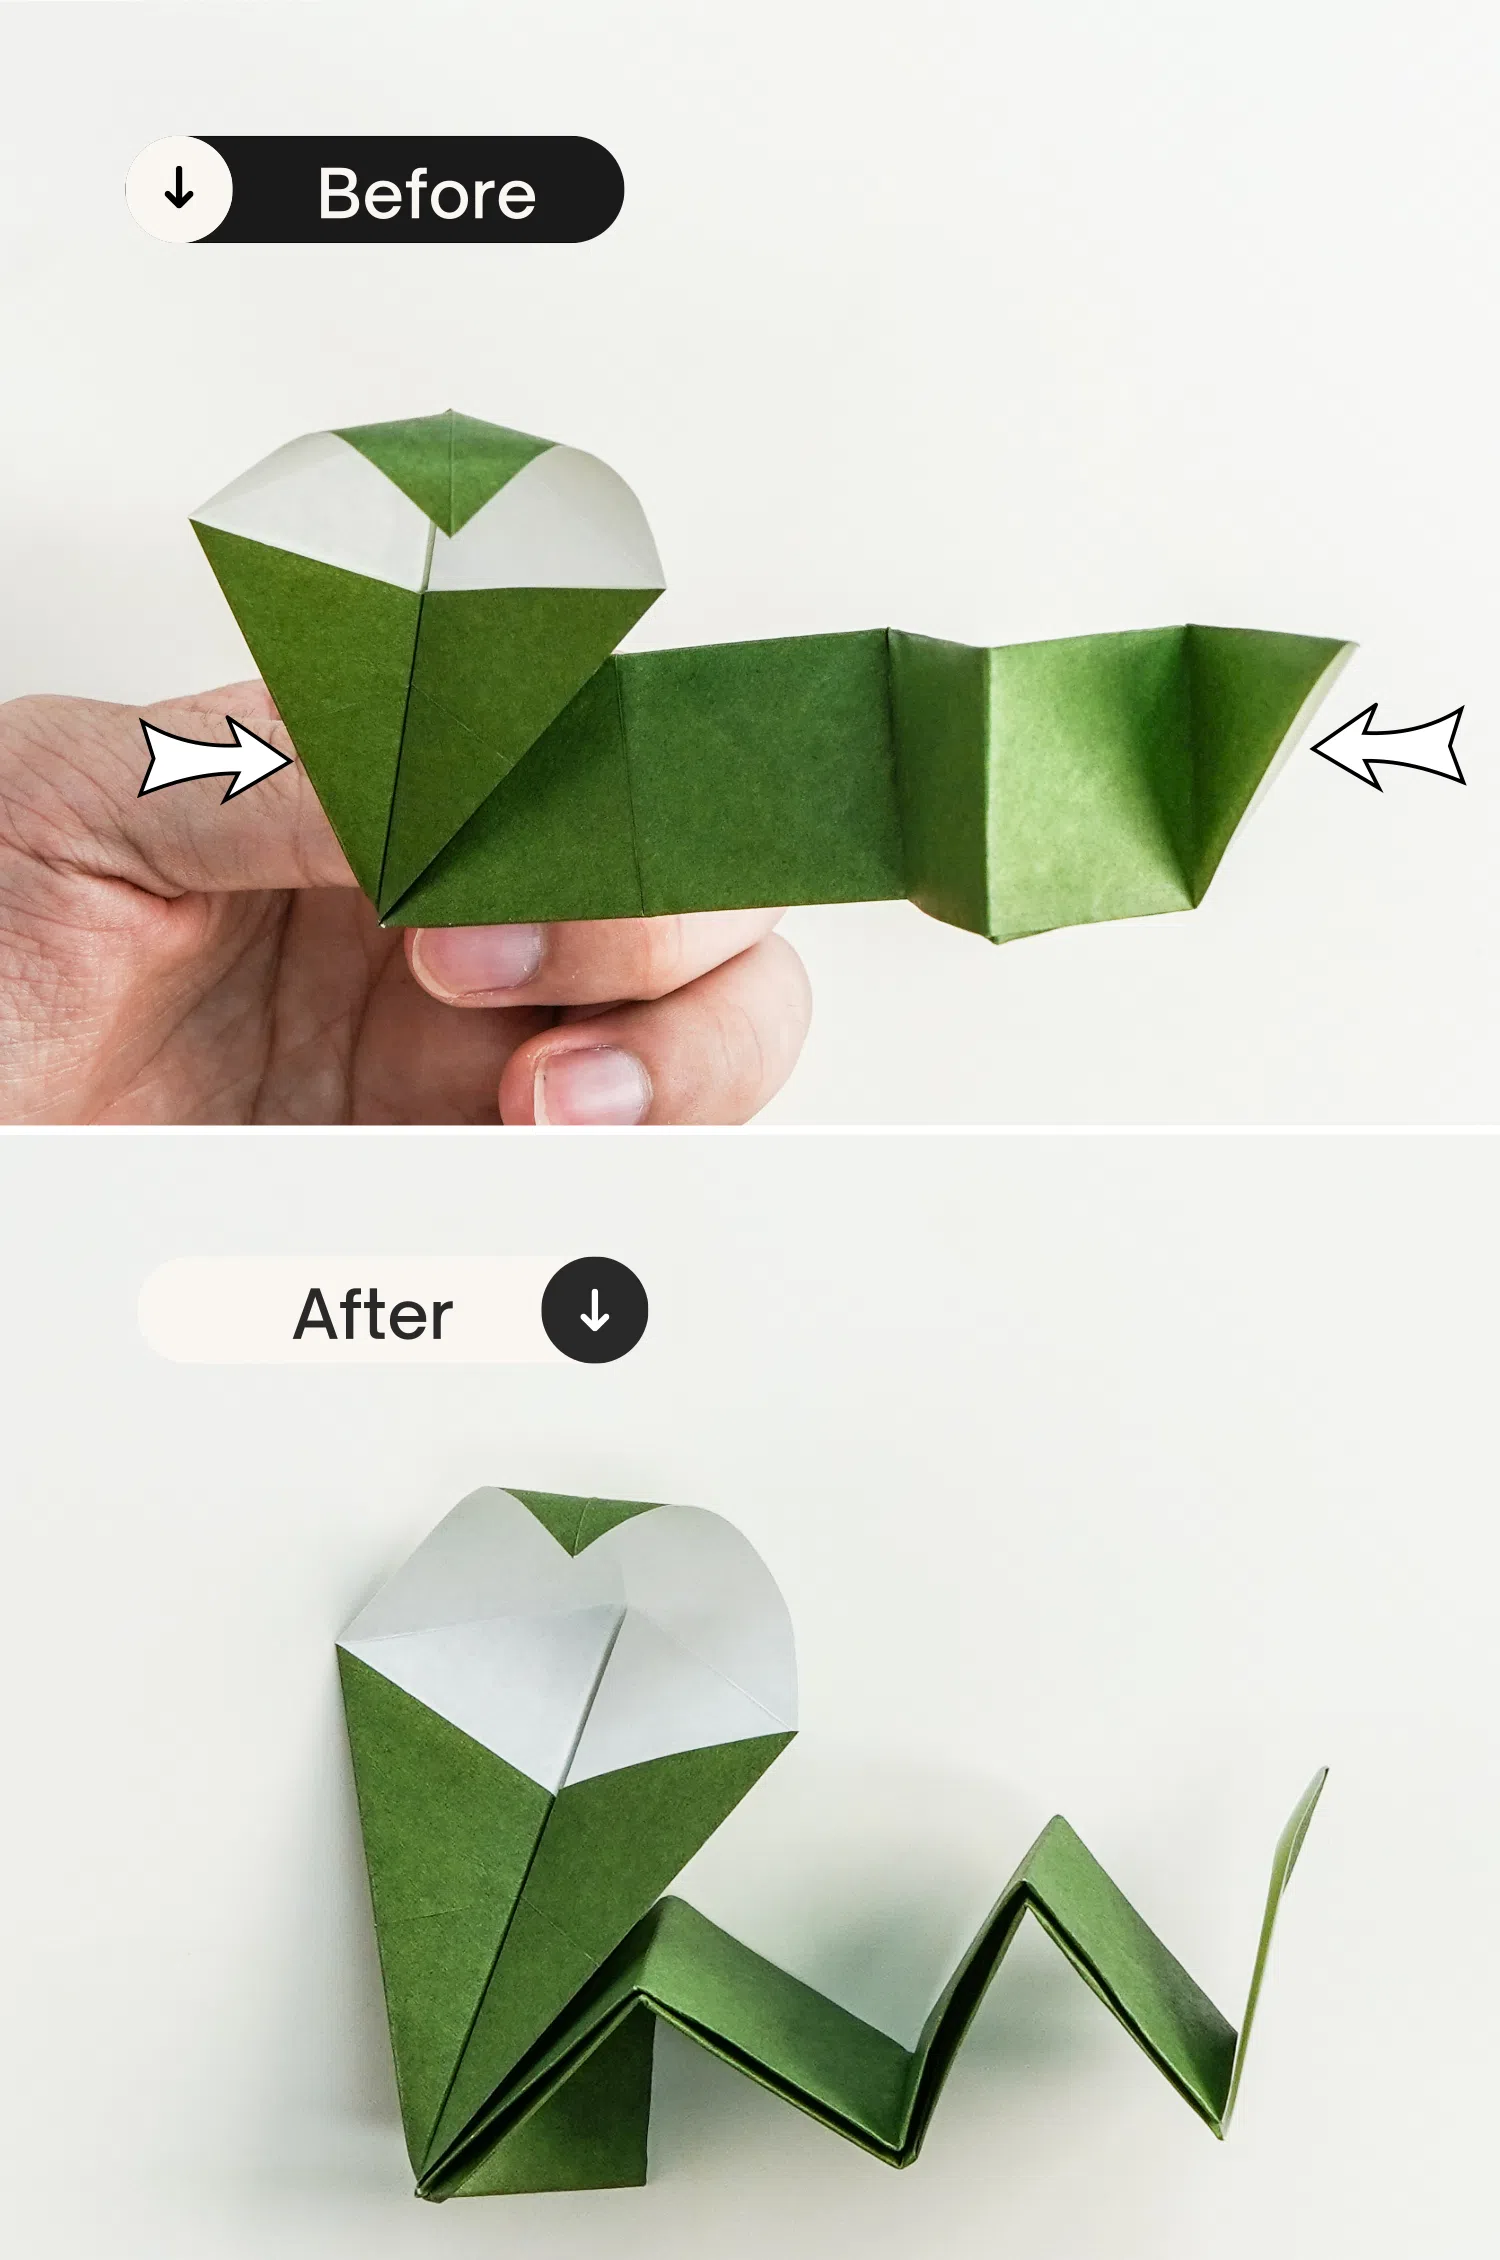
The best presentation way of this origami snake is to stand it on the table, just like the real Ophiophagus hannah with the head hold high. Now you can move on to make other interesting origami animal like crane, dove or butterfly. Happy folding.


