How to Make an Easy Origami Fox Face
Step by Step Tutorials
Step 1
Start with the white side of the paper facing up and fold in half diagonally.
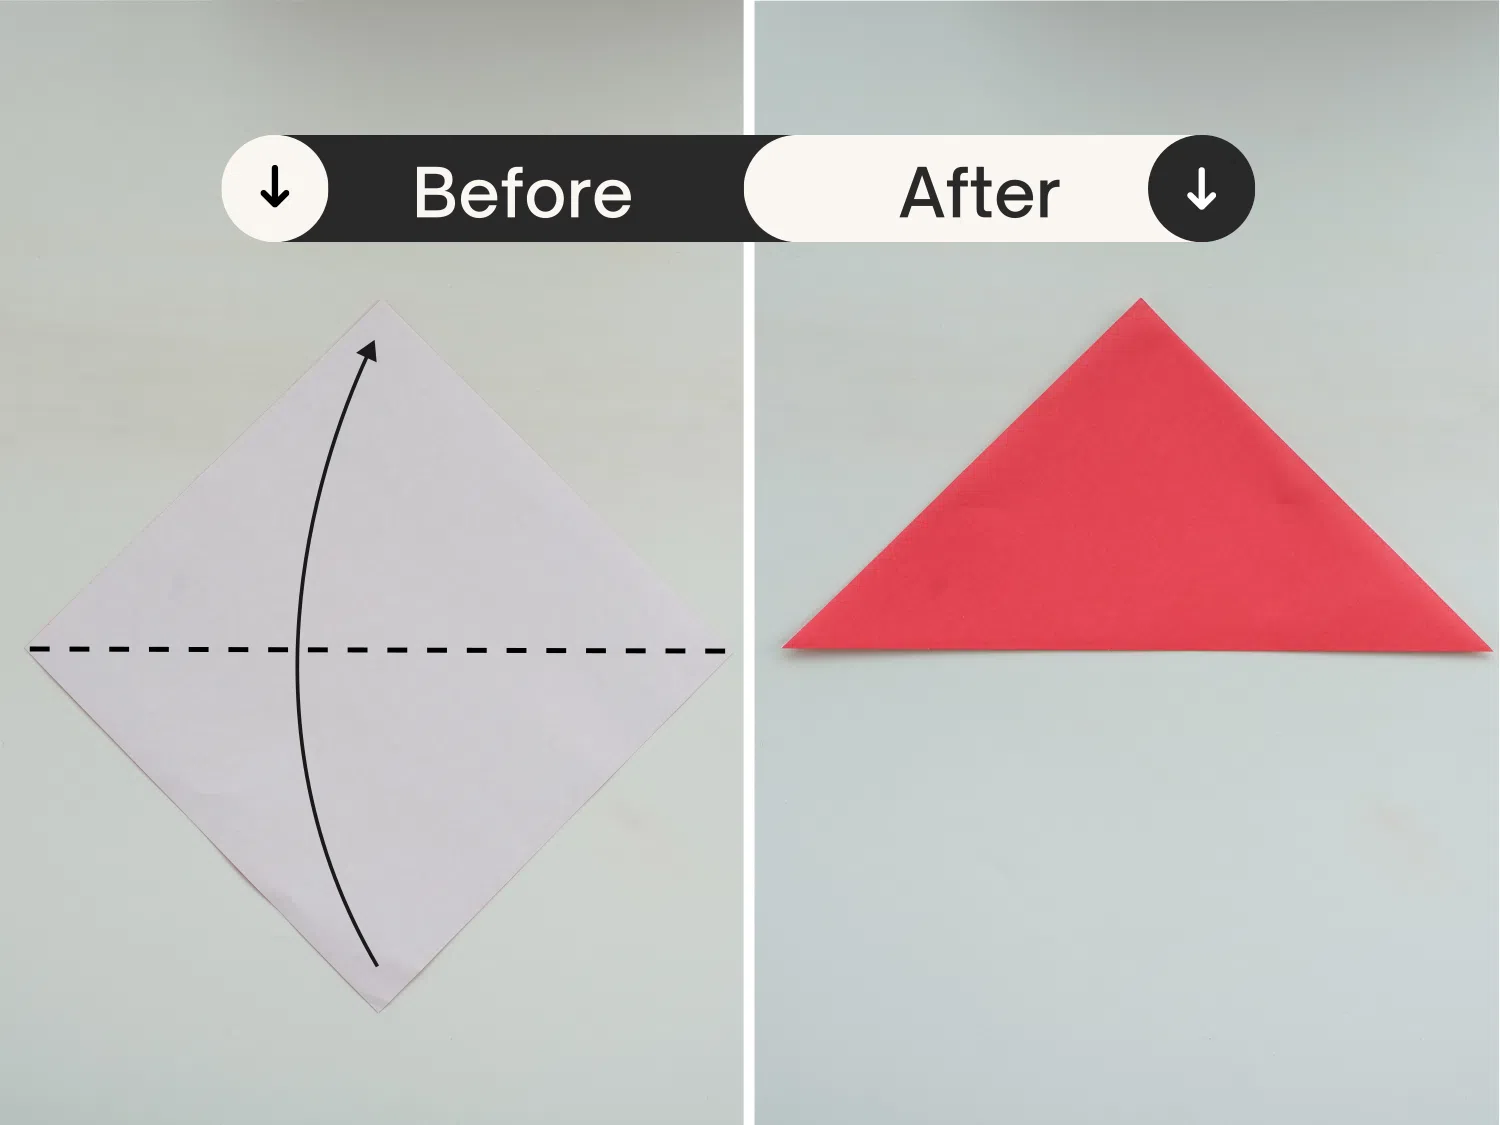
Step 2
Take the one point over to the other side and make a small crease along the bottom edge to mark the middle. Then unfold it and we find the middle.
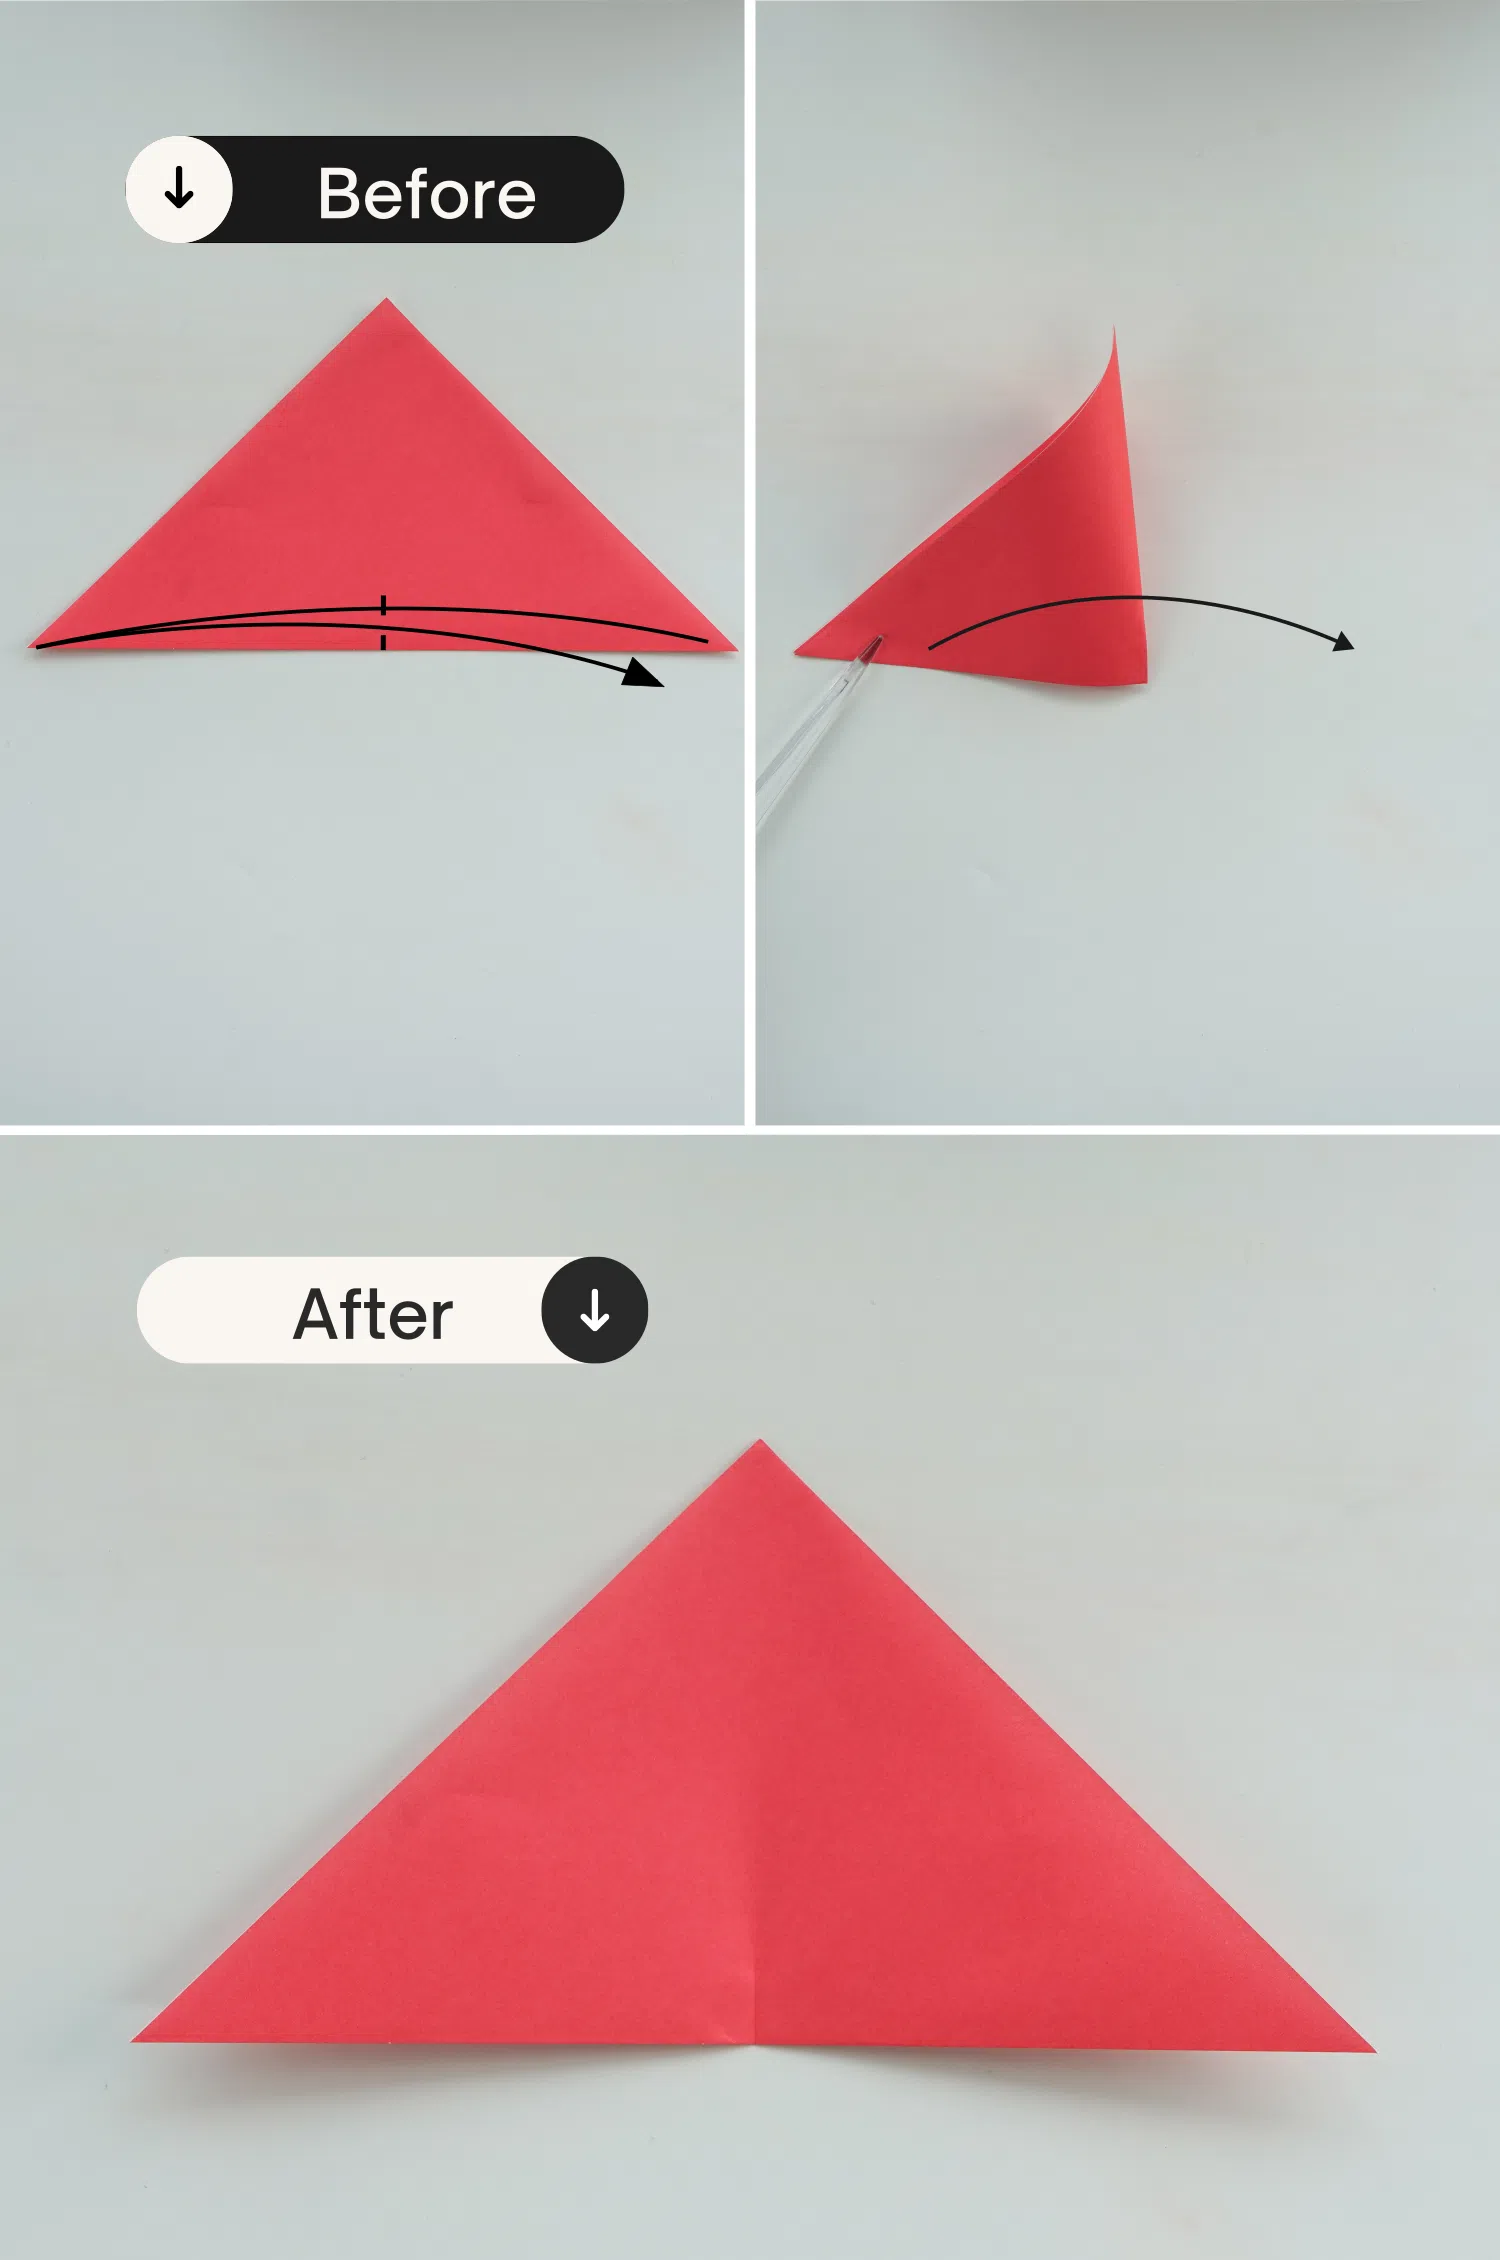
Step 3
Take the top point, fold it down diagonally to meet the middle point of the bottom edge.
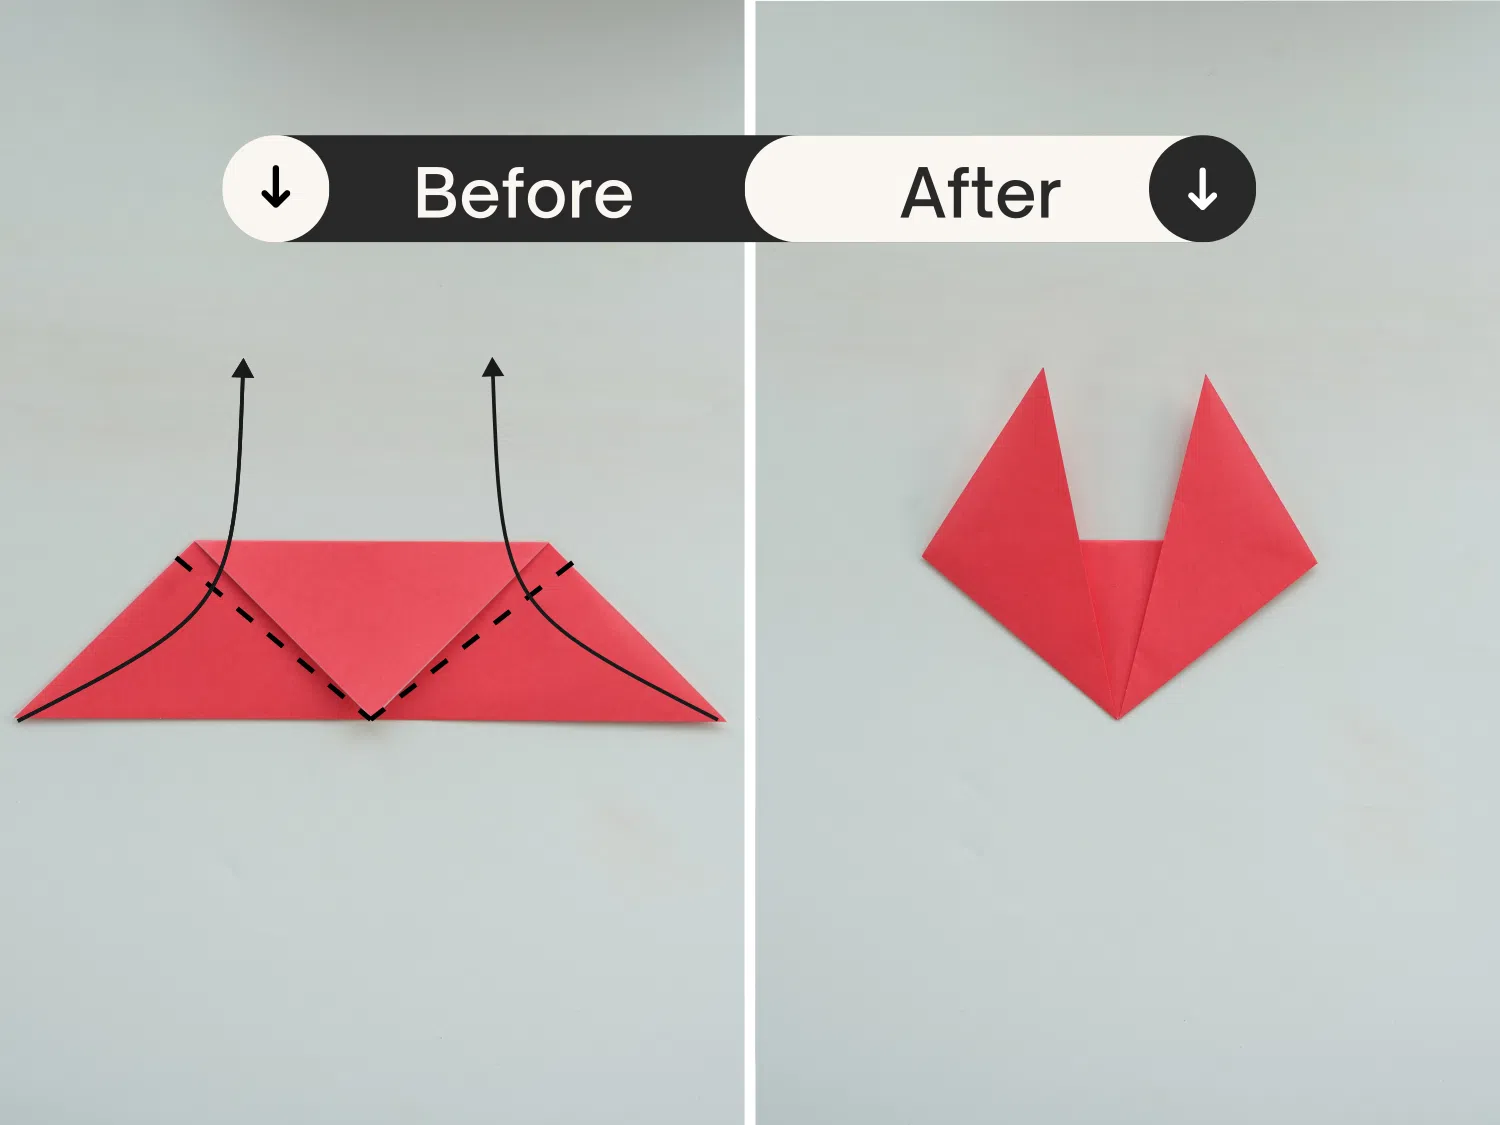
Step 4
Fold the bottom right point up to form the fox’s cheek.
Repeat the left side too.
You can adjust the angle according to your preference to make a smaller or bigger fox face.
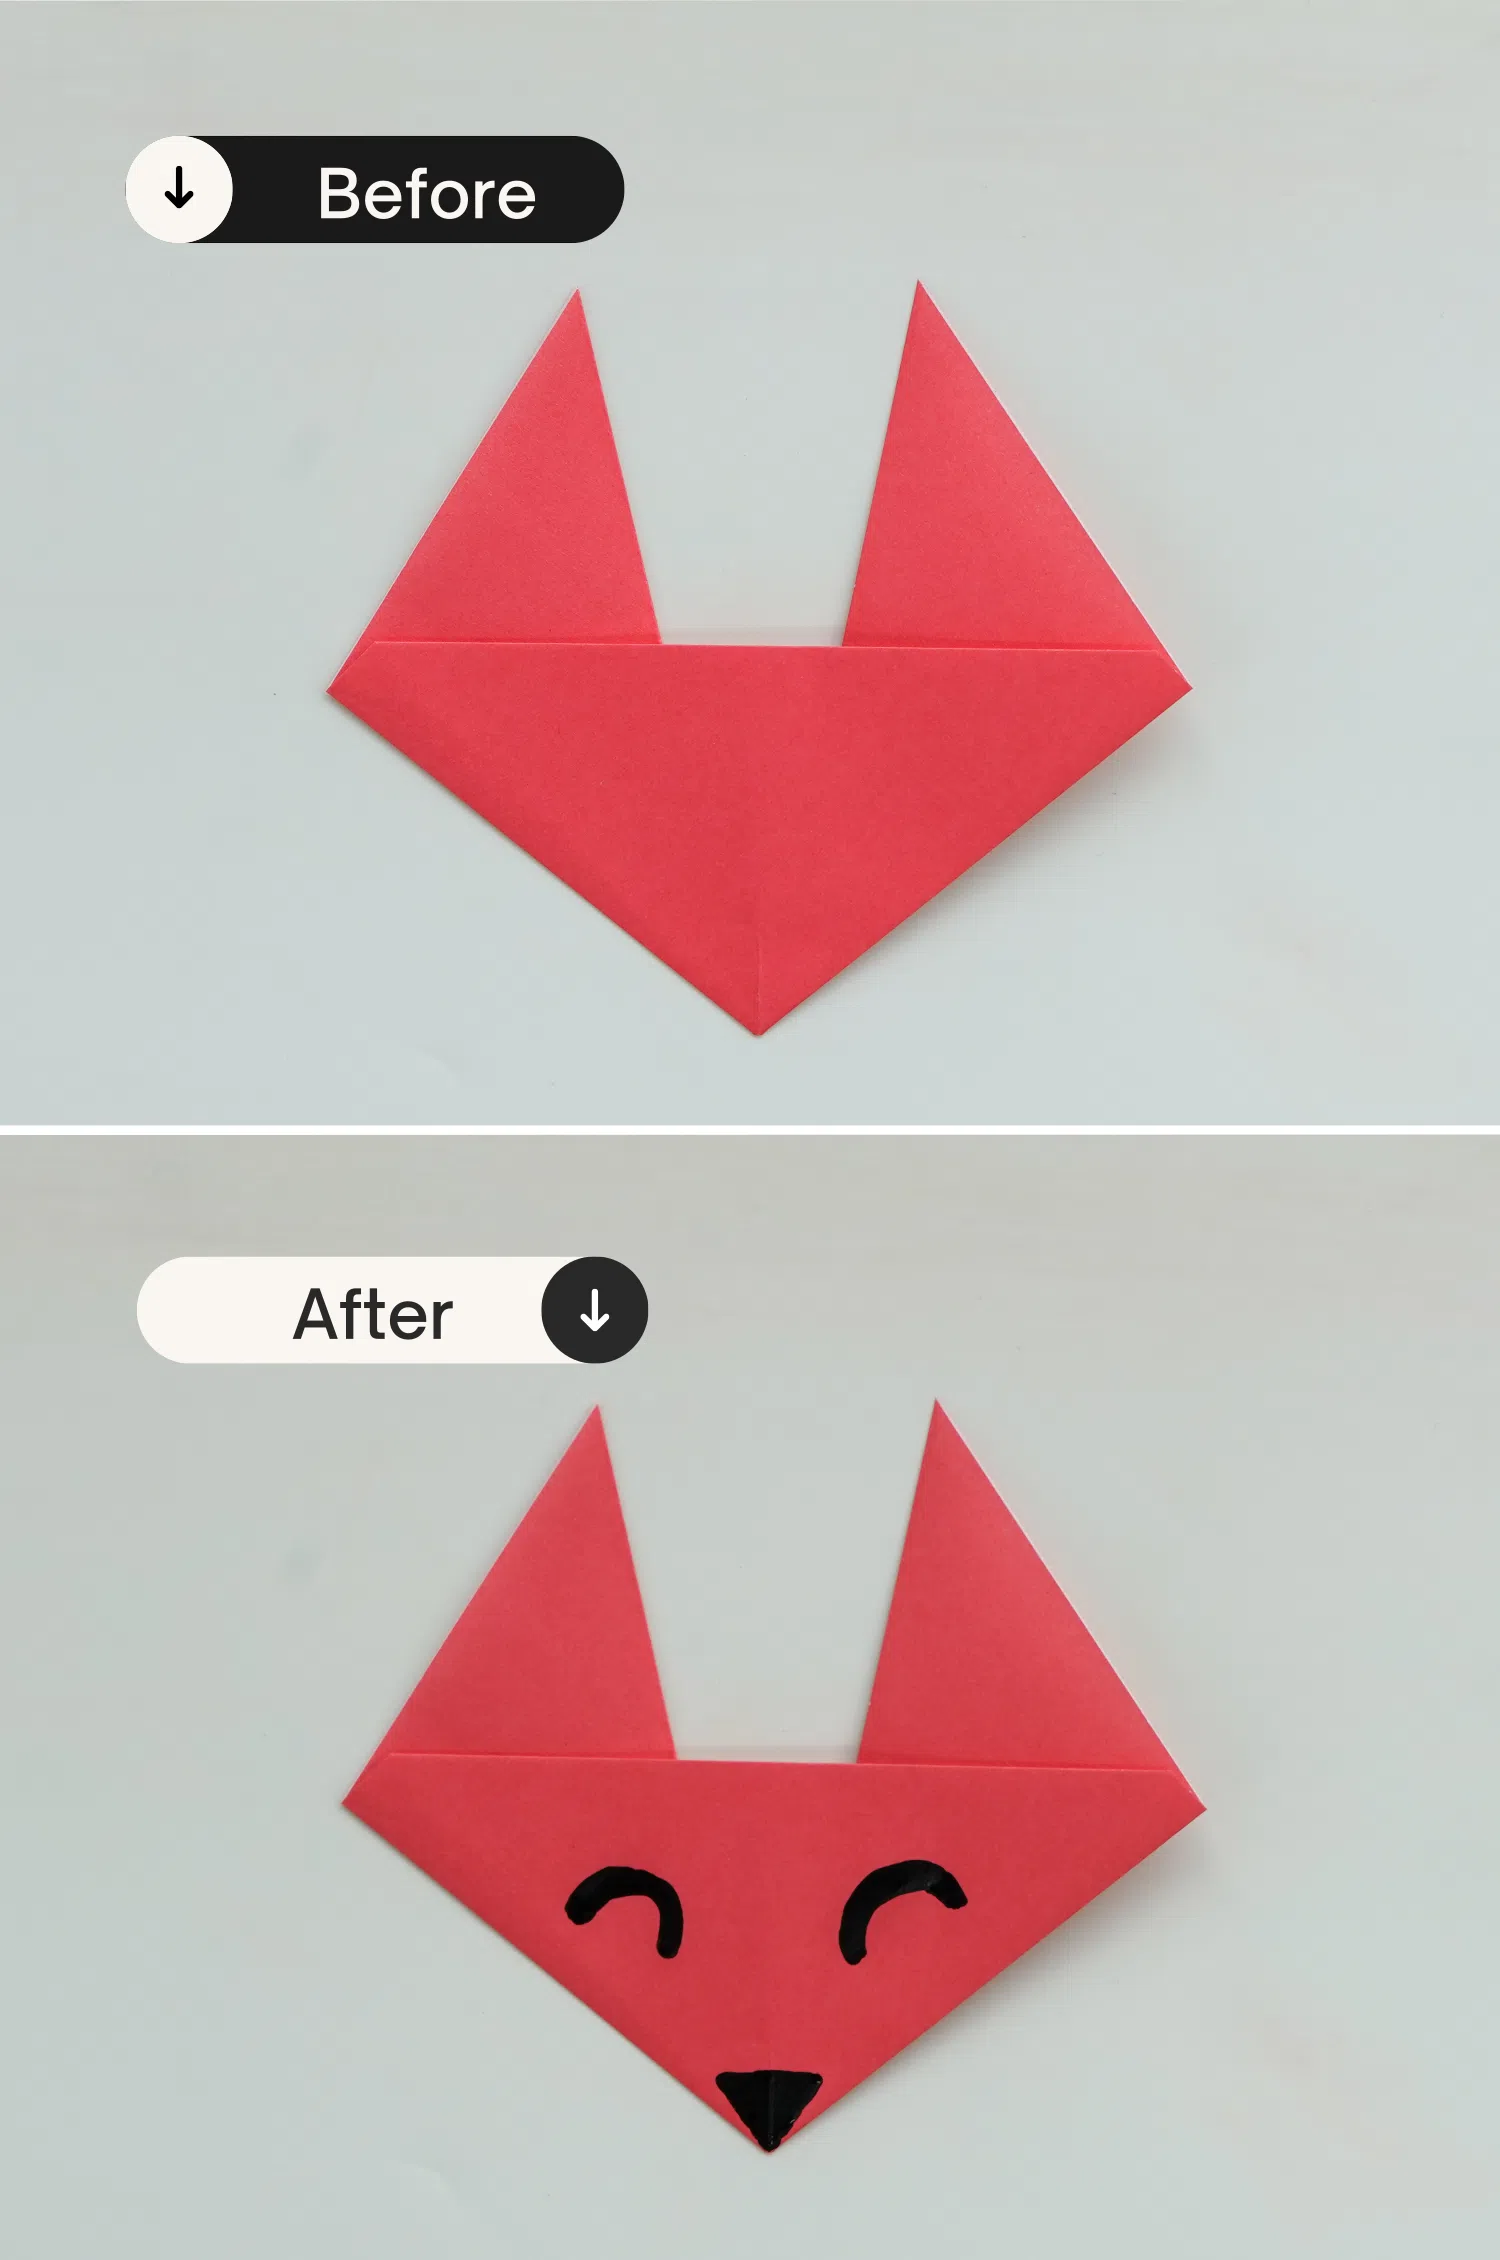
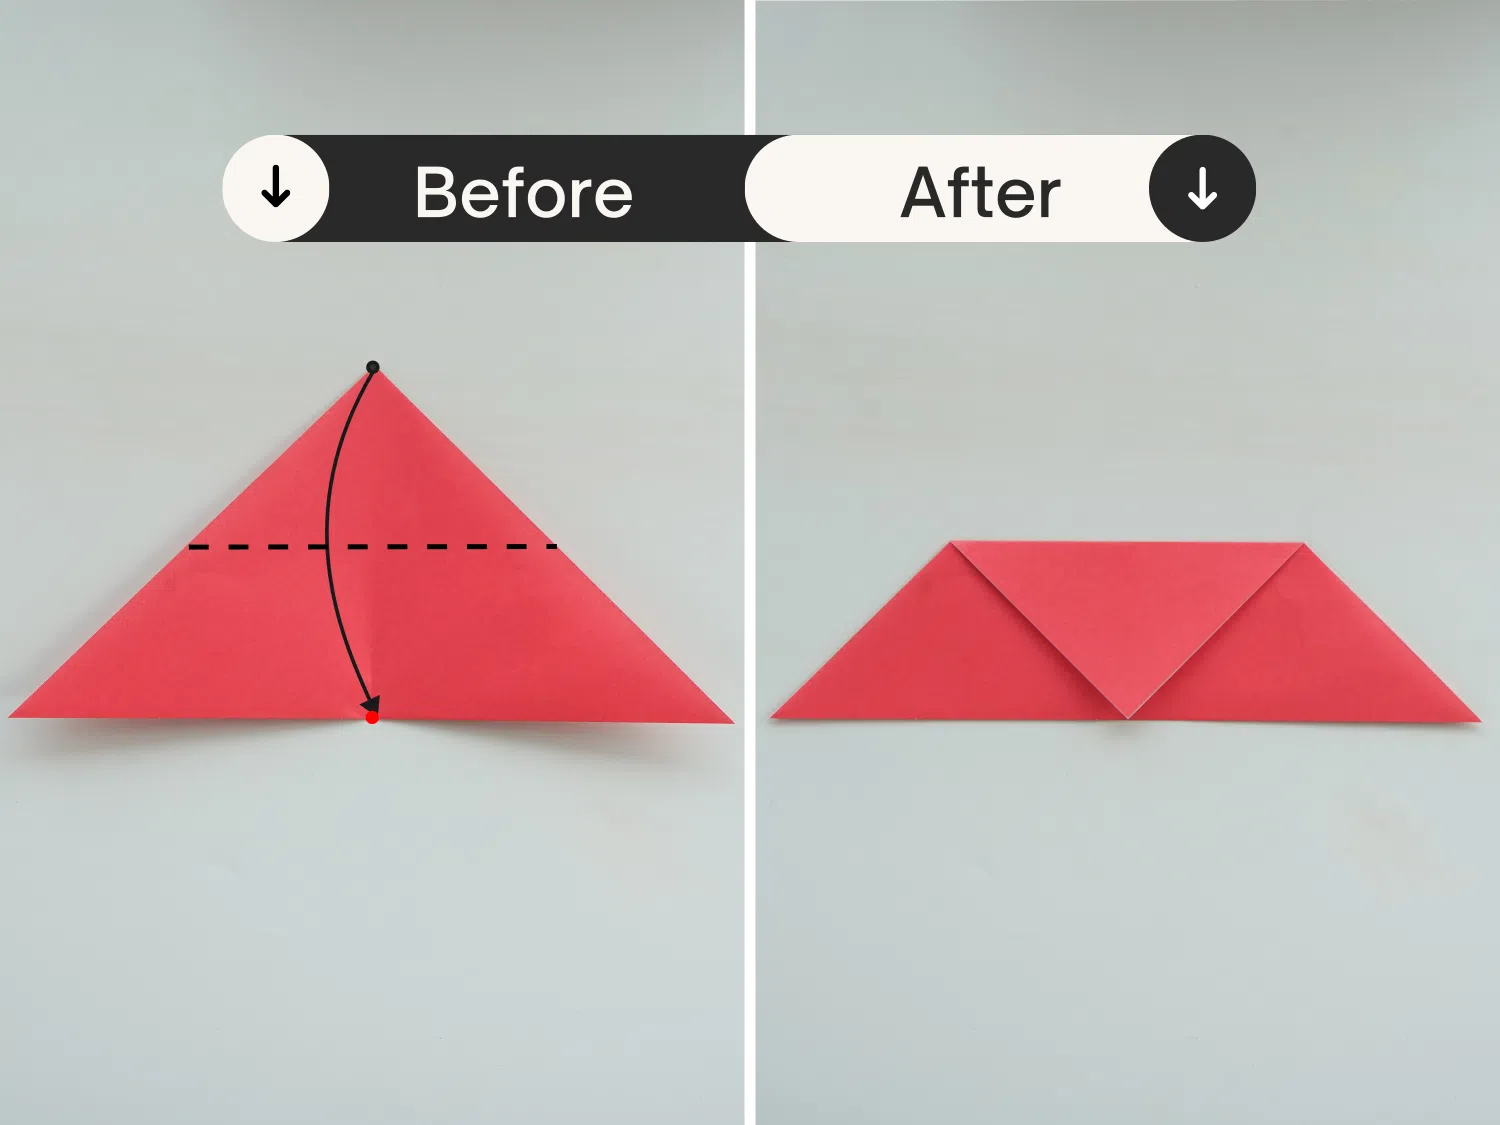
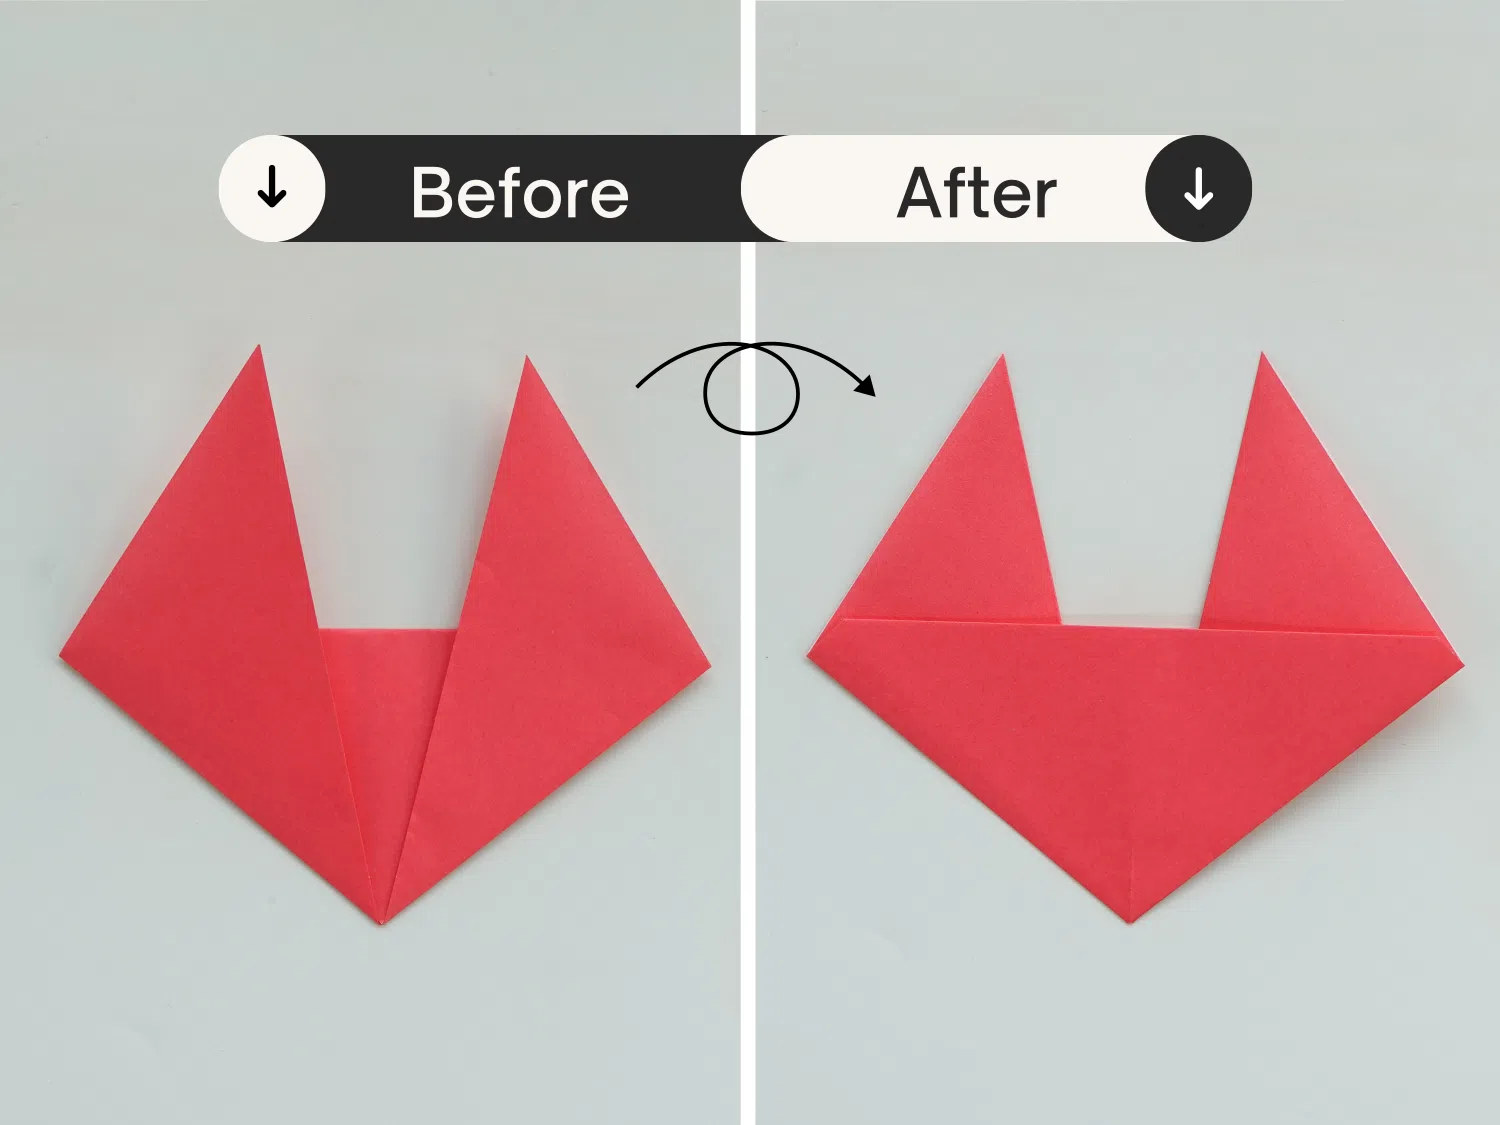
Step 5
Flip it over, you get this special fox face.
Step 6
Draw the fox’s mouth and eyes by yourself.