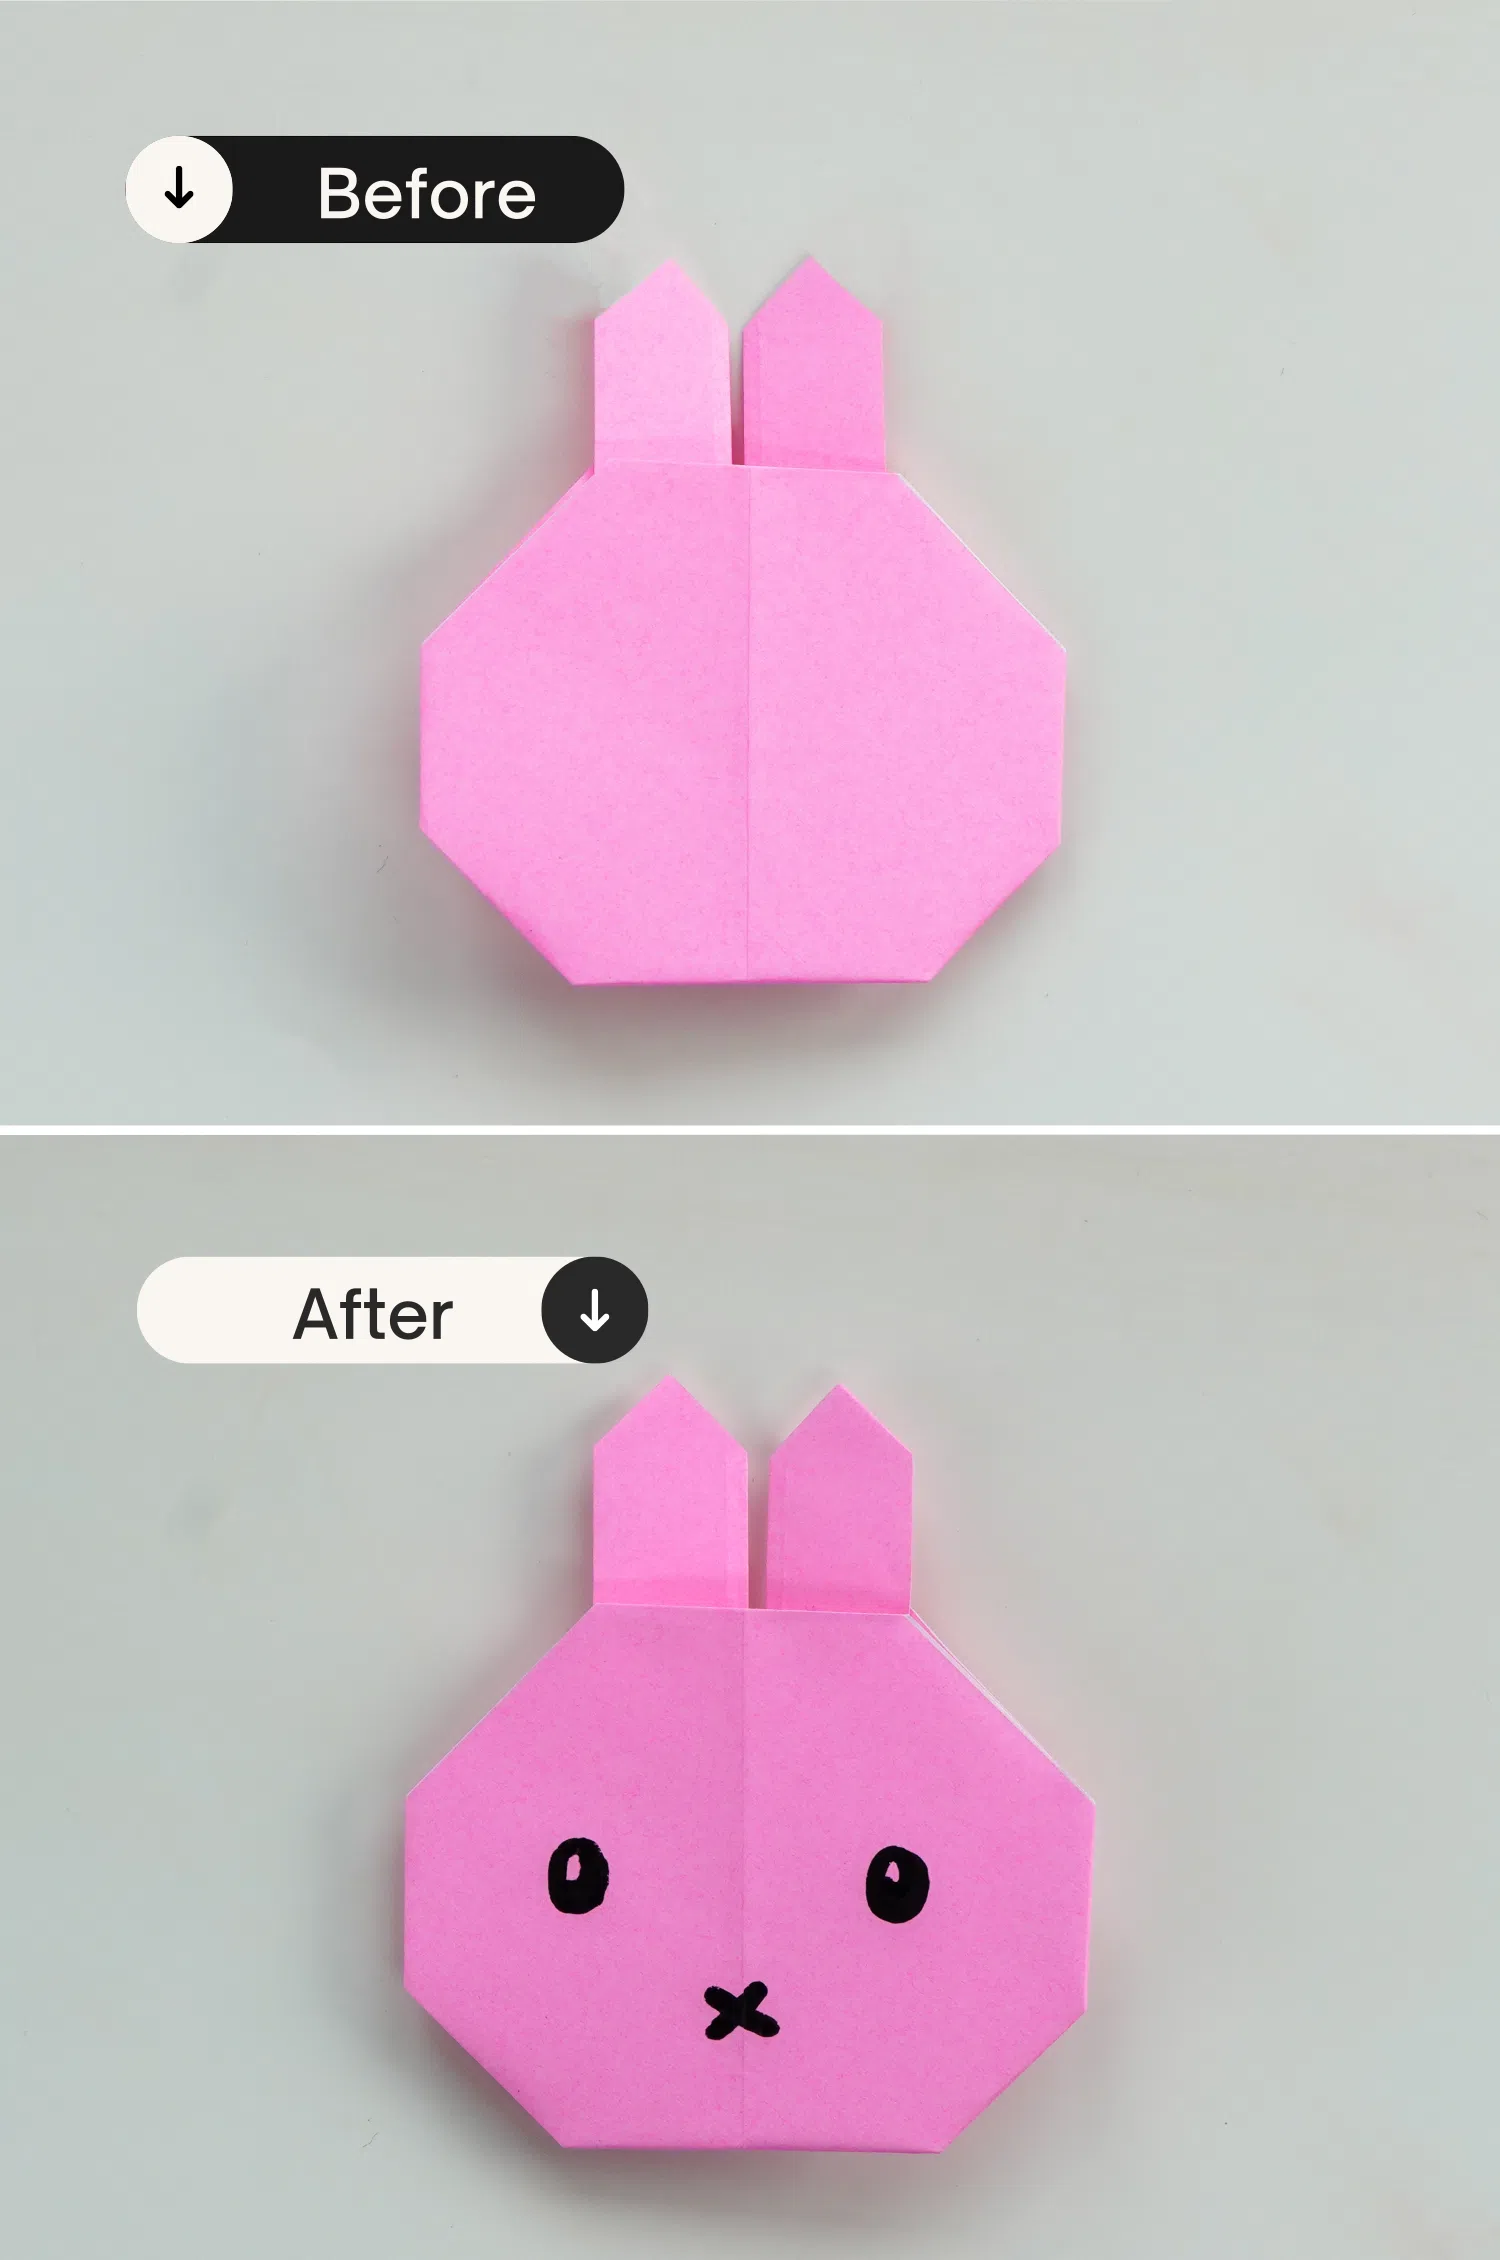
How to Make an Easy Origami Rabbit Face
Step 1
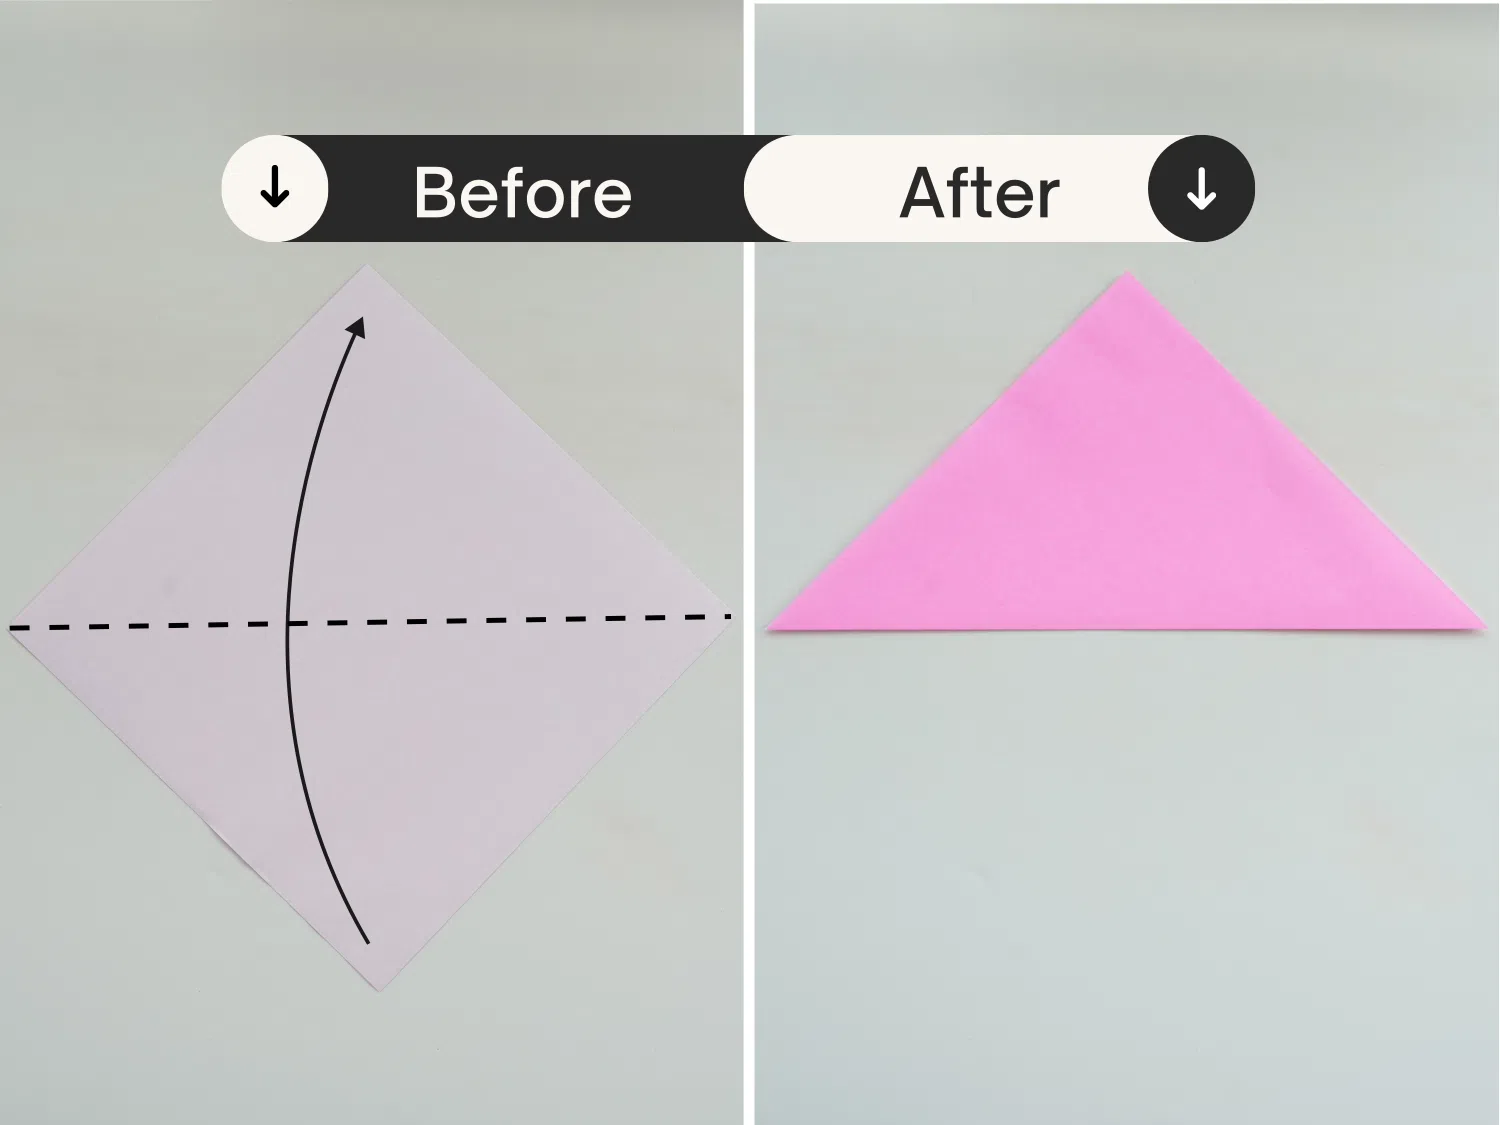
Start with the white side of the paper facing up and fold in half diagonally.
Step 2
Take the one point over to the other side to make a center crease. Then unfold it.

Step 3
Fold the bottom edge up a little.

Step 4
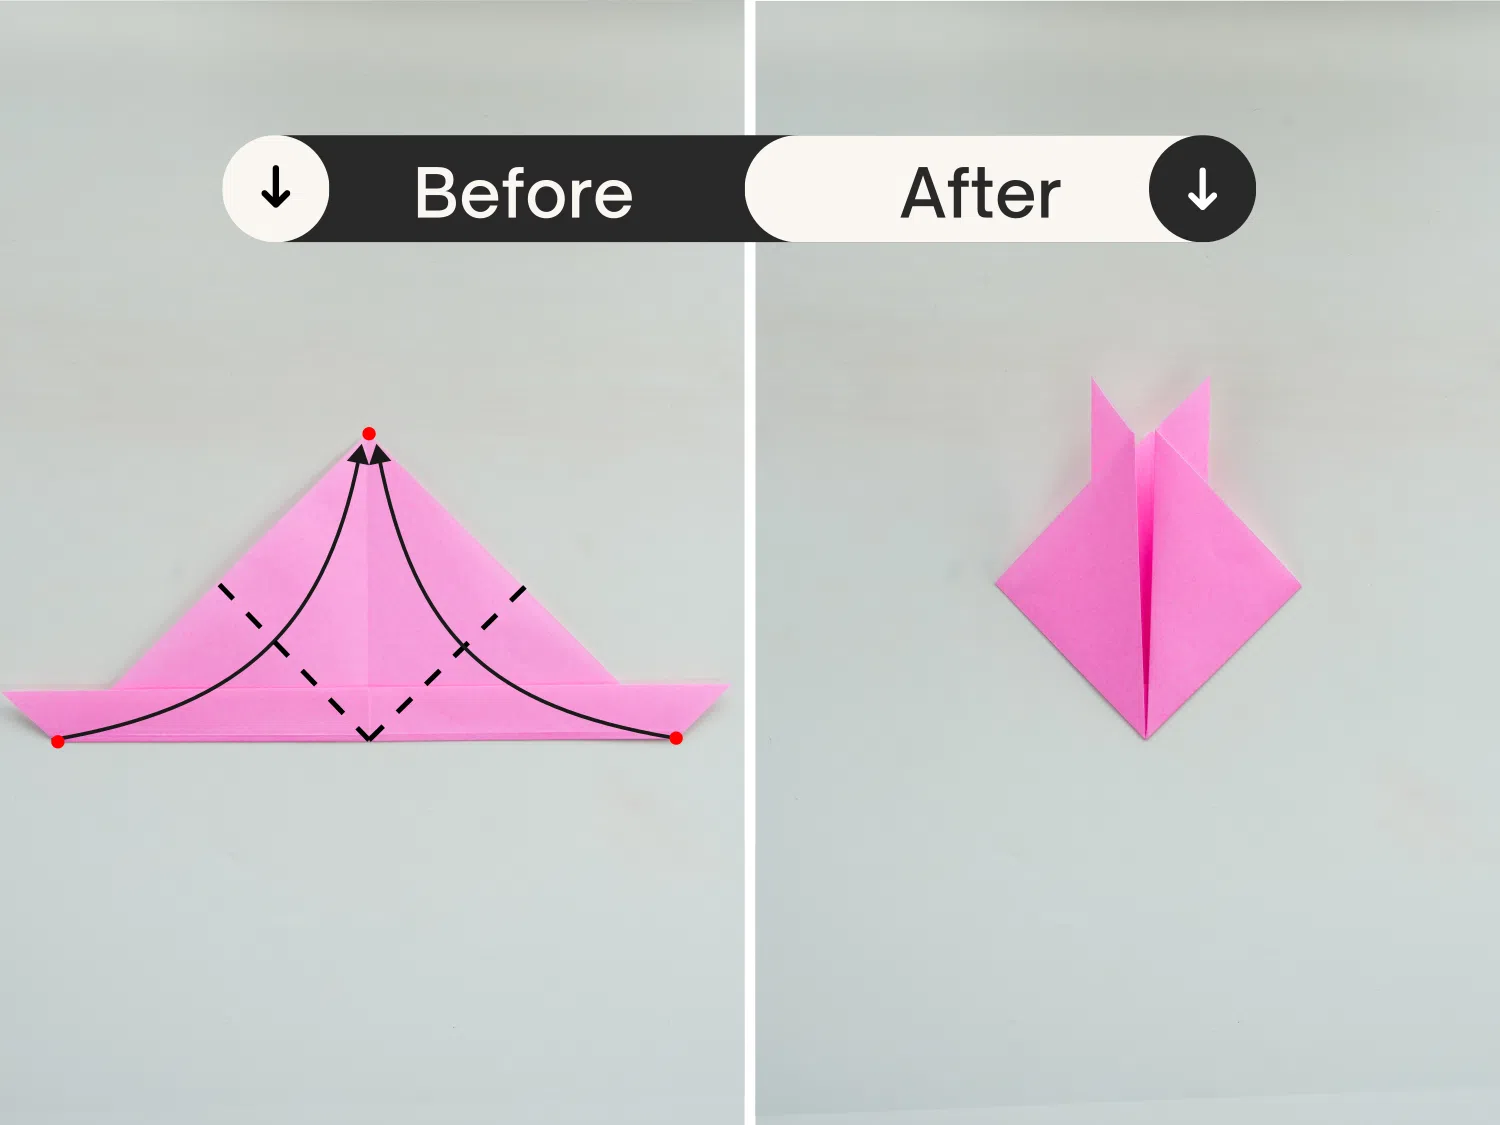
Take the right point of the original triangle , bring it up and fold it to the top point.
Repeat the other side too.
Step 5
Flip it over.

Step 6
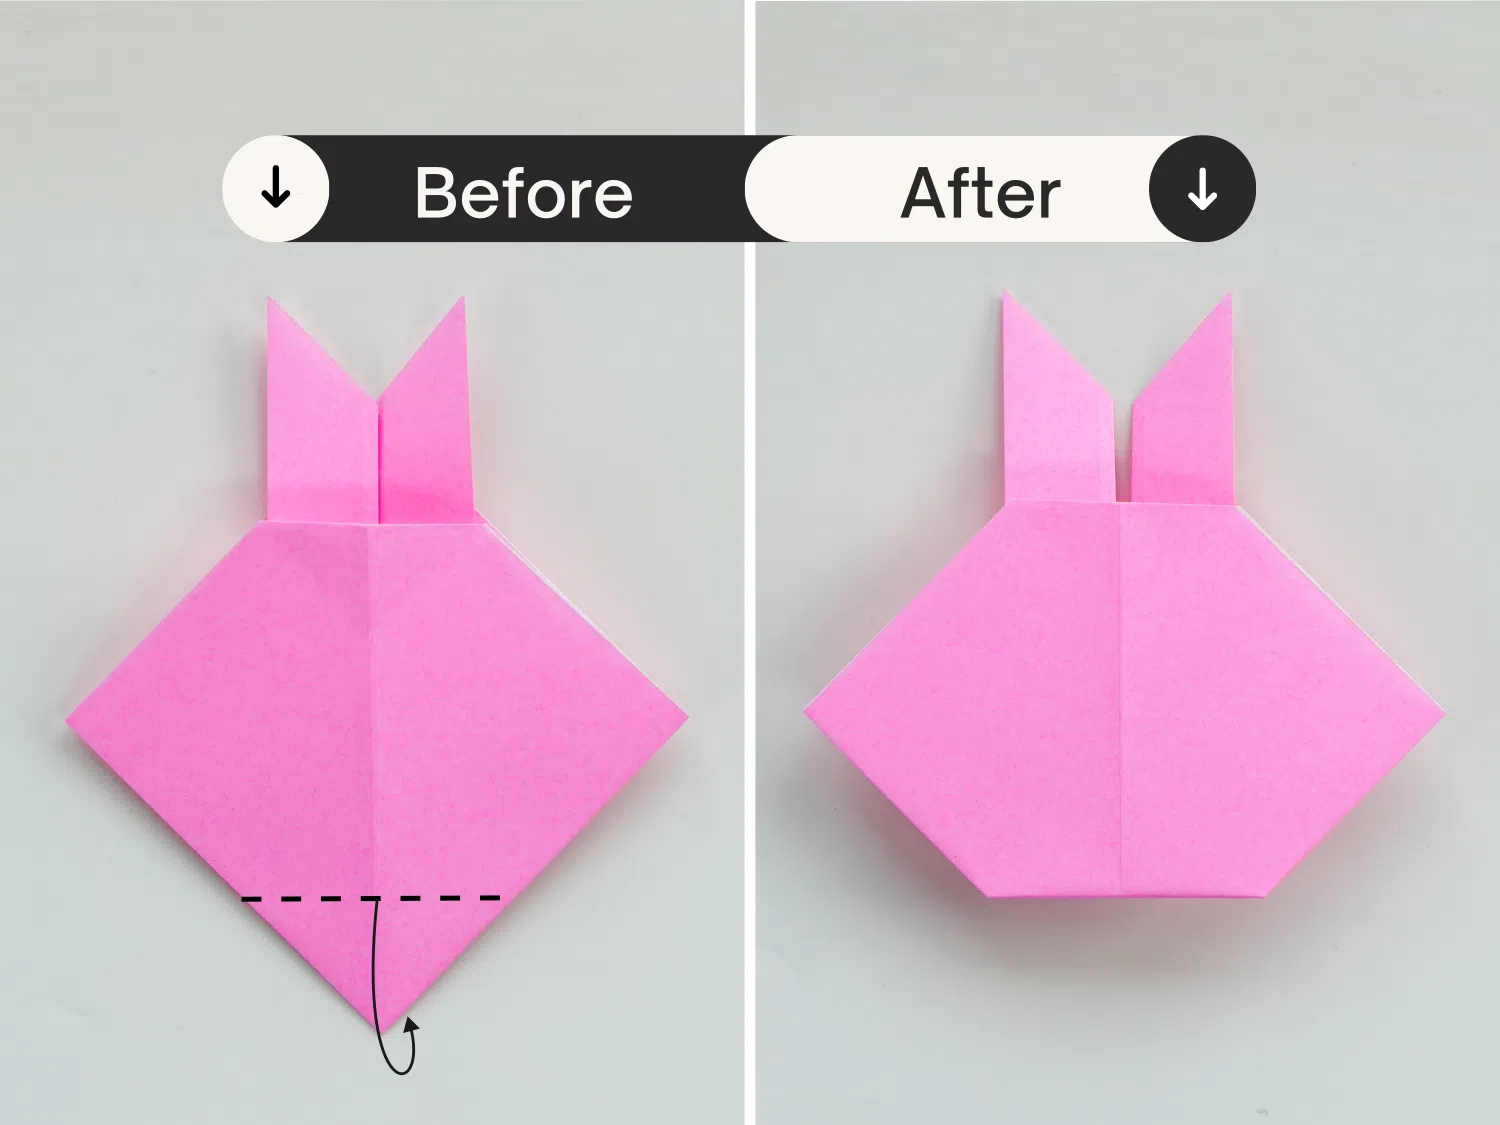
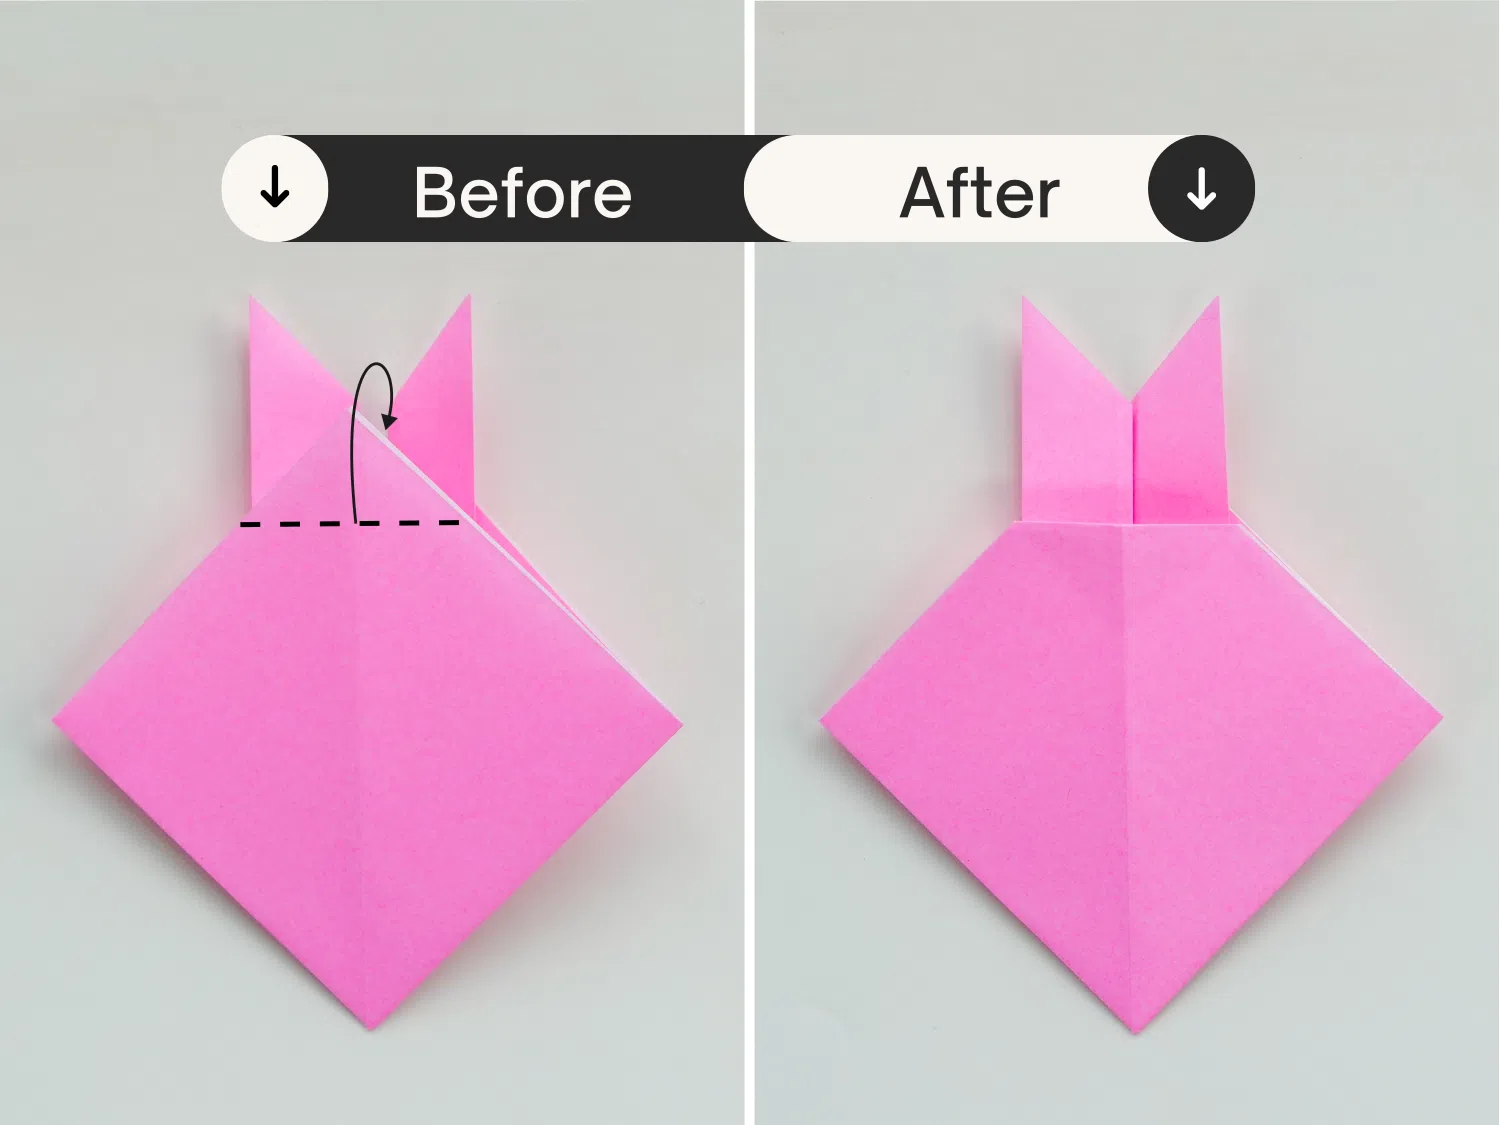
Now fold the bottom point backward a little to form the rabbit’s chin.
Step 7
Now we have a front square with two ears behind. Fold the top point of the square backward a little to form the rabbit’s forehead. We get the rabbit’s forehead and ears now.
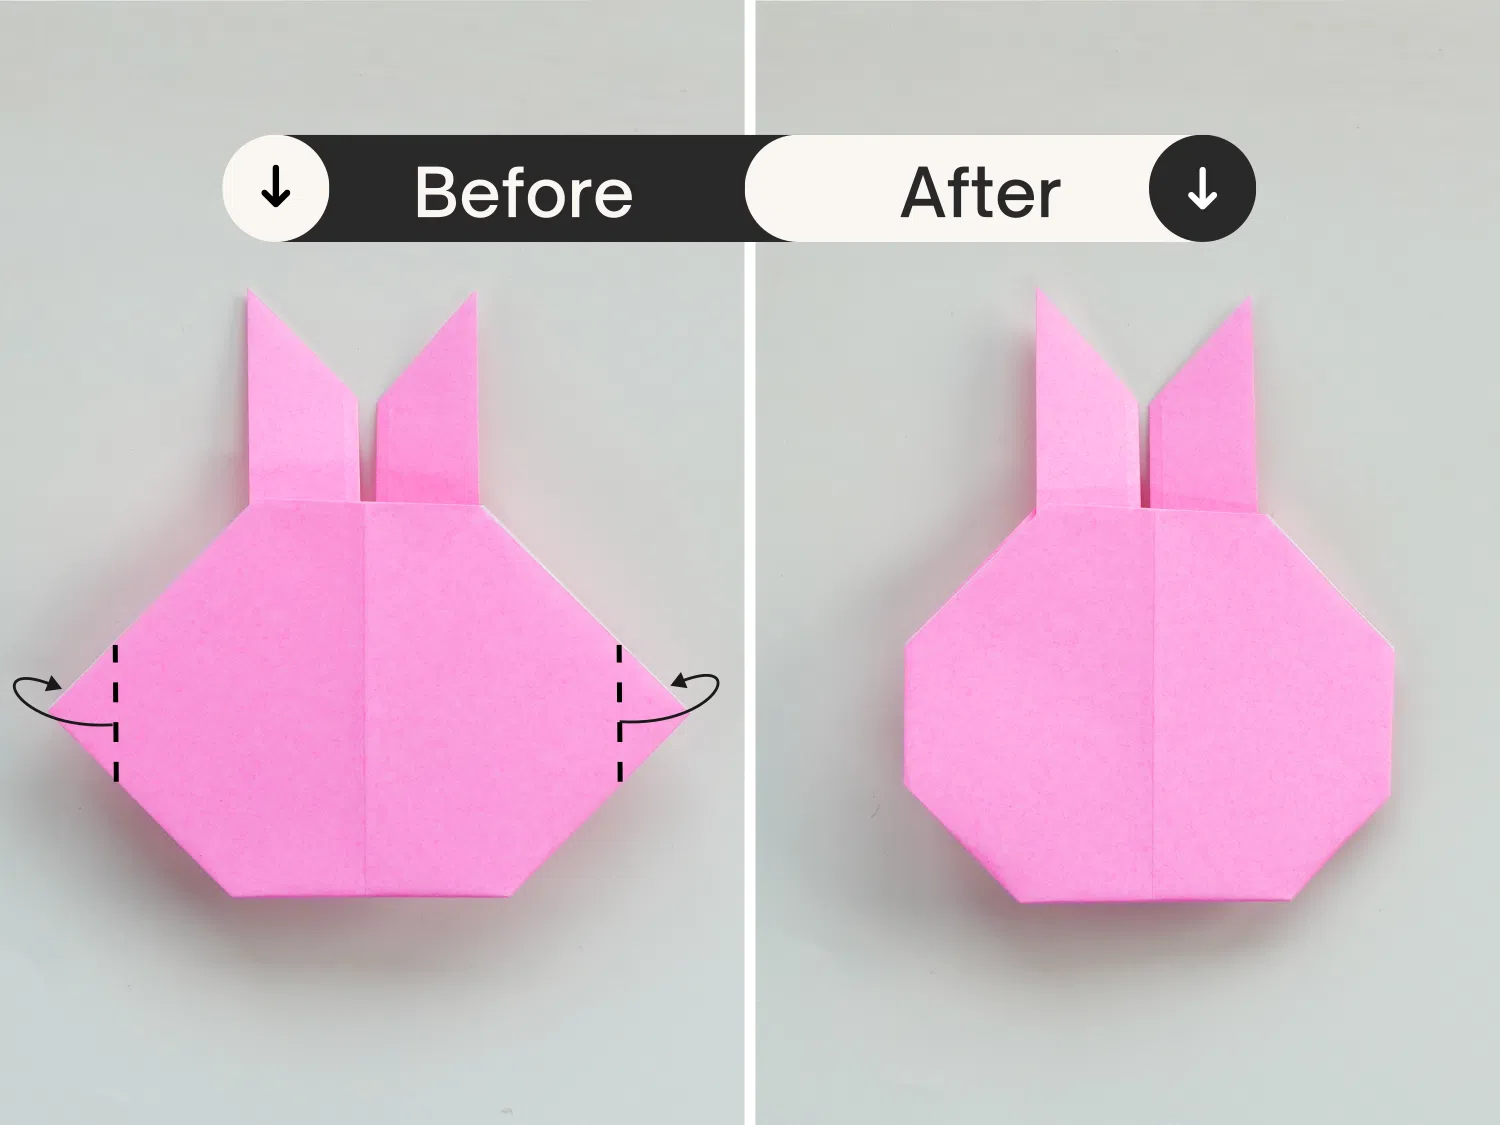
Step 8
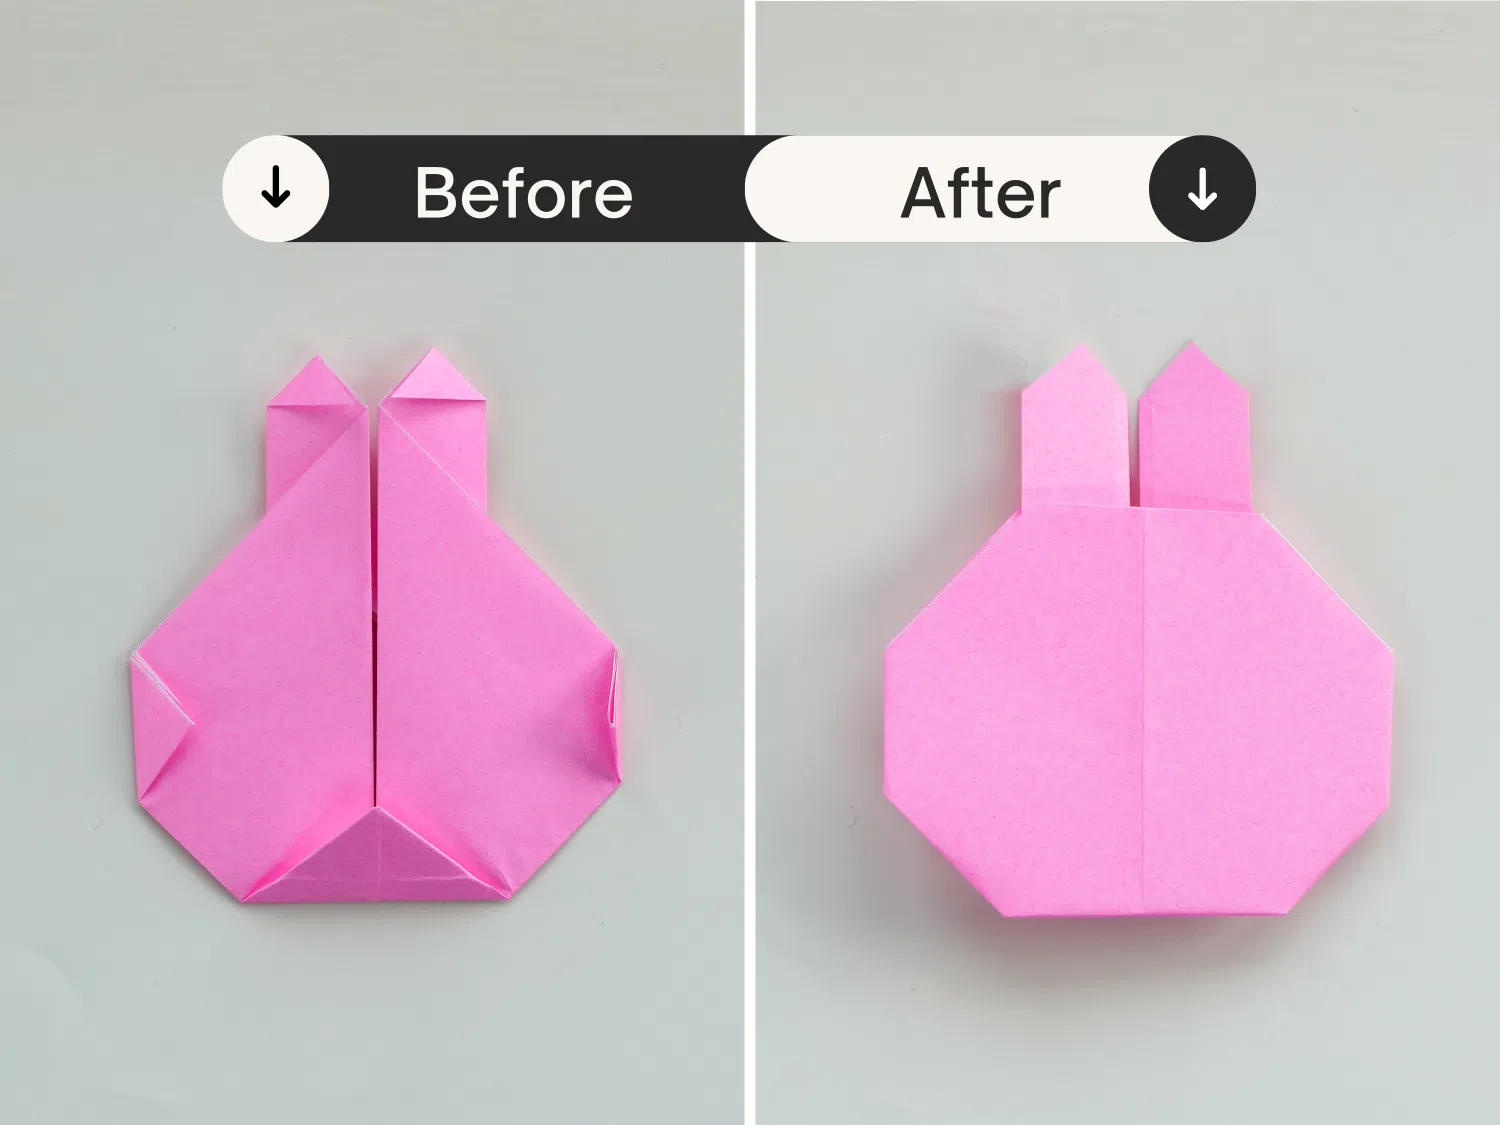
Fold both the right corner and left corners backward a little, adjusting the cheekbone of your rabbit.
You may adjust this part for a personalized face shape.
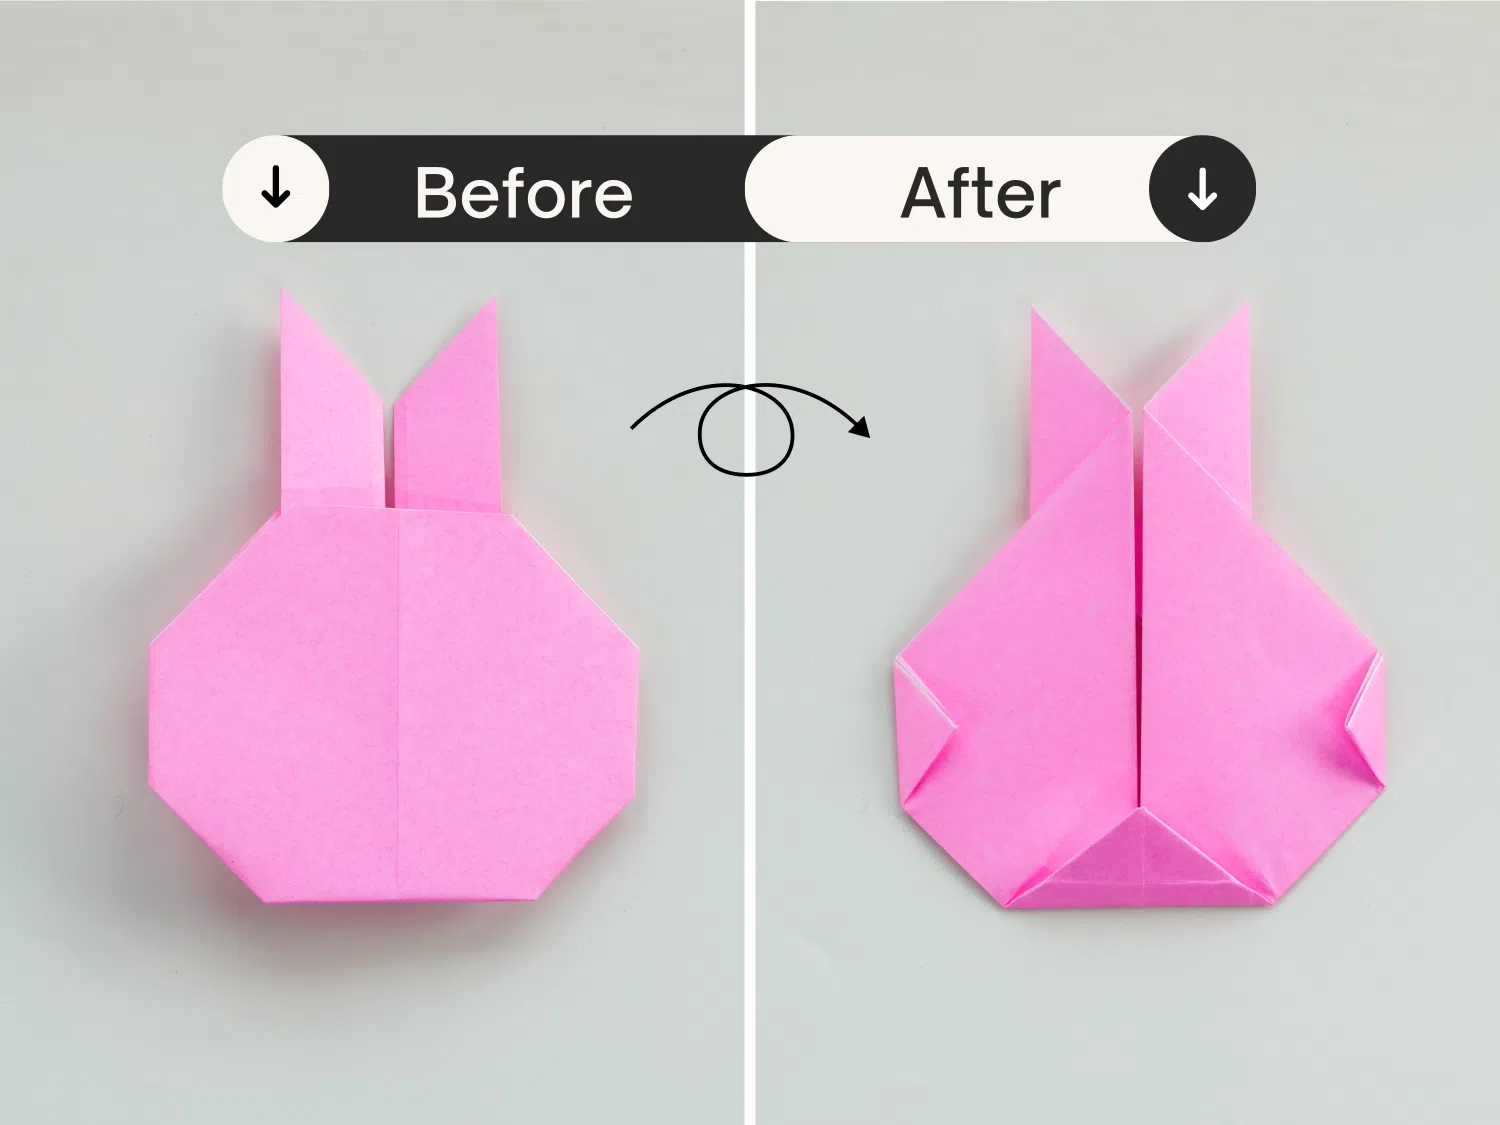
Step 9
Flip the paper over.
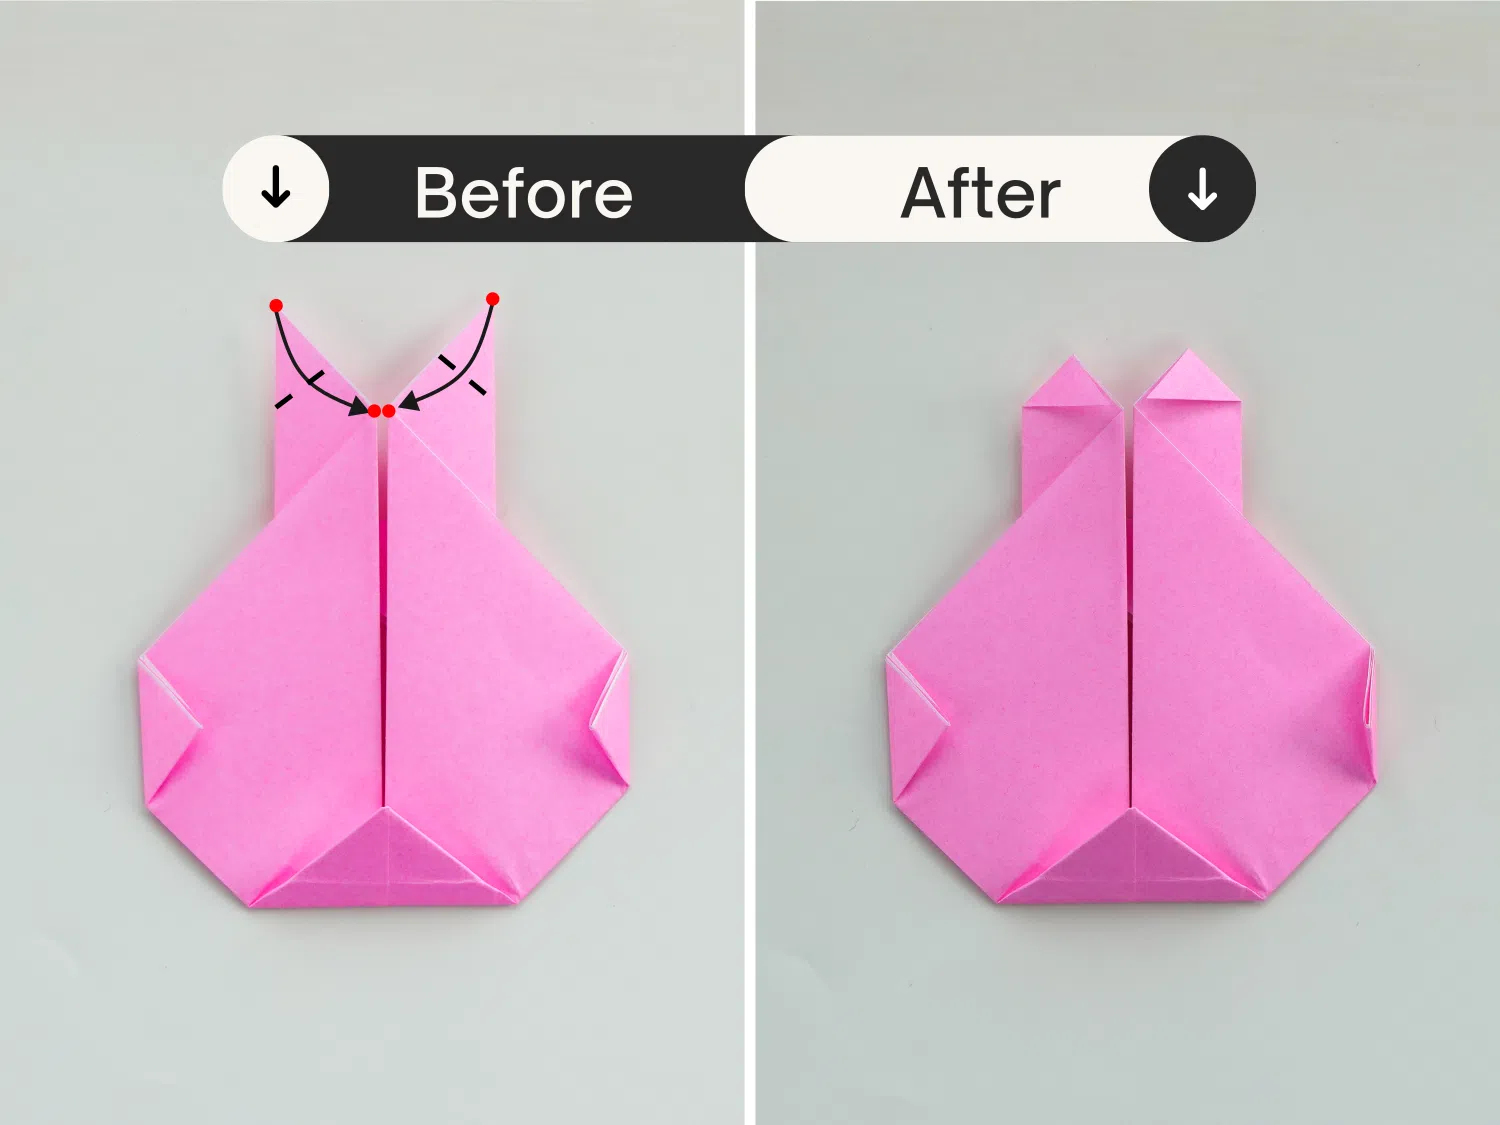
Step 10
Take the top point of the right ear, and fold it down diagonally to meet the top point of the face.
Repeat the other ear too.
Step 11
Flip it over again, now you get this lovely rabbit face.
Step 12
You can draw the rabbit’s eyes, and mouth.