How to Fold an Origami Chameleon
Step 1
Place the paper with the desired display color side down to begin folding, fold it in half horizontally, leaving a crease, and unfold it.
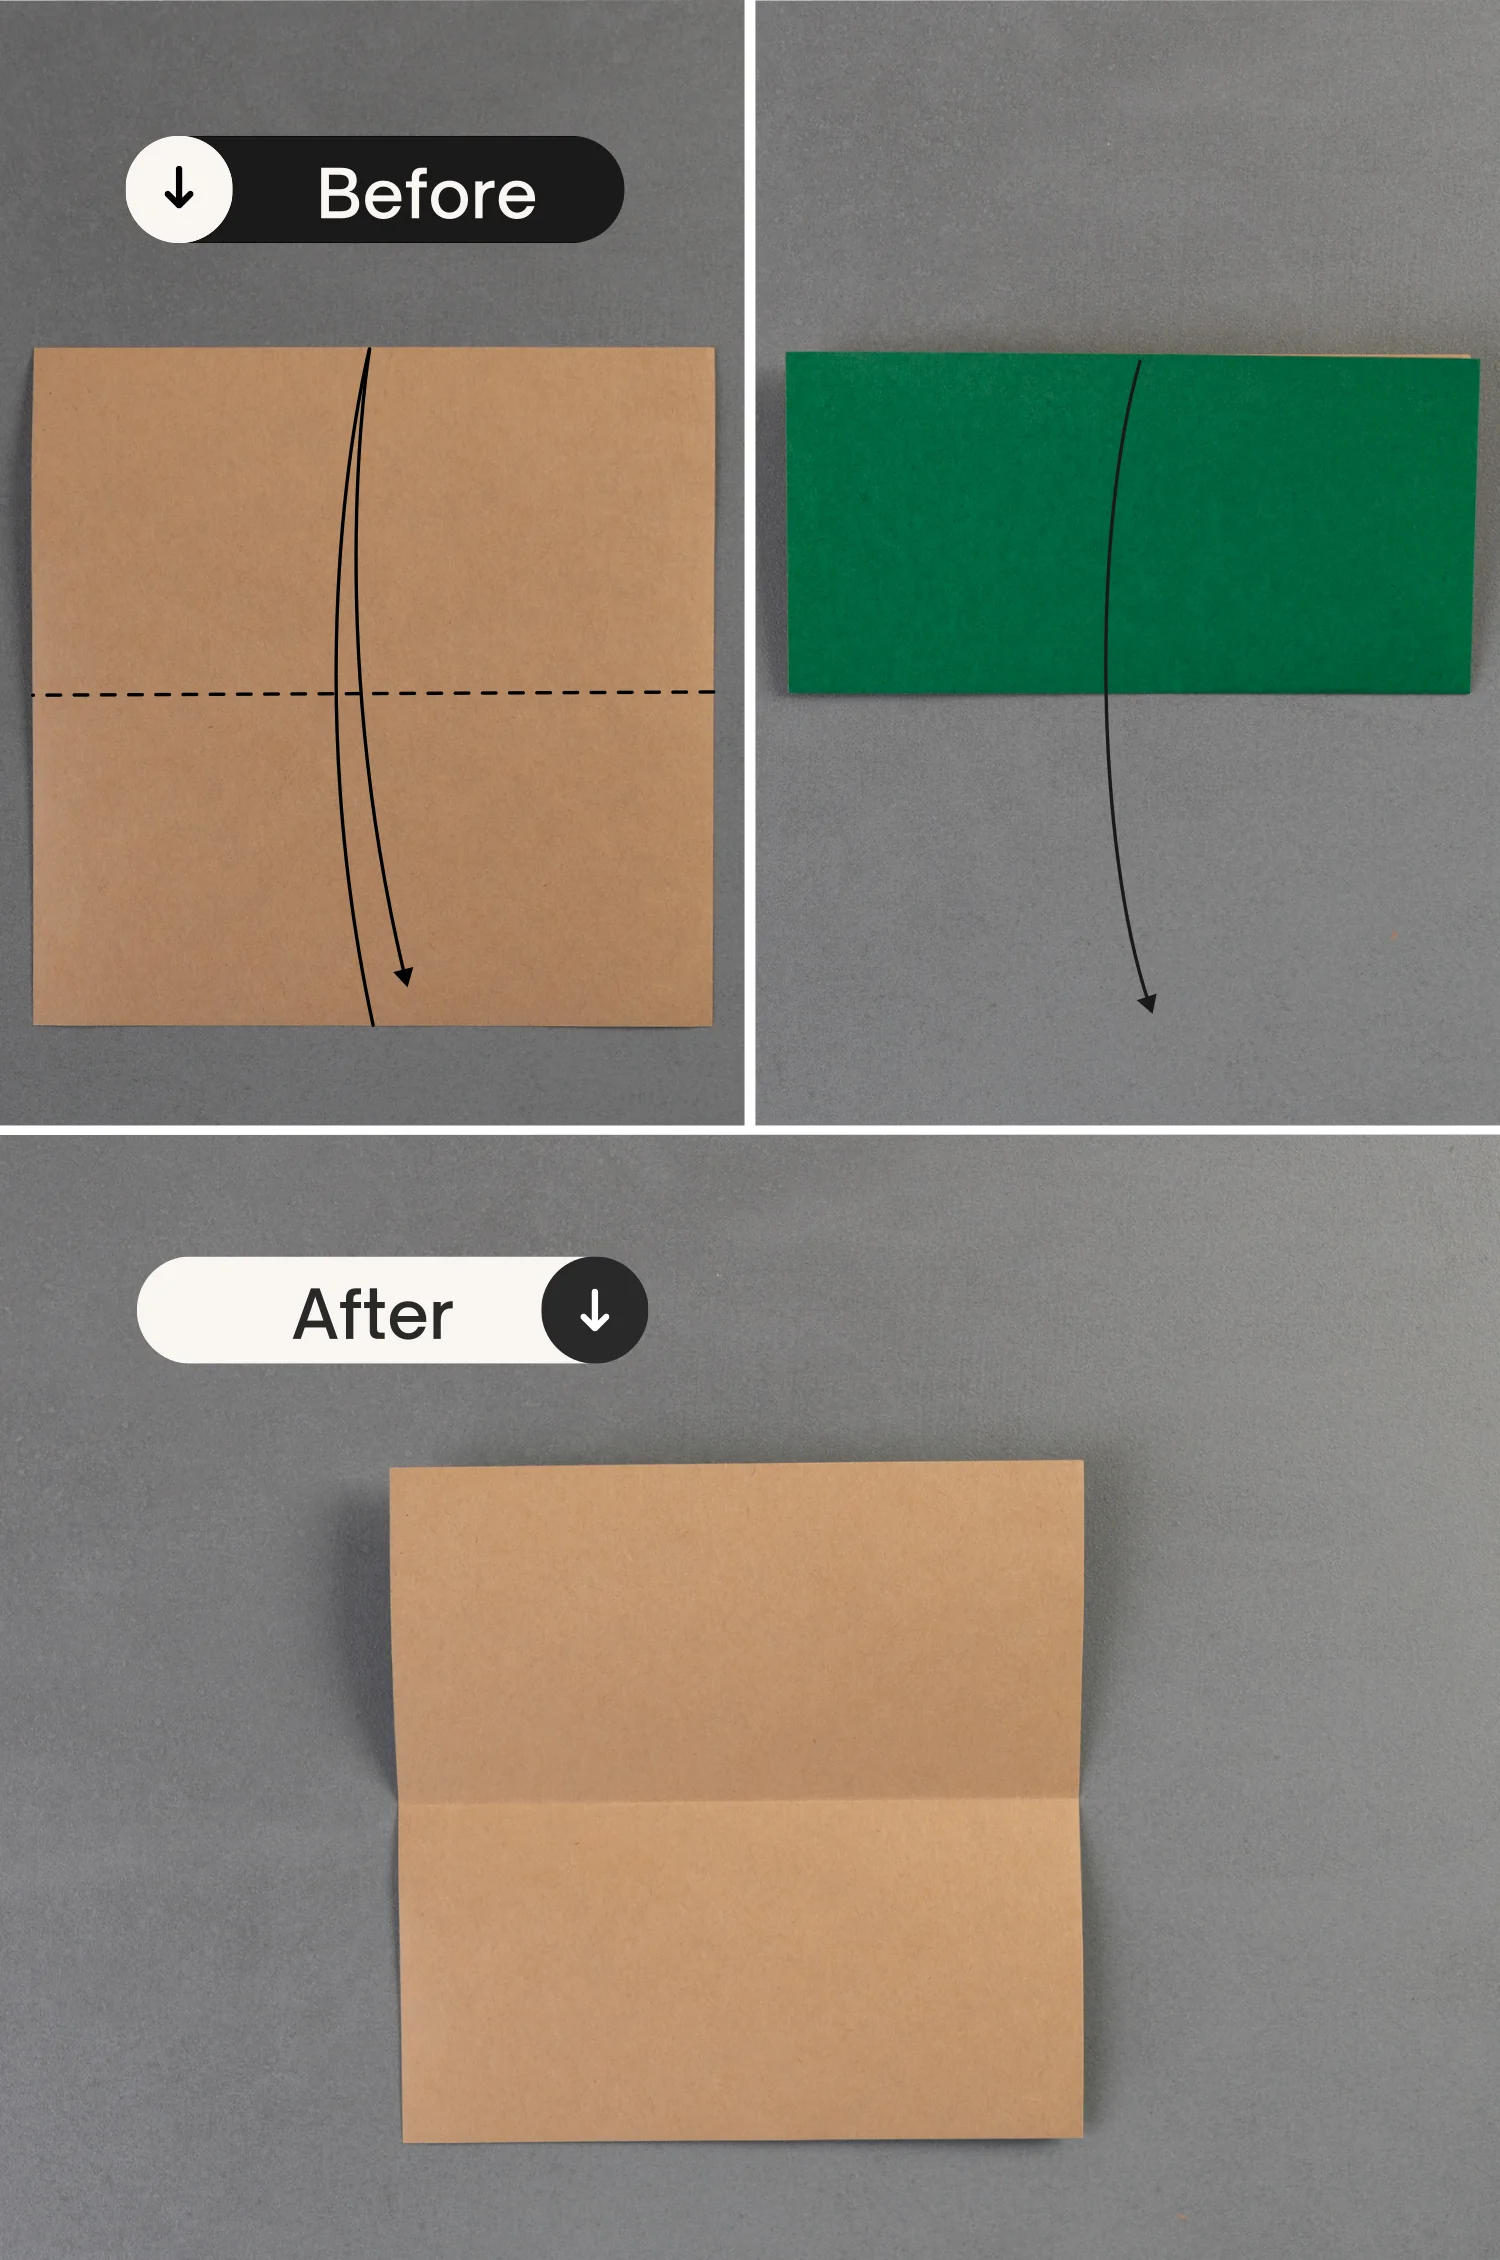
undefined
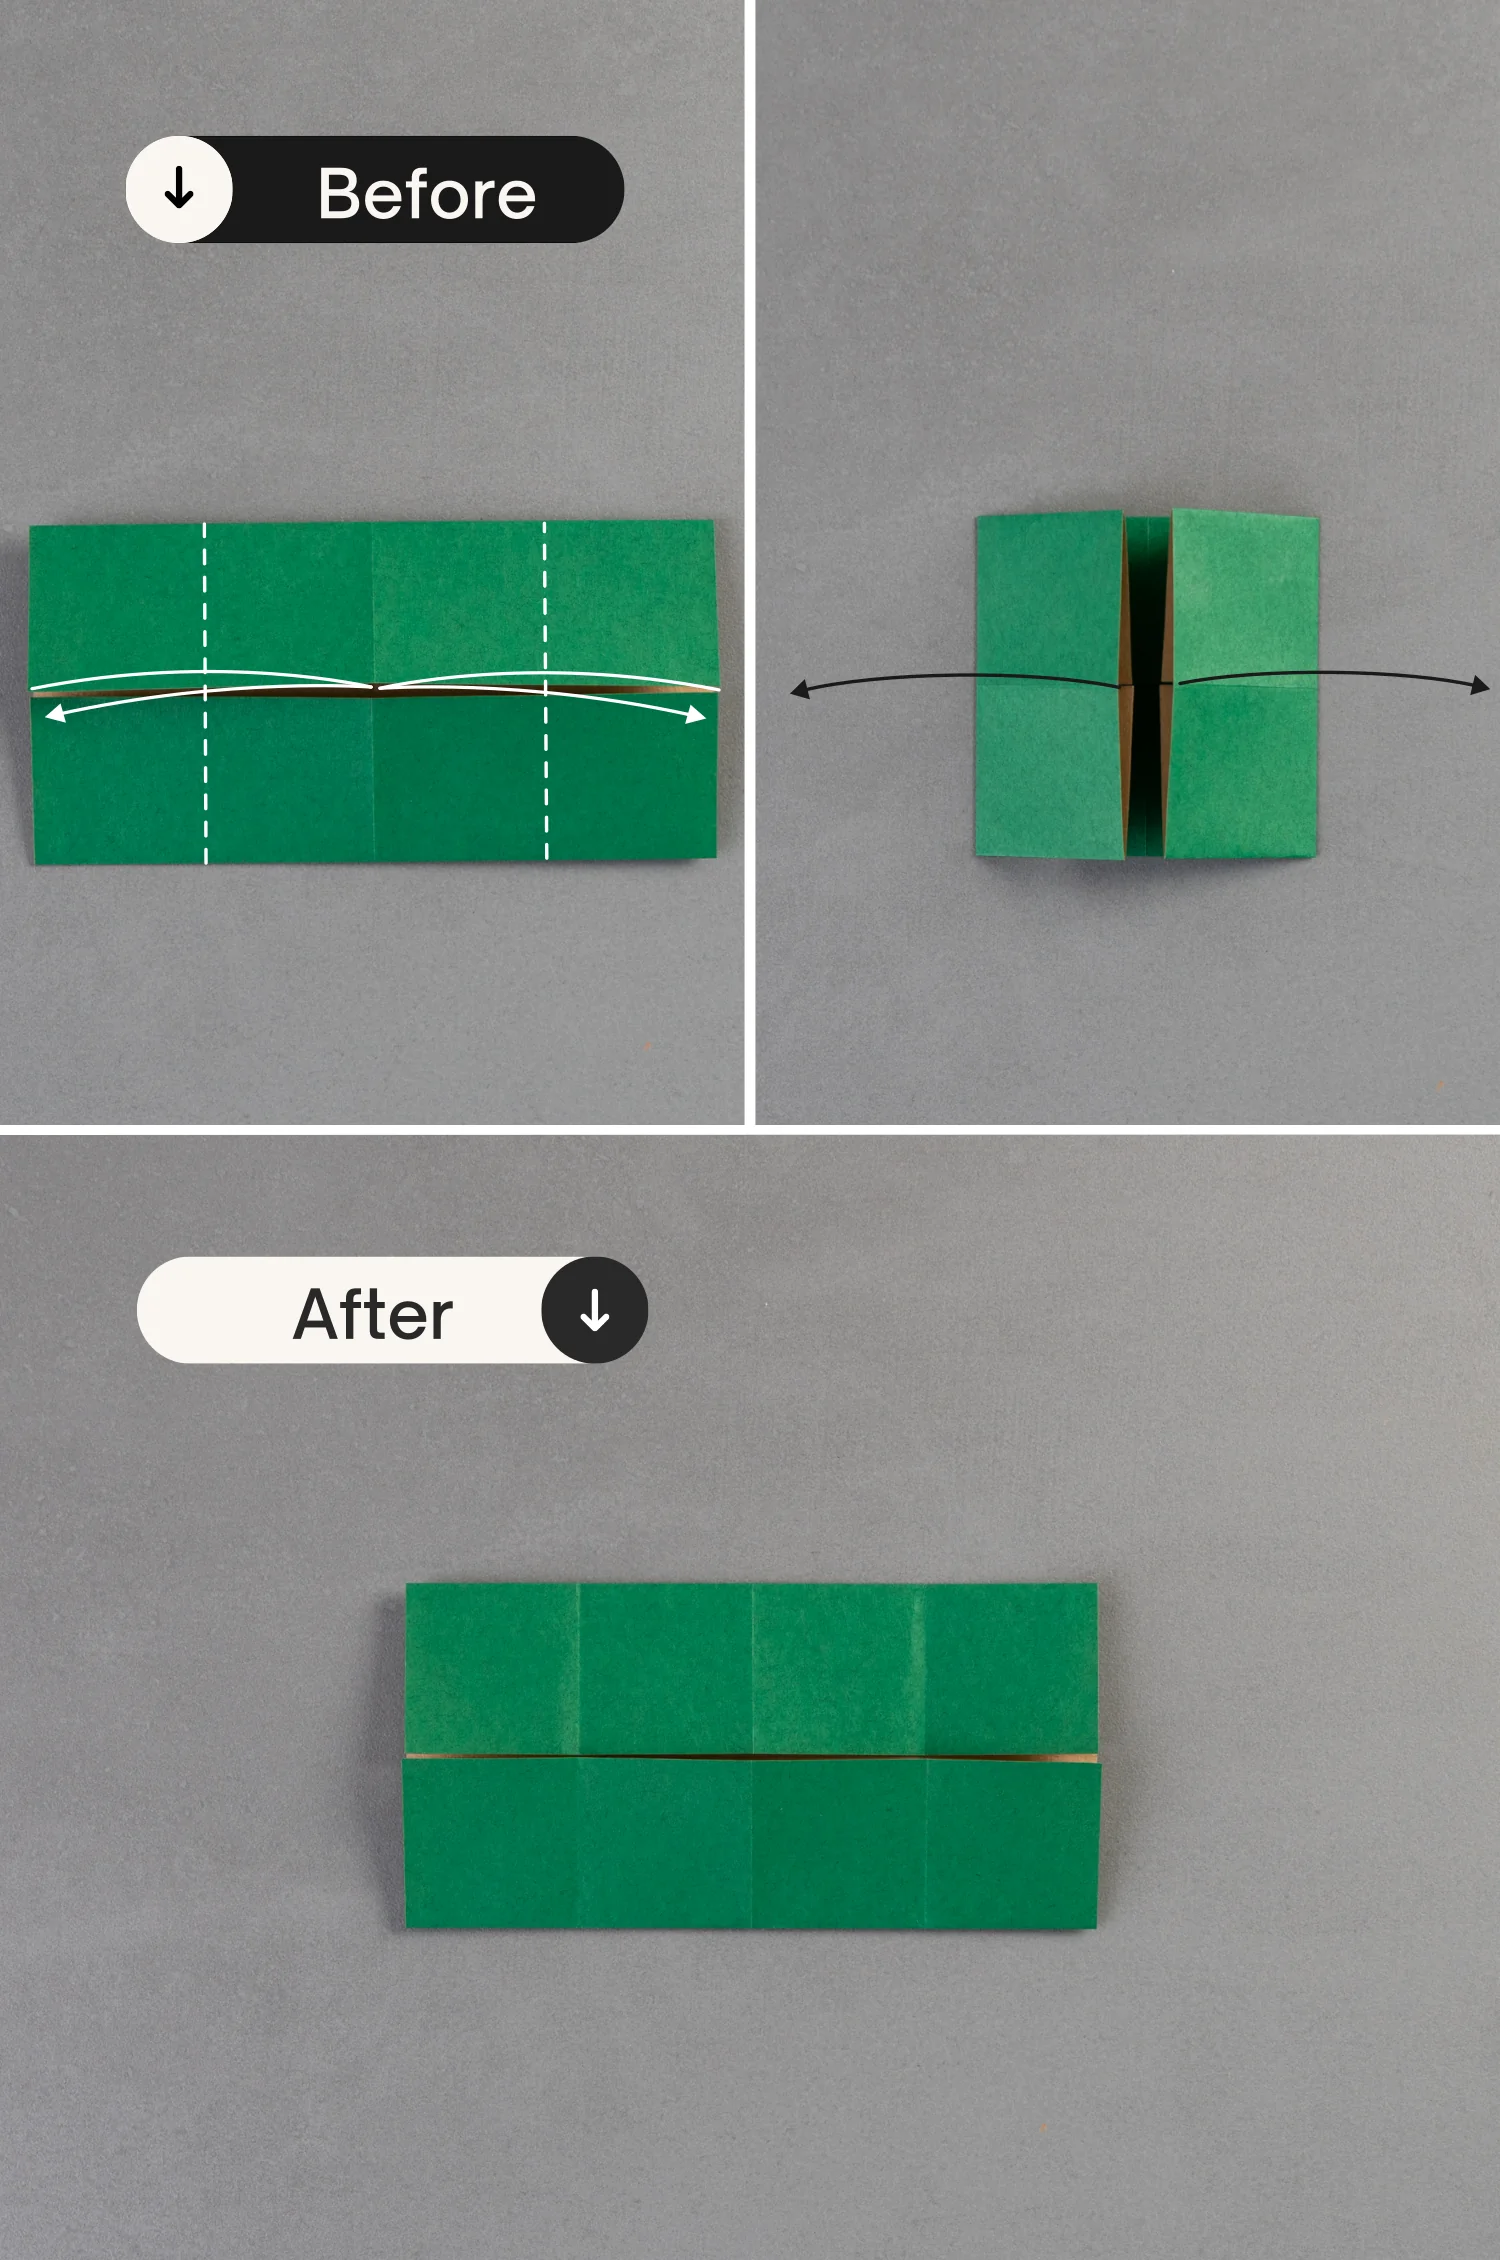
Step 2
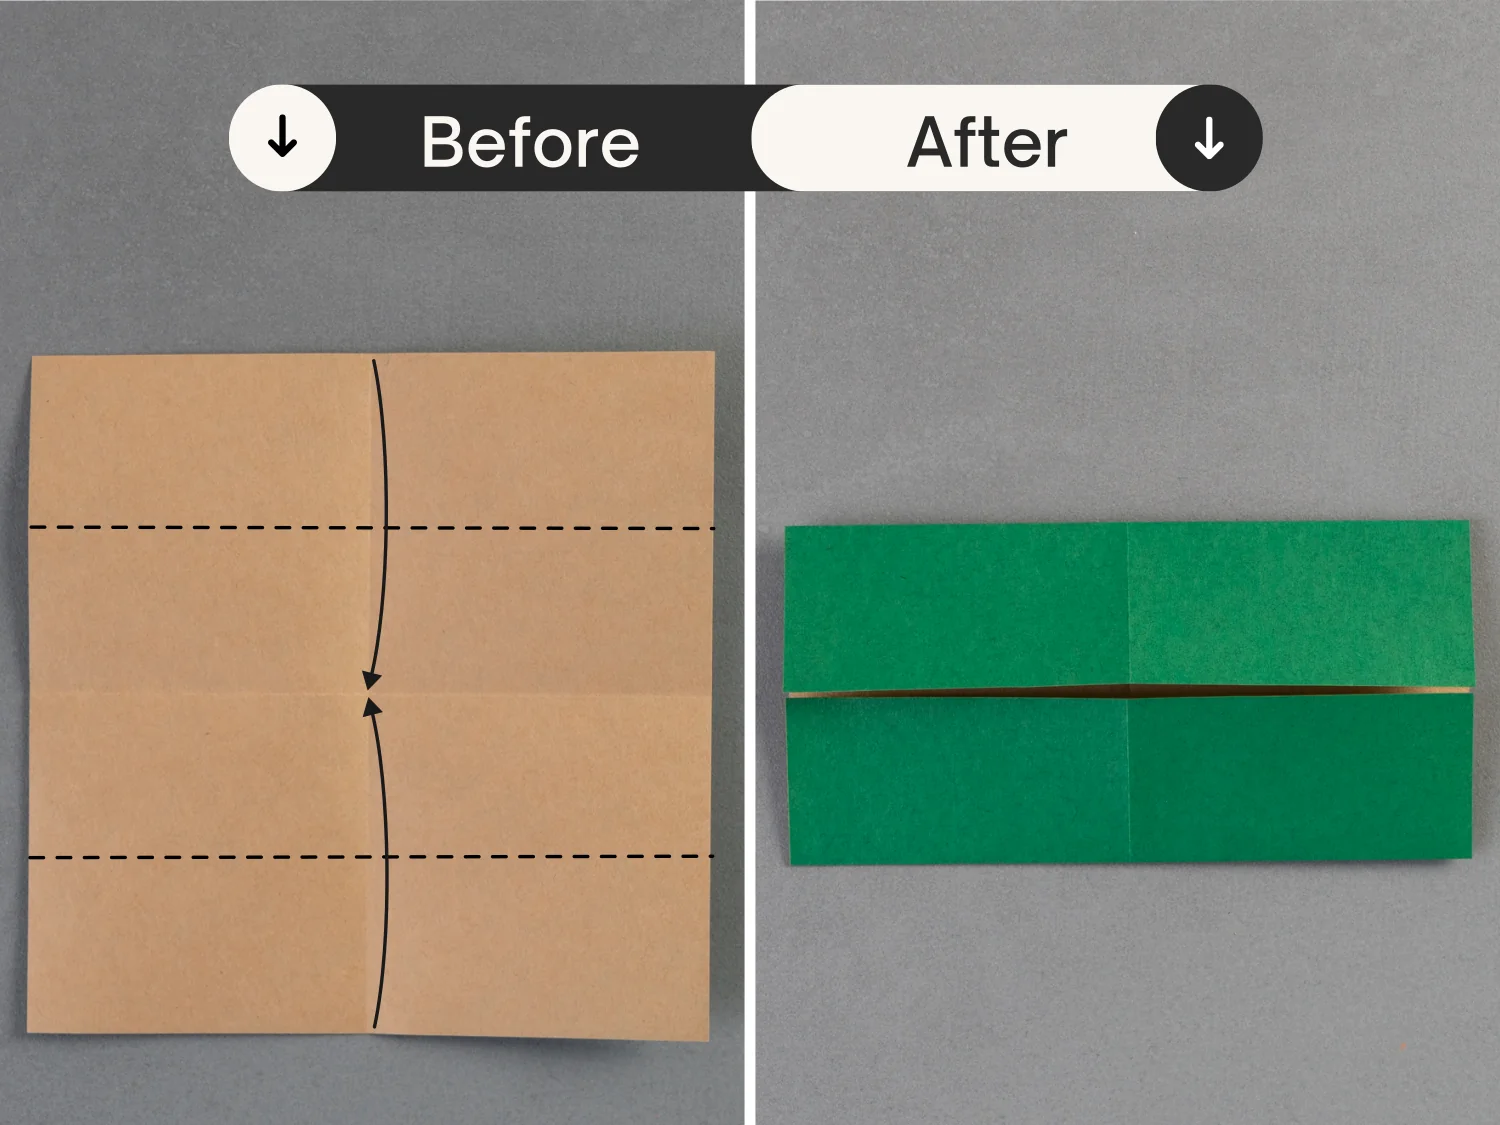
Fold it in half vertically, and unfold it.
undefined
Step 3
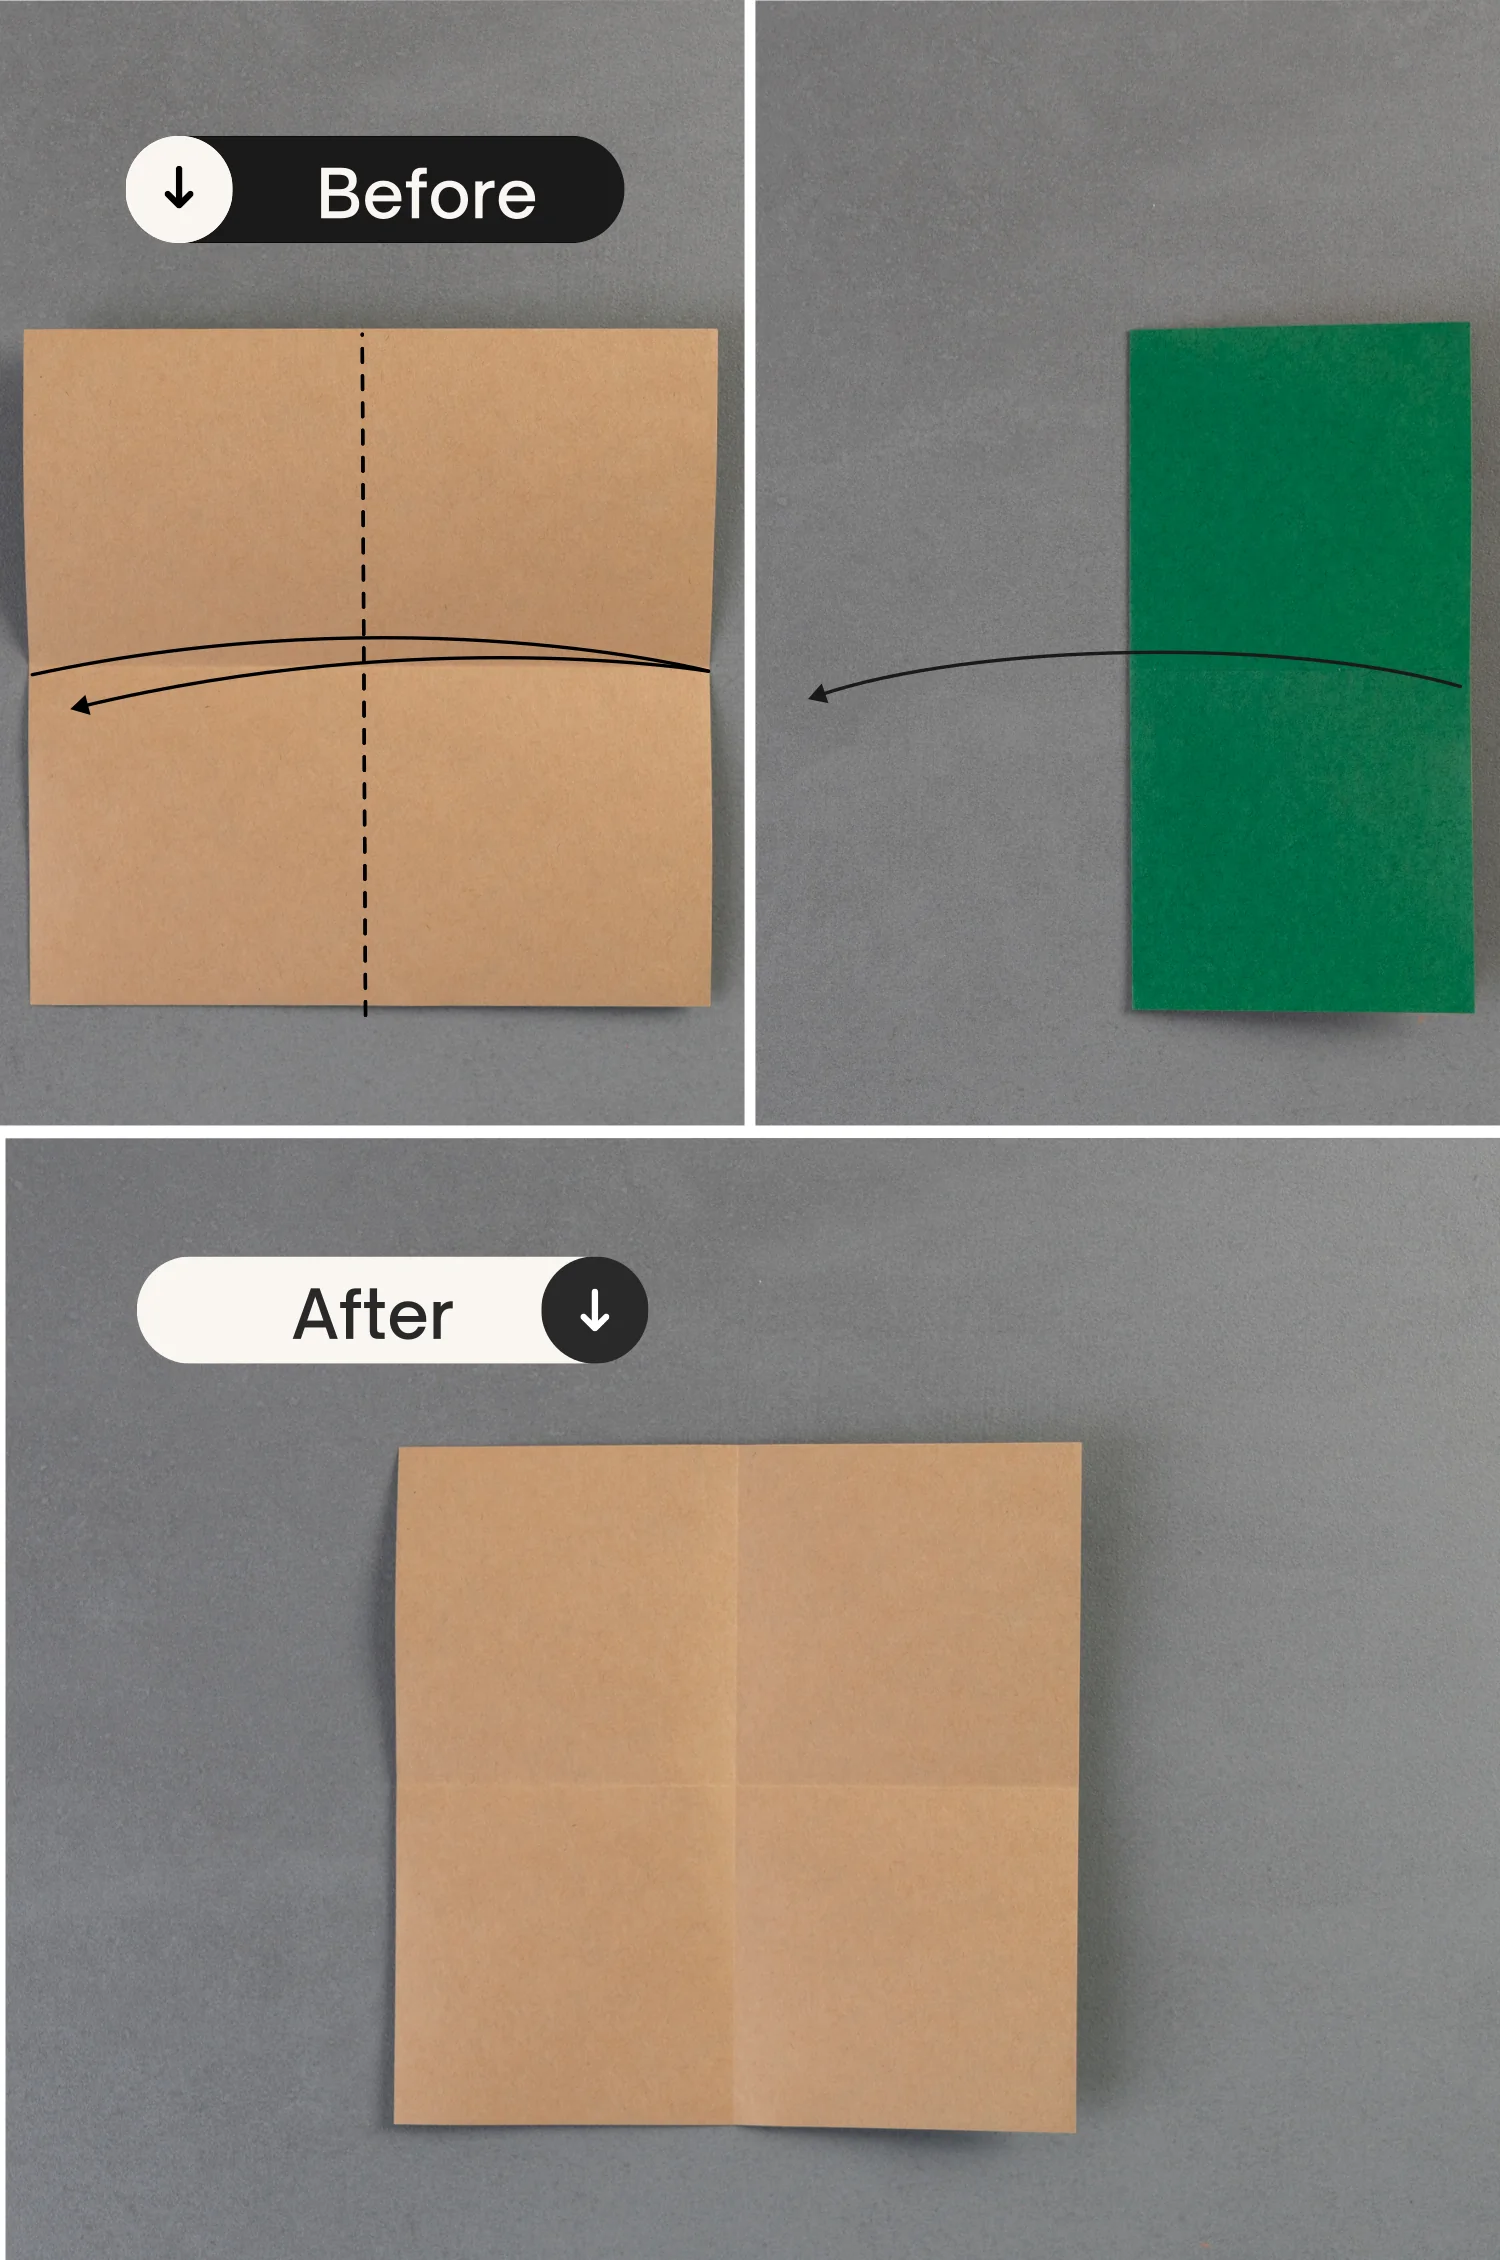
Fold the top and bottom edges to align with the middle horizontal crease.
undefined
Step 4
Fold the left and right edges to align with the middle vertical crease, crease them well, and unfold them.
undefined
Step 5
Fold the four points of the paper diagonally along the white dotted lines, leaving four creases, and unfold them.
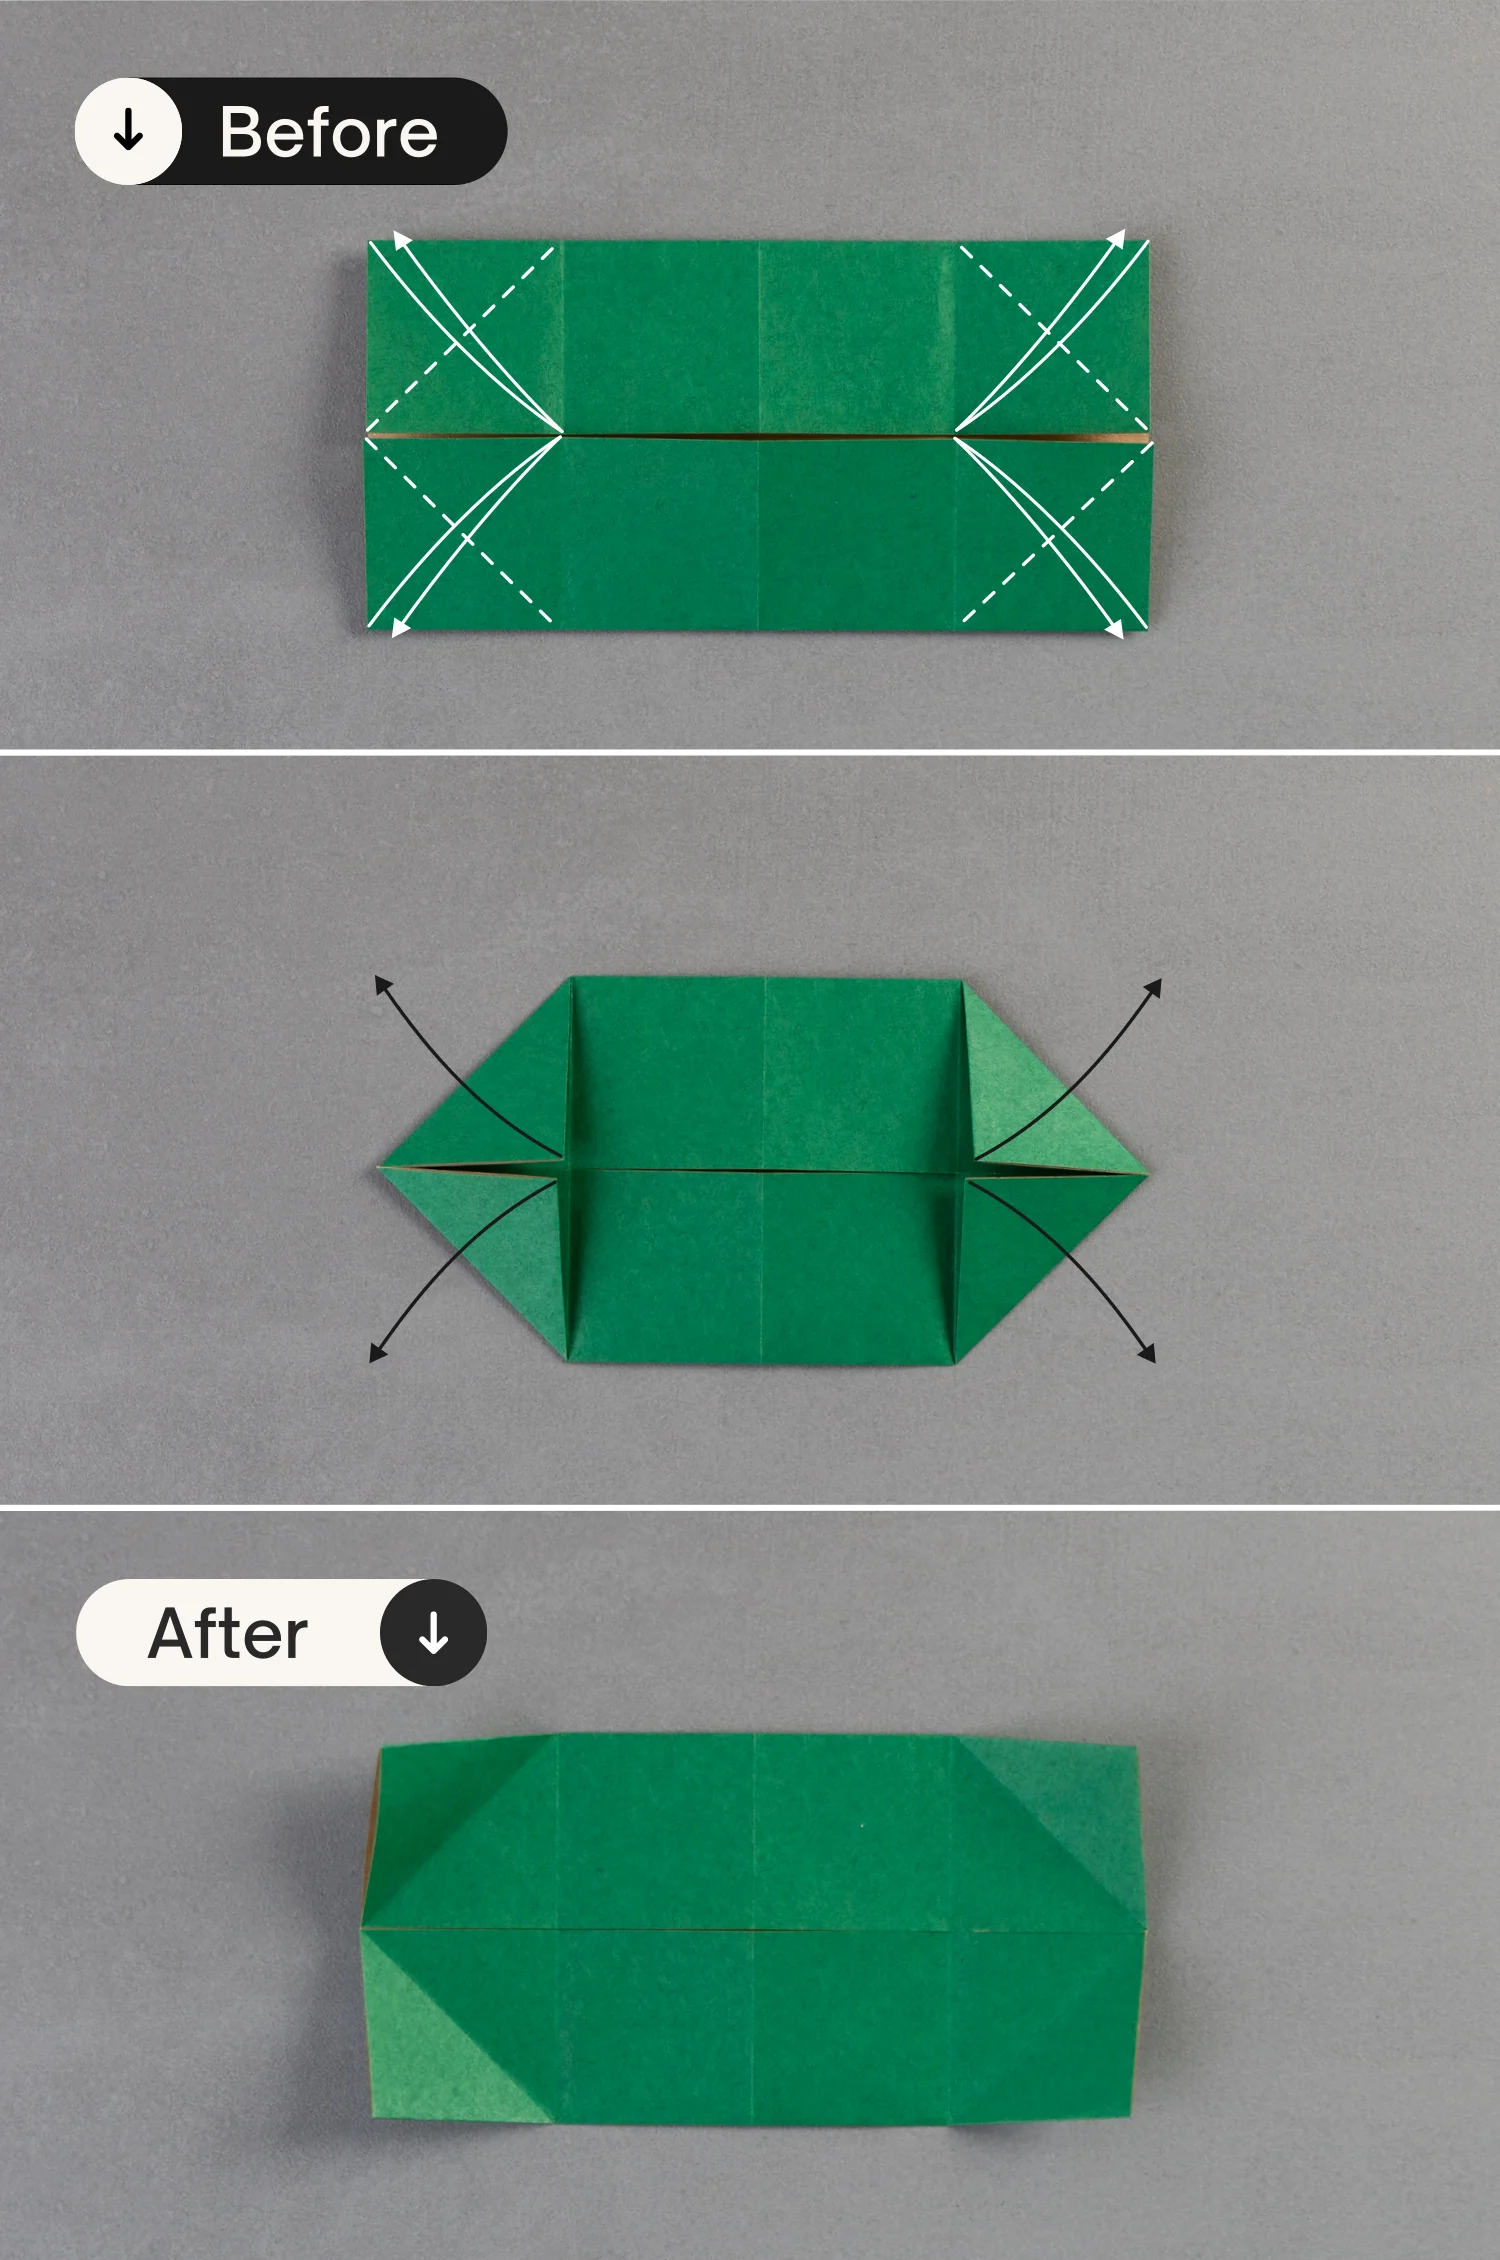
undefined
Step 6
Mountain fold the four creases you made in the previous step, then lift the two layers from the sides and squash the four corners along the existing creases.
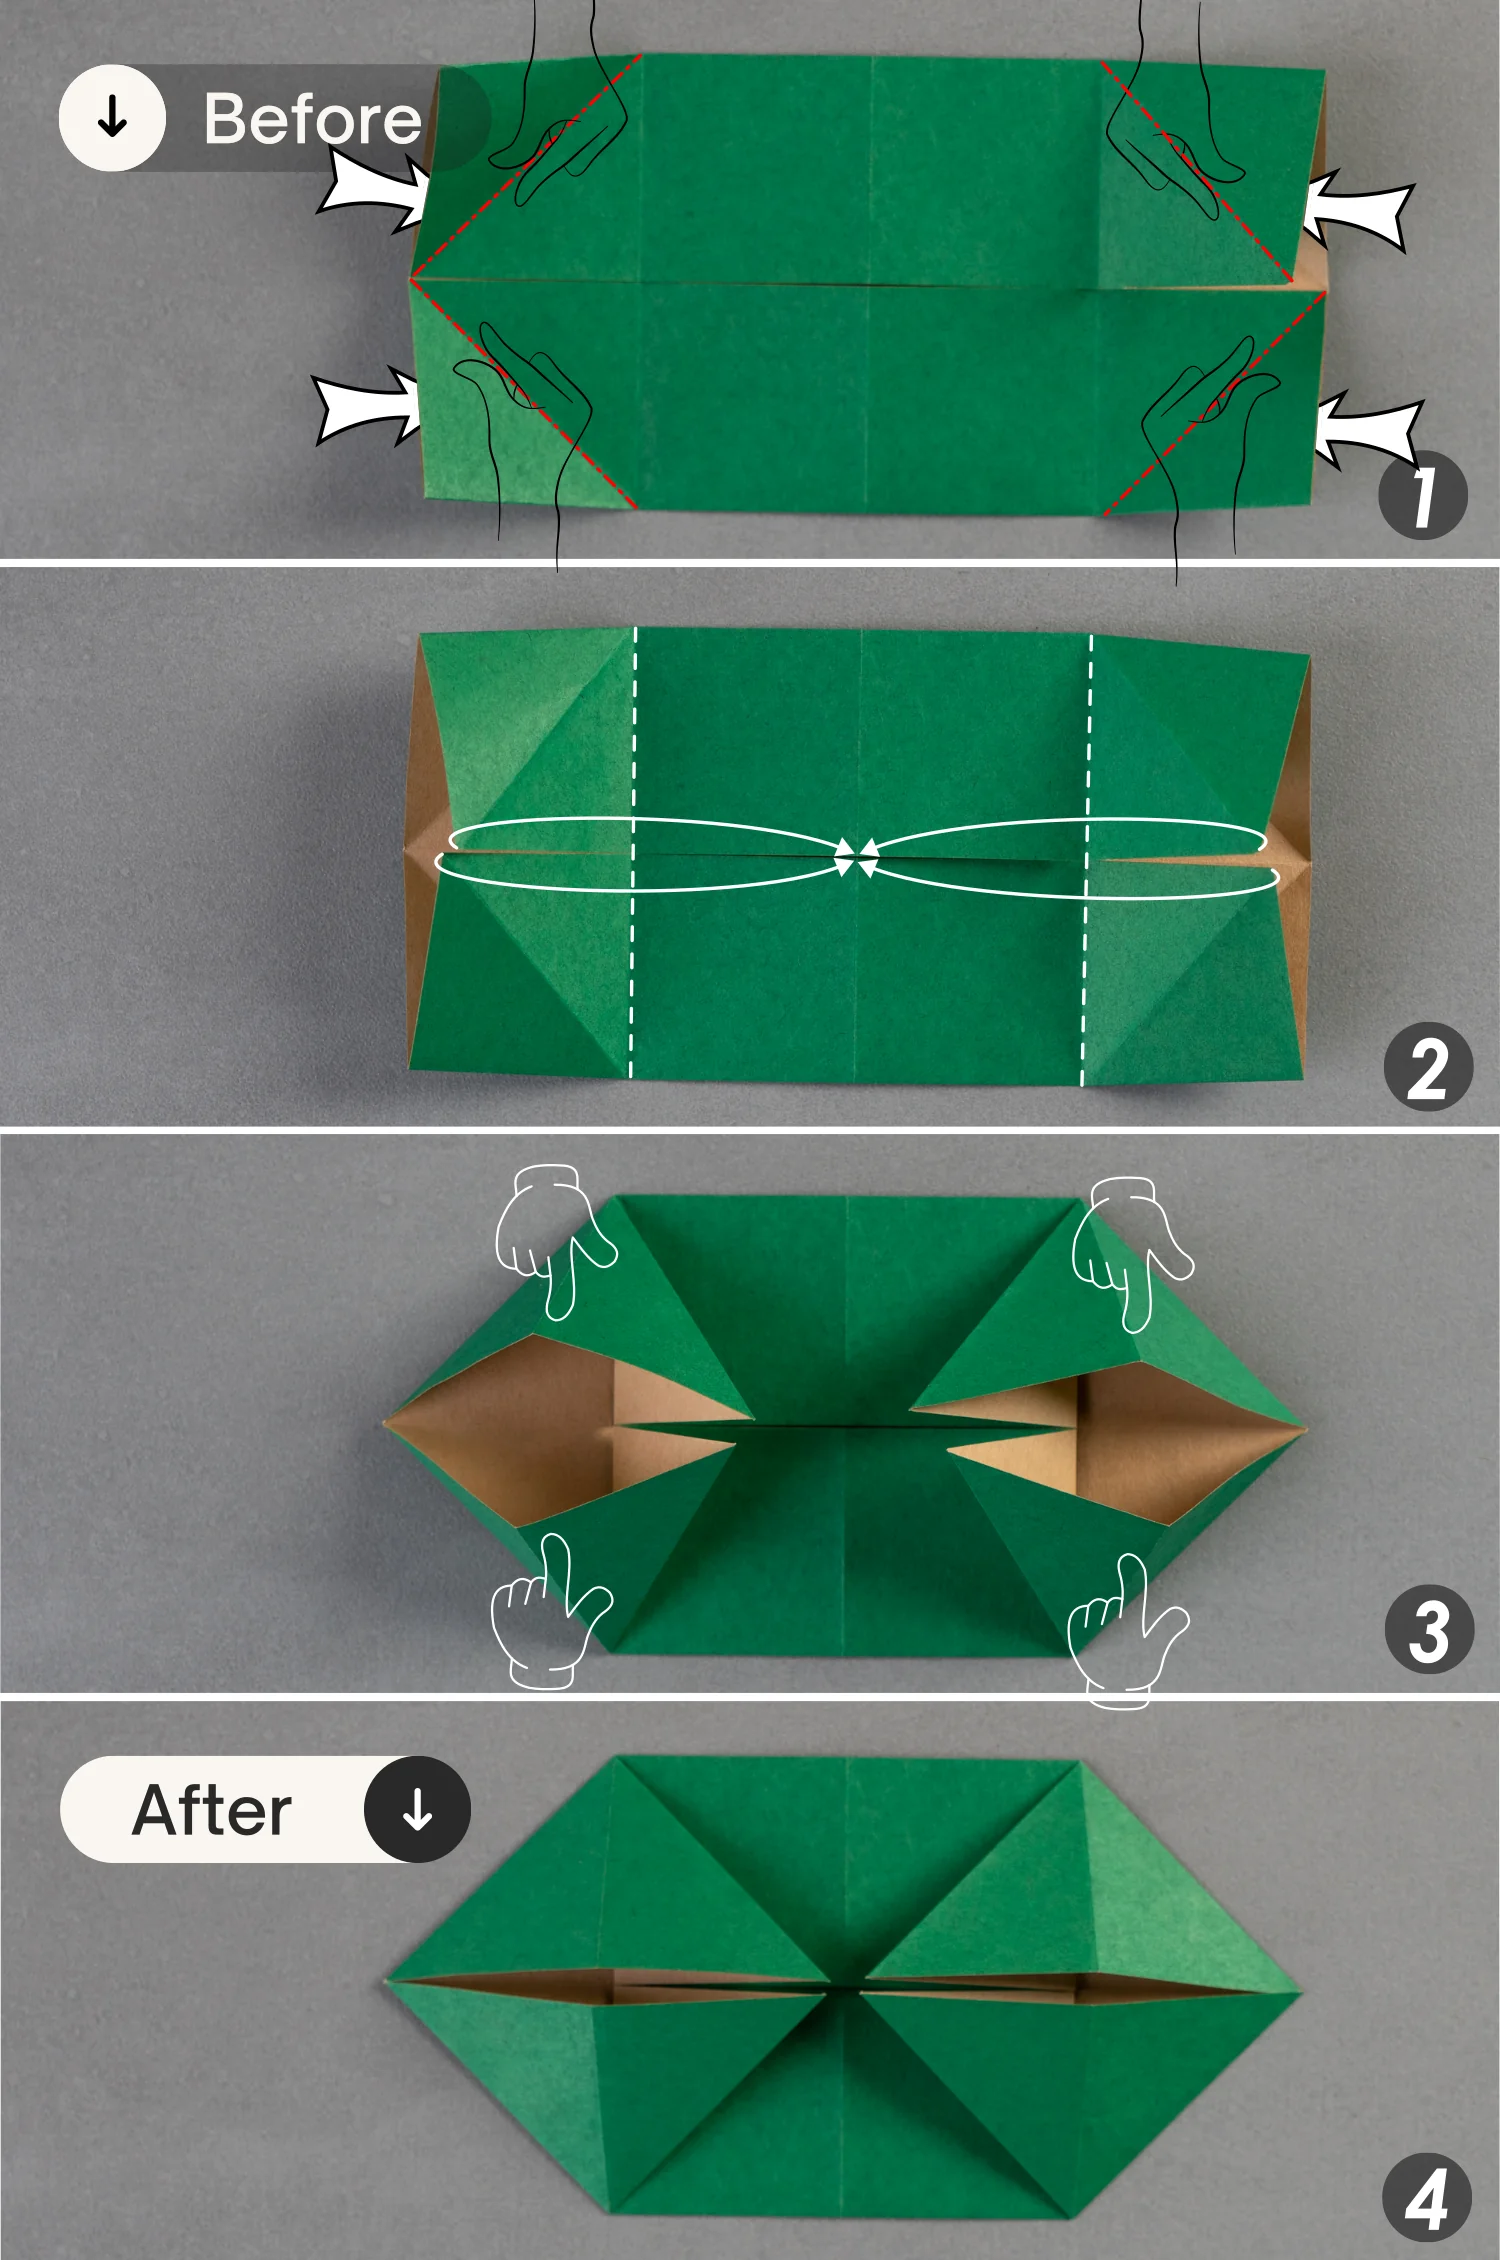
undefined
Step 7
Flip the paper over from front to back, then fold the top and bottom right edges to align with the middle horizontal crease, next, fold the top and bottom left edges to align with the horizontal crease as well.
undefined
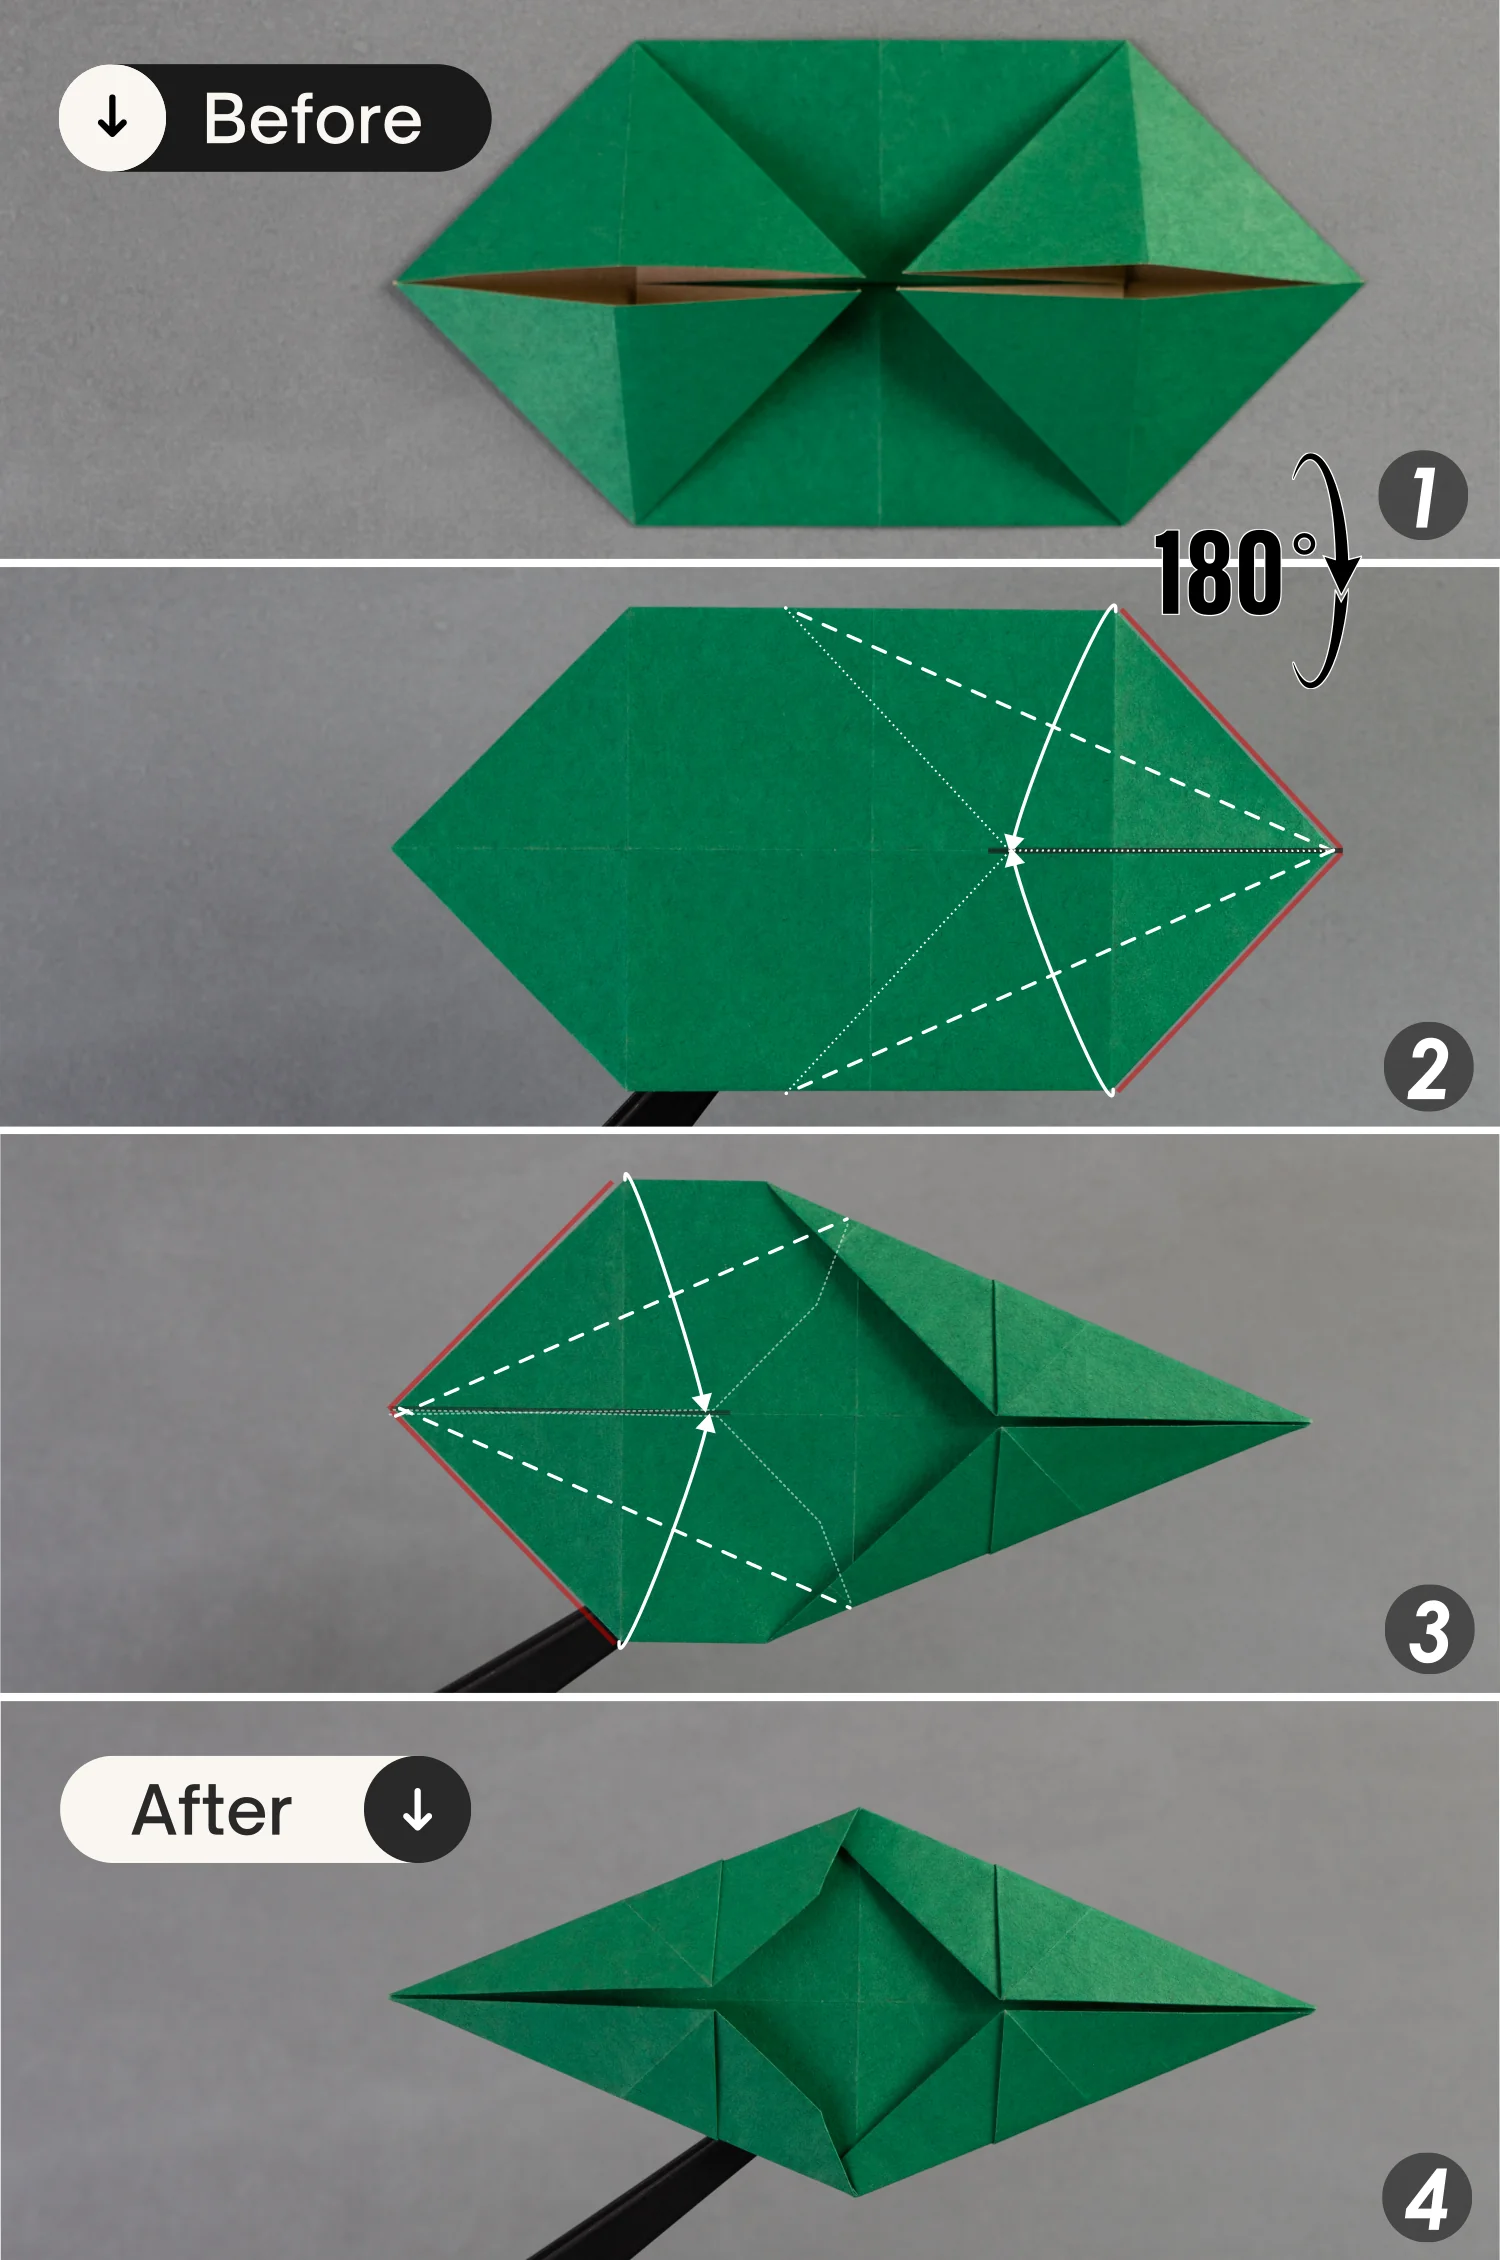
Step 8
Rotate the paper 180 degrees from front to back, then fold the four corners in the middle outward along the dotted lines.
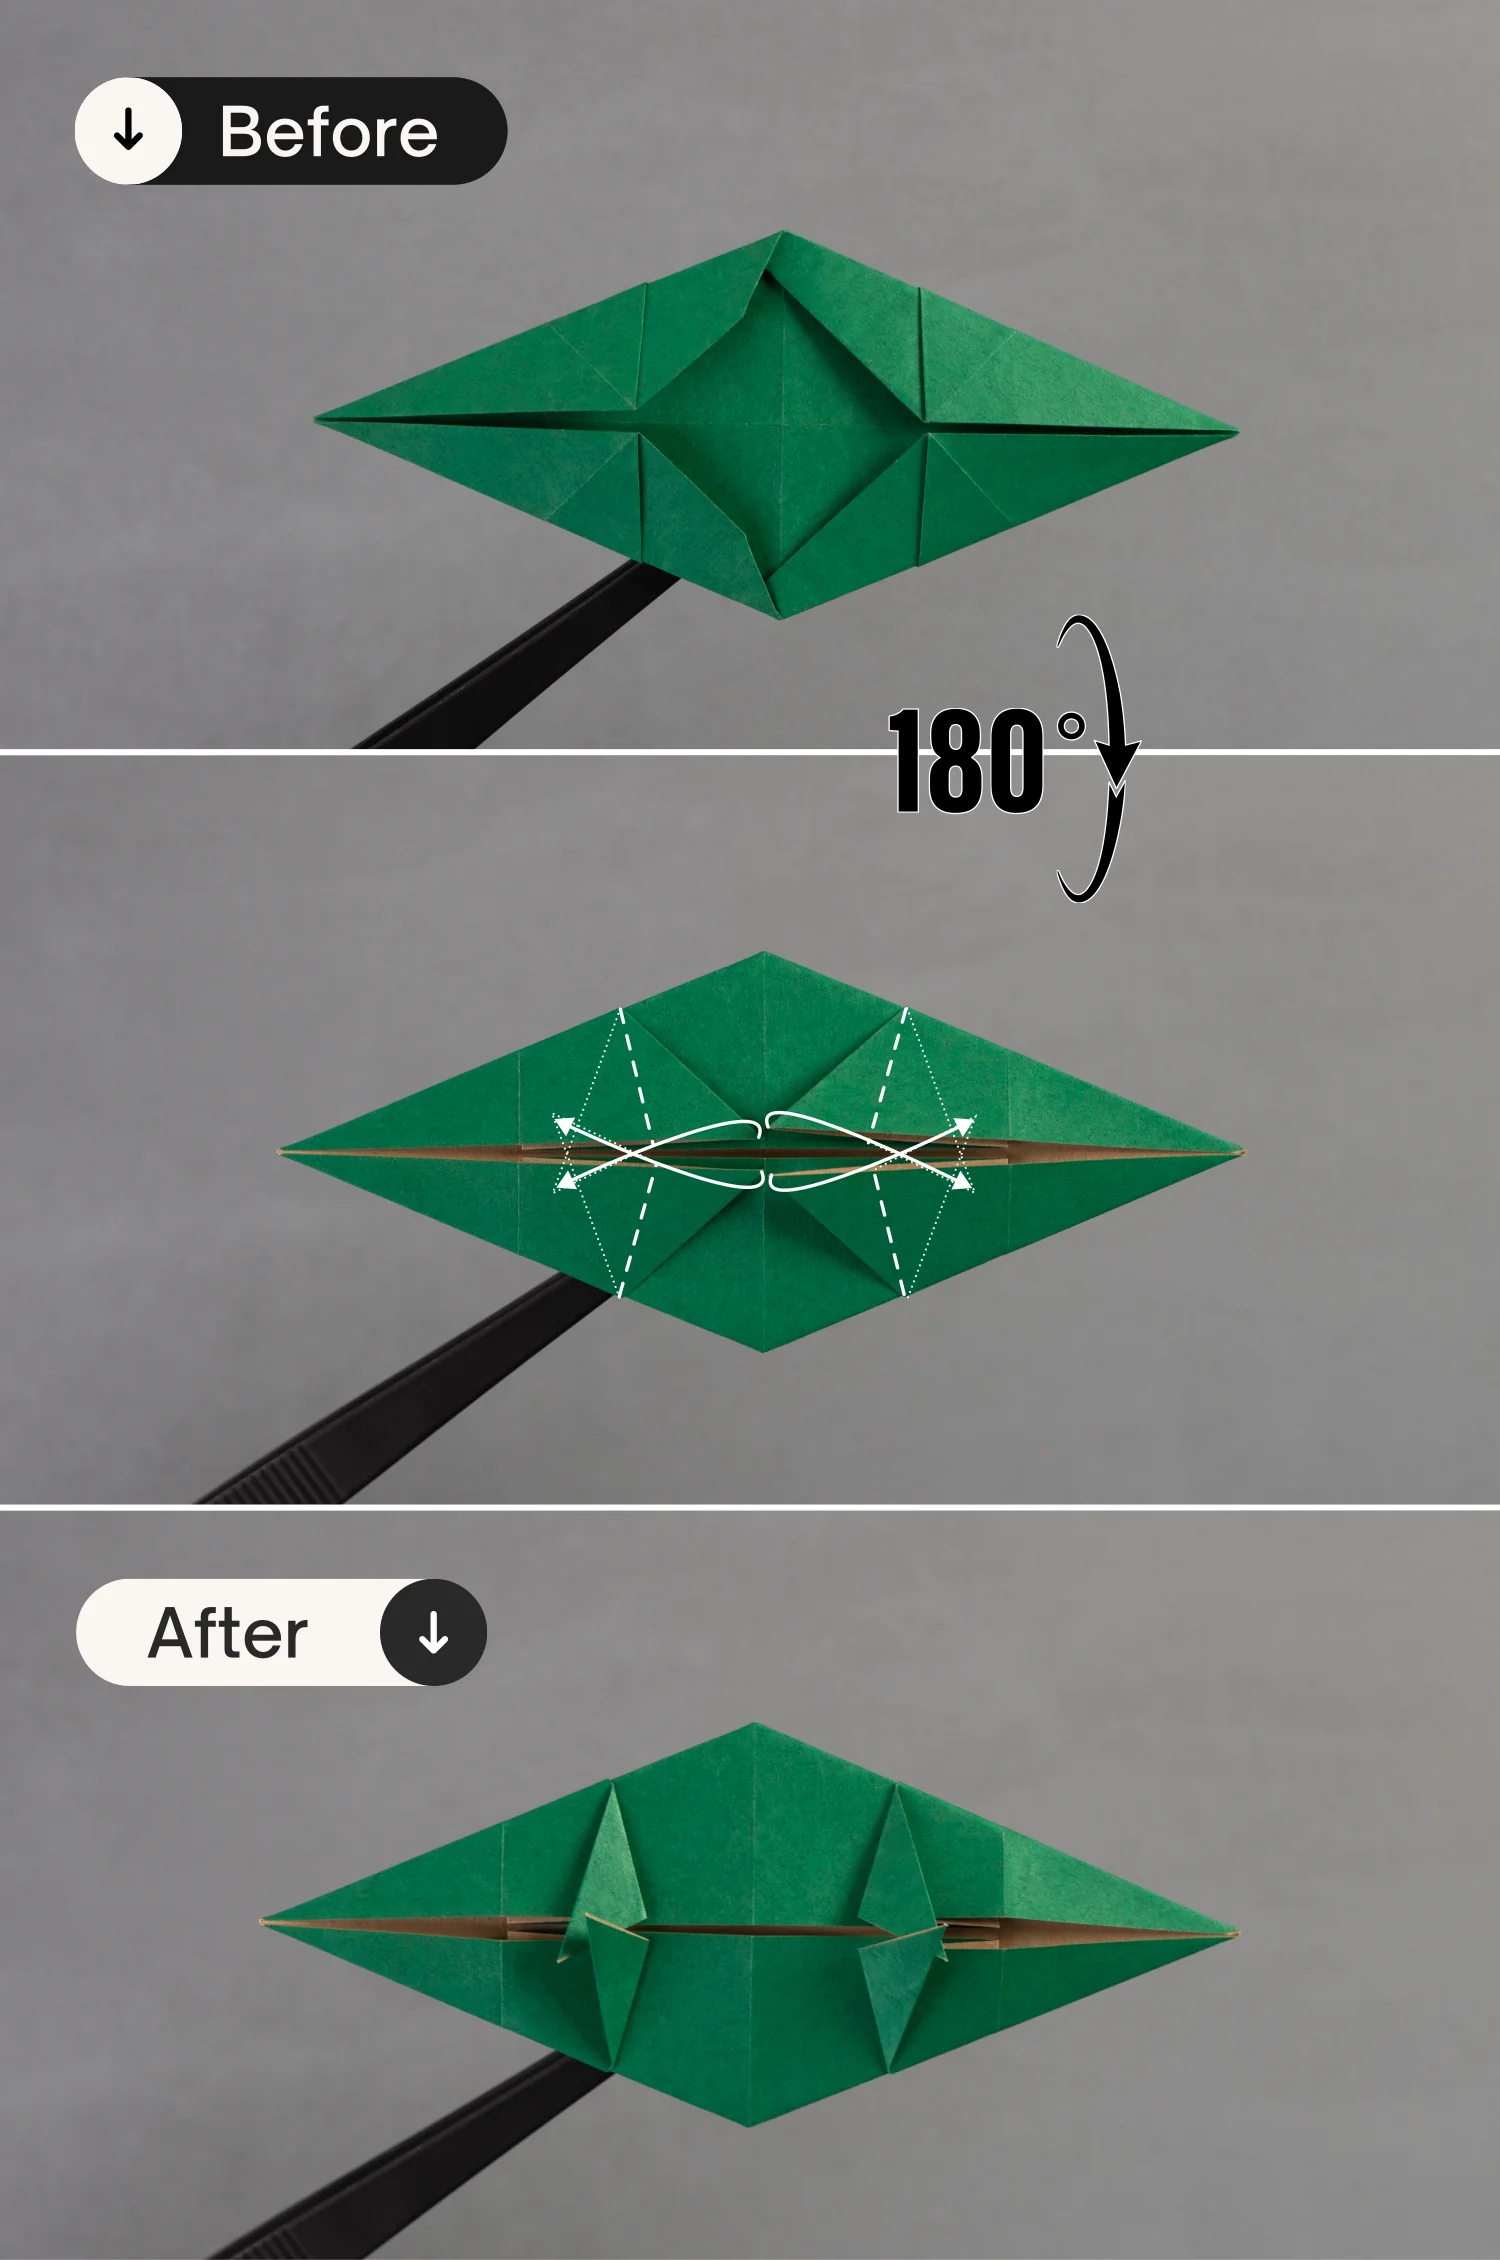
undefined
Step 9
Flip the paper over from front to back, then fold the left point toward the right side, and finally, fold the paper in half horizontally from bottom to top.
undefined
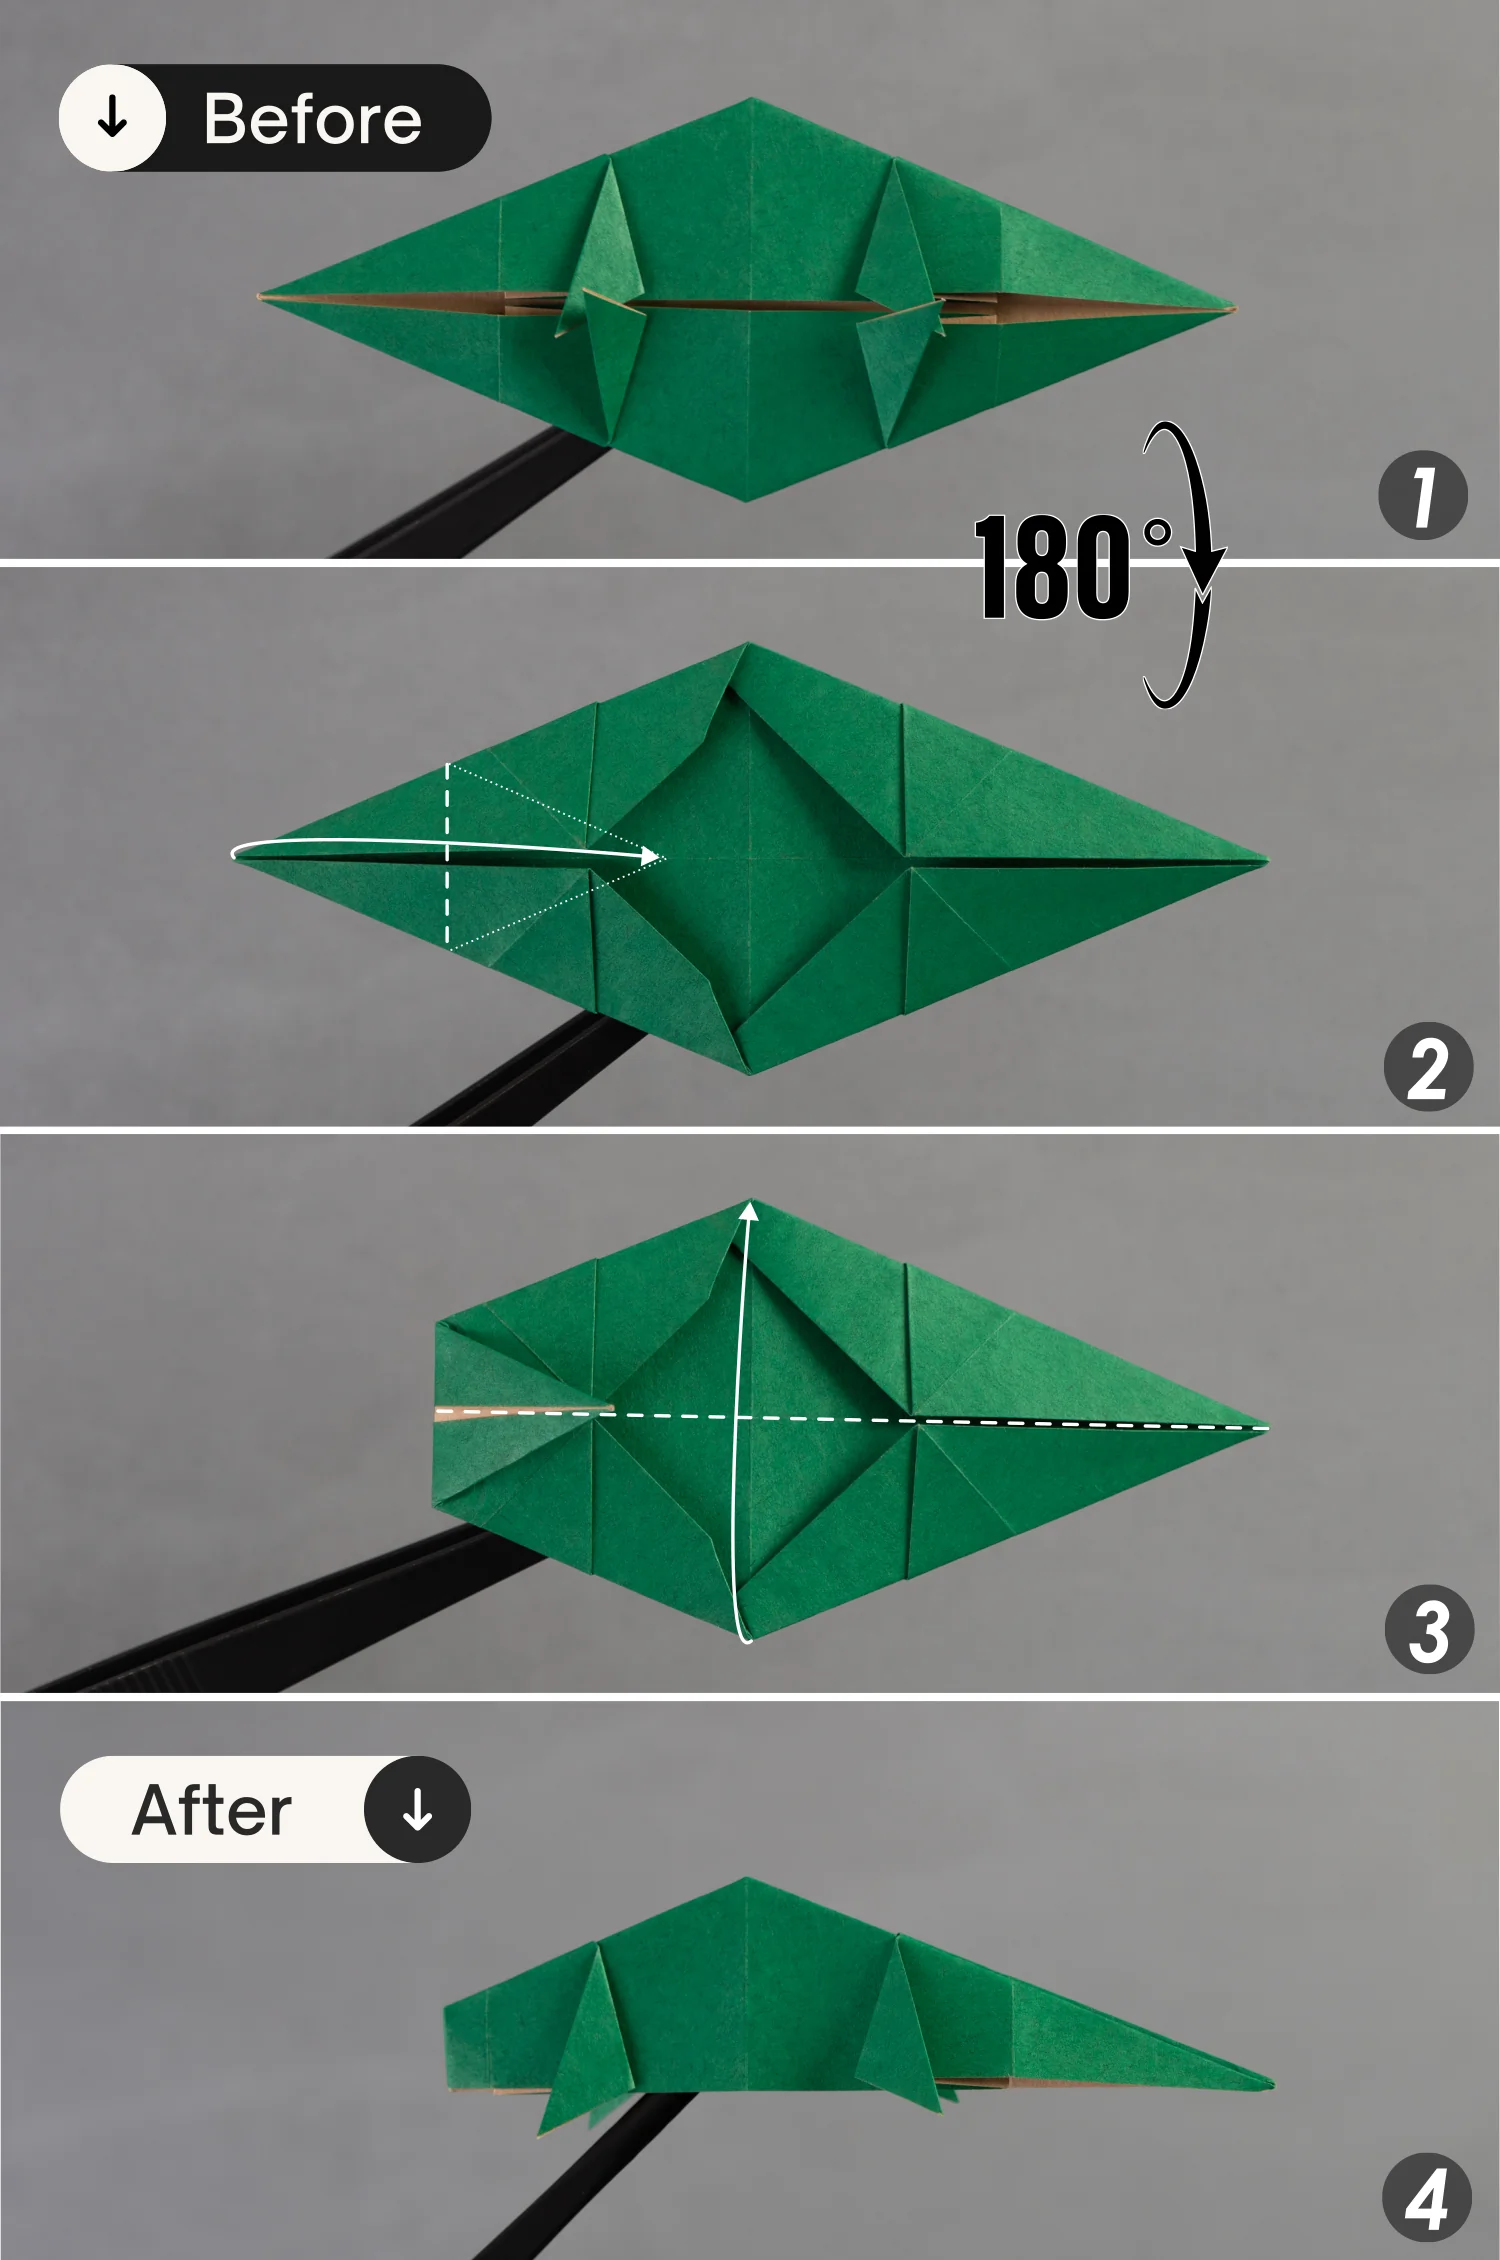
Step 10
Fold down the tail part, crease it well, and unfold it.
undefined
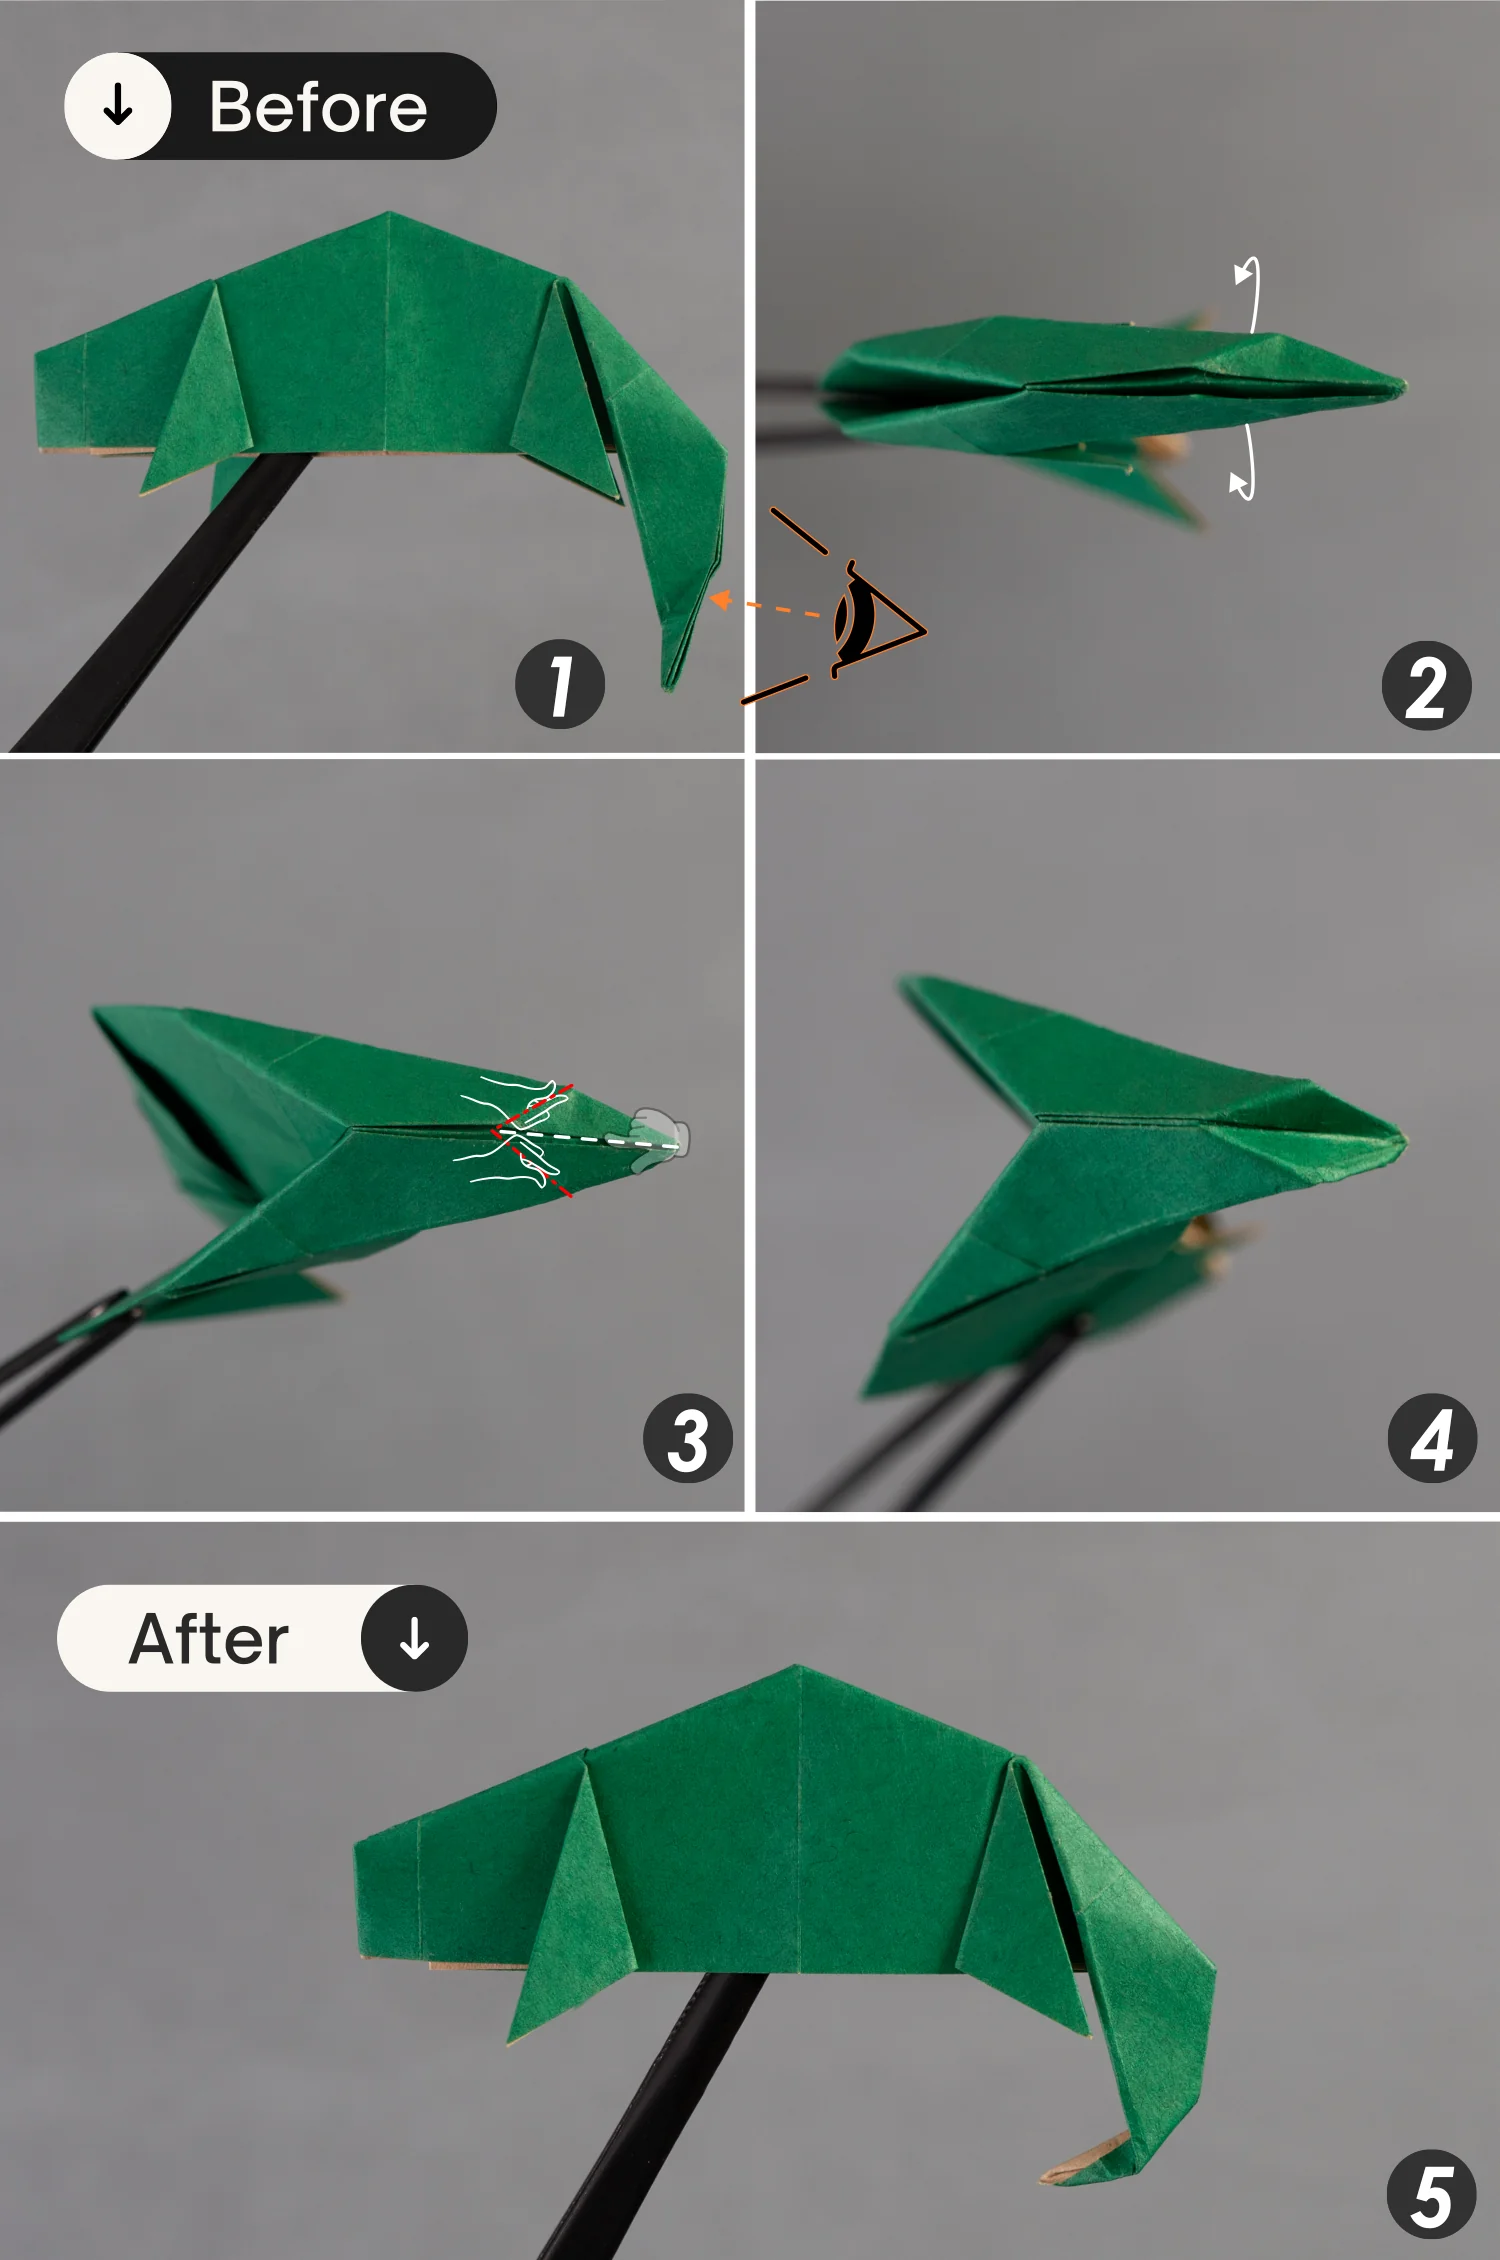
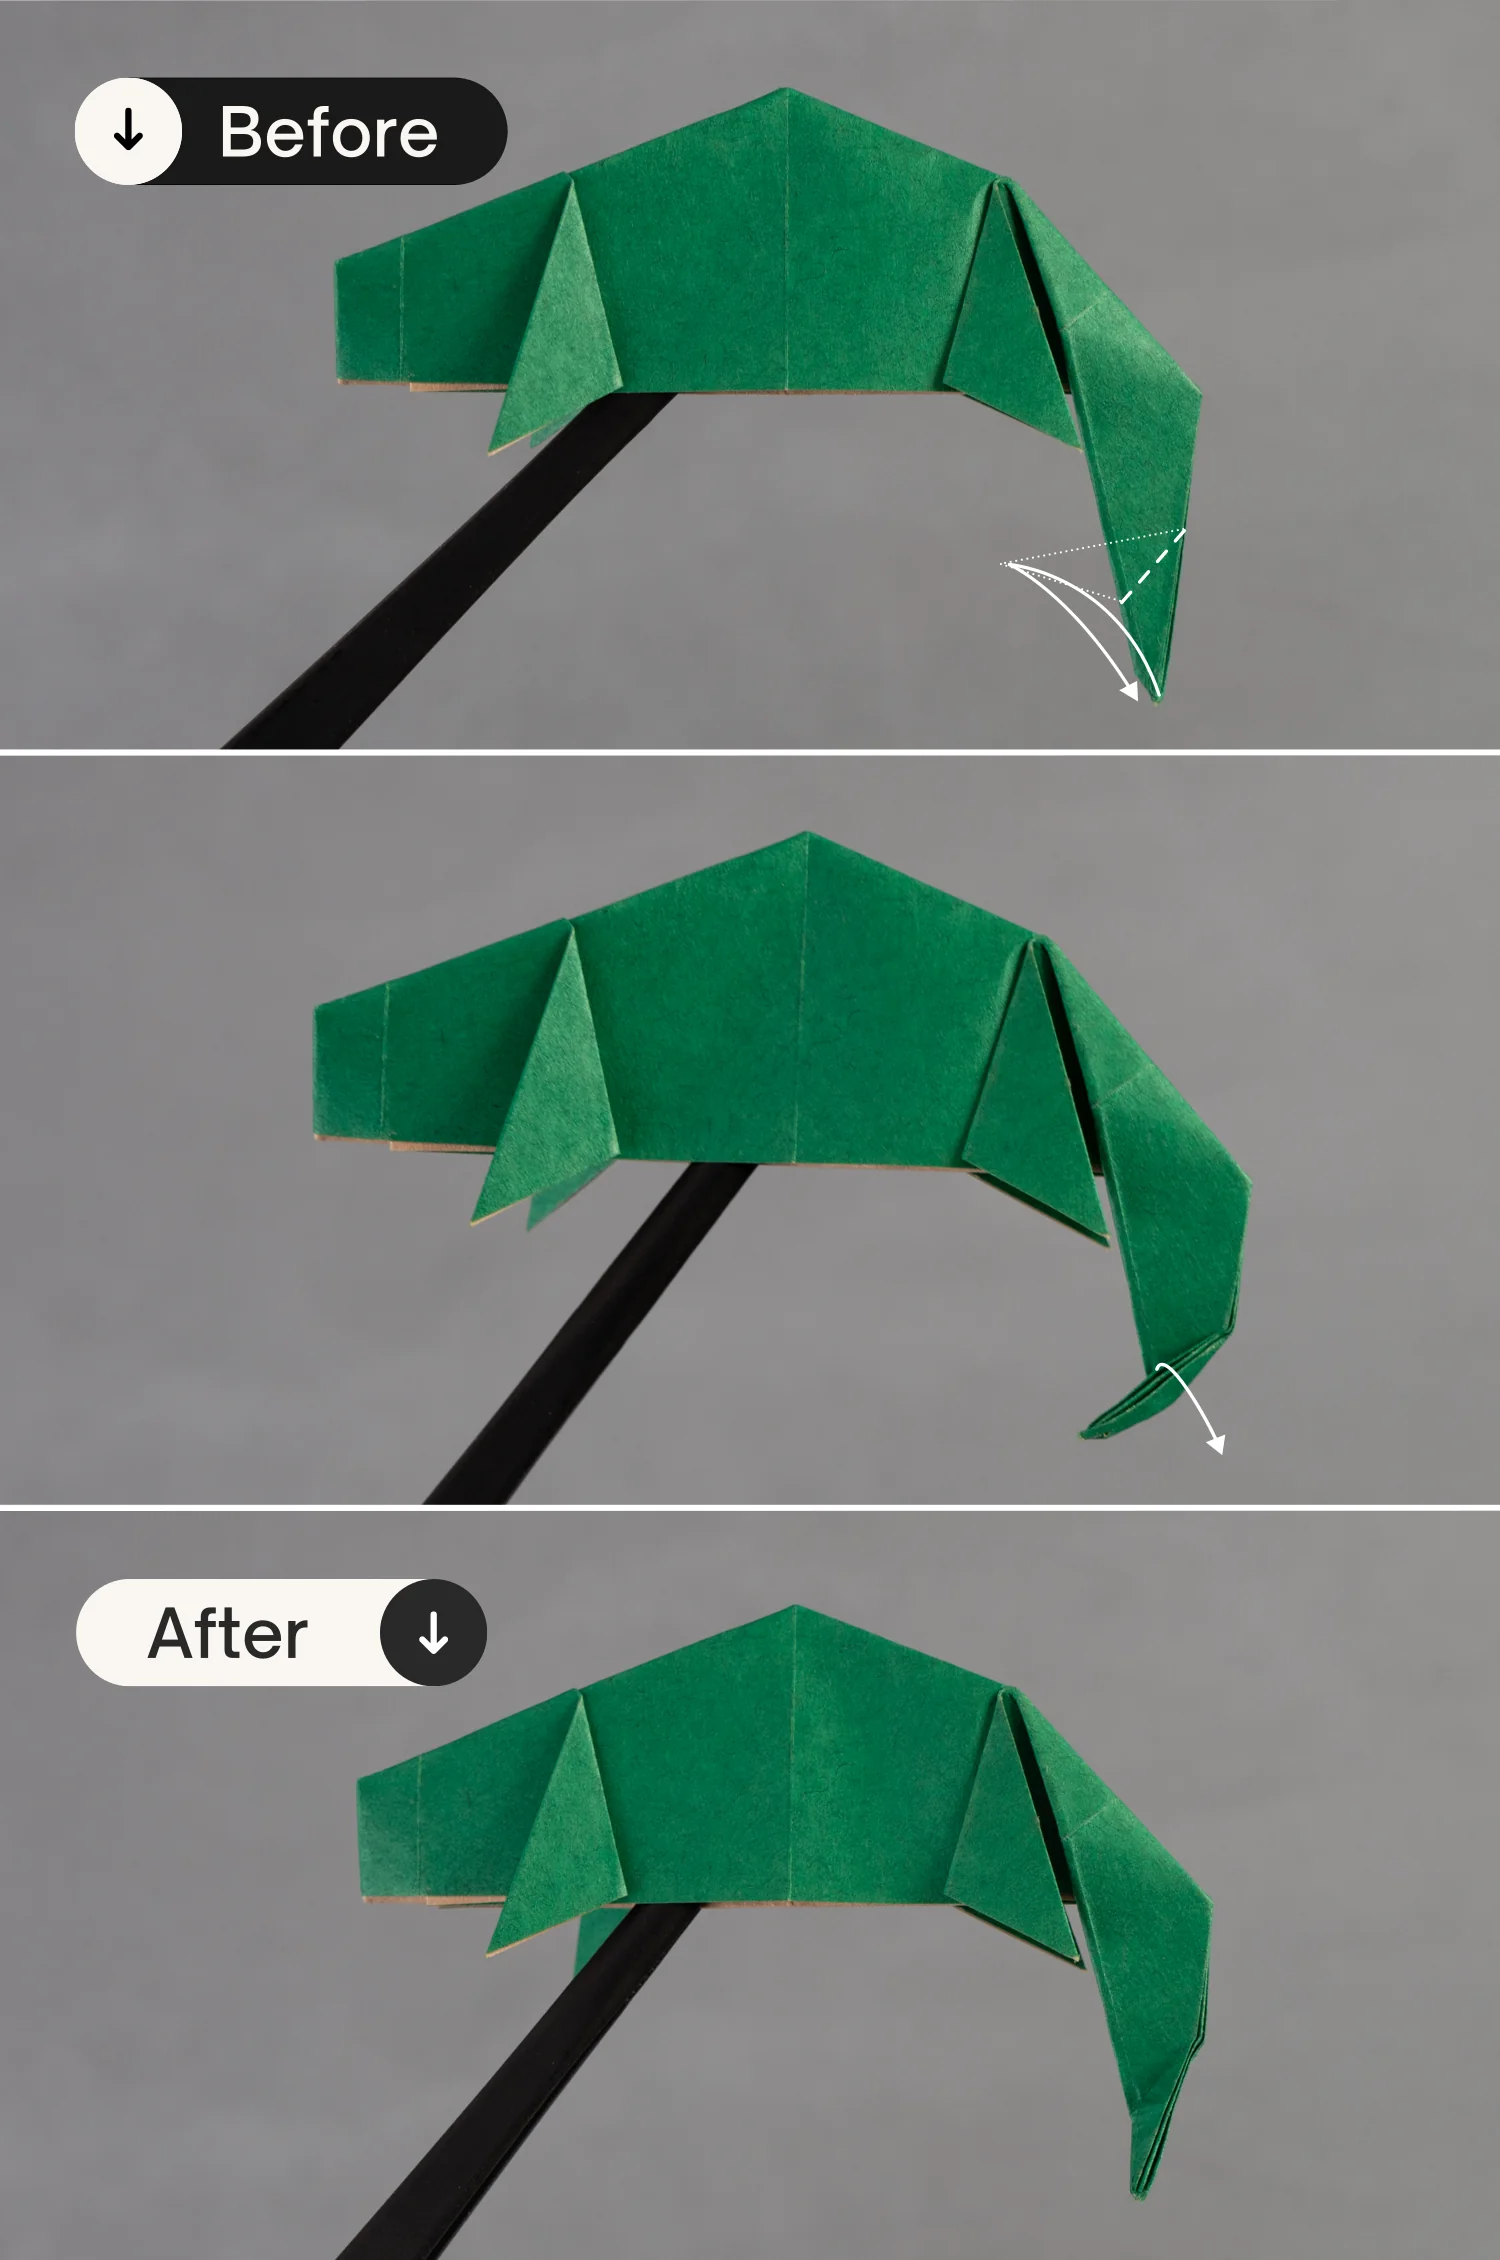
Step 11
Rotate it 90 degrees from front to back, then open this opening. Next, shape the creases you made in the previous step and the right section of the horizontal crease [picture 3].
Finally, press down the right point and close this opening, then rotate the paper 90 degrees from back to front.
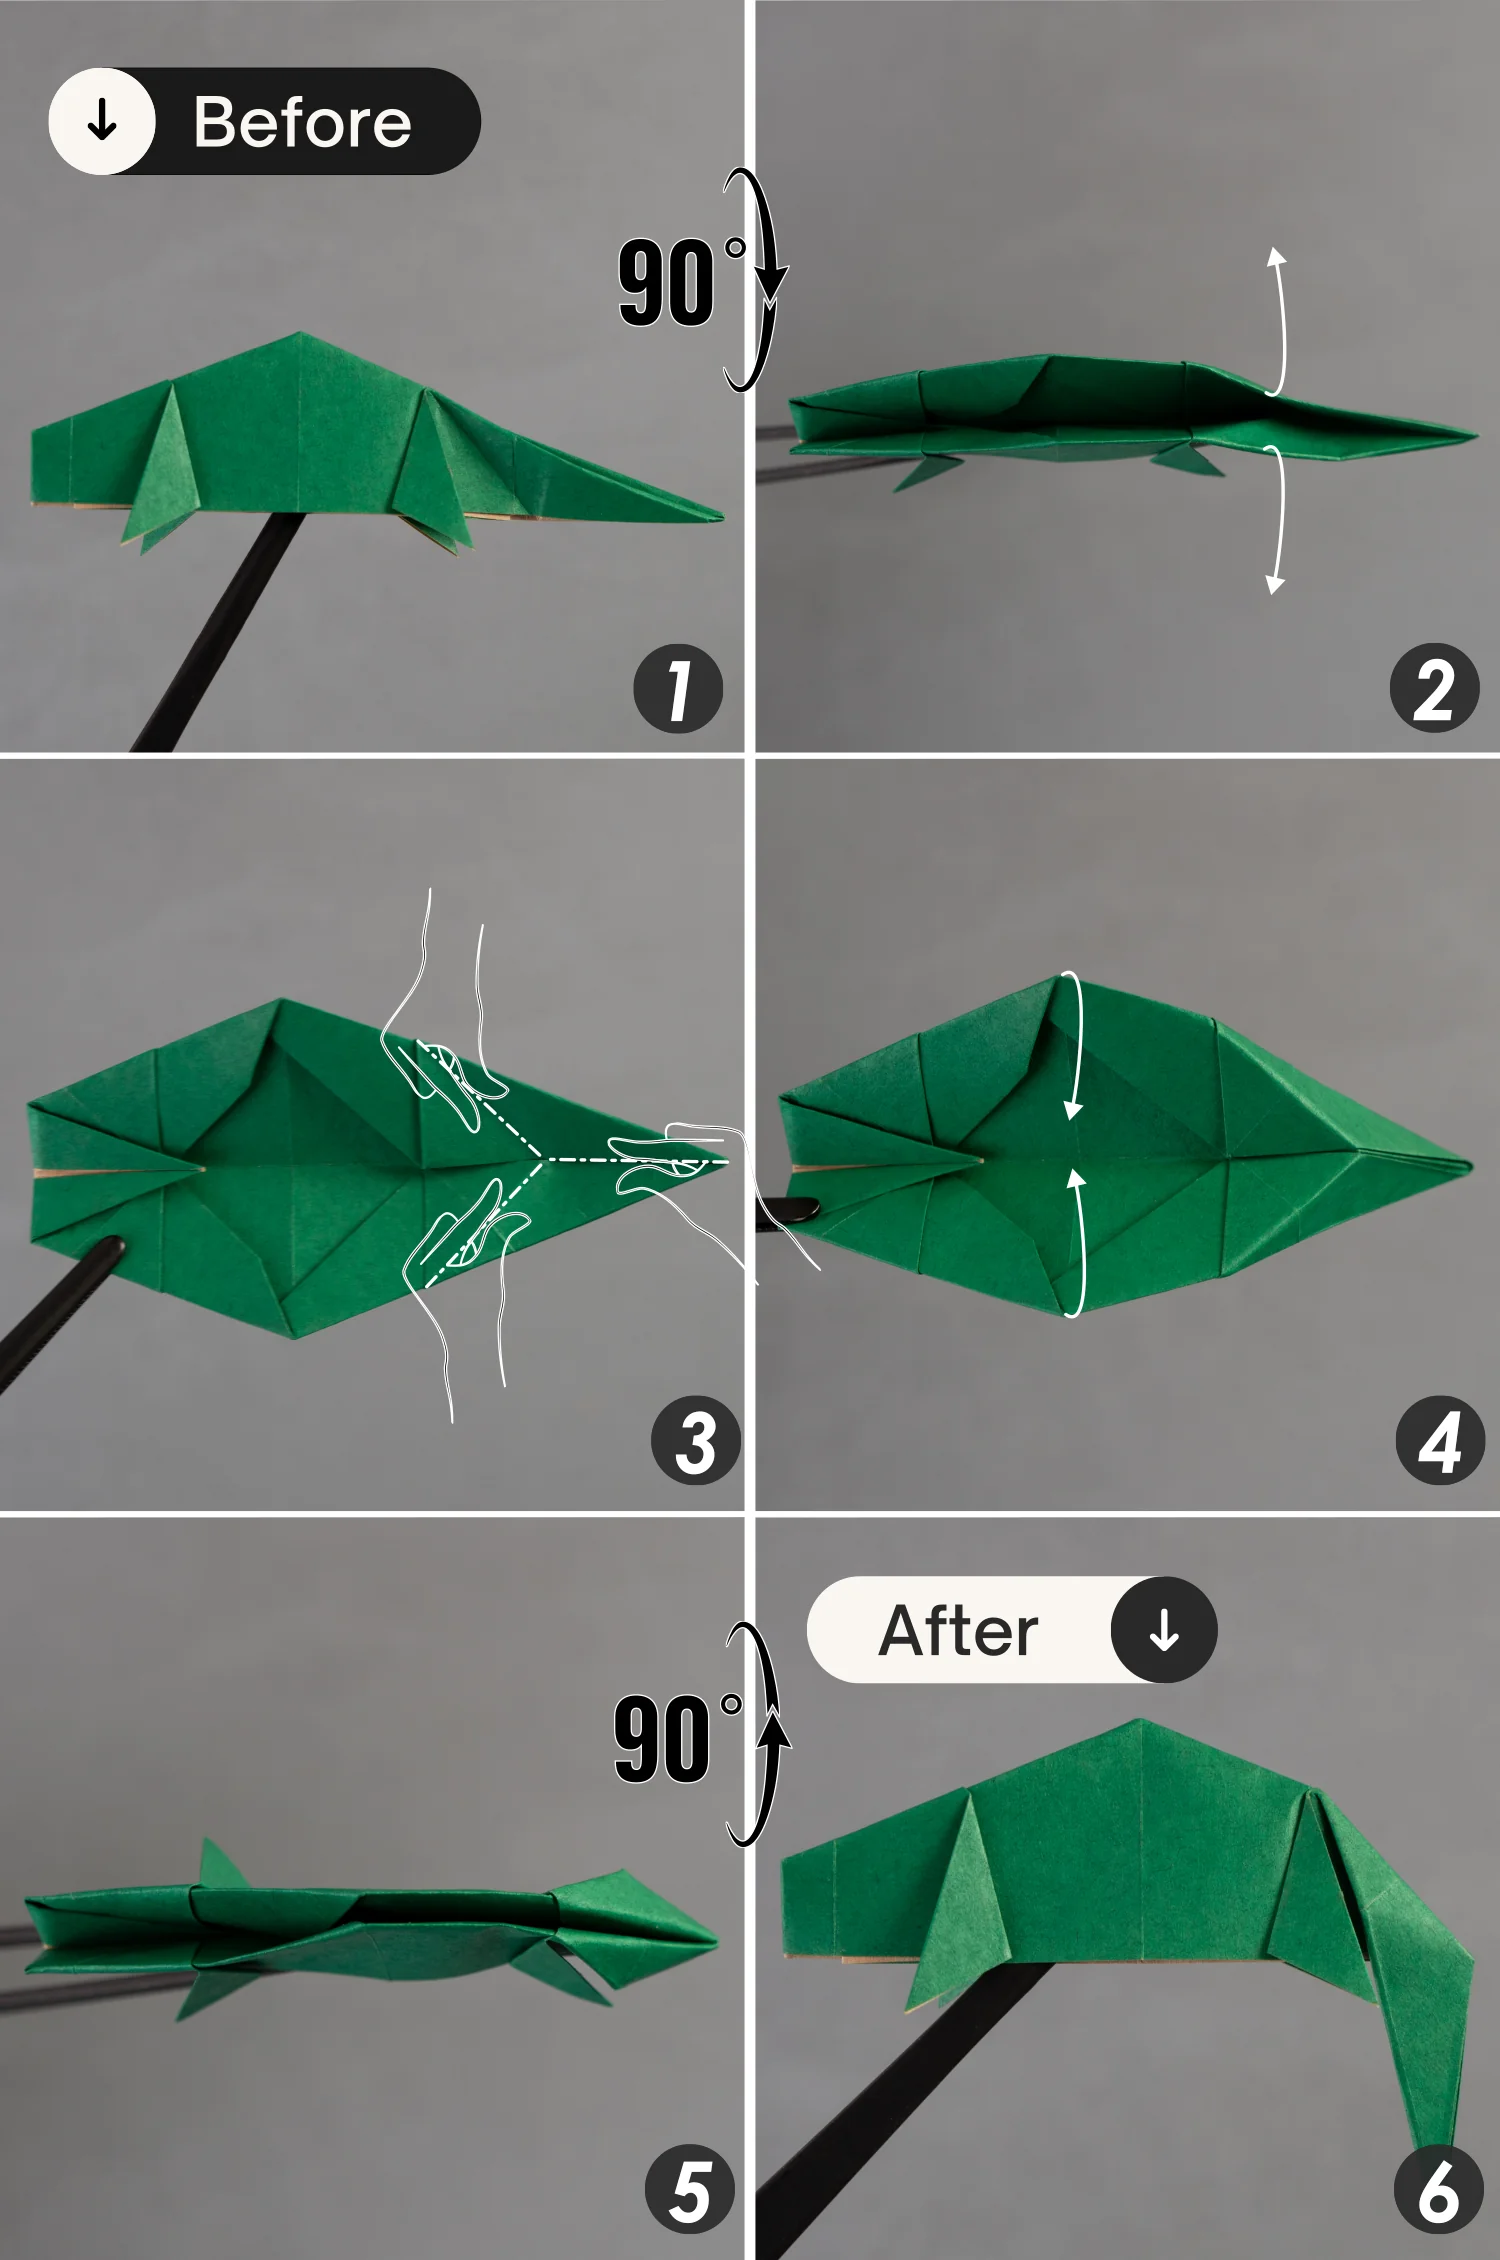
undefined
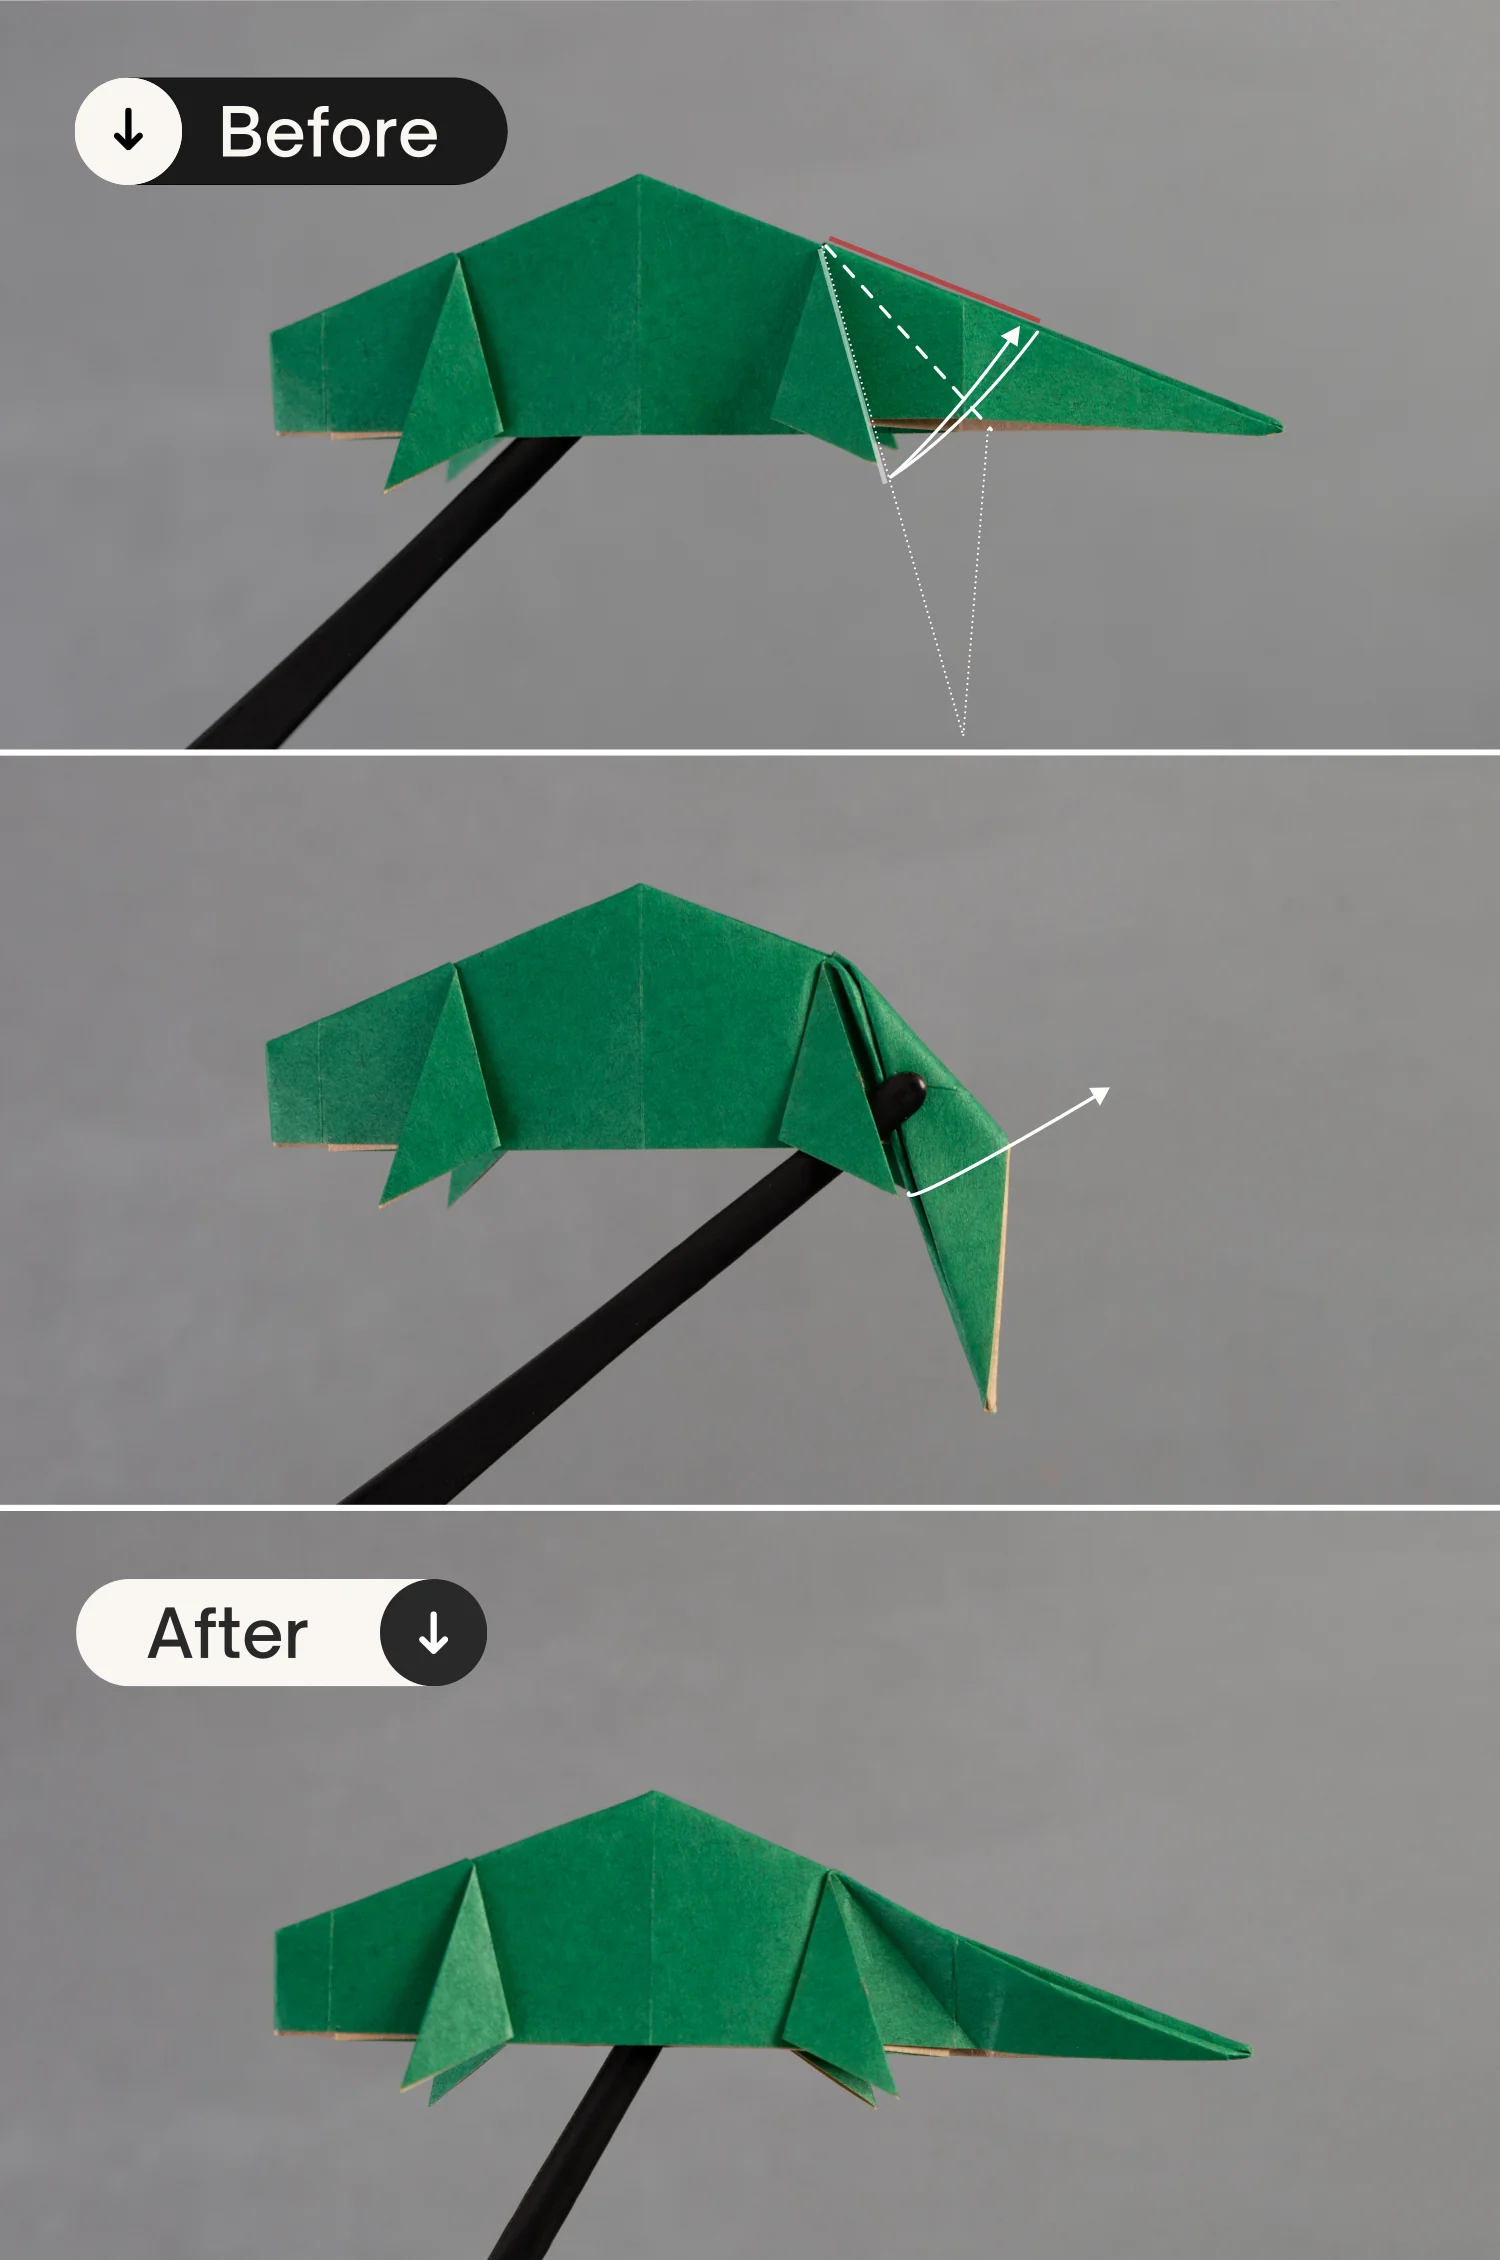
Step 12
Fold up the bottom part of the tail, then unfold it.
undefined
Step 13
Focus on the bottom of the tail and view it from the right side, expand this corner from the bottom, then shape the creases you made in the previous step, and finally, press down the tip, valley its middle crease and close the opening.