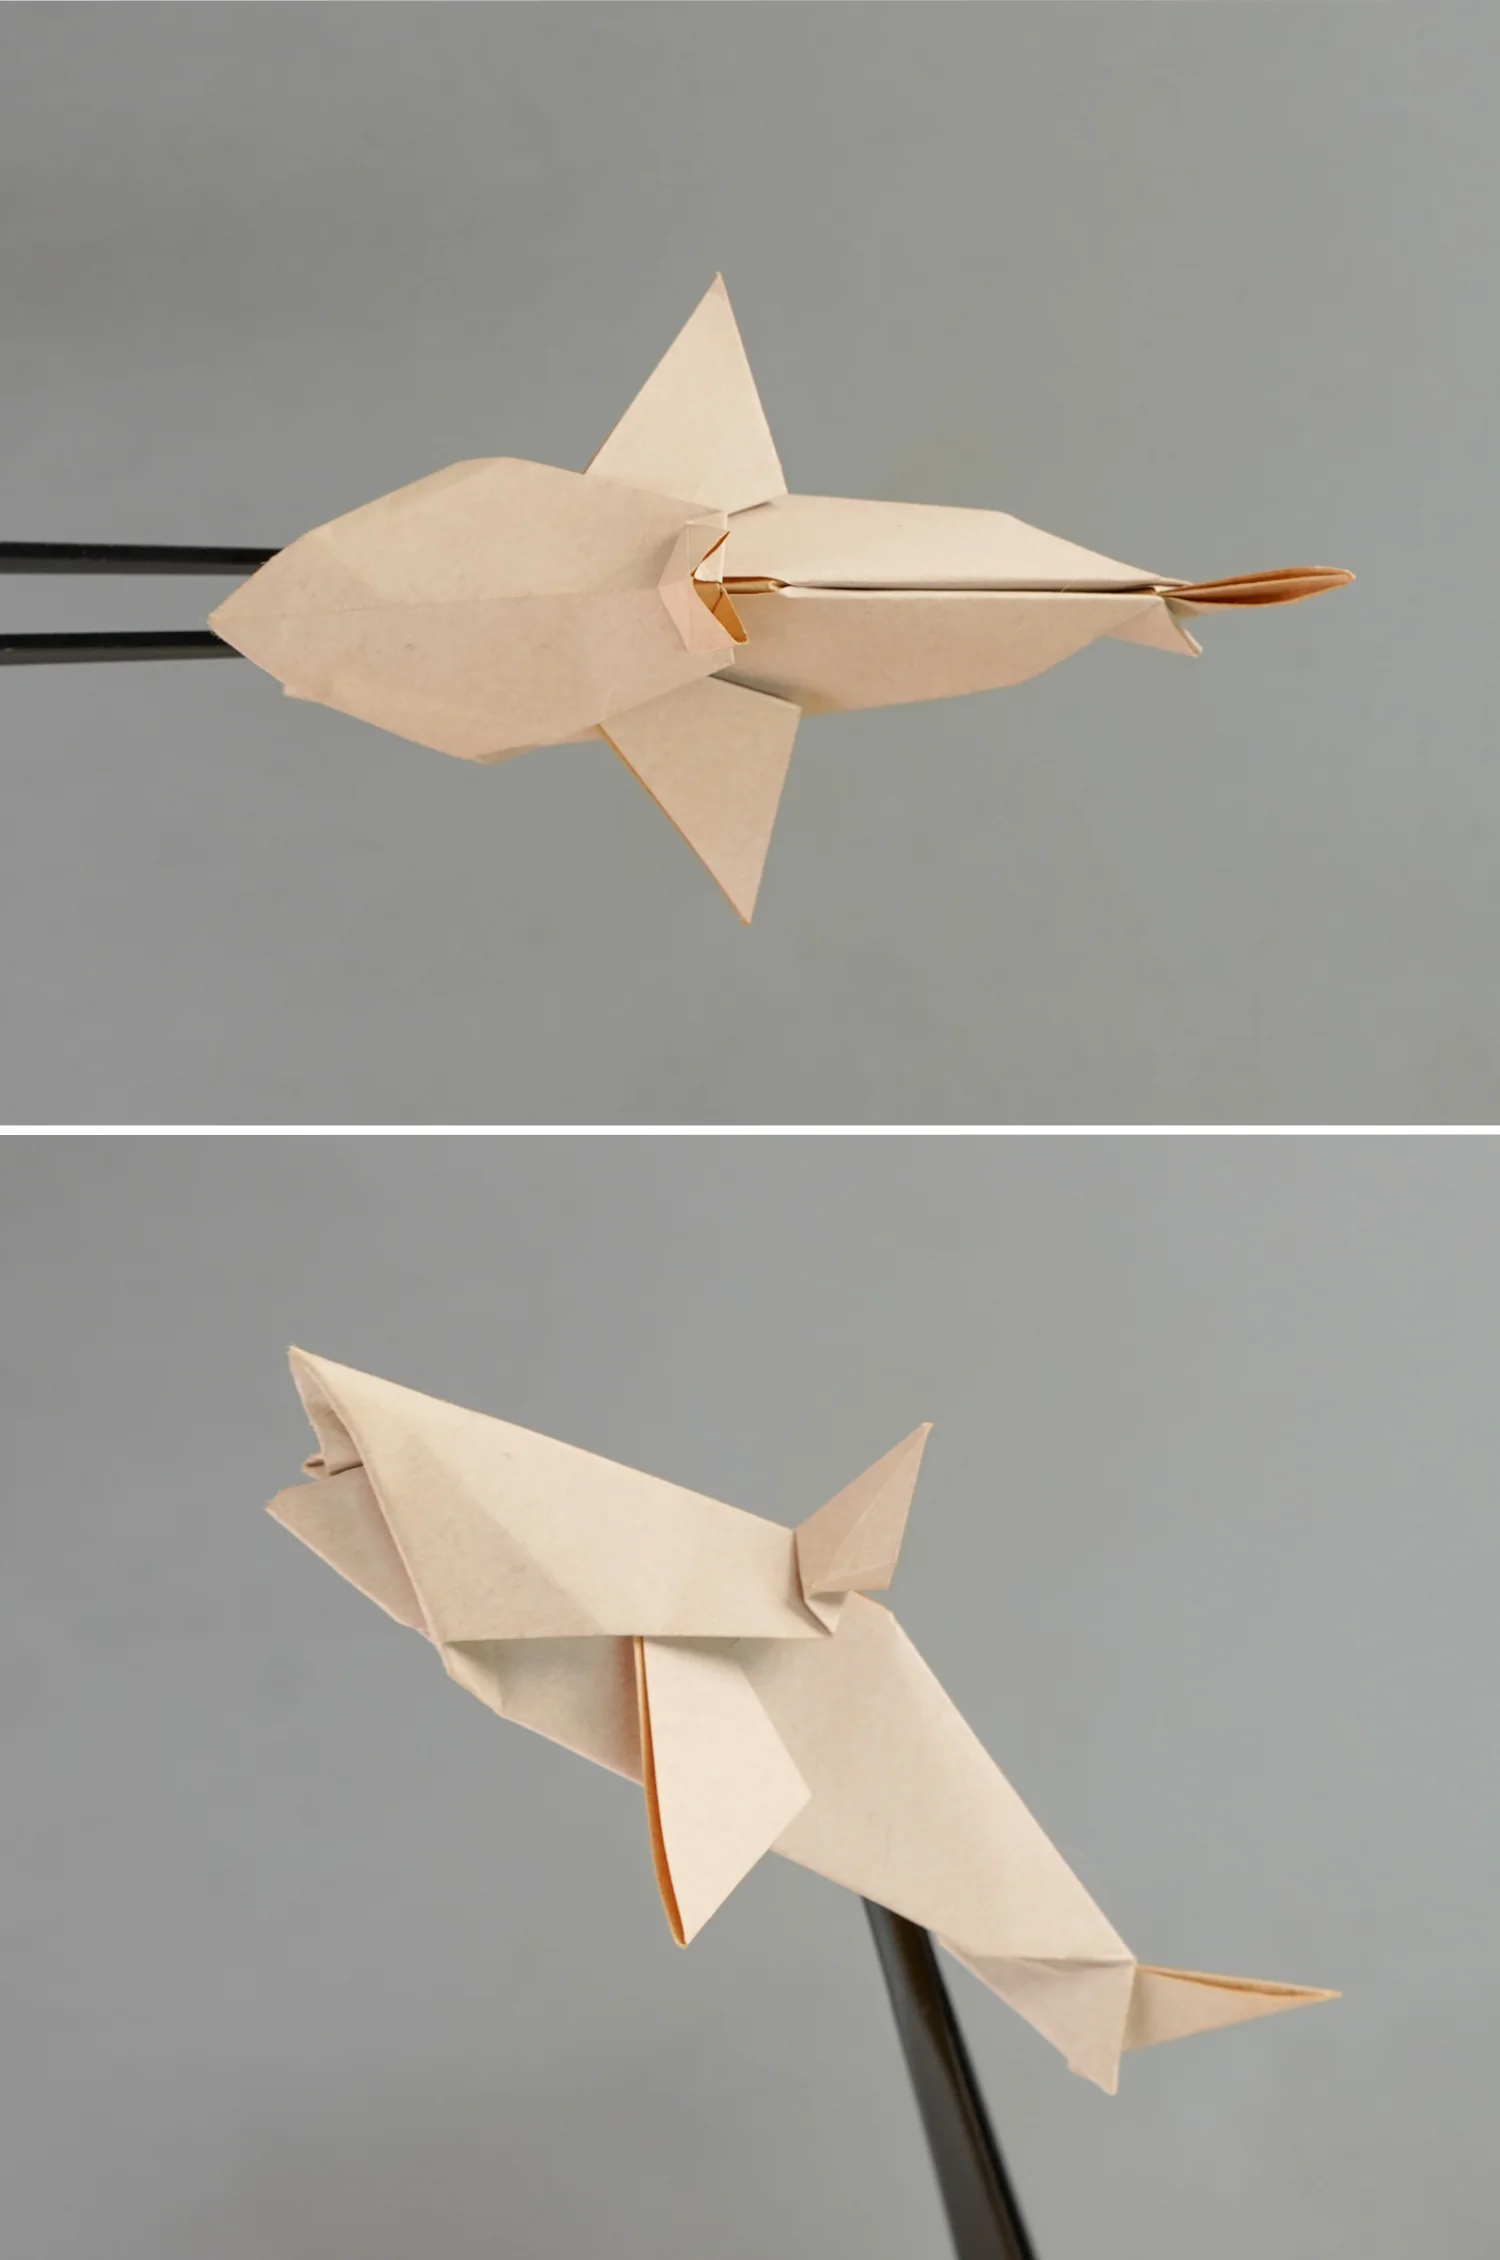
How to Fold an Origami Shark
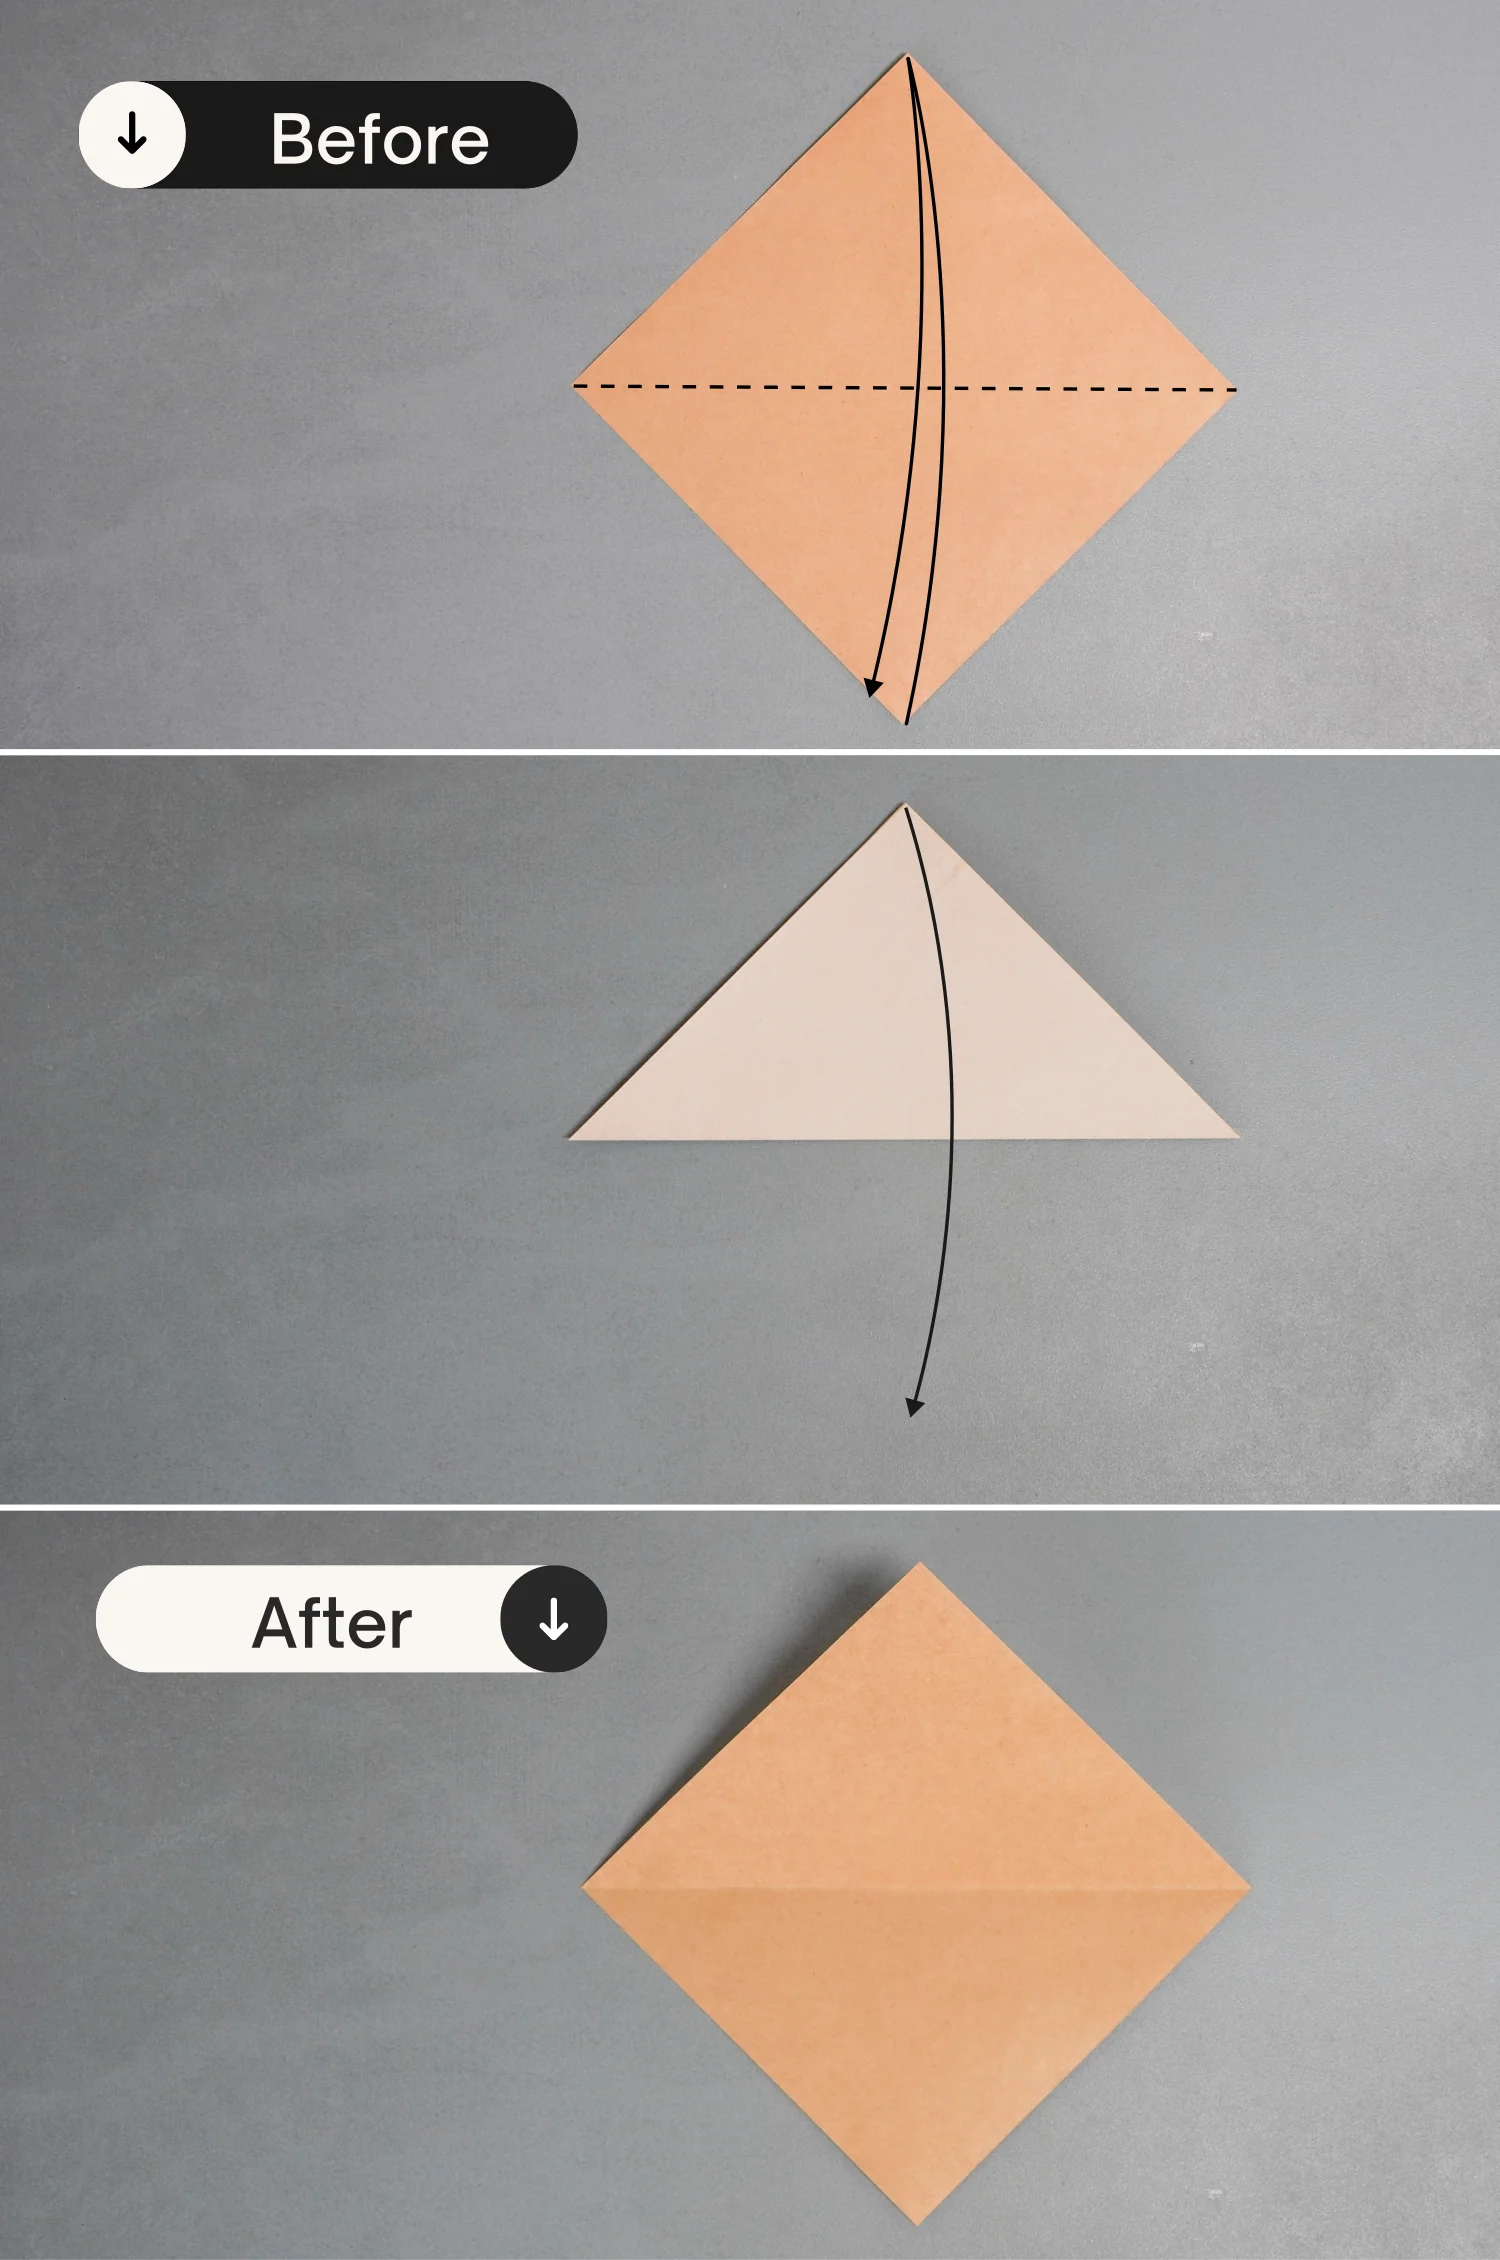
Step 1
Place the paper with the desired display color side down to begin folding, fold it in half horizontally, and unfold it.
undefined
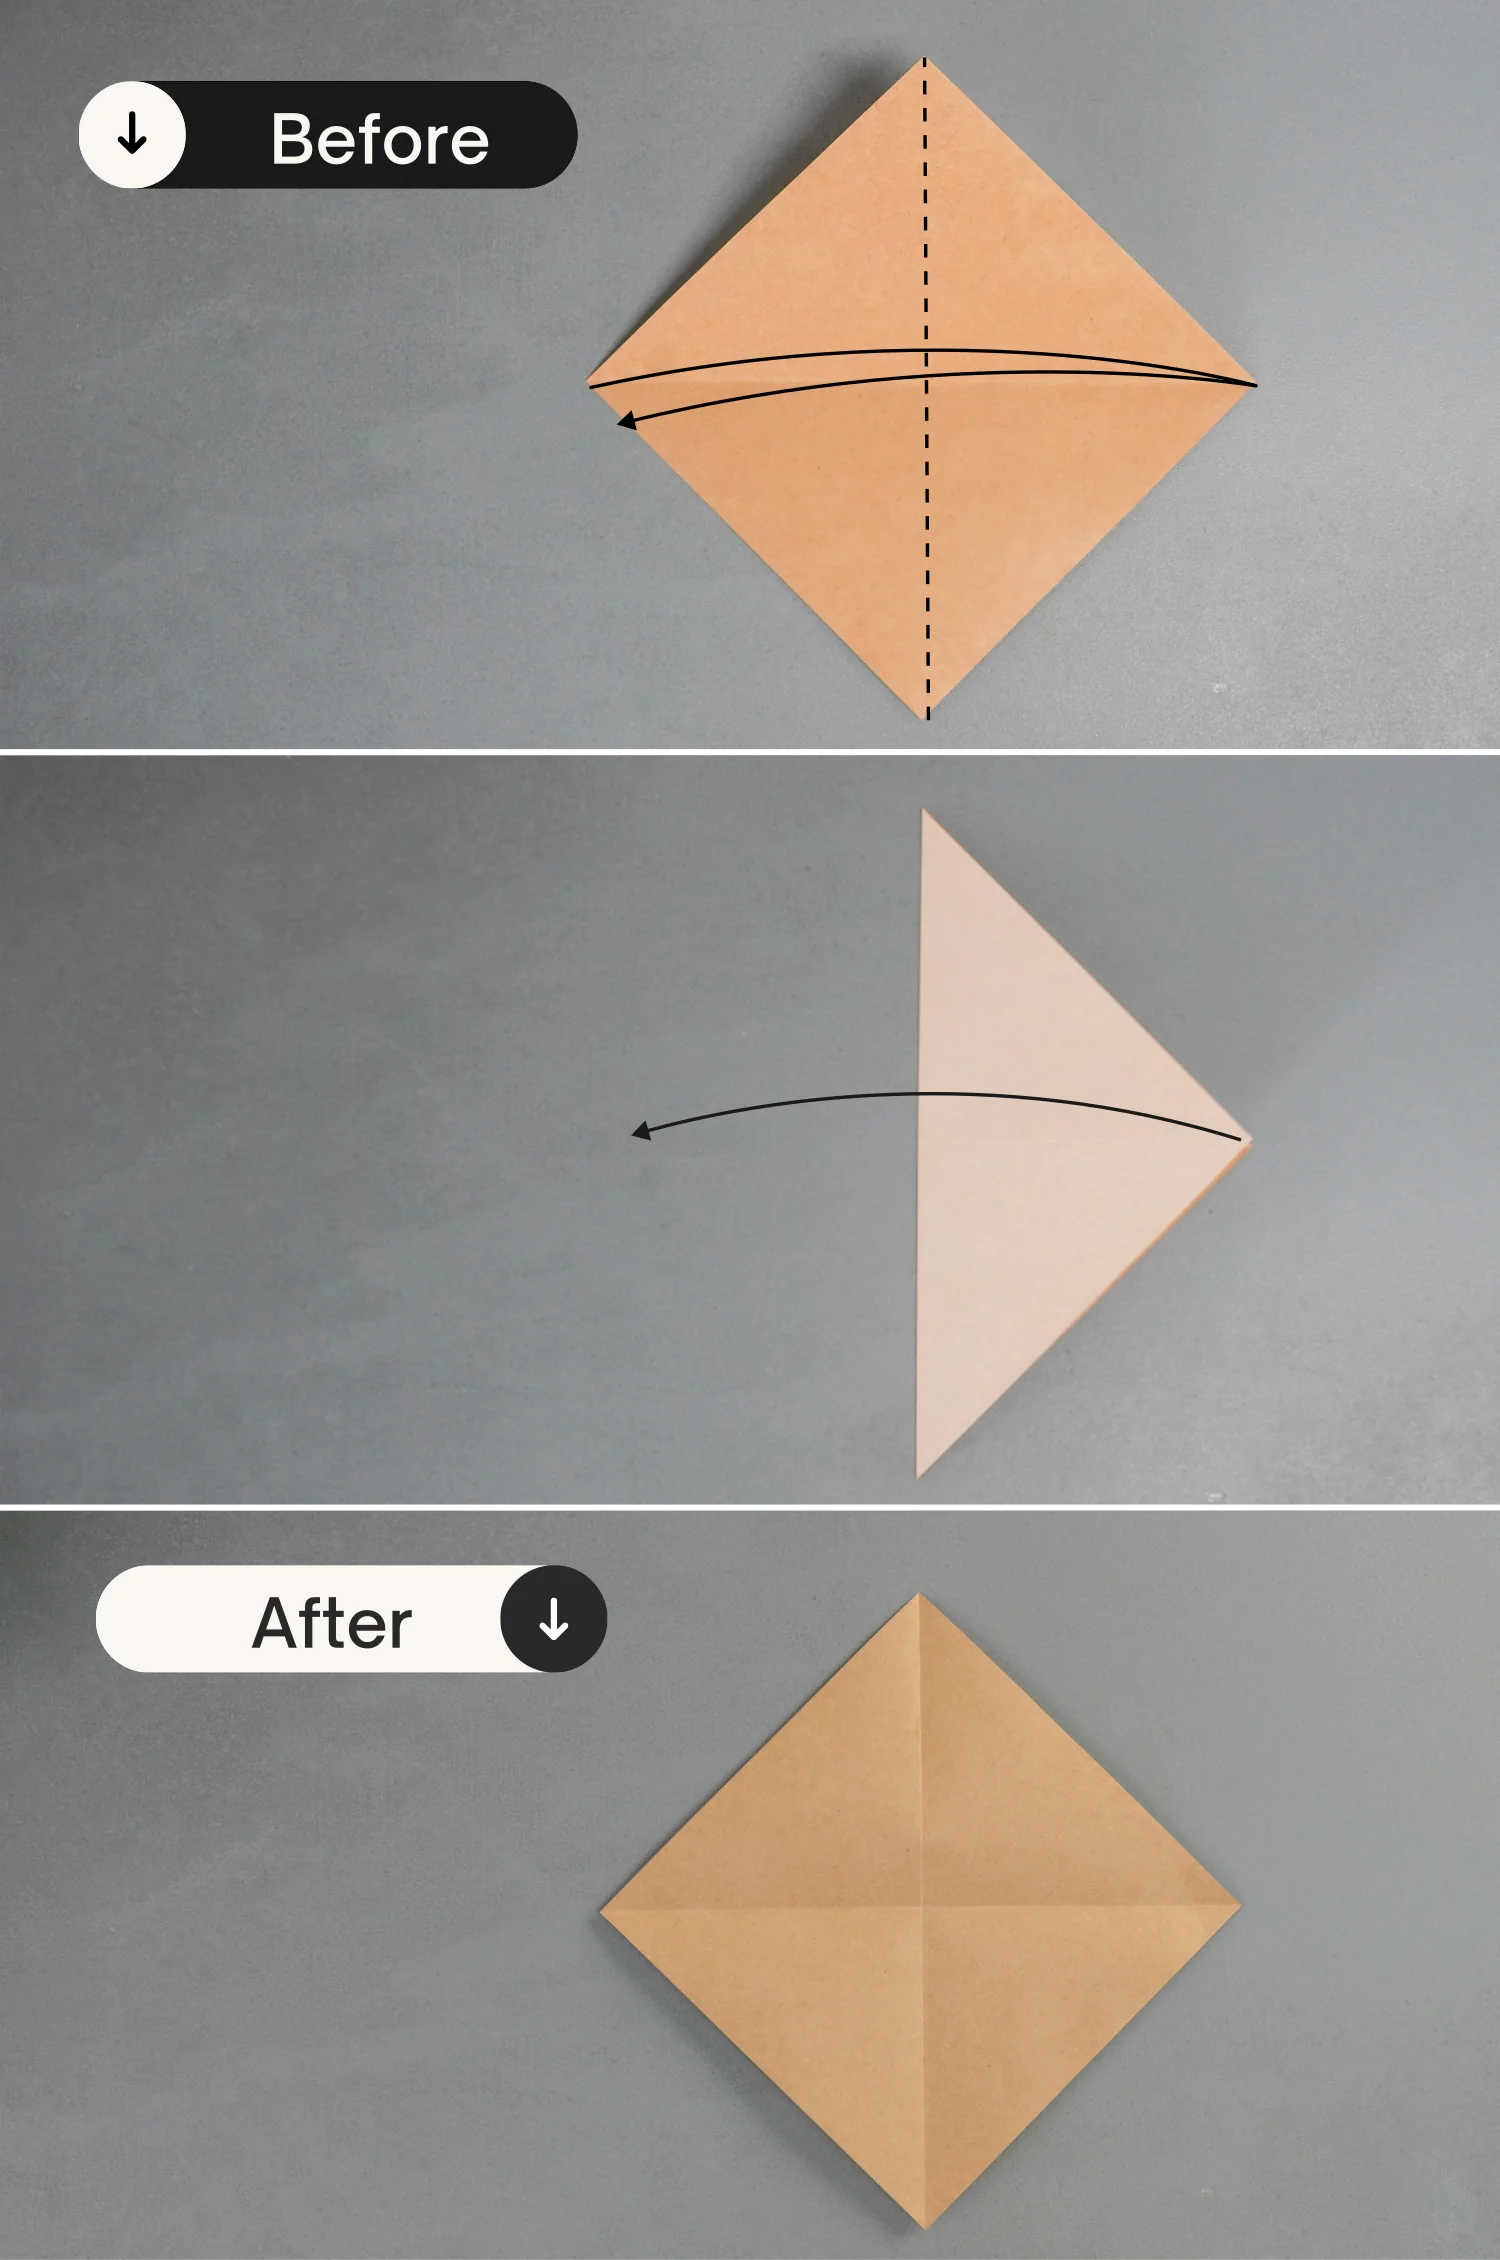
Step 2
Fold it in half vertically, and unfold it.
undefined
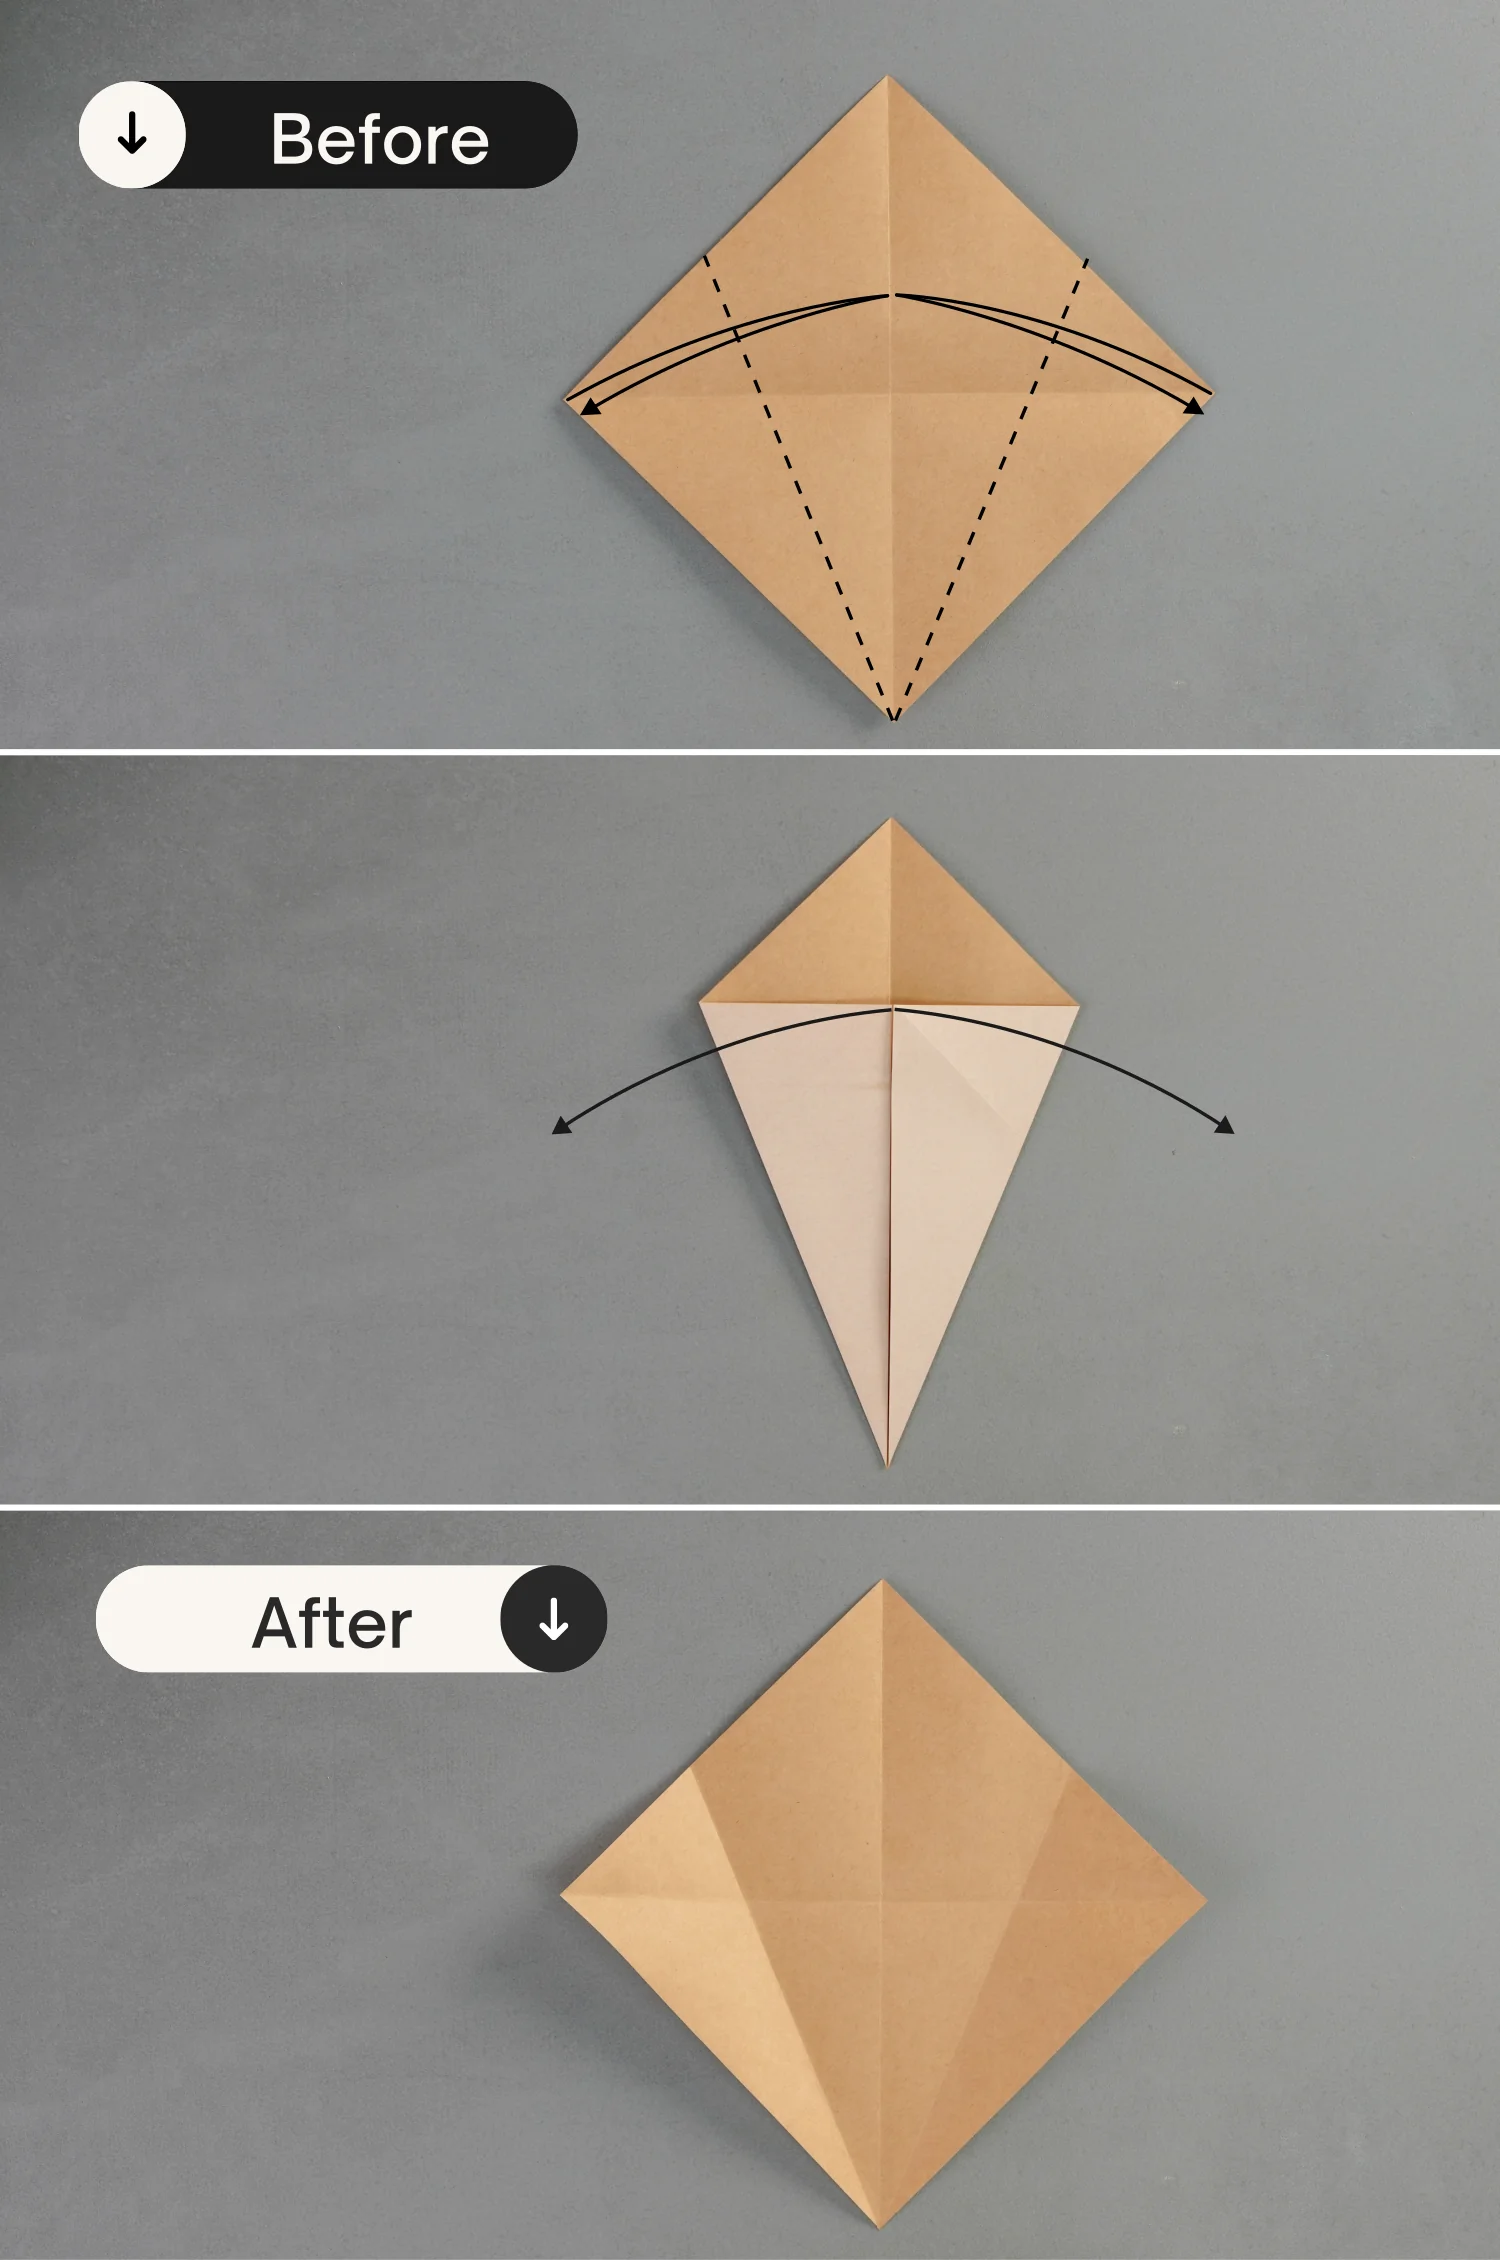
Step 3
Fold the bottom left and right edges to align with the middle vertical crease, crease them well then unfold them.
undefined
Step 4
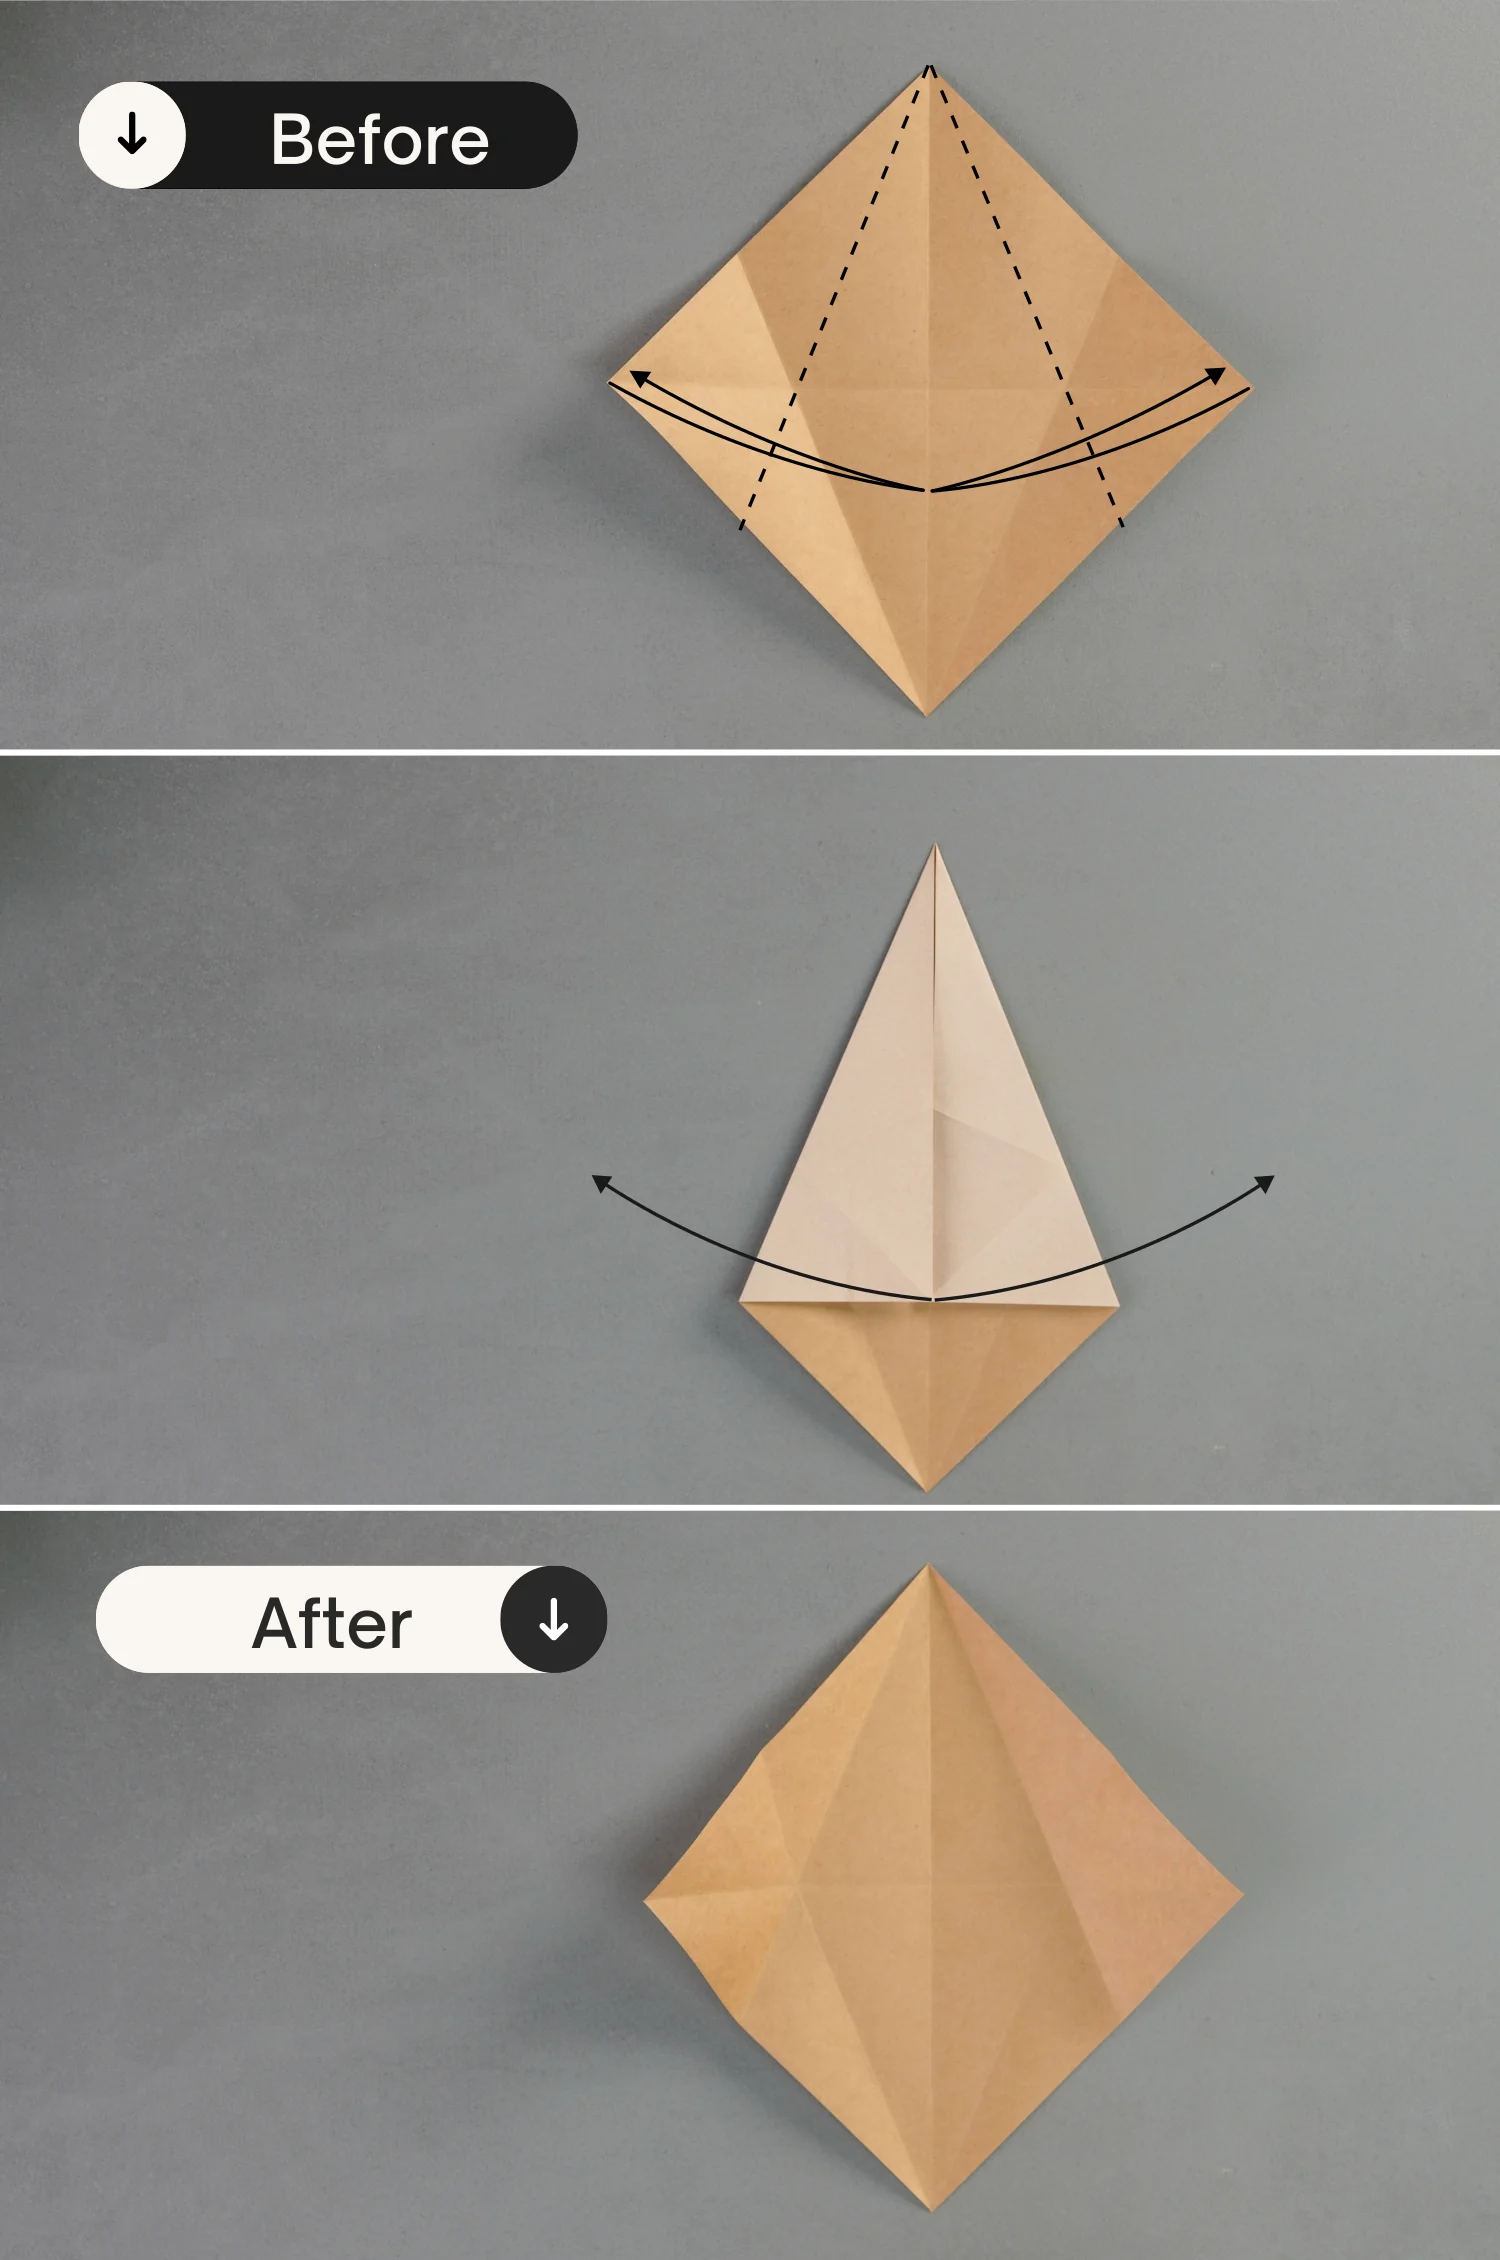
Fold the top left and right edges to align with the middle vertical crease, and unfold them.
undefined
Step 5
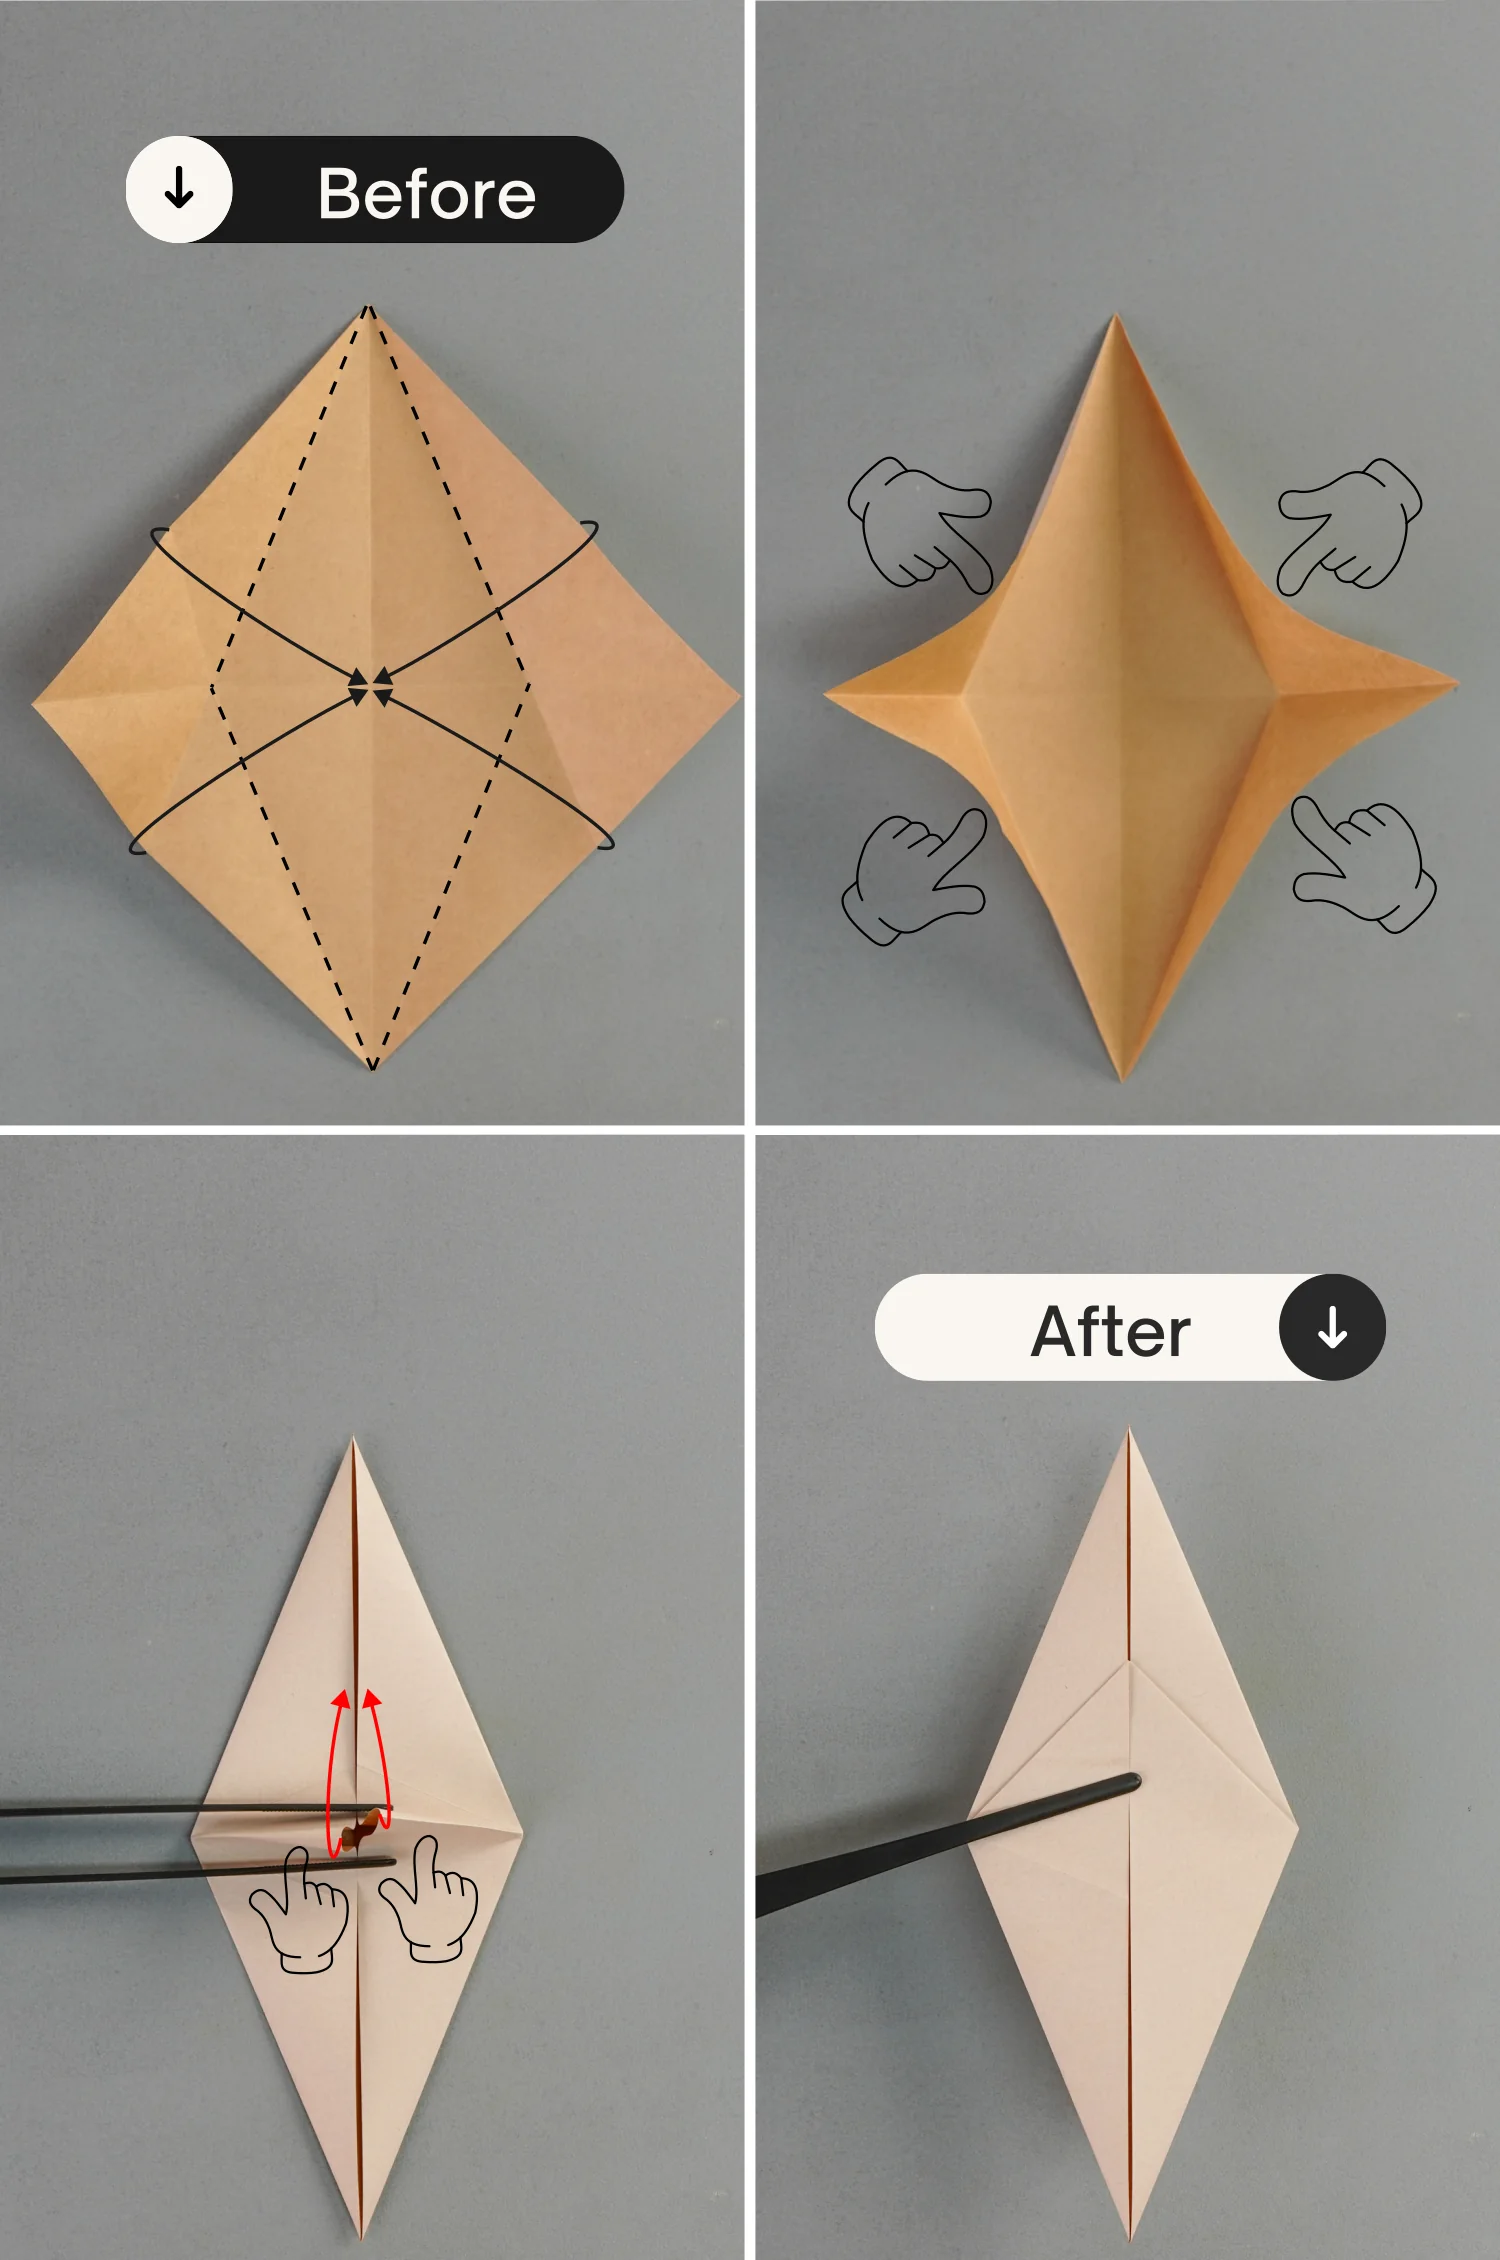
Push the four edges toward the center along the existing creases, then sharpen the left and right corners, and flatten them upward.
undefined
Step 6
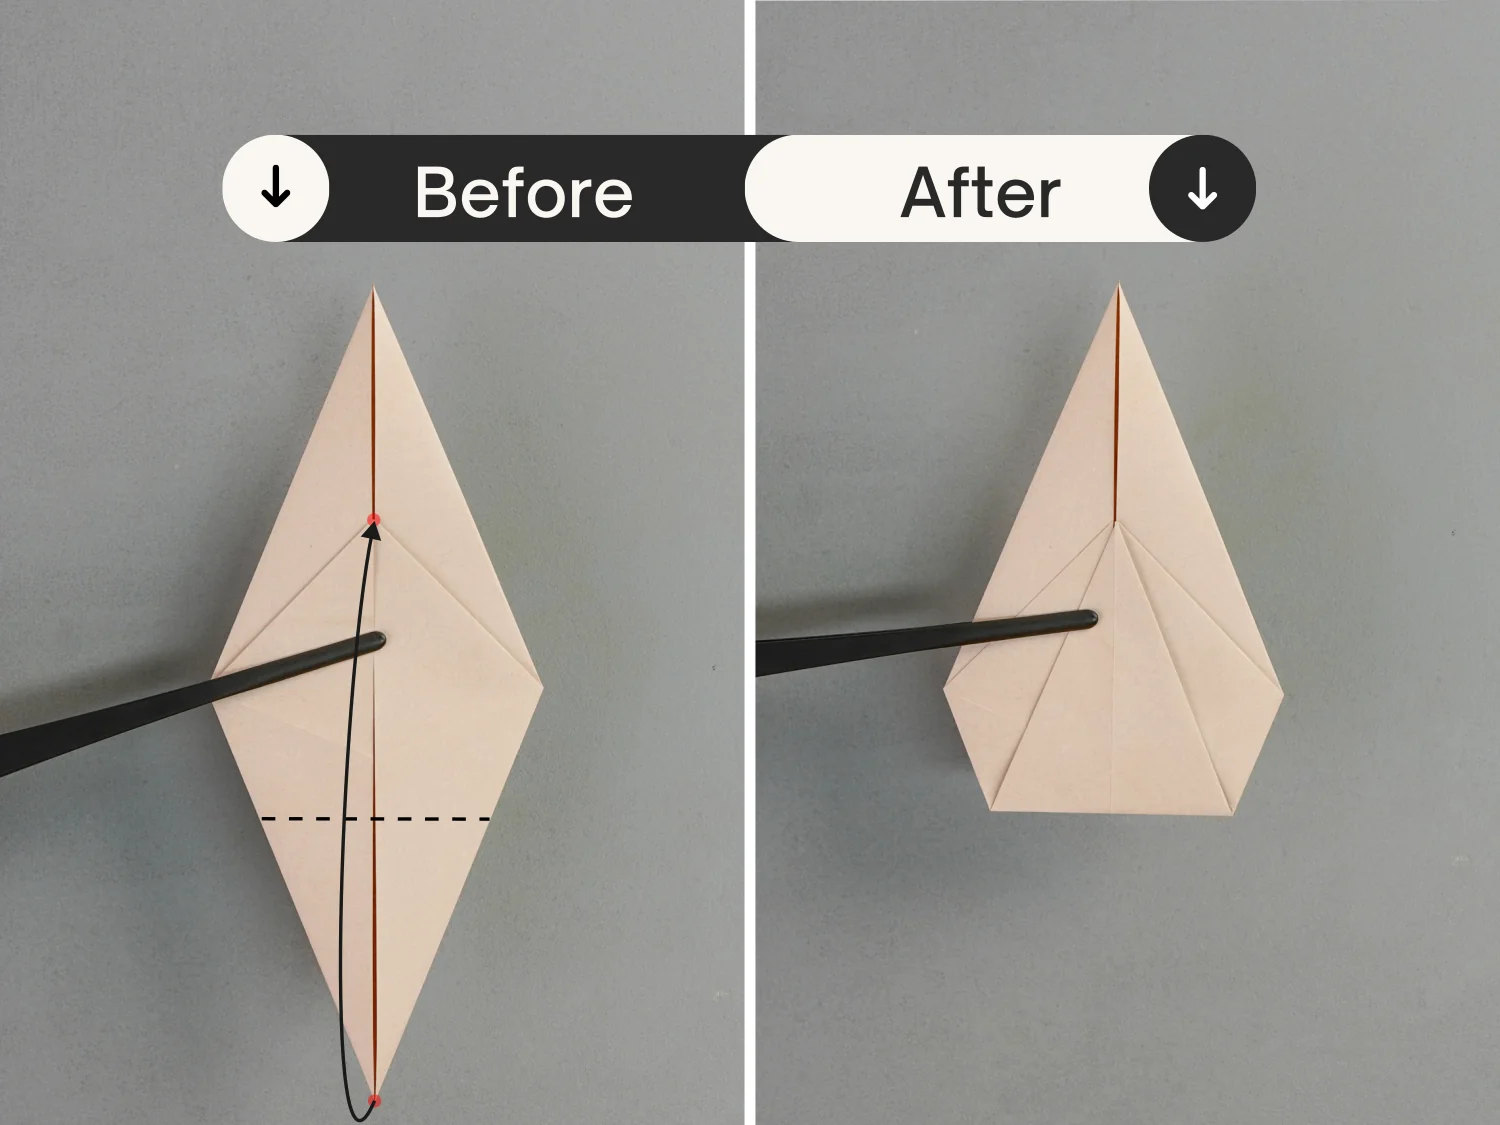
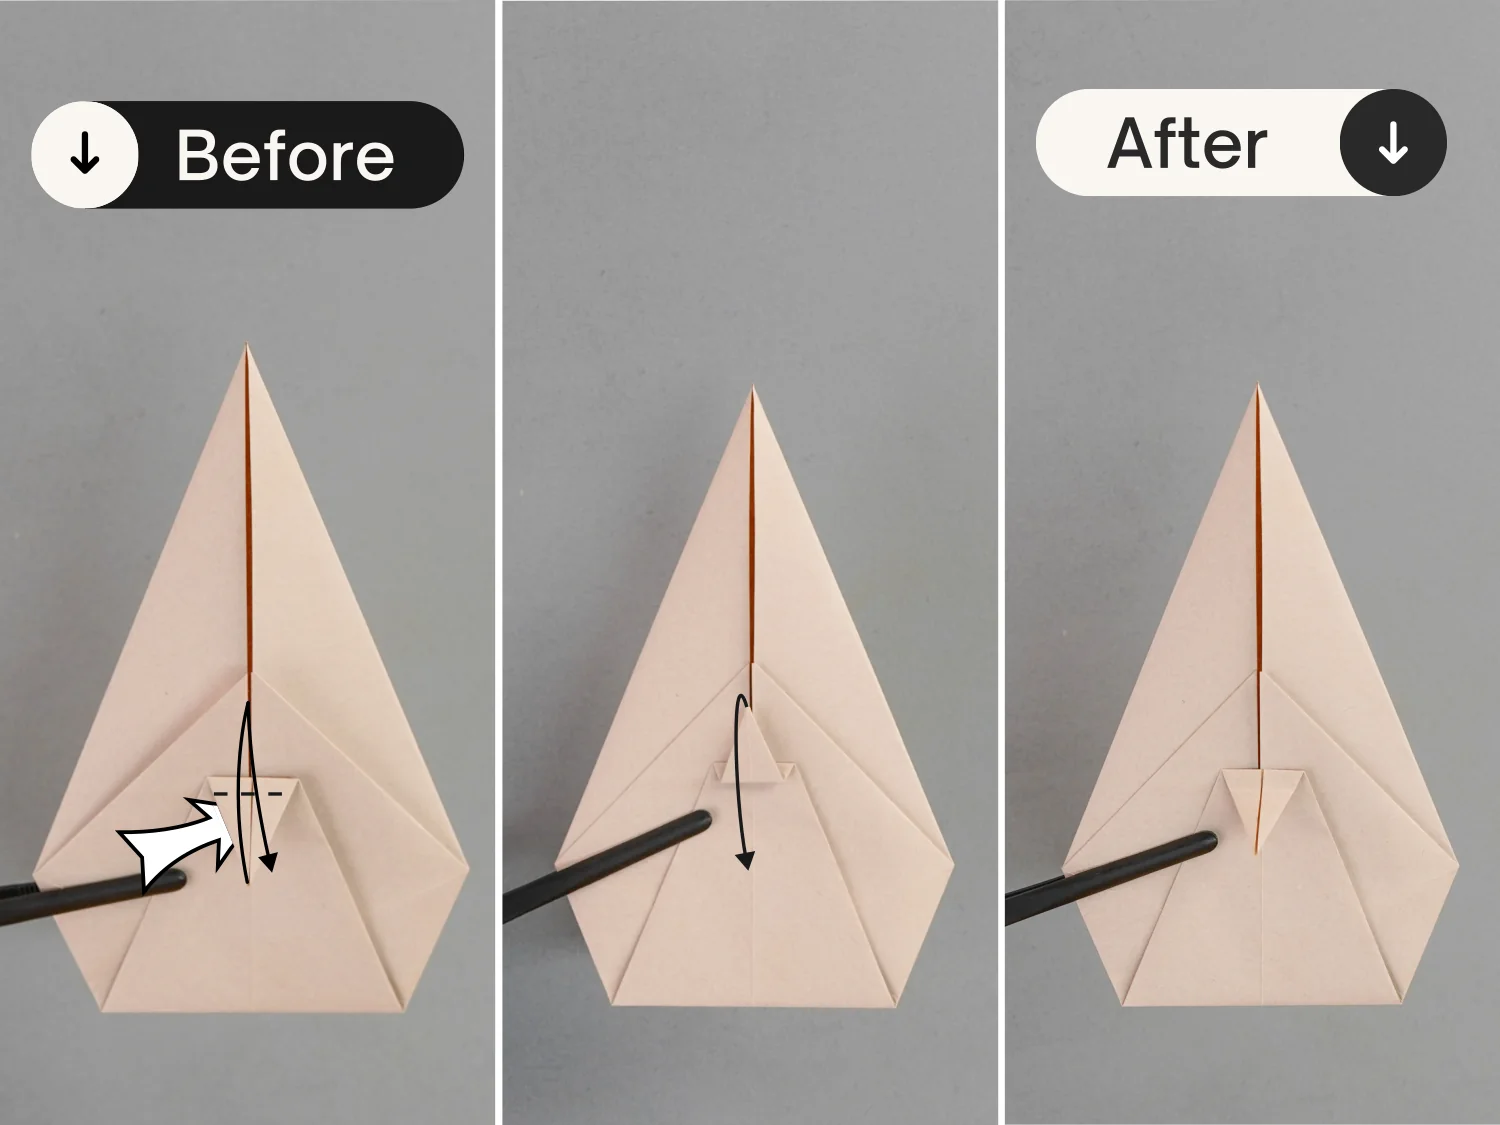
Fold up the bottom point to meet the top point of the top layer.
undefined
Step 7
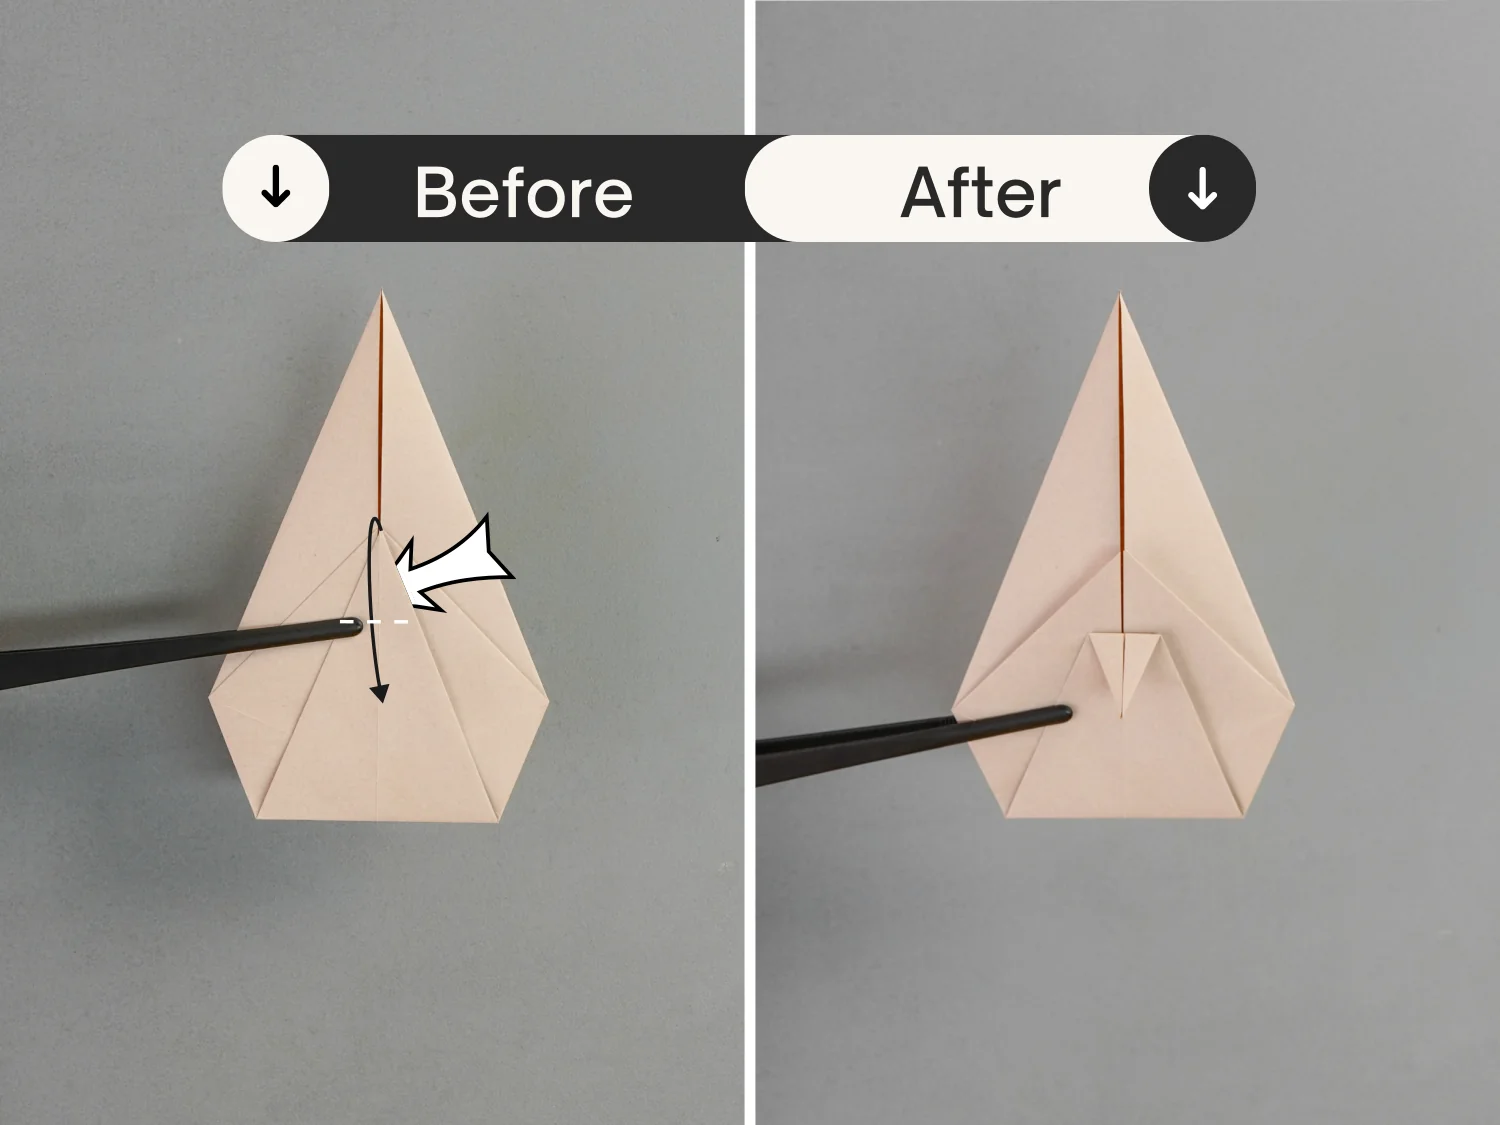
Then fold it down a little.
undefined
Step 8
Fold it up again for a short section, and unfold it.
undefined
Step 9
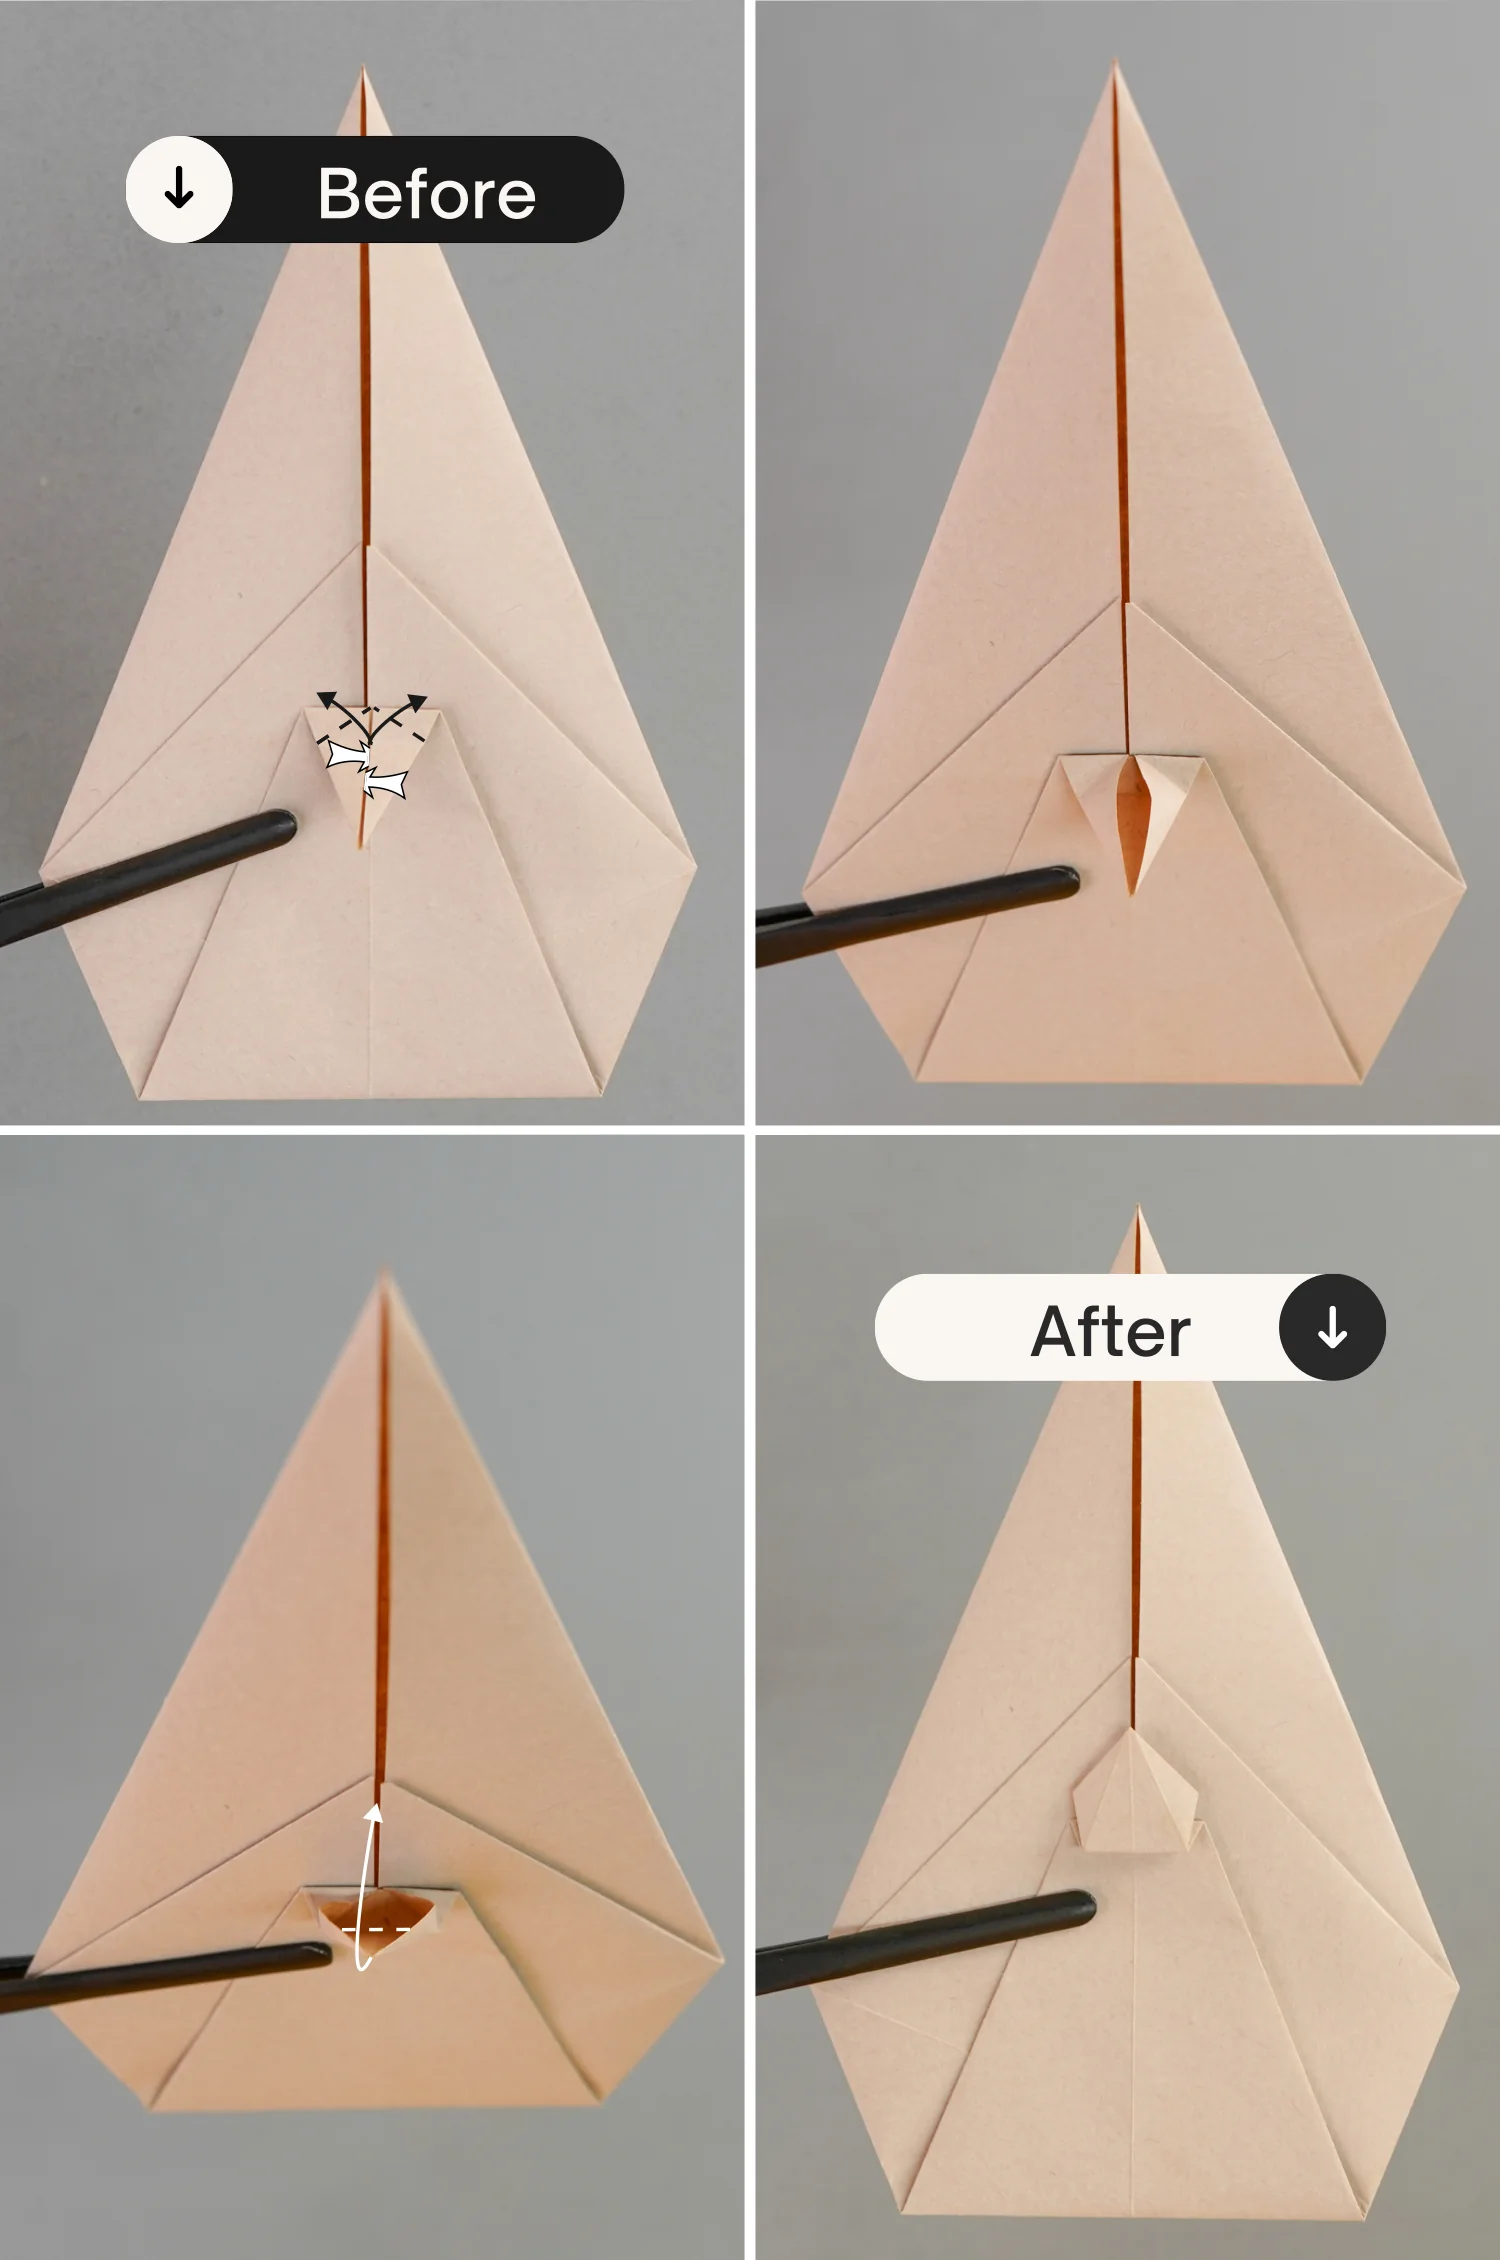
Open the pocket of this small tip, and fold it up along the crease you just made.
undefined
Step 10
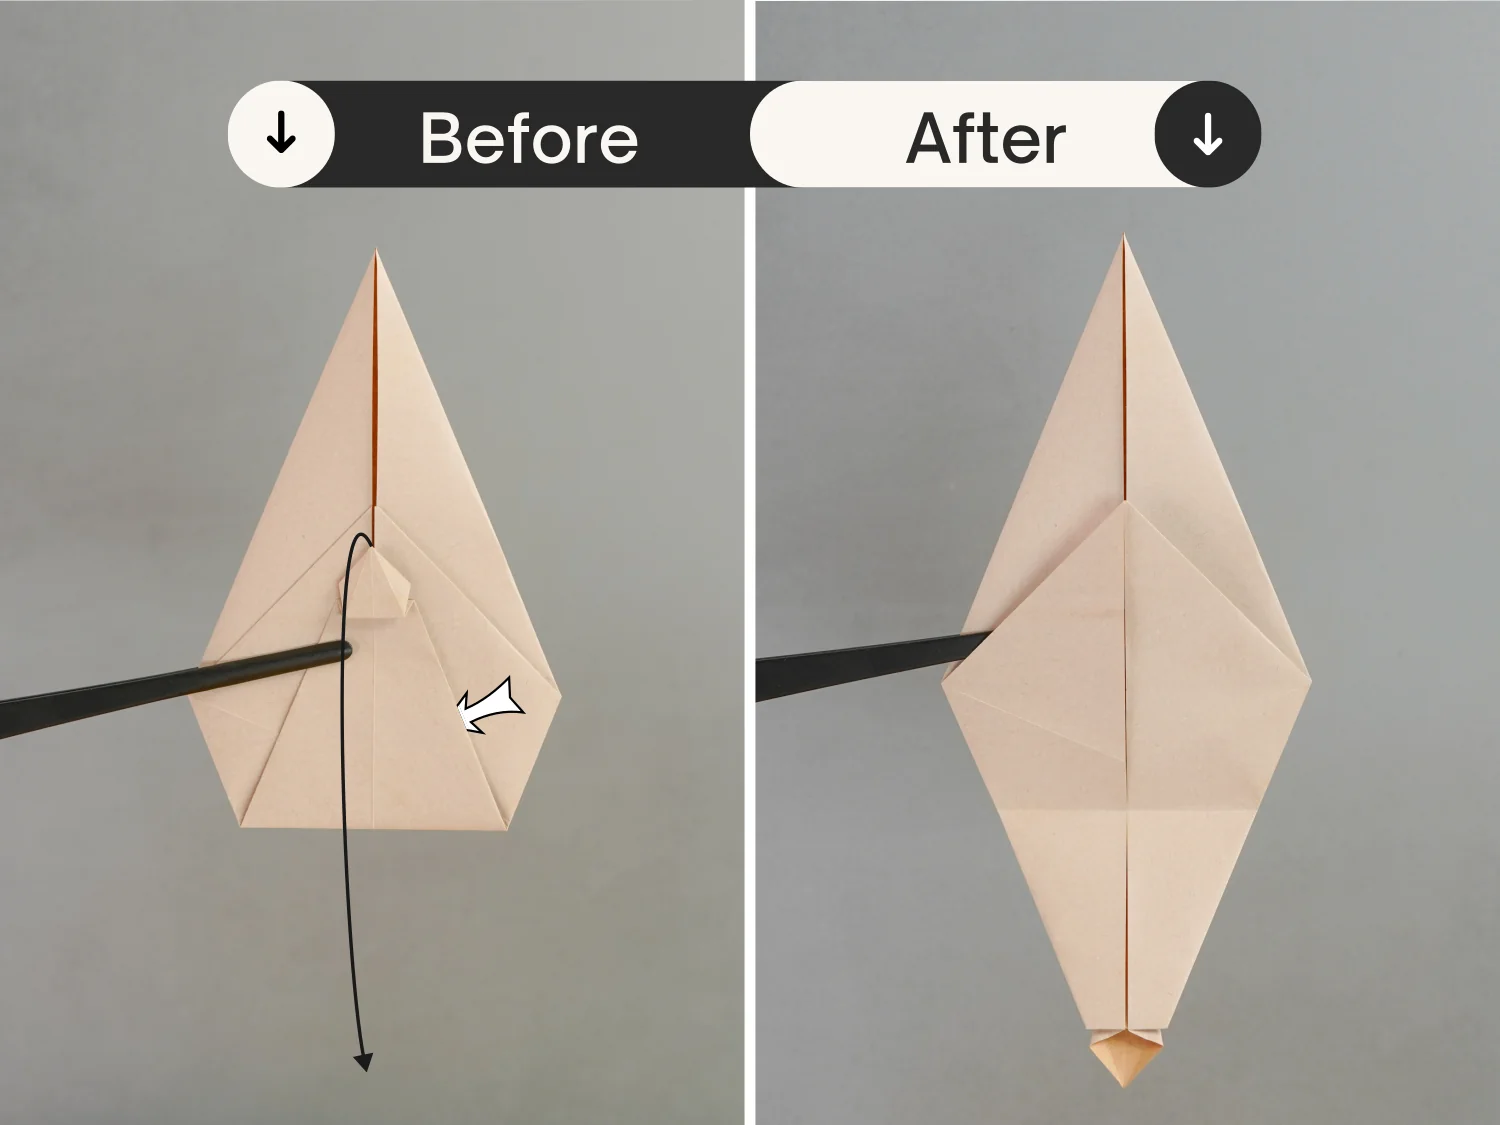
Fold the top layer down.
undefined
Step 11
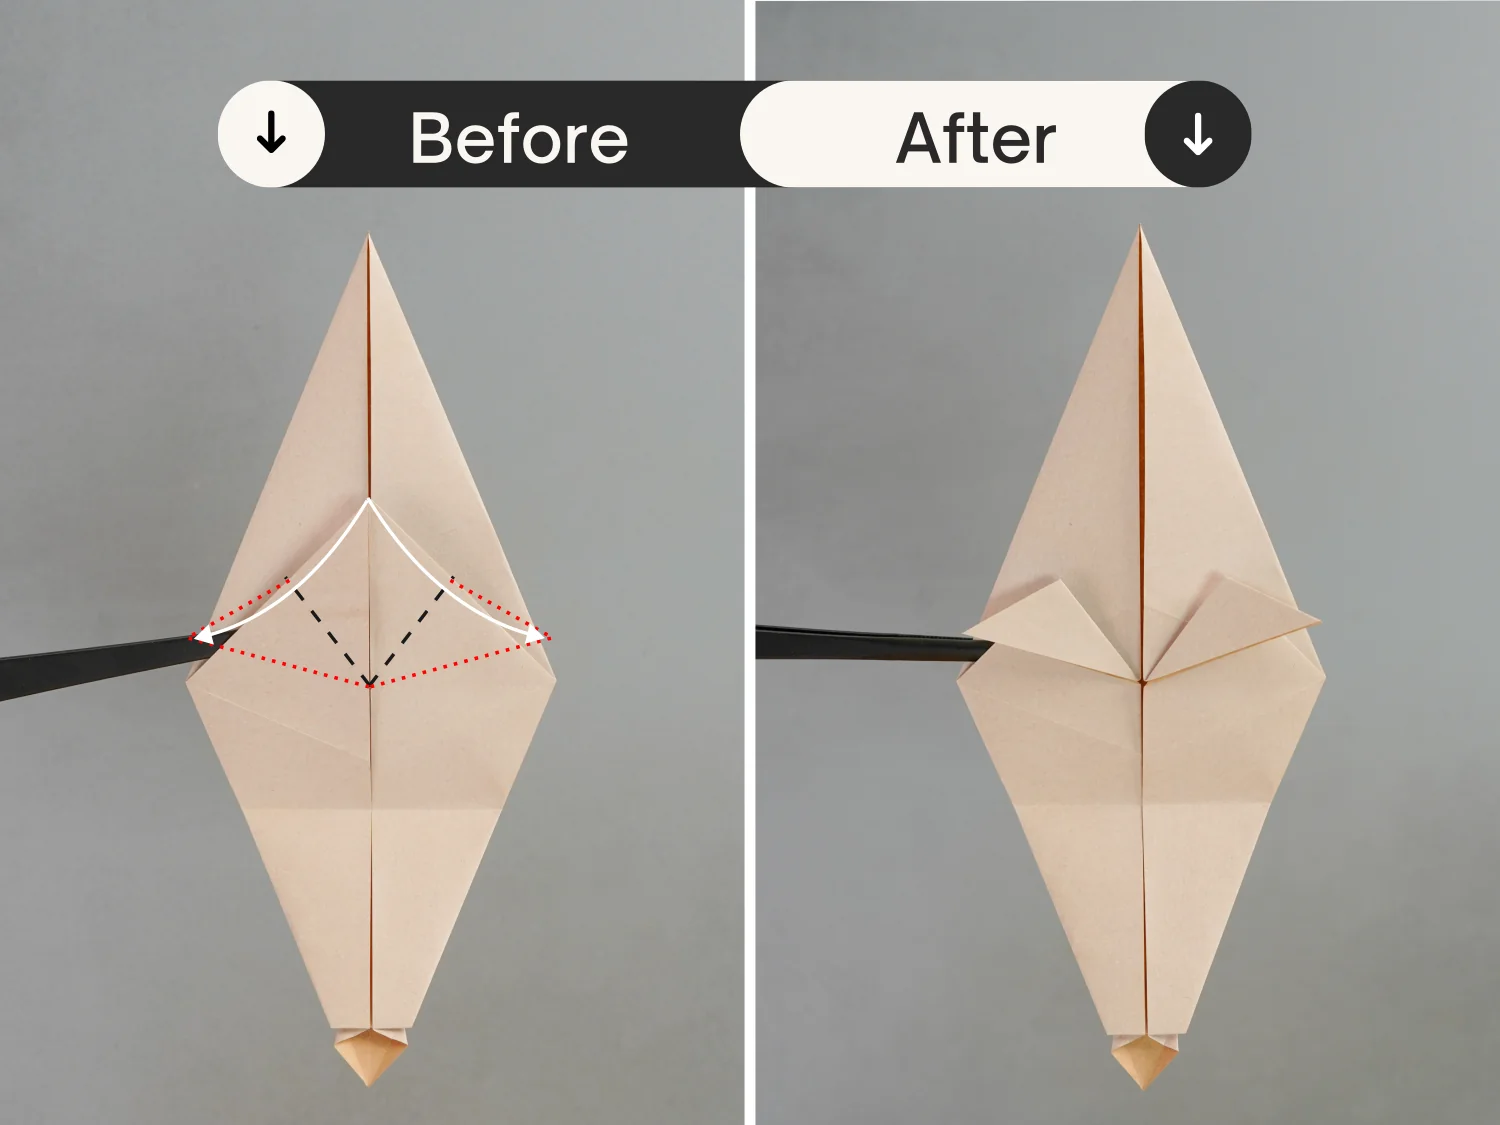
Fold the top points of the top left and right layers along the black dotted lines.
undefined
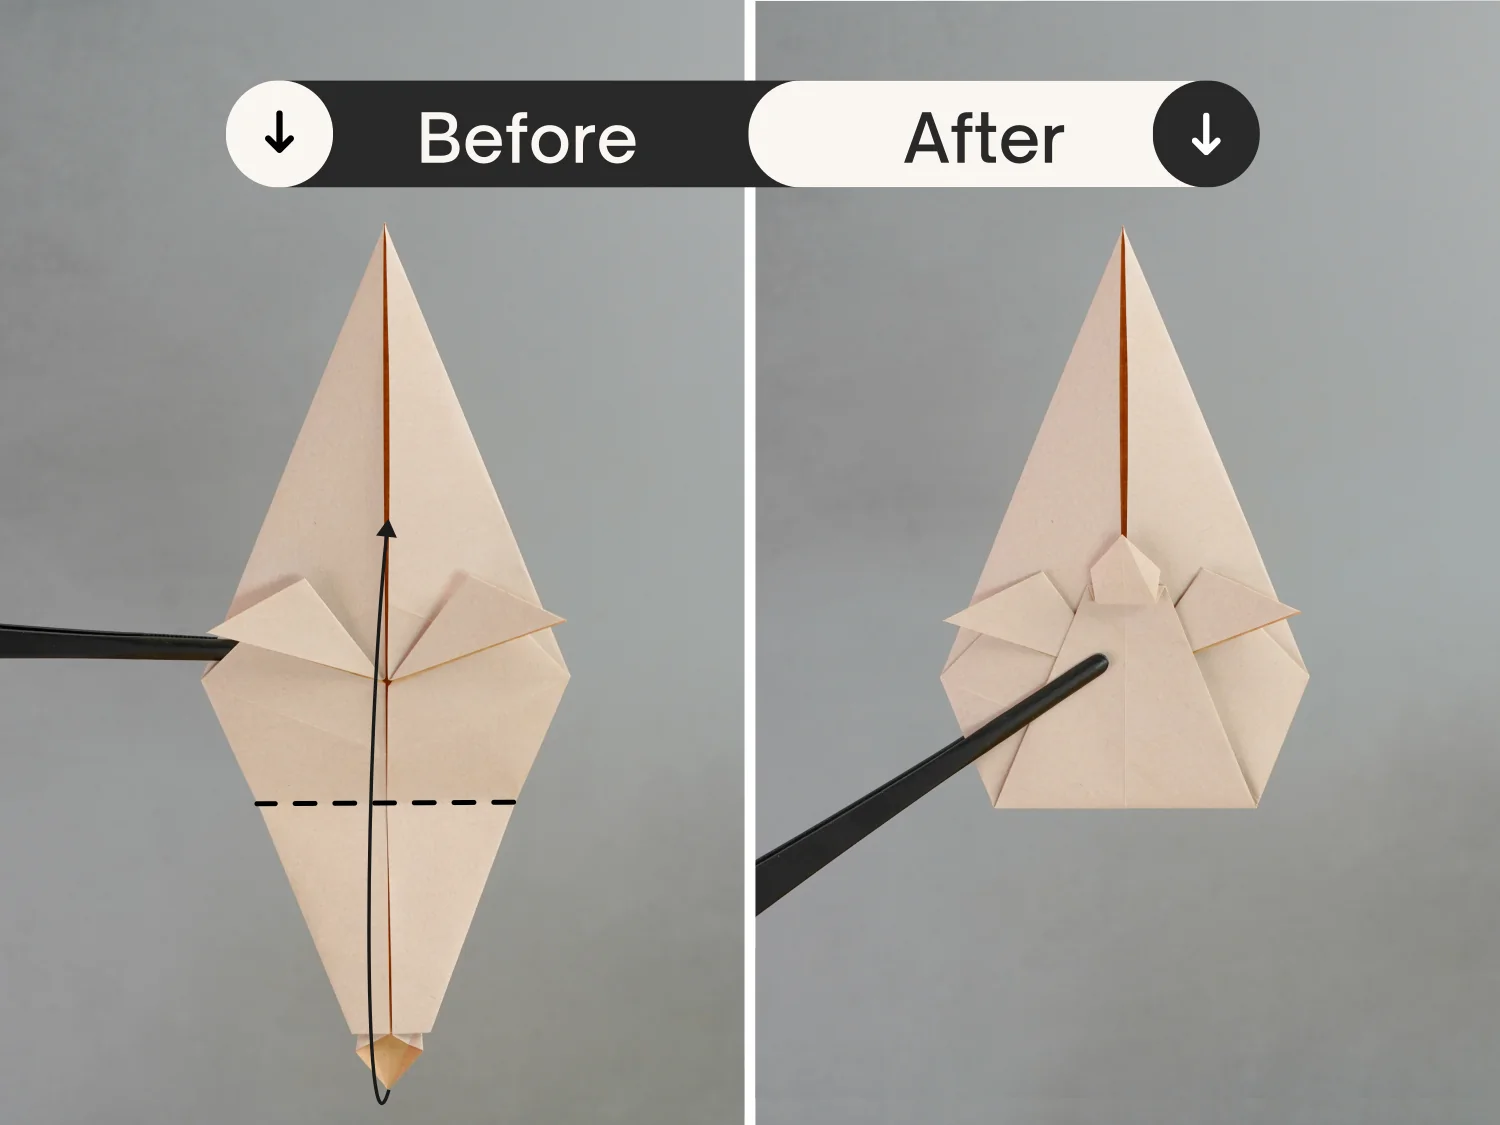
Step 12
Fold the bottom part up again along the existing crease.
undefined
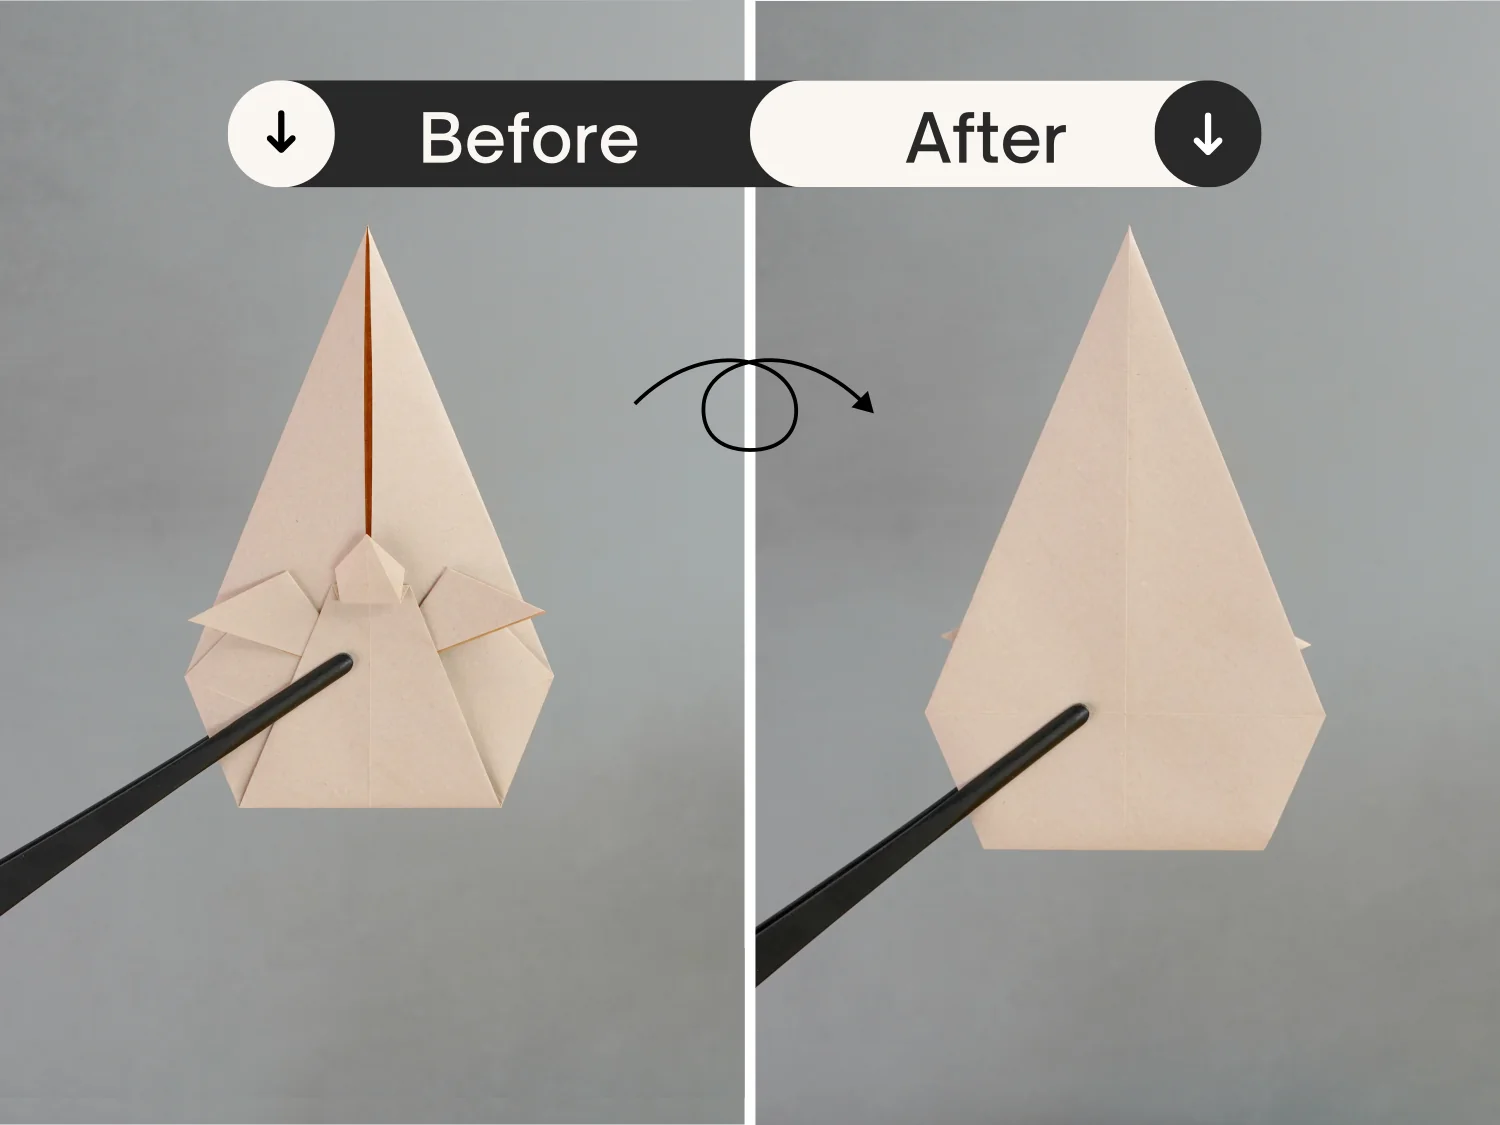
Step 13
Flip the paper over.
undefined
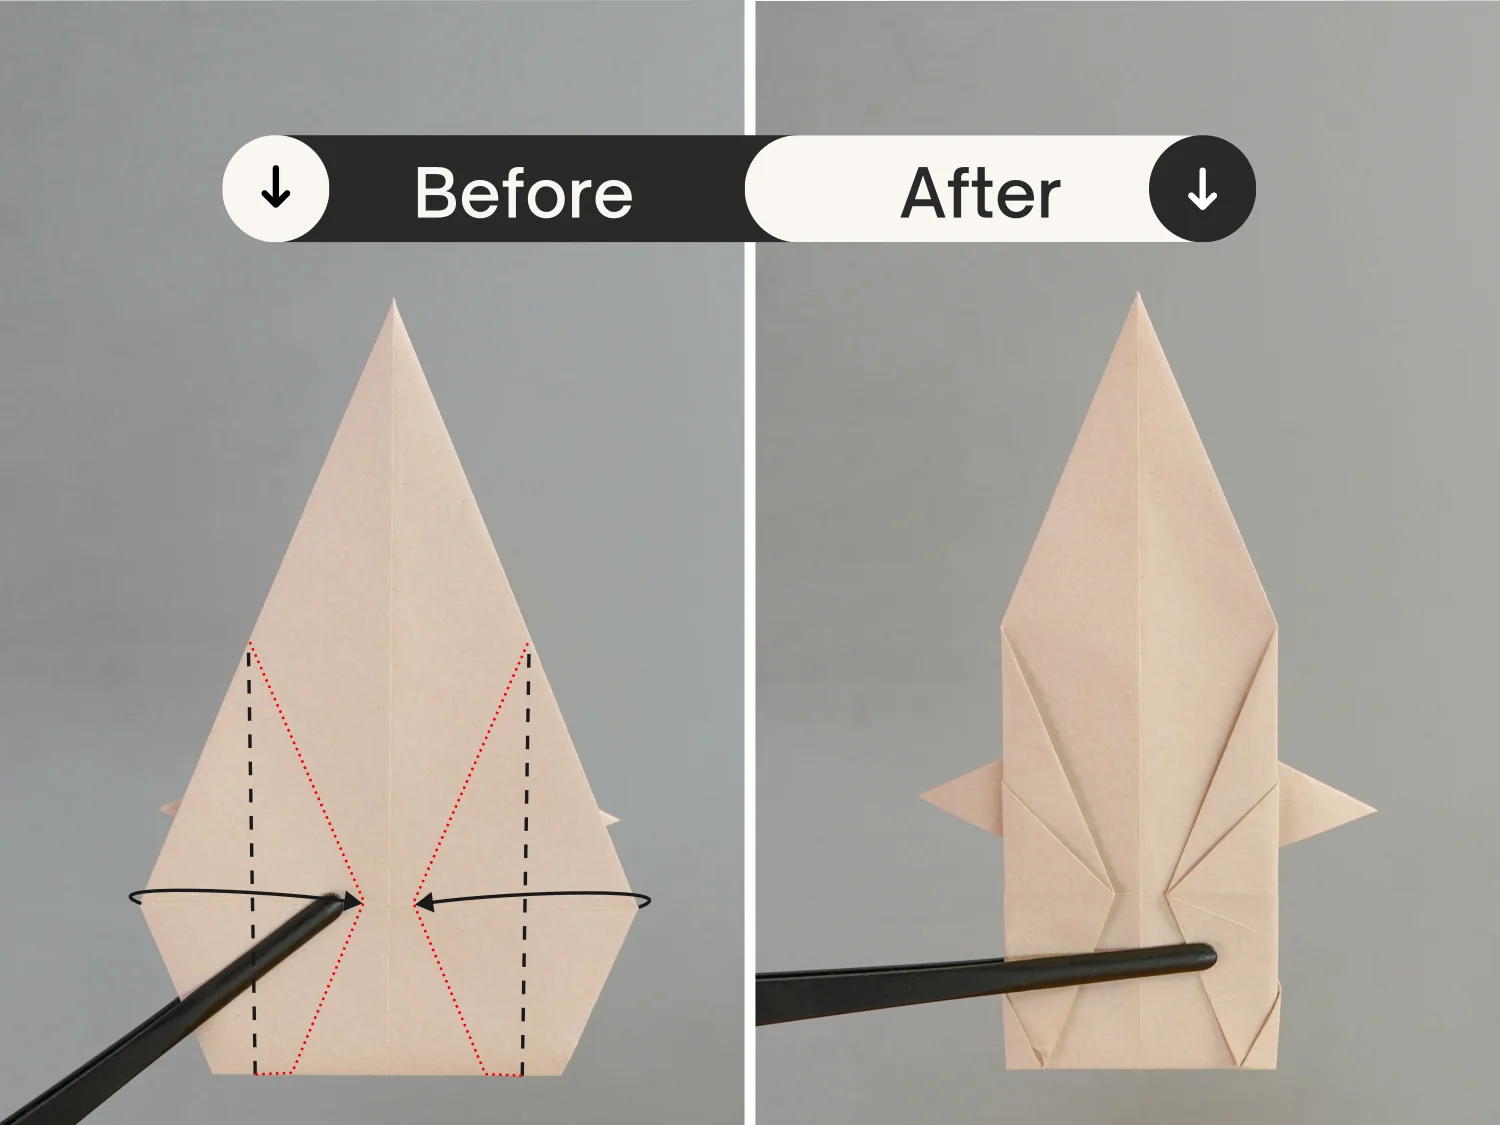
Step 14
Fold the left and right corners toward the center.
undefined
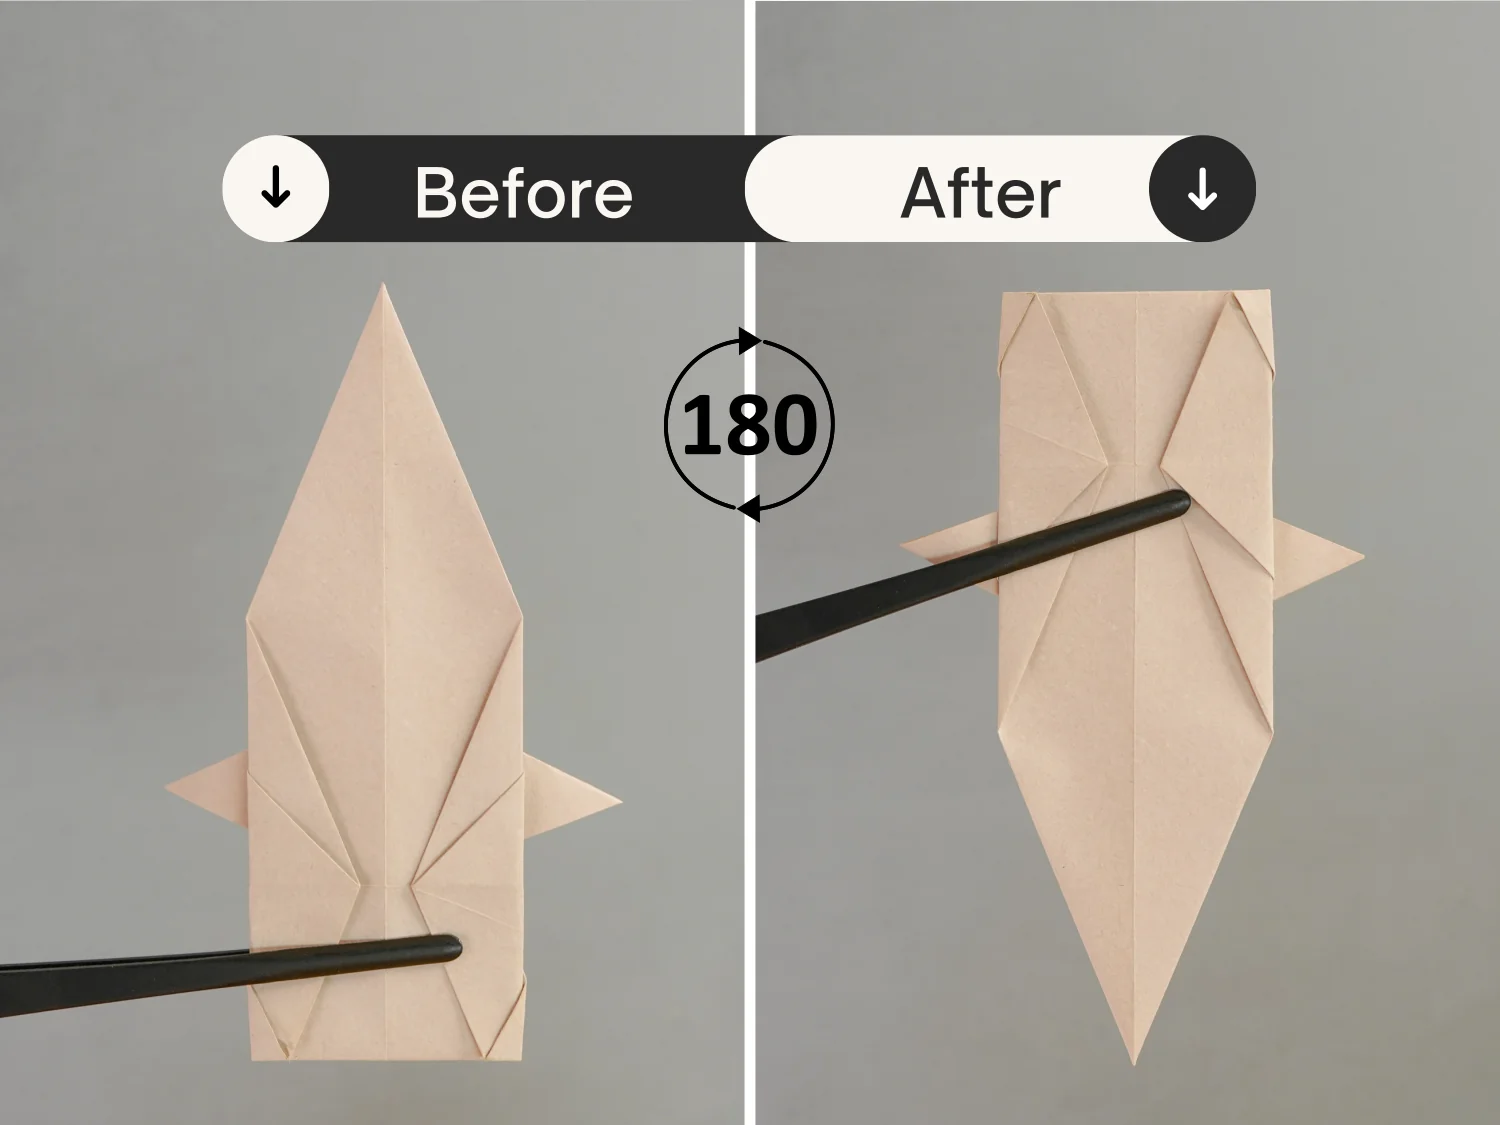
Step 15
Rotate it 180 degrees clockwise.
undefined
Step 16
Fold down the top left and right corners diagonally.
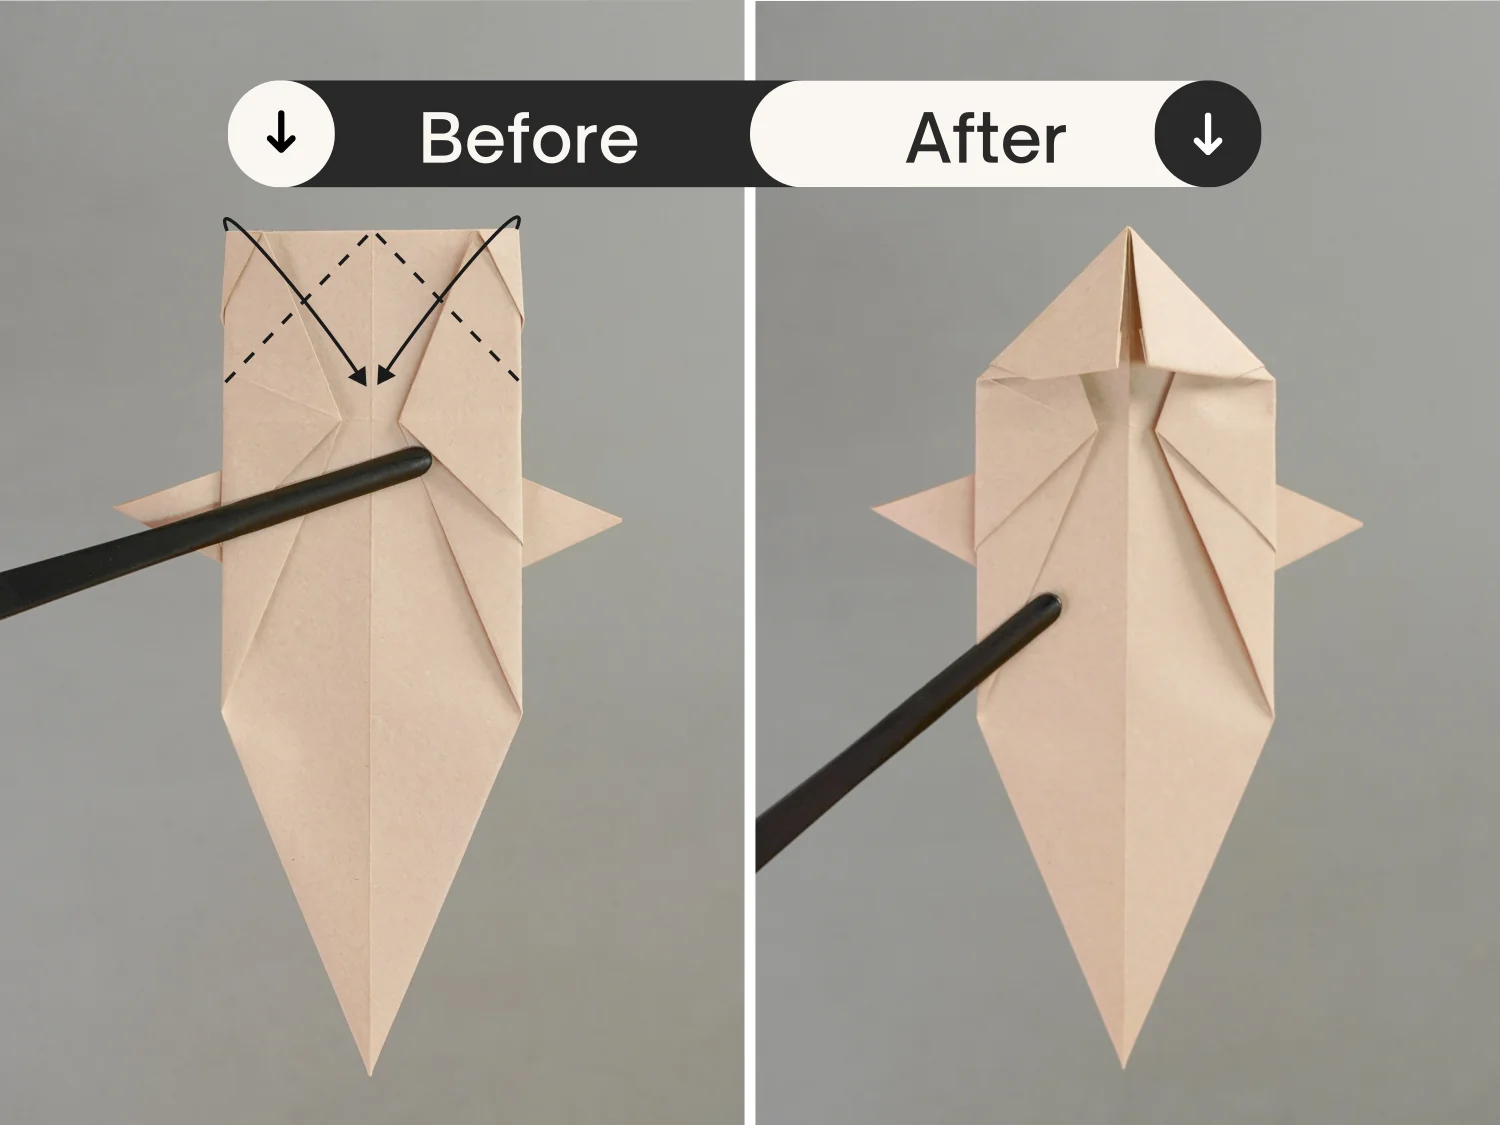
undefined
Step 17
Then fold them back to the original direction for a short section.
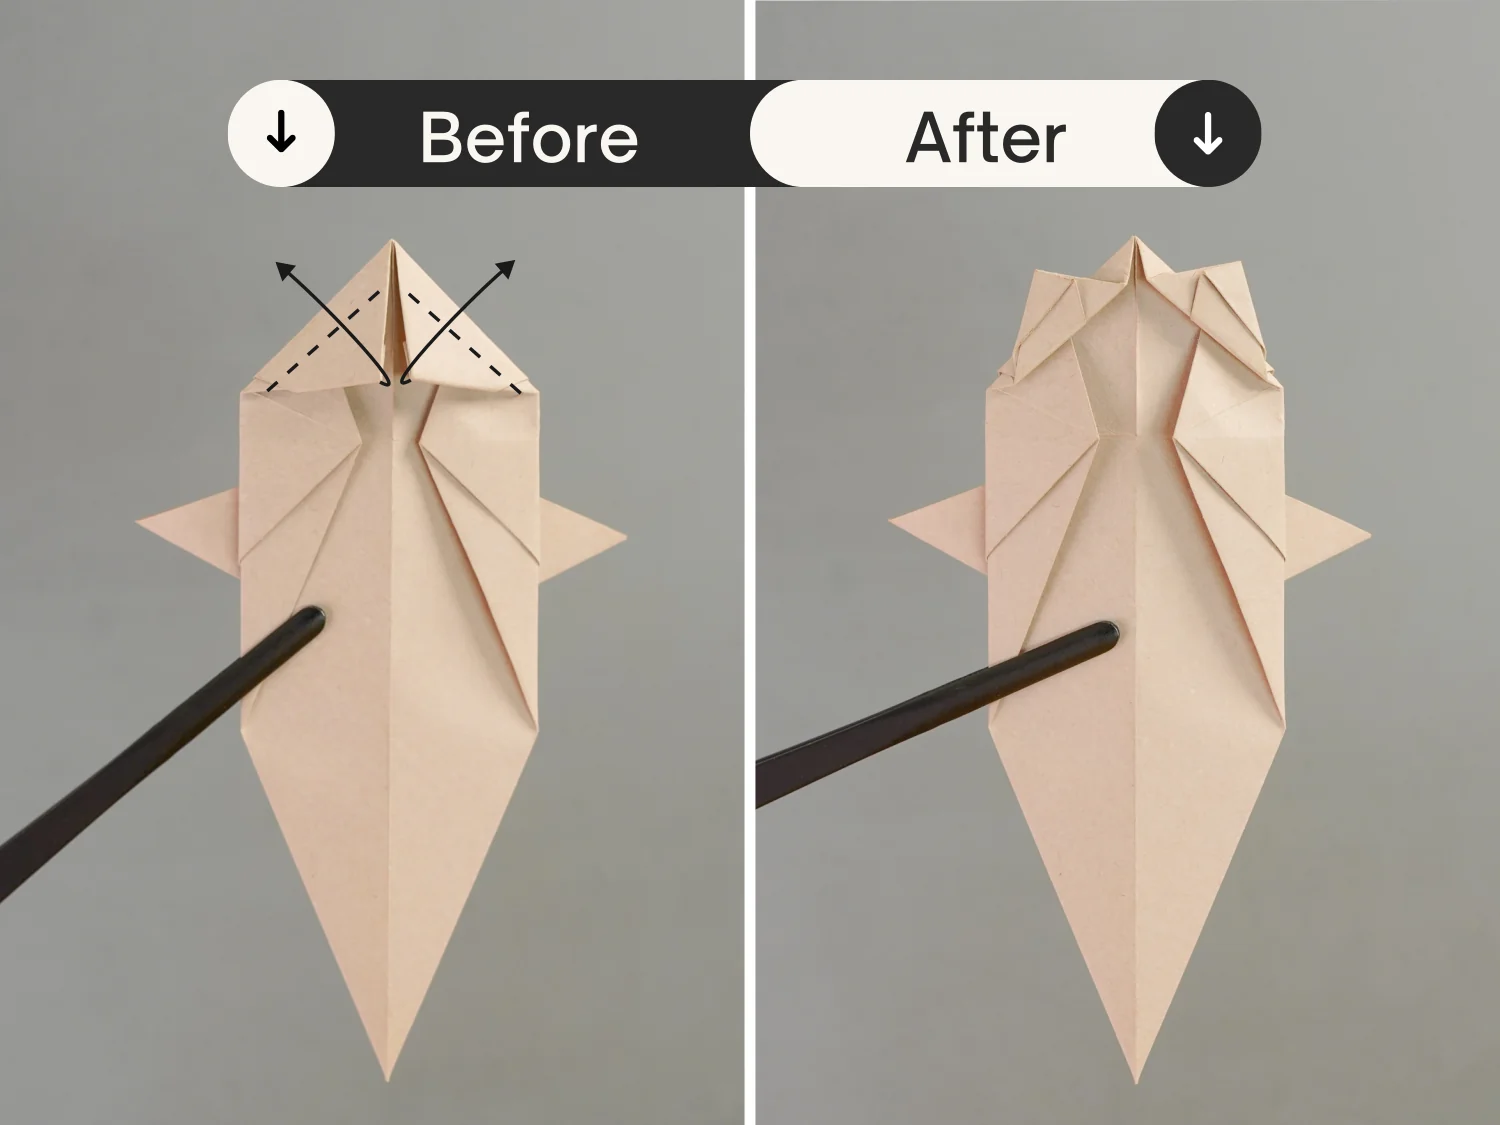
undefined
Step 18
Fold the two small corners along the dotted lines.
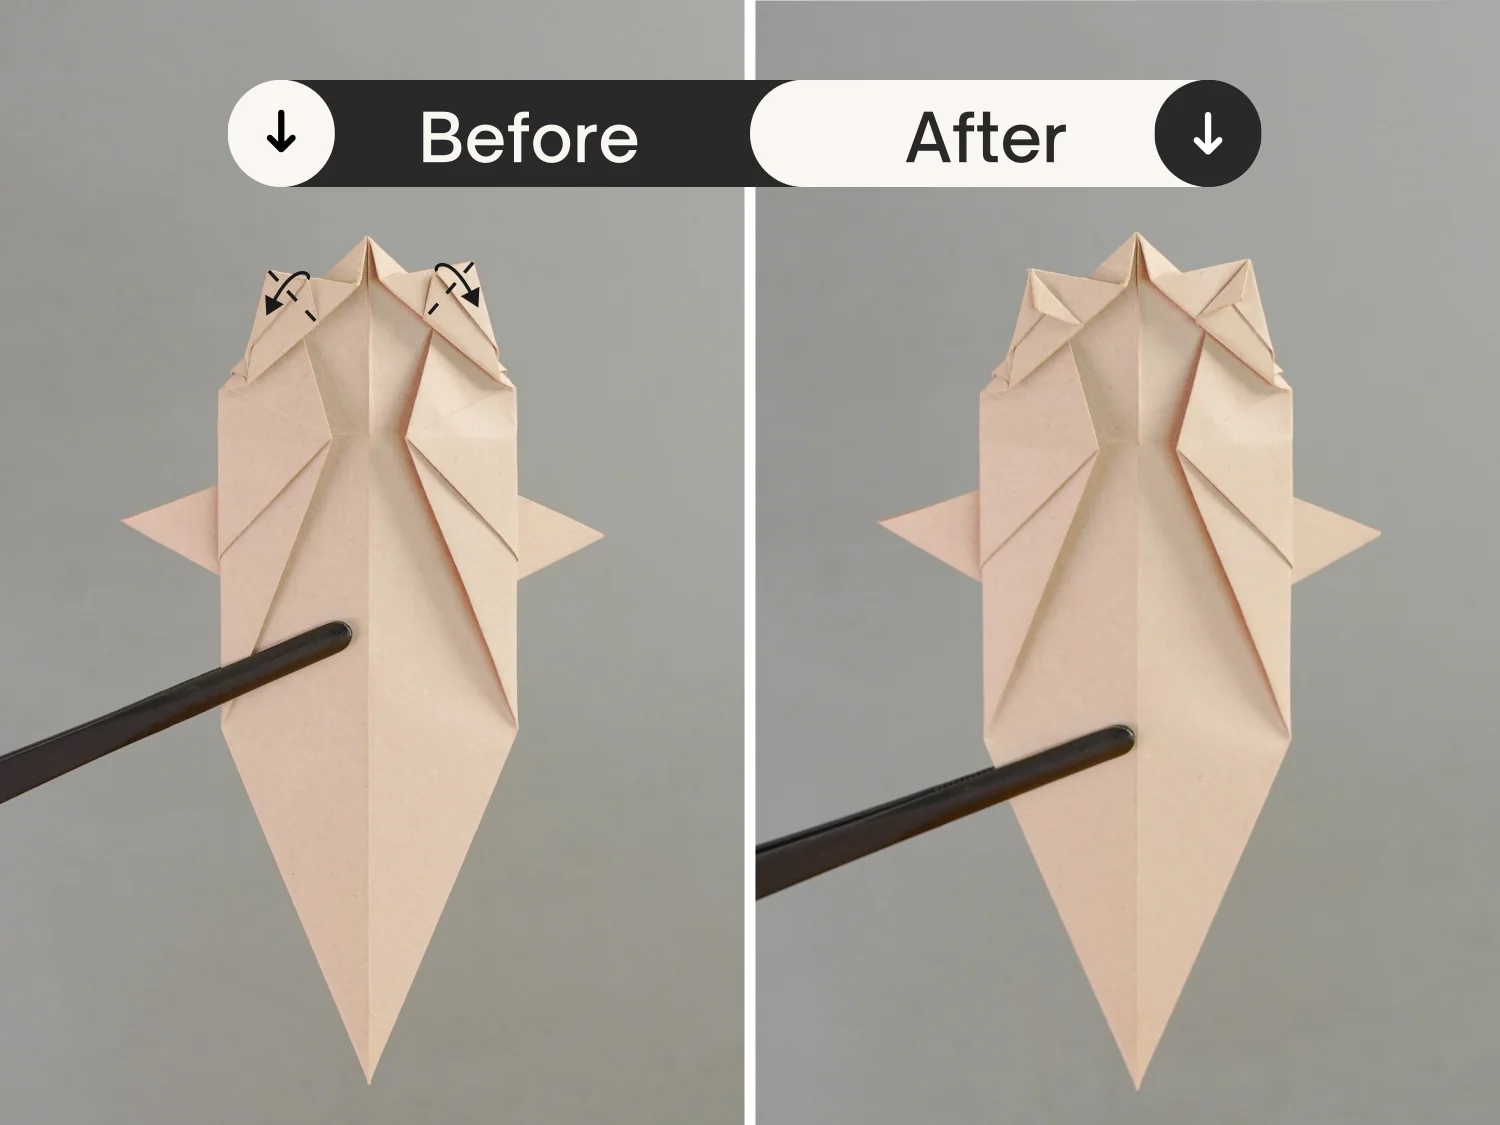
undefined
Step 19
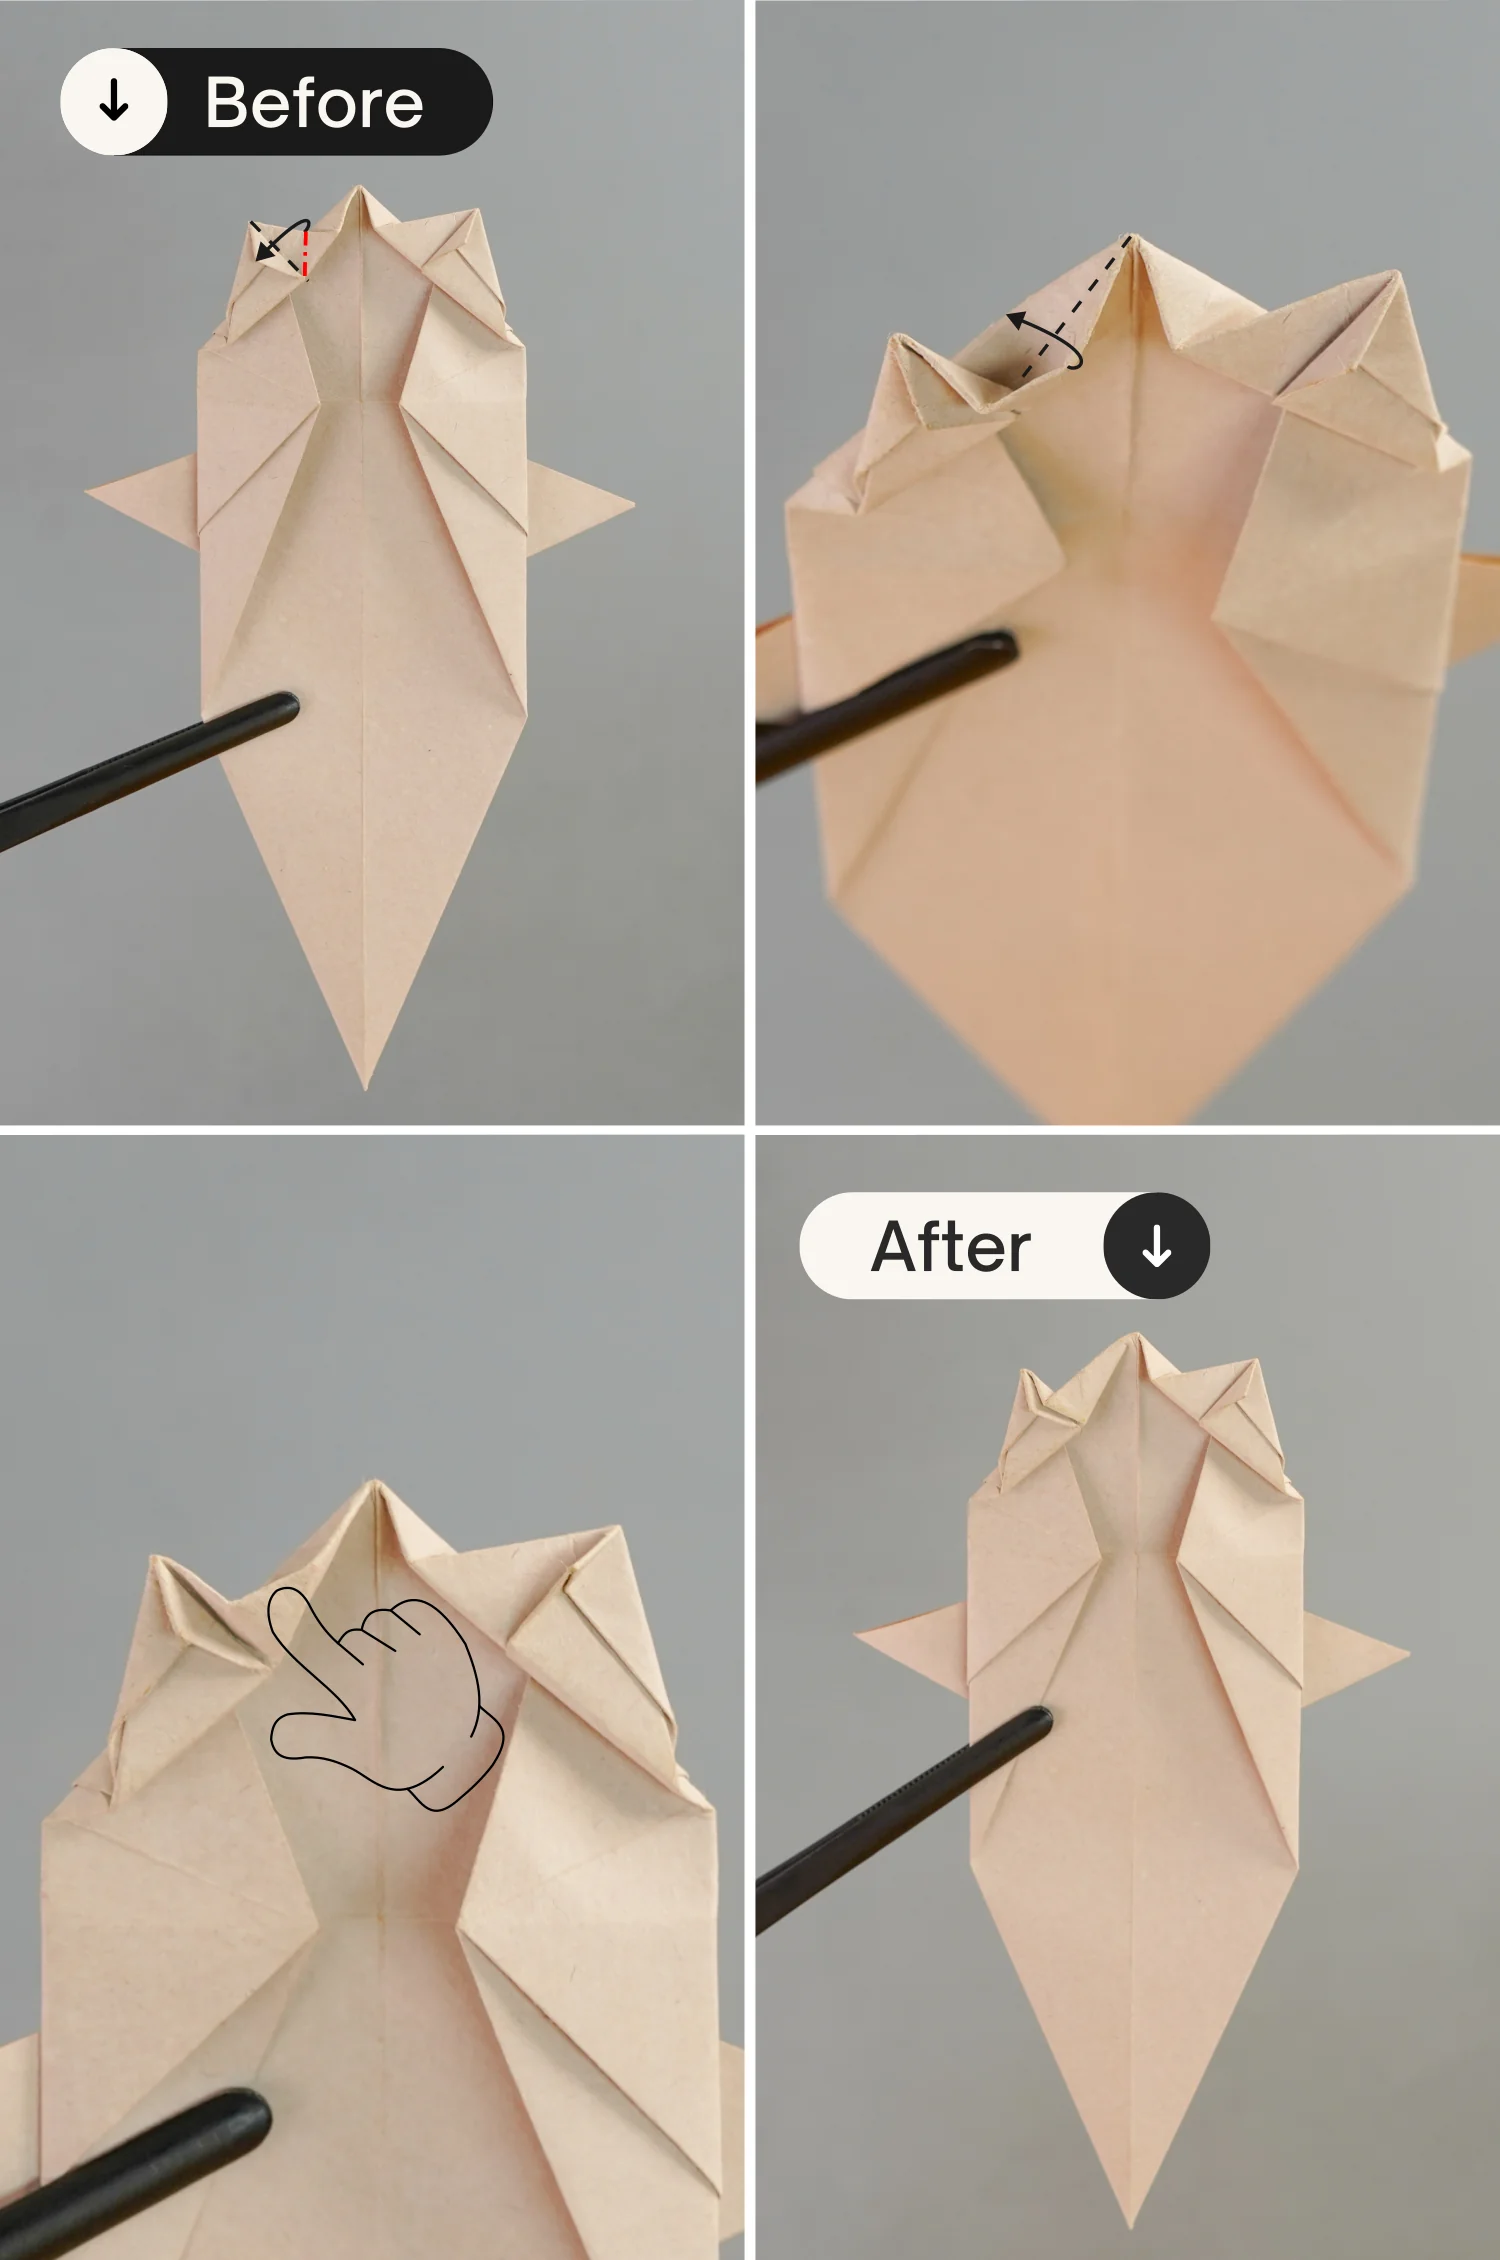
Fold the edge indicated by the black line to align with the edge indicated by the red line, crease it well, and then unfold it.
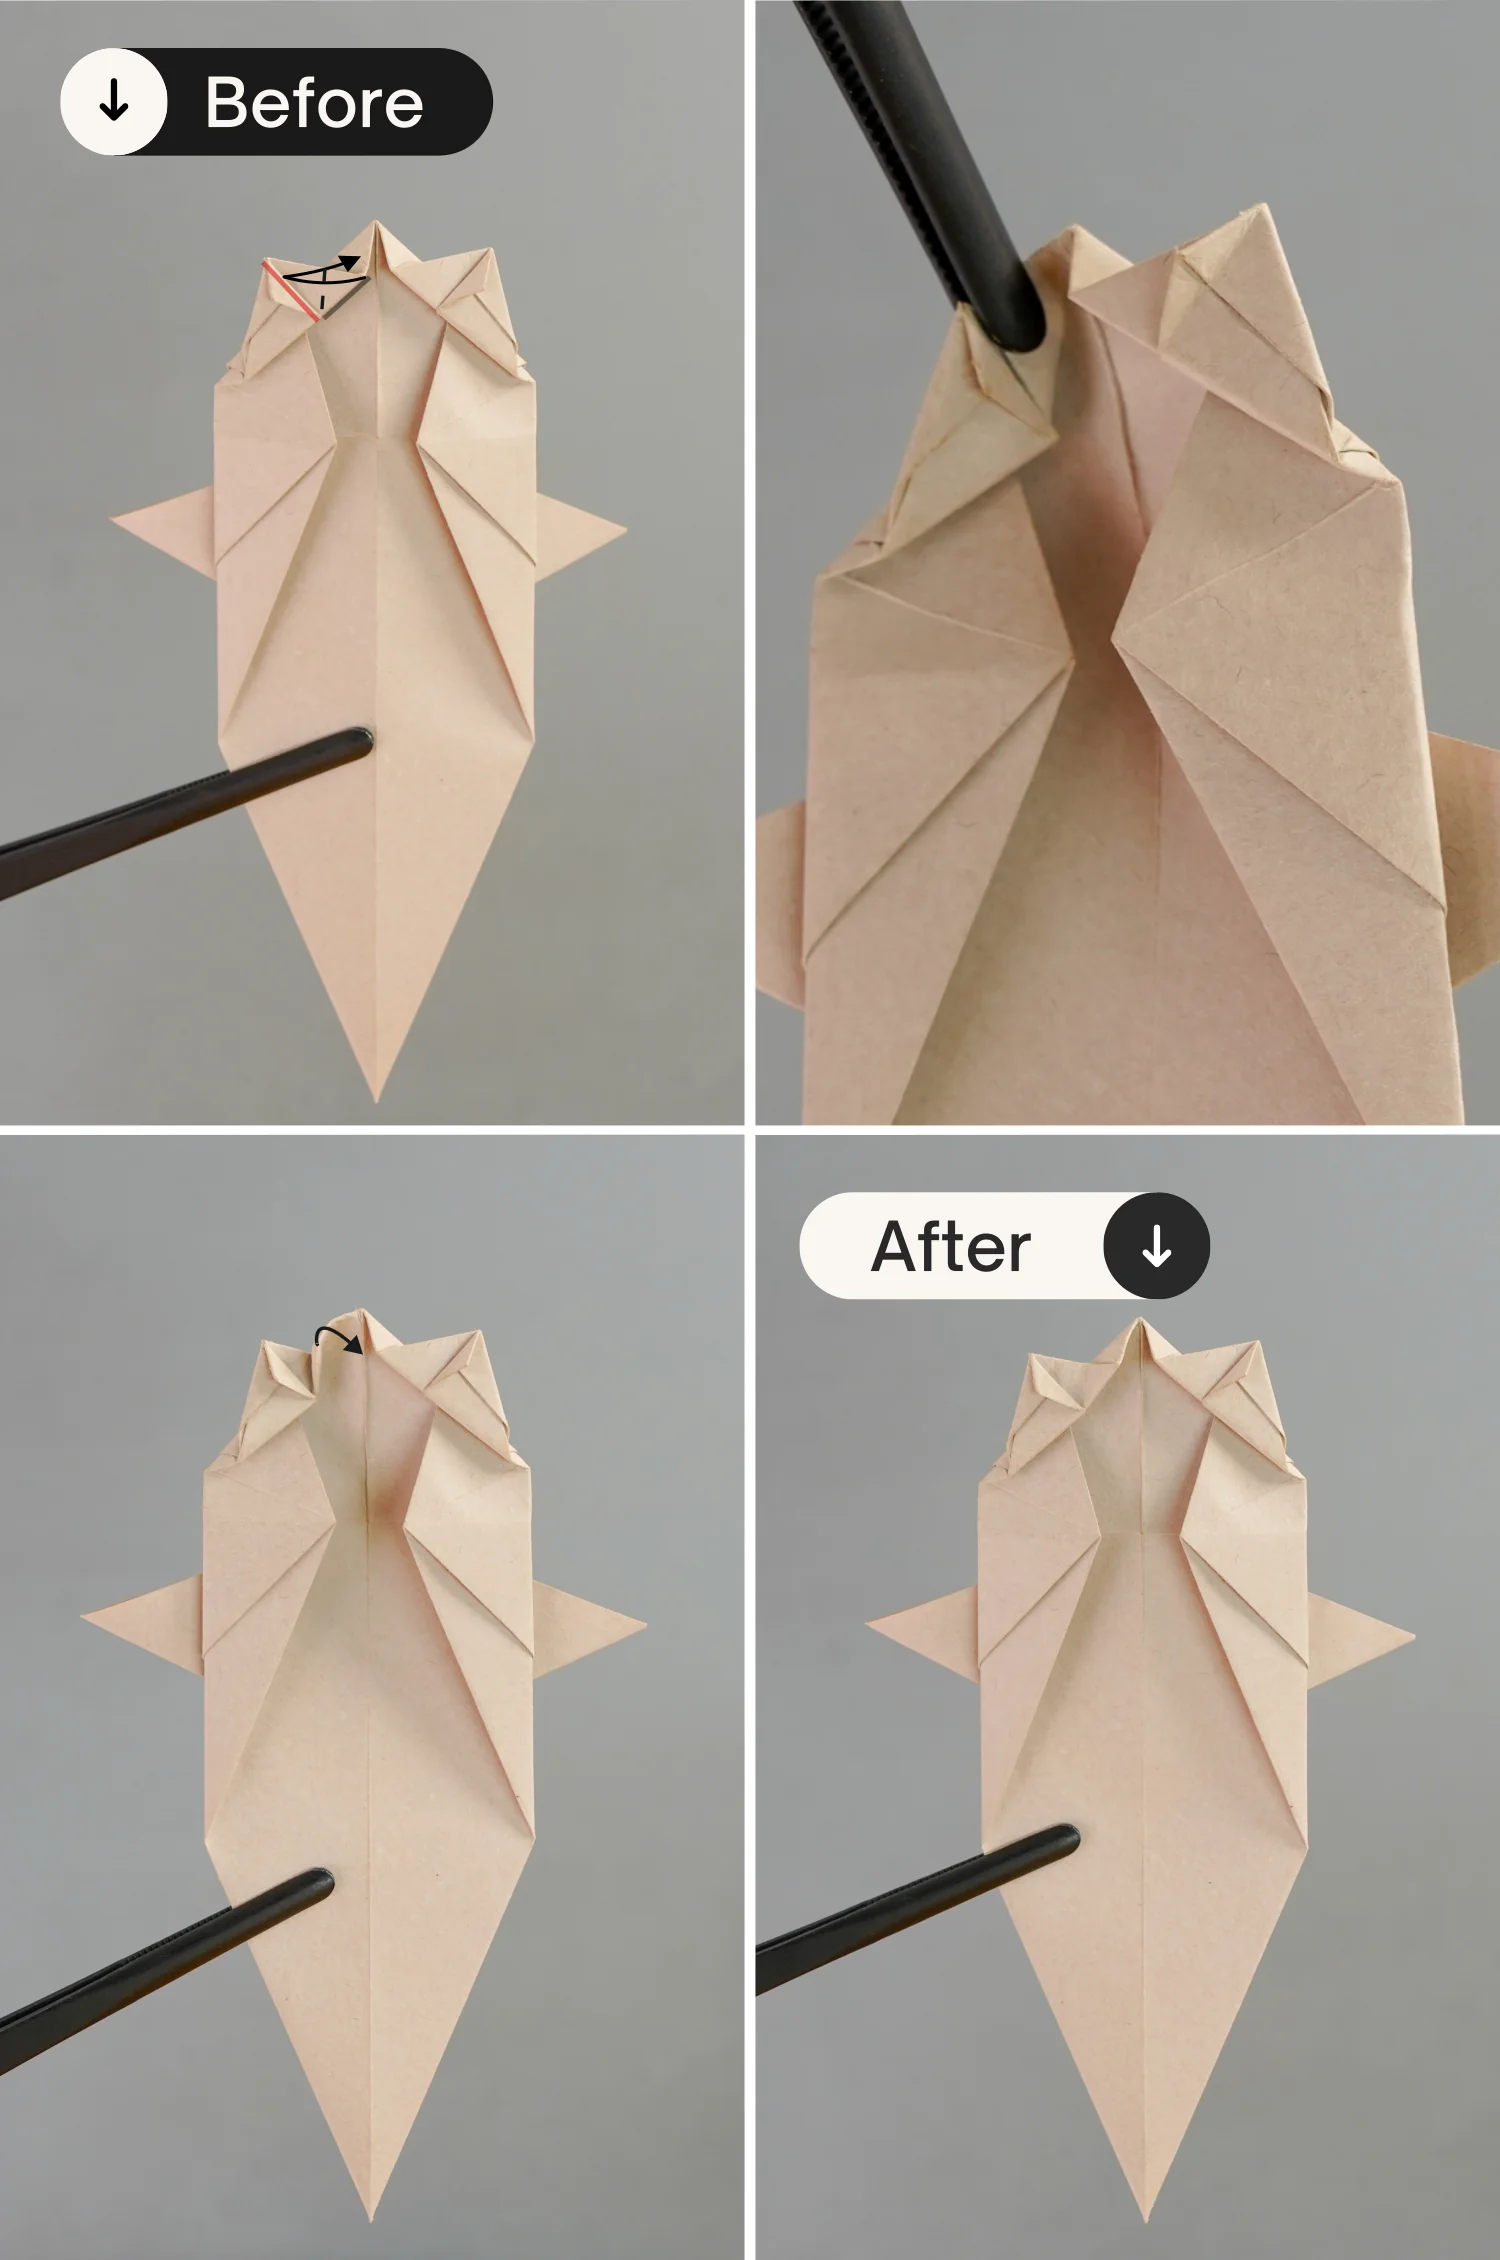
undefined
Step 20
Slightly lift the small top left layer, and push the edge upward as the second picture shows, then flatten the fold along the crease you just made.
undefined
Step 21
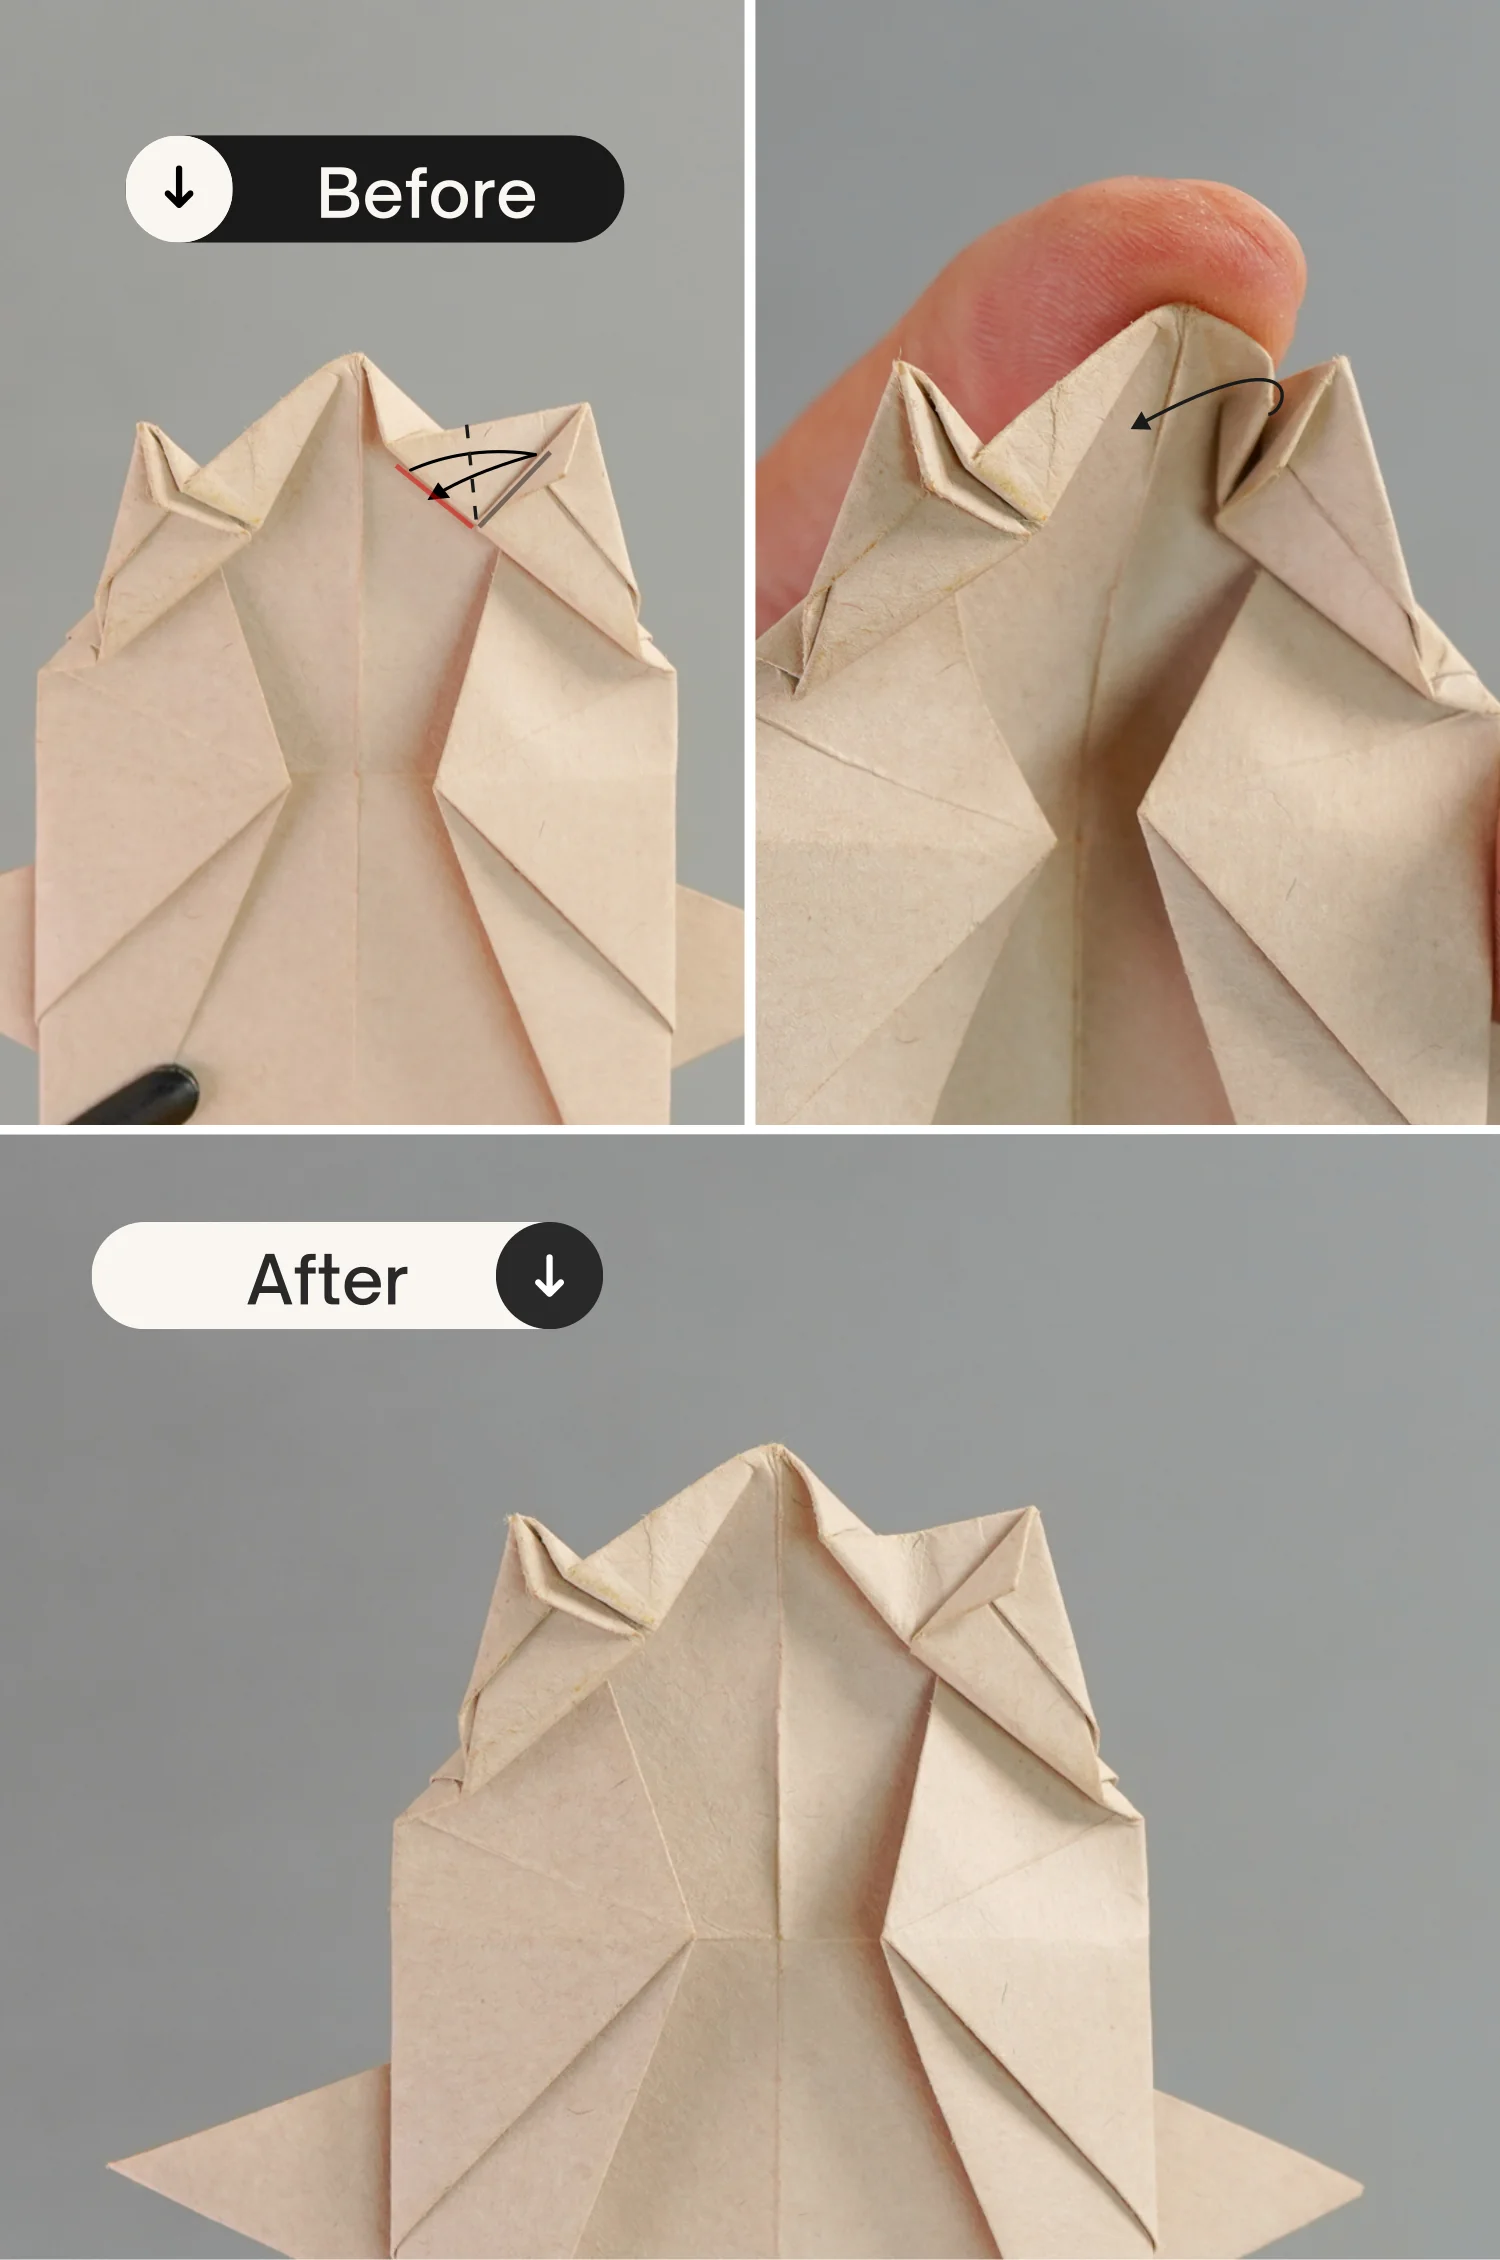
Like before, fold the edge indicated by the red line to align with the edge indicated by the black line, crease it well, and then unfold it.
undefined
Step 22
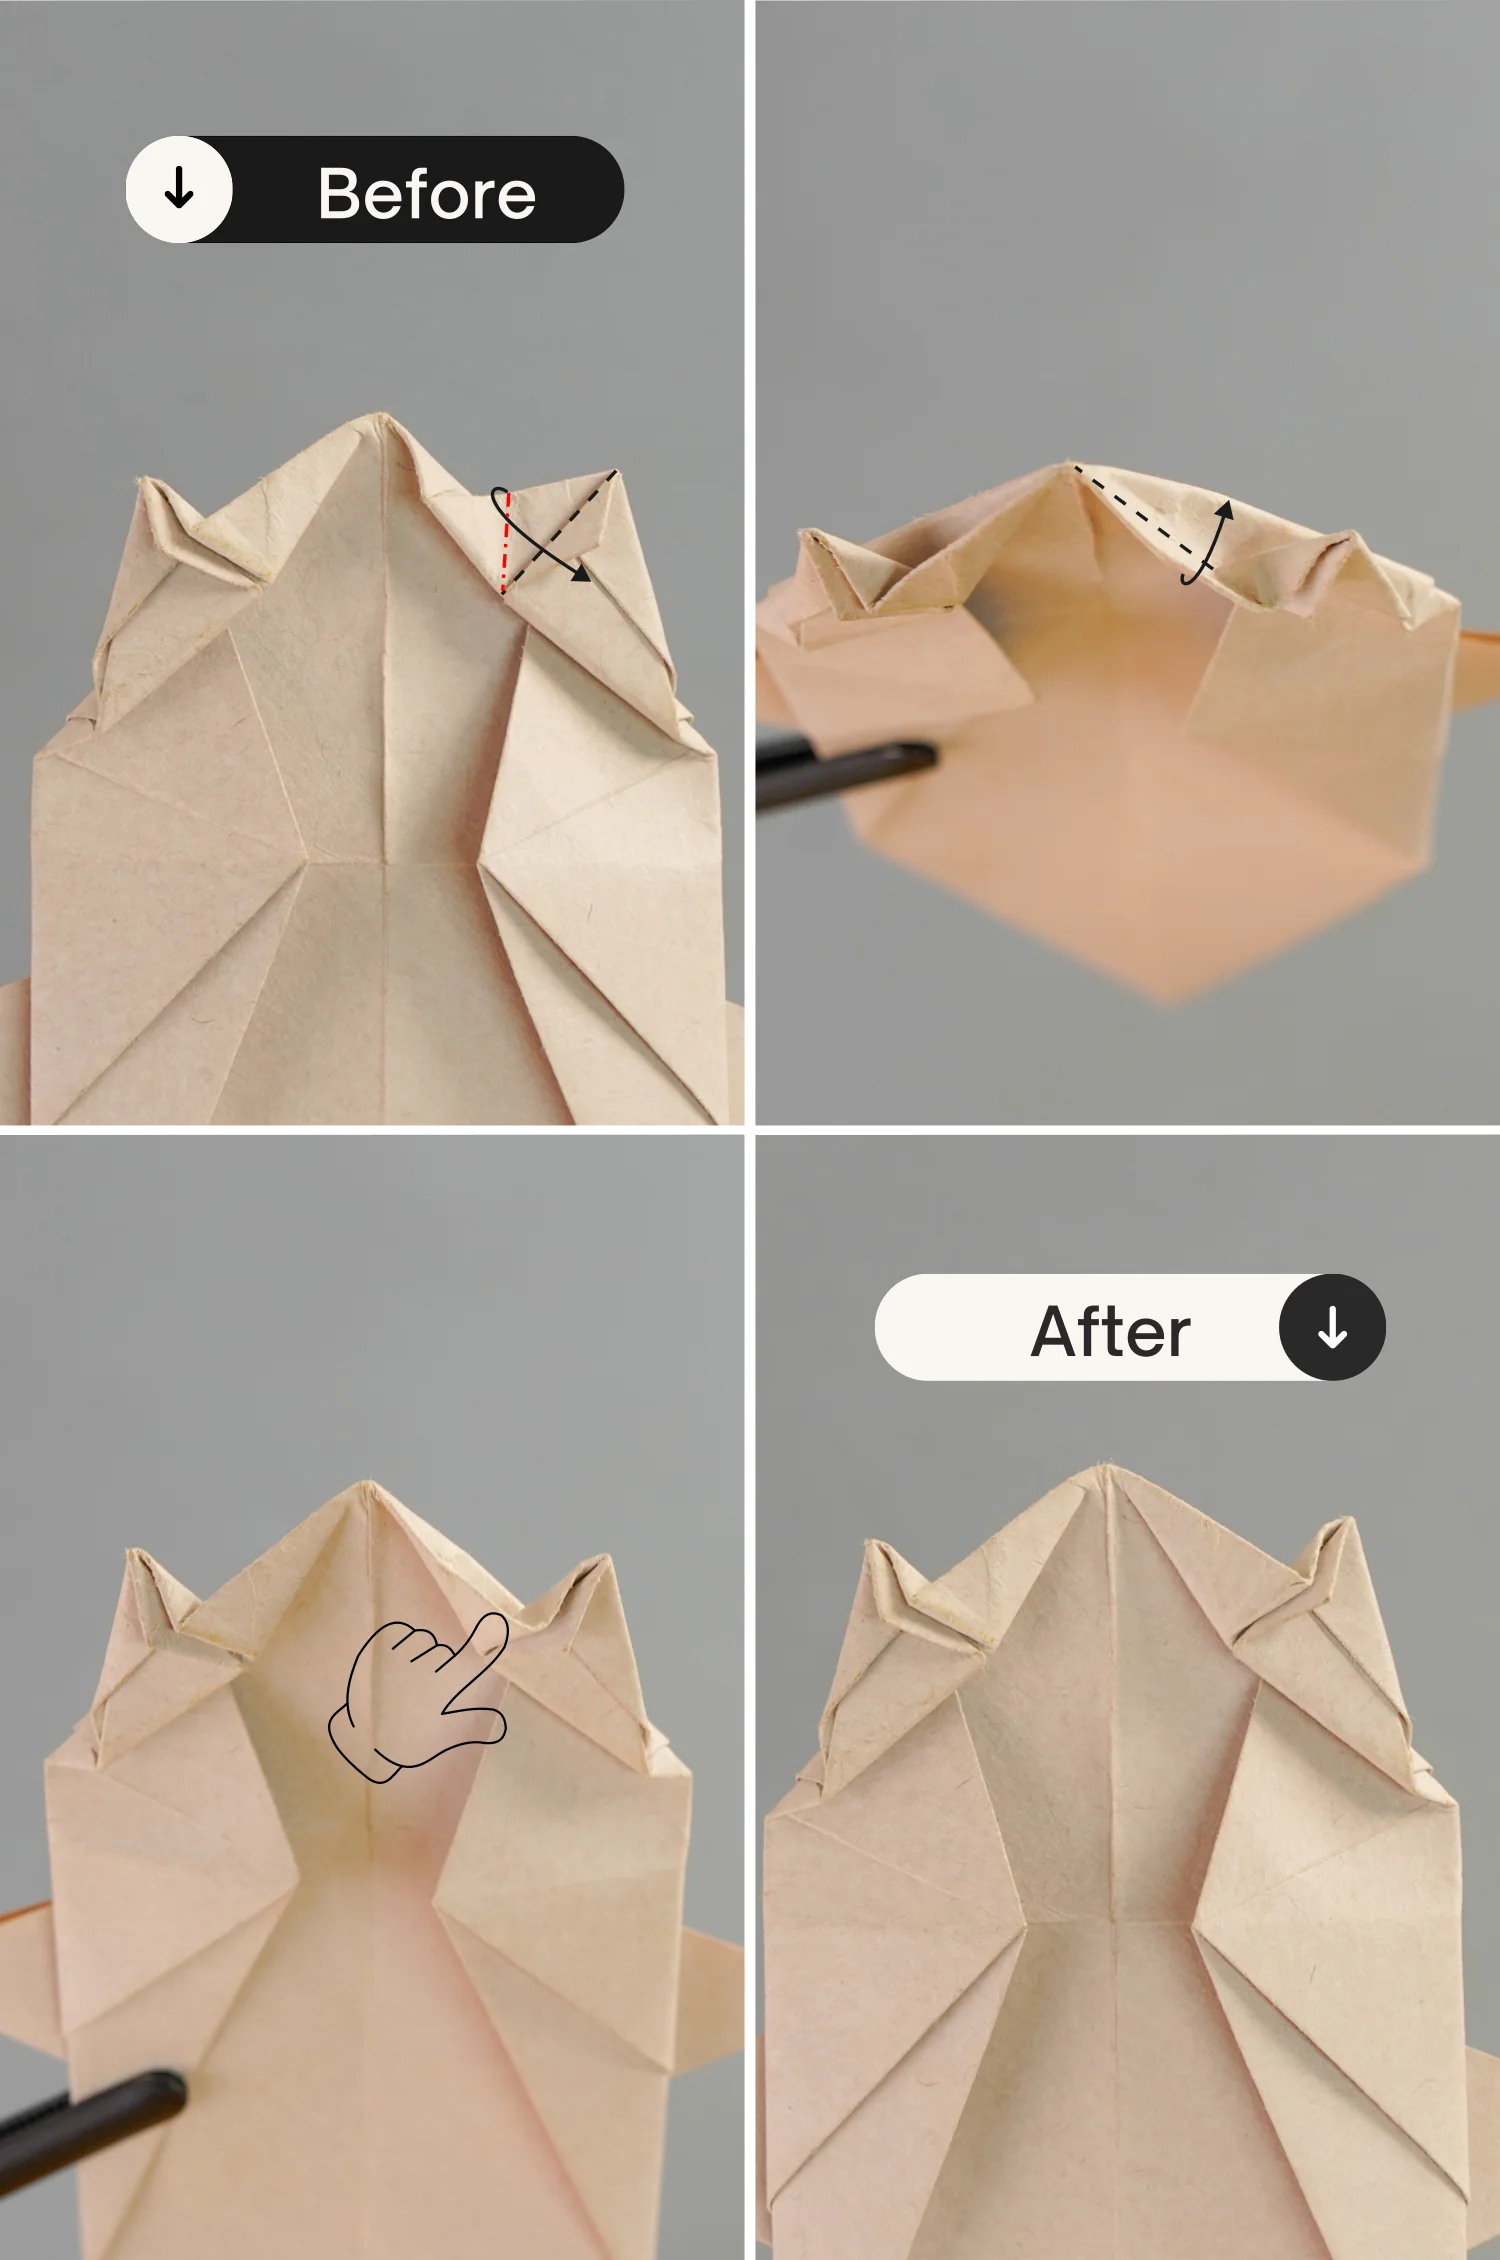
Slightly lift the small top right layer, and push the edge upward as the second picture shows, then flatten the fold along the crease you just made.
undefined
Step 23
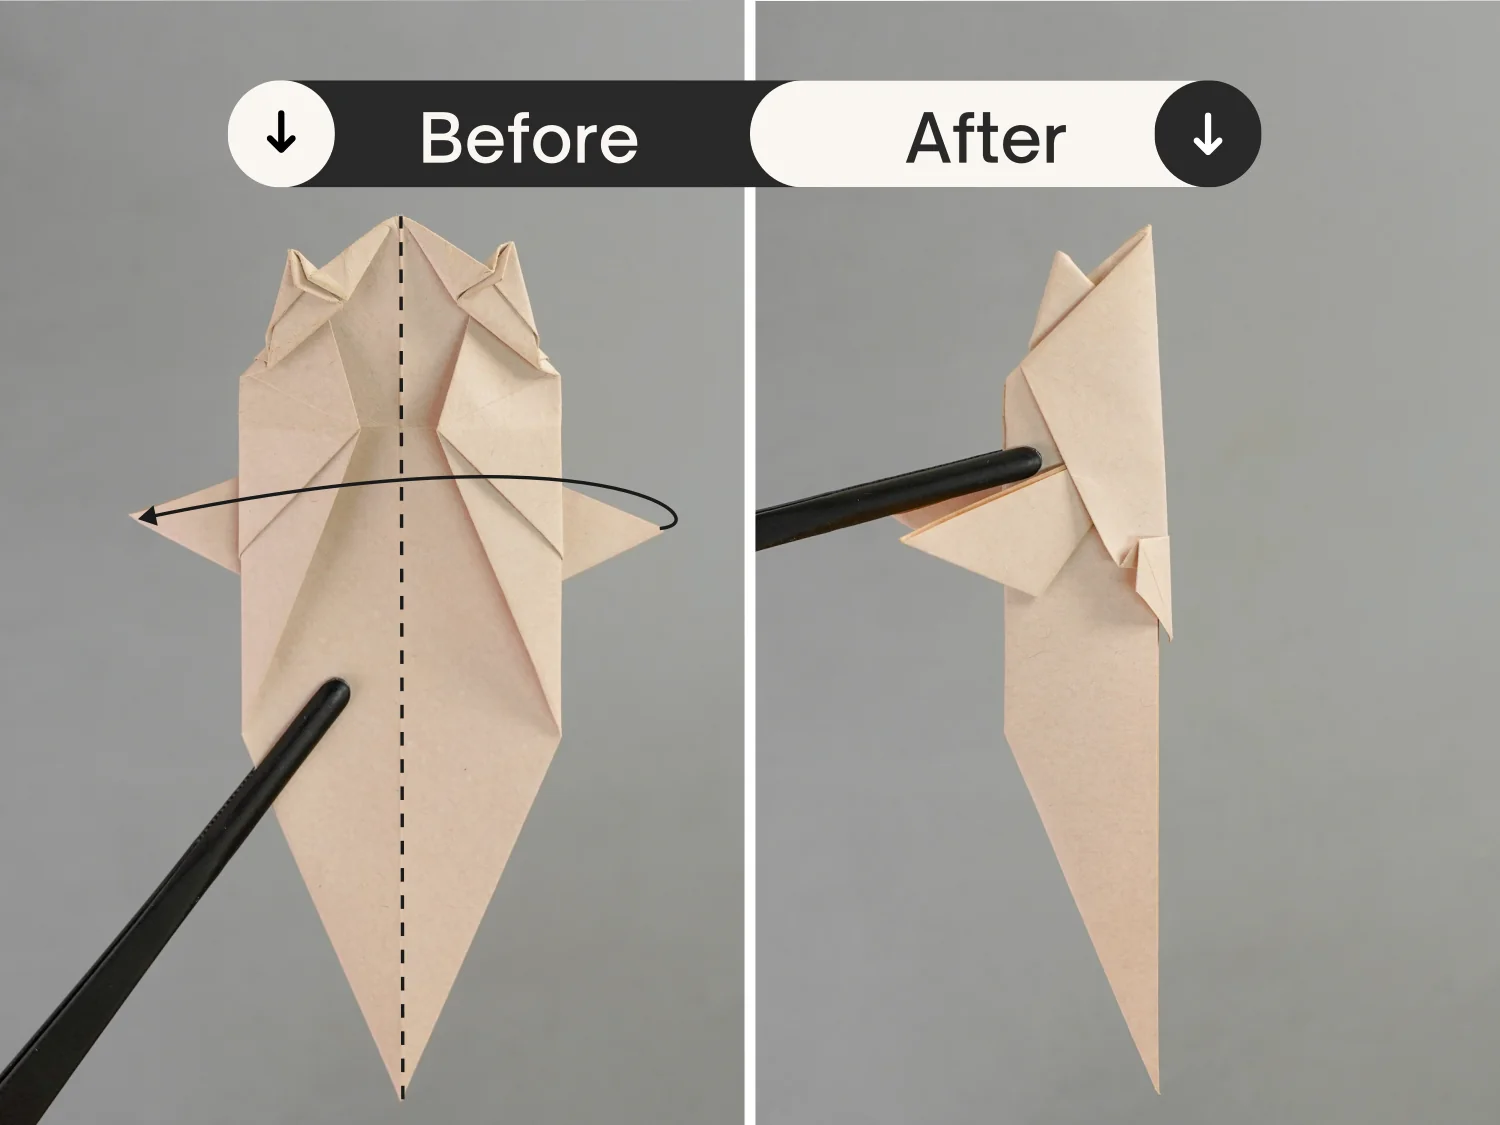
Fold the paper in half vertically from the right to the left.
undefined
Step 24
Lift the small tip a little on the right side.
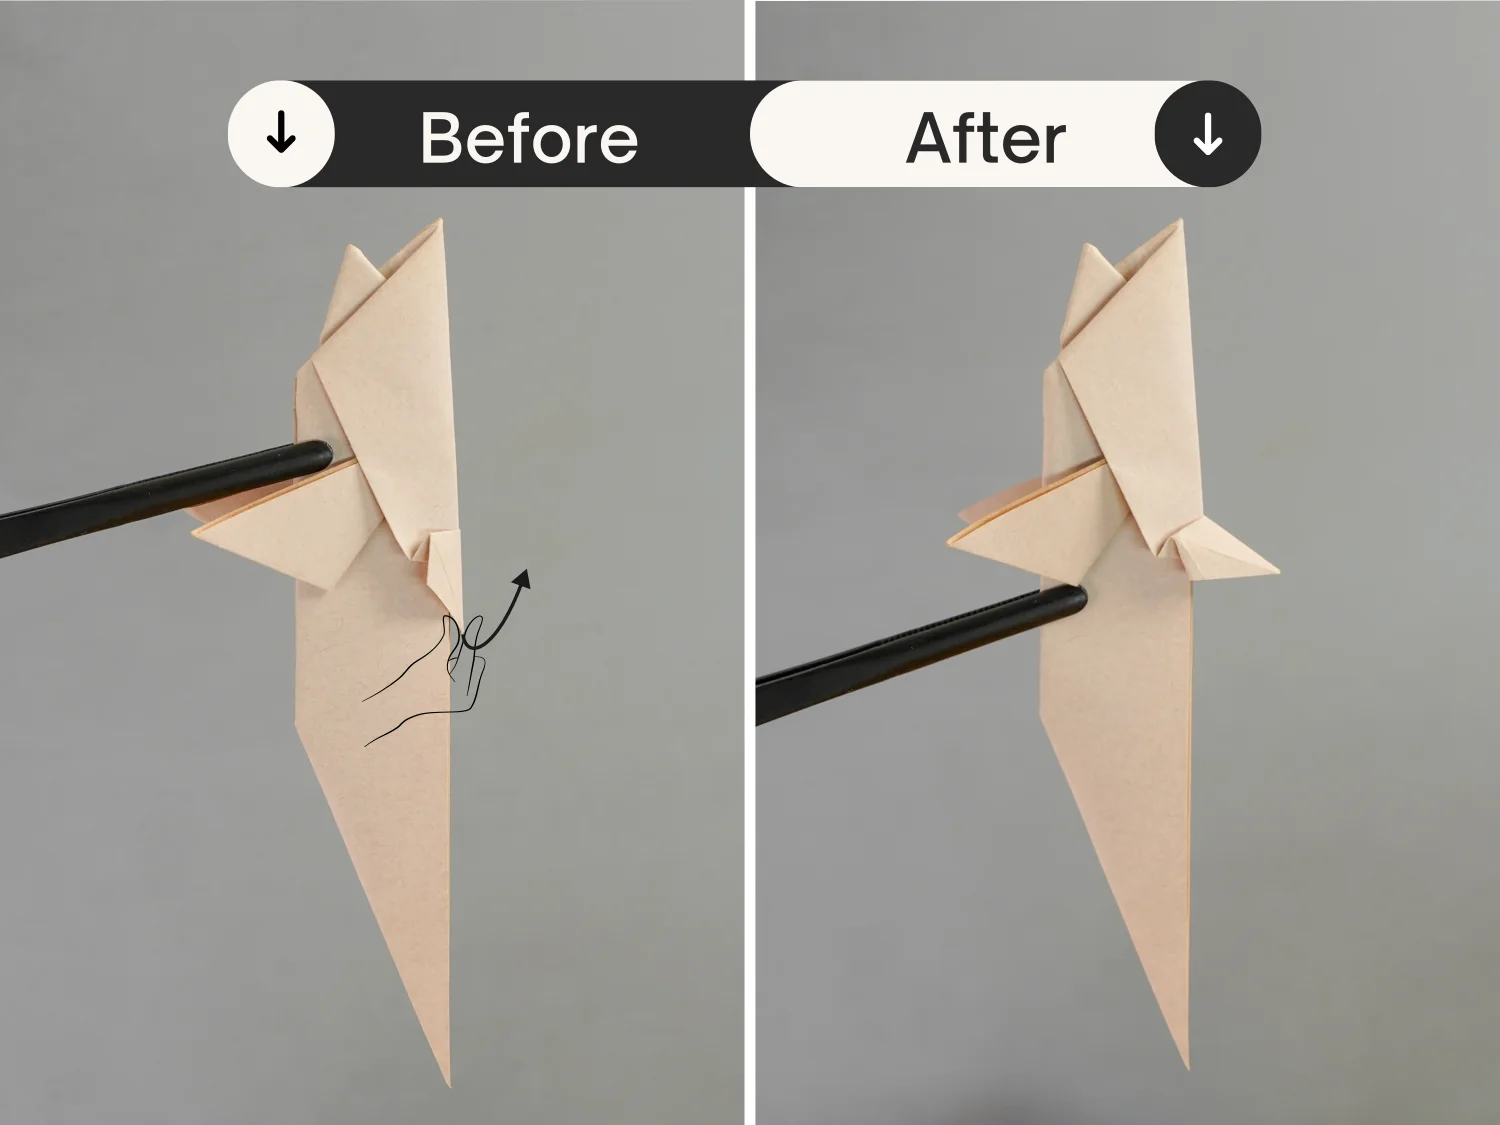
undefined
Step 25
Rotate it 90 degrees counterclockwise.
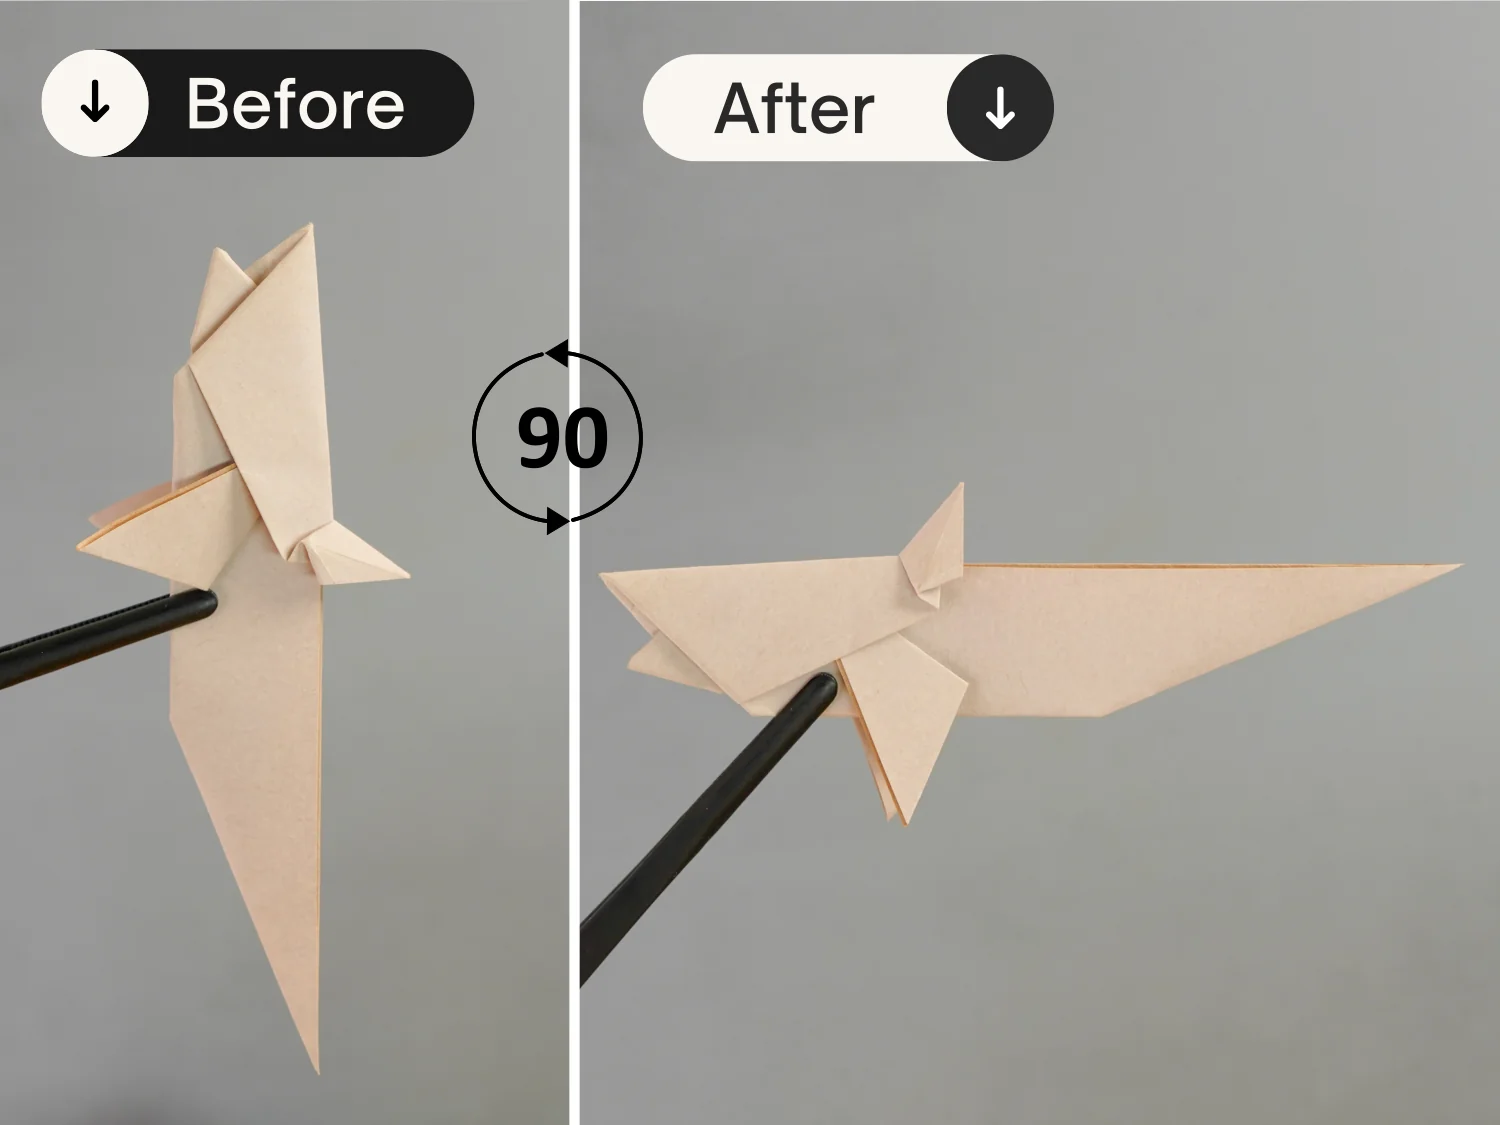
undefined
Step 26
Fold down the tail part, and unfold it.
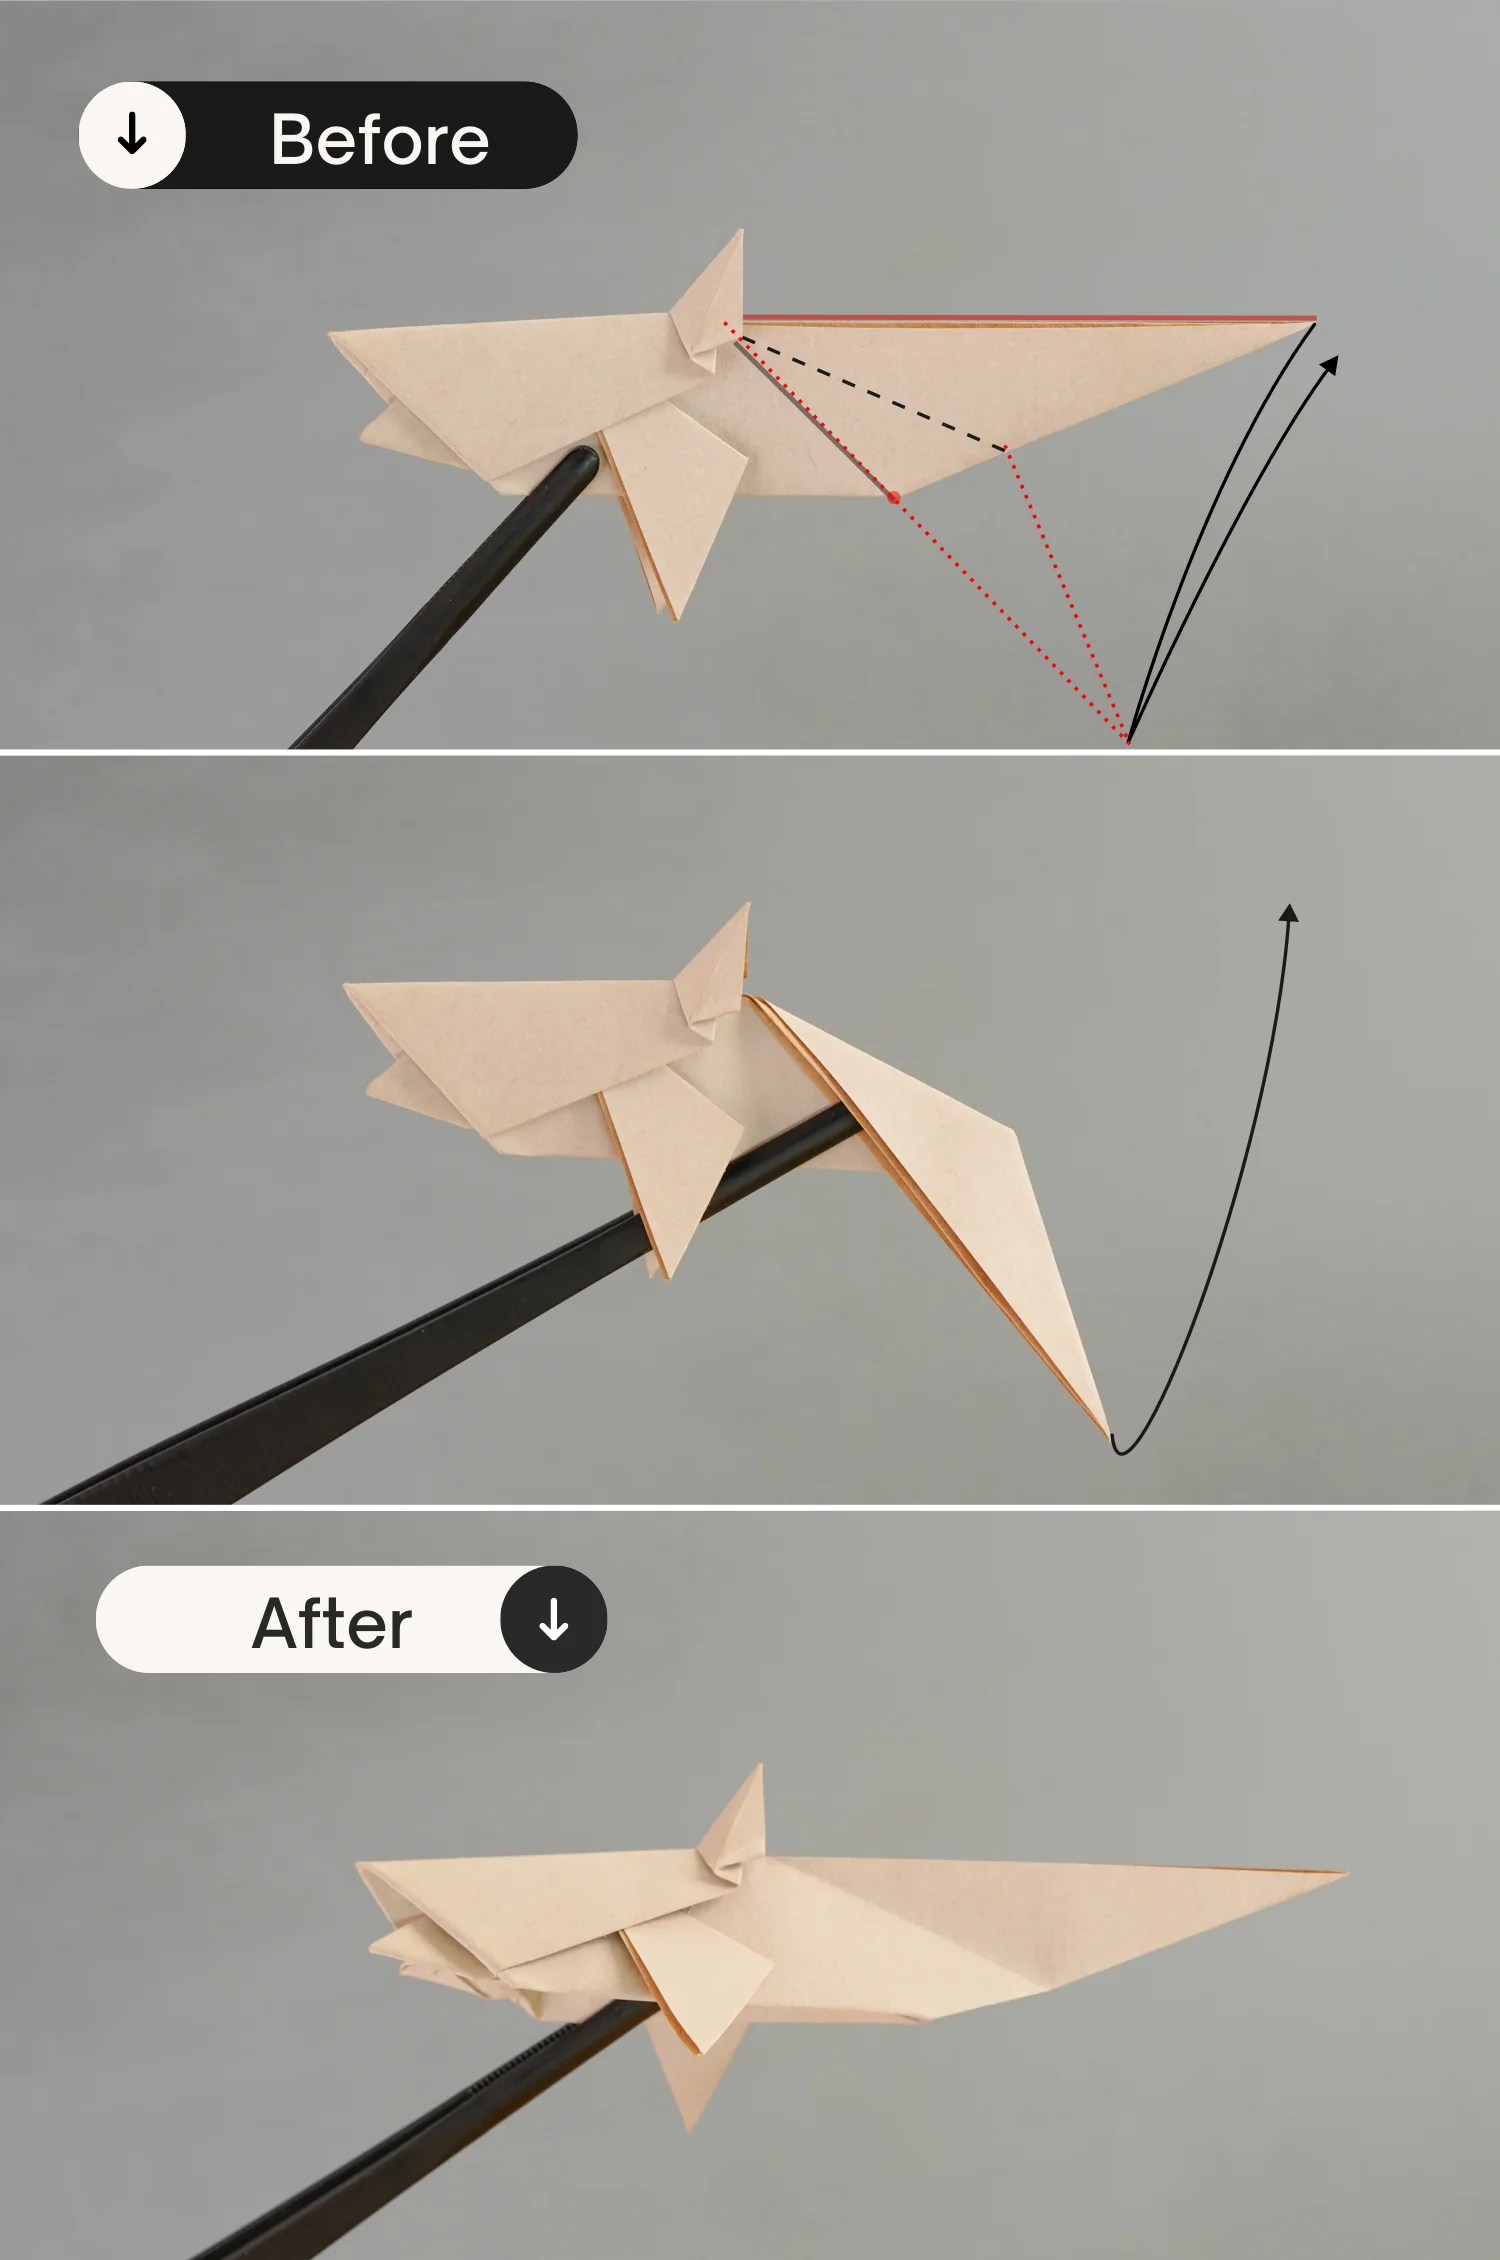
undefined
Step 27
Rotate the paper 90 degrees from the back to the front, to make the back of the shark face up. Then open the back from the bottom, and shape the creases you made in the previous step. Next, push down the middle line of the tail, and flatten the fold.
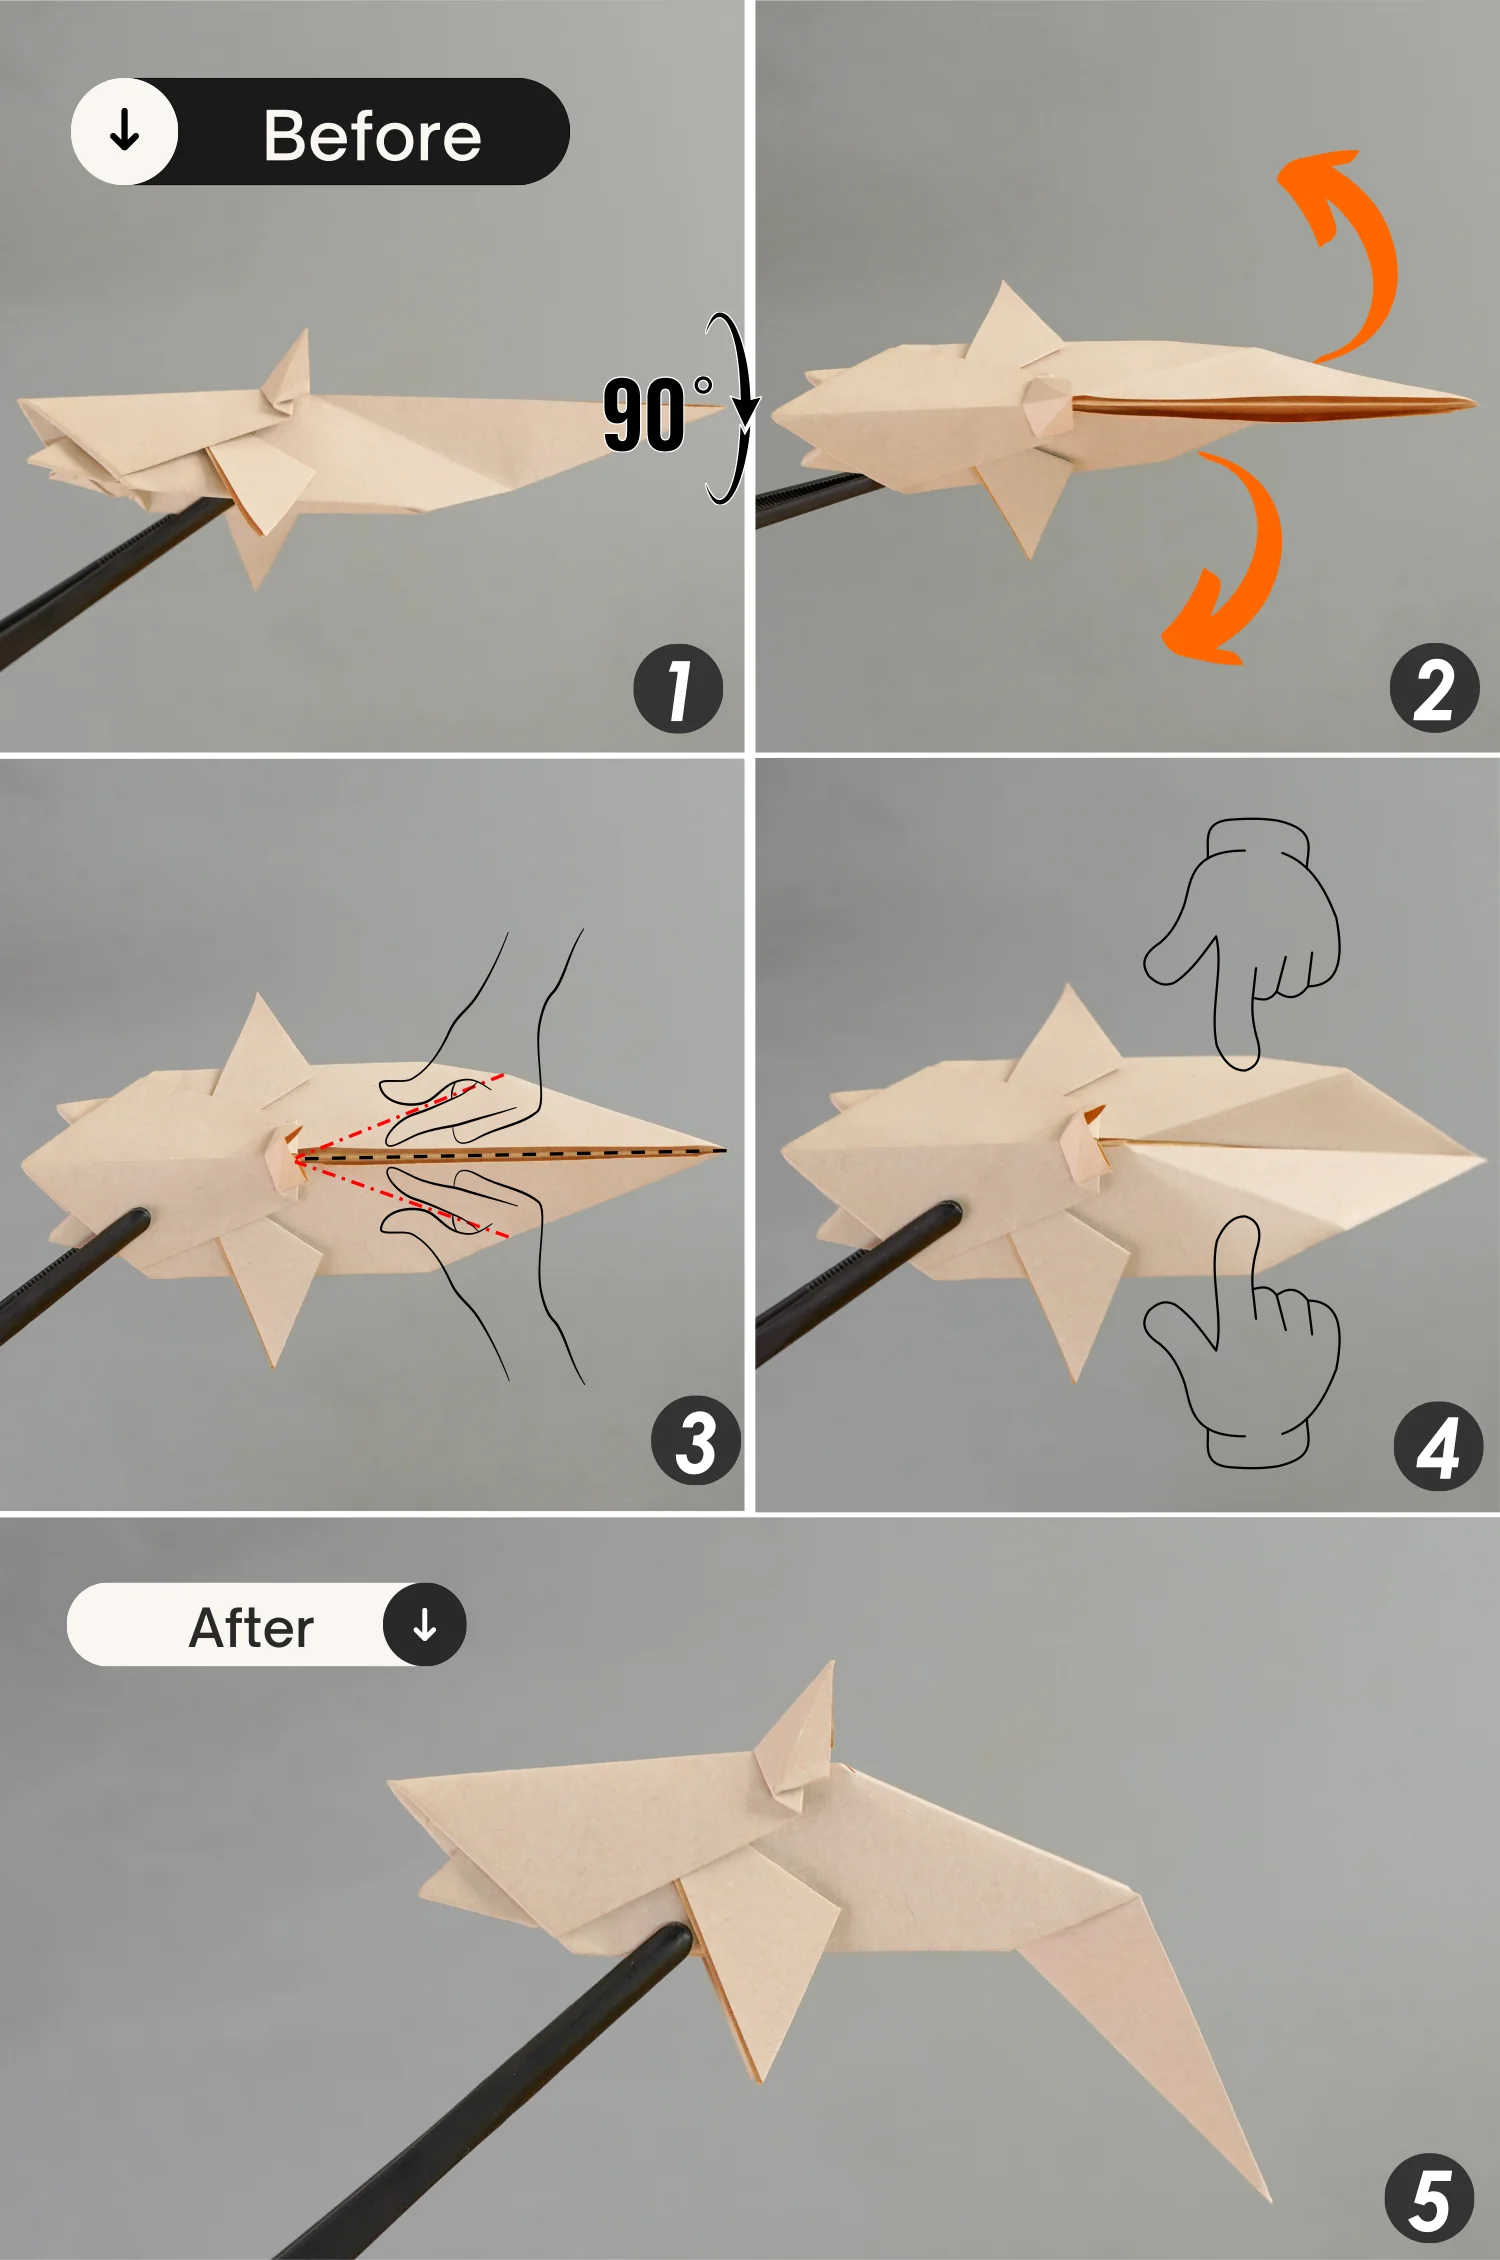
undefined
Step 28
Fold up the tail fin, making the edge indicated by the black line to align with the edge indicated by the red line, leaving a crease, and unfold it.
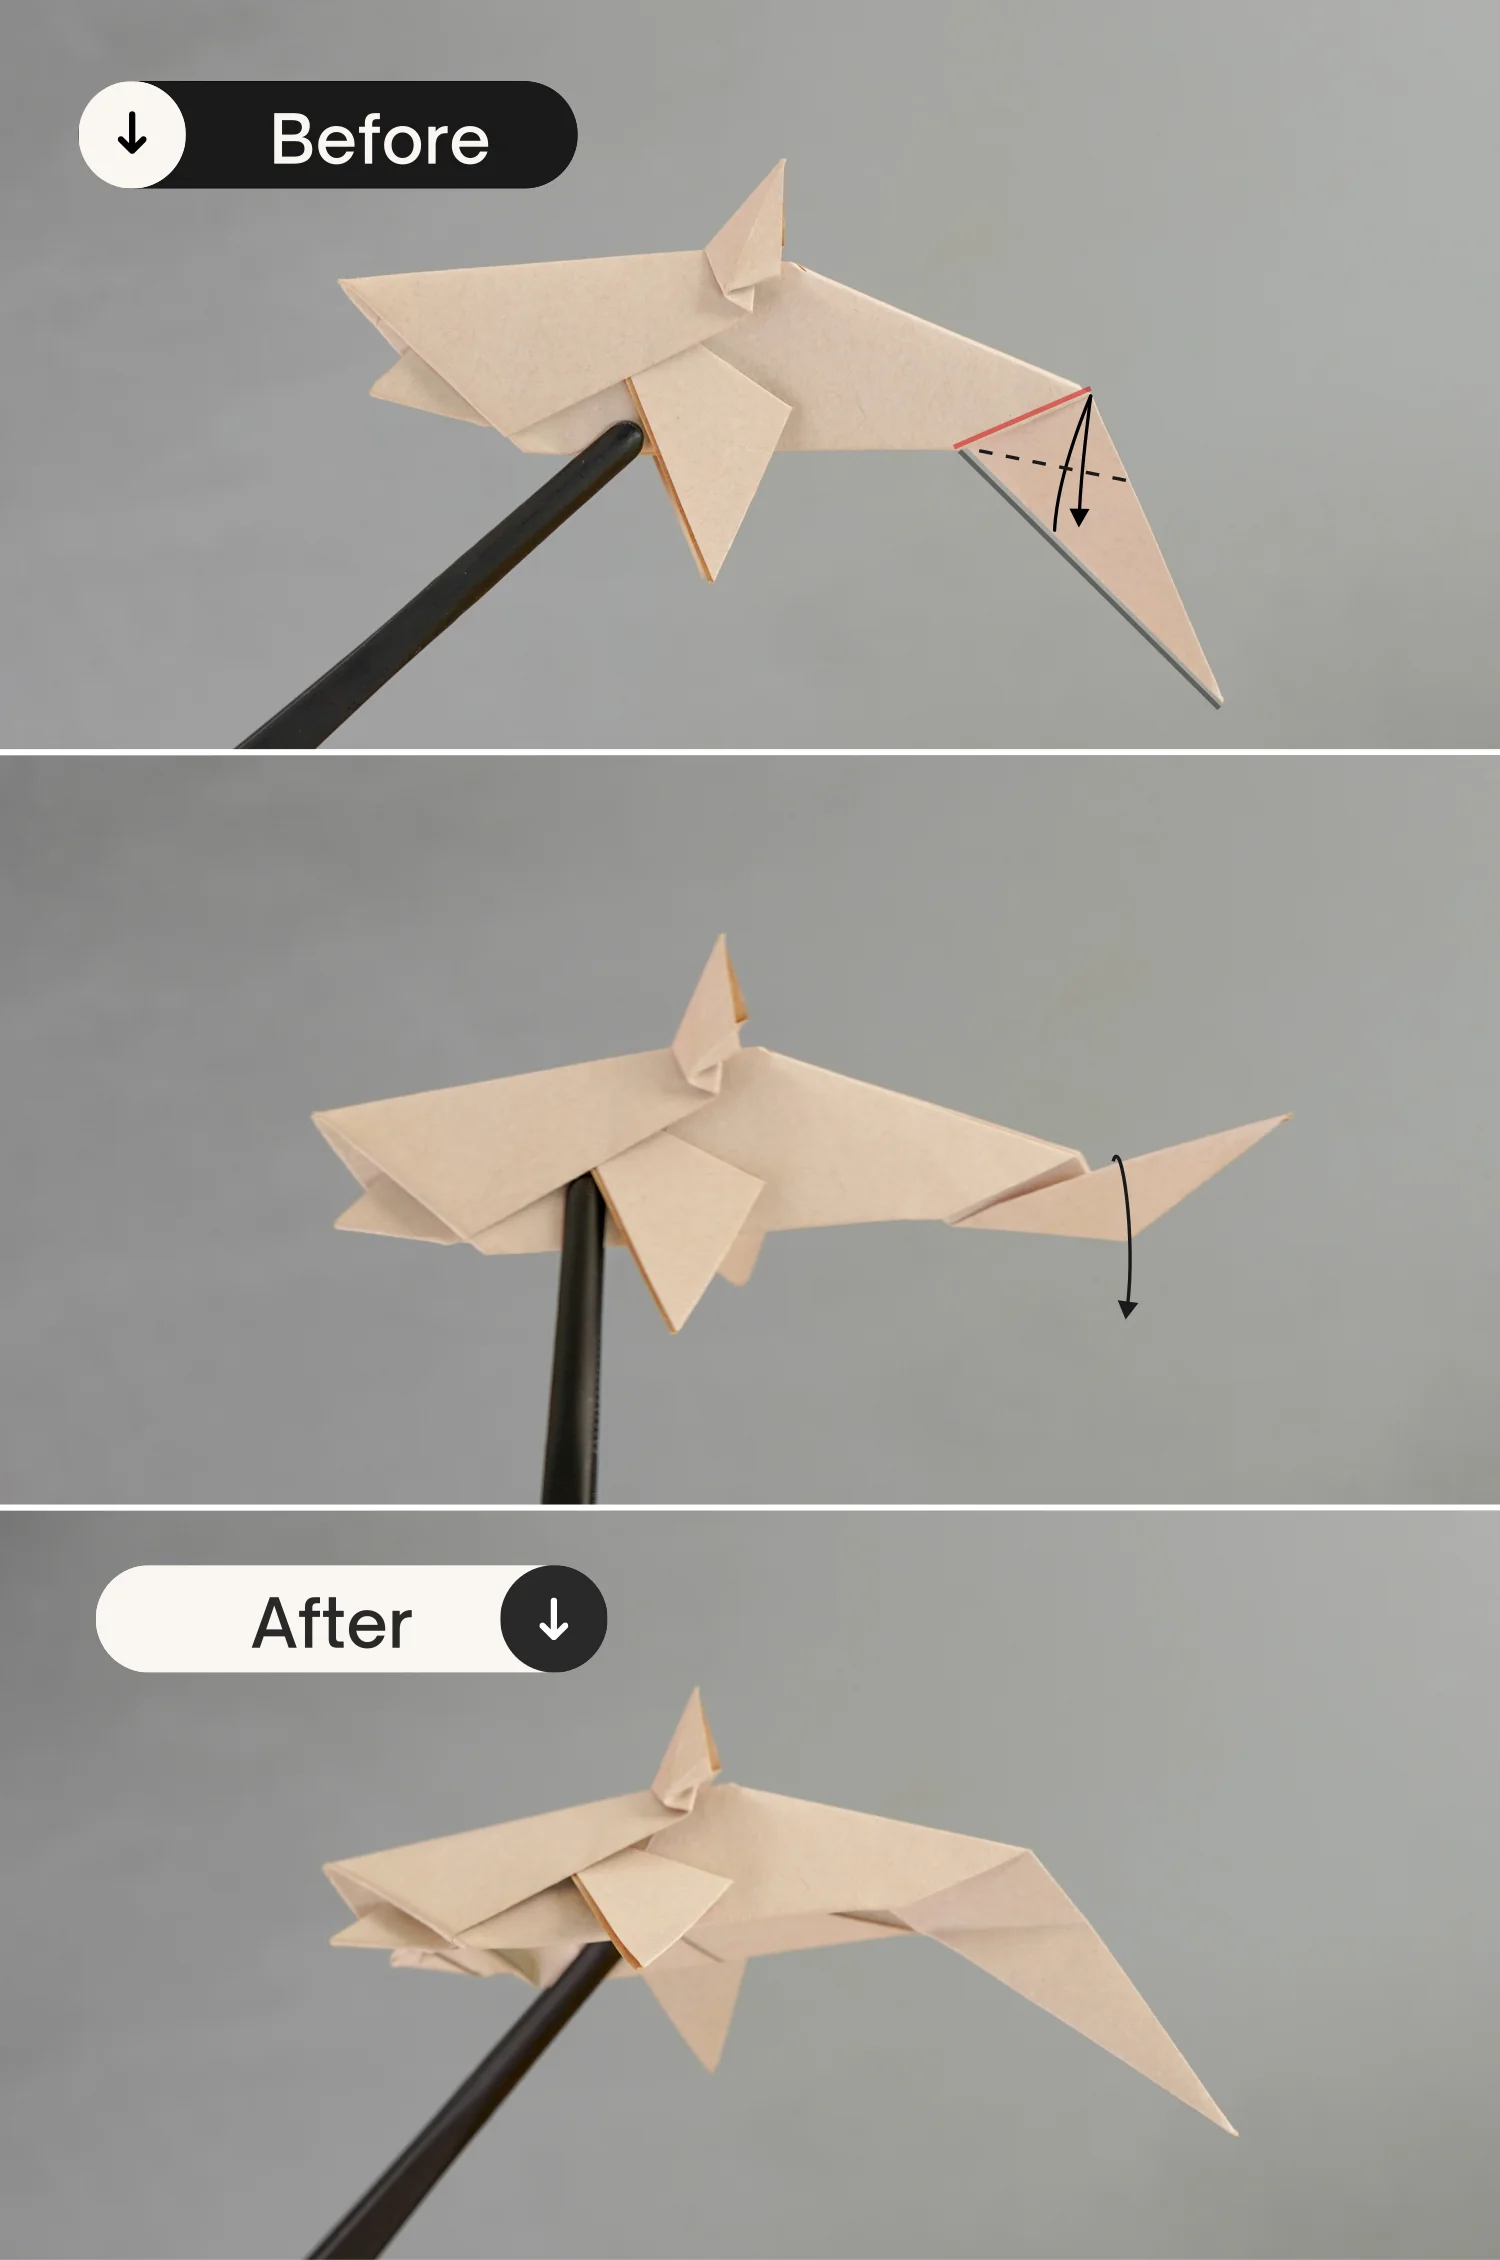
undefined
Step 29
Rotate it 90 degrees from the back to the front, open the tail fin, and shape the creases you just made. Then bring up the tail fine, flatten the fold based on the creases you shaped, and rotate it 90 degrees from the front to the back.
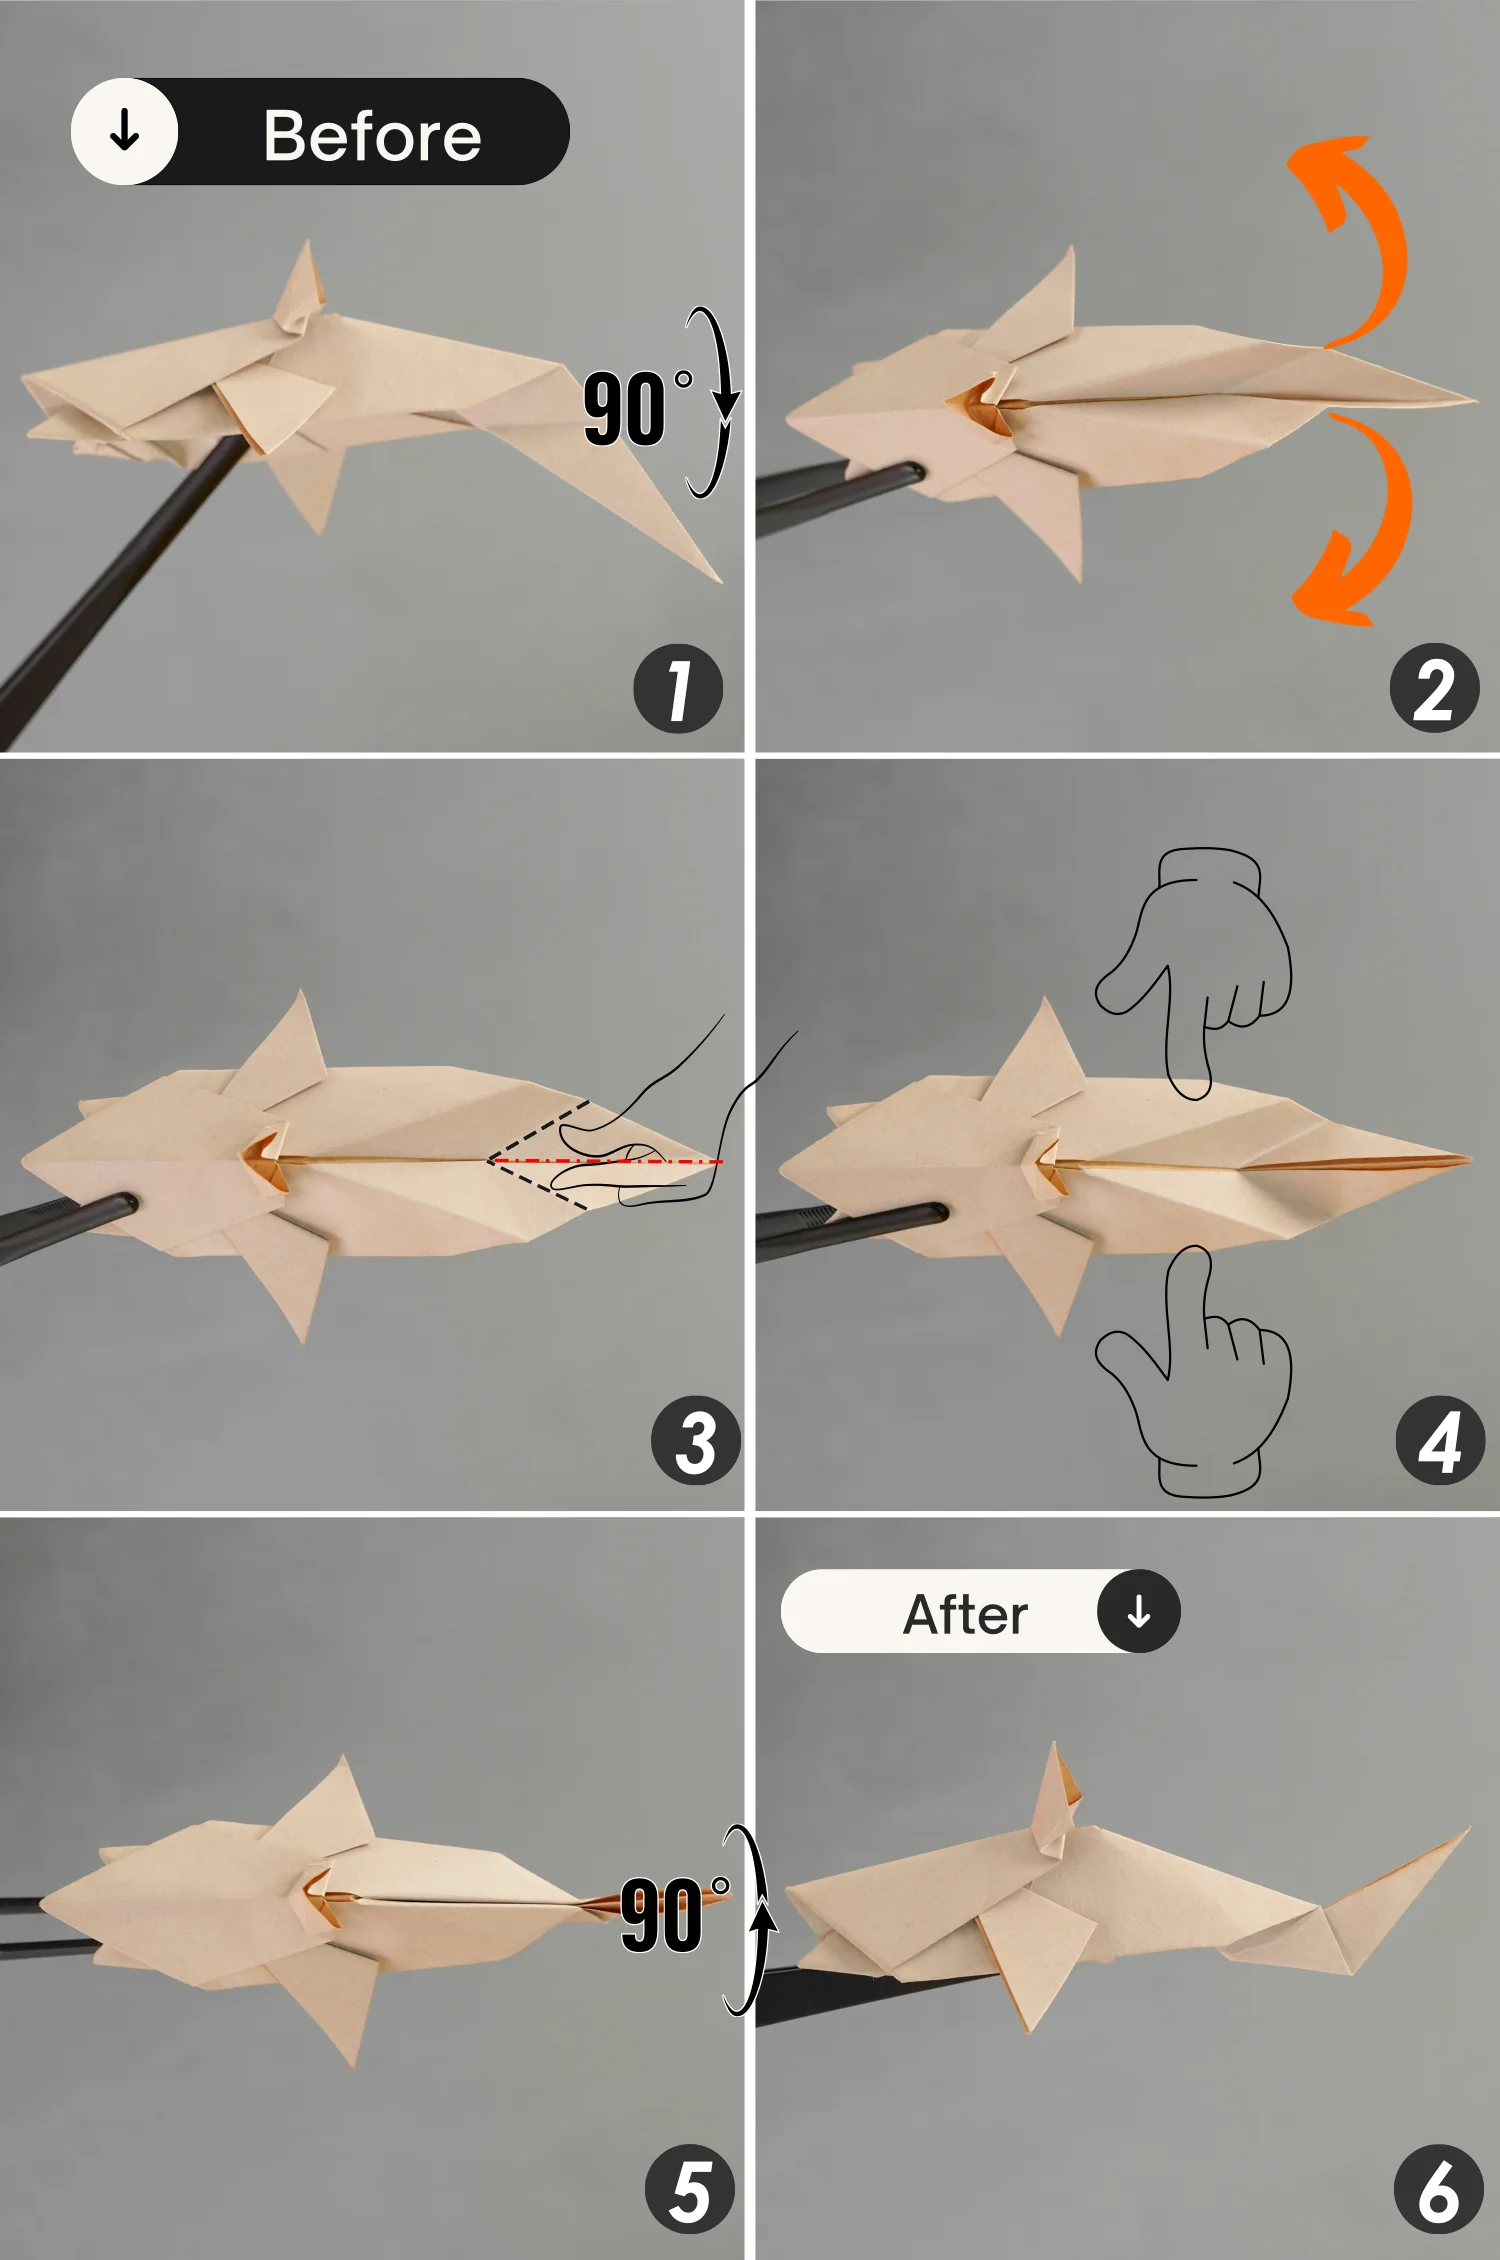
undefined
Step 30
Take the top layer of the bottom edge of the tail fin, and fold it up along the dotted line. Then the right point to the left side, and fold it back to the right side for a short section. Finally, fold the top point of the tail fin to meet the bottom point.
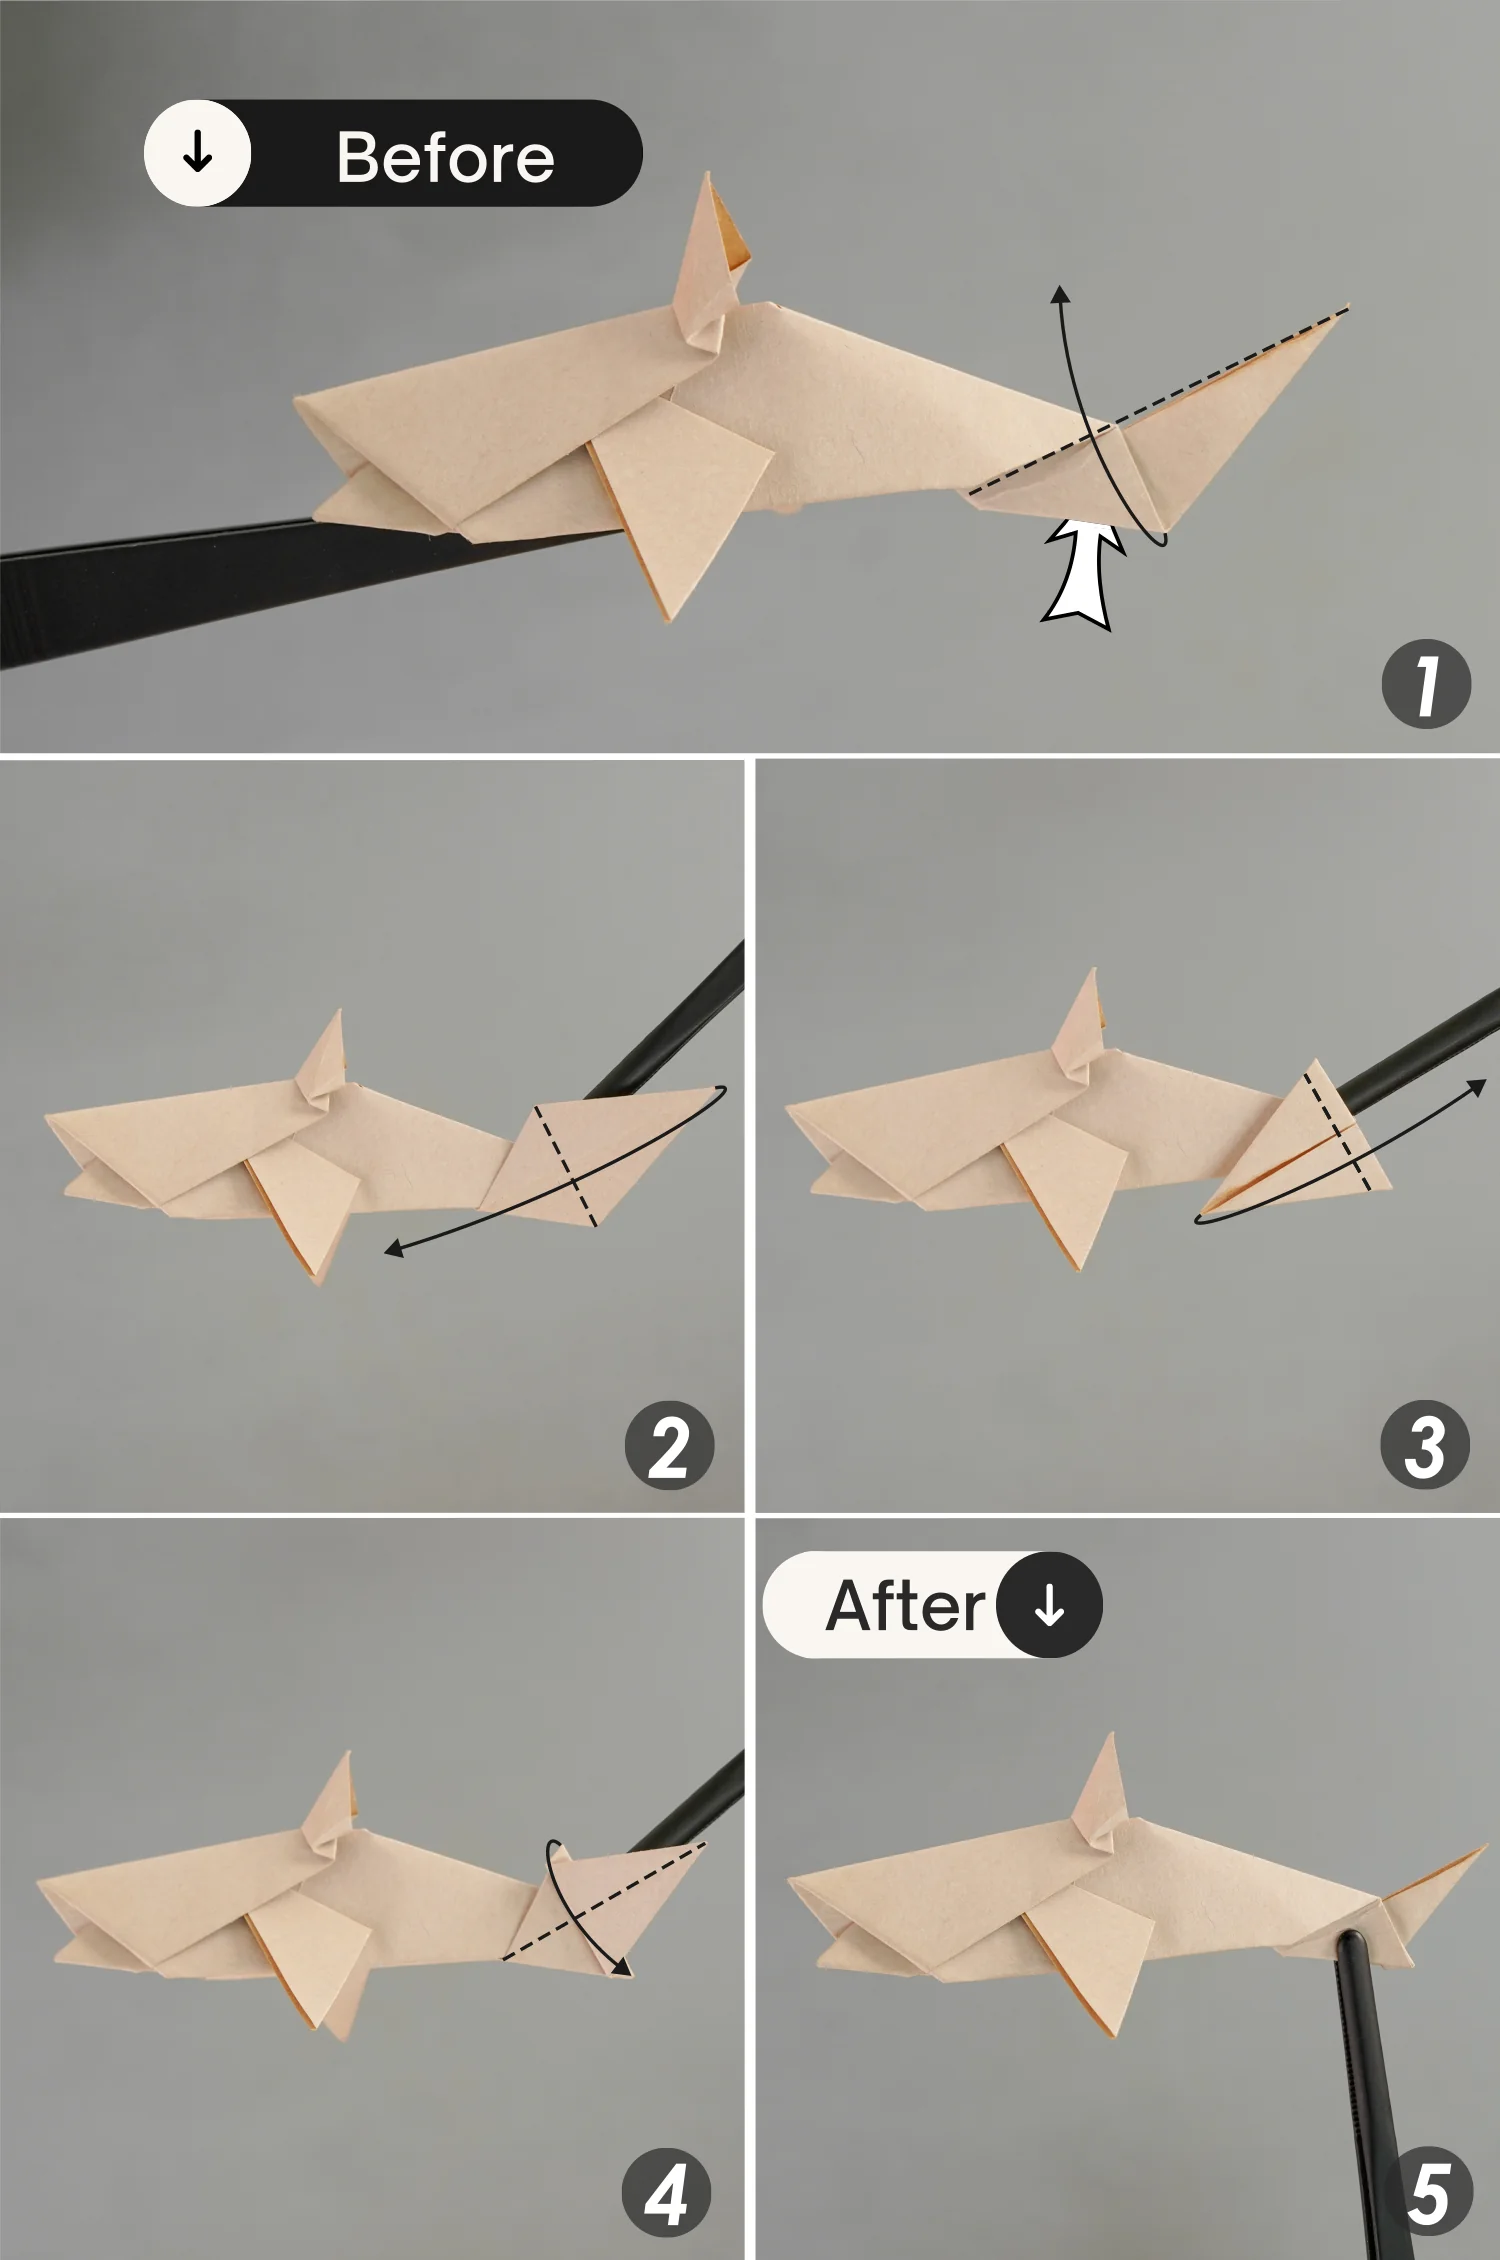
undefined
Step 31
Rotate it 90 degrees from the back to the front, and shape the red dotted lines, then rotate it 90 degrees to its original shape.
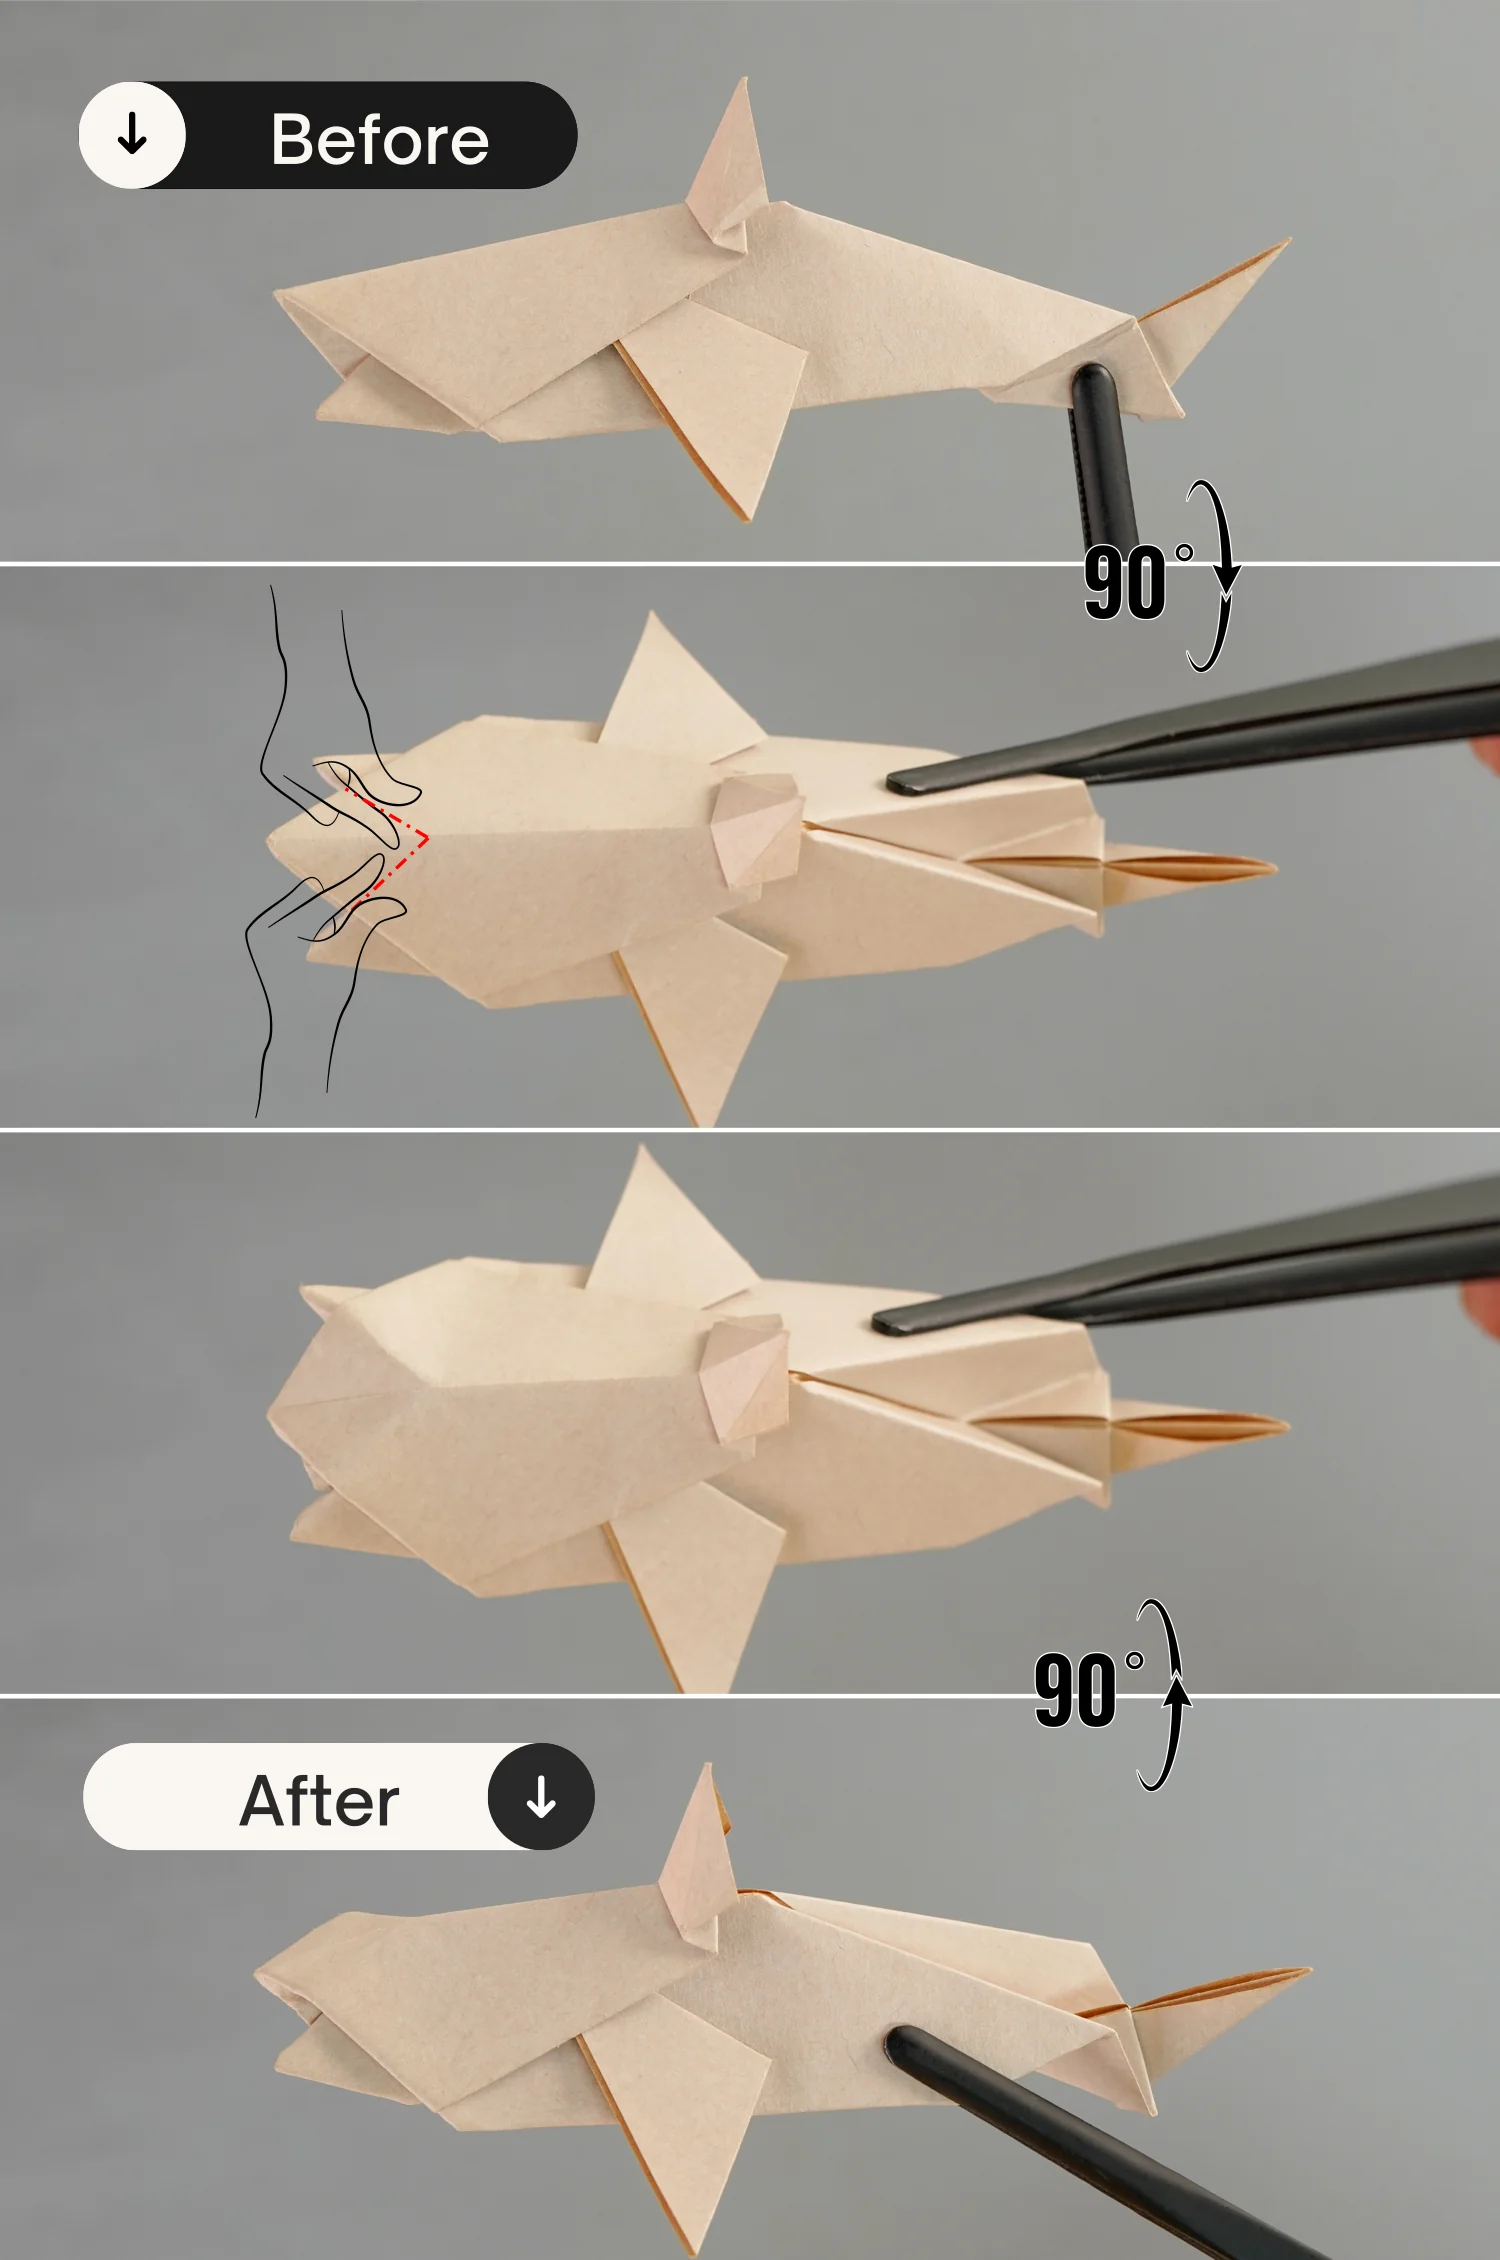
undefined
Step 32
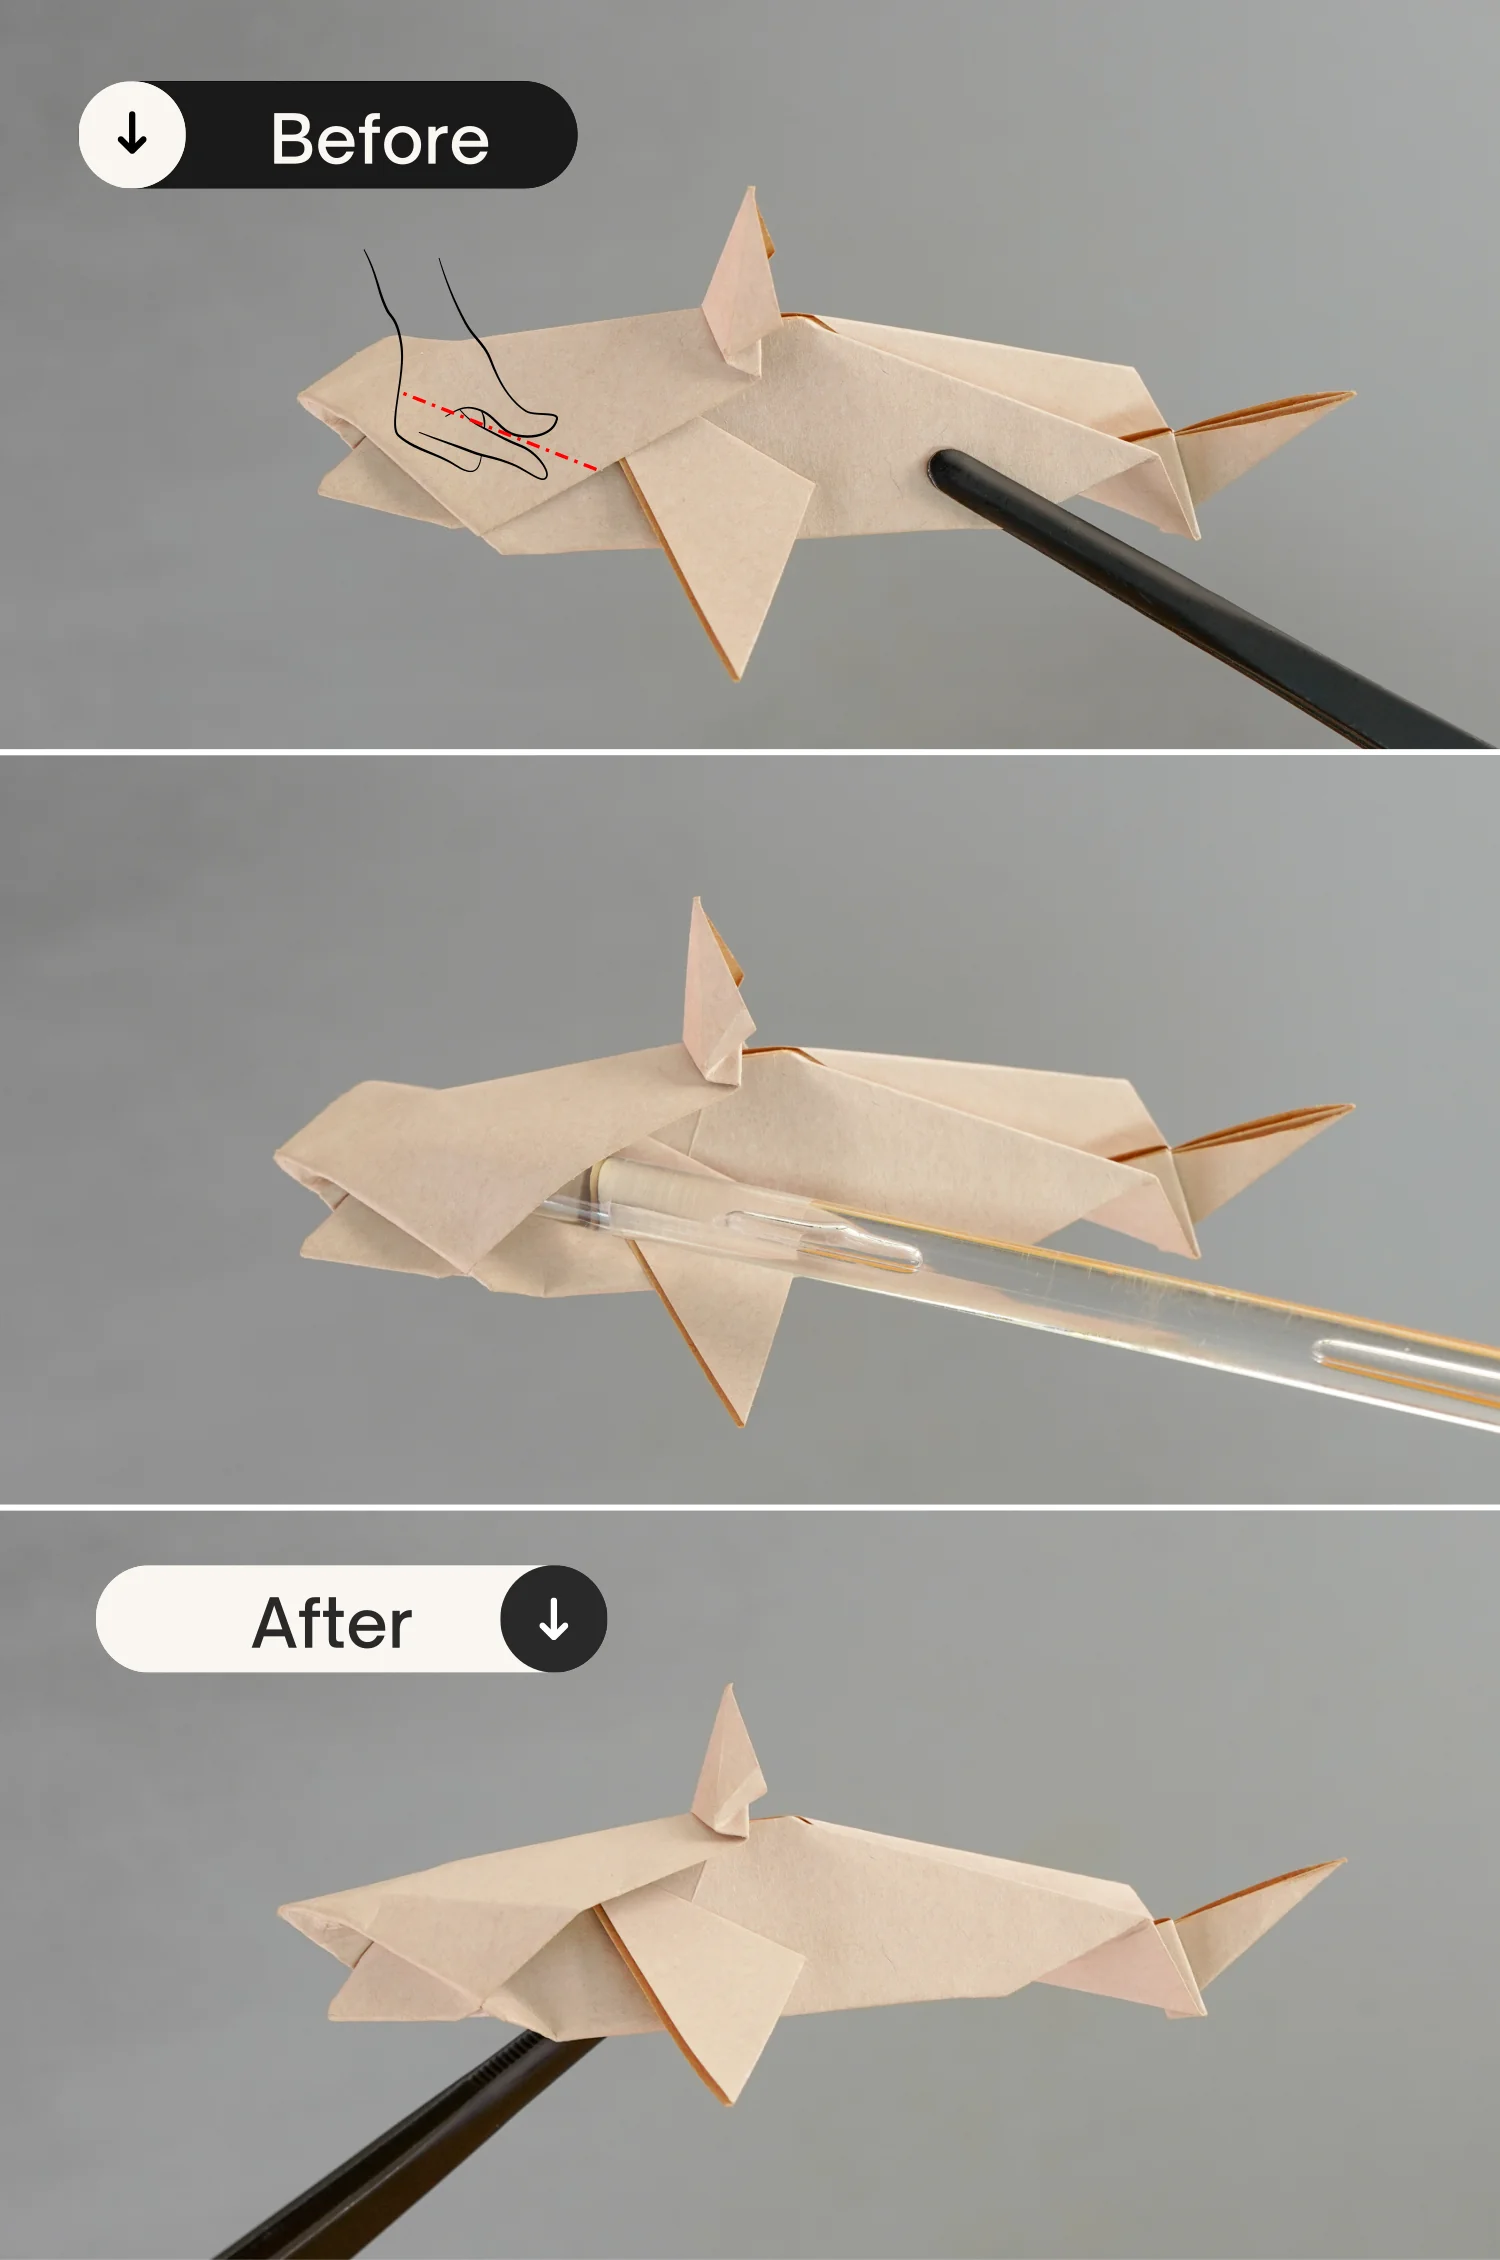
Make a gill for the shark by creating a crease as the picture shows.
undefined
Step 33
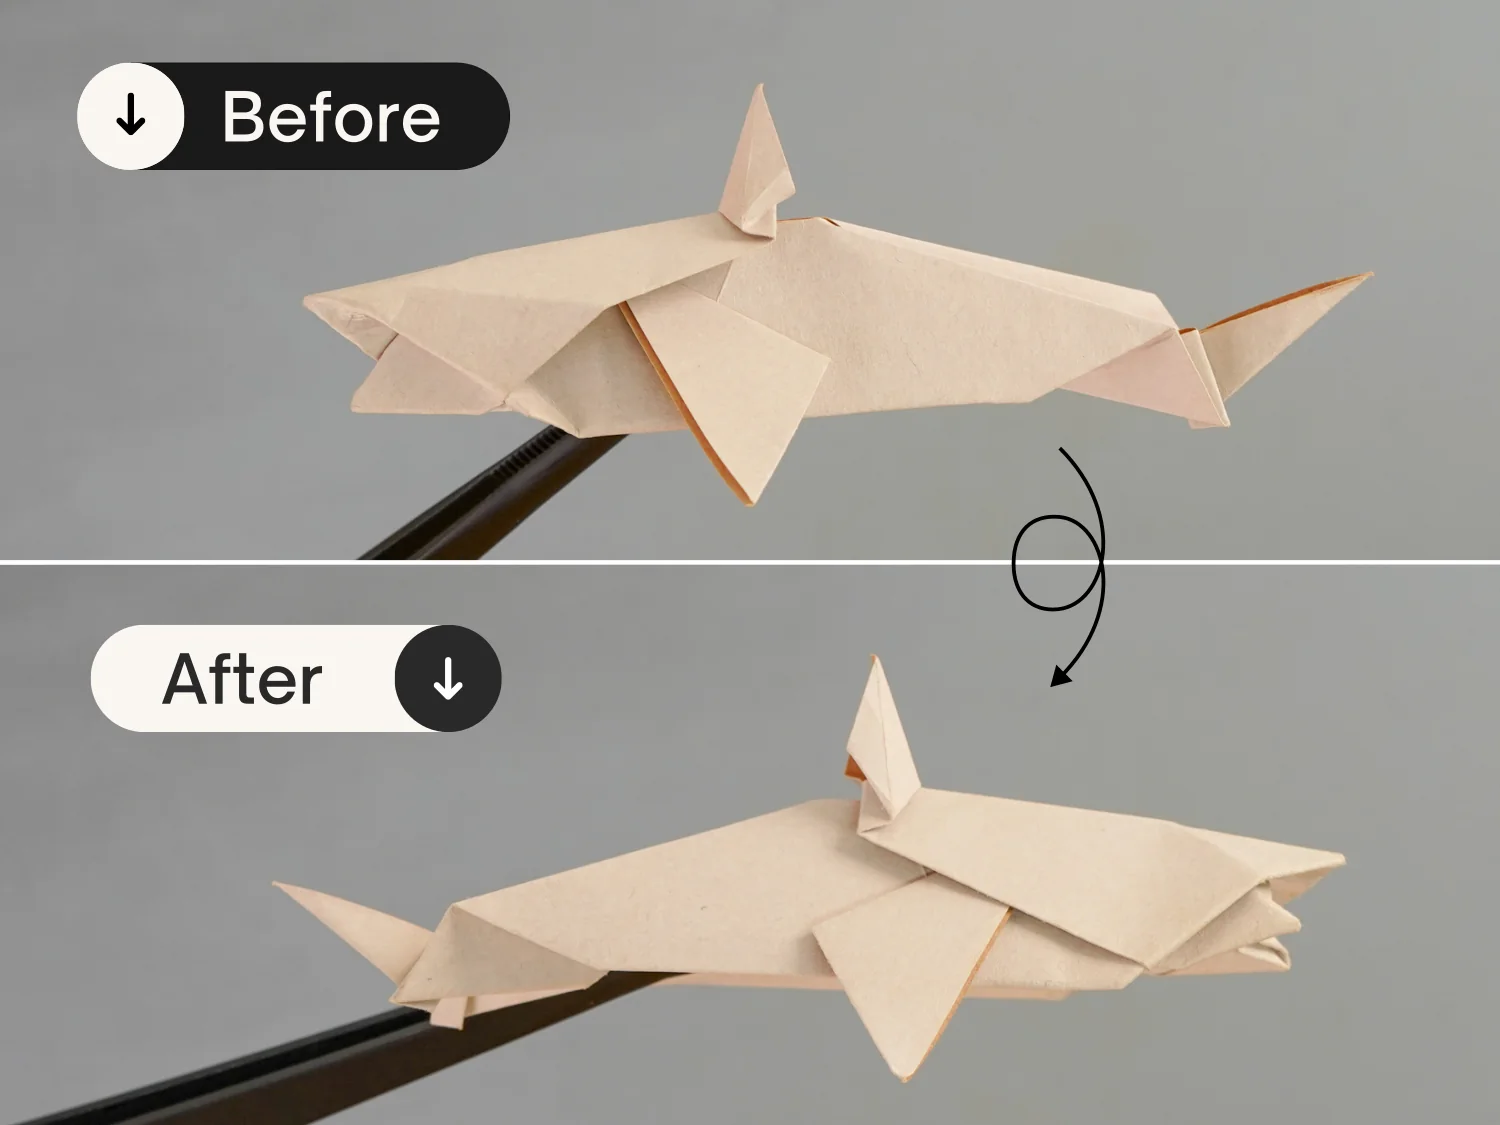
Flip the paper over.
undefined
Step 34
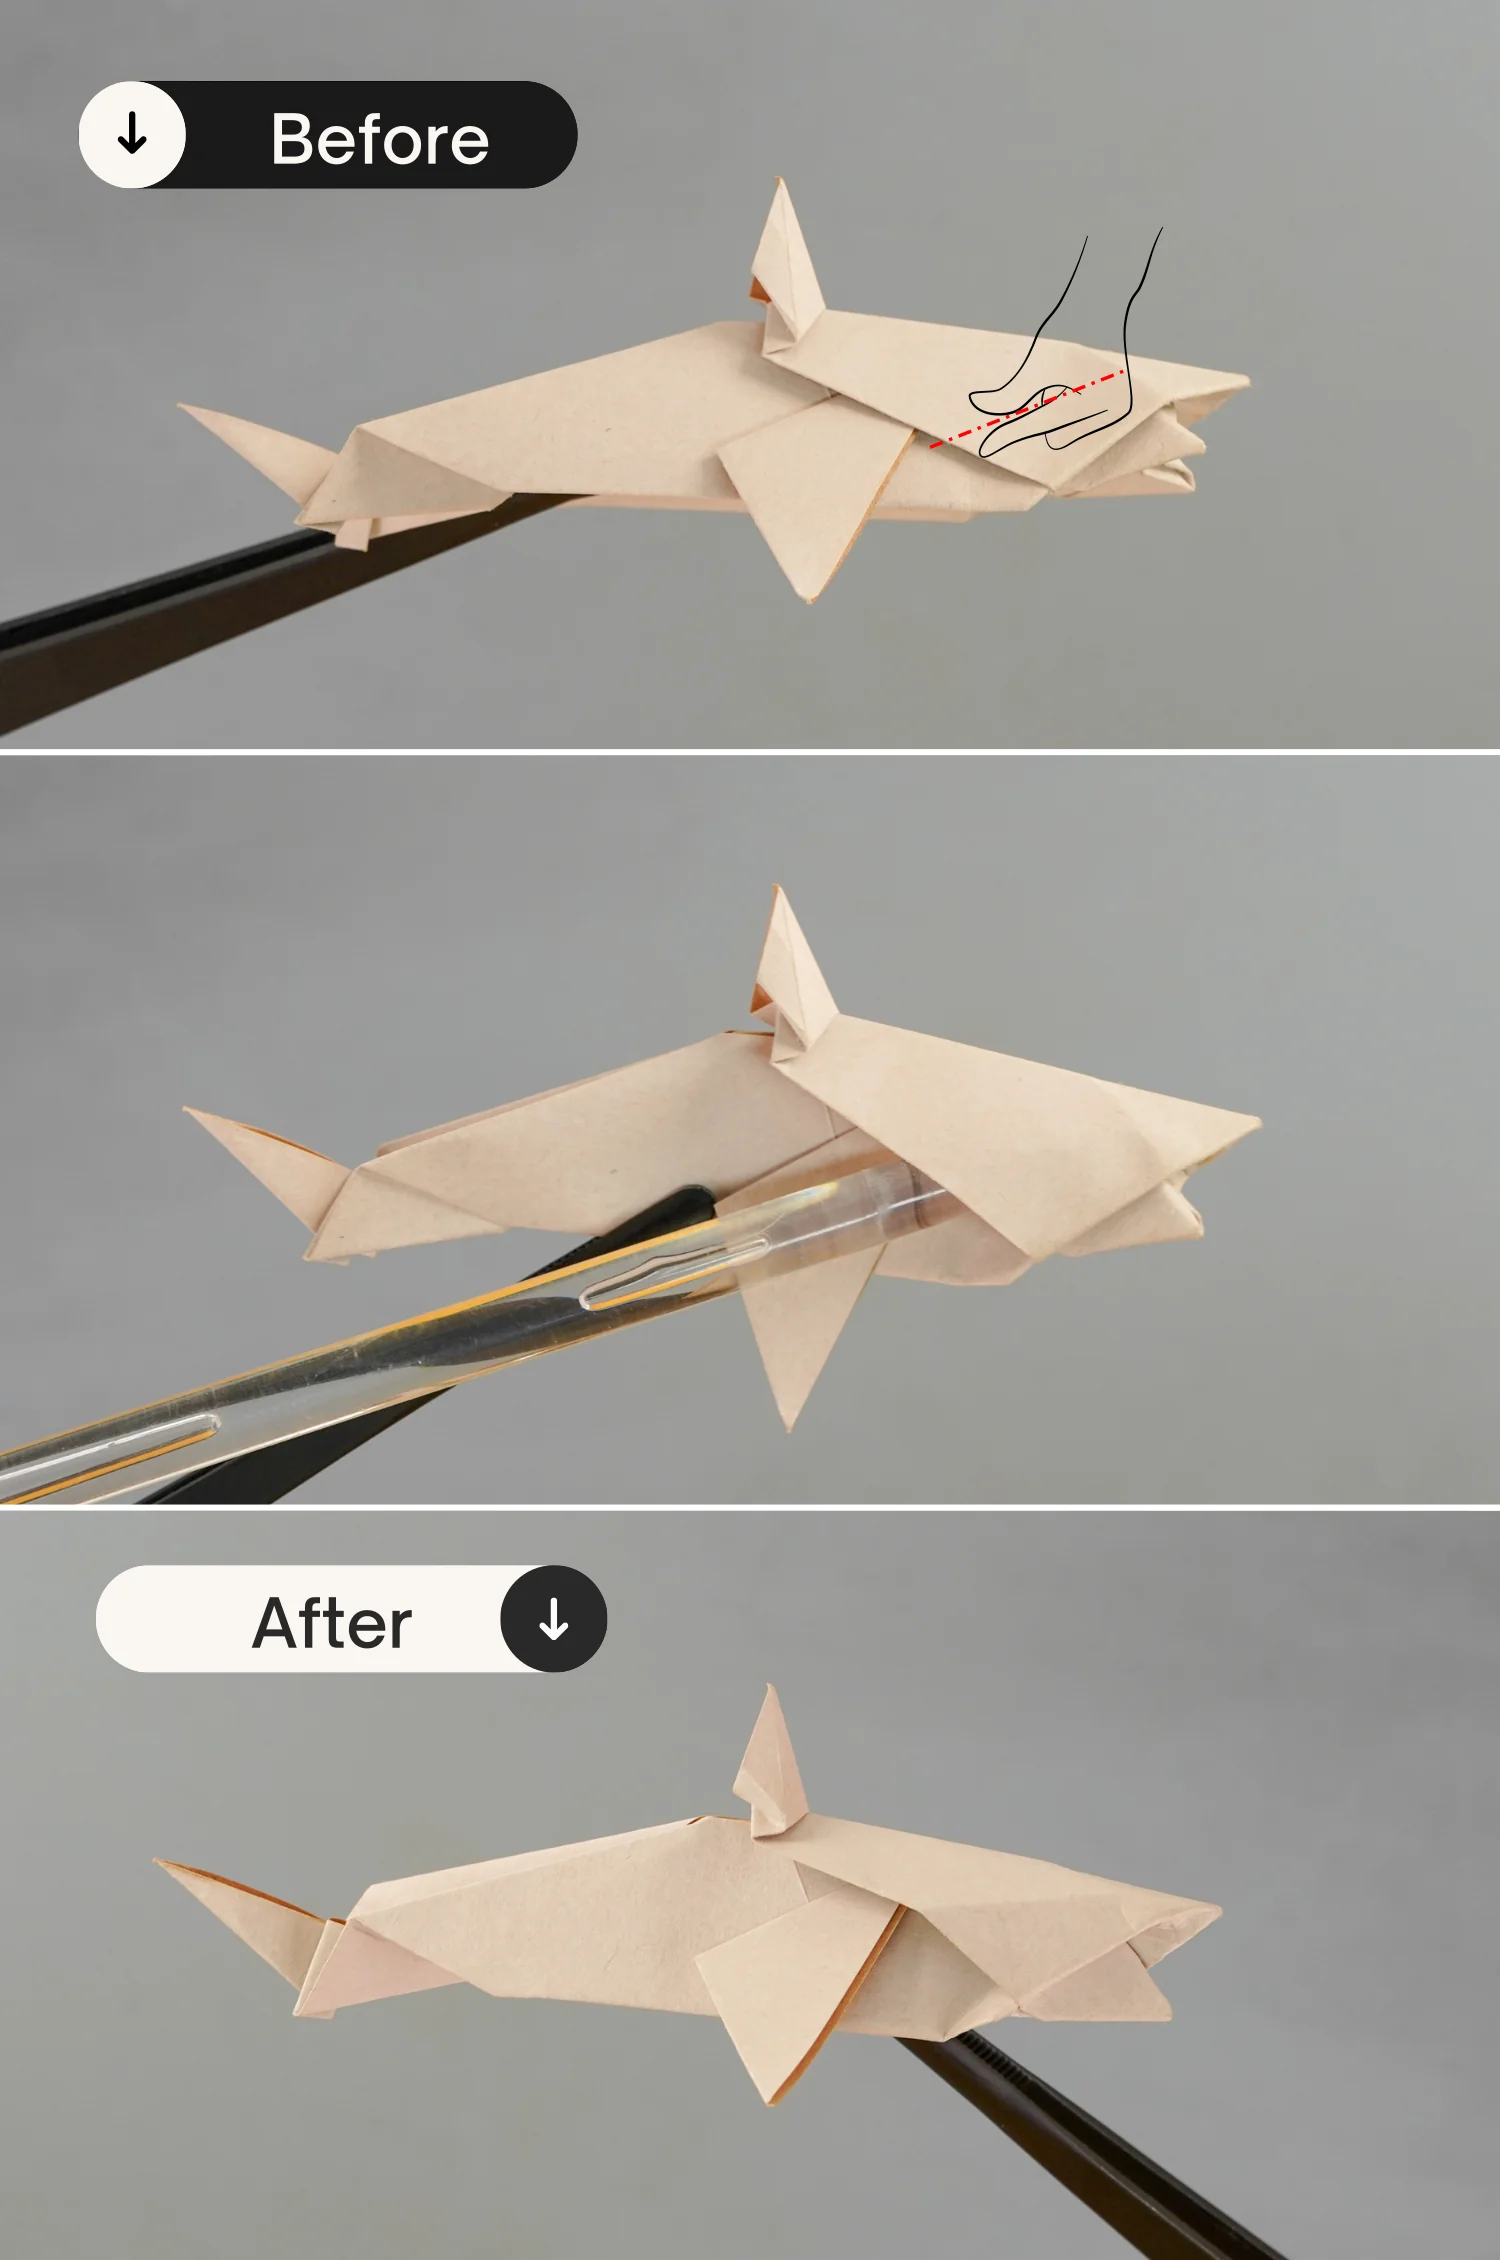
Create another gill for it in the same way.
undefined
Step 35
This is the final shape of your origami shark.
