How to Fold an Origami Cute Whale
Step 1
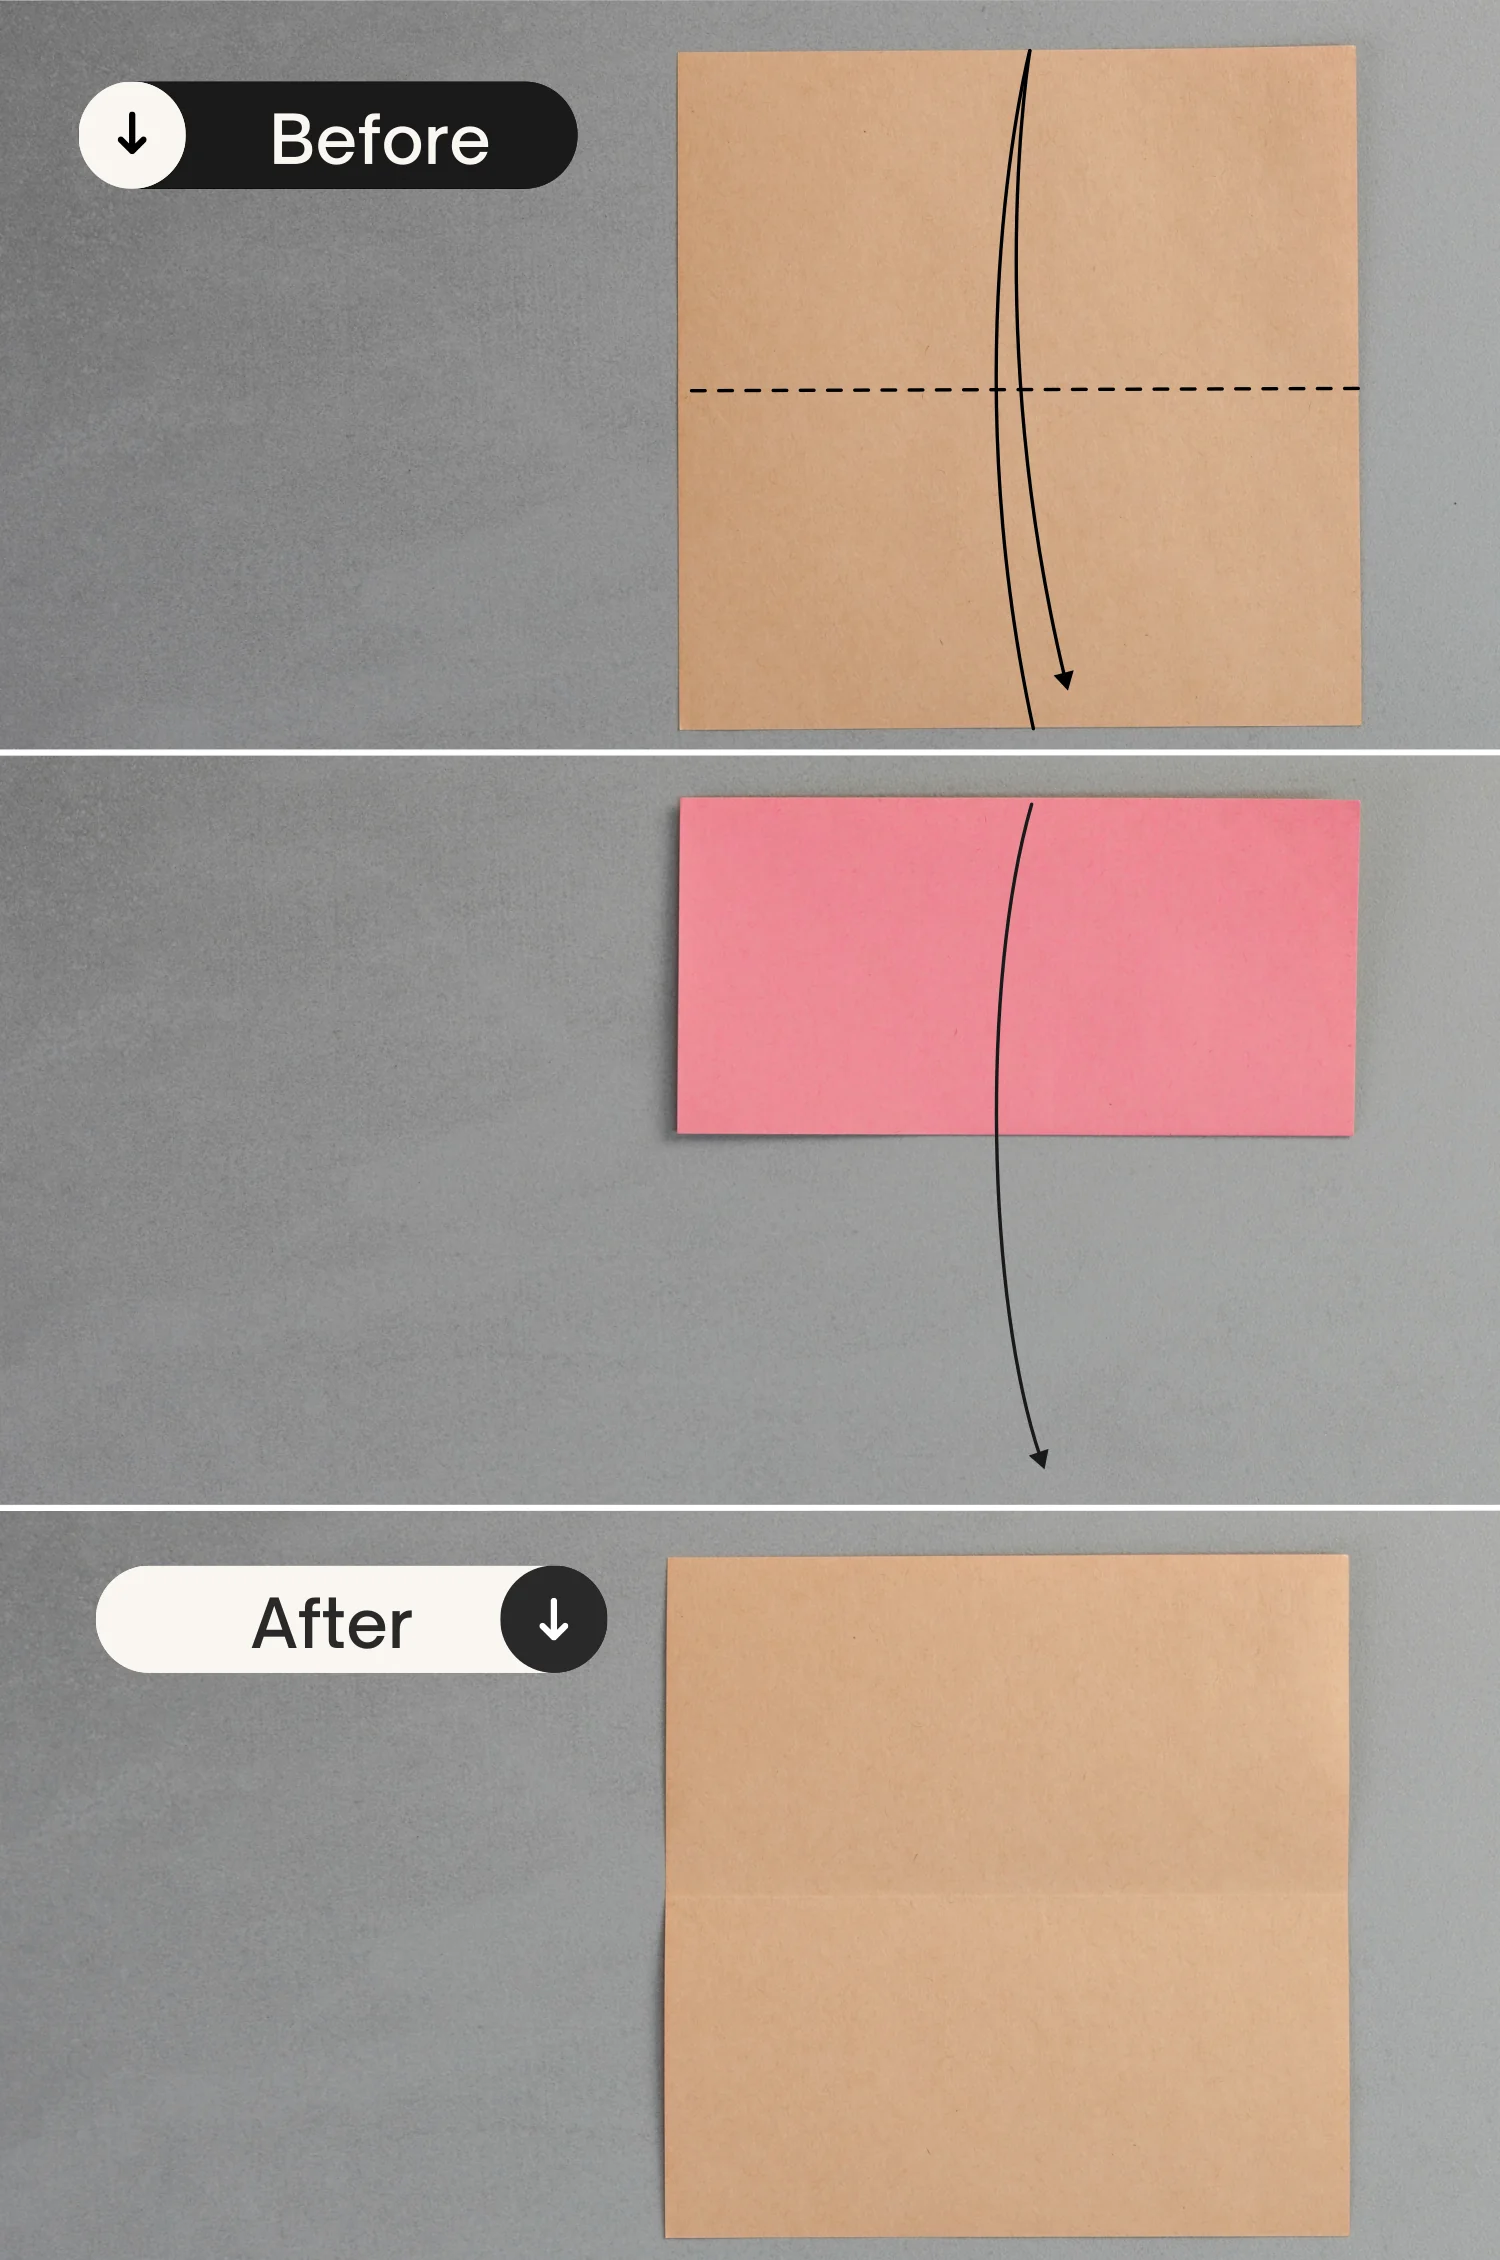
Place the paper with the desired display color side down to begin folding, fold it in half horizontally, and unfold it.
undefined
Step 2
Fold it in half vertically, leaving a crease, and unfold it.

undefined
Step 3
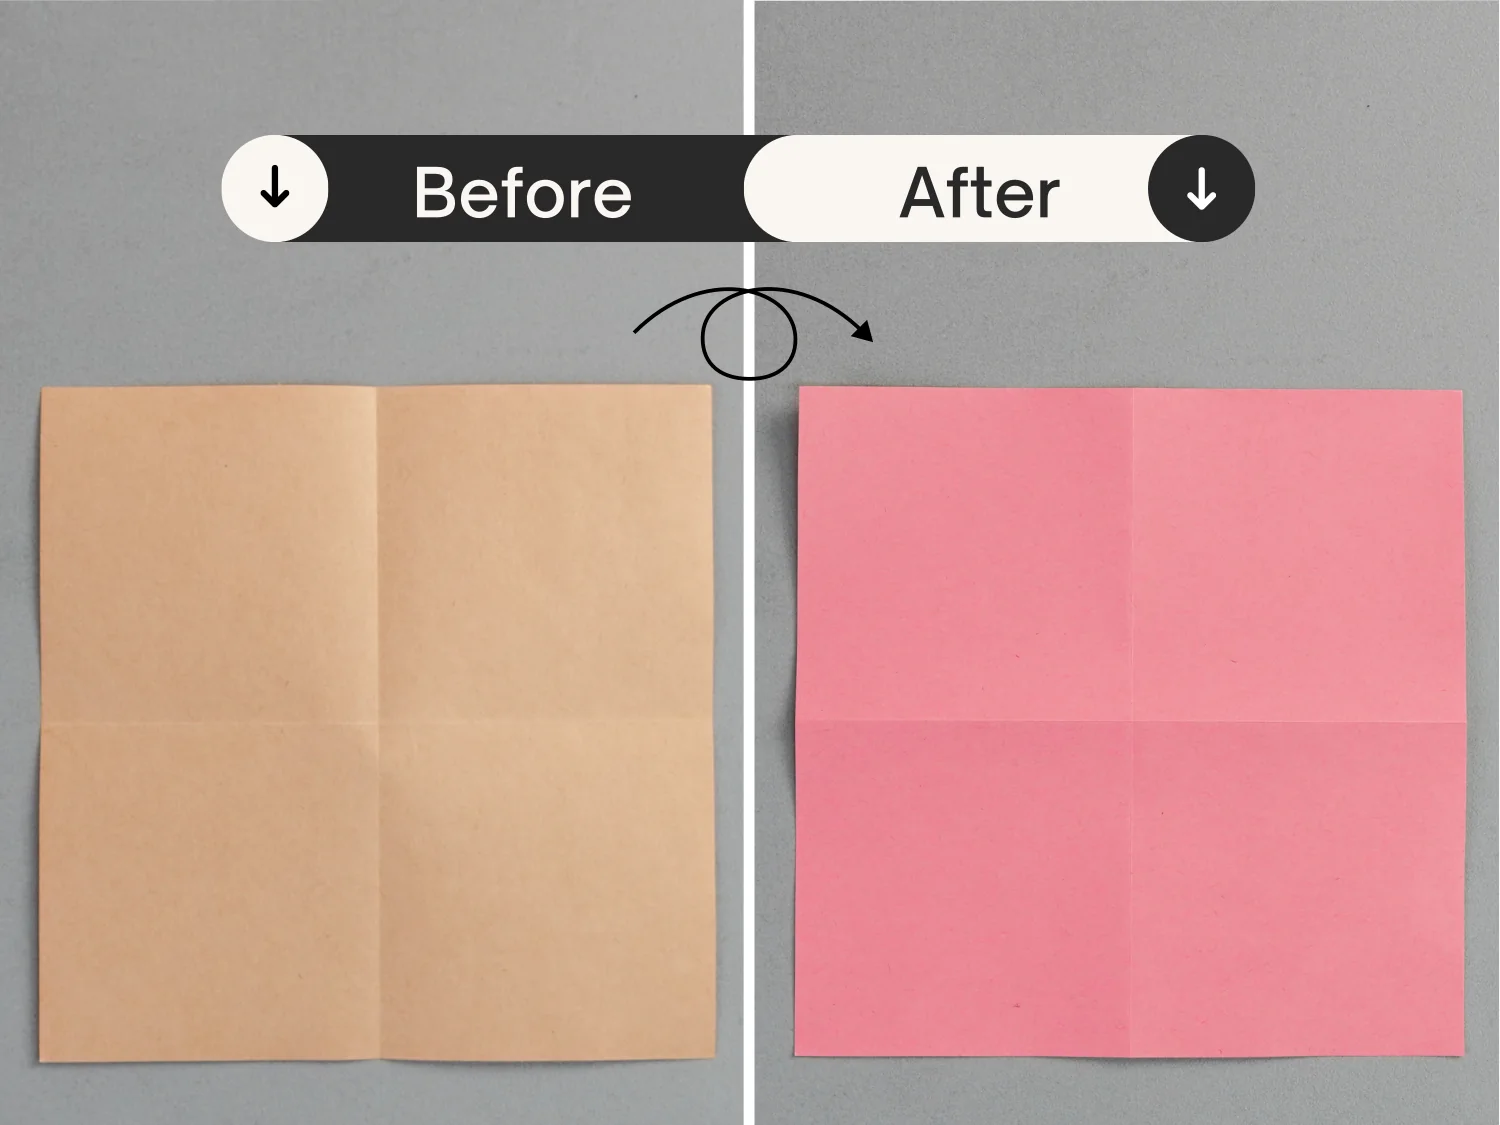
Flip the paper over.
undefined
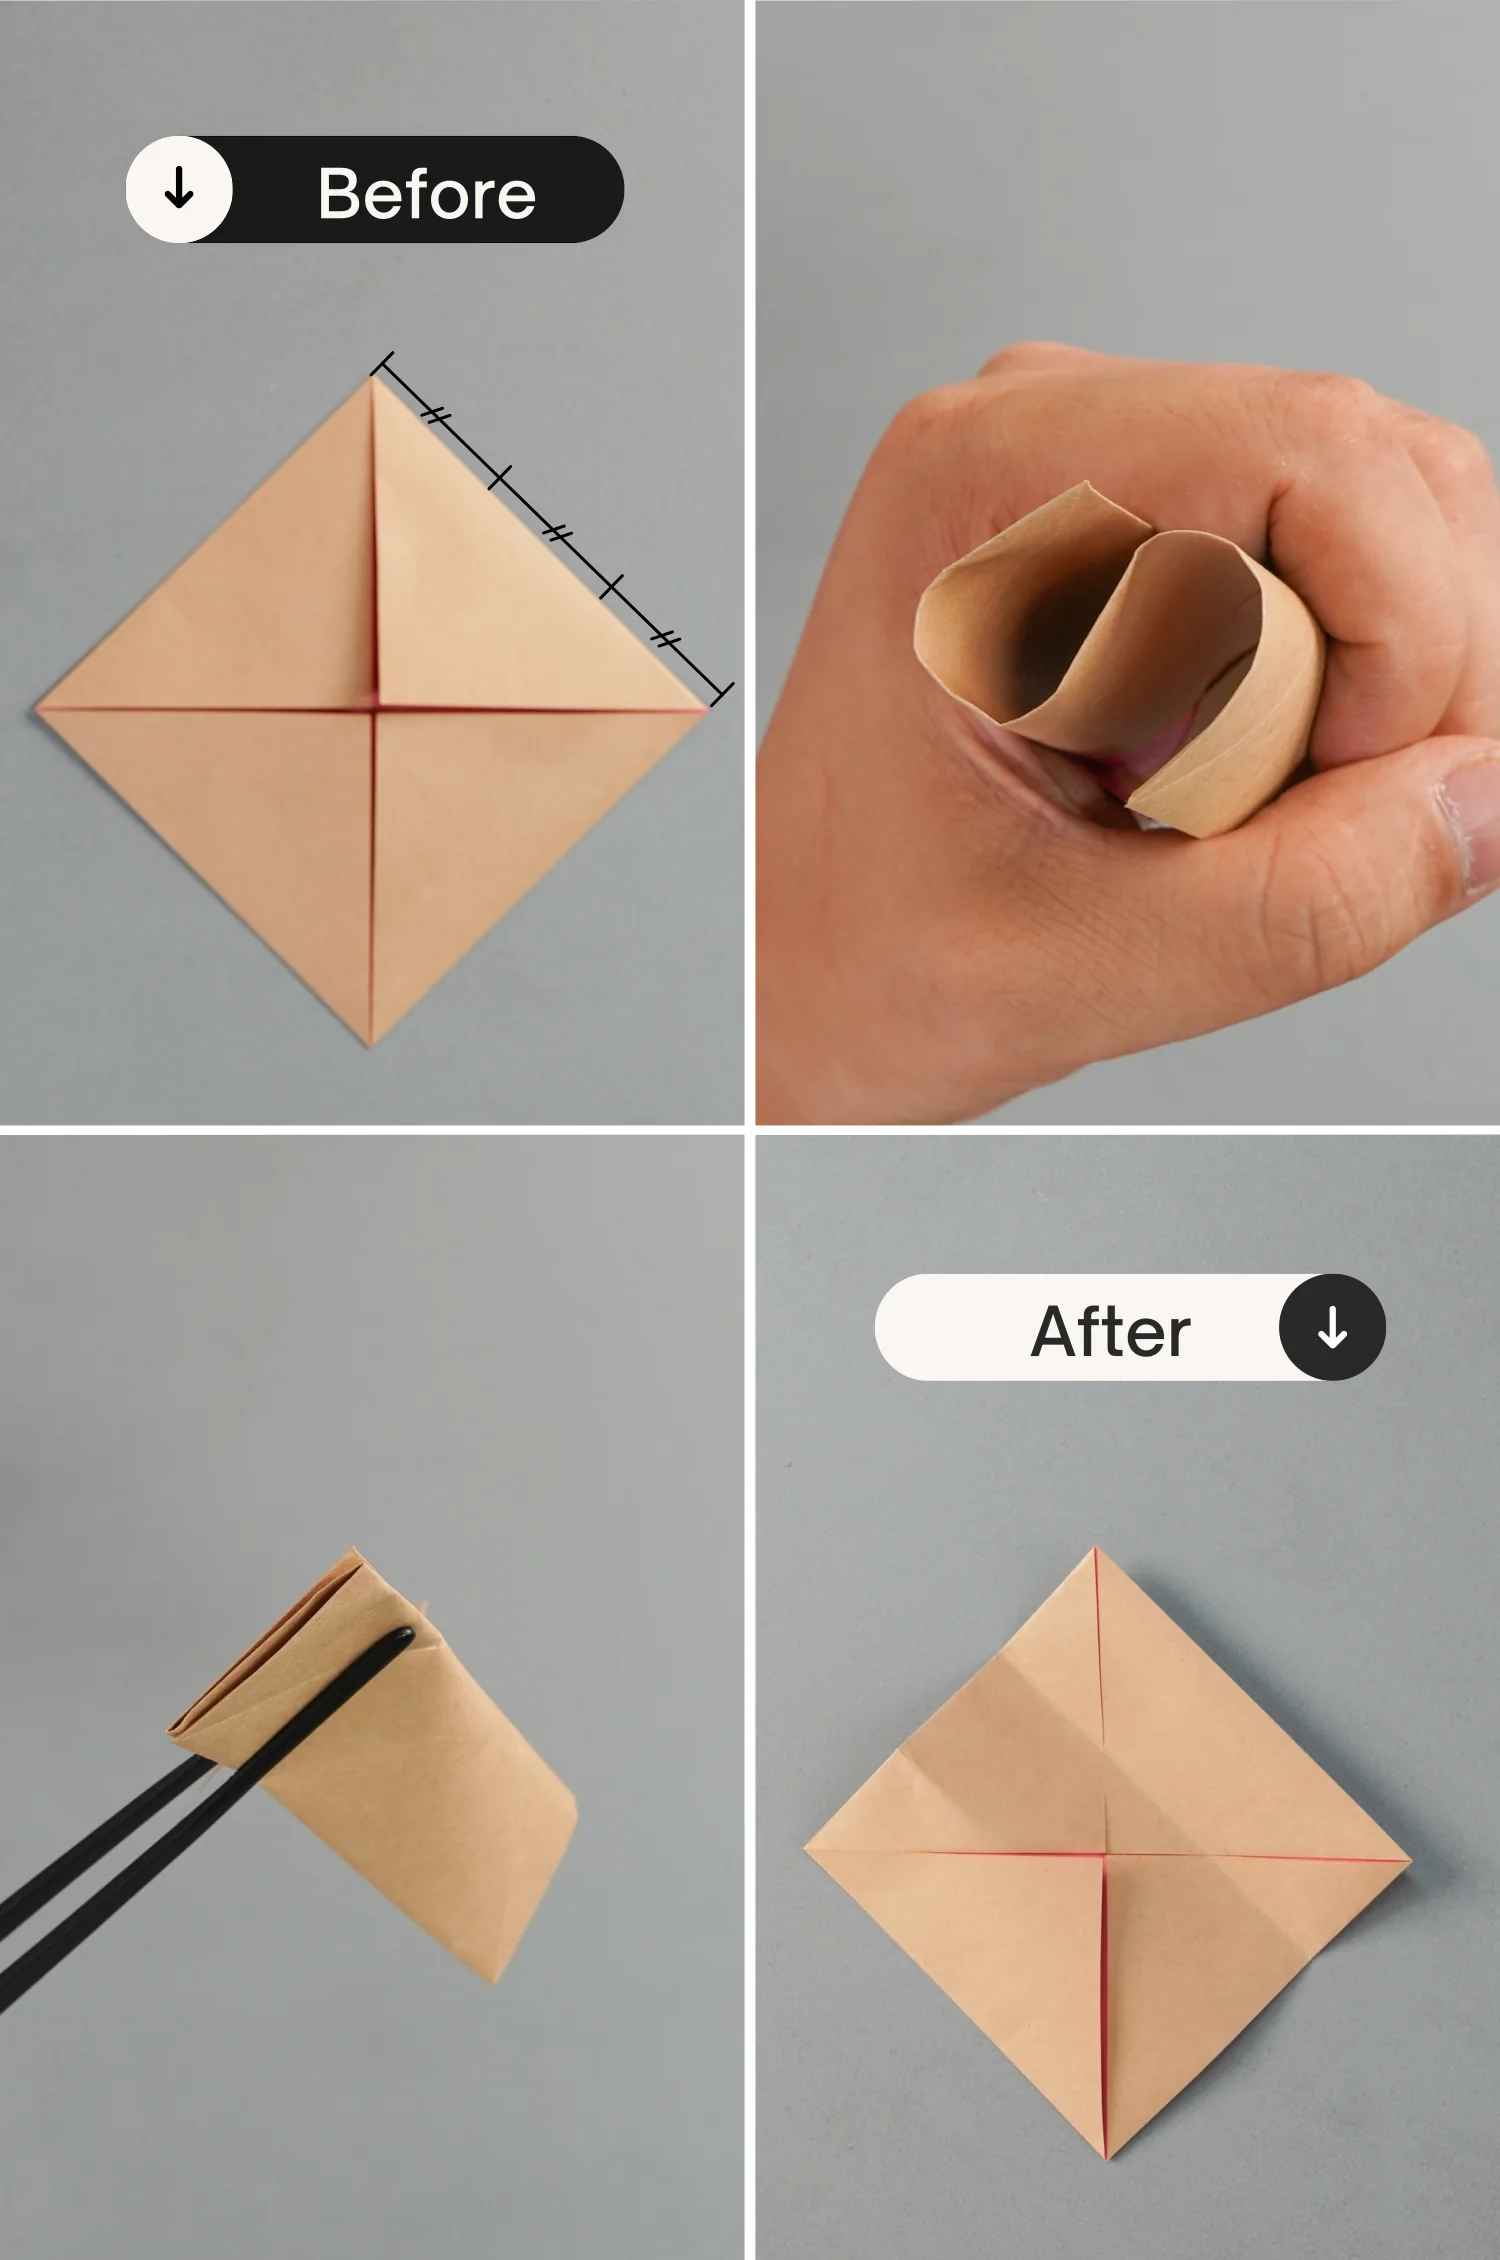
Step 4
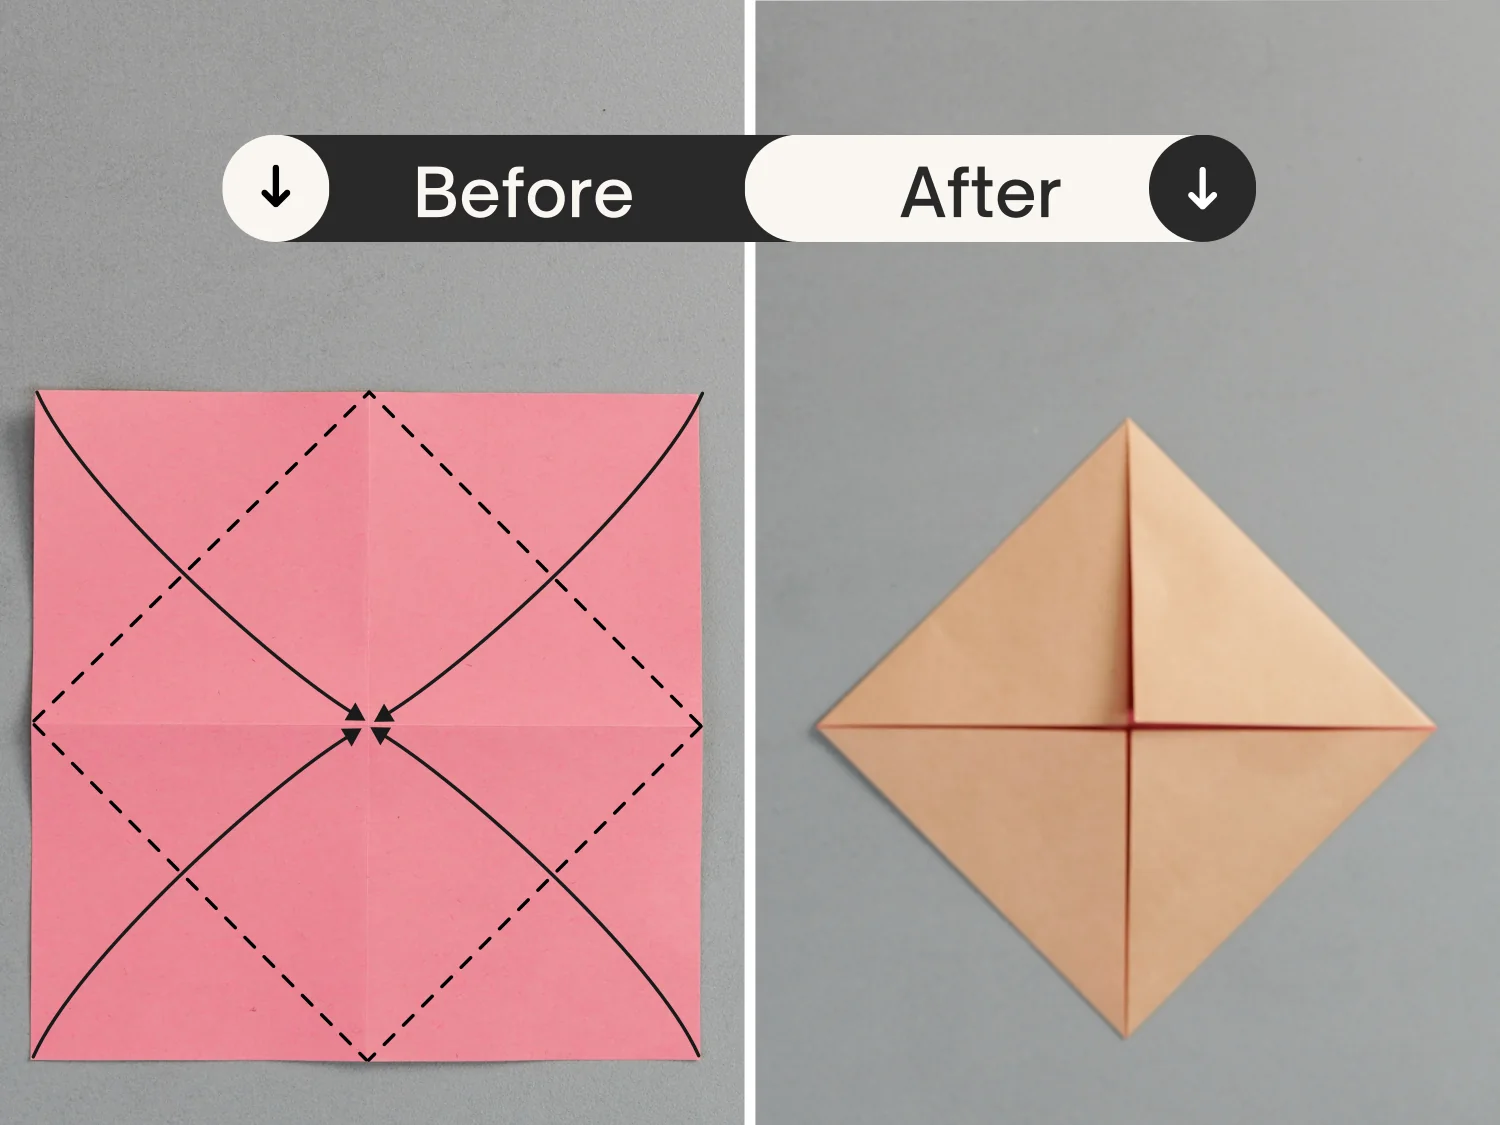
Fold the four points to meet the center intersection point formed by the two creases you just made.
undefined
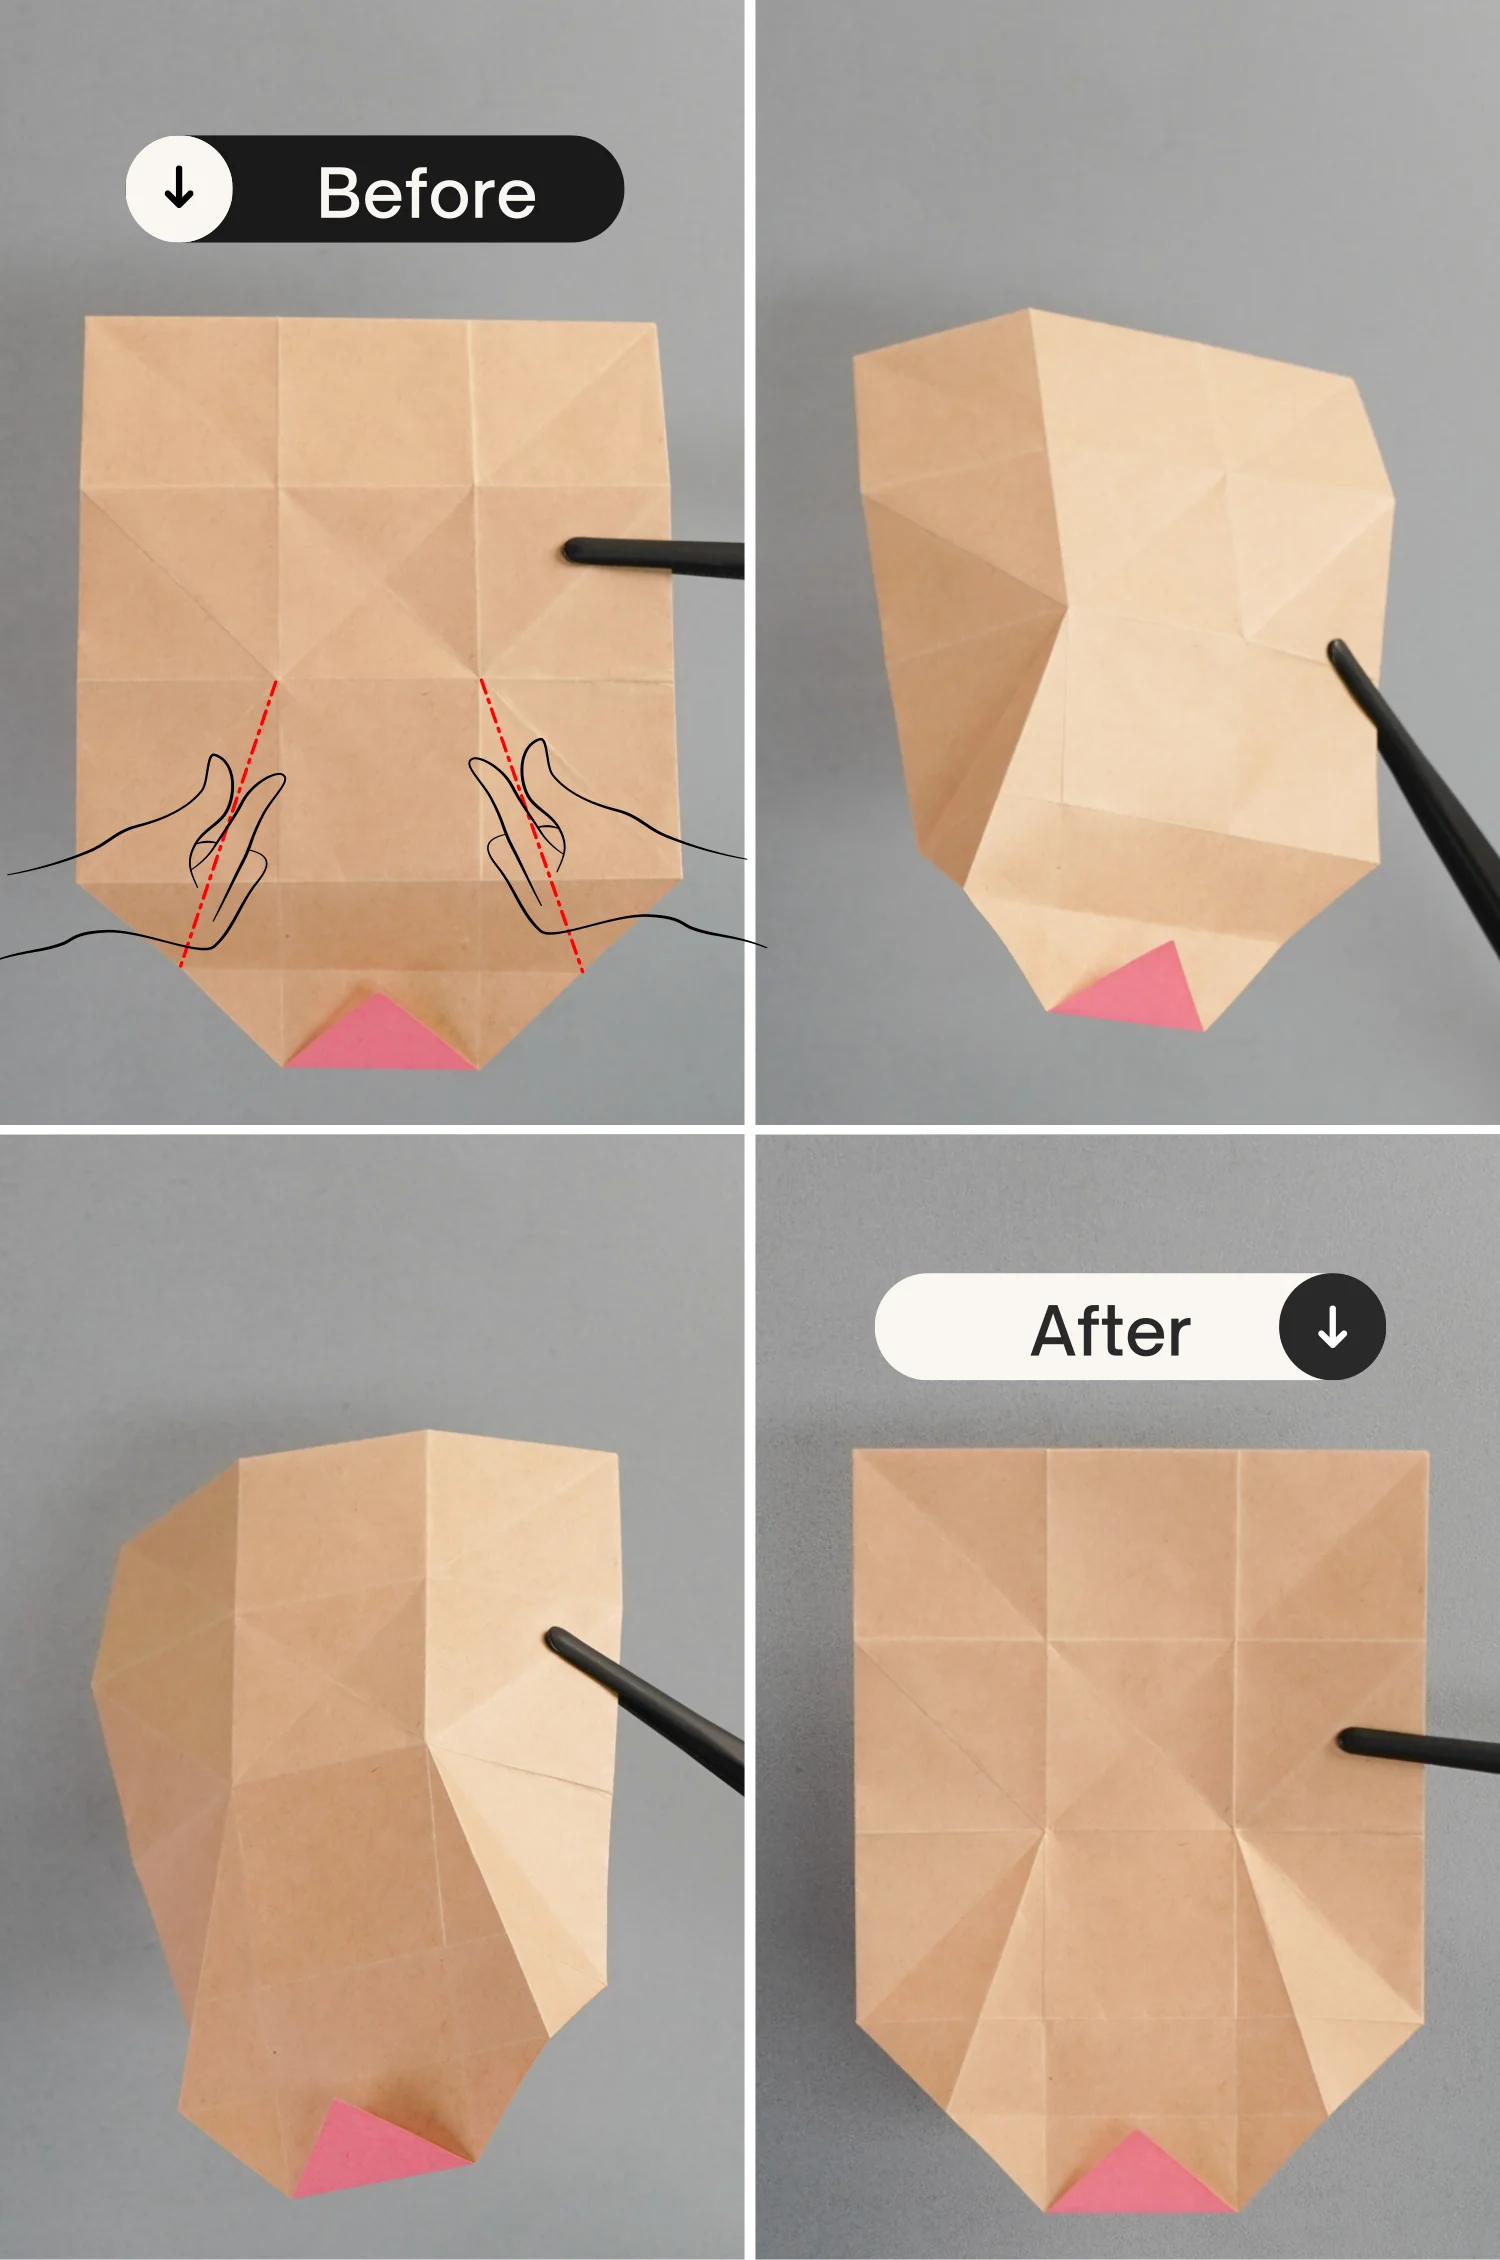
Step 5
Hold the paper in your hand so that it bends in the same way as the picture shows, like an “S”, then flatten this edge, creating two creases to divide this edge into three equal parts.
undefined
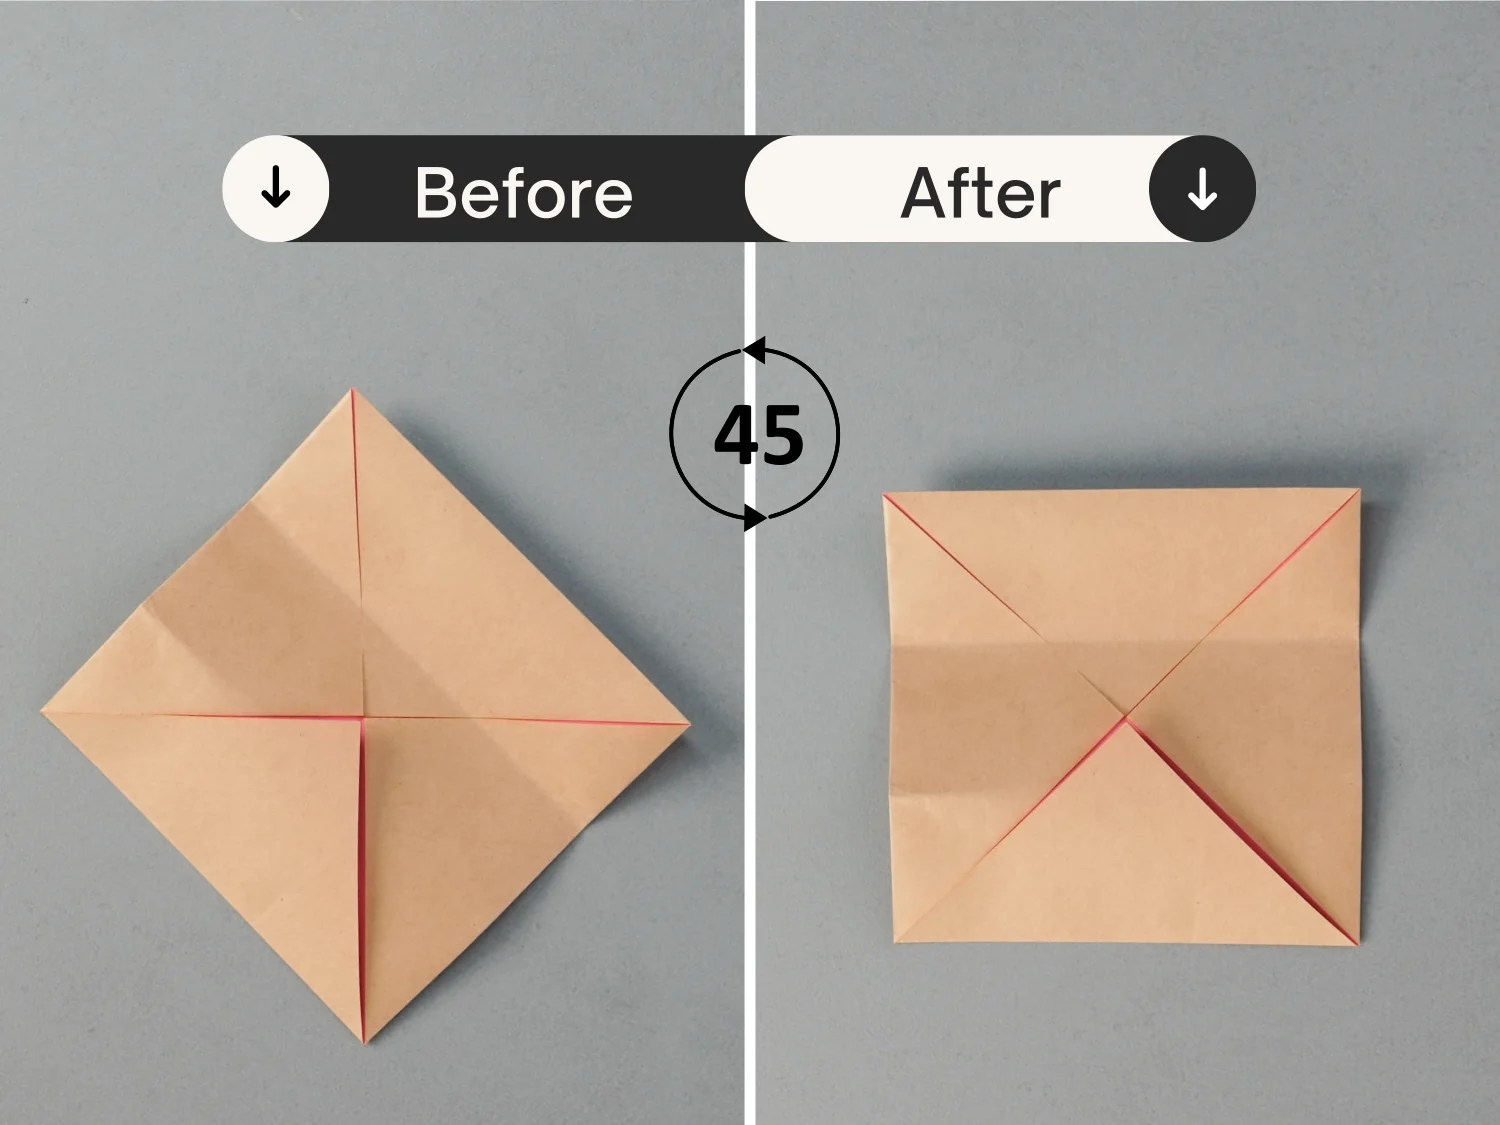
Step 6
Rotate the paper 45 degrees counterclockwise.
undefined
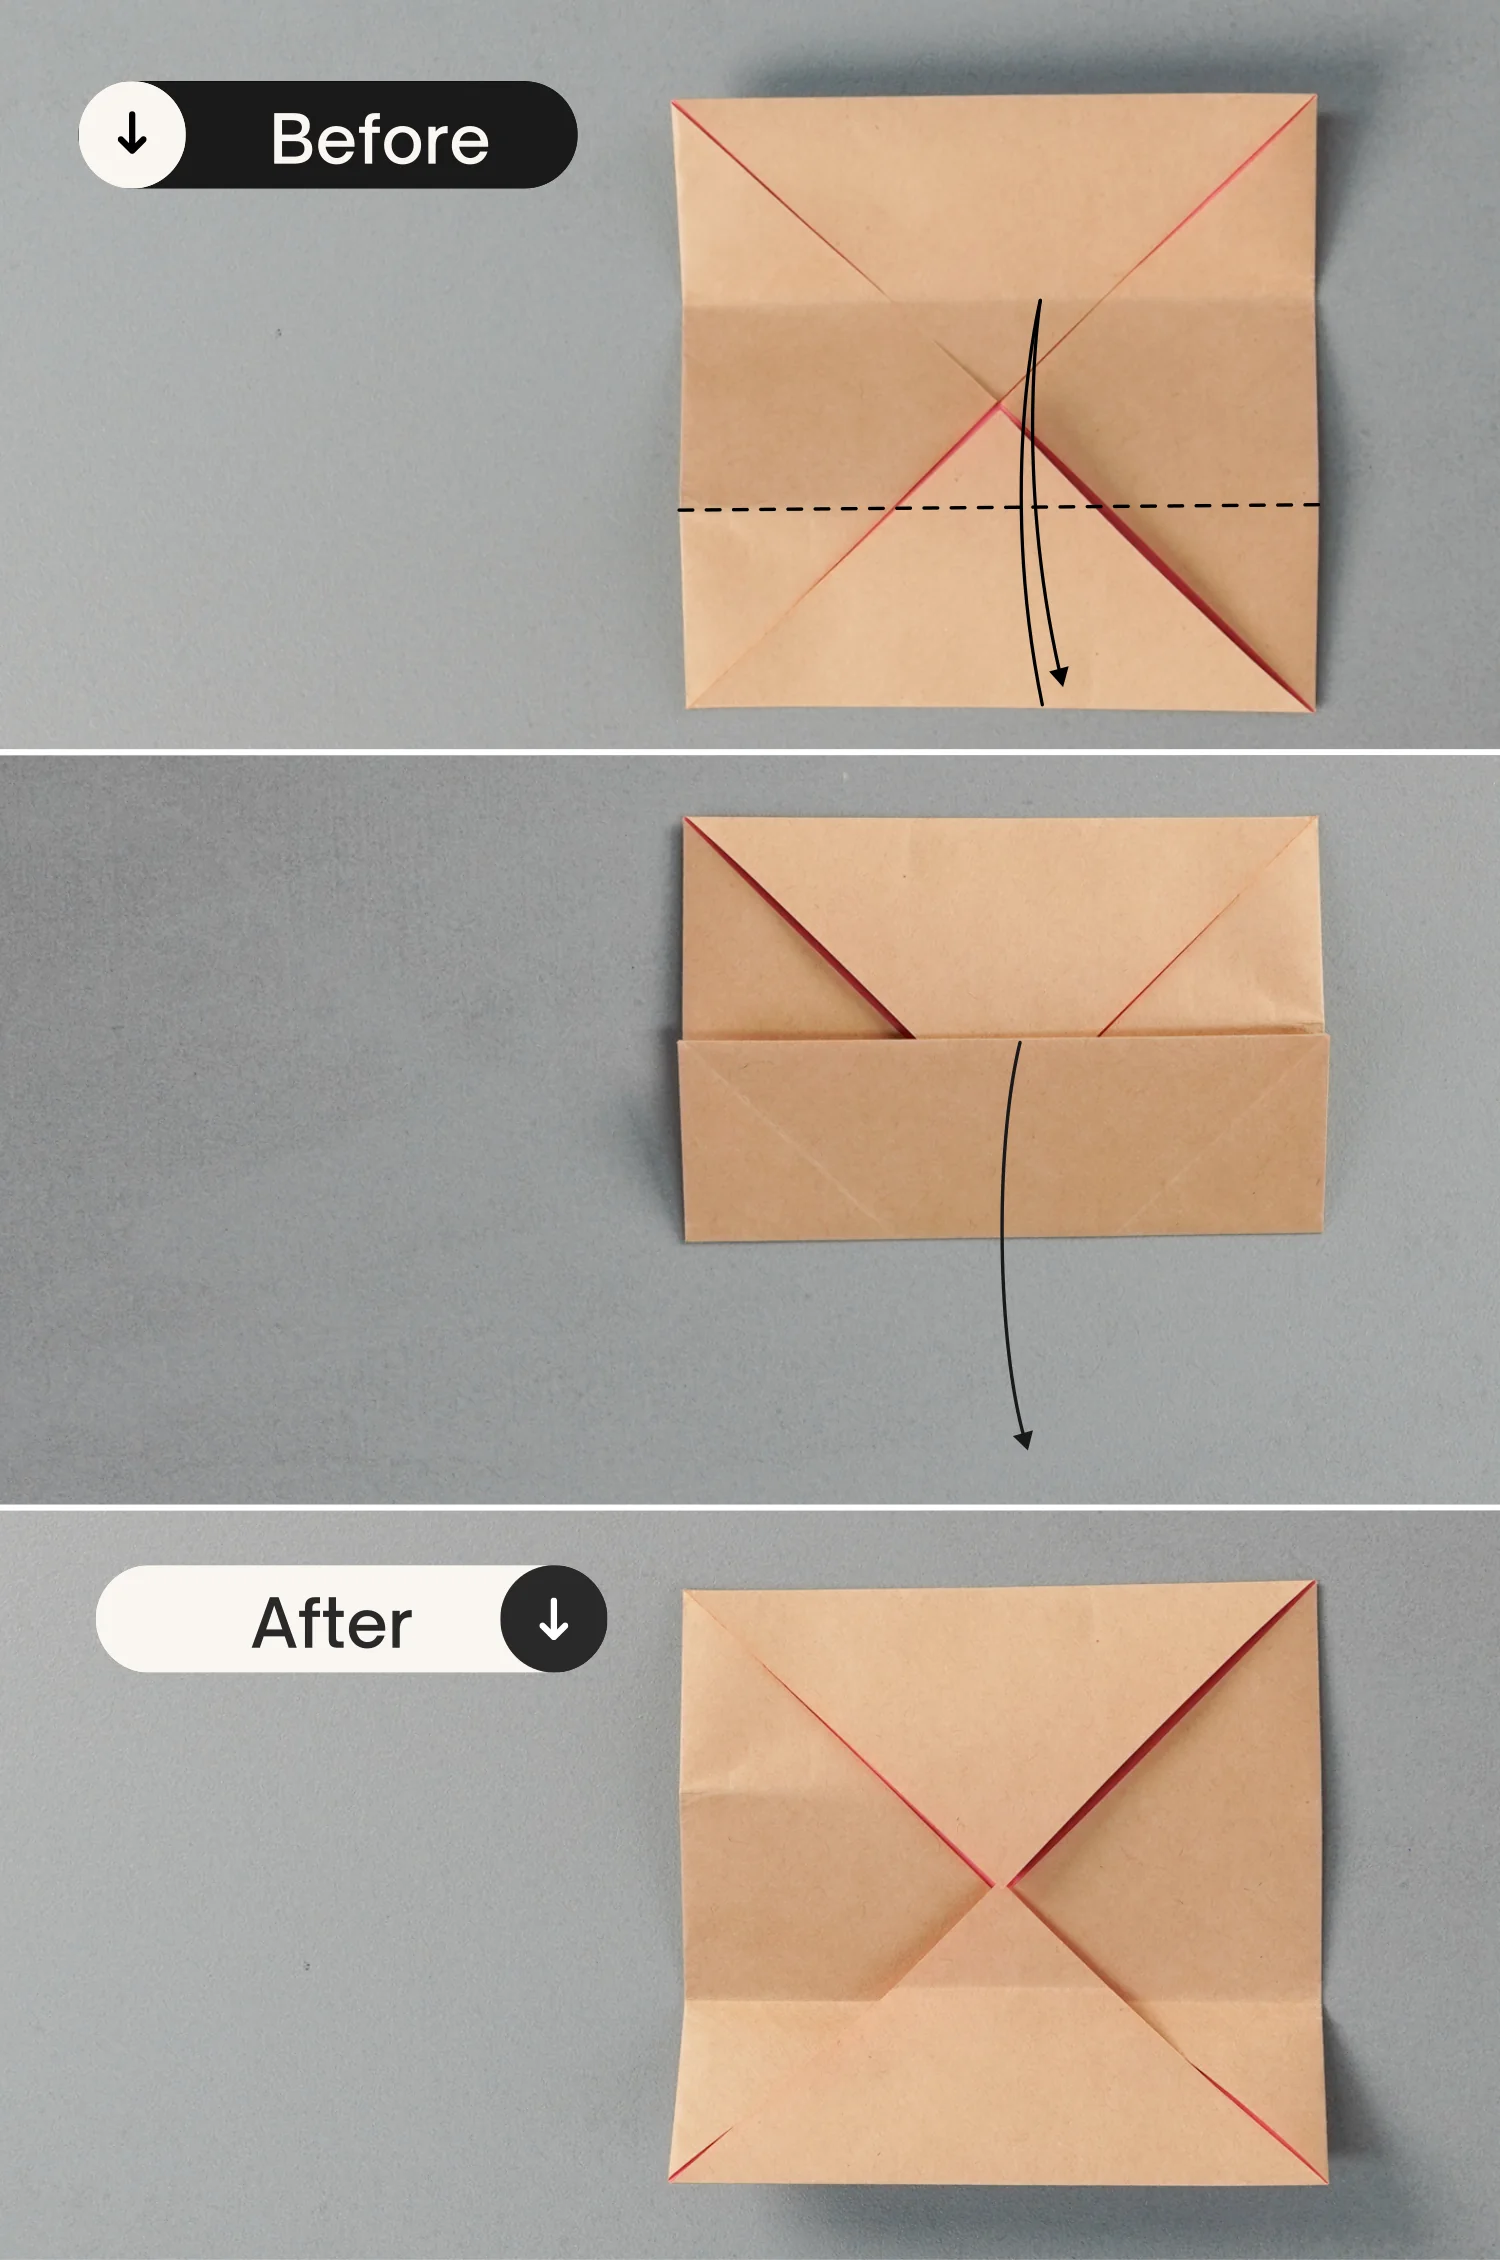
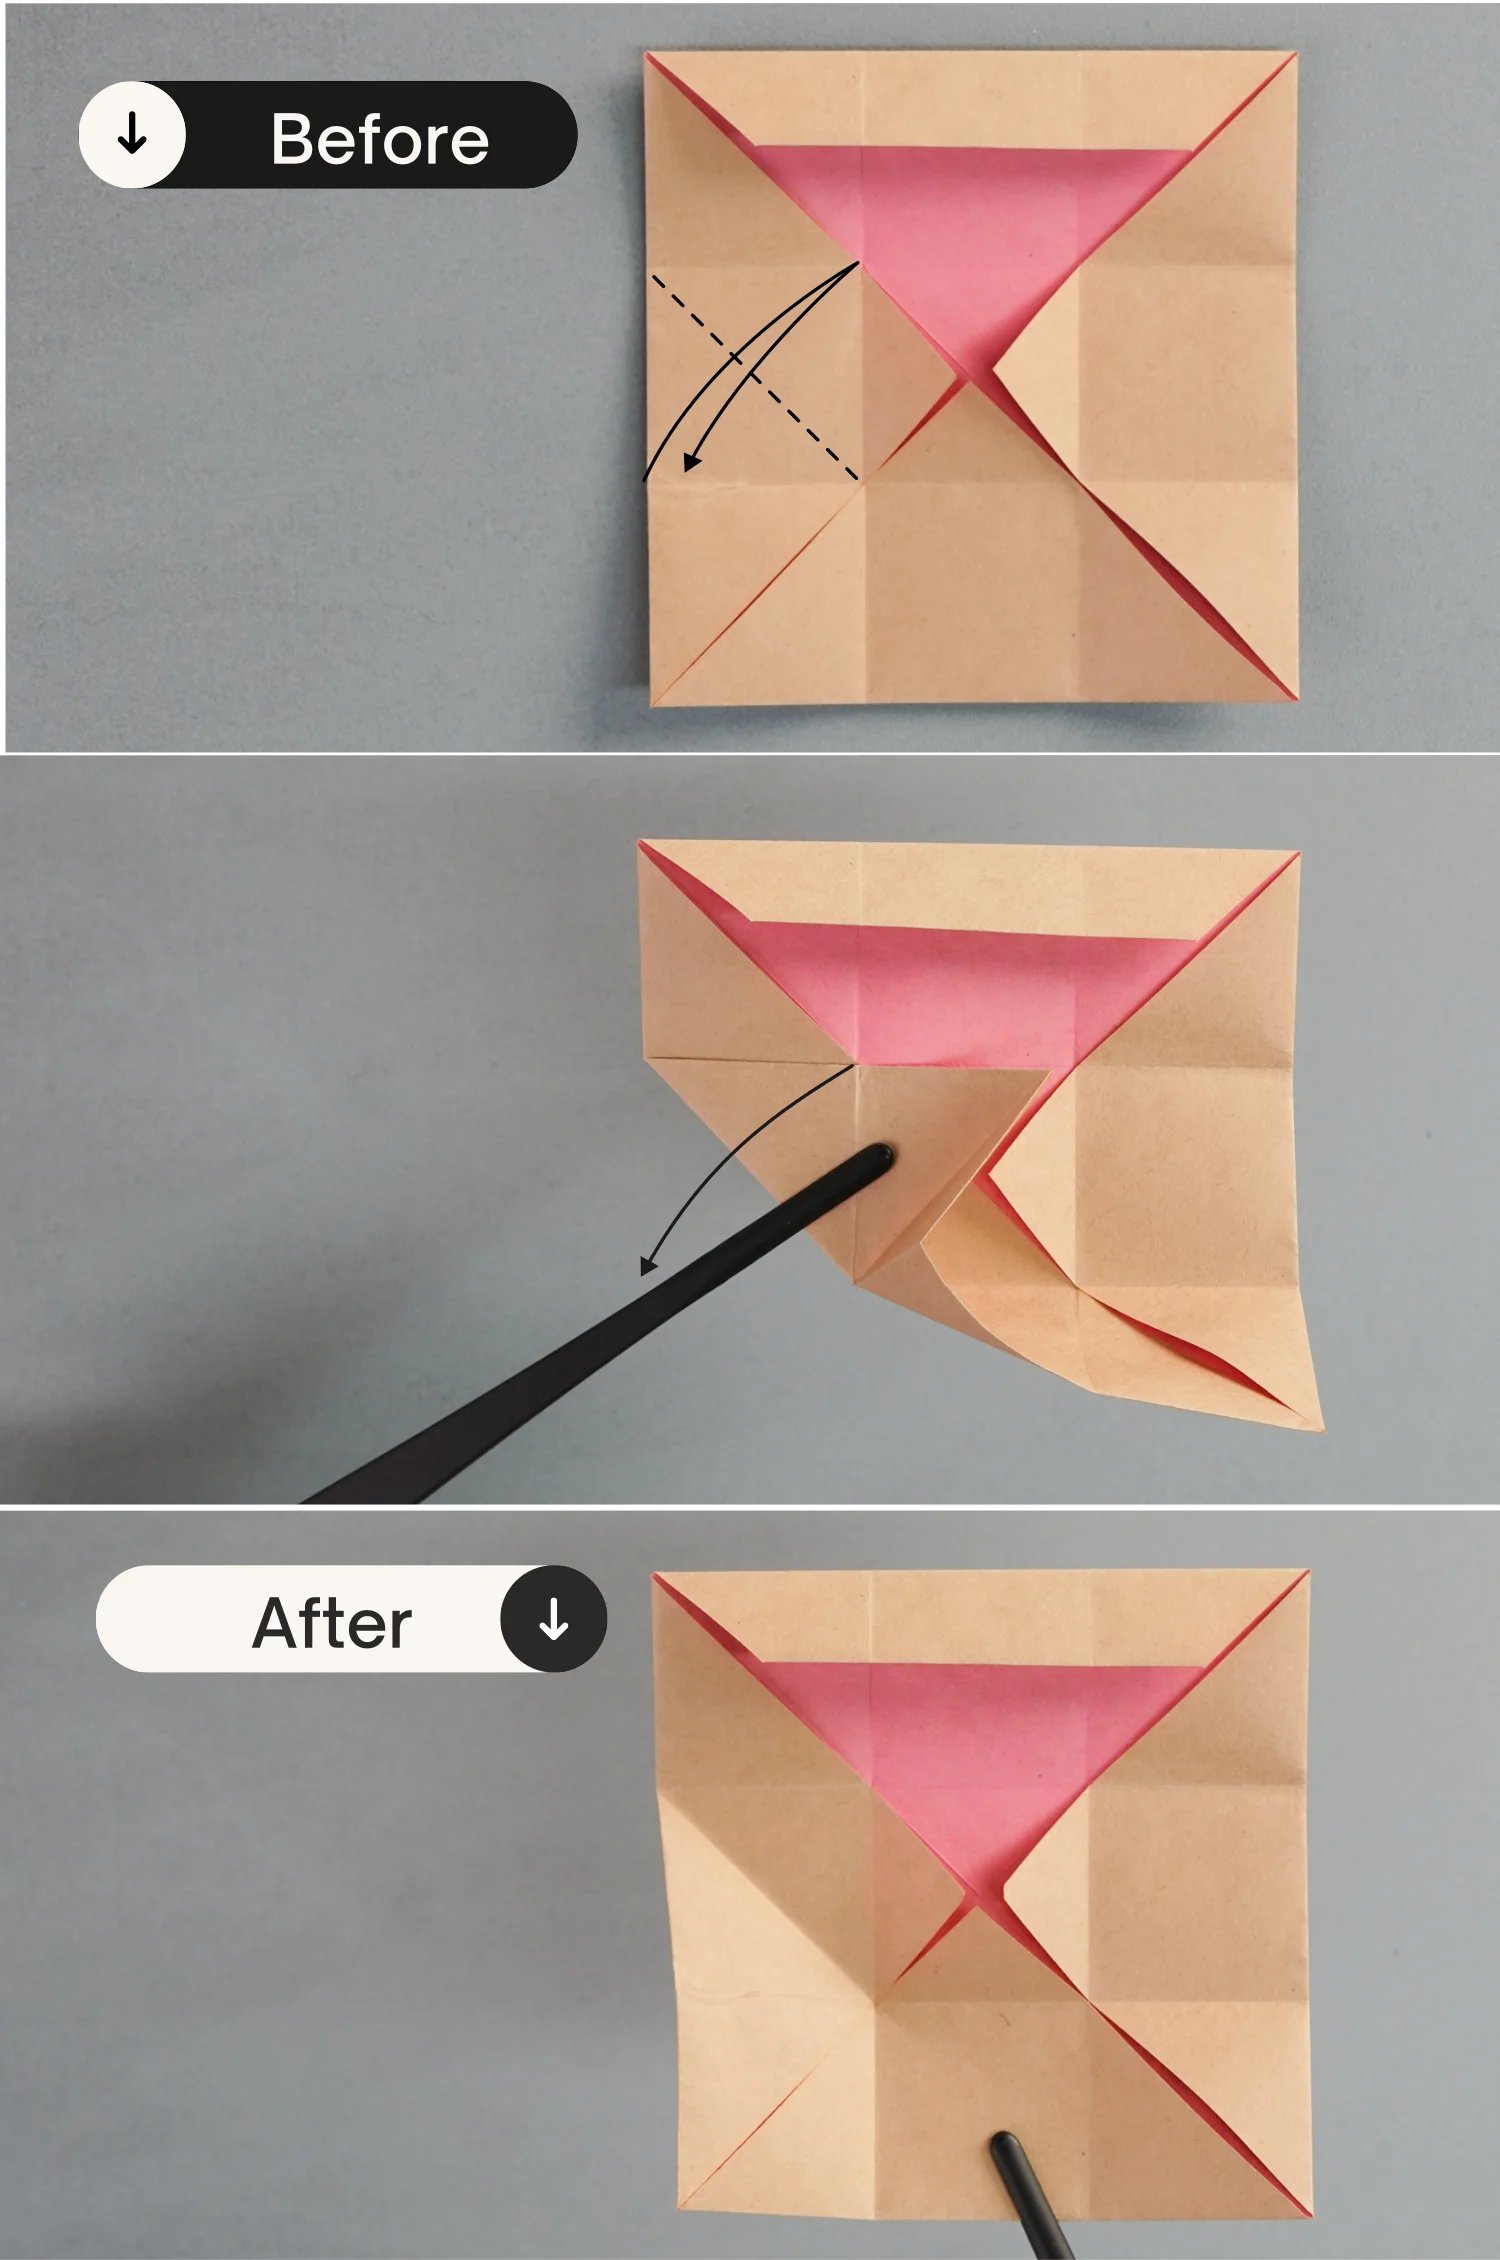
Step 7
Fold up the bottom edge to align with the upper one of the two creases you just made, and unfold it.
undefined
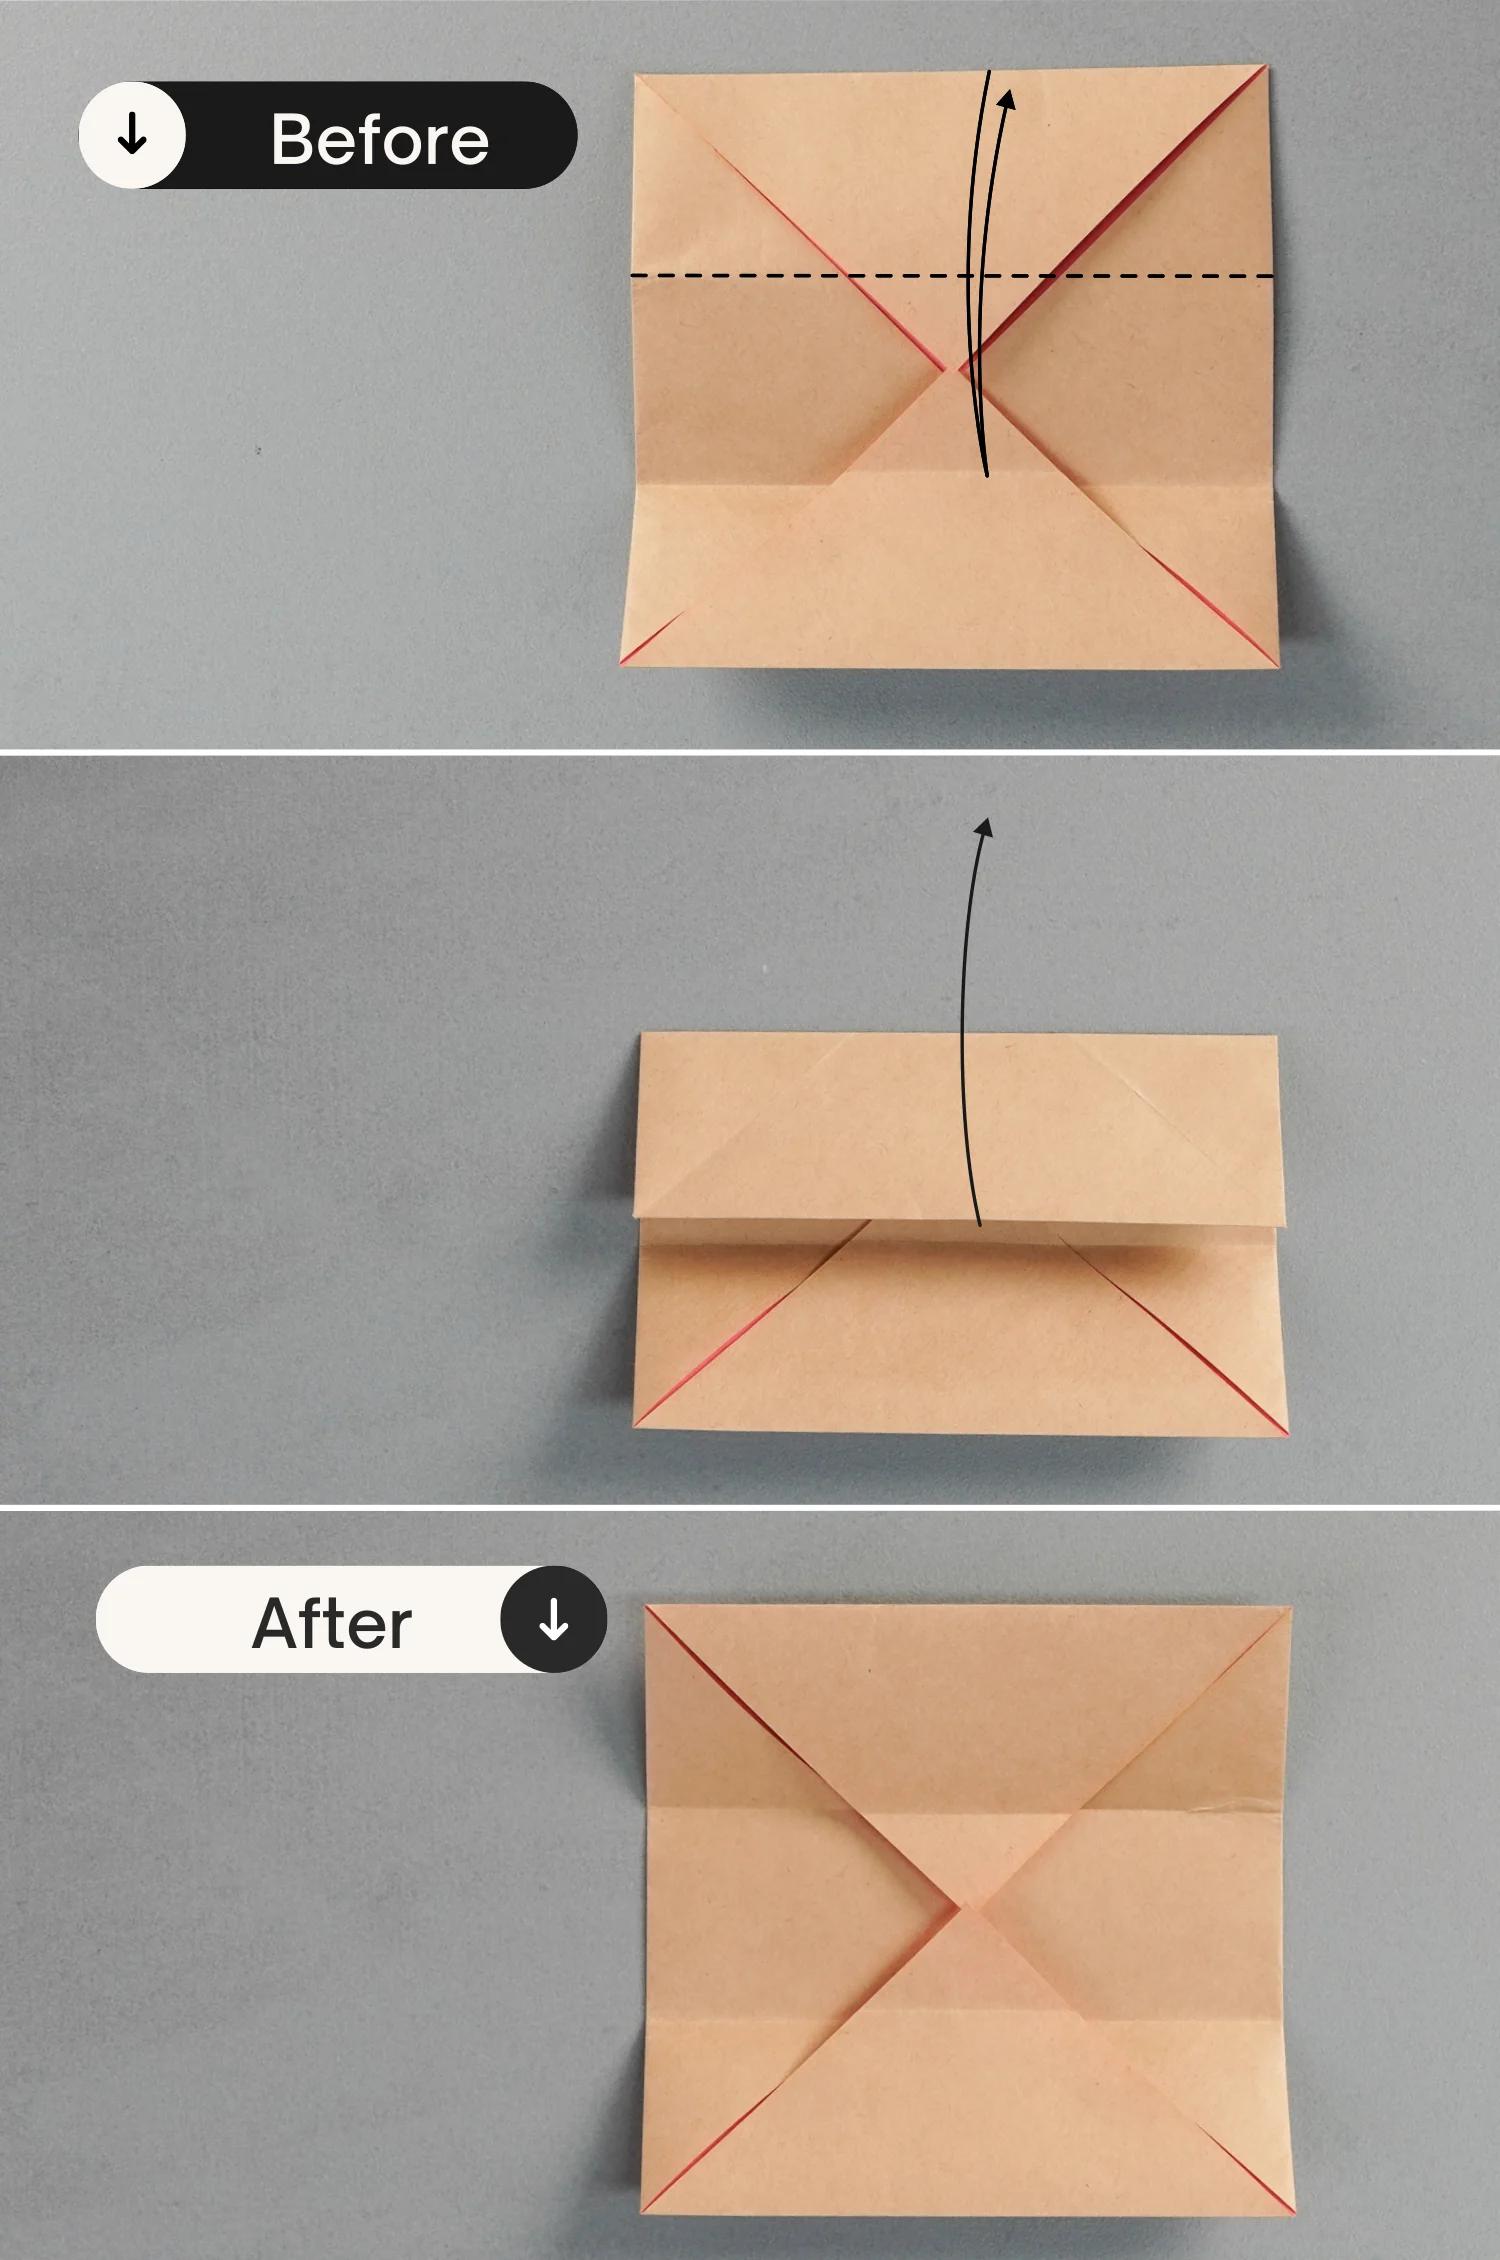
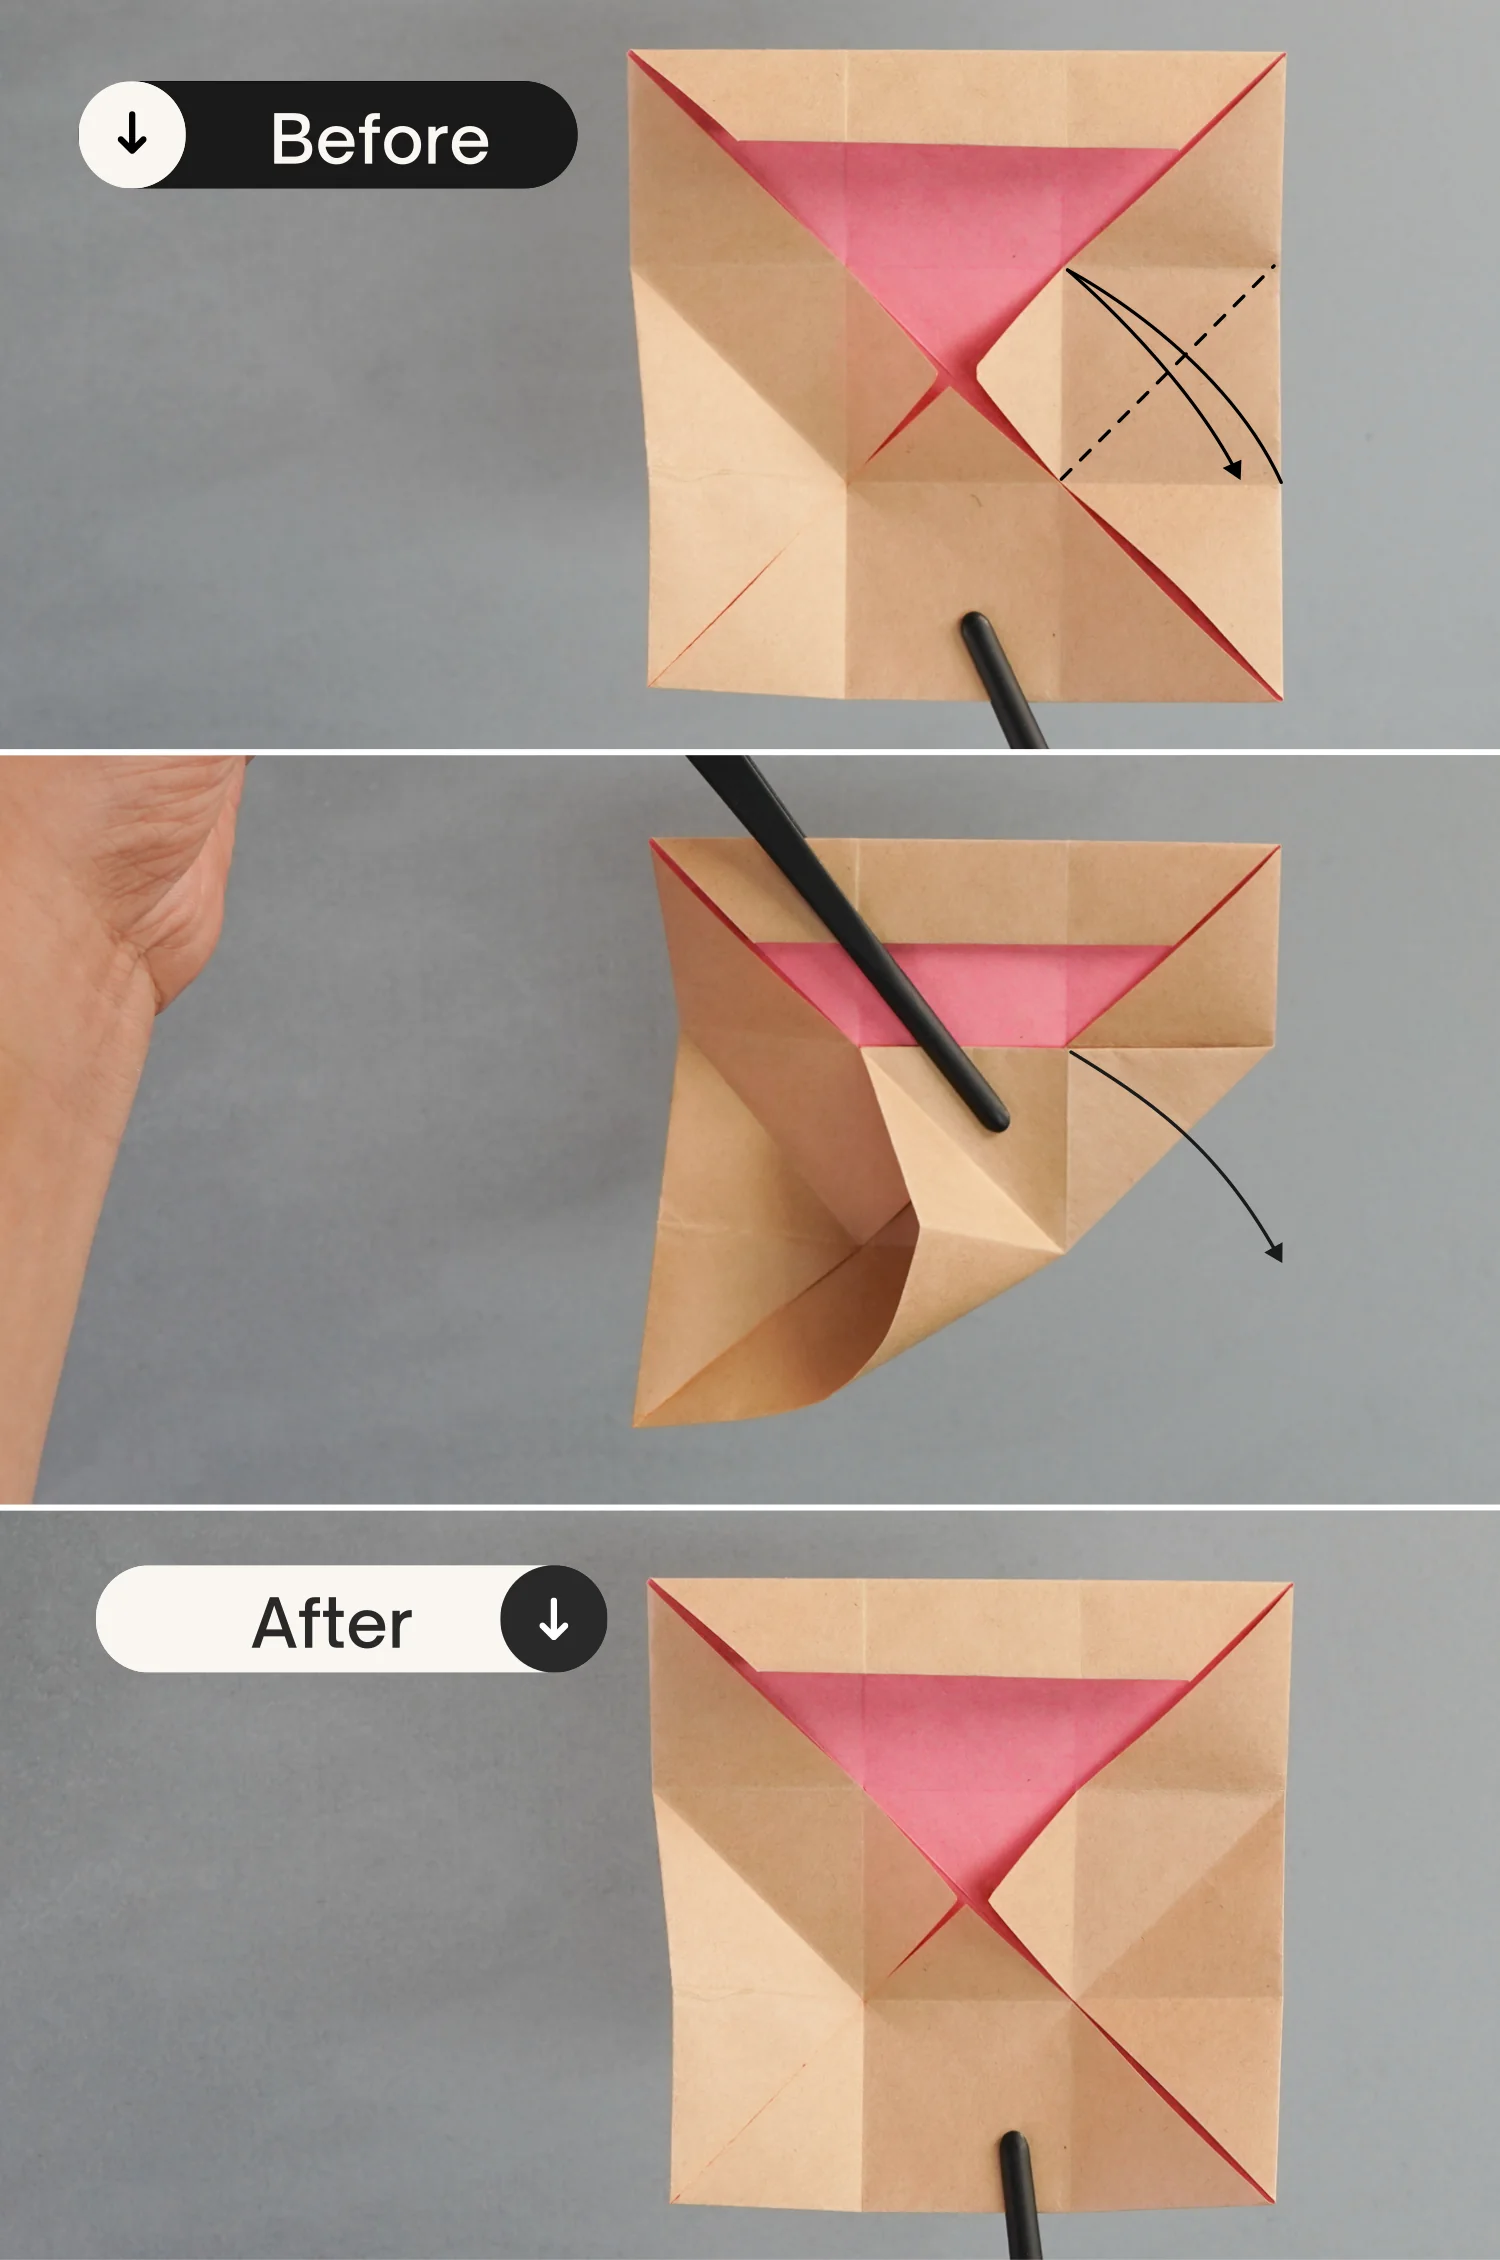
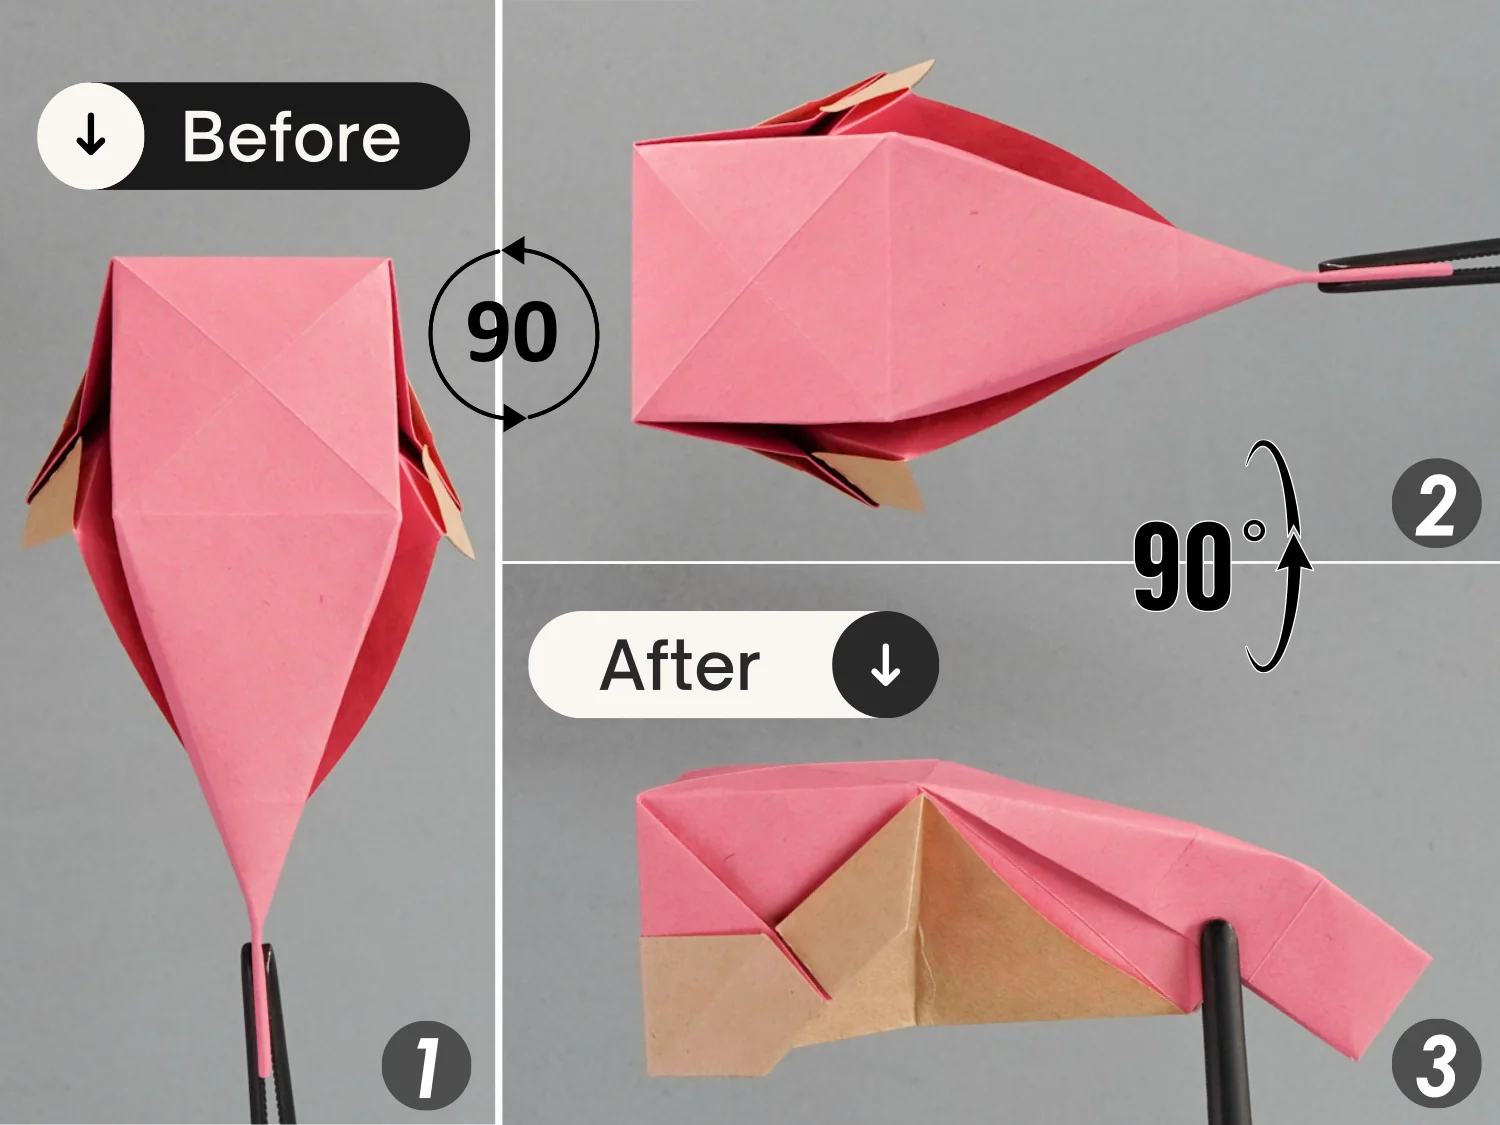
Step 8
Fold down the top edge to align with the lower one of the two creases you just made, and unfold it.
undefined
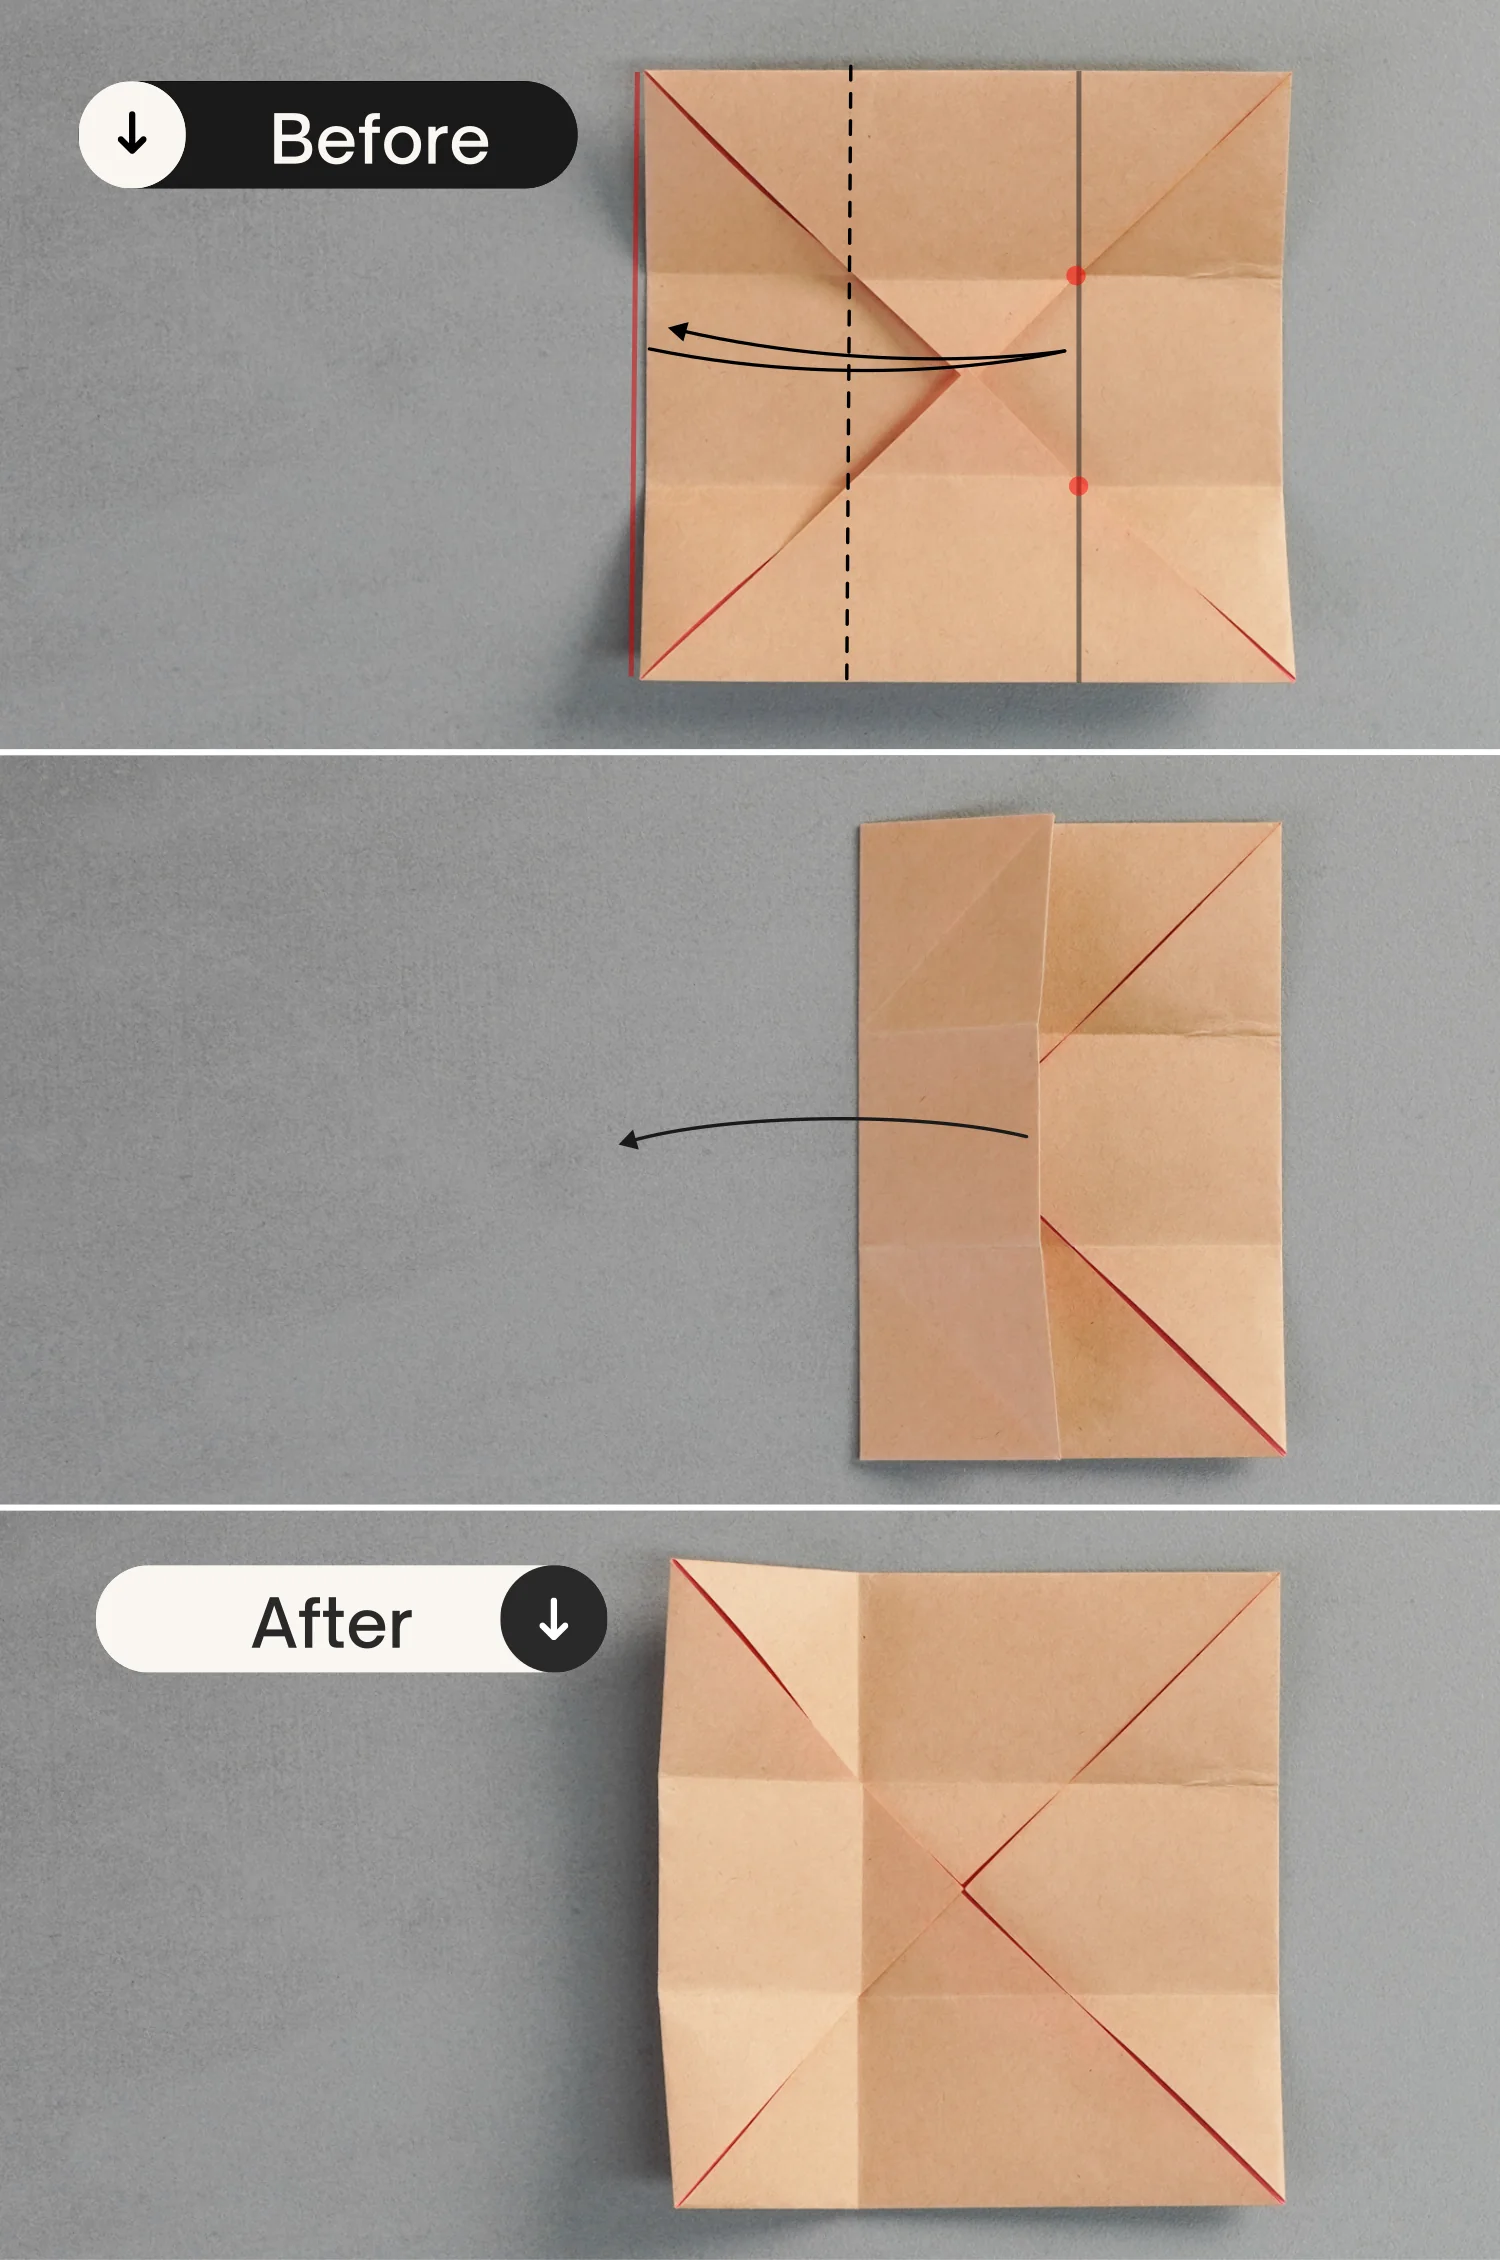
Step 9
Fold the left edge to the right along the dotted line, to align with the line connecting by the two red points. (the red points are formed by the intersection of the two creases you just made and the slits).
Crease it well then unfold.
undefined
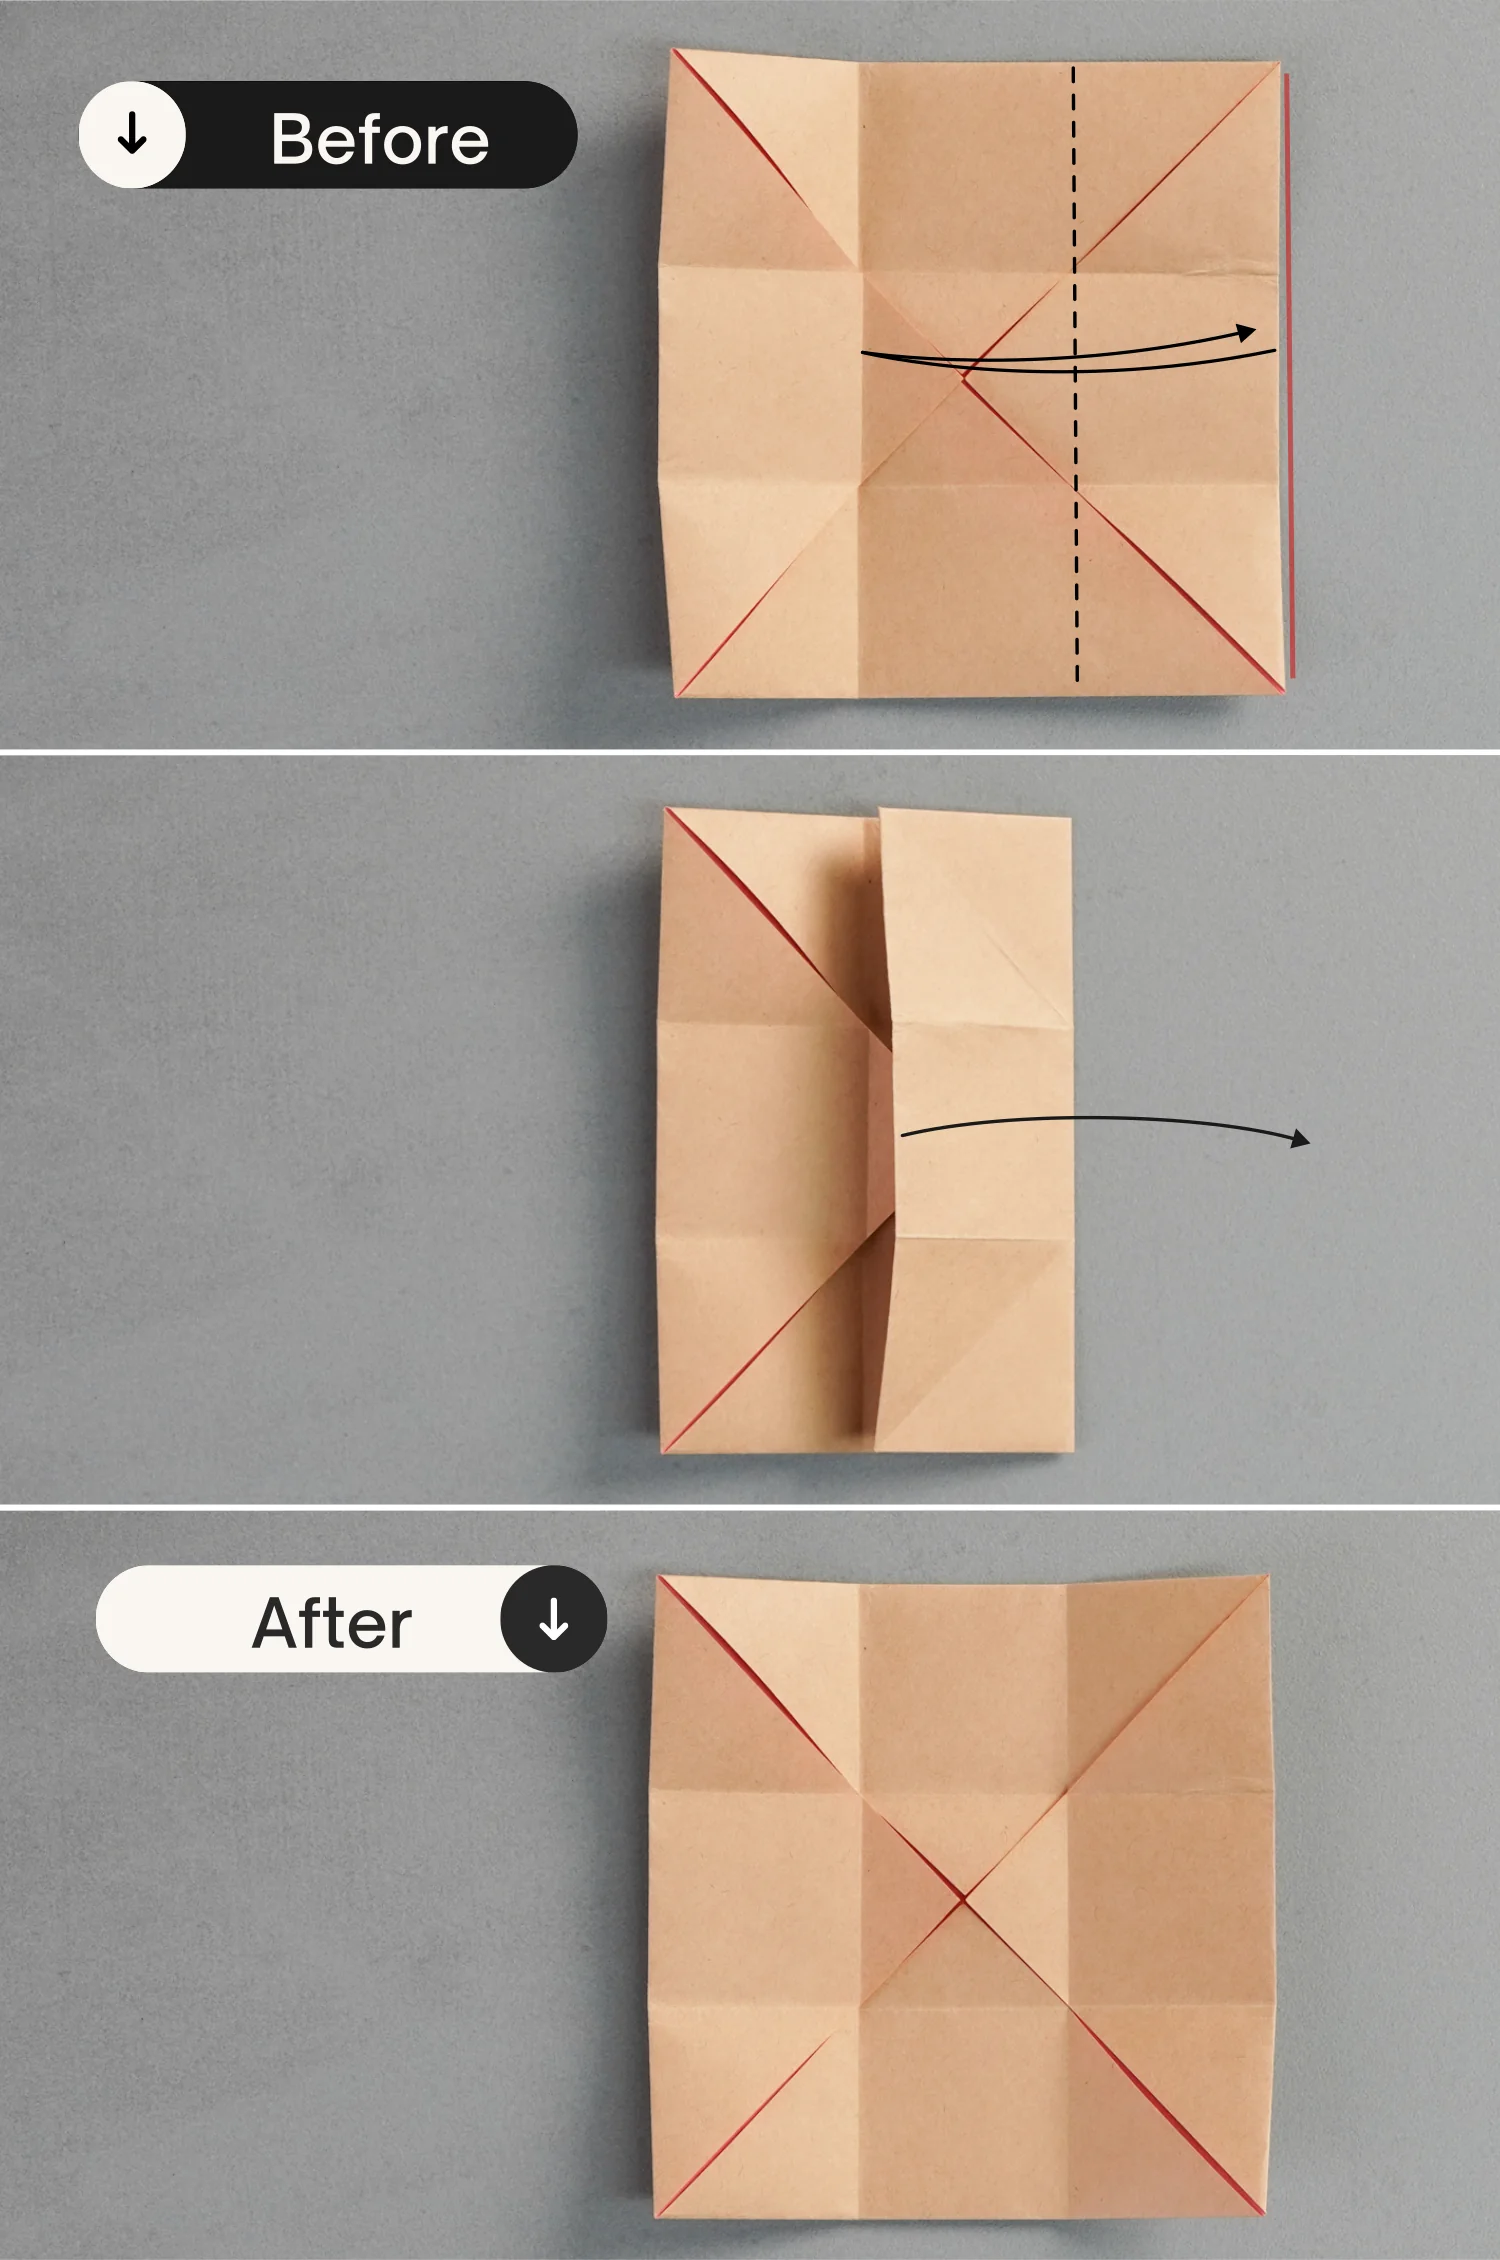
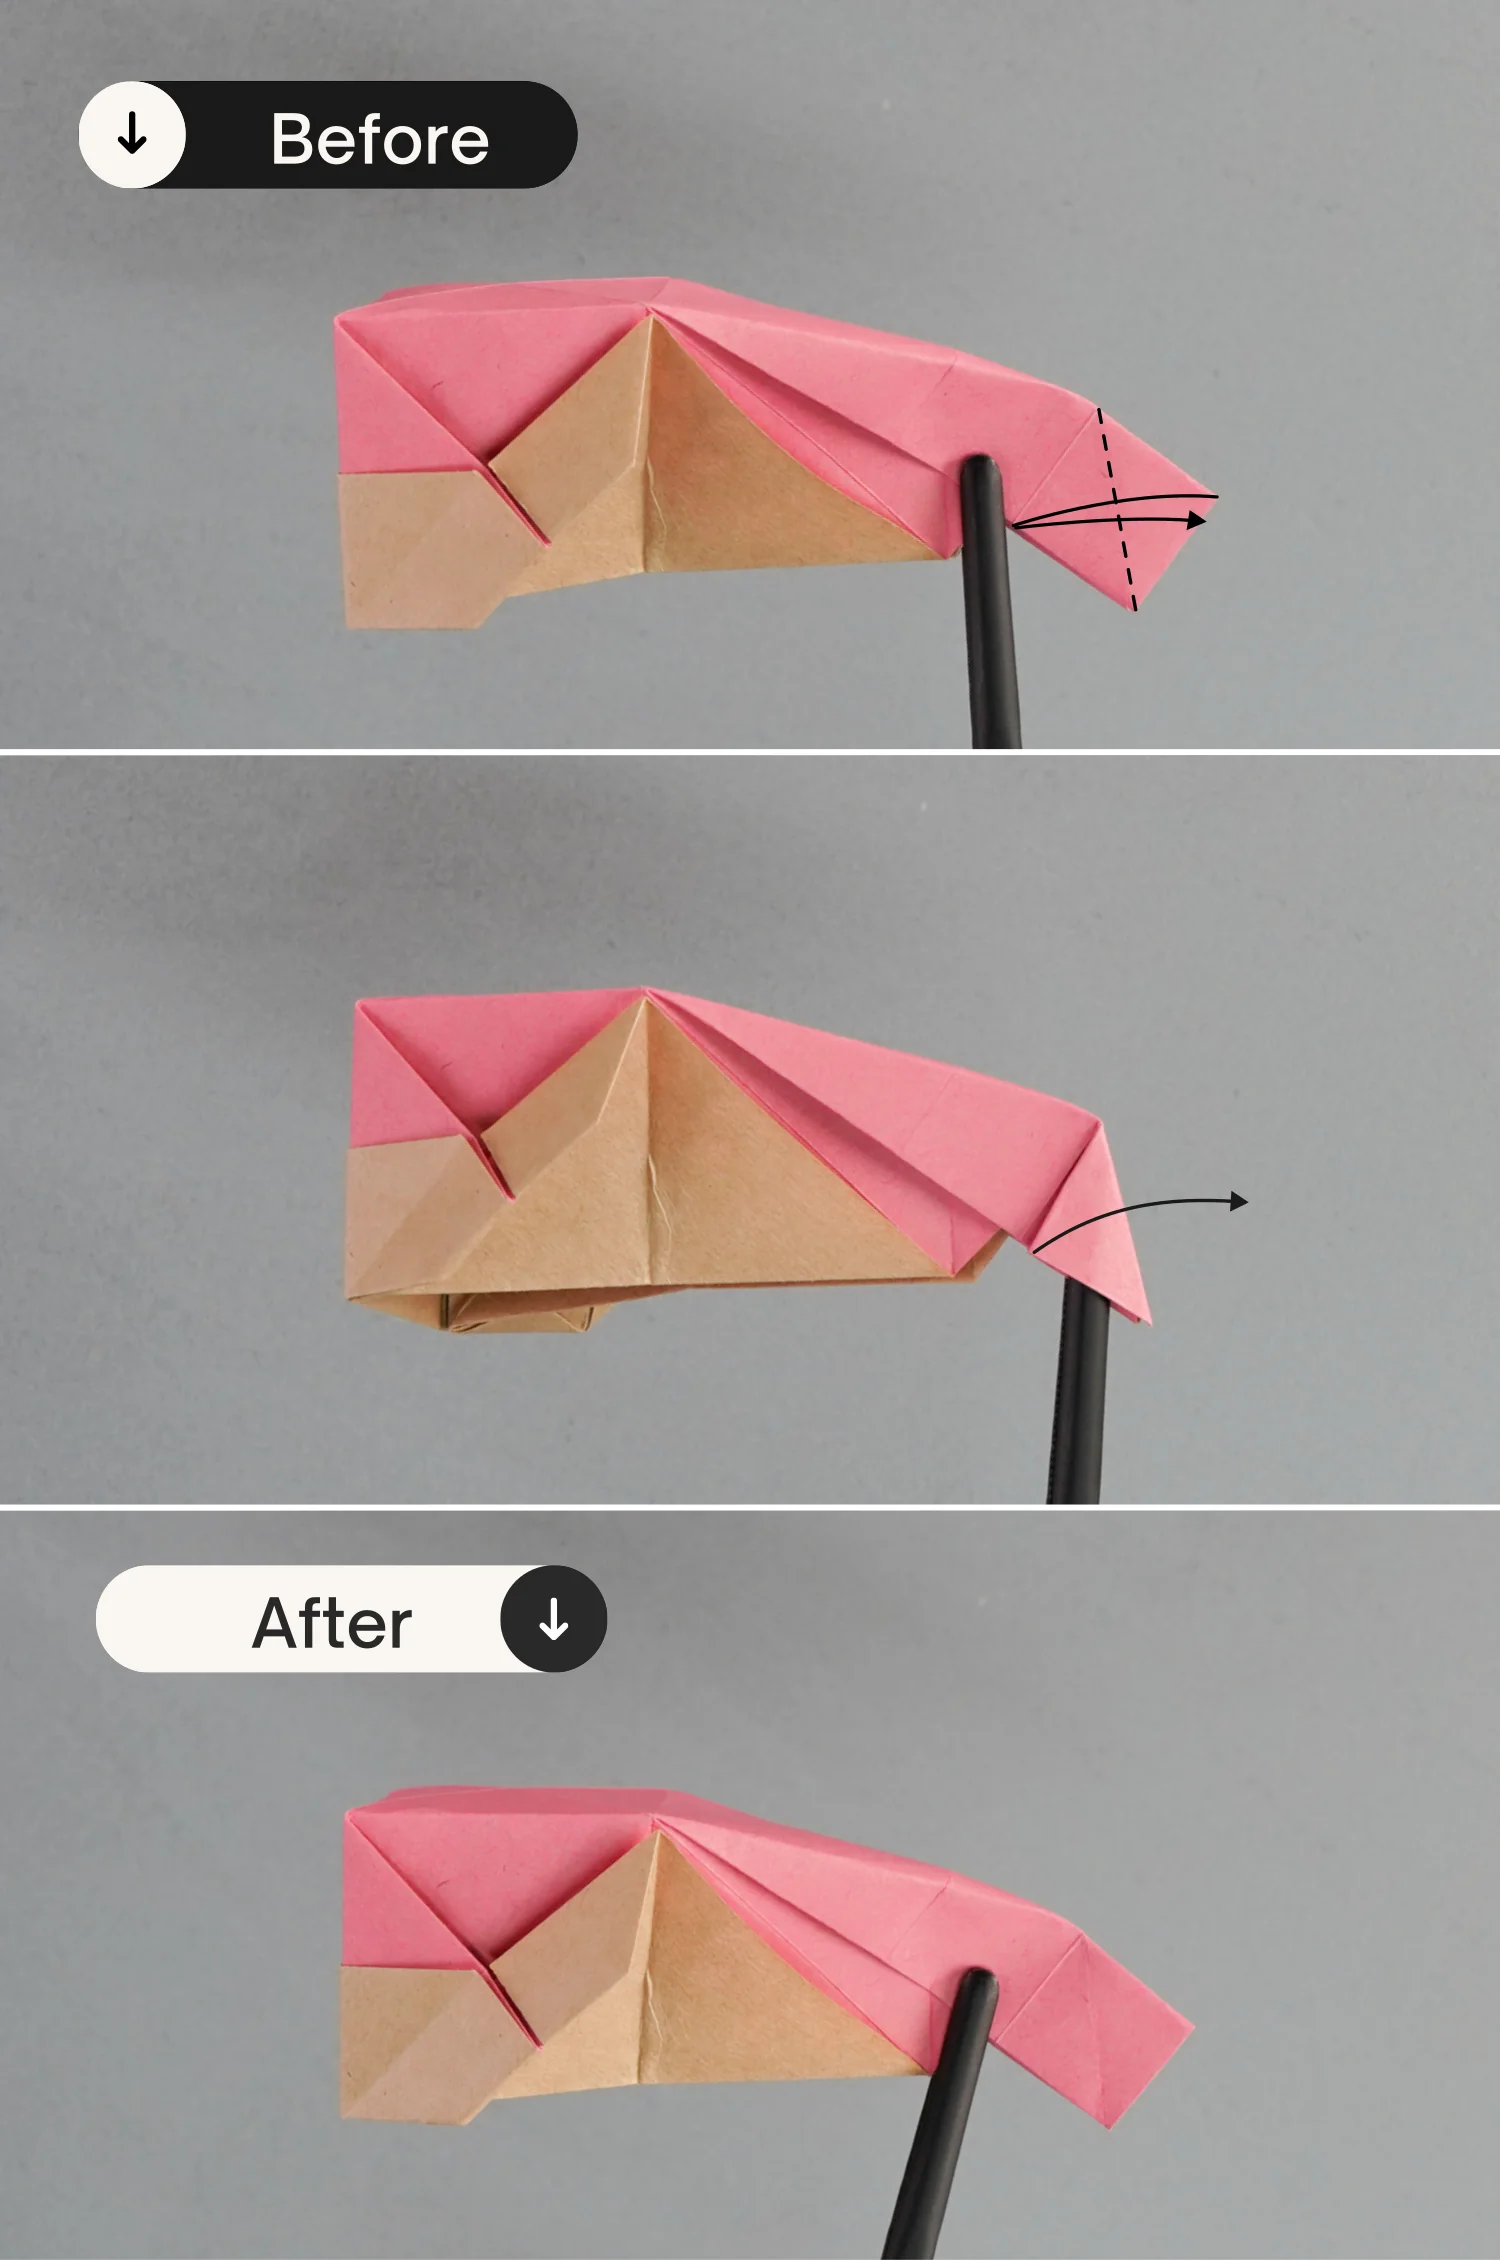
Step 10
Fold the right edge to align with the crease you just made, crease it well, and unfold it.
undefined
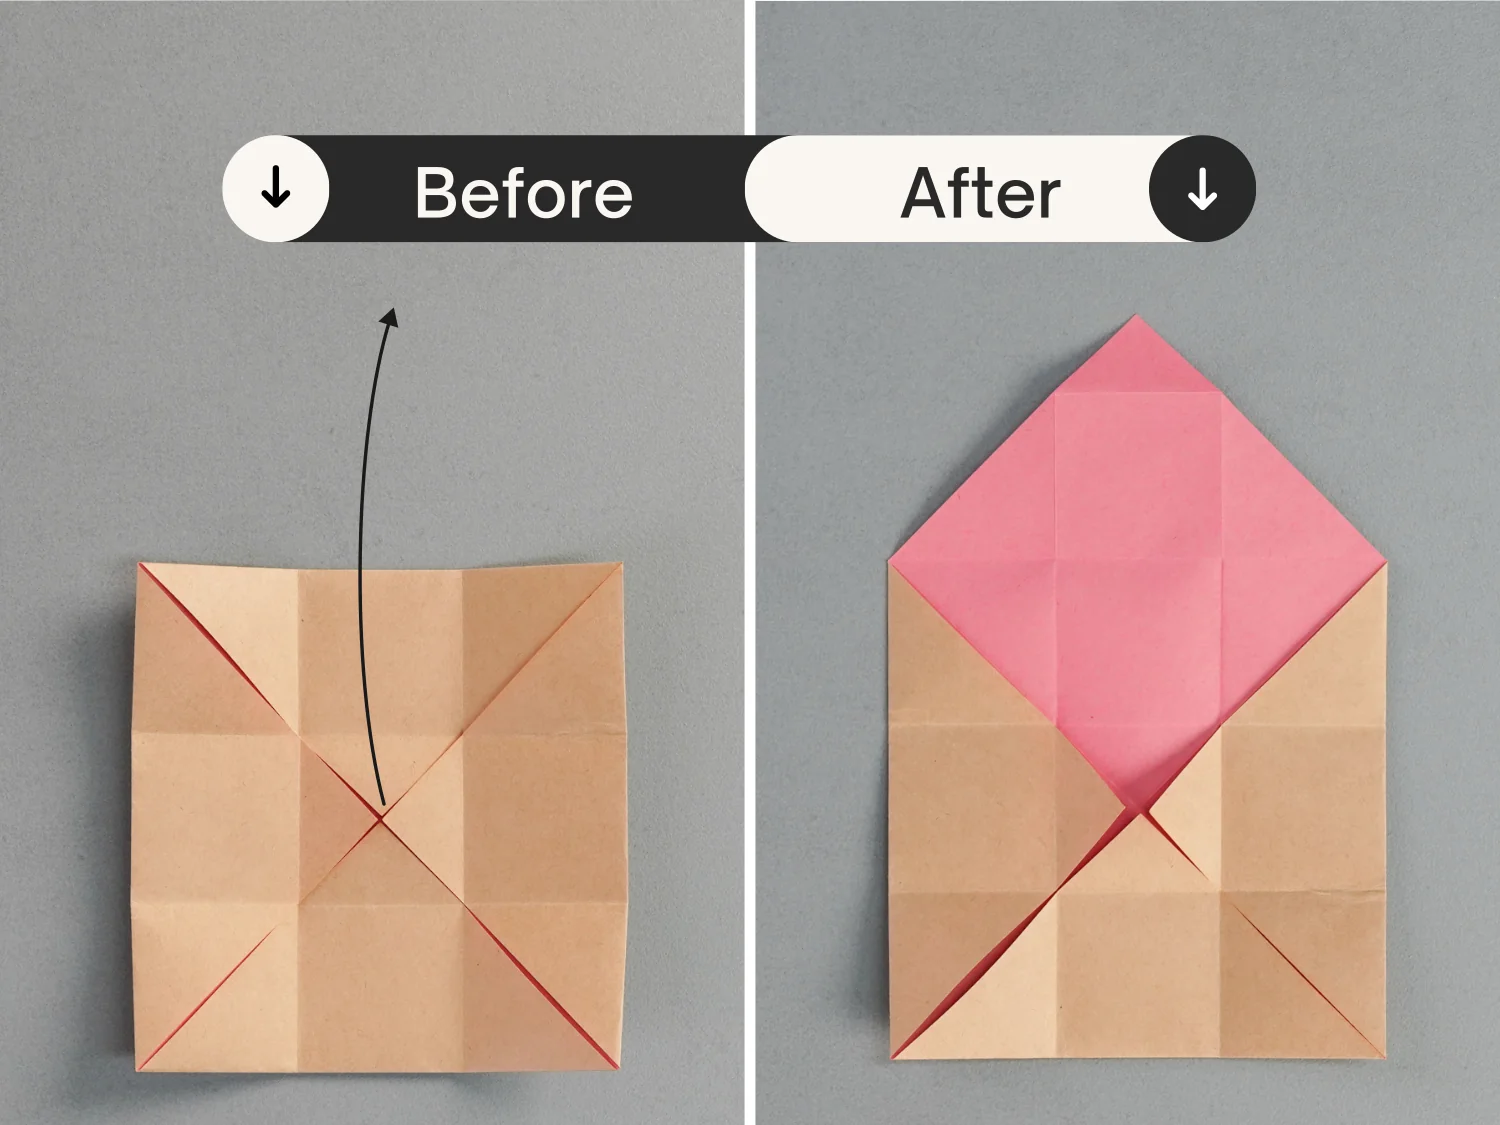
Step 11
Unfold the top triangle.
undefined
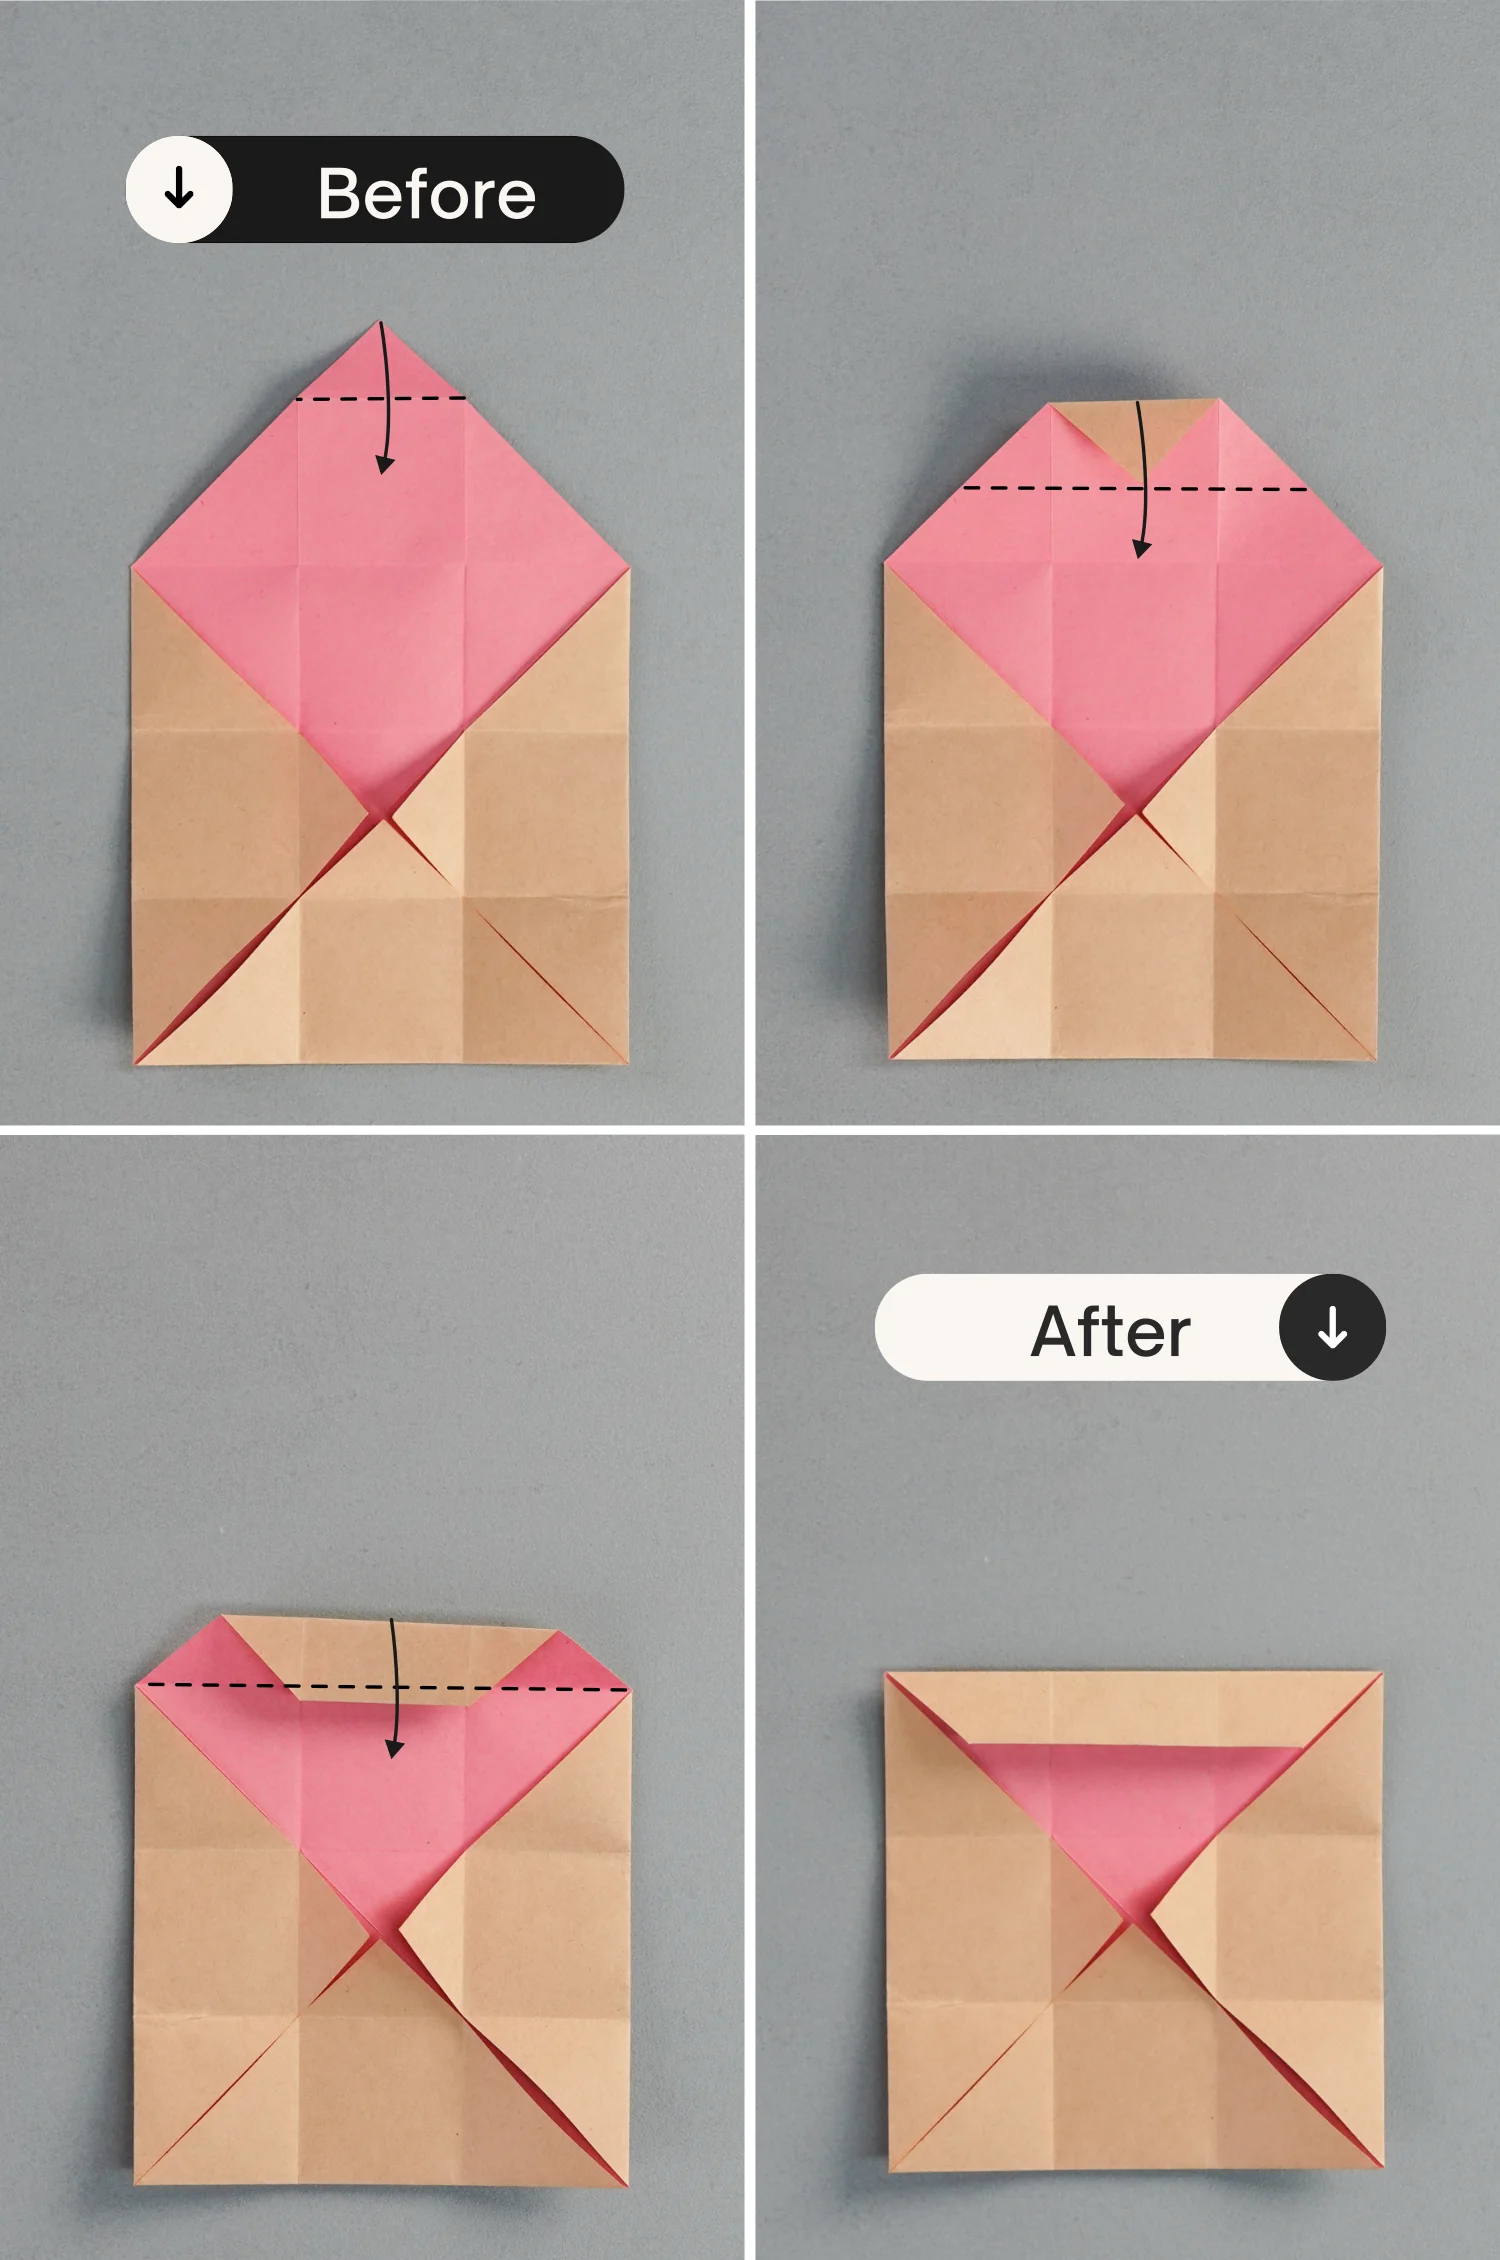
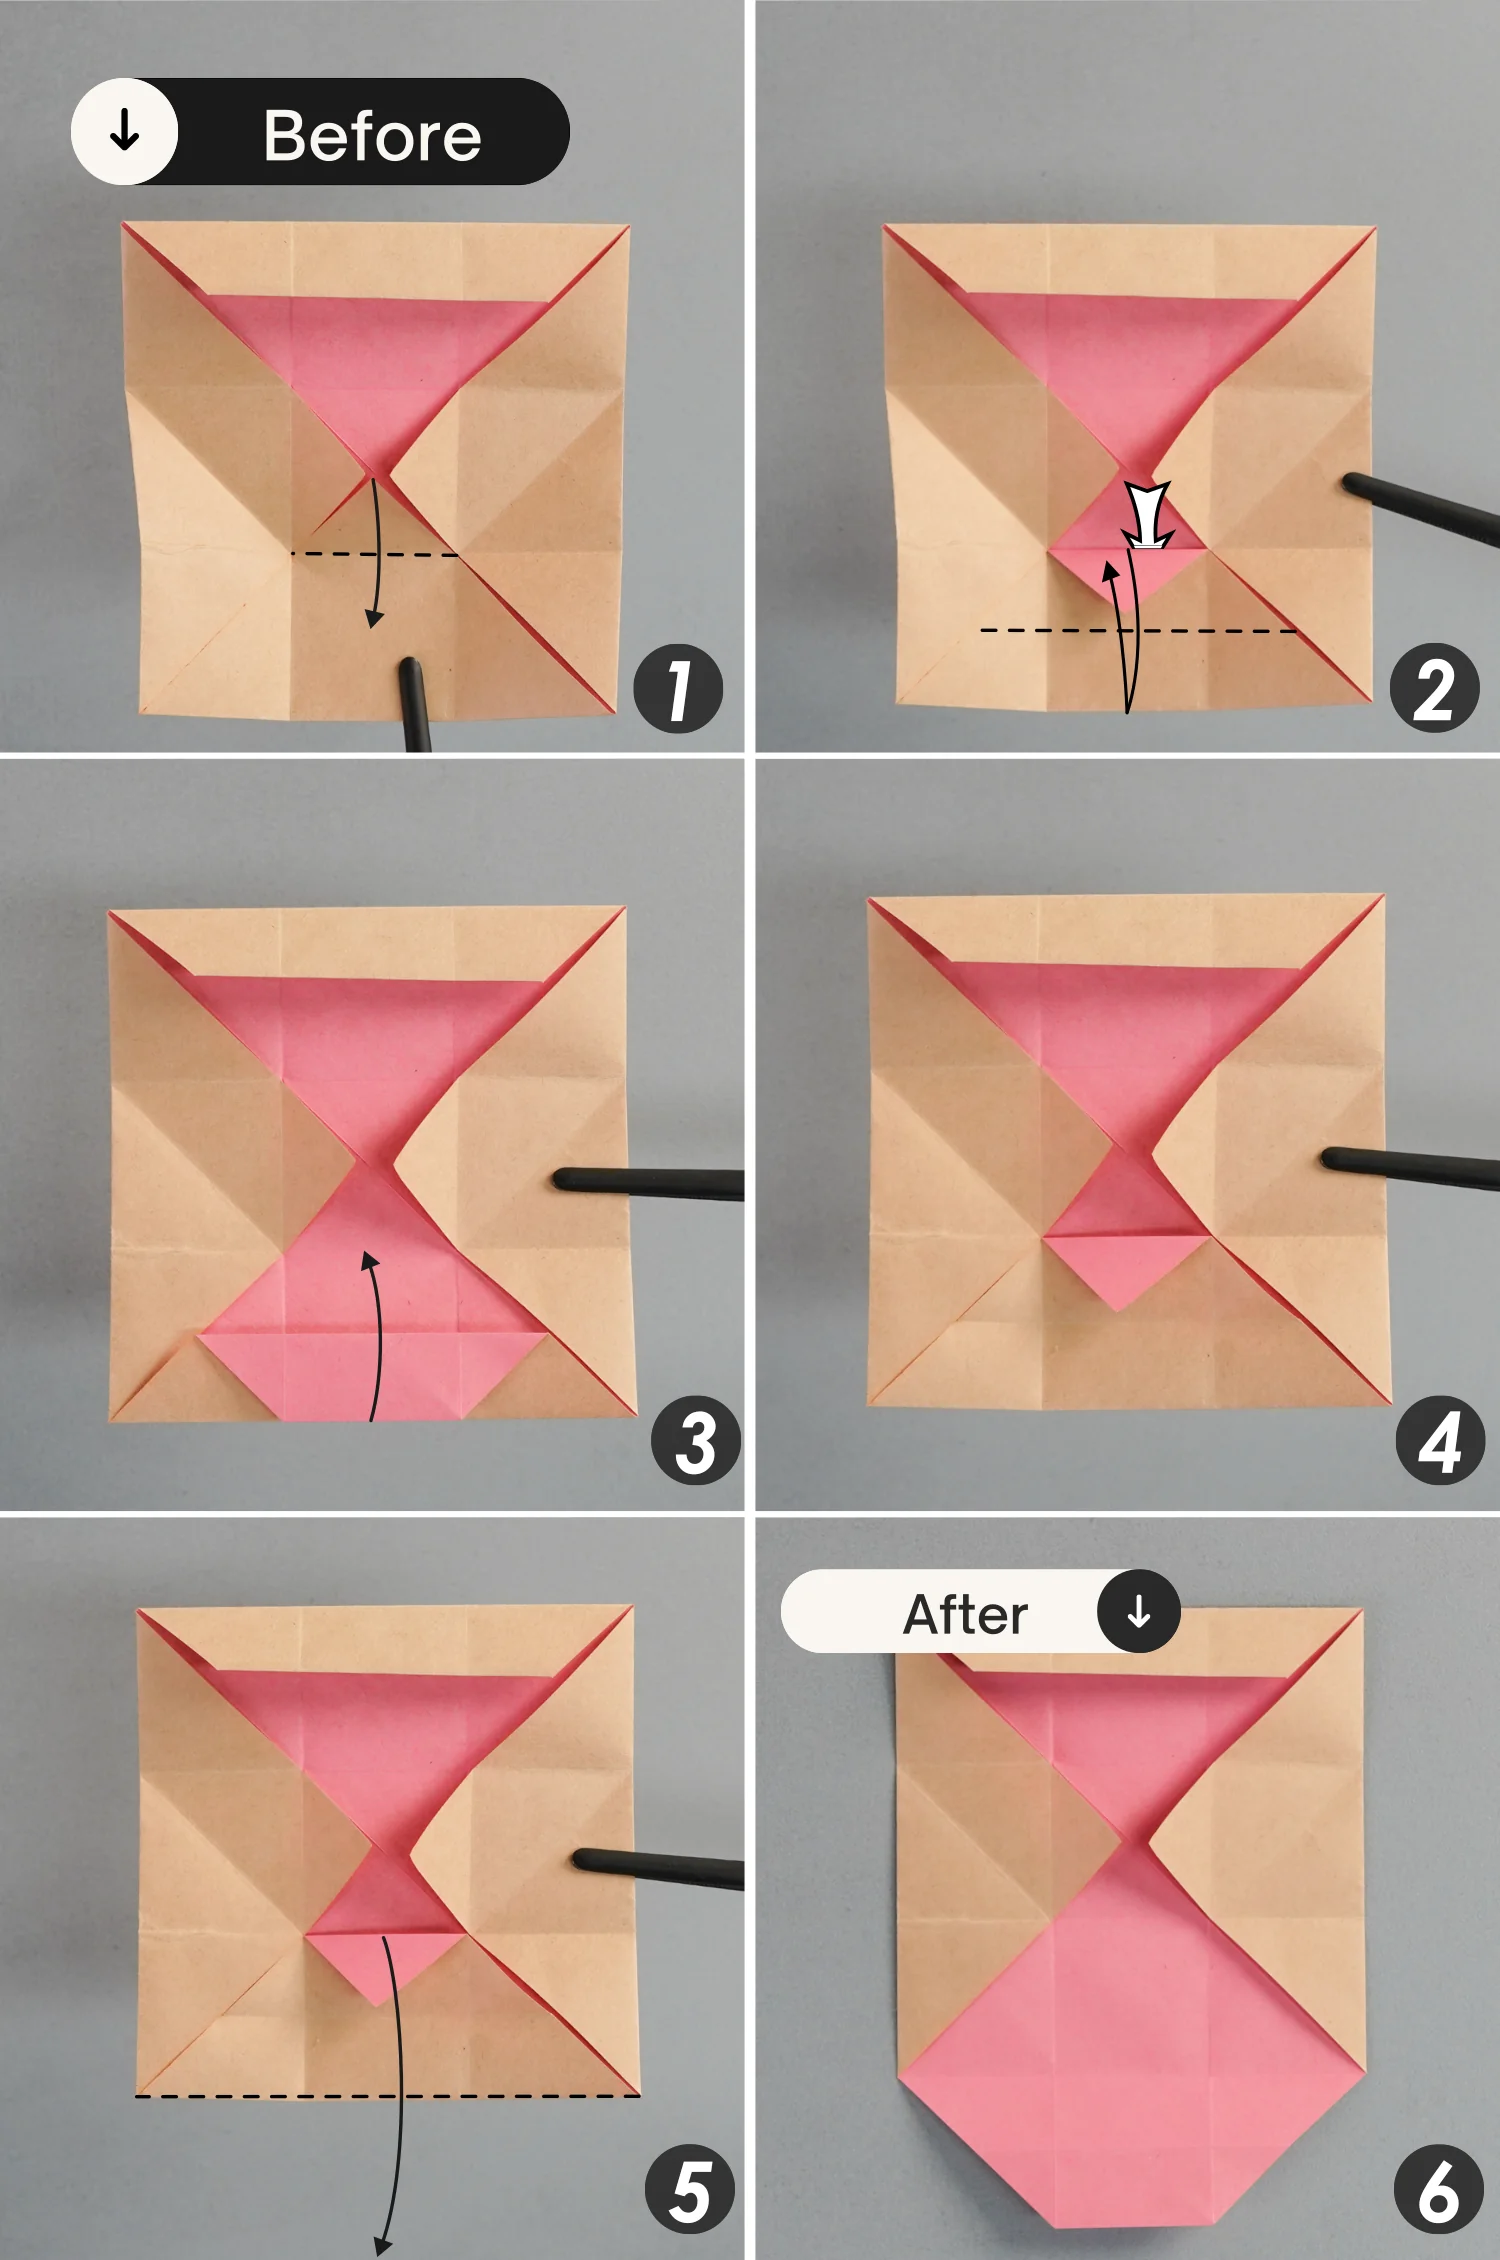
Step 12
Fold the top point down along the crease shown by the dotted line, then fold the top edge of the paper down to align with the top edge of the square. Next, fold the top edge of the paper down along the crease shown by the black dotted line.
undefined
Step 13
Focus on the left triangle, and fold the left edge to align with the upper horizontal crease on it, leaving a crease, and unfold it.
undefined
Step 14
Similarly, fold the right edge of the right triangle to align with the upper horizontal crease, and unfold it.
undefined
Step 15
Fold the top point of the bottom triangle down along the crease indicated by the dotted line, then fold the top edge of this triangle down to align with its bottom edge, leaving a crease then unfold it. Next, unfold this bottom layer.
undefined
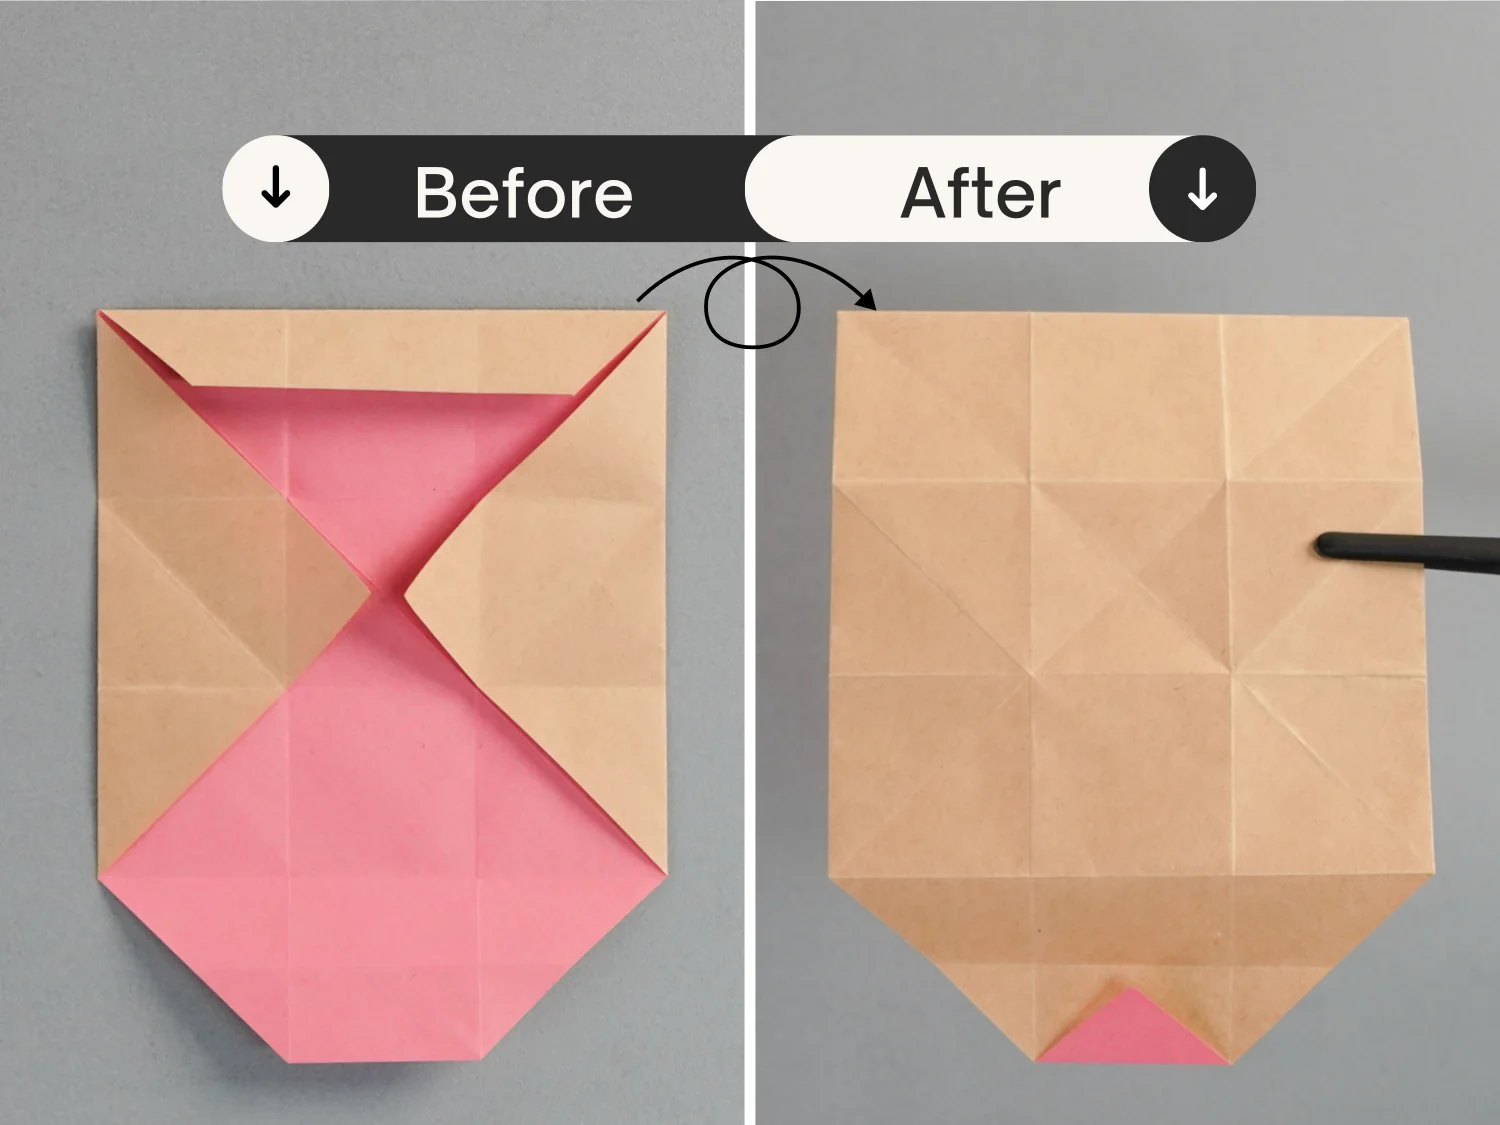
Step 16
Turn over the paper.
undefined
Step 17
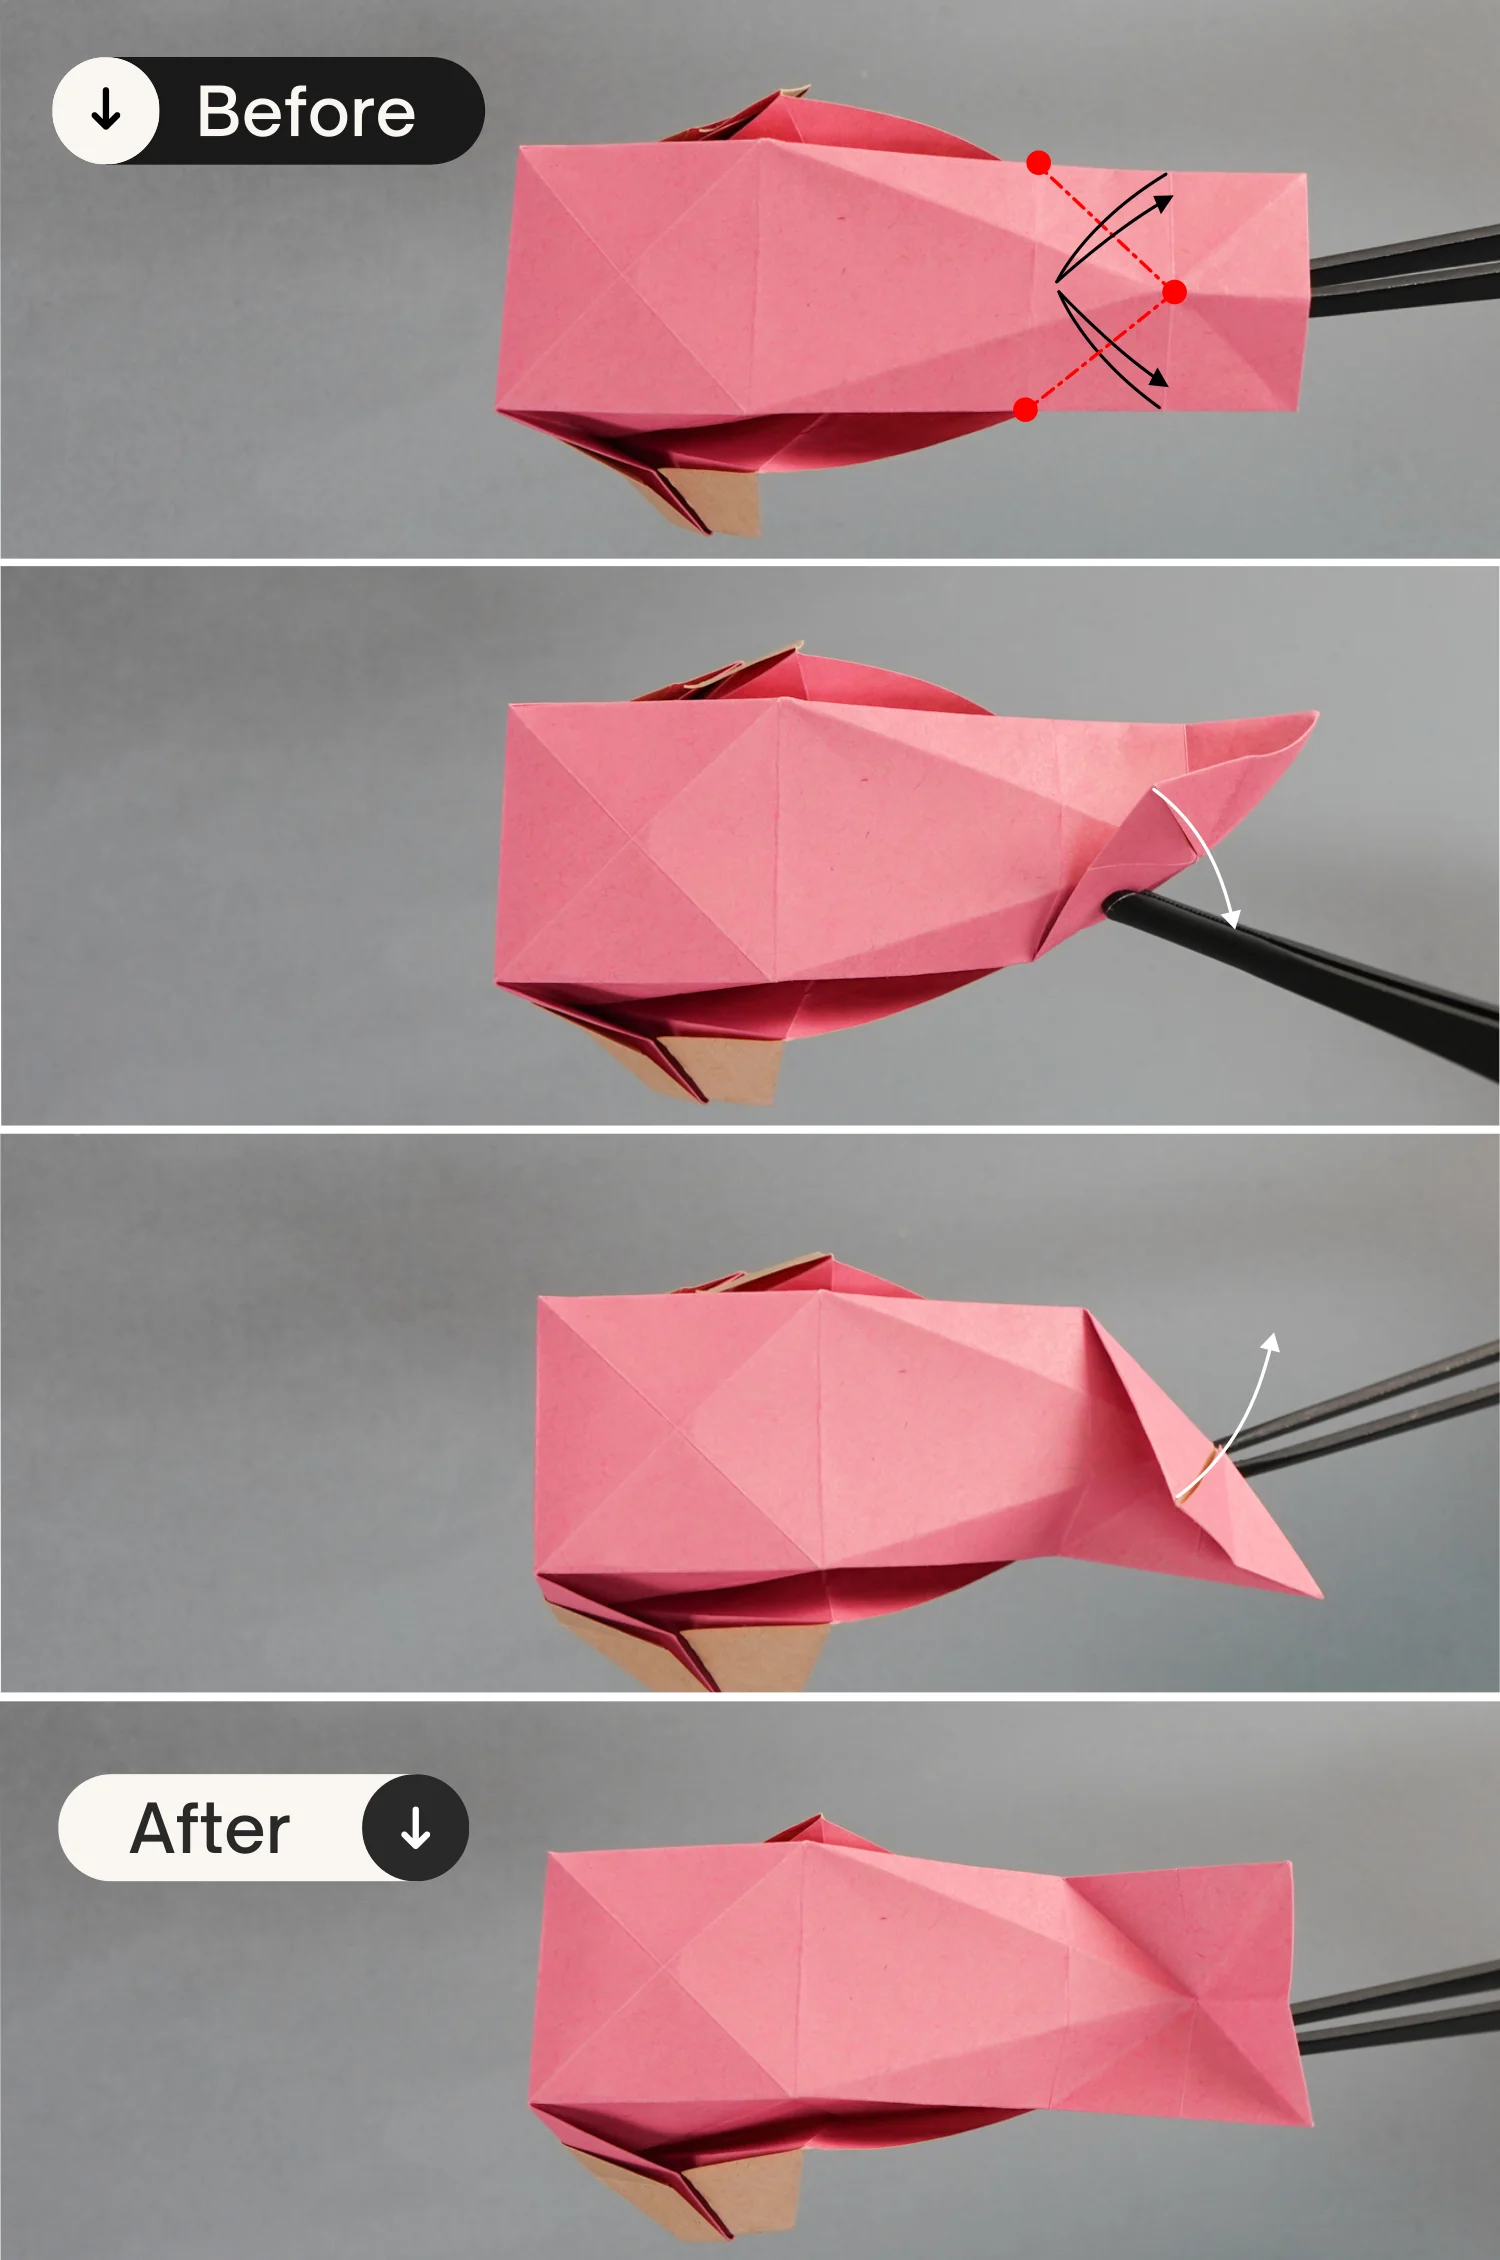
Create two creases as the picture shows indicated by the red dotted lines, these dotted lines connect two intersection points.
undefined
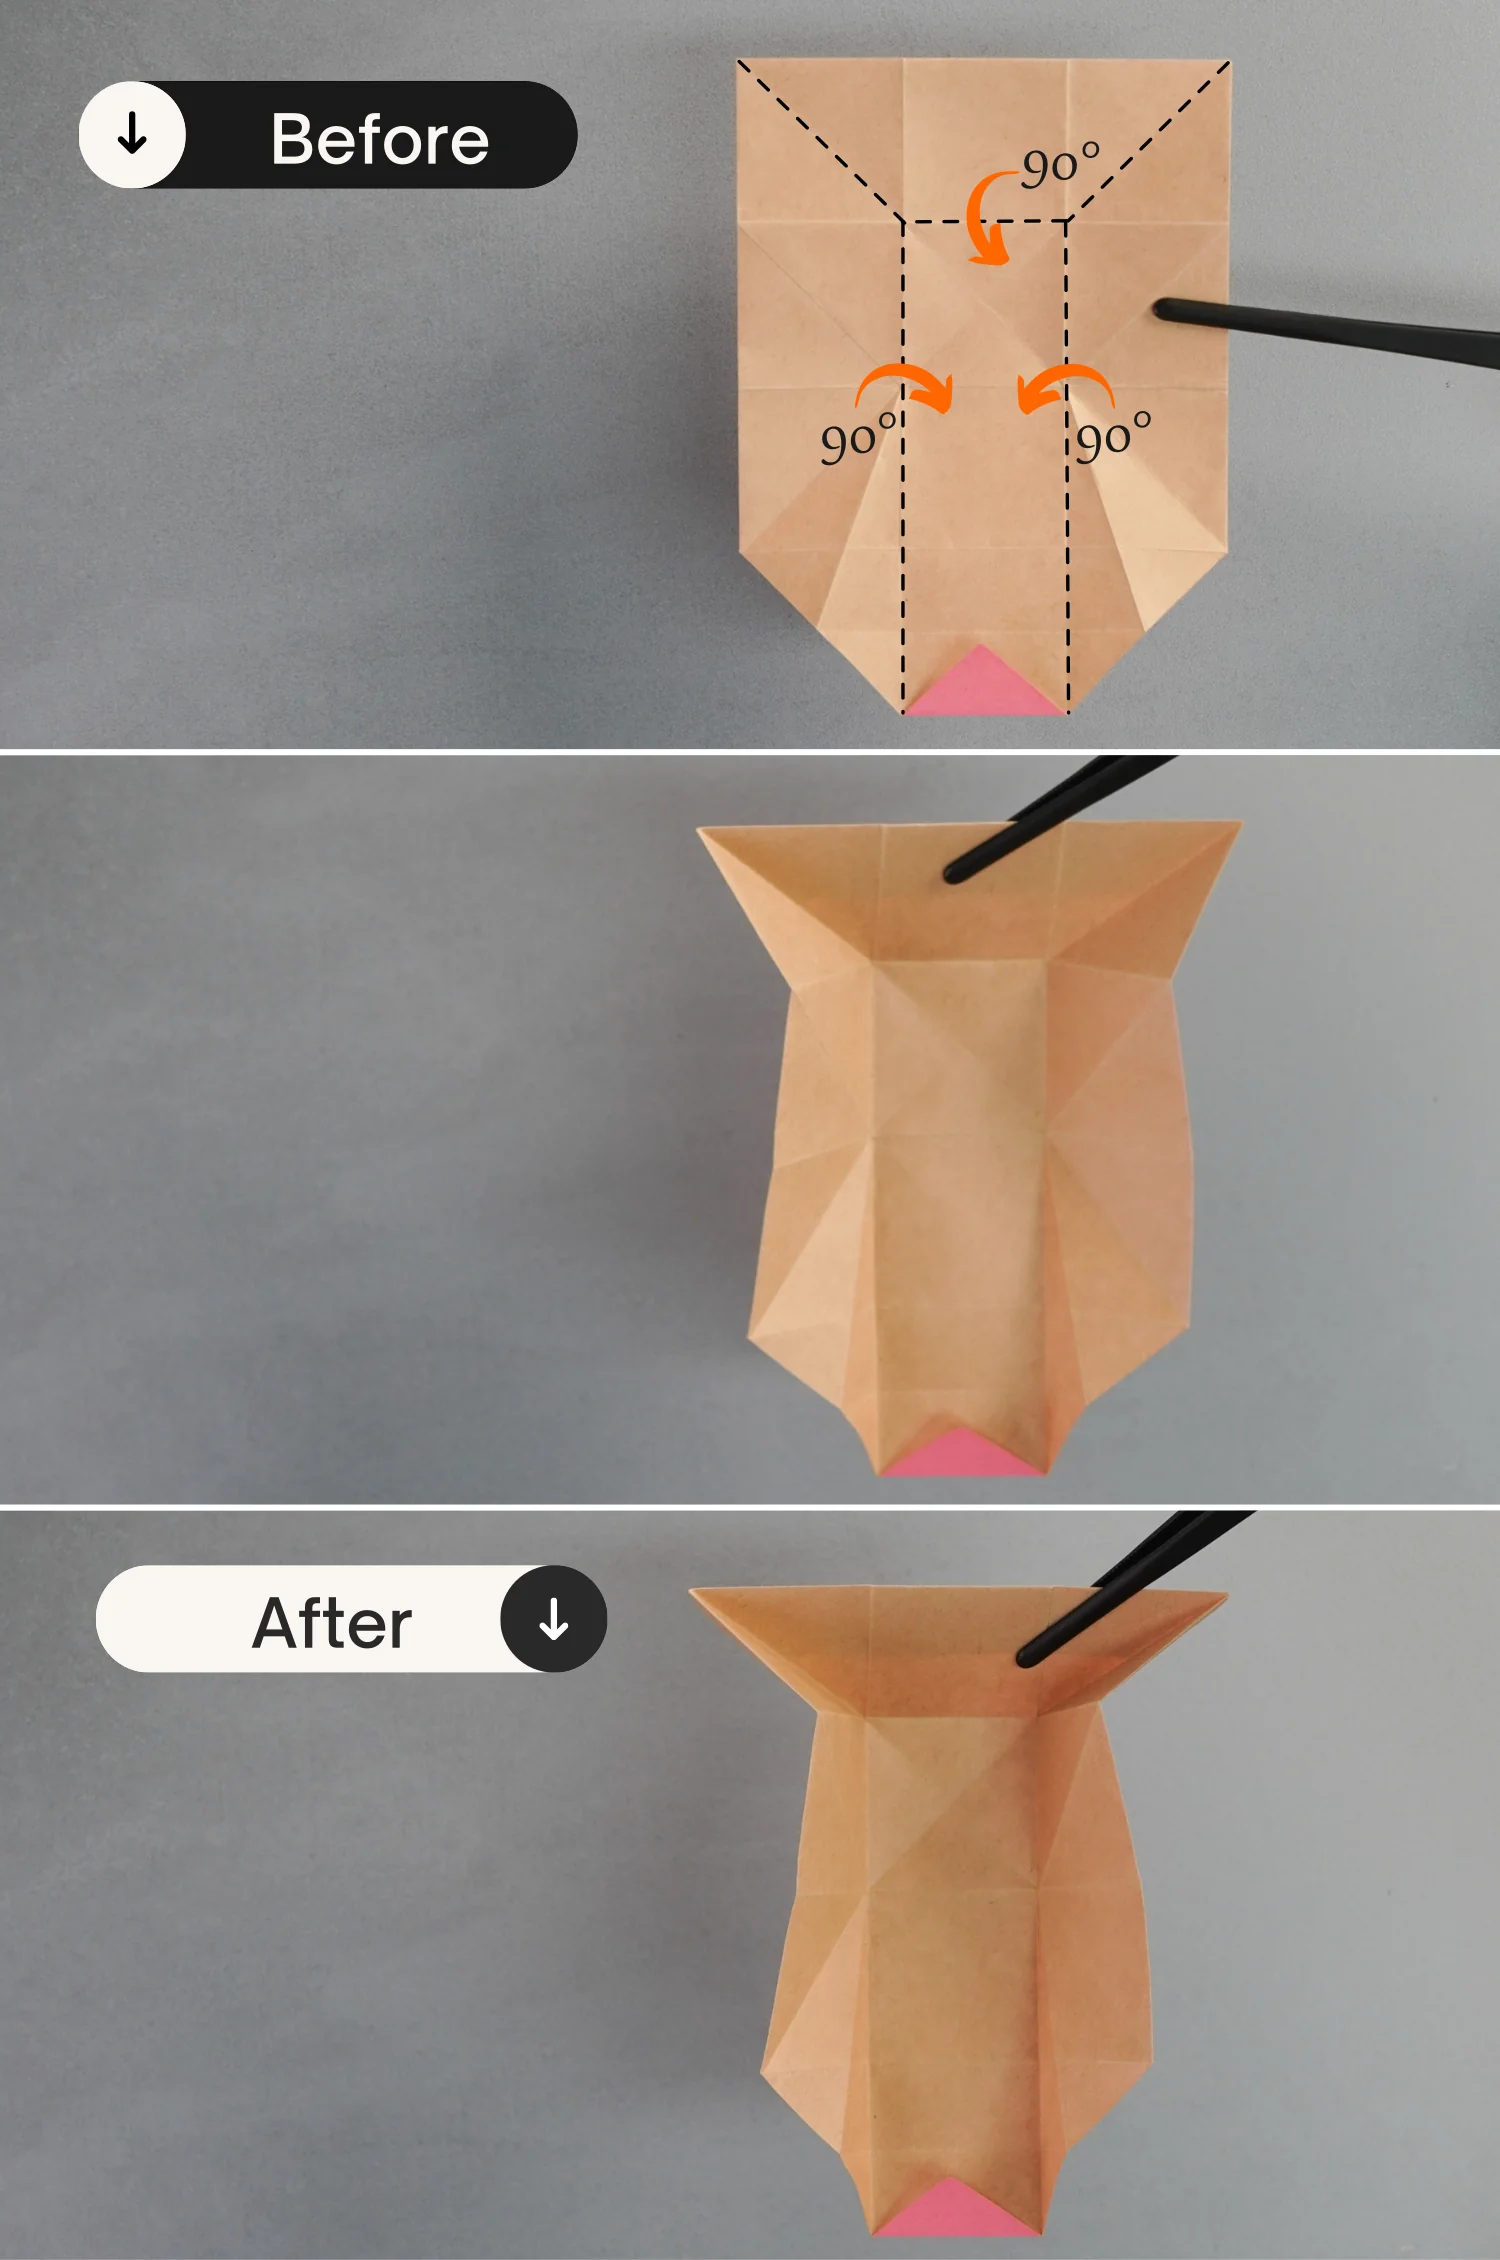
Step 18
Bring up the top, left, and right edges along the existing creases shown by the dotted lines, creating three standing edges.
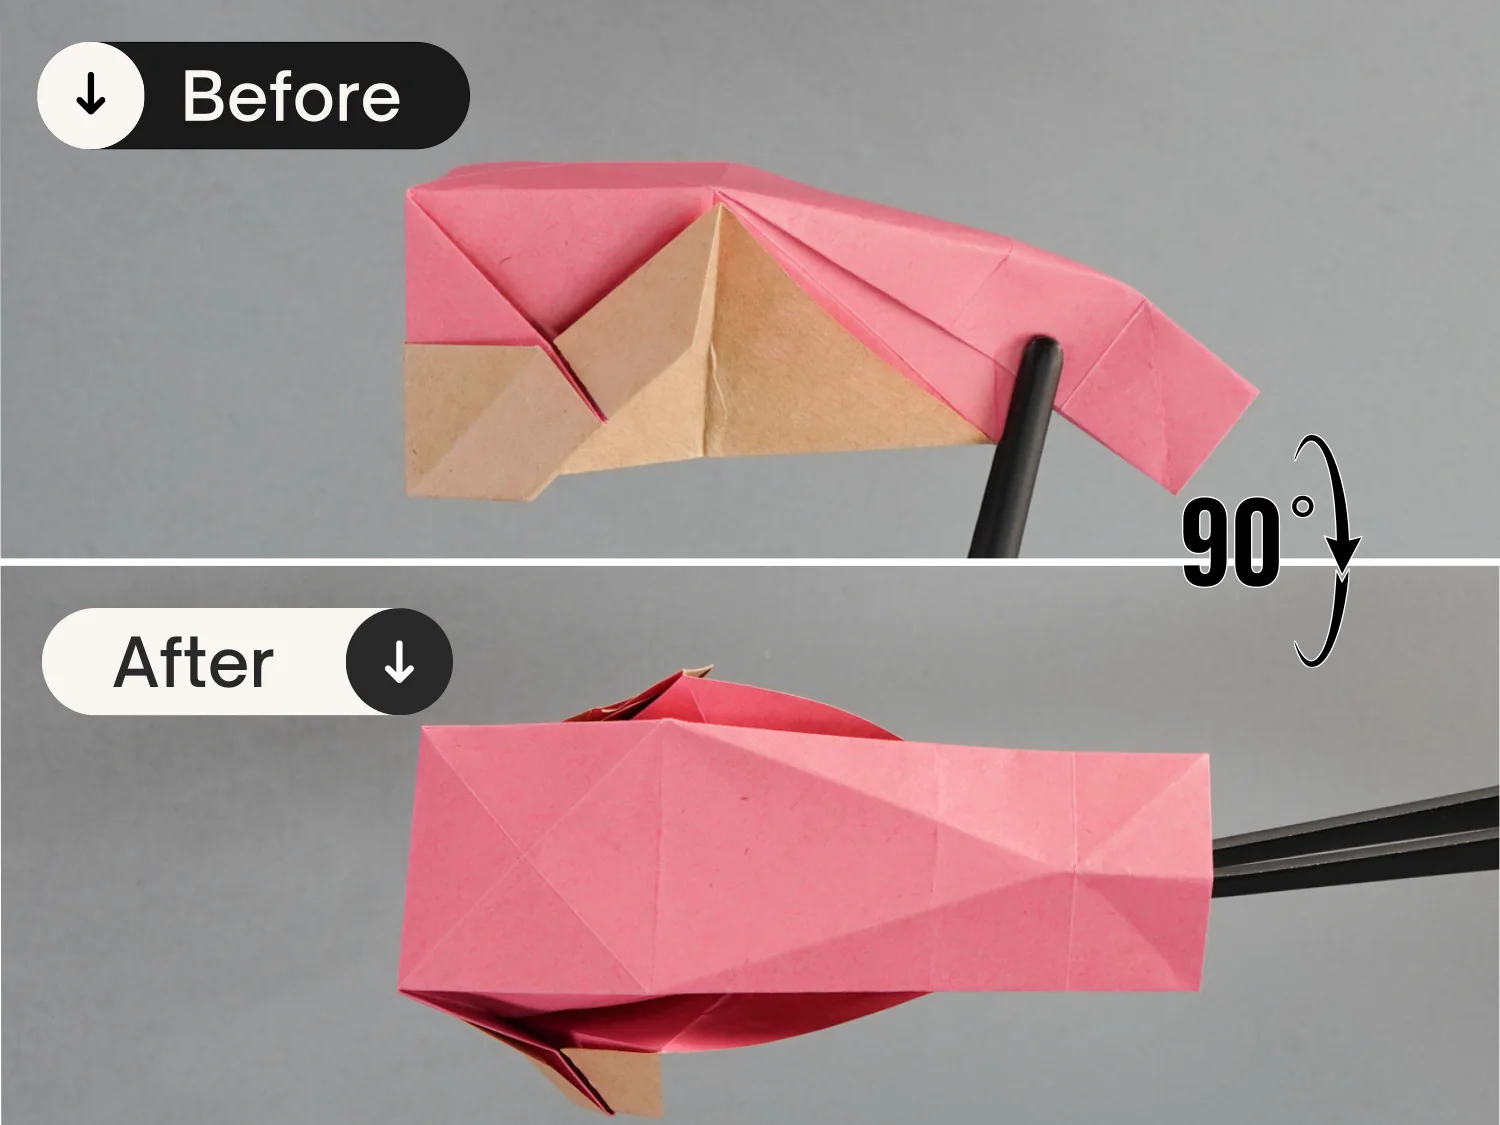
undefined
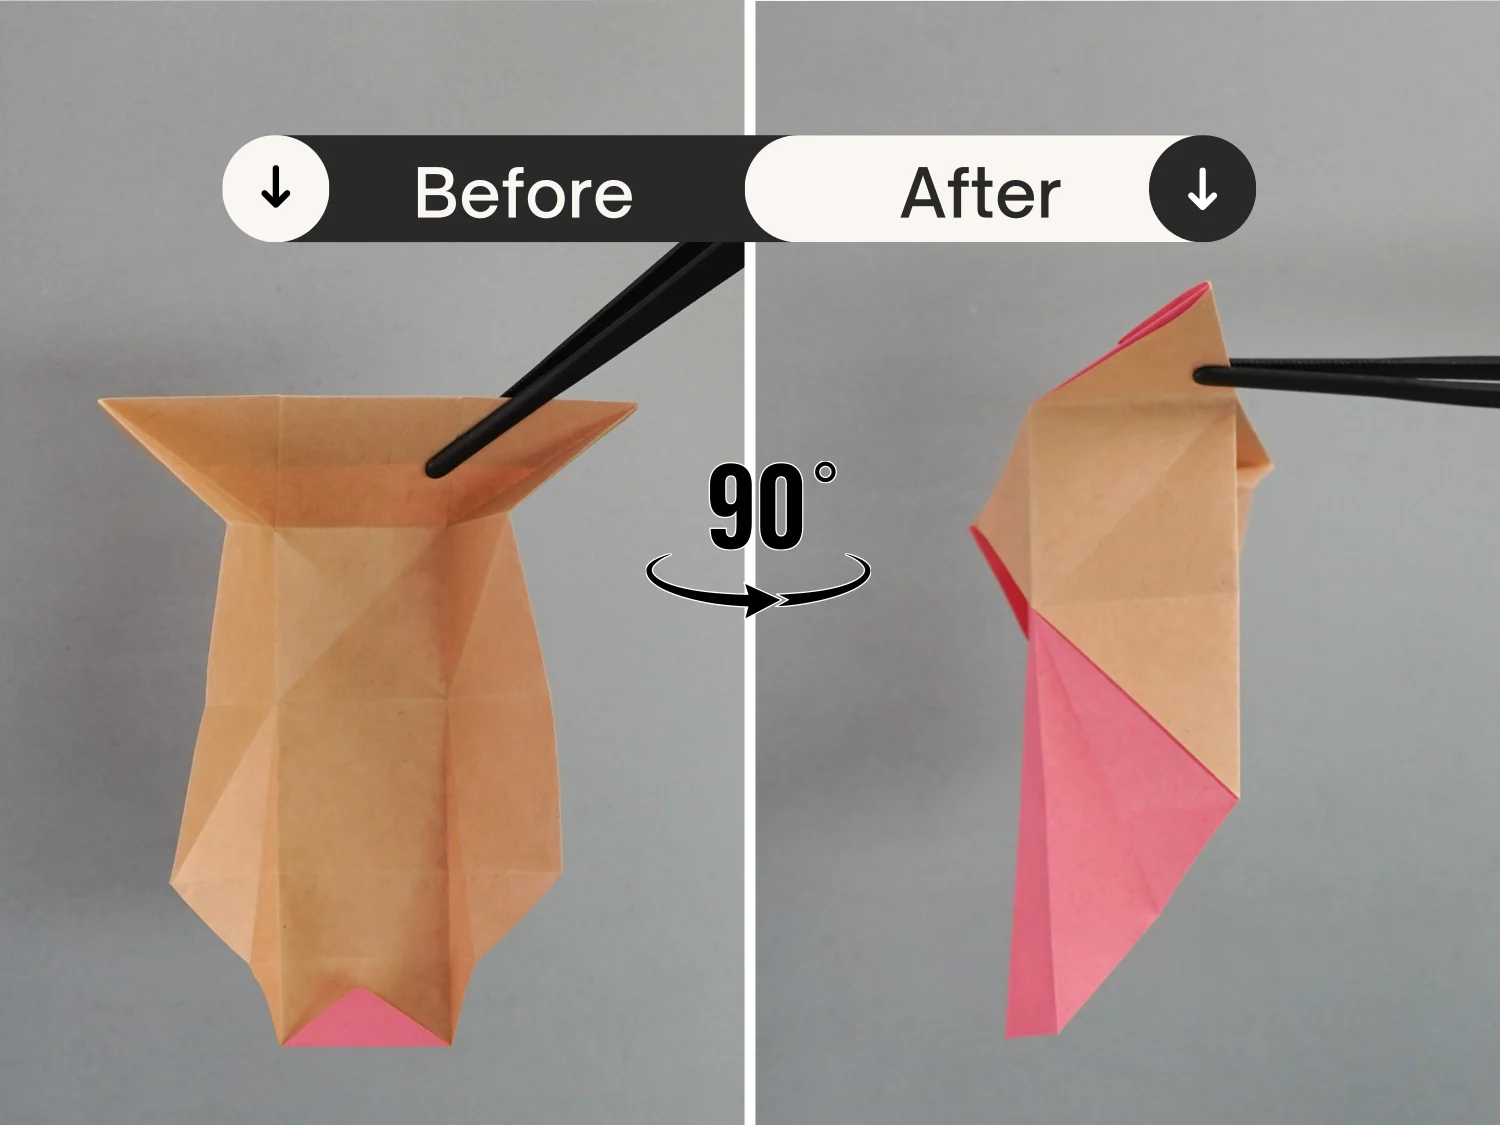
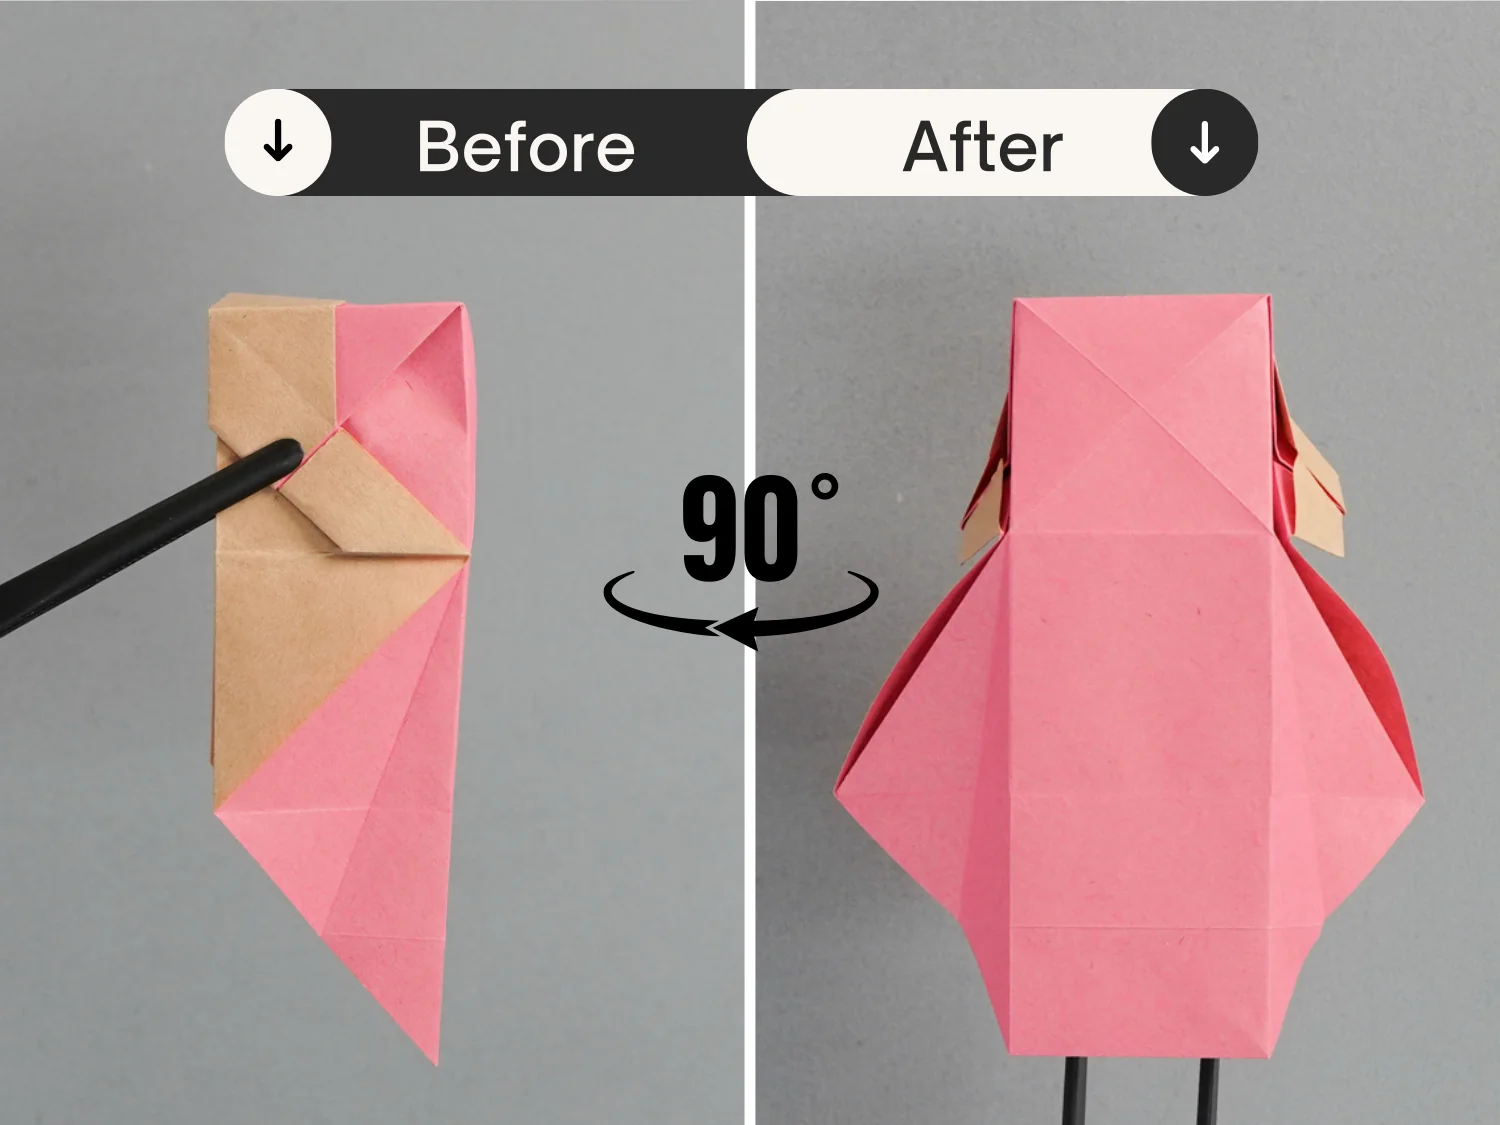
Step 19
Rotate it 90 degrees from the left to the right, making the left edge face up.
undefined
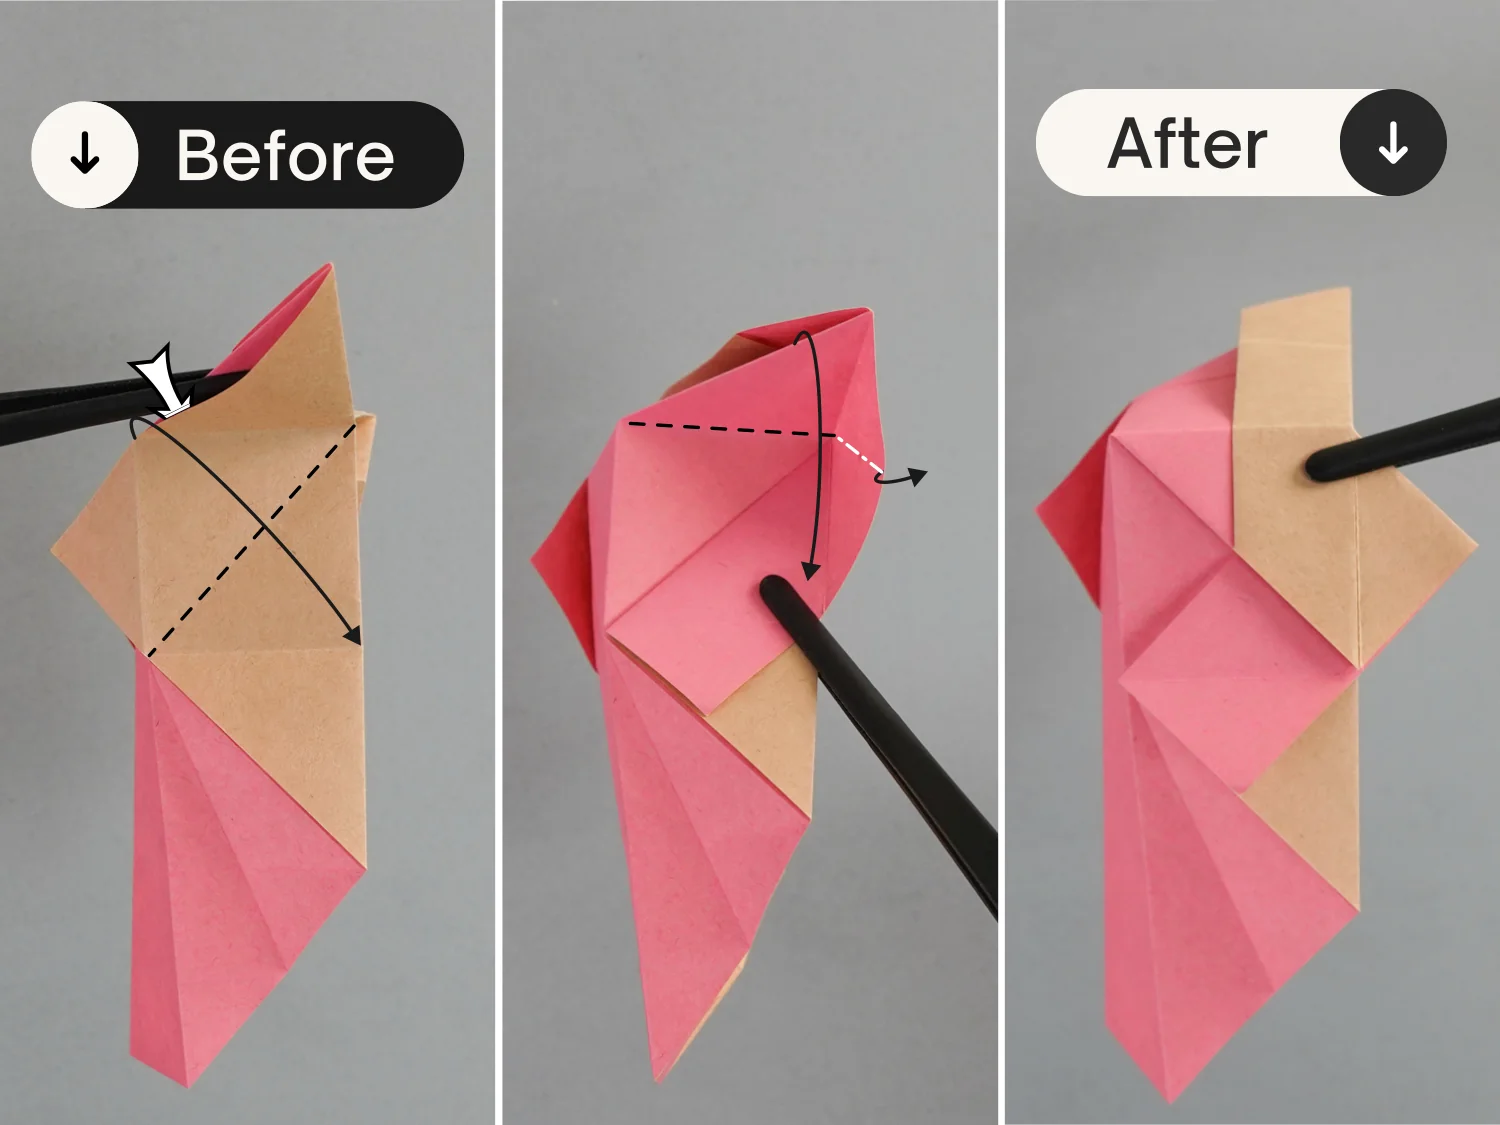
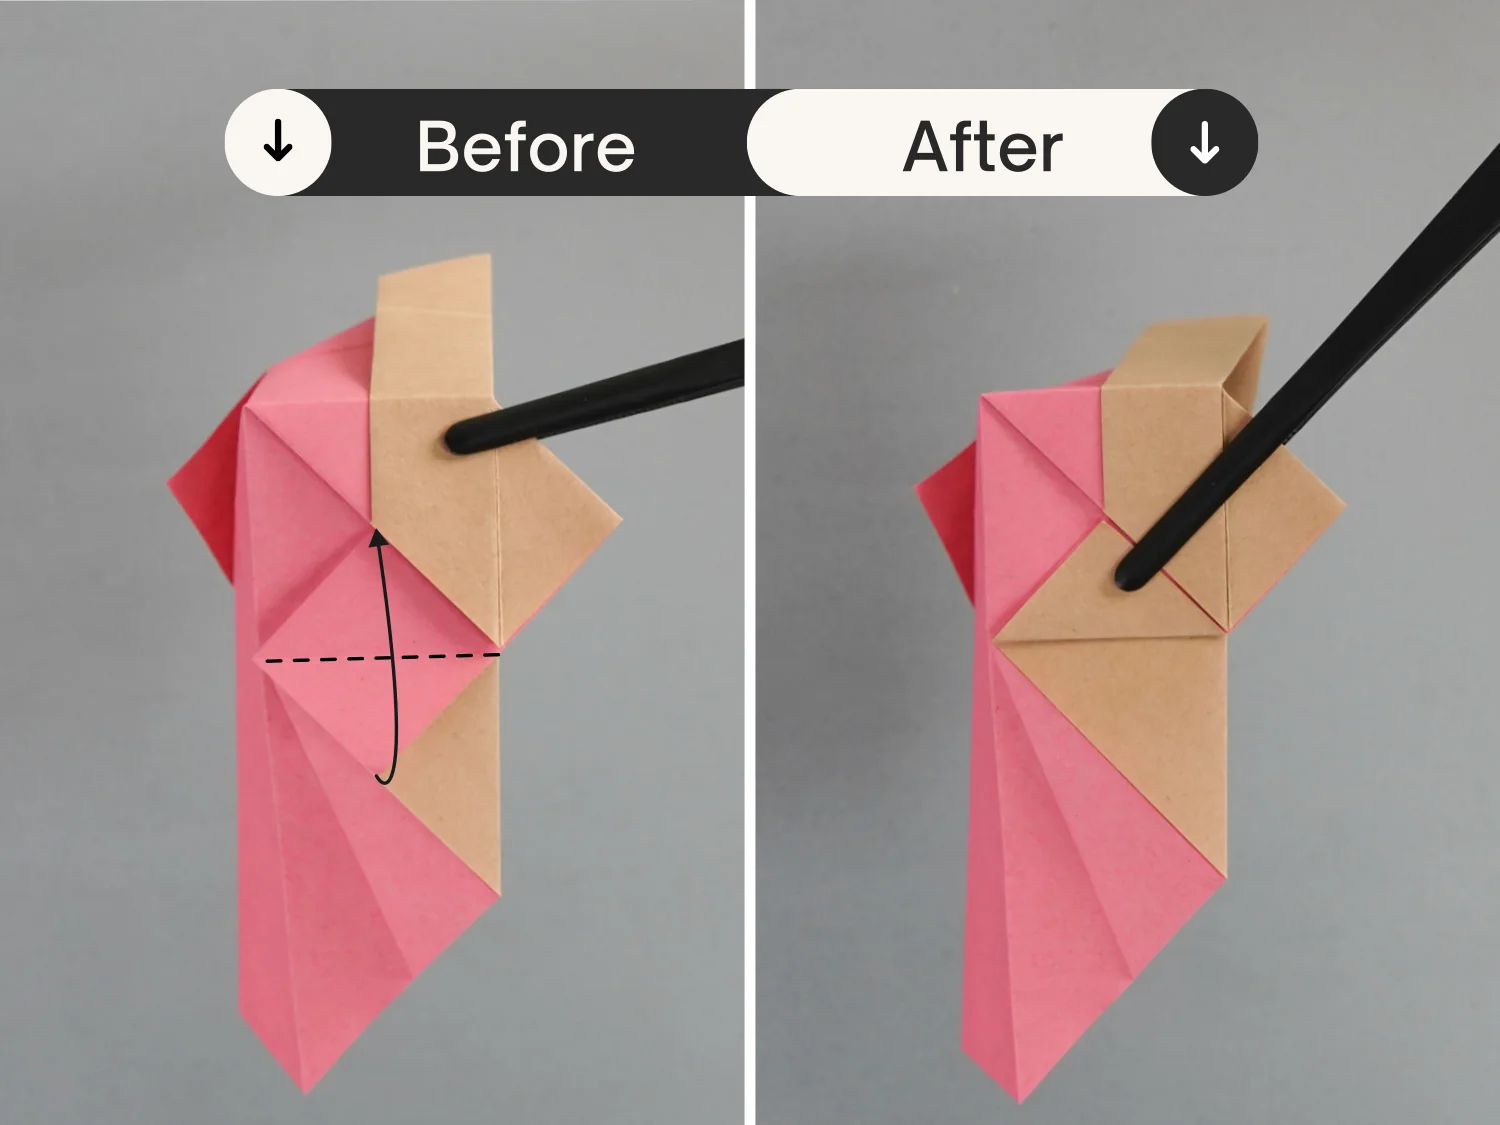
Step 20
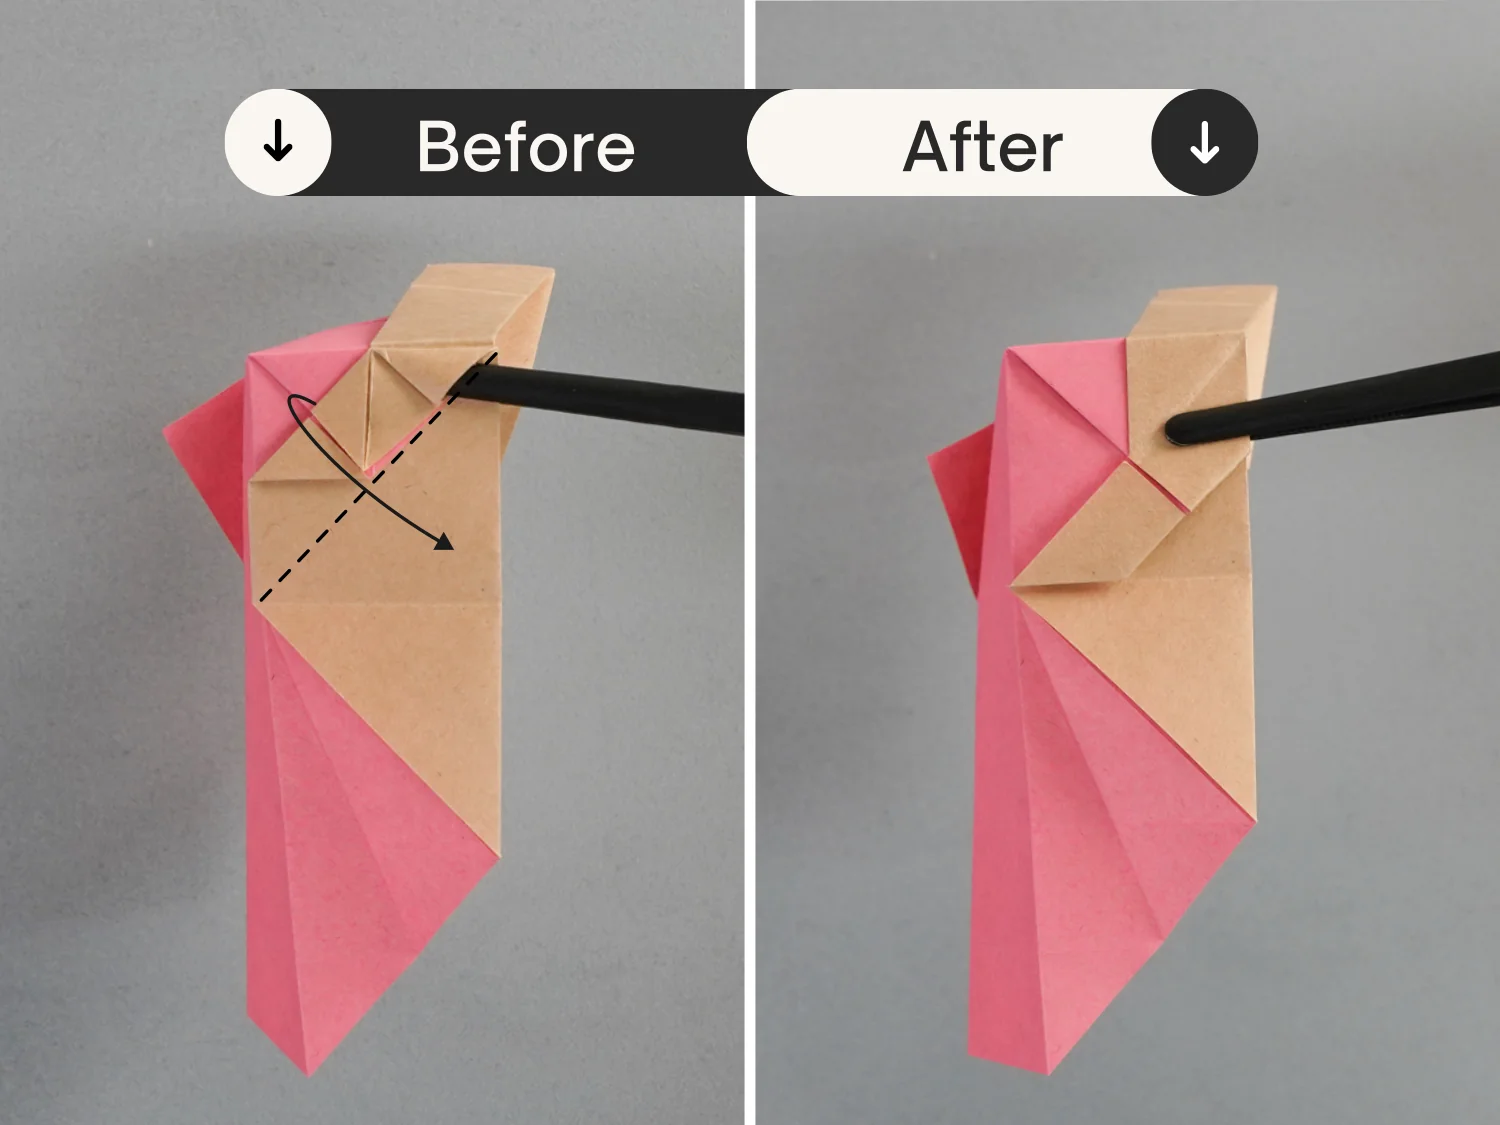
Take the top left edge of the yellow triangle, and fold it down along the crease shown by the dotted line. Then press down the top corner along the existing crease, and pull the right layer to the right. Finally, flatten the fold.
undefined
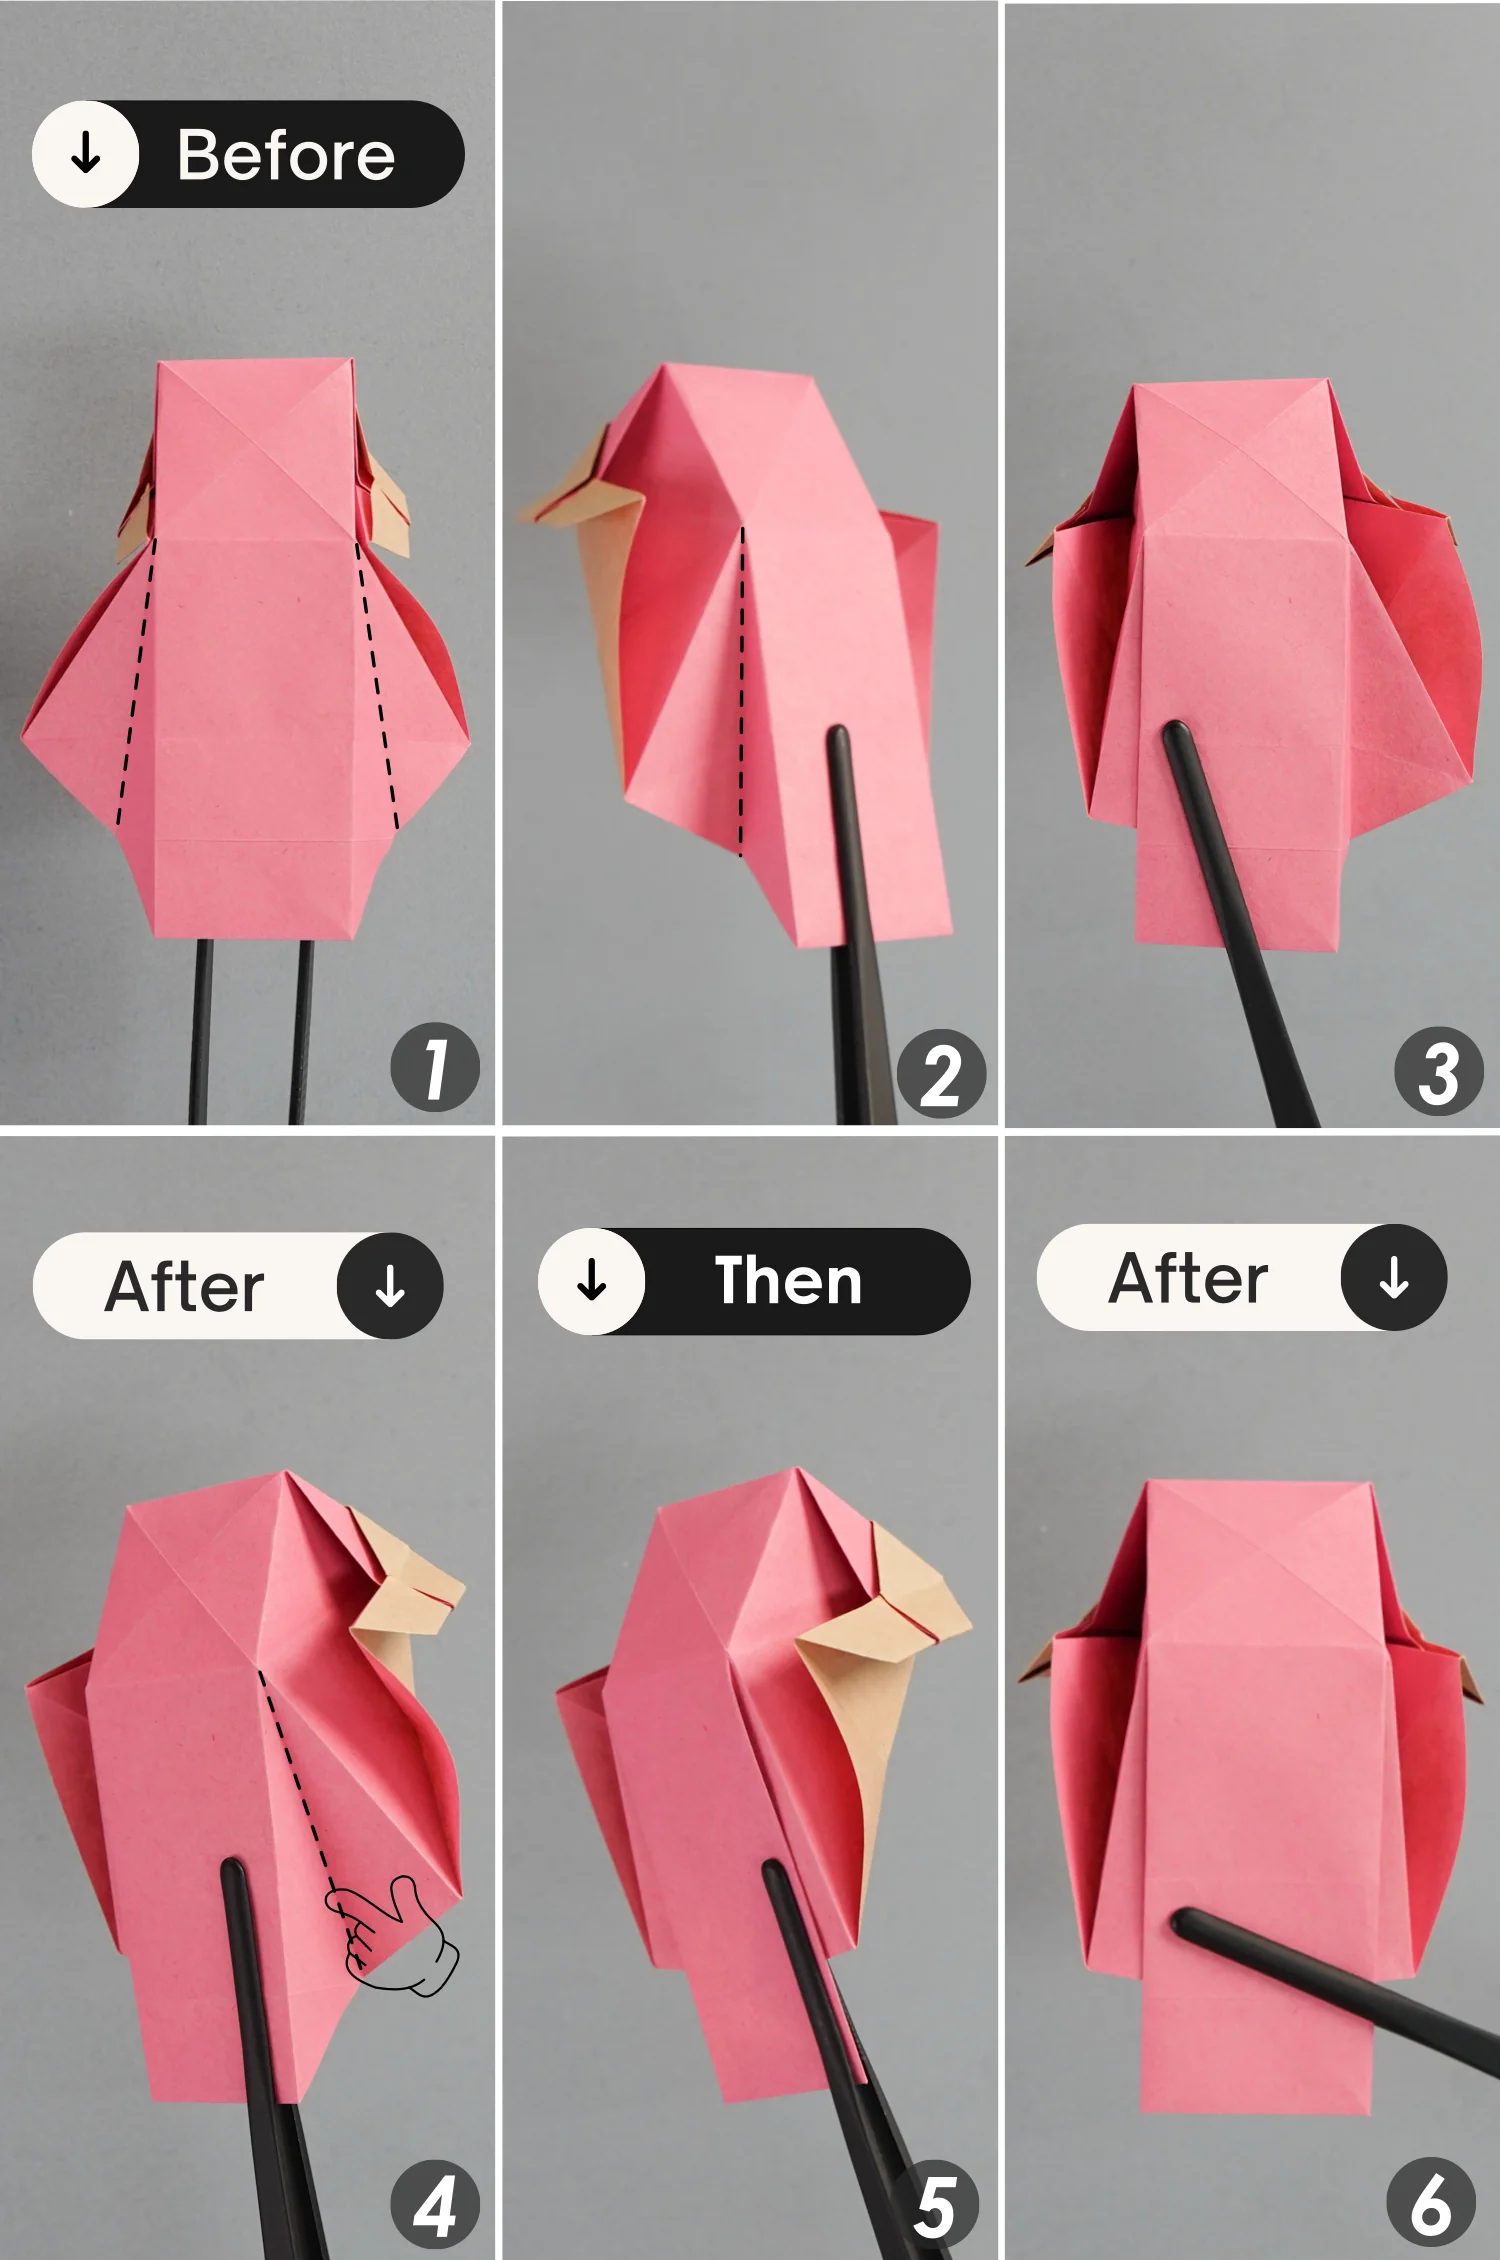
Step 21
Fold the bottom point of this pink square to meet its top point along the crease indicated by the dotted line.
undefined
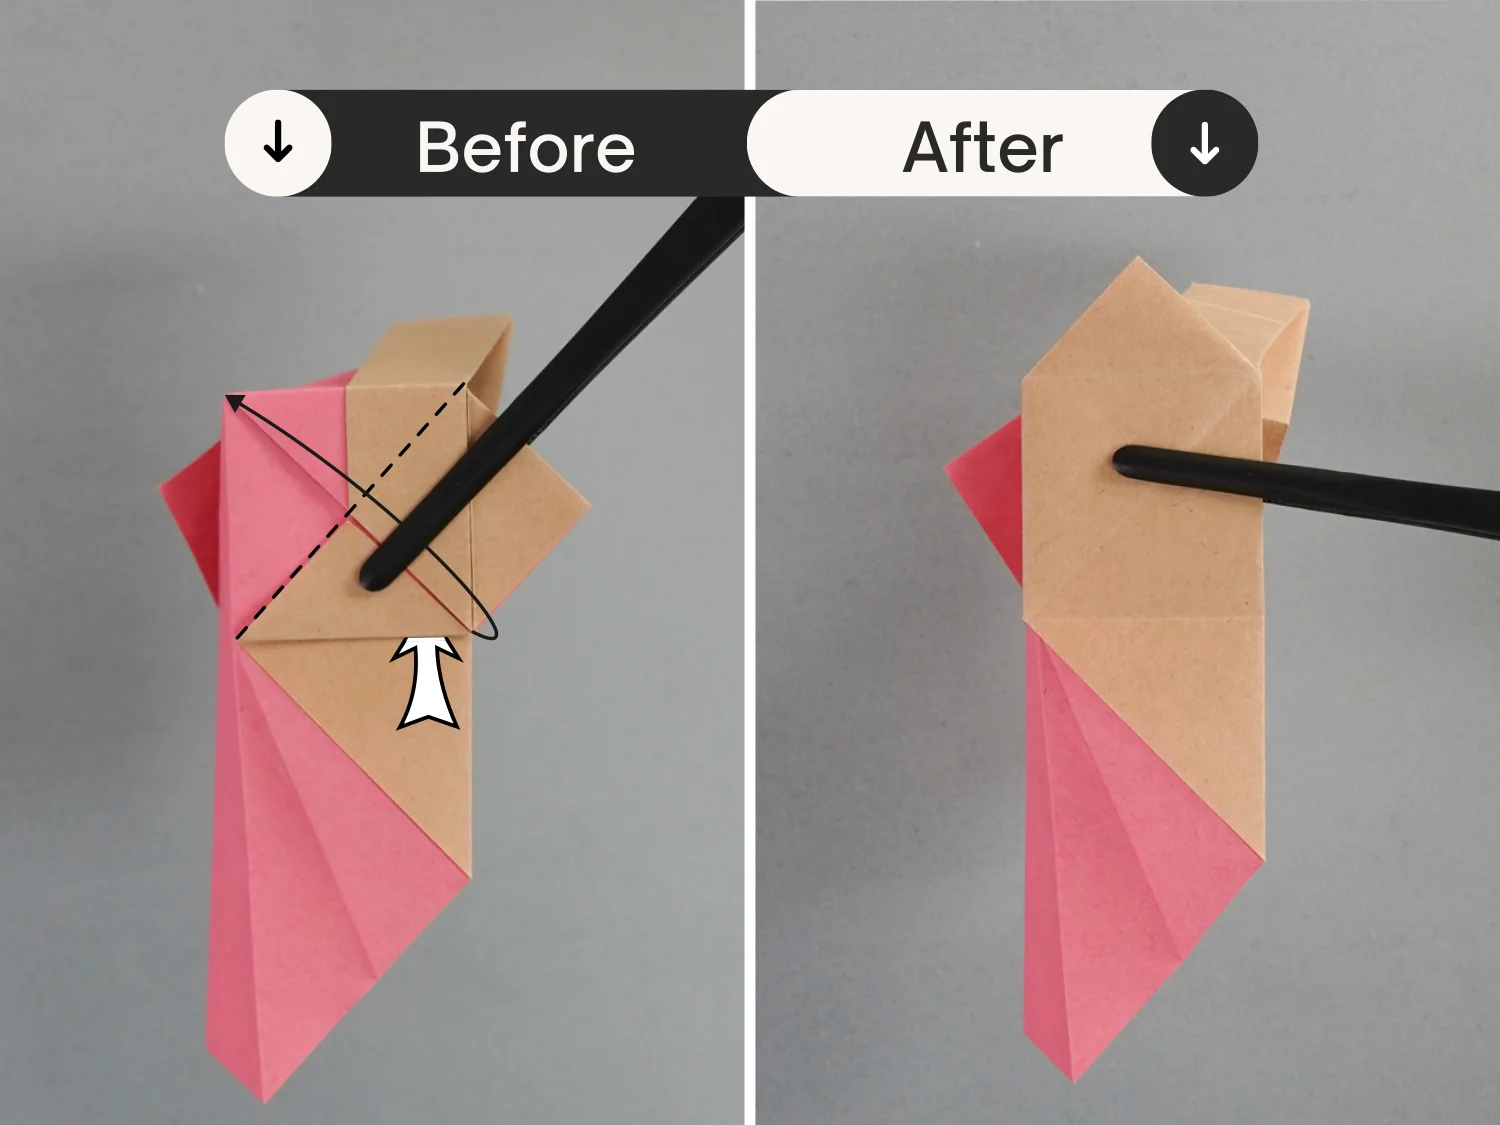
Step 22
Fold up the flap along the dotted line.
undefined
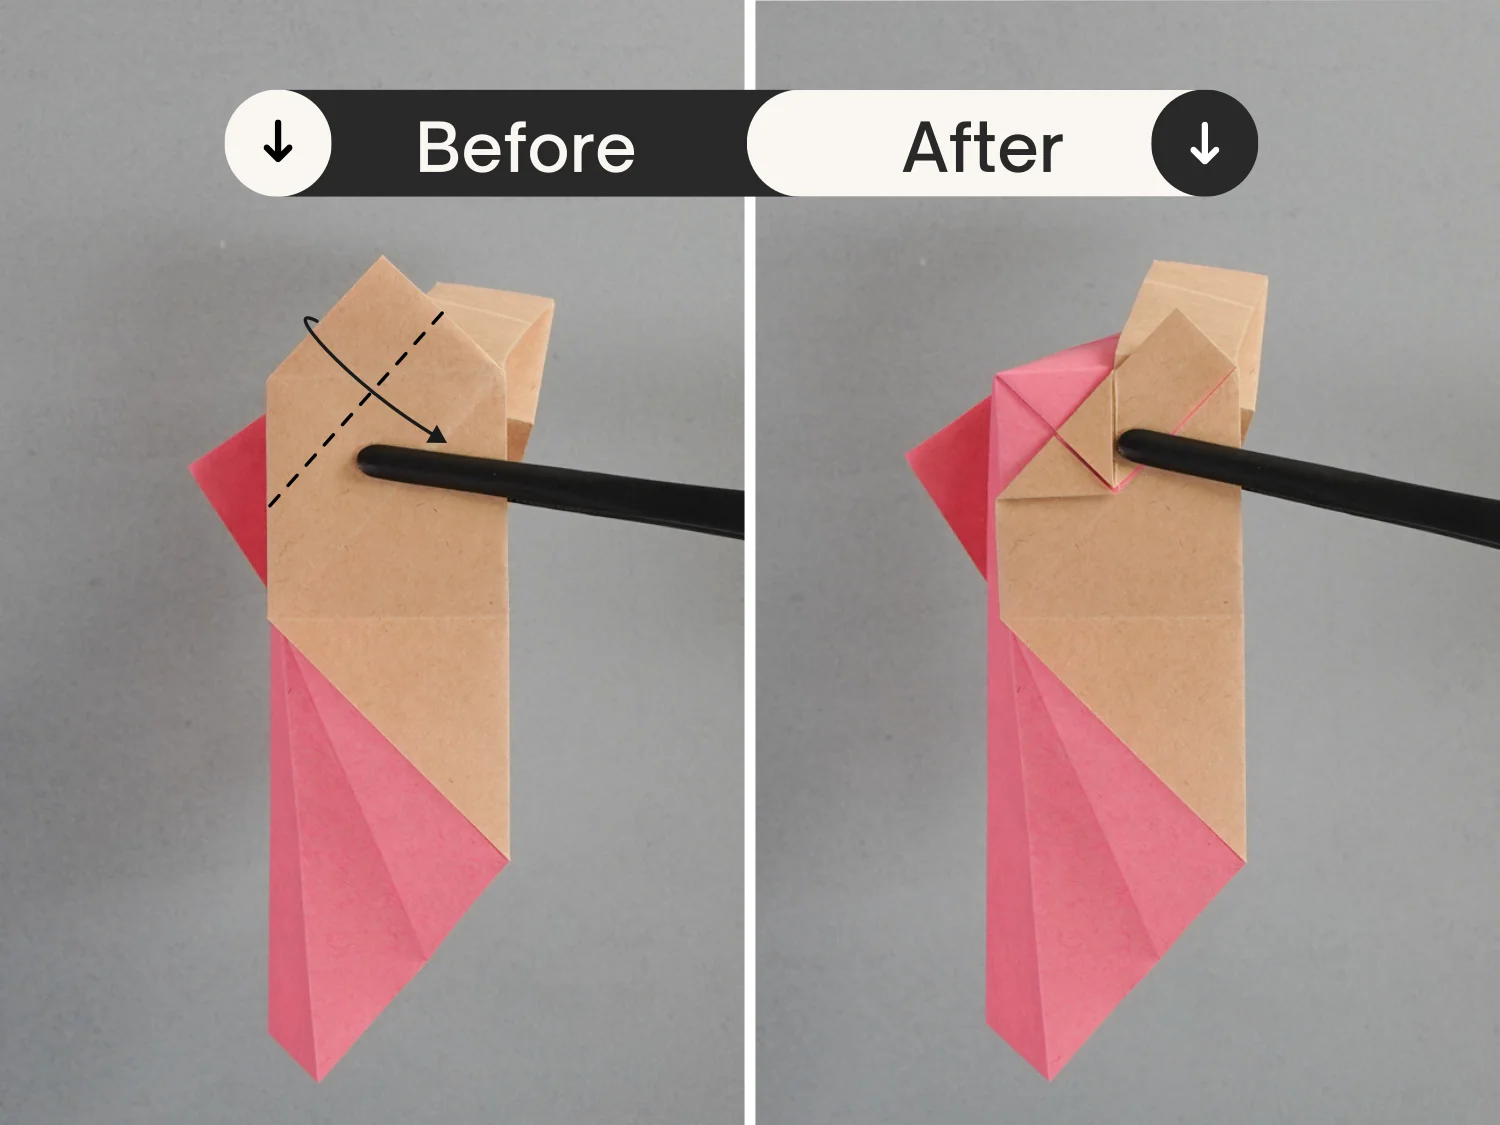
Step 23
Fold the top left edge along the dotted line to align with the crease.
undefined
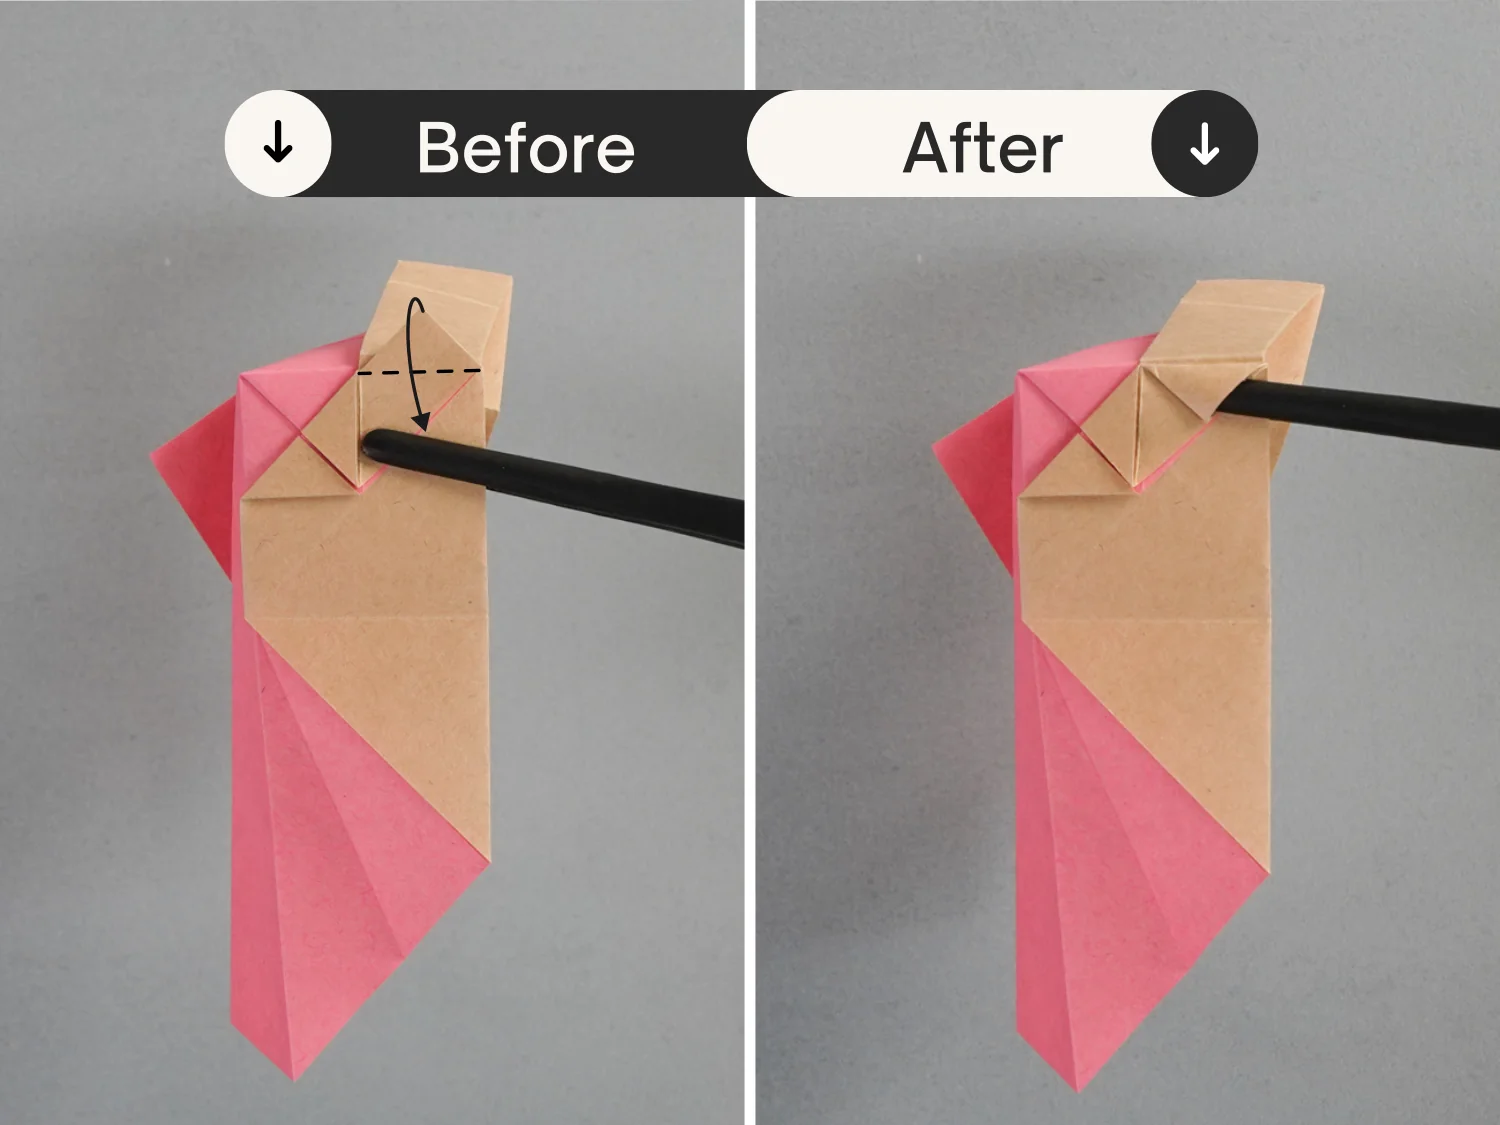
Step 24
Fold the top corner down diagonally.
undefined
Step 25
Fold this flap toward the bottom right along the dotted line.
undefined
Step 26
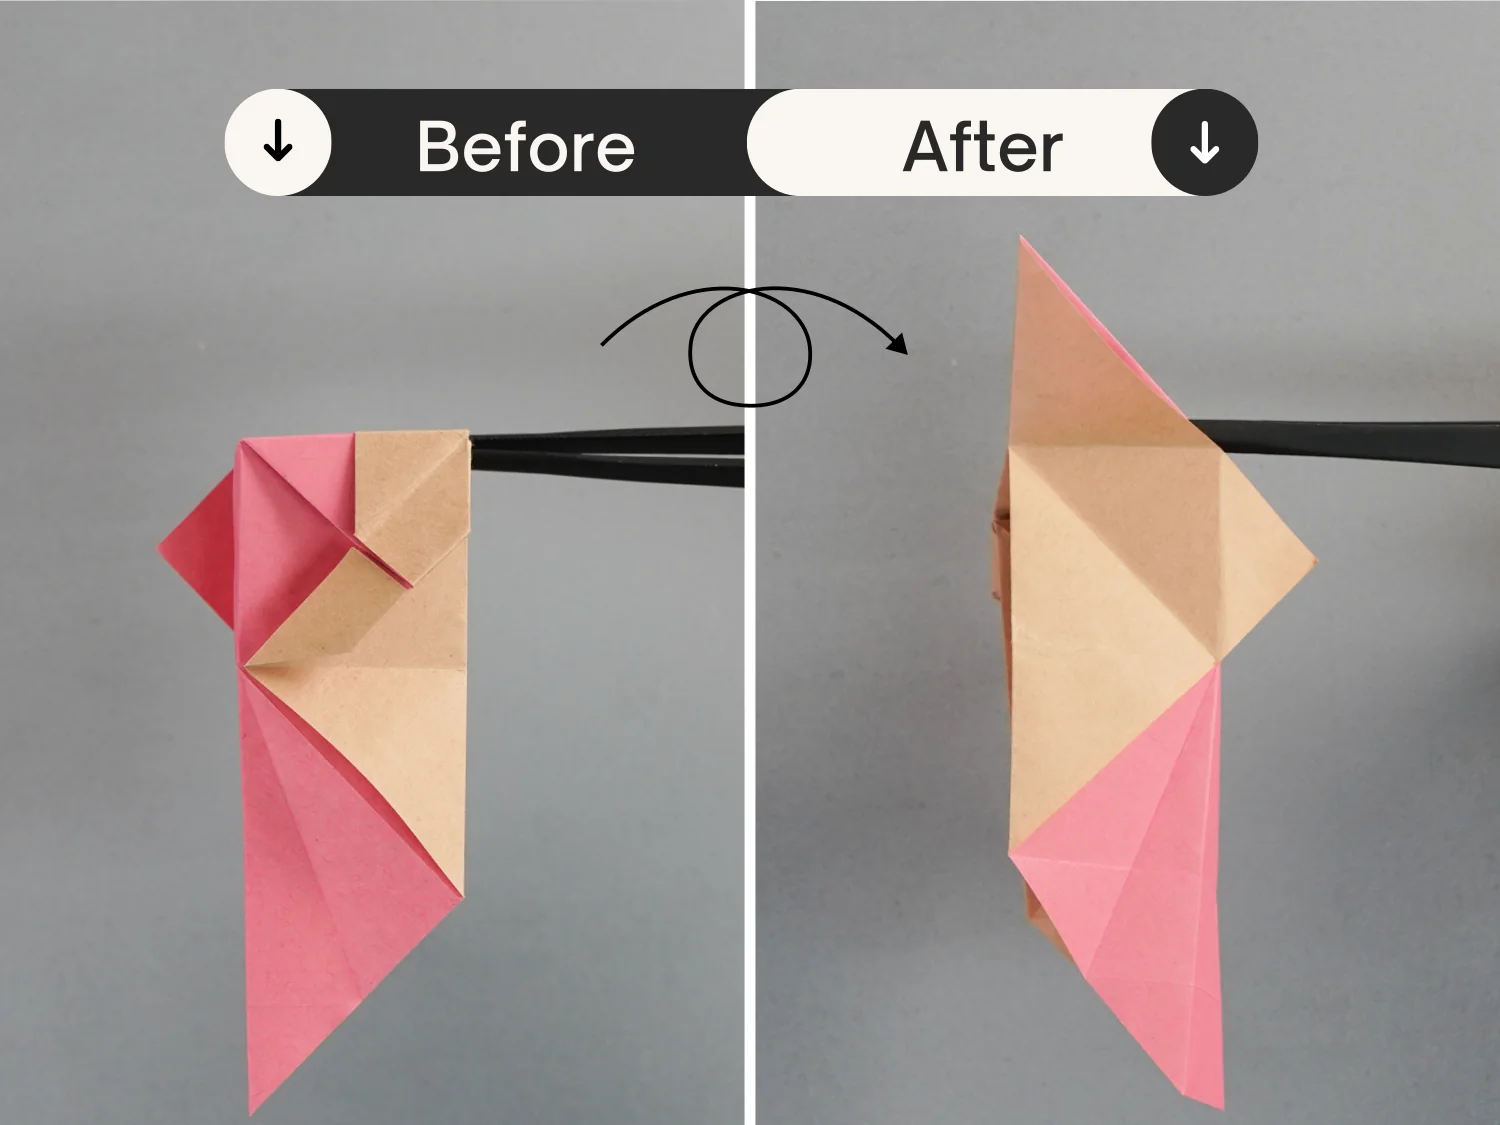
Turn over the model, to shape this edge.
undefined
Step 27
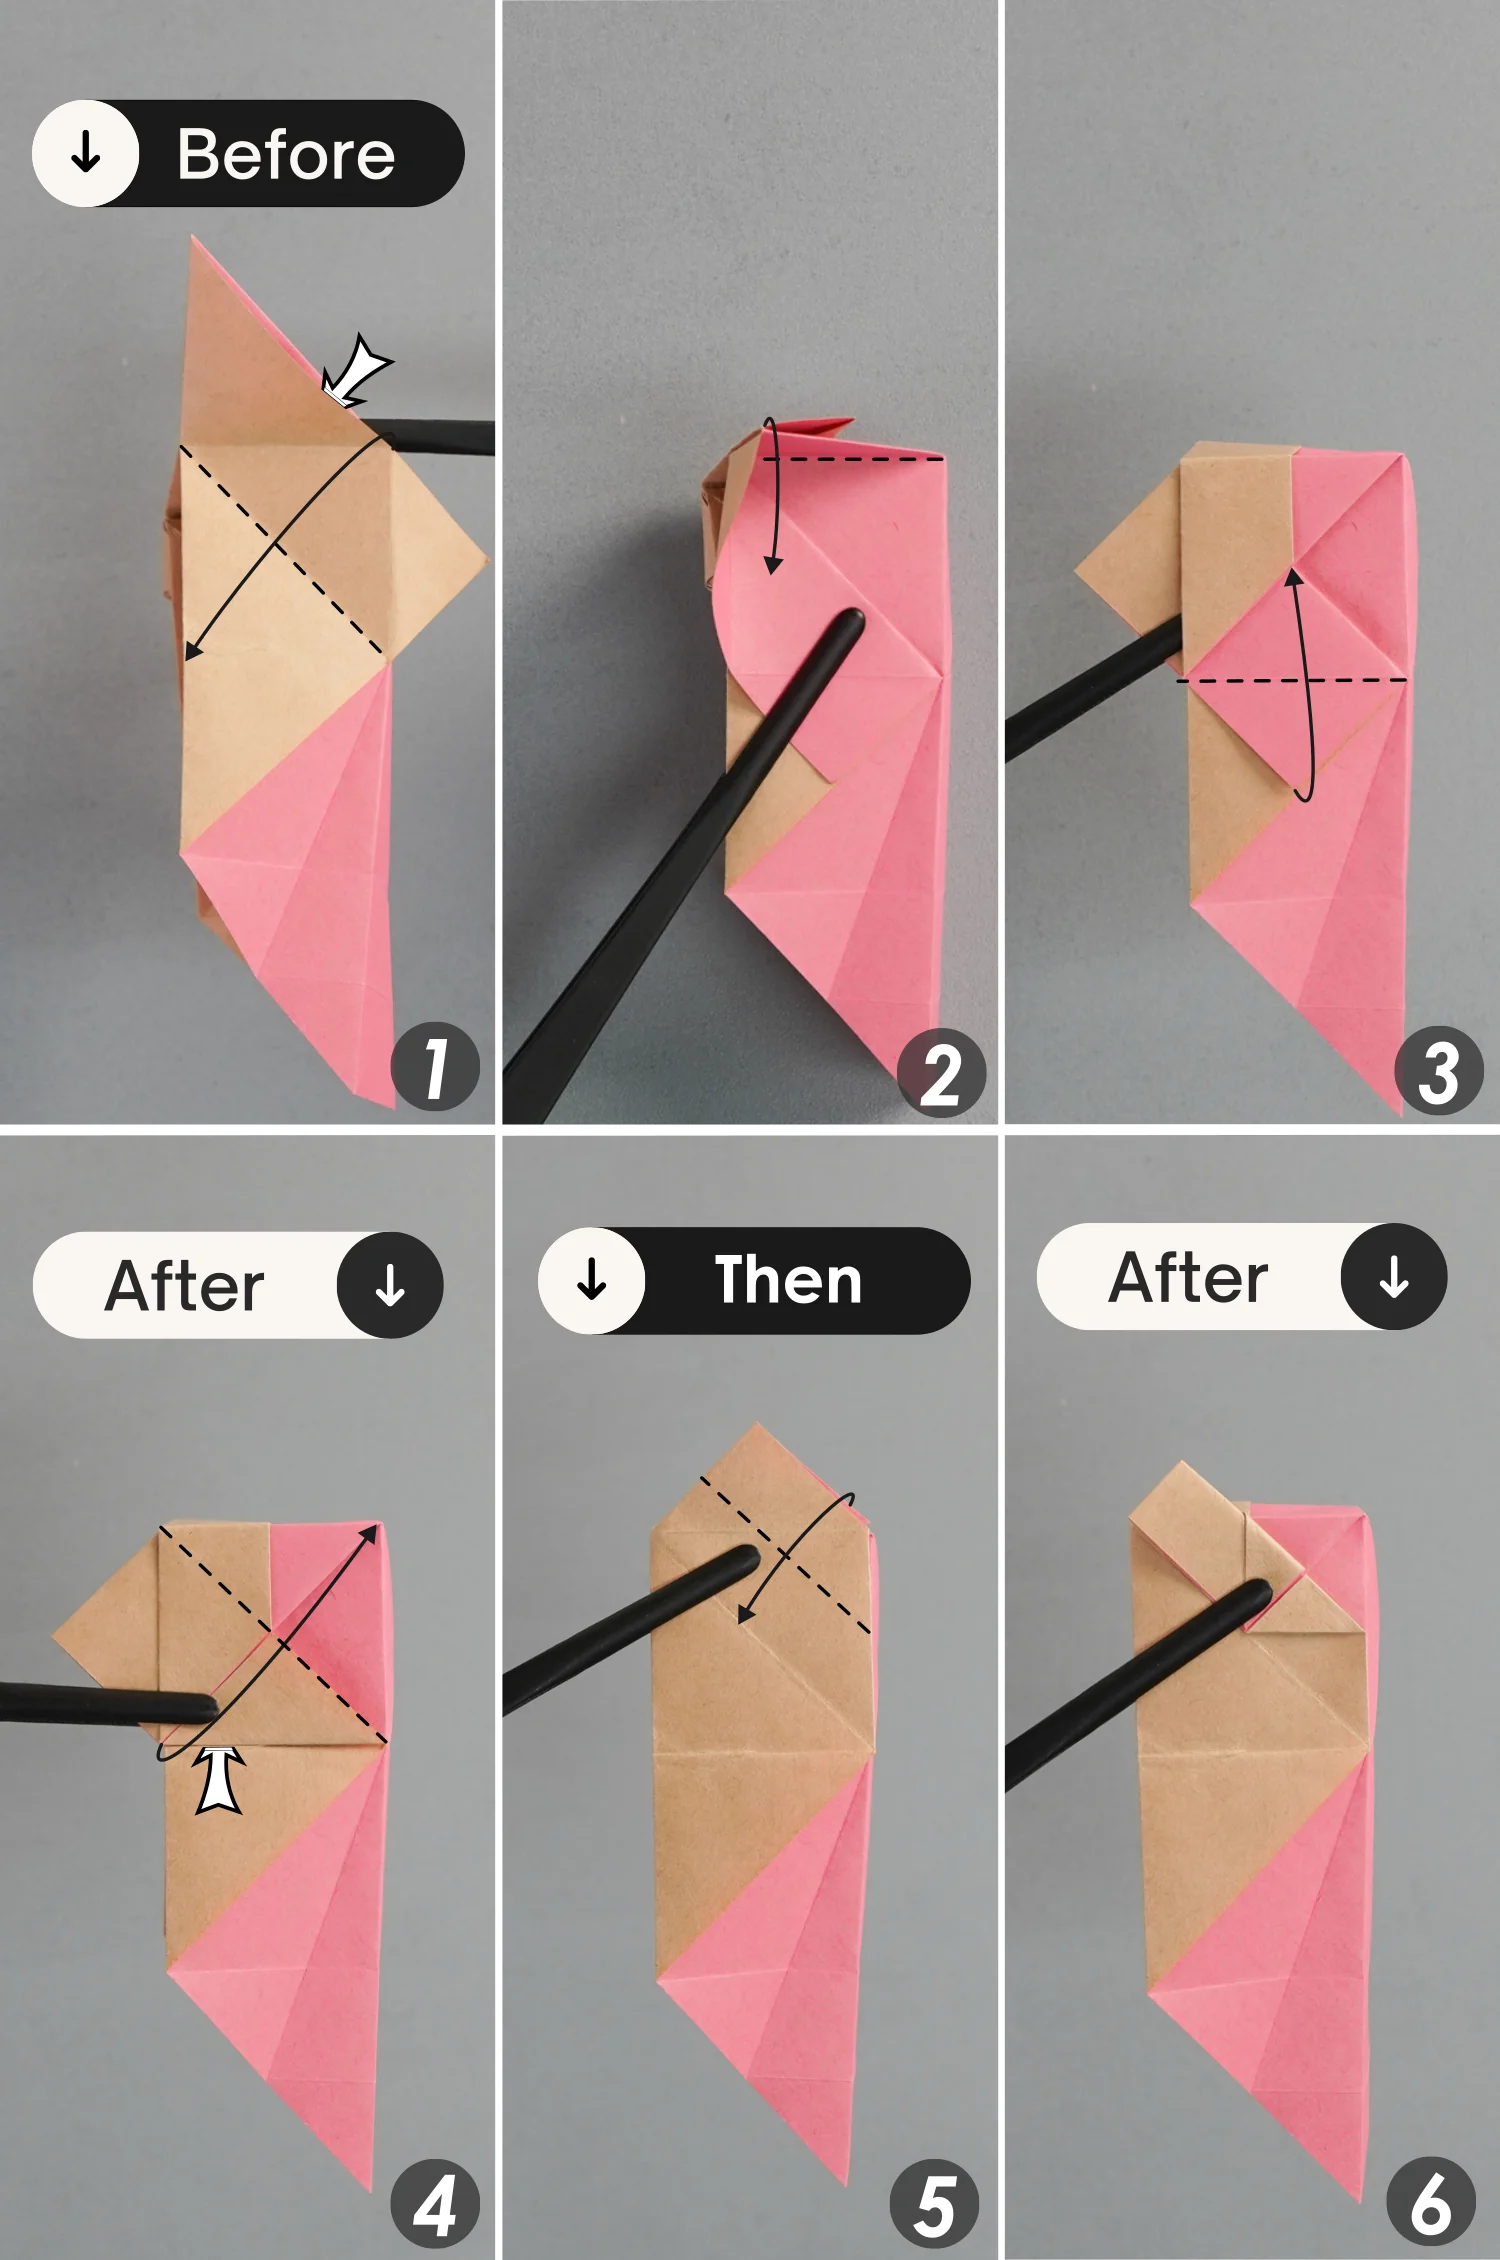
Like before, fold the top right edge of the yellow triangle down along the dotted line [picture 1 ], and push down the top corner along the existing crease [picture 2], then fold the bottom point of the pink square to meet its top point [picture 3].
Next, fold up the flap along the dotted line [picture 4], and finally fold the top right edge to align with the slanted crease.
undefined
Step 28
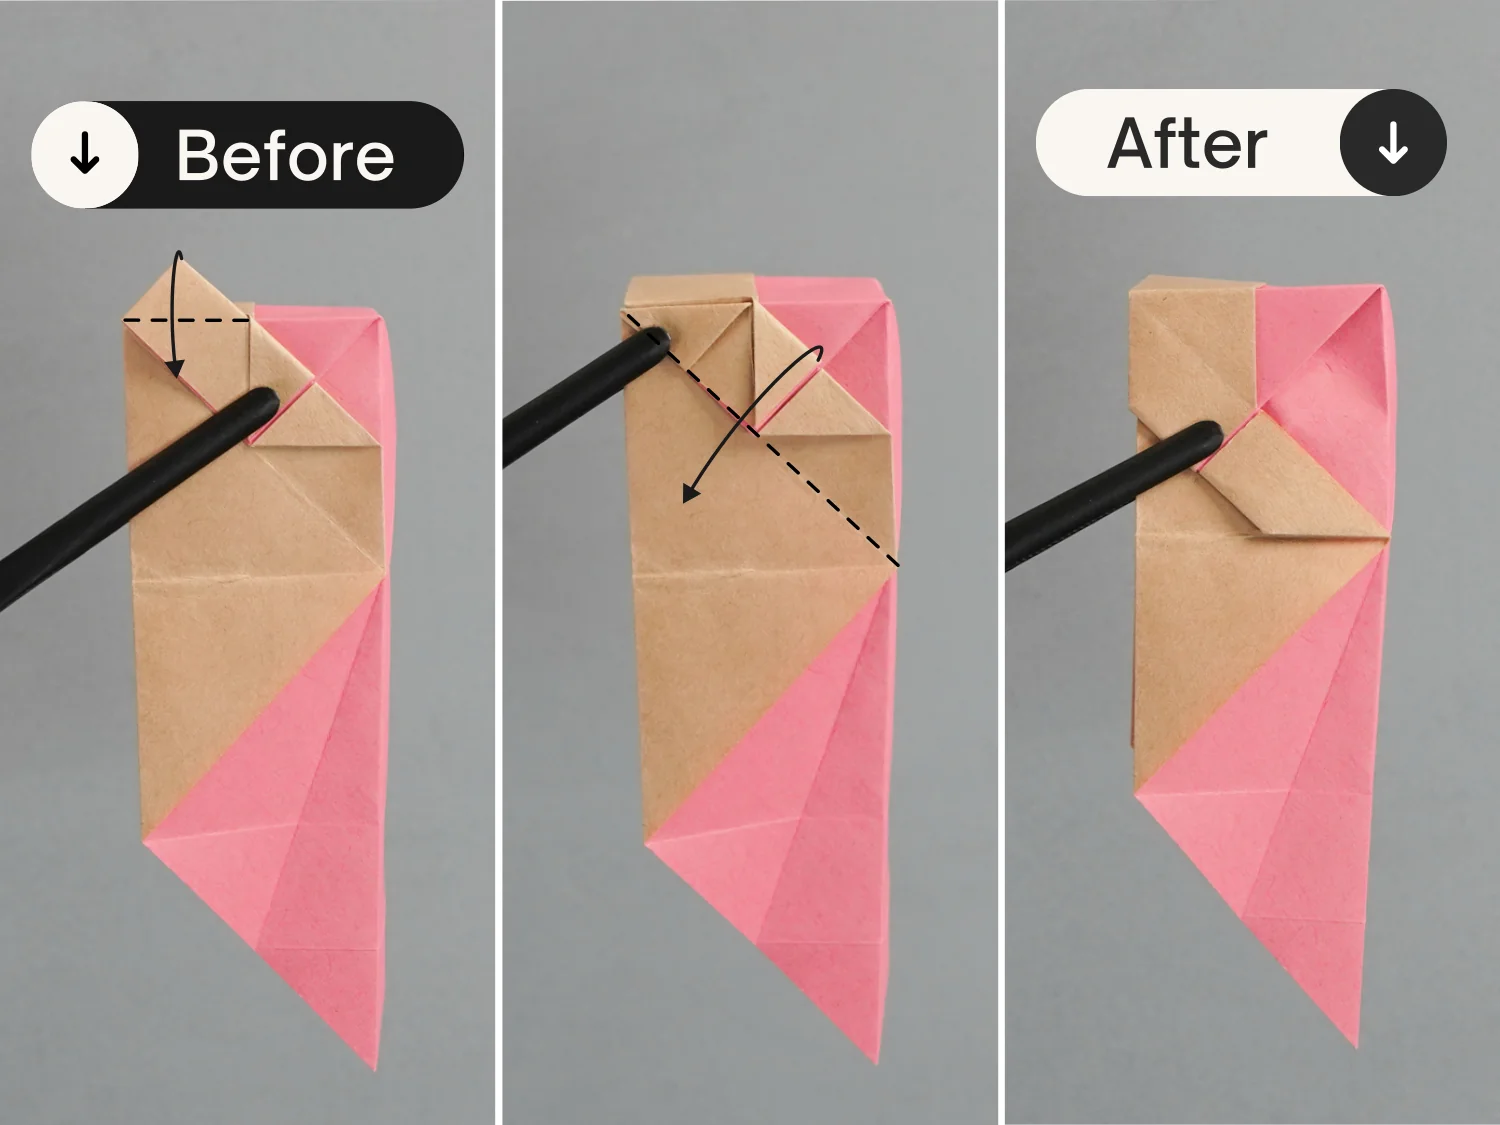
Fold down the top corner diagonally, and fold the flap to the bottom left along the crease indicated by the dotted line.
undefined
Step 29
Rotate the model 90 degrees from the right to the left.
undefined
Step 30
Shape the creases indicated by the dotted lines from the back, then flatten the bottom part along the existing creases.
undefined
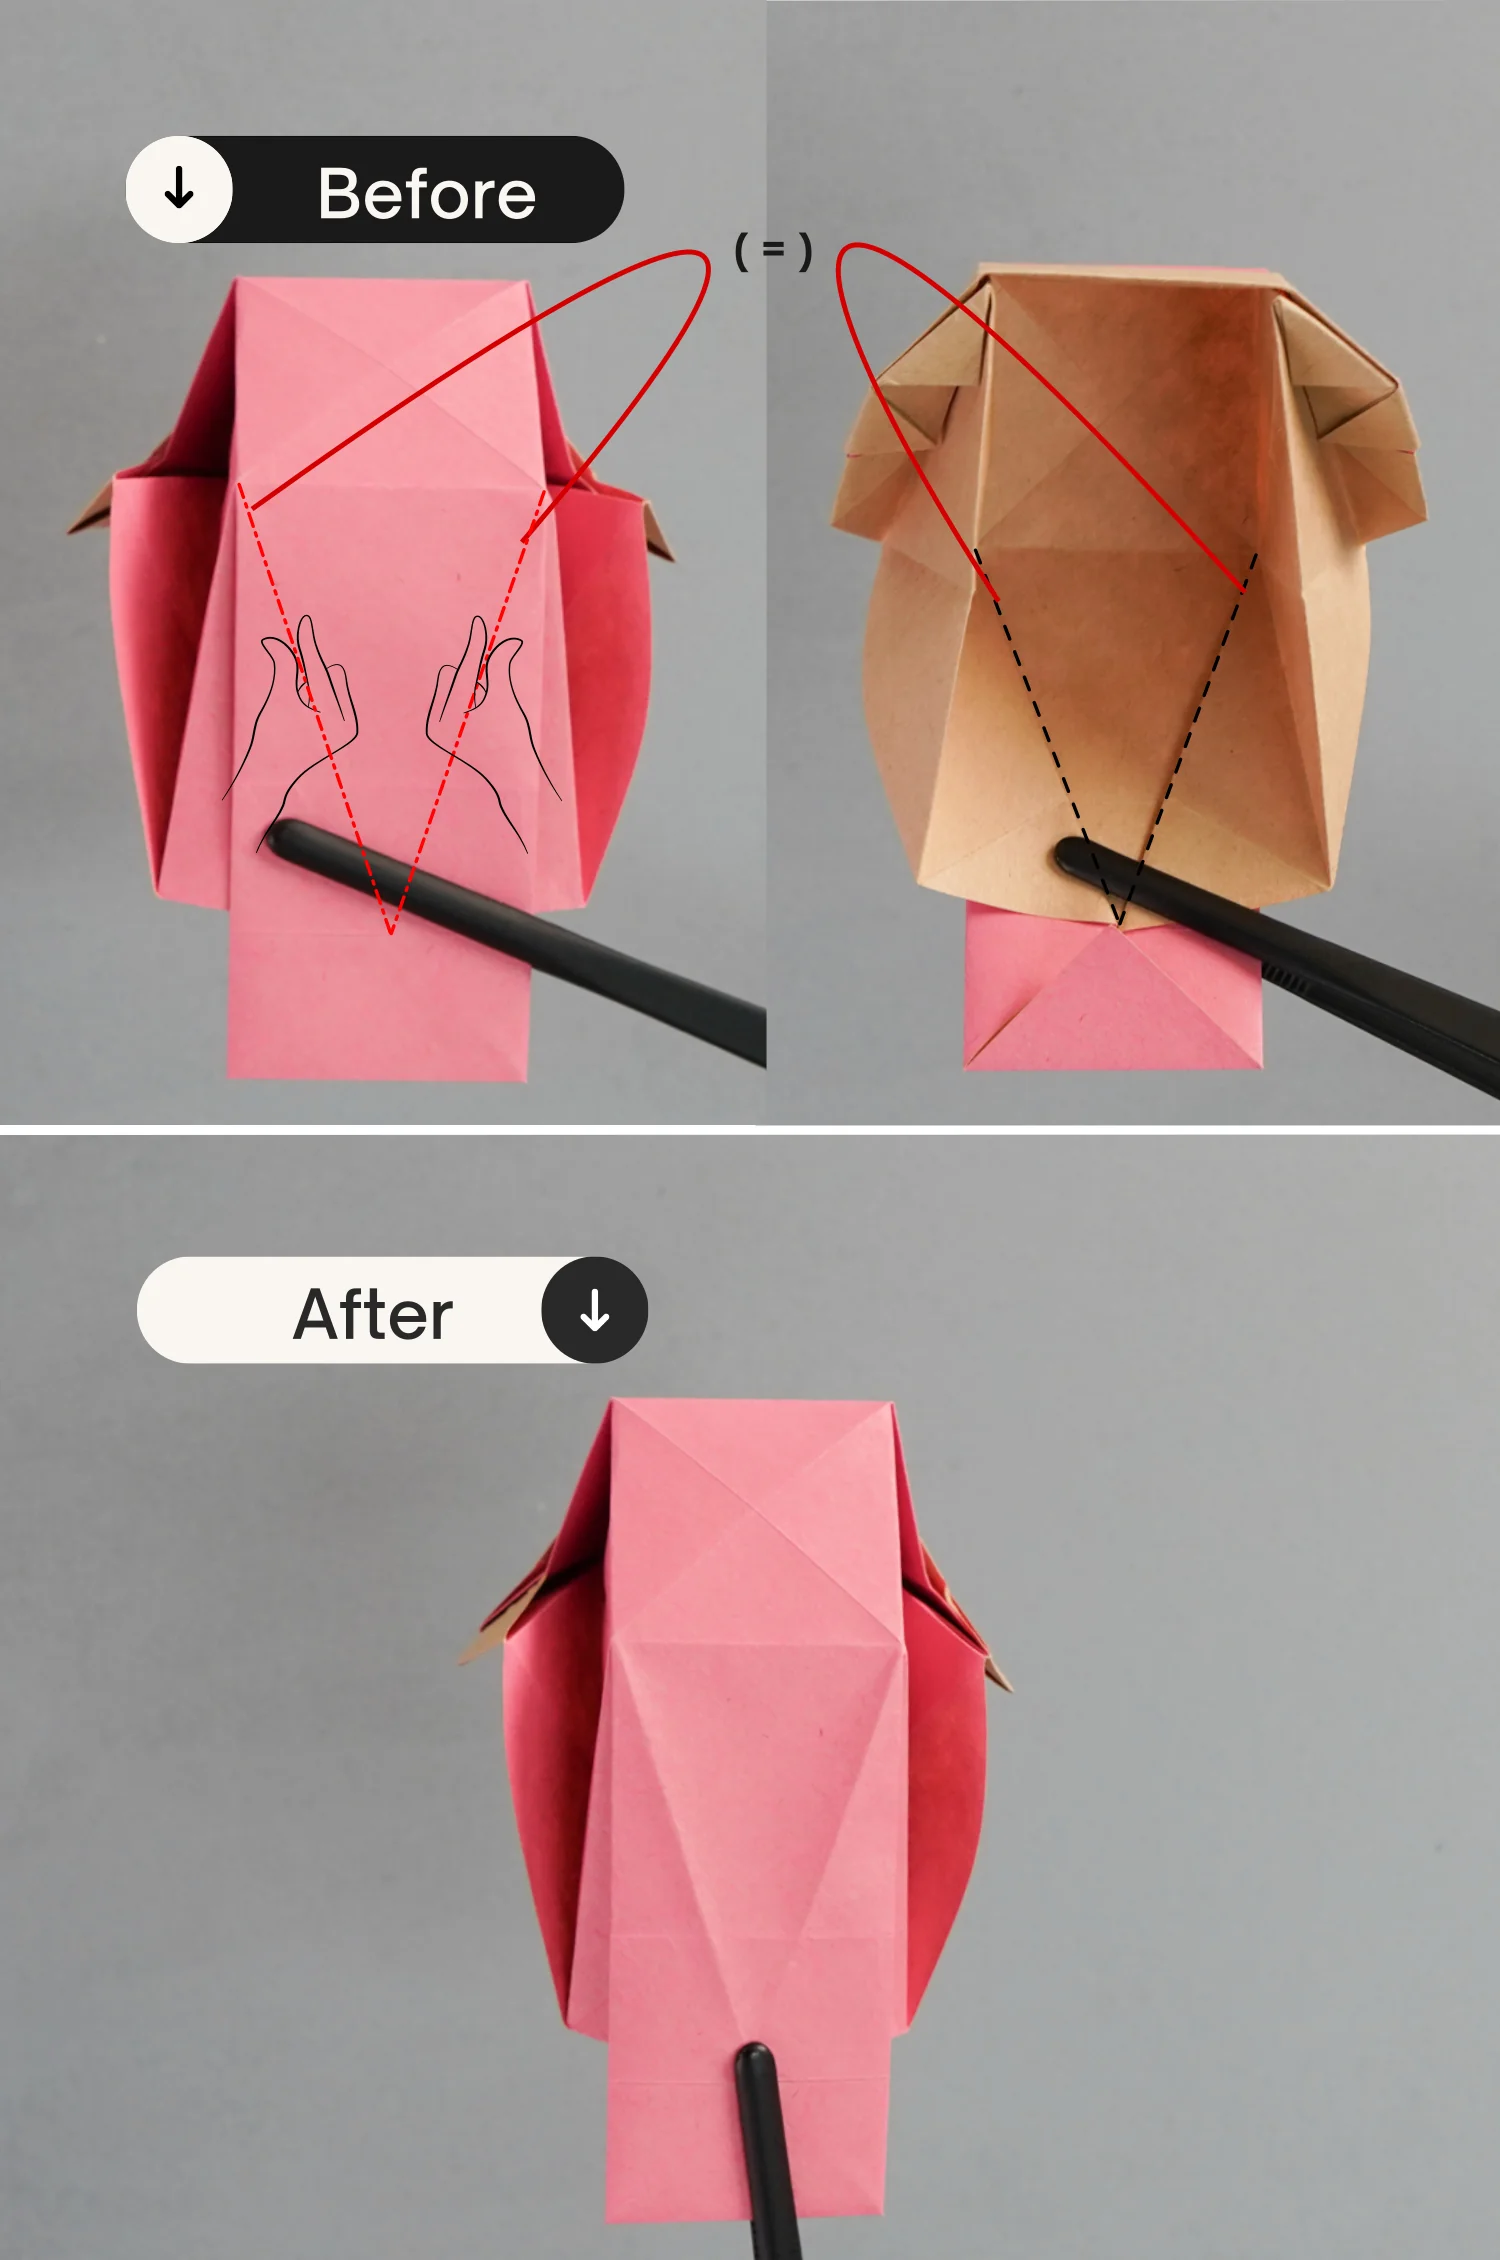
Step 31
Create two creases shown by the red dotted lines, and these two red lines are the two edges on the back as you can see in the second picture, indicated by the black dotted lines, so you can shape them from the front.
undefined
Step 32
Fold the bottom left and right points together at the back.
undefined
Step 33
Rotate the model 90 degrees counterclockwise, then rotate it 90 degrees from the front to the back.
undefined
Step 34
Fold the right point of the small square along the dotted line diagonally to the left point, leaving a crease, and unfold it.
undefined
Step 35
Rotate it 90 degrees from the back to the front., and unfold the tail part.
undefined
Step 36
Focus on the right square, fold its bottom edge to align with its left edge, crease it well then unfold it. Repeat this for its top edge, fold it to align with its left edge, and unfold it.
undefined
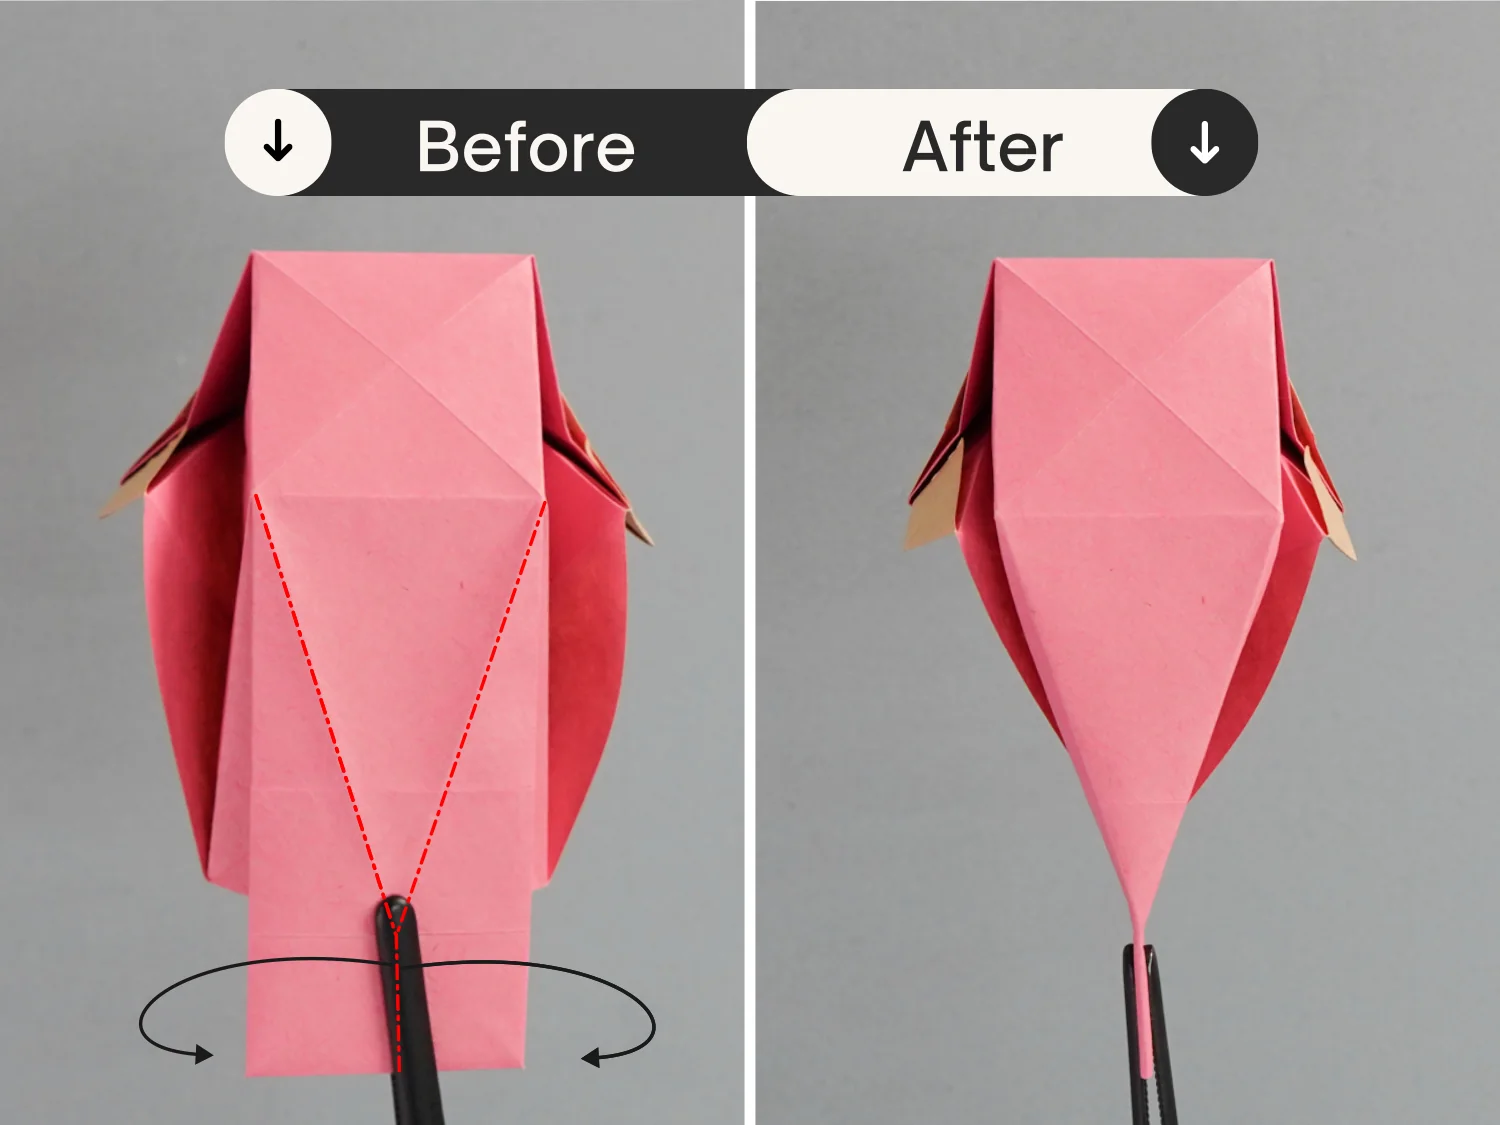
Step 37
Push the midpoint of the right edge to the left side based on the creases indicated by the dotted lines.

undefined
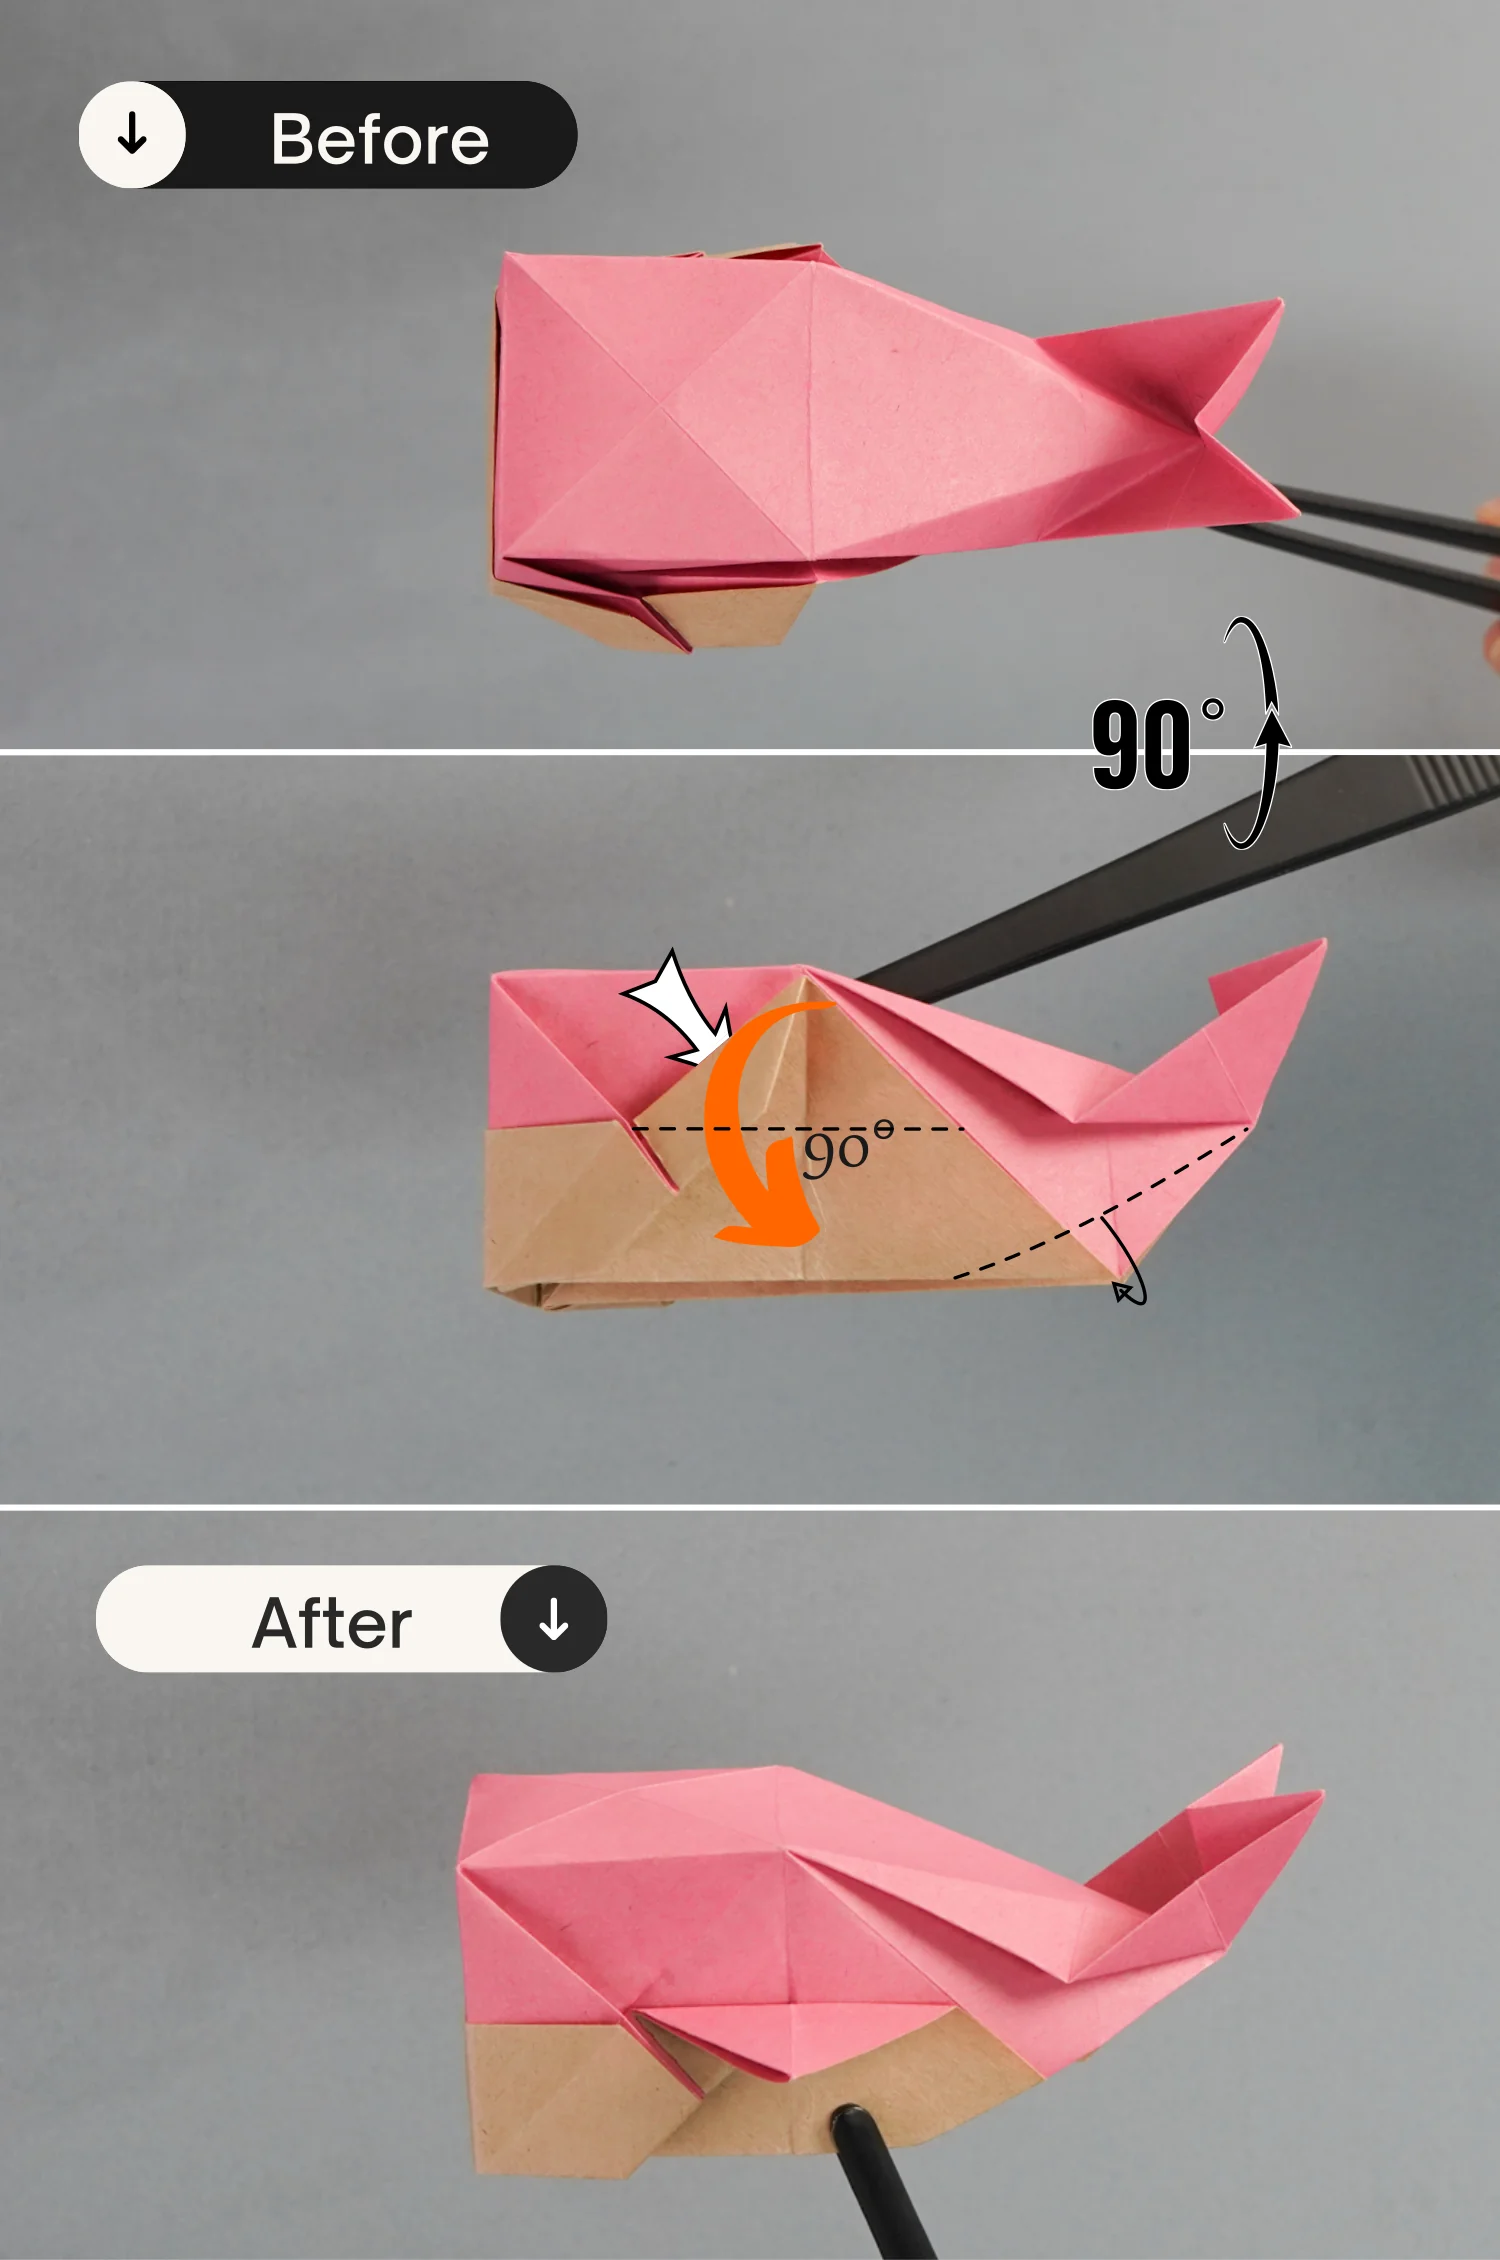
Step 38
Rotate the model 90 degrees from the front to the back, then fold down the triangle for only 90 degrees, and fold the bottom right corner backward along the dotted line.
undefined
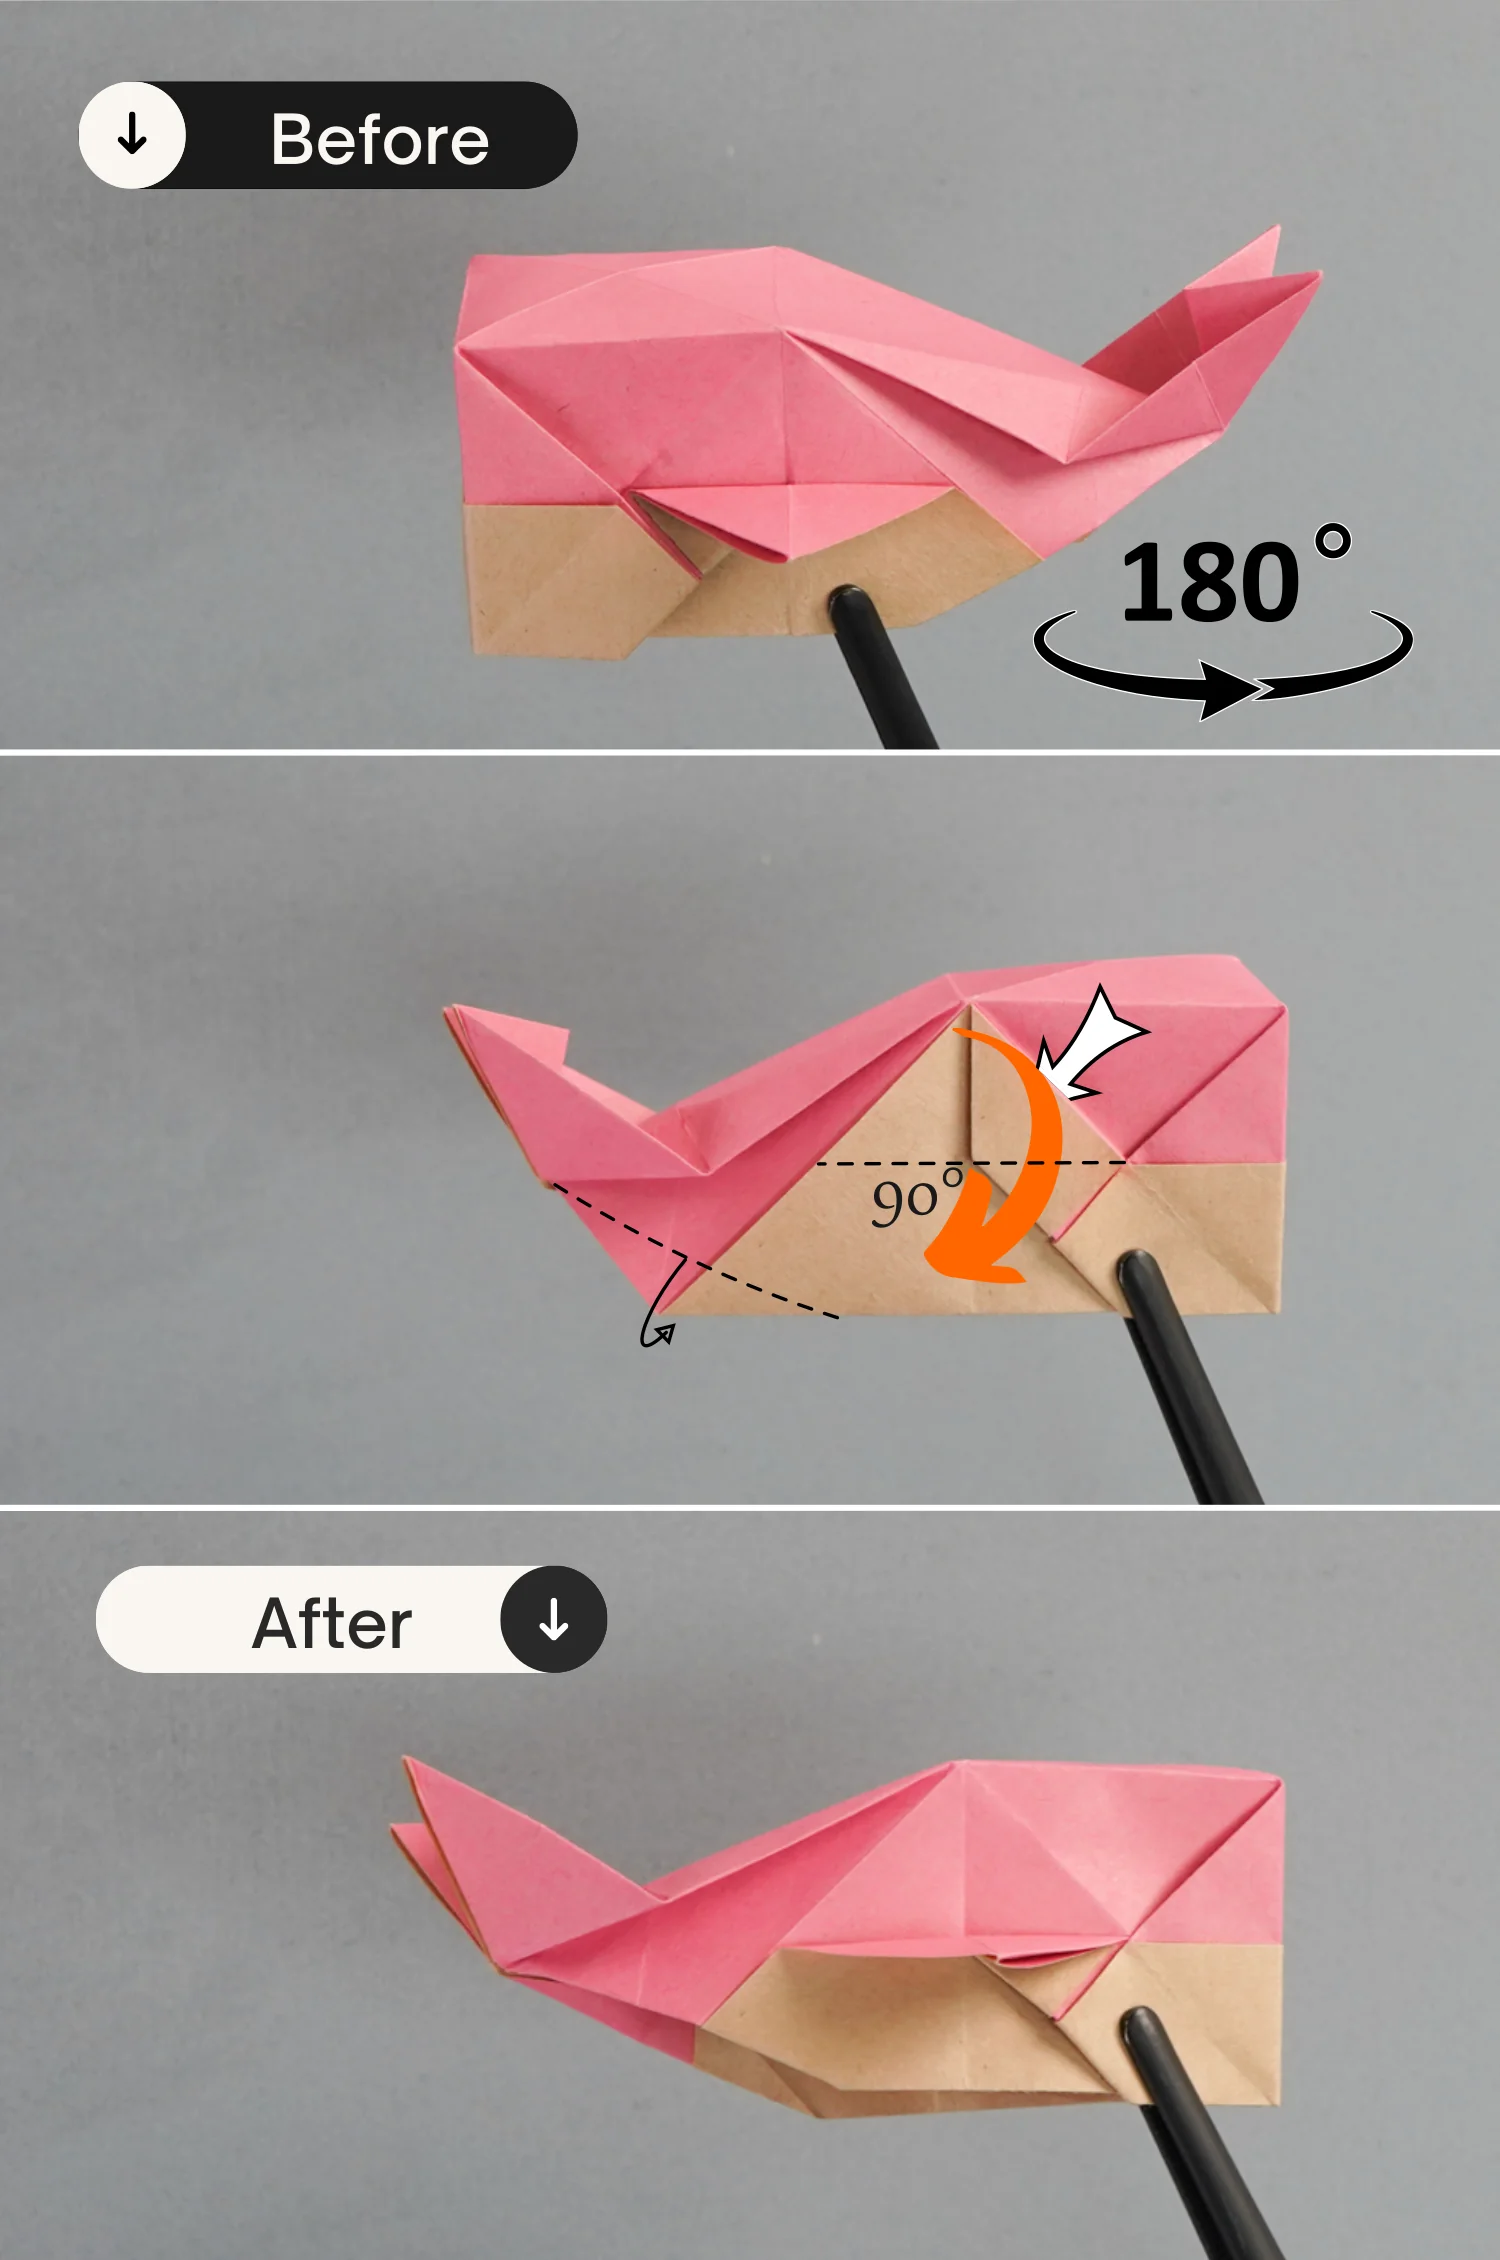
Step 39
Rotate it 180 degrees from the left to the right, in the same way, push down the triangle for only 90 degrees, and fold the bottom left corner backward along the dotted line.