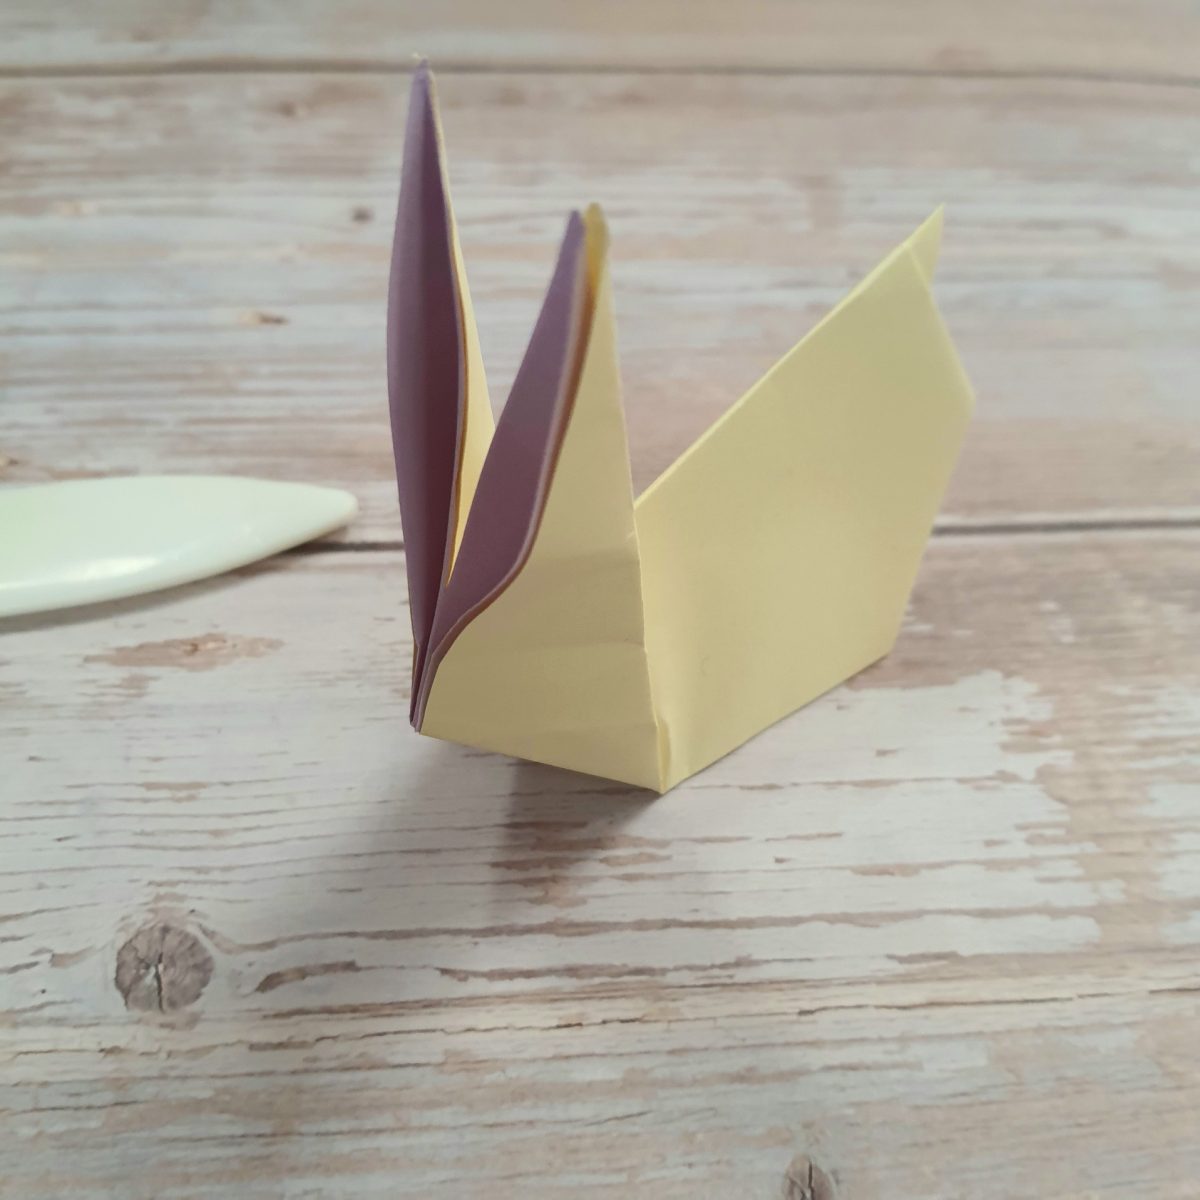
Easy Origami Rabbit Tutorial

I chose this for my next tutorial as 2023 is the Chinese year of the rabbit! There are lots of origami bunny tutorials; this is one of the simpler ones.
All you really need is some thin squares of paper and a pair of scissors.
If you make this out of double sided paper, the inside of the ears will be a different colour! Not got any? Use two thin sheets of different colours (that’s what I’ve done here).
Don’t forget to fold neatly and crease firmly – you can press the creases with the back of your thumb nail if you don’t have a creasing tool.

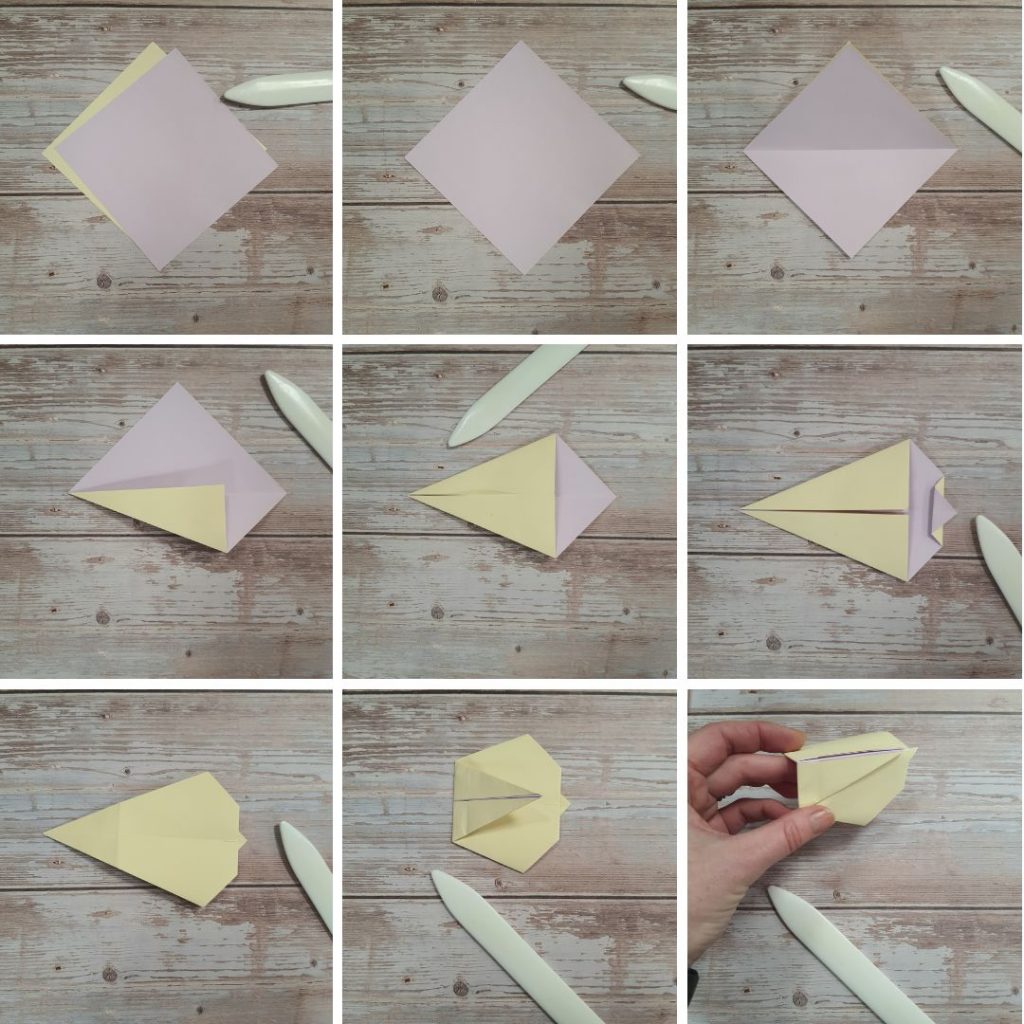
If you’re using two-colour paper, start with the colour you want the inside of the ears to be facing upwards.
Start with the paper in a diamond shape, with a corner pointing towards you.
Fold in half from top point to bottom, crease and unfold.
Take the bottom left sloping edge and fold in to meet the centre crease.
Do the same with the top left edge.
Take the right hand point – fold it back to meet the edge you’ve just made, then fold the tip back the other way so it sticks out over the flat edge a bit (this will be the tail!)
Flip the whole thing over.
Fold the left hand point over to the right, so it almost meets the flat edge.
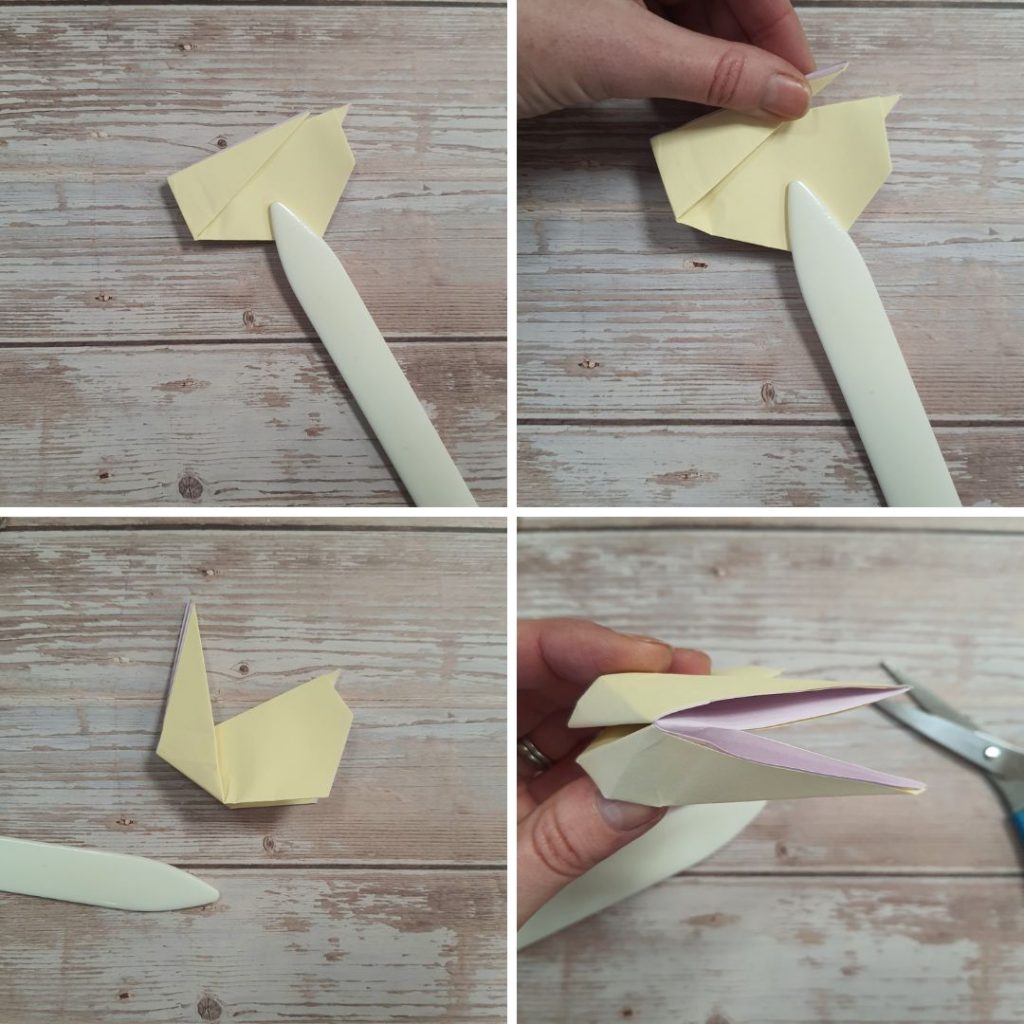
Next, fold the whole thing in half, bringing the centre crease upwards and the edges down towards each other – it’s easier if you pick it up to do this (see last picture).

Now we’re going to make the ears! At the moment, they look like they’re laying along the rabbit’s back.
Hold the bottom of the model in one hand and gently bring the points of the ears up with the other.
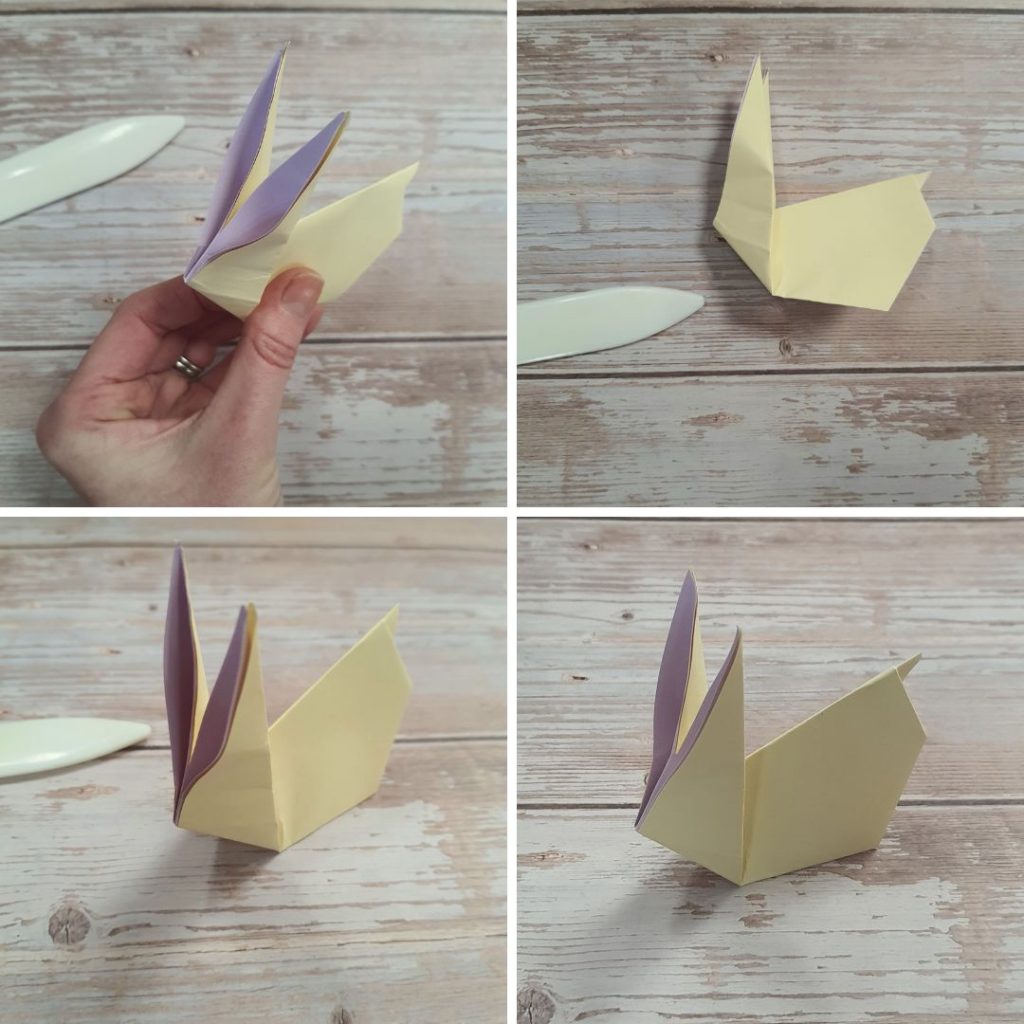
Stop when the back of the ears are roughly perpendicular to the base. Crease well.
Ok – so the next step involves separating the ears! Take a pair of scissors and very carefully snip down the centre crease between the ears, being careful not to cut all the way down.

To give the ears a bit more shape – stick your finger in them


