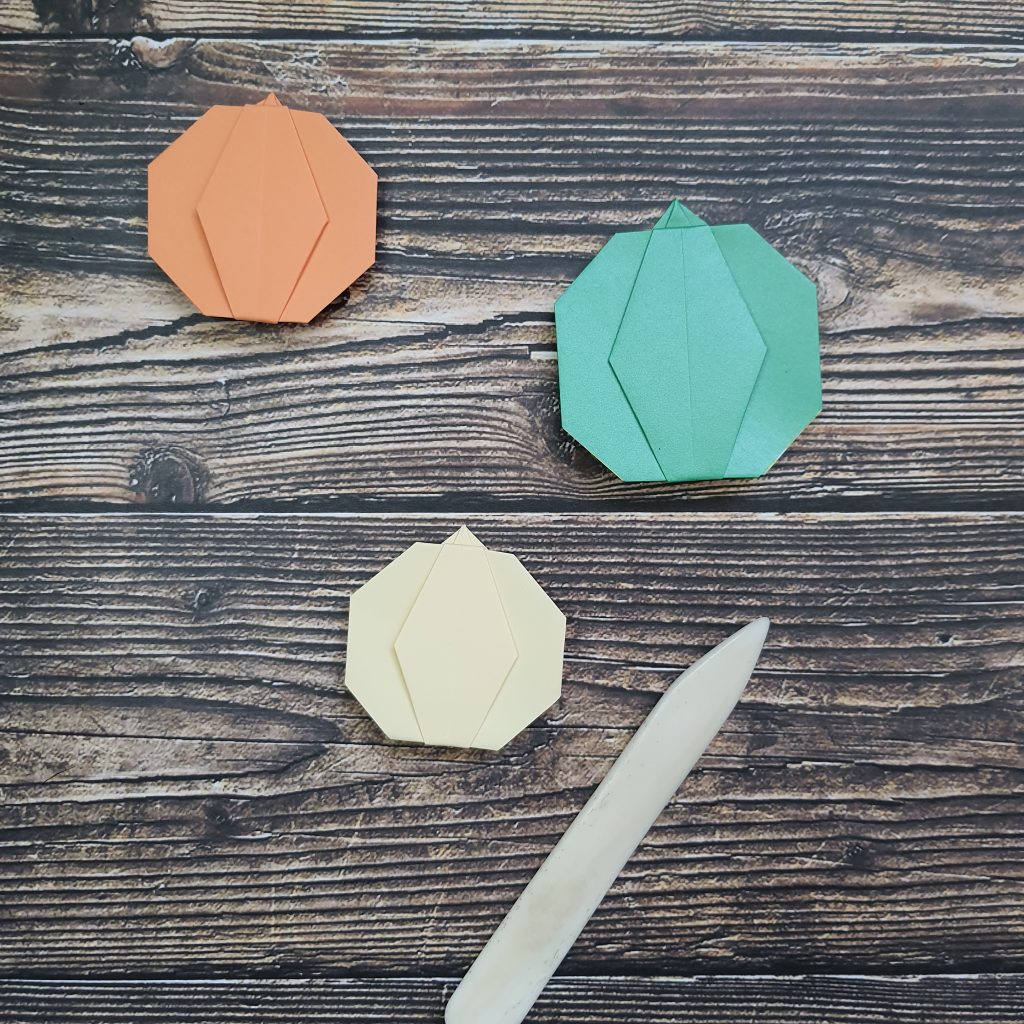
Simple origami pumpkin tutorial
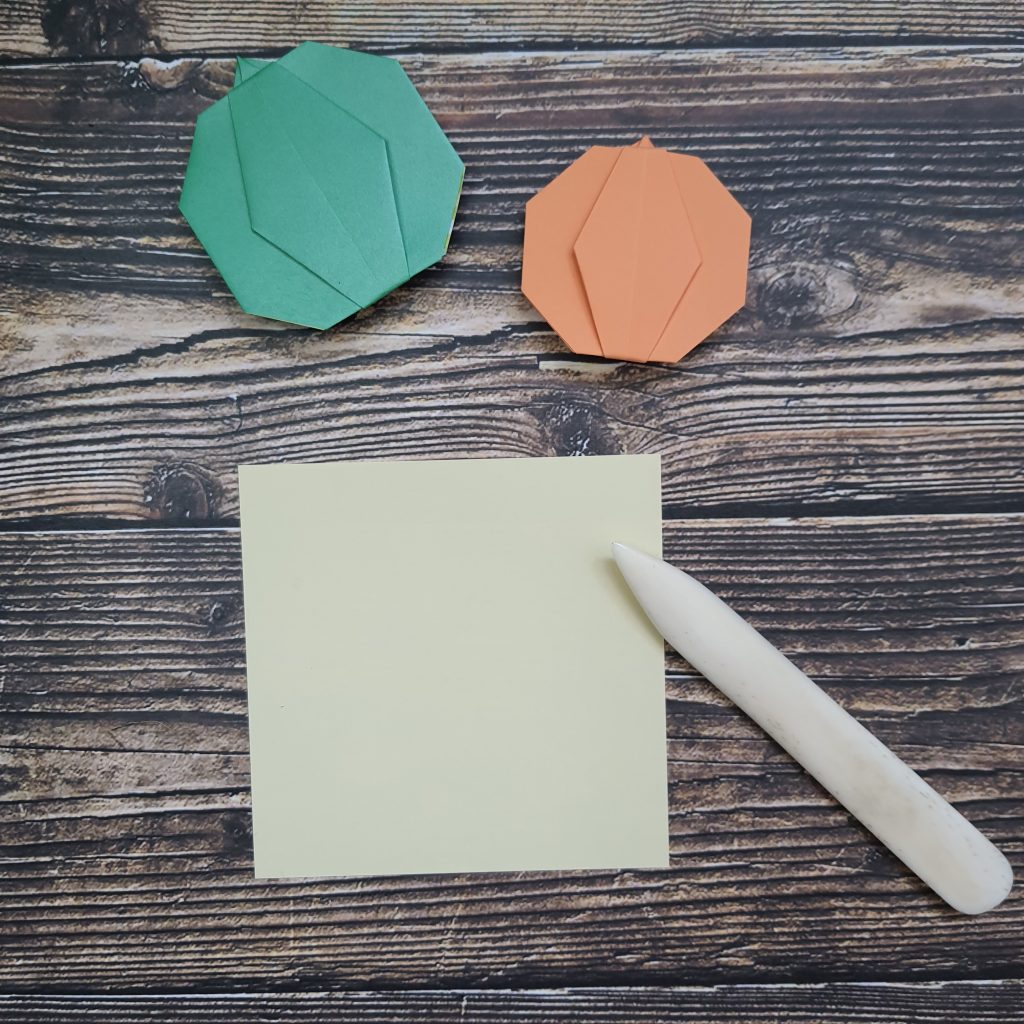
Try making this origami pumpkin in a variety of colours and patterns for a fun autumn project. You’ll need a sheet of fairly thin square paper; crease the folds with a creasing tool, or you can use the back of your thumb nail.
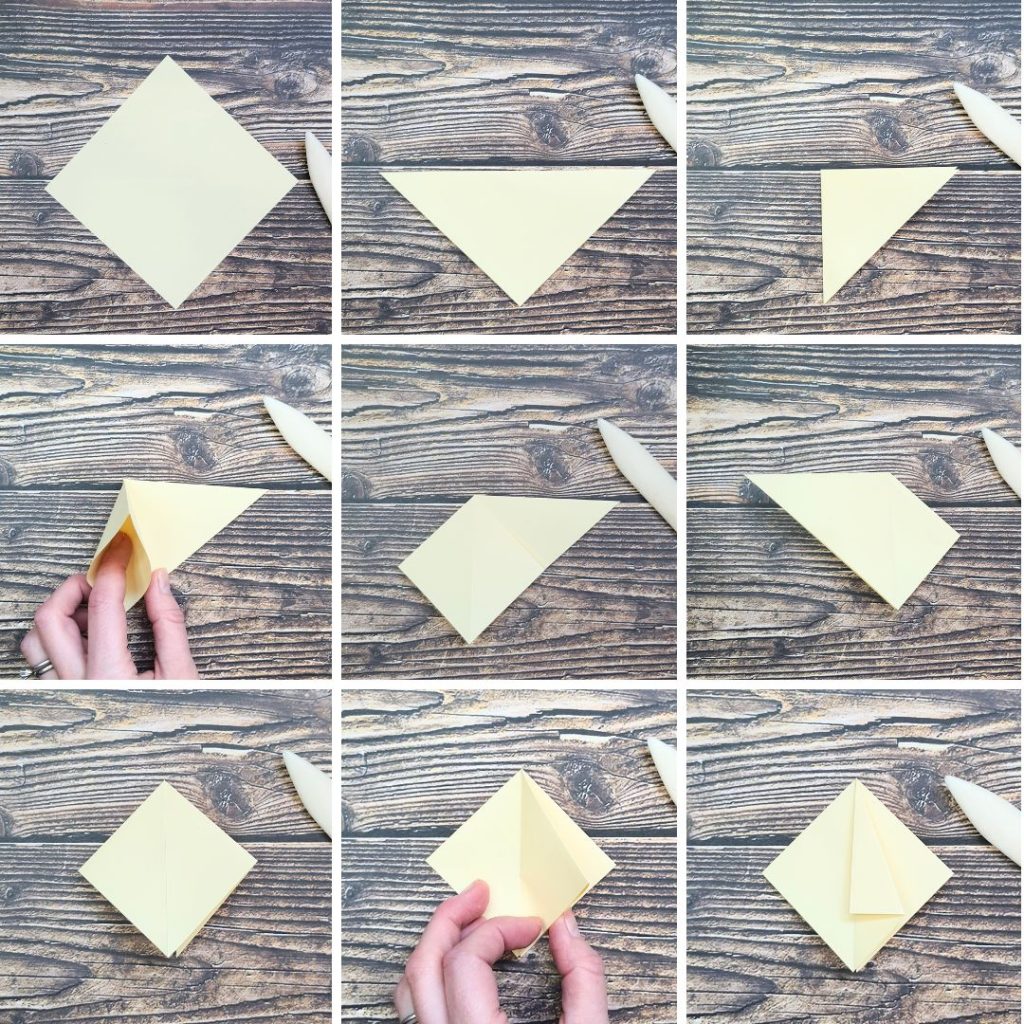
Start with the square of paper turned so it looks like a diamond
Fold it in half, top corner to bottom corner
Fold in half again, corner to opposite corner, along the top edge
Lift the flap you’ve just folded, and open up the layers…
Squash this layer into a neat diamond shape
Flip over sideways, and do the same squash fold on the other flap
You should now have a nice diamond shape, with layers that open at the bottom
Take the top flap on the left over to the right…
Fold this to the left, so the top sloped edge lines up with the central crease
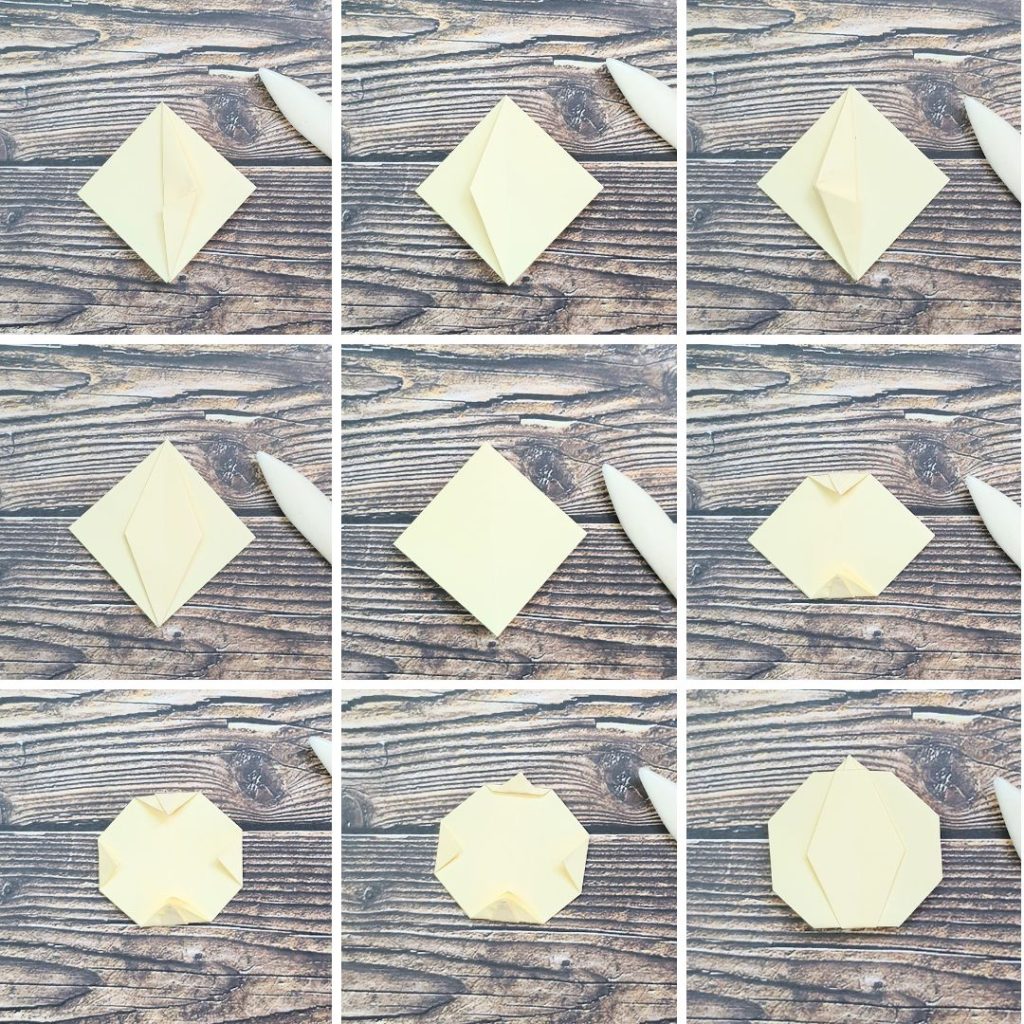
Fold the bottom sloped edge to line up with the central crease
Take this layer back over to the right and press the creases flat
Next, take the top flap on the right over to the left, and make the same two folds
Once you’ve taken that flap back over to the right, you should be left with a slim diamond shape in the middle
Flip the model over
Fold over the top and bottom corners a small amount to shape the pumpkin
Fold both side corners in, roughly the same amount (you can take a look at the right side to check you’re happy with the shape, and adjust these folds if necessary)
Take the small top triangle you folded over, and fold the point up, so the tip sticks out a bit over the top of the pumpkin, creating the stalk
Turn it over to the right side to see the finished result!