How to Fold an Origami Dreidel
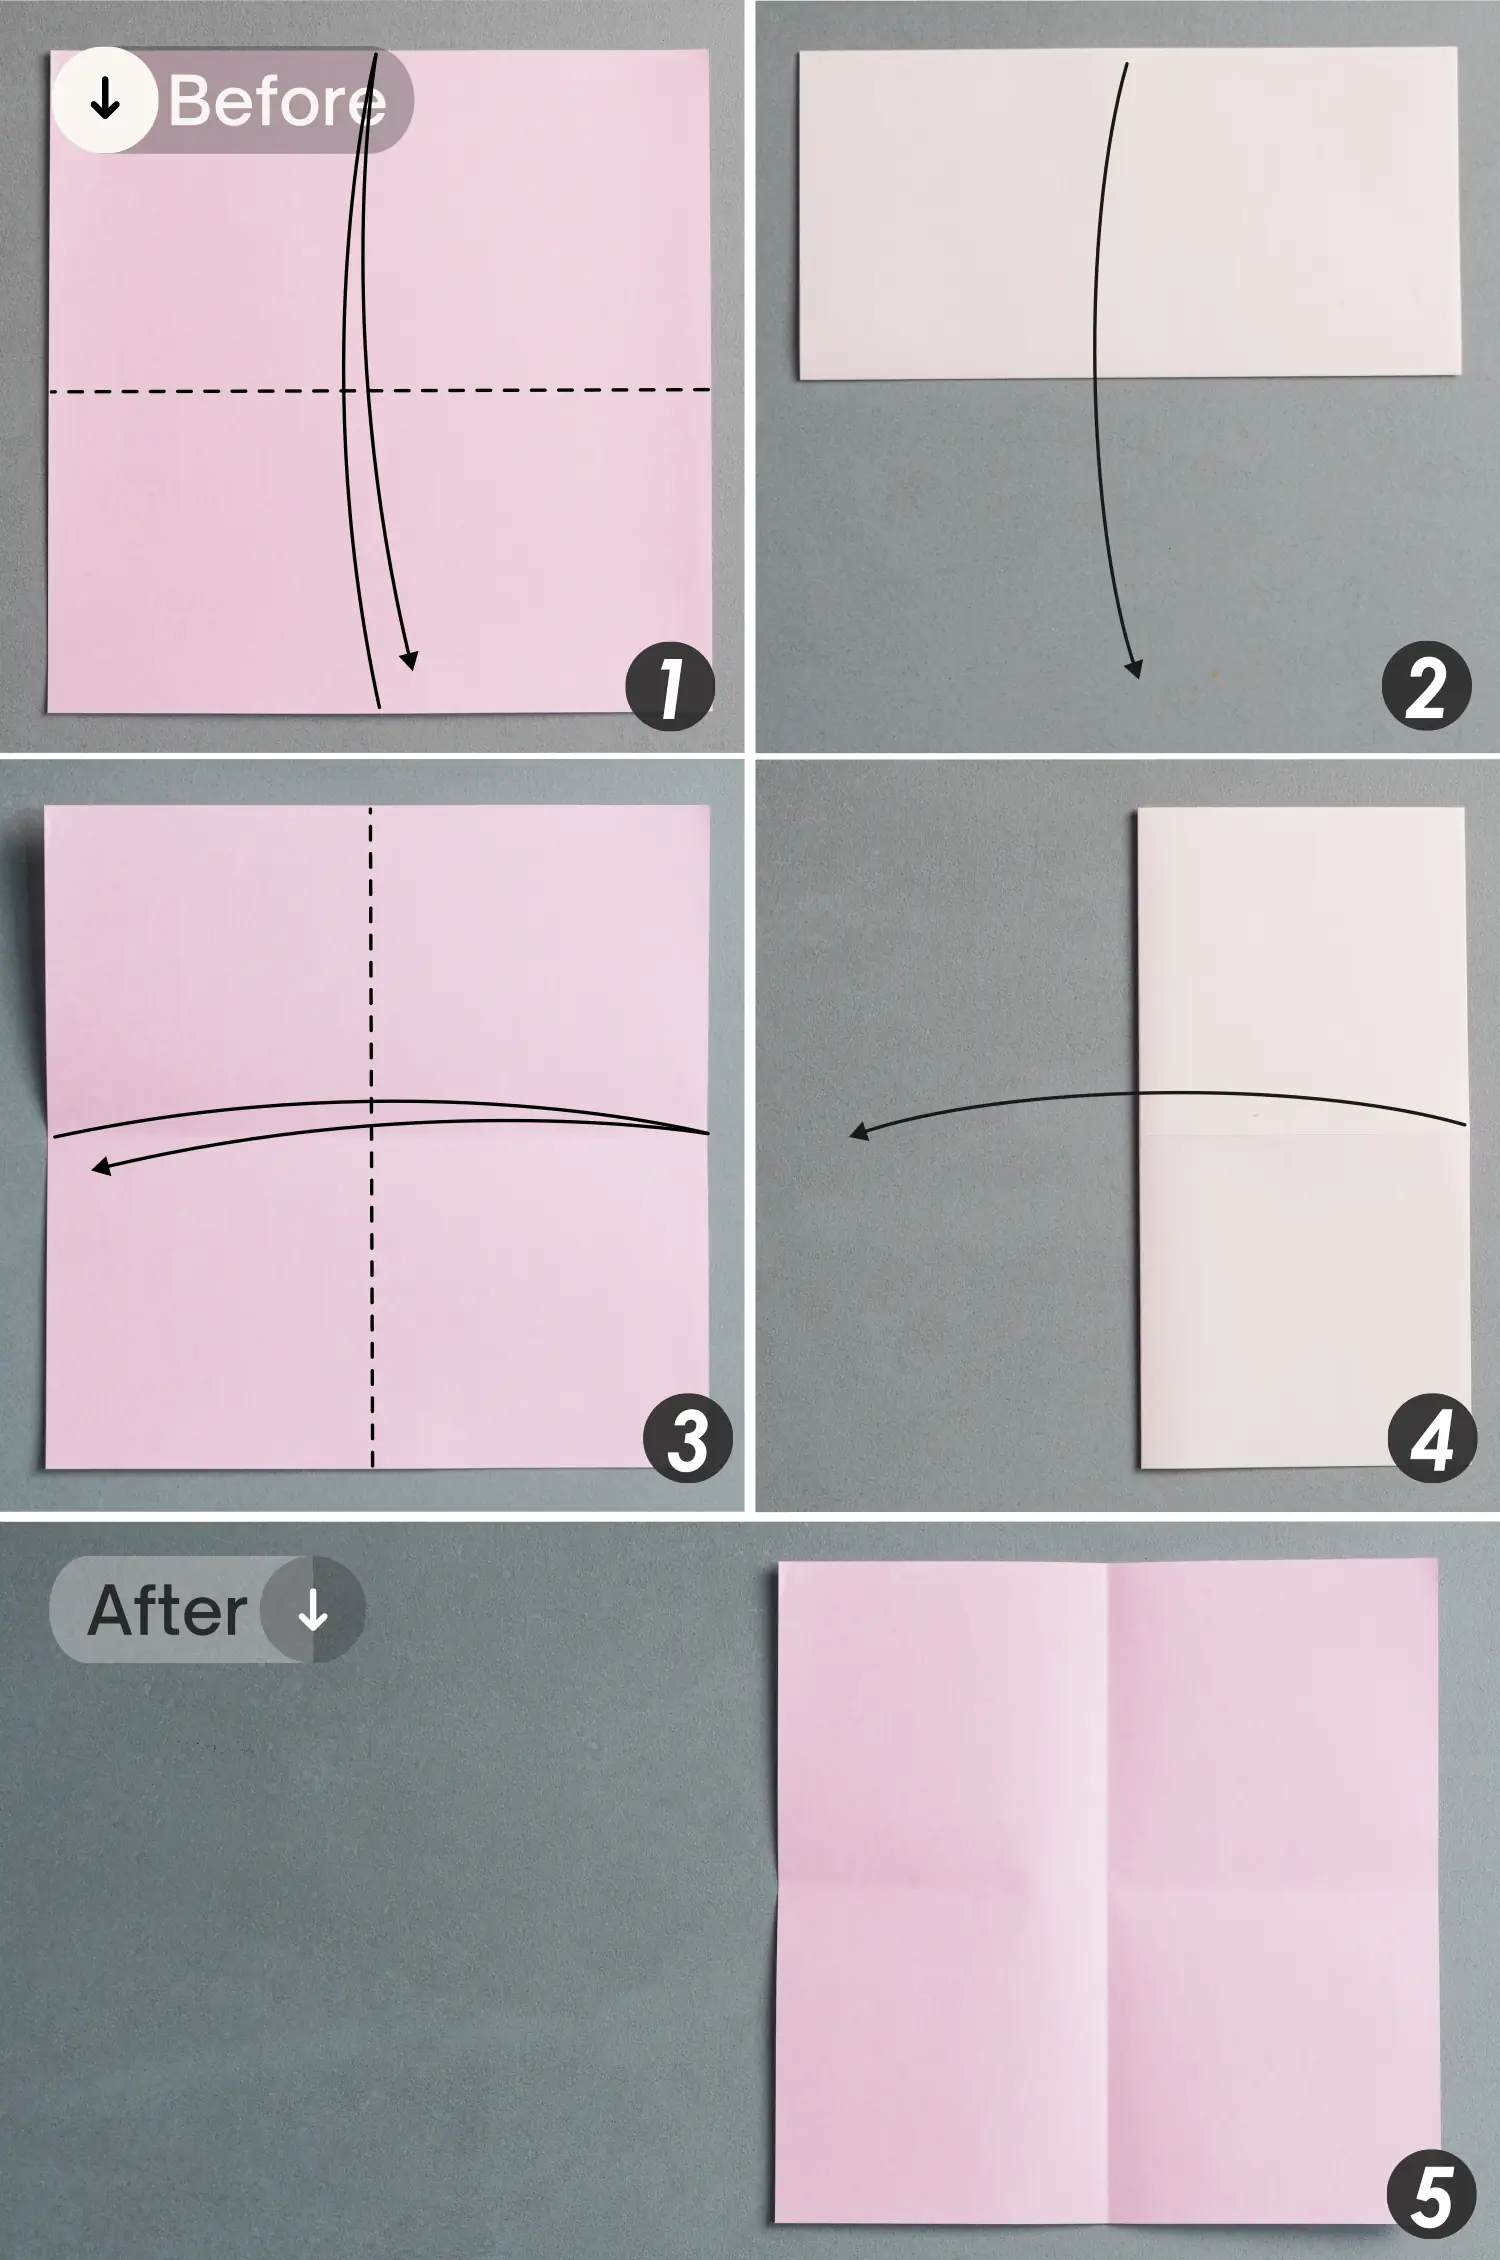
Step 1
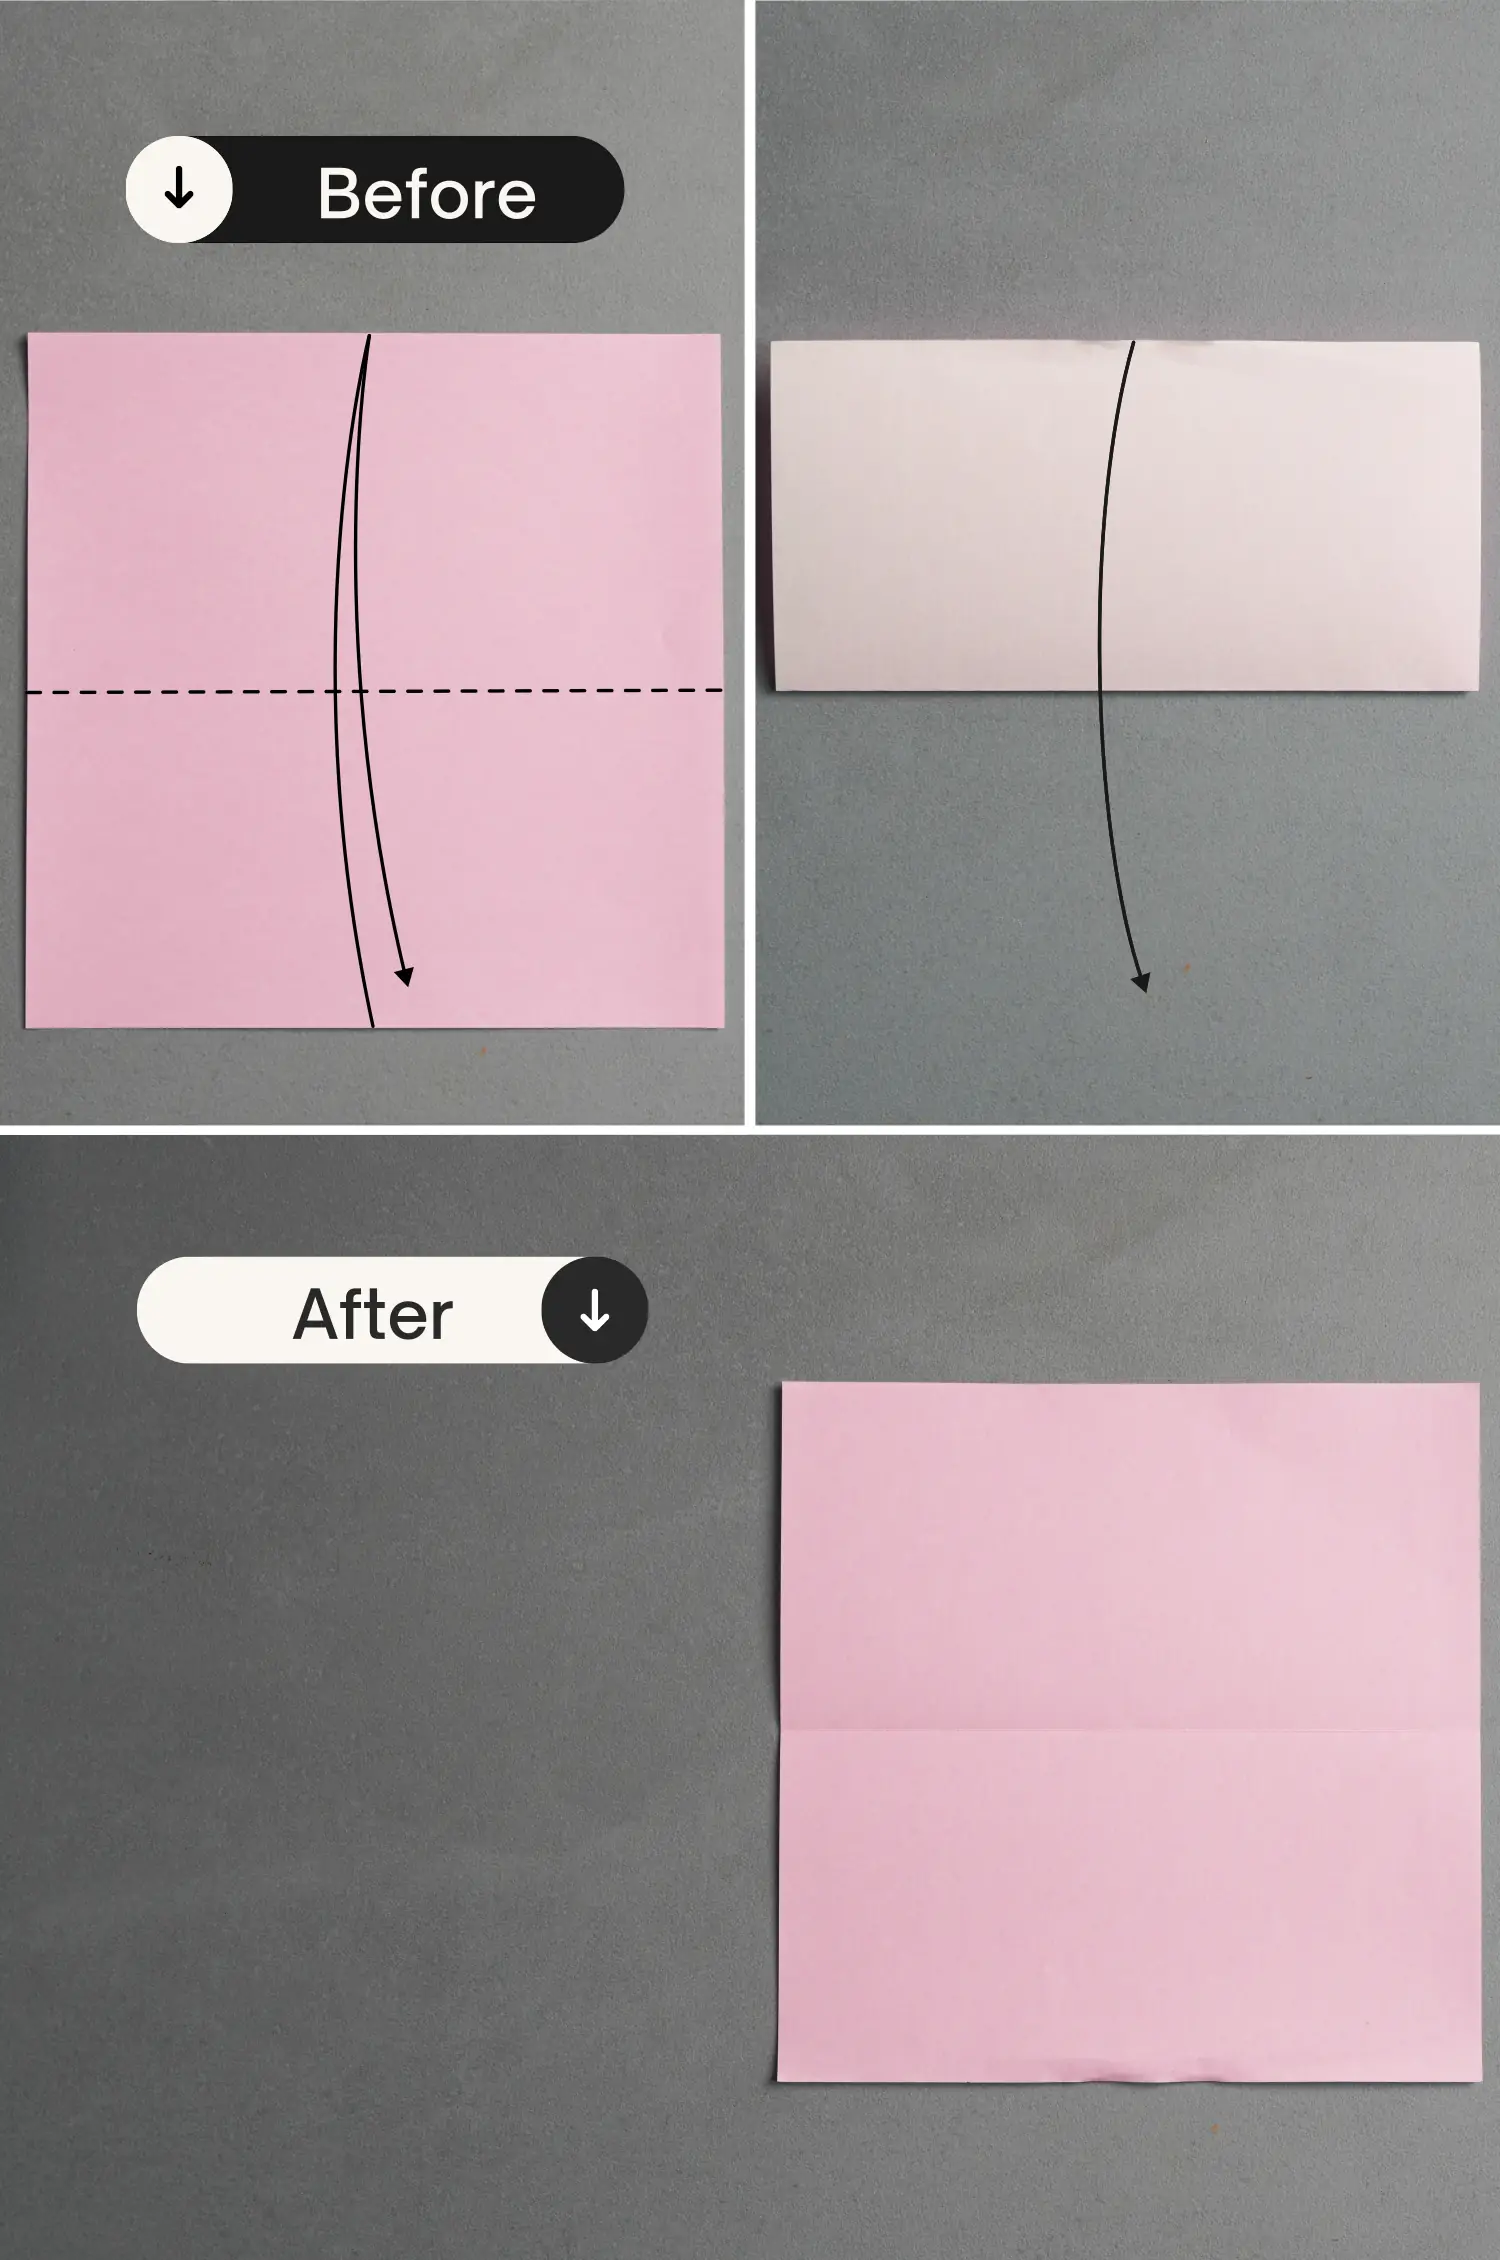
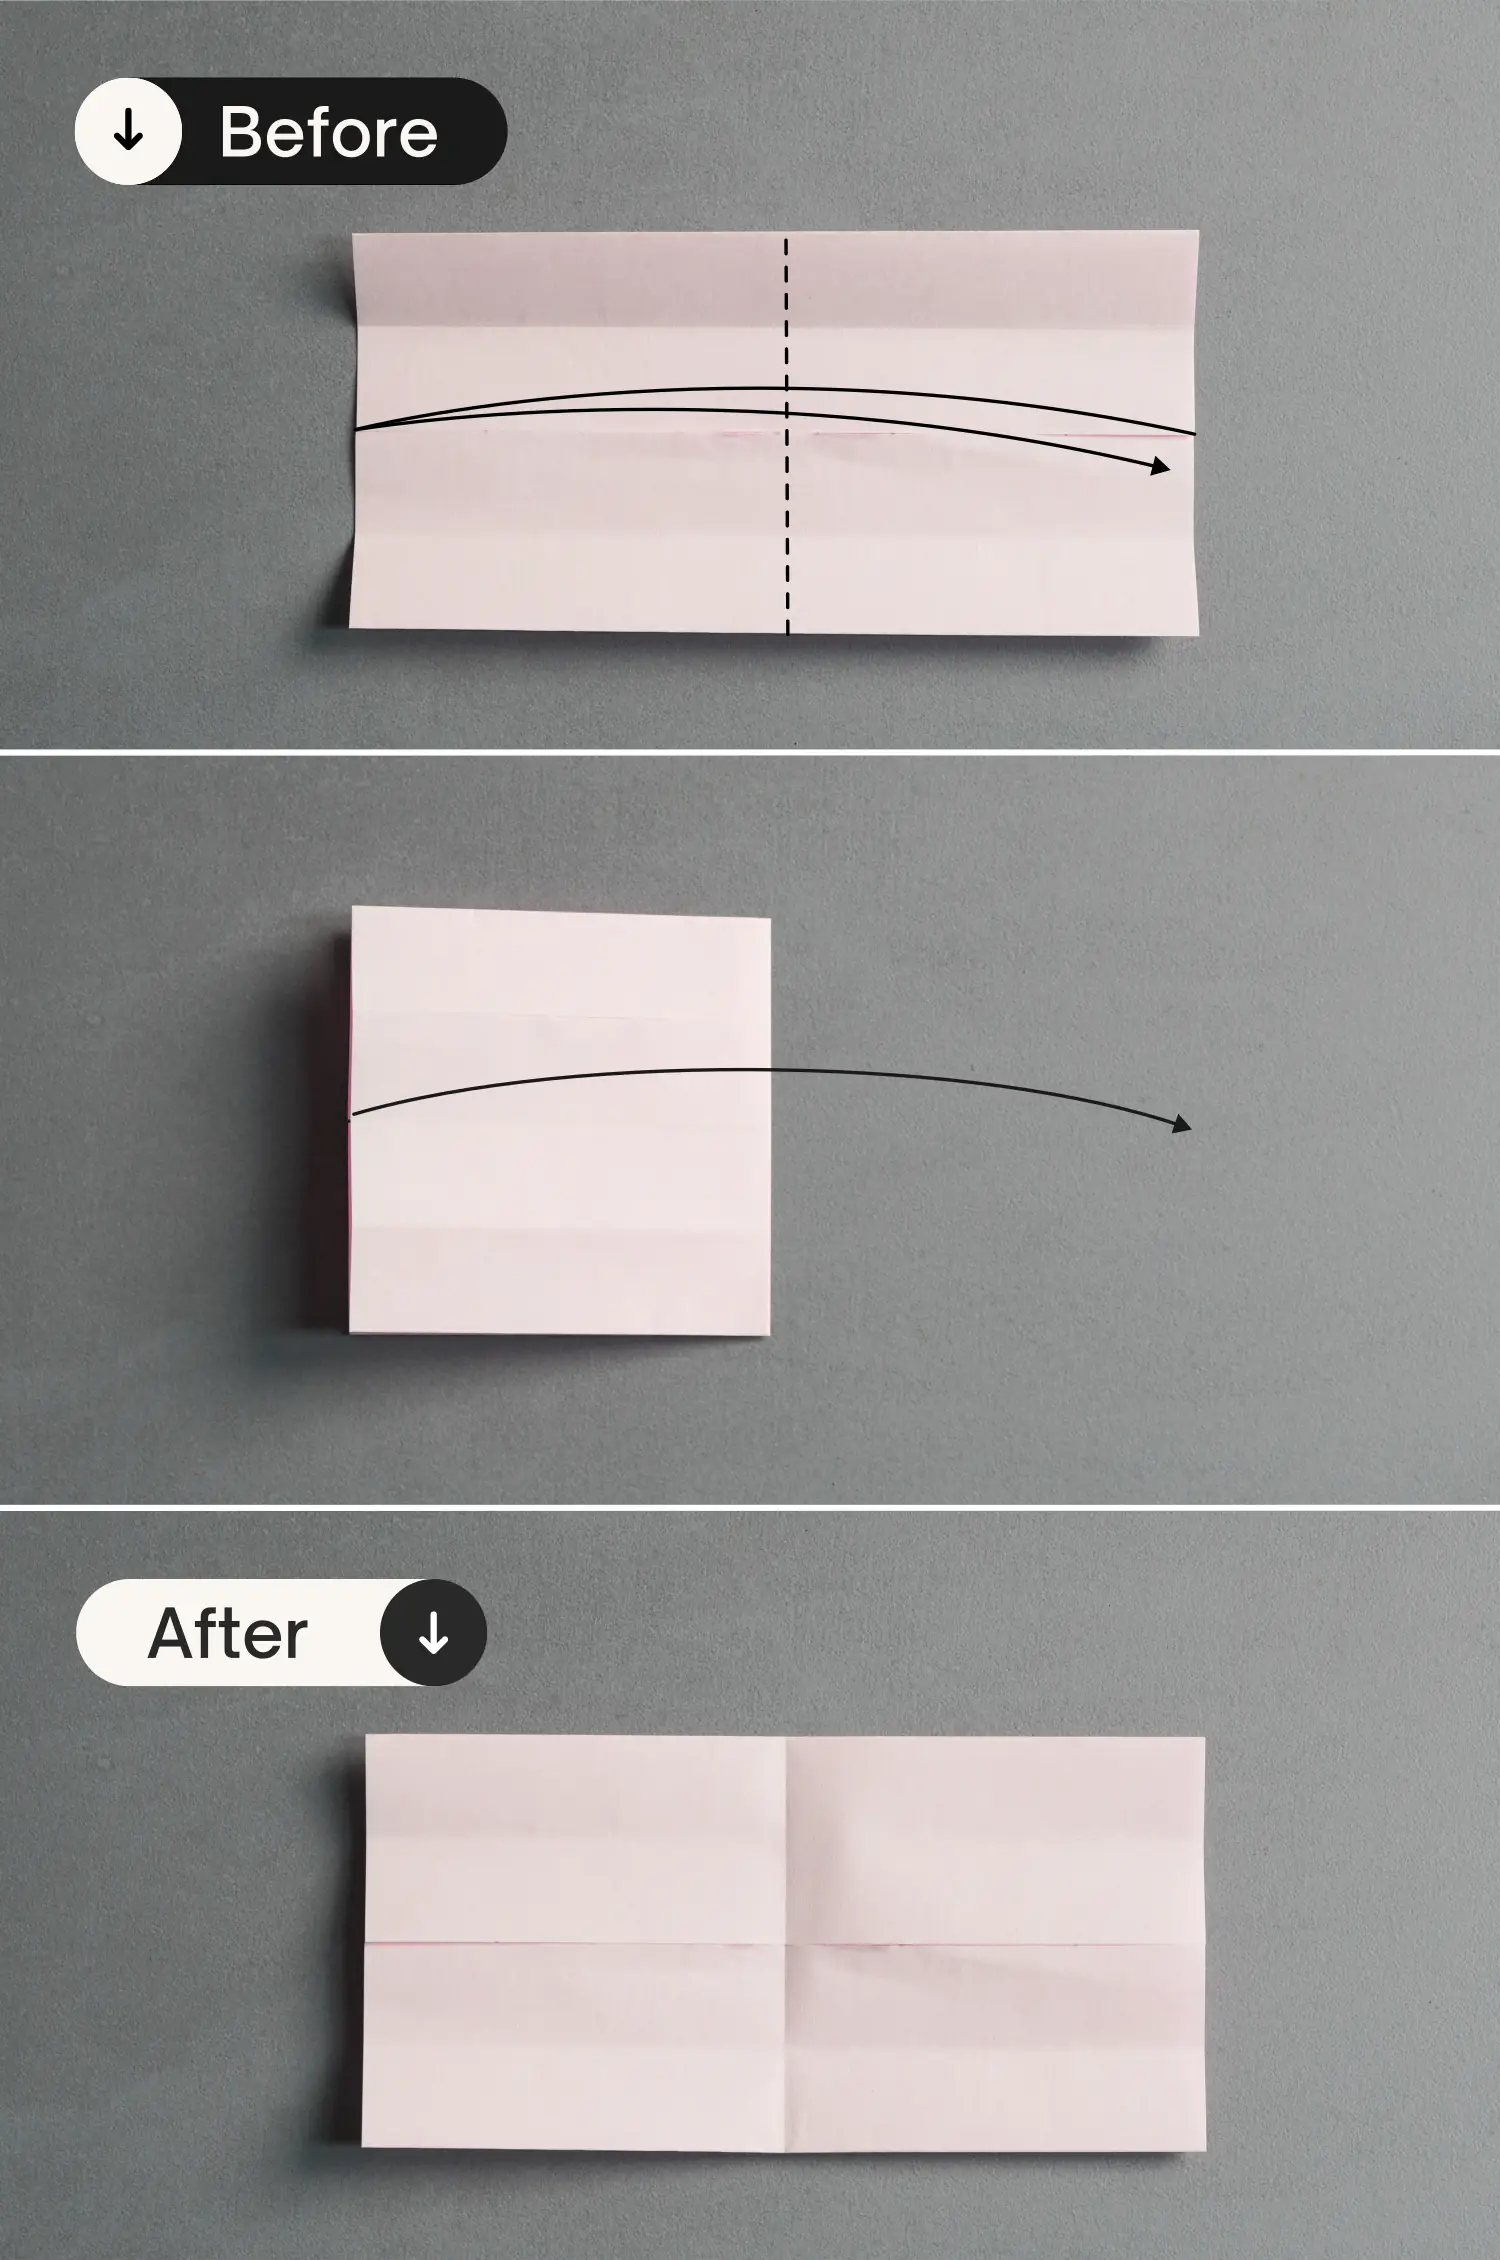
Take out one of the papers, place it with the desired display color side down to begin folding, fold it in half horizontally, leaving a crease, and unfold it.
Step 2
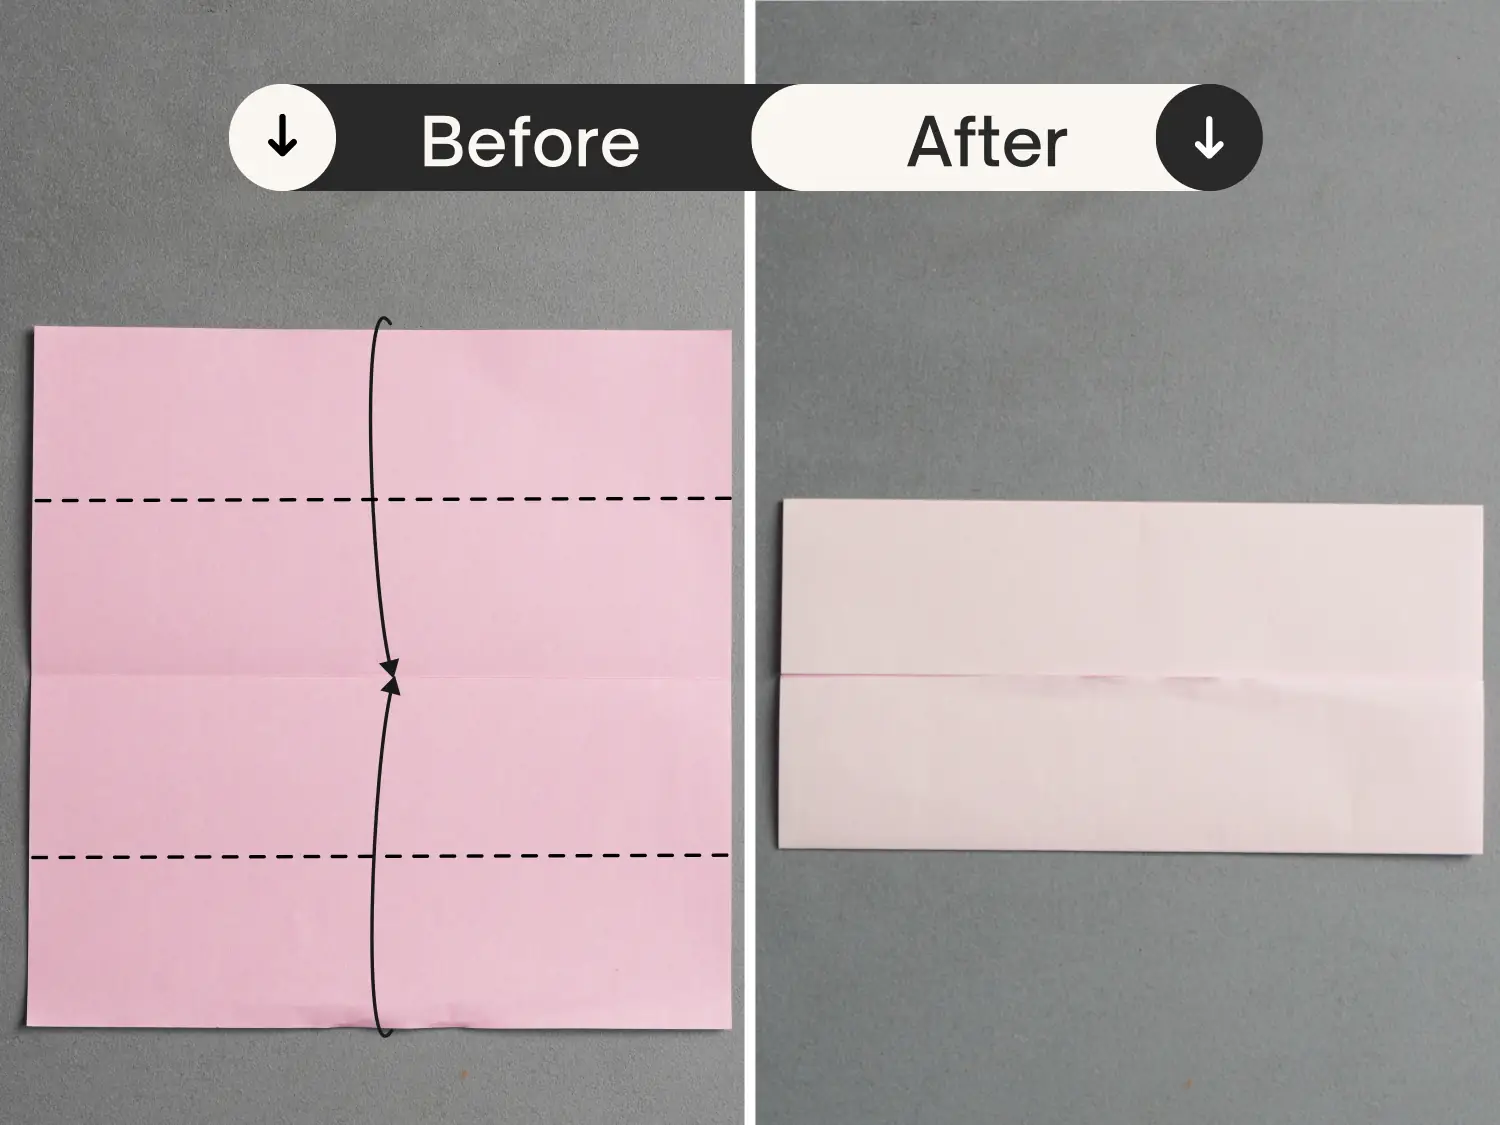
Fold the top and bottom edges to align with the horizontal crease.
Step 3
Fold the top and bottom edges to align with the horizontal crease, leaving two creases, and unfold them.
Step 4
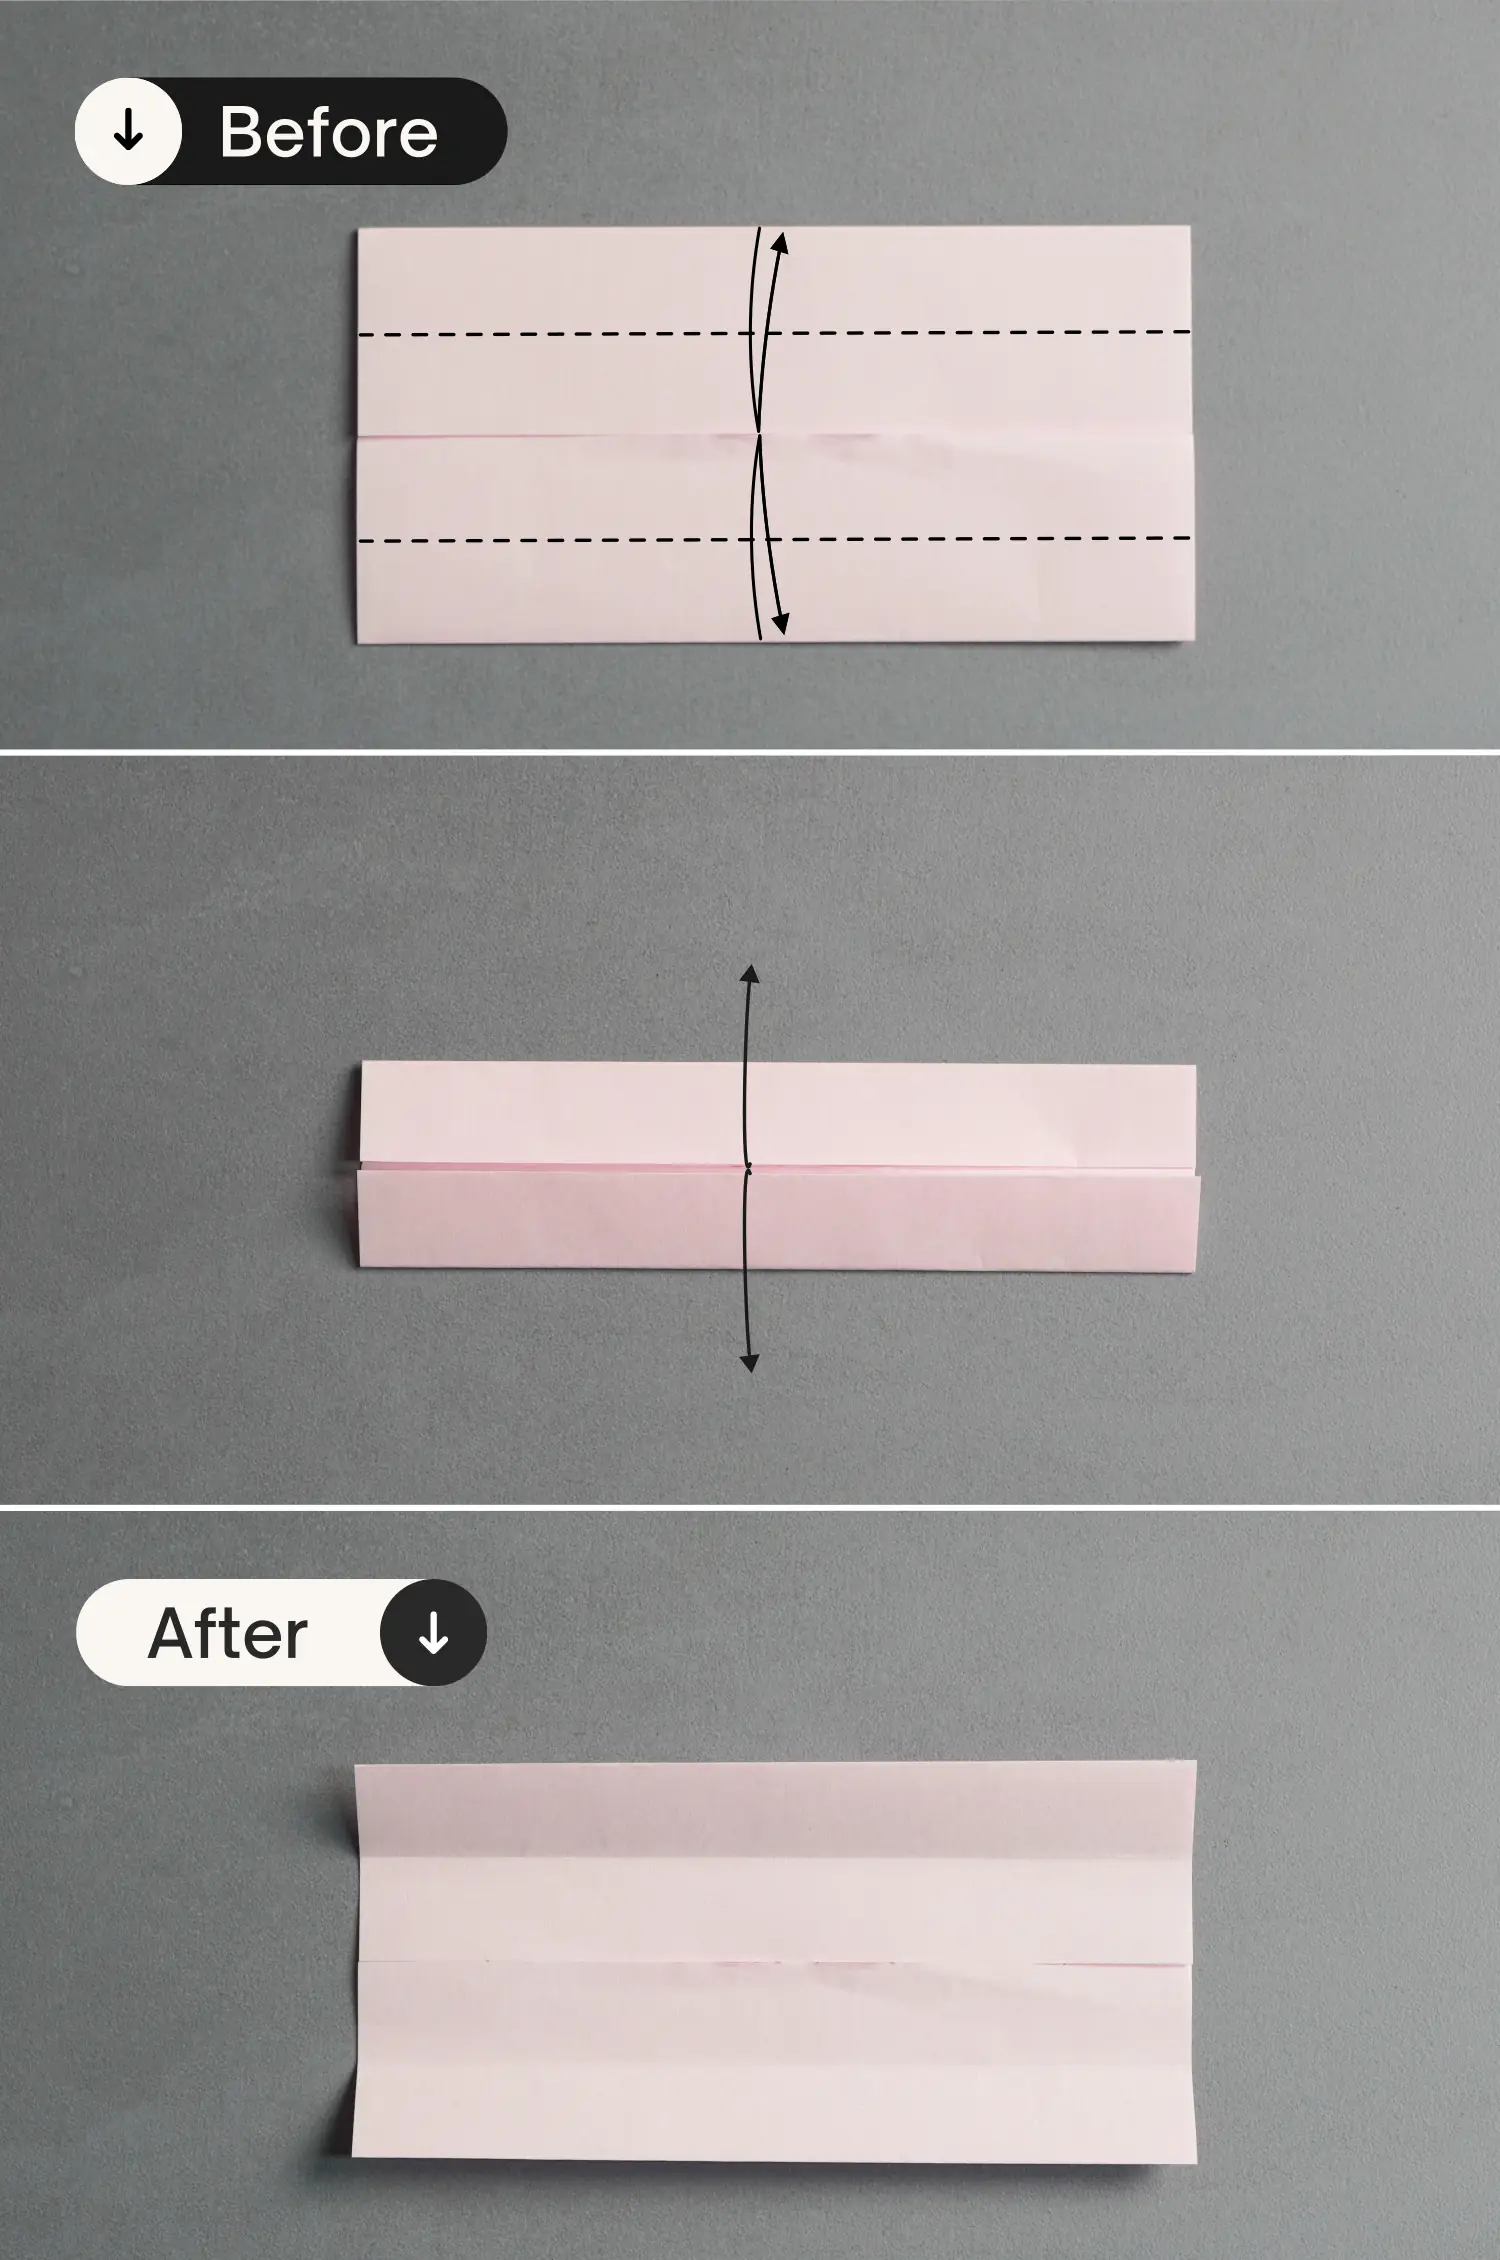
Fold the paper in half vertically and unfold it.
Step 5
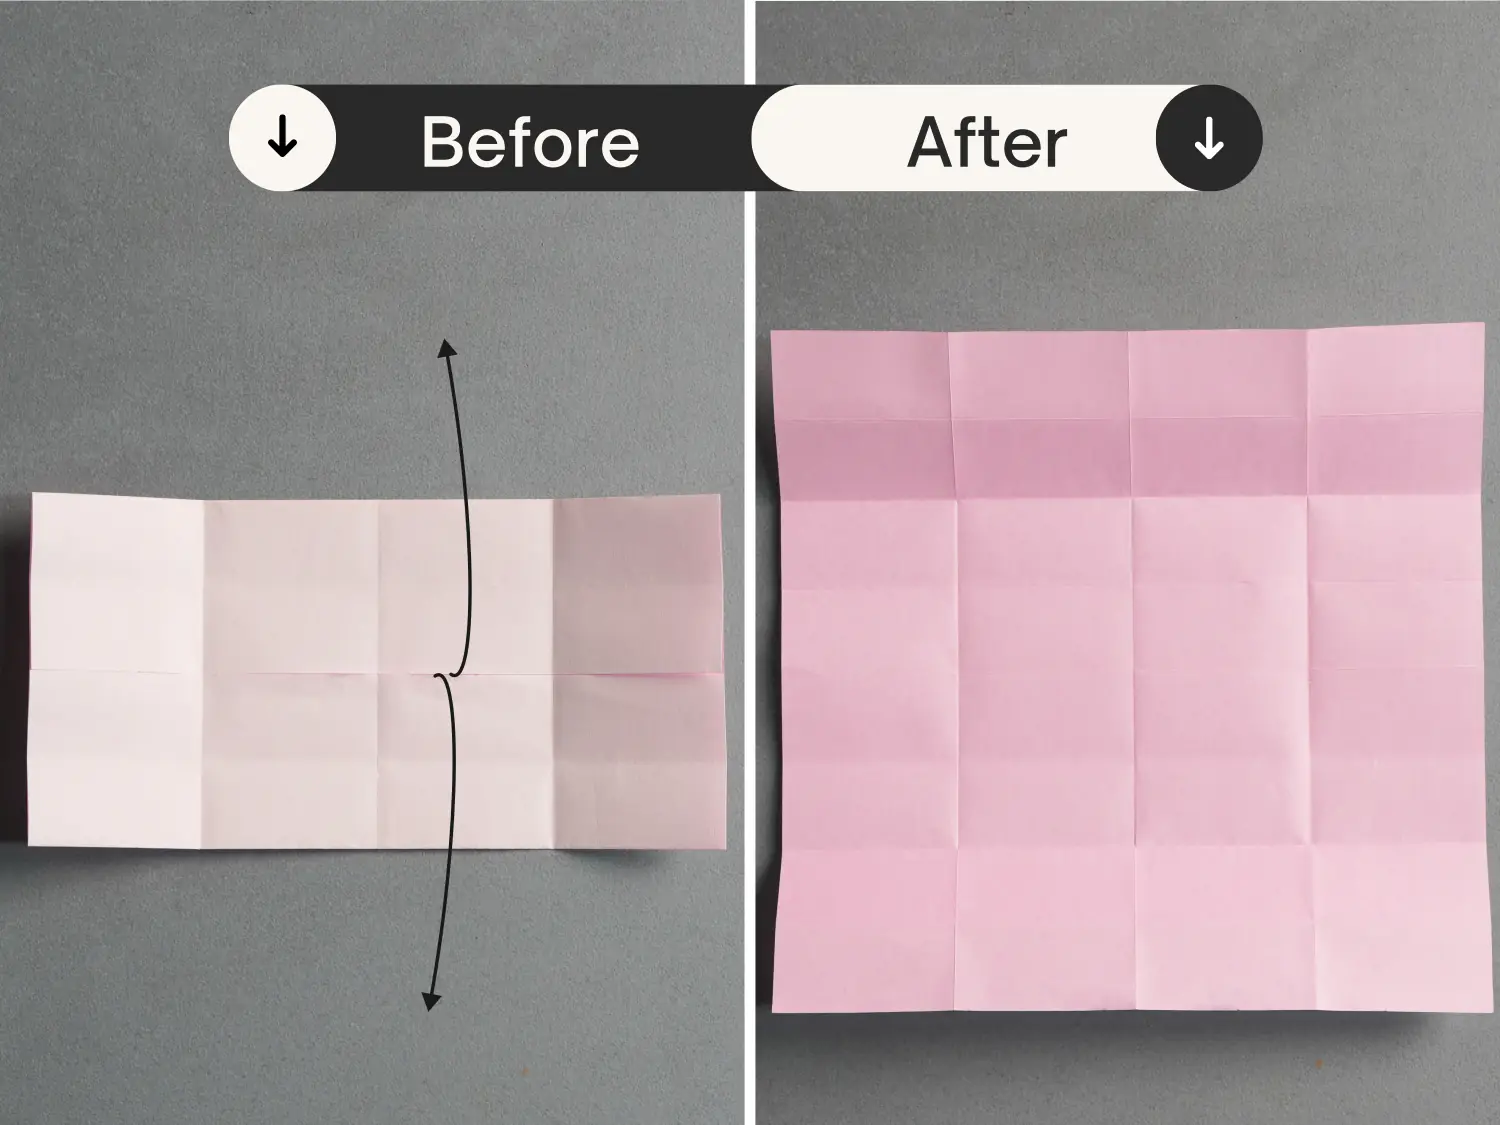
Fold the left and right edges to align with the middle vertical crease, leaving two creases, and unfold them.

Step 6
Expand the paper completely.
Step 7
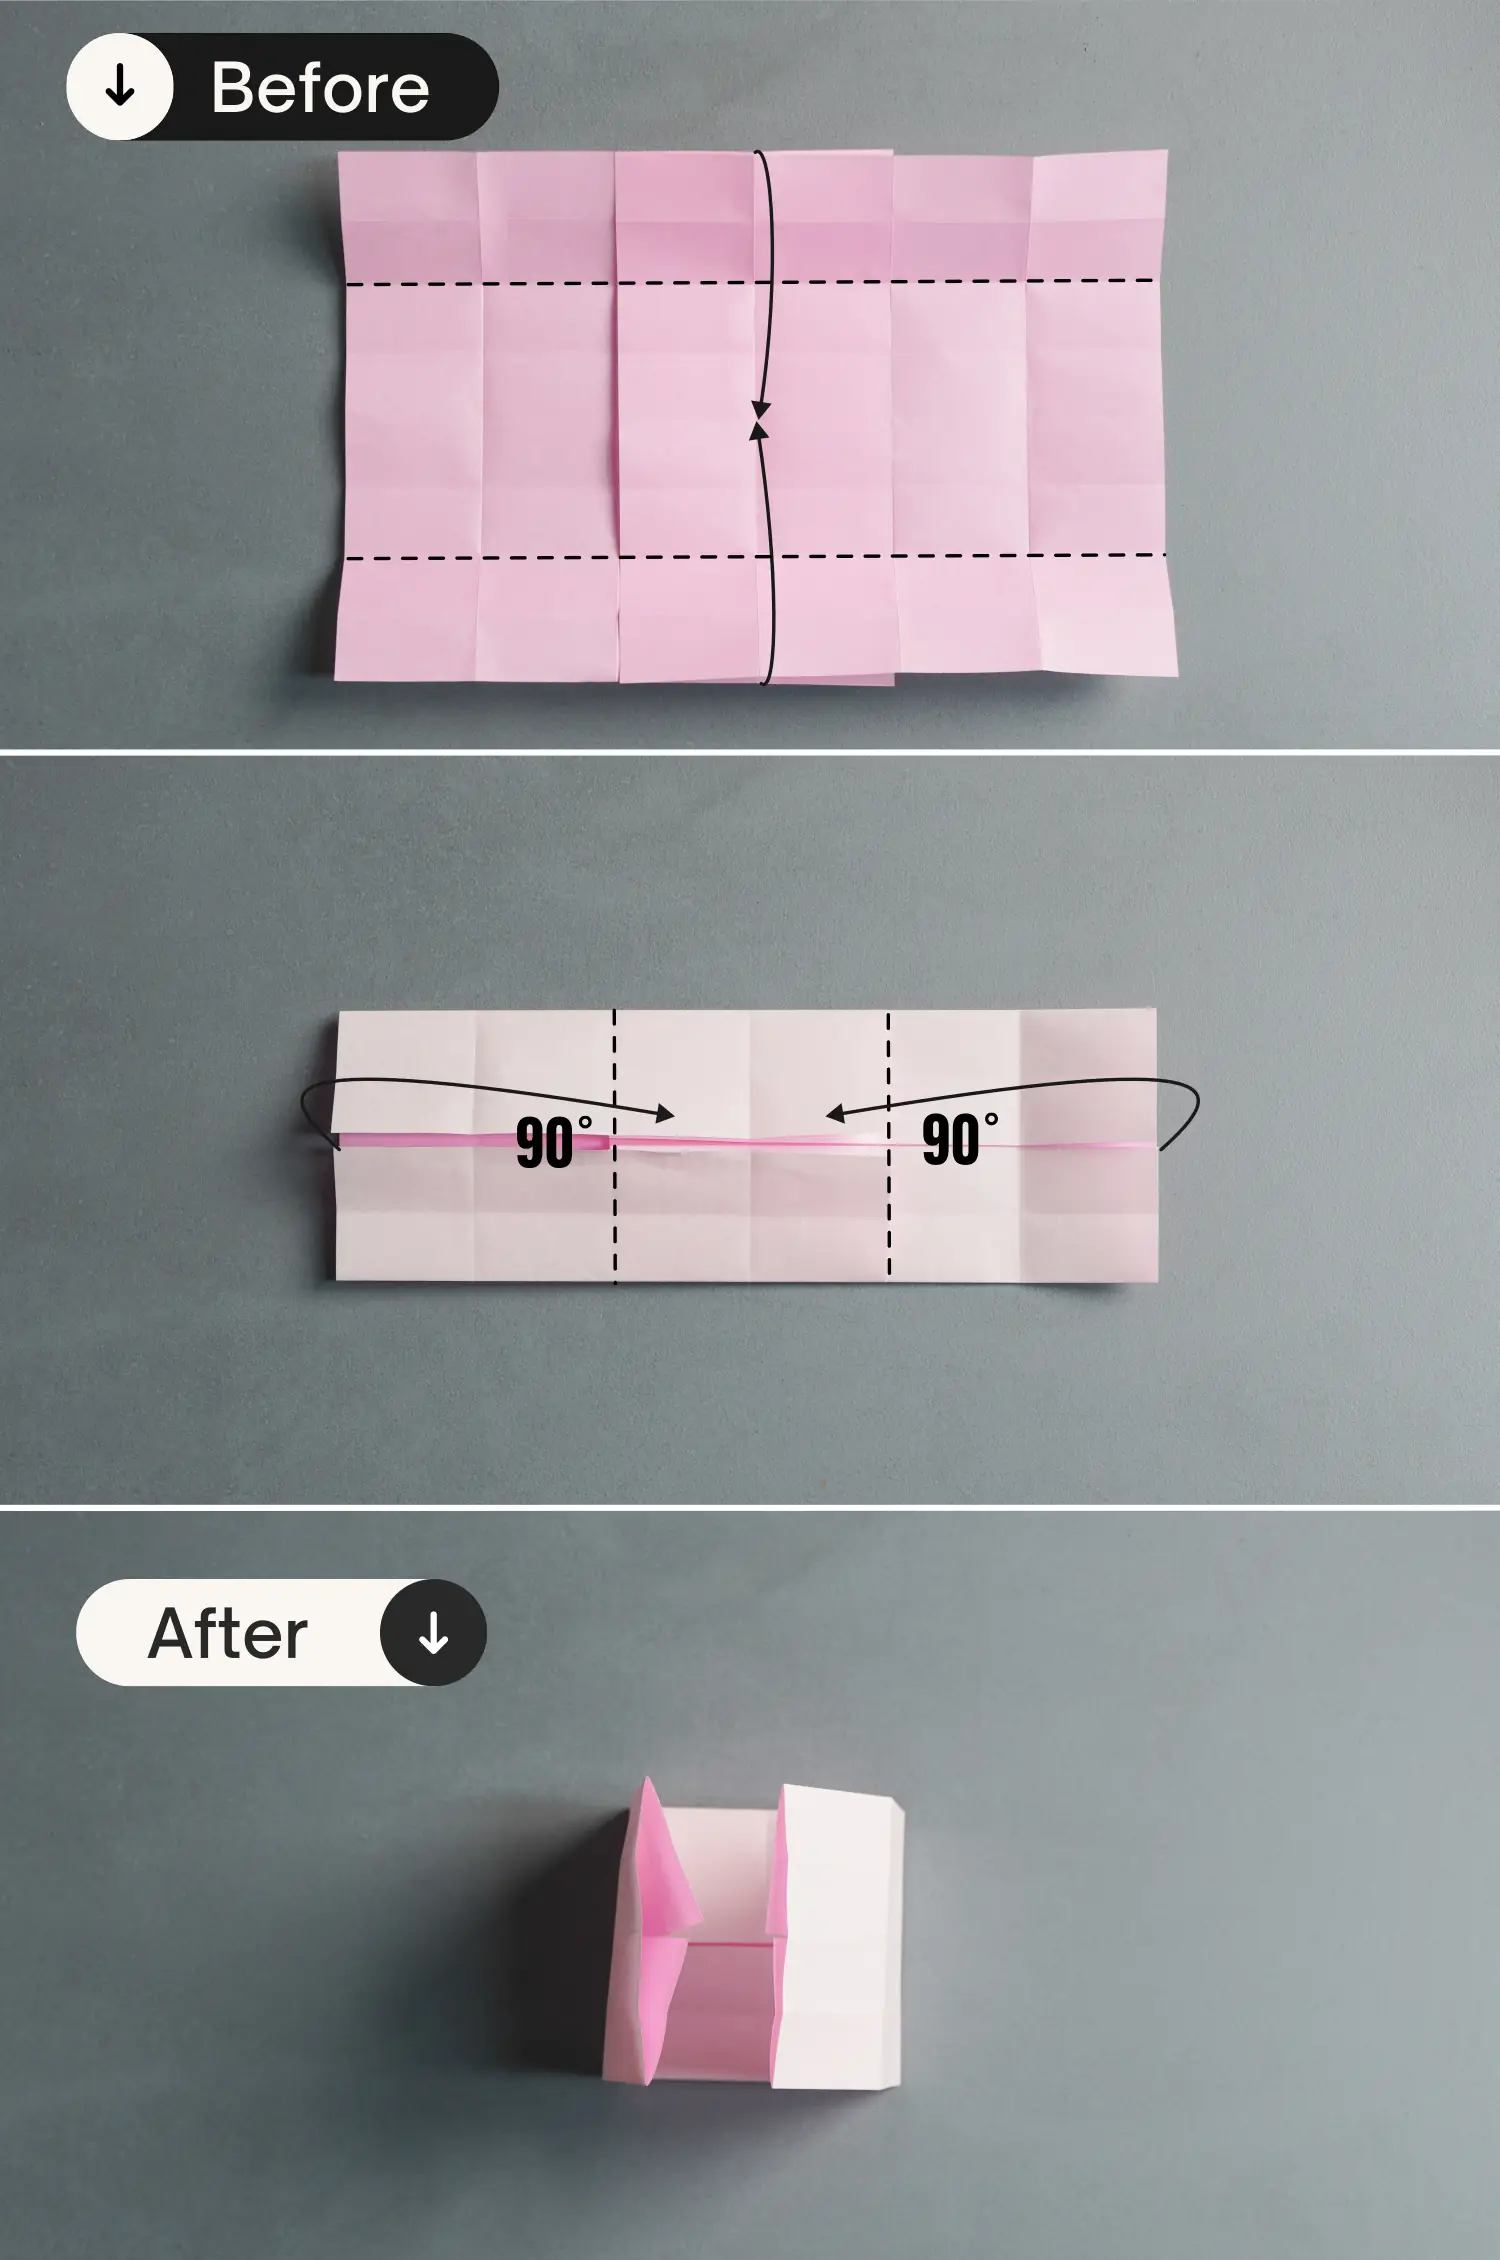
Fold another piece of paper in the same manner as above. Then overlap the two sheets of paper as shown in picture 2.

Step 8
Fold the top and bottom edges toward the center along the creases indicated by the dotted lines. then, lift the left and right edges along the creases indicated by the dotted lines for 90 degrees, to get two stand upright flaps.
Step 9
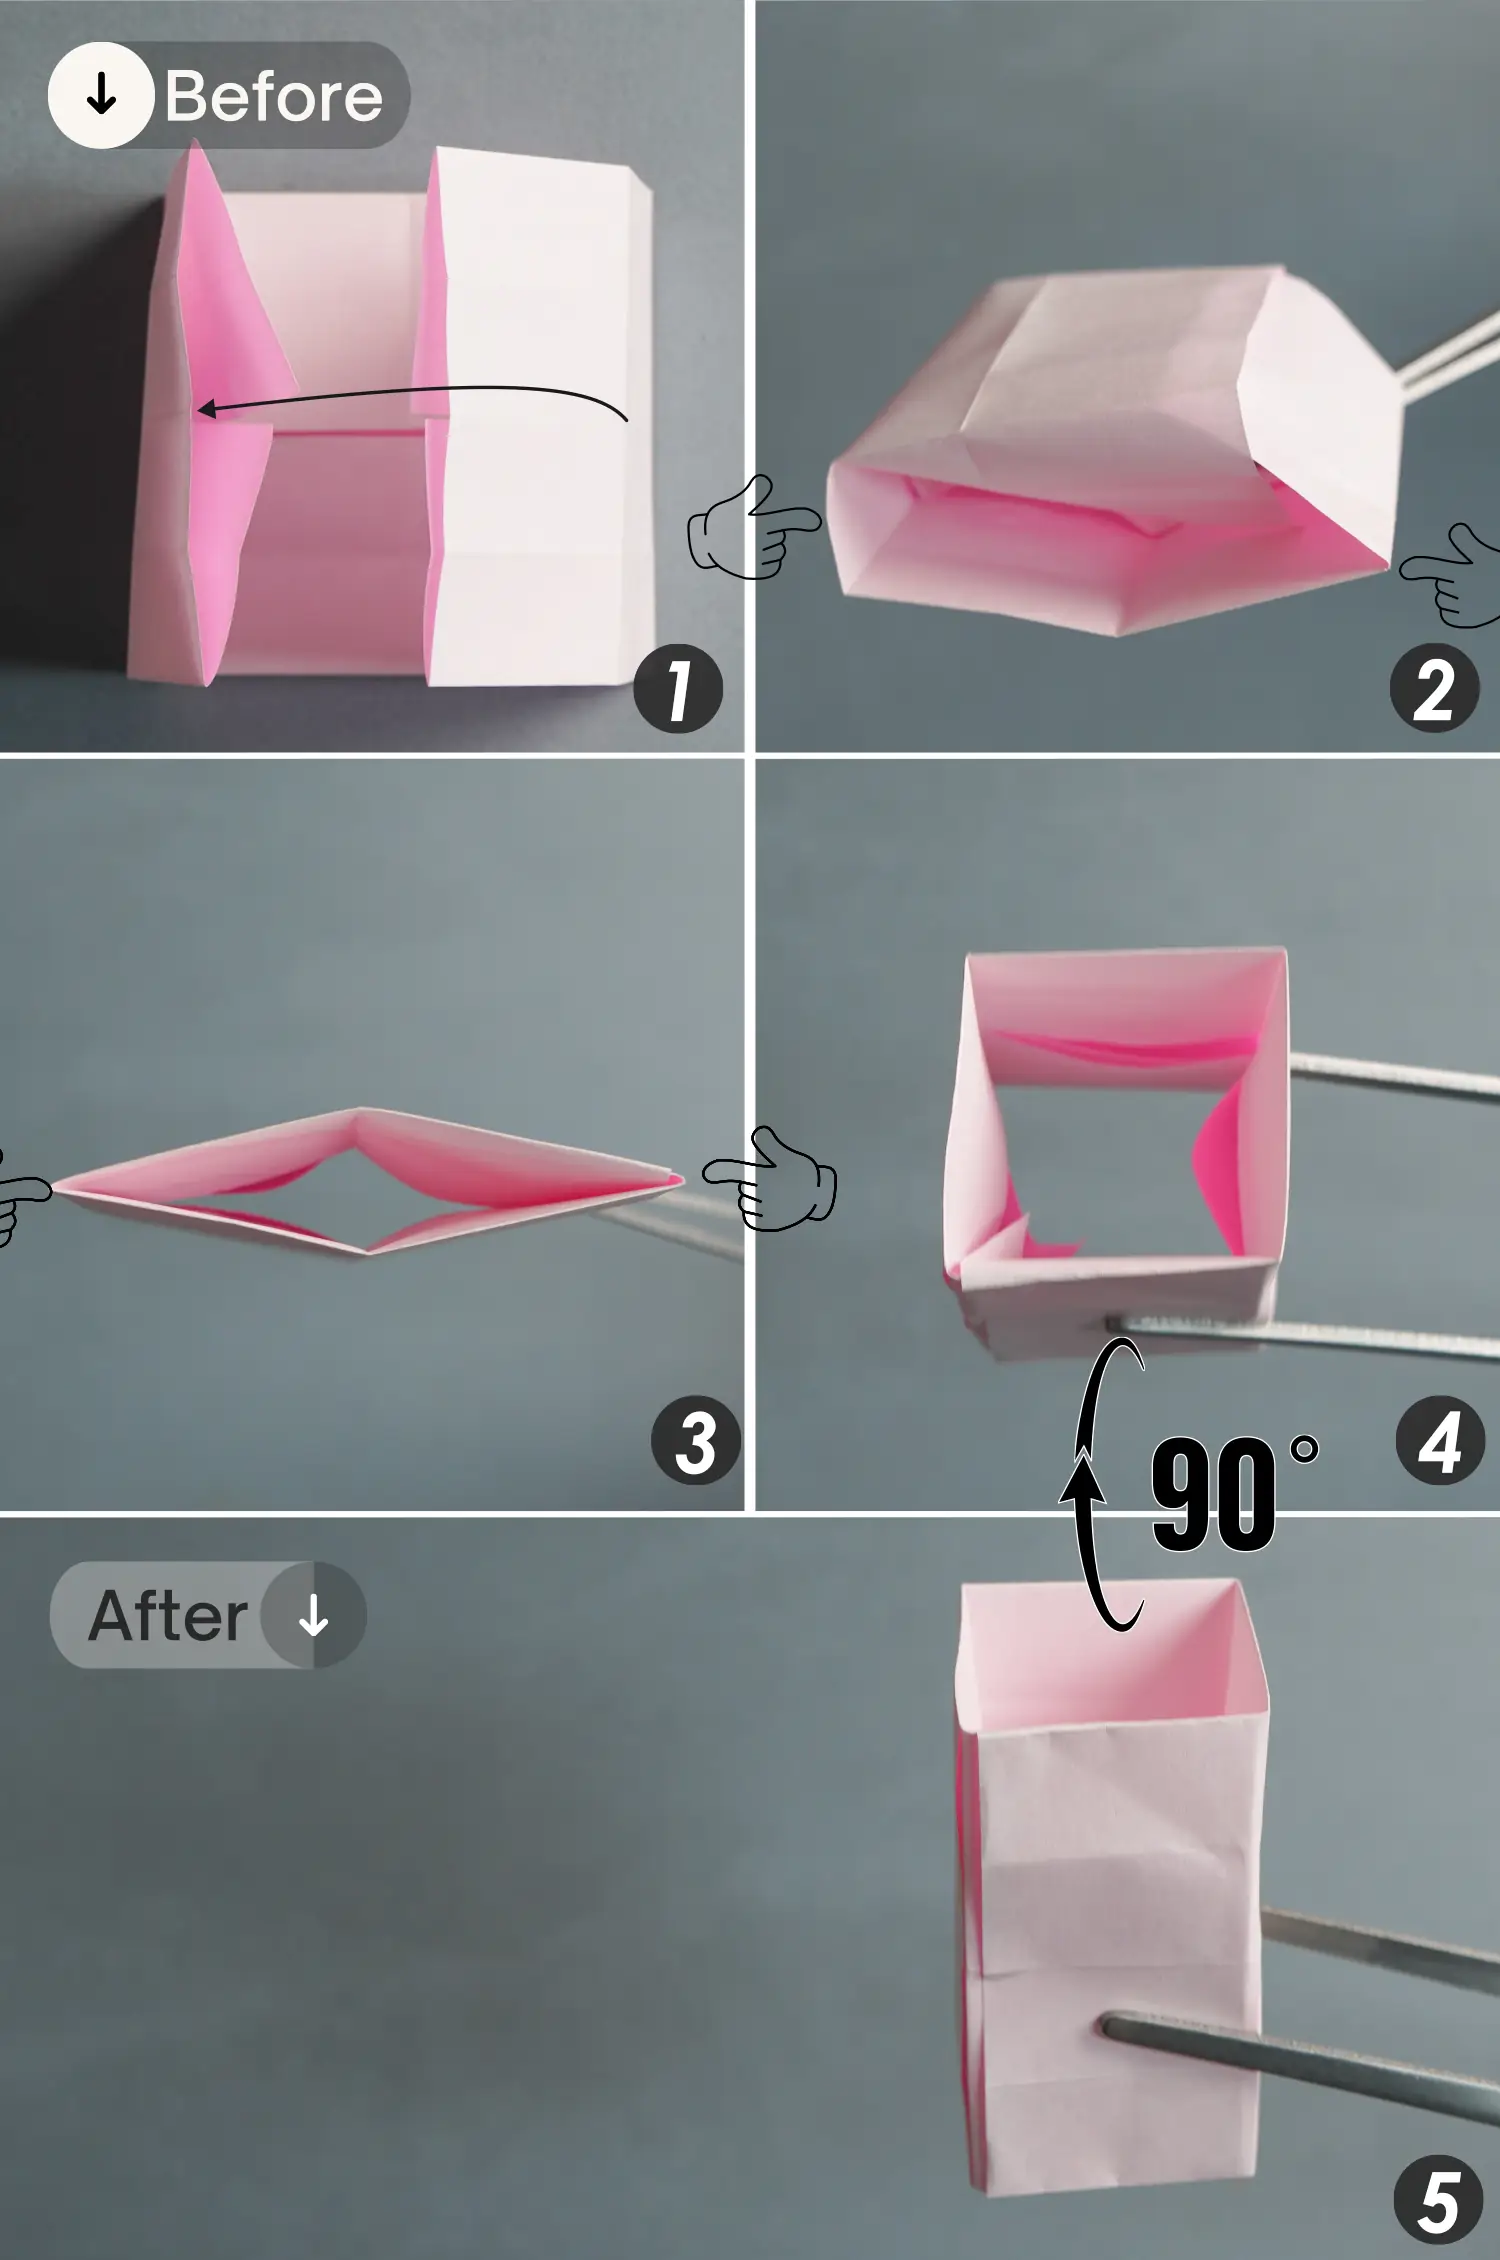
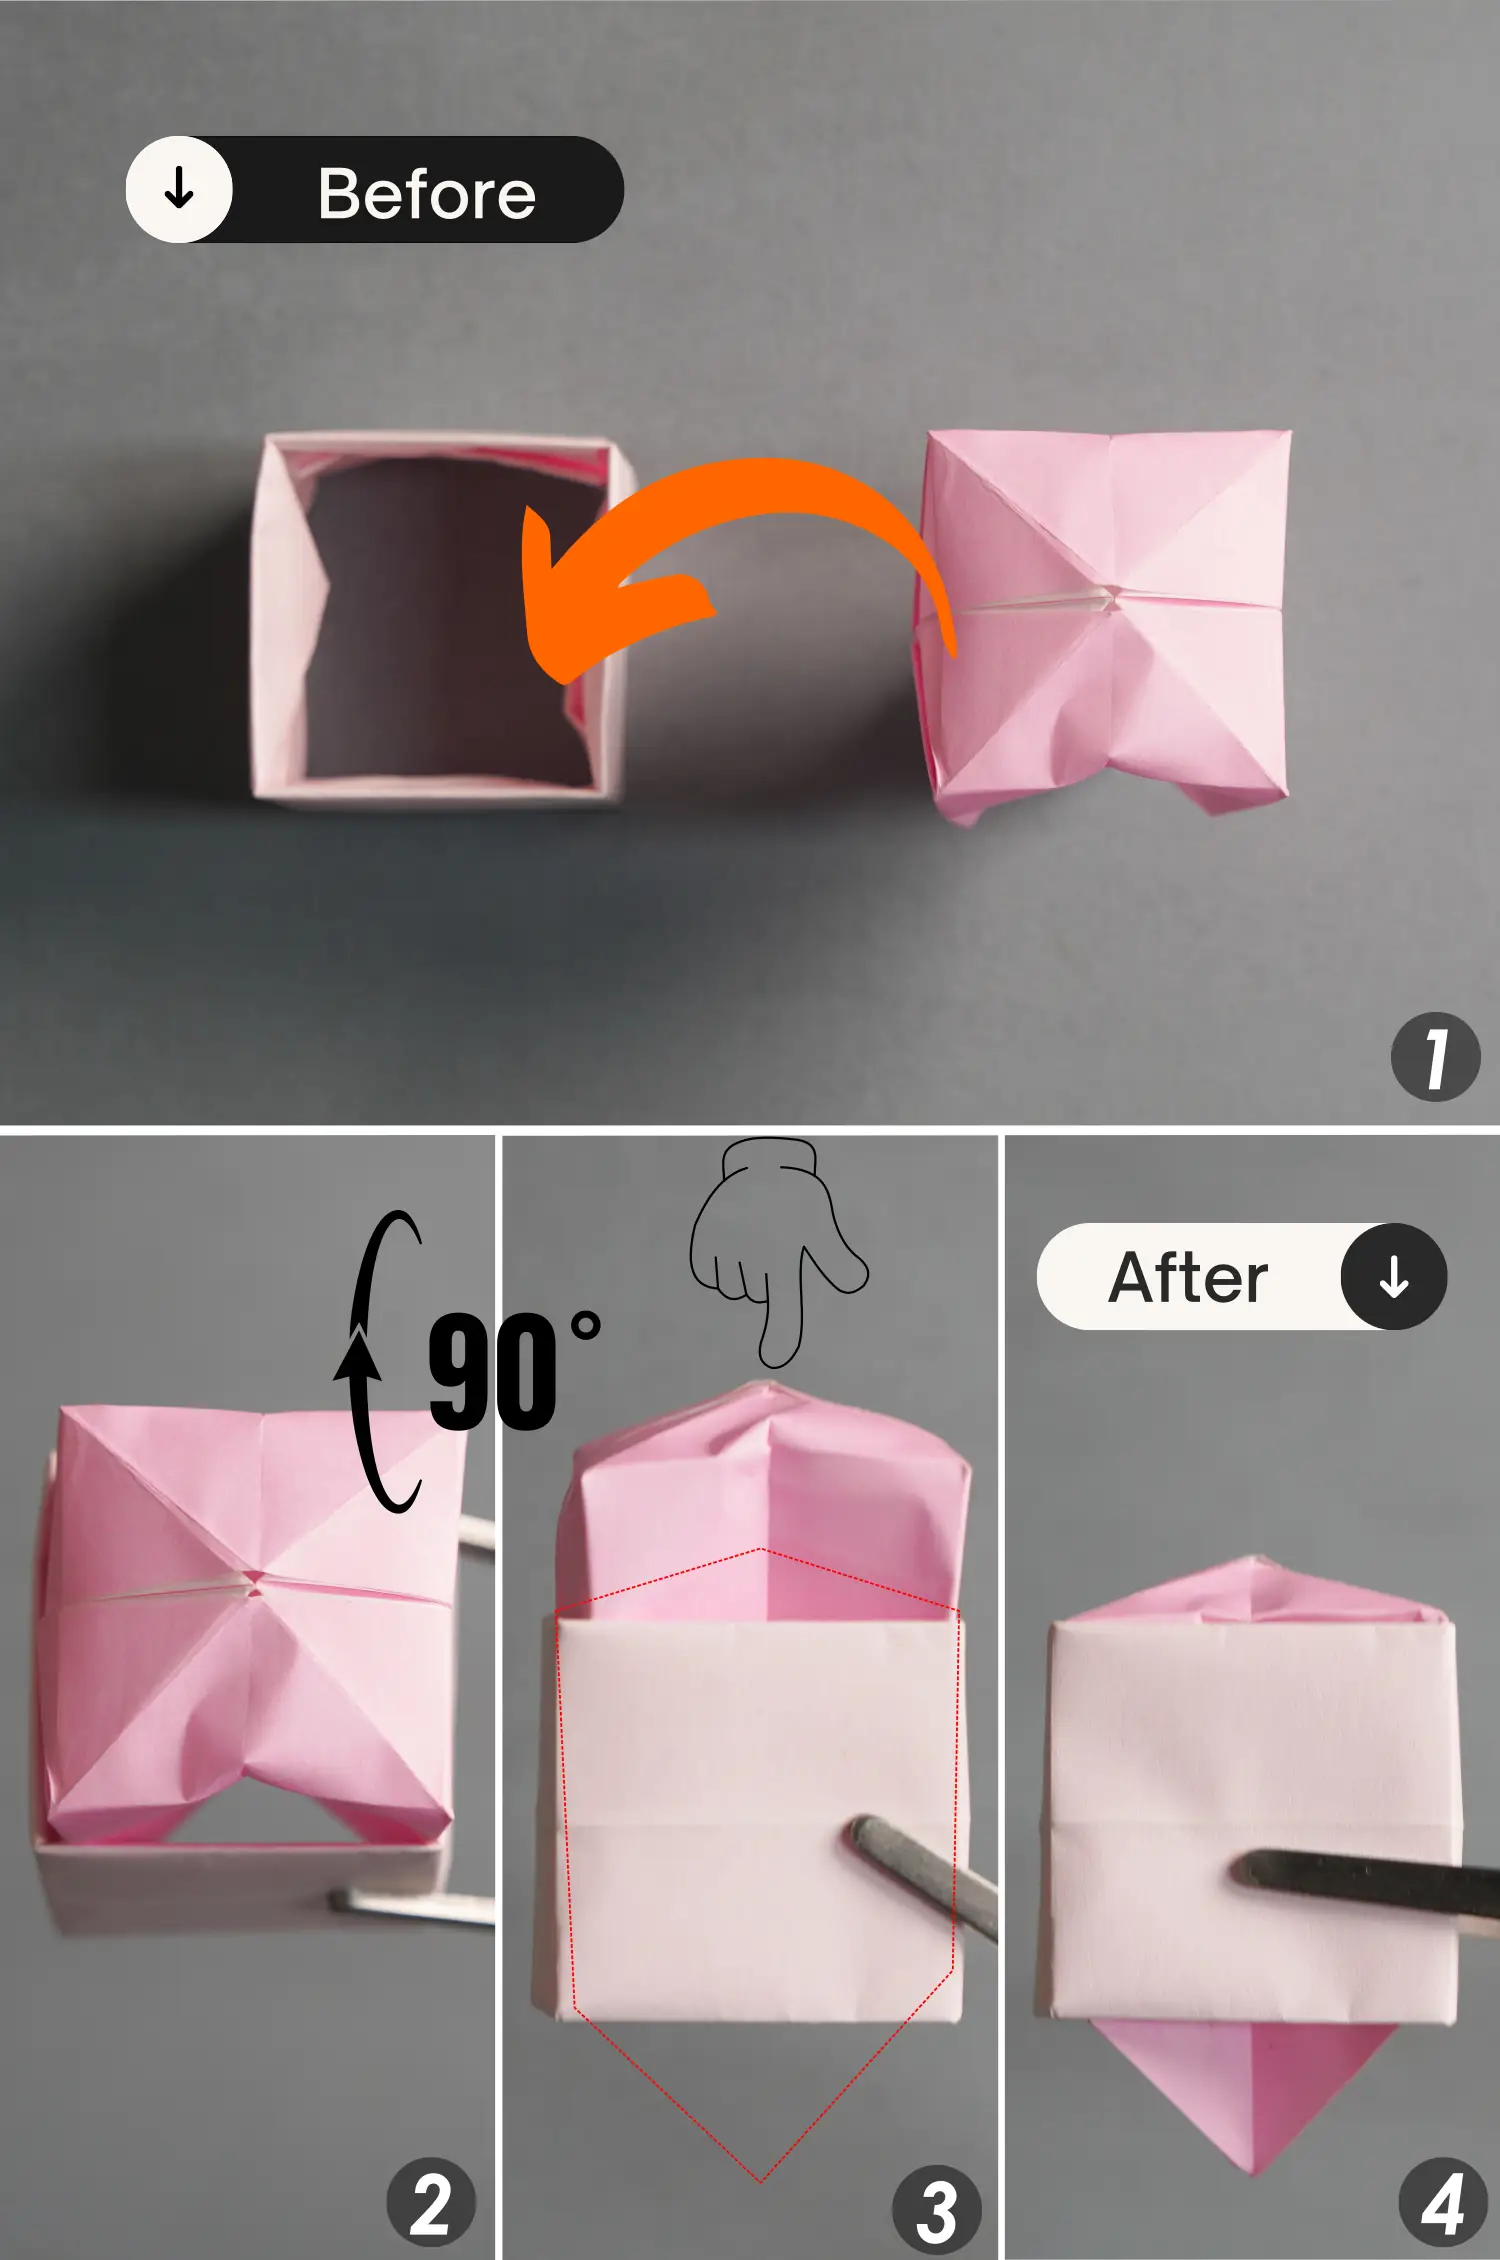
Insert the right flap into the pocket of the left flap, adjust it well, and push the left and right corners toward the center to form a square. Rotate the paper 90 degrees from back to front, making this cuboid upright.
Step 10
Fold down the front edge of the top opening backward along the crease shown by the red dotted line, and fold down the back edge along the crease shown by the black dotted line. Then, we can see here two triangle flaps on each side, and press them so that they fit snugly against the sides.
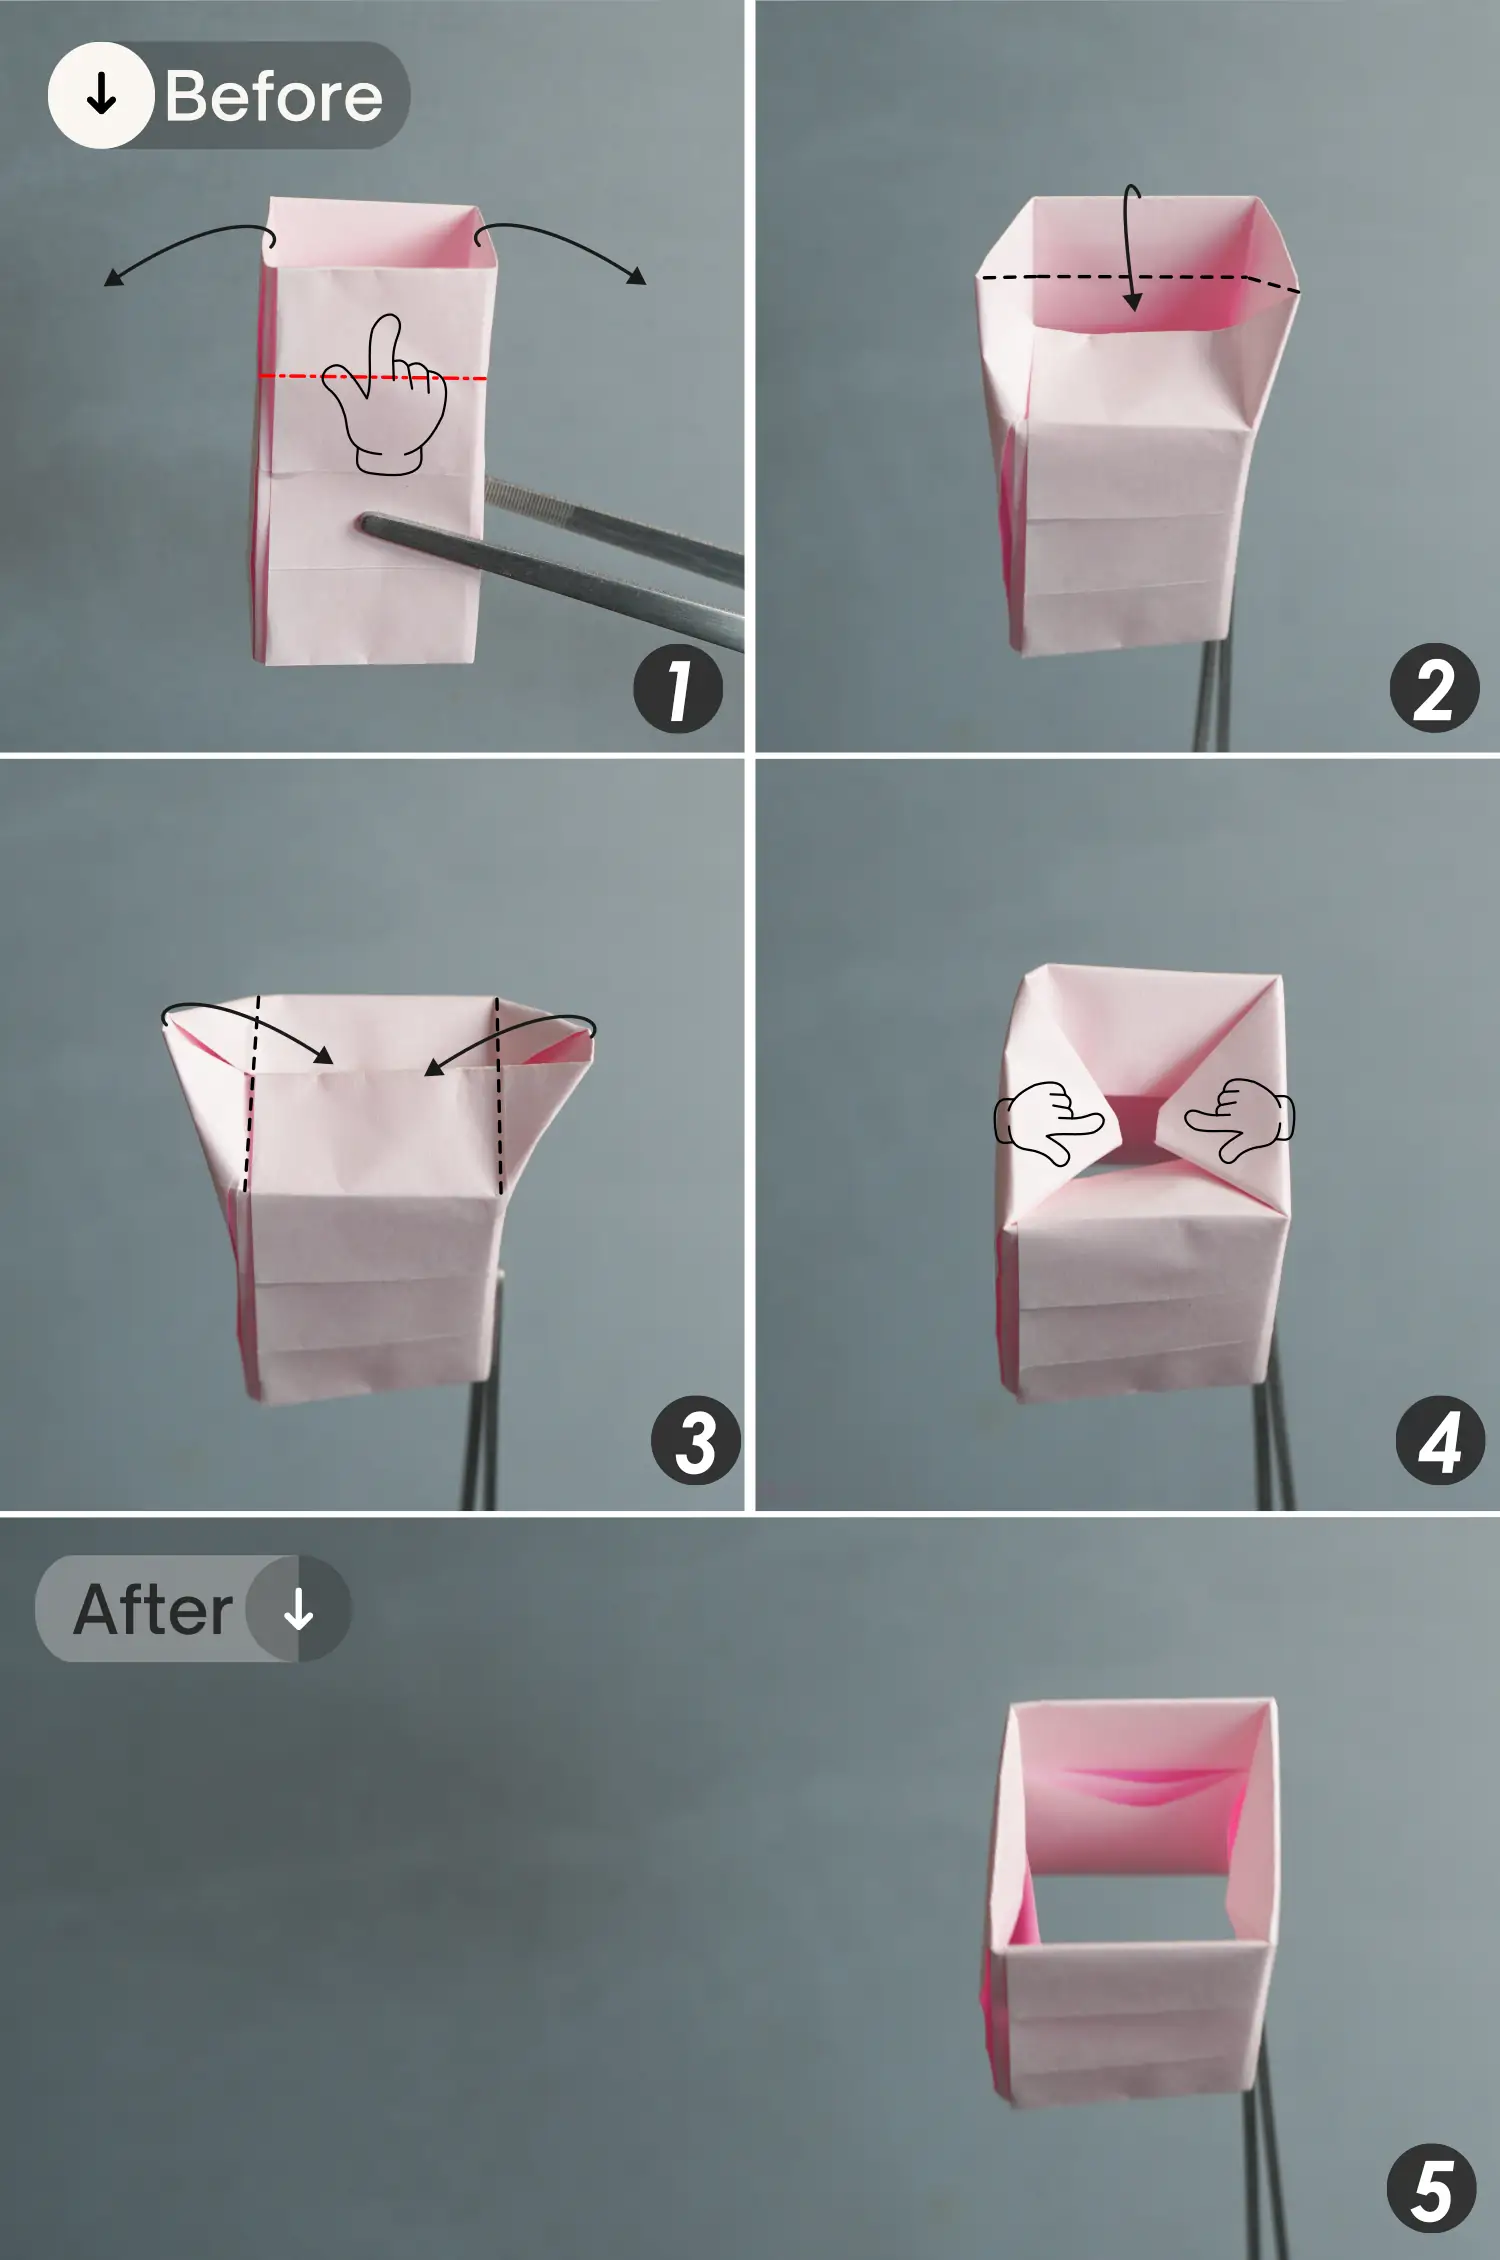
Step 11
Flip the model over from front to back, then repeat the previous step.

Step 12
Take another piece of paper and place it with the desired display side facing up. Fold and unfold it horizontally, then vertically.
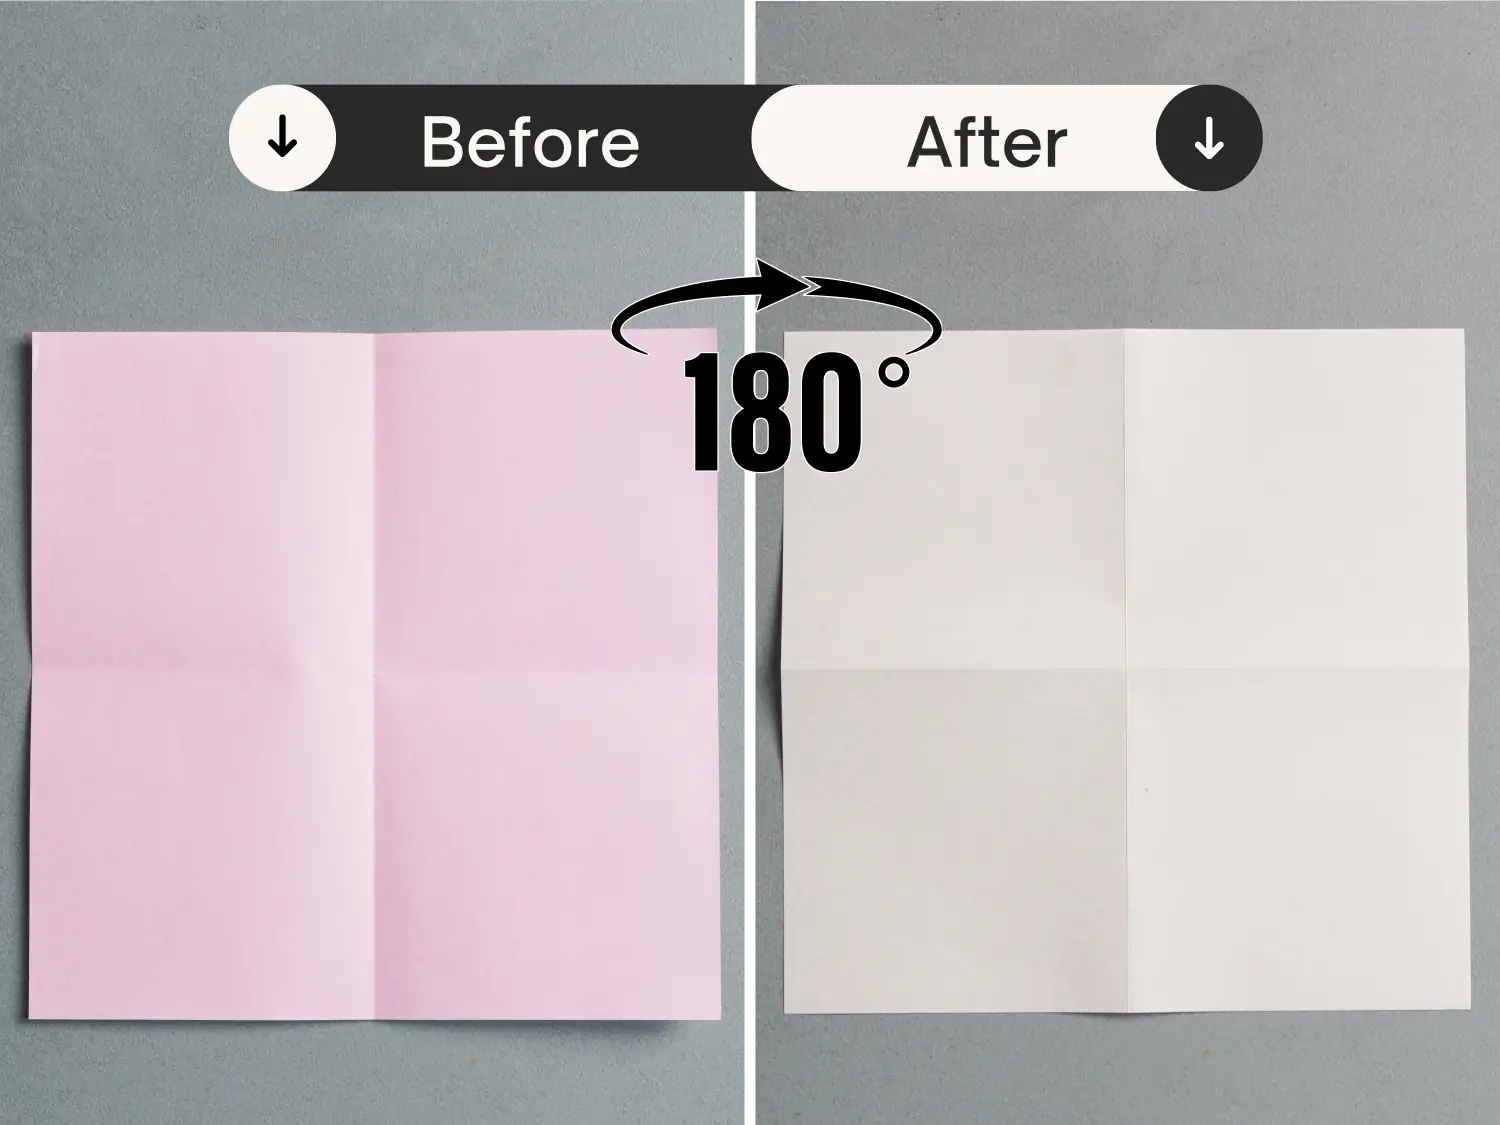
Step 13
Turn over the paper from left to right.
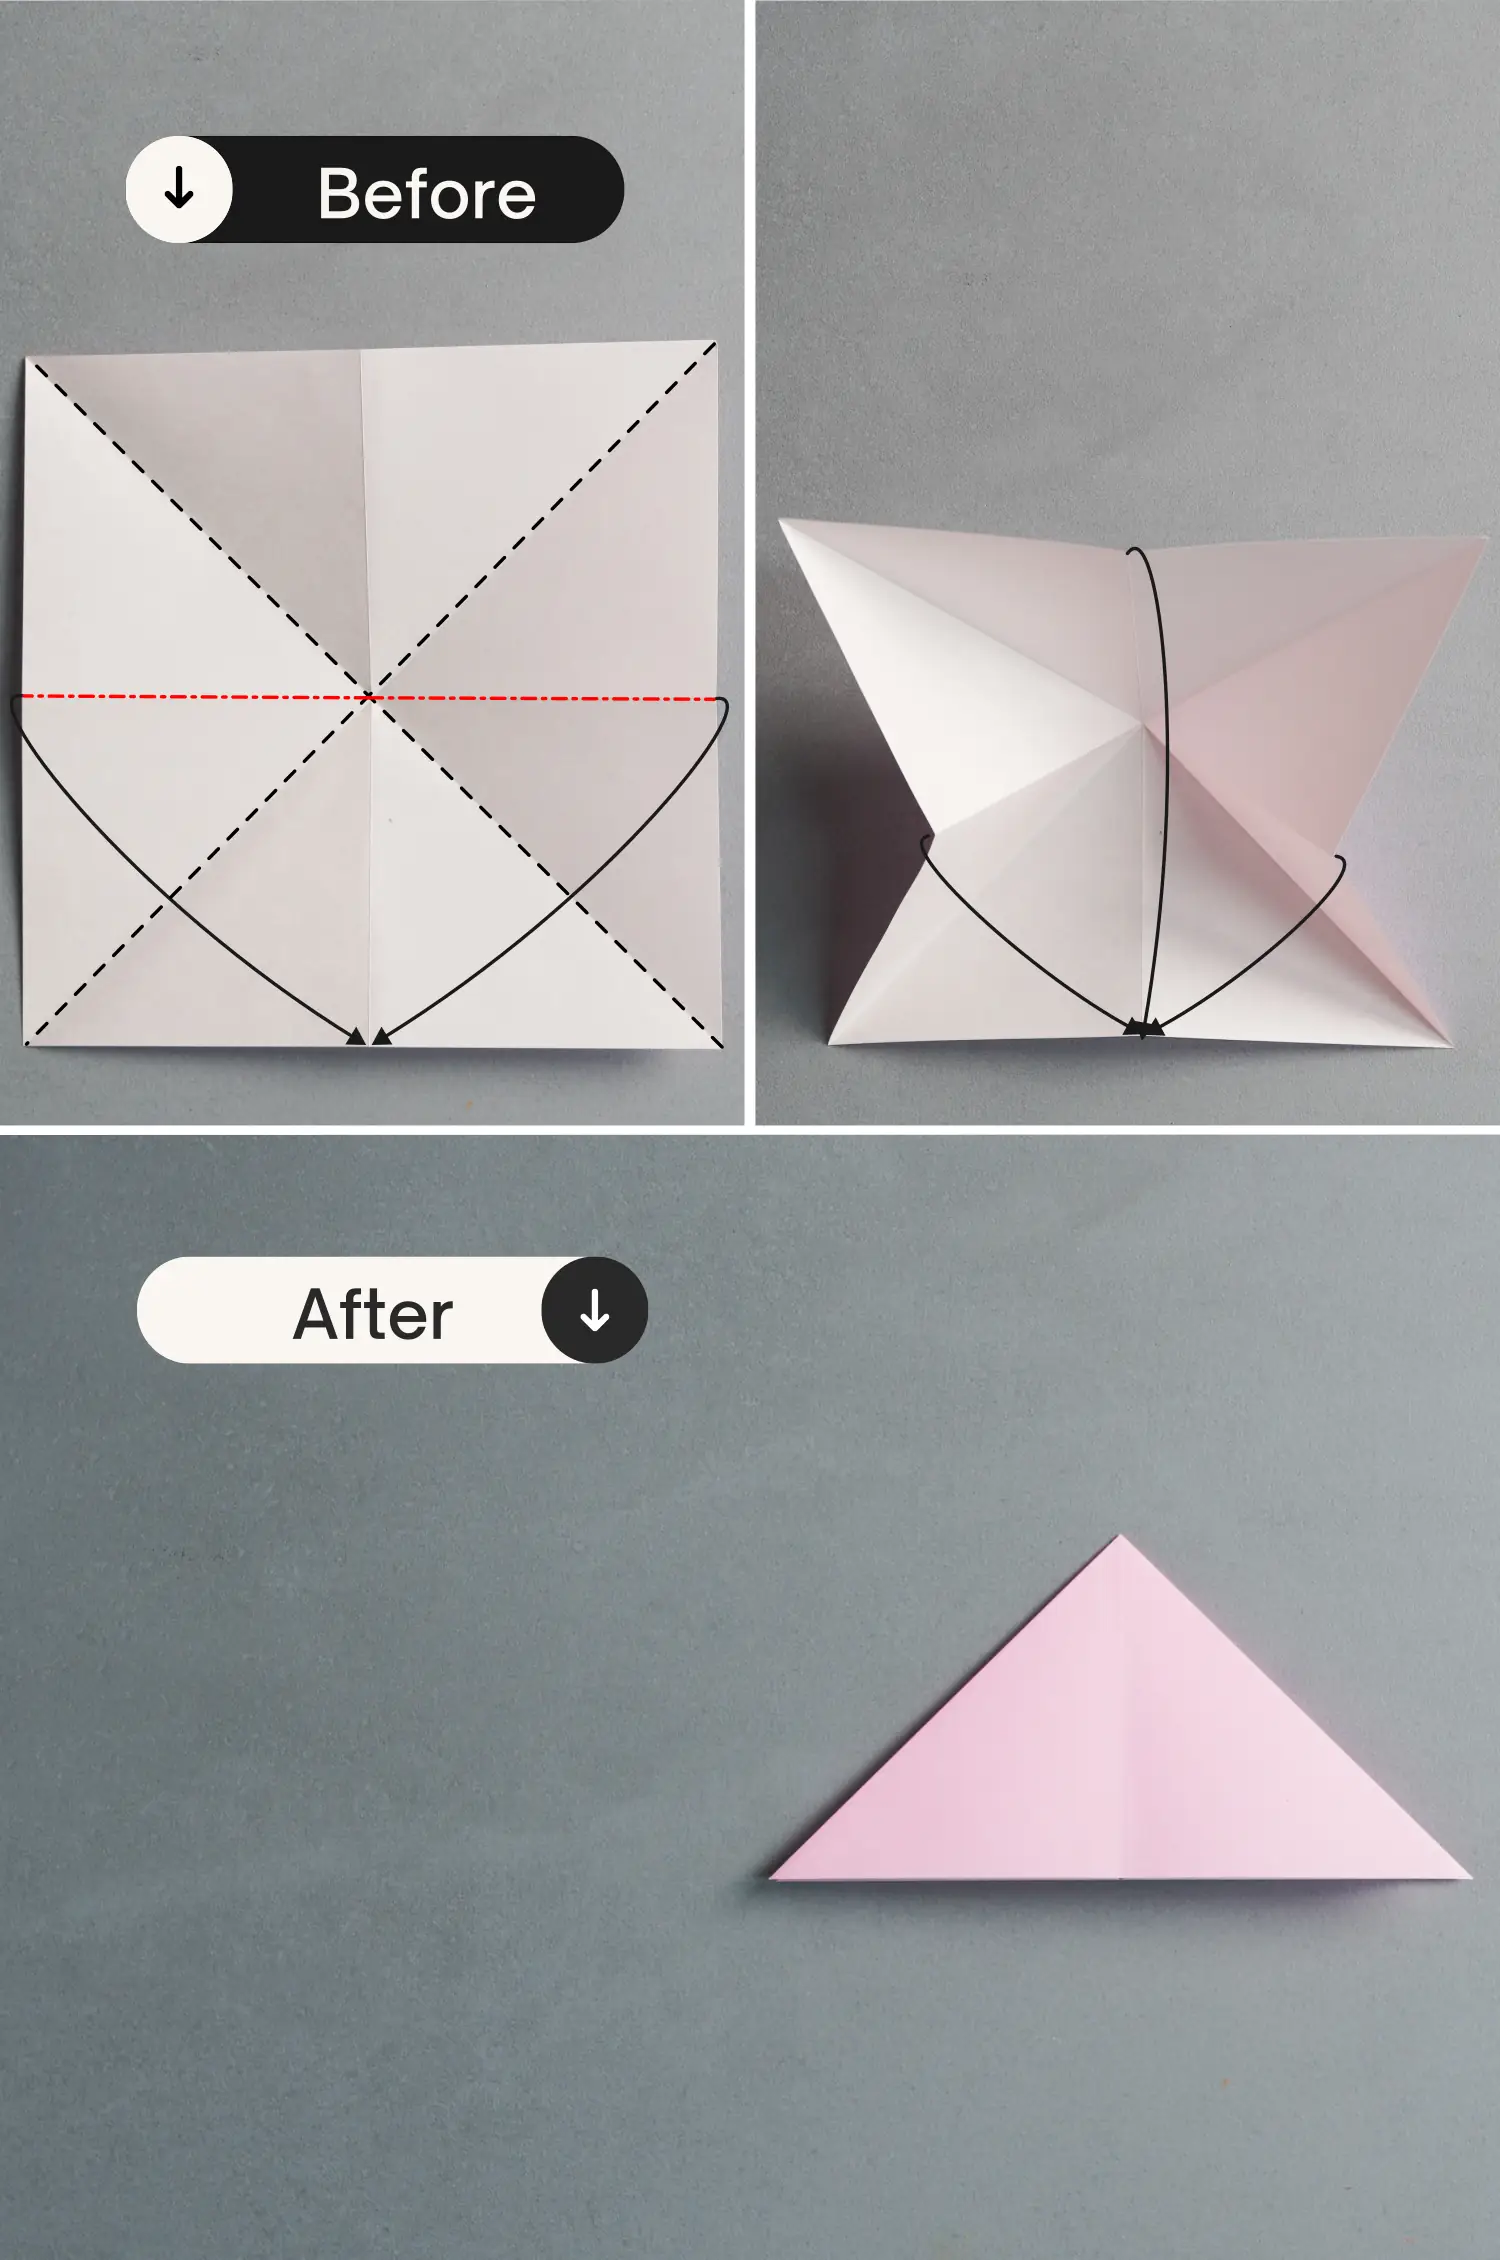
Step 14
Fold and unfold it diagonally from both sides.

Step 15
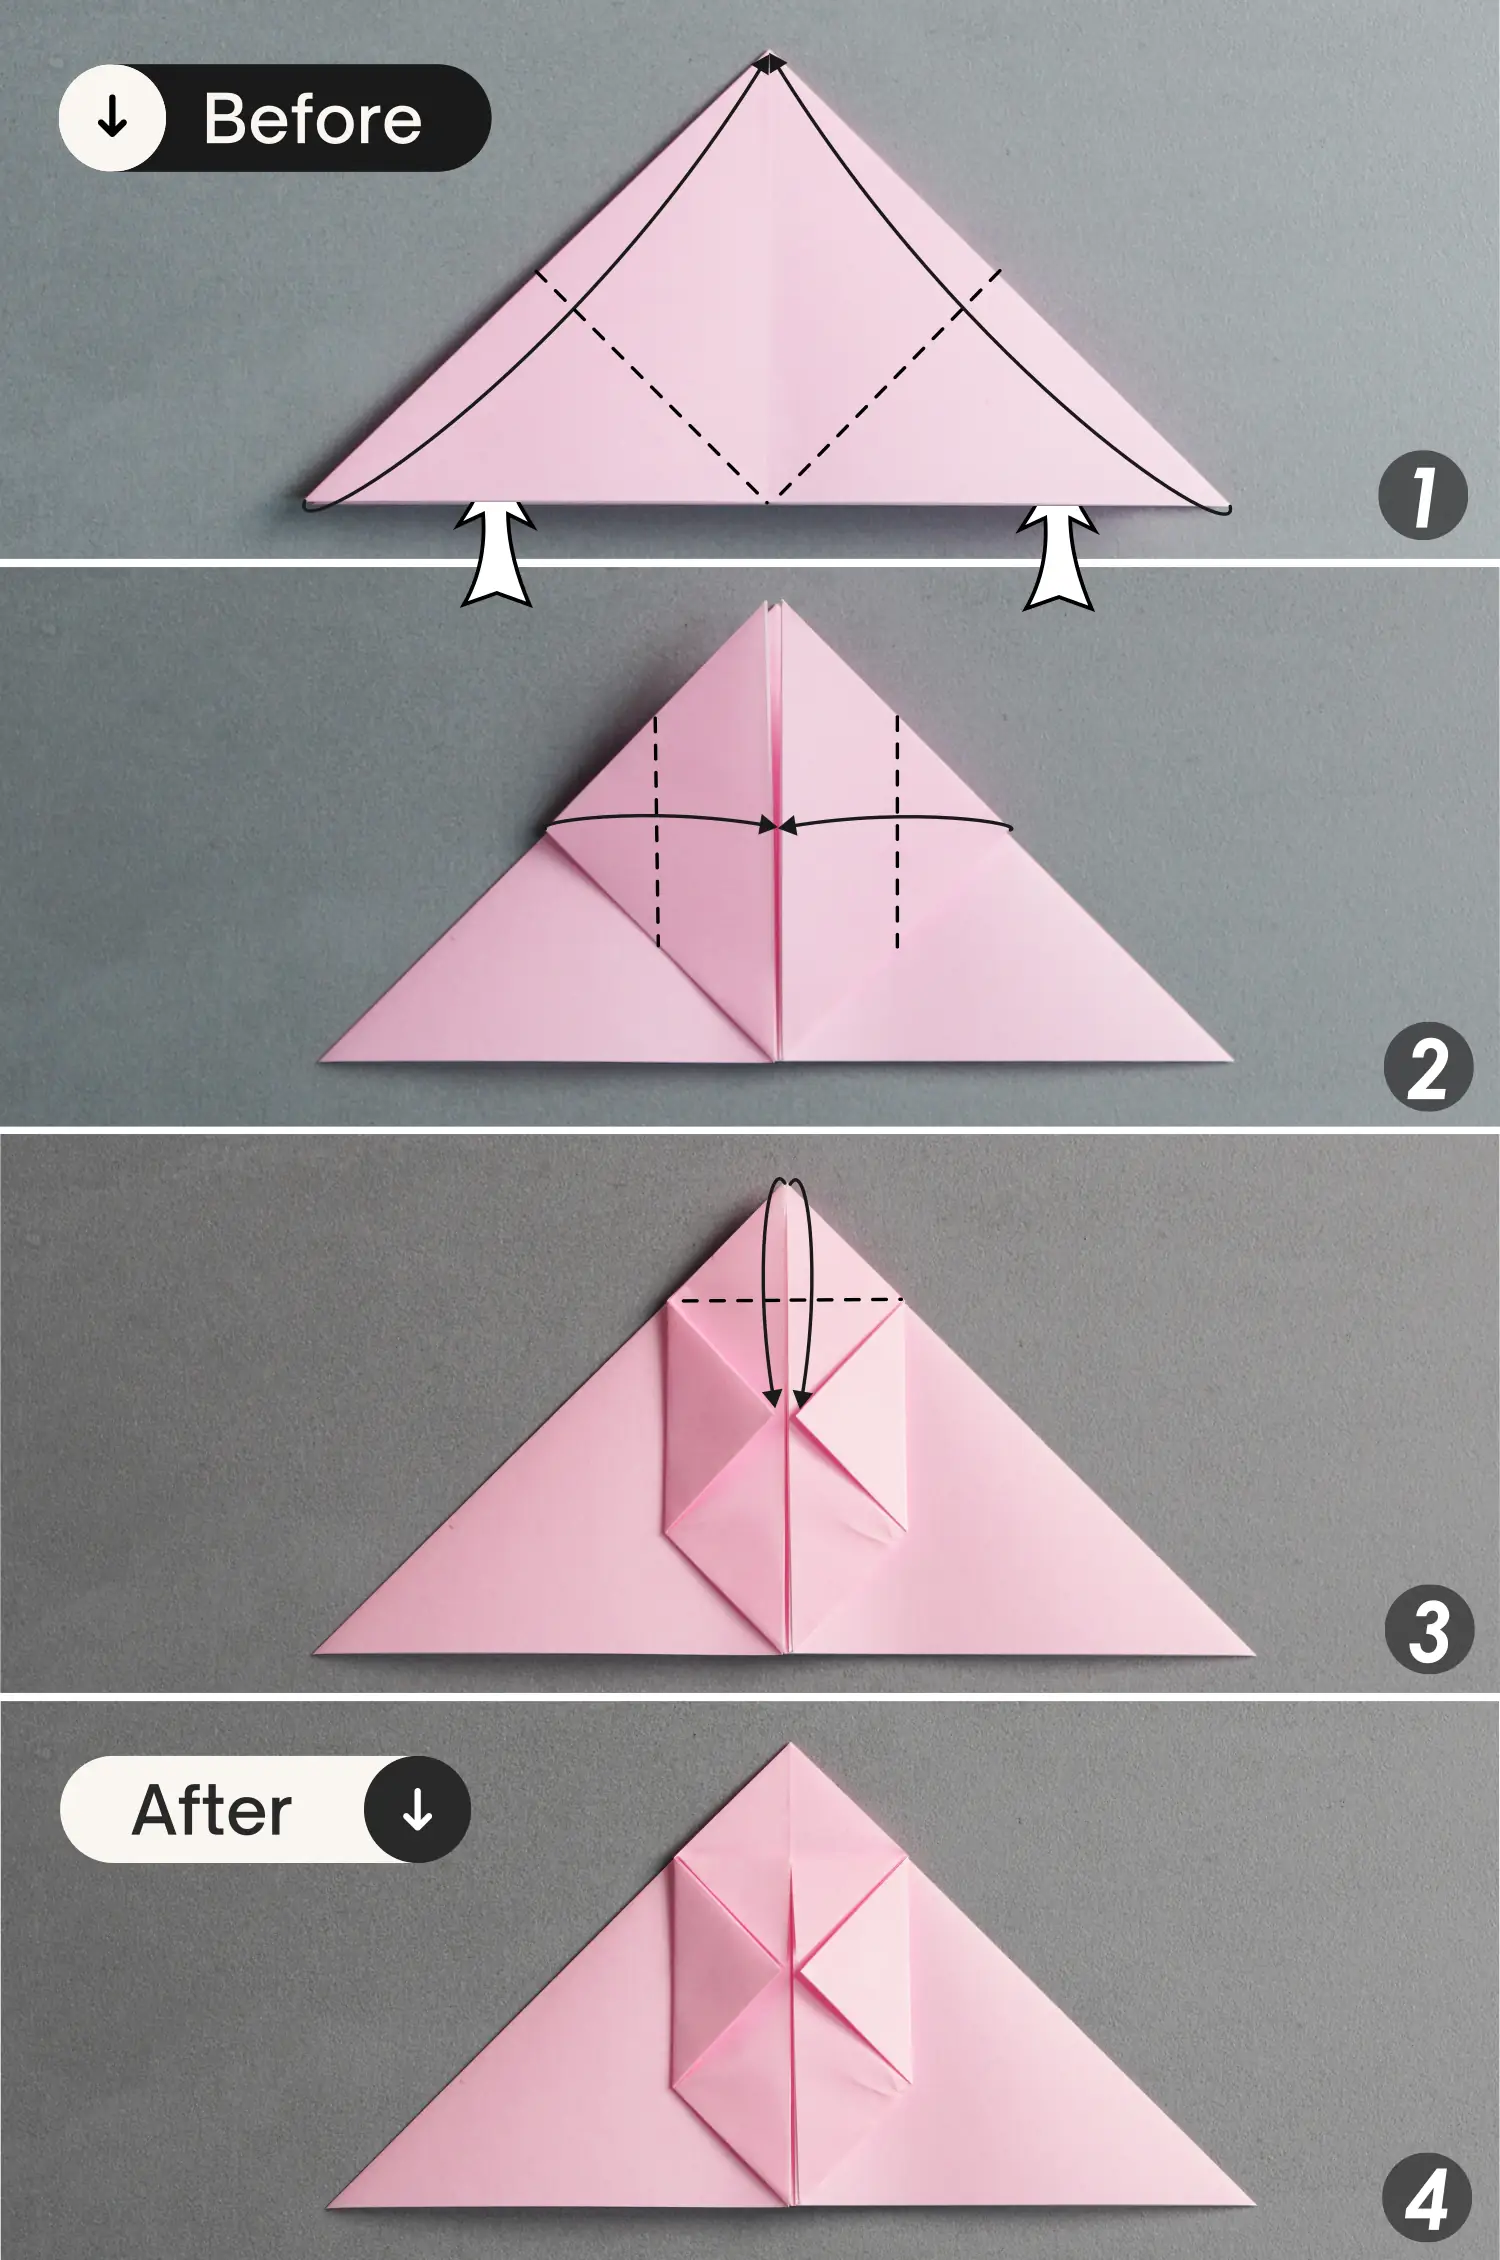
Bring the midpoints of the left, right, and top edges to meet the bottom edge’s midpoint, and flatten the fold to get a triangle.
Step 16
Fold the bottom left and right points of the top layer to meet the top point to form a small square, then fold the left and right points of this square along the dotted lines to meet the vertical line. Finally, fold down the two top points of the top layer.
Step 17
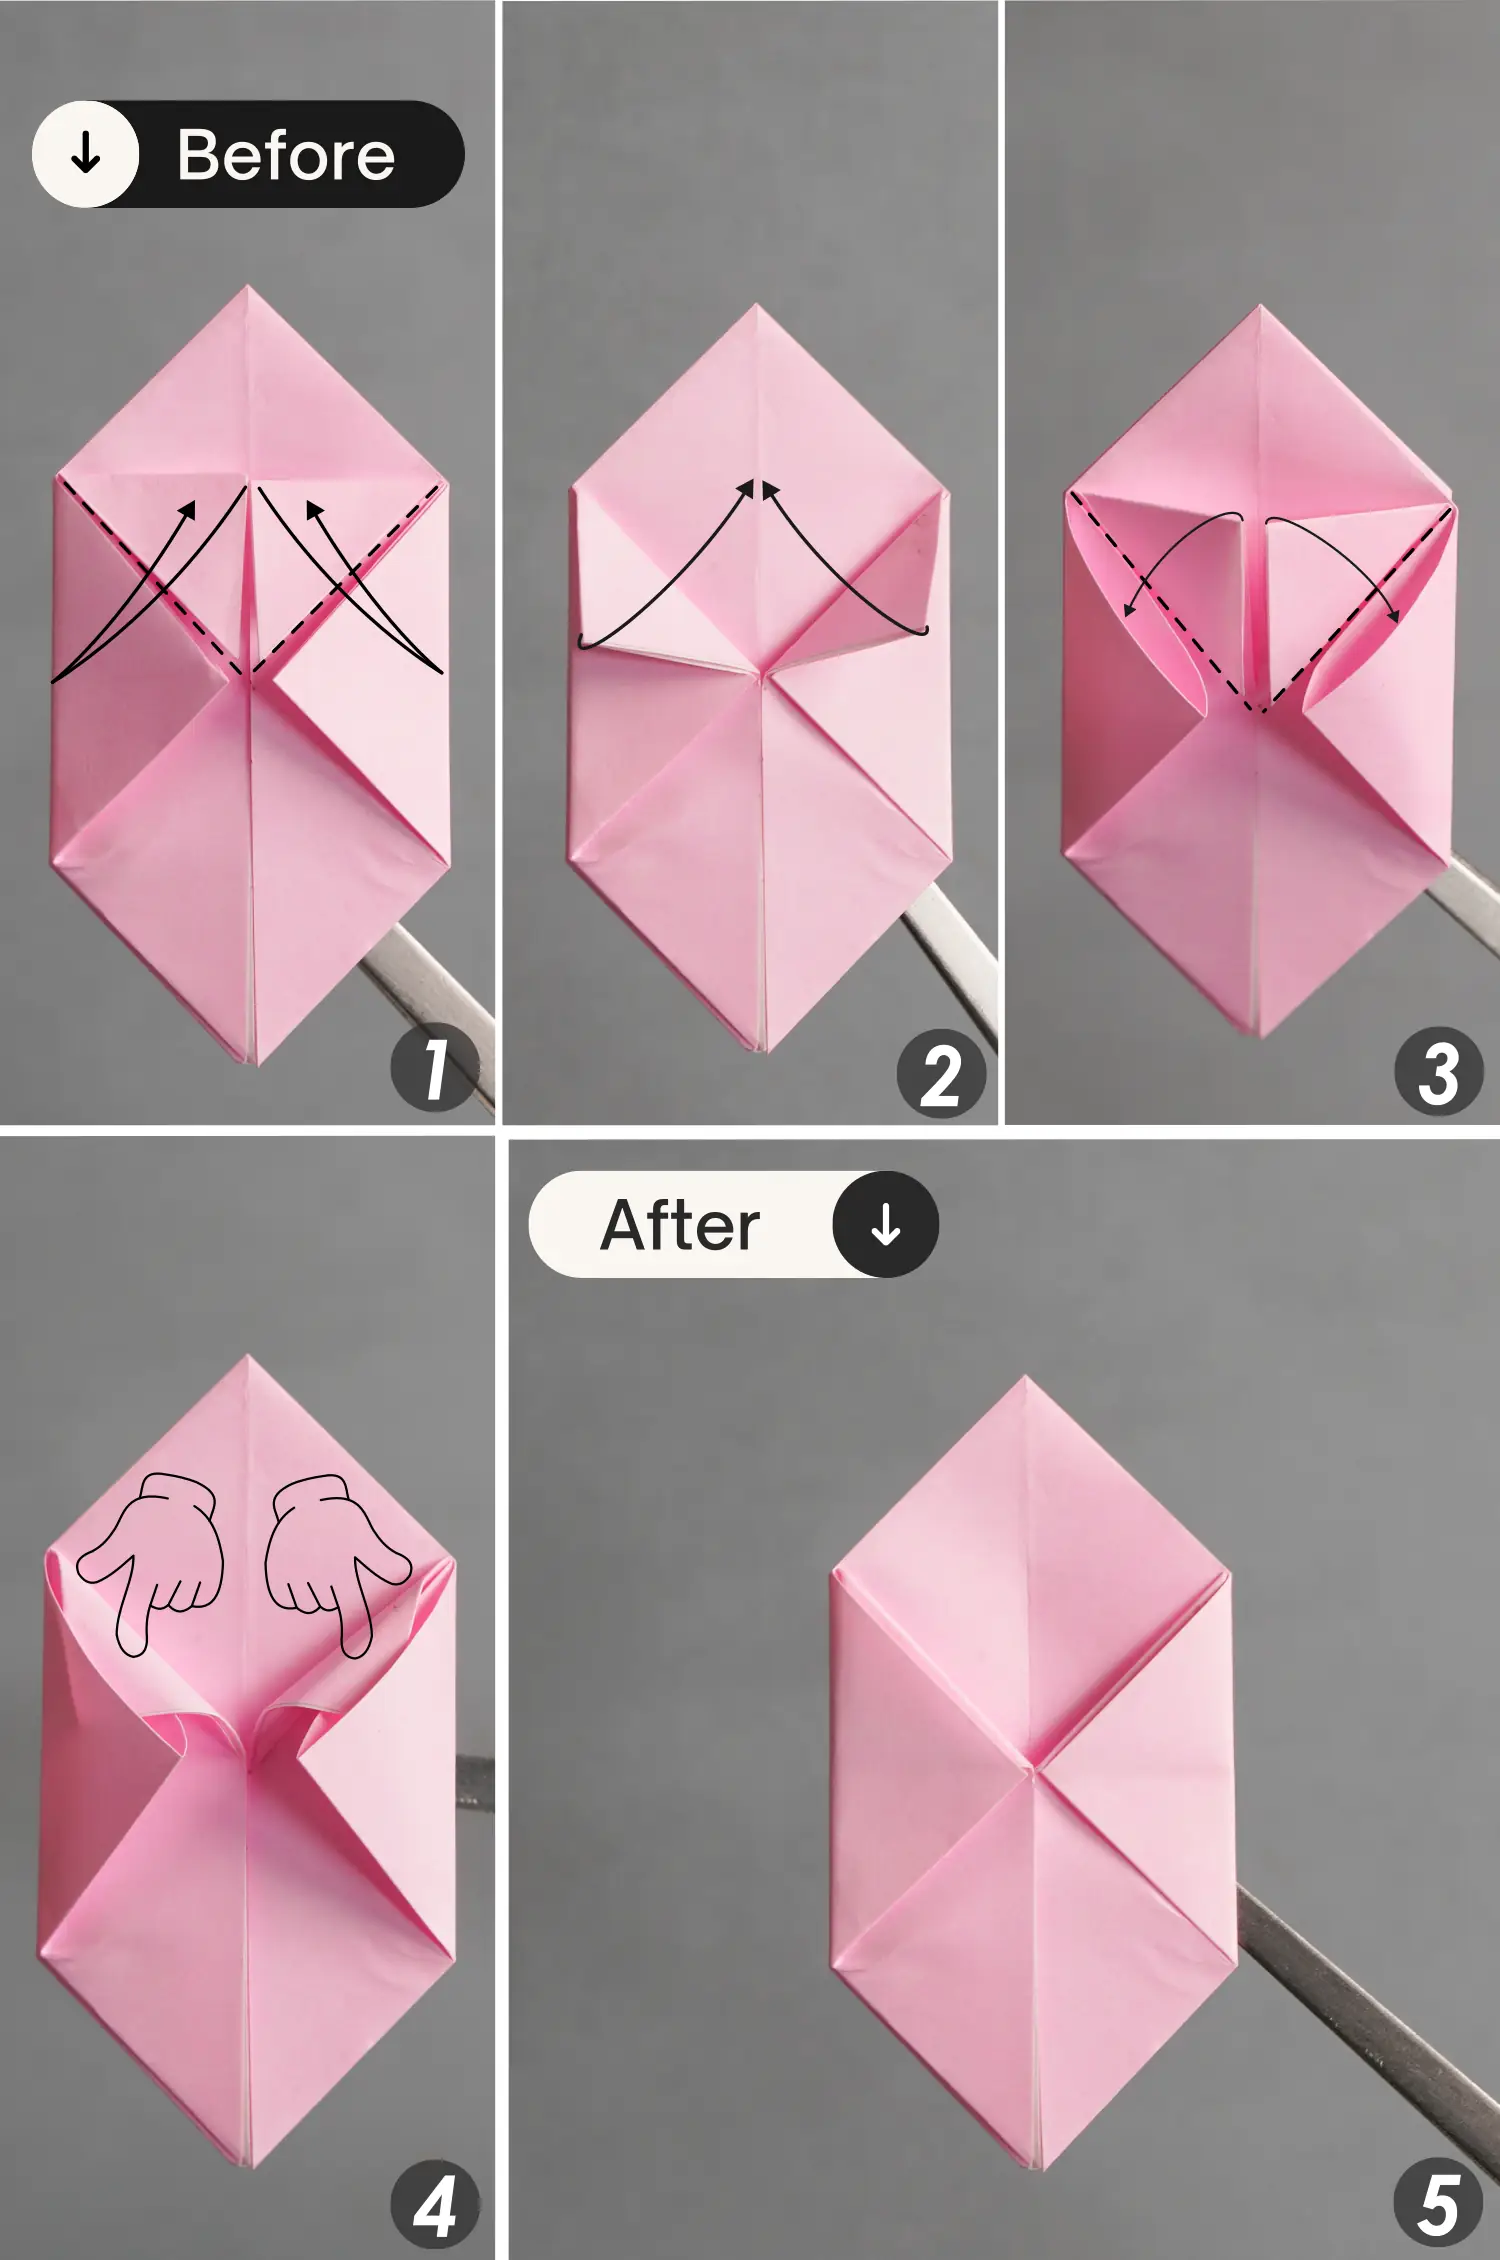
Fold down these two small triangles, and unfold them. Then, tuck the two triangles into the pocket below them.

Step 18
Turn over the paper from left to right, then fold up the bottom left and right points to meet the top point to form a small square. Next, fold the left and right points of this square toward the center along the vertical dotted line. Finally, fold down the two points on the top of the top layer.

Step 19
Repeat the step 17.
Step 20
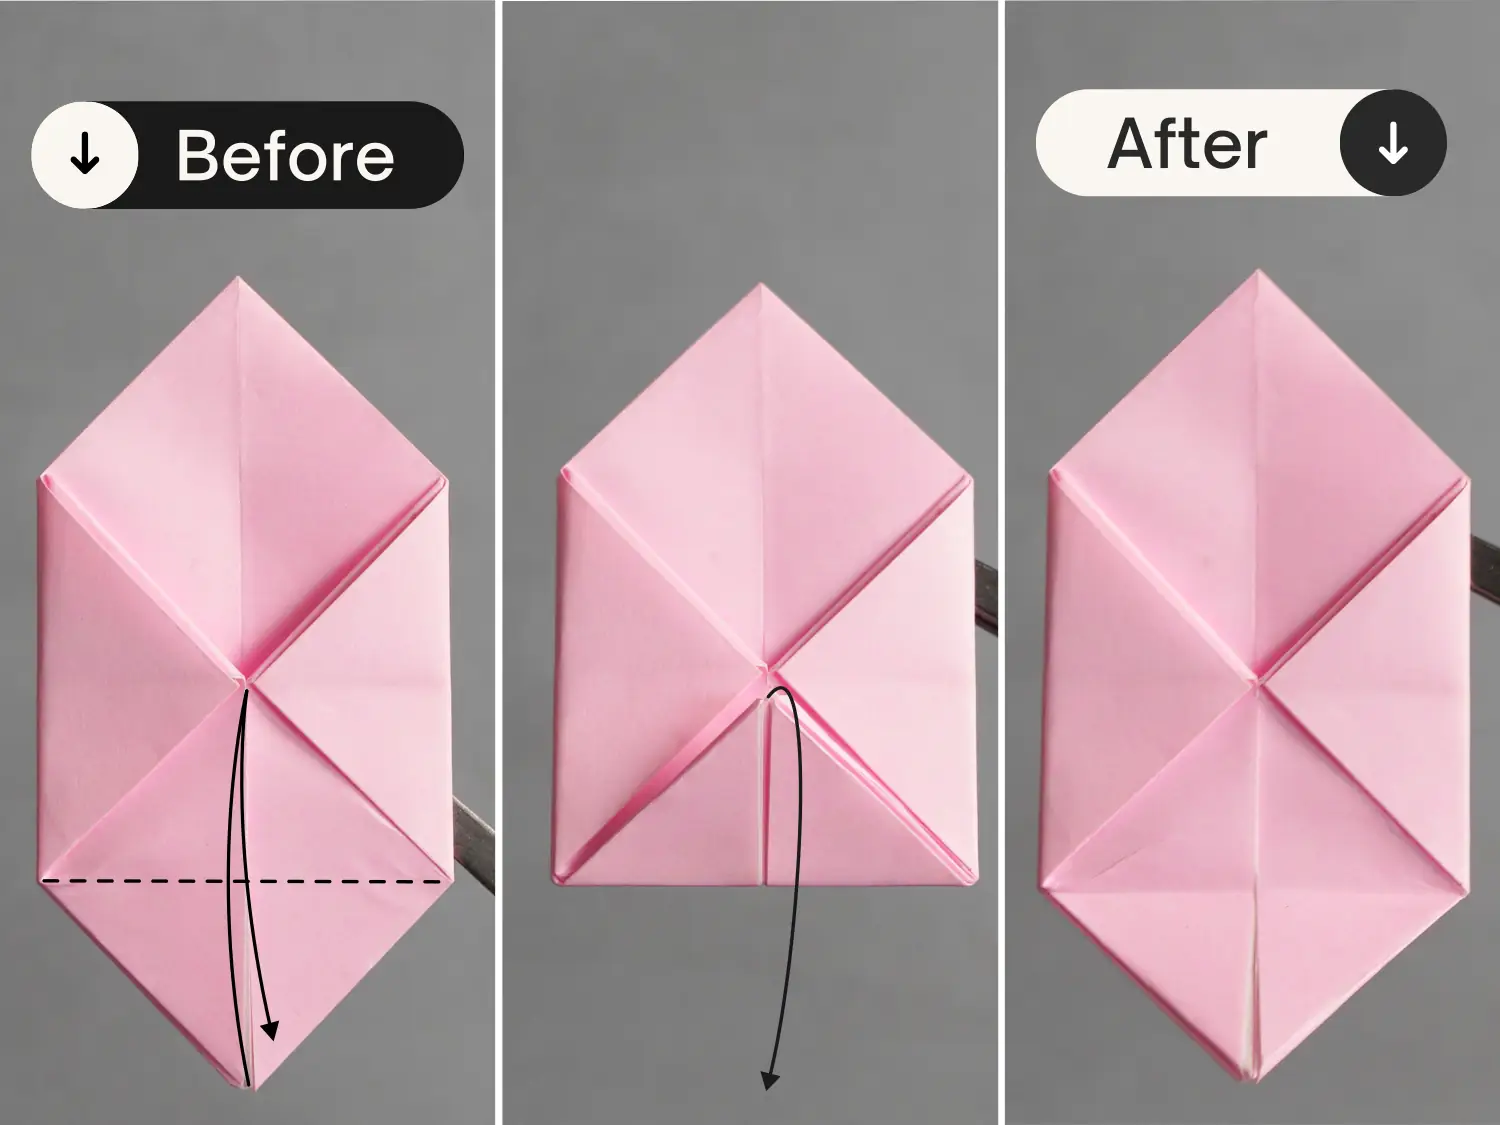
Fold up the bottom point along the dotted line, leaving a crease, and unfold it.
Step 21
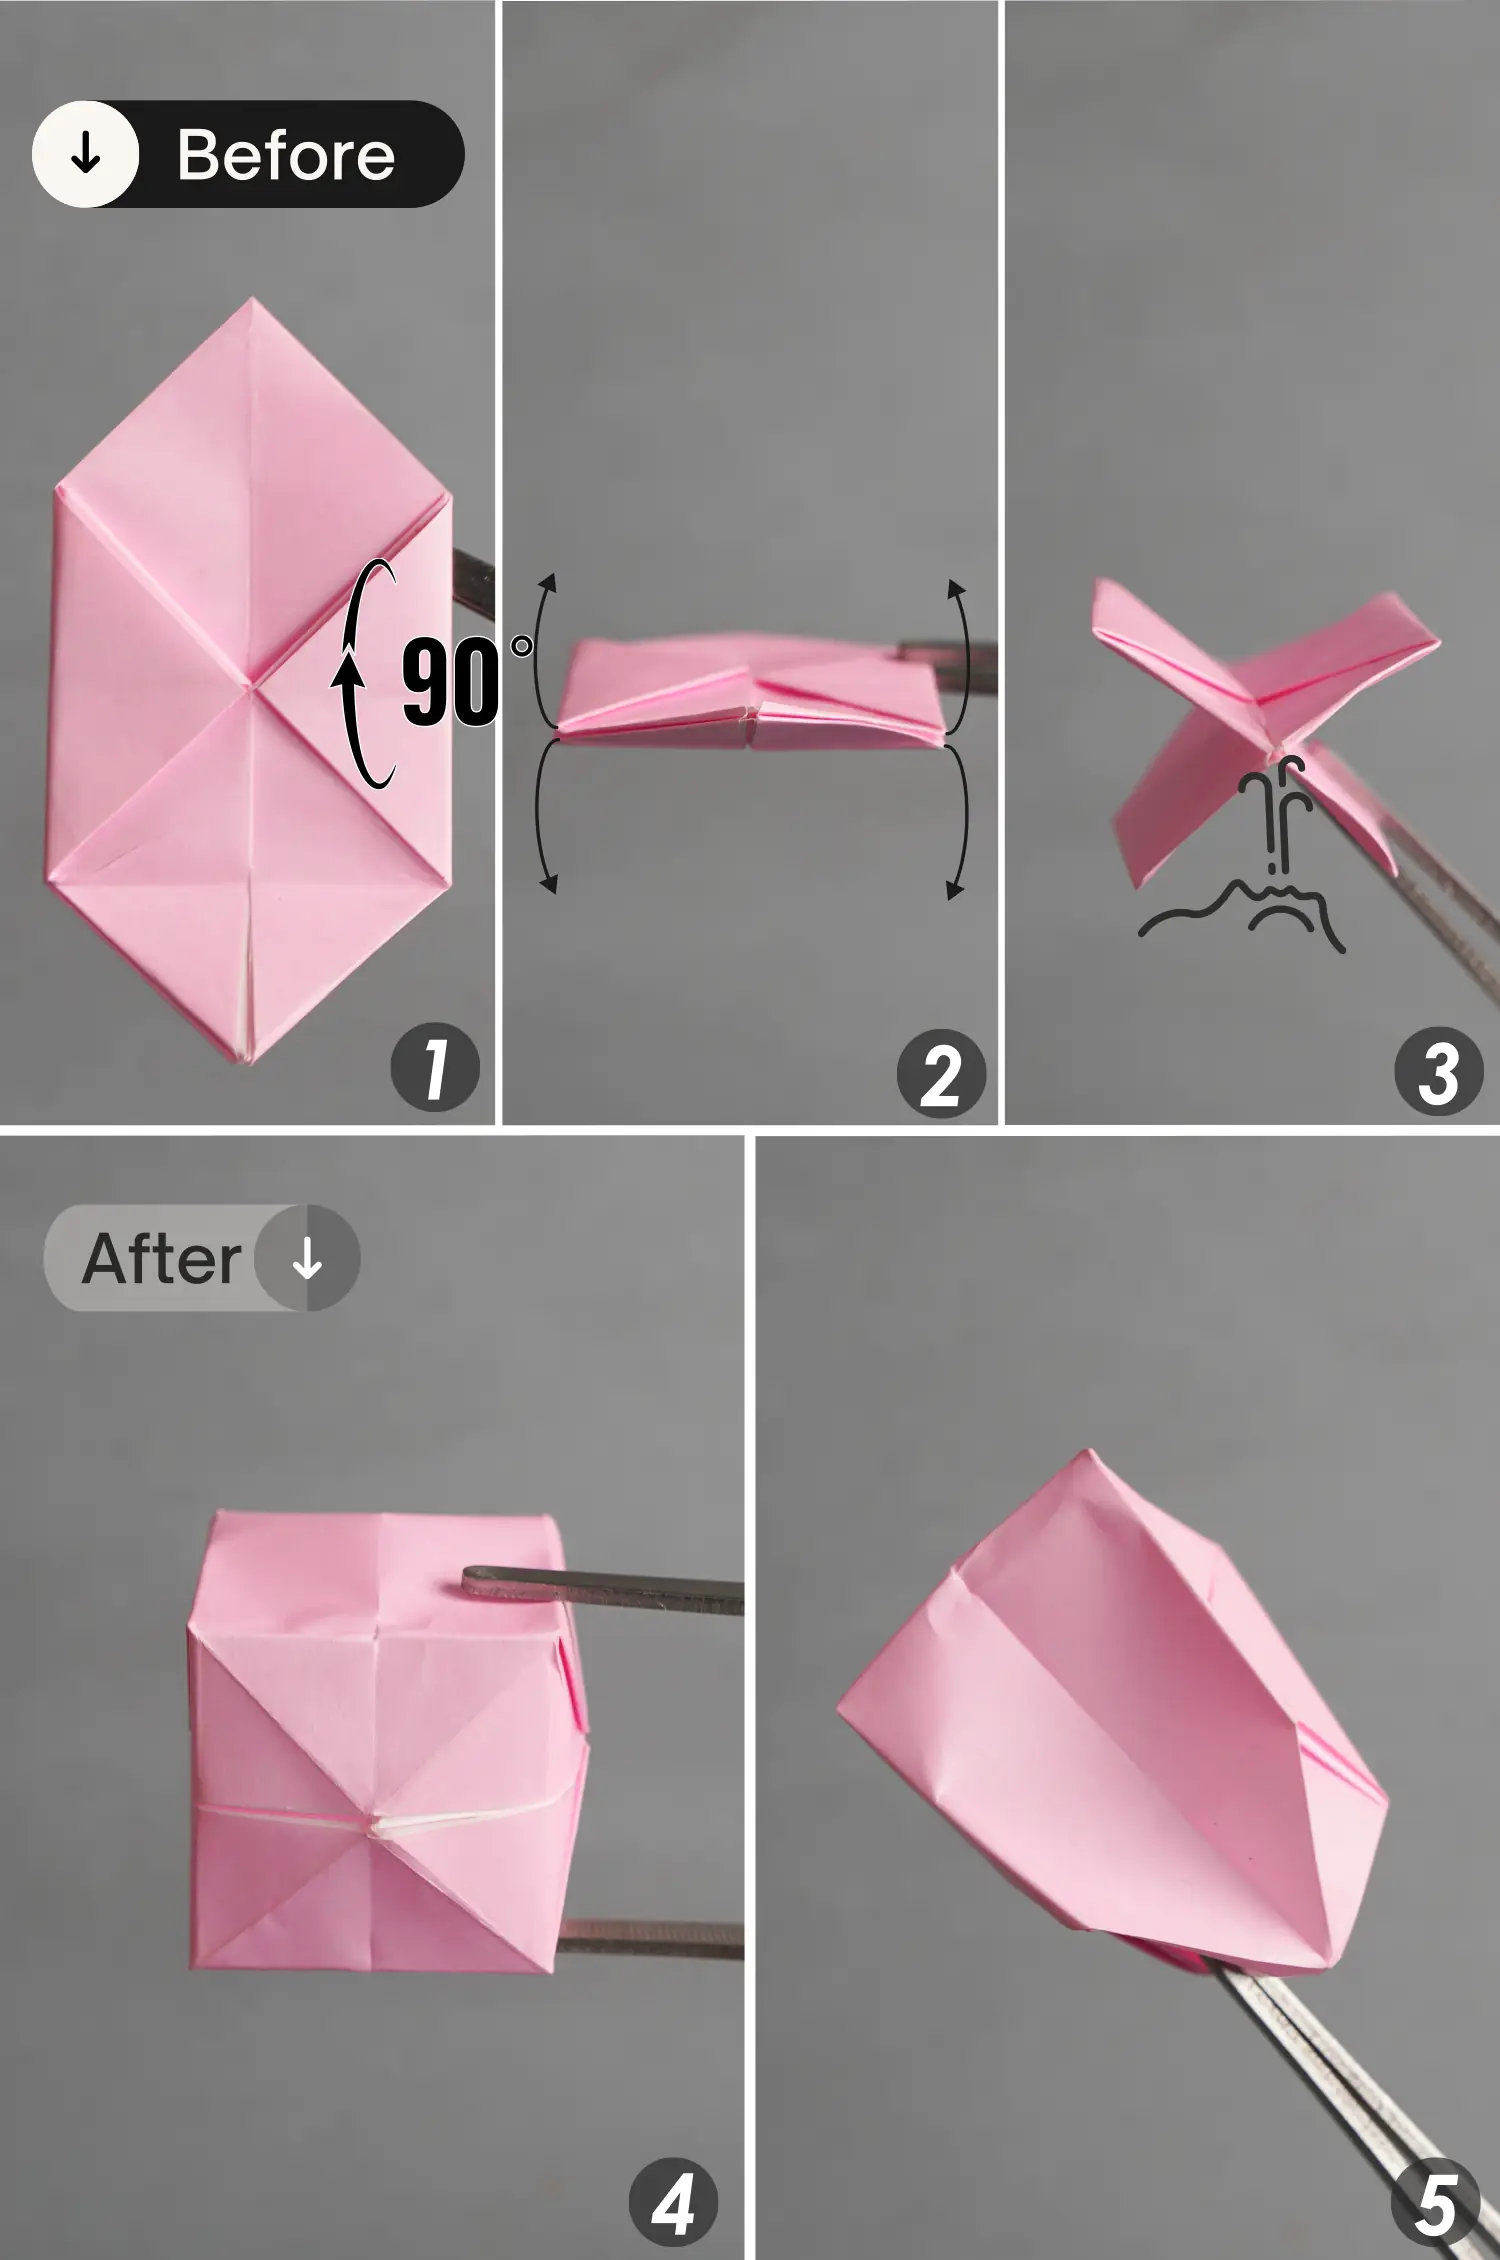
Rotate this paper 90 degrees from back to front, then bring up the top two flaps and press down the bottom two flaps. Finally, blow it from the bottom hole to inflate this model.
Step 22
Assemble this ball and the hollow cube.
Step 23
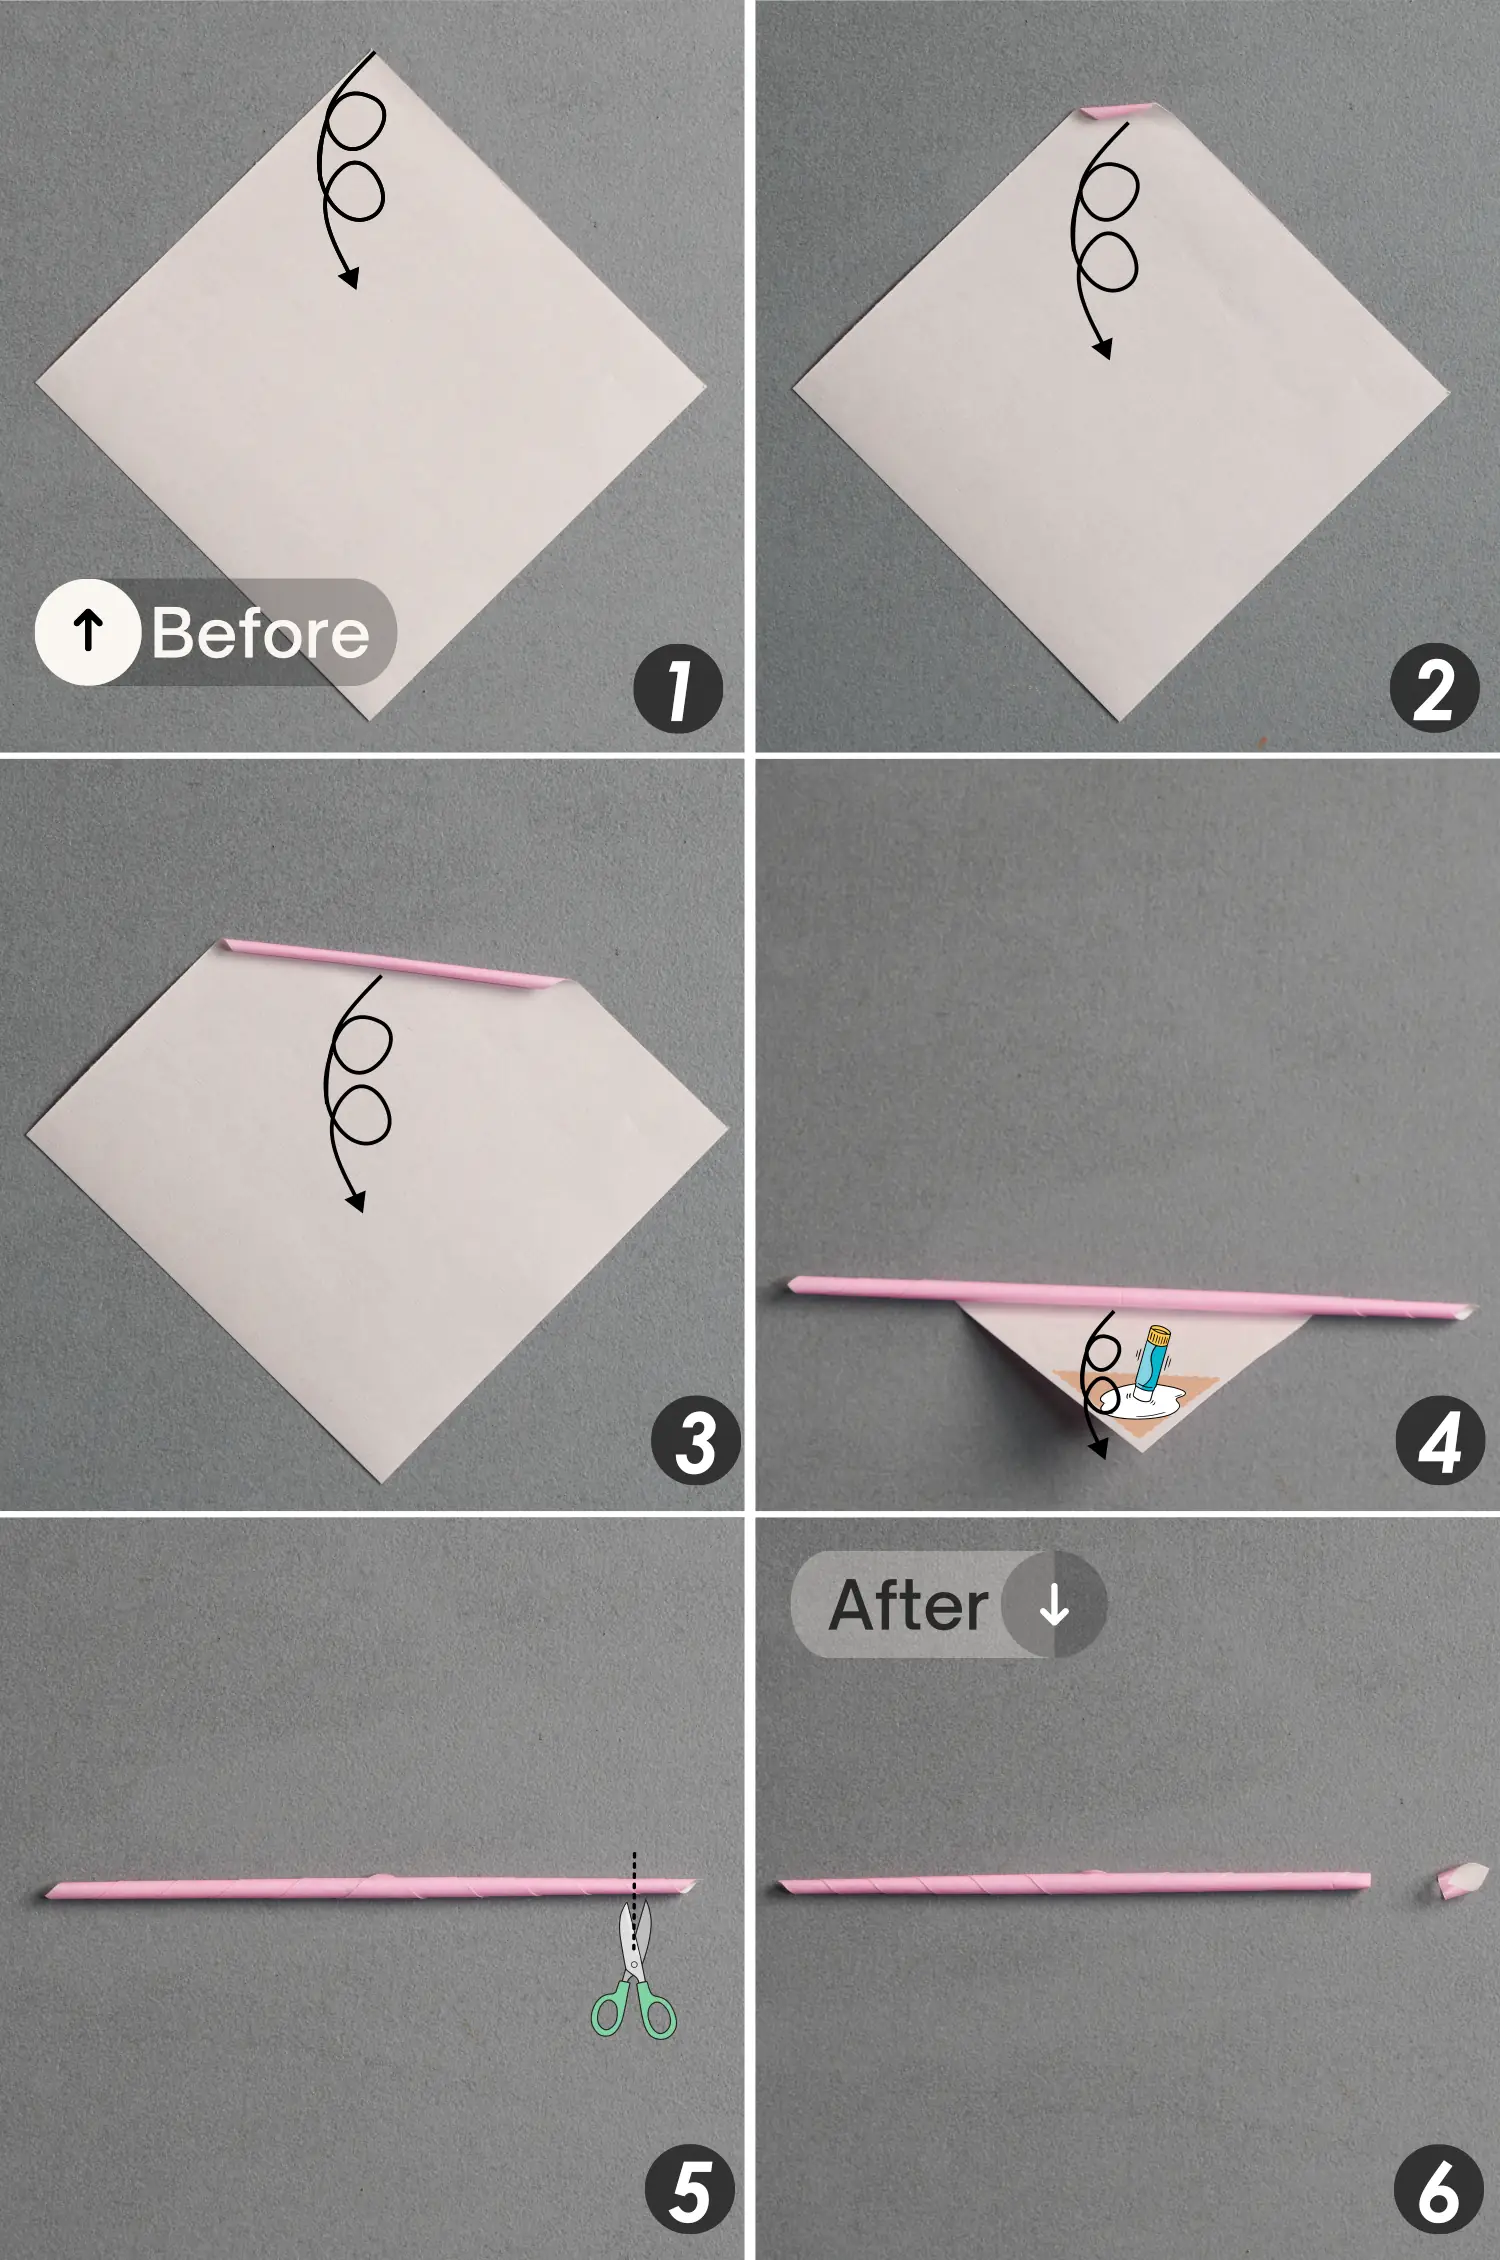
Take the last piece of paper, fold and unfold it in half horizontally, then vertically. Cut the paper along the creases to get a small square.

Step 24
Roll this small square paper from the top, and apply glue to the bottom to secure it in place to get a small paper stick. Cut the right end a little.
Step 25
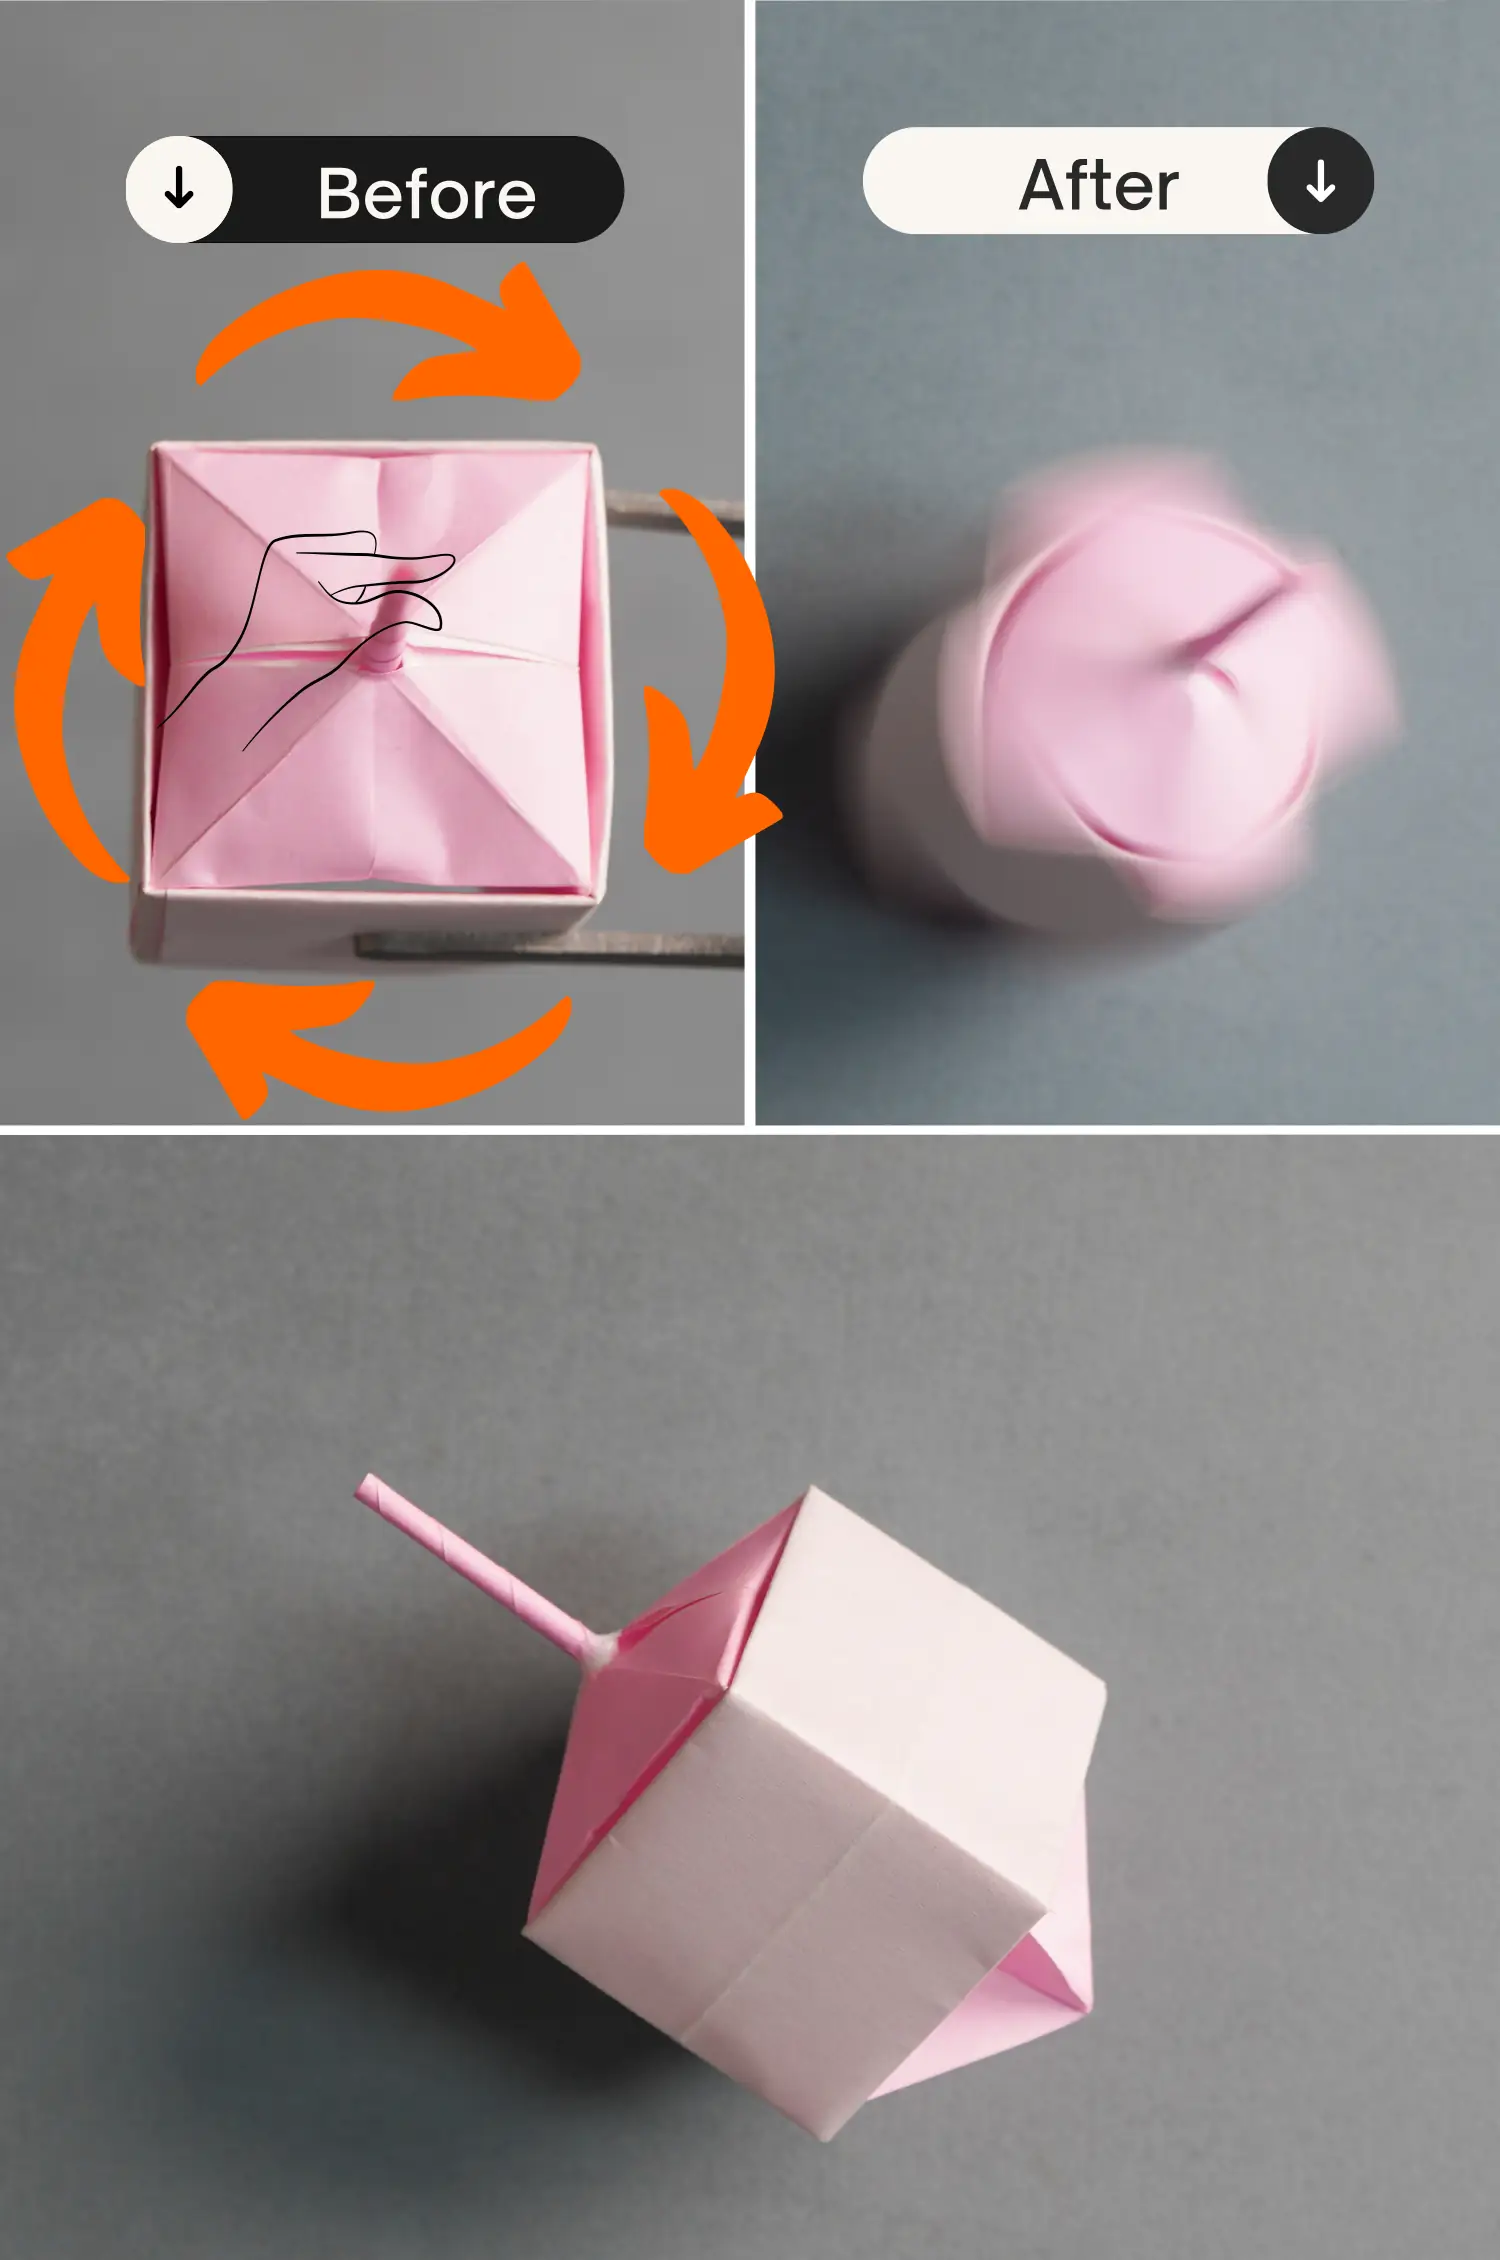
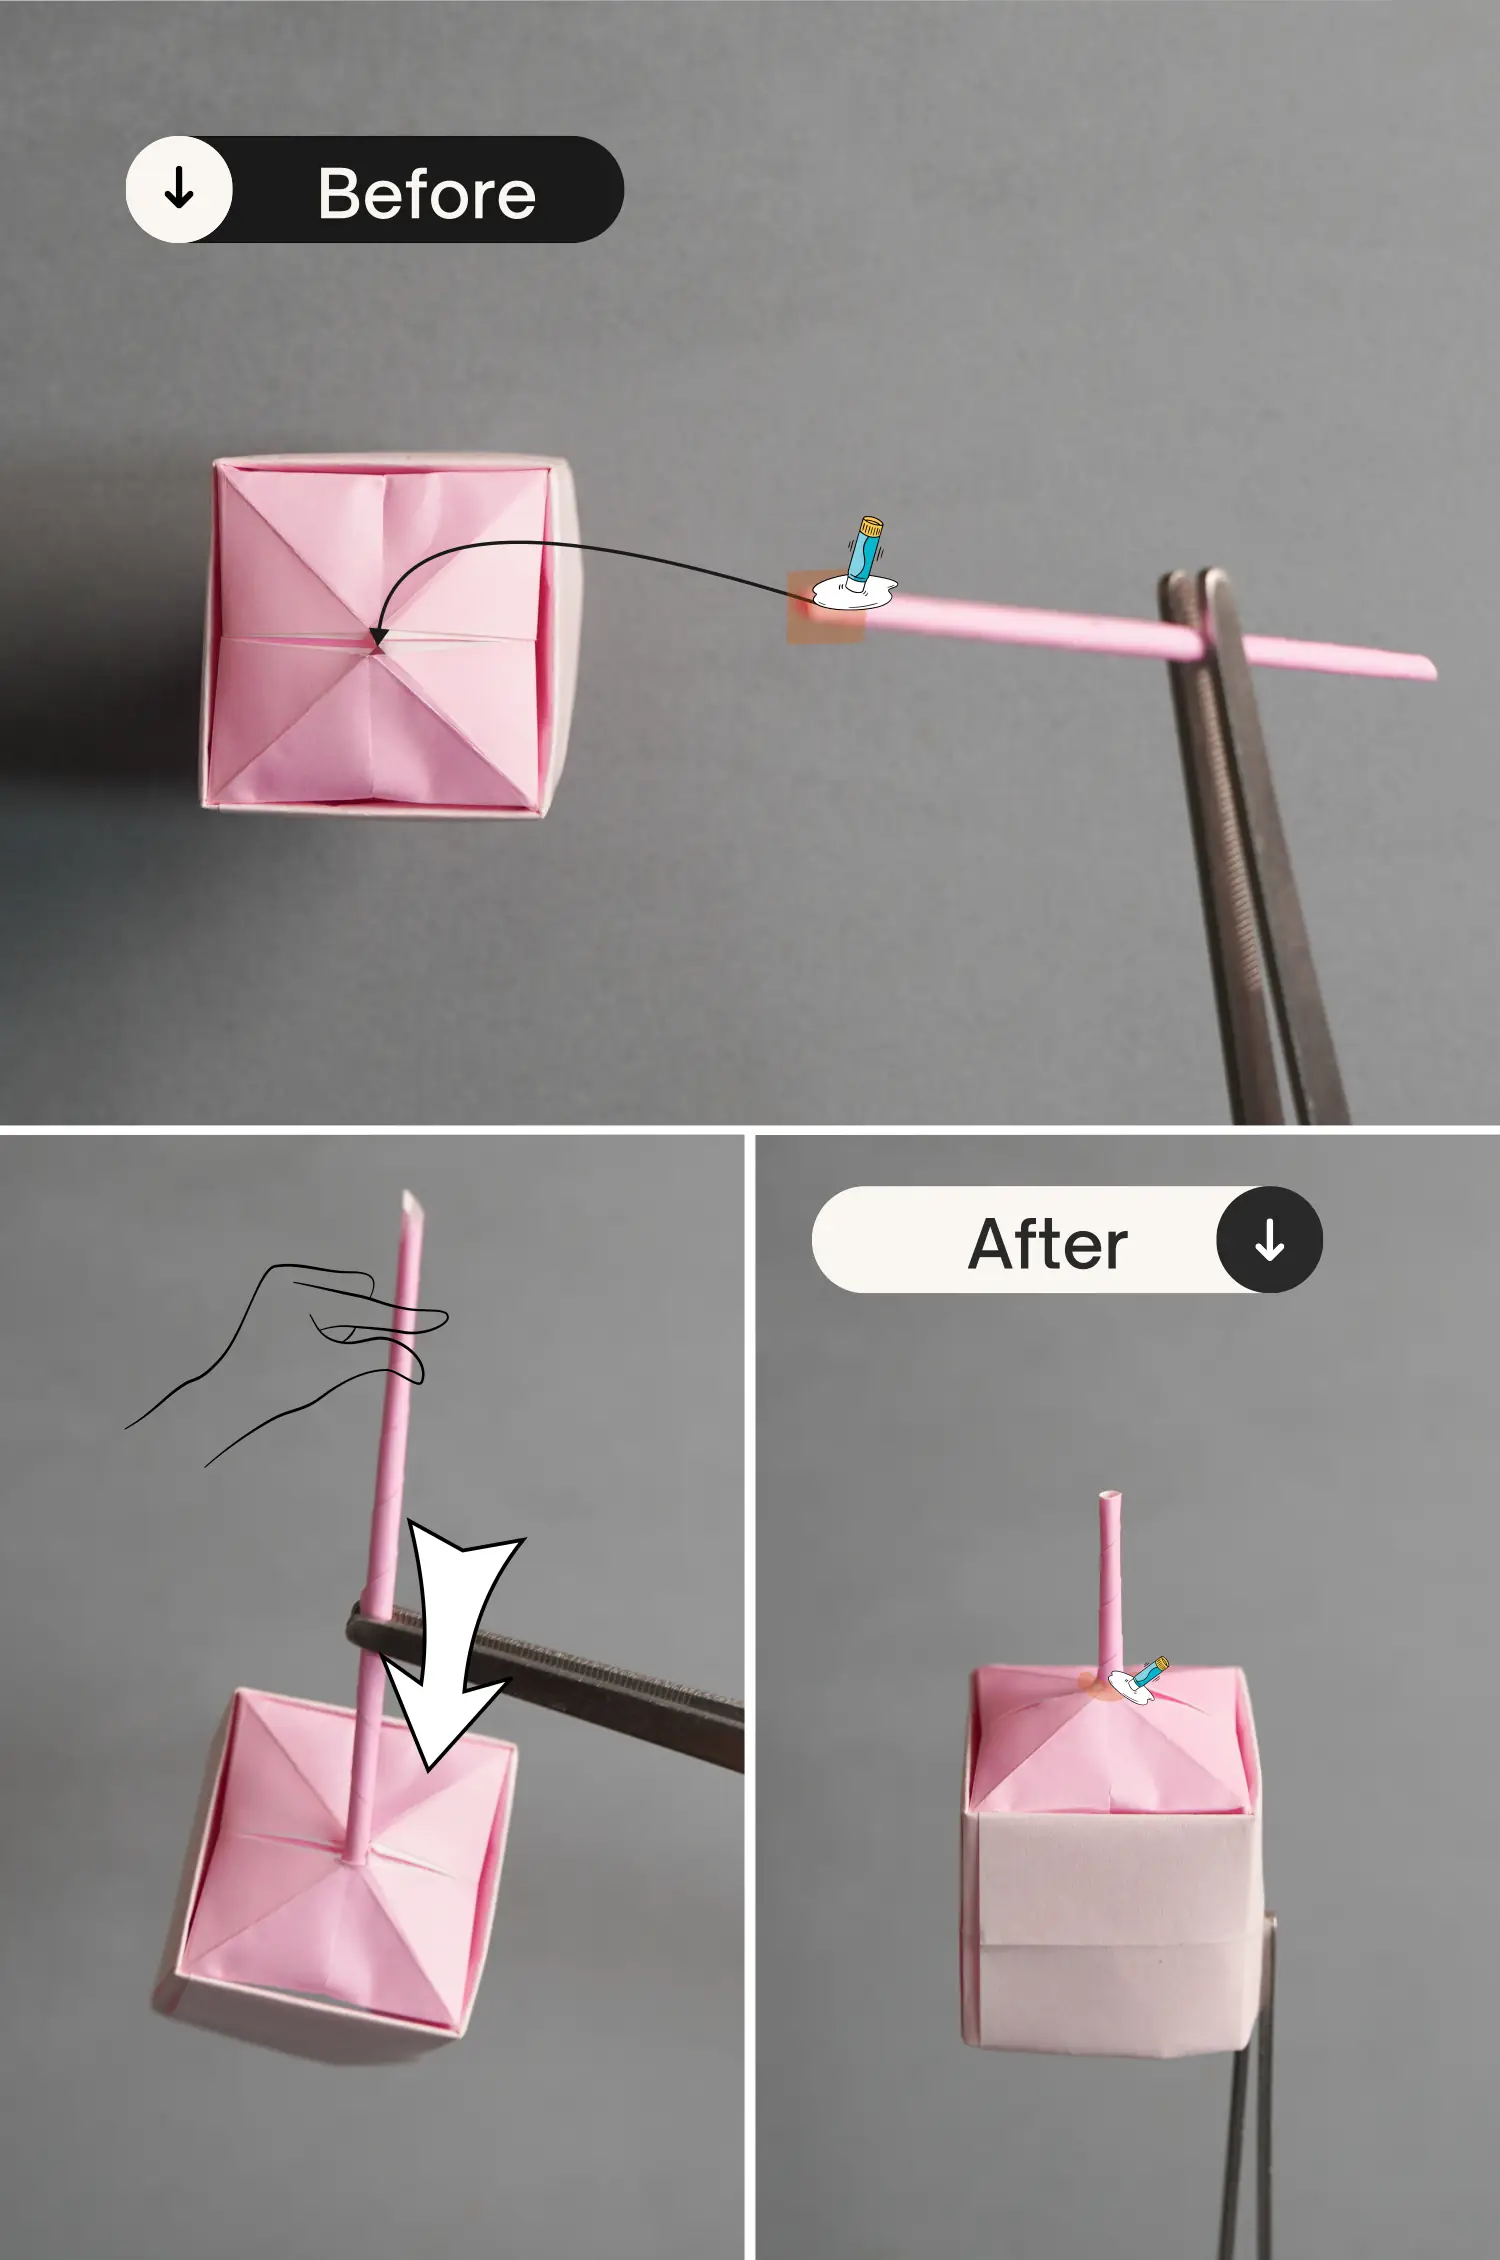
Put this paper stick into the ball from the top hole. Remember to apply glue to secure the paper stick.
Step 26
Hold the stick part with your thumb and forefinger, and slightly lift the dreidel, then quickly roll the stick and release the dreidel and it will spin.