How to Make an Origami Human
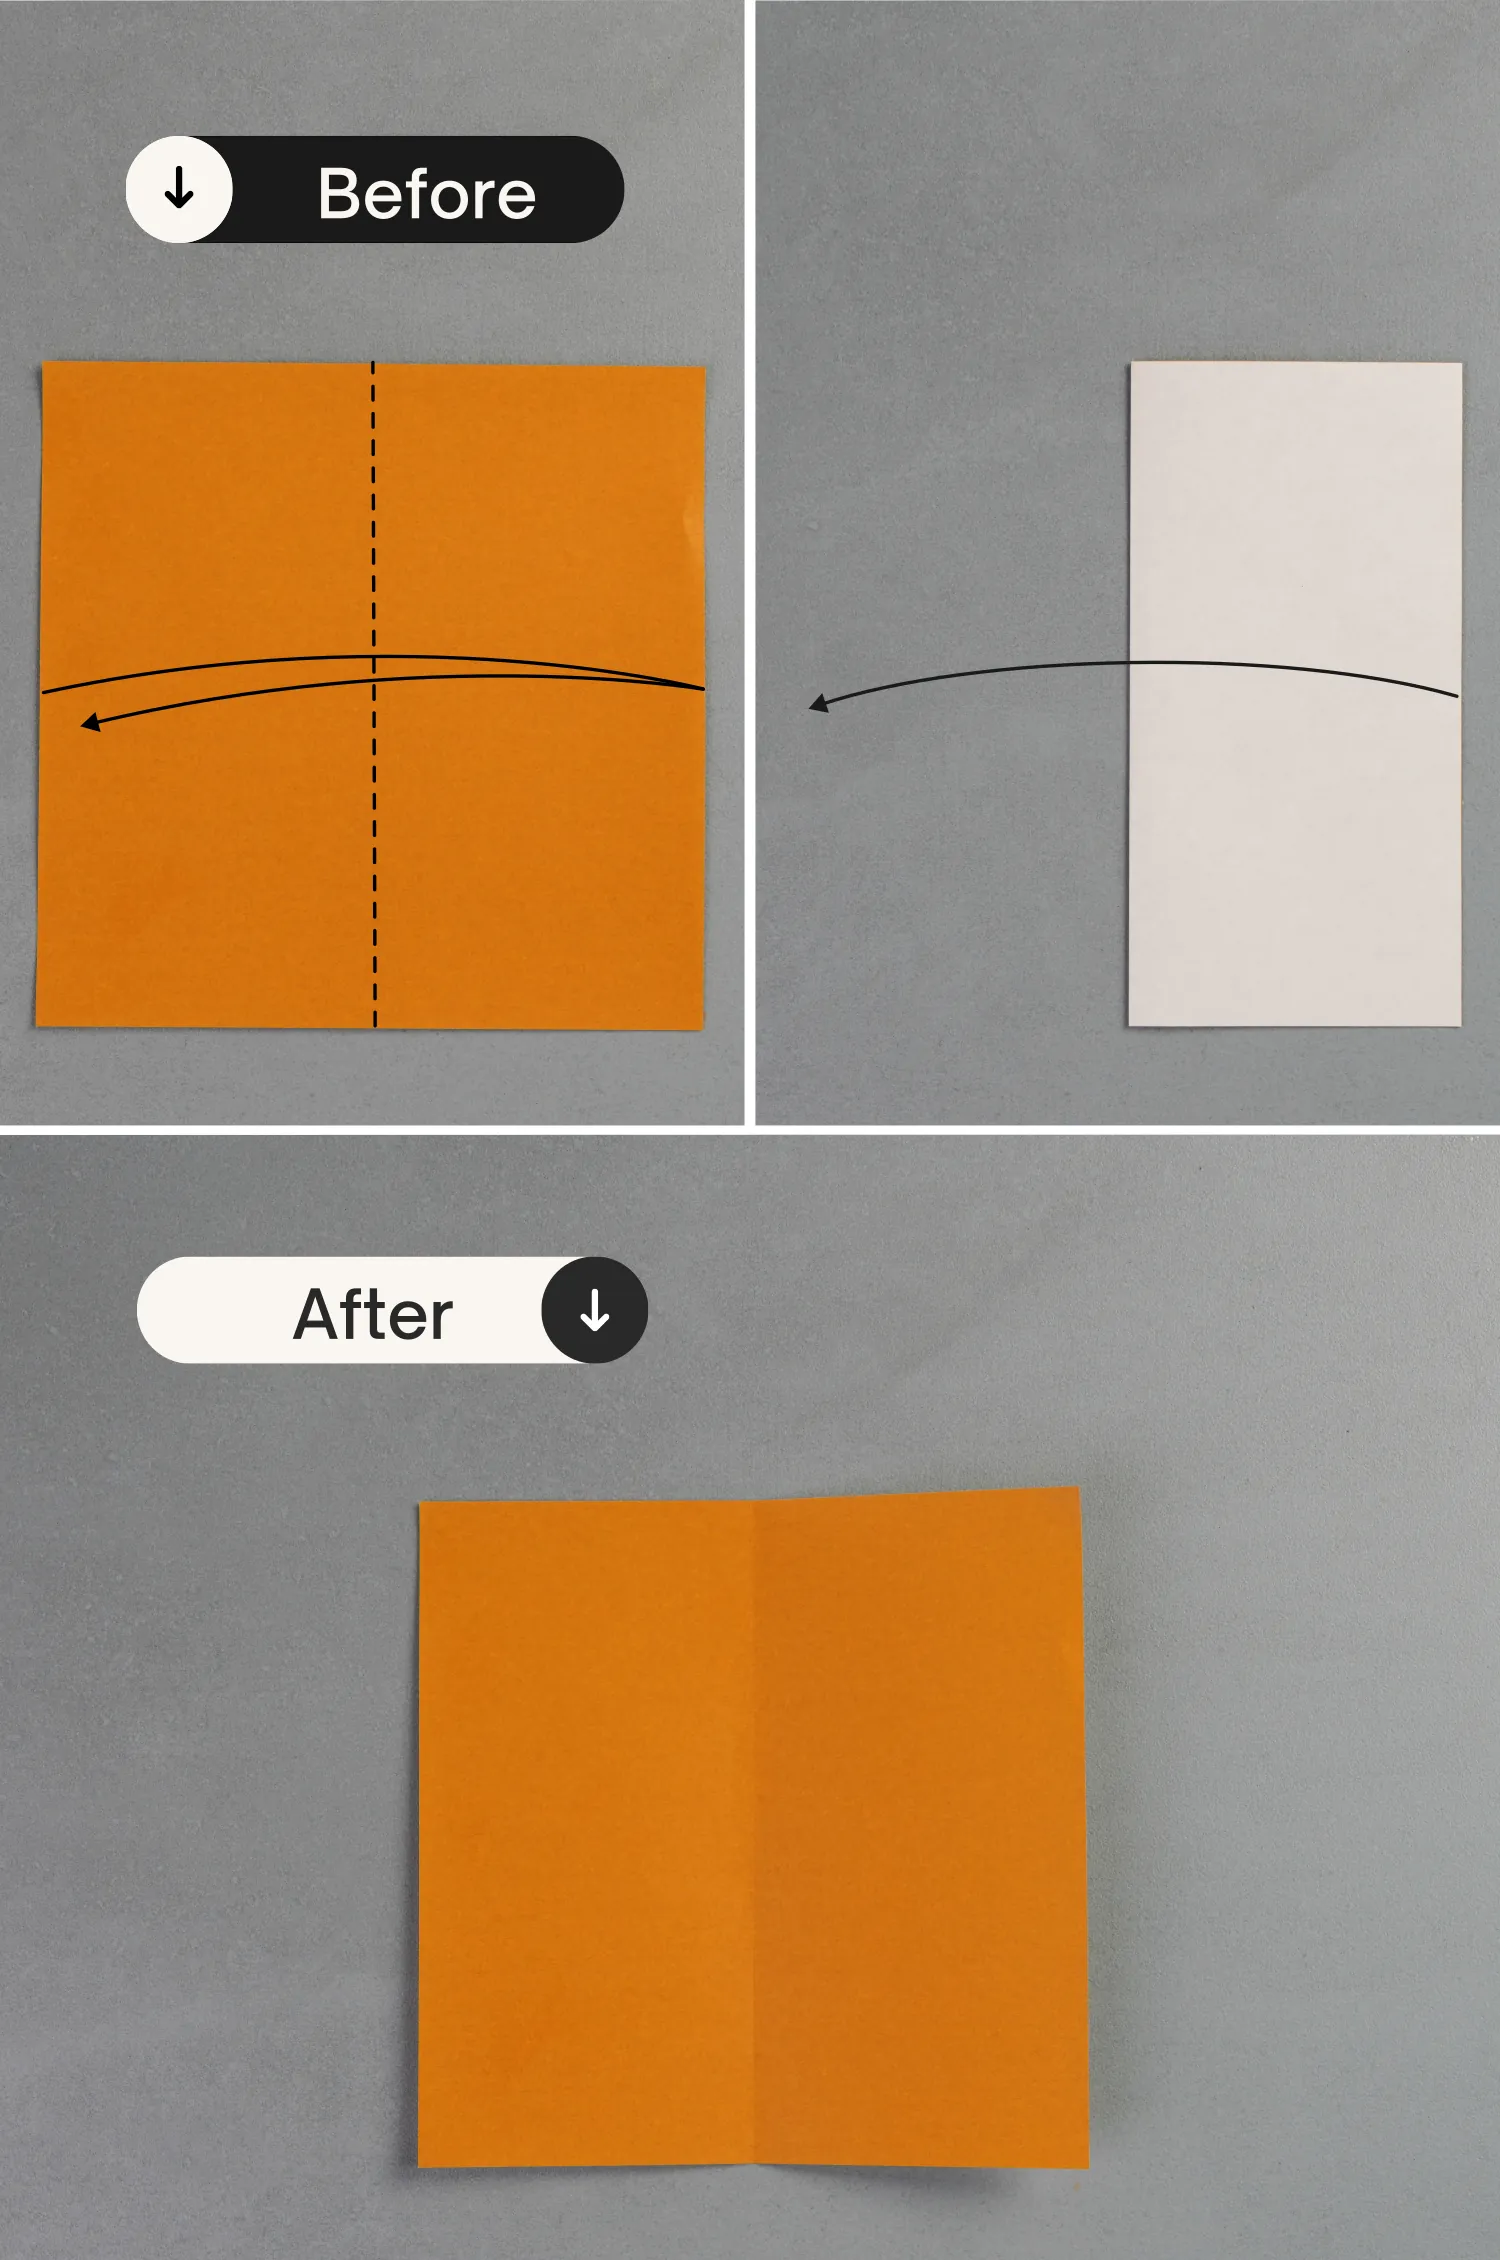
Step 1
Place the paper with the desired display side facing up, fold it vertically, and unfold it.
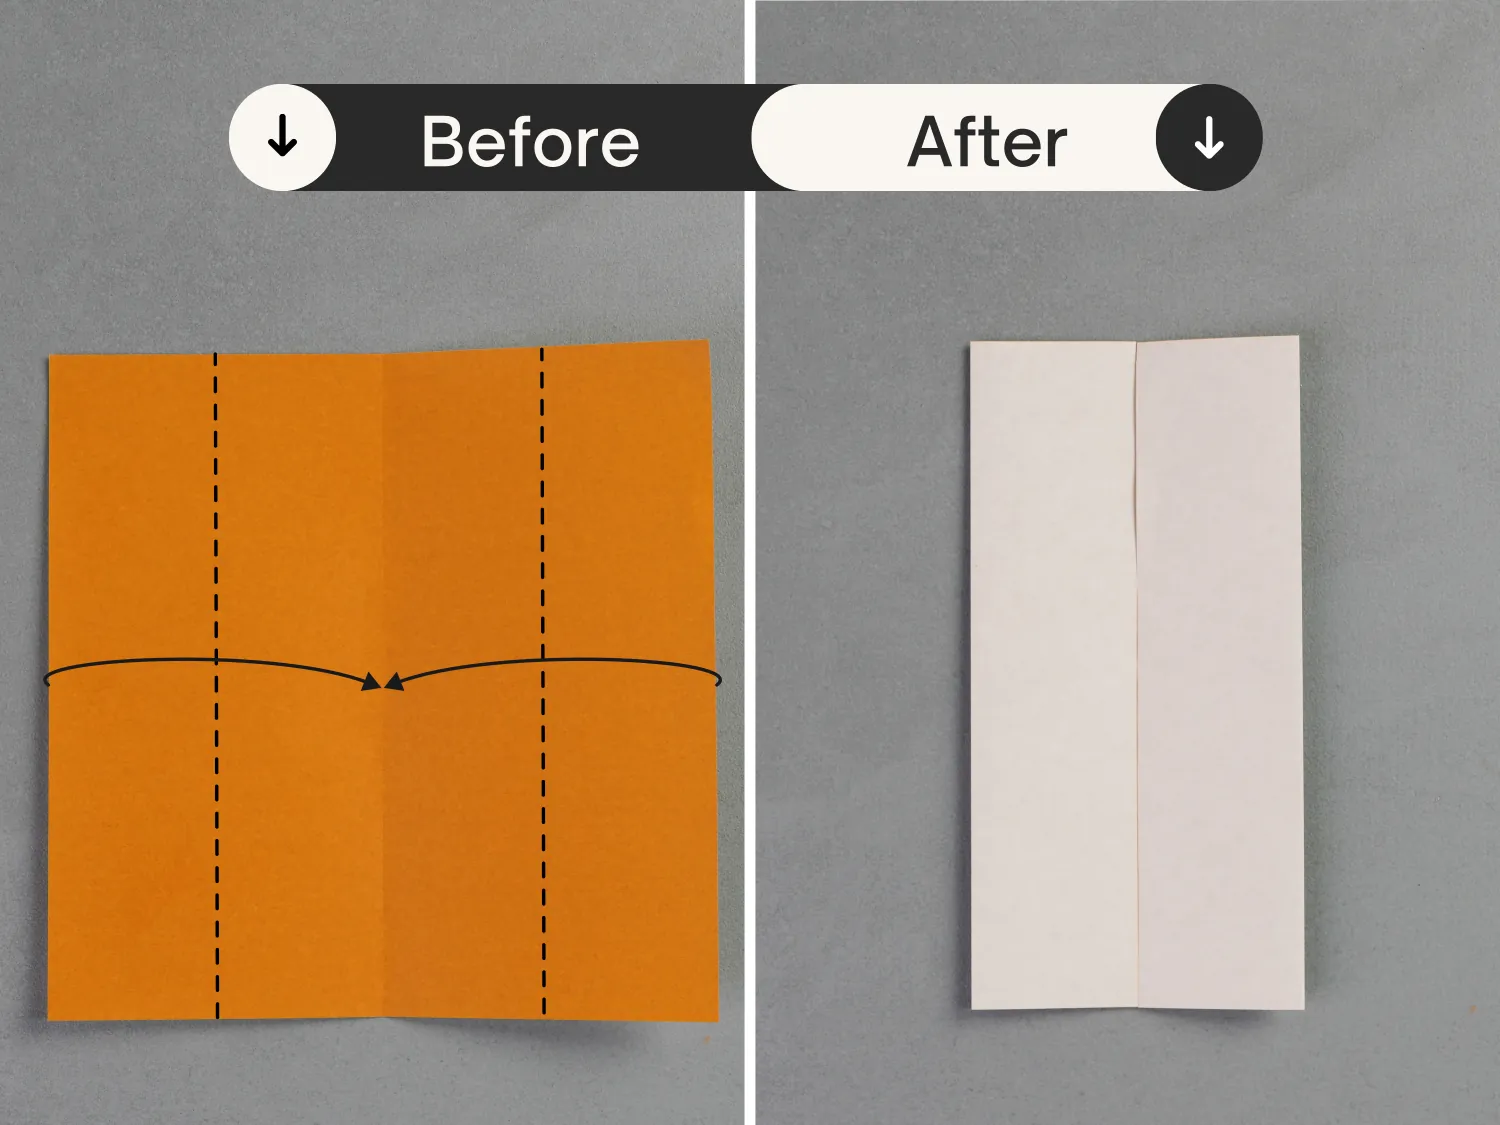
Step 2
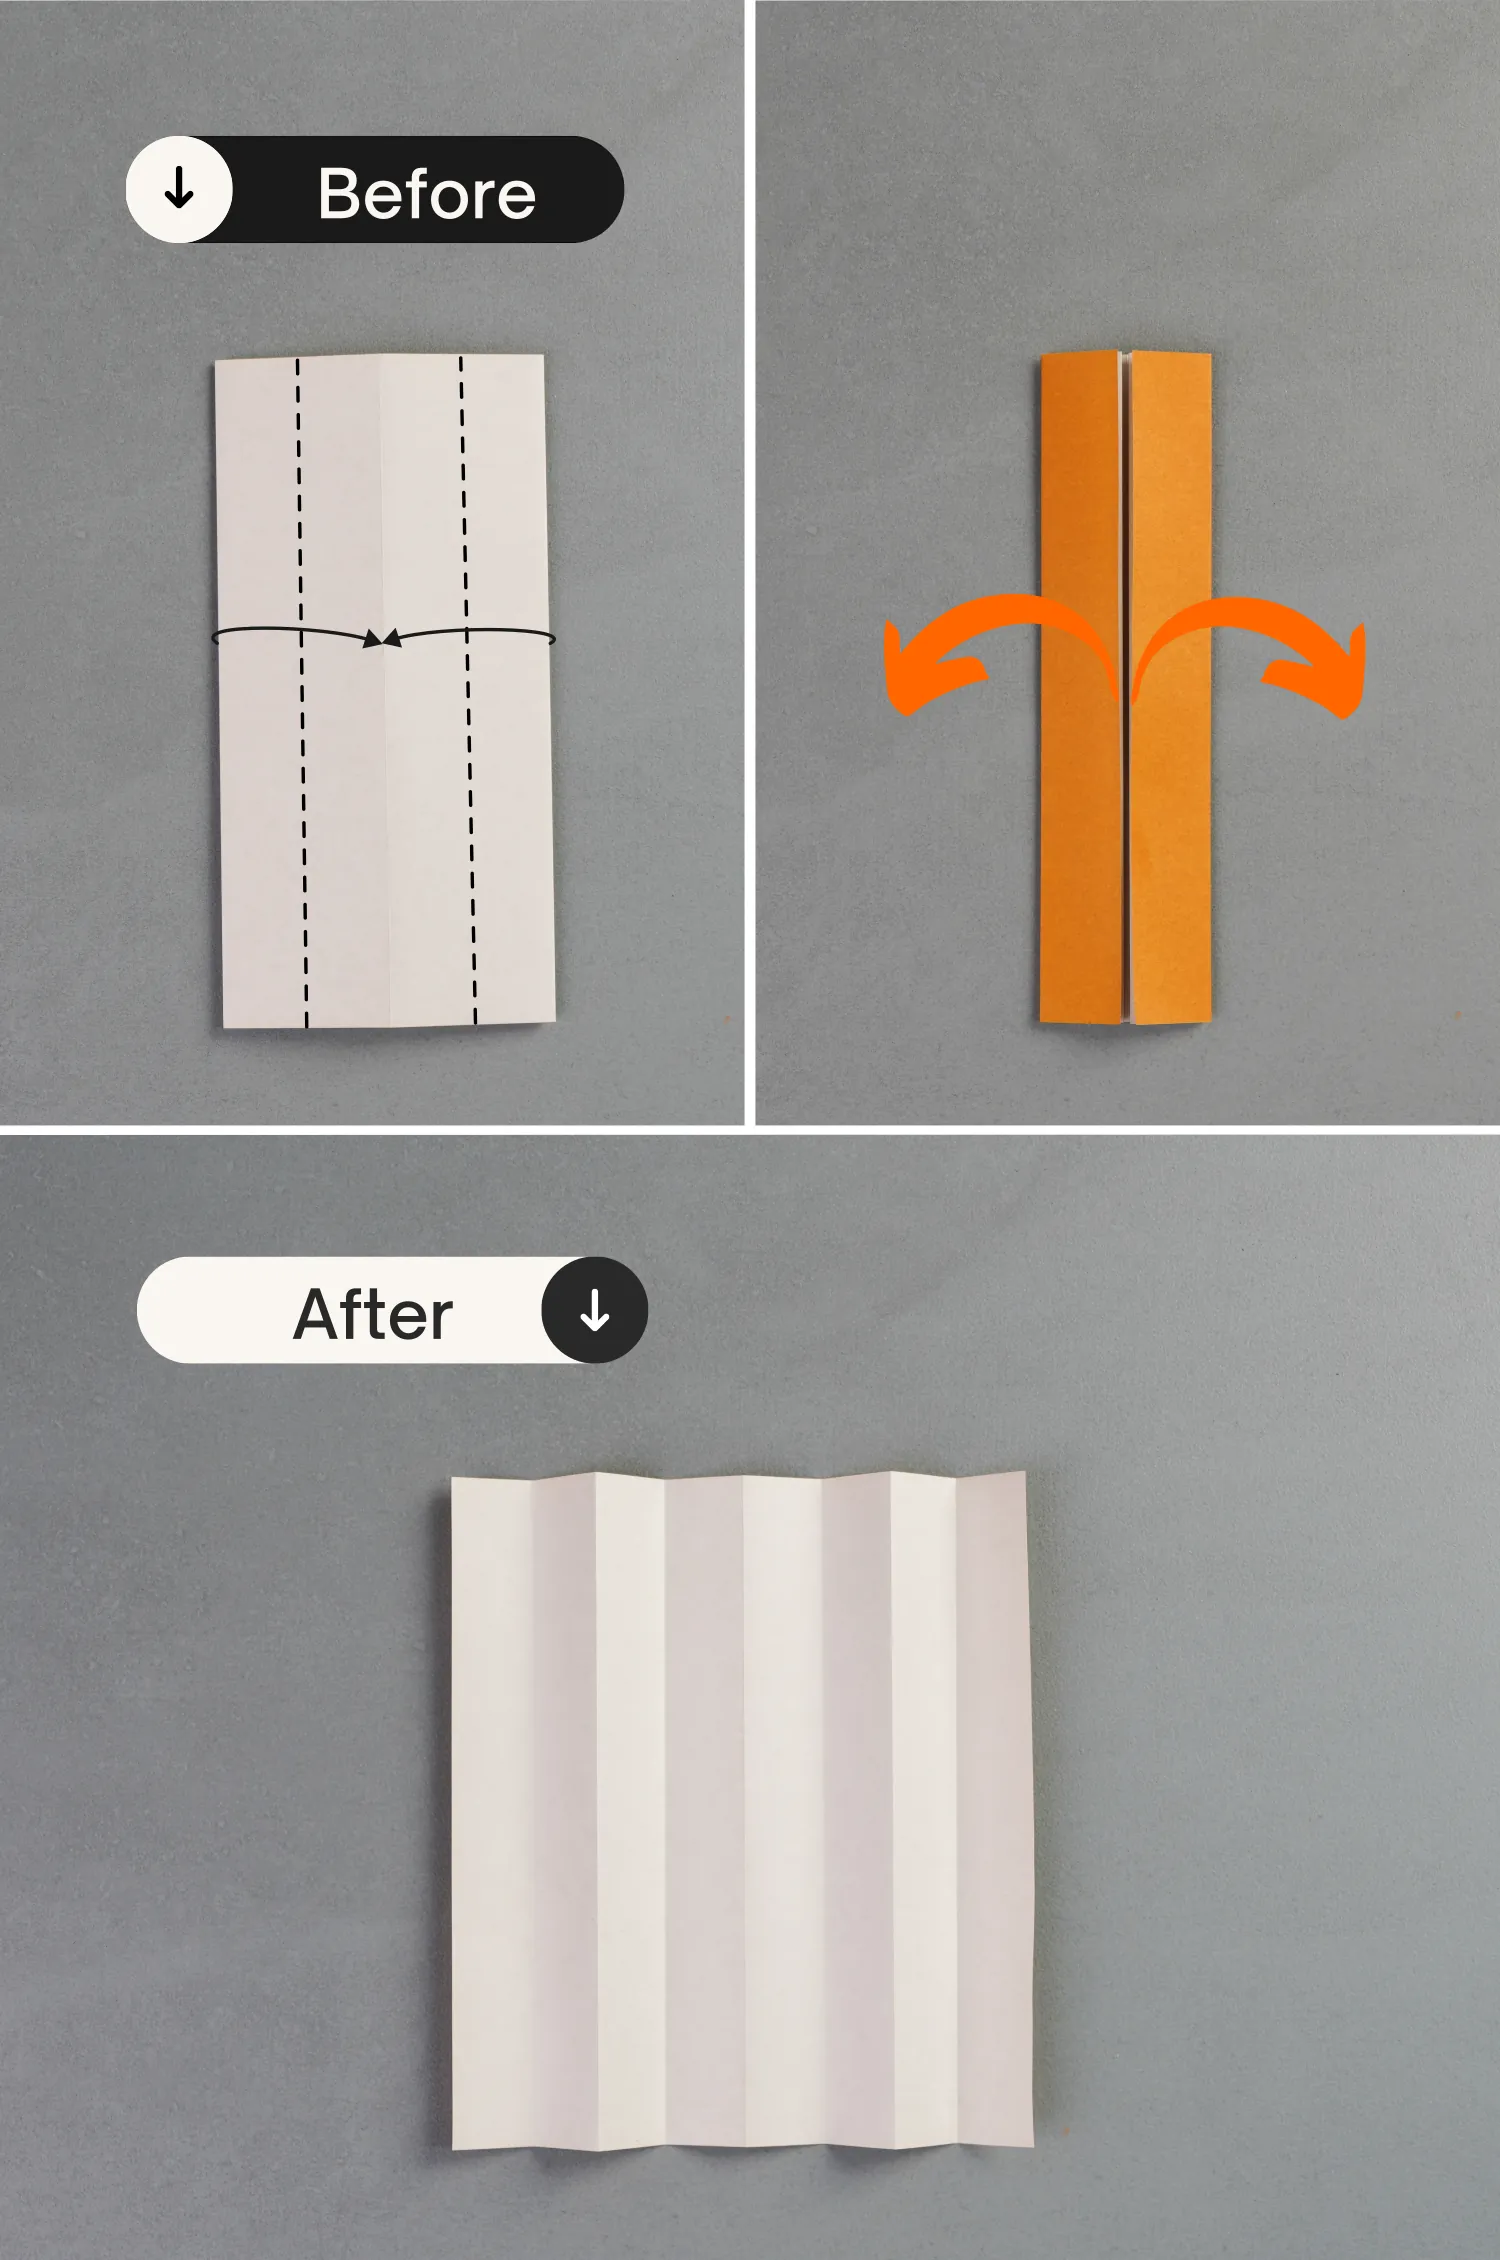
Fold the left and right edges to align with the vertical crease.
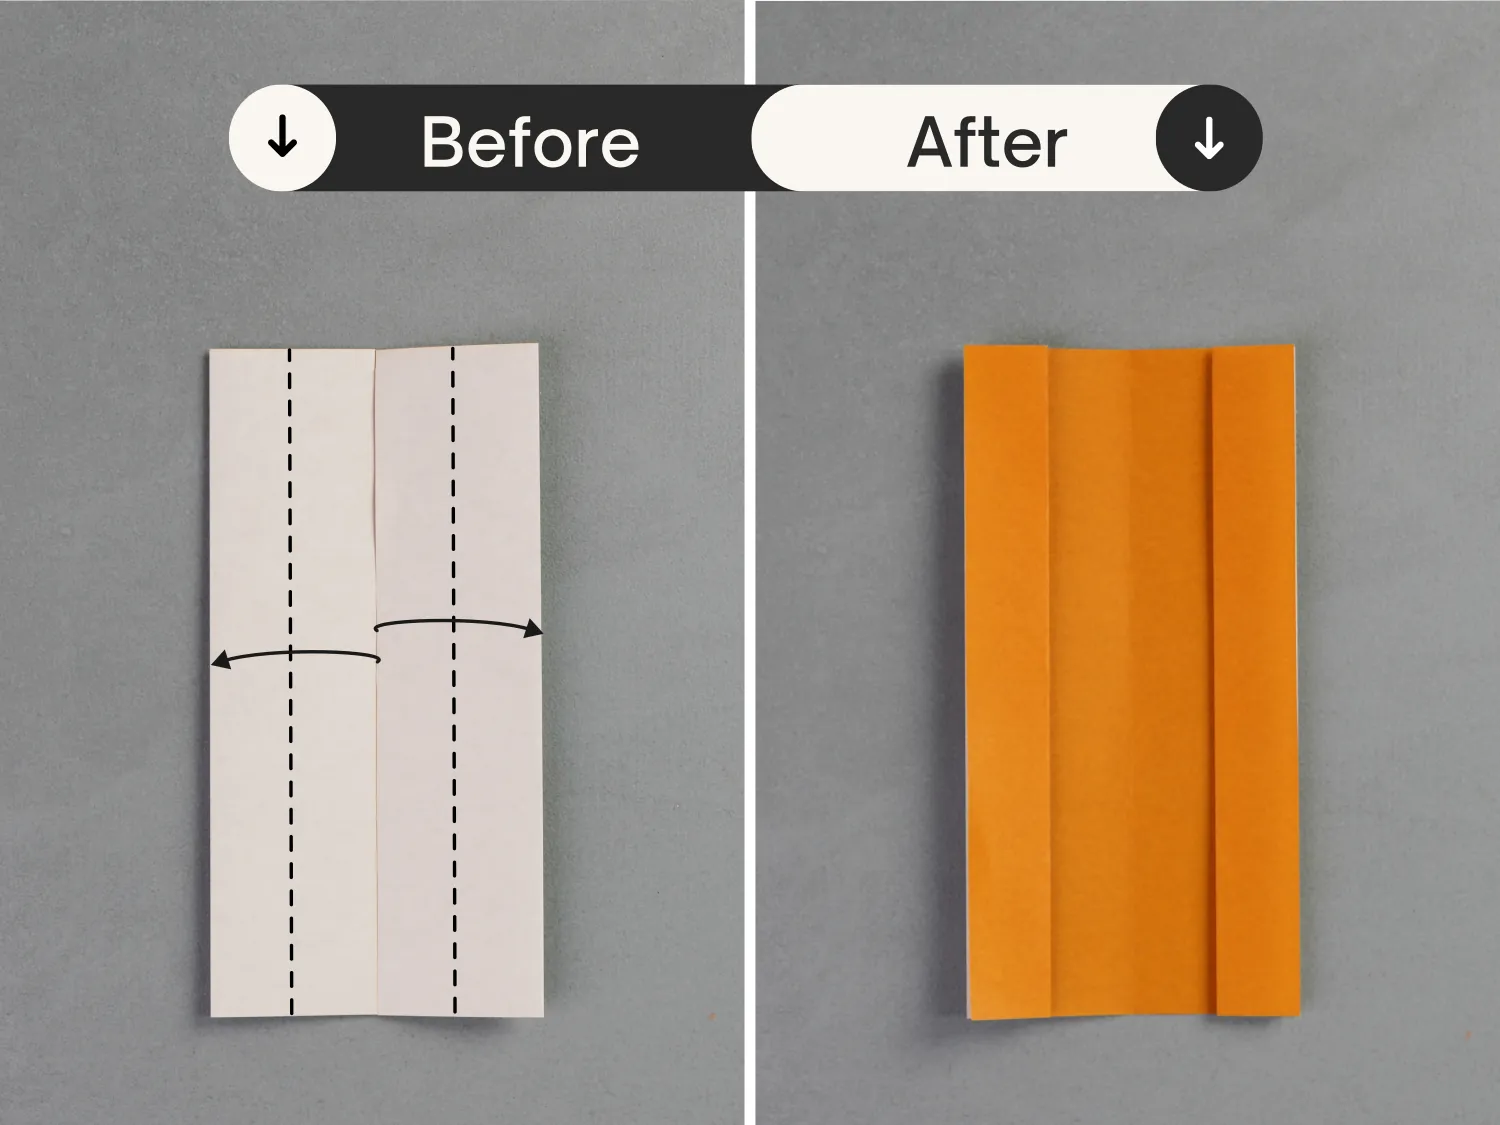
Step 3
Fold the left layer in half vertically from right to left, and fold the right layer in half vertically from left to right.
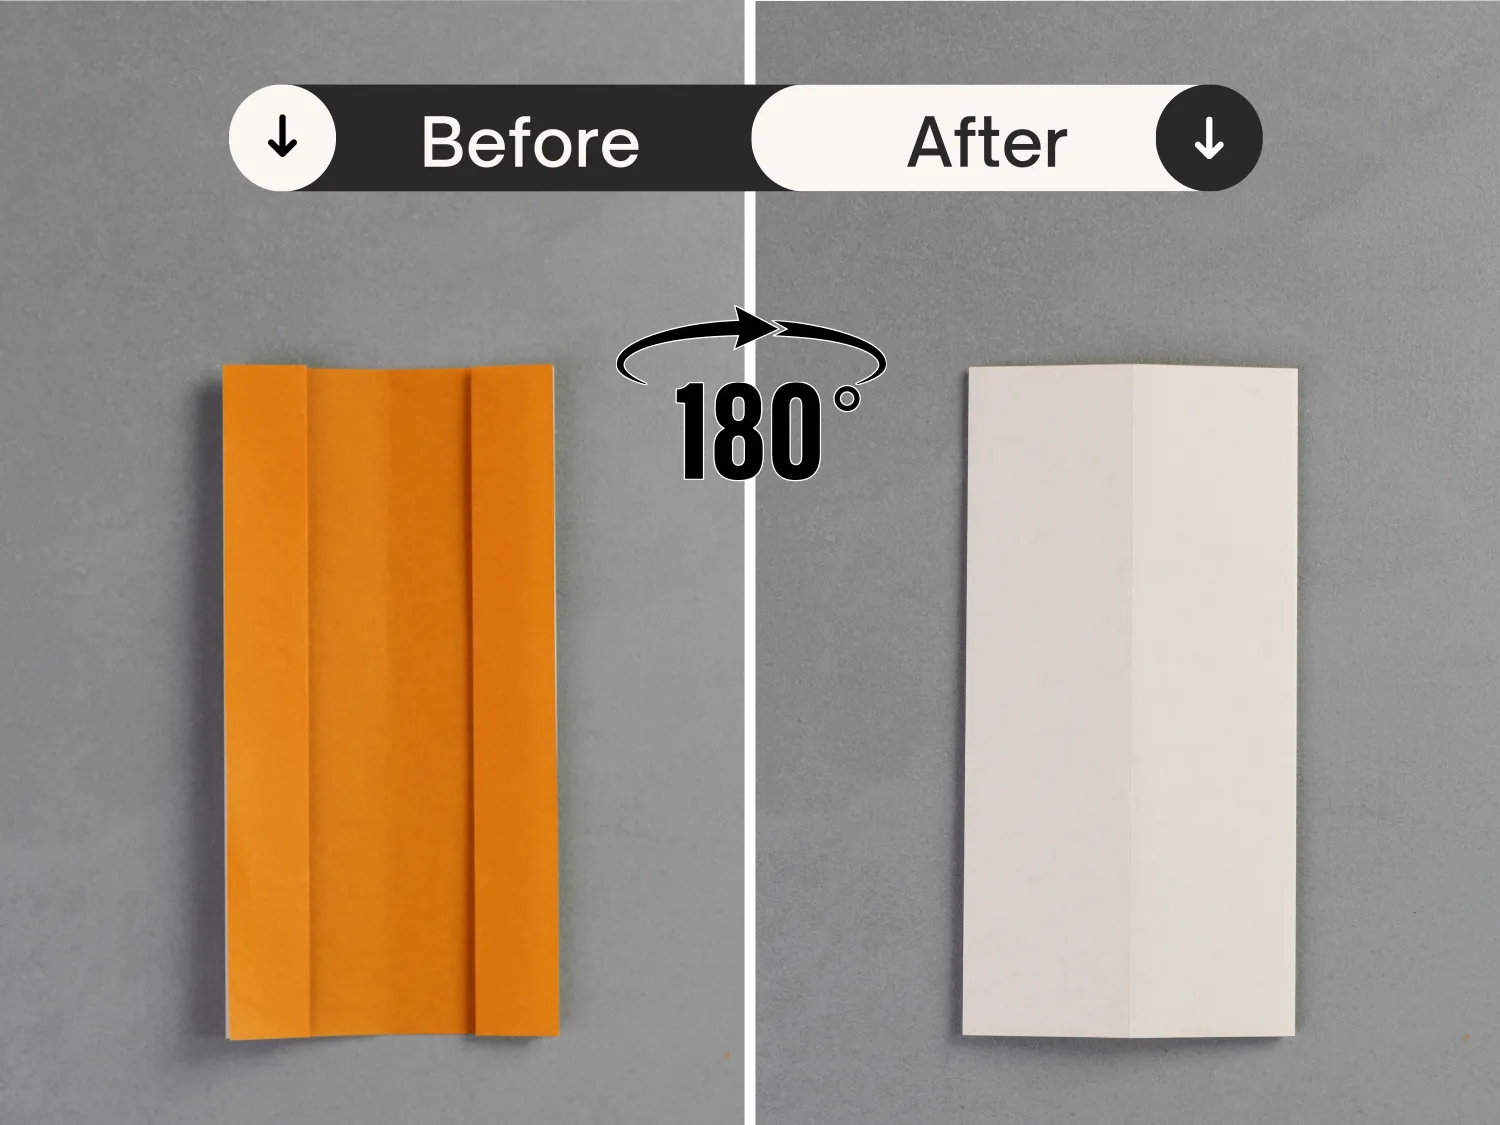
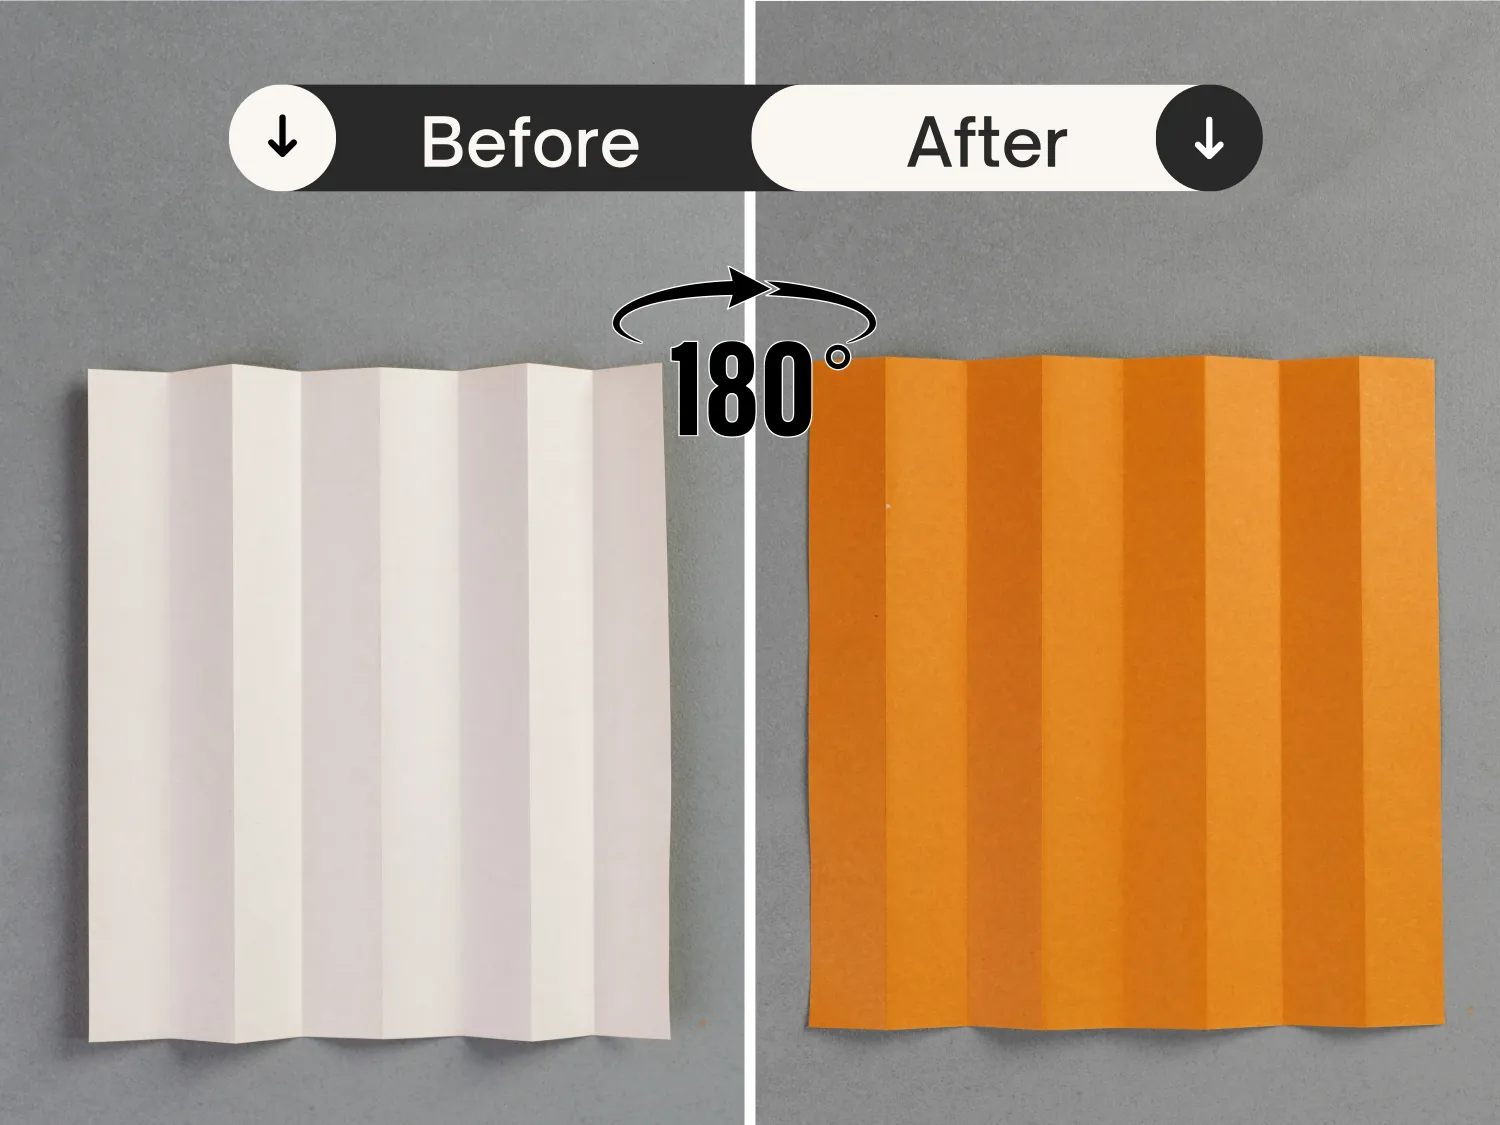
Step 4
Flip the paper over from left to right.
Step 5
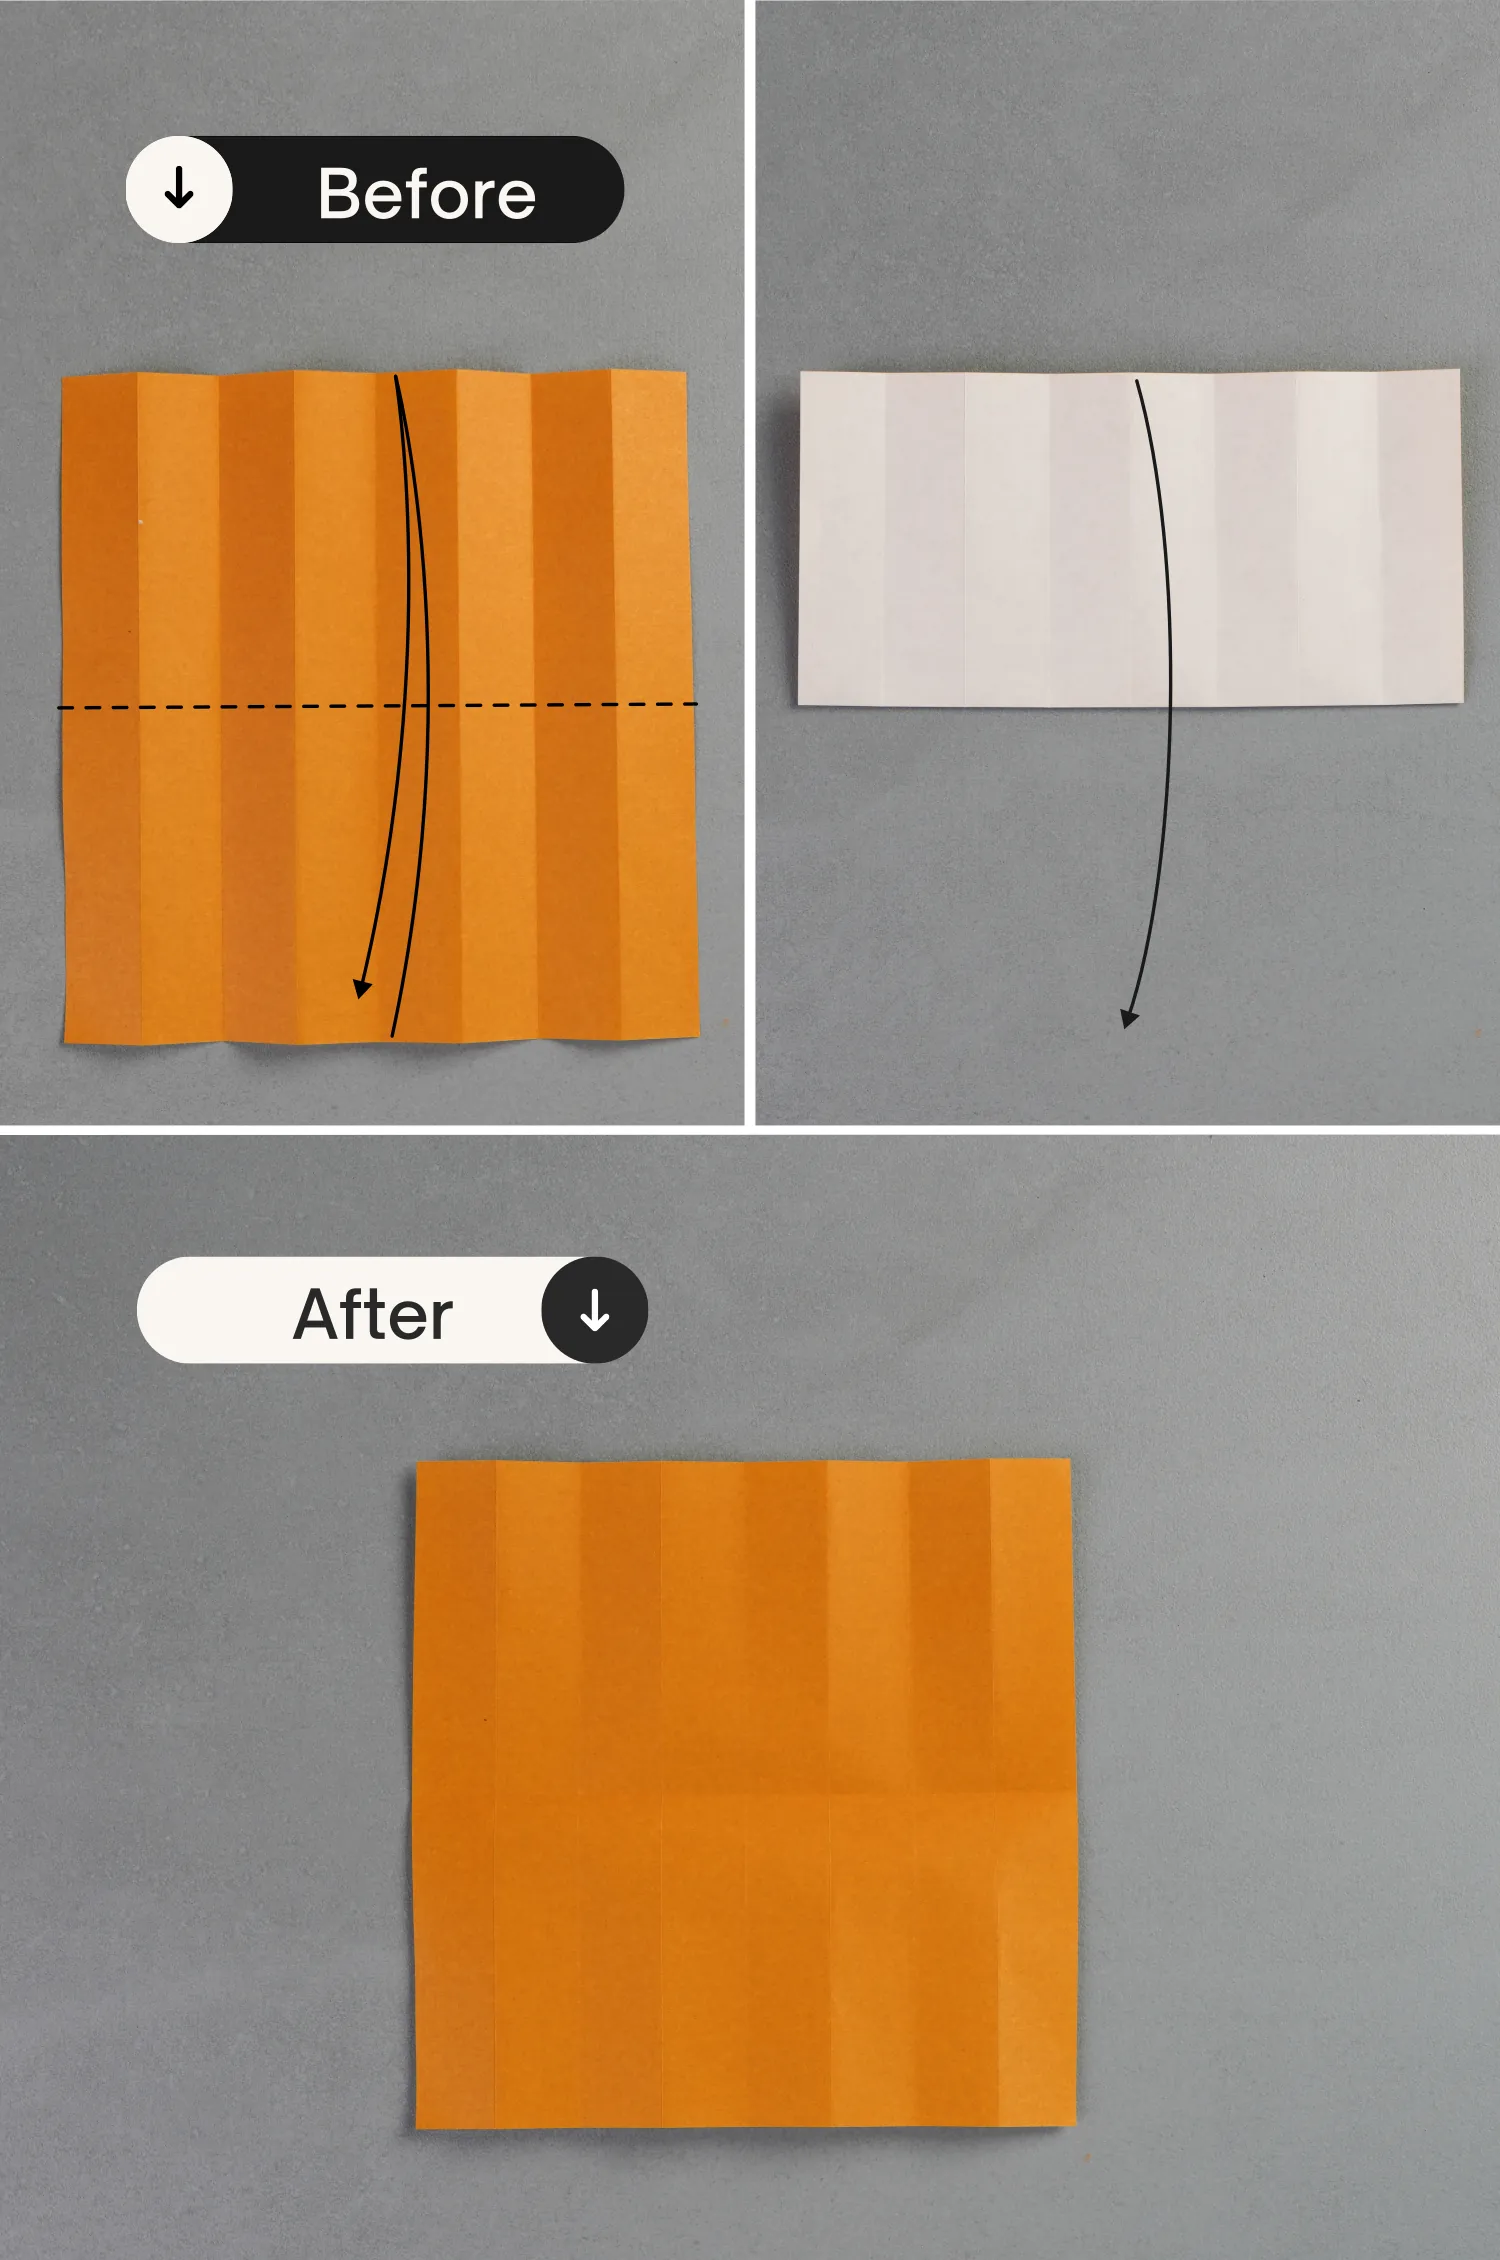
Fold the left and right edges to align with the vertical crease, then unfold the paper completely.
Step 6
Turn over the paper from left to right.
Step 7
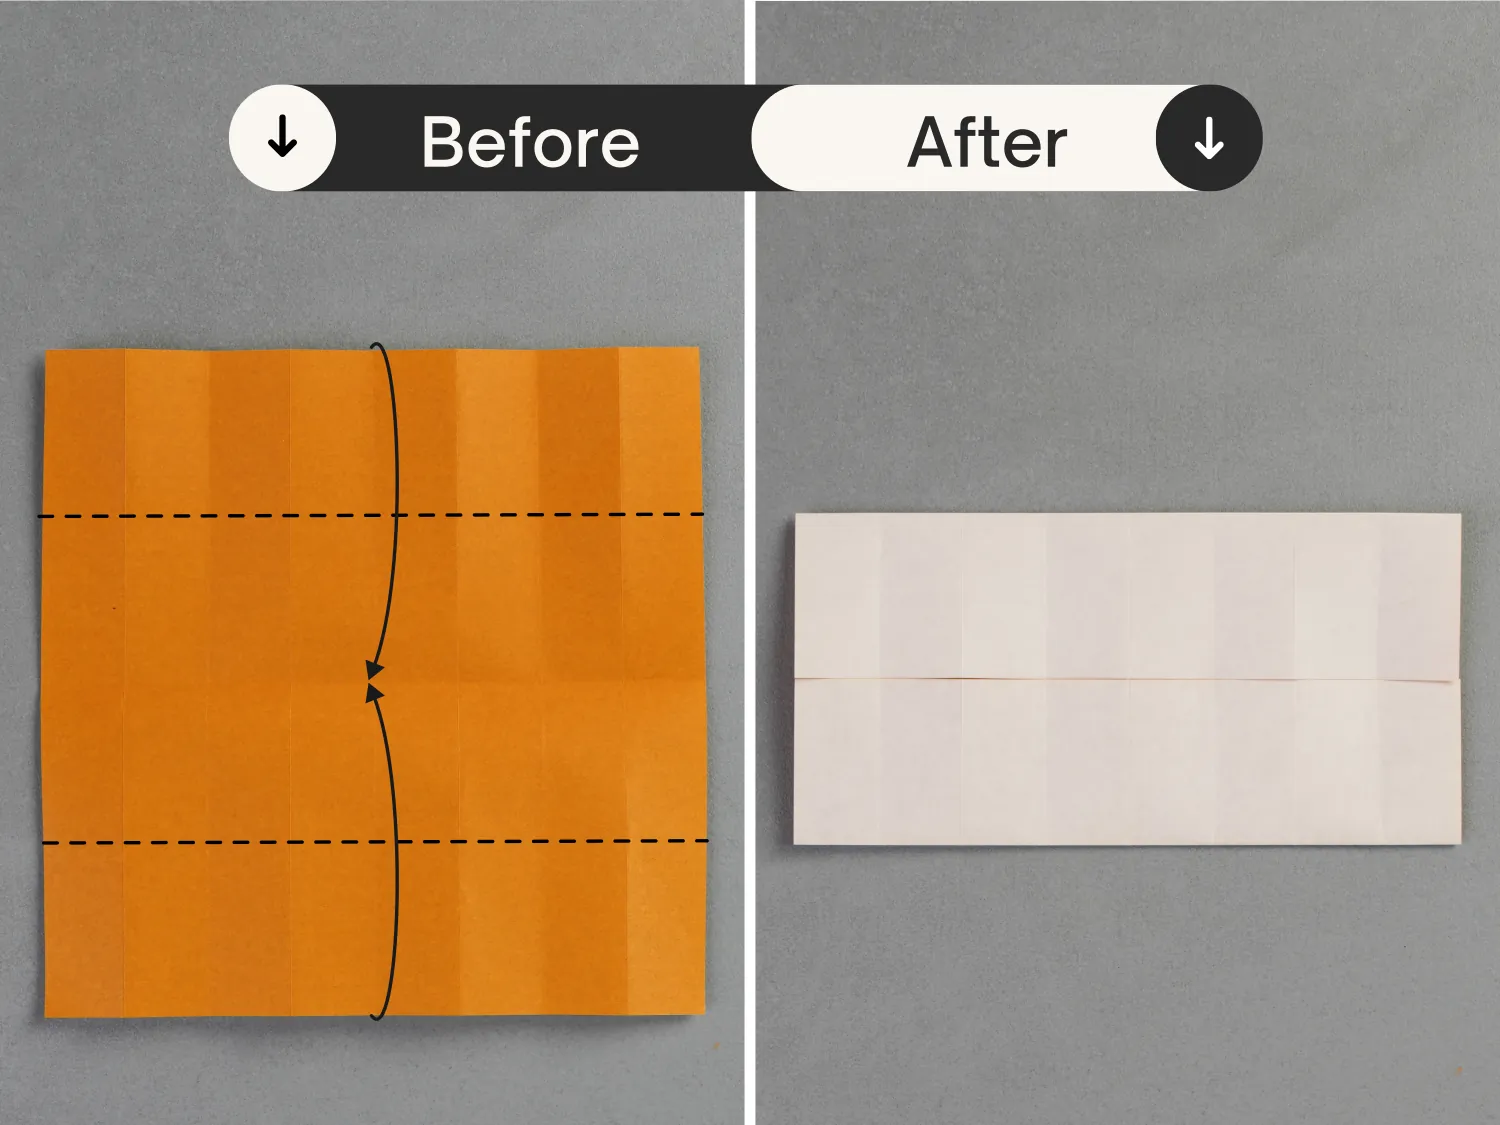
Fold the paper in half horizontally, and unfold it.
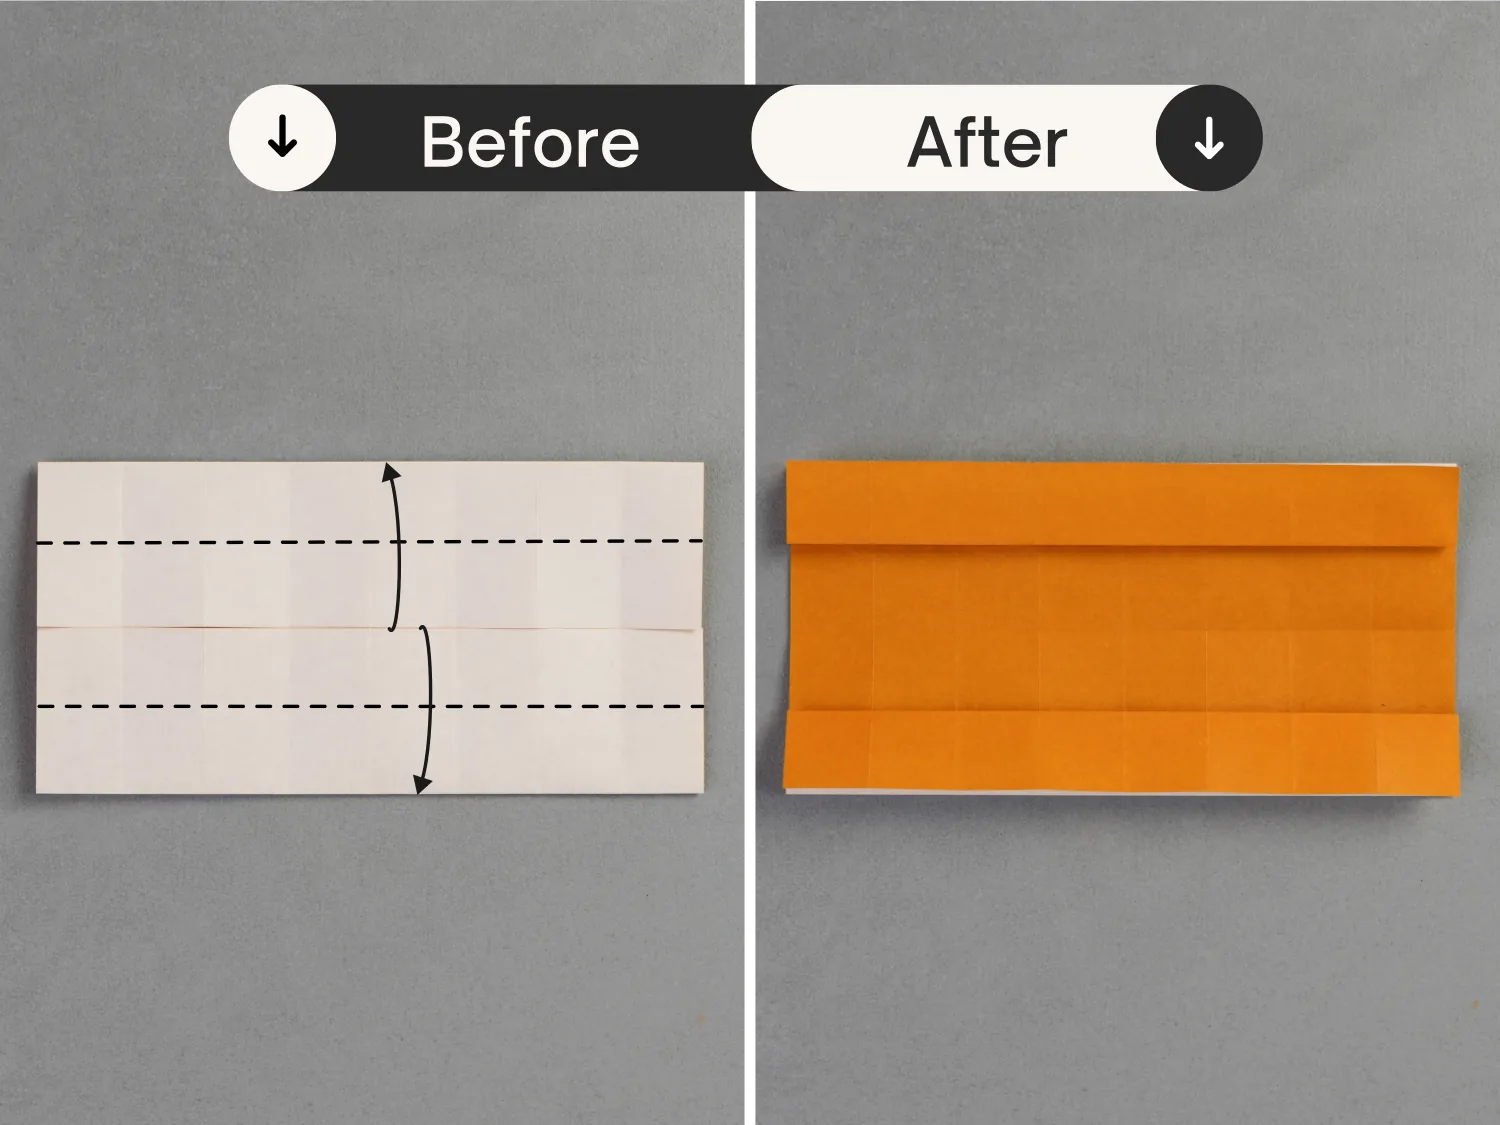
Step 8
Fold the top and bottom edges to align with the horizontal crease.
Step 9
Fold the top layer in half horizontally from bottom to top, and fold the bottom layer in half horizontally from top to bottom.
Step 10
Flip the paper over from front to back, then fold the top and bottom edges to align with the middle horizontal crease.

Step 11
Turn over the paper from front to back, then fold it in half horizontally from bottom to top.

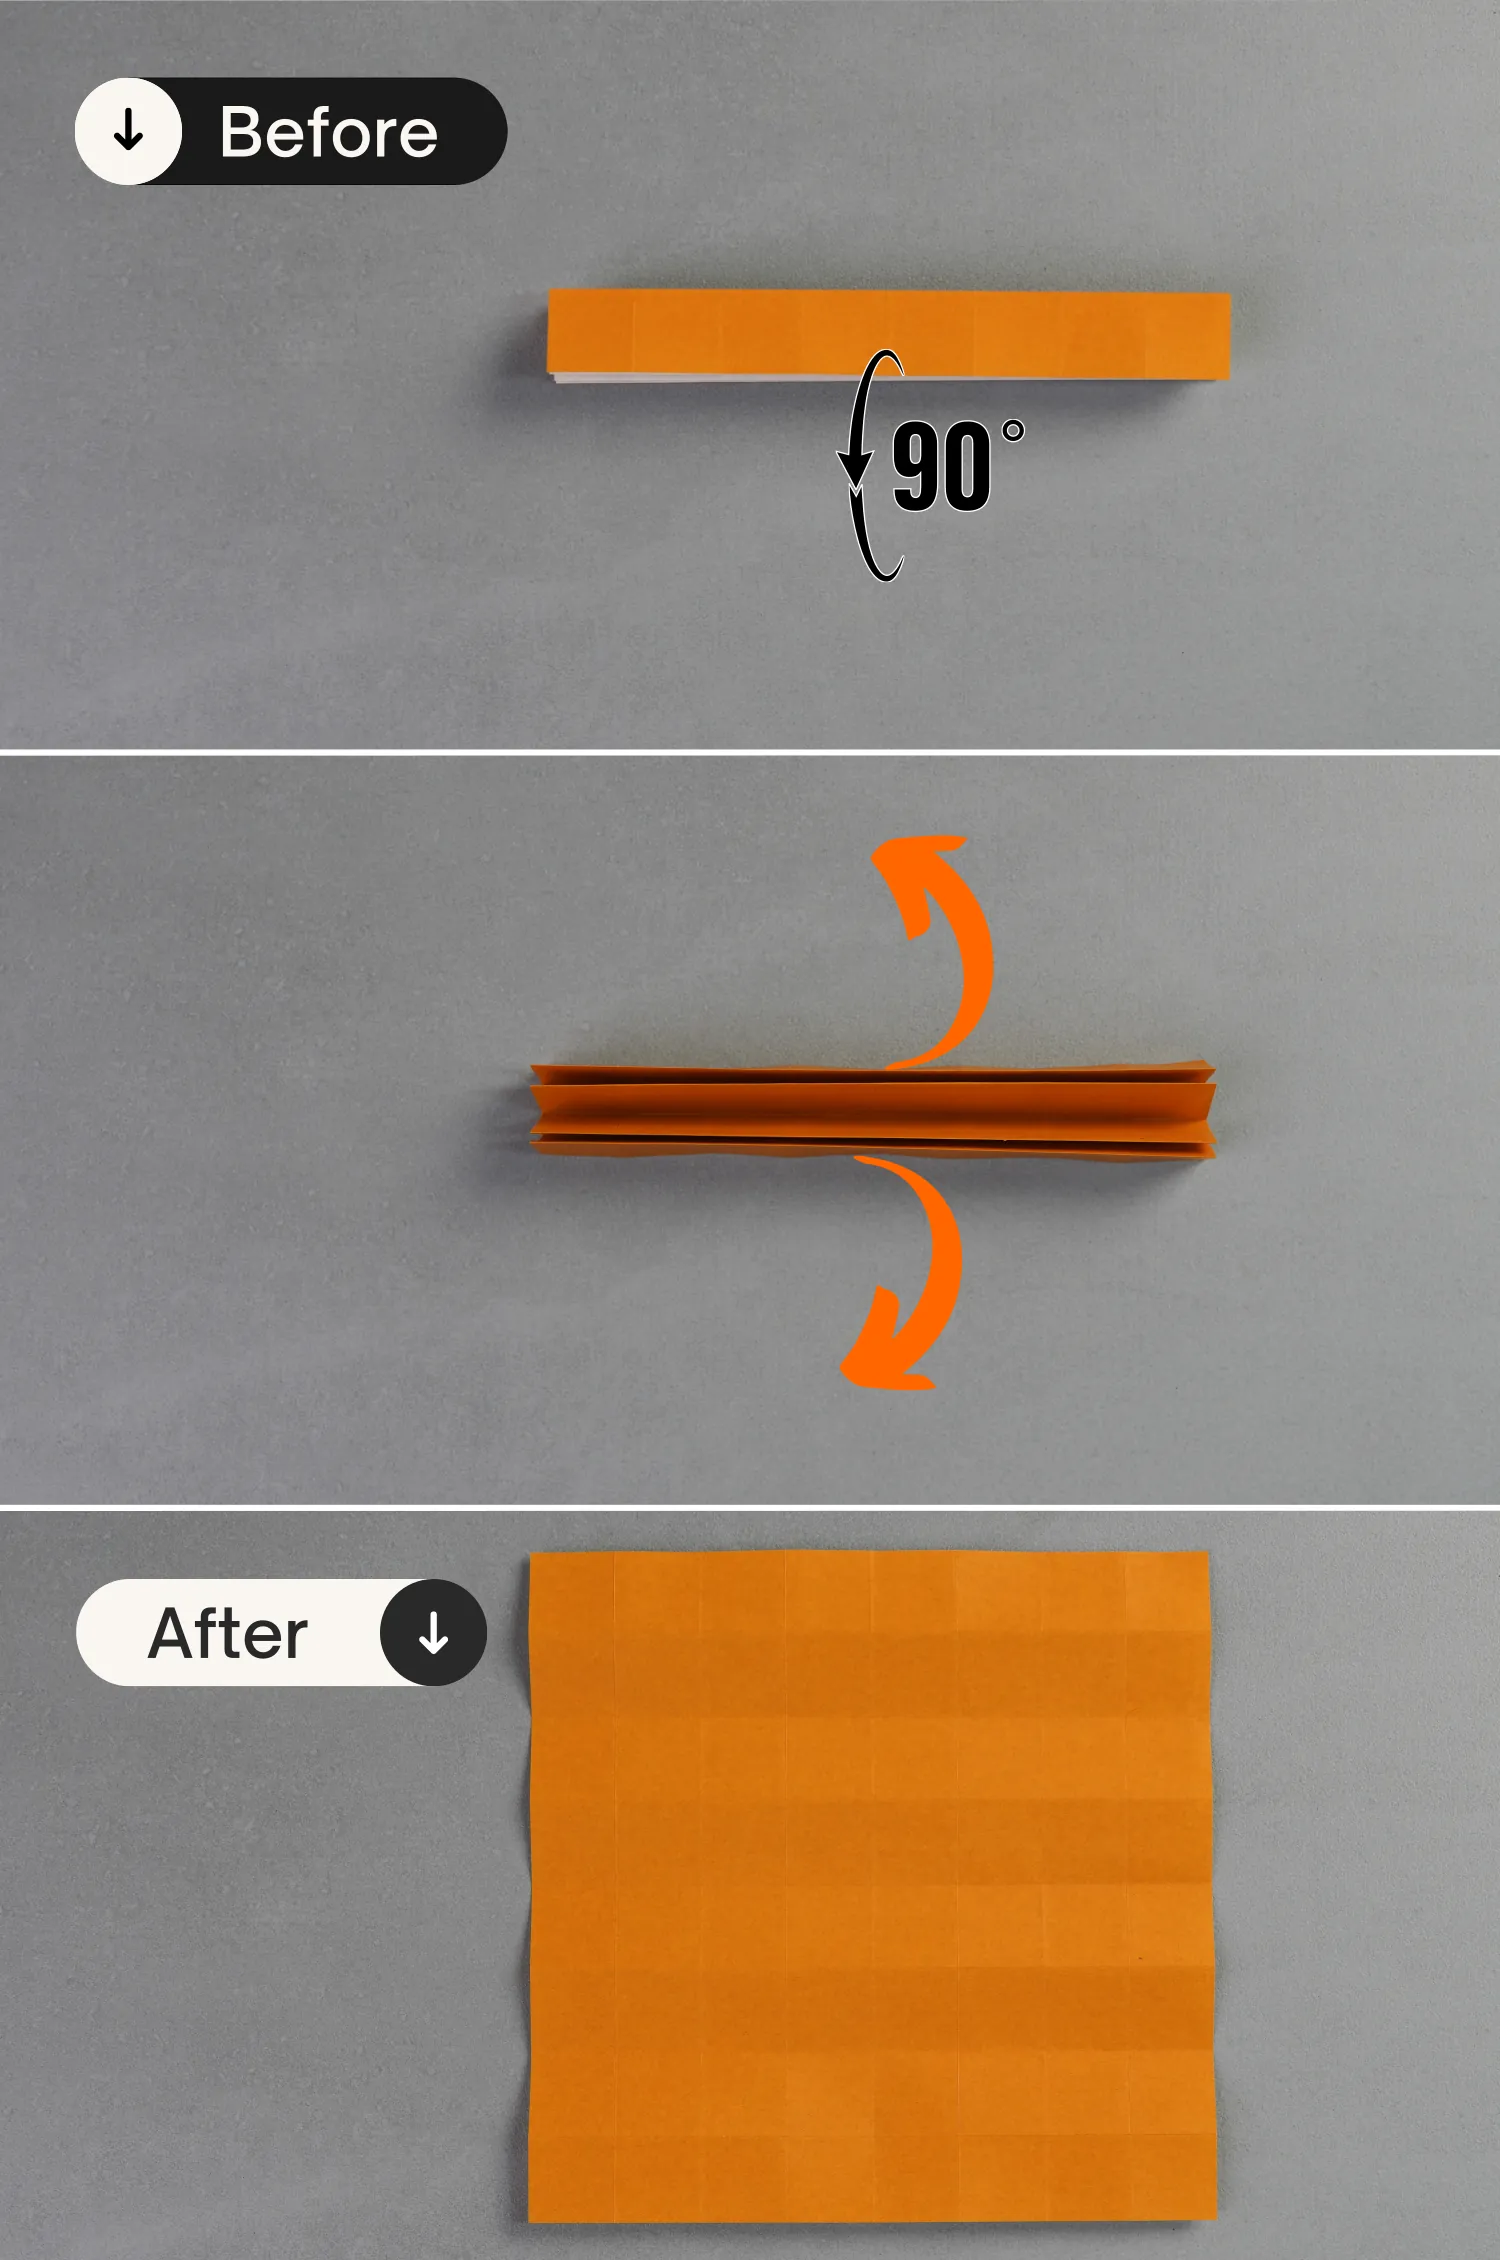
Step 12
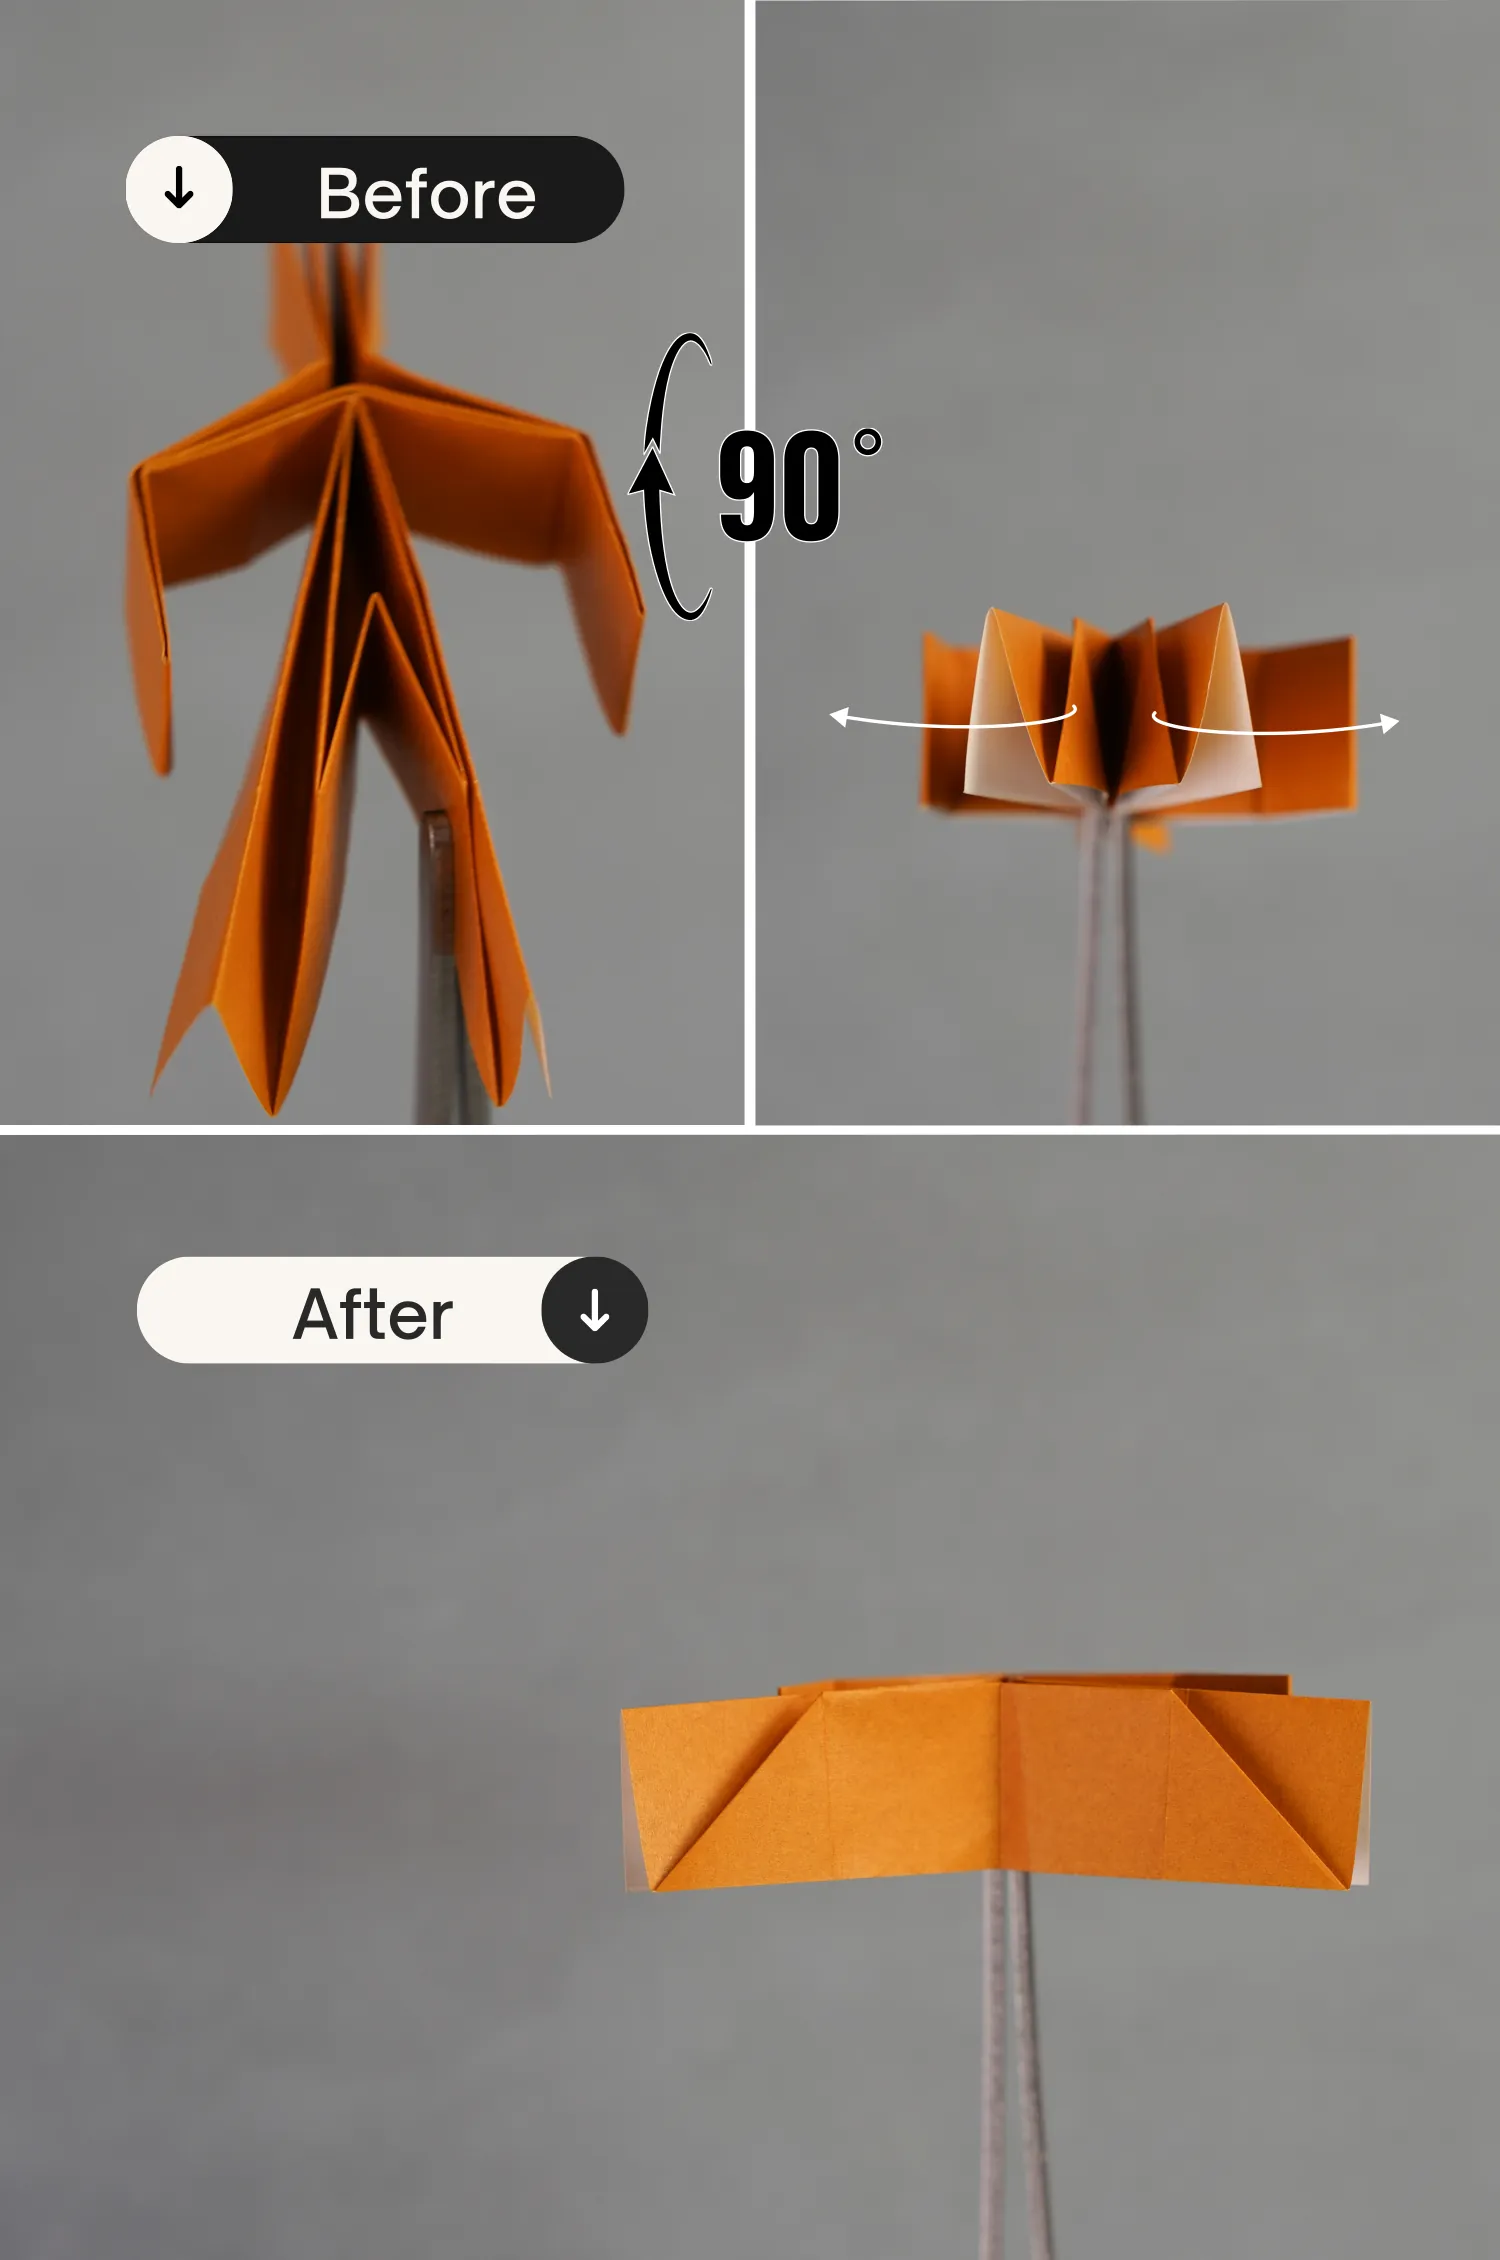
Rotate the paper 90 degrees from front to back, and expand the paper completely.
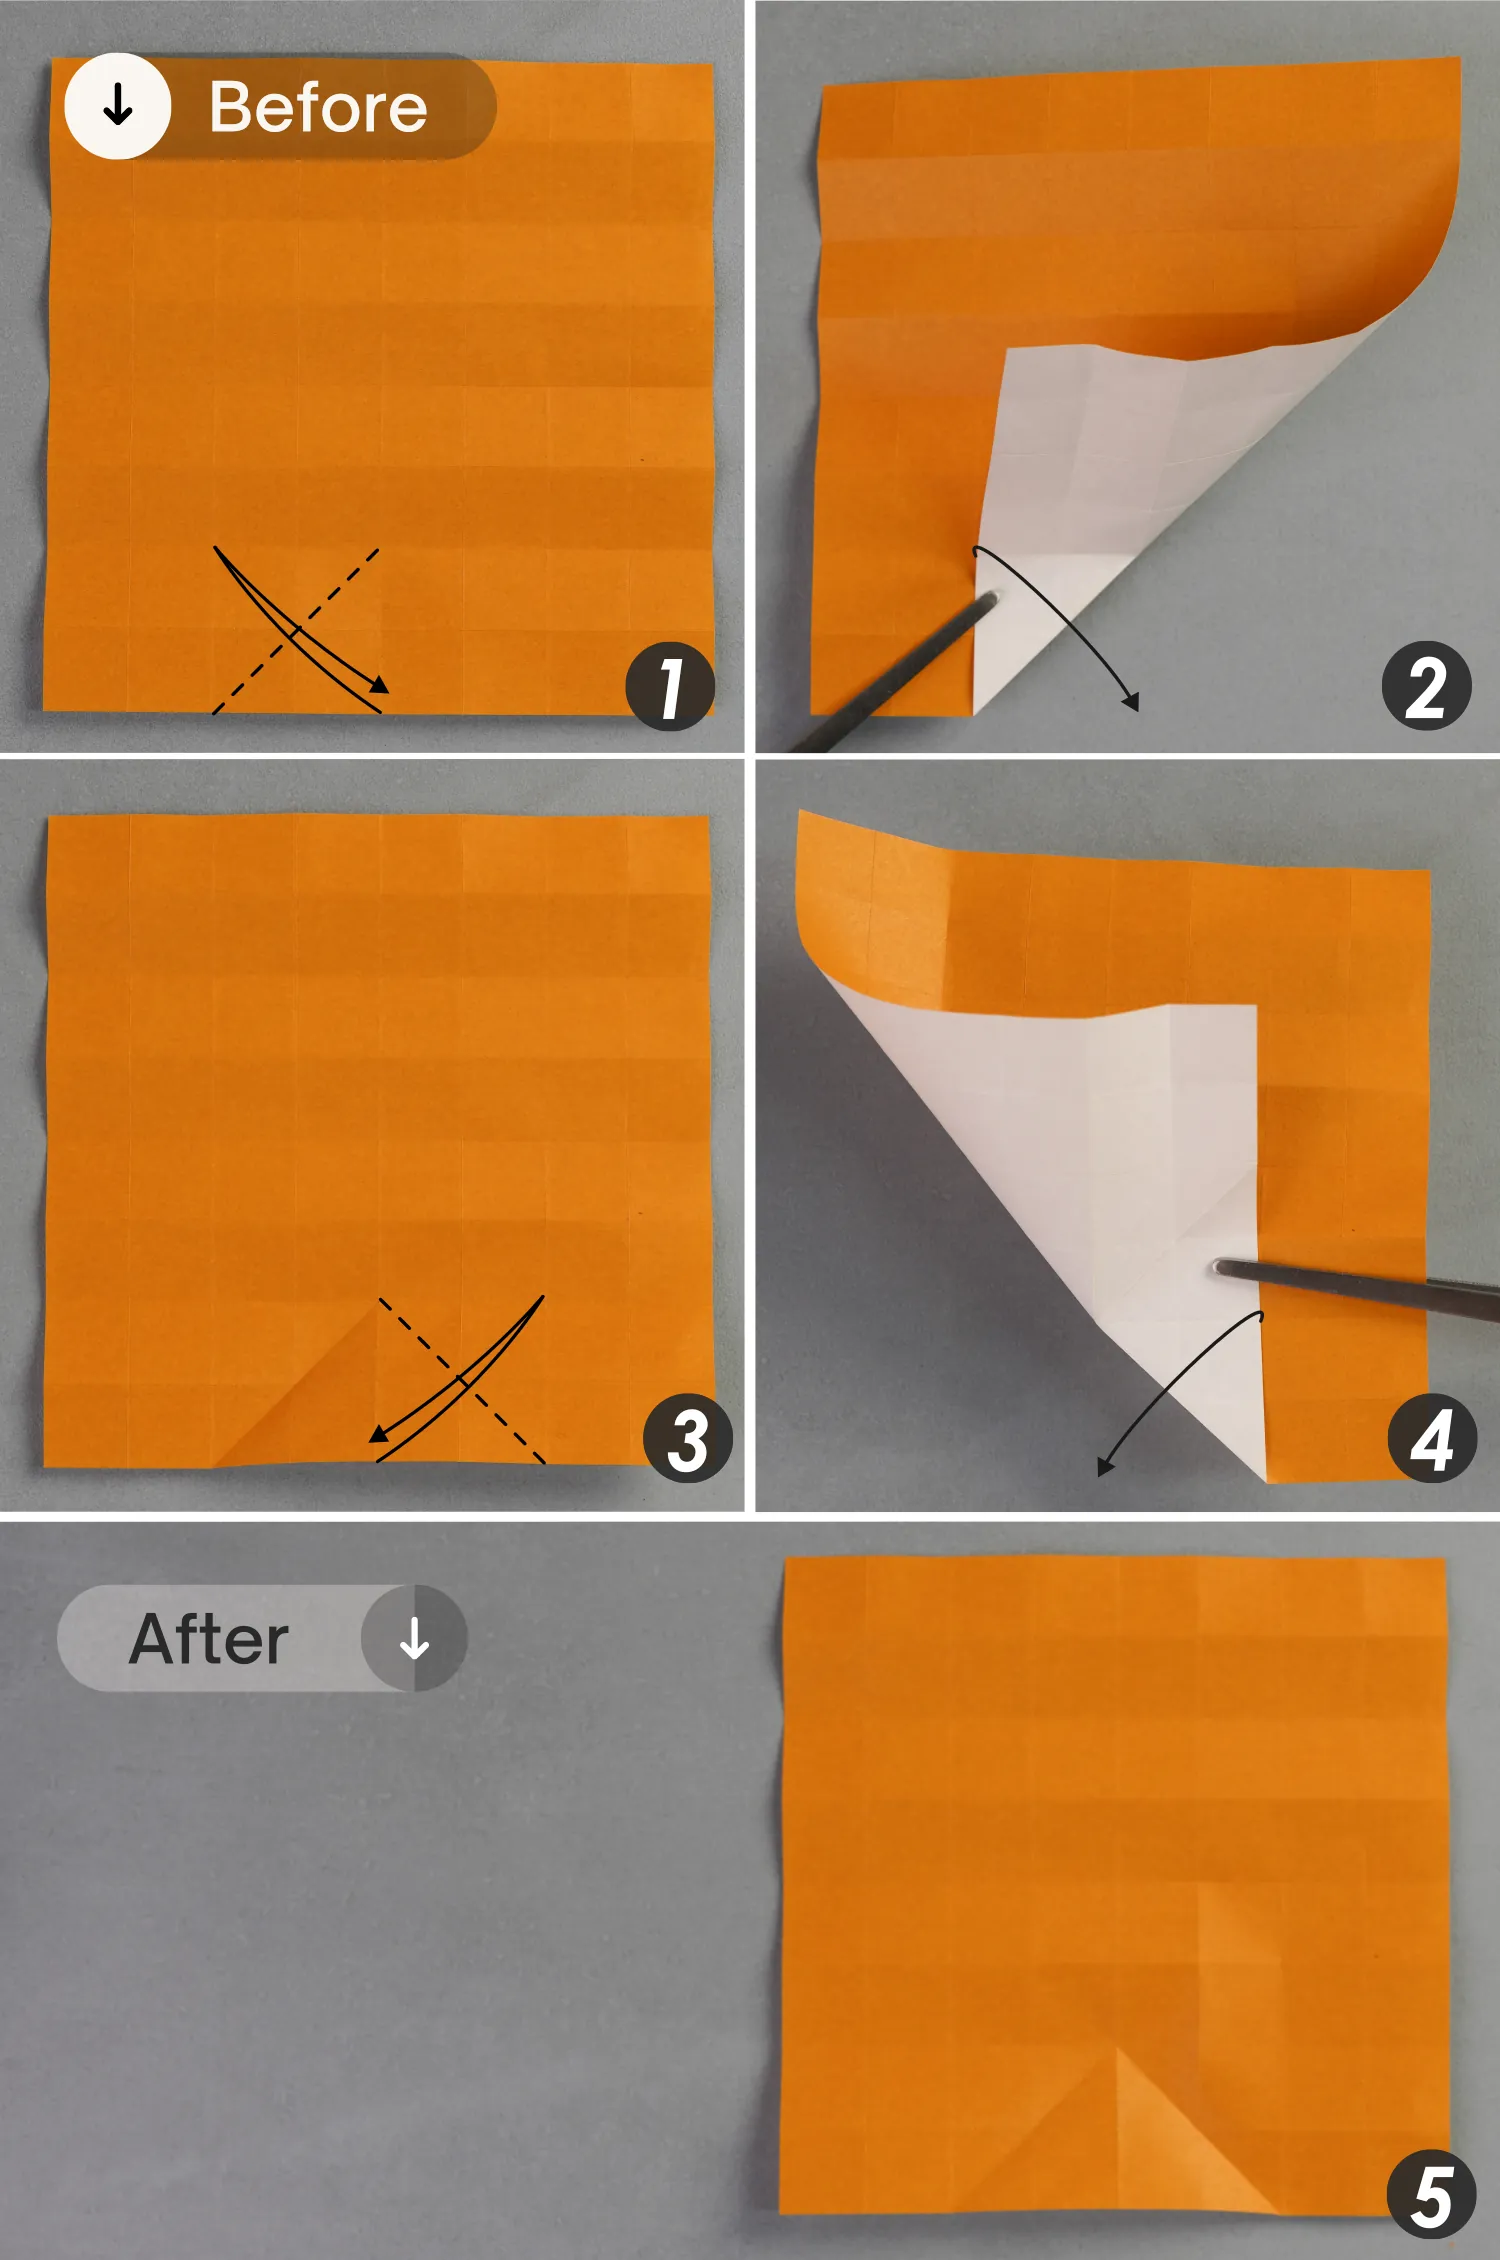
Step 13
Fold up the right section of the bottom edge along the dotted line, leaving a crease, and unfold it.
Fold up the left section of the bottom edge along the dotted line, leaving a crease, and unfold it.
Step 14
Fold two more valley fold creases in the same manner as the previous step.

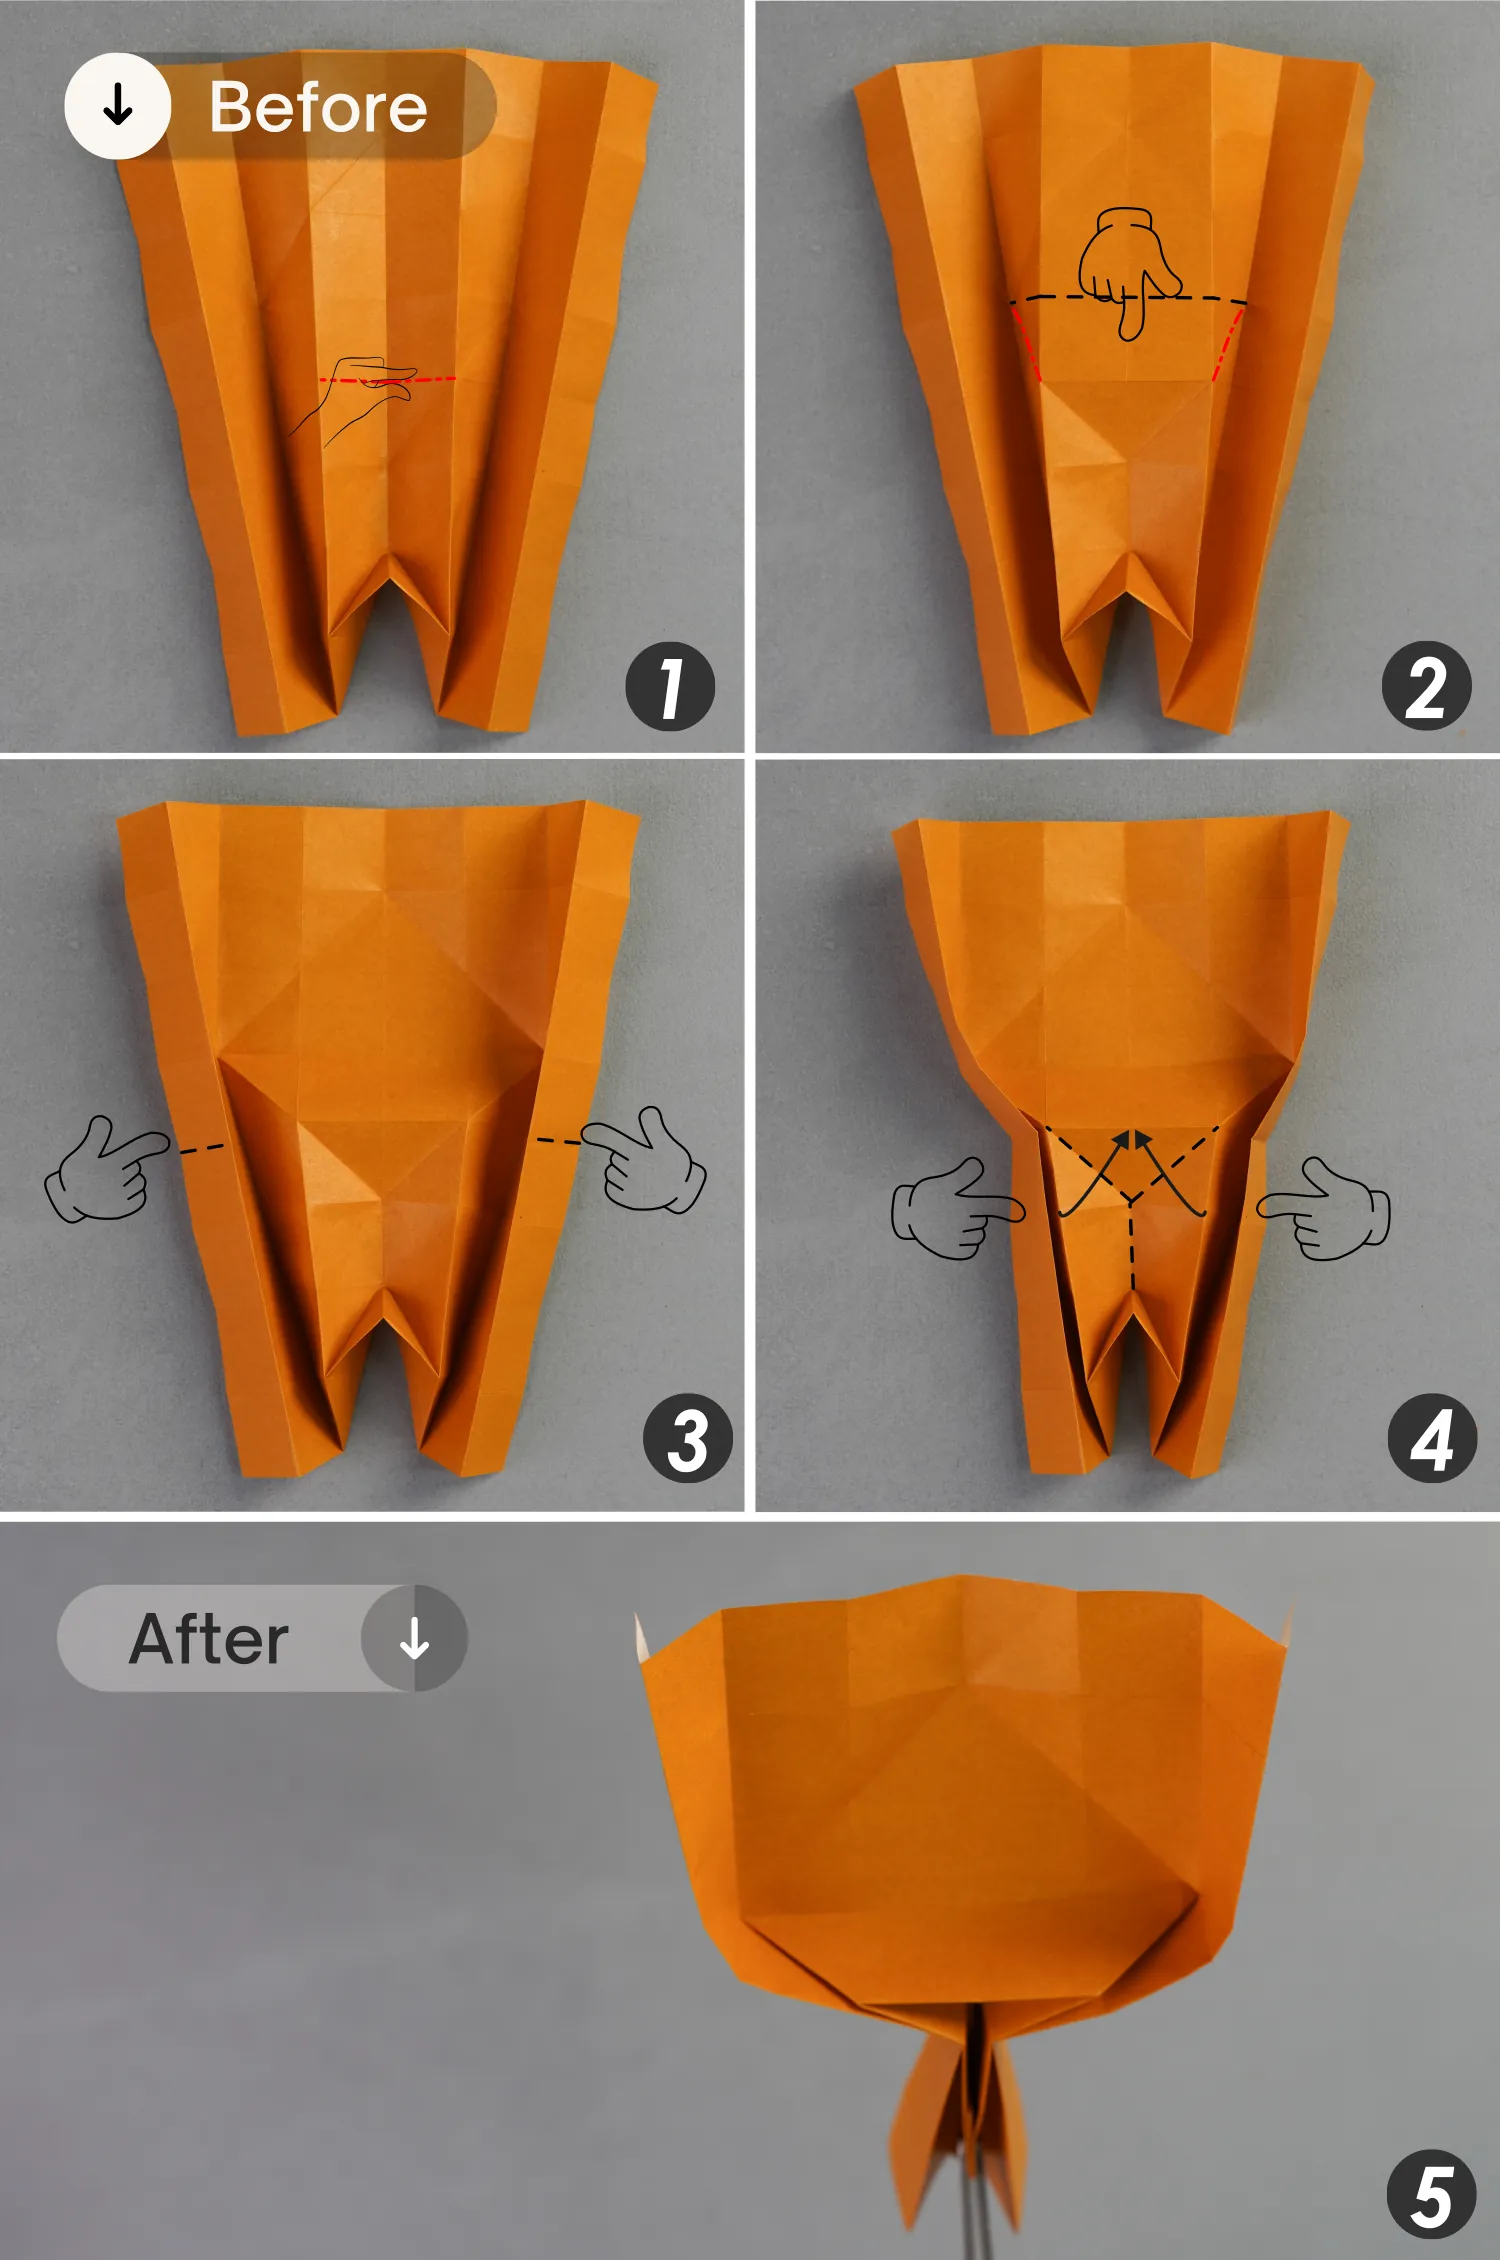
Step 15
Make two more valley fold creases.

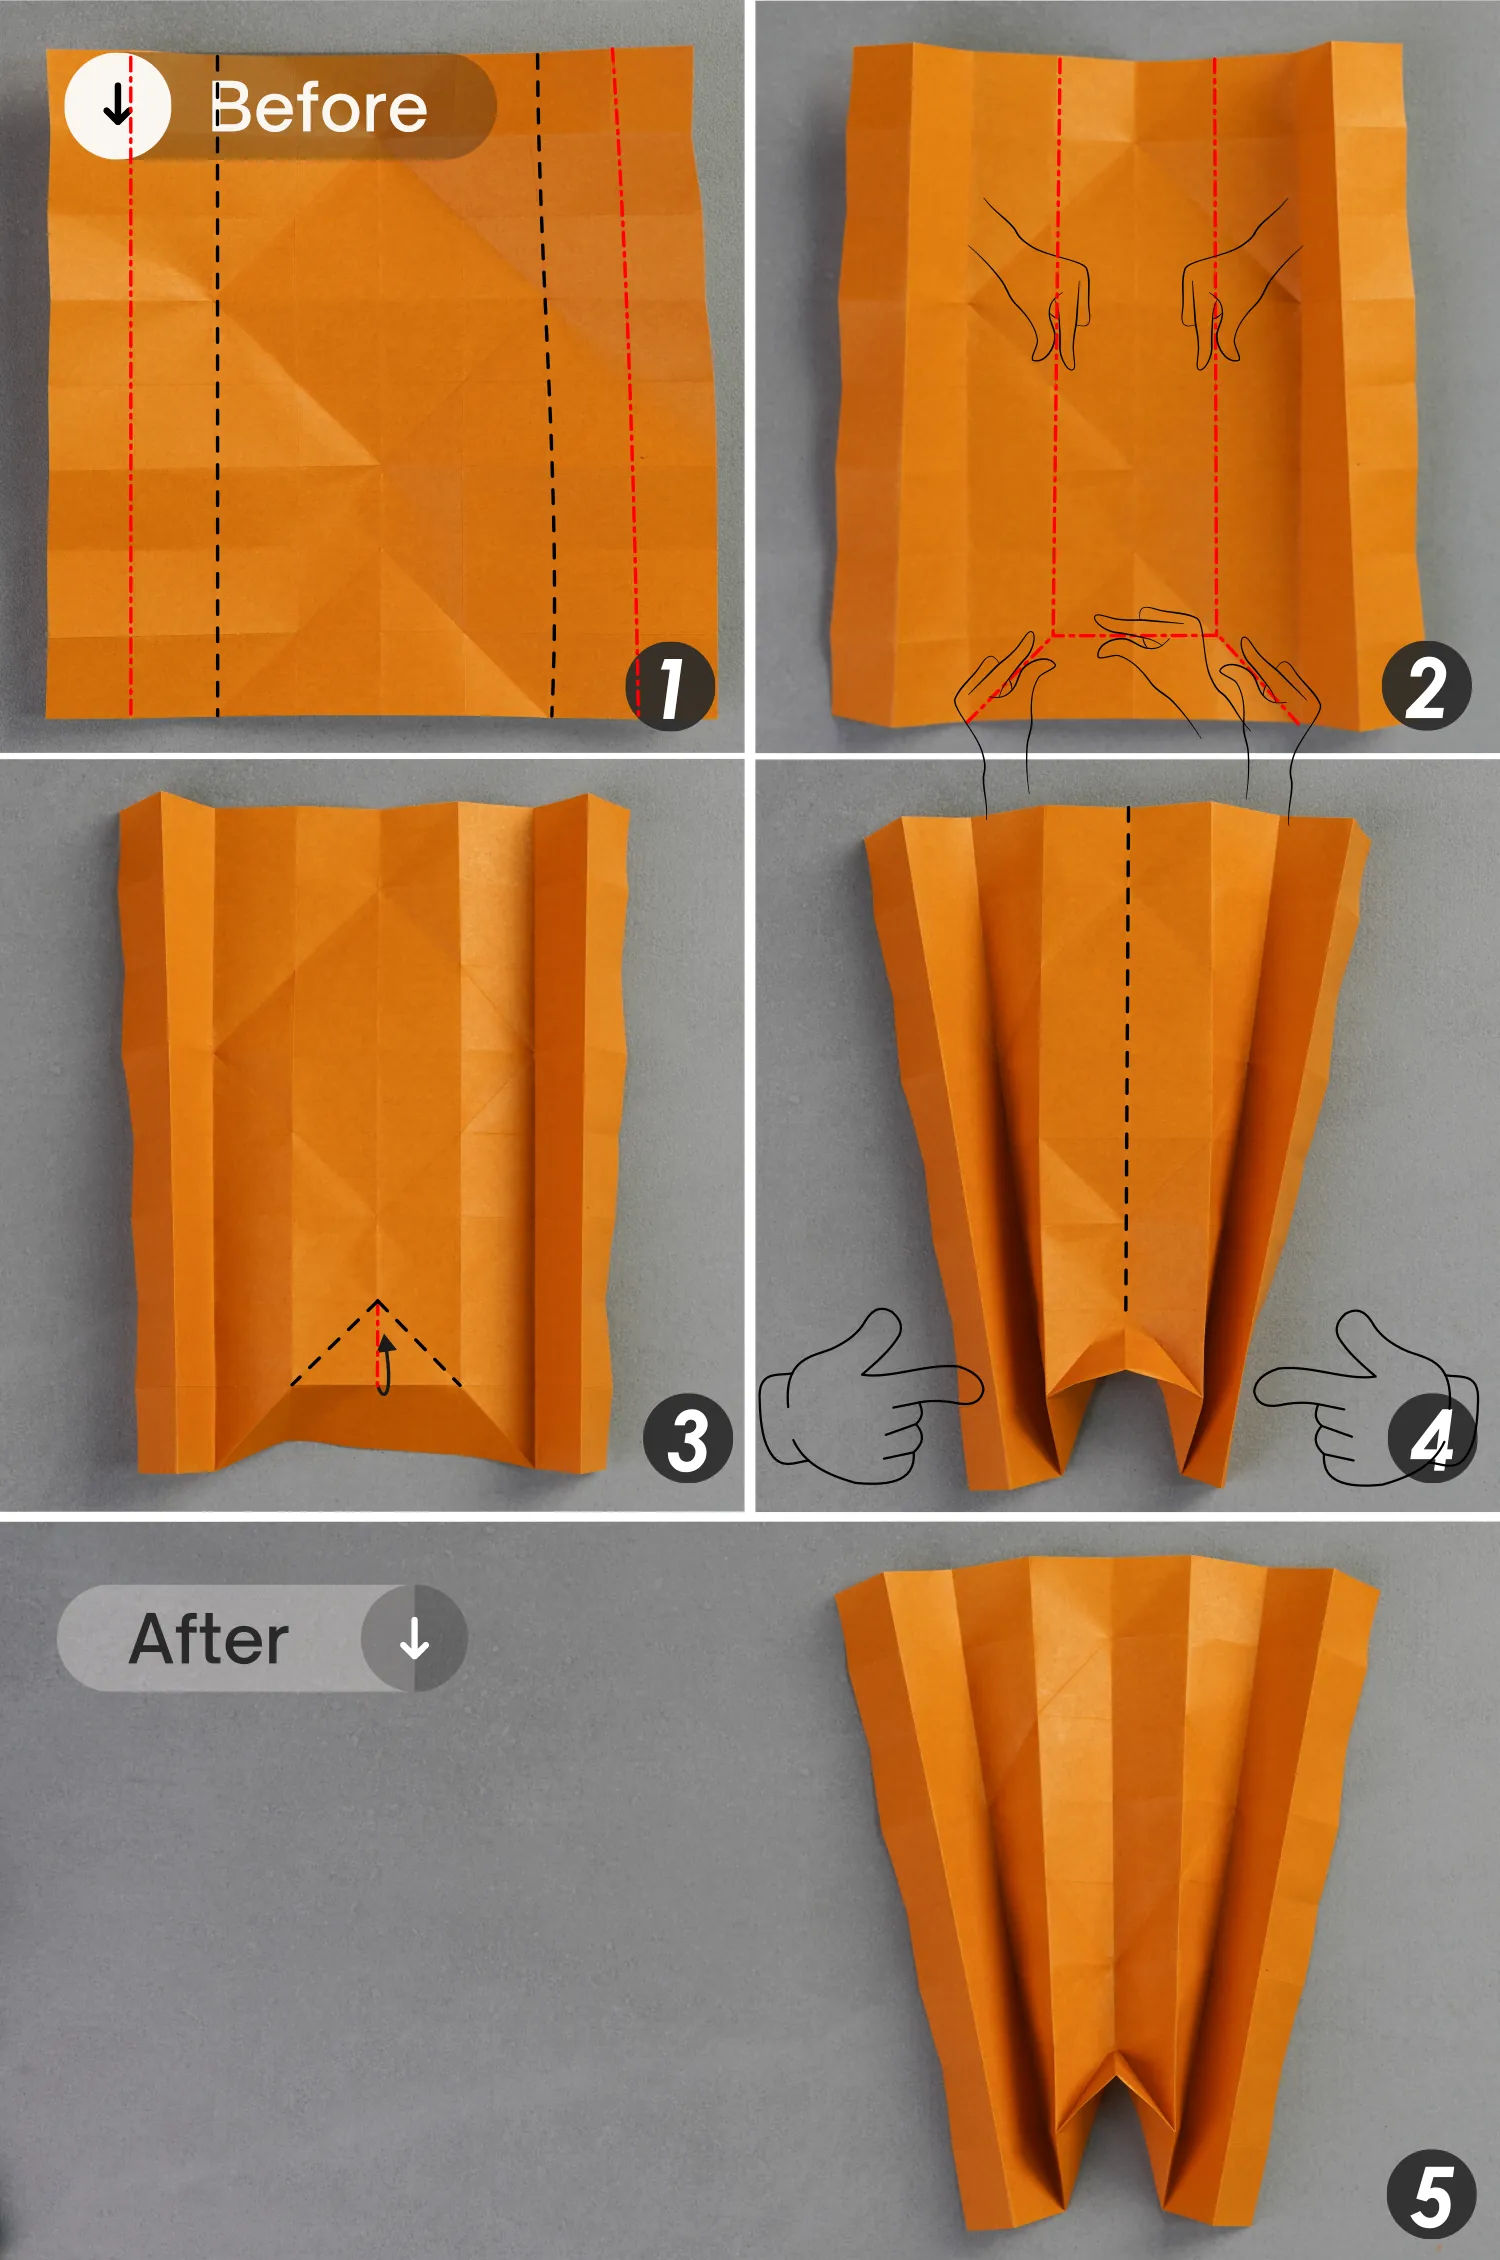
Step 16
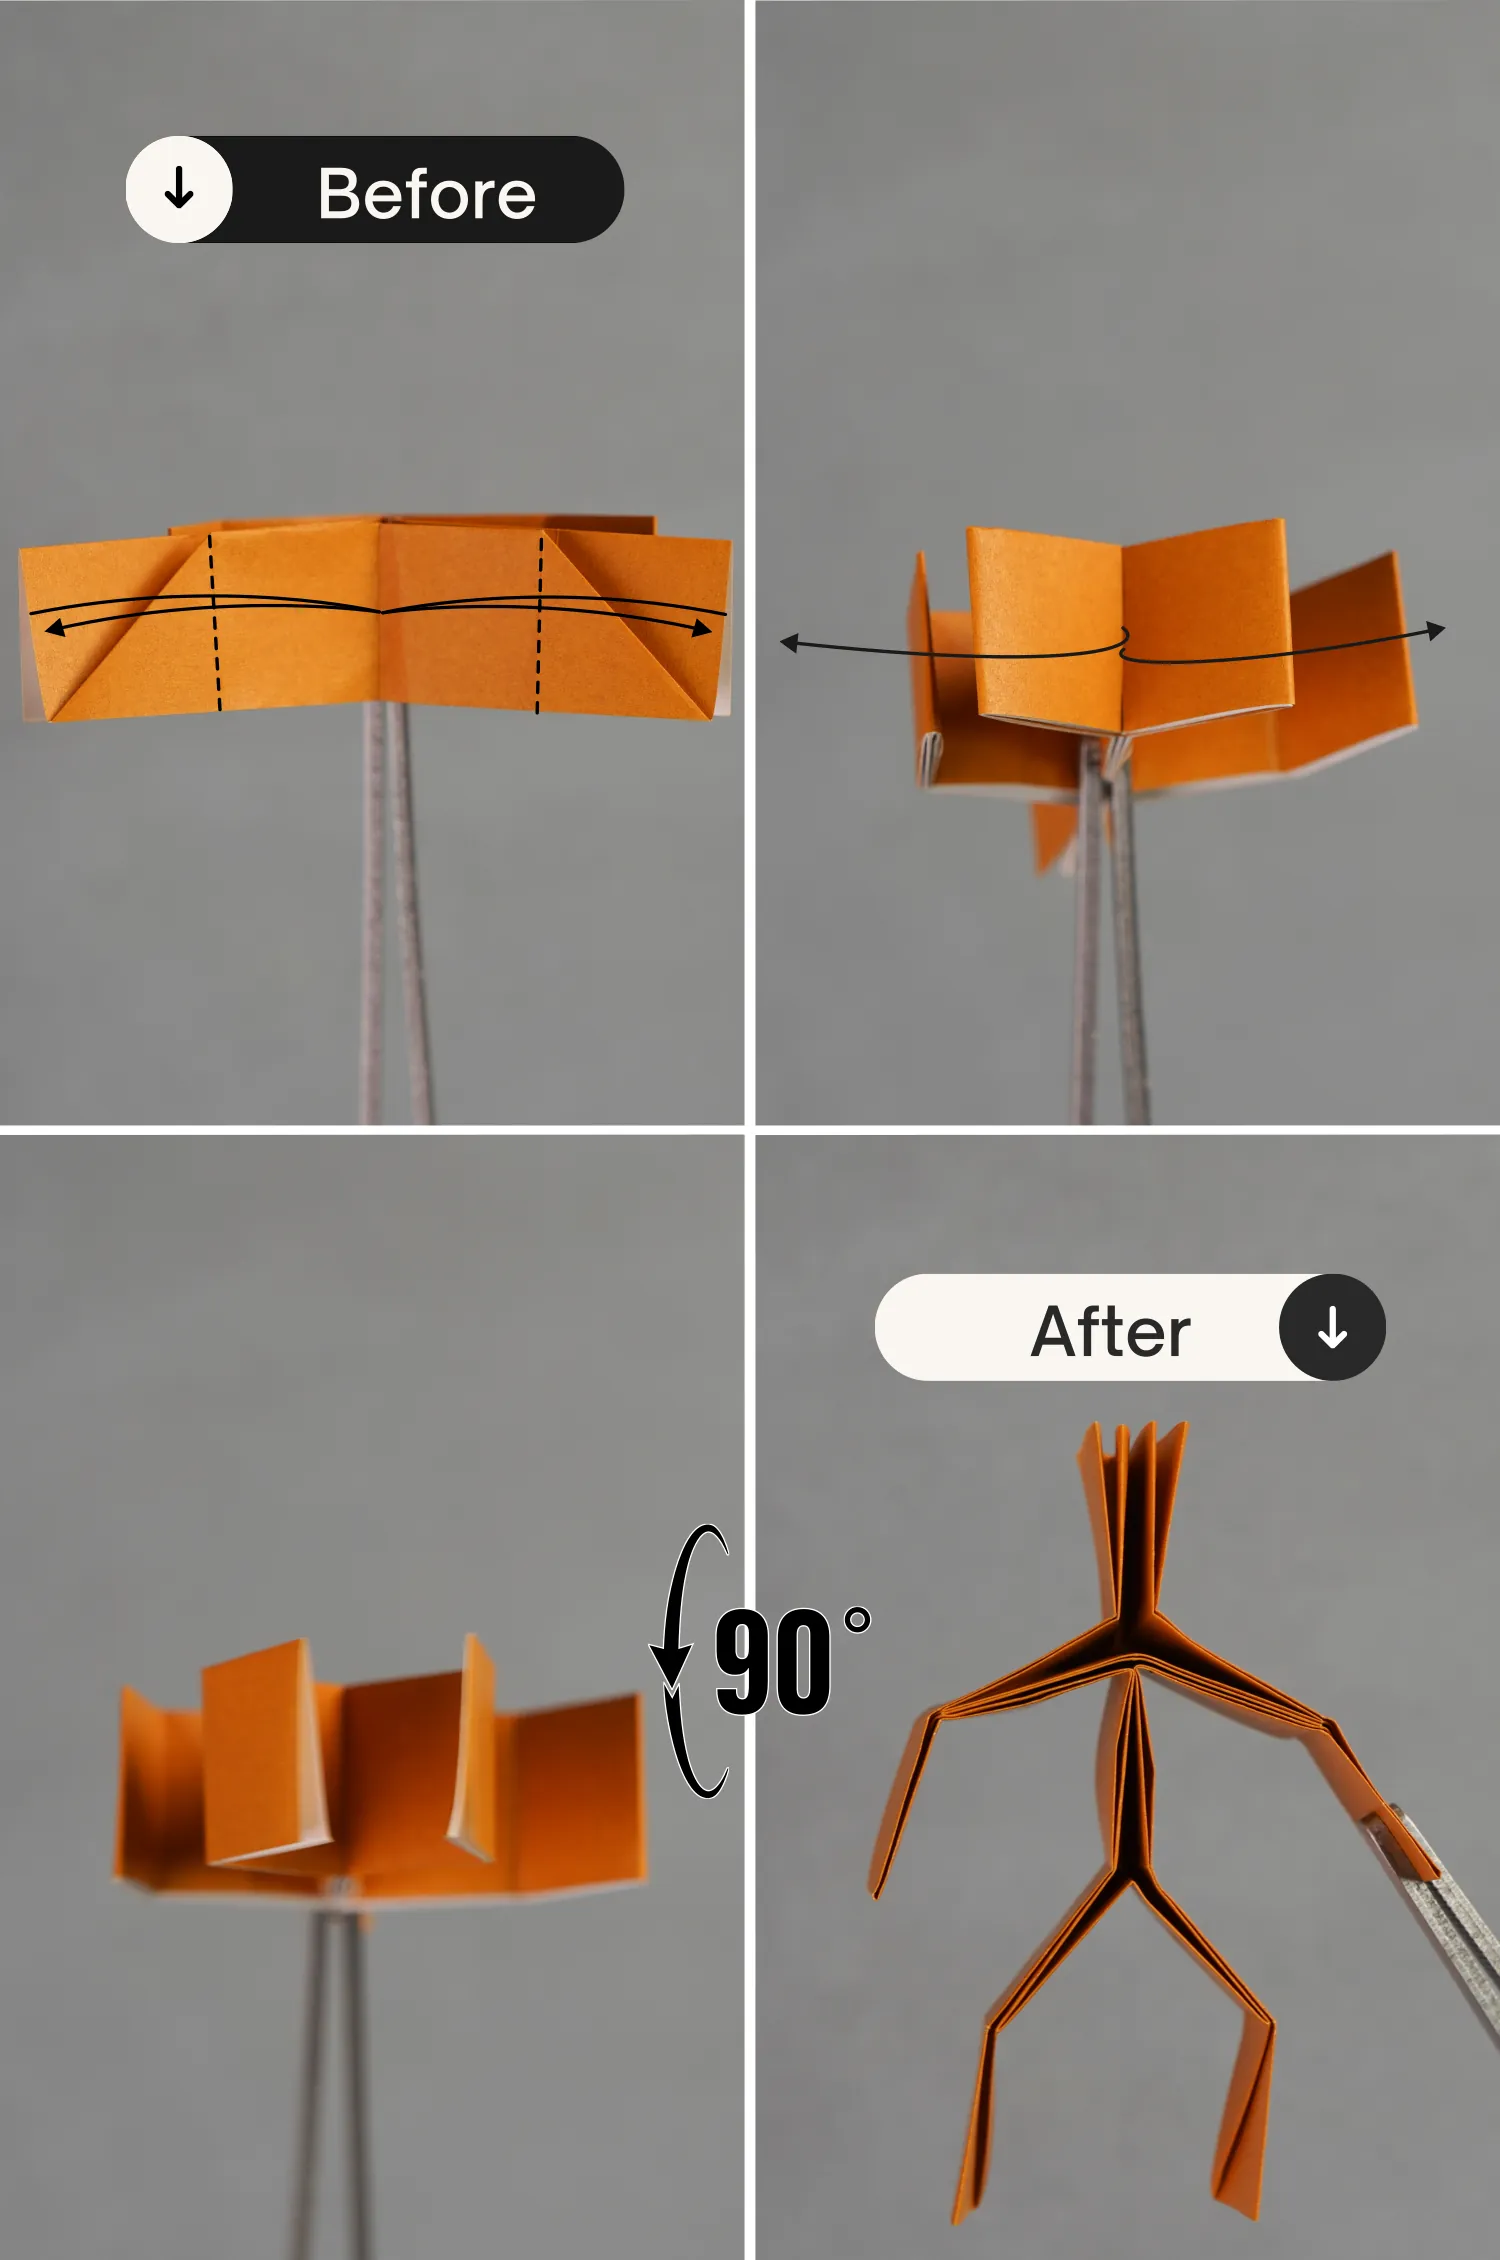
Mountain fold the creases indicated by the red dotted lines, and valley fold the creases indicated by the black dotted lines. Push the bottom of the left and right sides of the paper toward the center along the existing creases to bring the folds together.
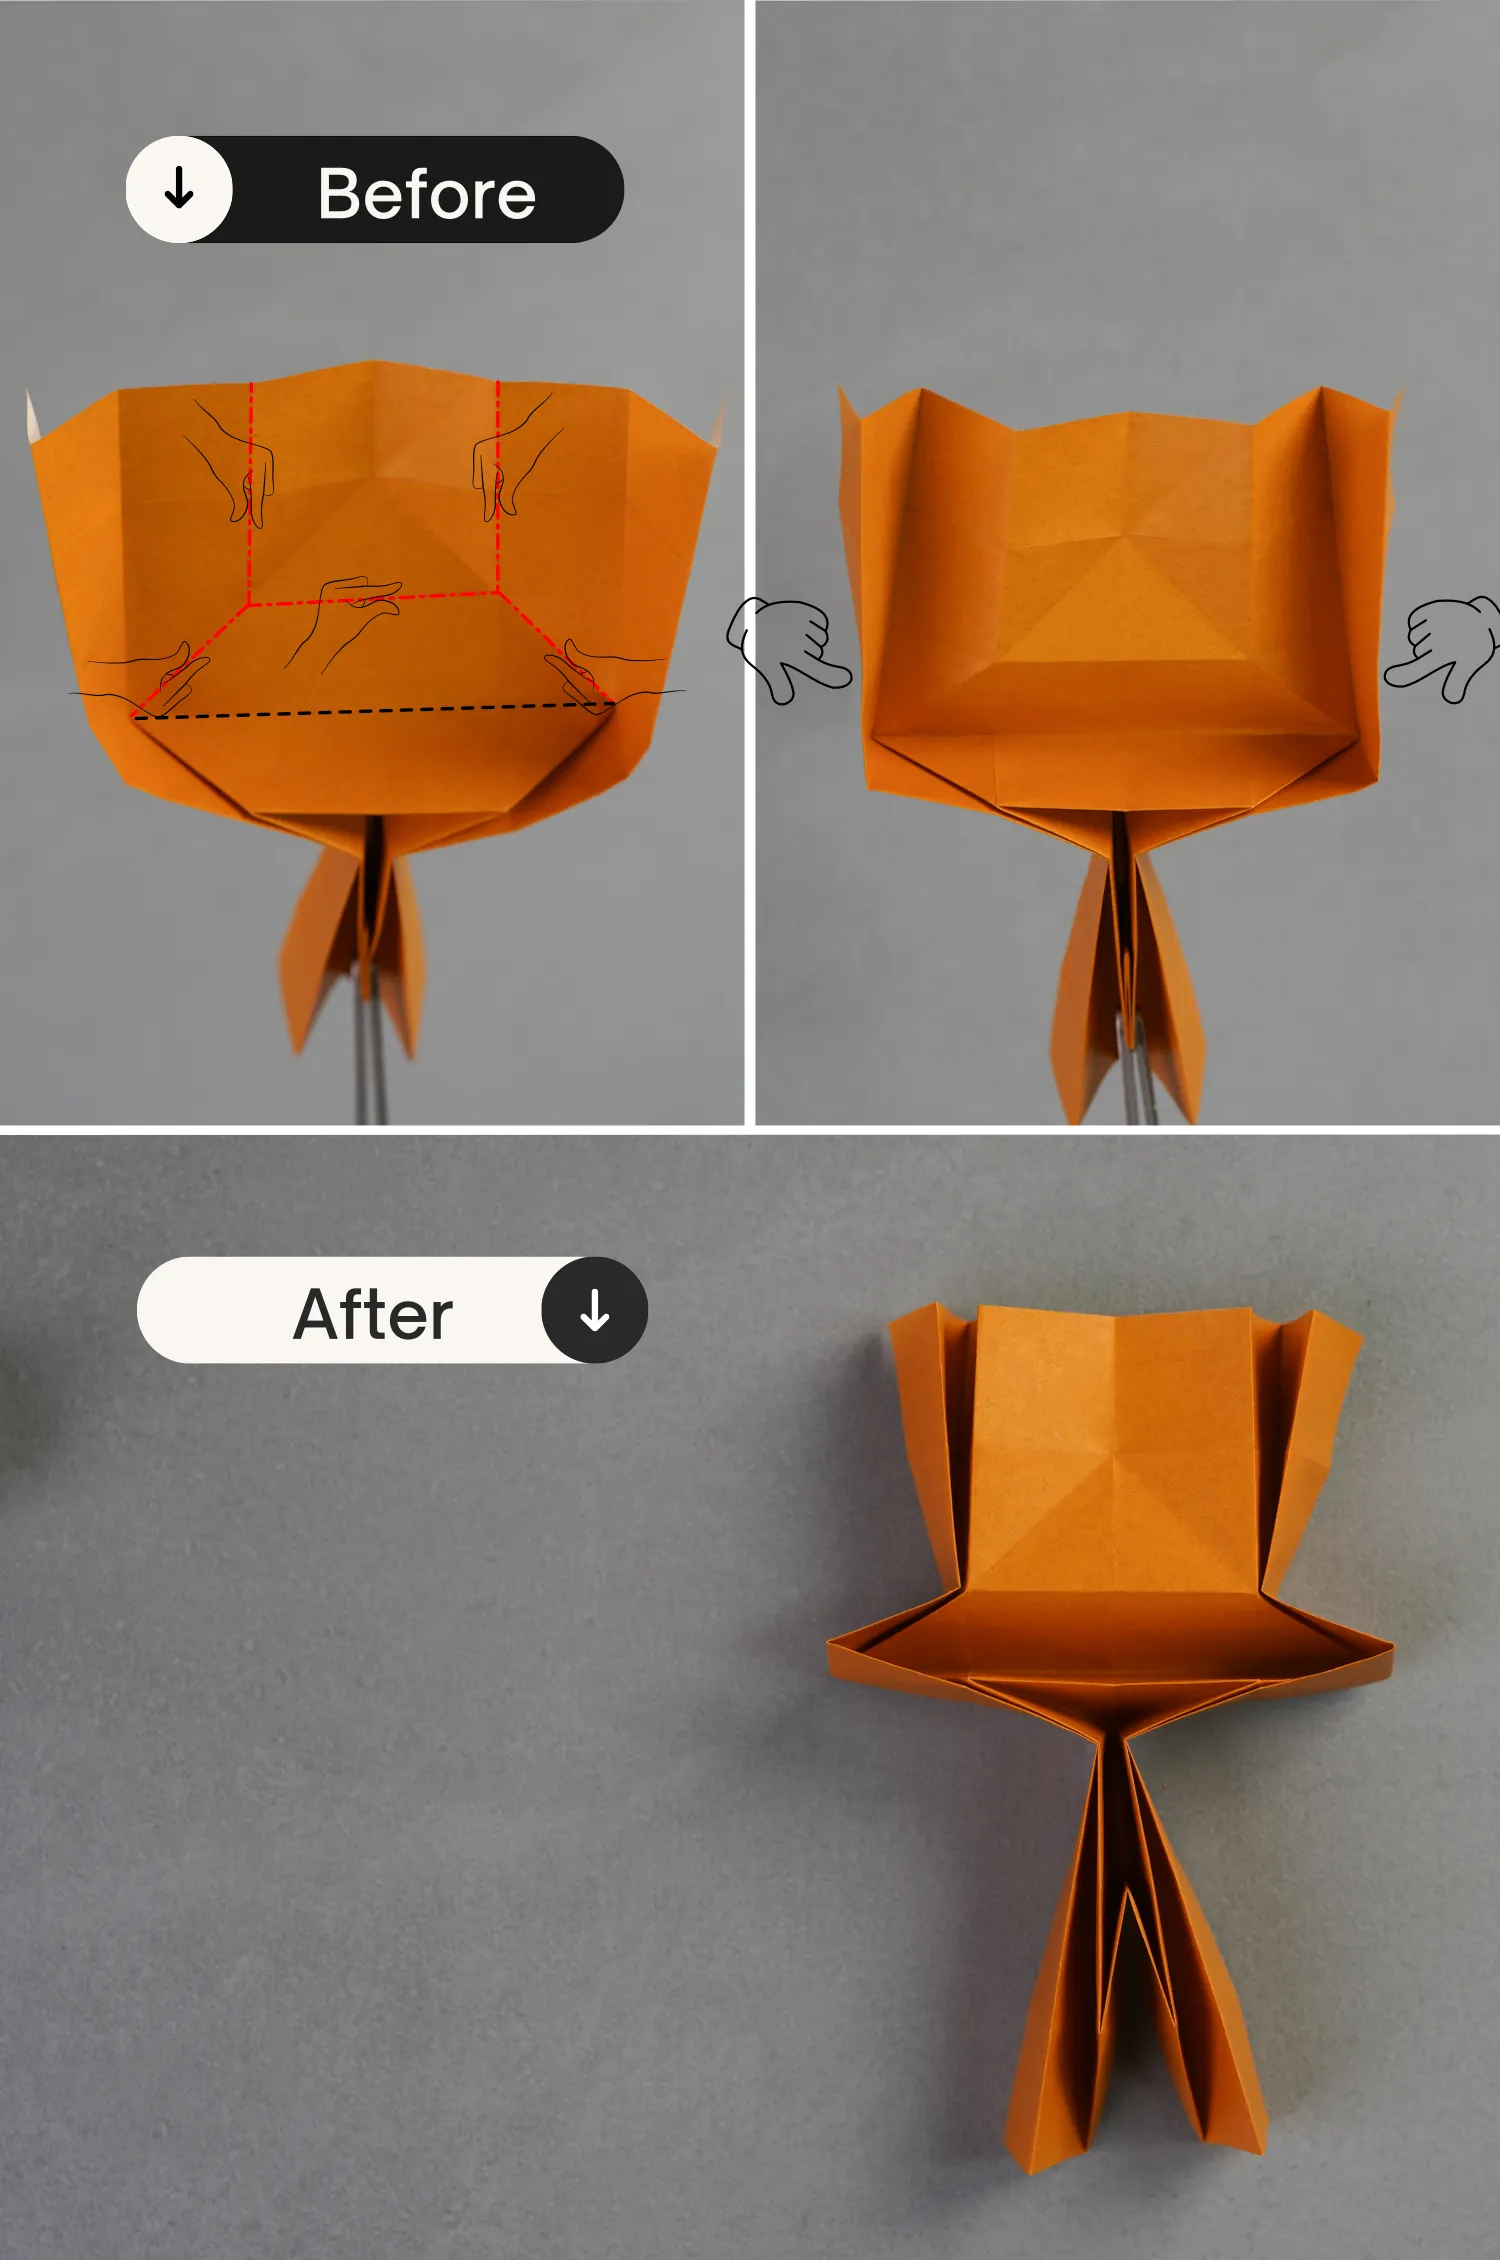
Step 17
Similarly, mountain fold the creases indicated by the red dotted lines, and valley fold the crease indicated by the black dotted line [pictures 1 and 2]. Then push the left and right sides of the paper toward the center along the existing creases.
Step 18
Mountain fold the creases indicated by the red dotted lines, then push the bottom sections of both left and right edges down and toward the center.
Step 19
Press down the center point of the top square and push its left and right edges down [pictures 1 and 2]. Next, fold down the left and right flaps and then bring them up.
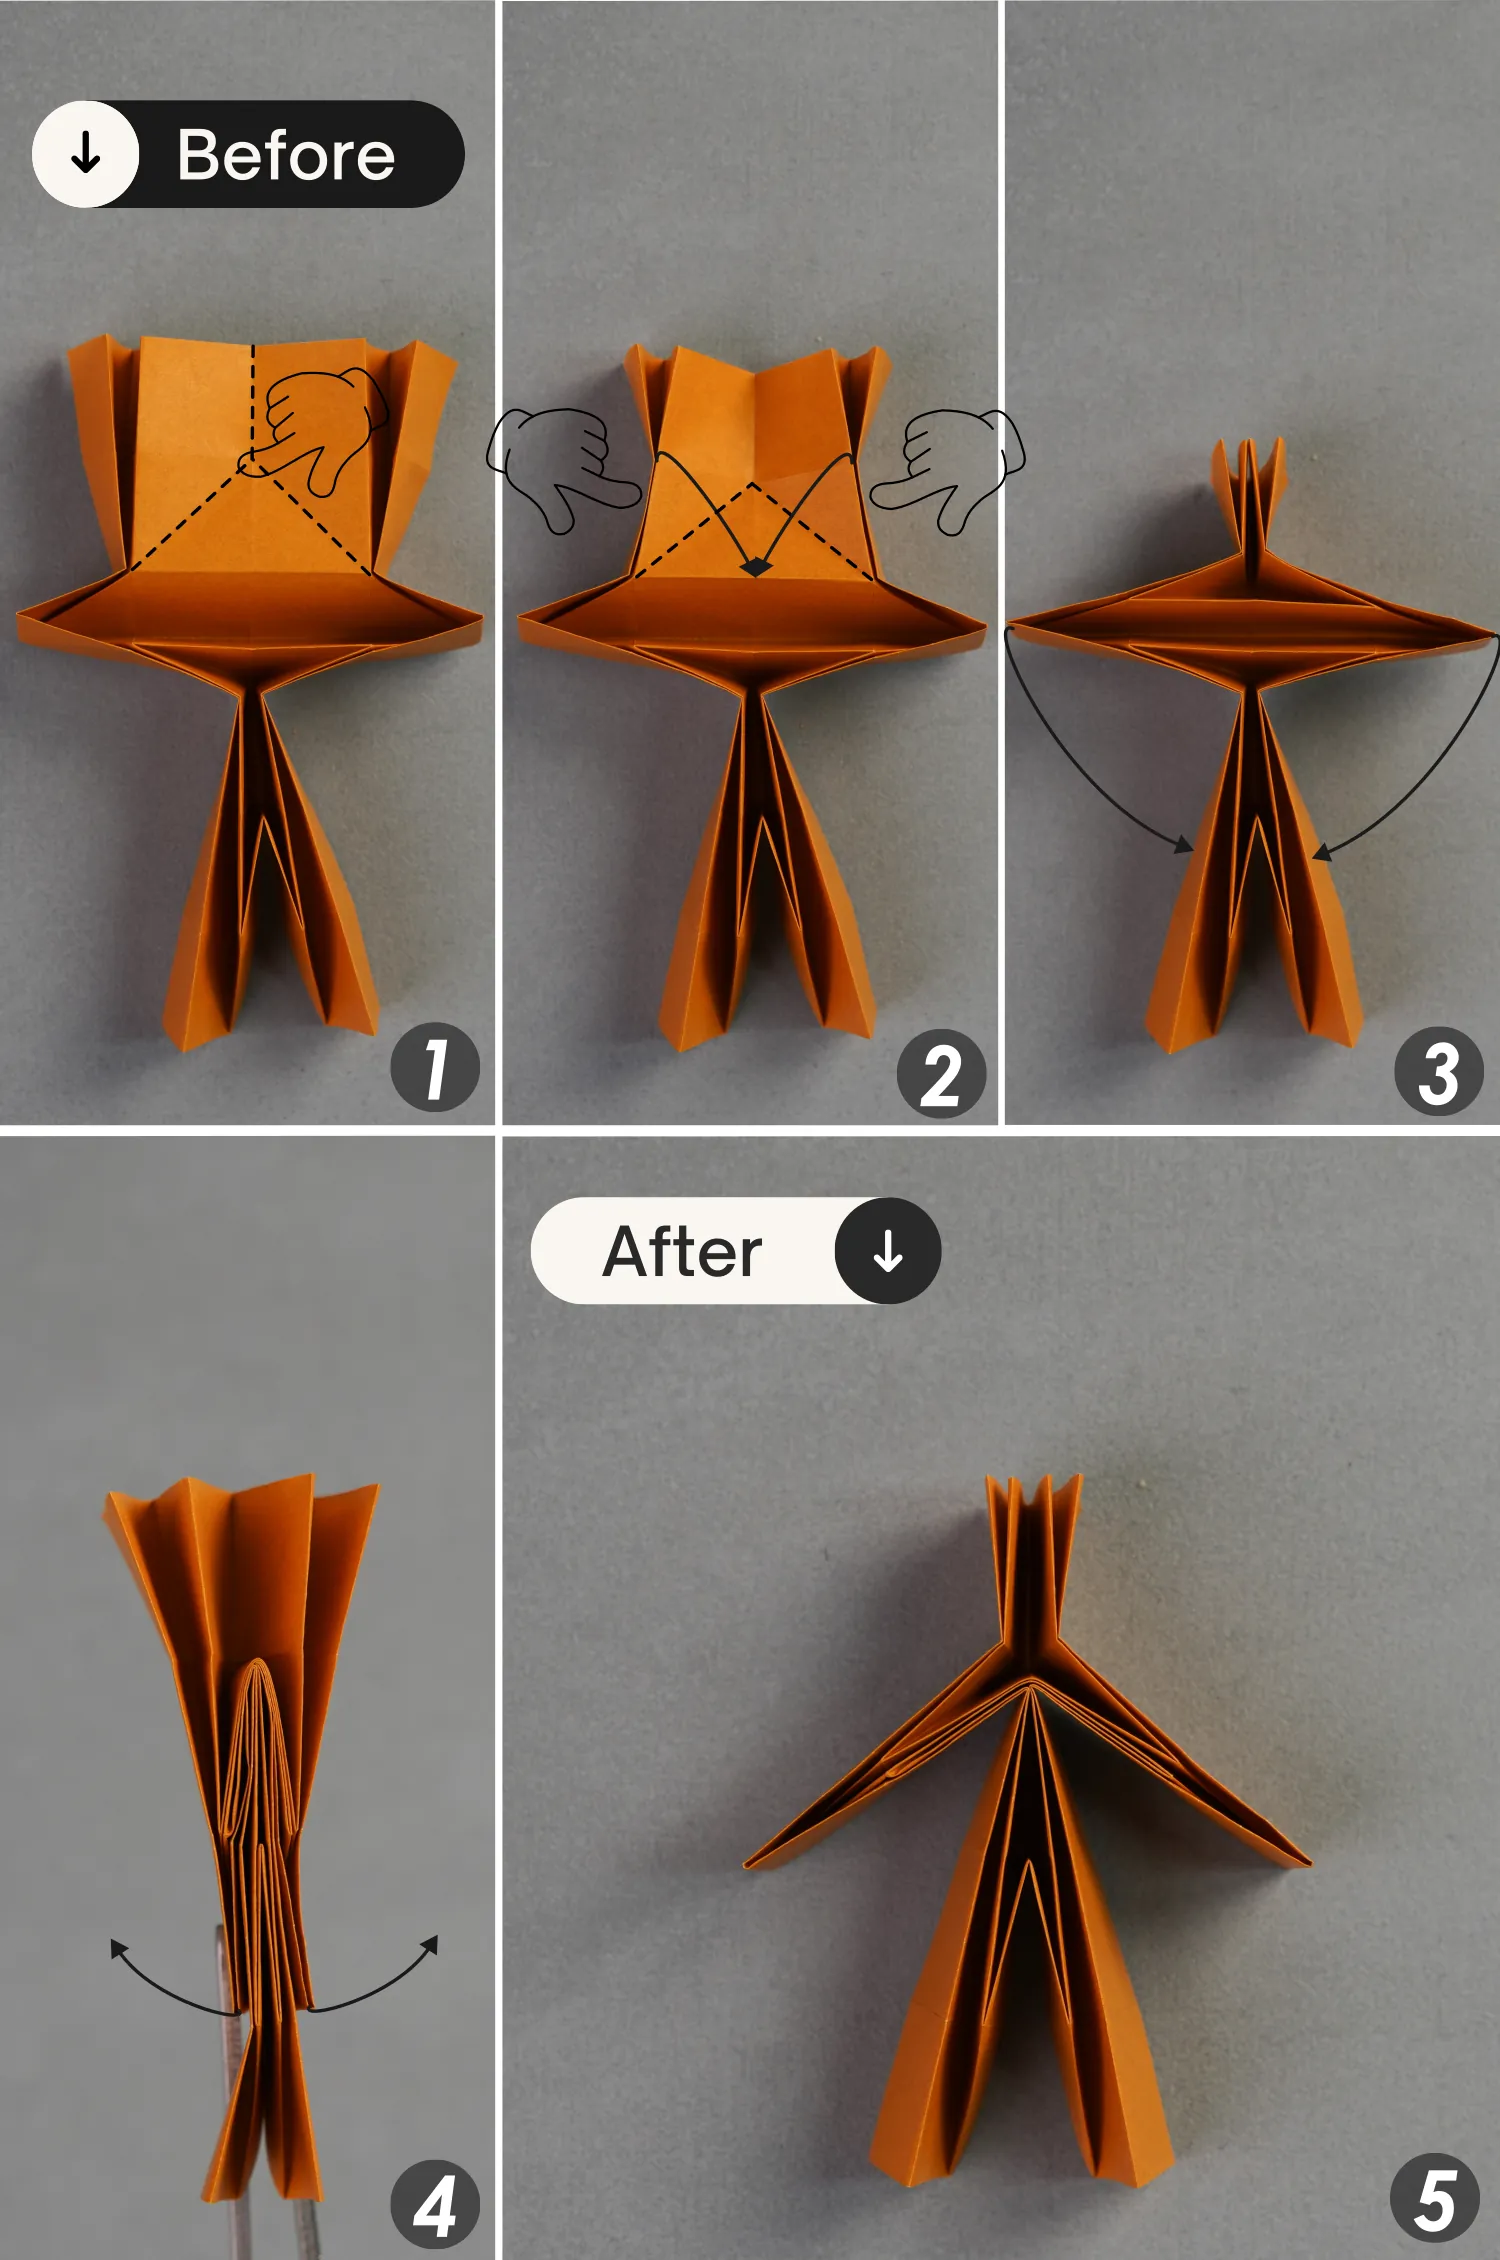
Step 20
Rotate the paper 90 degrees from back to front, then fold both left and right edges toward the center along the dotted lines, and unfold them to make them drape naturally.
Step 21
Fold the bottom two flaps toward the sides to spread its legs.
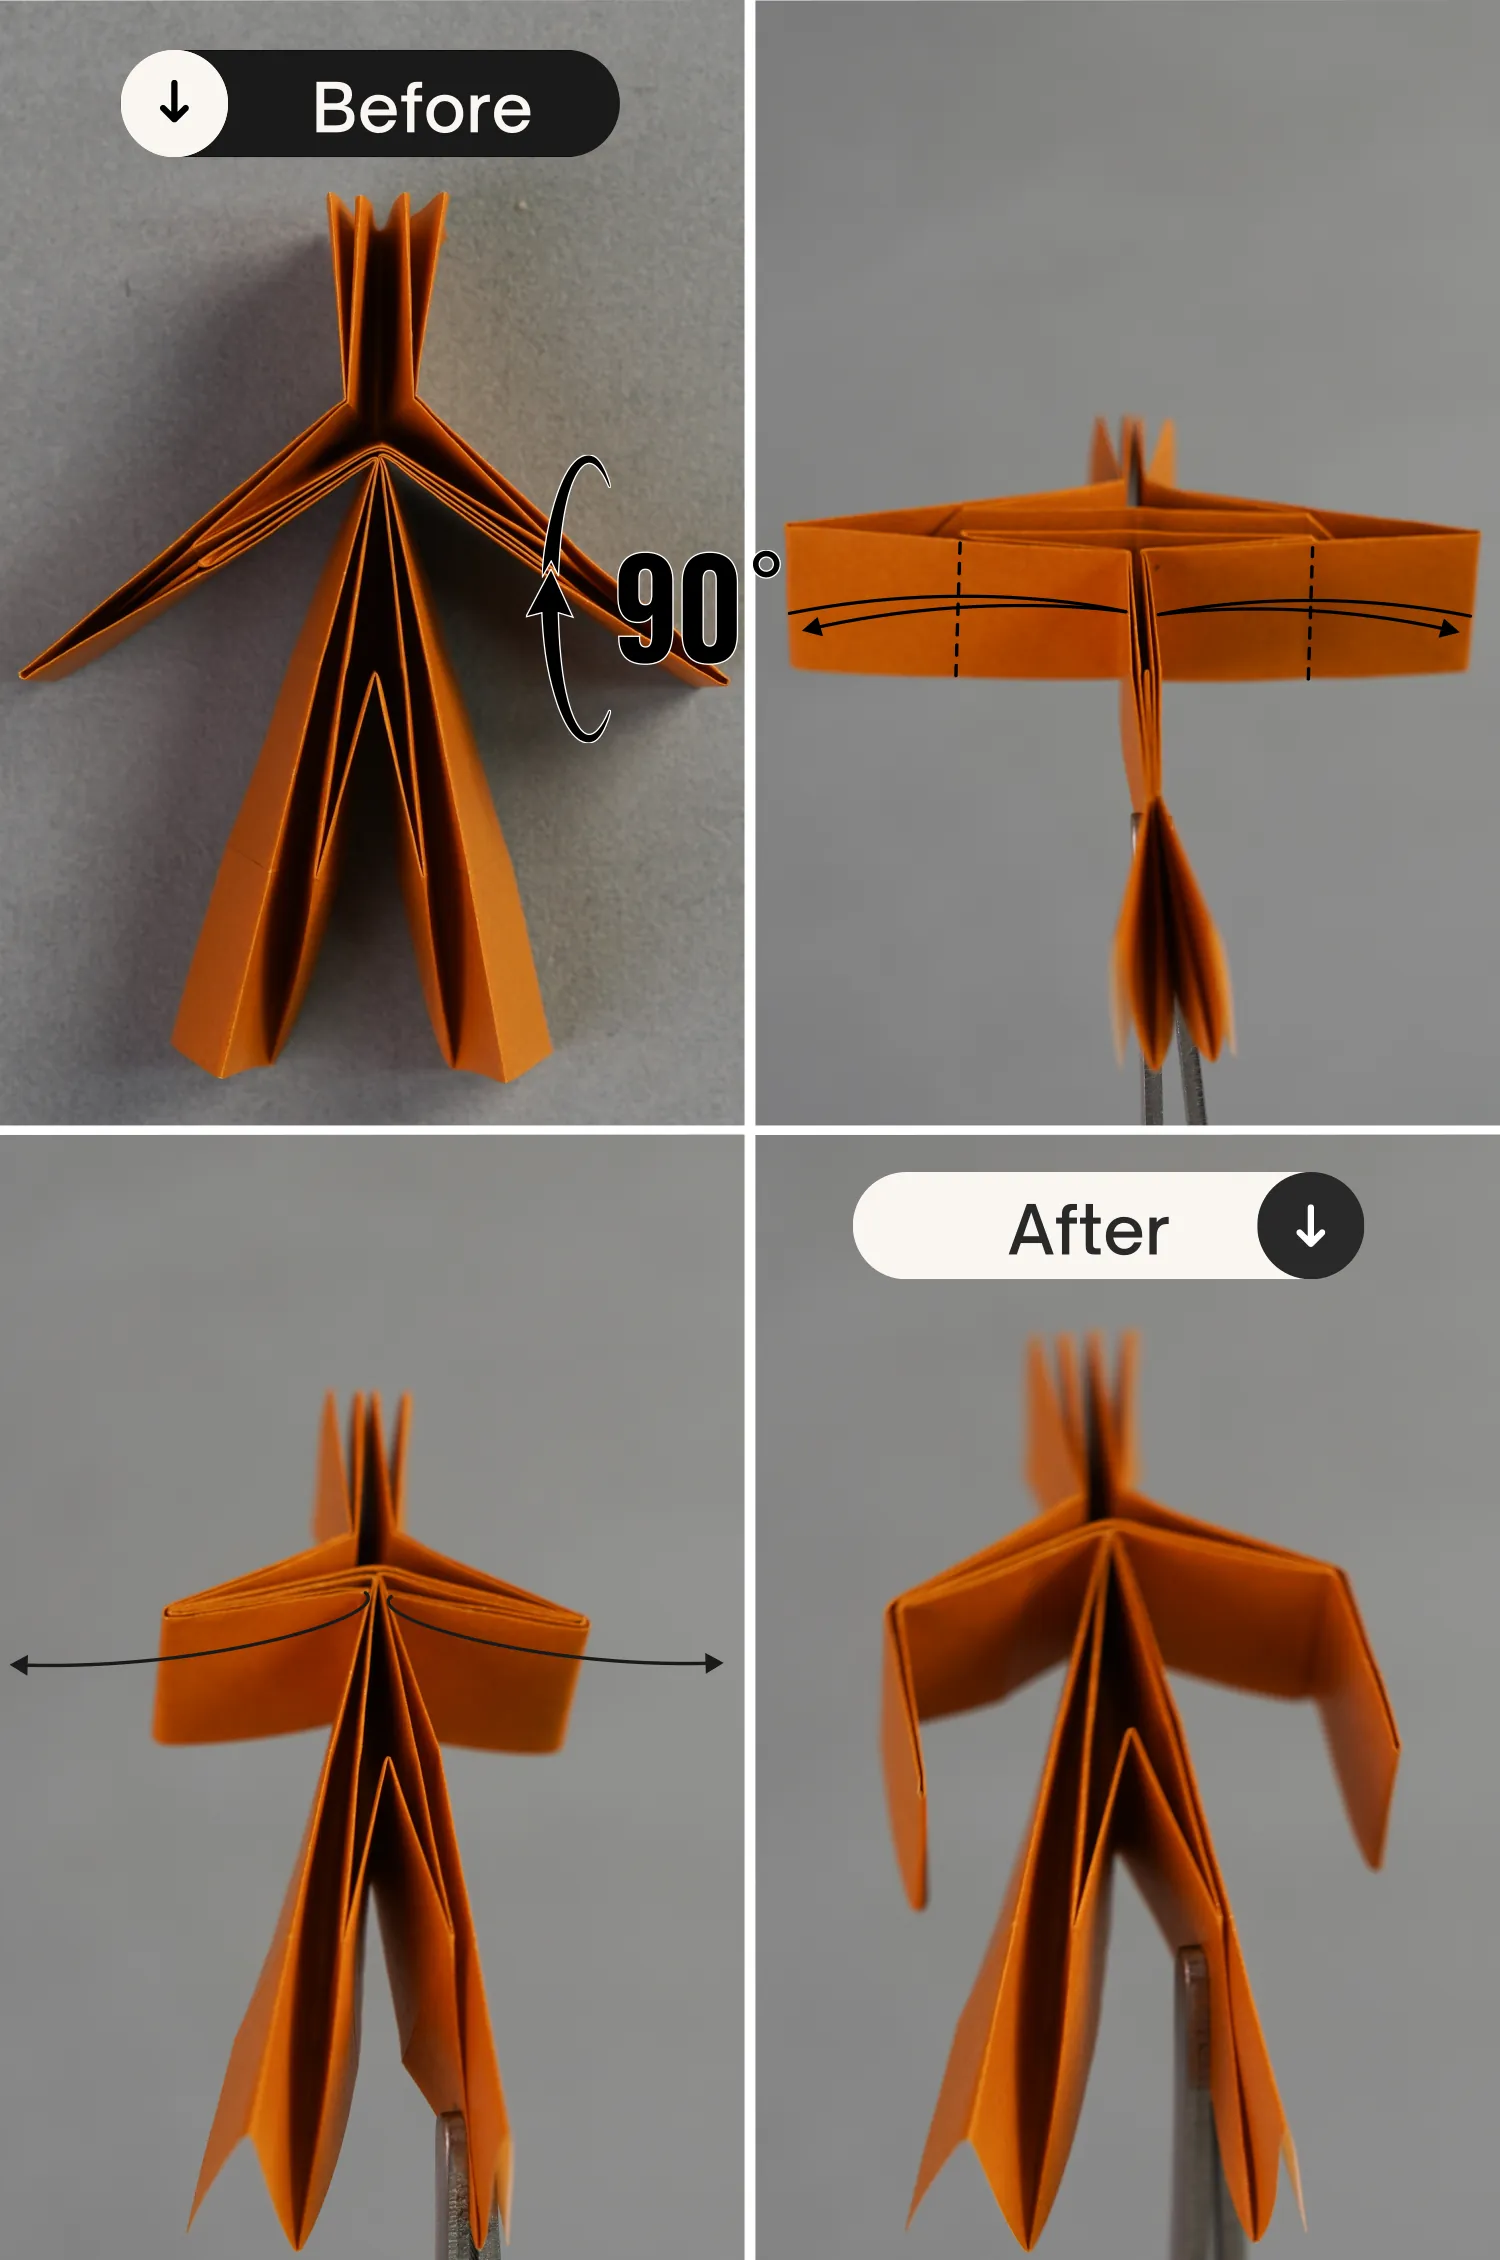
Step 22
Fold the left and right edges toward the center along the dotted lines, and unfold them. Rotate it 90 degrees from front to back.
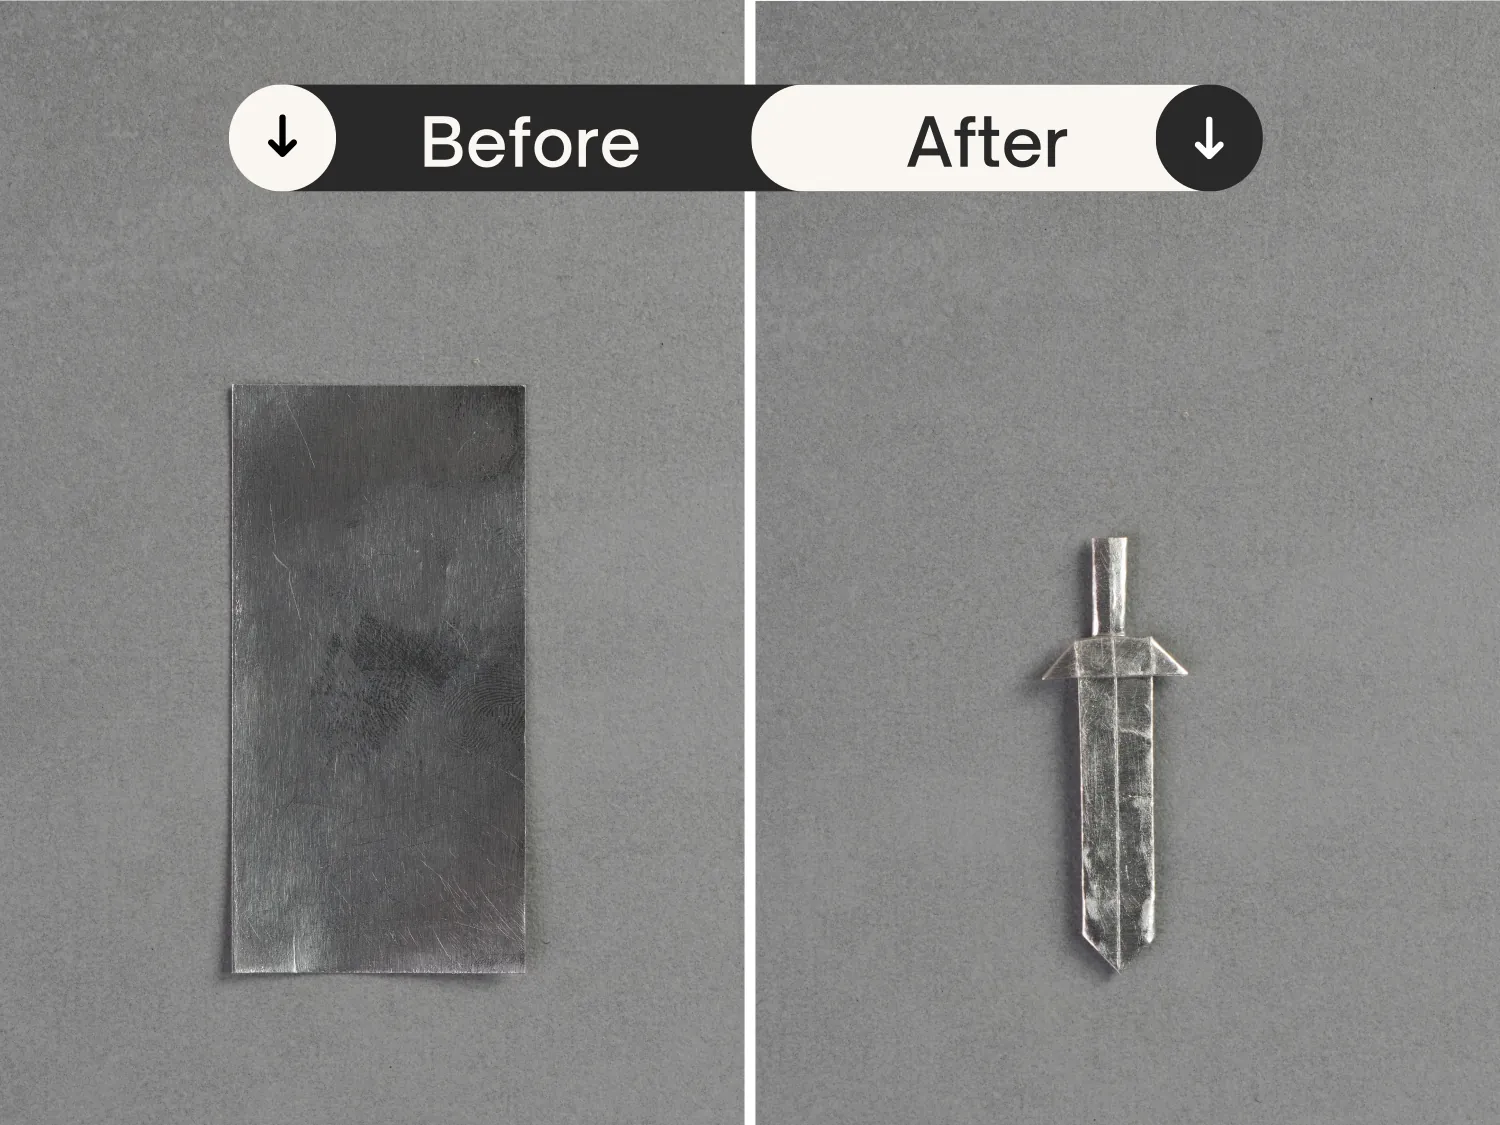
Step 23
Make an origami sword.
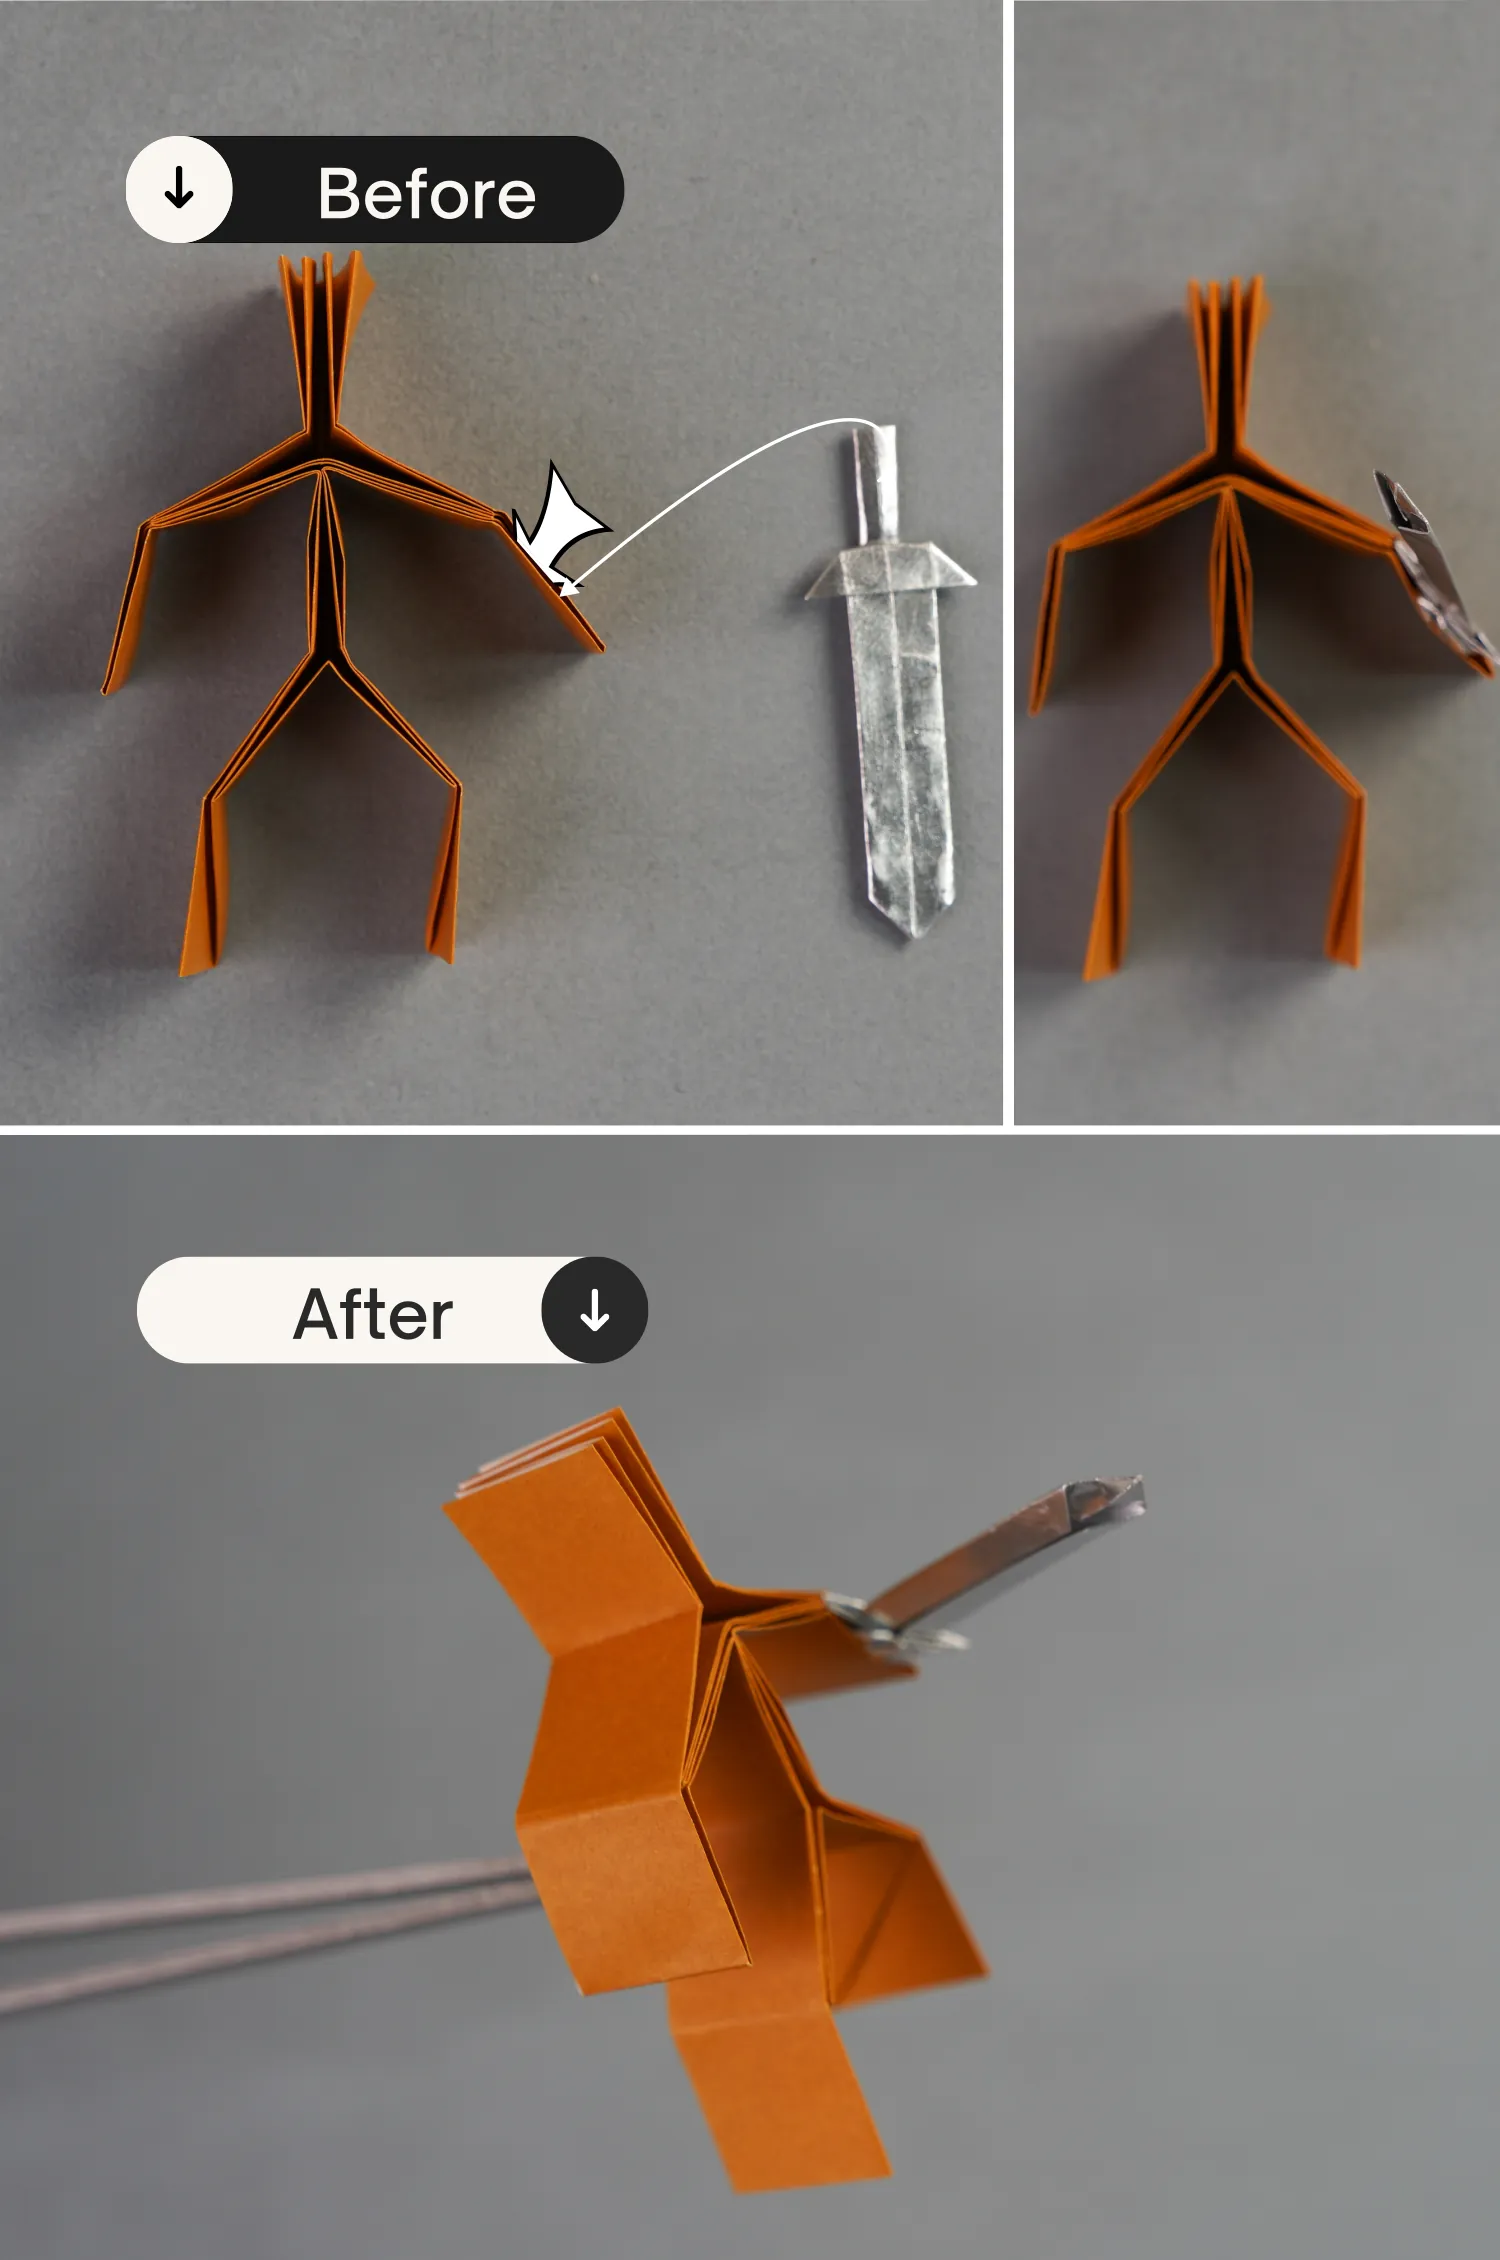
Step 24
Stuck the origami sword in the origami human’s hand.
What’s Next
Now you must have successfully made this interesting origami human. You can now explore our other lovely origami toy ideas. Enjoy folding!


