How to Fold an Origami Car
Step 1
Take out one of the papers to create the main part, place it with the desired display color side down to begin folding, fold it in half horizontally, crease it well, and unfold it.
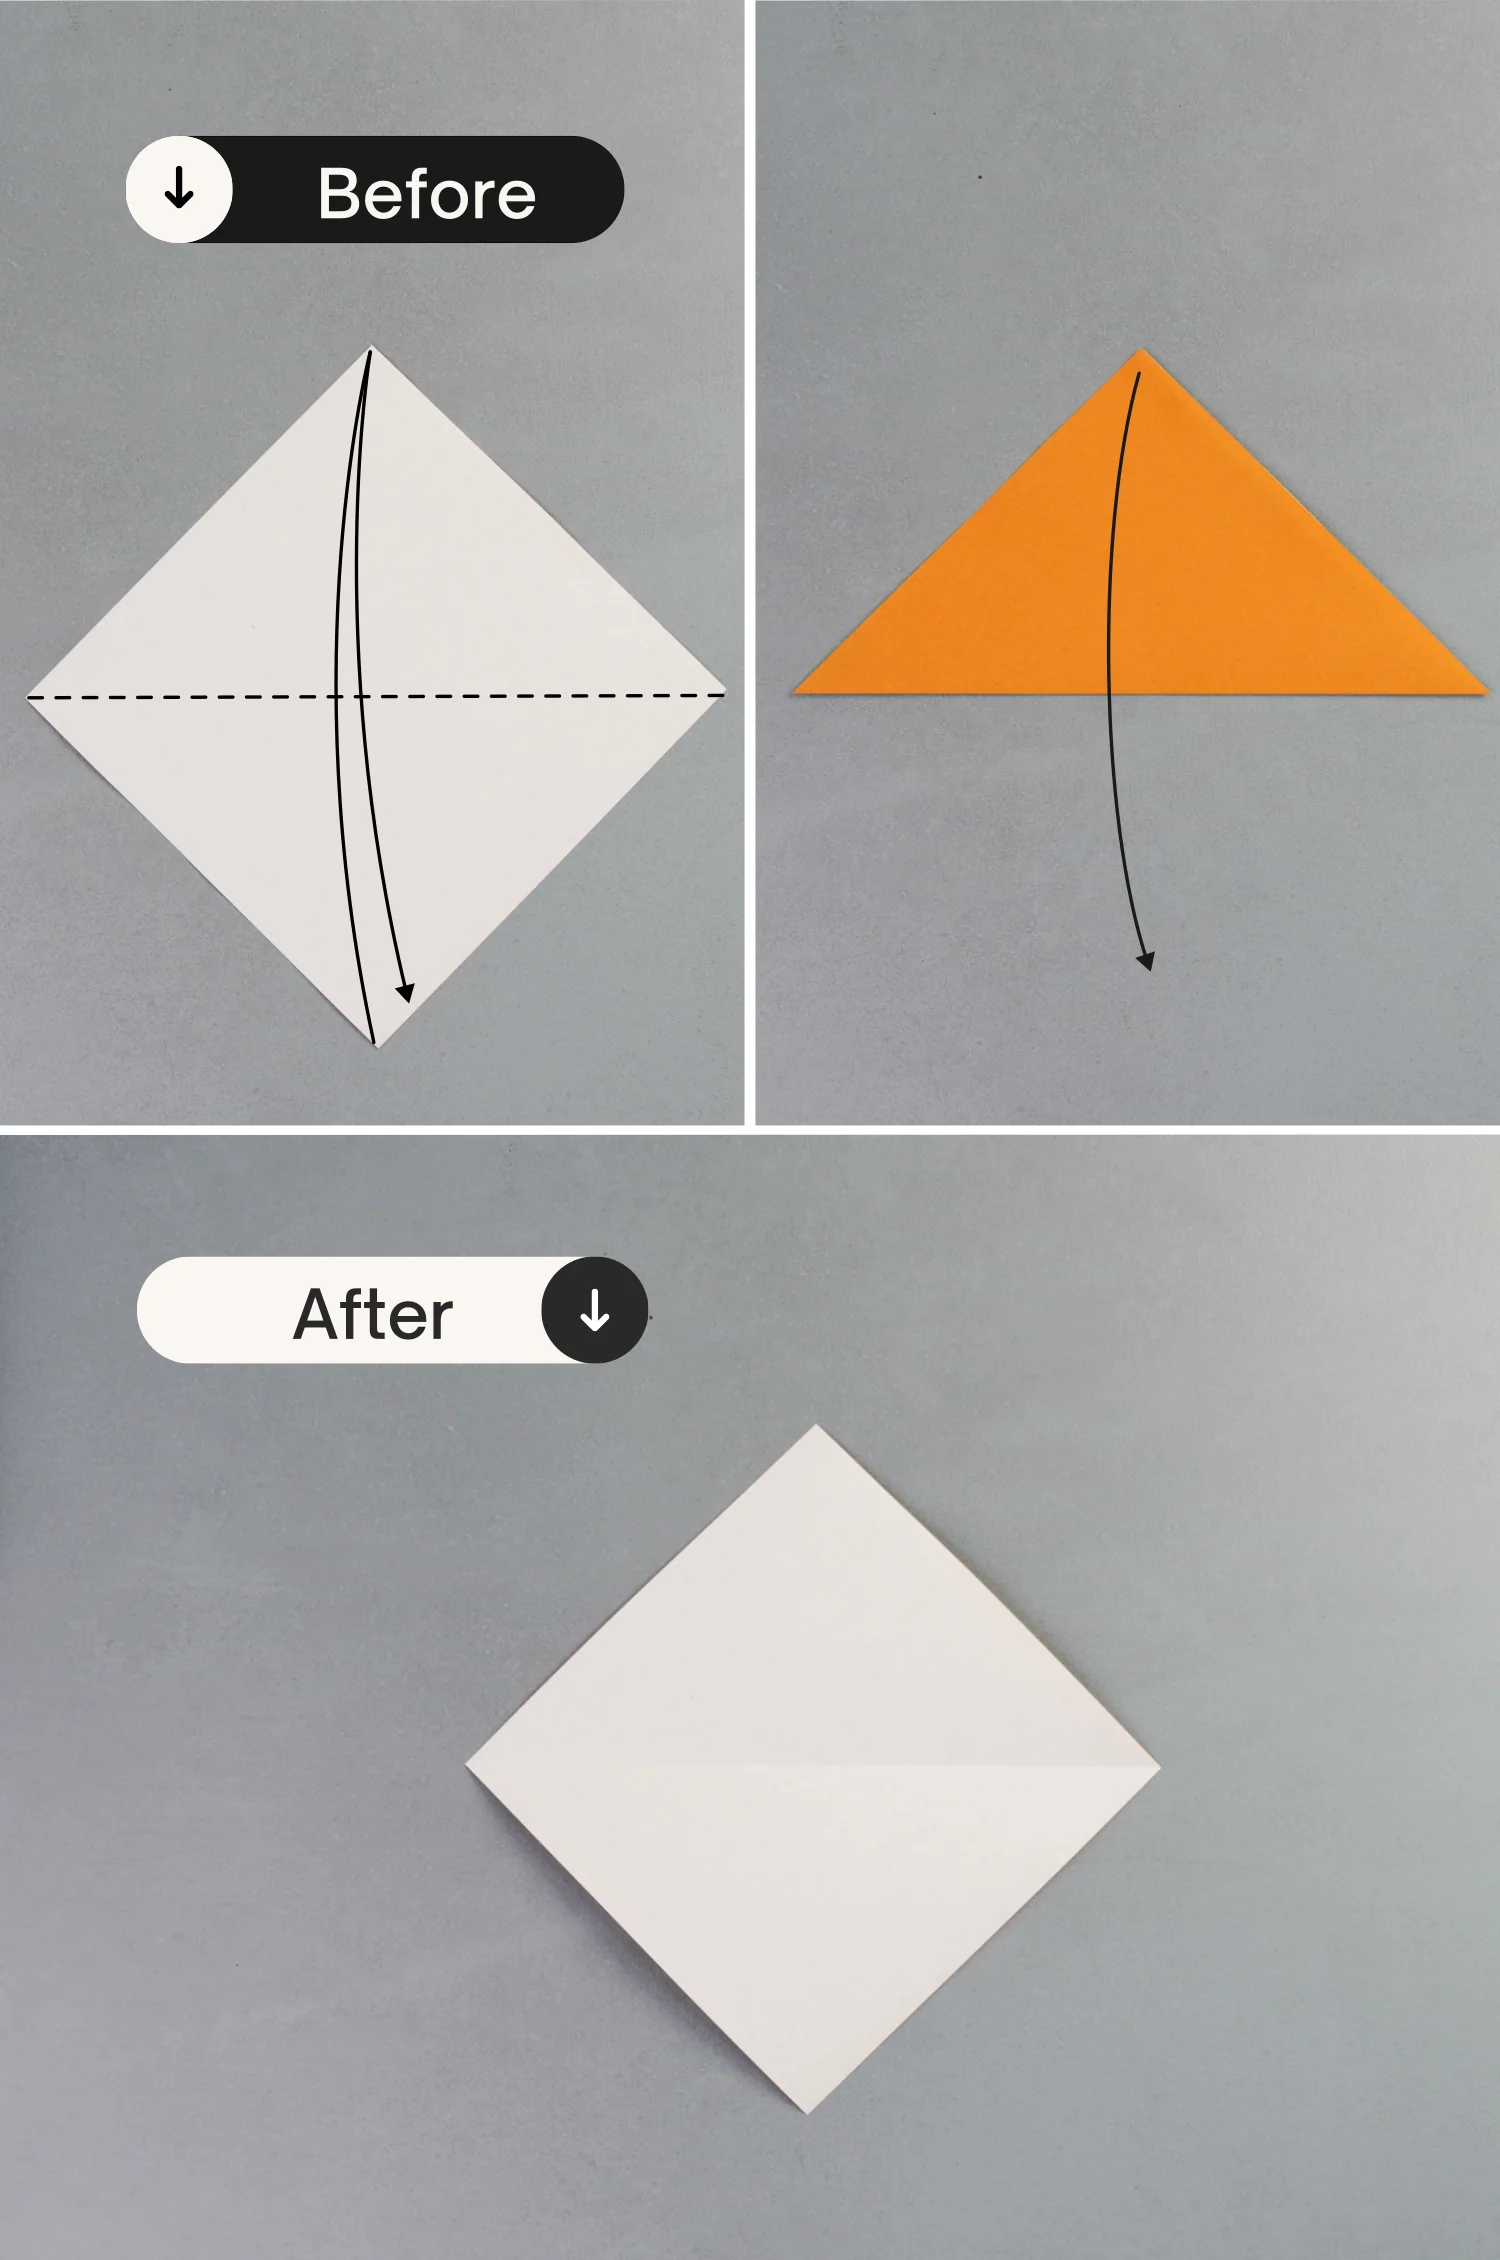
Step 2
Fold it in half vertically, leaving a crease, and unfold it.

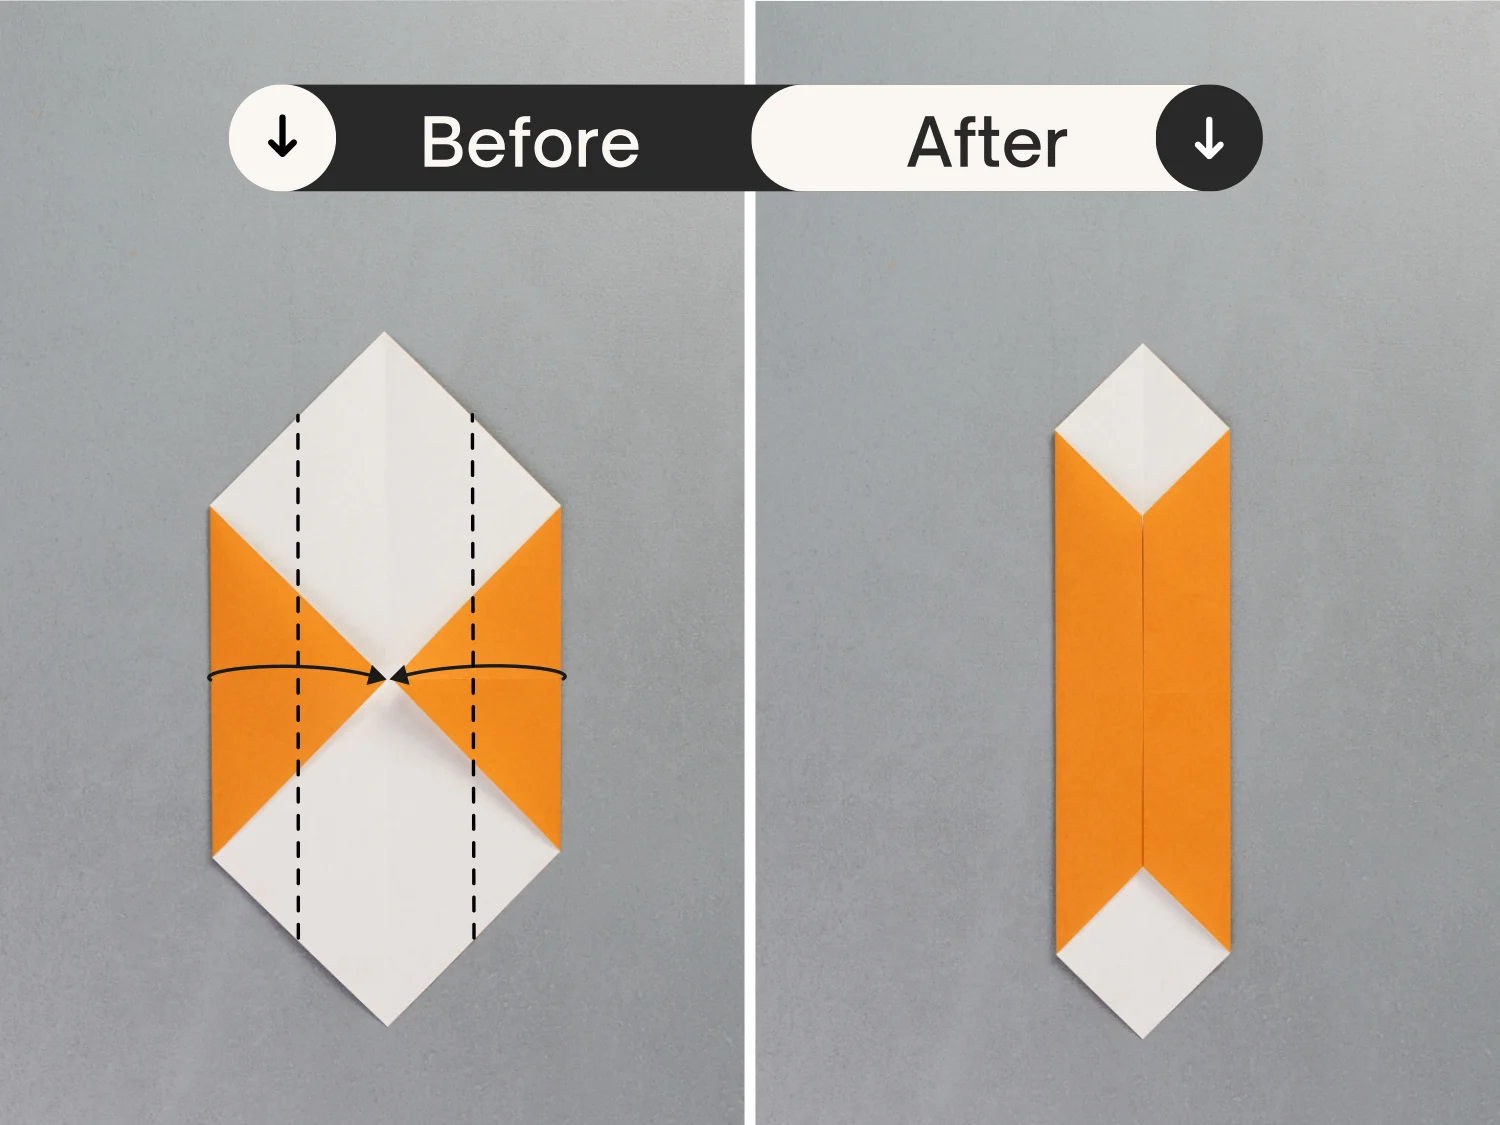
Step 3
Fold the left and right points to meet the center intersection point.

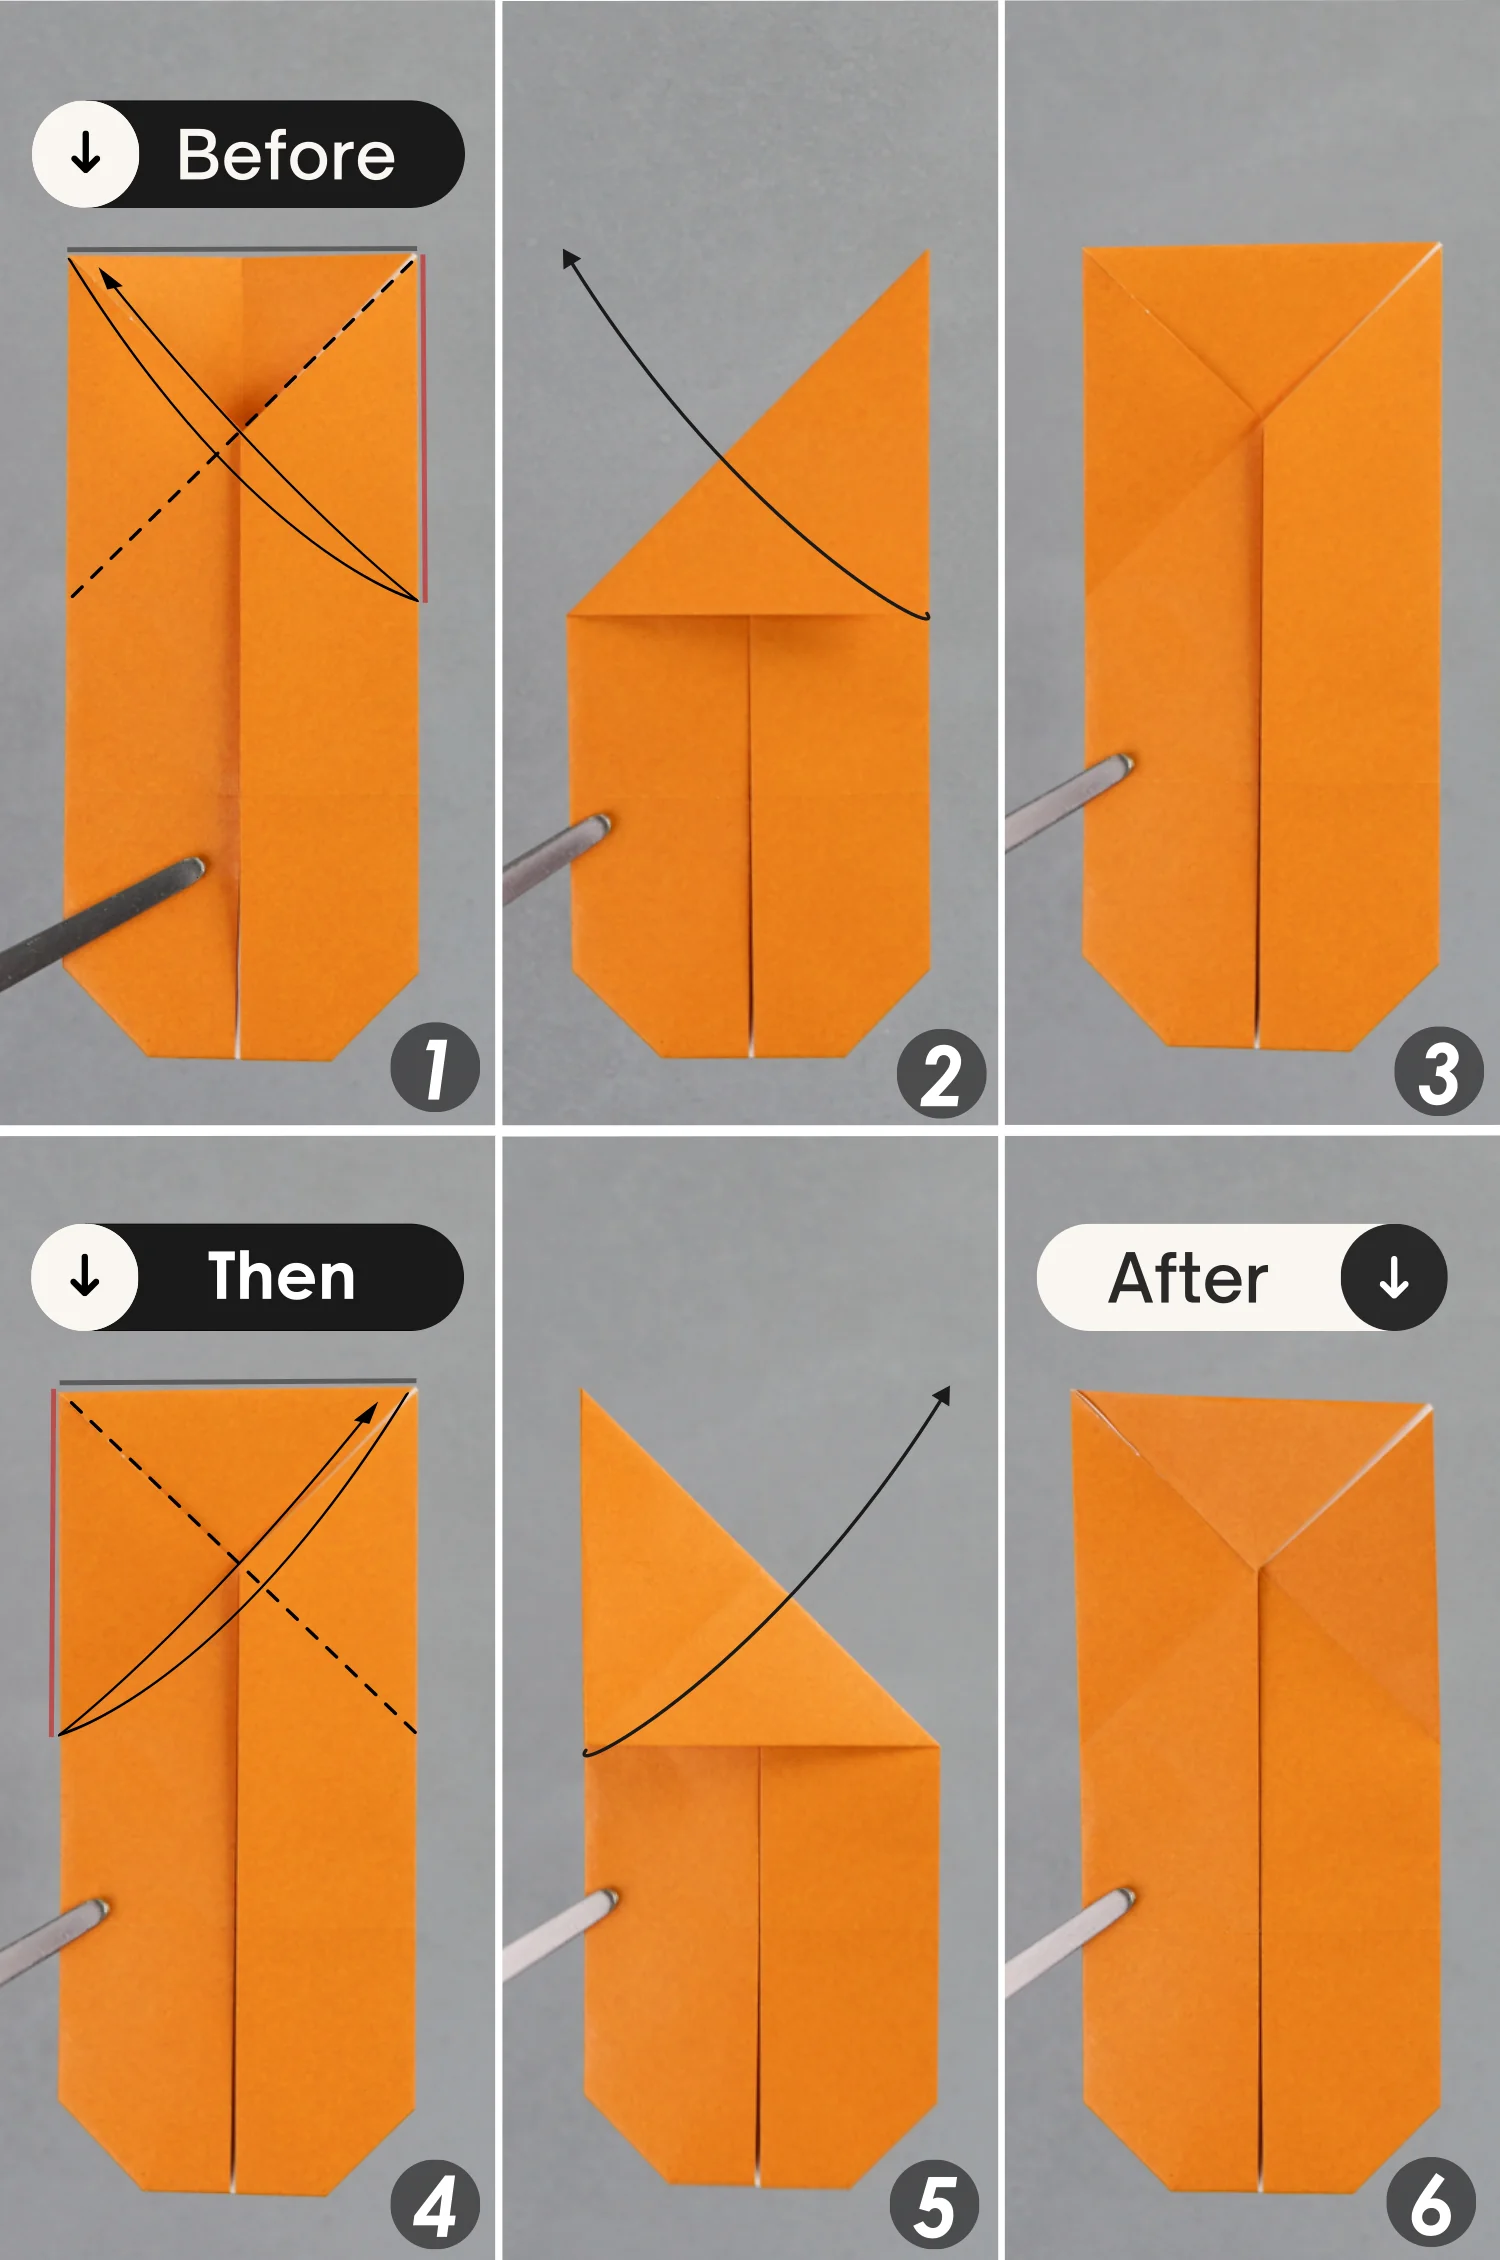
Step 4
Fold the left and right edges to align with the middle vertical crease.
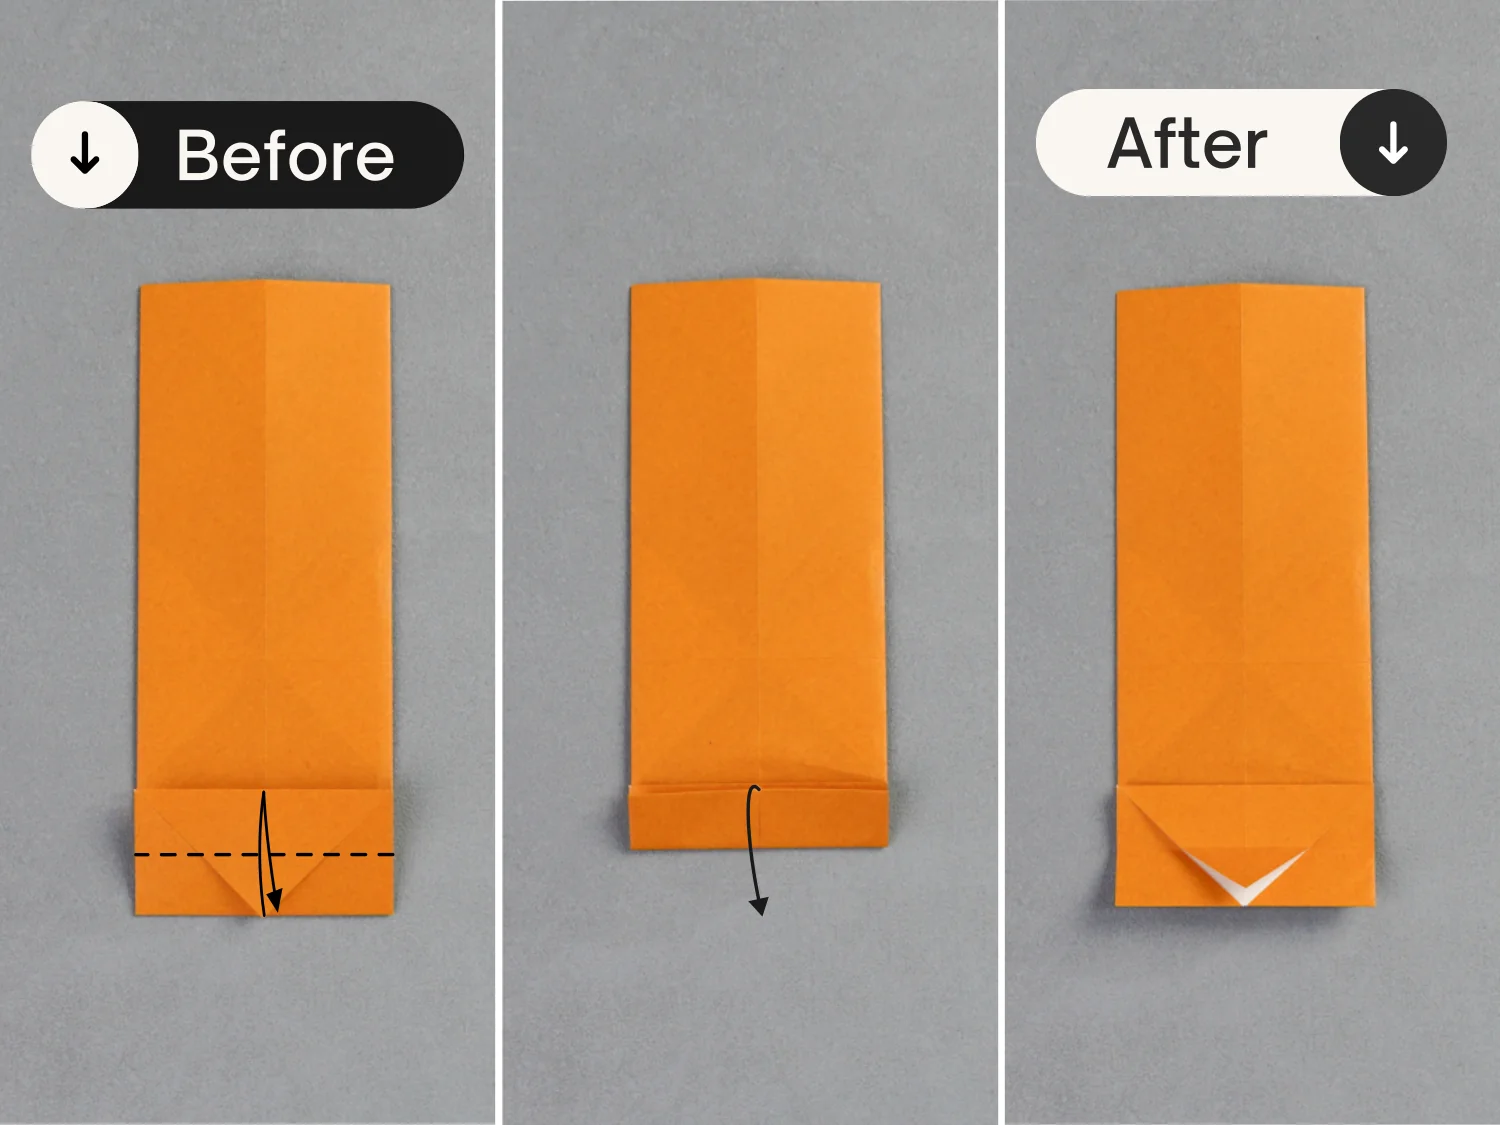
Step 5
Fold the top and bottom triangles toward the center.
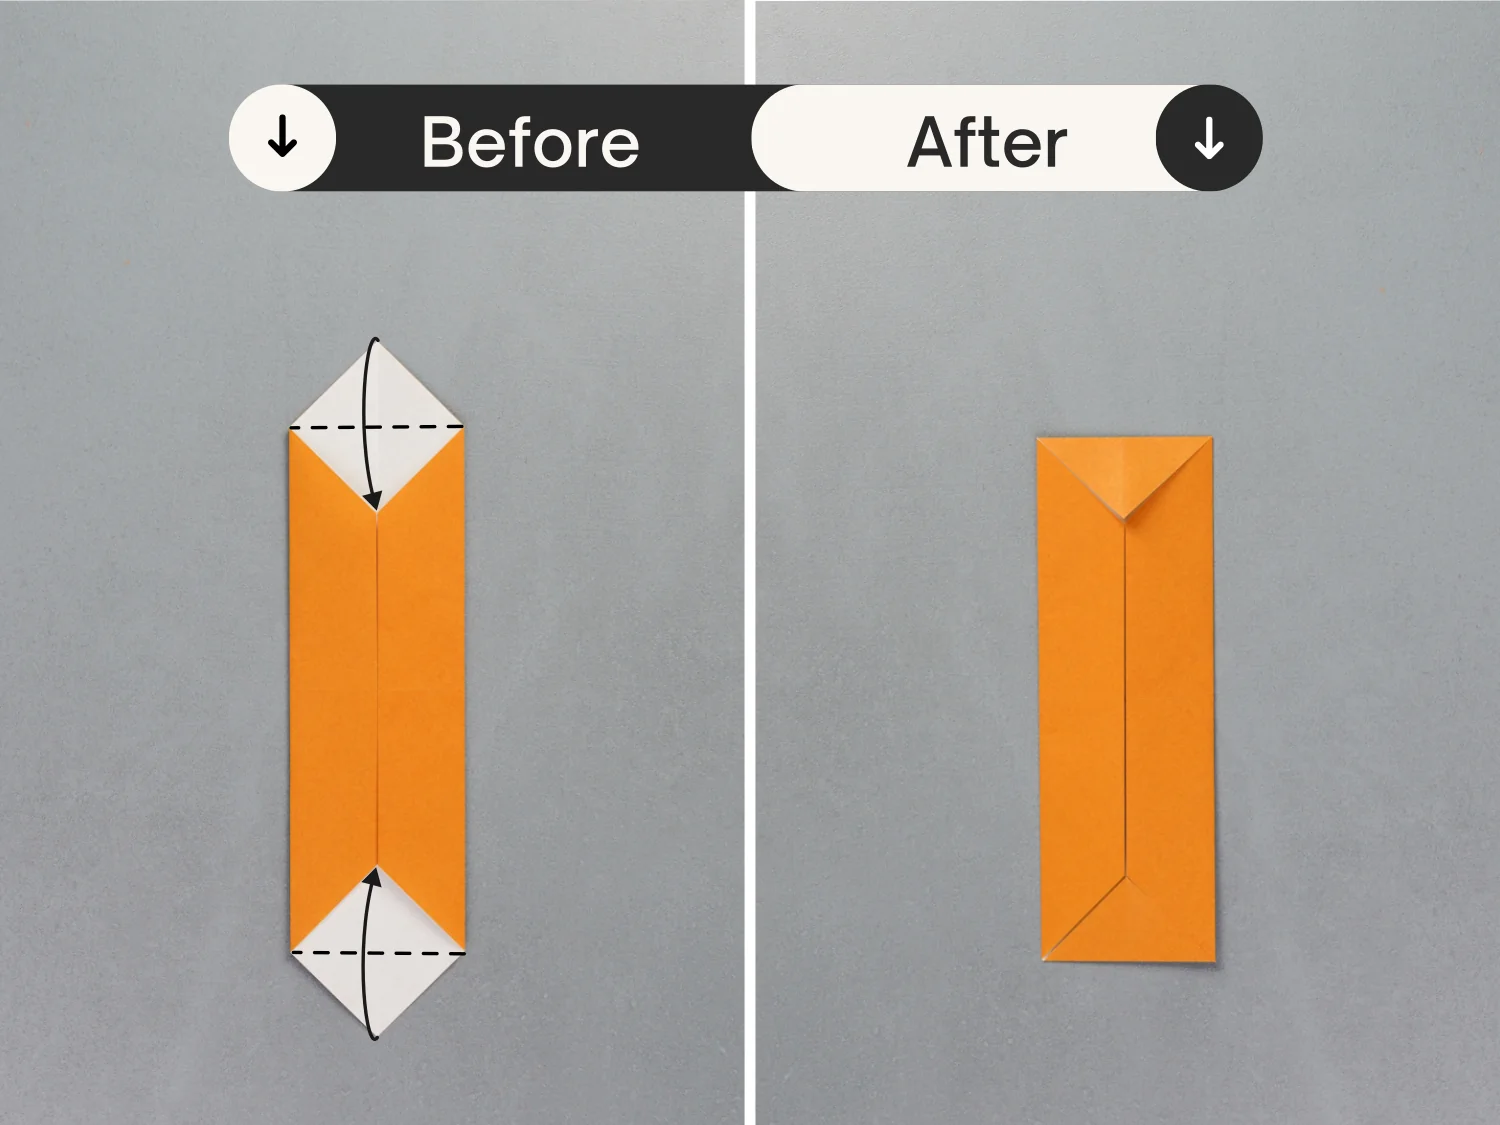
Step 6
Flip the paper over from left to right, then fold up the bottom edge along the black dotted line.
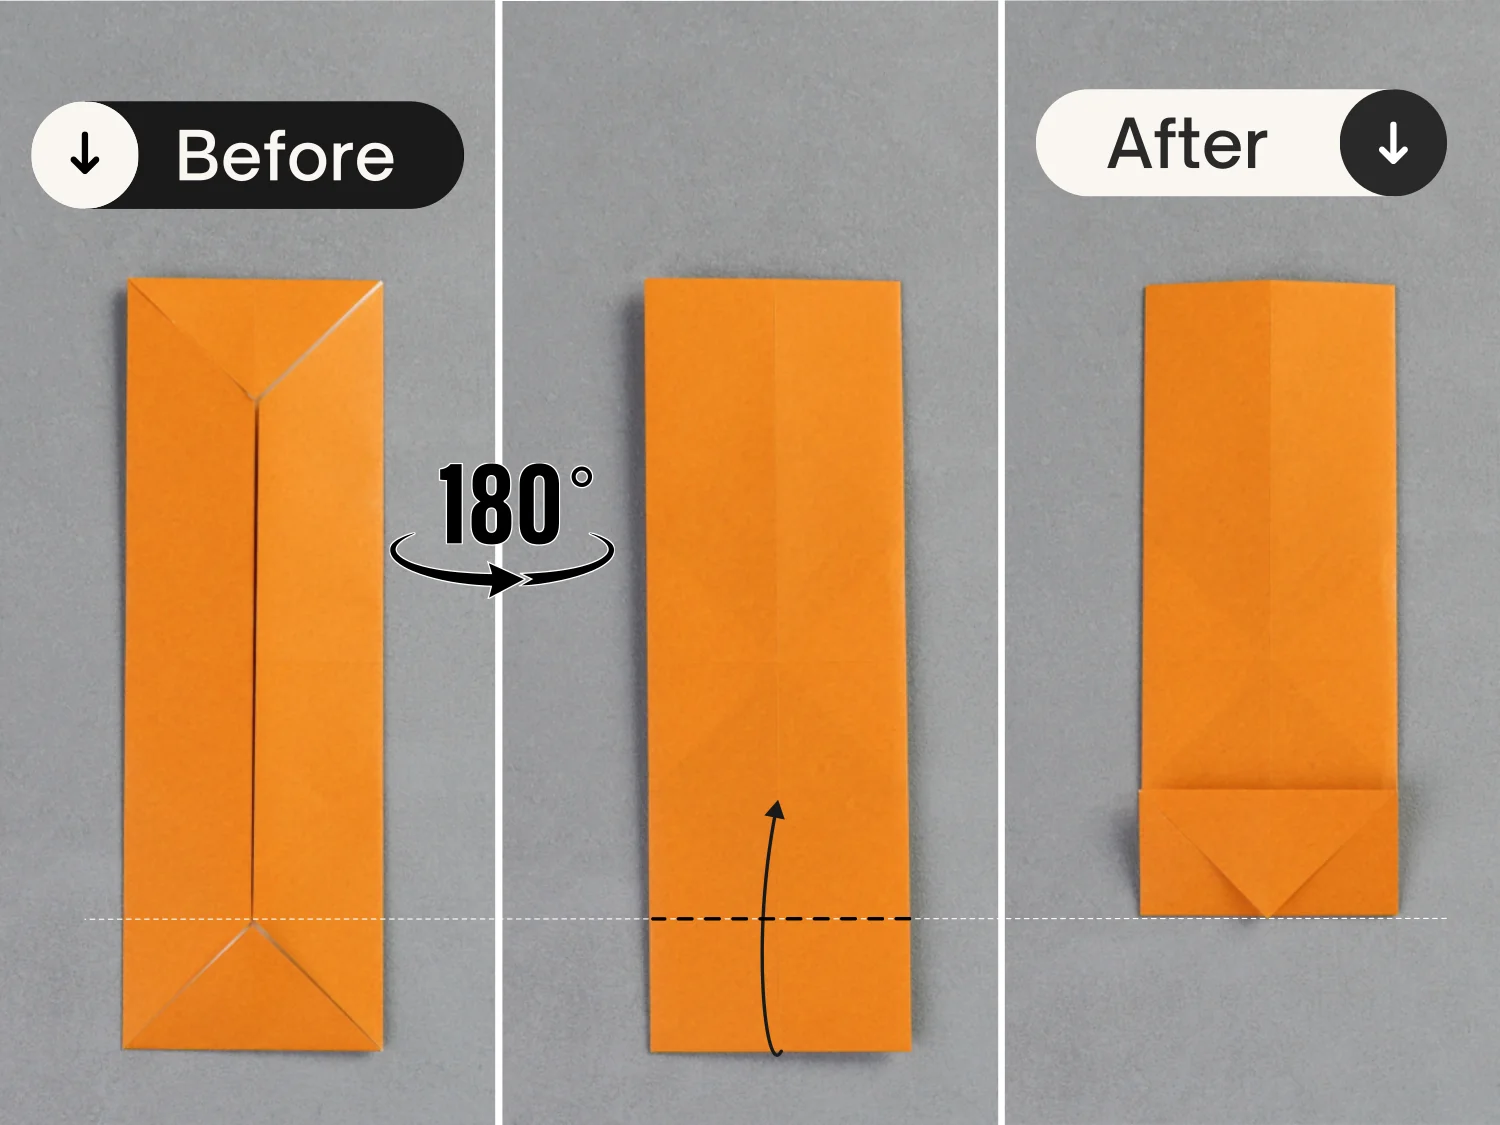
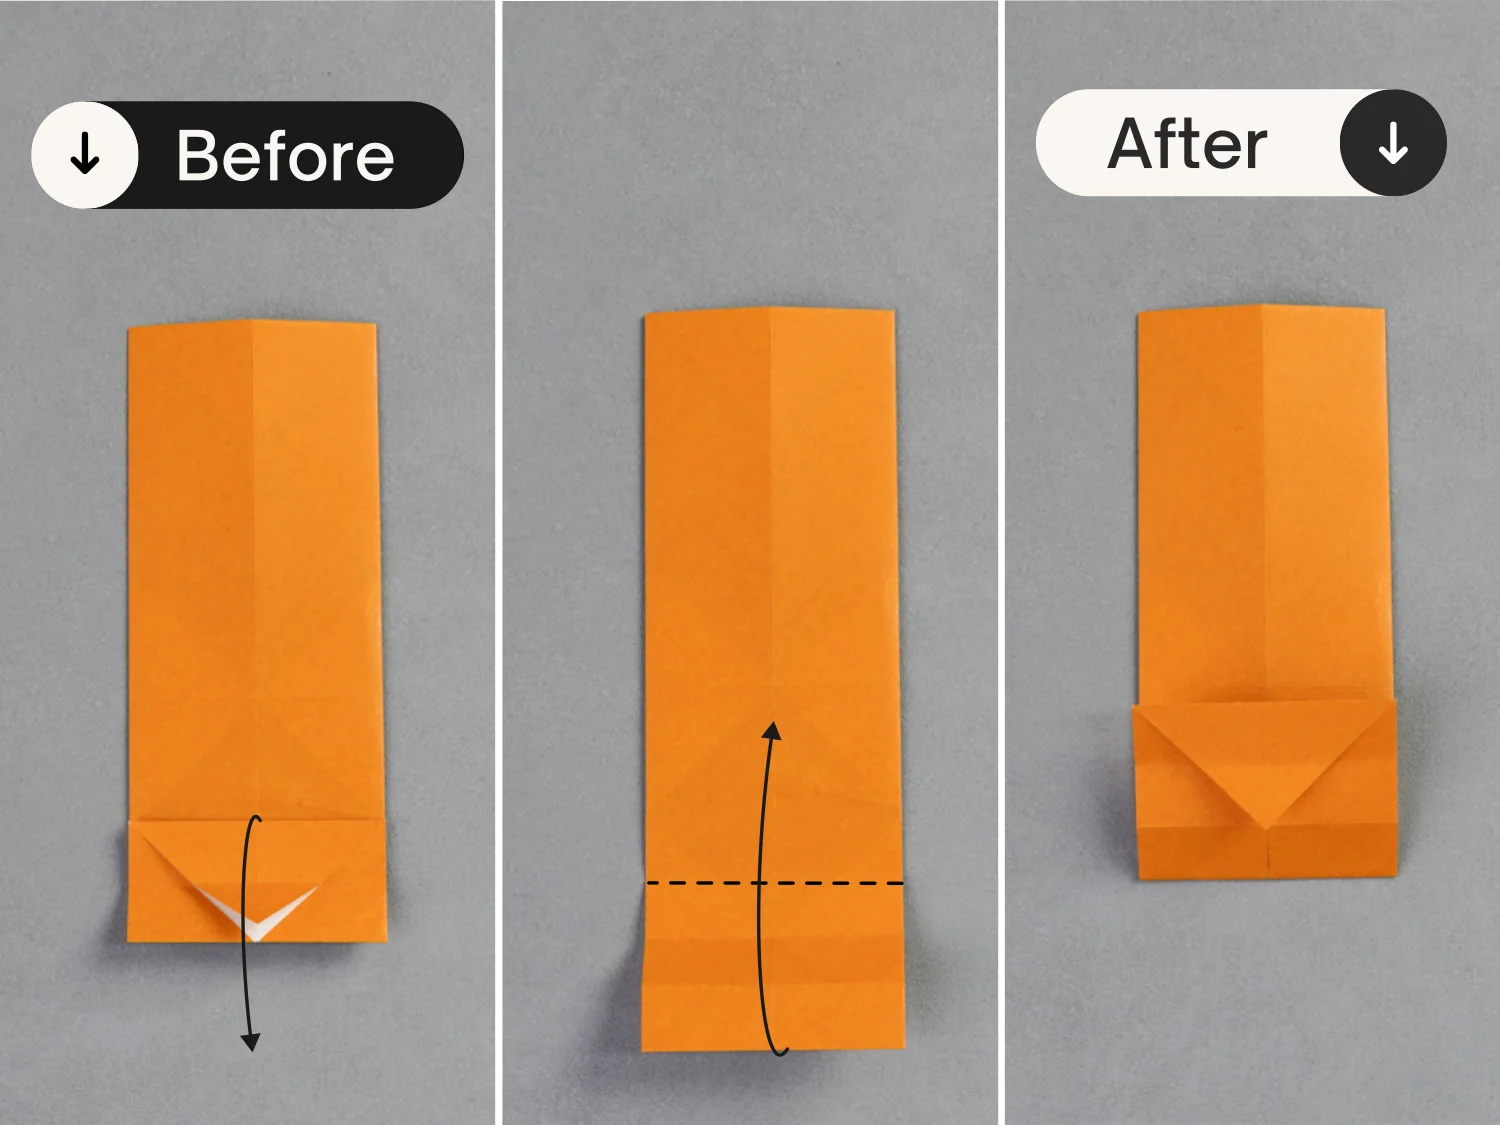
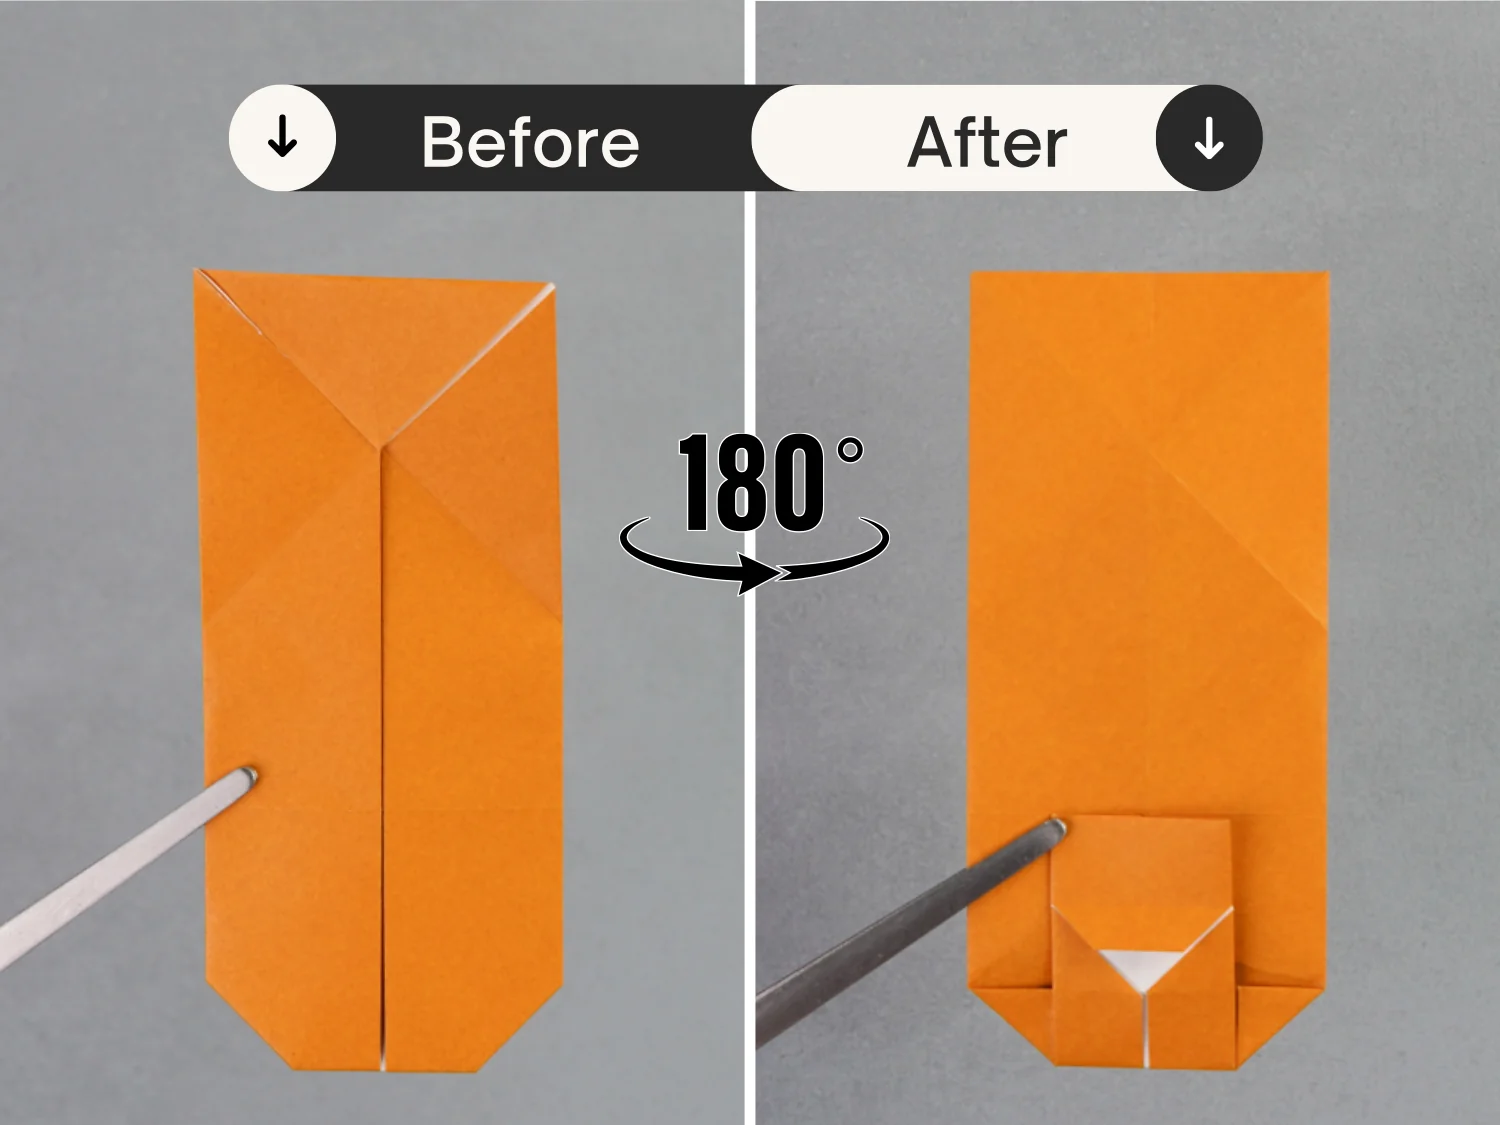
Step 7
Fold the top edge of the rectangle at the bottom to align with its bottom edge, crease it well, and unfold it.
Step 8
Unfold the bottom rectangle, and fold the bottom edge of the paper to align with the middle horizontal crease.
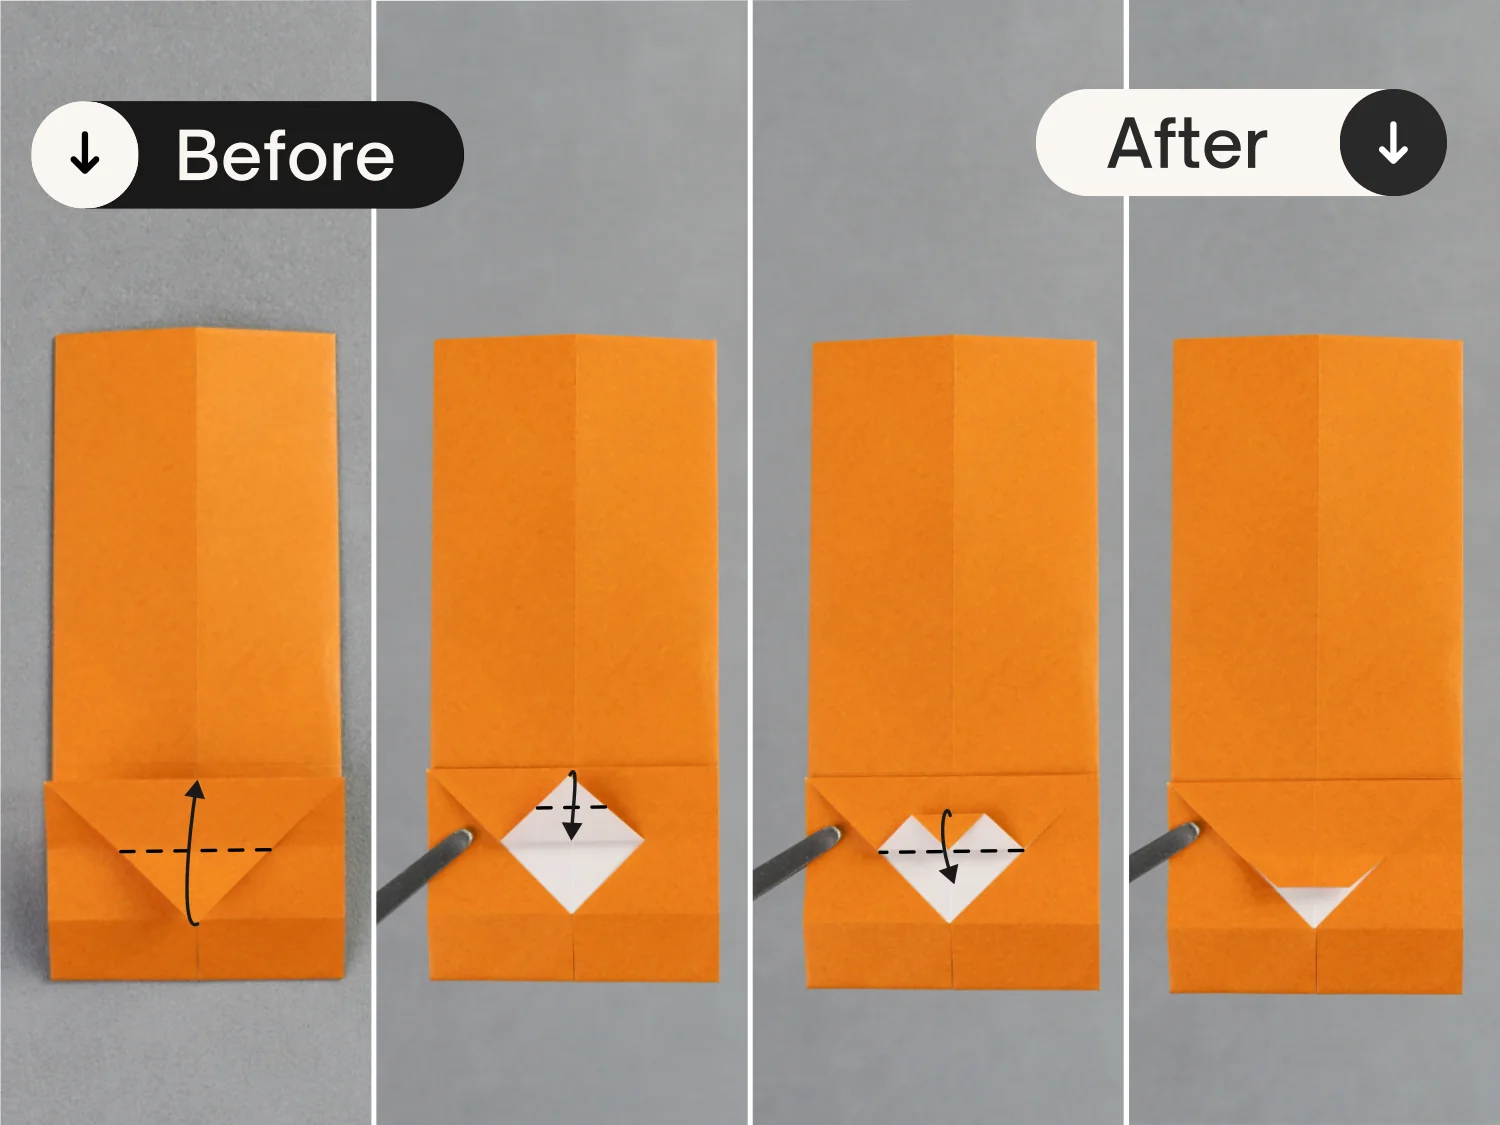
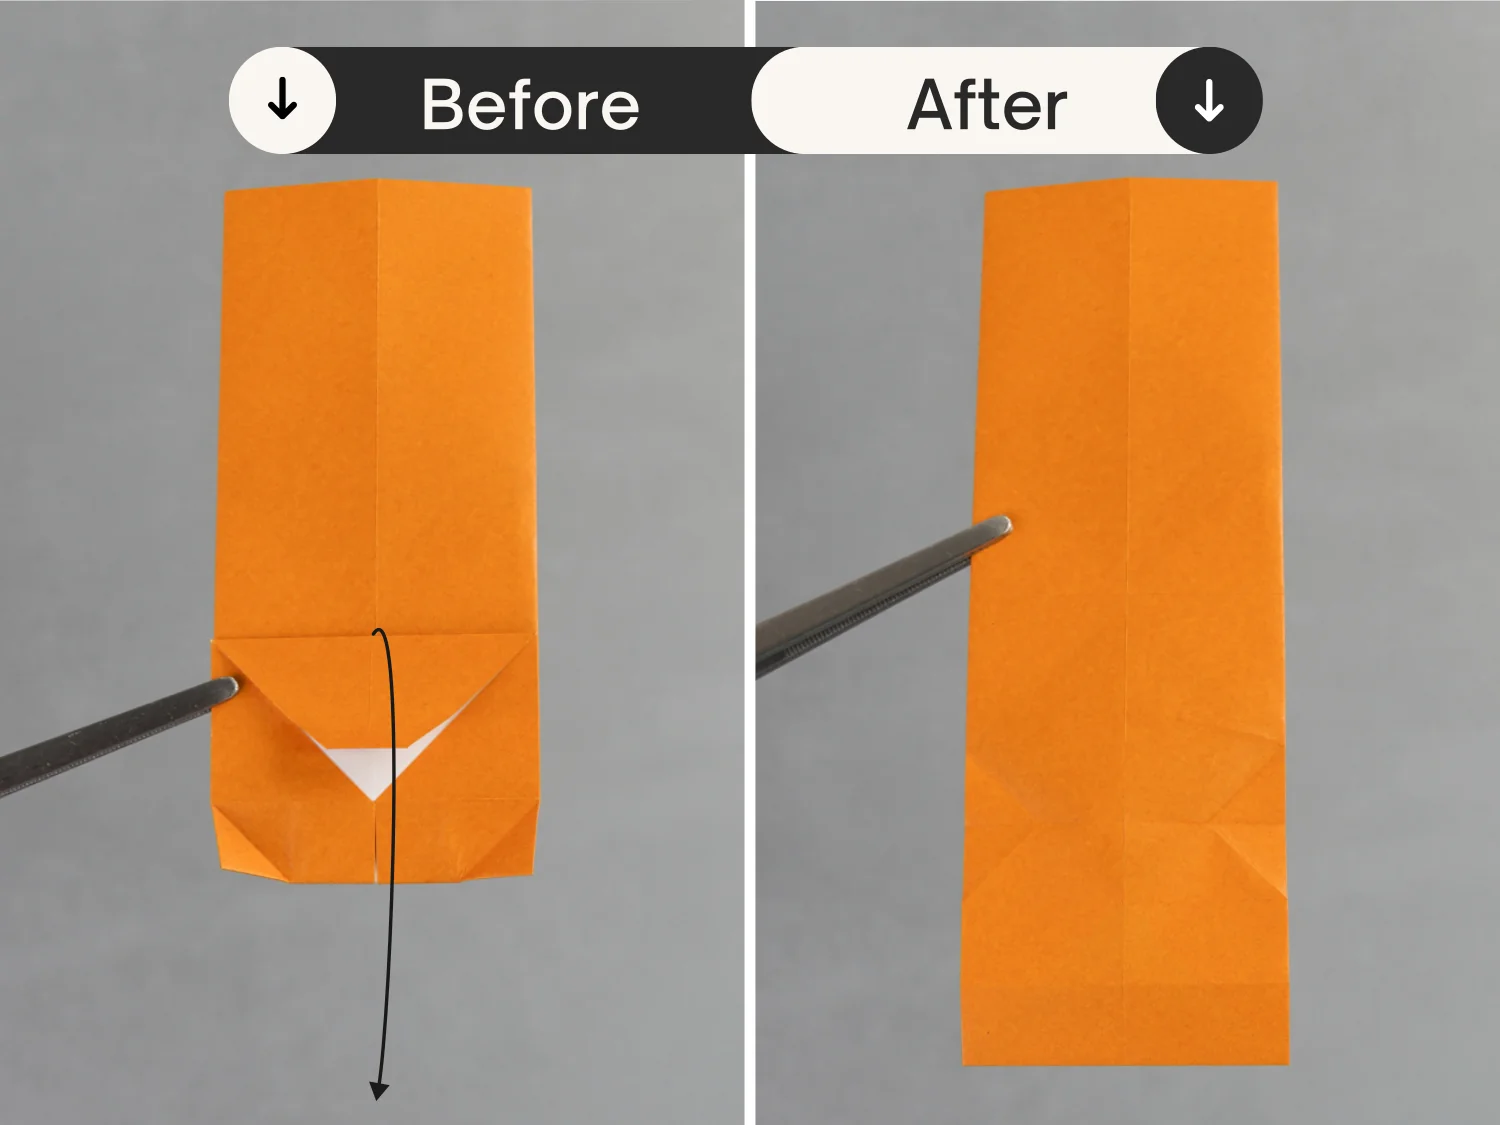
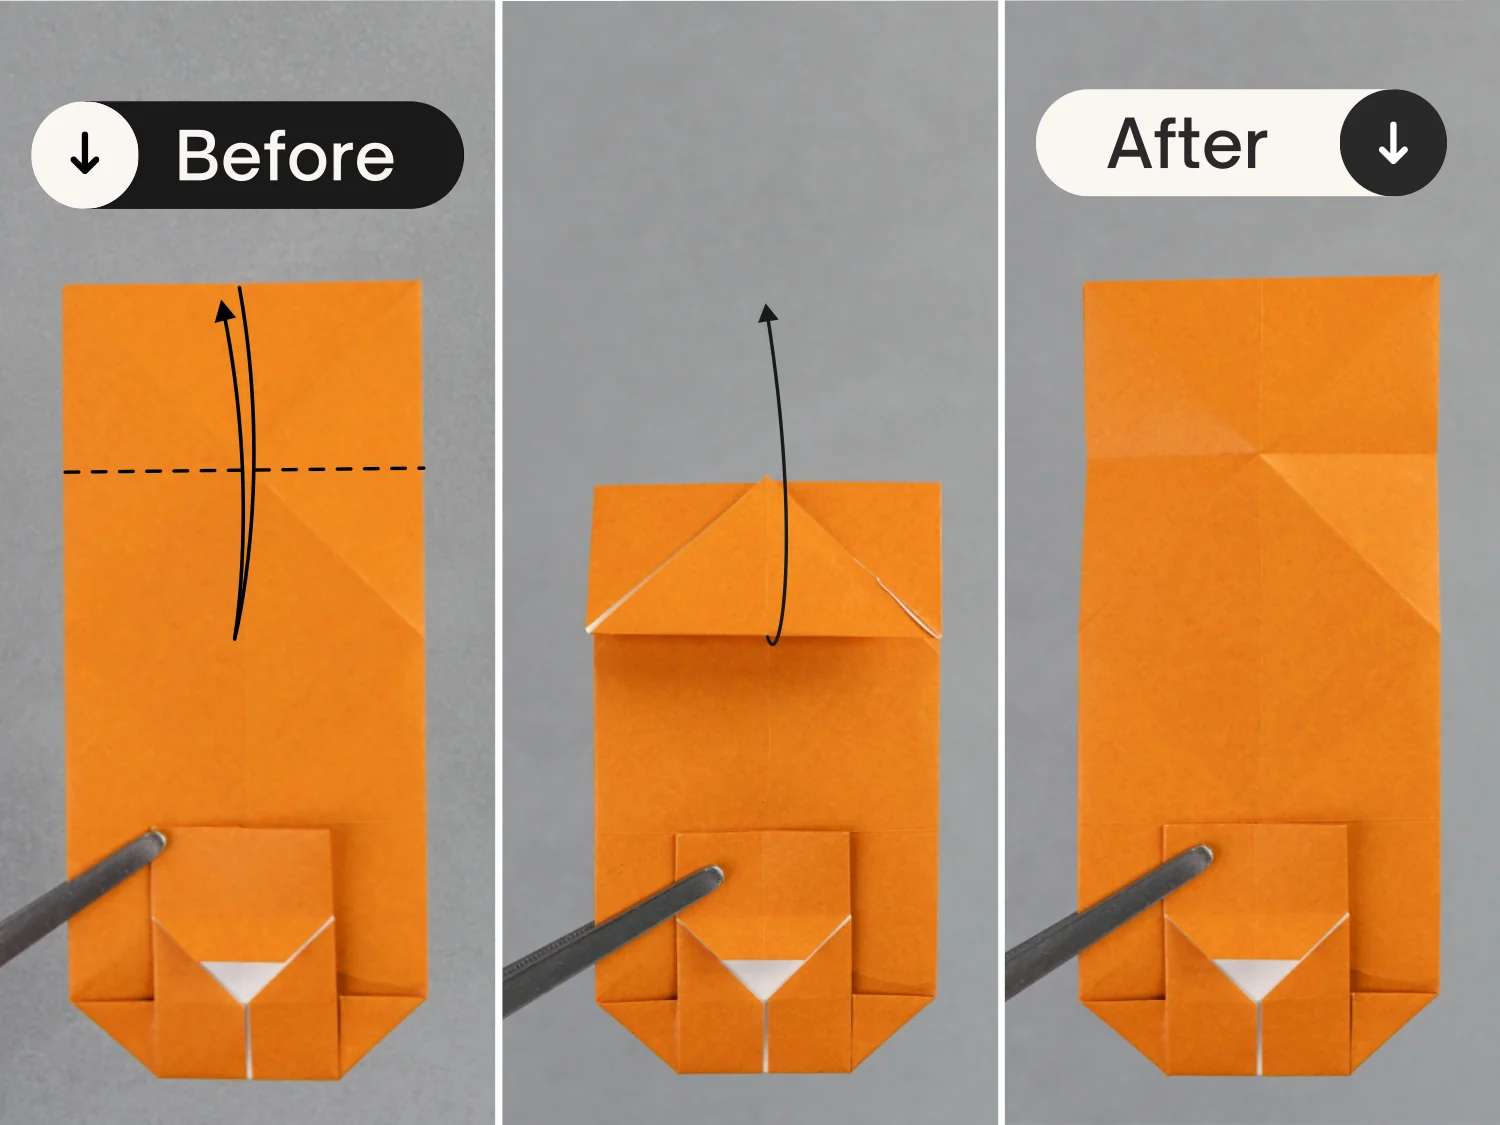
Step 9
Fold up the bottom point of the triangle to form a smaller white triangle, then fold this point down to meet the bottom edge of this small triangle. Finally, fold down this trapezoidal layer.
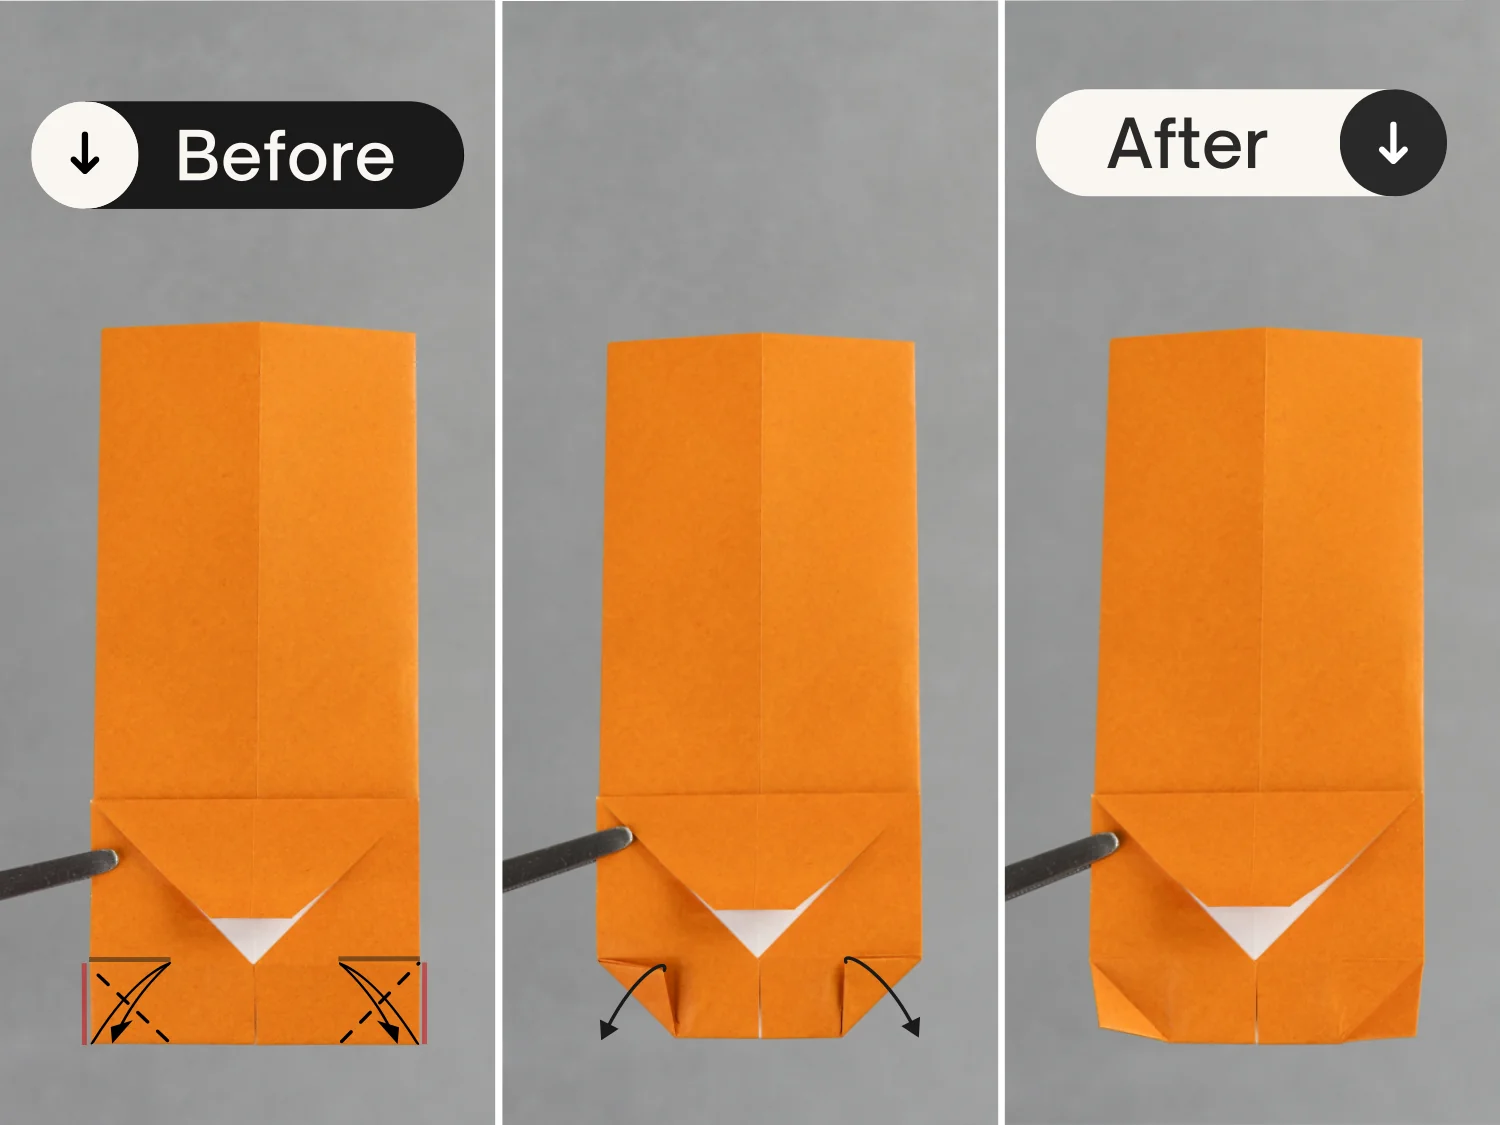
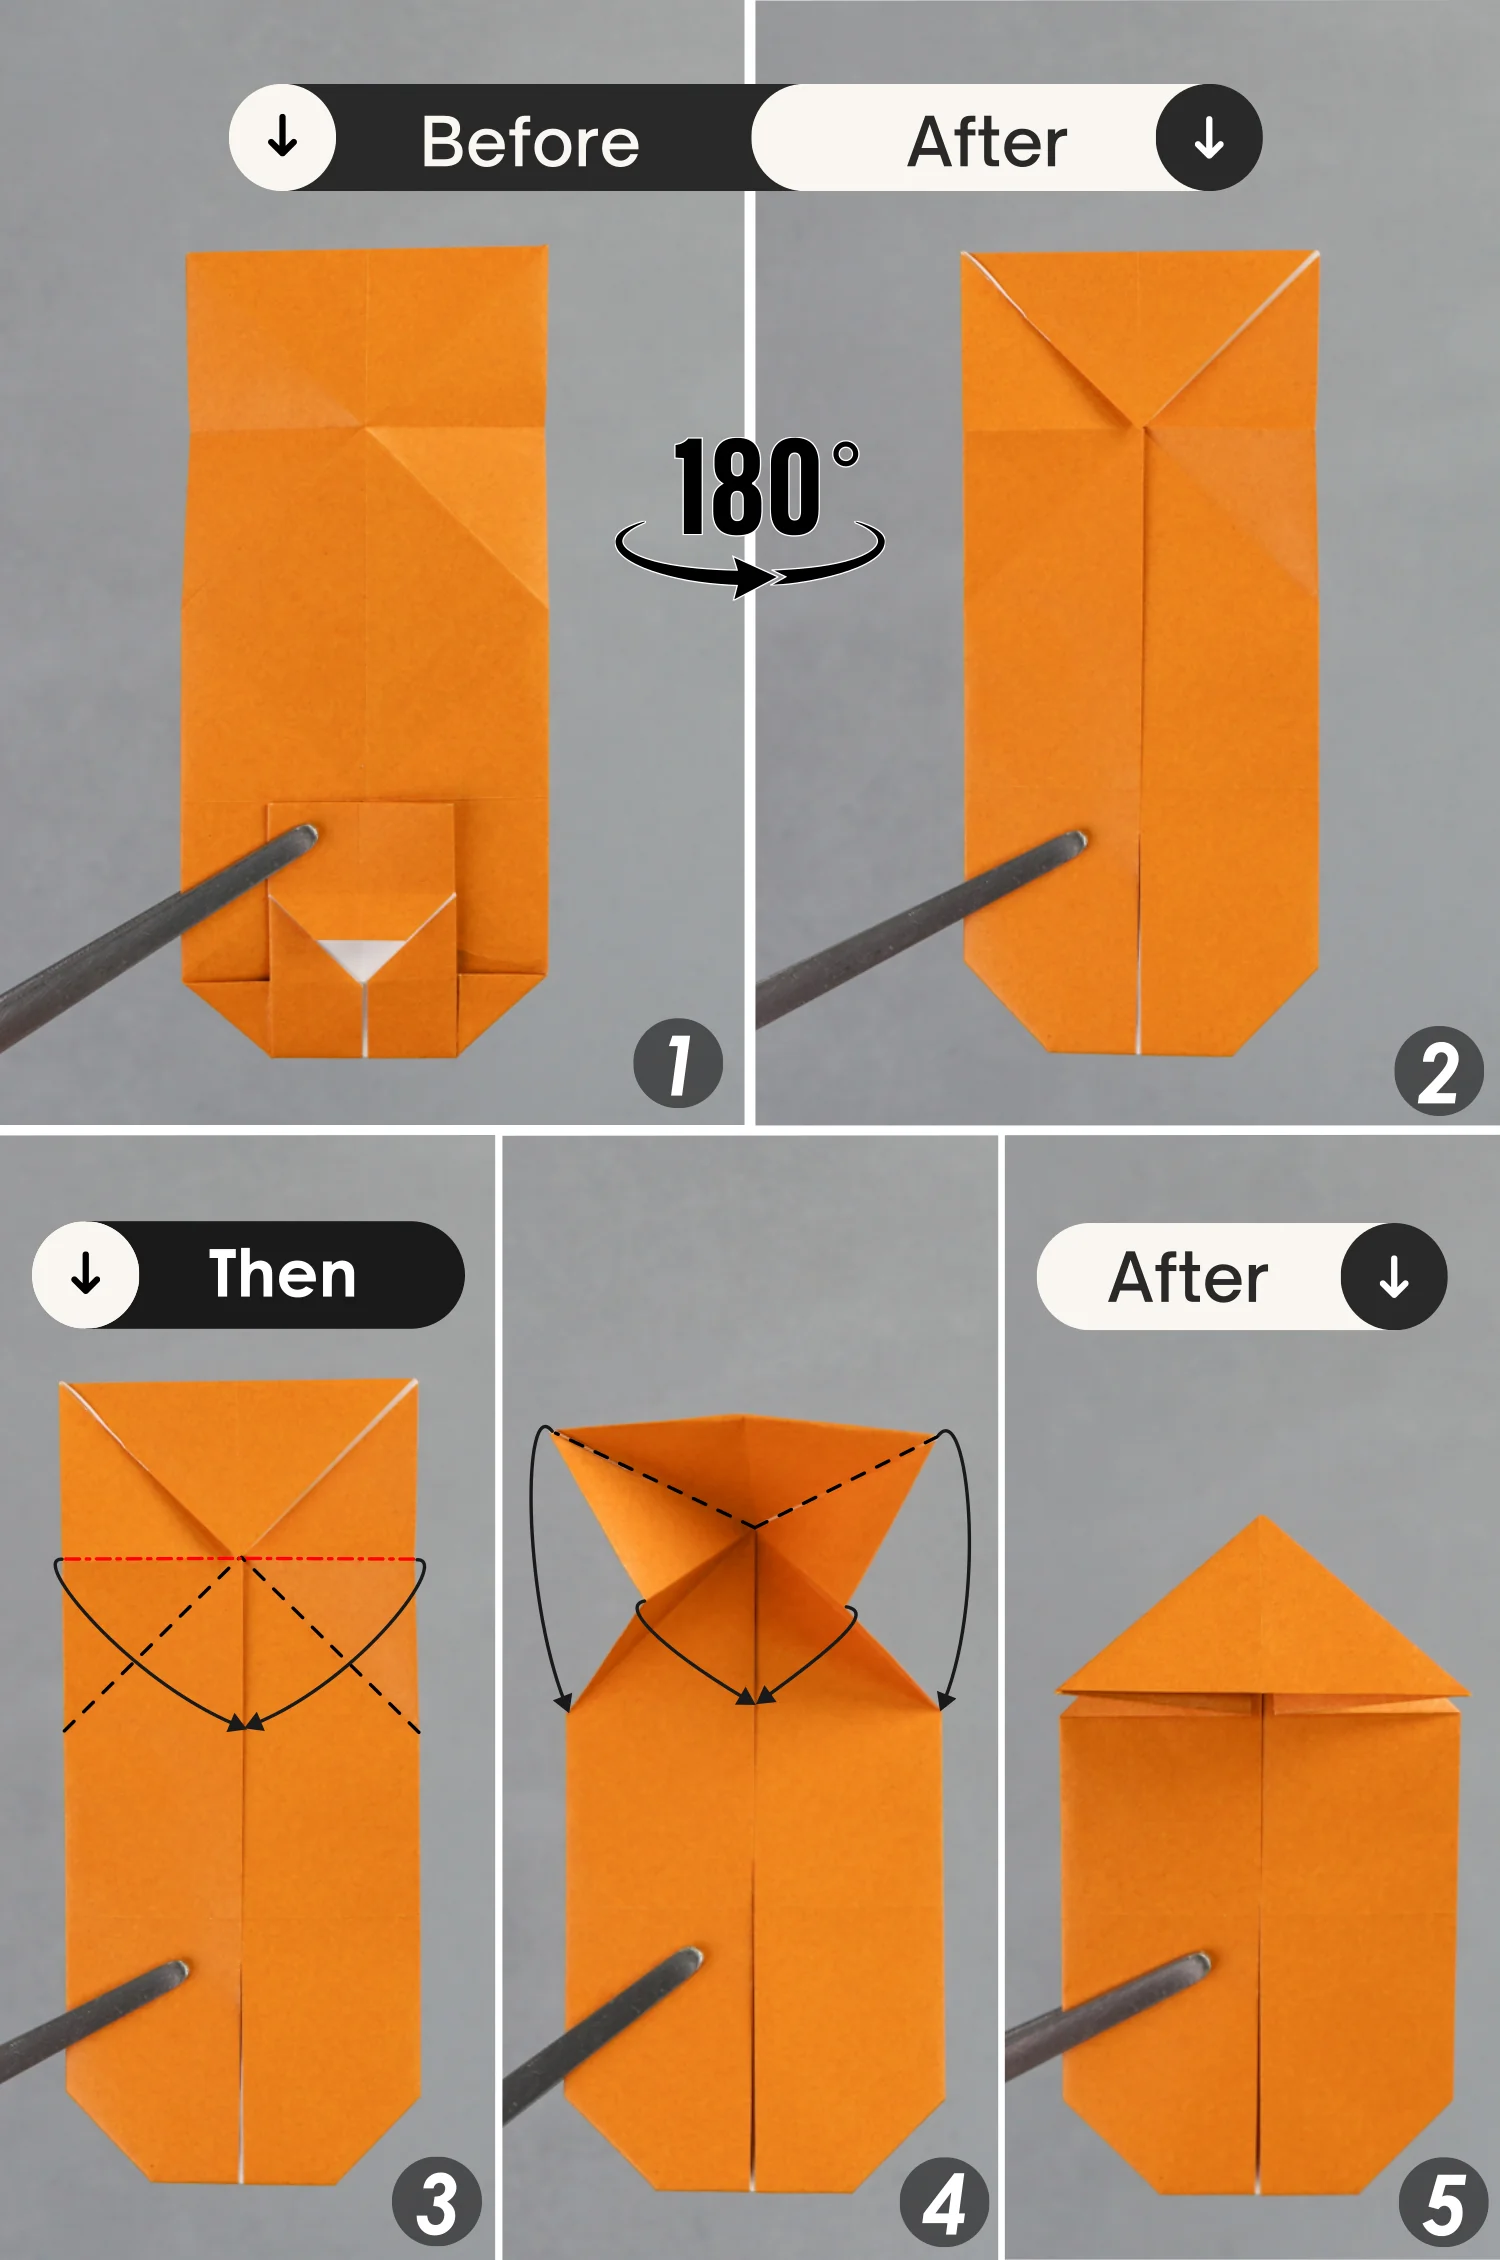
Step 10
Fold the bottom sections of the left and right edges, indicated by the red lines, to align with the horizontal crease indicated by the black lines. Crease them well, and unfold it.
Step 11
Unfold this upper layer at the bottom.
Step 12
Fold the edge indicated by the red line to align with the middle vertical crease indicated by the black line, leaving a crease, and unfold it.
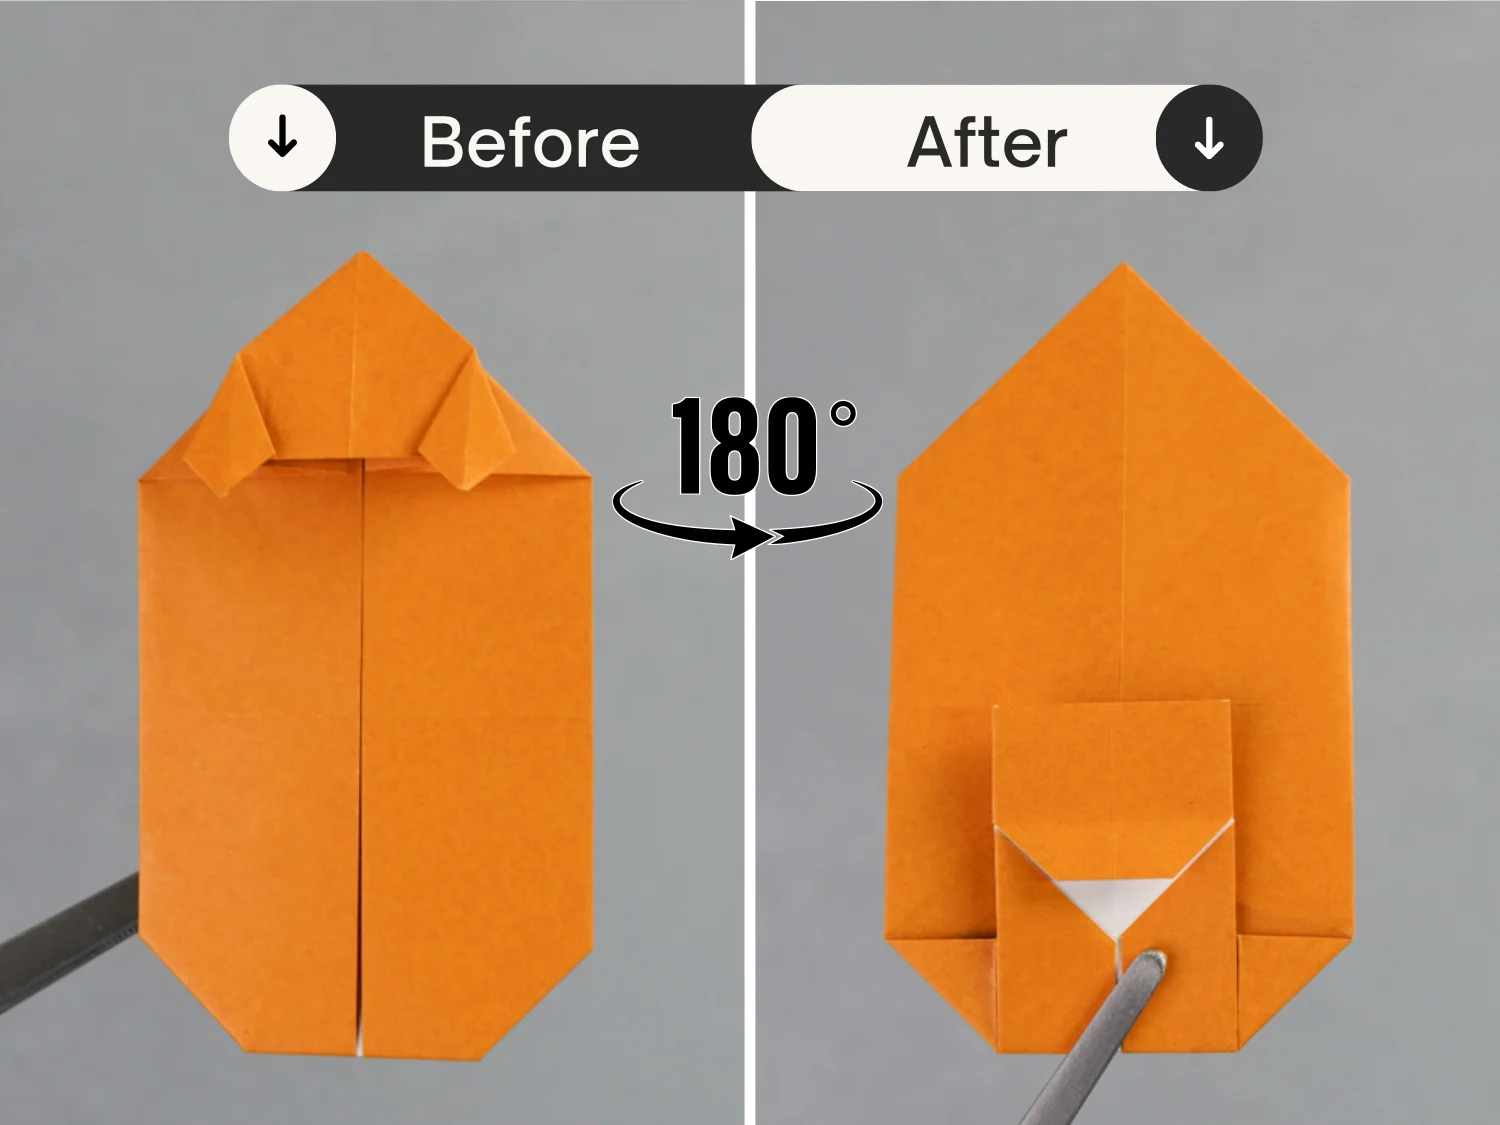
Repeat this for the right side, fold the edge indicated by the red line to align with the middle vertical crease indicated by the black line, leaving a crease, and unfold it.
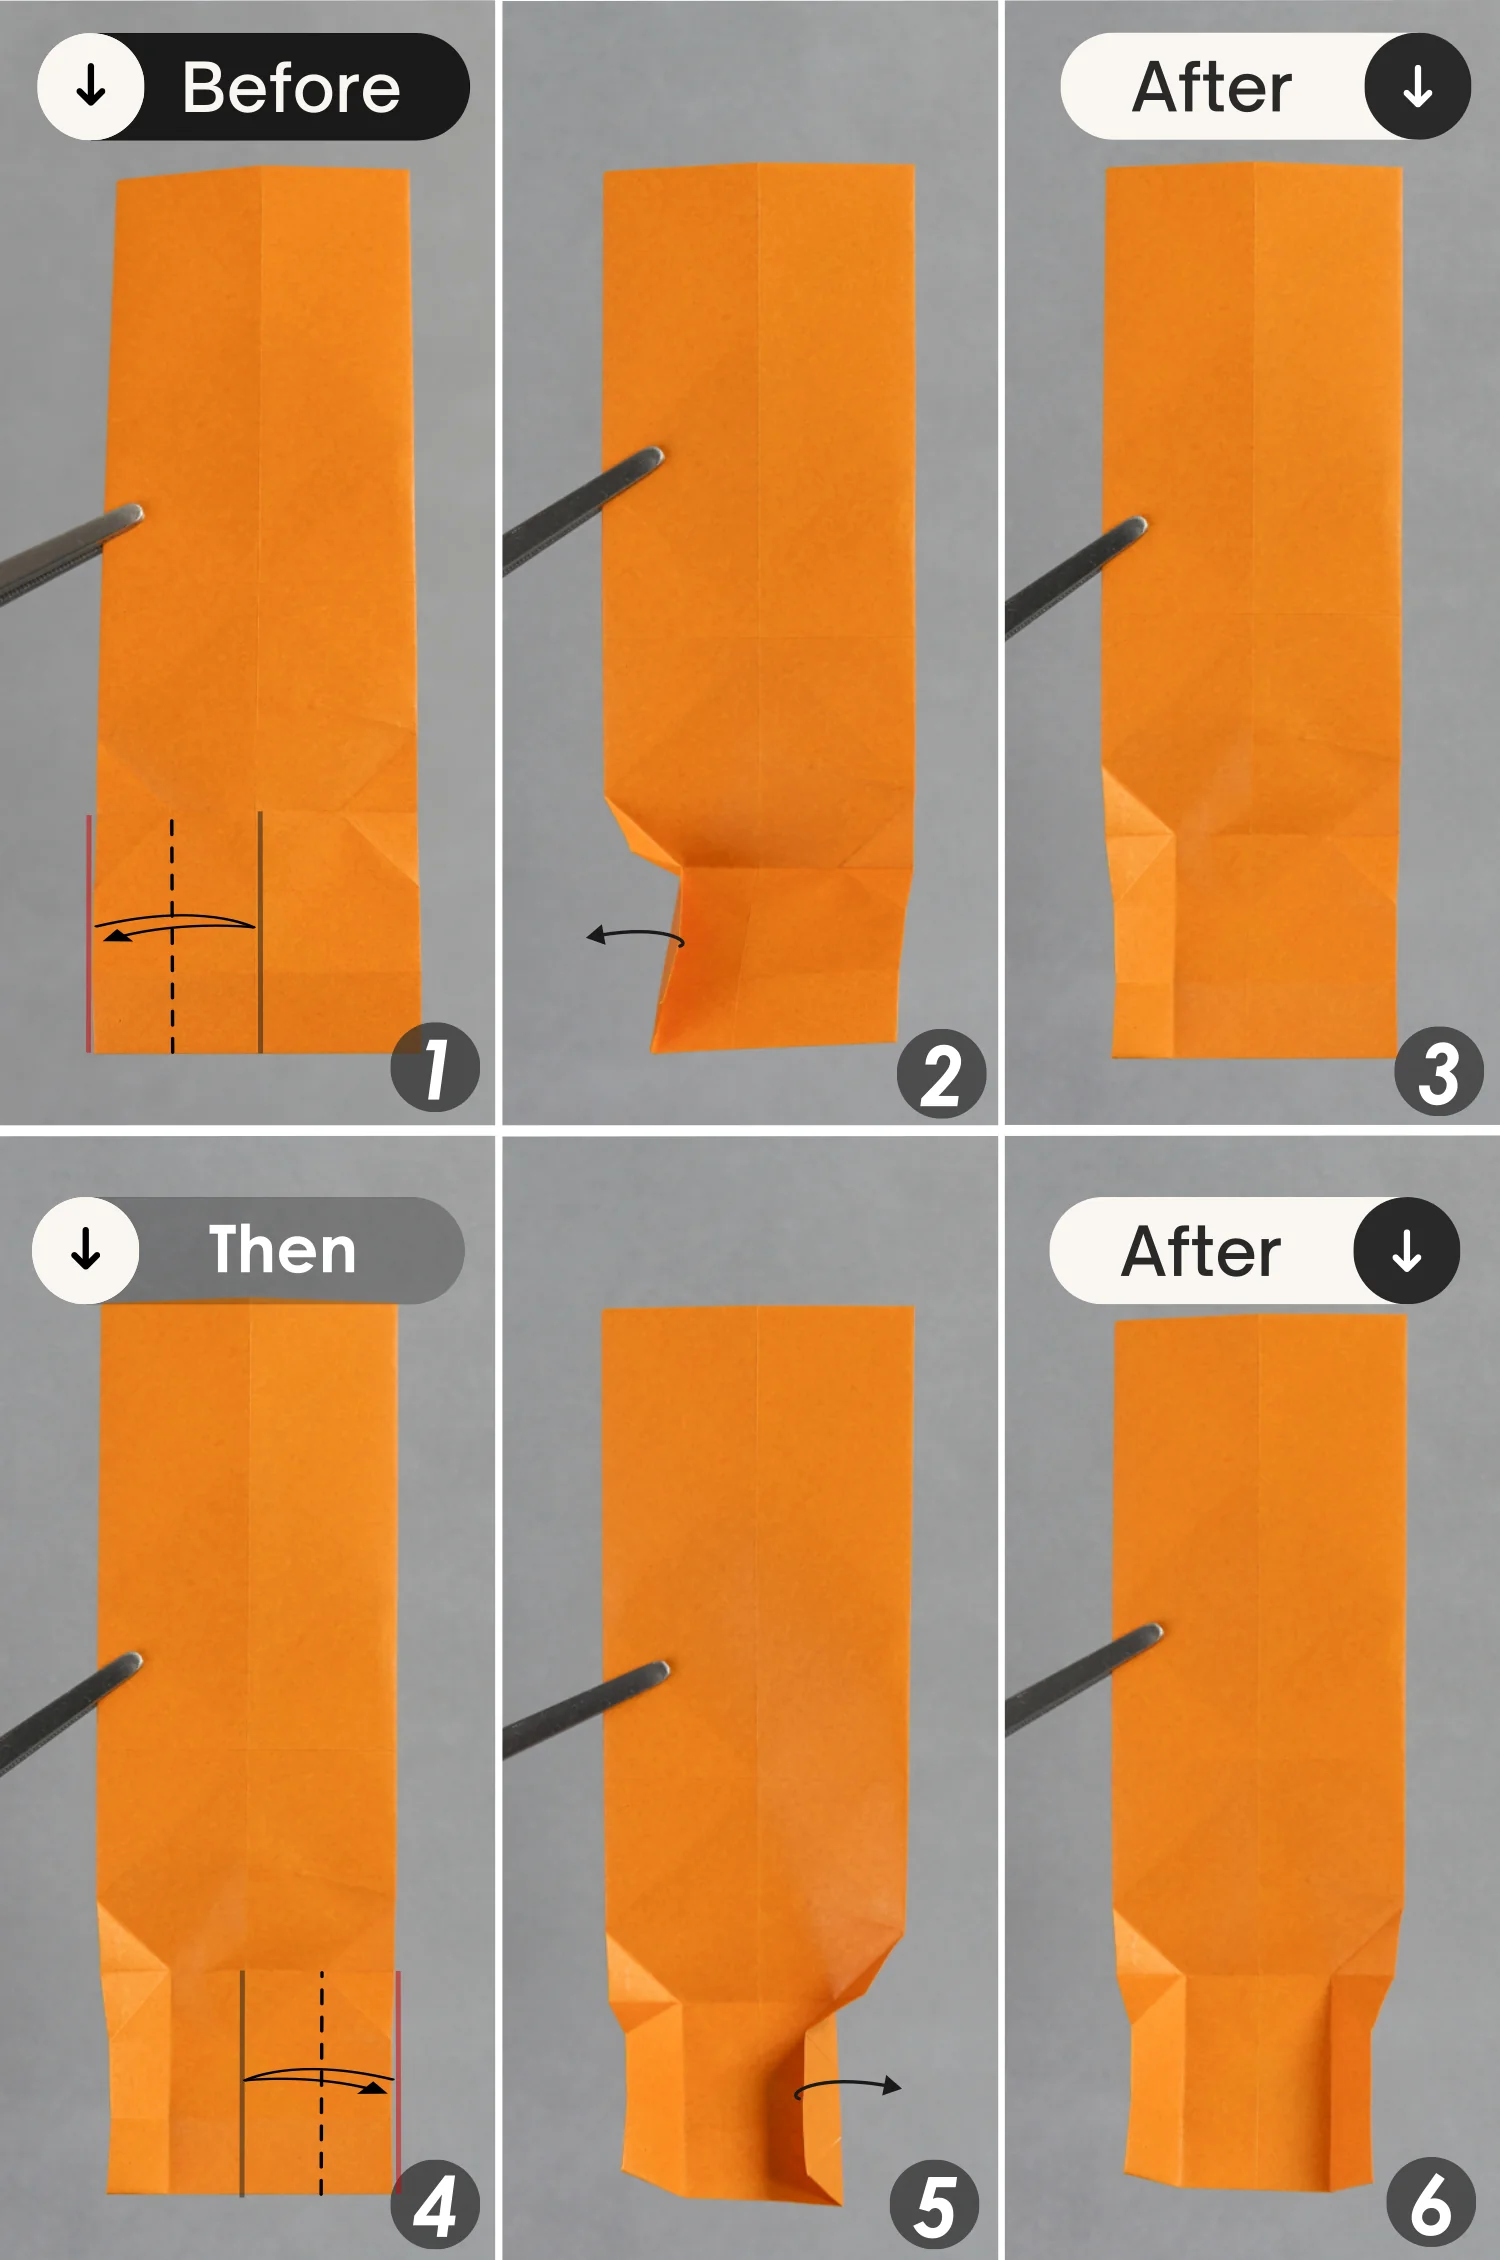
Step 13
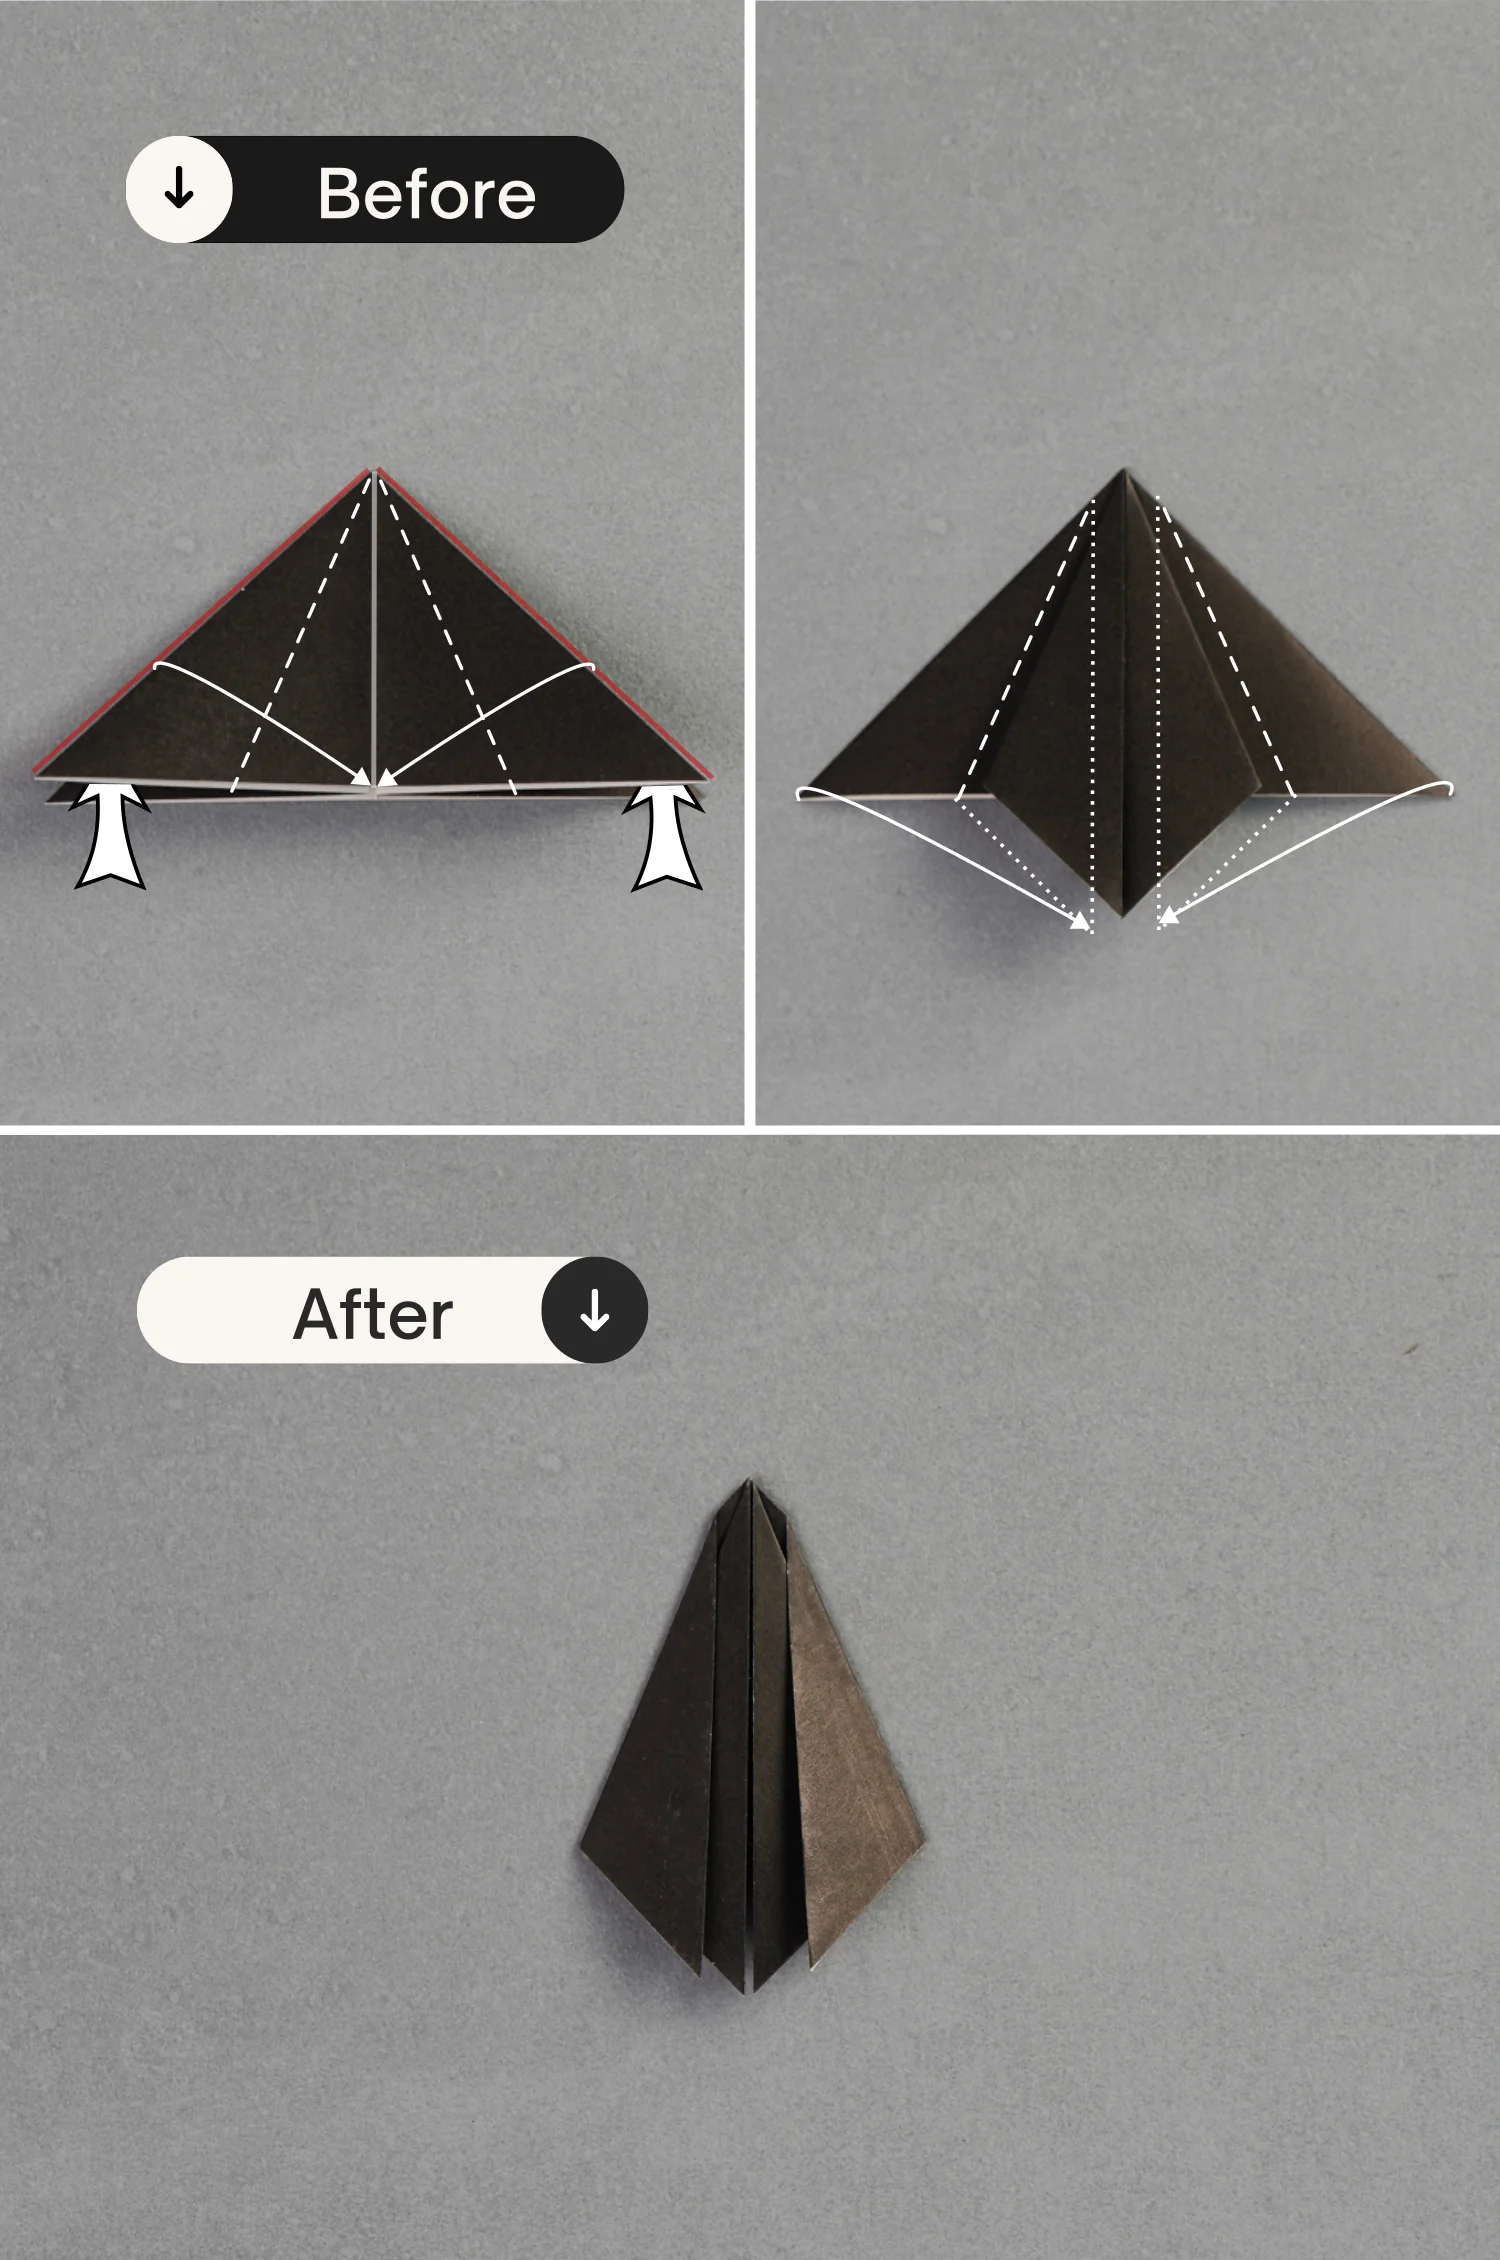
Bring up the bottom sections of the left and right edges along the existing creases, then lift the bottom part of the paper, and finally, flatten the fold.
Step 14
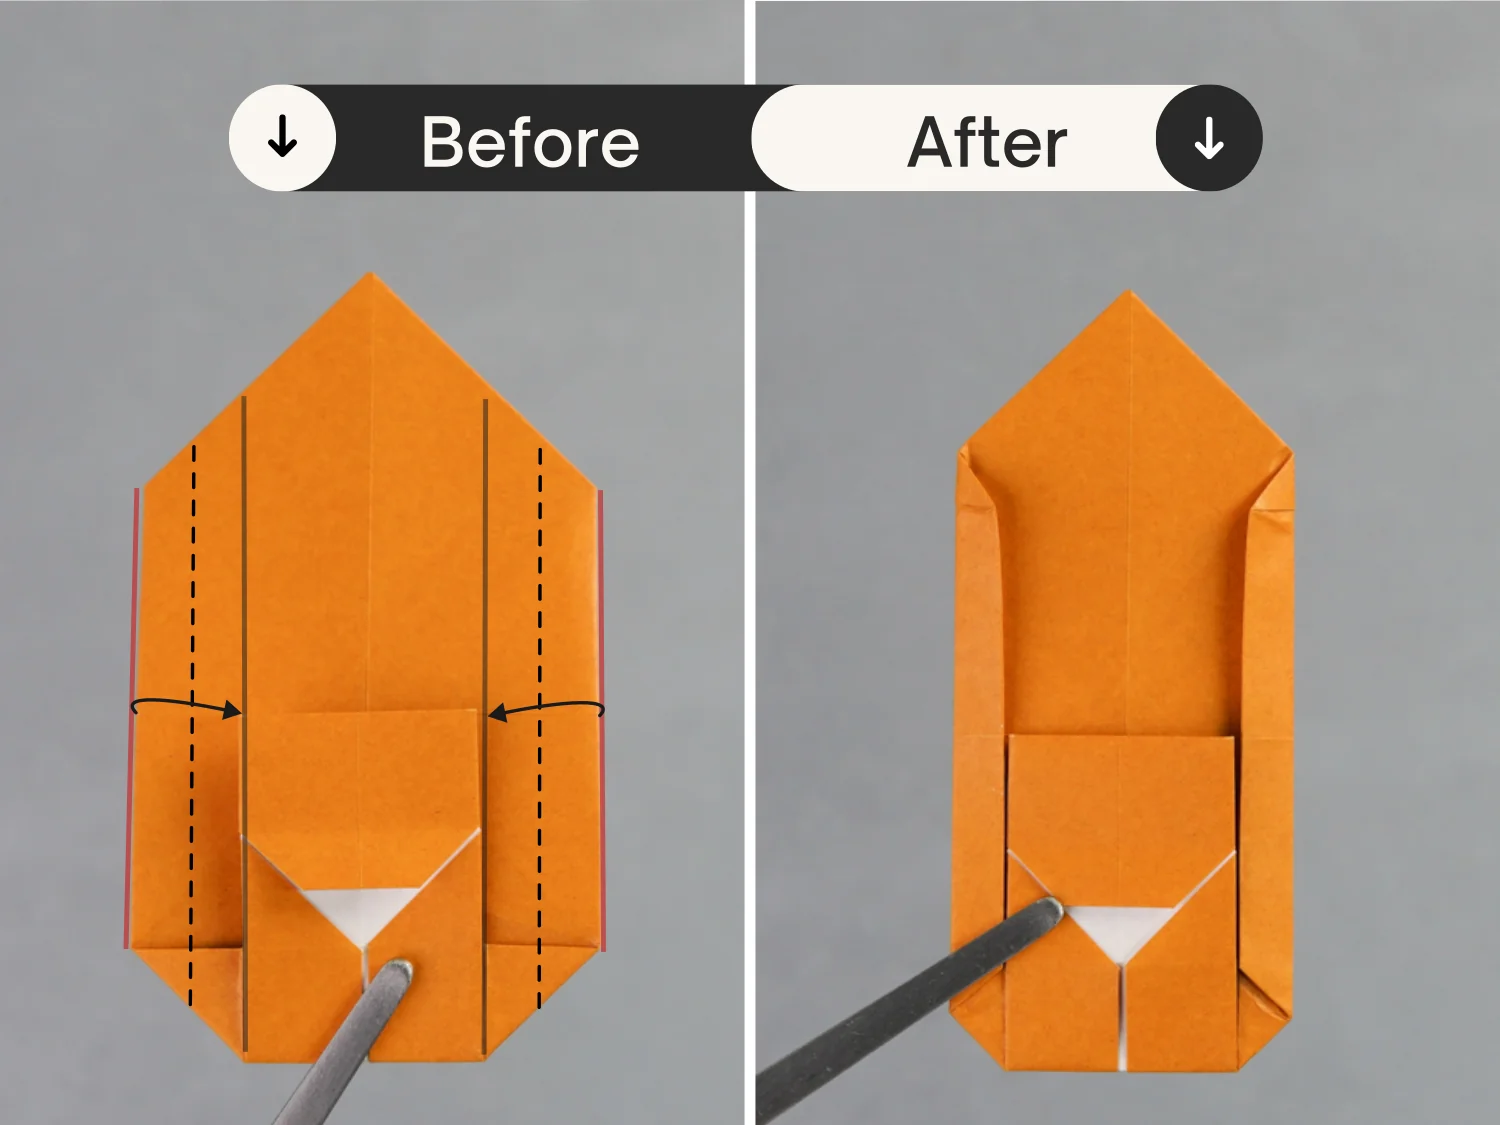
Turn over the paper from left to right.
Step 15
Fold the top edge to align with the right edge, leaving a crease, and unfold it. Then, fold the top edge to align with the left edge and unfold it.
Step 16
Turn over the paper from left to right.
Step 17
Fold down the top edge along the dotted line, leaving a crease, and unfold it.
Step 18
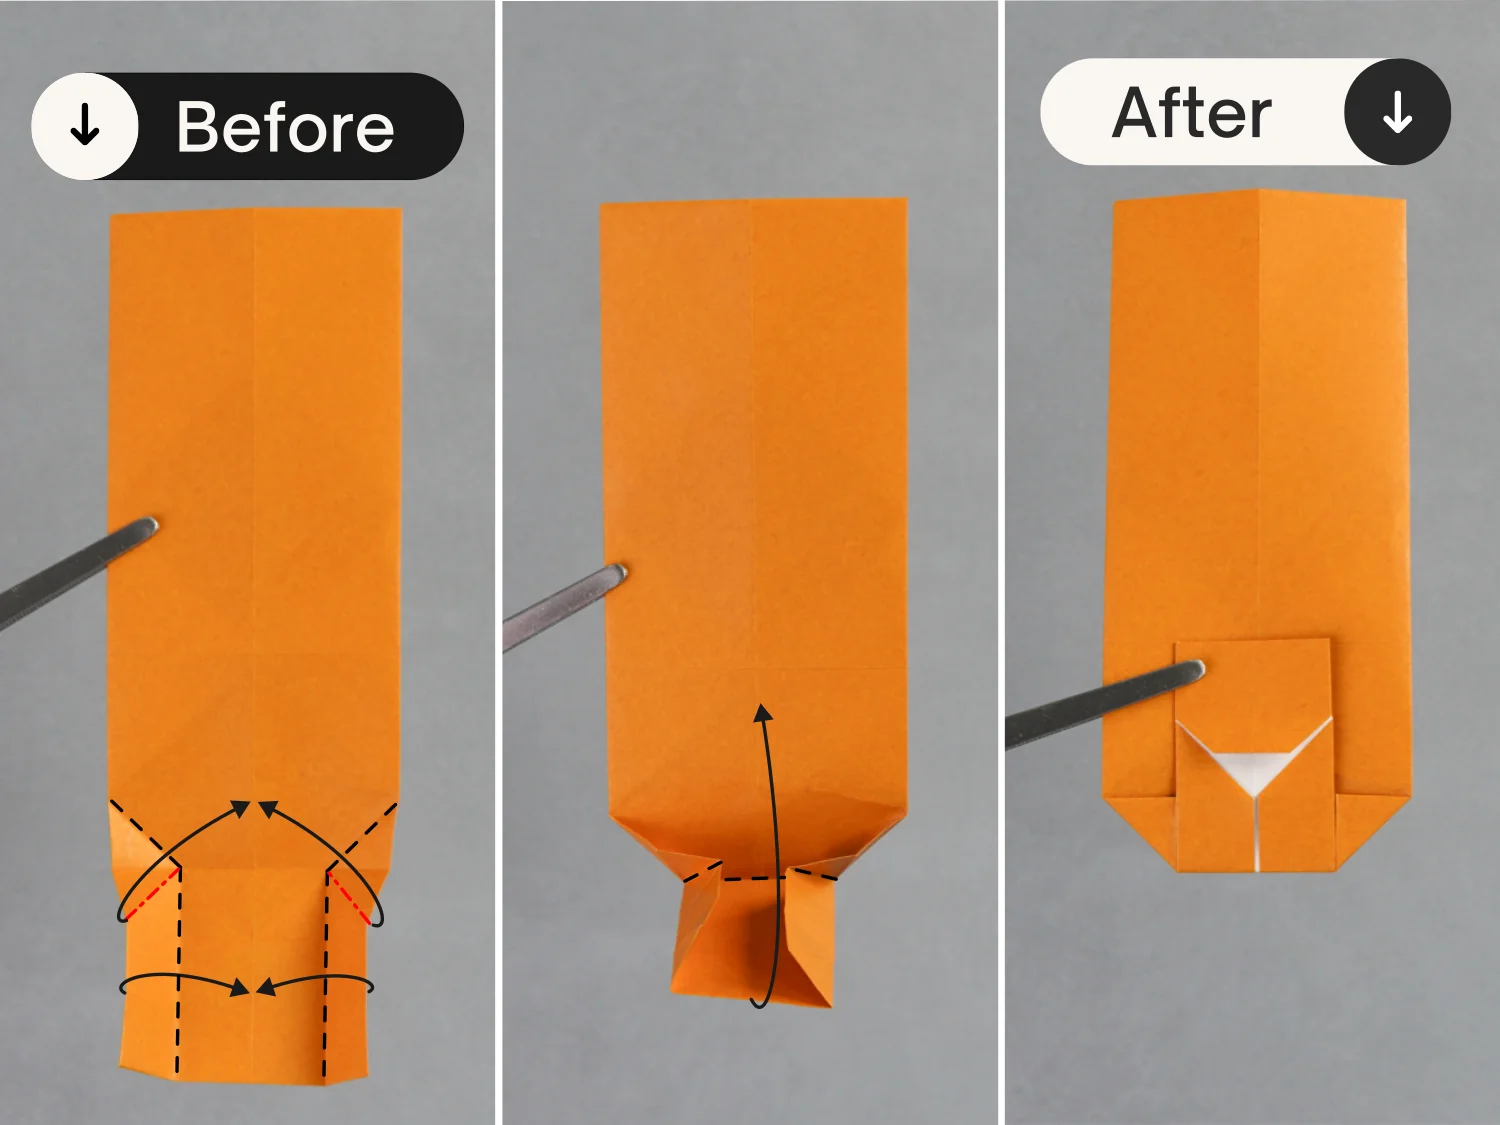
Flip the paper over from left to right, then fold the two horizontal creases indicated by the red dotted lines to align with the middle vertical crease, and finally, flatten the fold to get a triangle.
Step 19
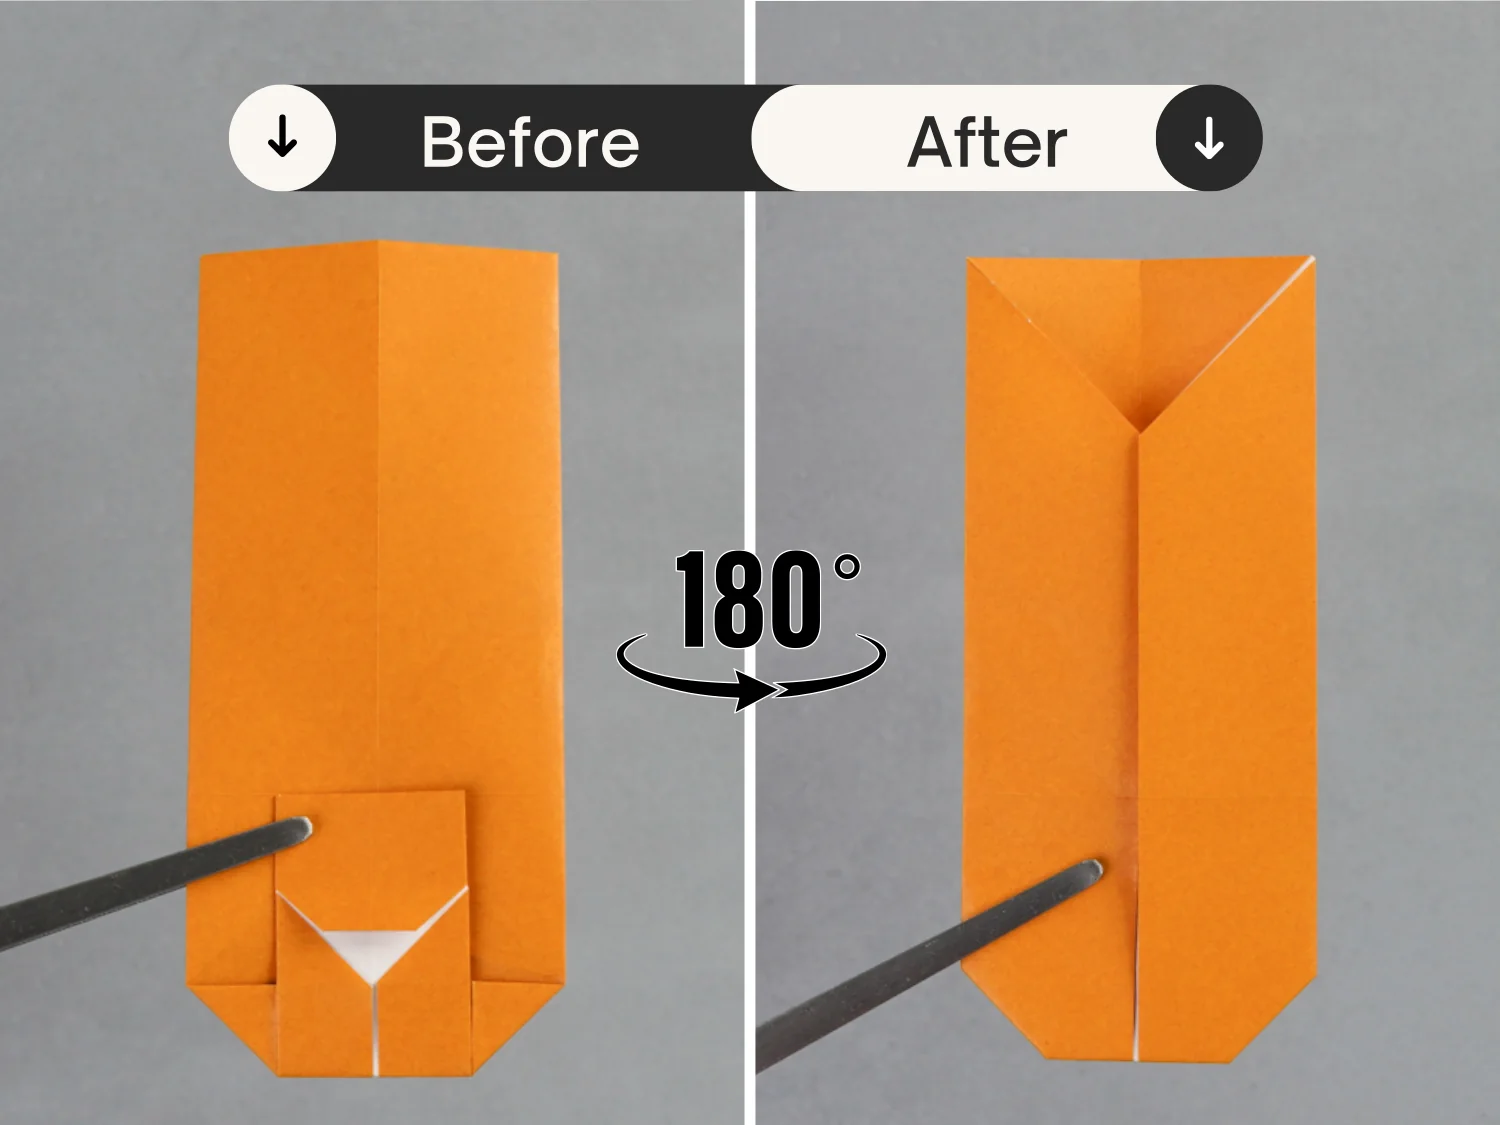
Fold the bottom left and right points to meet the midpoint of its bottom edge, then unfold them for 90 degrees to make them stand, and finally, squash them.

Step 20
Flip the paper over from left to right.
Step 21
Fold the left and right edges indicated by the red lines to align with the black lines.
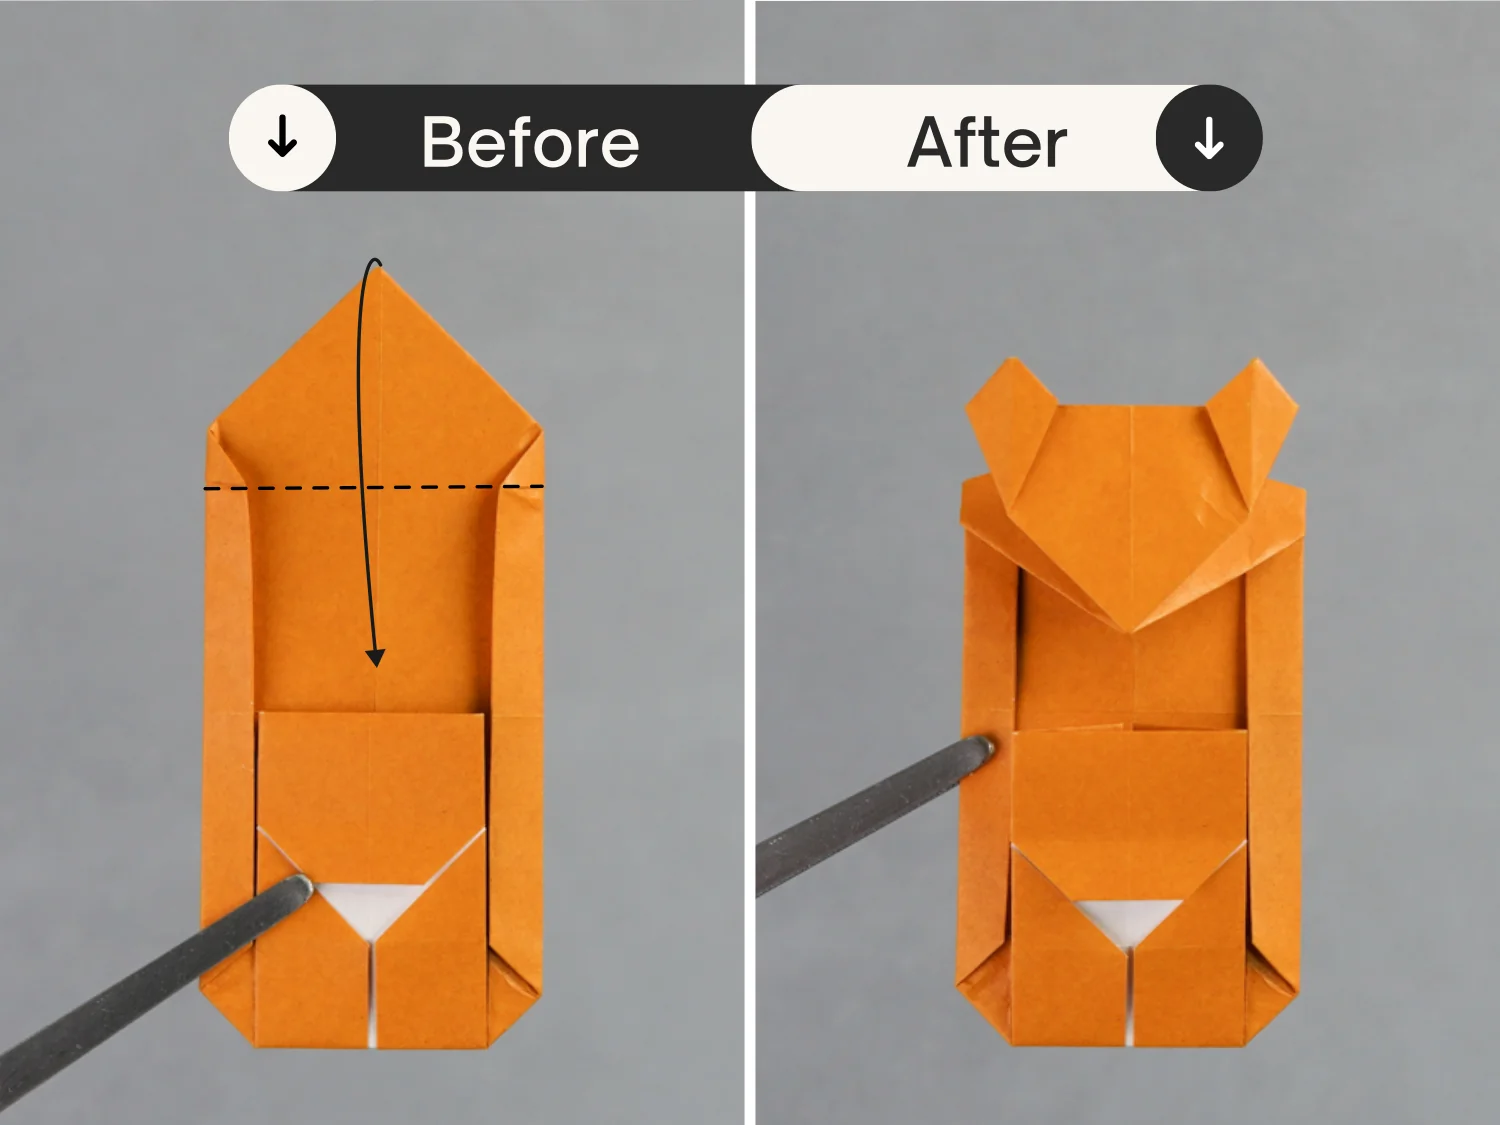
Step 22
Fold down the top part along the dotted line. This is the main part of the car.
Step 23
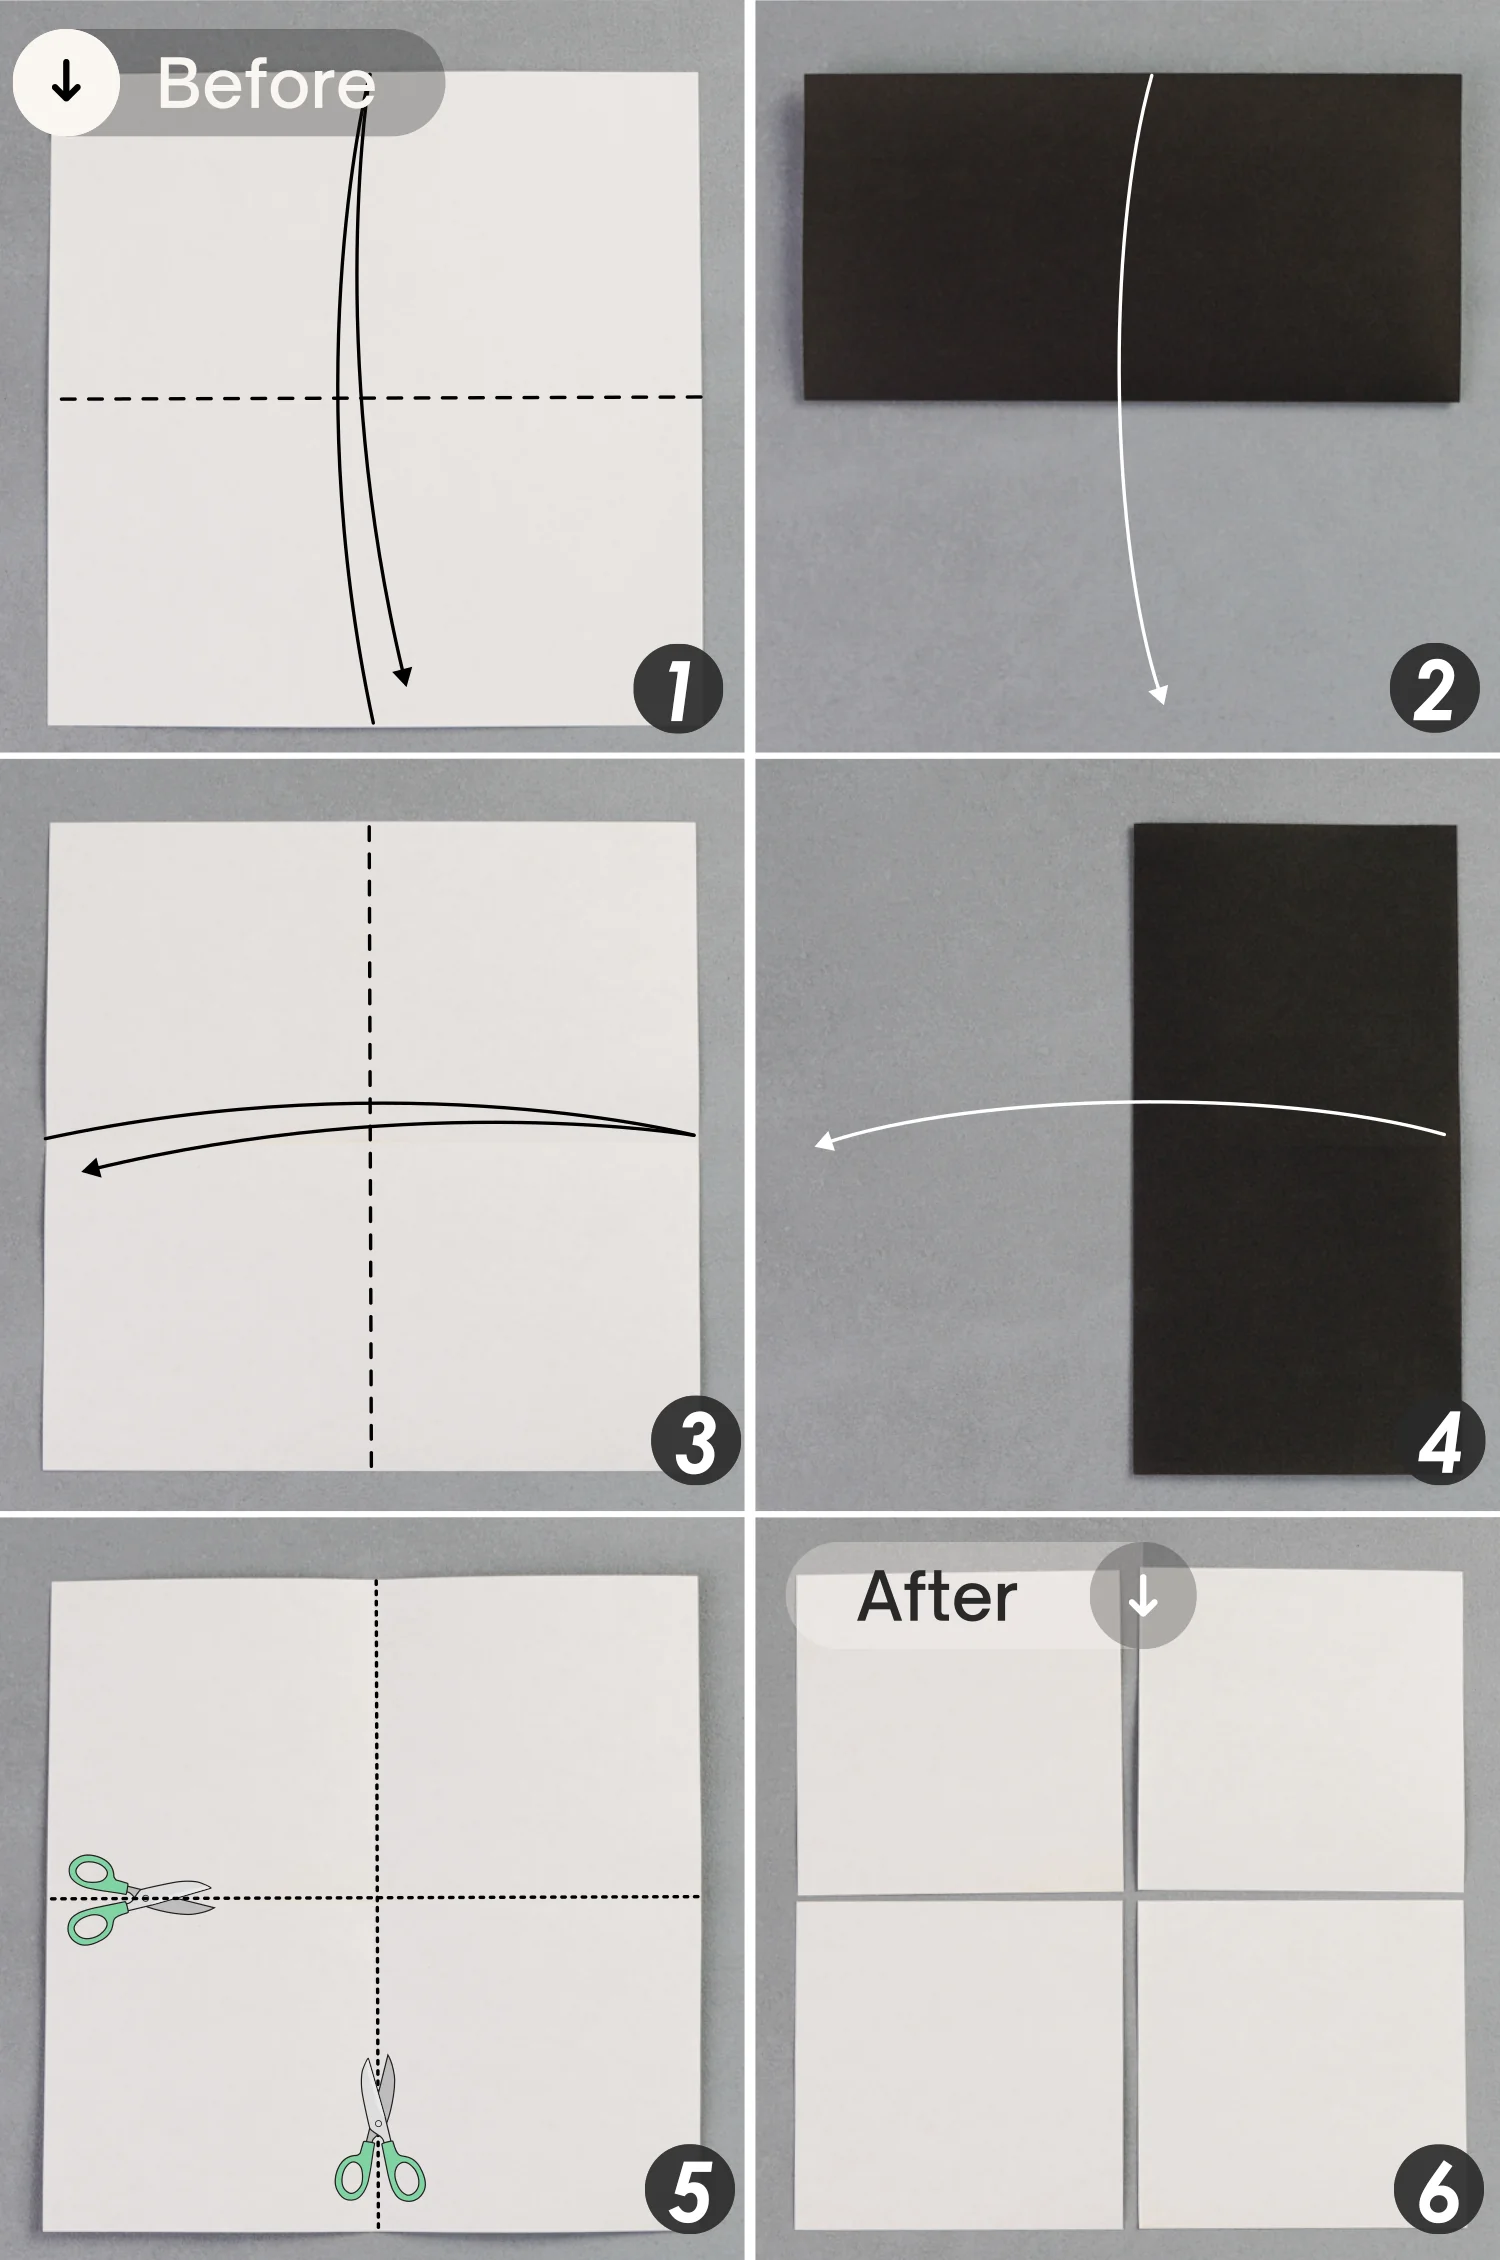
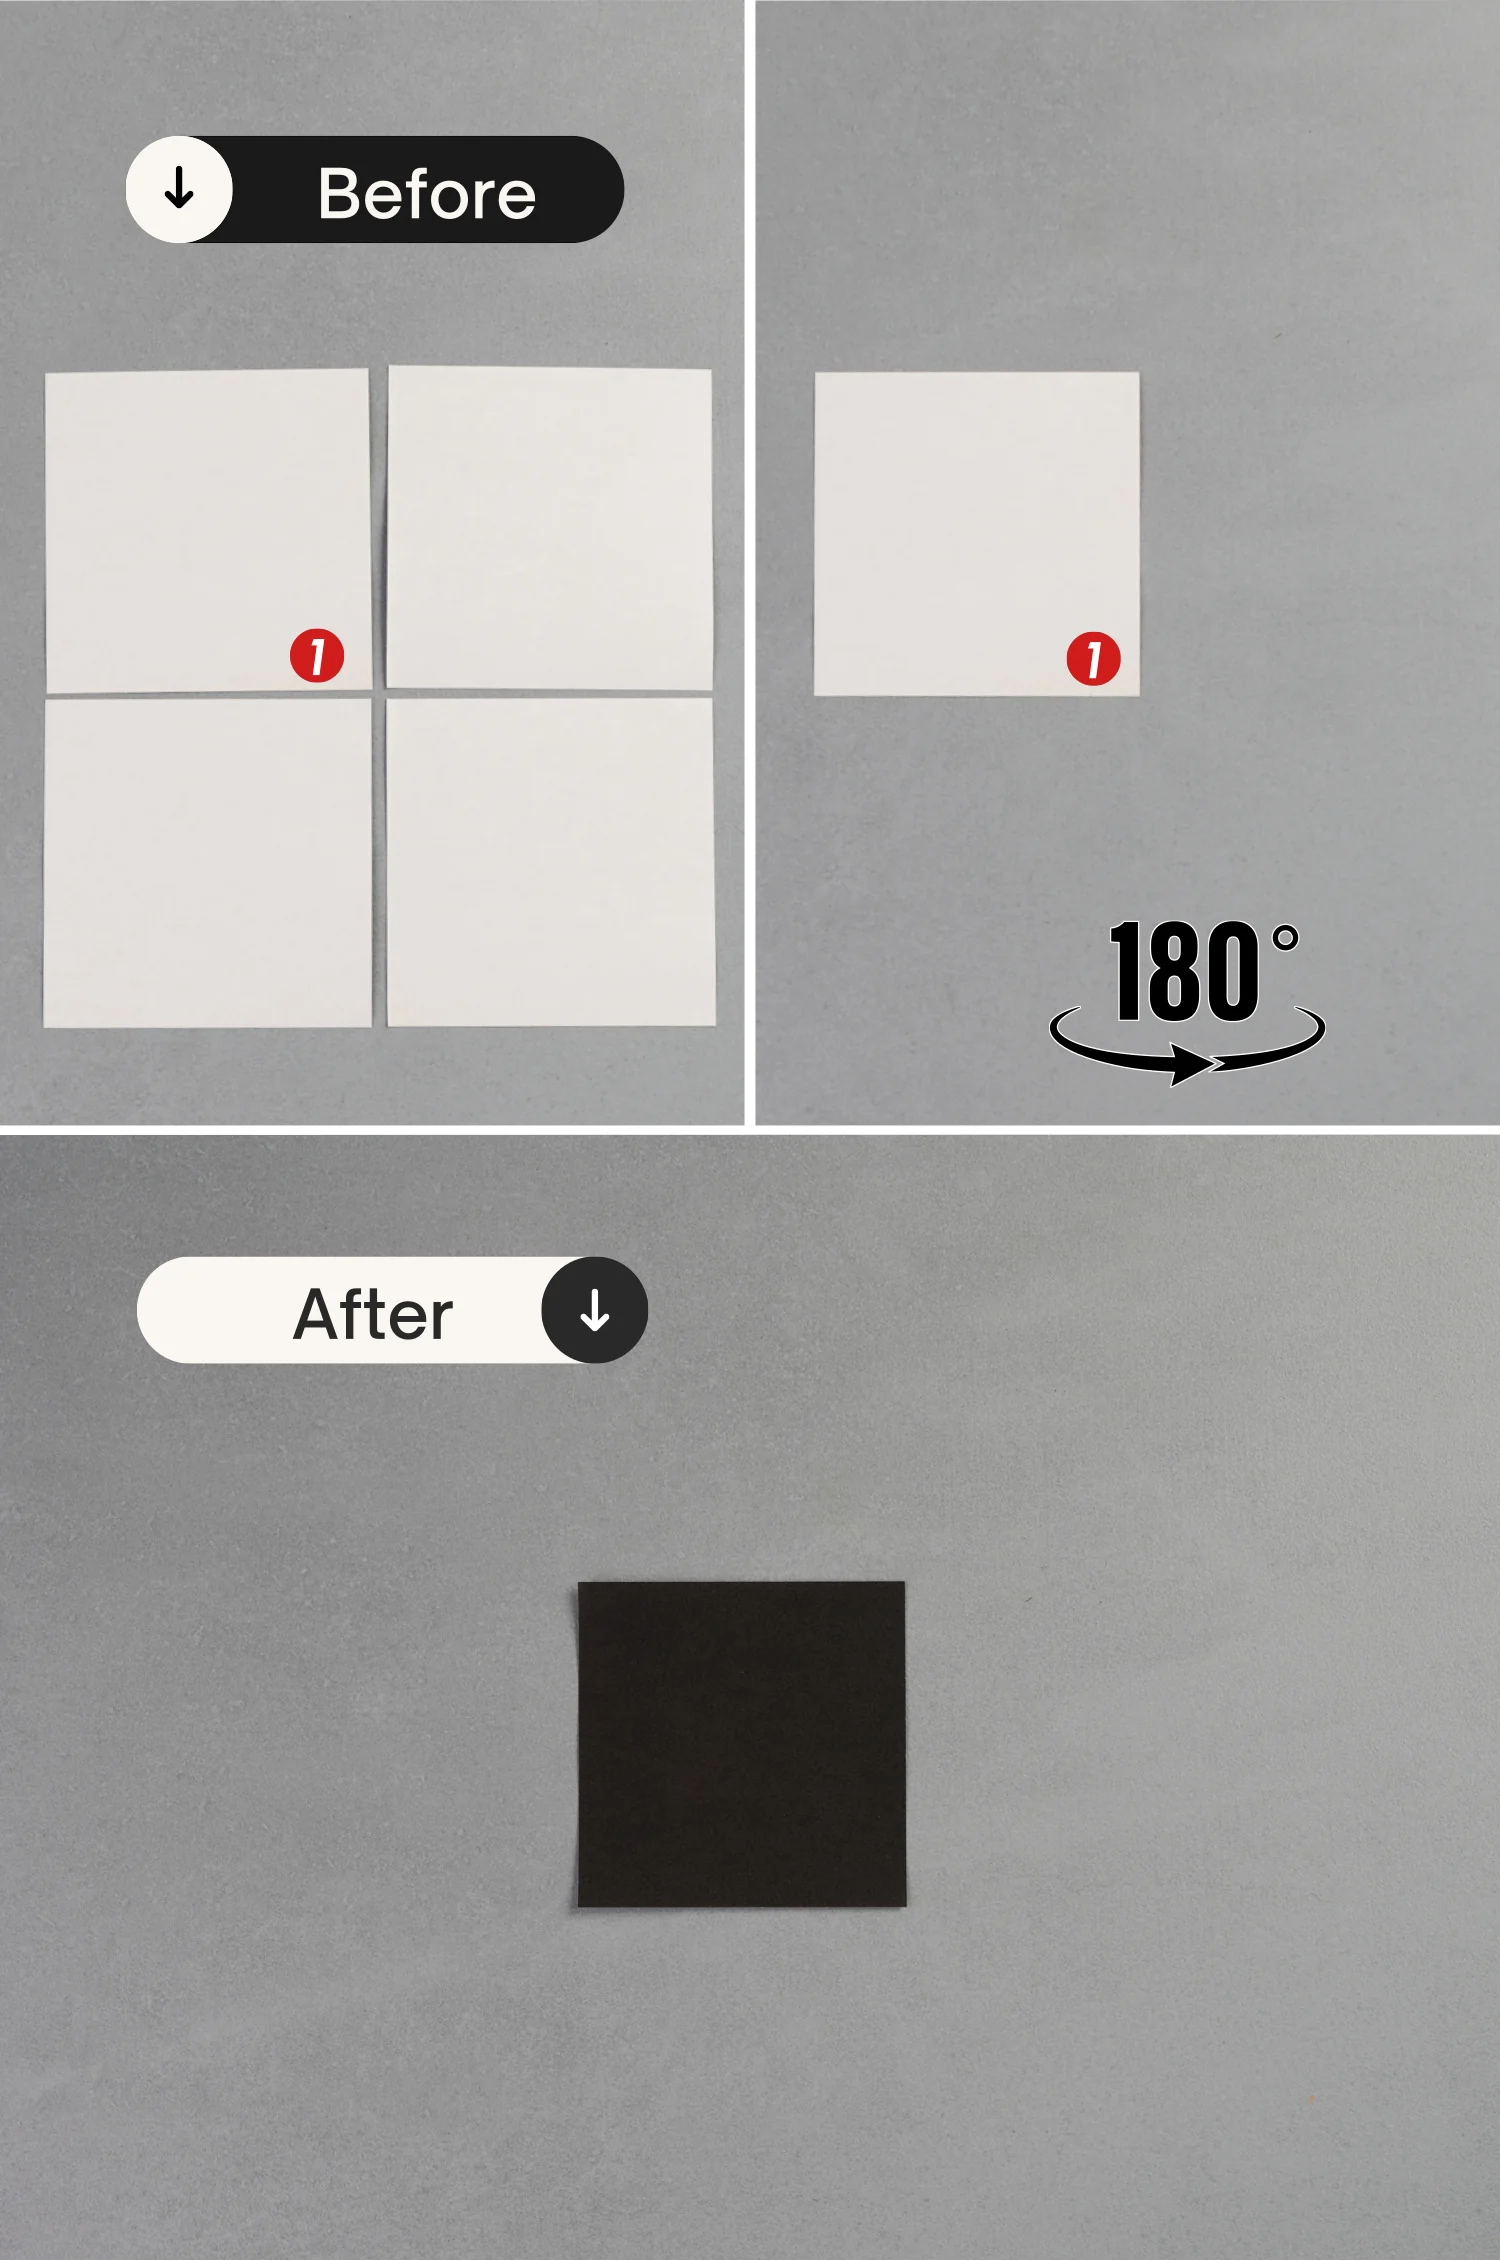
Take out the other piece of paper, we are going to create the rear wings.
Place it with the desired display color side down to begin folding, fold it horizontally and unfold it, and fold it vertically and unfold it to get two creases. Finally, cut the paper along the creases to get four small squares.
Step 24
Take out one of the small squares we marked No.1, and flip it over from left to right to make the desired display side face up.
Step 25
Fold it in half horizontally, leaving a crease, and unfold it. Then, fold it in half vertically, and unfold it. Finally, flip the paper over from left to right.
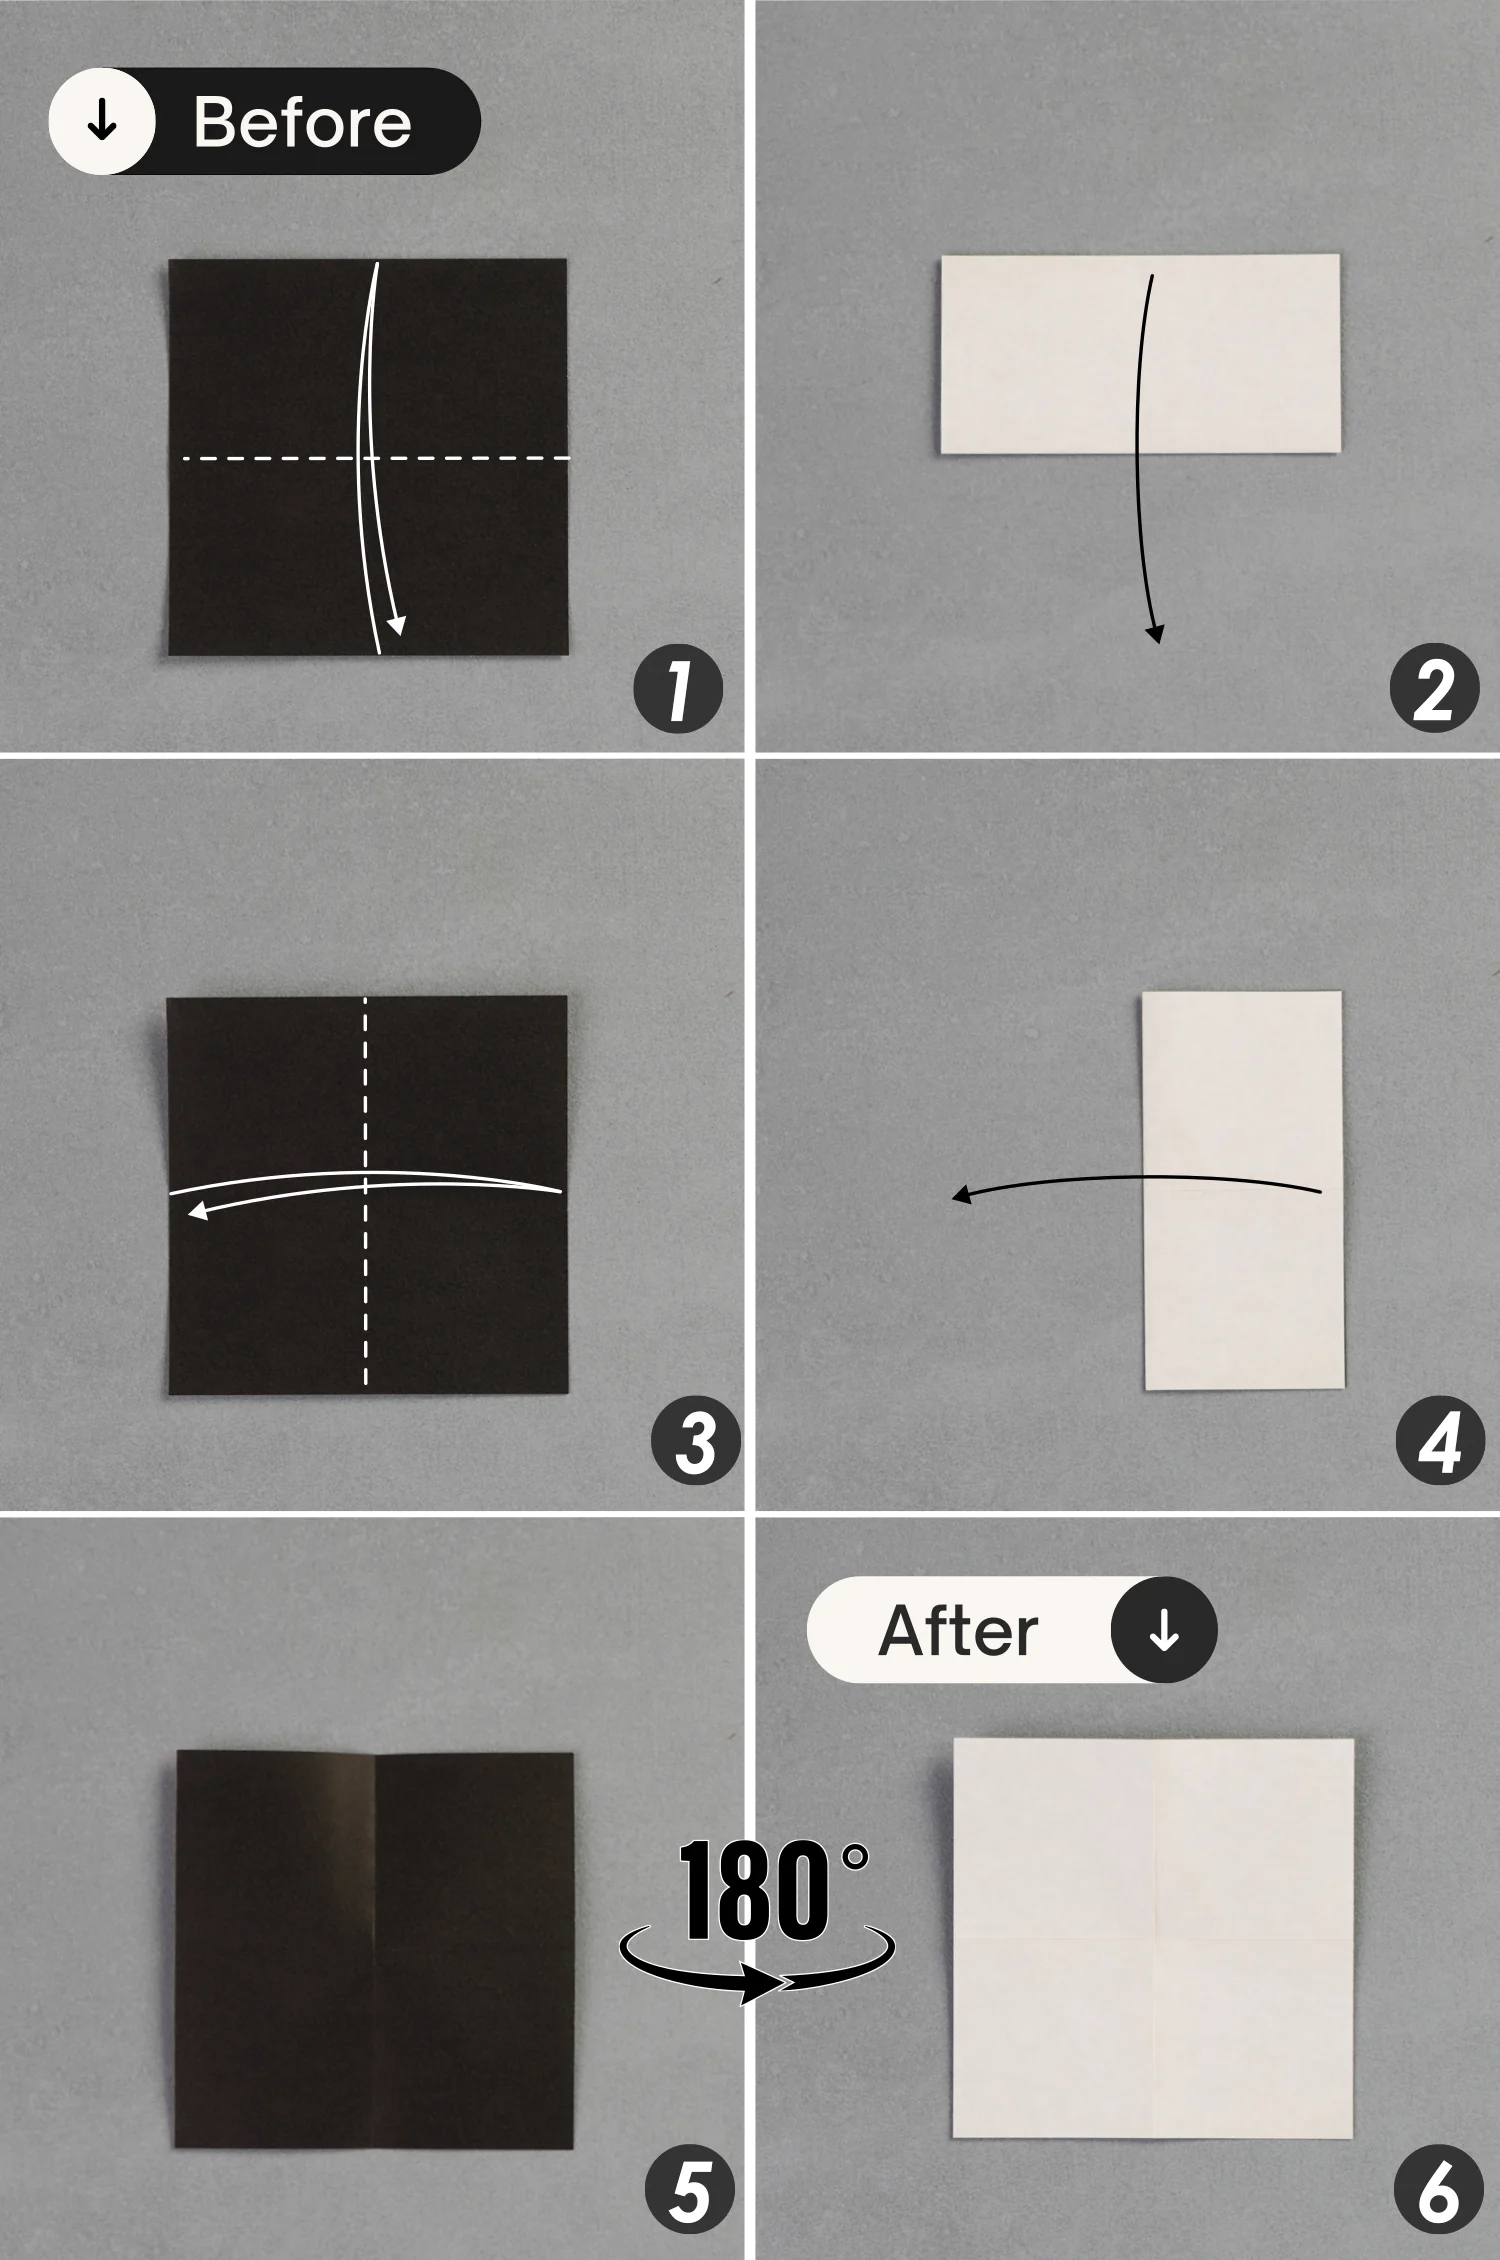
Step 26
Fold it in half diagonally and unfold it, then fold it in half diagonally from the other side and unfold it.
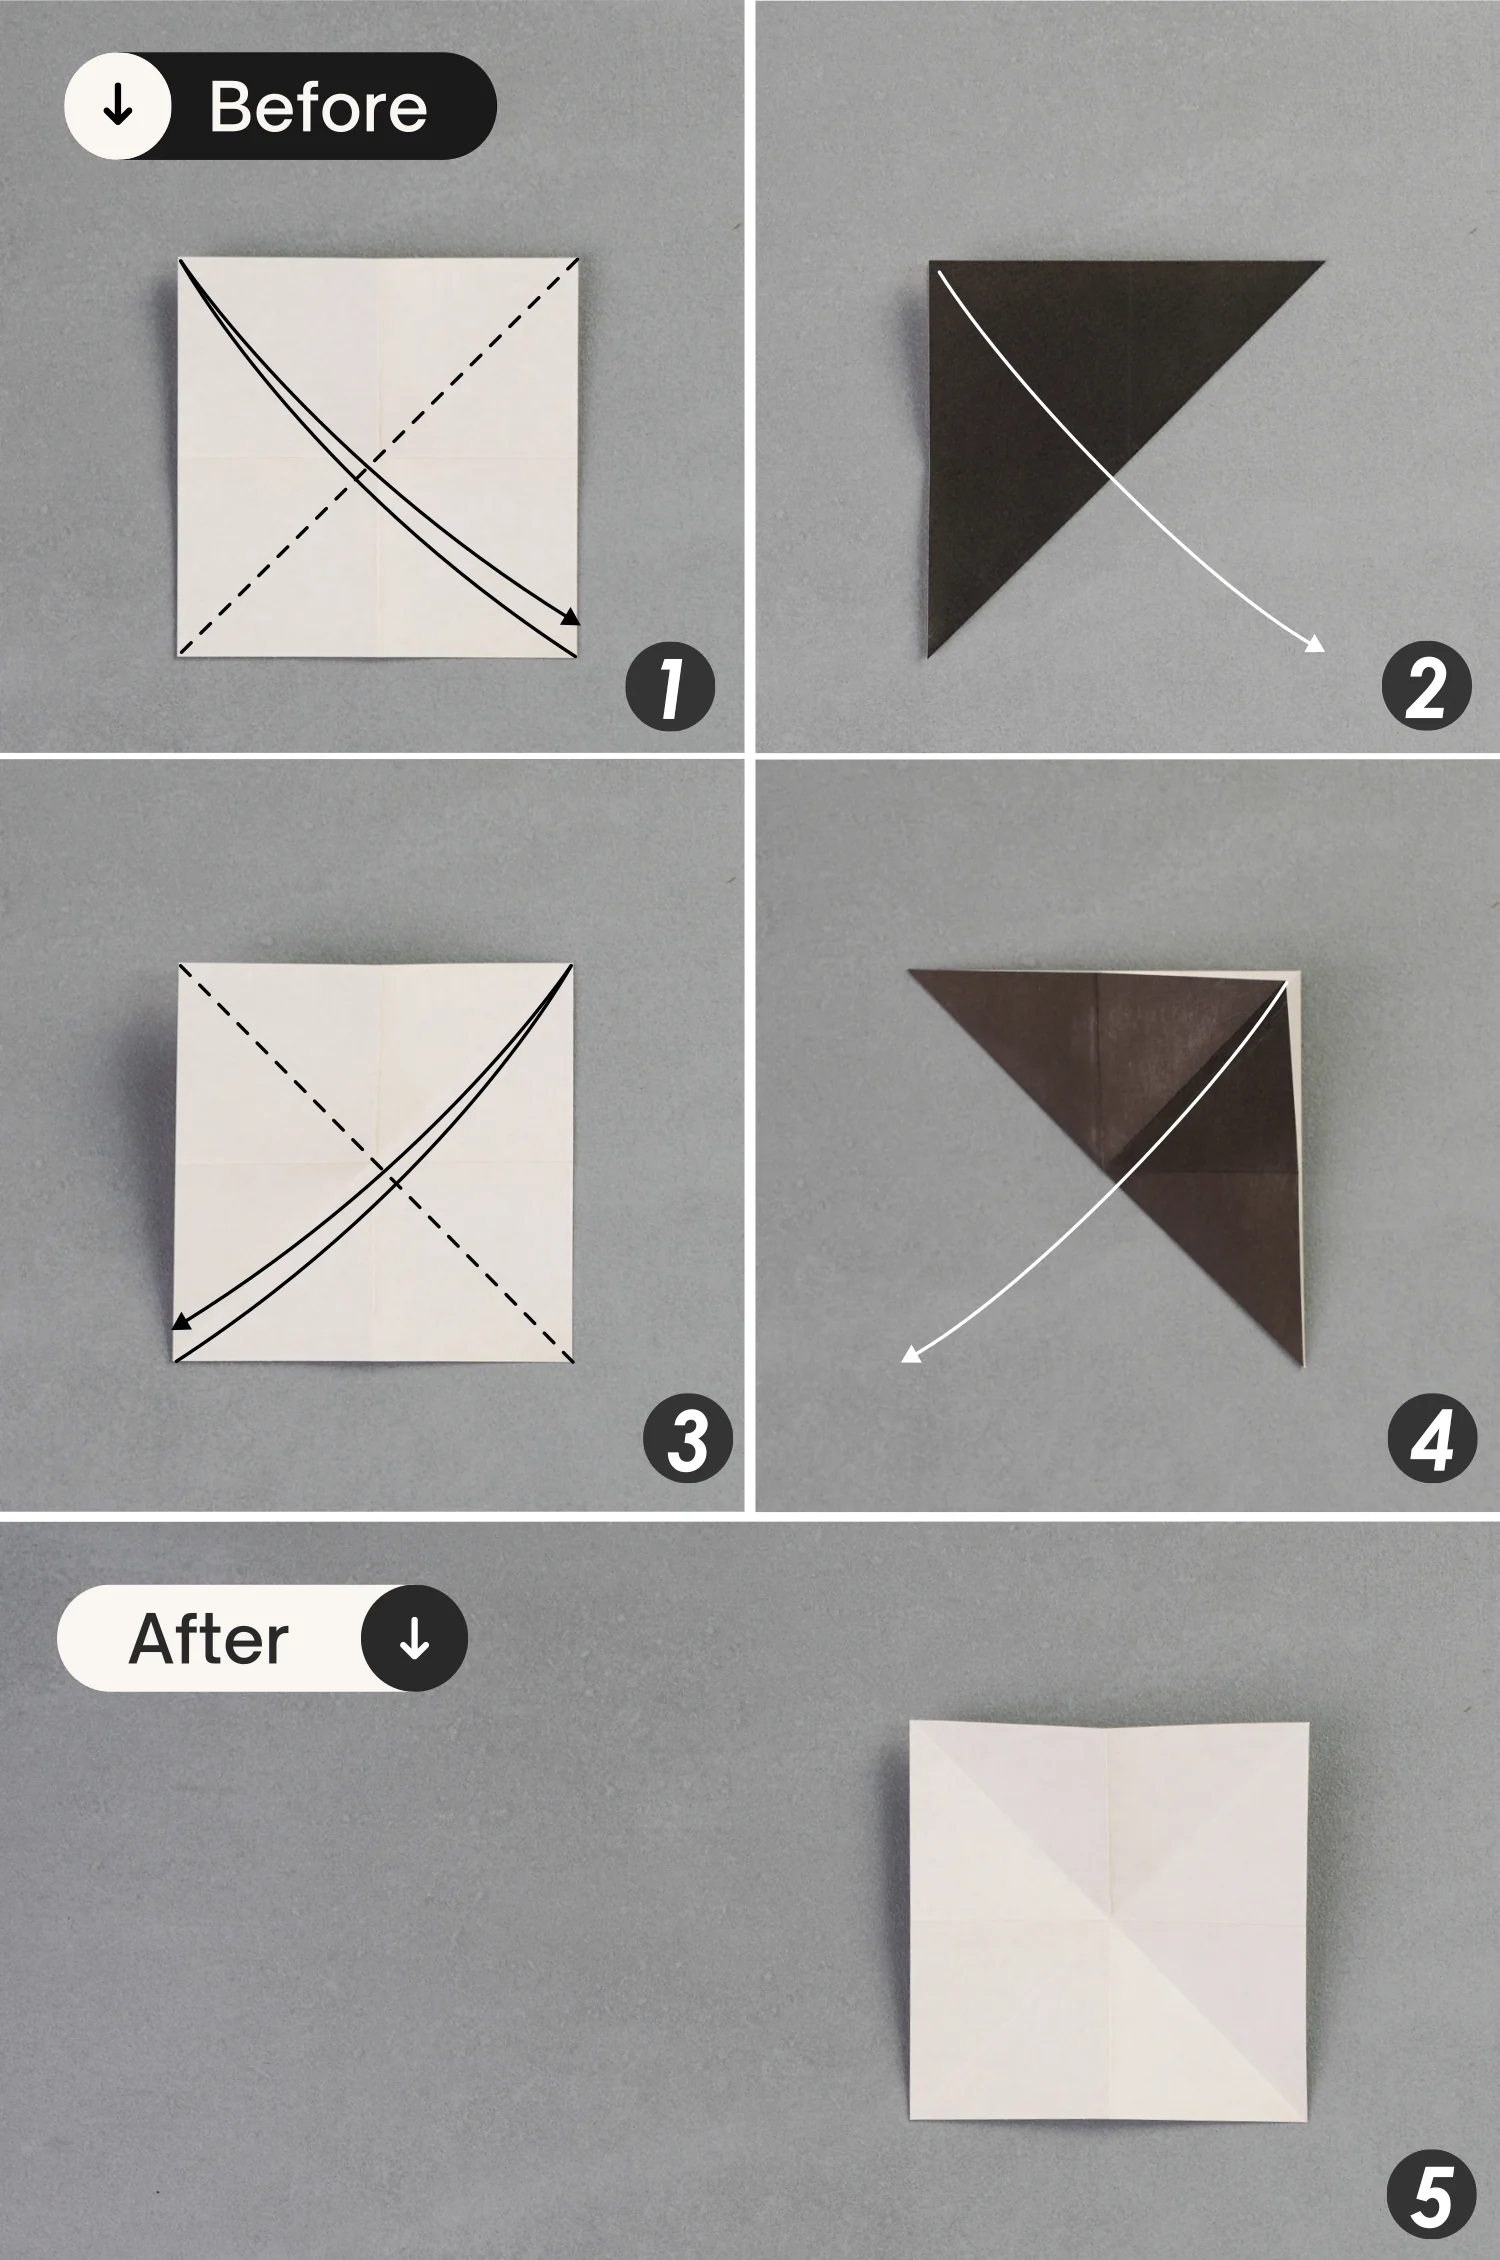
Step 27
Mountain fold the middle horizontal crease, then fold the midpoints of the left and right edges to meet the midpoint of the bottom edge. Flatten the fold to create a triangle.
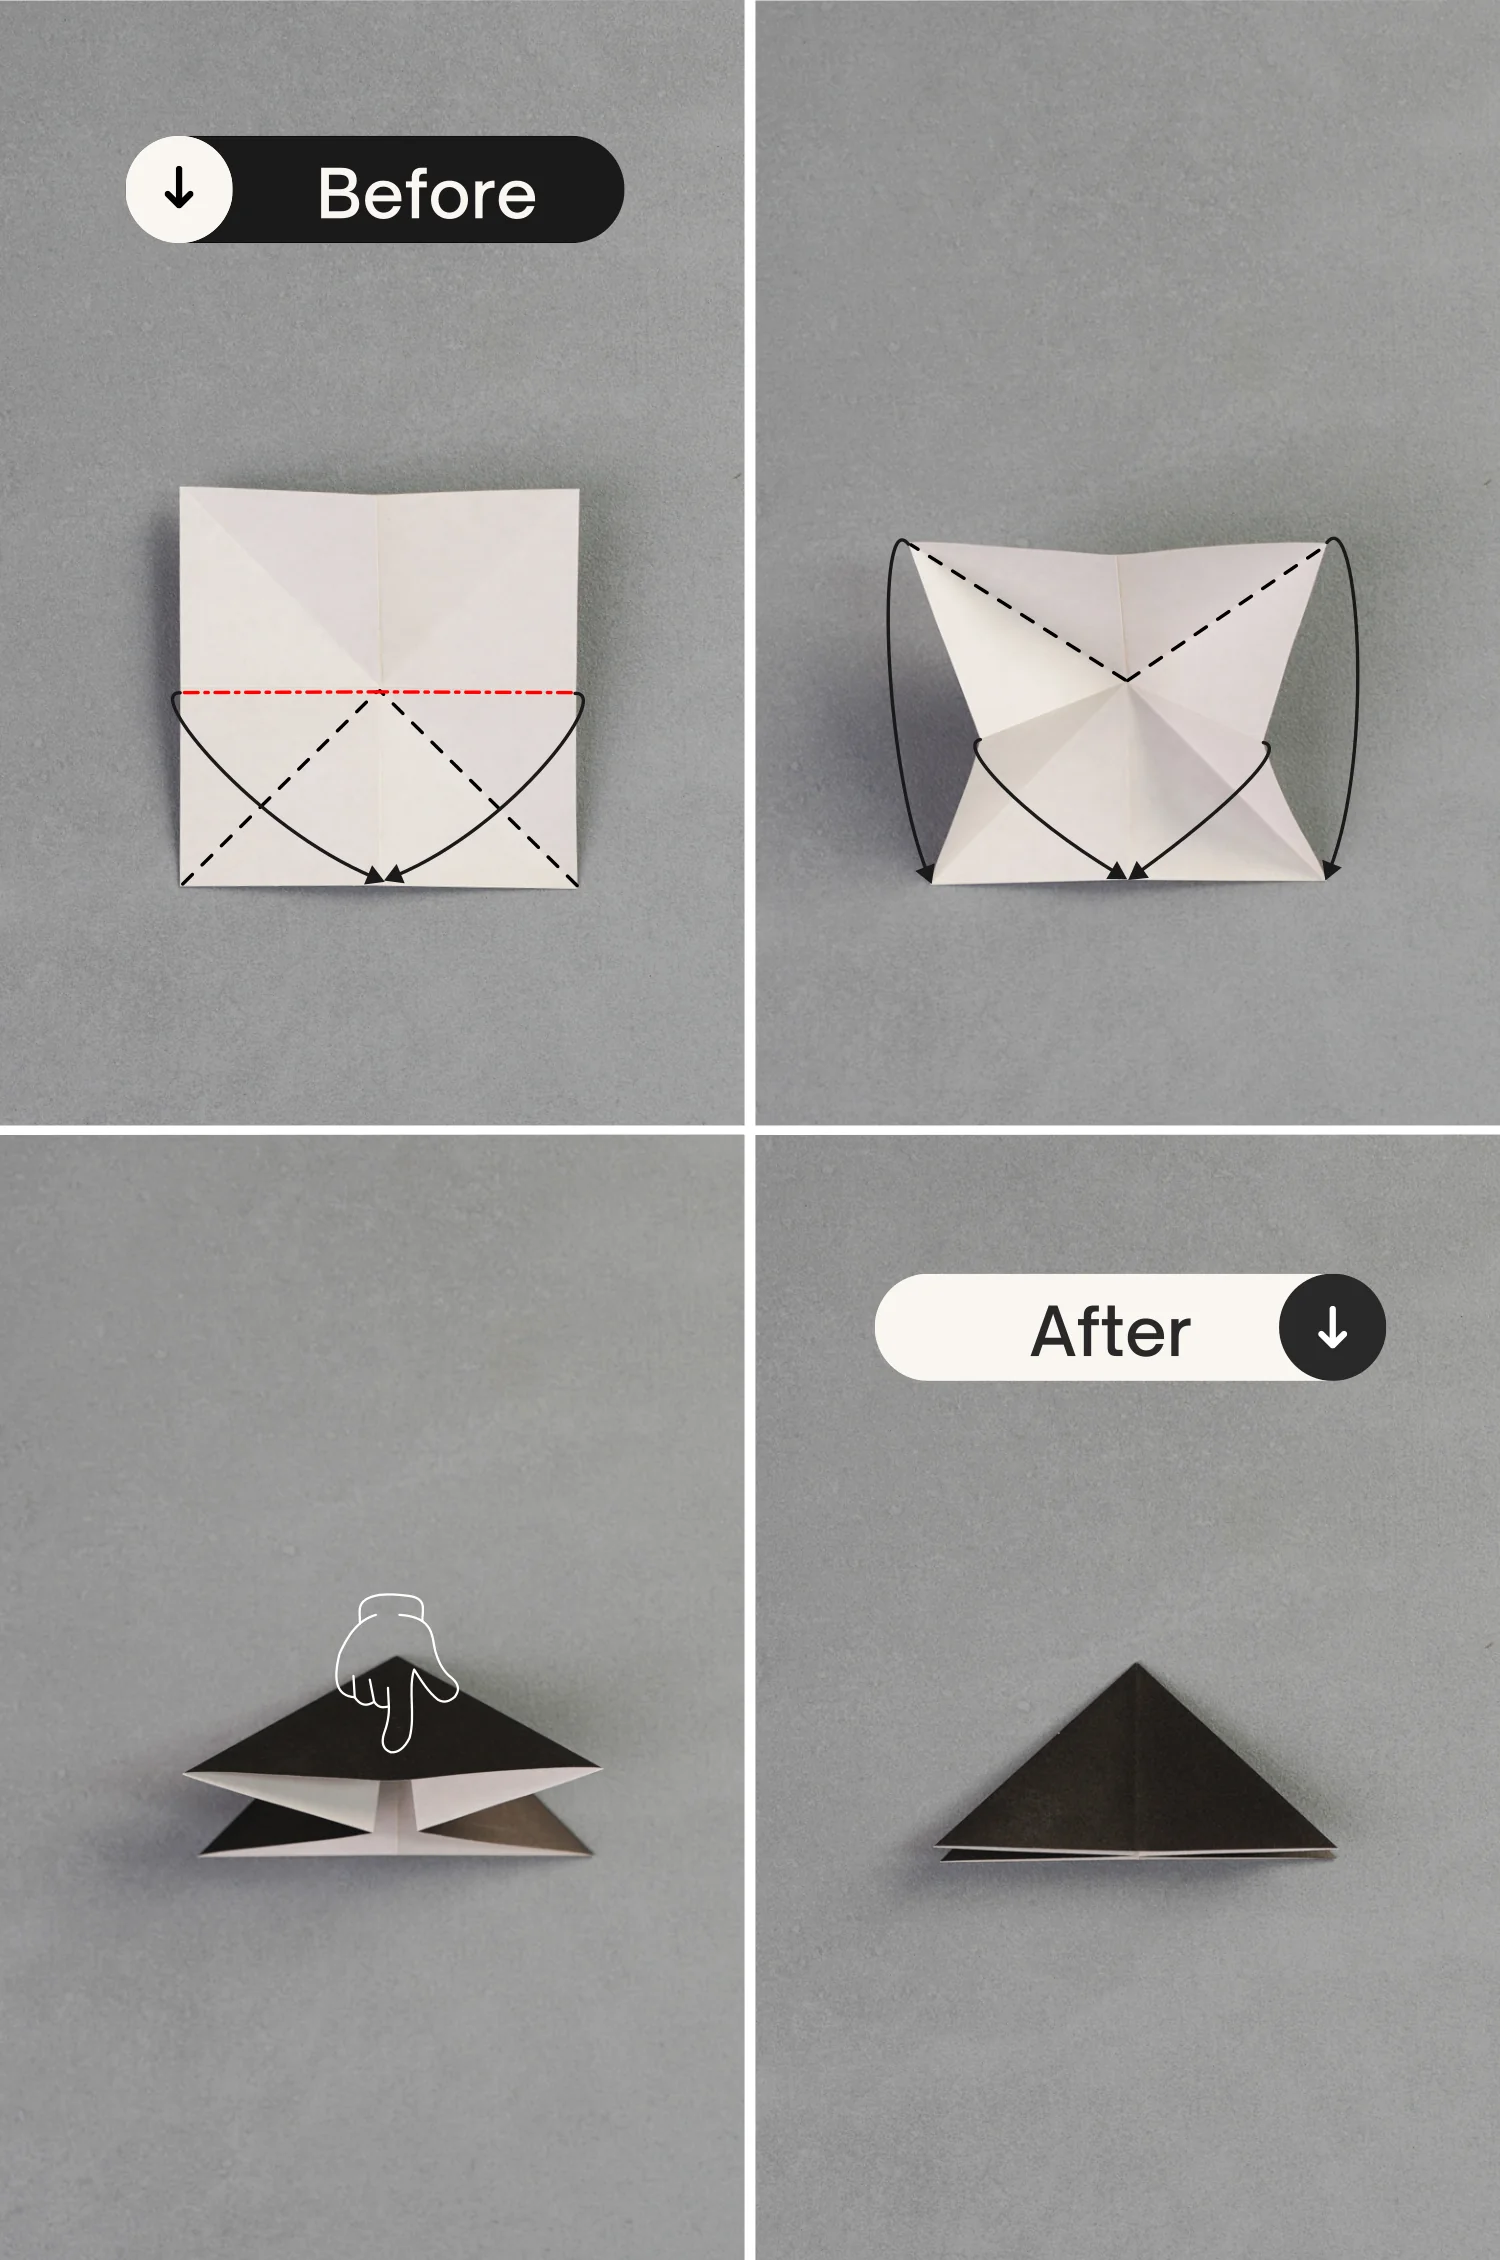
Step 28
Take the left and right edges of the front layer and fold them to align with the middle vertical crease.
Next, fold down the left and right edges of the back layer.
Step 29
Snap the bottom of the rear wing together with the lower part of the car part.
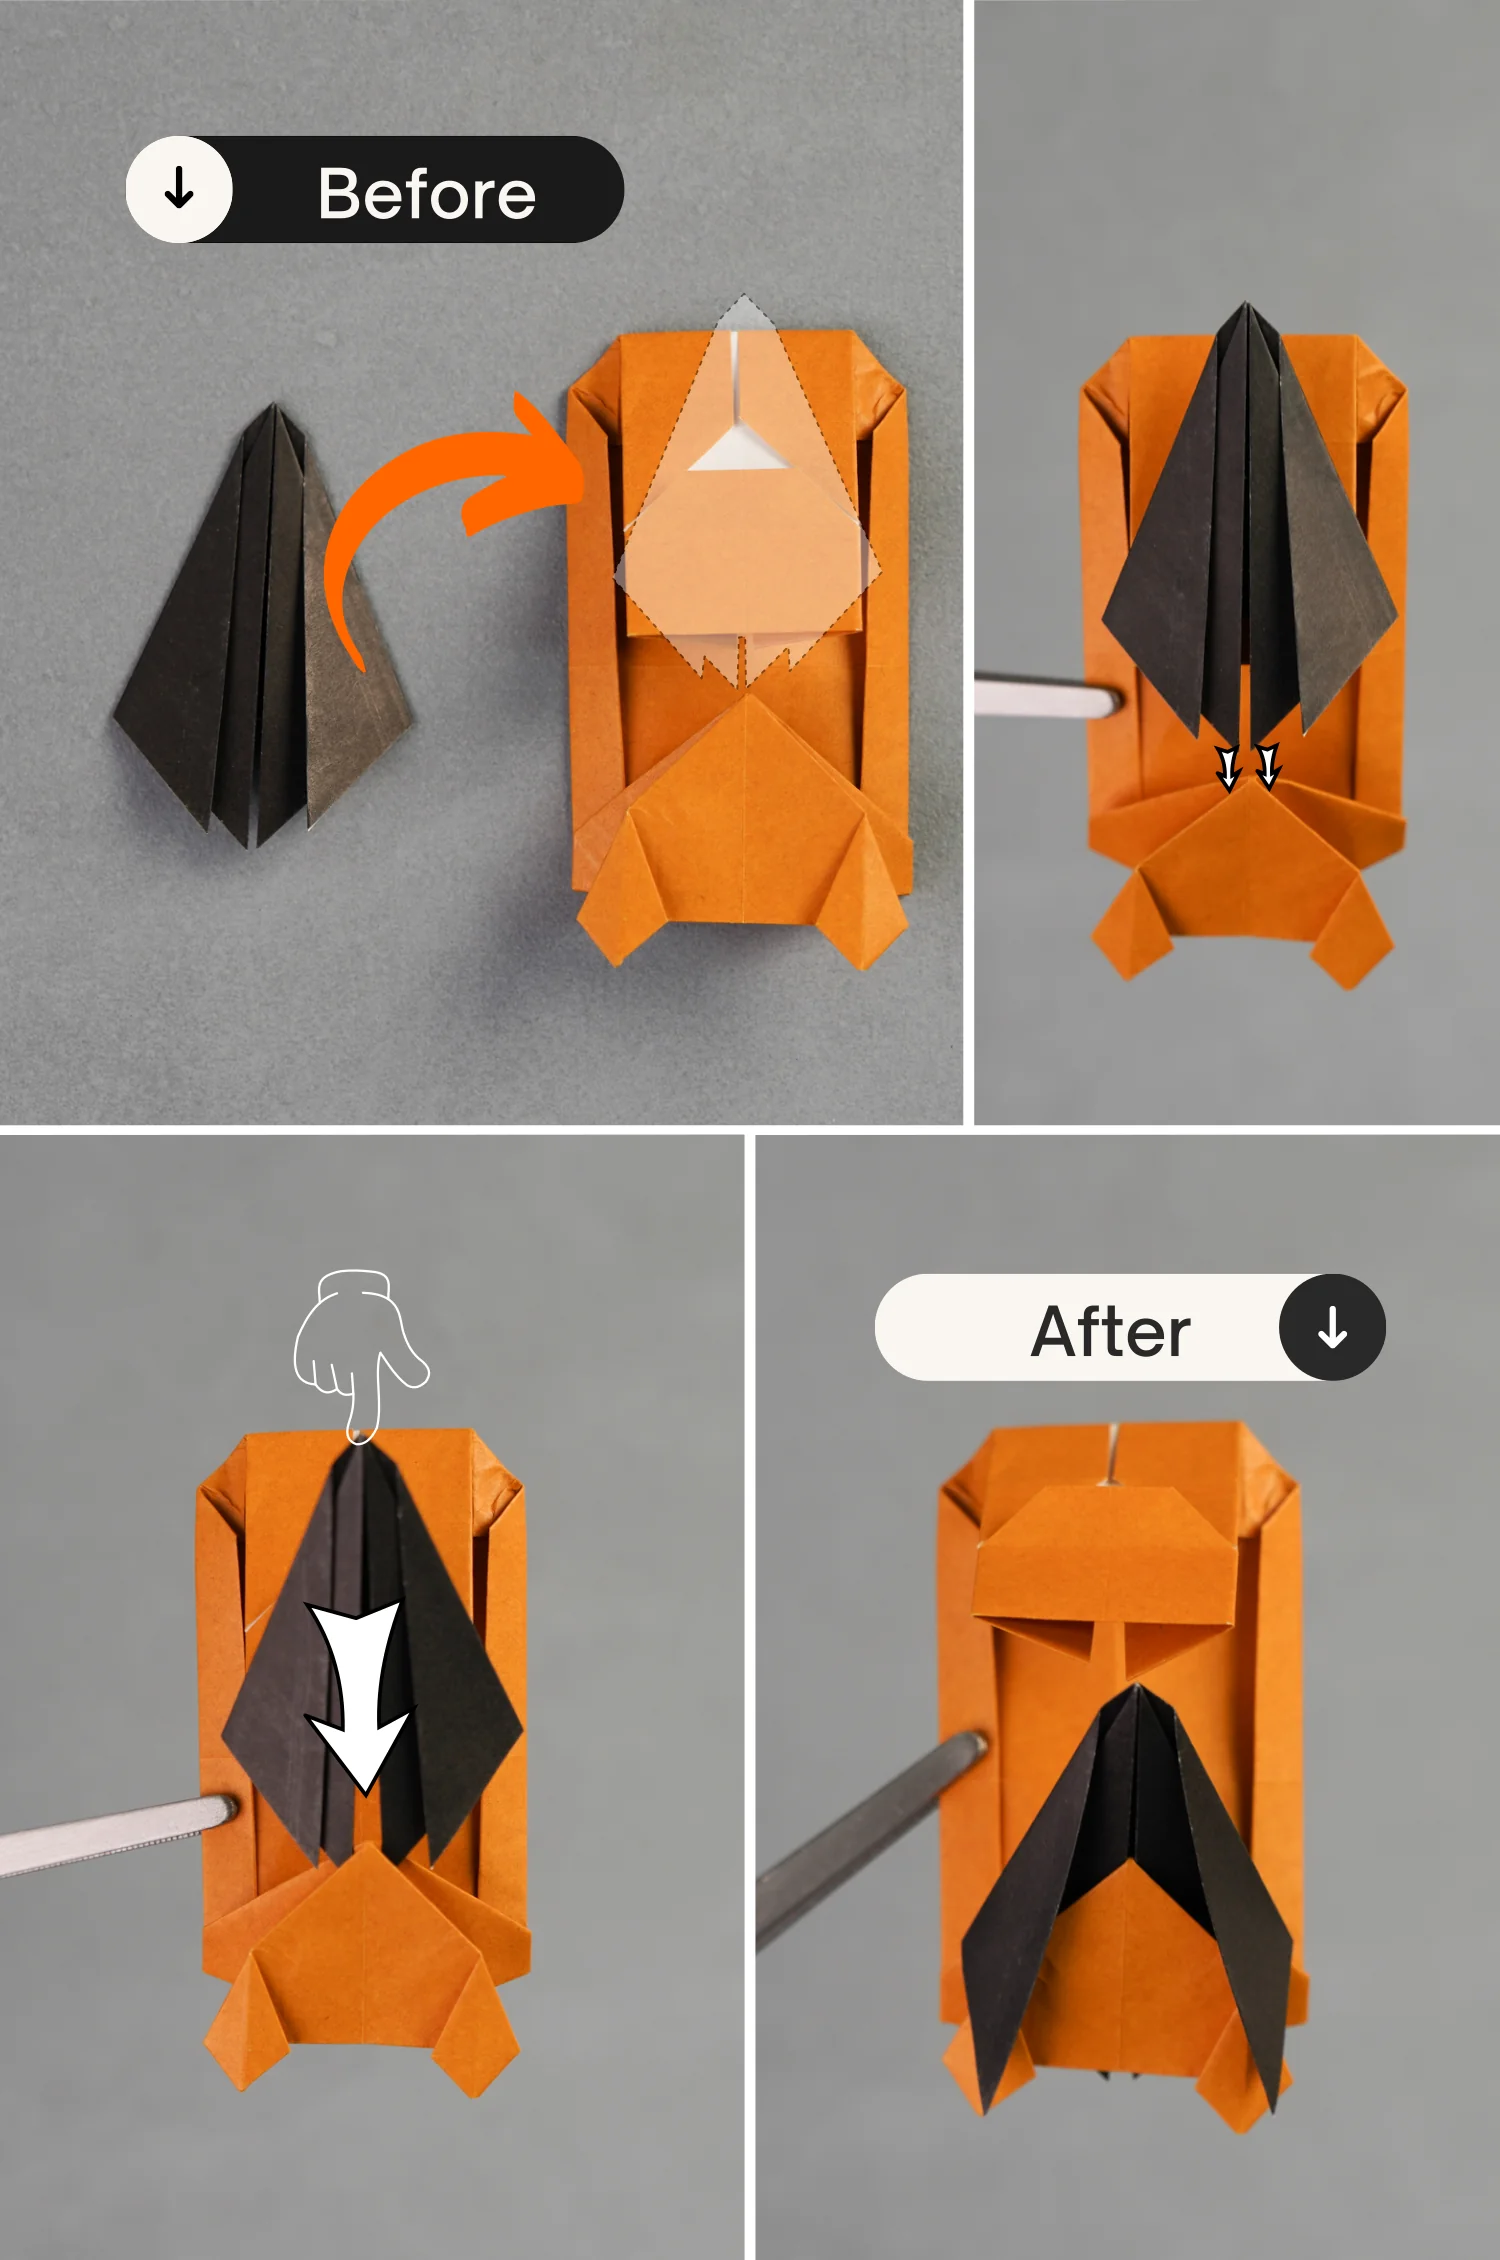
Step 30
Insert the top end of the rear wing into the bottom opening of the top upper layer of the car part.
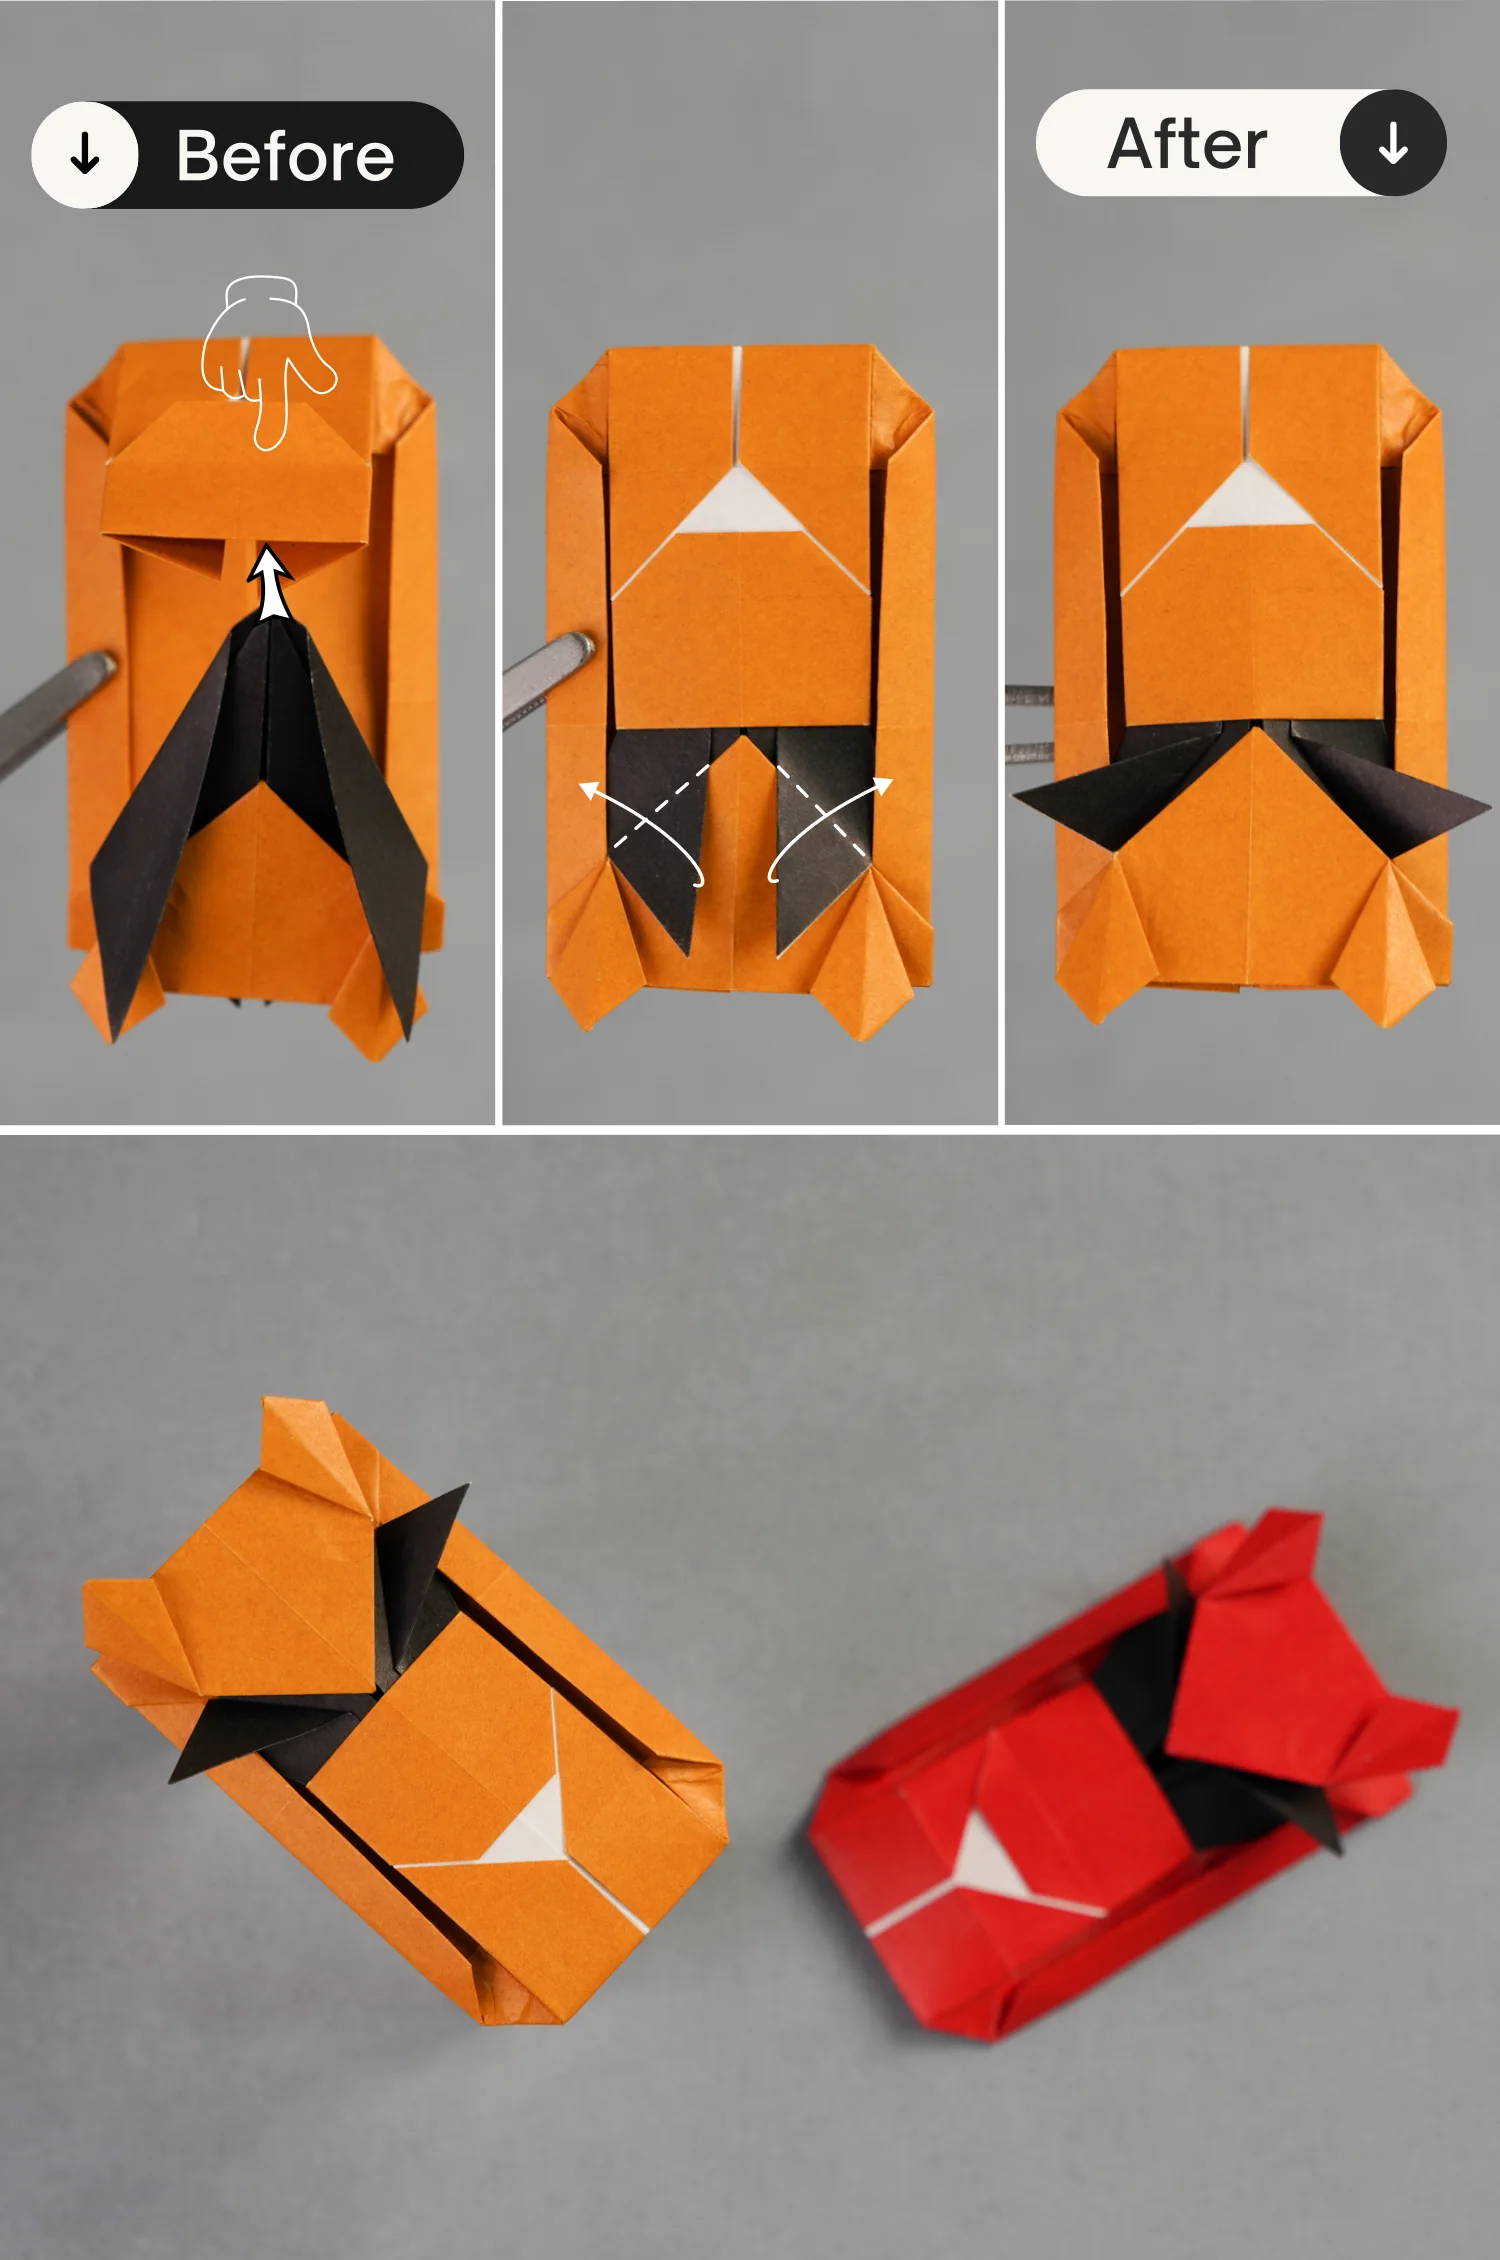
What’s Next
Now you have completed making this cool origami car. Next, check out our other interesting origami tutorials. Happy folding!


