How to Make an Origami Sword
Step 1
Start with the white side of the paper facing up, and fold it in half vertically, leaving a crease then unfold it.
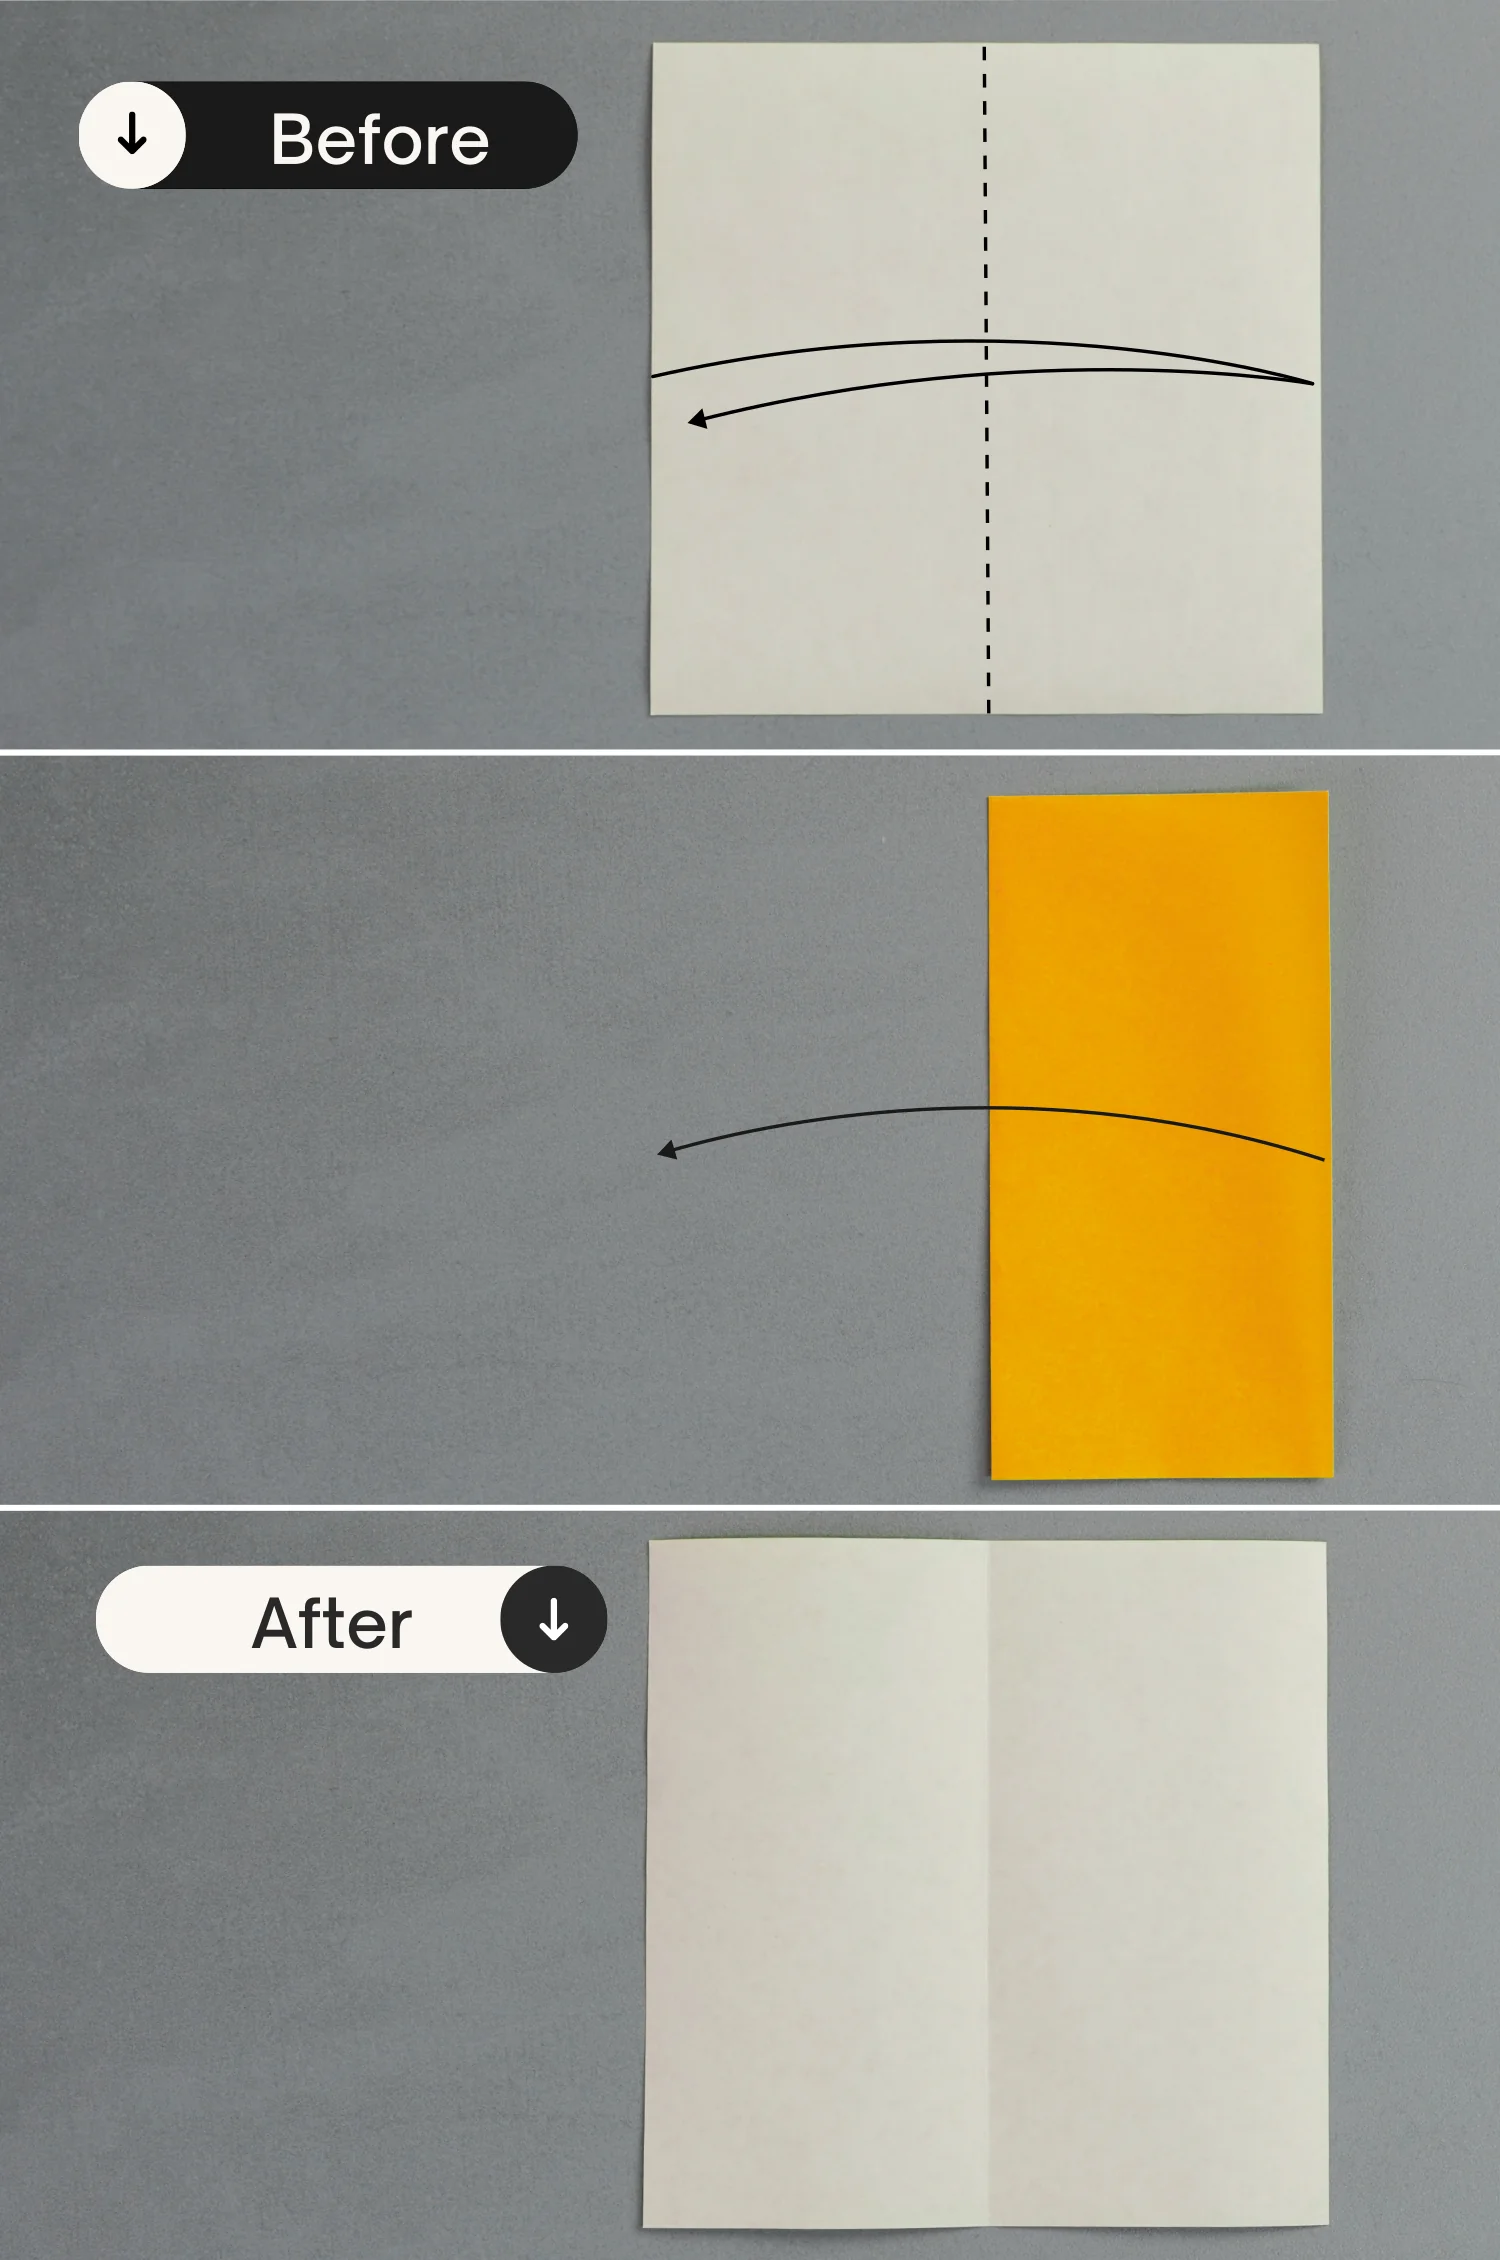
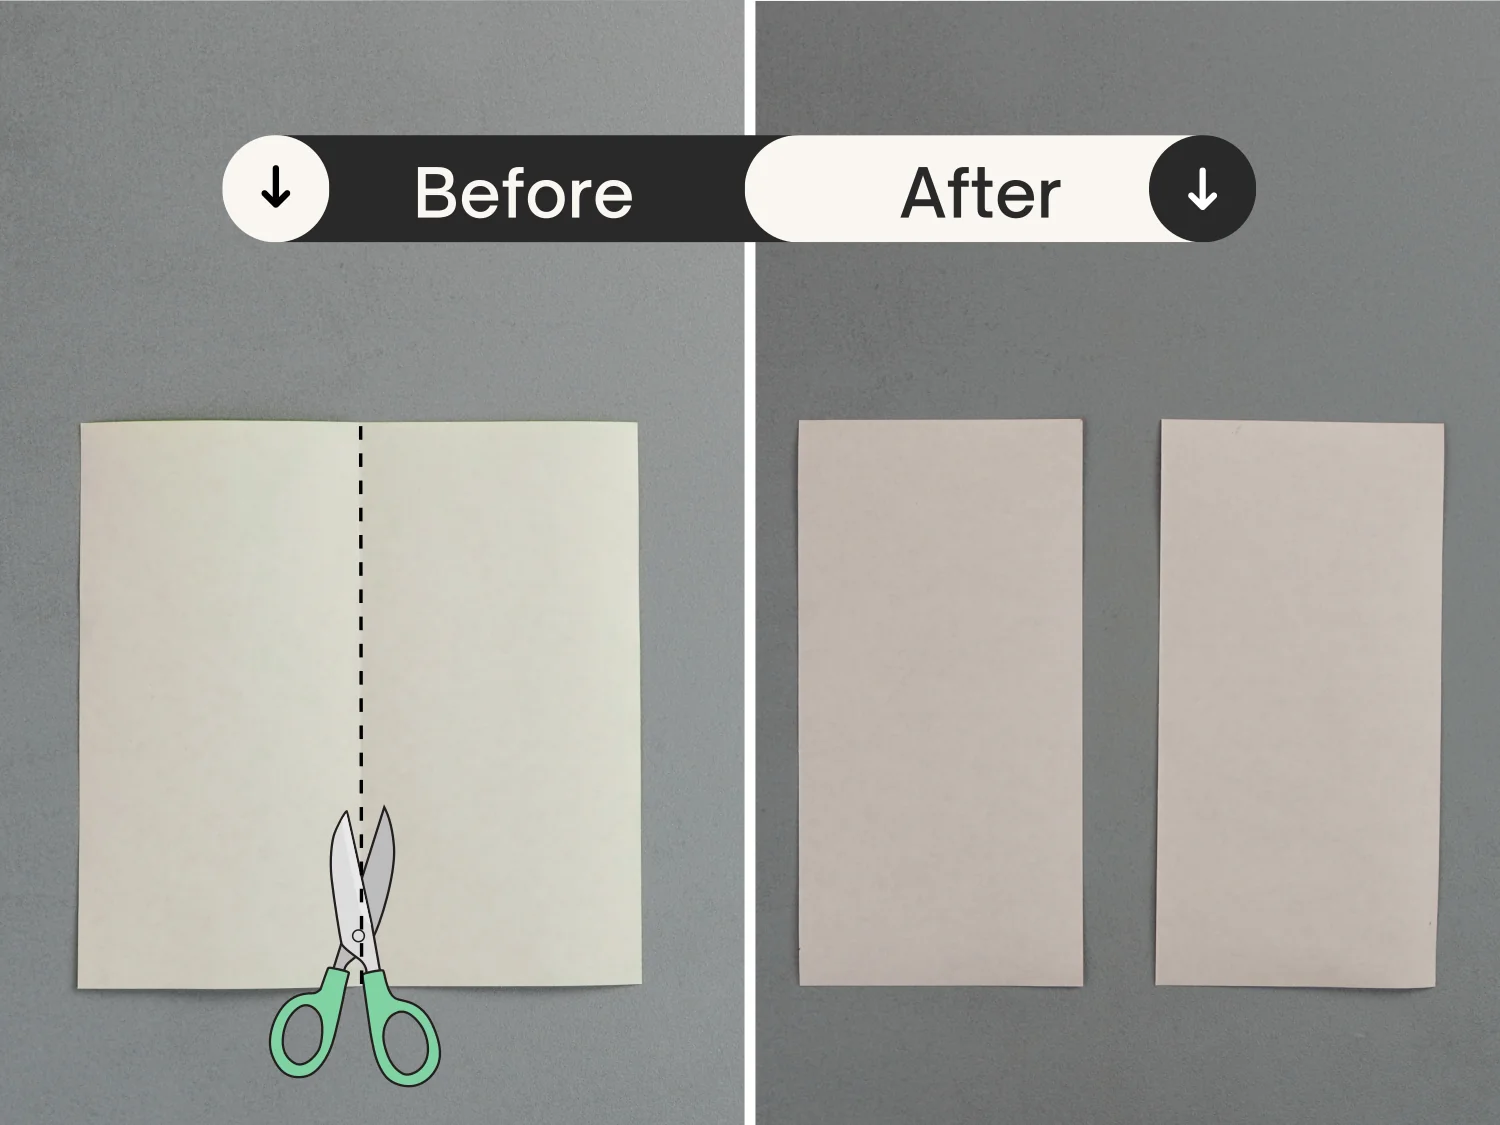
Step 2
Cut the paper along the crease.
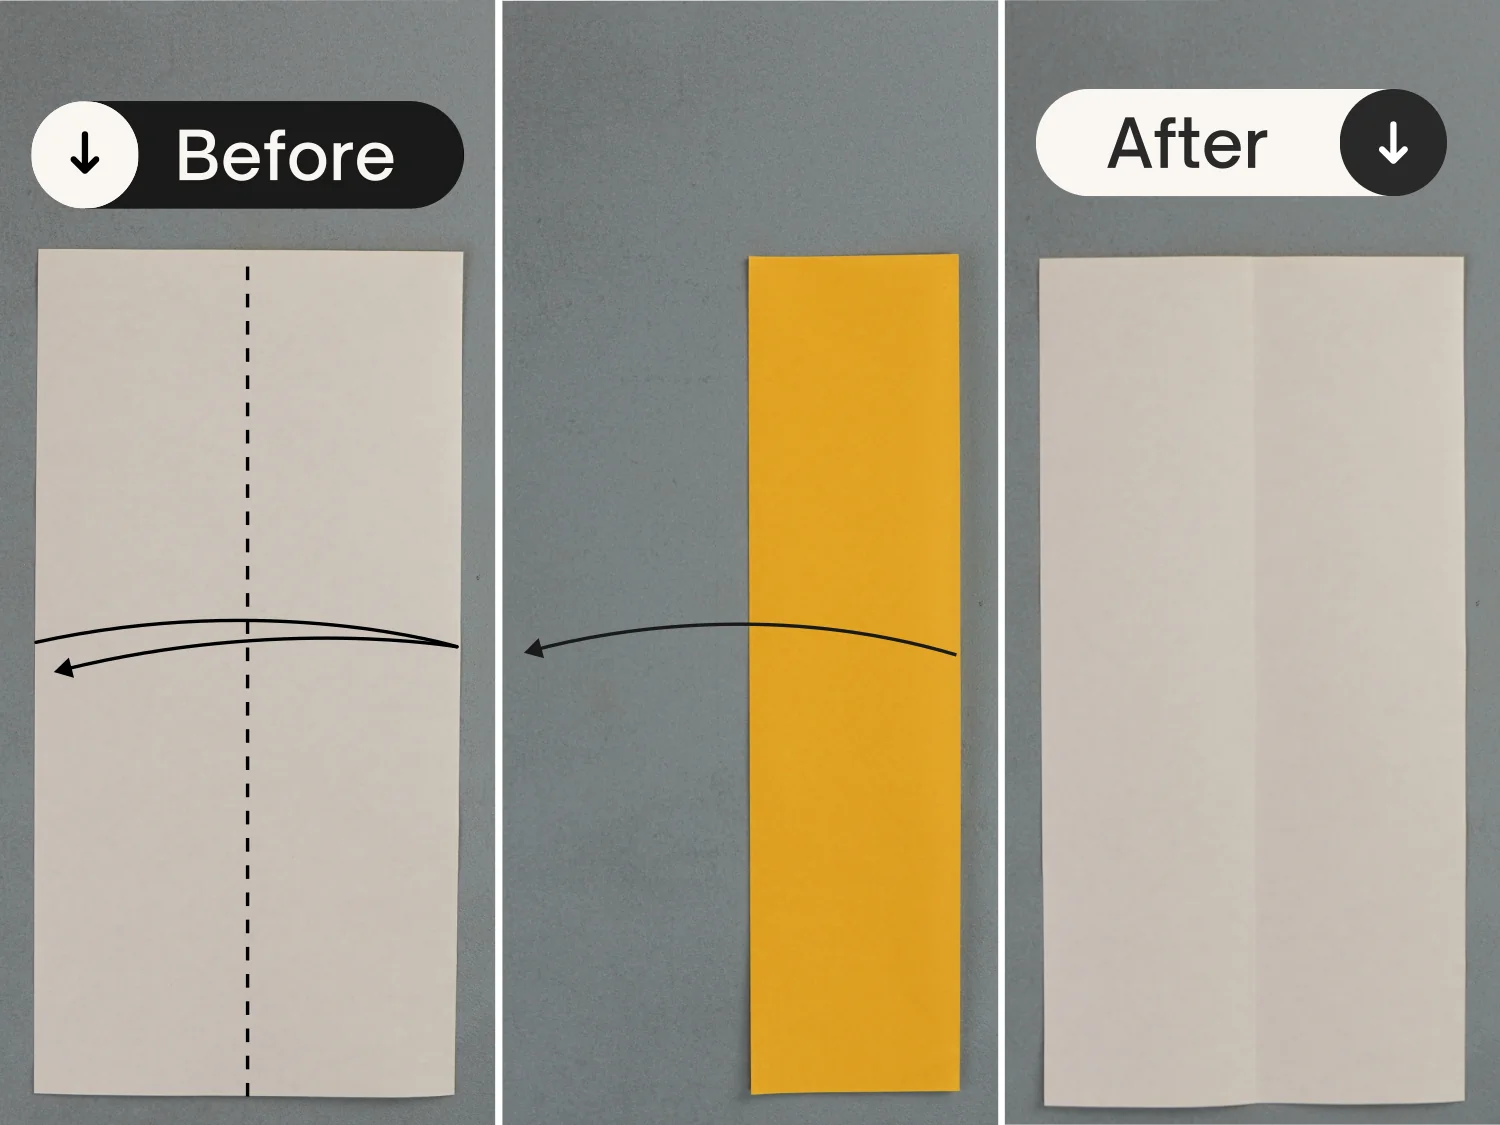
Step 3
Take out one of the papers, fold it in half vertically, leaving a crease then unfold it.
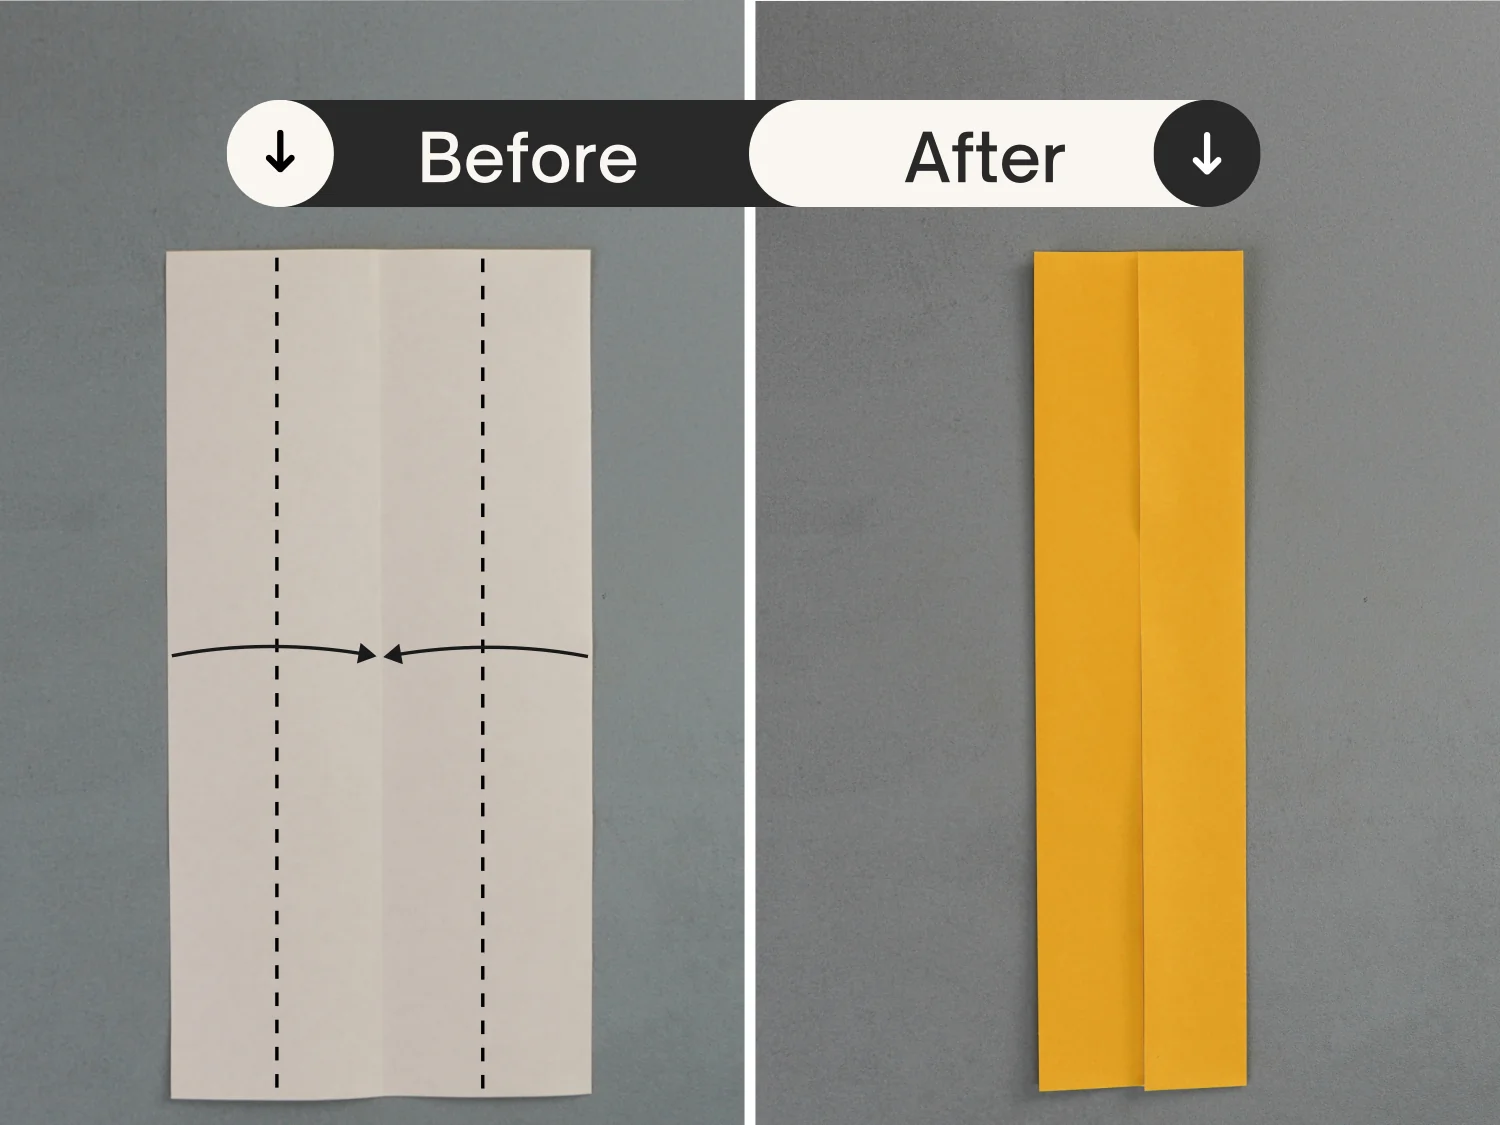
Step 4
Fold the left and right edges to align with the vertical crease.
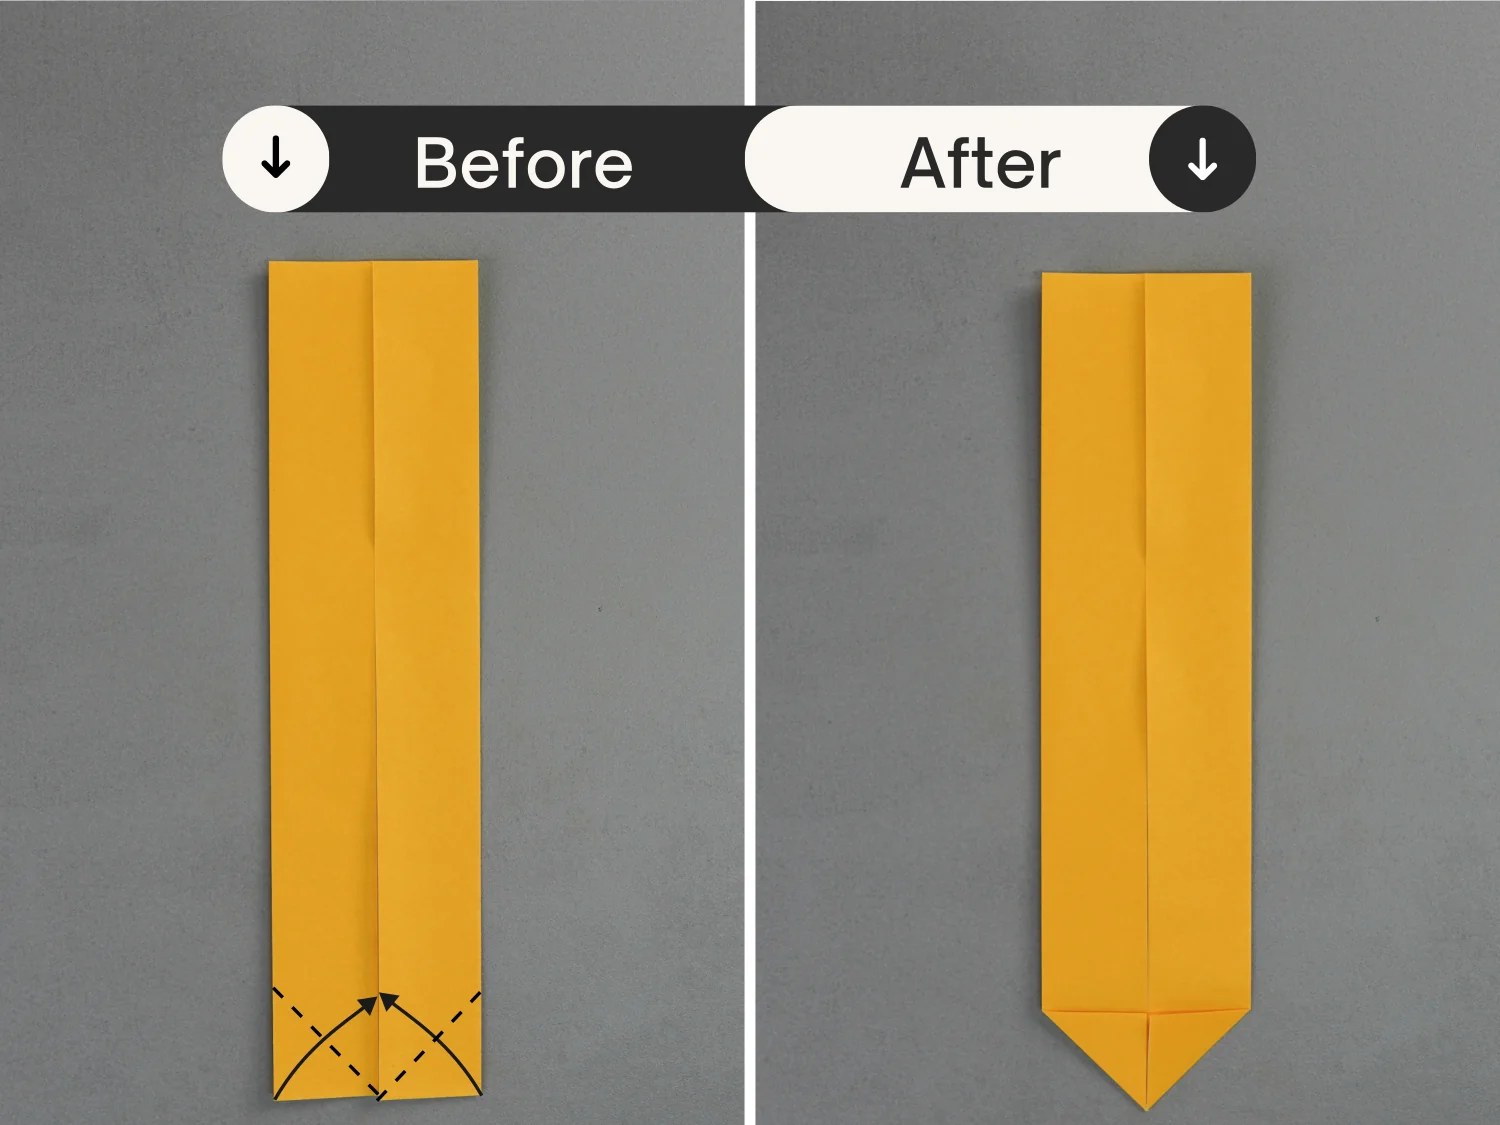
Step 5
Fold the bottom left and right points diagonally along the dotted lines.
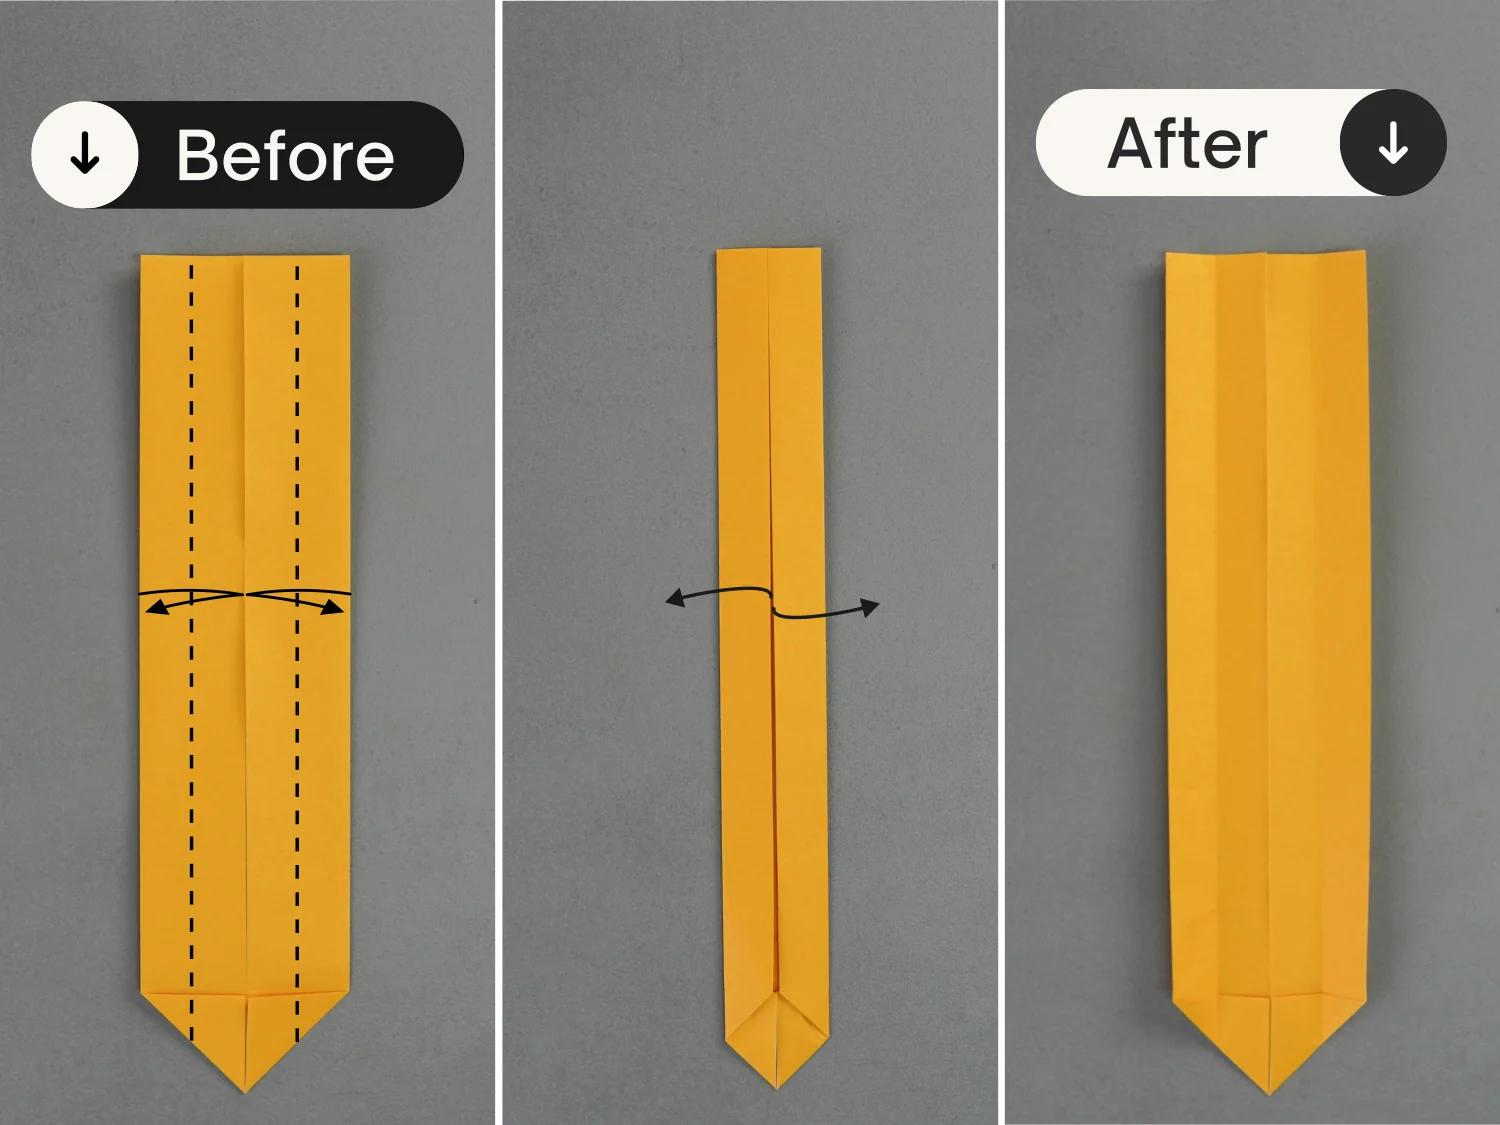
Step 6
Fold the left and right edges to align with the vertical crease, crease well then unfold them.
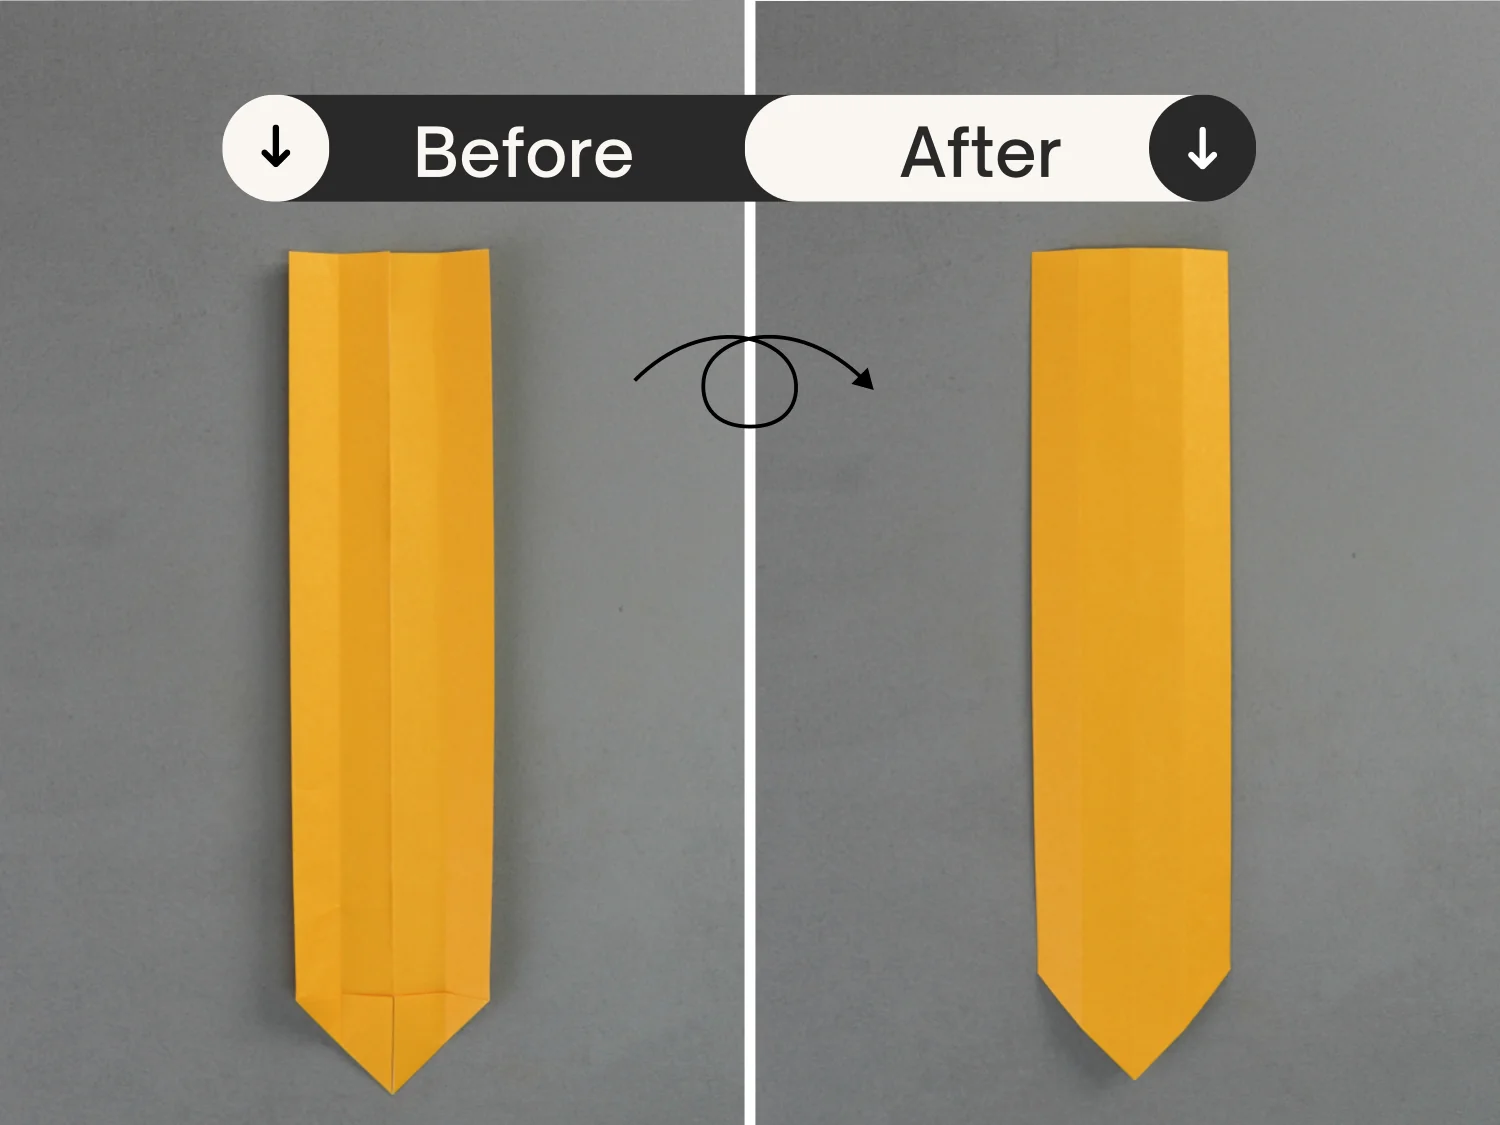
Step 7
Flip the paper over.
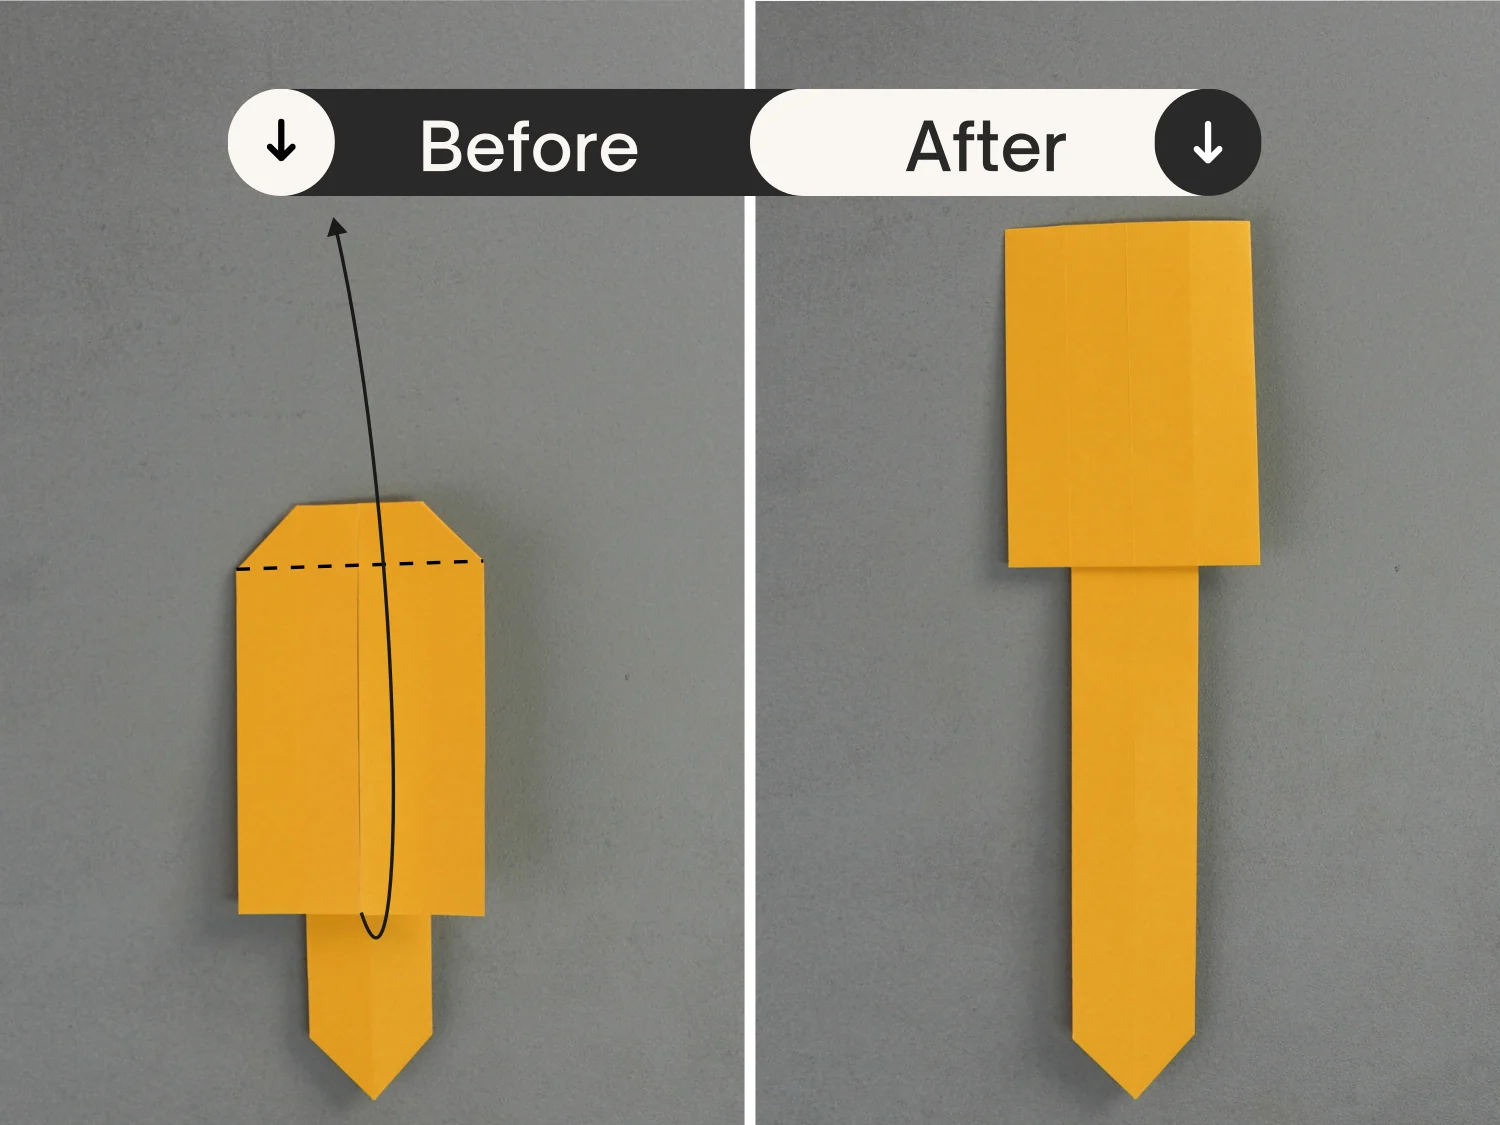
Step 8
Fold the top edge down along the dotted line.
Step 9
Flip it over.
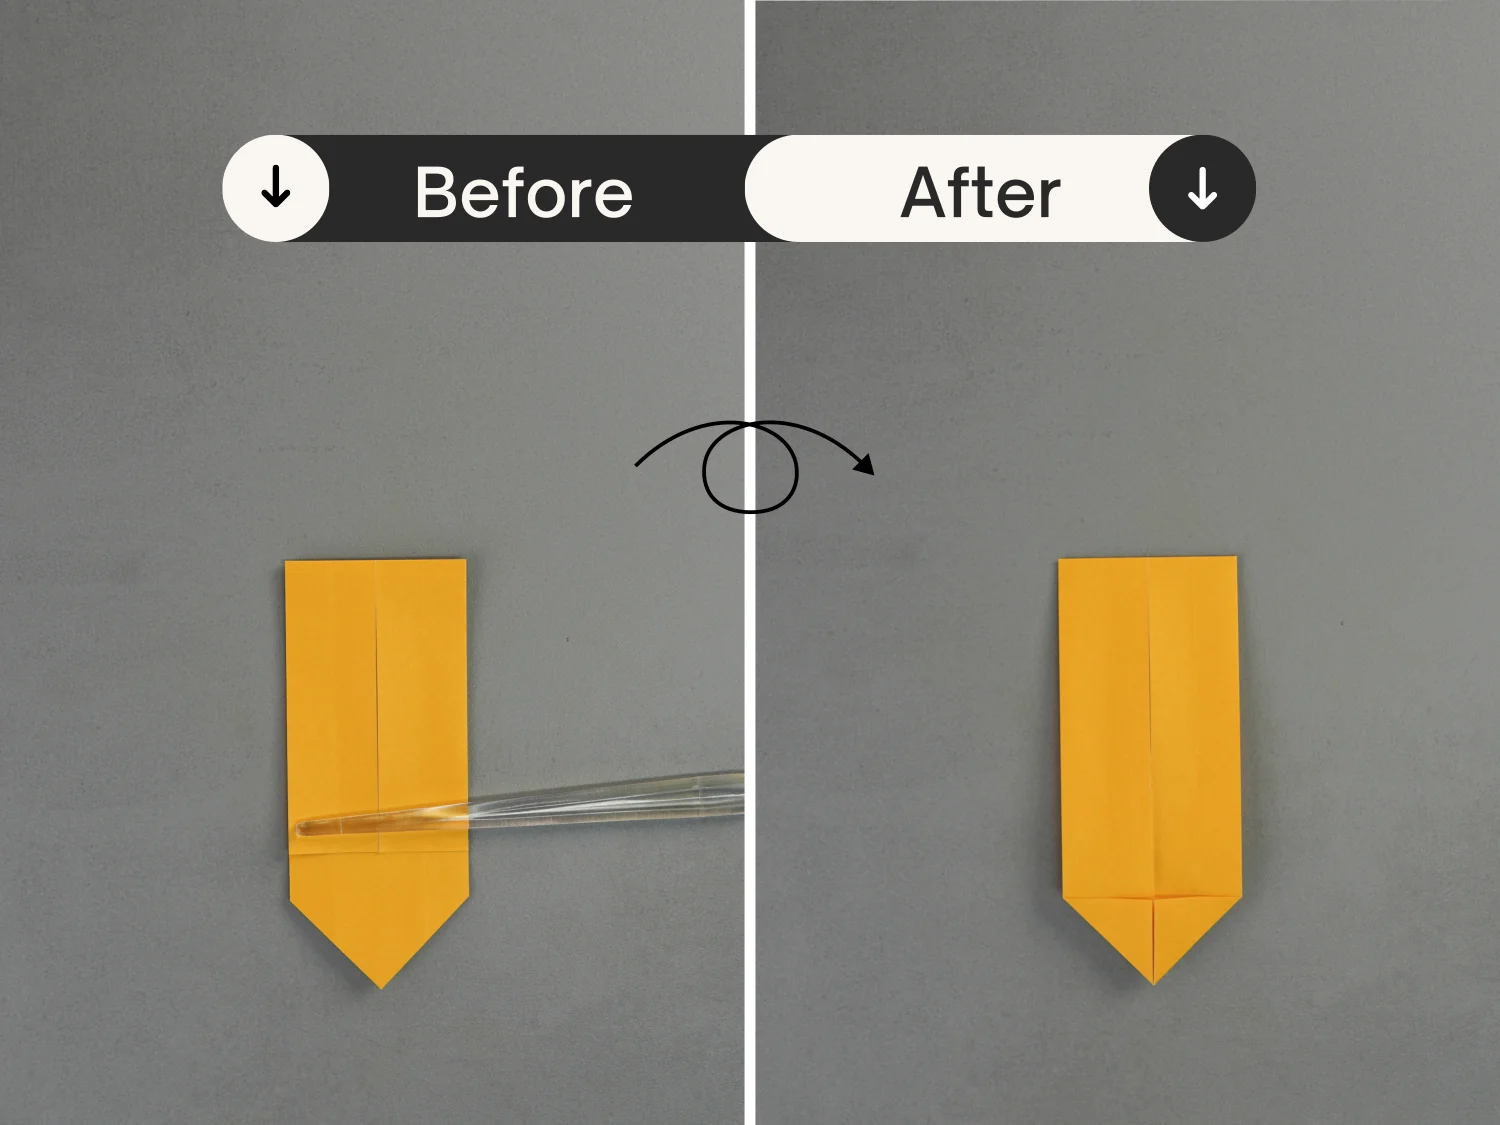
Step 10
Fold the top left and right points a little along the dotted lines.
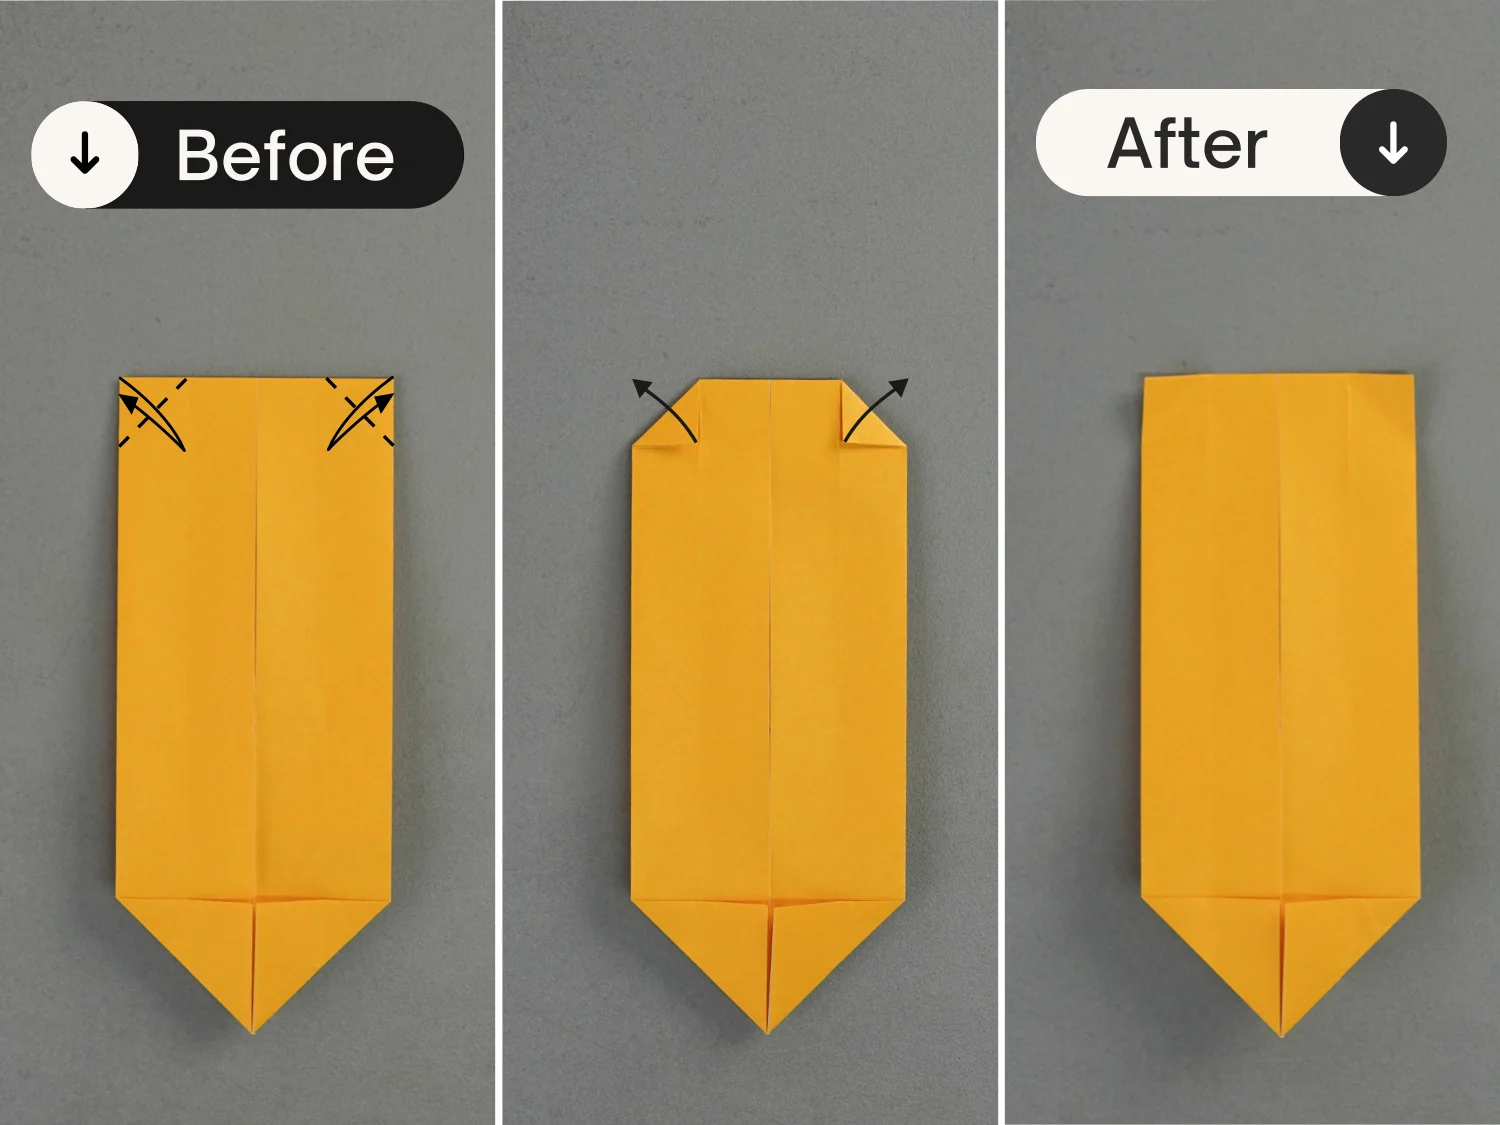
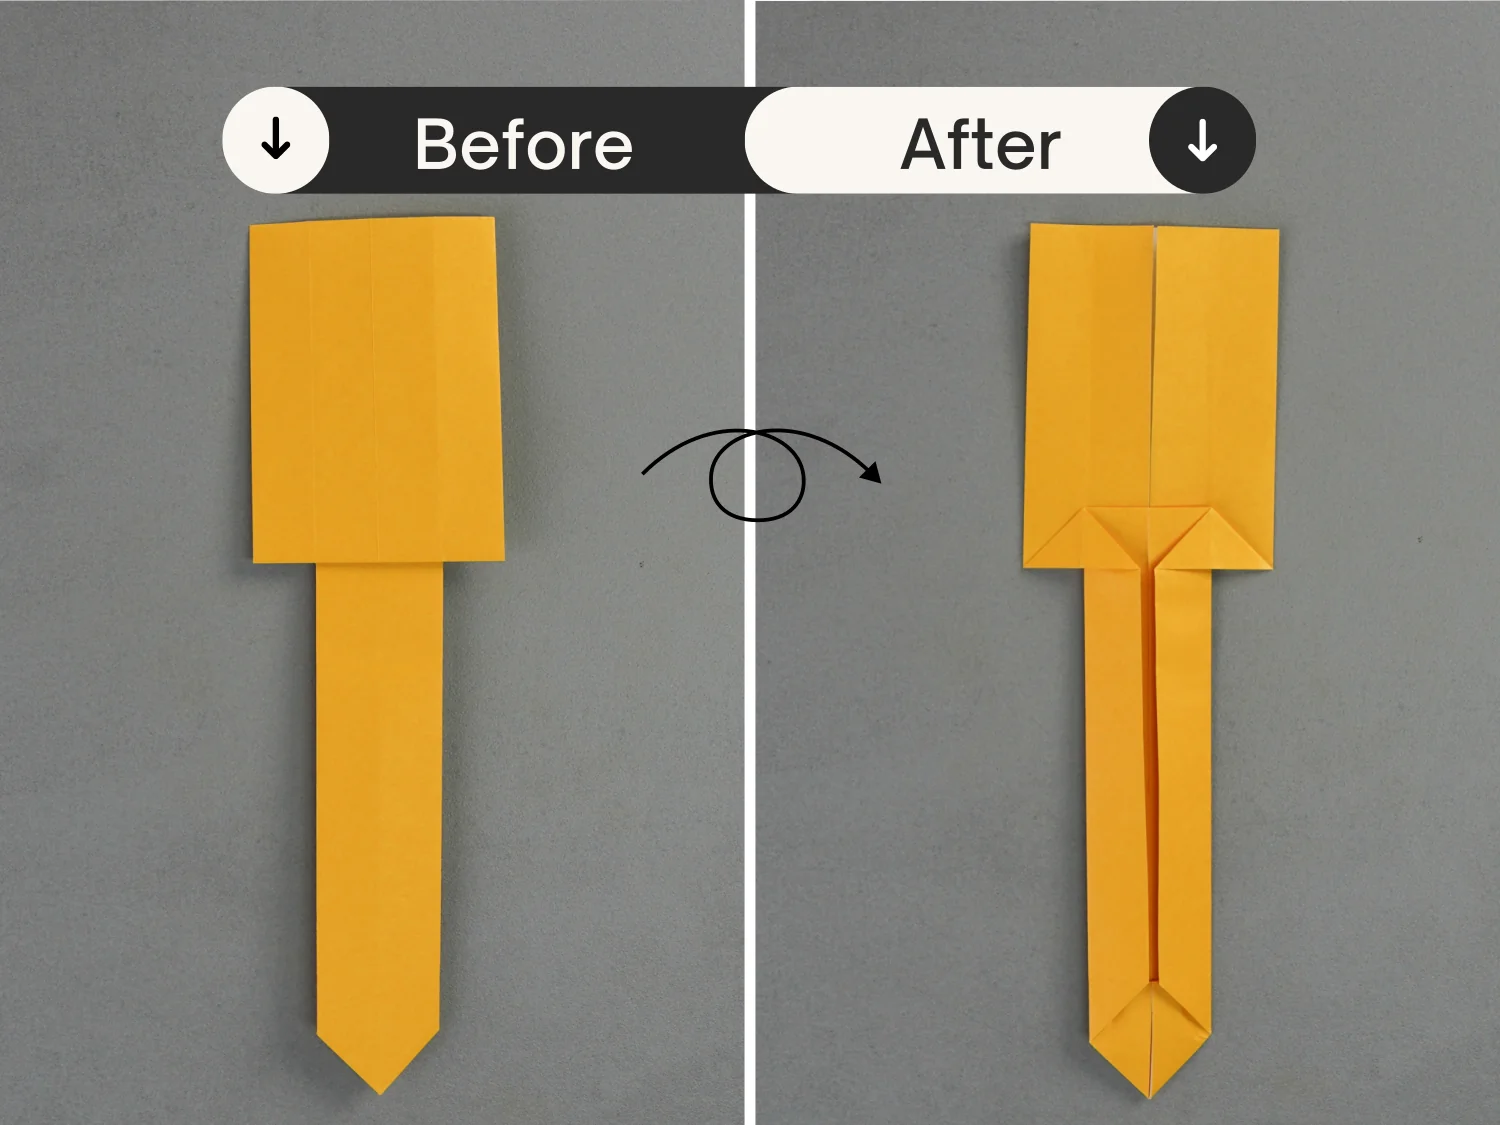
Step 11
Bring up the left and right edges along the existing creases, then squash the top left and right corners along the creases you just made, and finally flatten the fold.
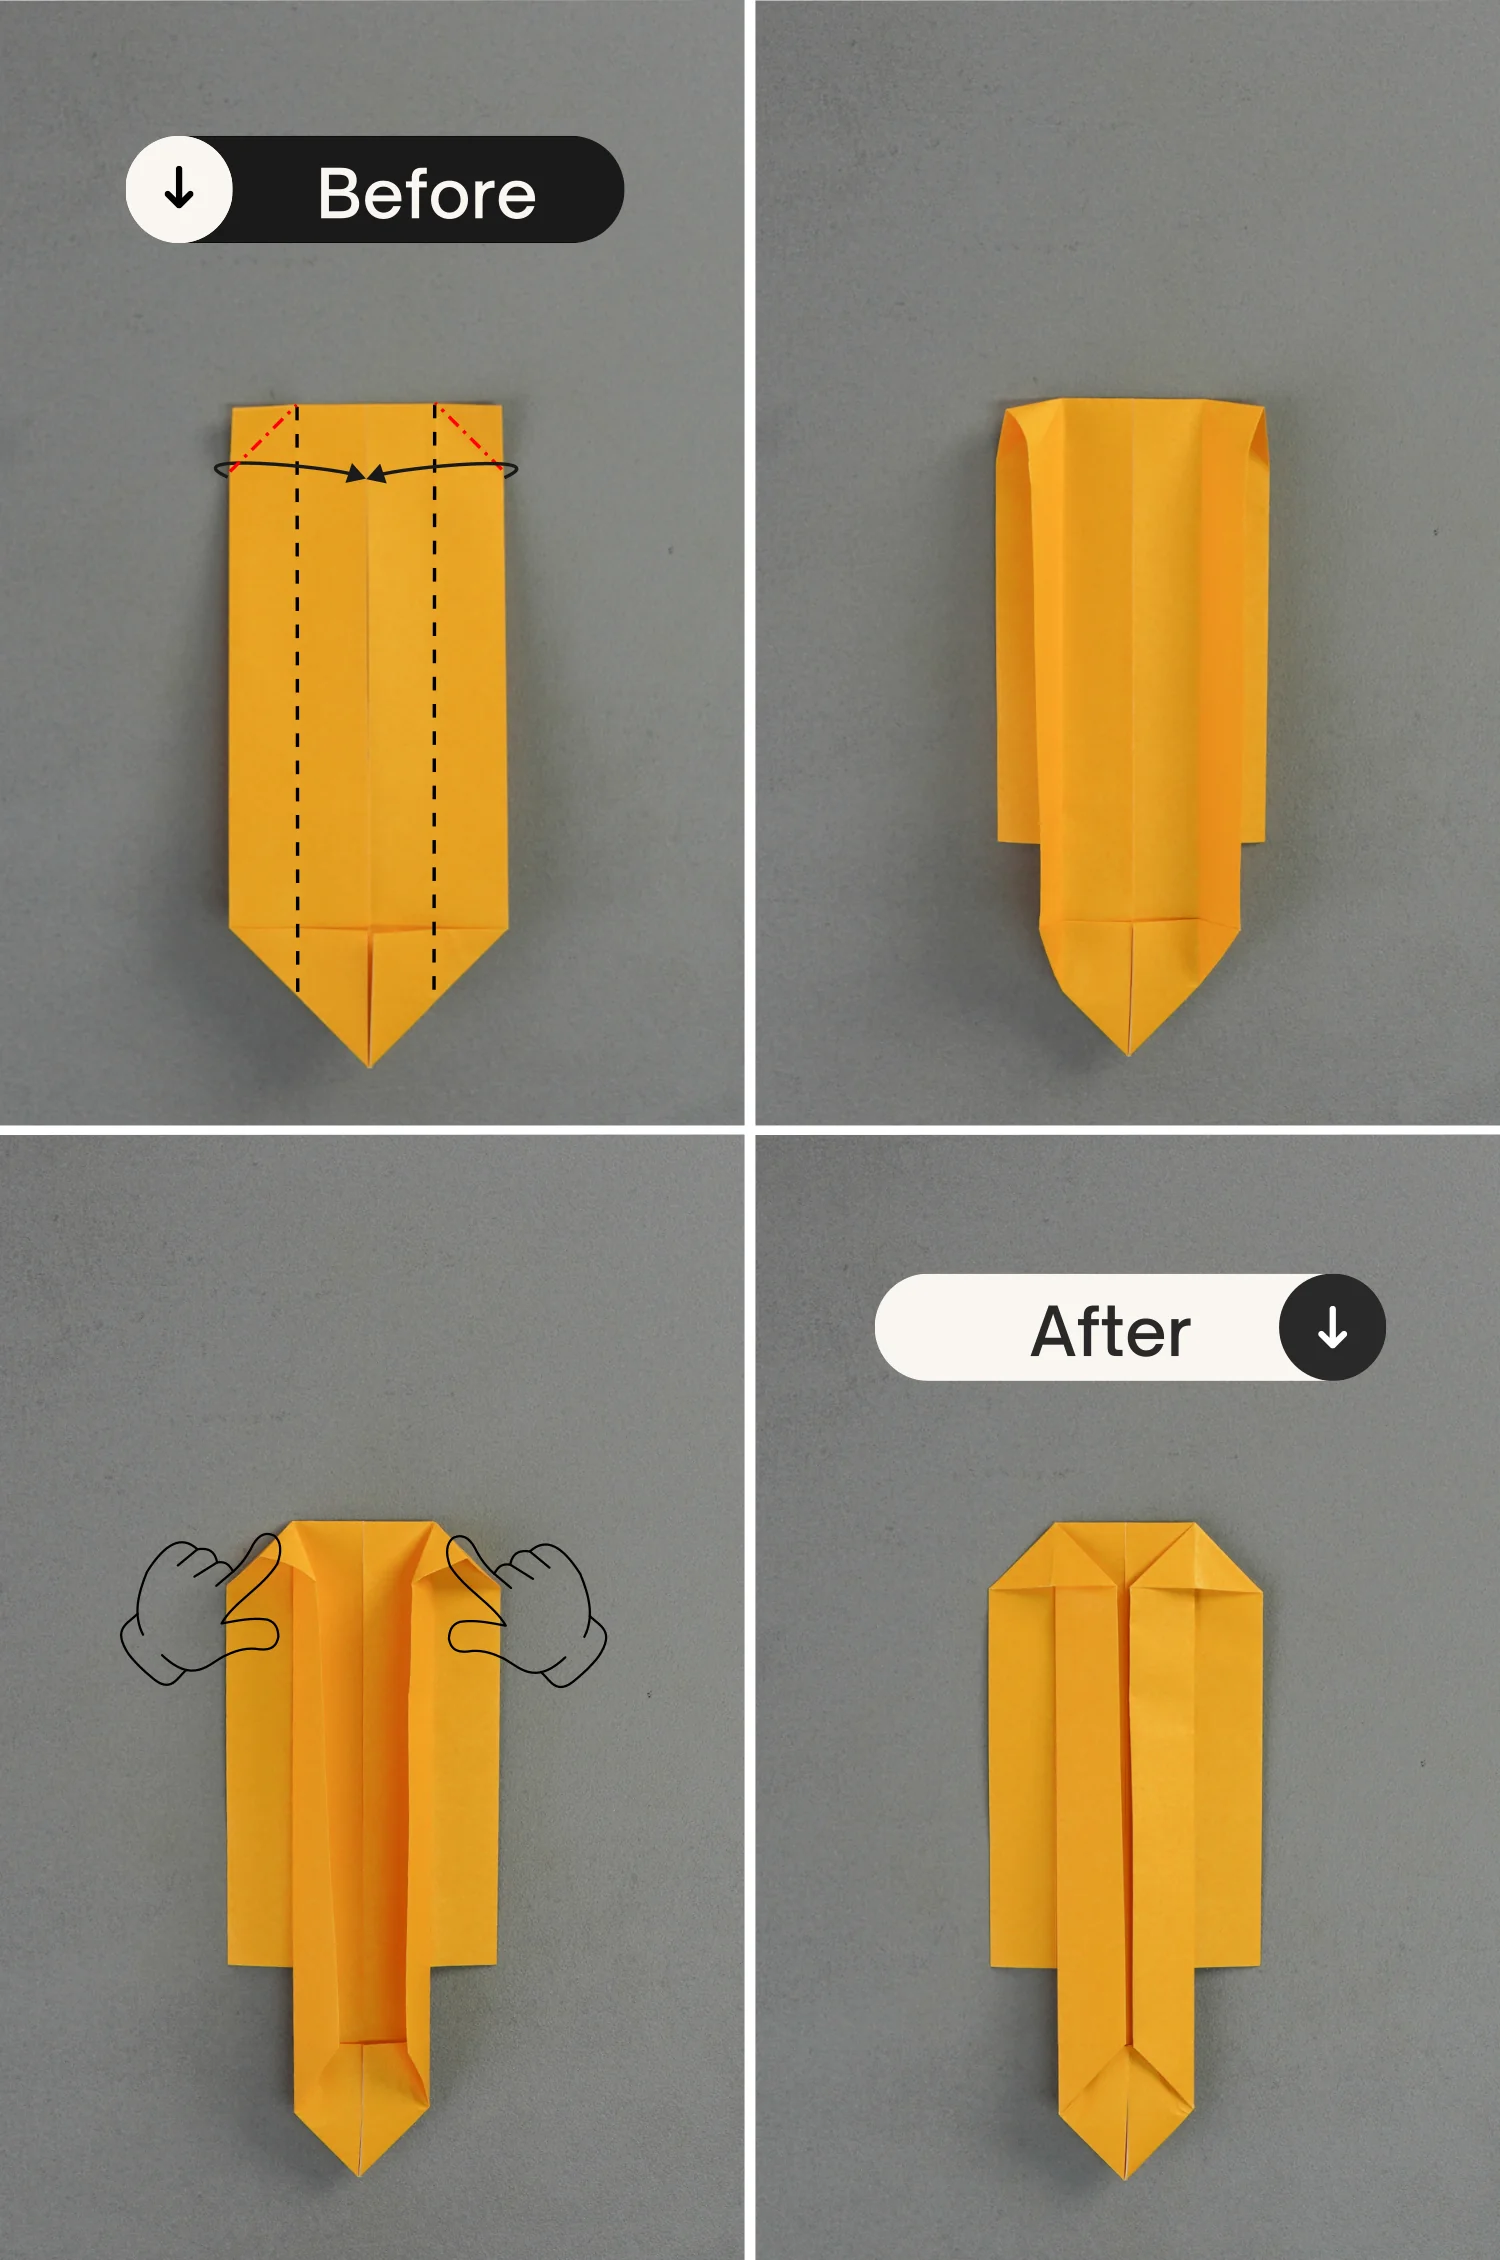
Step 12
Turn over the paper.
Step 13
Fold up the upper layer along the dotted line.
Step 14
Flip the paper over.
Step 15
Fold down the bottom sections of the left and right edges of the top rectangle along the edges indicated by the dotted lines, then bring up its left and right edges along the existing crease. Finally, press down this top layer, and flatten the fold.
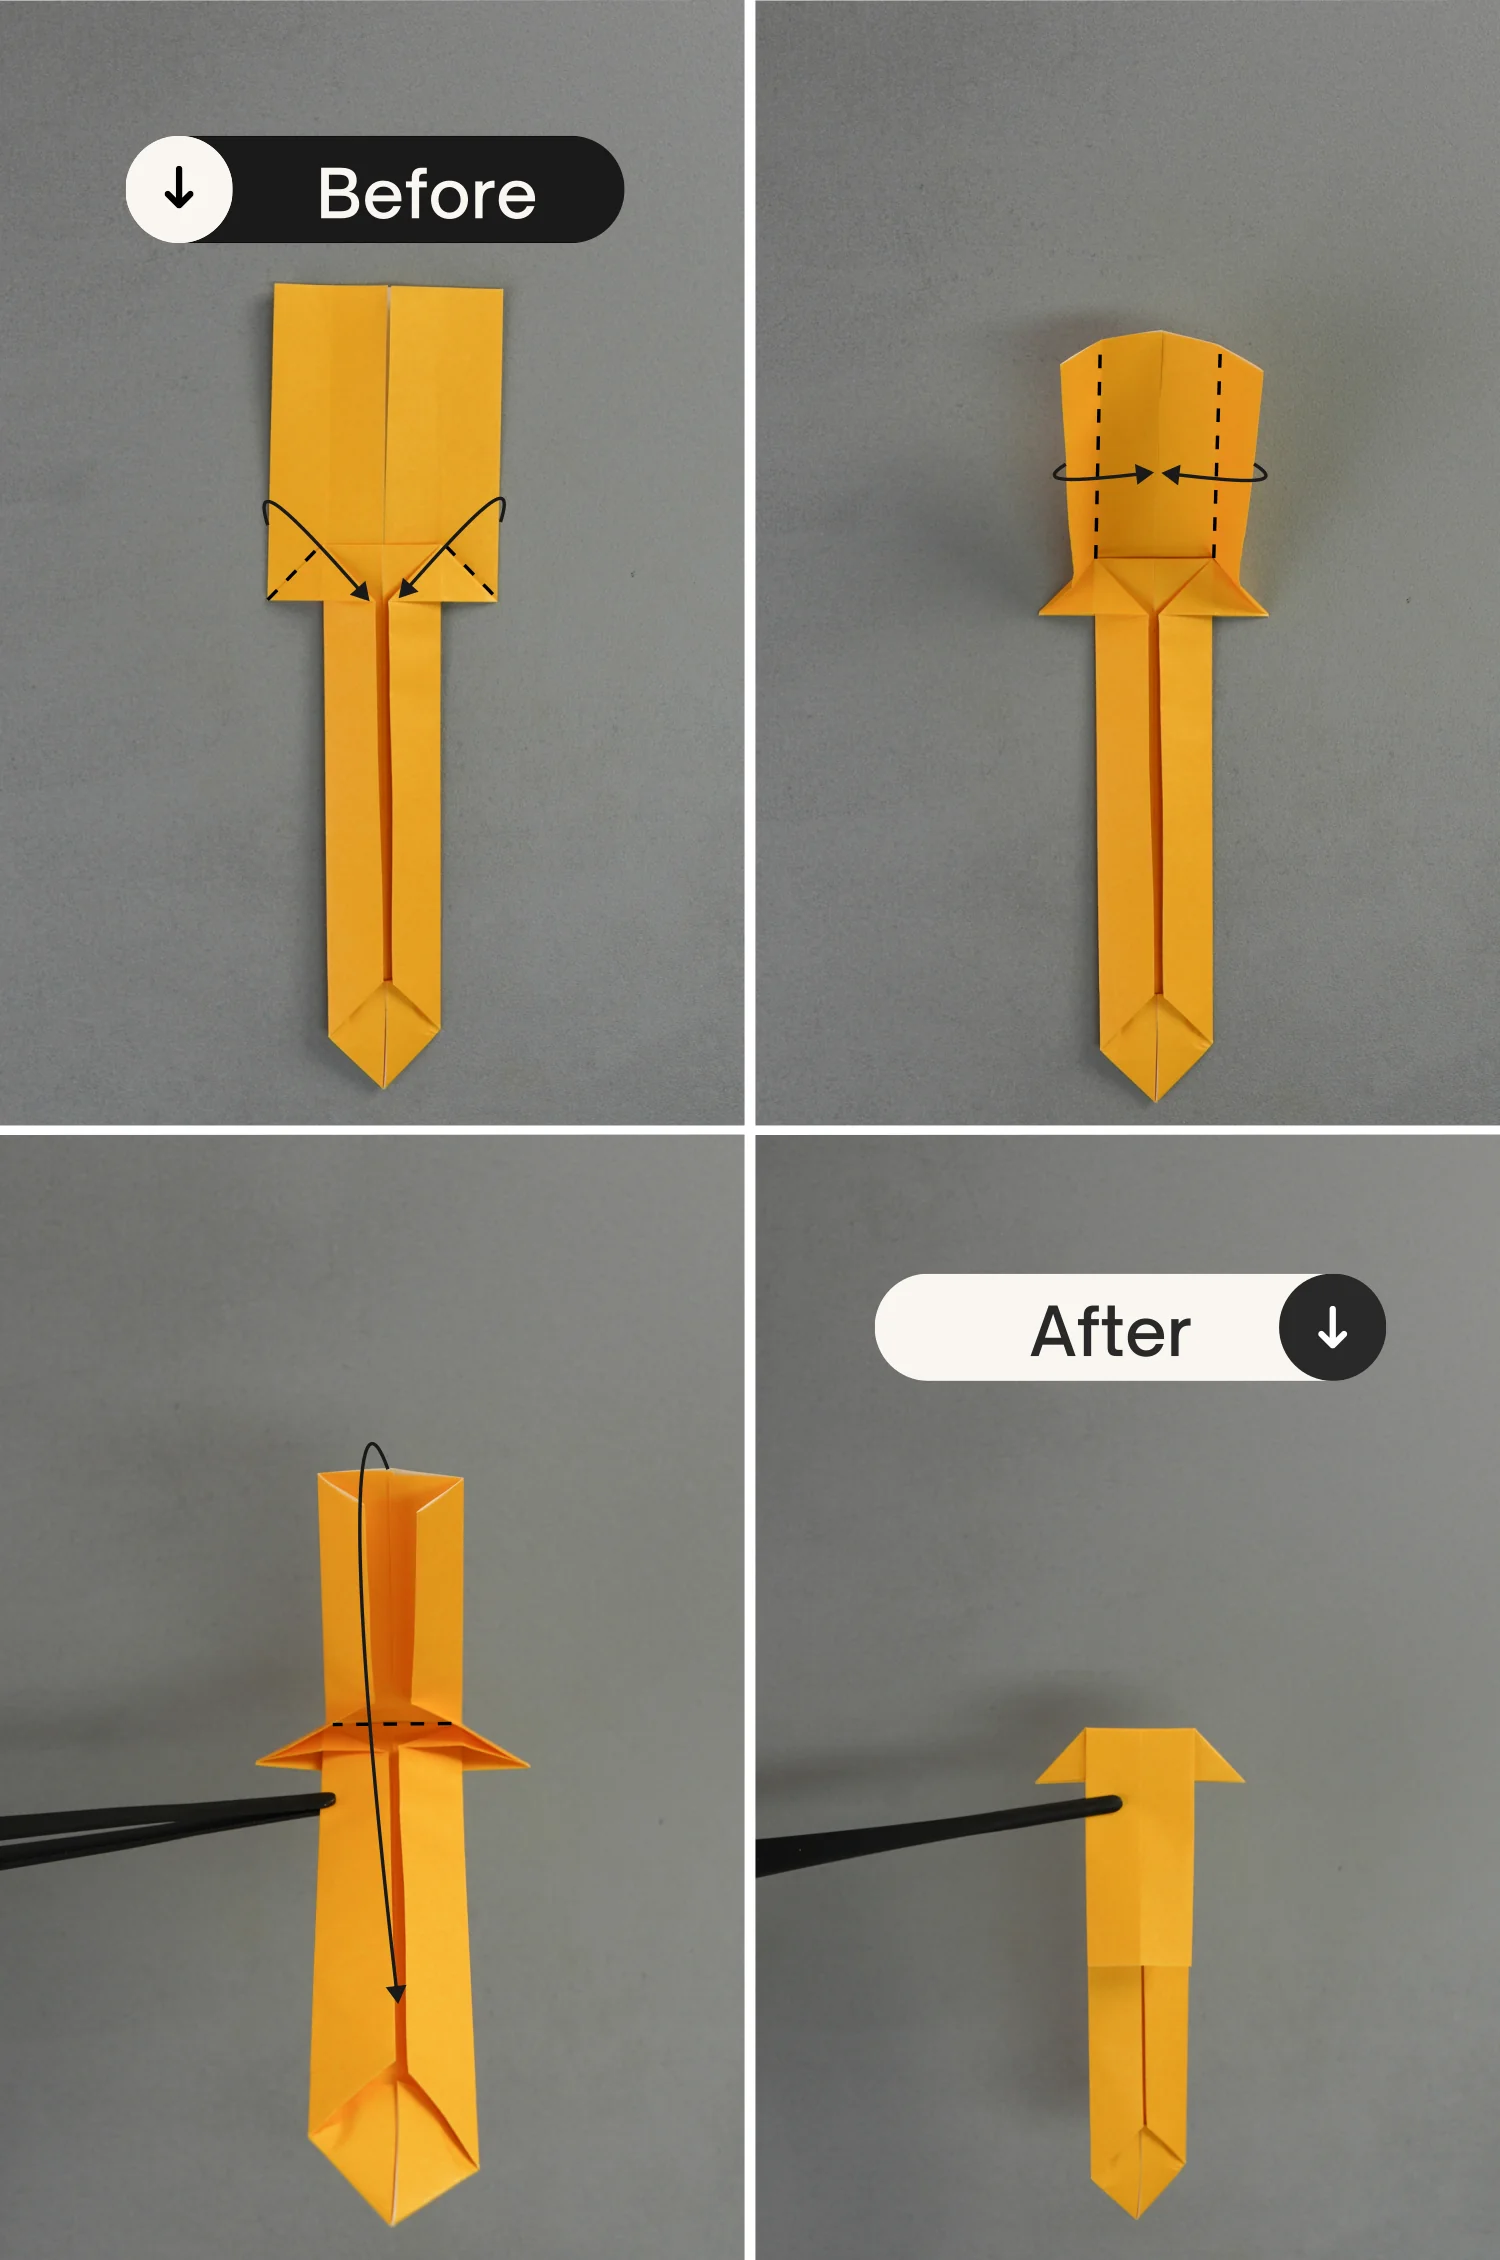
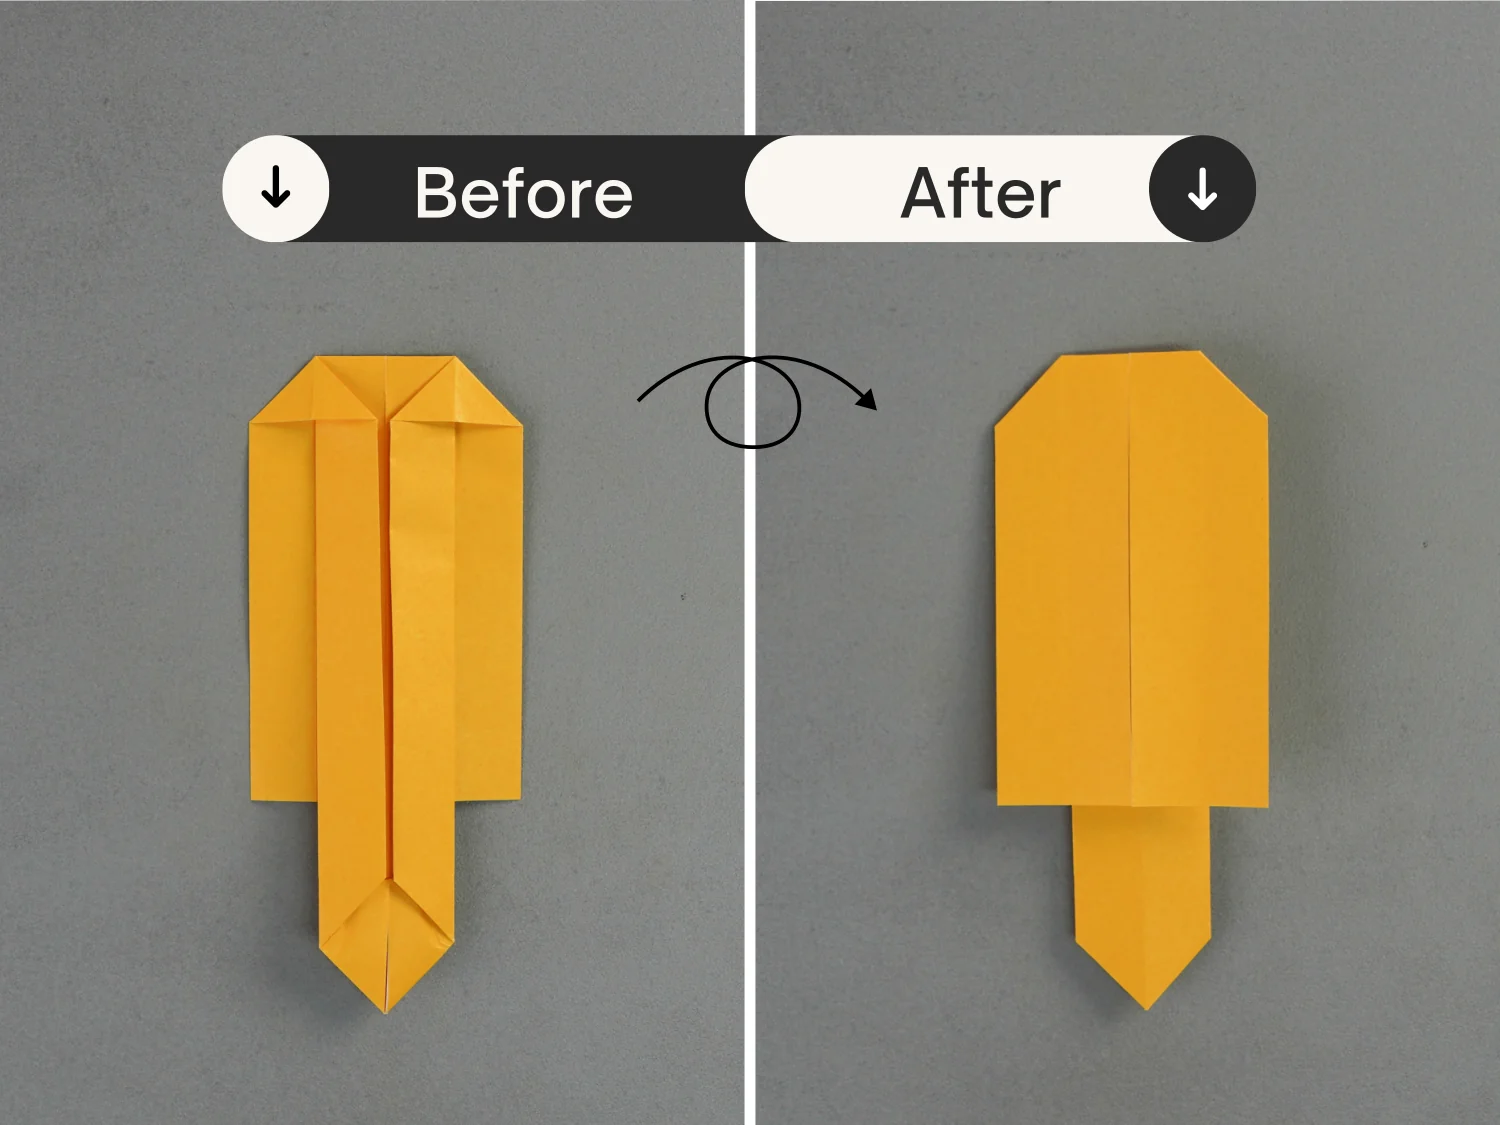
Step 16
Then fold it up along the dotted line.
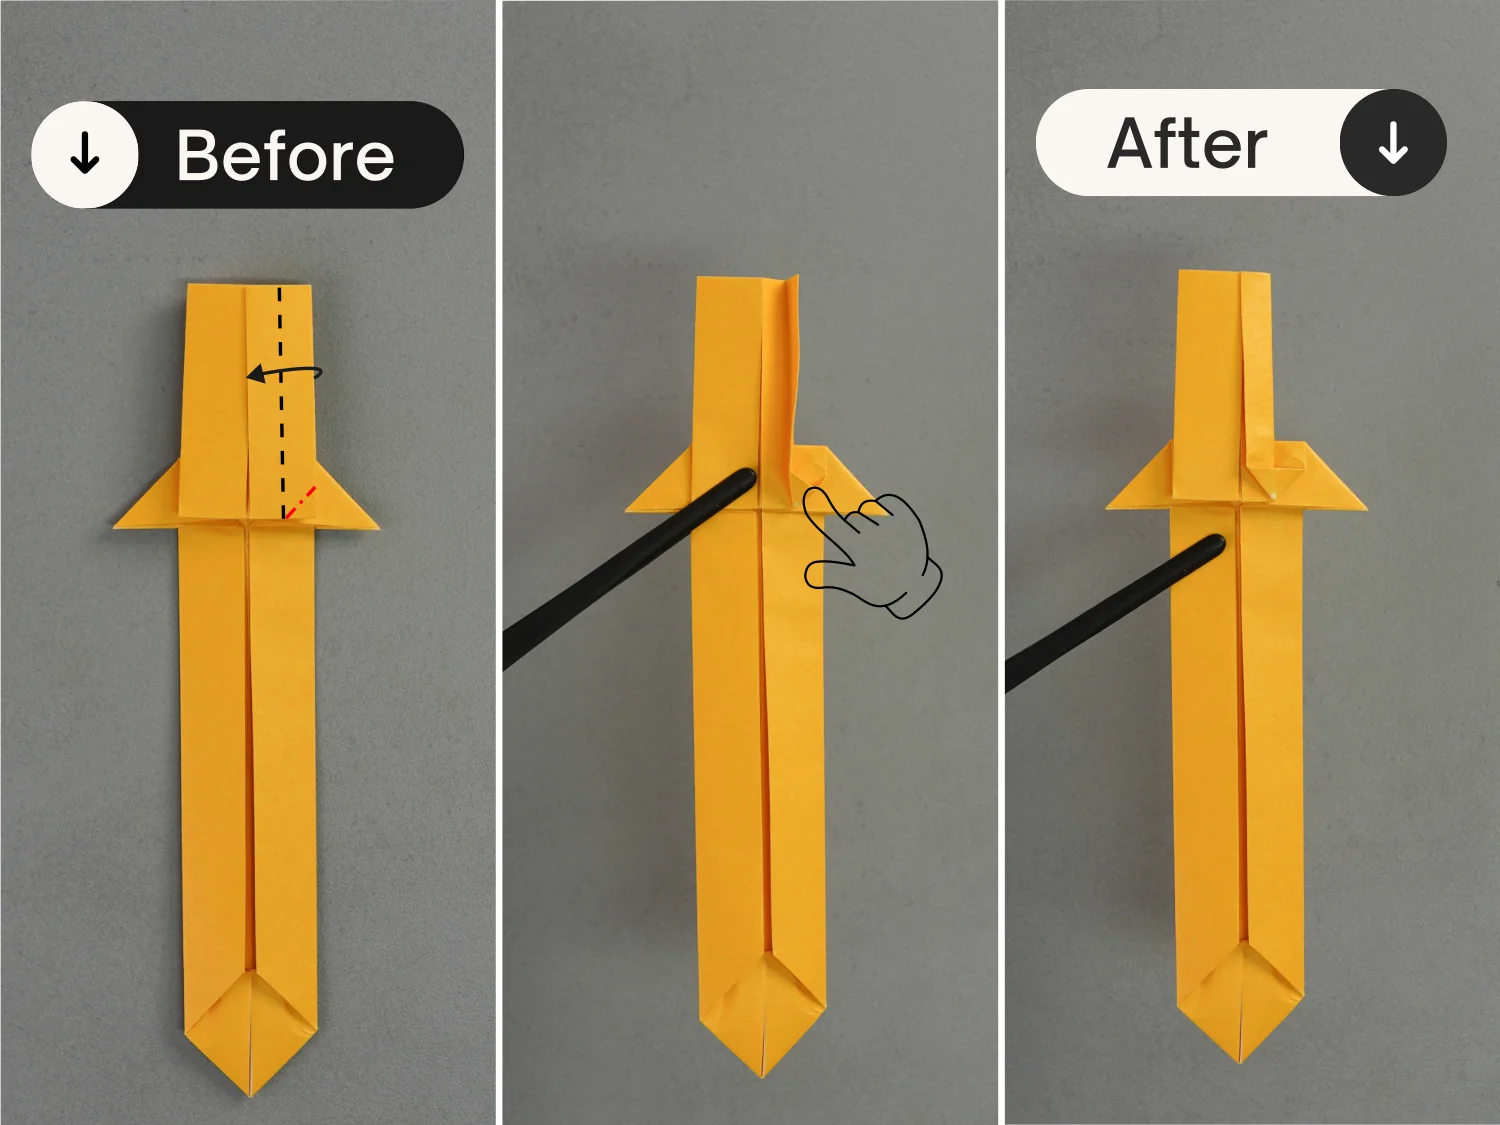
Step 17
Lift the right edge of the top layer to open its bottom right corner, then squash this corner, and press the right edge to align with the middle vertical line.
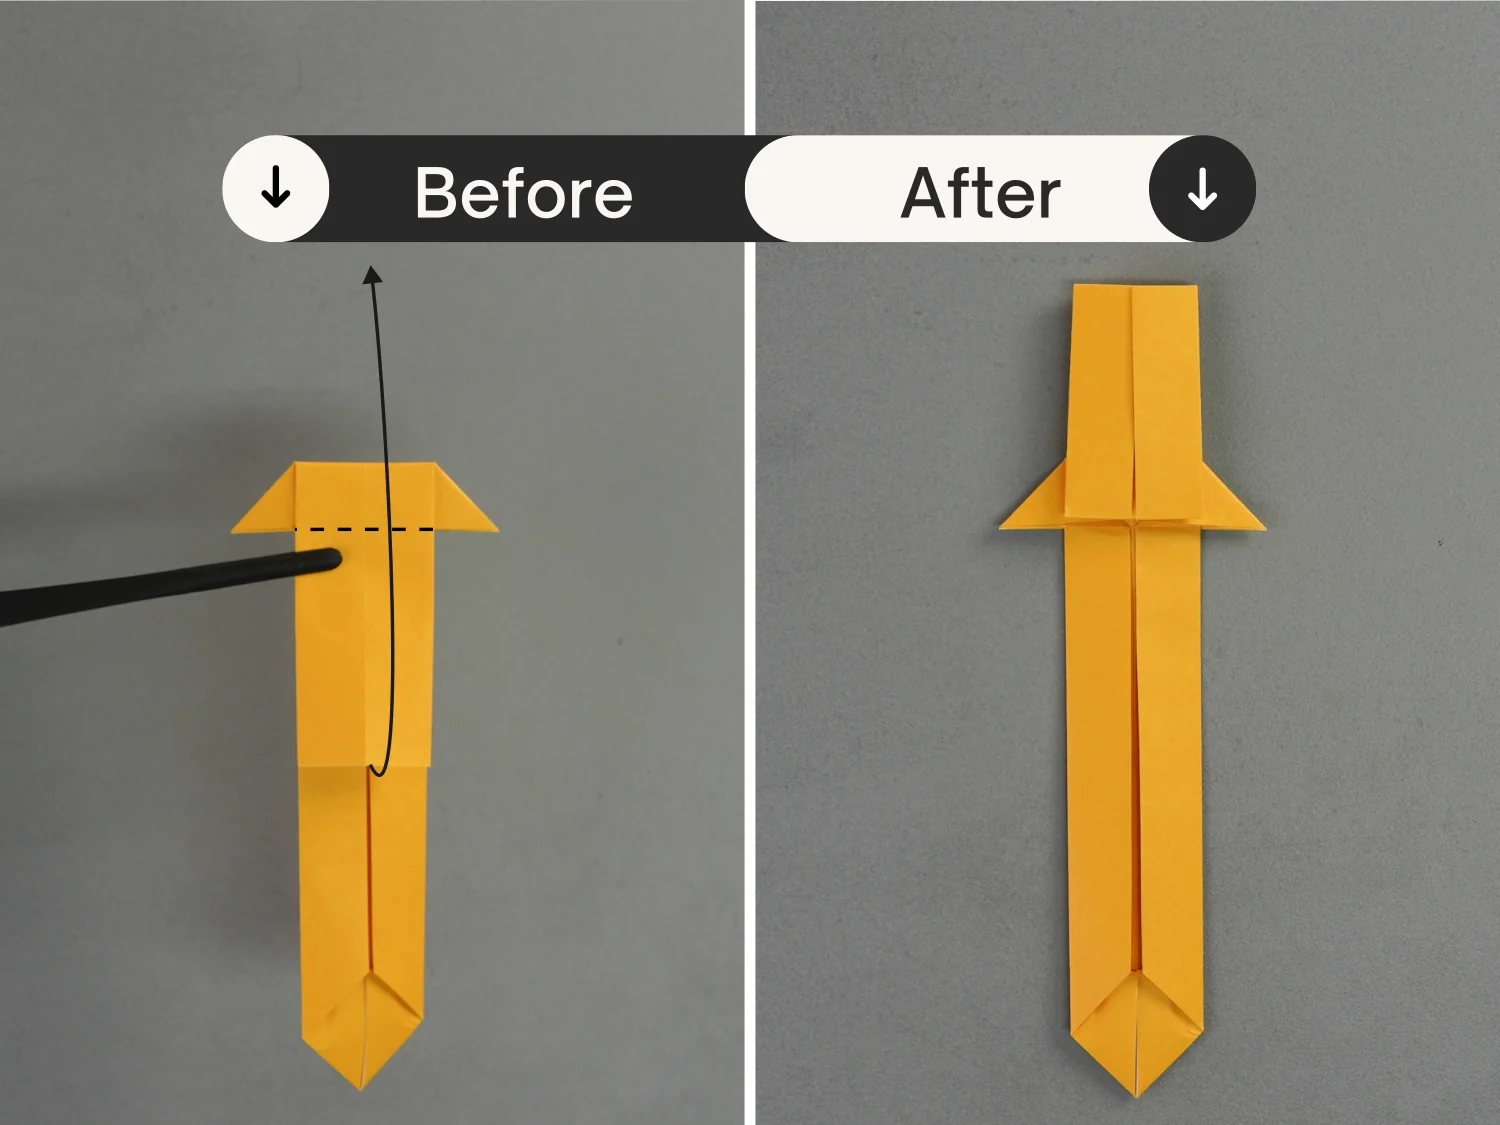
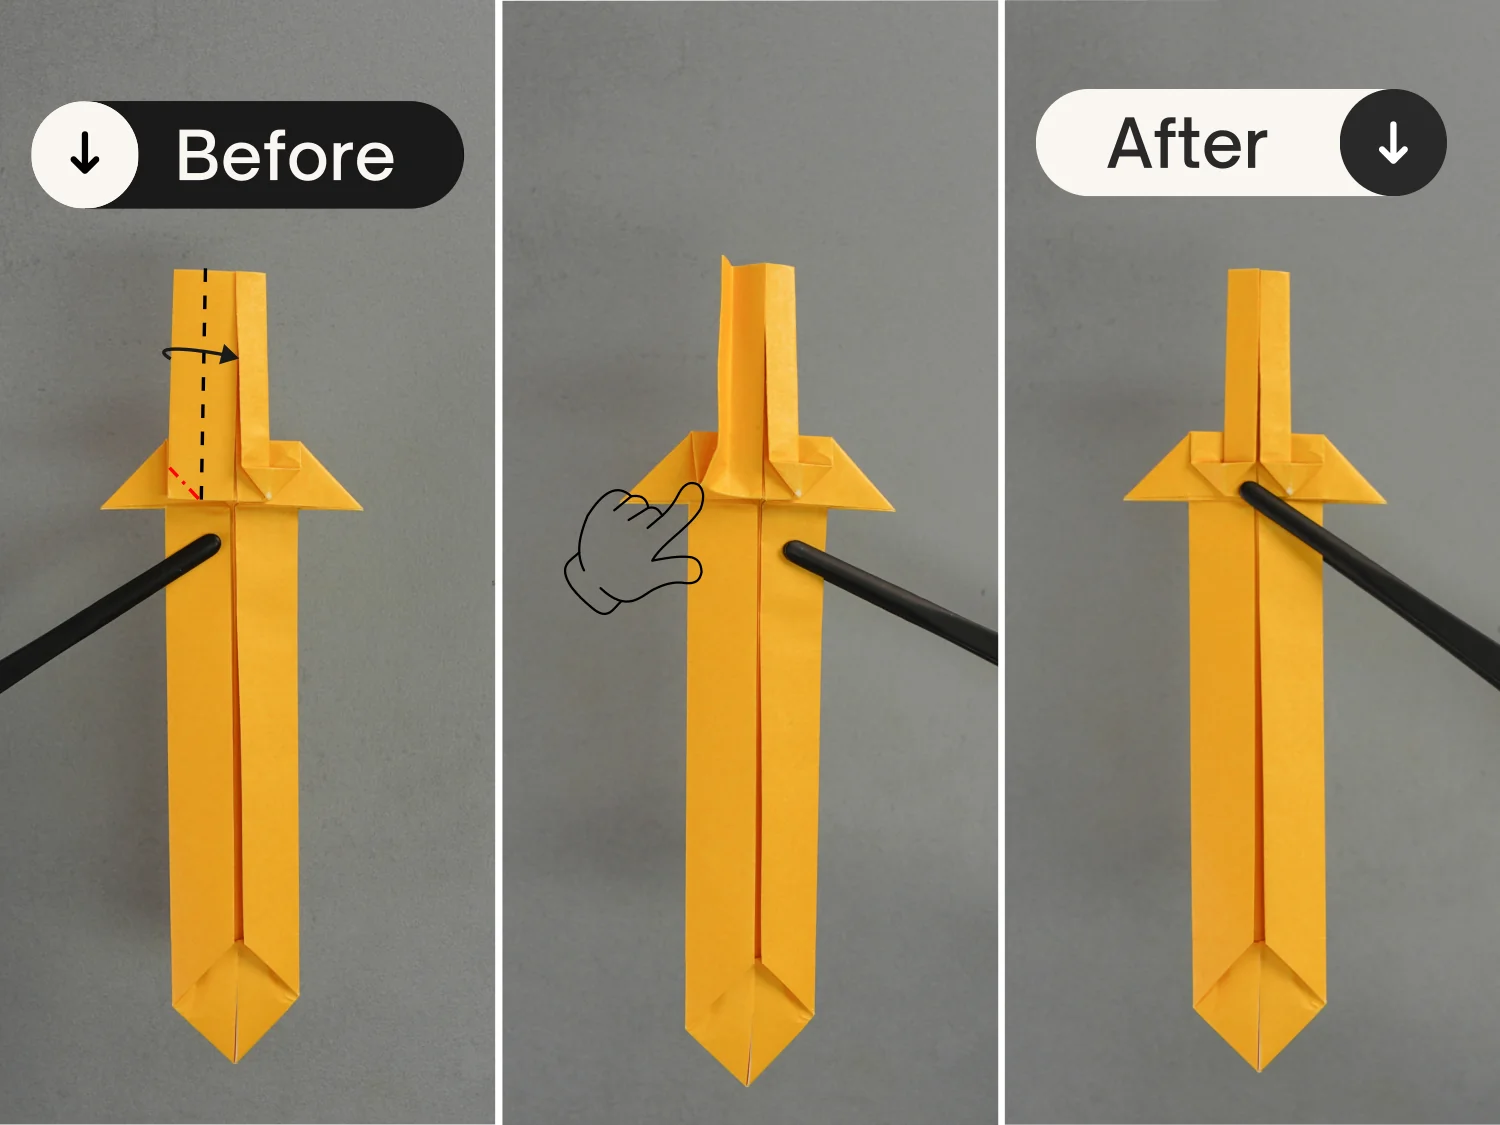
Step 18
Similarly, fold the left edge of the top layer to the right side along the dotted line, and squash the bottom left corners of this layer.
What’s Next
That’s your cool origami sword, it would be a great gift for your children. Now you can explore our other easy origami instructions. Happy folding!


