How to Make an Easy Origami Balloon
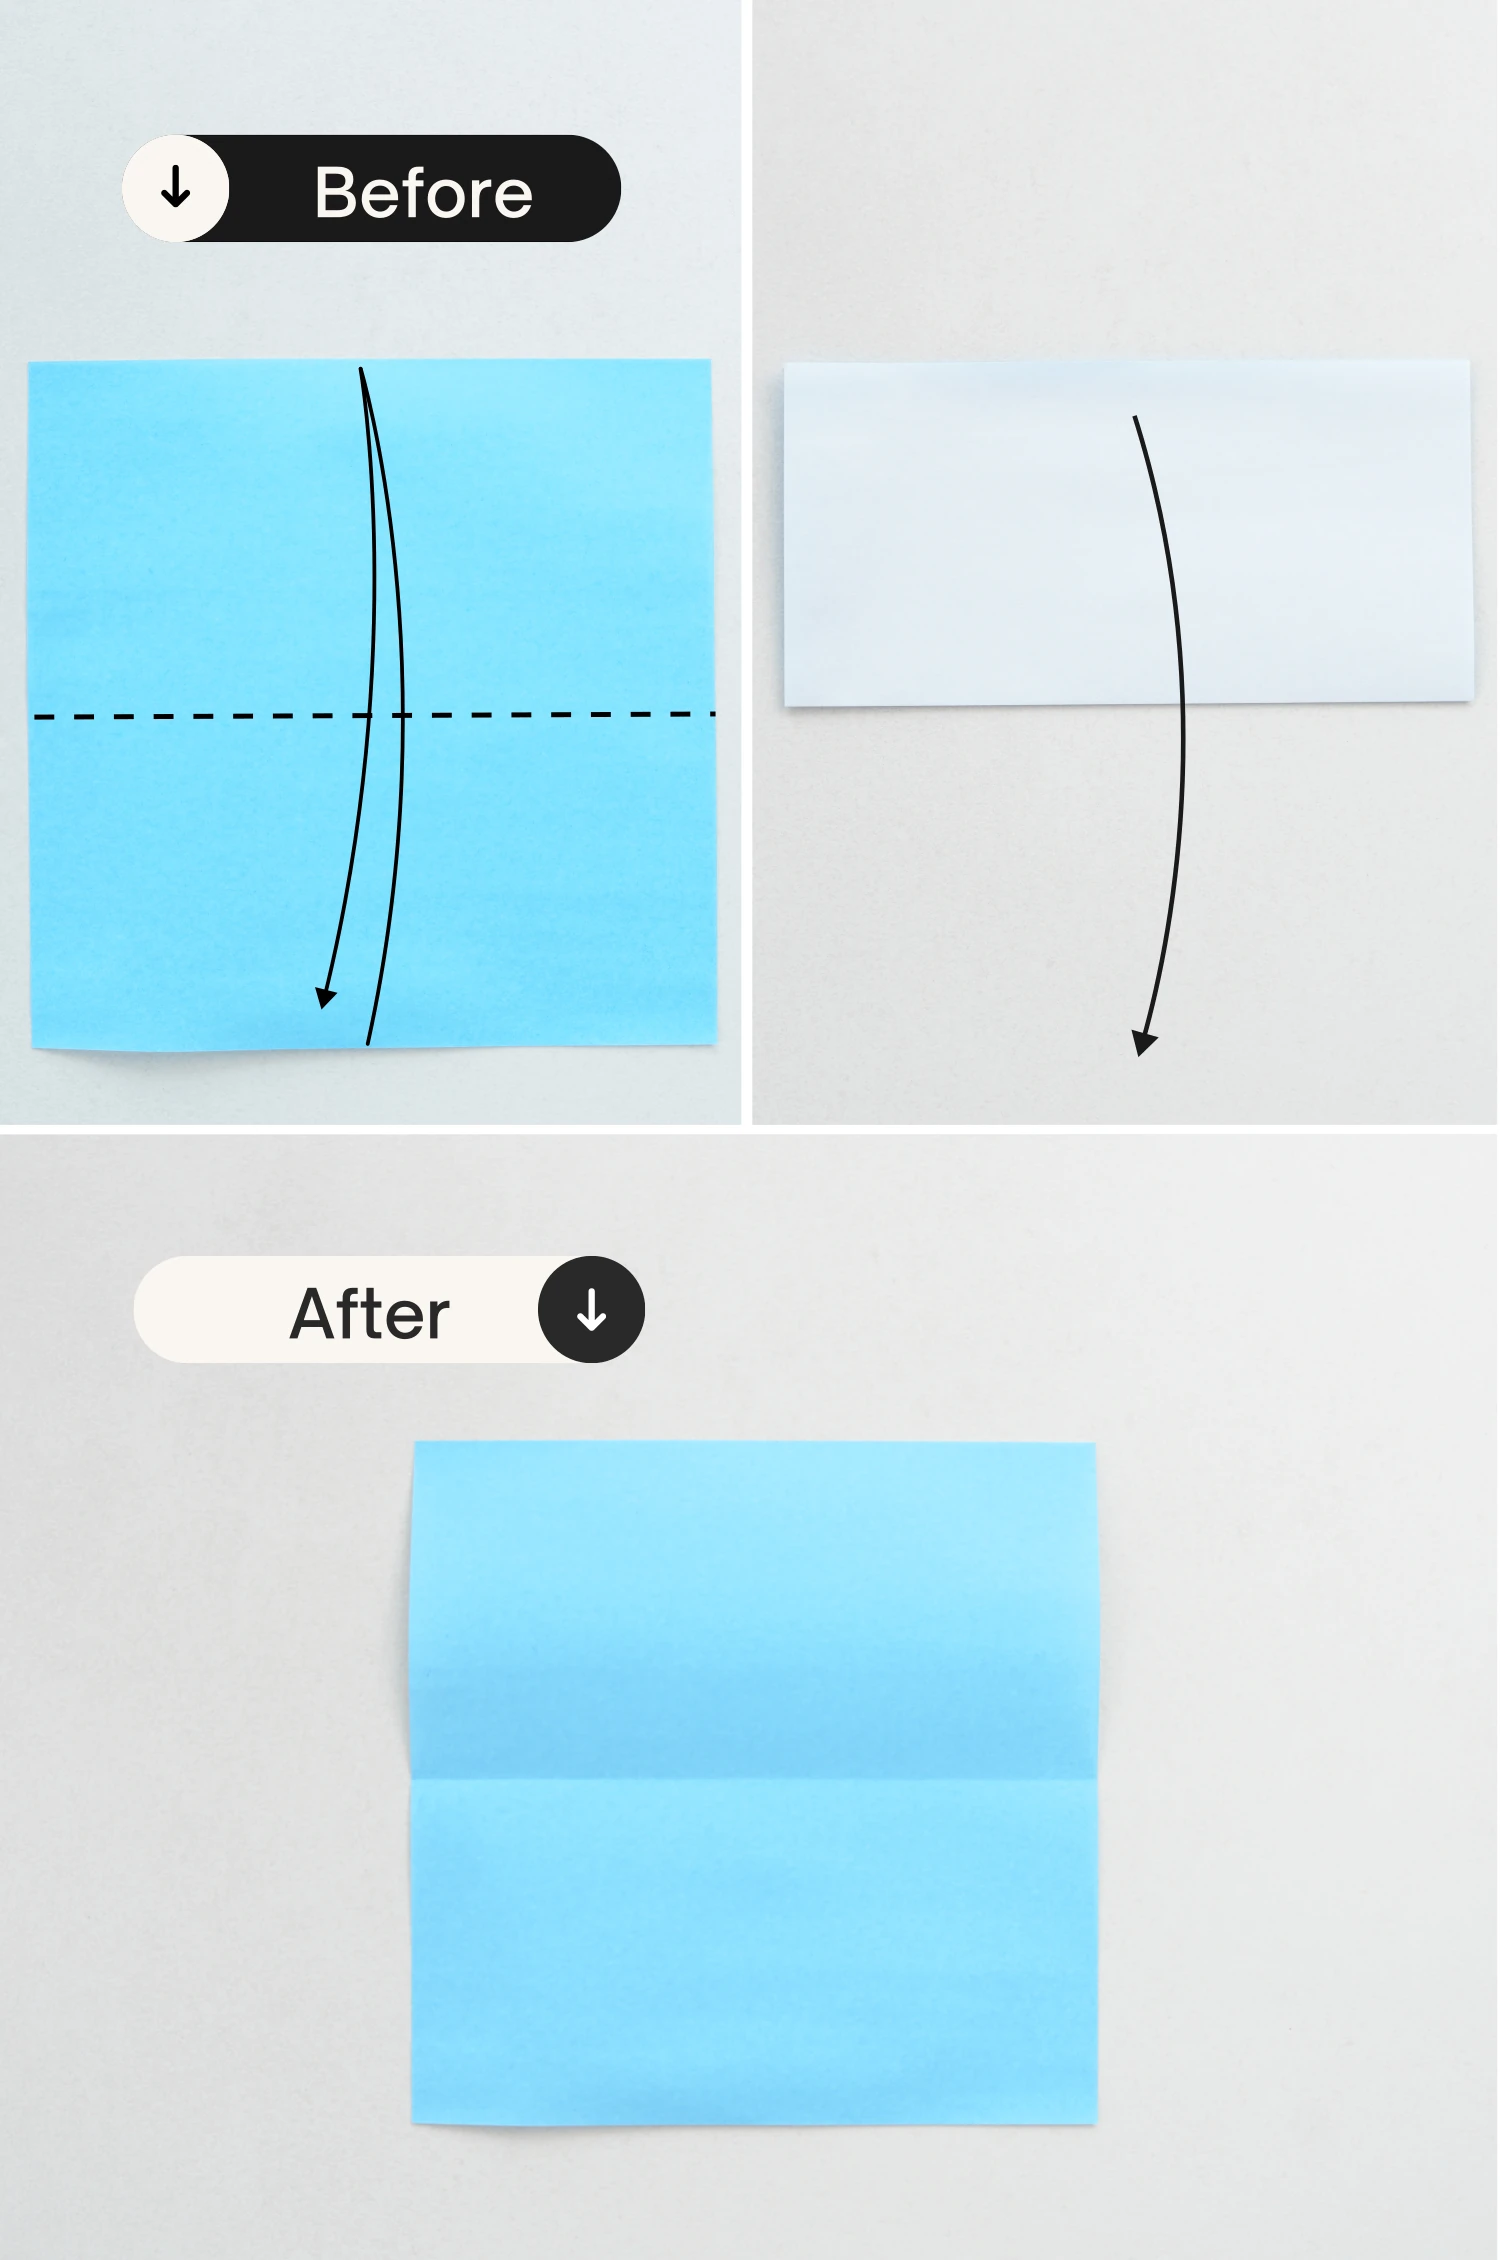
Step 1
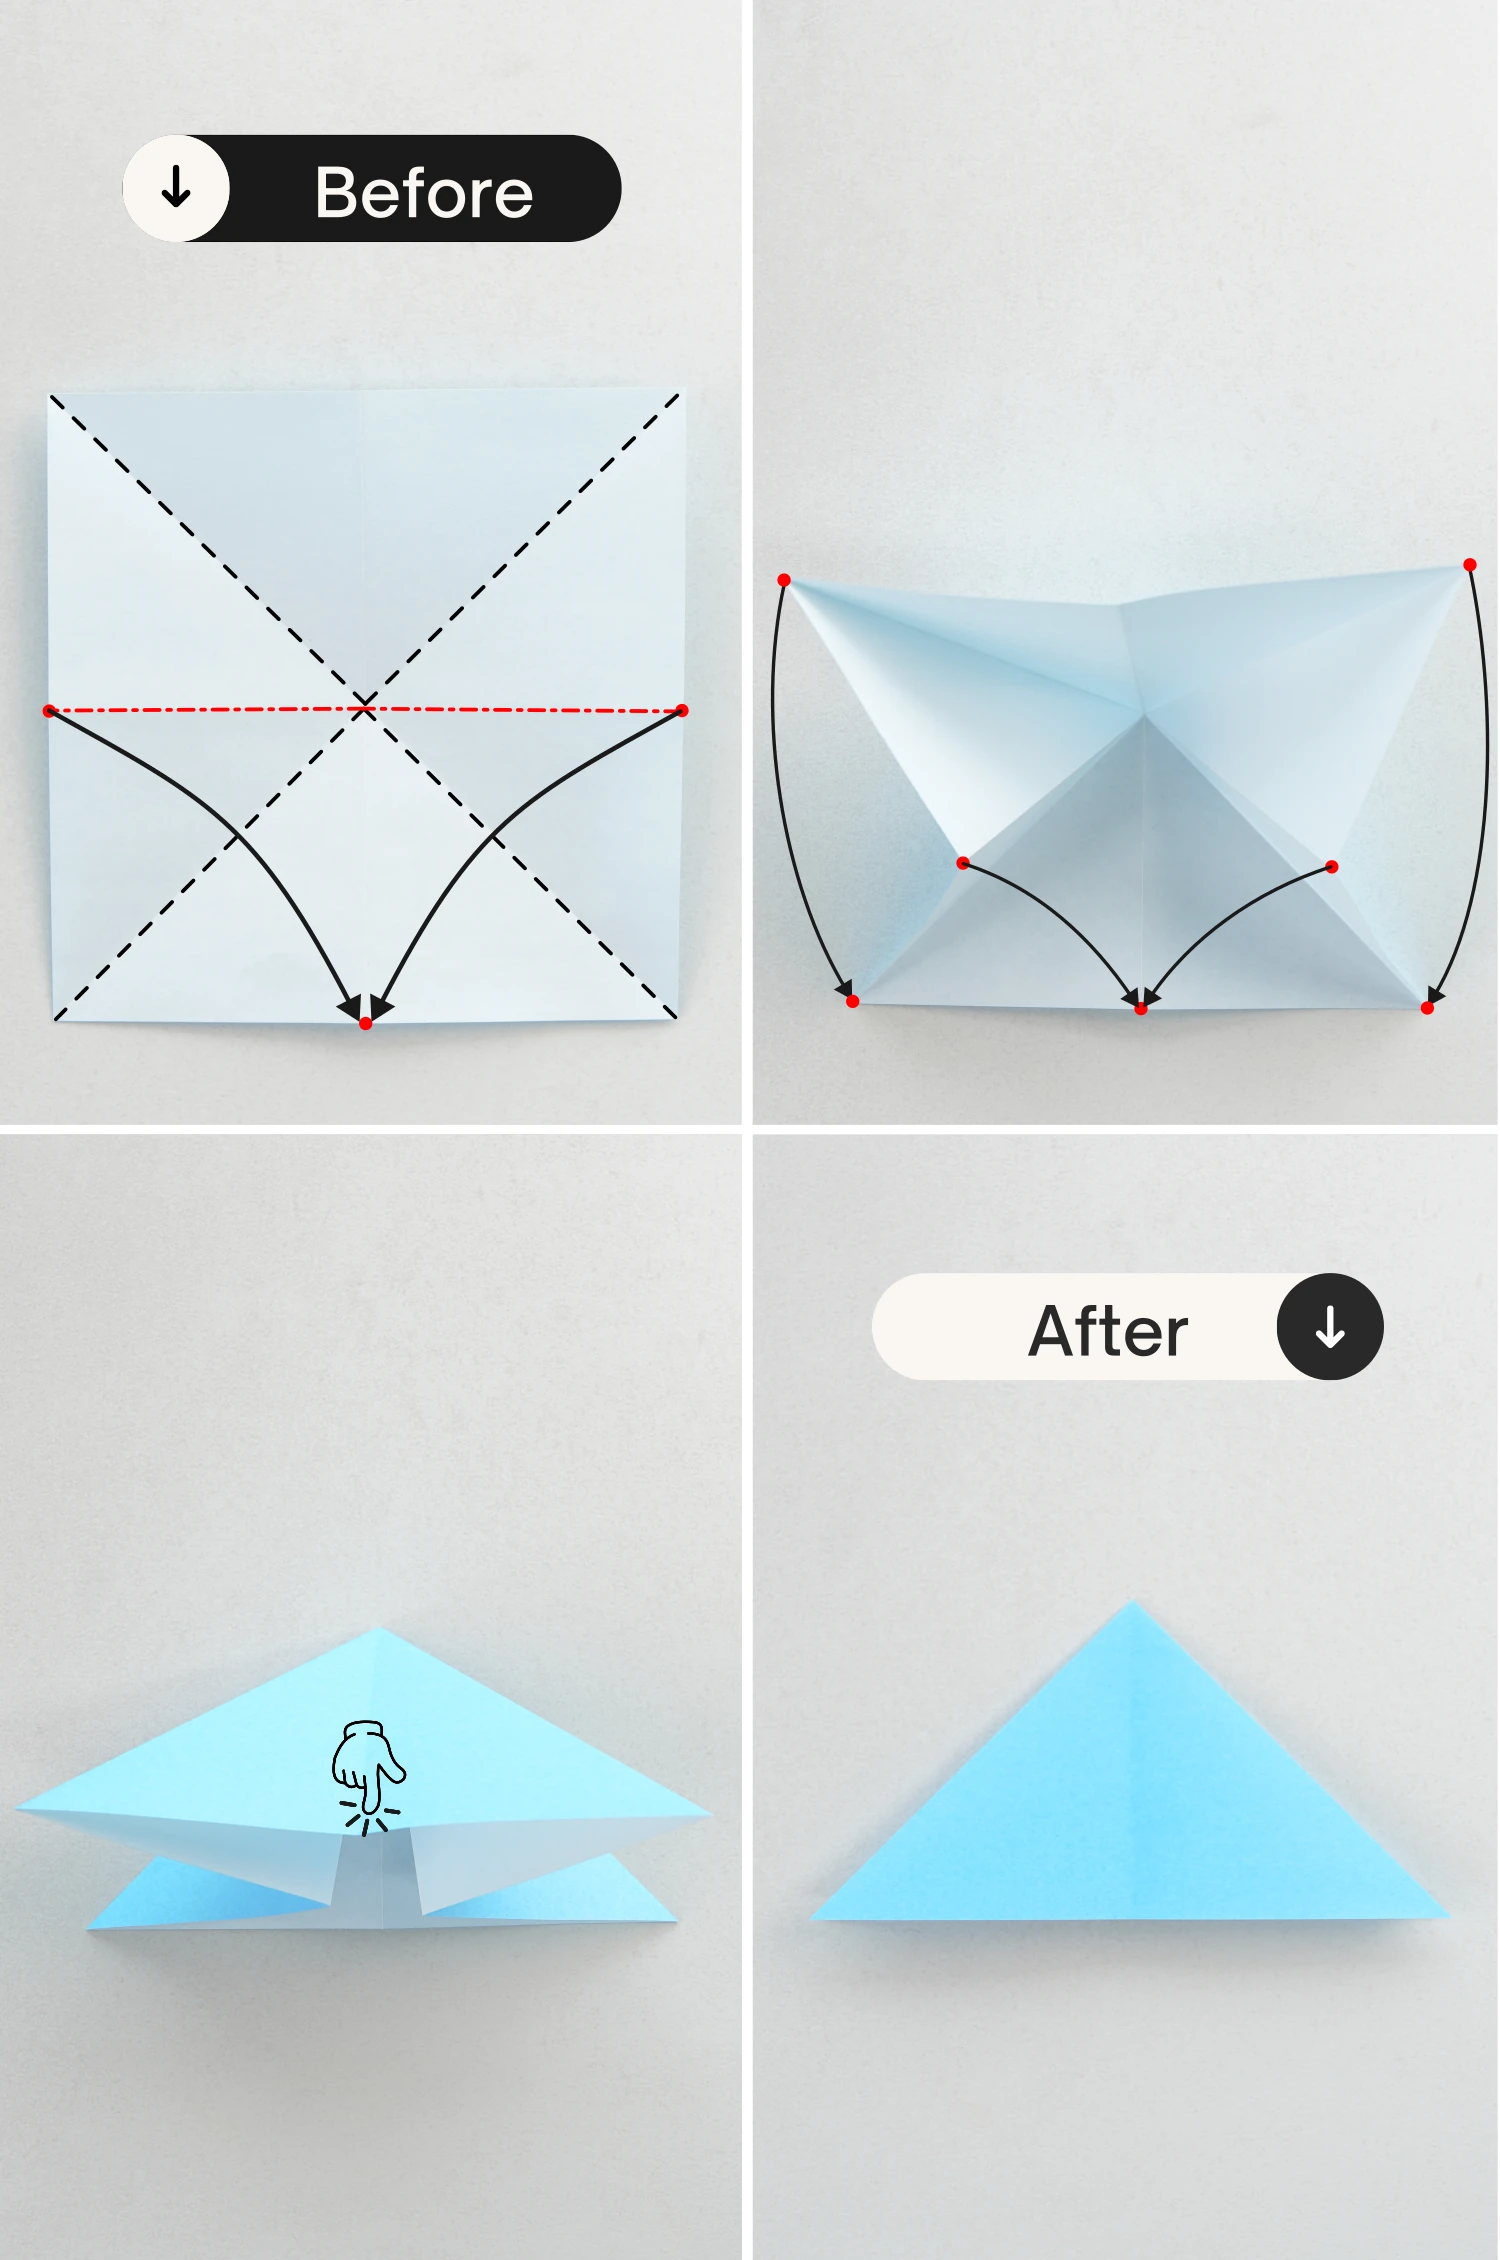
Start with the blue side of the paper facing up, and fold it in half horizontally, crease it well then unfold.
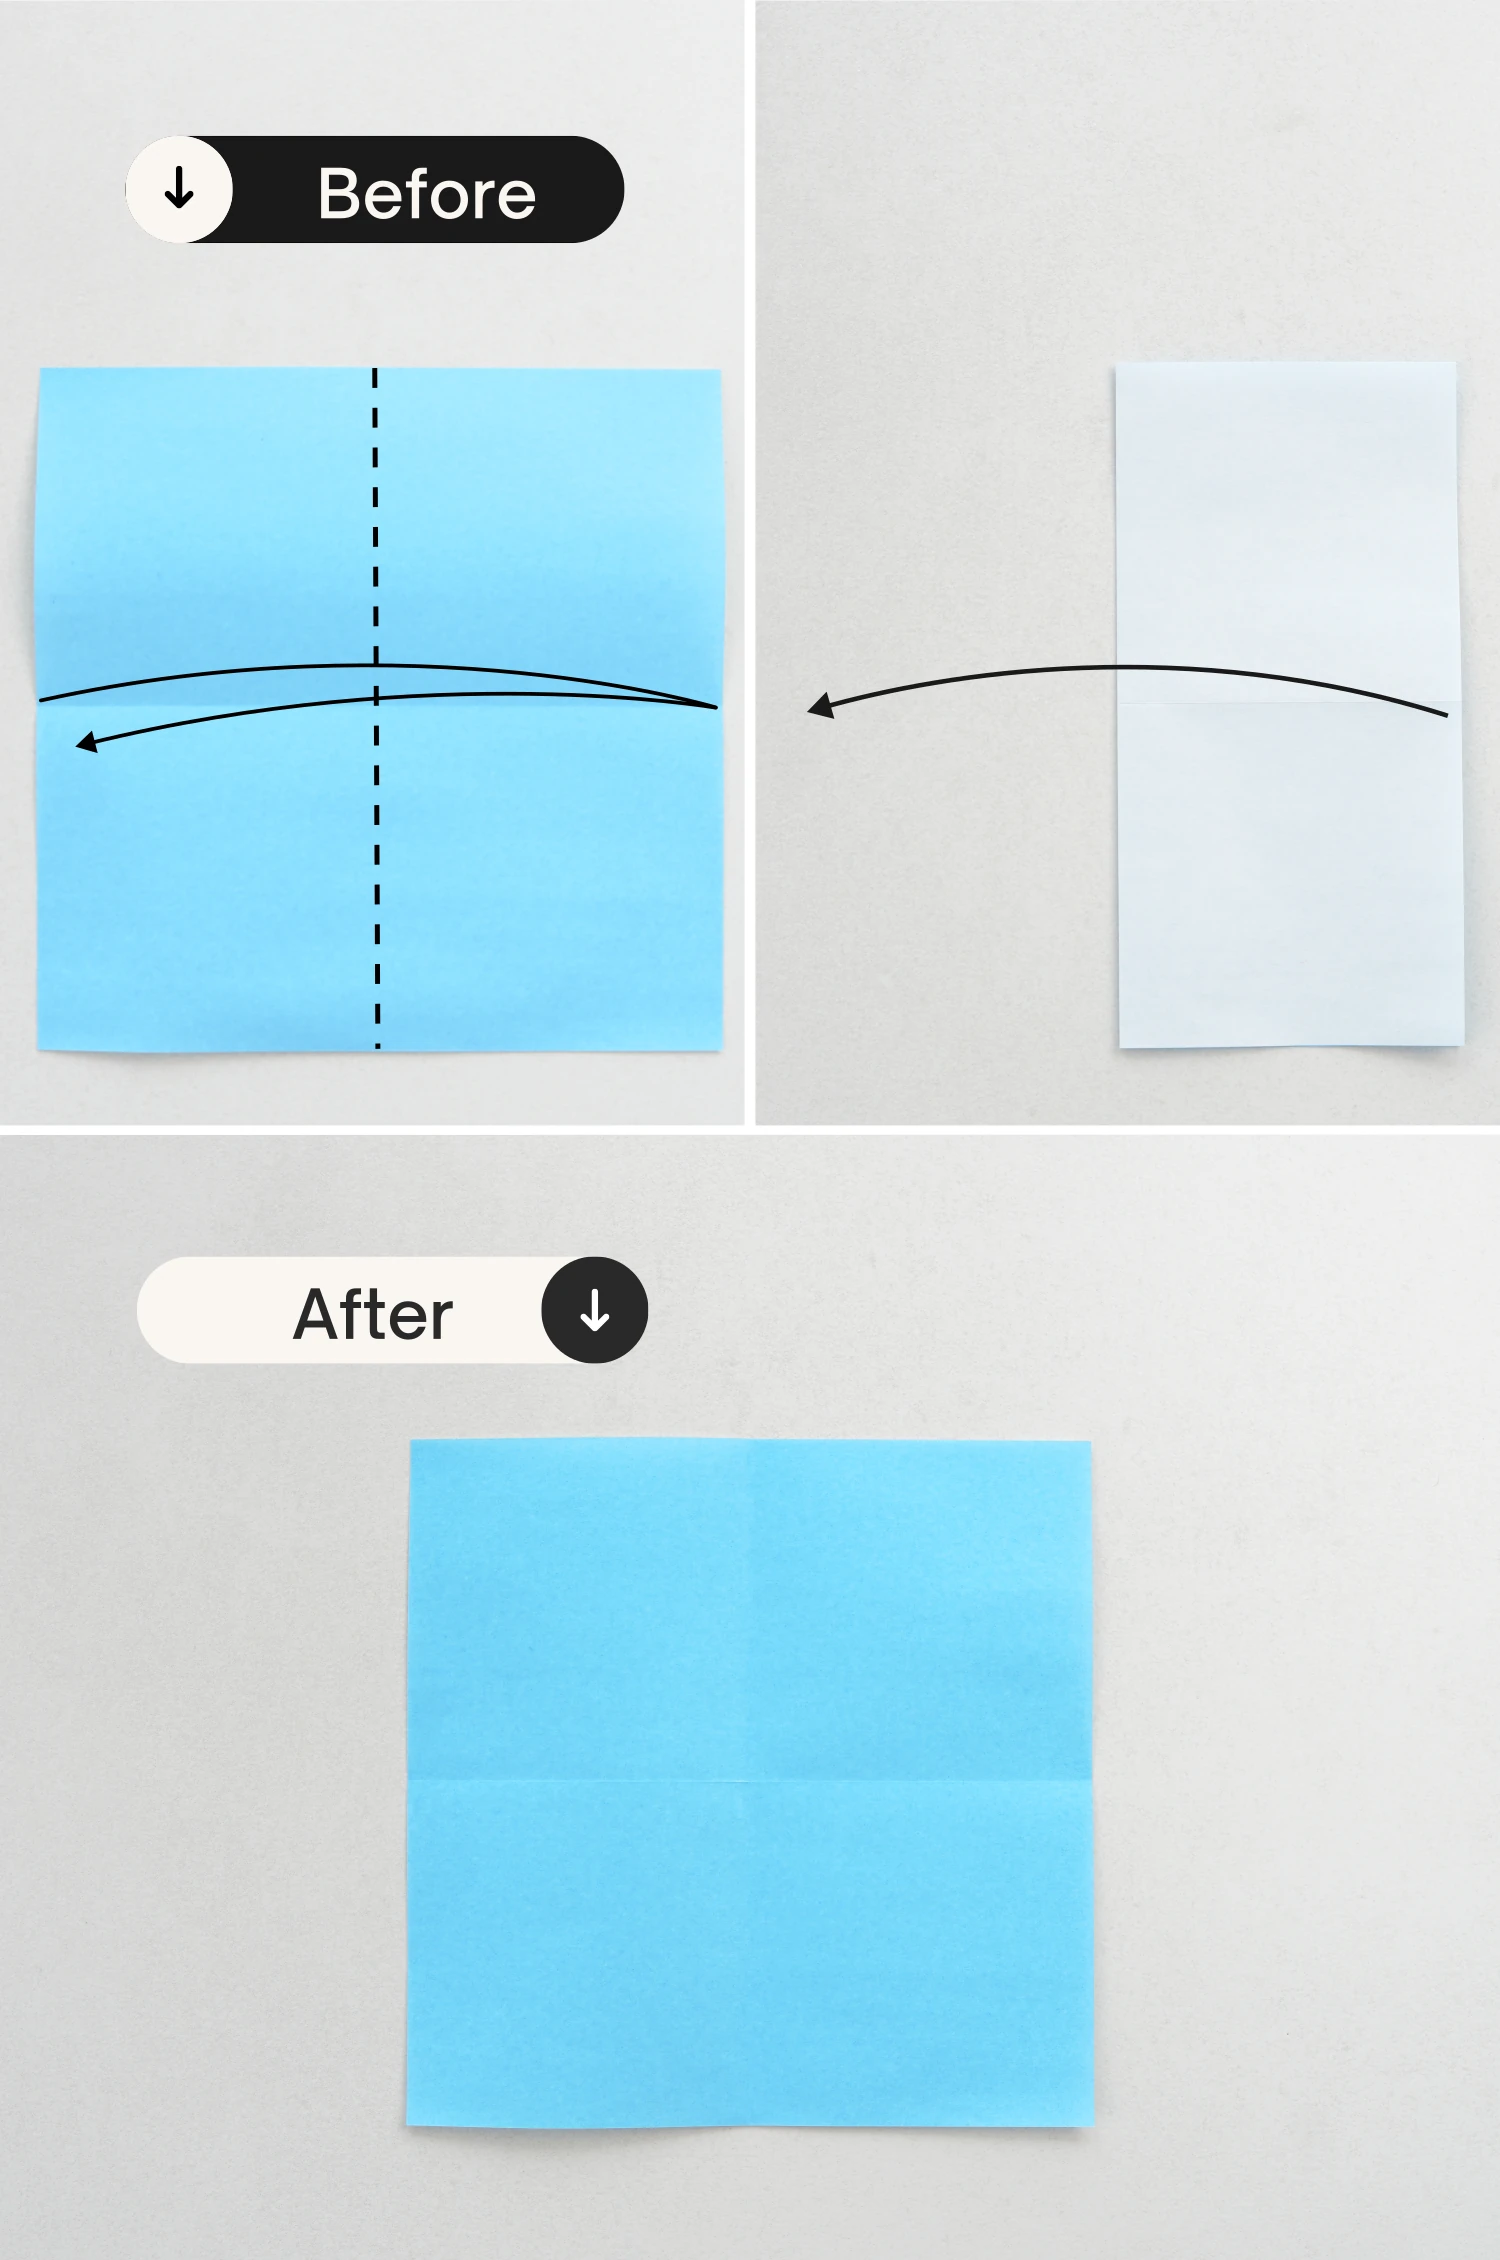
Step 2
Fold it in half vertically, crease it well then unfold.
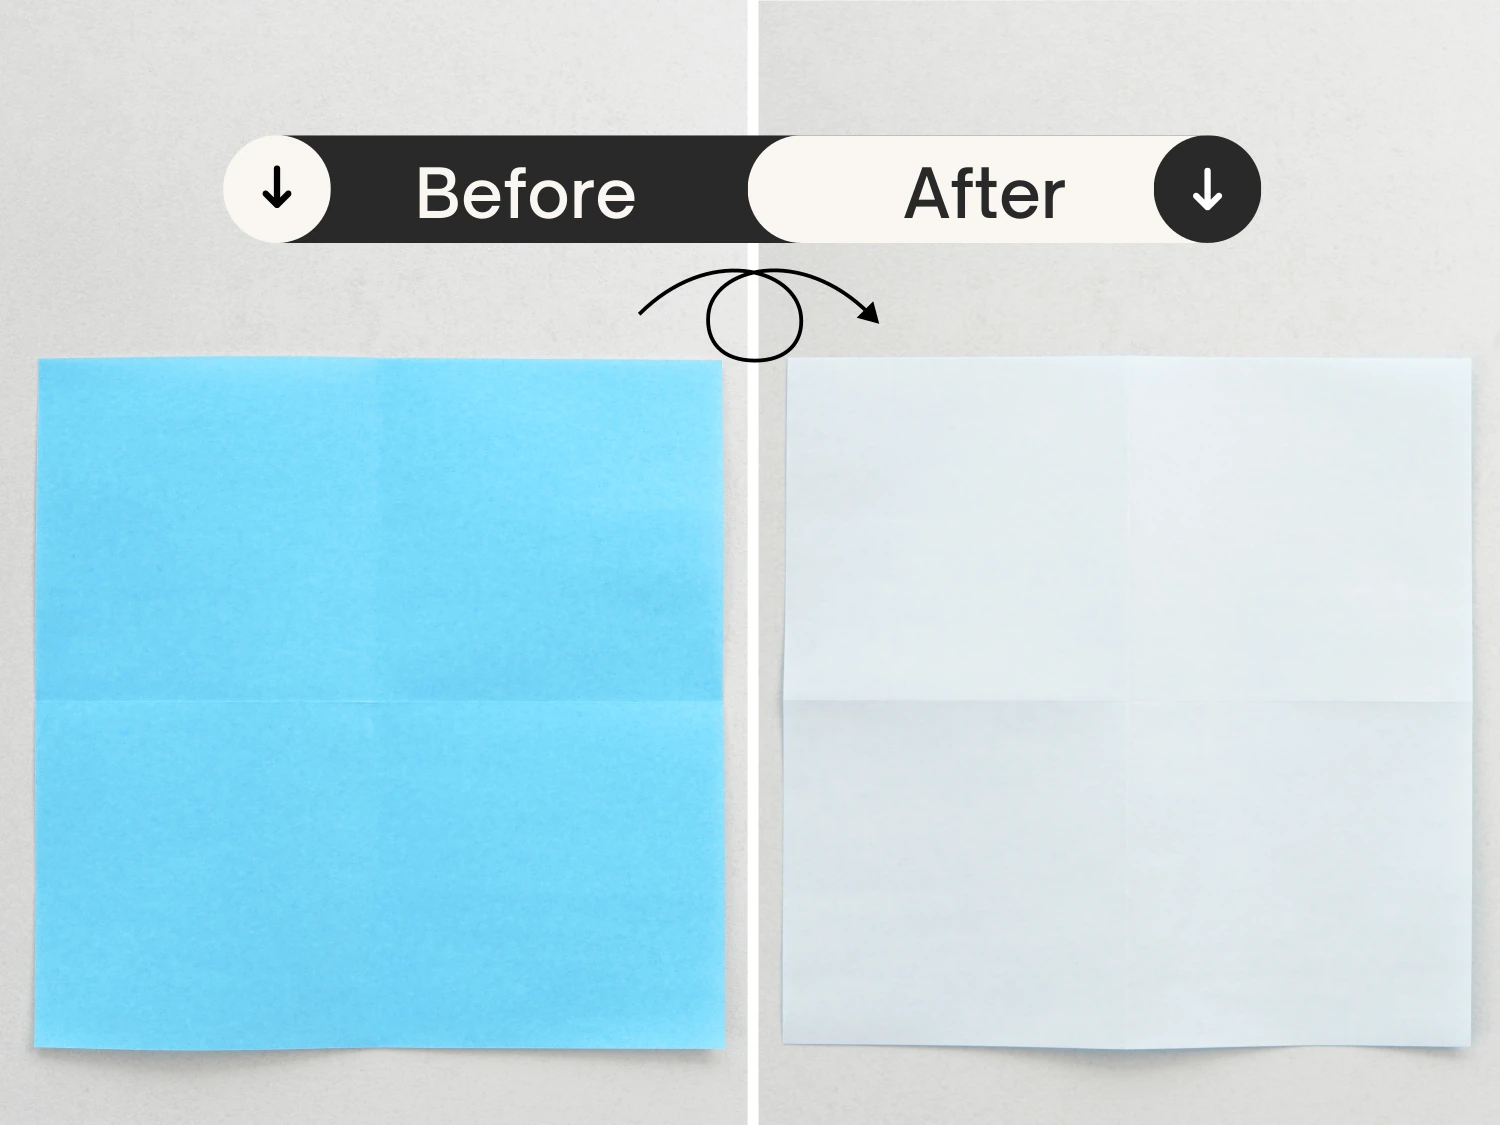
Step 3
Flip it over.
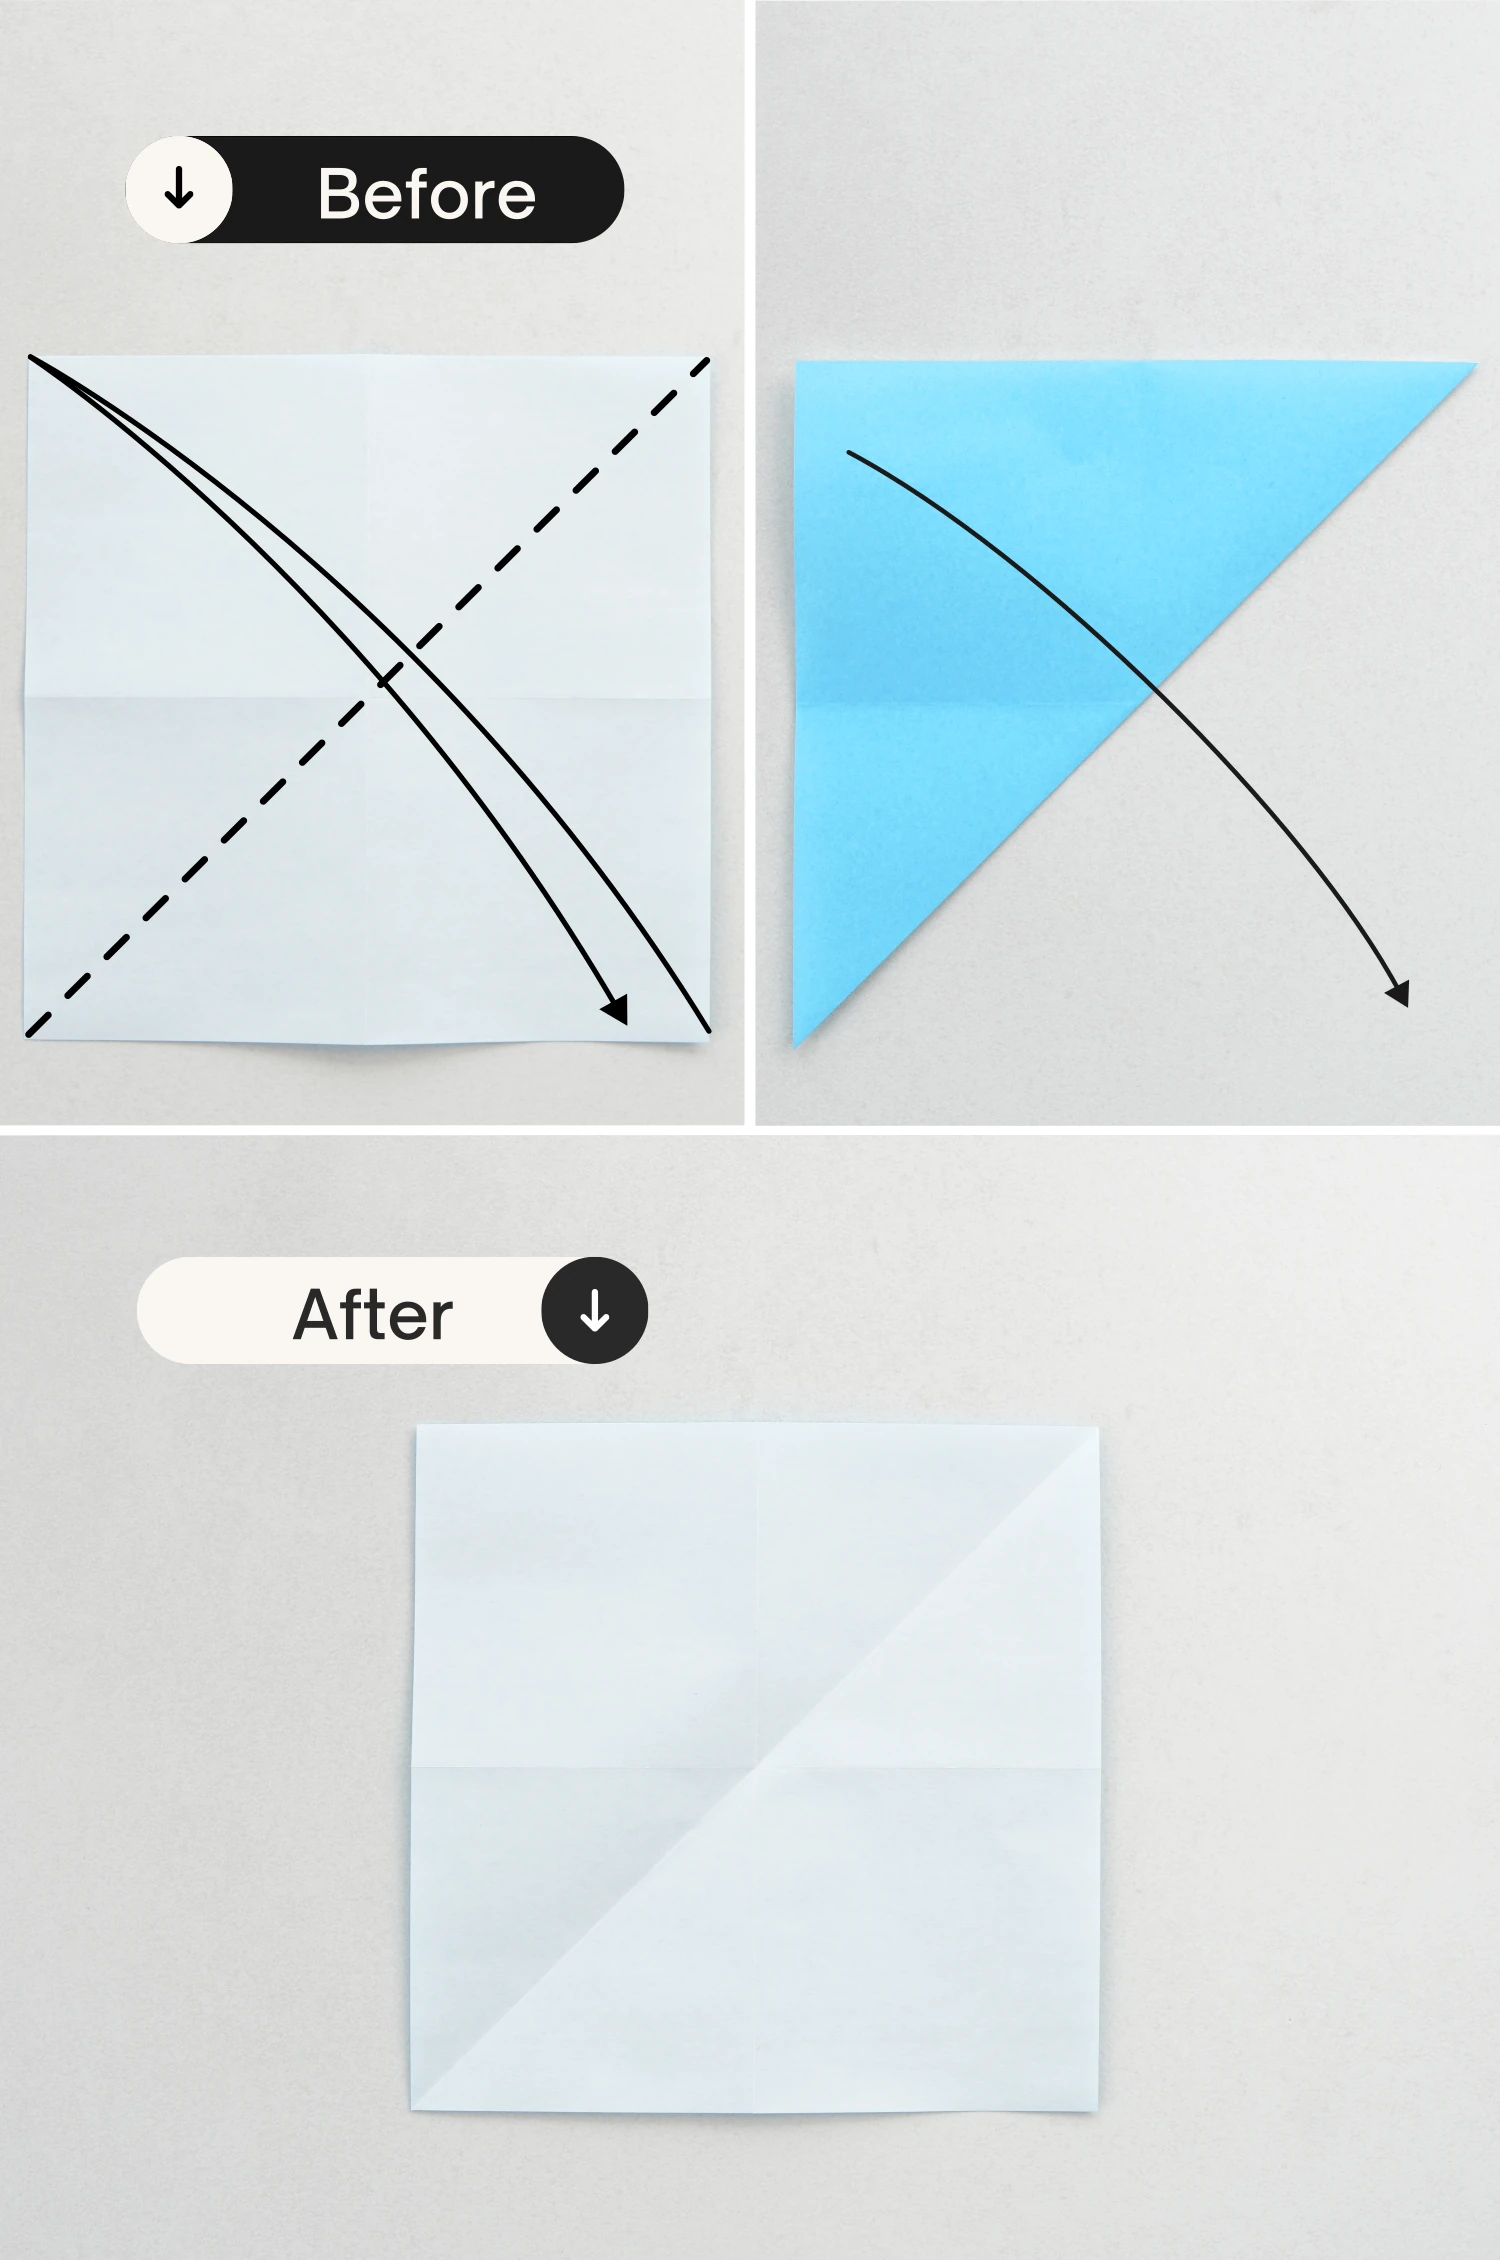
Step 4
Fold it in half diagonally, crease it well then unfold.
Step 5
Fold it in half diagonally for another side, crease it well then unfold.

Step 6
Now, use both hands to press the two center points on the right and left edges. Then push it down to make the center points of the left, right, and top edges meet the center point of the bottom edge.
Flatten it to create a triangle.
Step 7
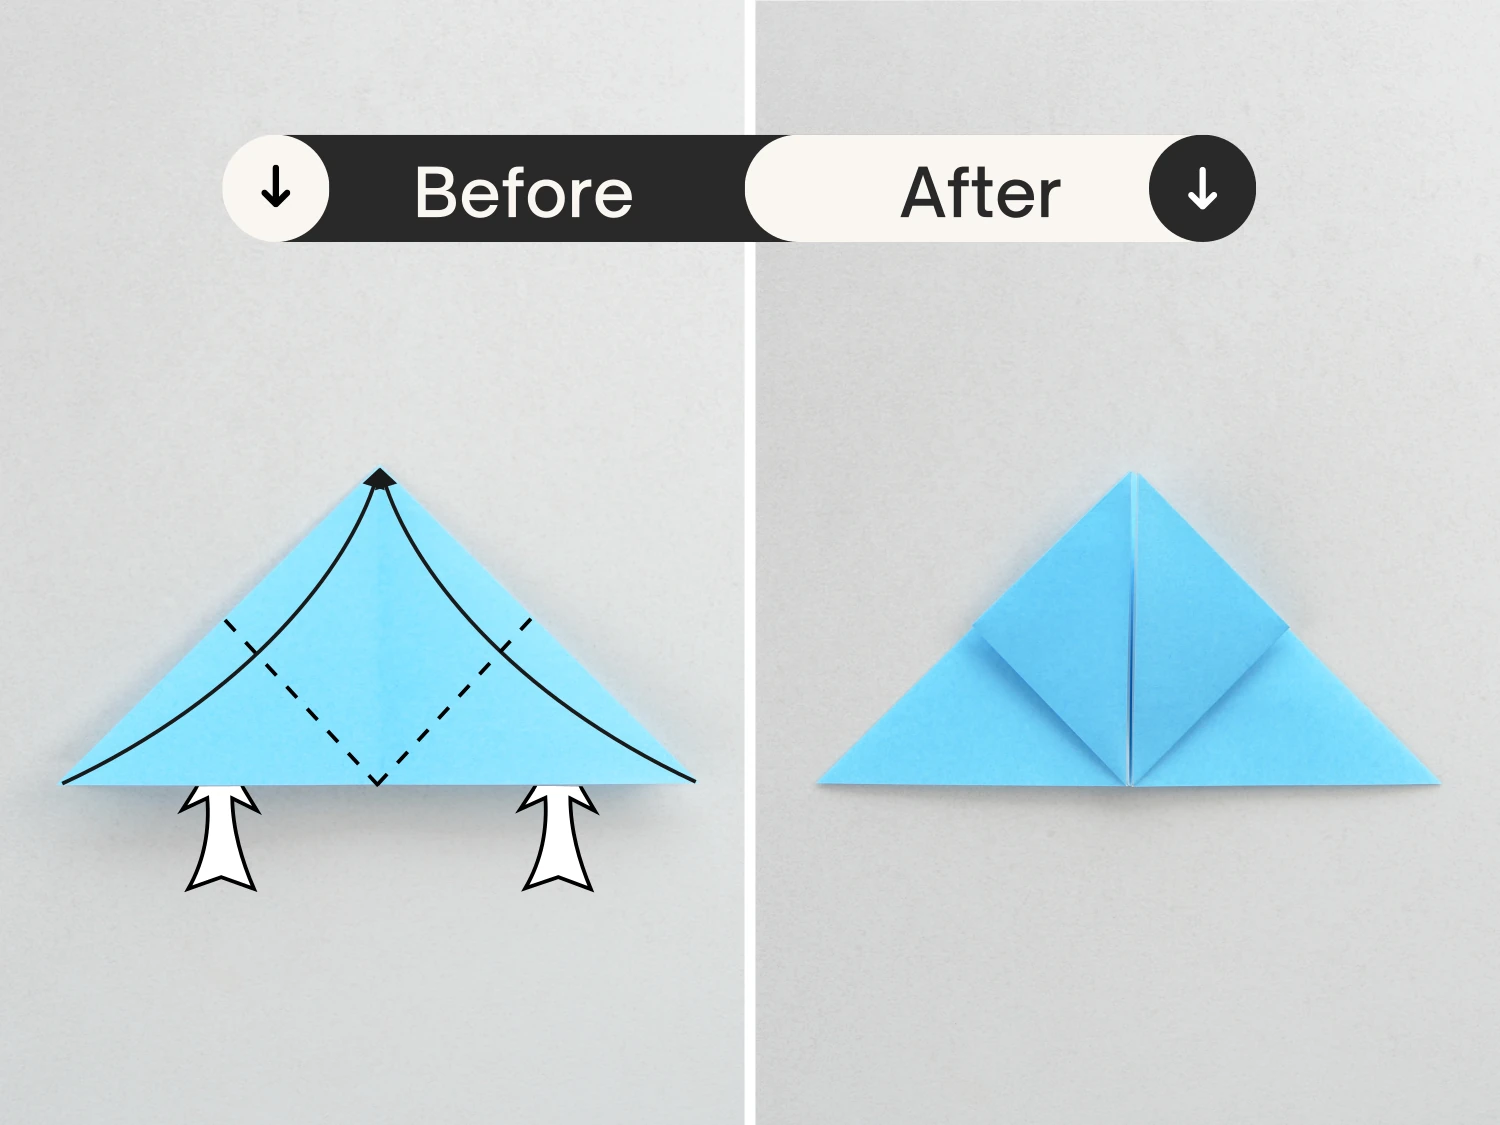
Fold the bottom left and right corners of the top layer up diagonally, to meet the top corner and form two triangles.
Step 8
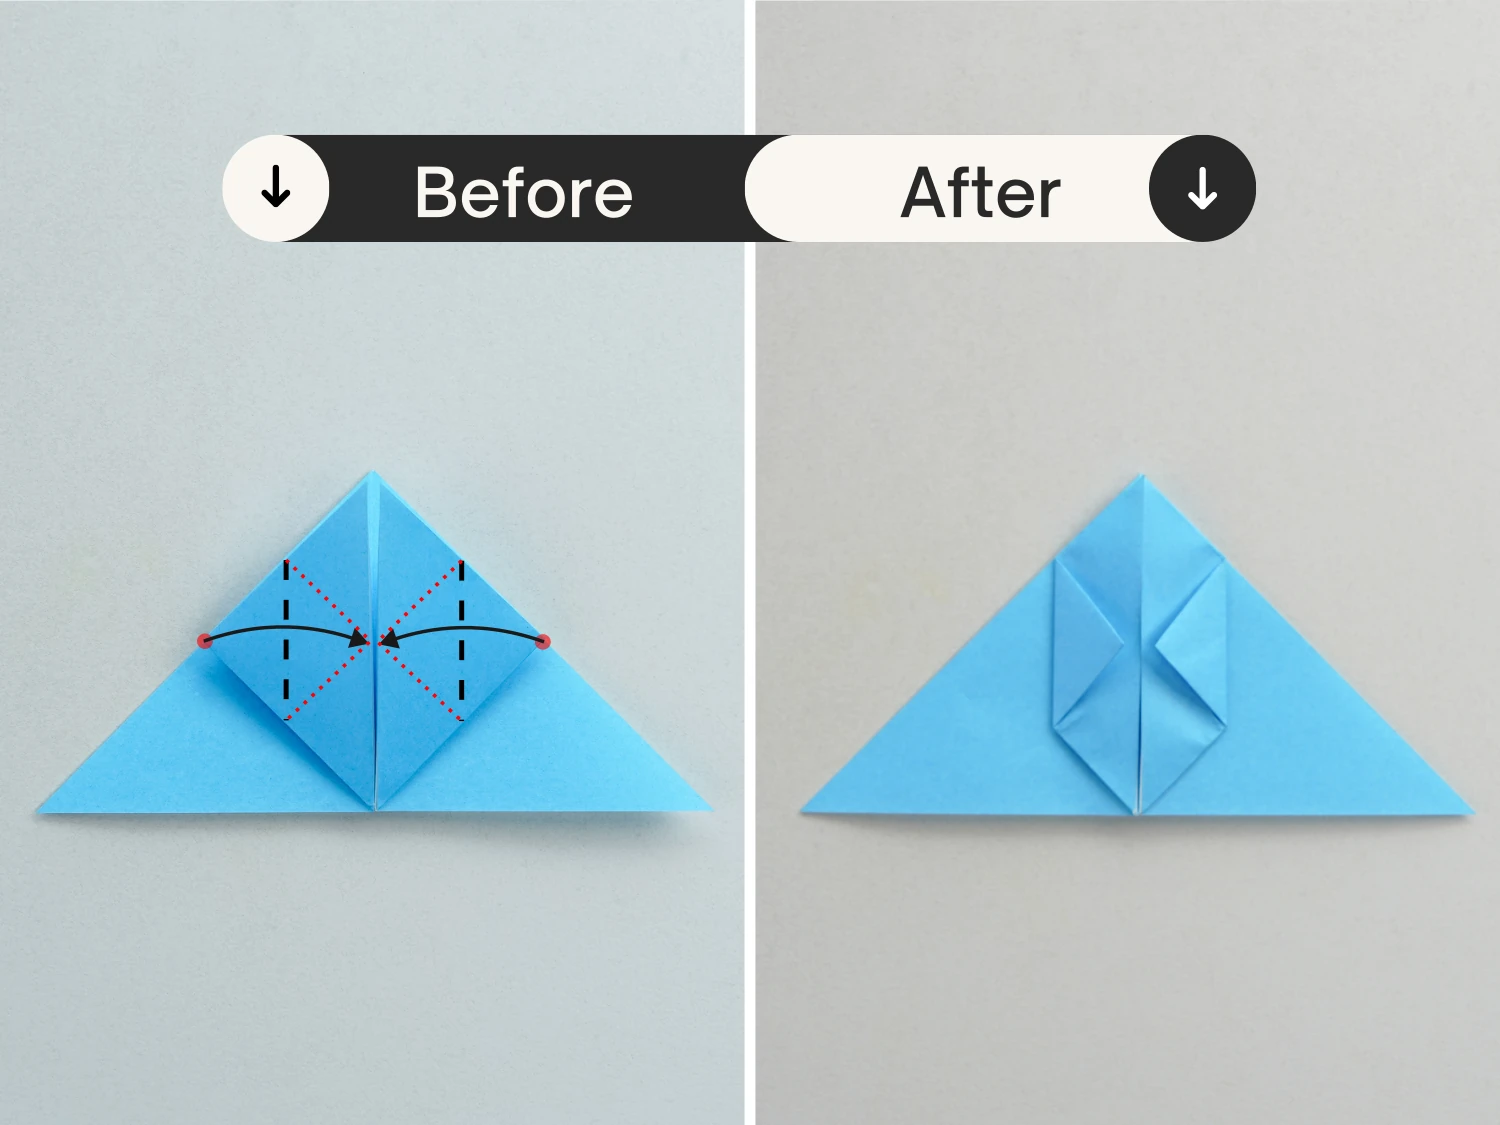
Then fold the left corner of the left triangle to the right diagonally to meet the right edge.
Fold the right corner of the right triangle to the left to meet the left edge.
Step 9
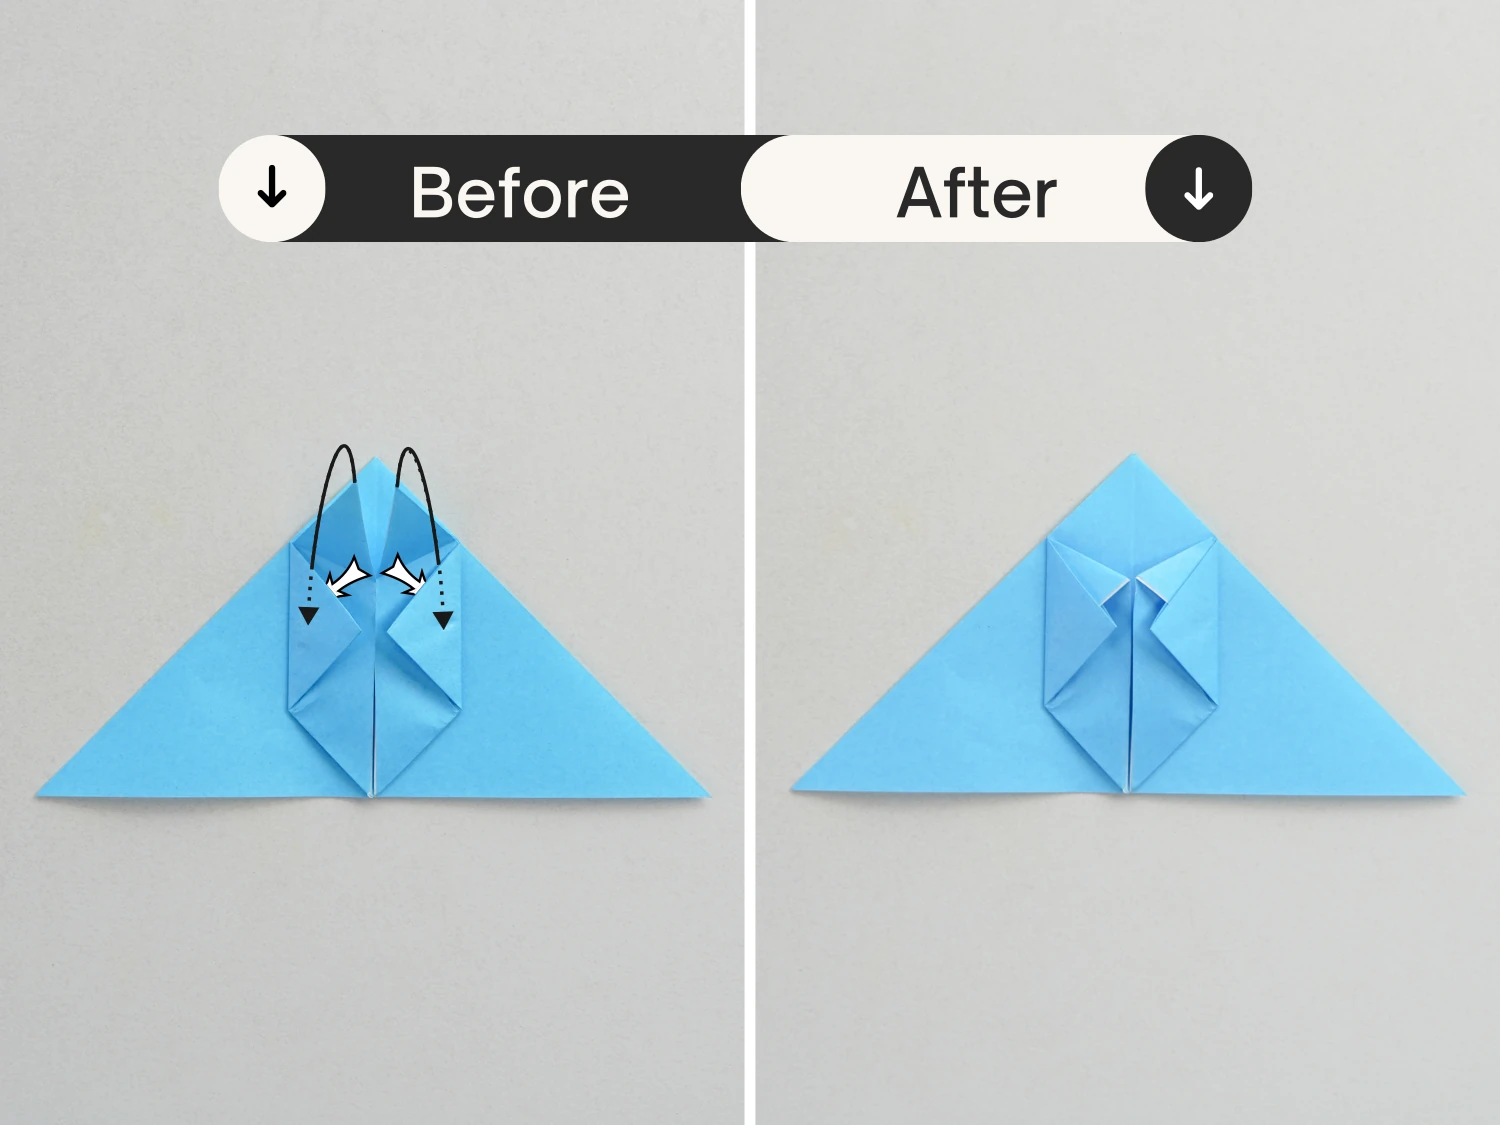
Fold the top part of the left edge(shown by the red line) down to align with the bottom edge of the top left triangle, crease it well then unfold.
Repeat this for the right side.

Step 10
Tuck the flaps you made in the previous step into the pocket under them.
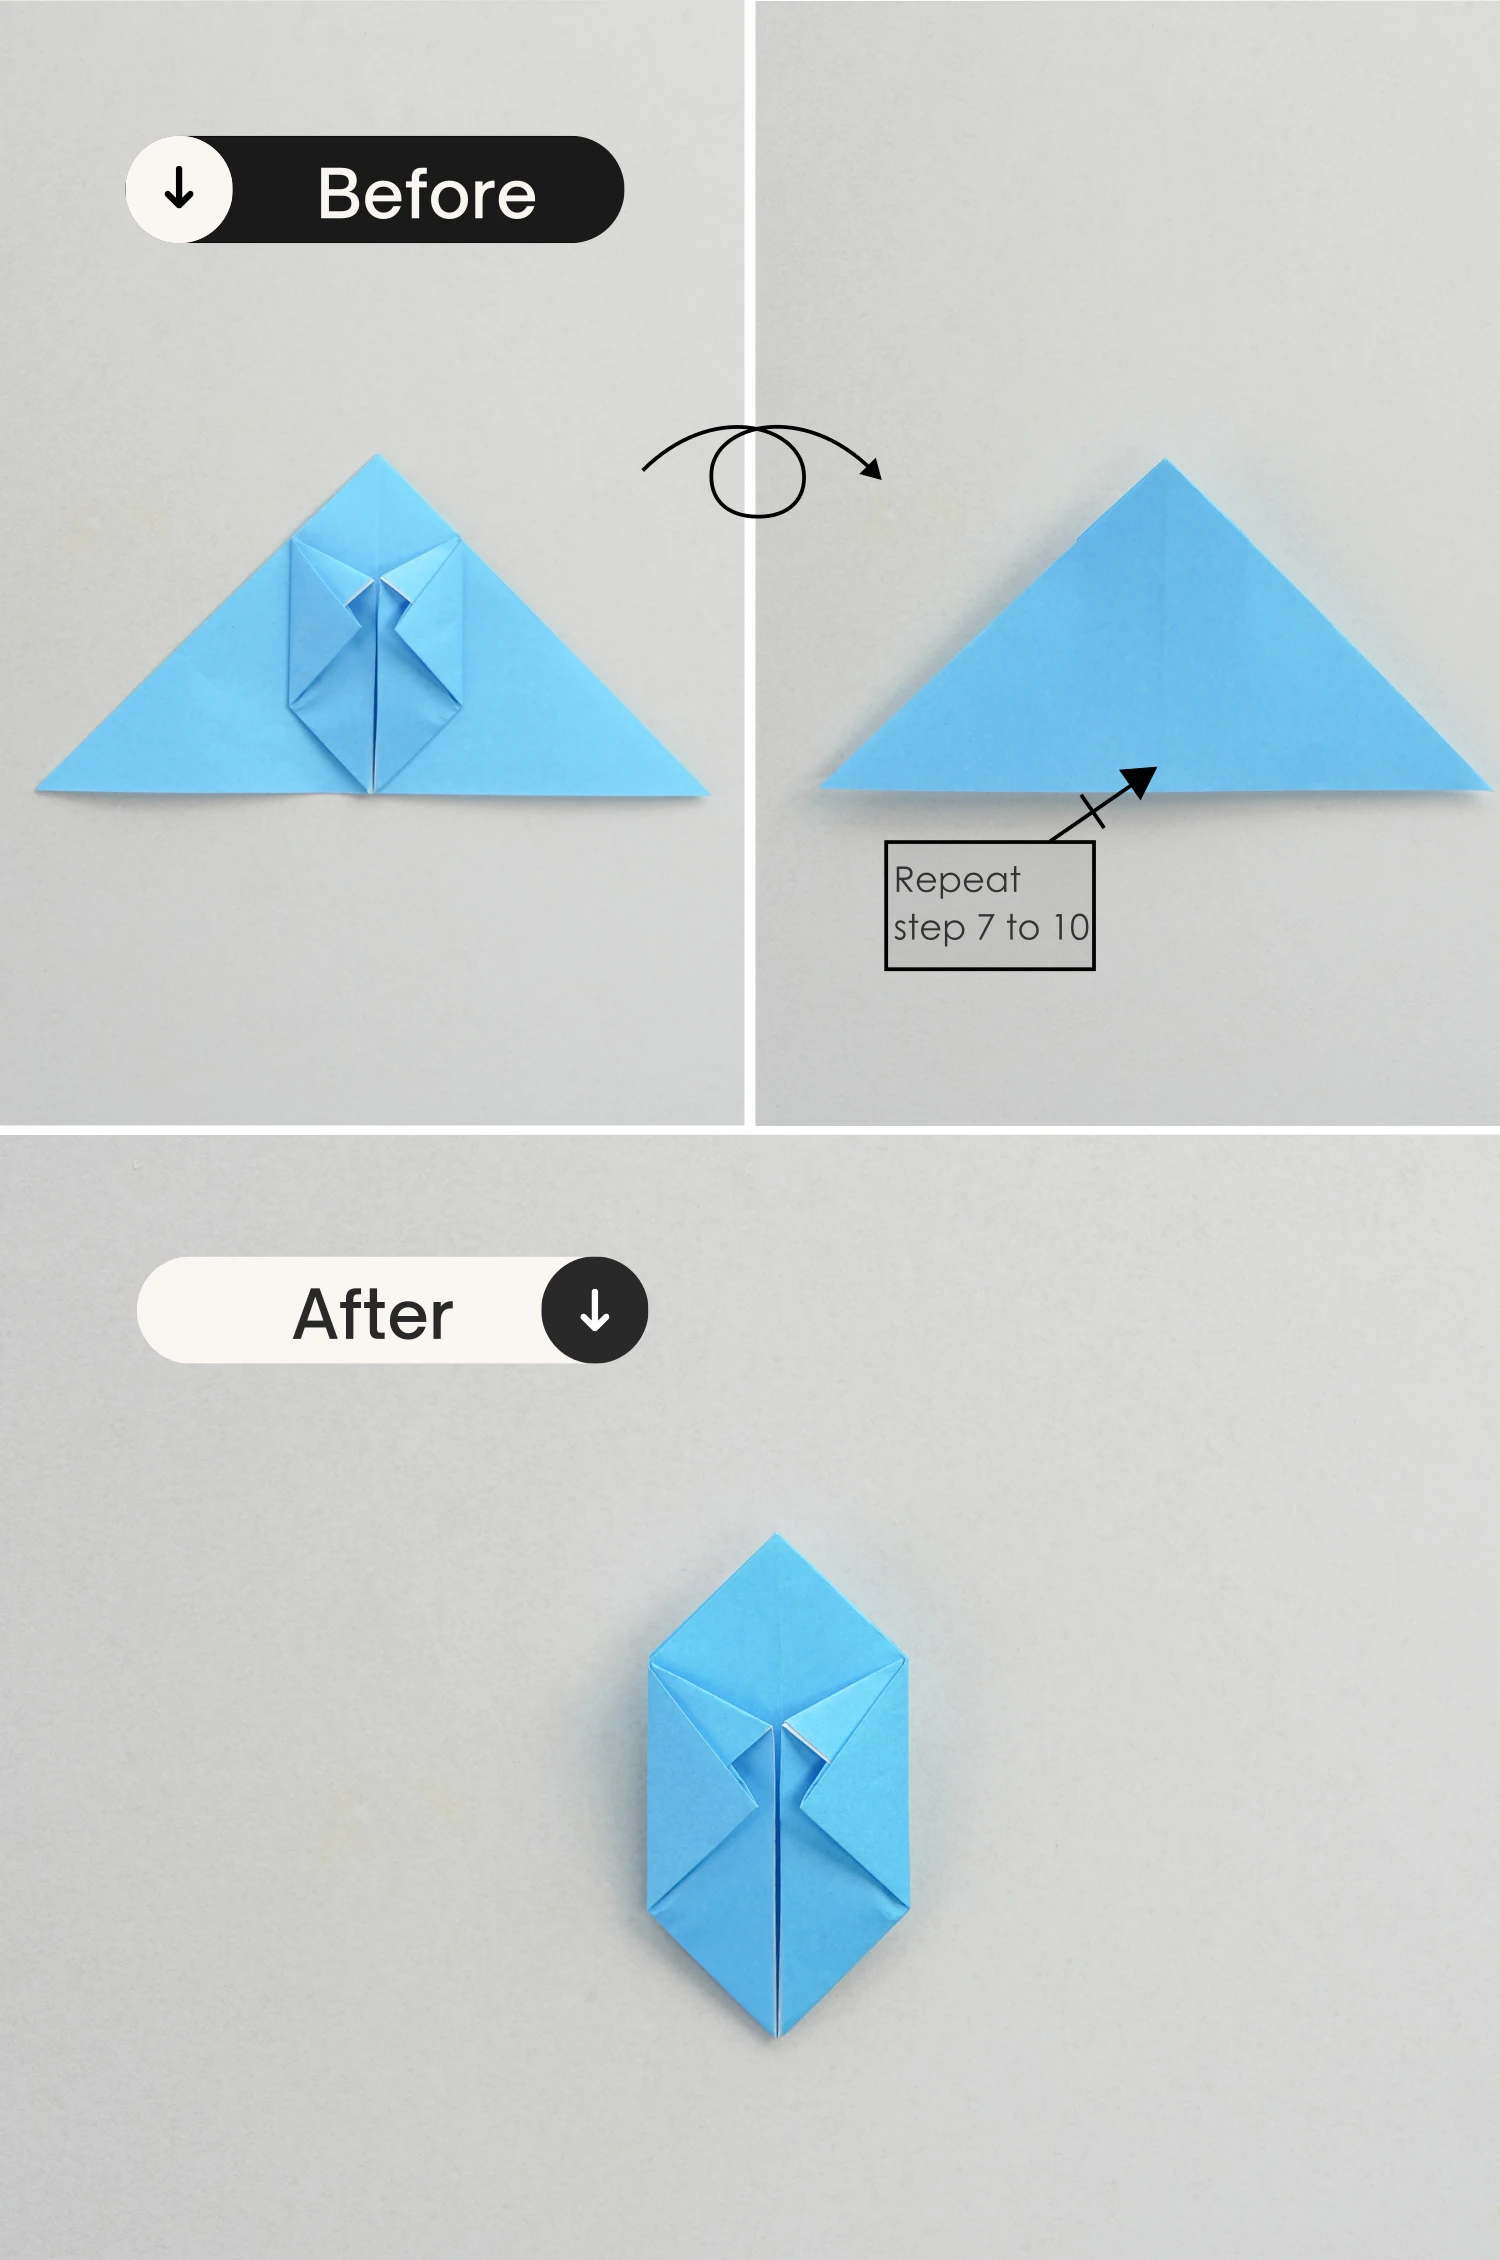
Step 11
Flip it over, repeat the steps 7 to 10 for this side.
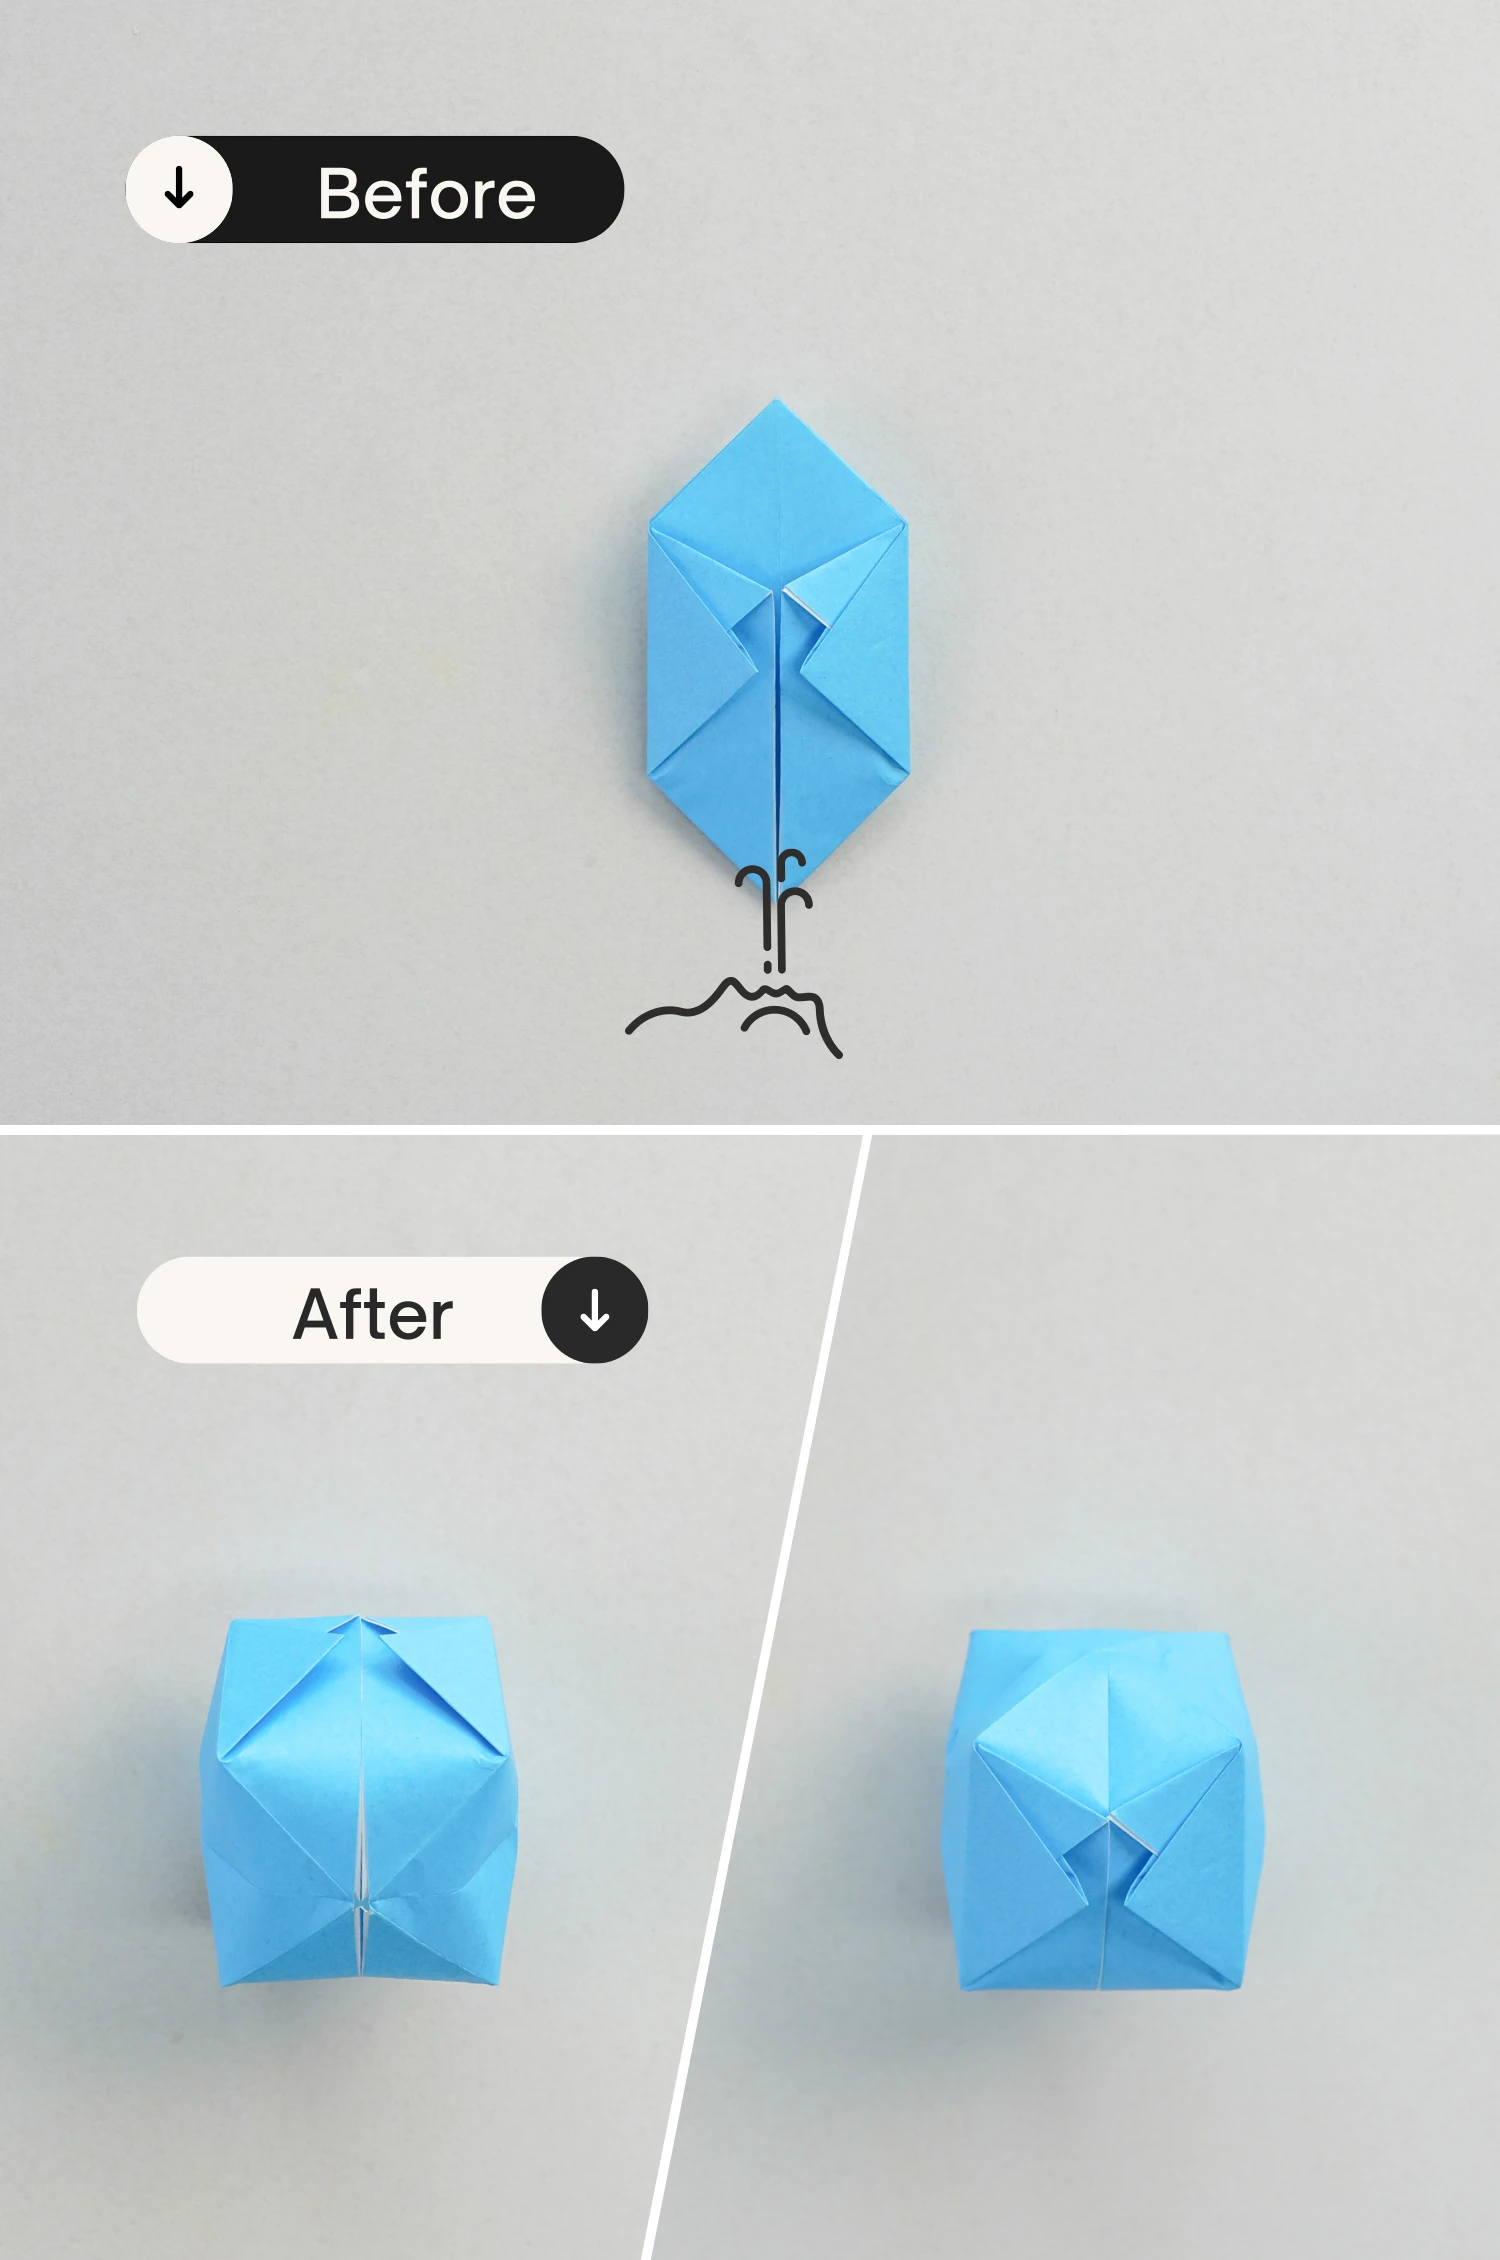
Step 12
Blow air into it through the hole at the bottom to make it inflate, you can always adjust it to make it more round.
What’s Next
That’s your easy origami balloon, and I would recommend the Origami Inflatable Rabbit which also needs to blow to make it inflate, it is also cute and interesting.
Next, you can check our other easy origami ideas, enjoy folding!


