How to Make an Origami Heart Ring
Step 1
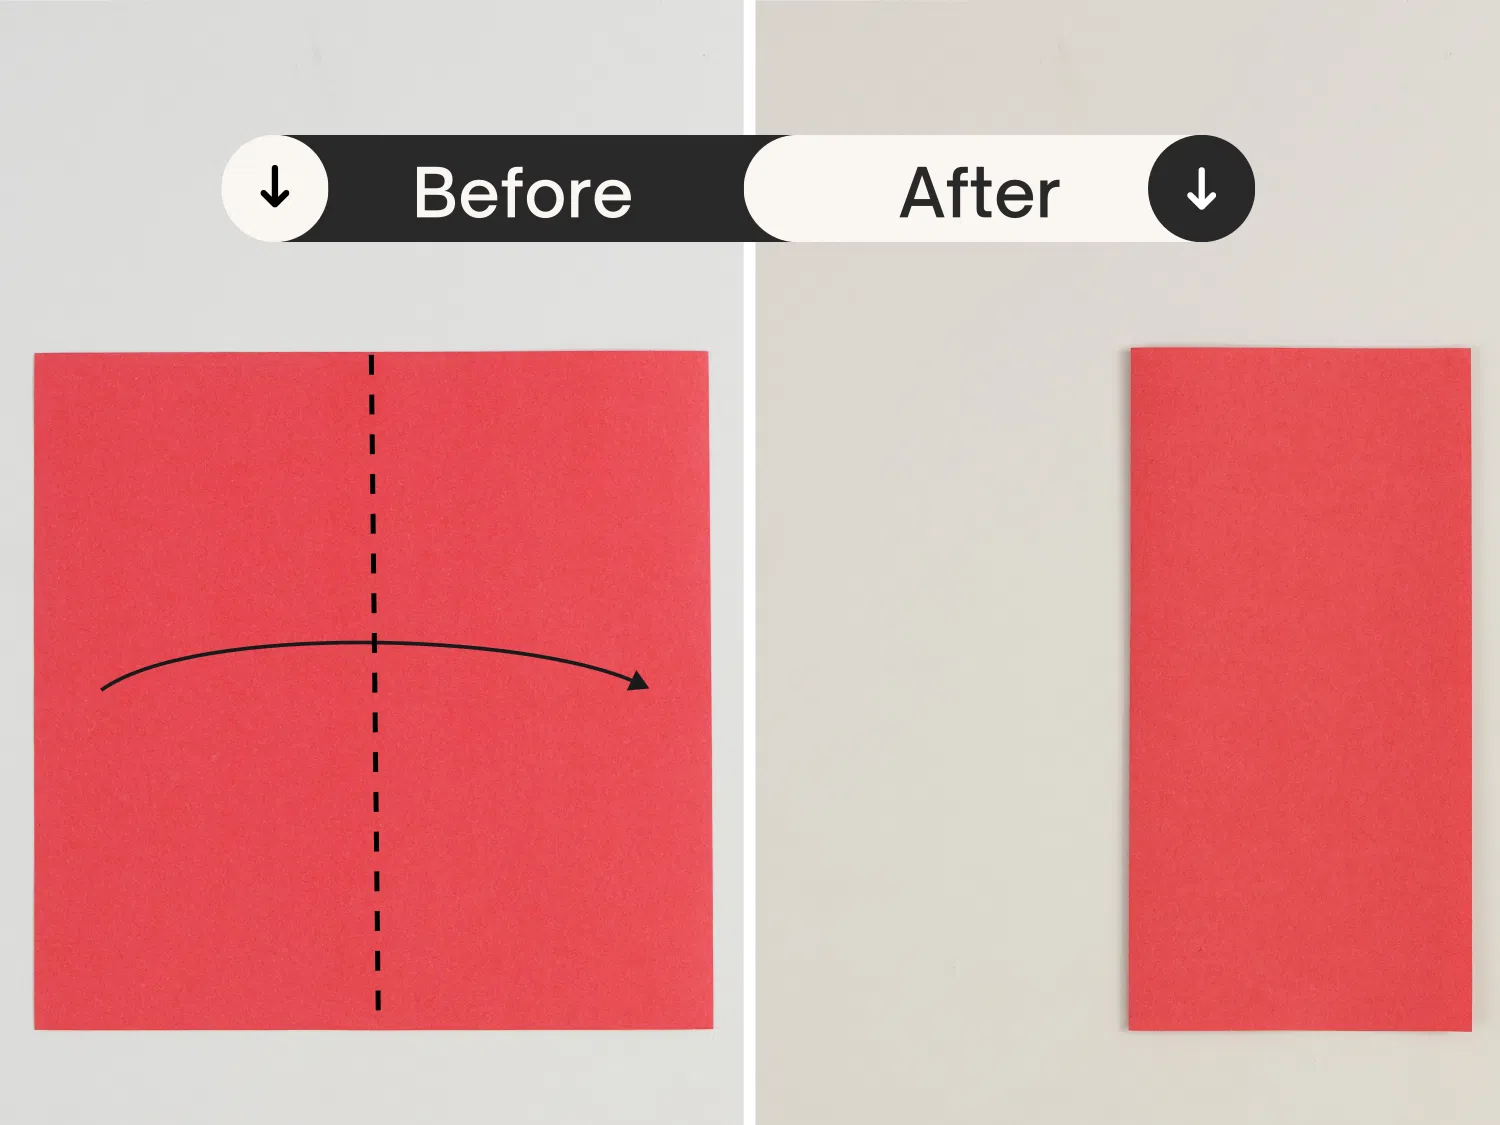
Fold the paper in half vertically and crease it well.
Step 2
Then unfold it, getting a center crease.

Step 3
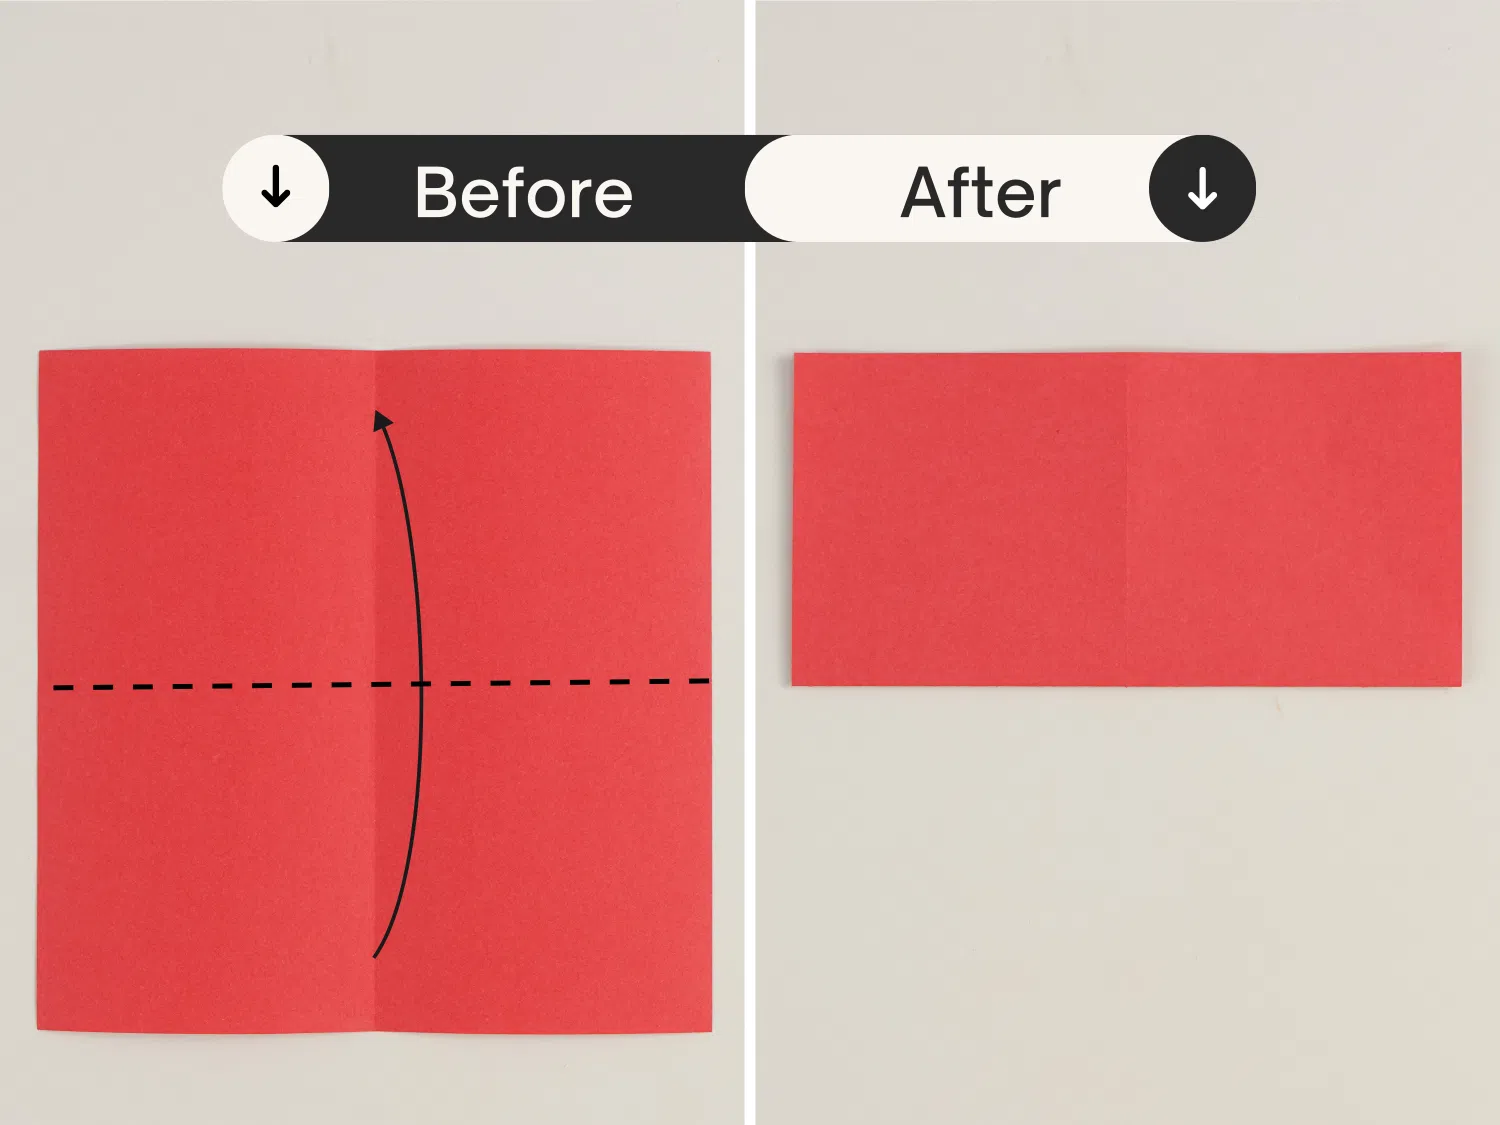
Fold the paper in half horizontally, and crease it well.
Step 4
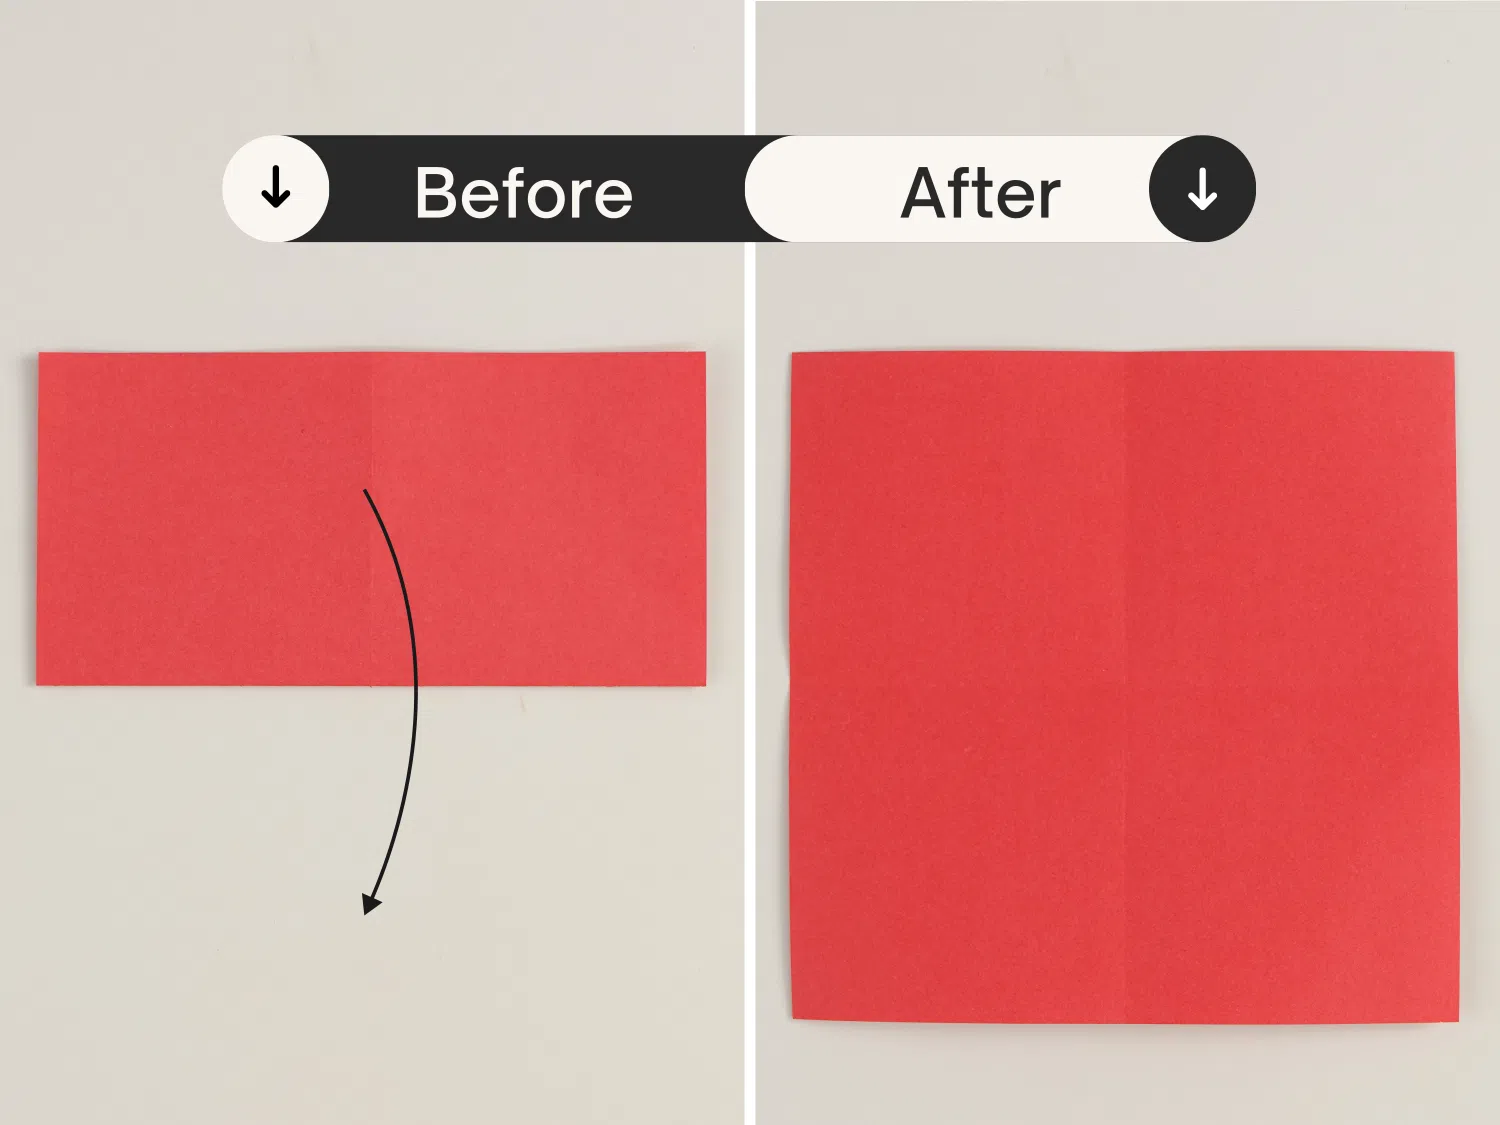
Unfold it again, getting a new crease that is perpendicular to the one you just made.
Step 5
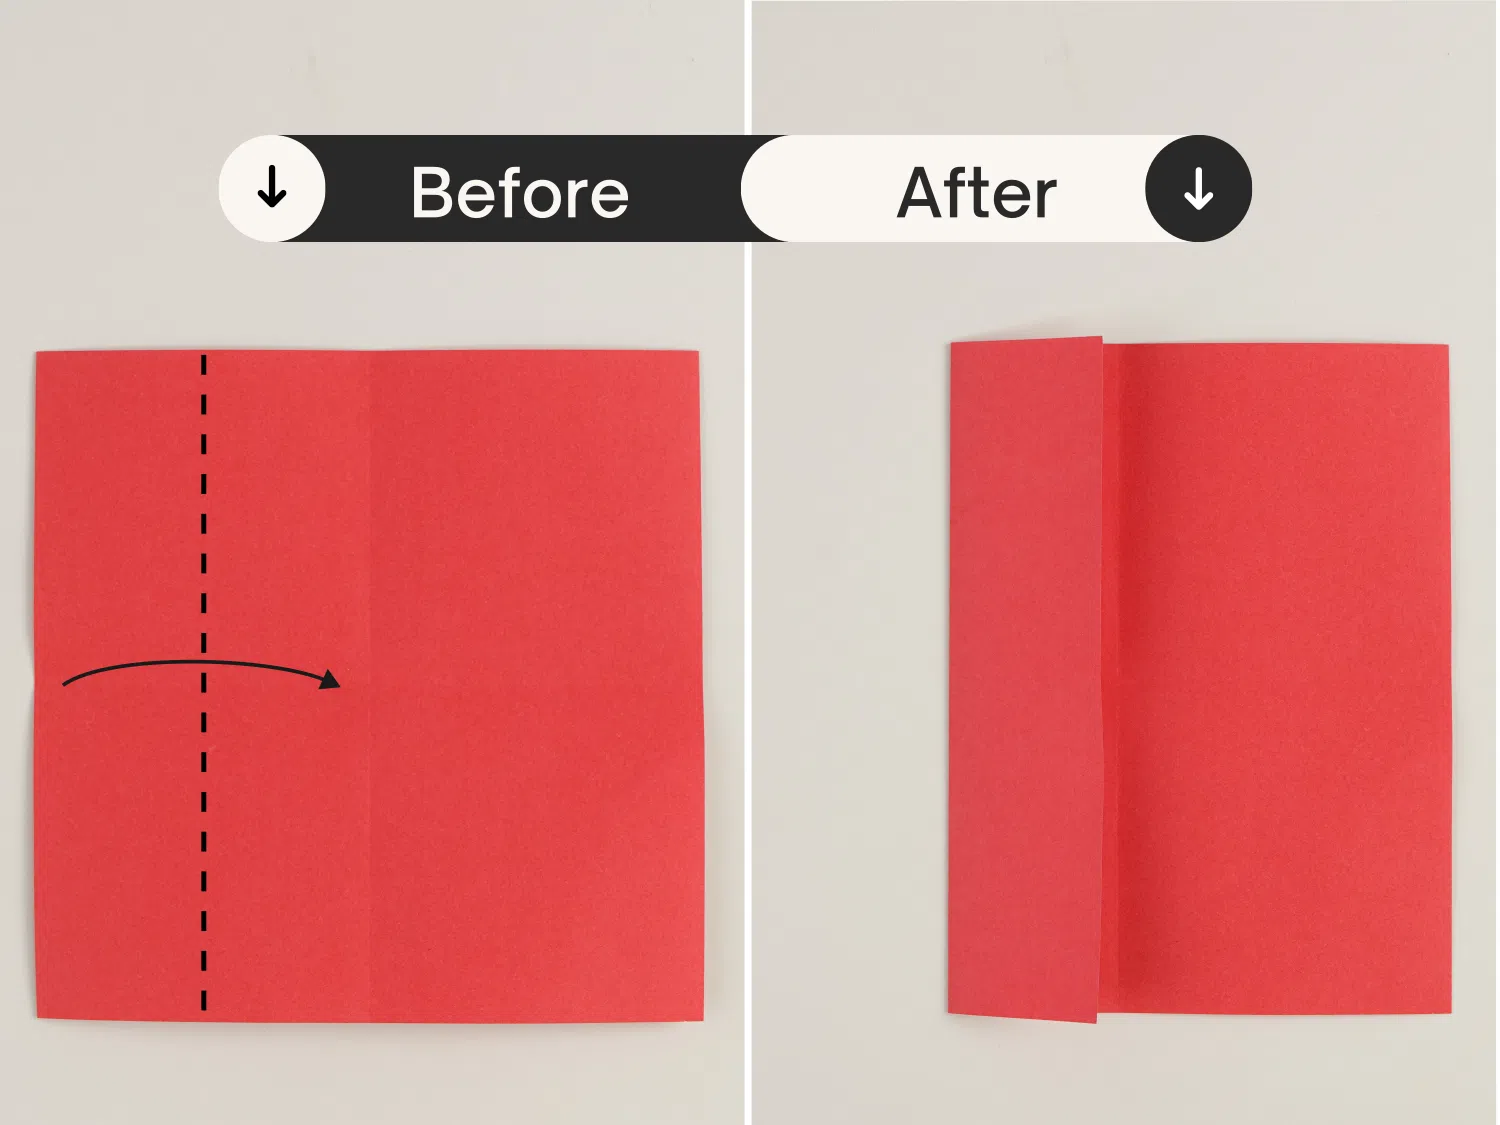
Fold the left part of the paper along the dotted line to the center.
Step 6
Then unfold it, creating a crease.
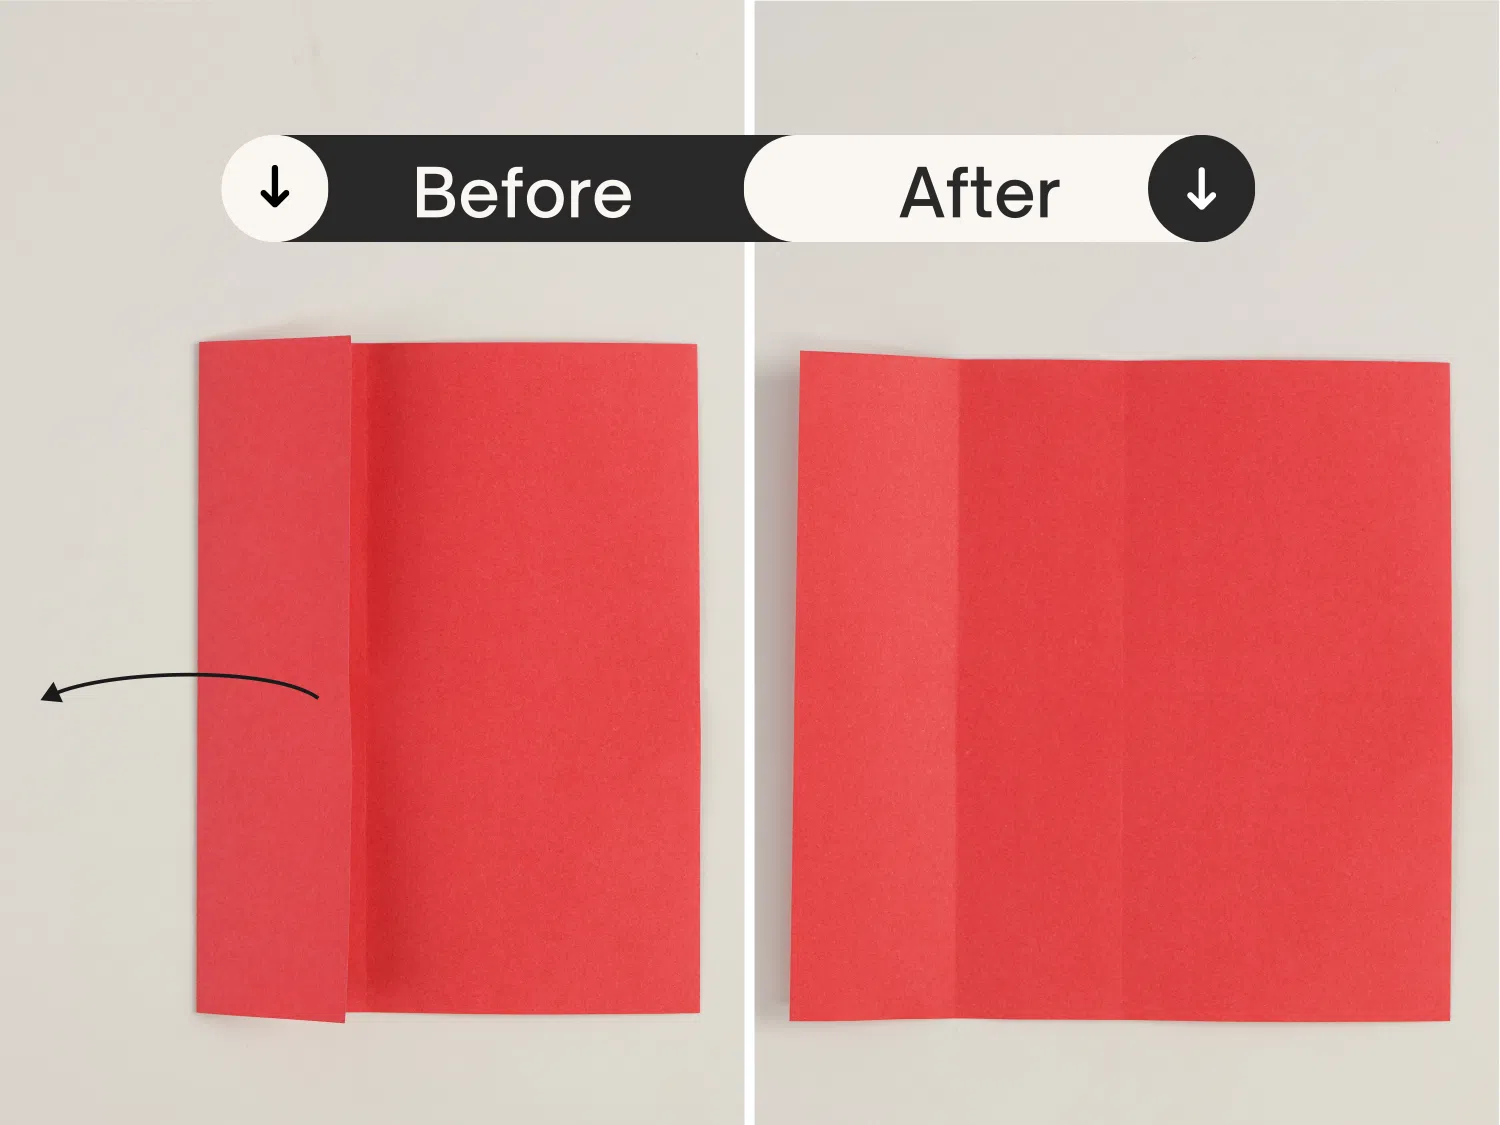
Step 7
Fold the left part of the paper along the dotted line to meet the crease you just made.

Step 8
Fold the left edge to the right side again along the dotted line.
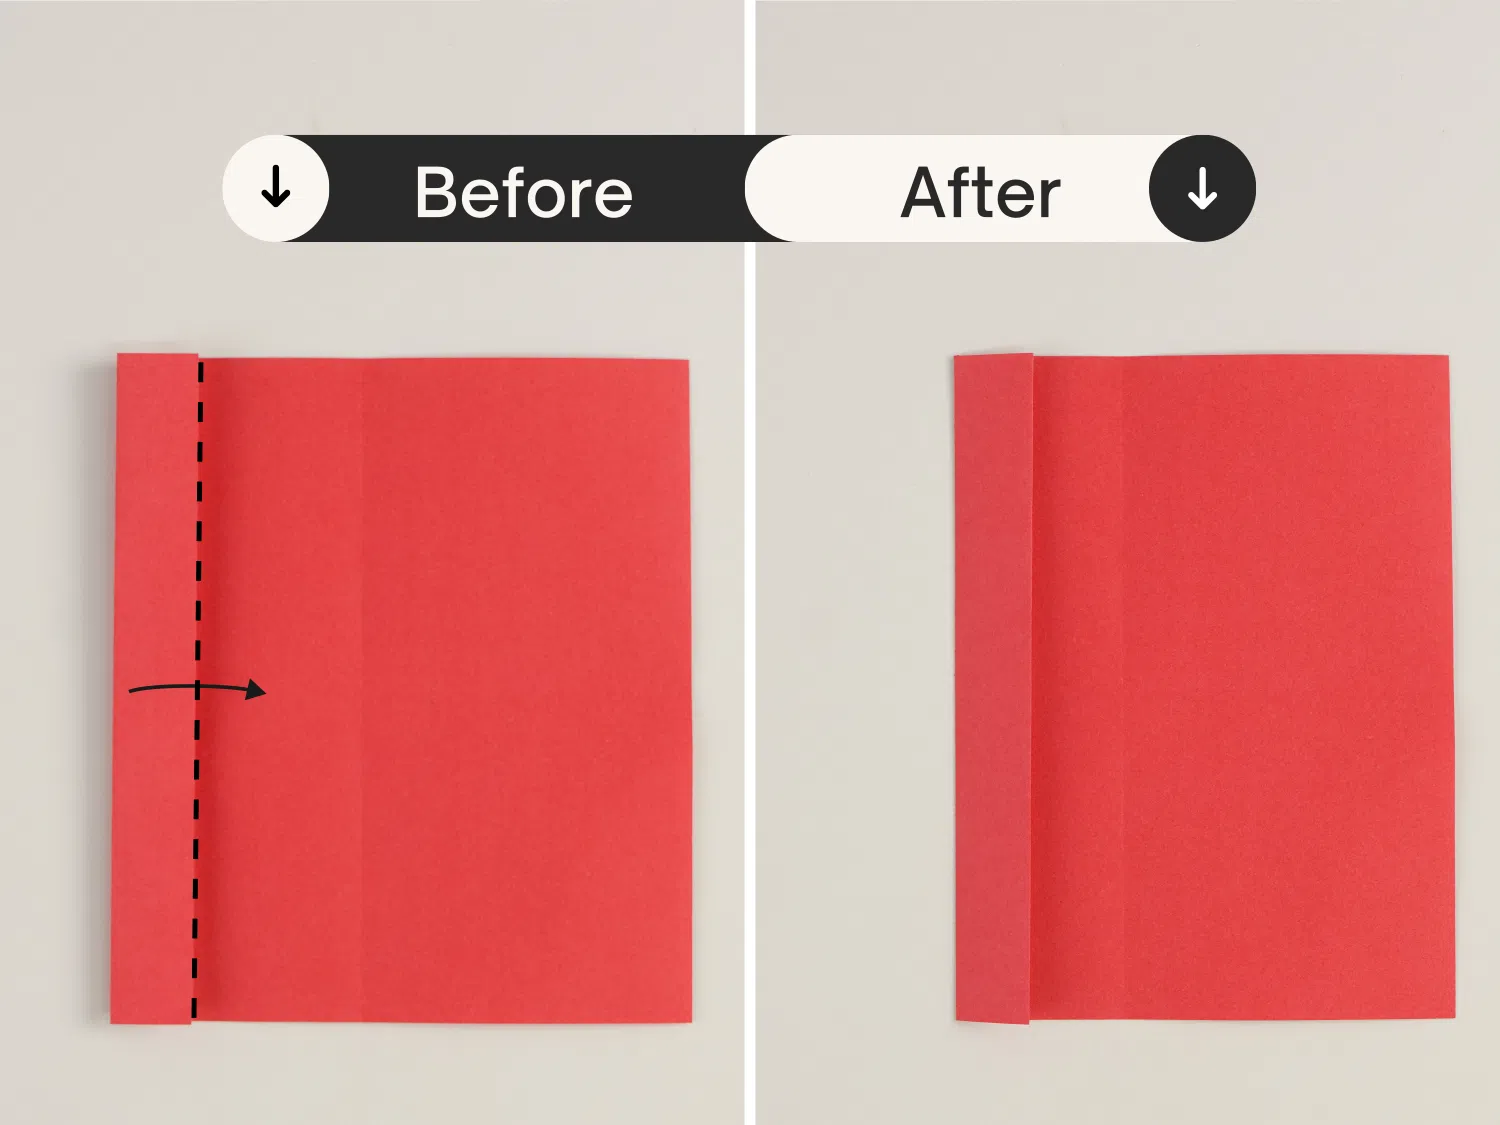
Step 9
Fold it to the right side one more time until it meets the center crease.

Step 10
Fold the right part of the paper to the center along the dotted line.
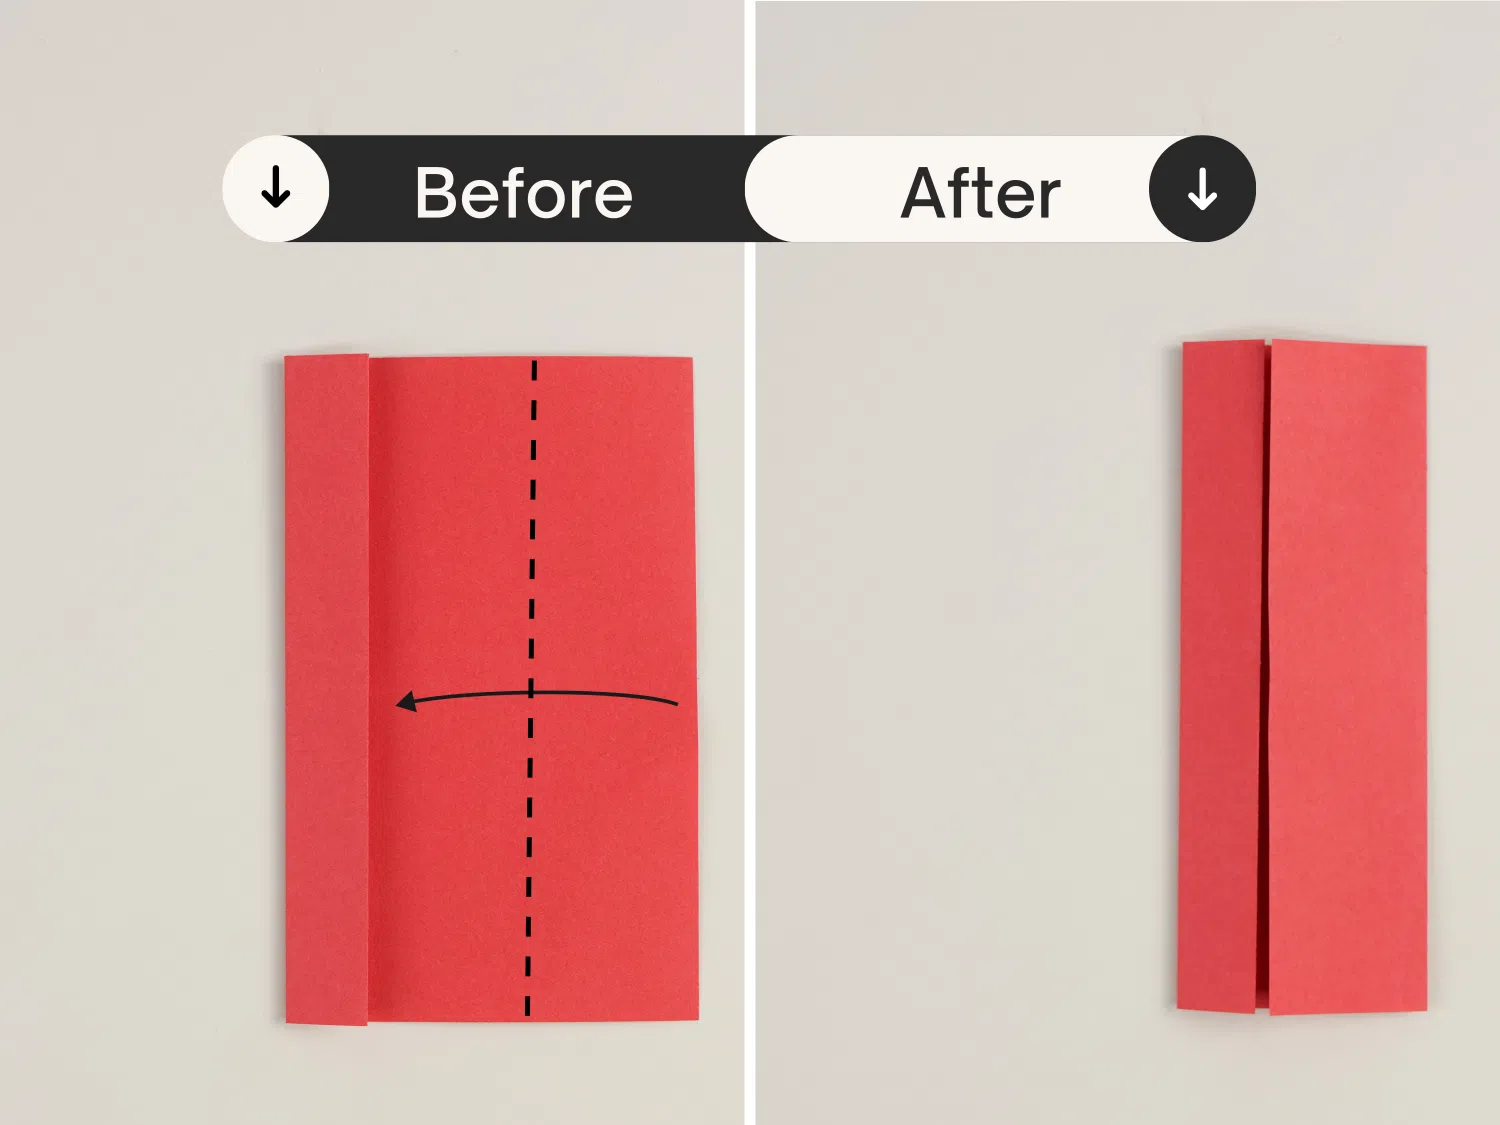
Step 11
Then unfold it, creating a crease.
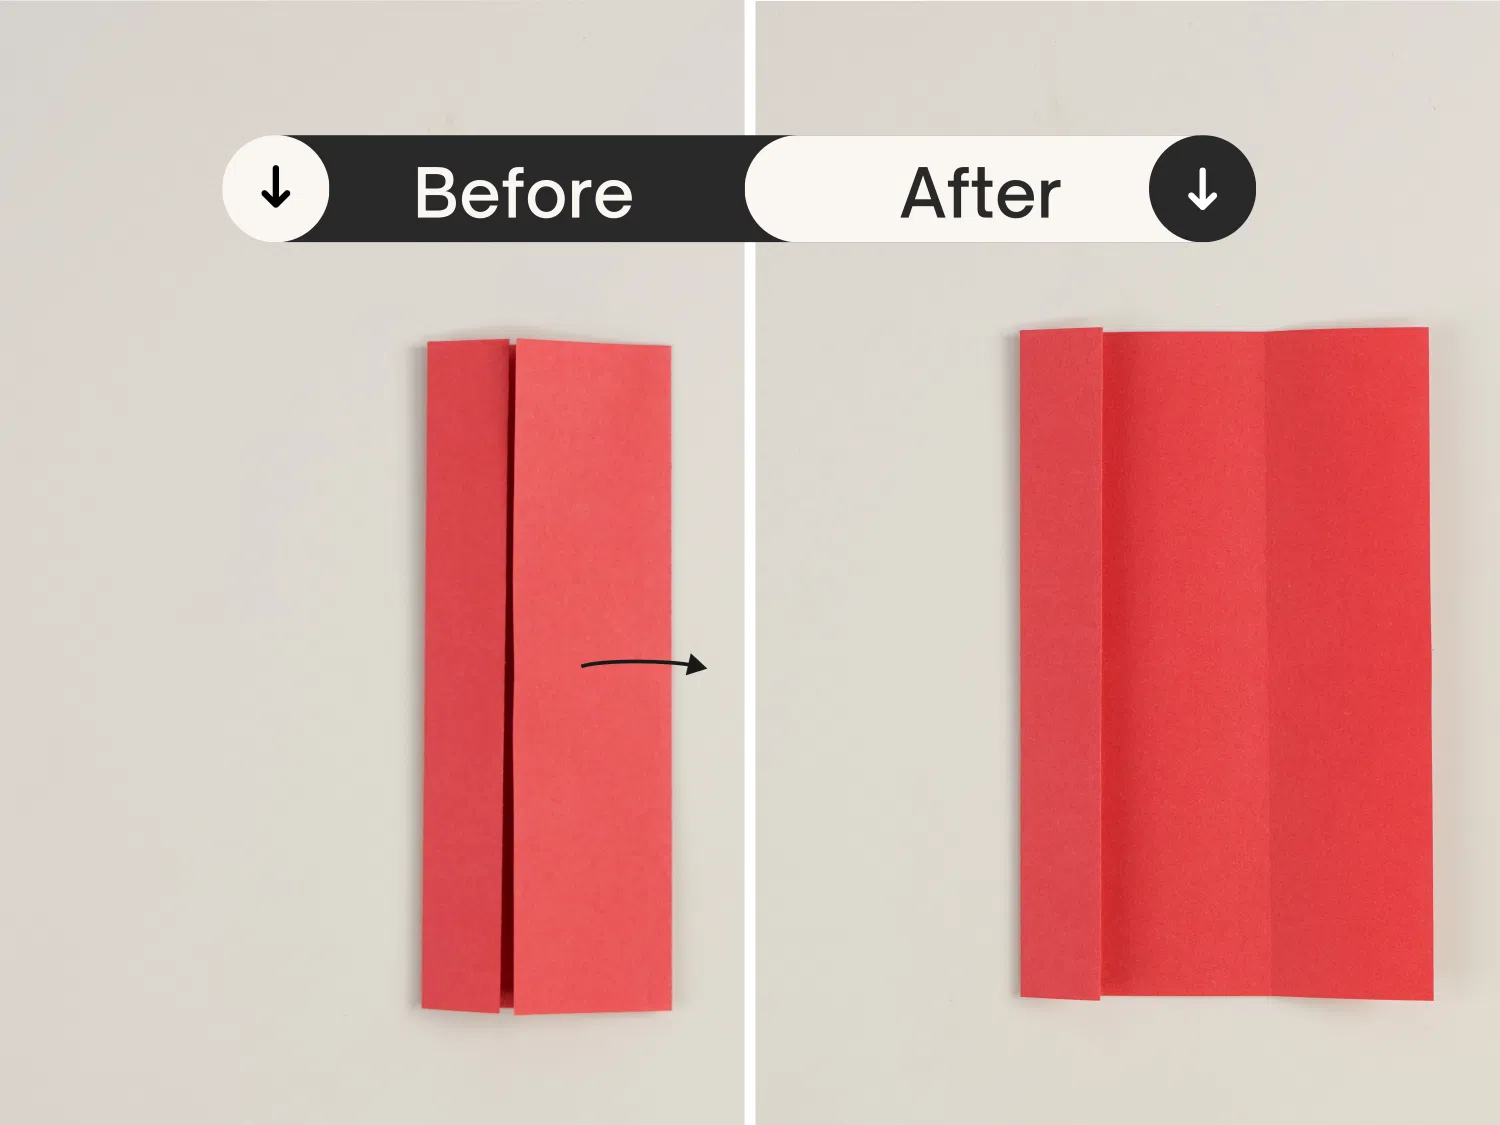
Step 12
Fold the right edge along the dotted line to the crease you just made in the previous step.
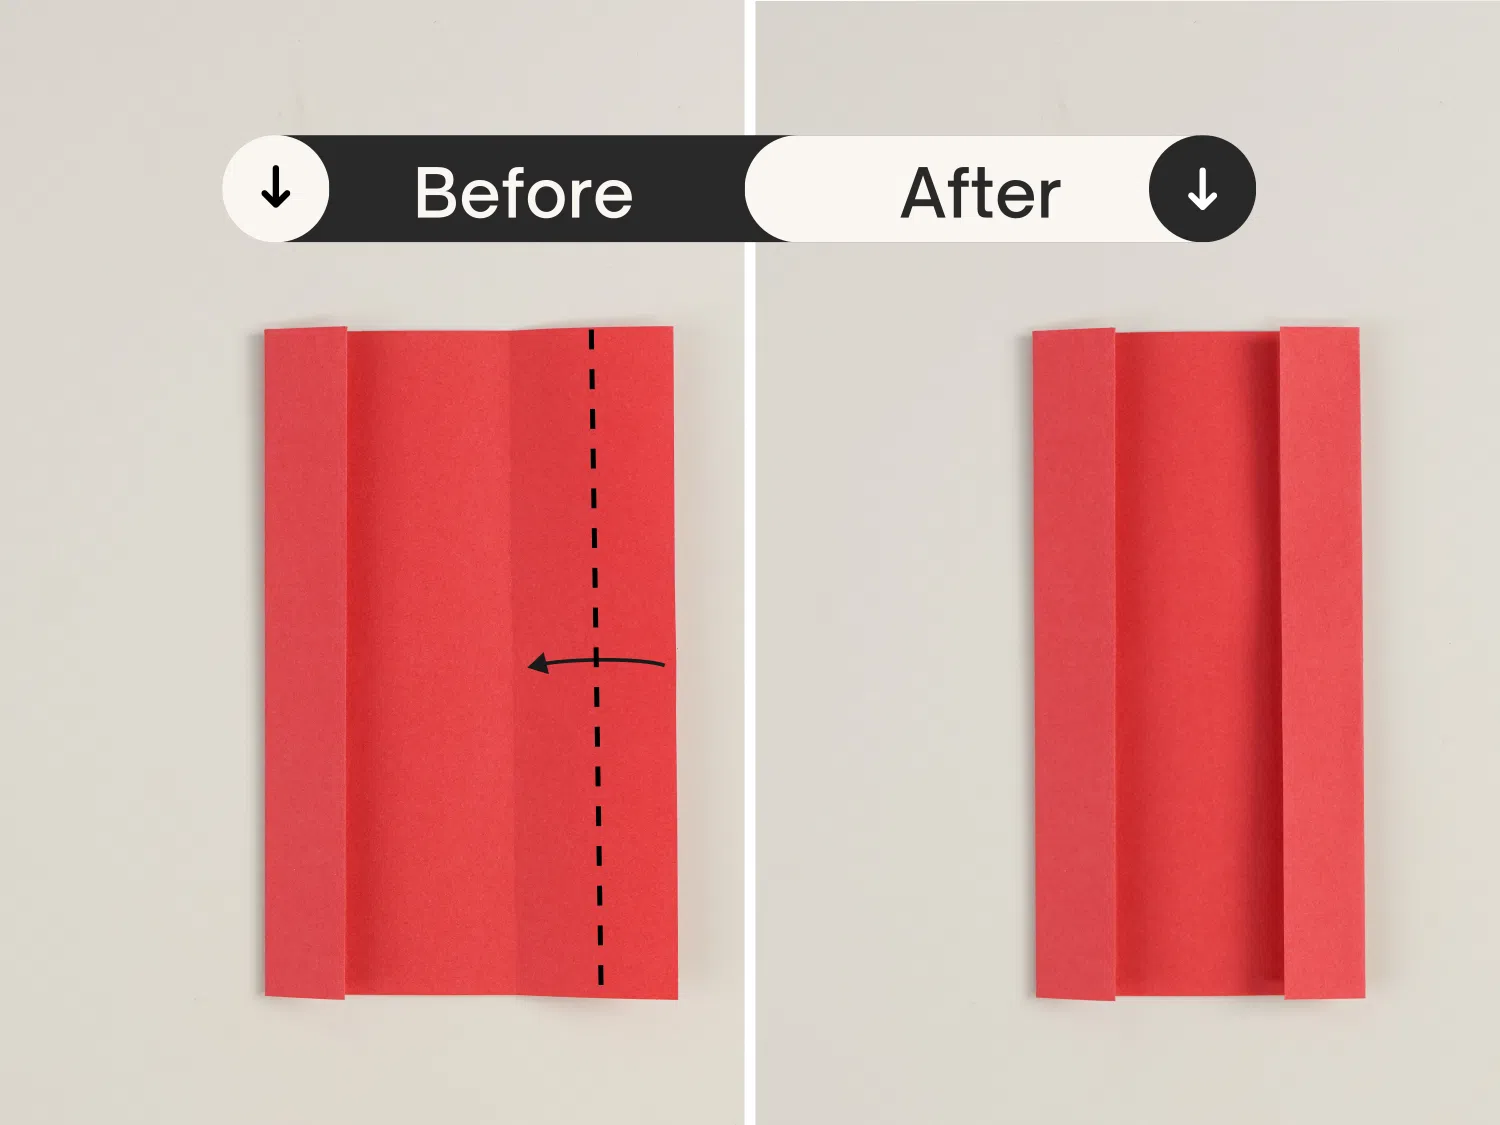
Step 13
Fold it to the left side again along the dotted line.
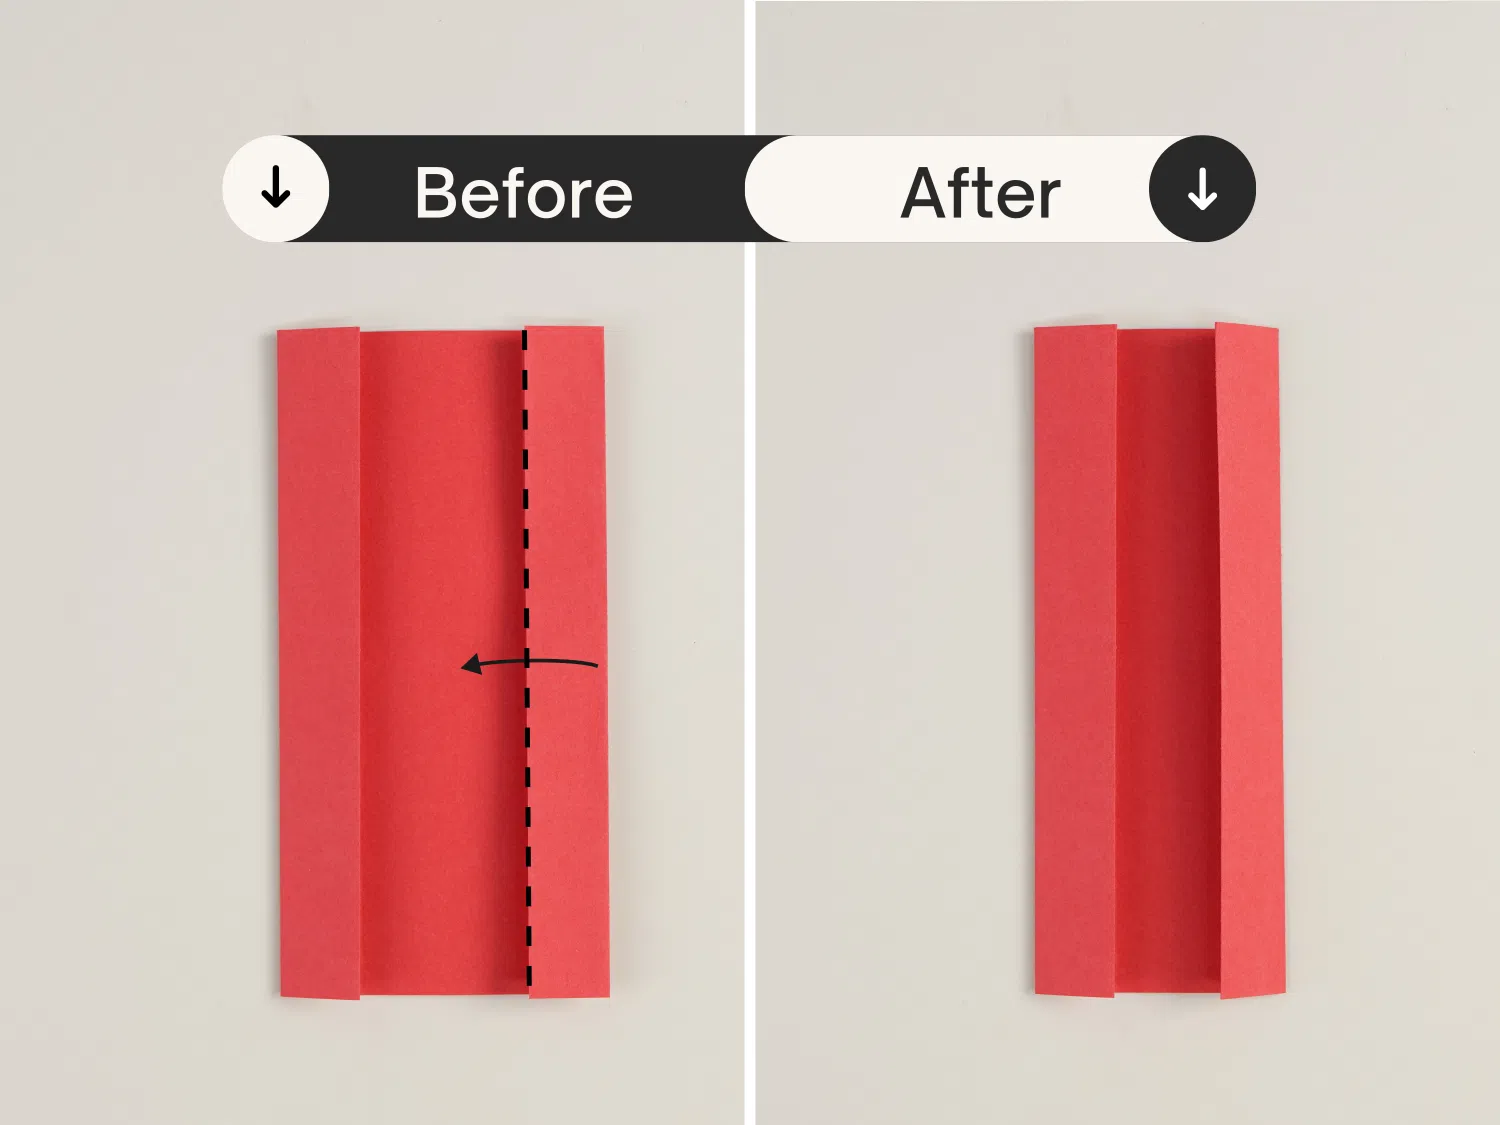
Step 14
Fold it to the left side one more time until it meets the middle crease.
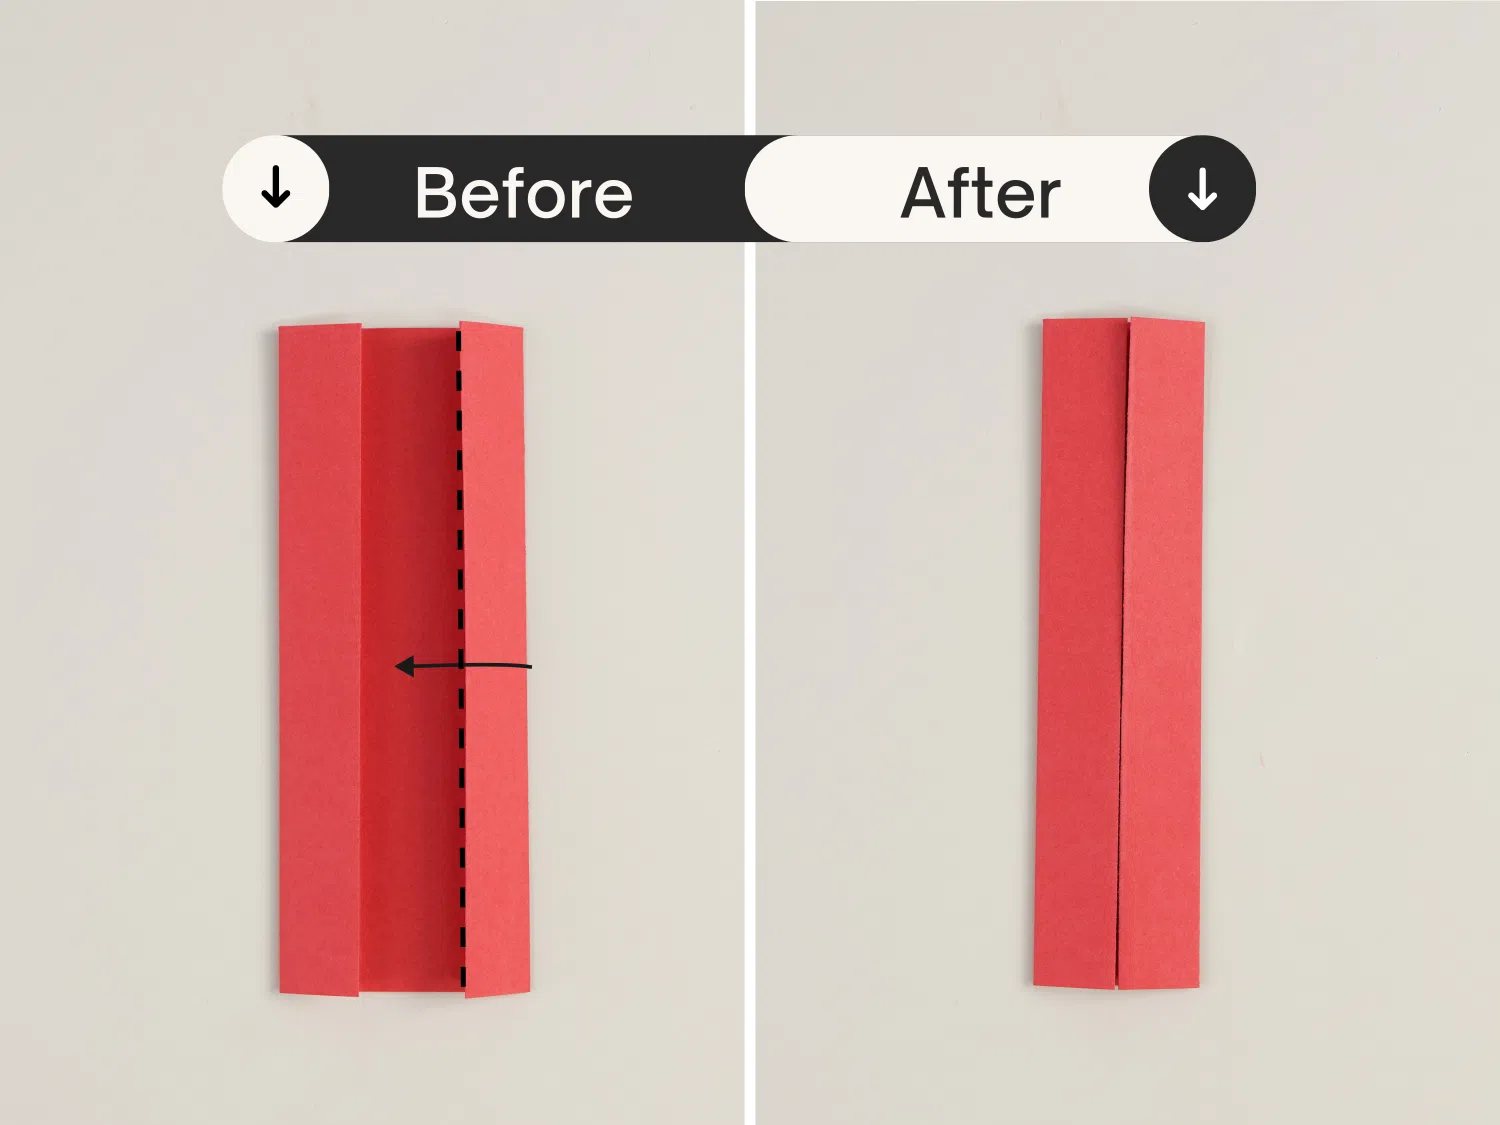
Step 15
Unfold the paper completely.
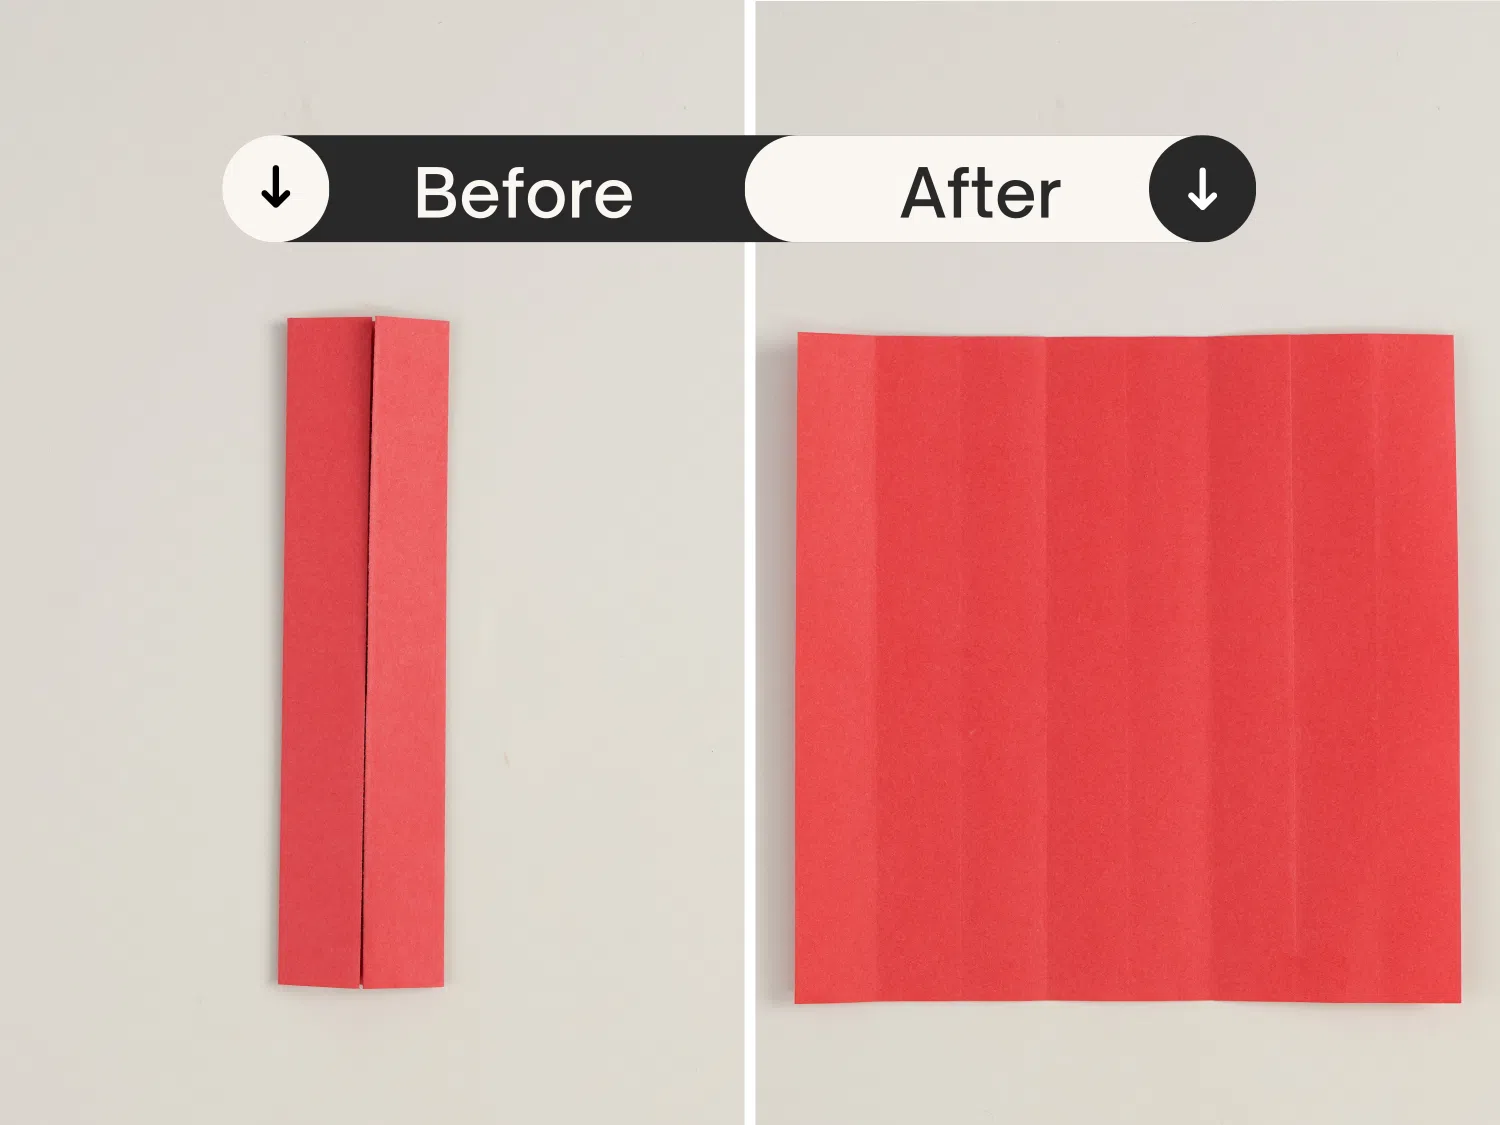
Step 16
Flip it over, we can see there are many creases.
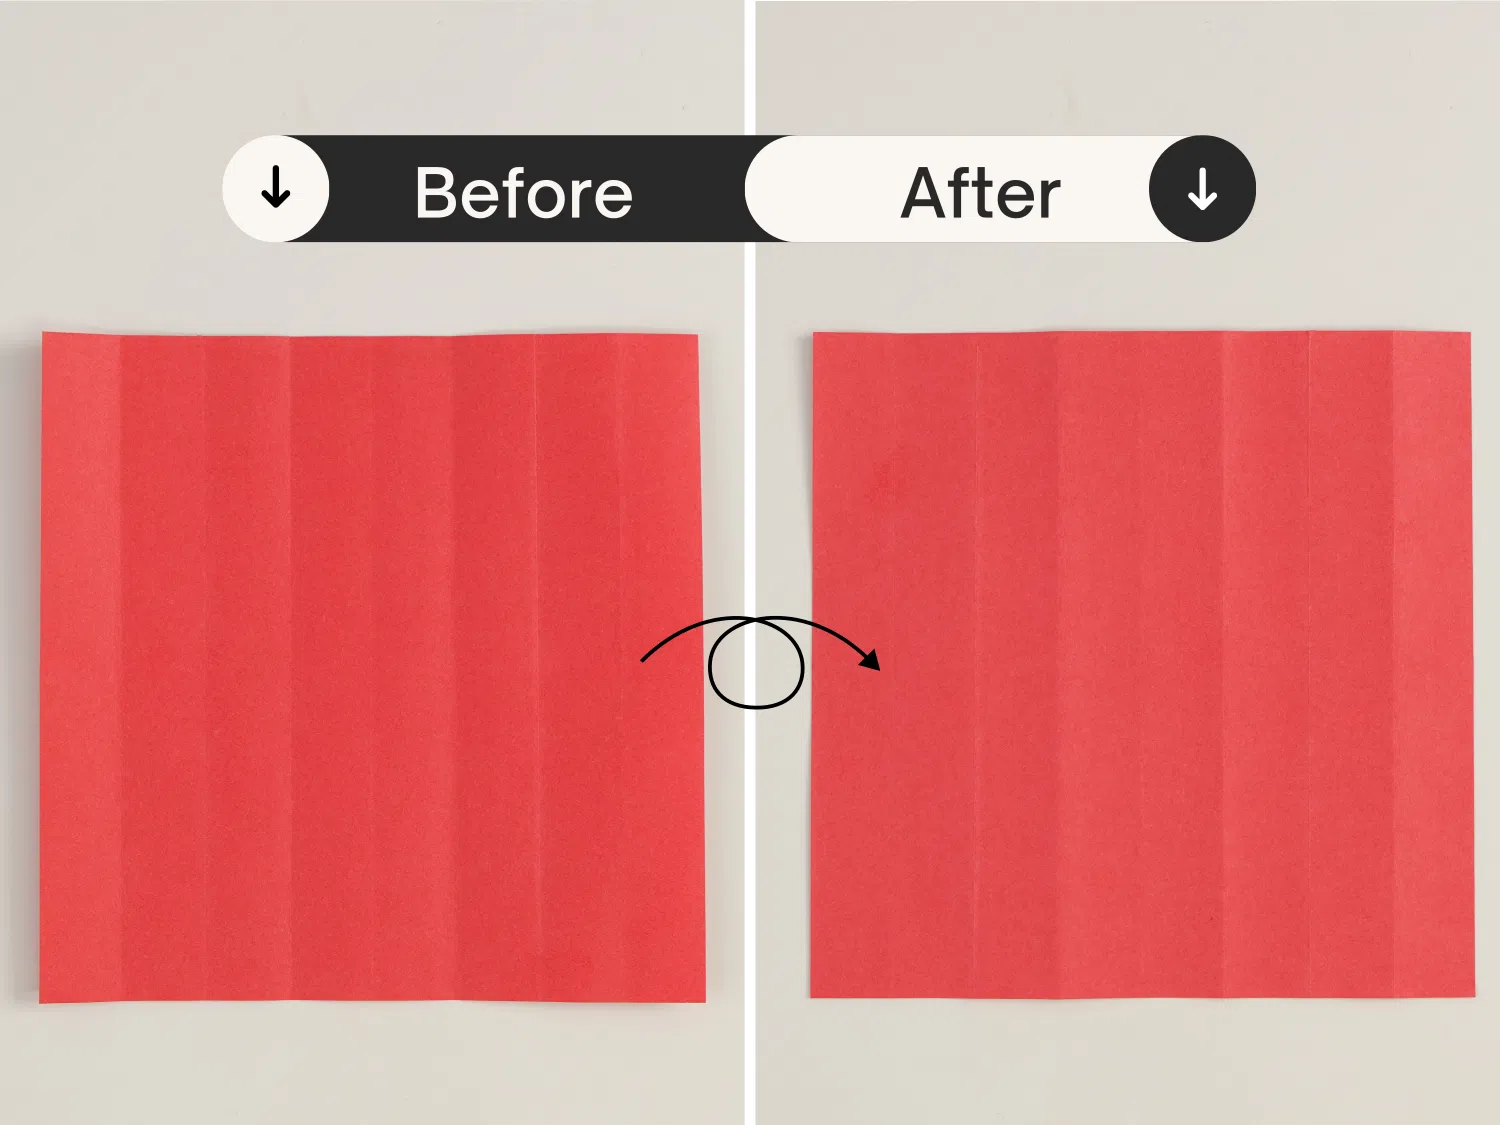
Step 17
Fold the right edge to the left side along the dotted line (the first crease).
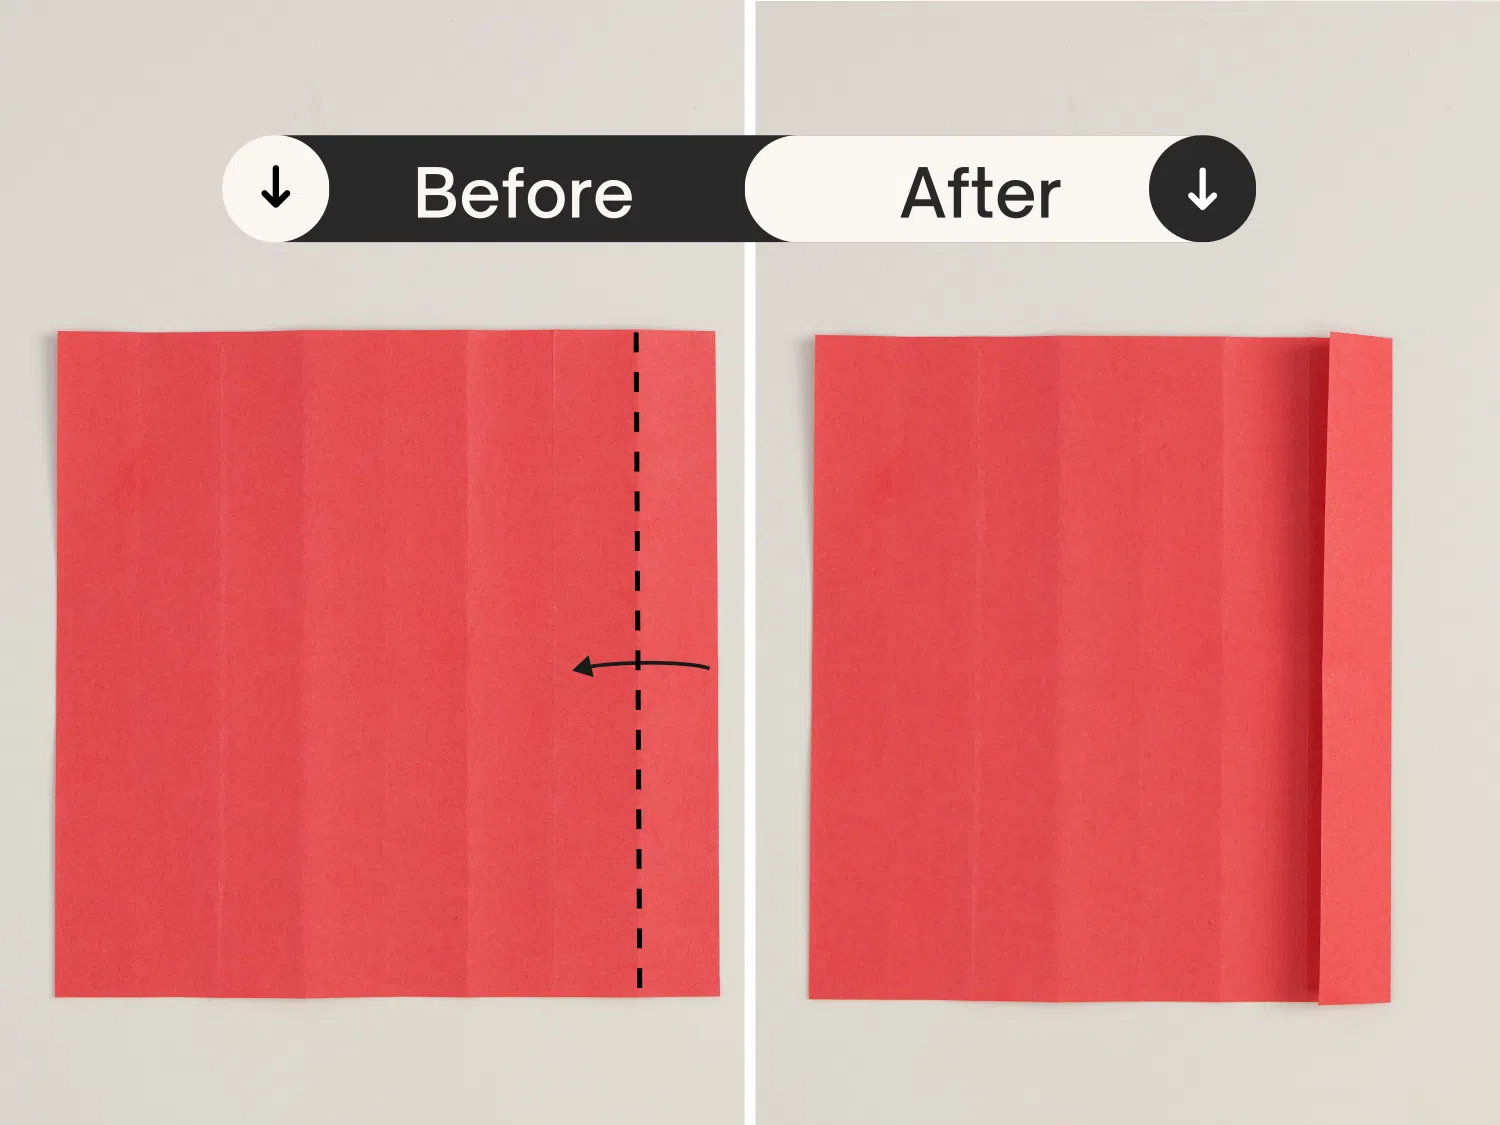
Step 18
Flip the paper over again.
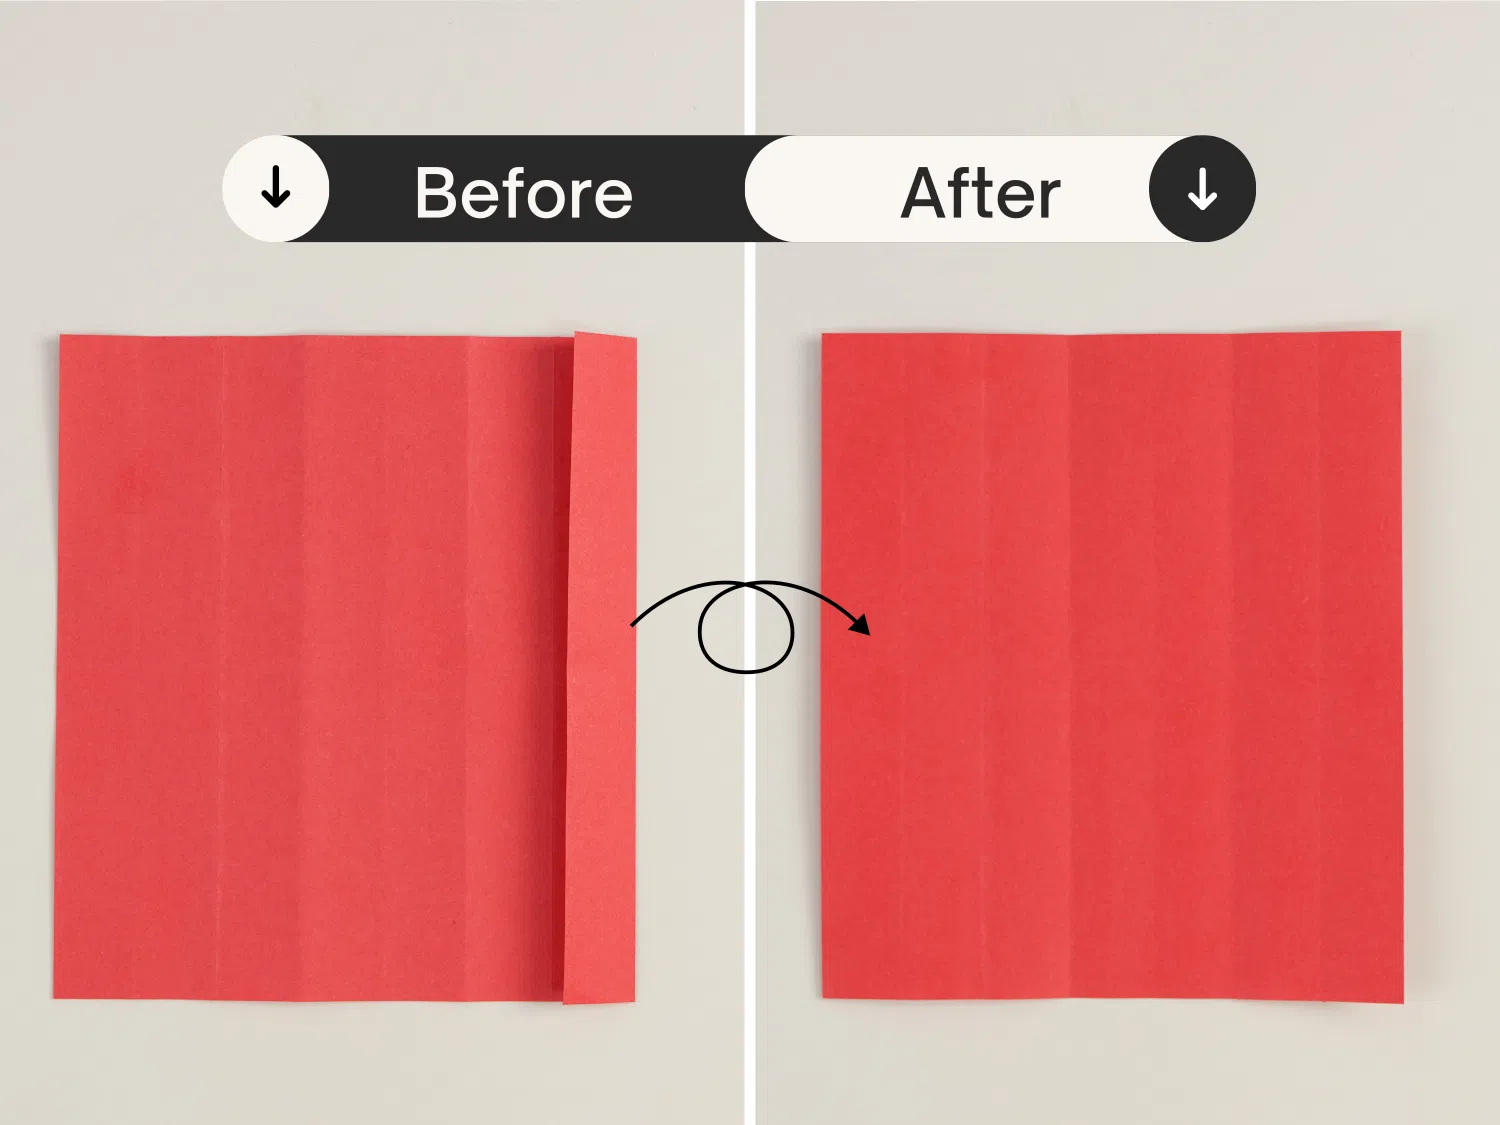
Step 19
Fold the top right and bottom corners to the center.
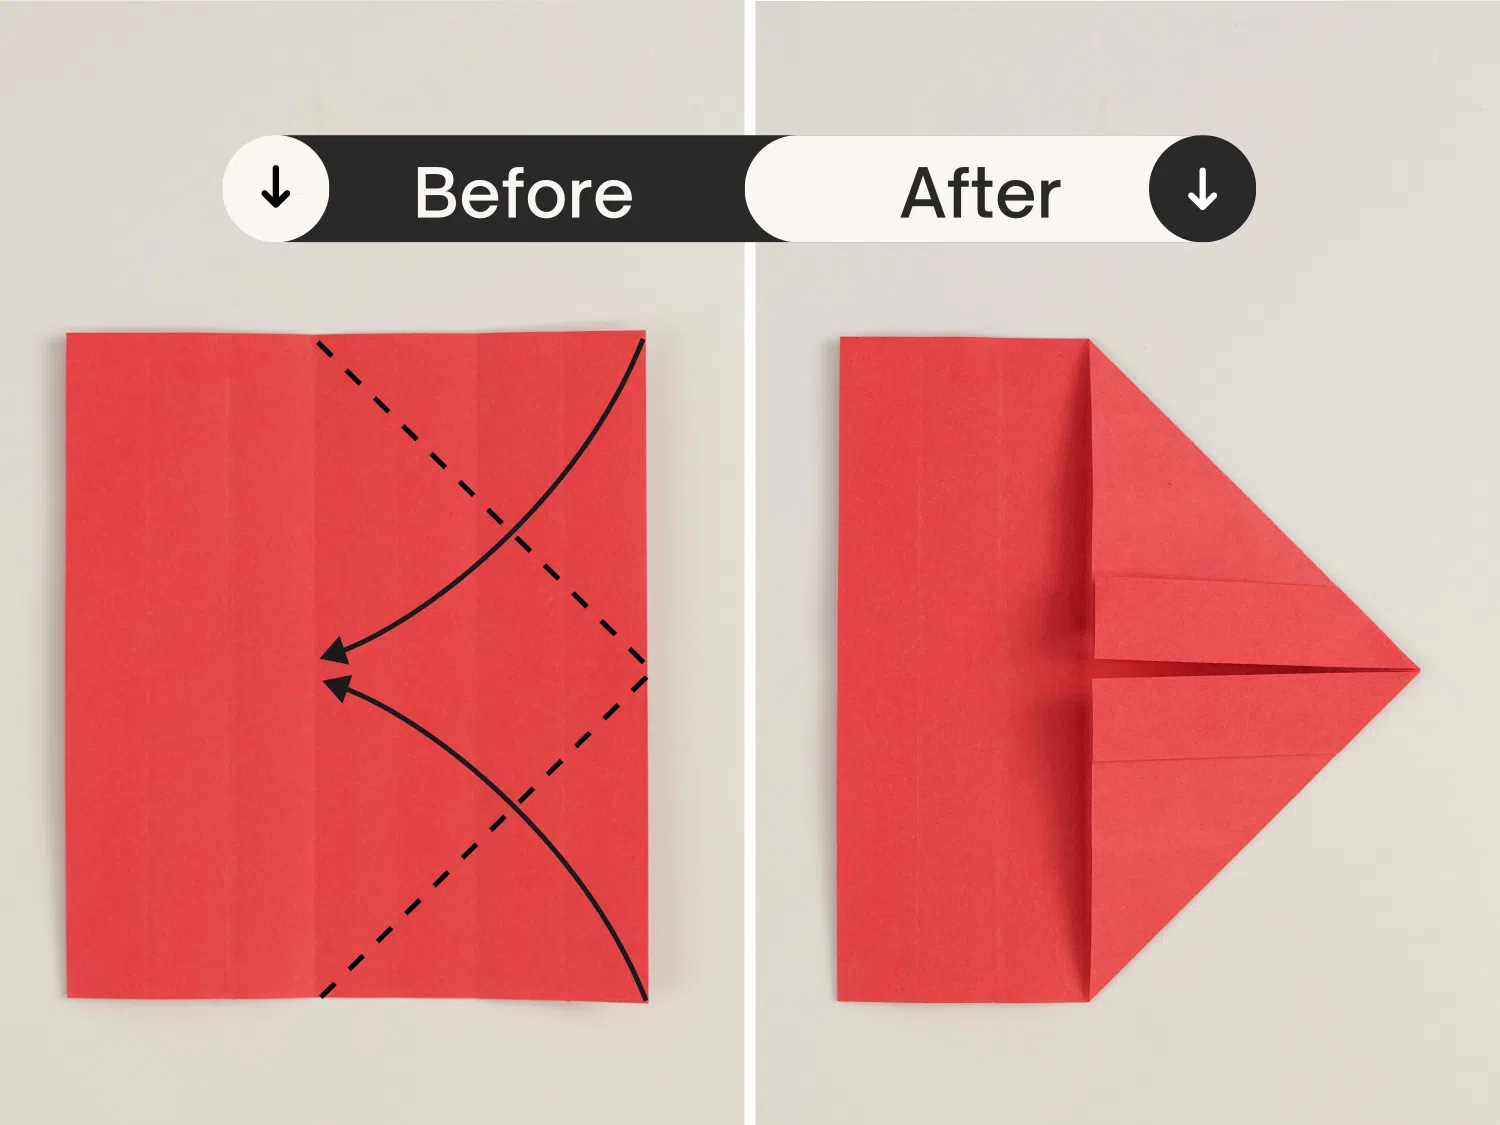
Step 20
Flip the paper over one more time.
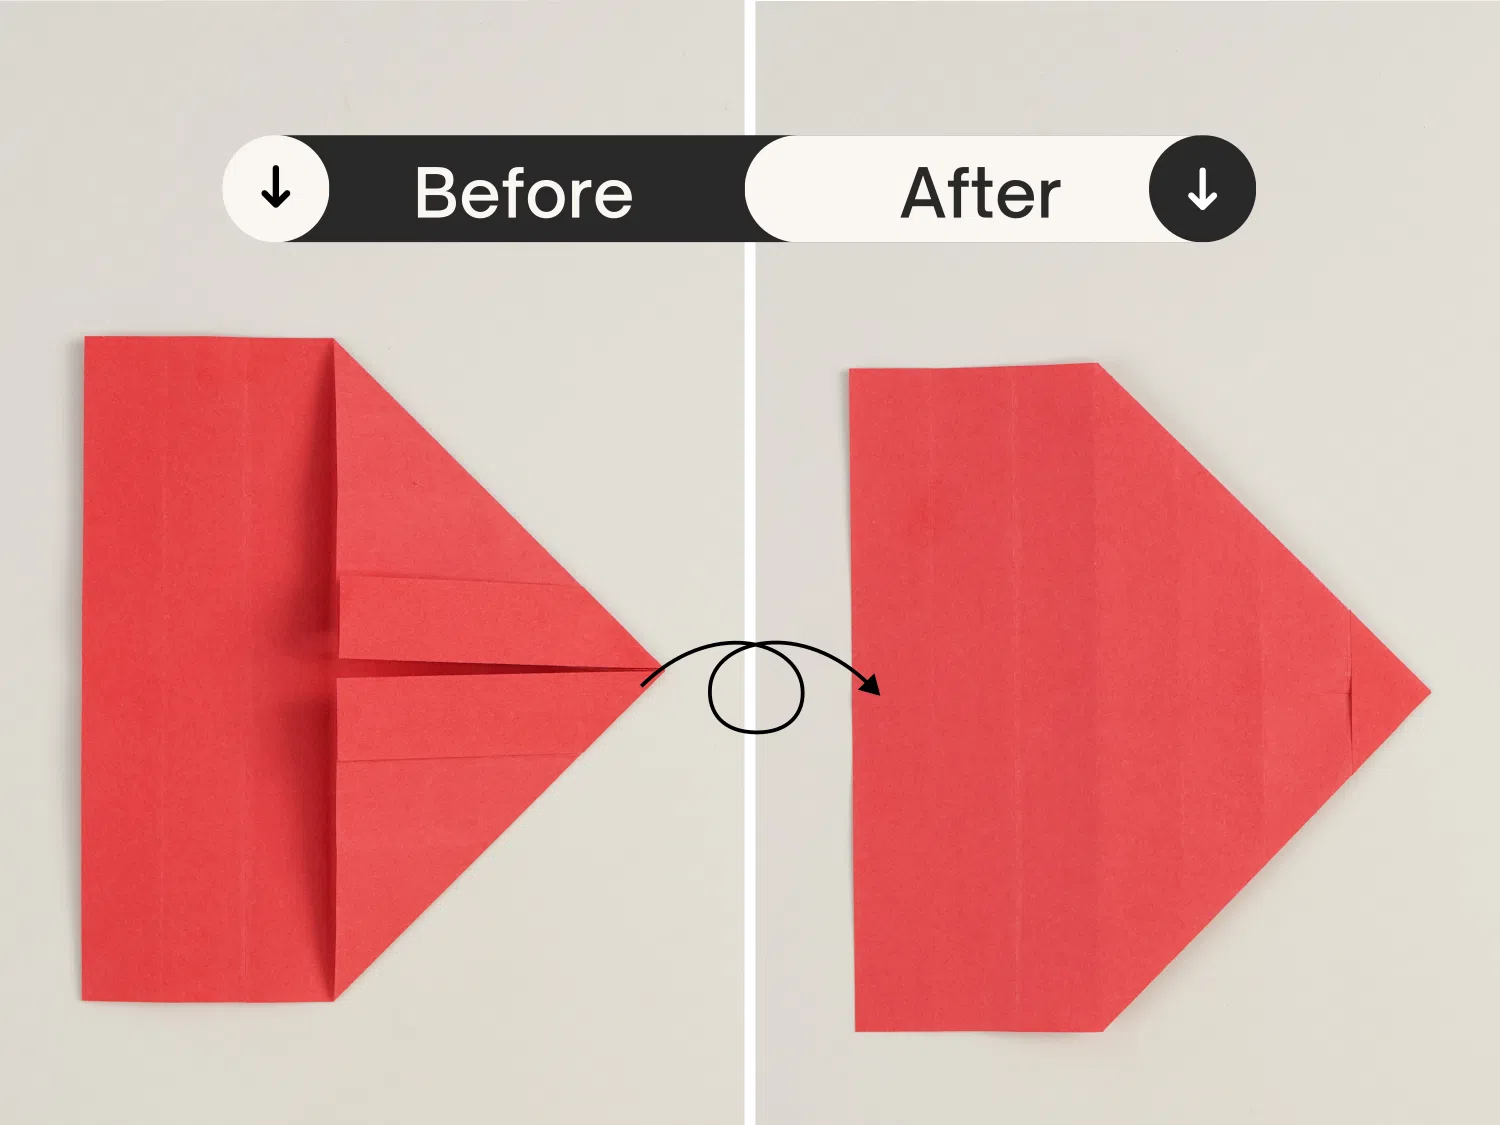
Step 21
Fold the right corner to the left along the dotted line (the second crease from right to left).
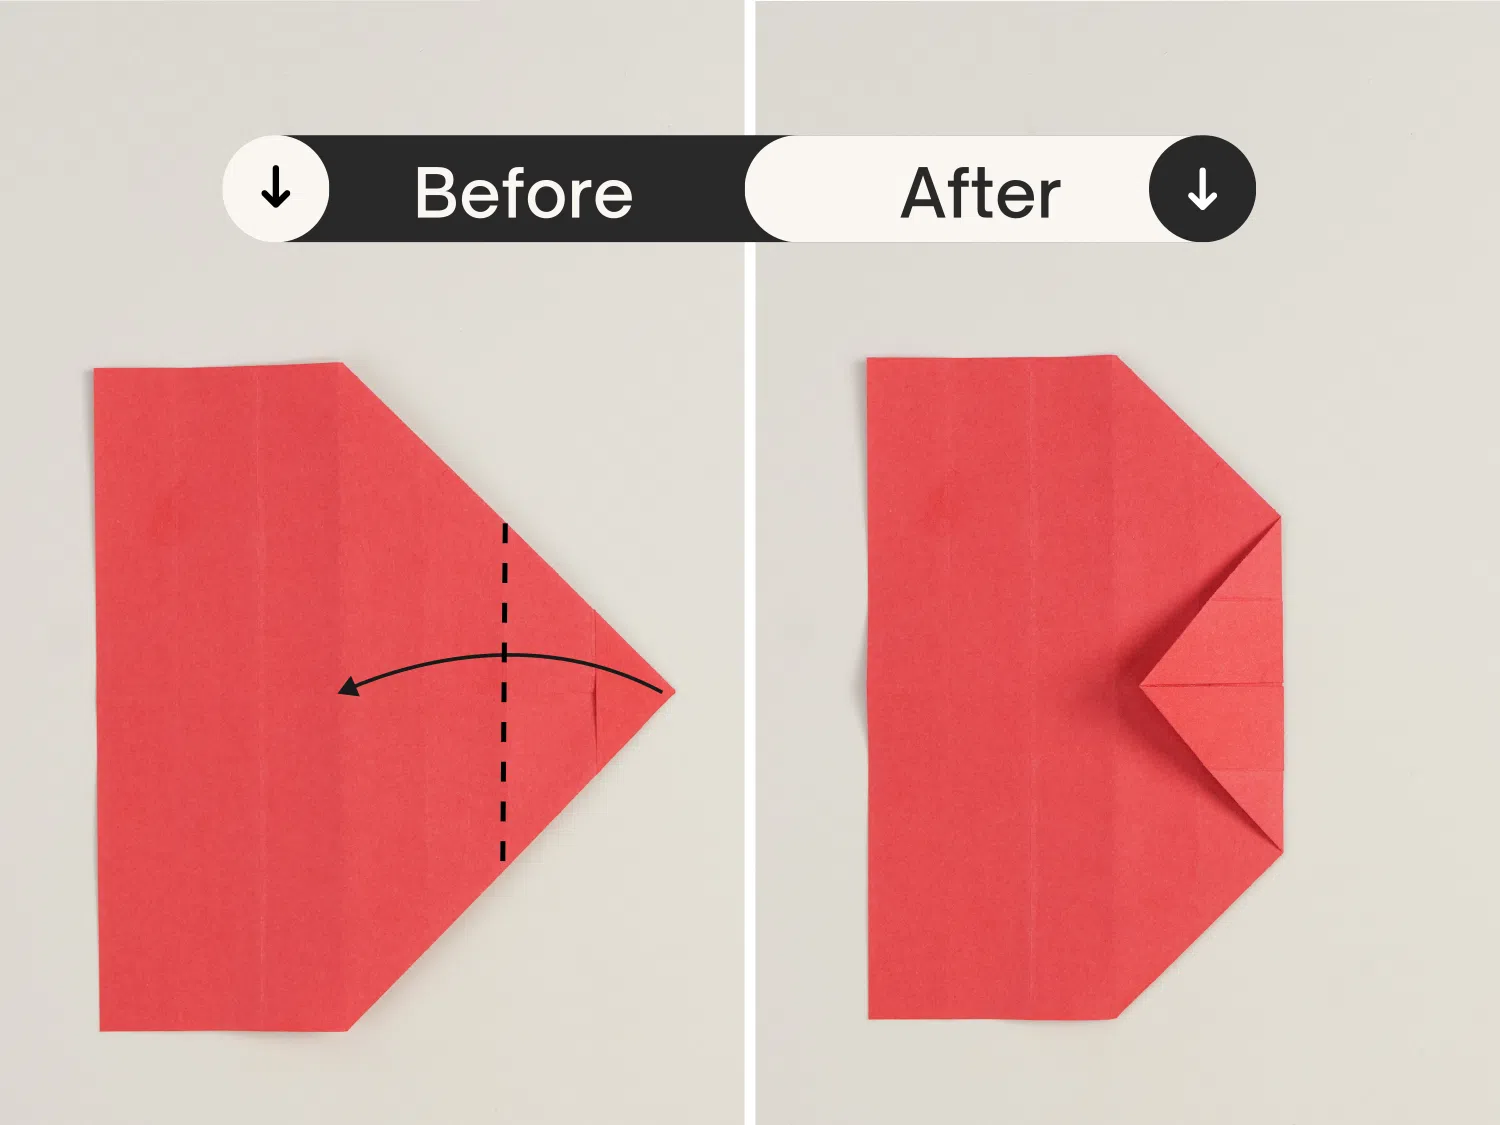
Step 22
Flip it over.

Step 23
Rotate it 45 degrees counterclockwise.

Step 24
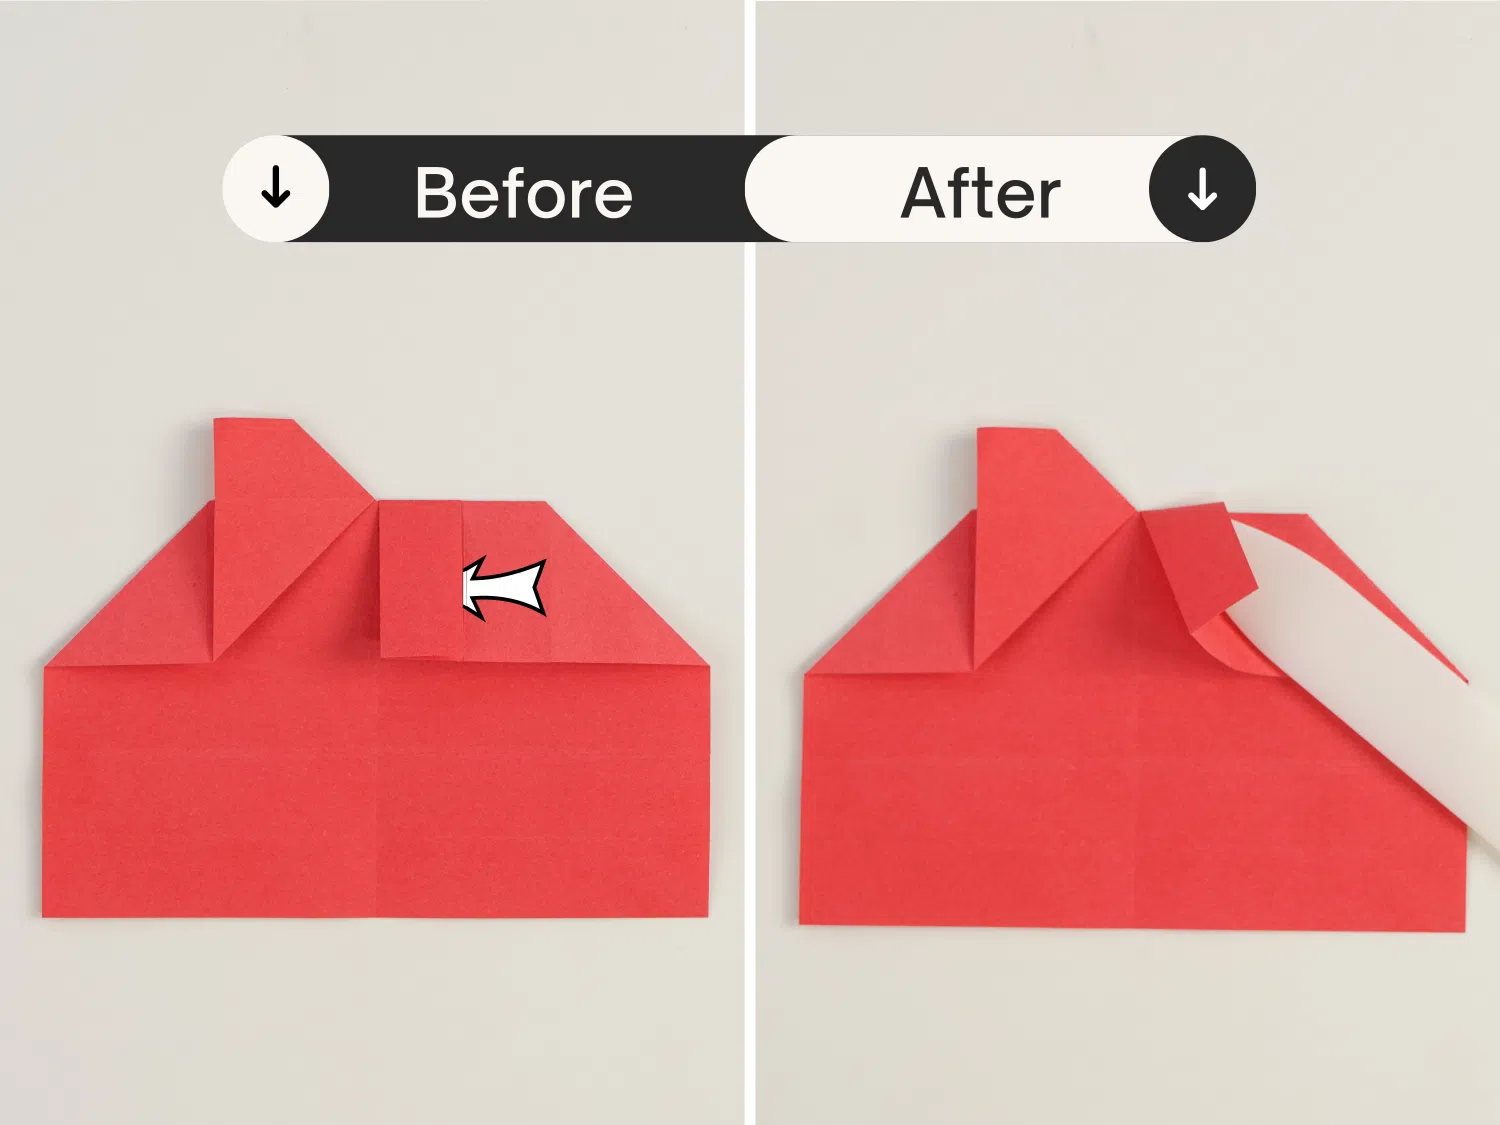
Use your finger or any other tools to slightly arch this corner.
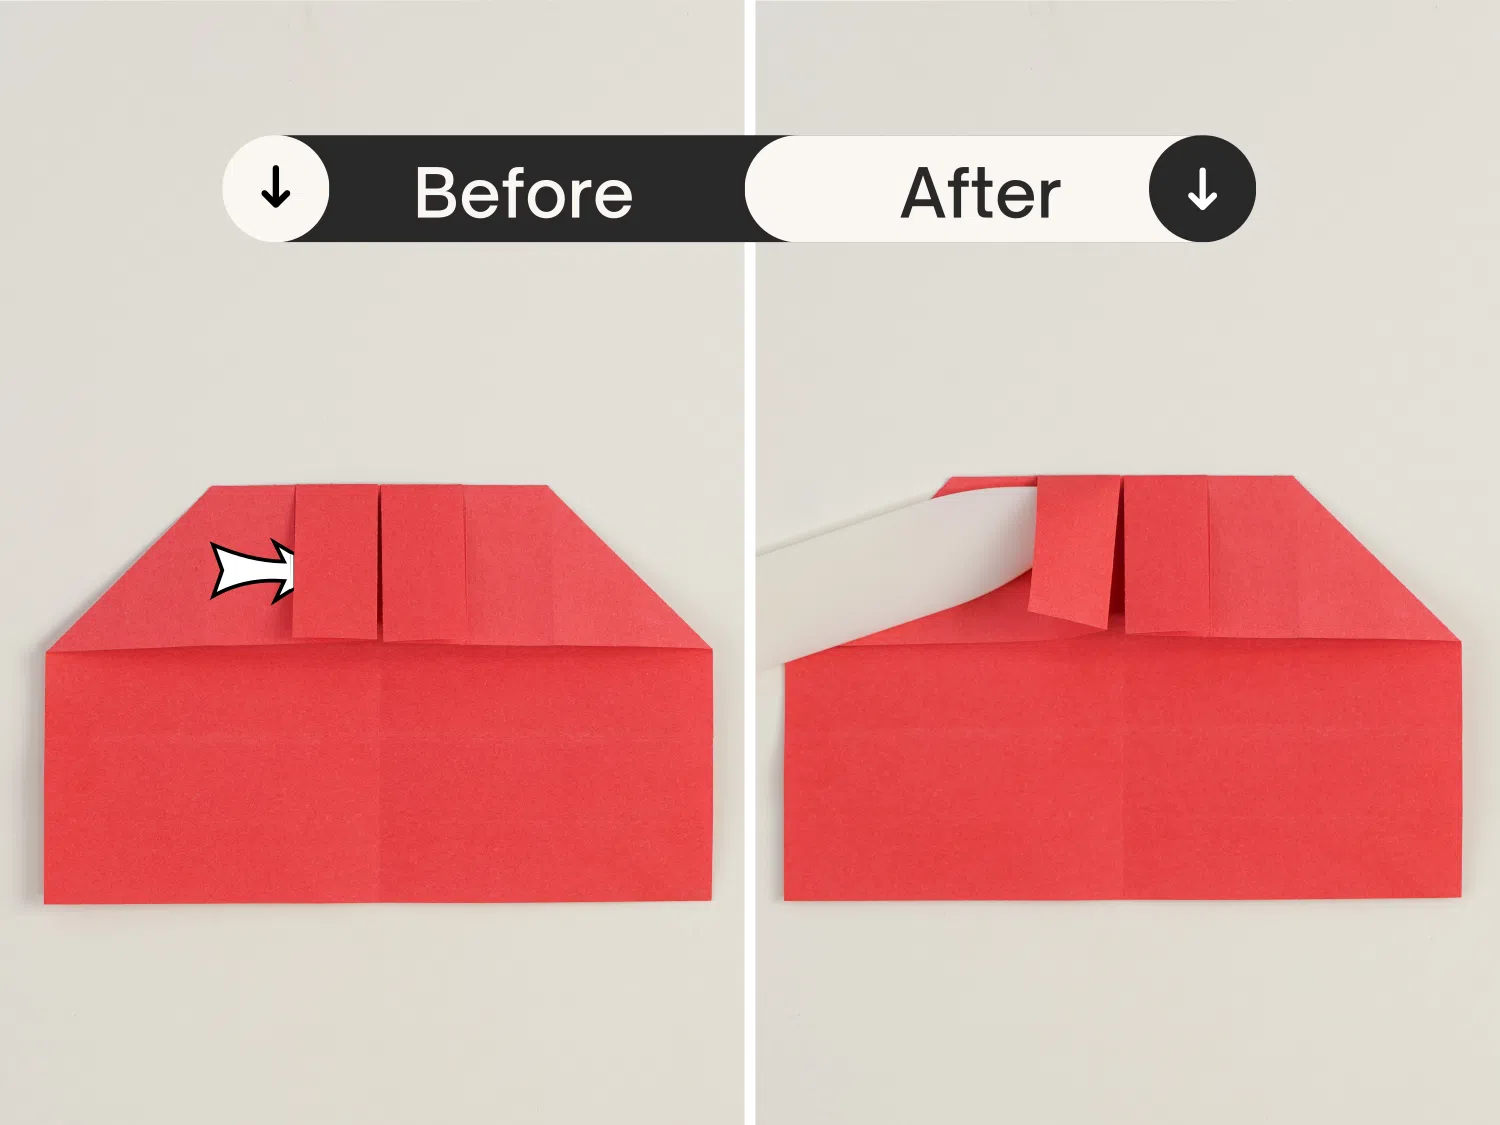
Step 25
Then push this corner from bottom to top, and slowly flatten it.
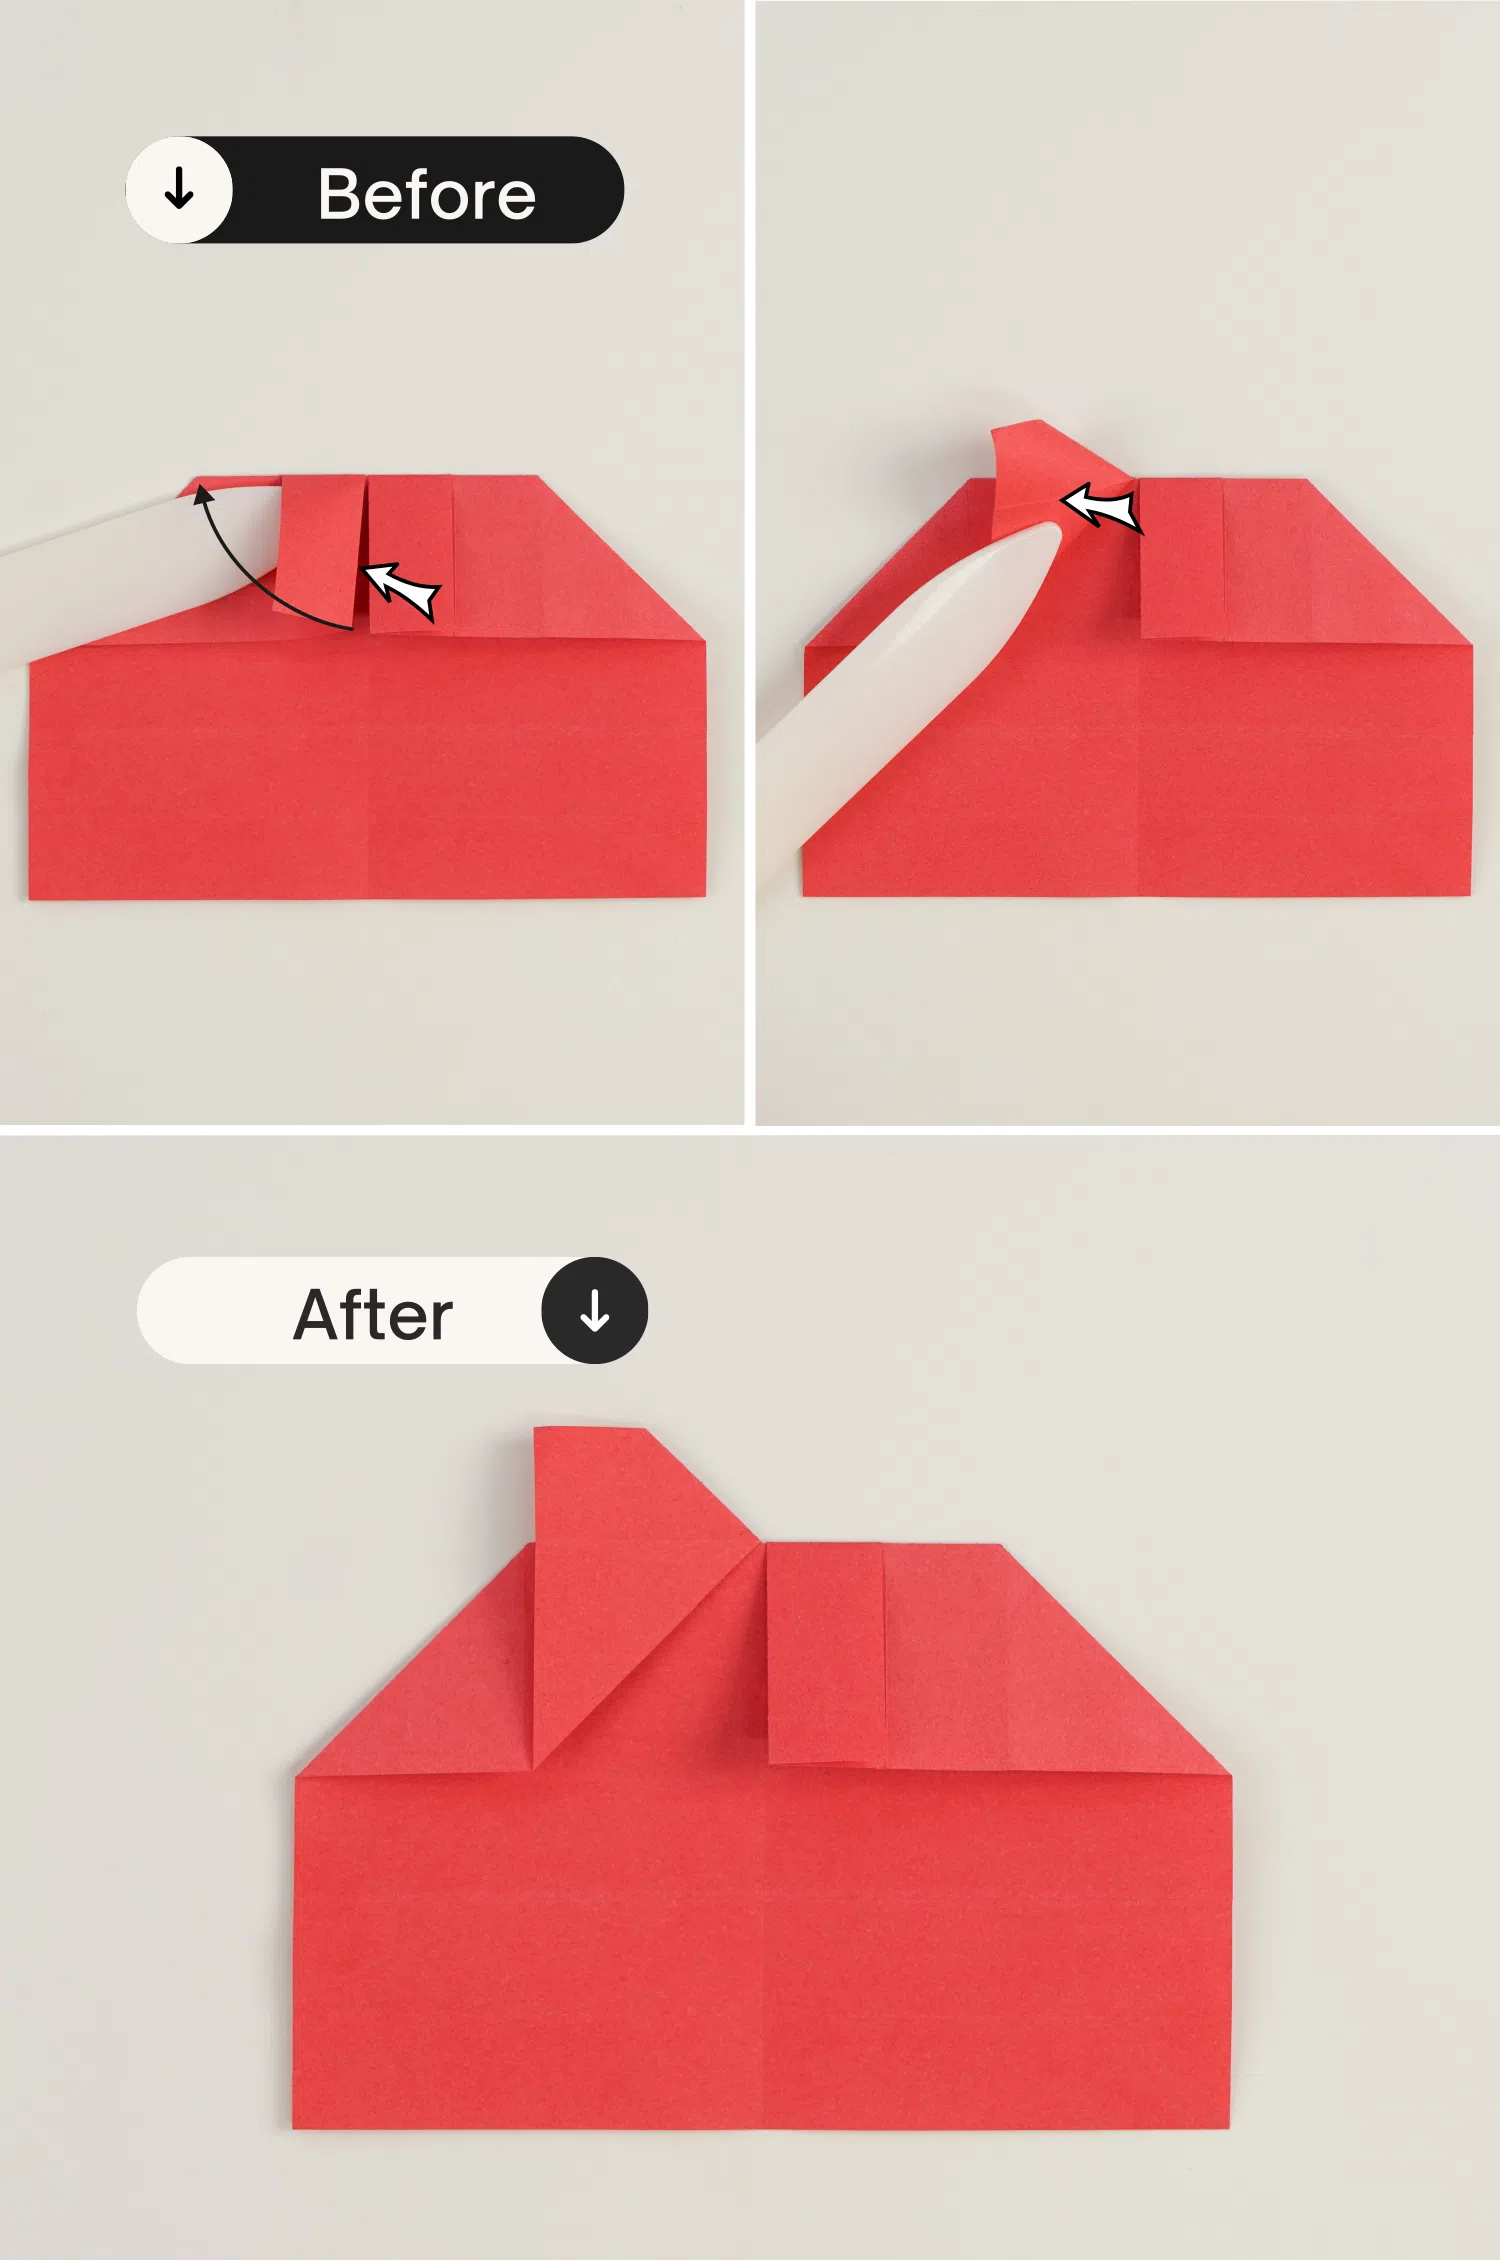
Step 26
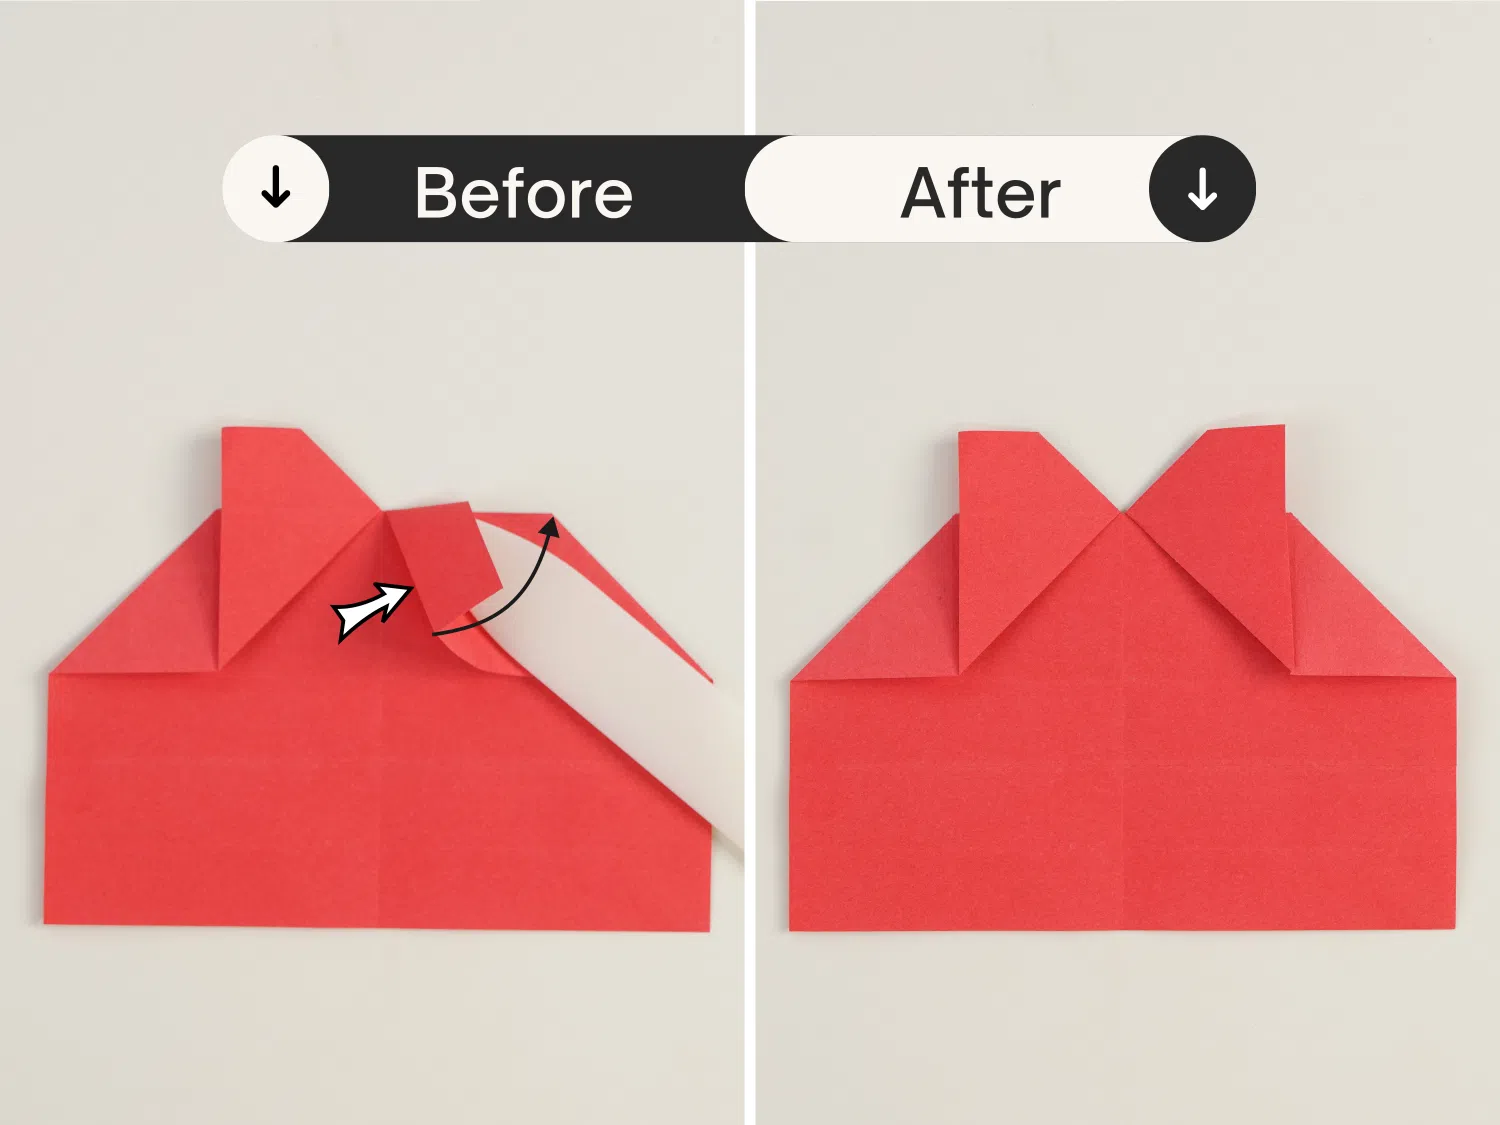
Repeat this to the right side, slightly arching this corner.
Step 27
Flatten it to form a same shape as the left one.
Step 28
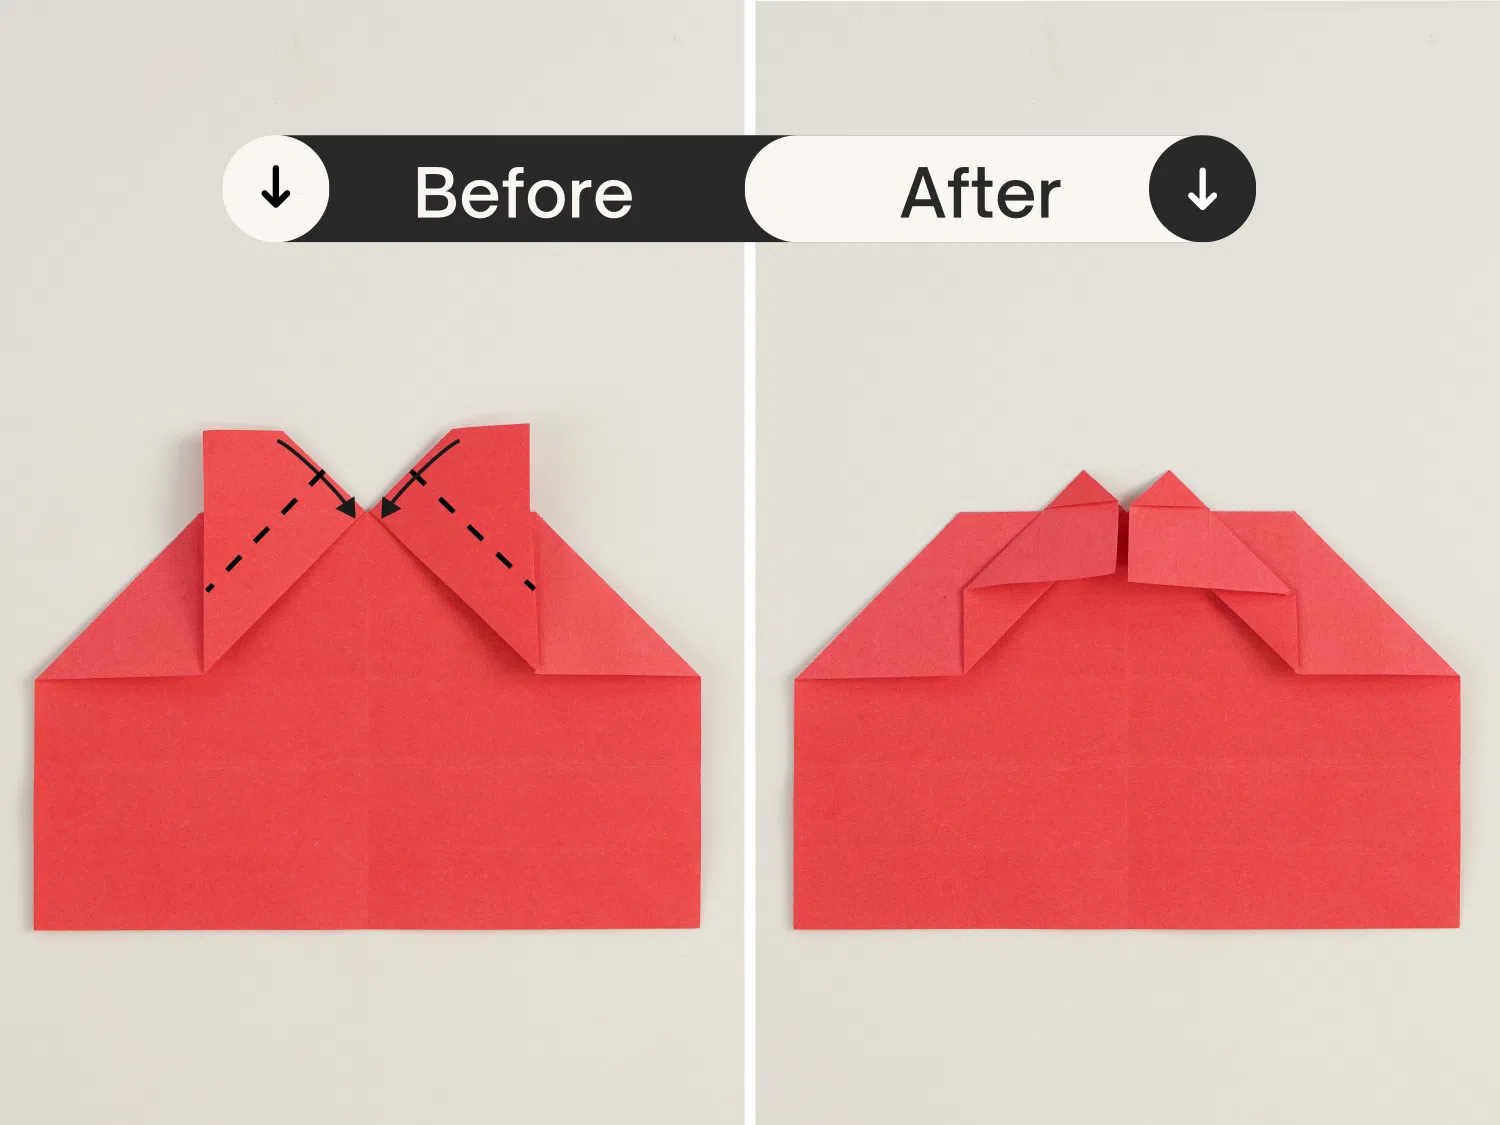
Fold the right corner down along the dotted line.
Repeat this to the left corner.
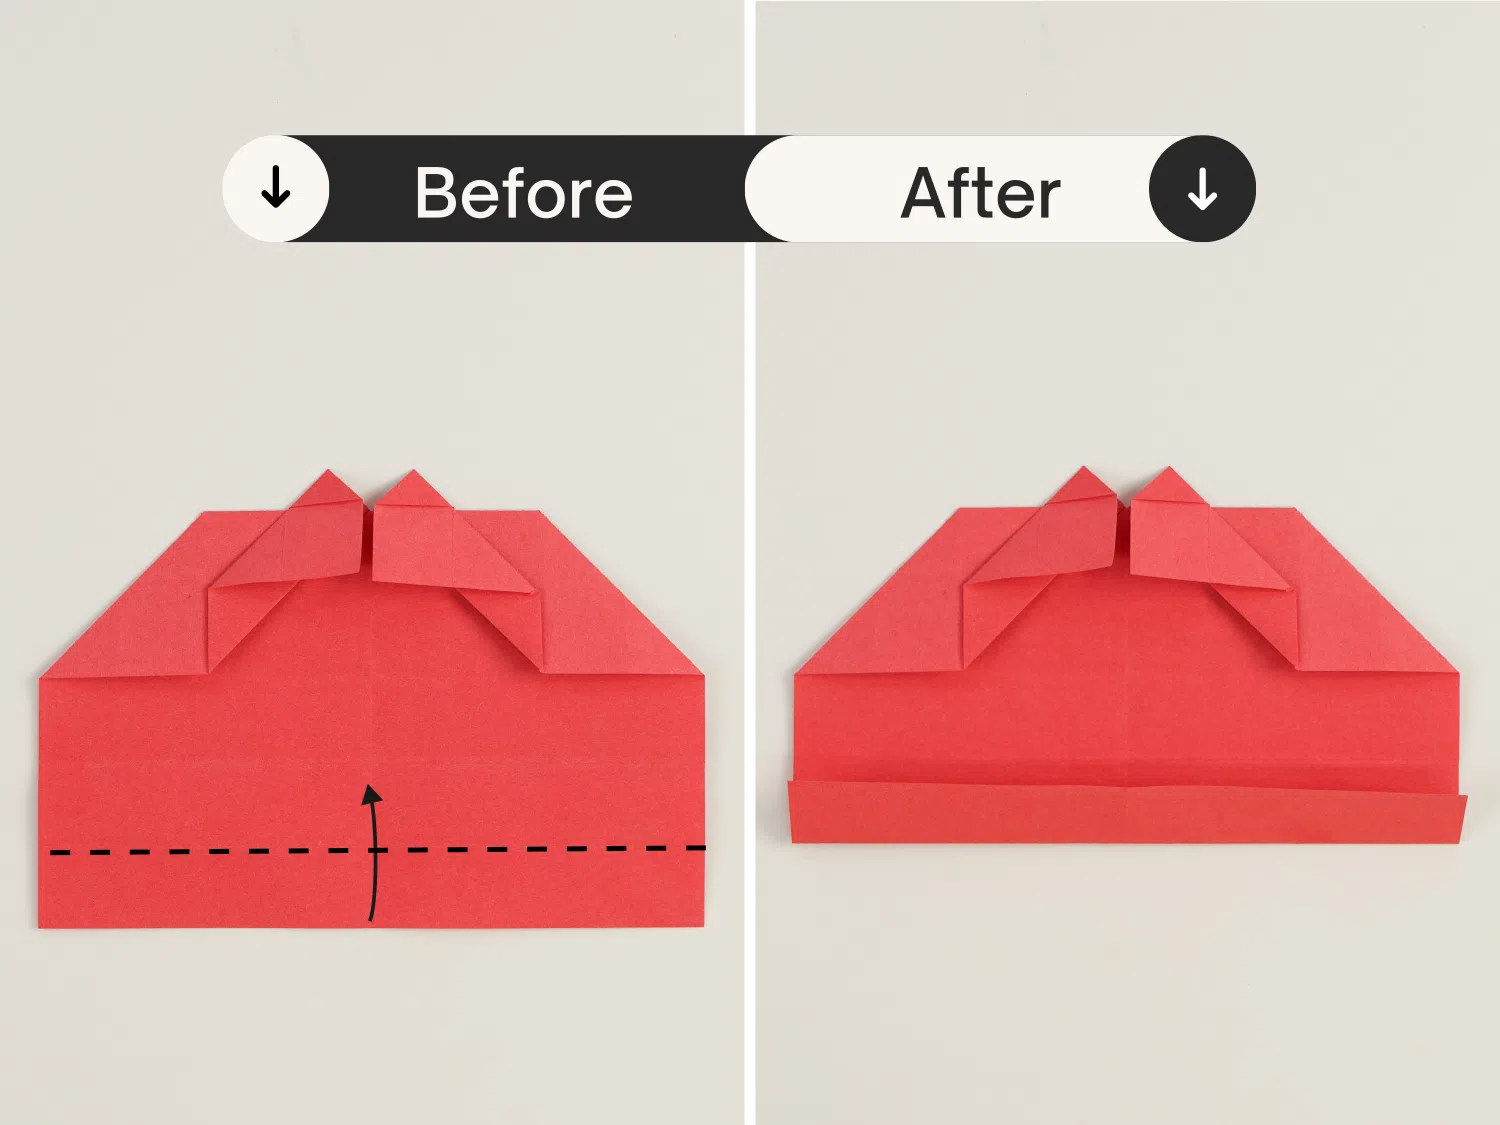
Step 29
Fold the bottom edge up along the first crease.
Step 30
Fold it up again along the second crease.
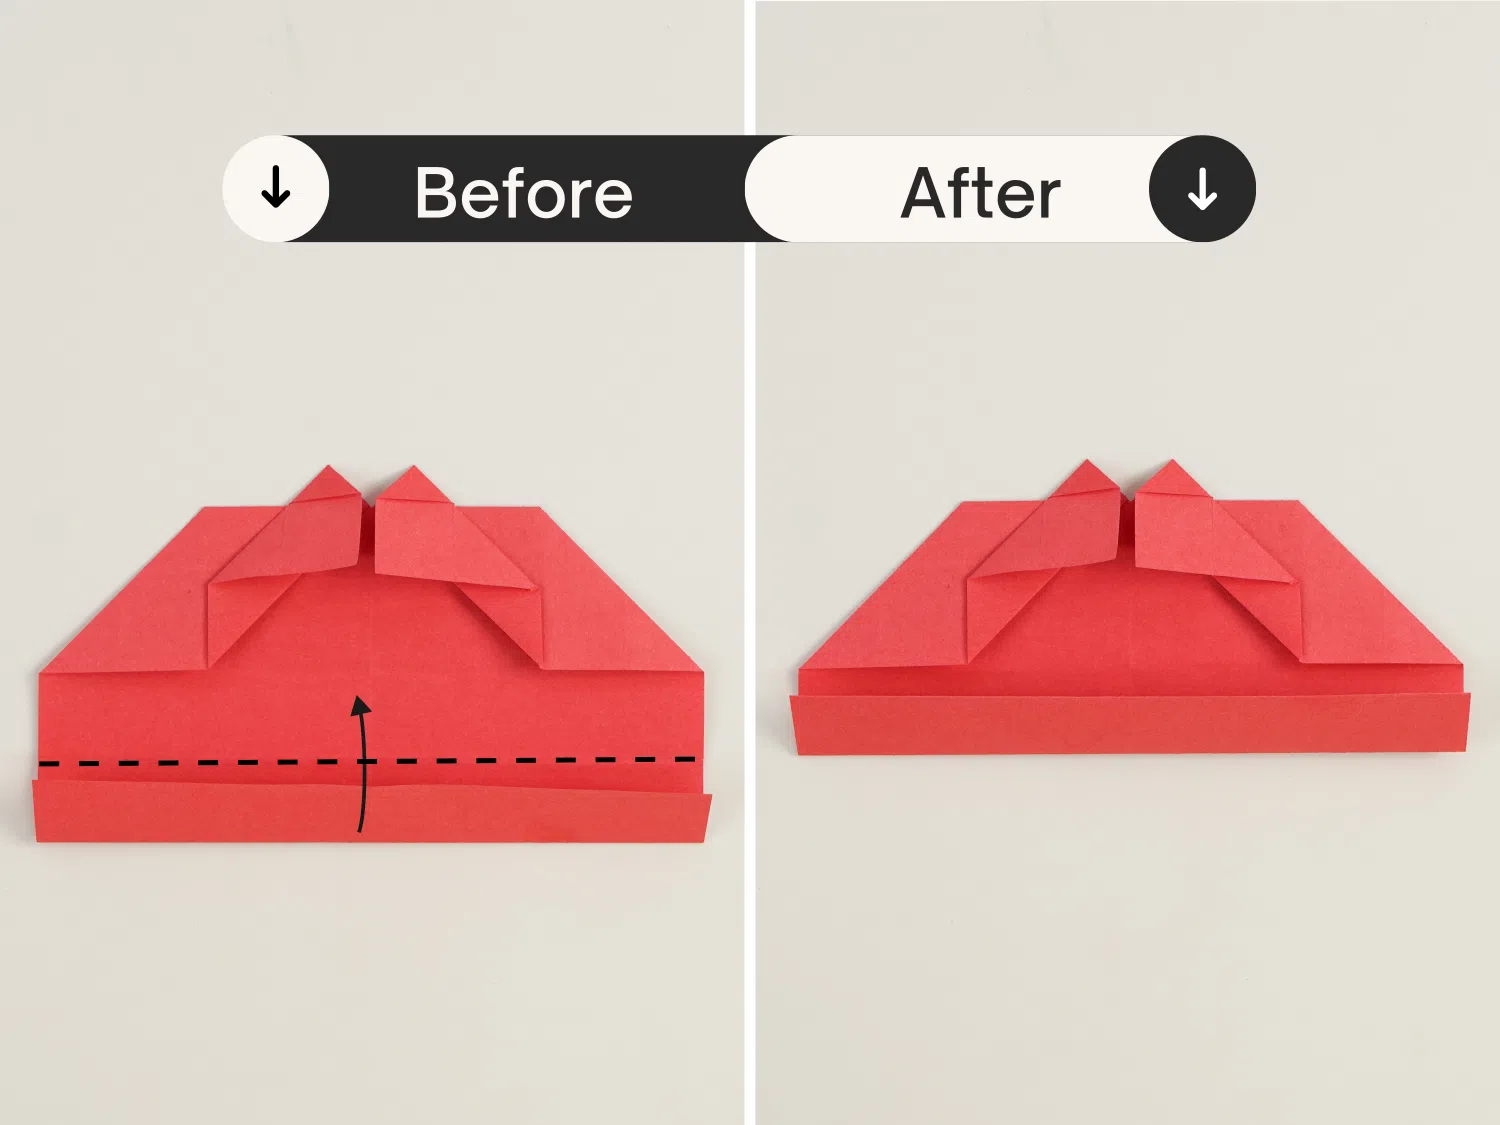
Step 31
Fold it up one more time.
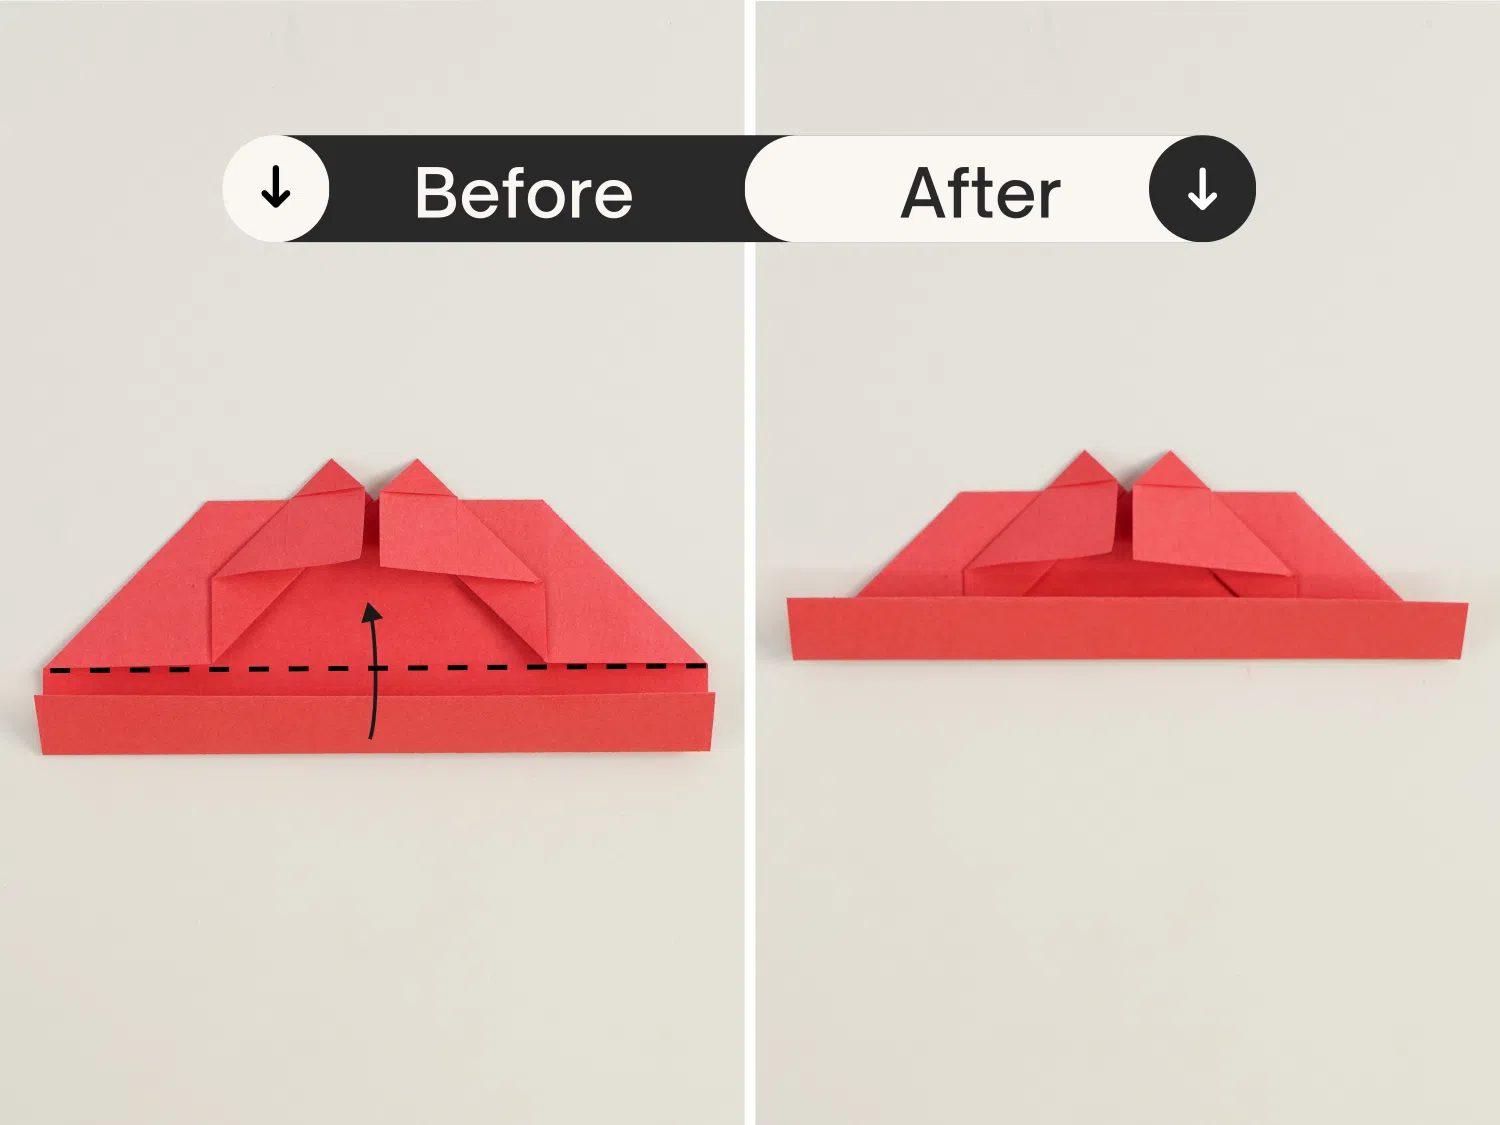
Step 32
Fold it up for the last time, there is a heart shape below.
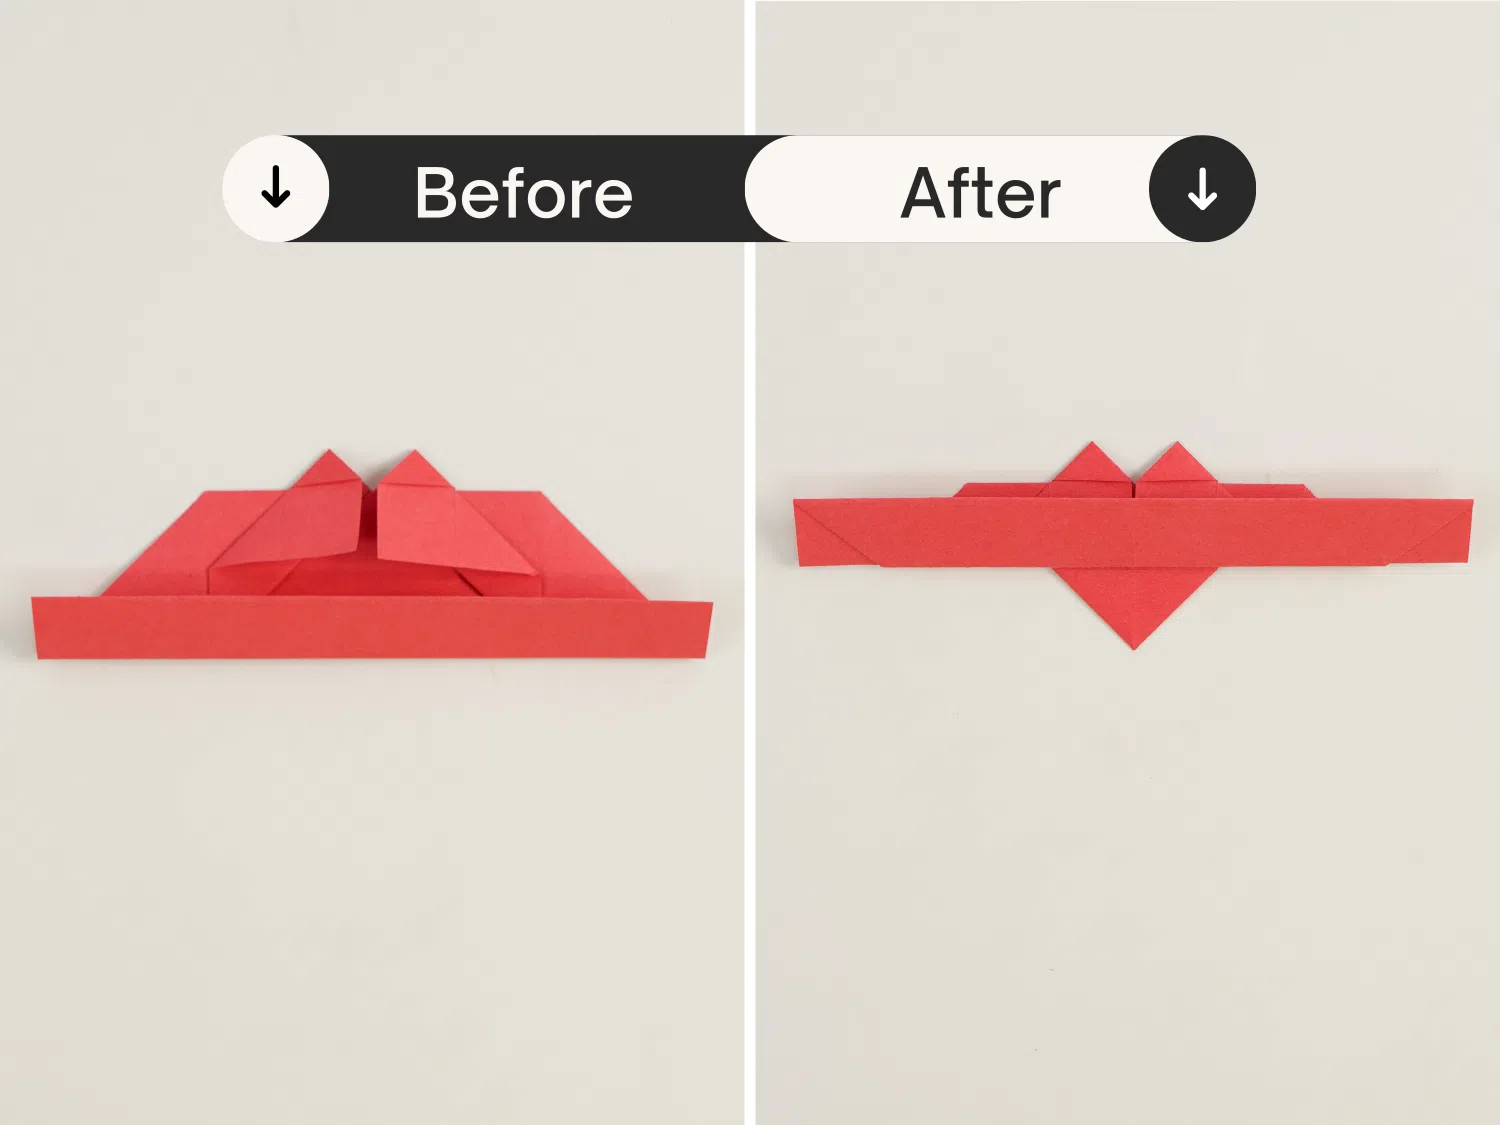
Step 33
Fold both the left and right top corners down a little to make the heart rounder.
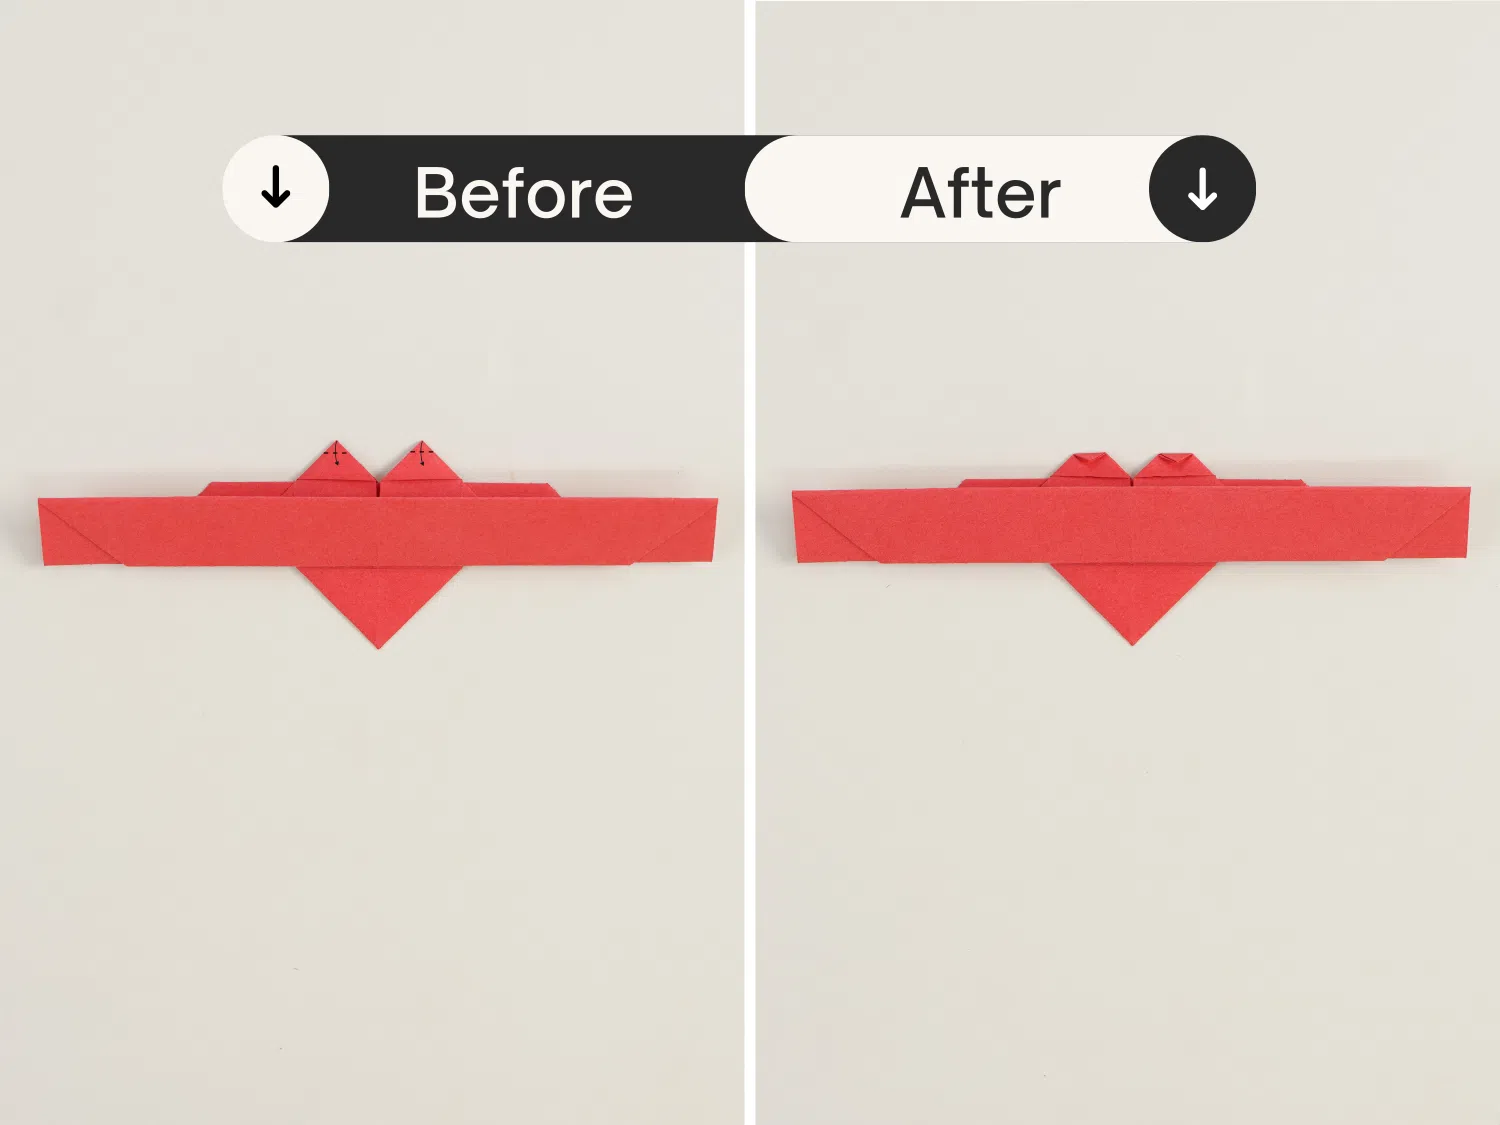
Step 34
Cut off a small part of the right side.
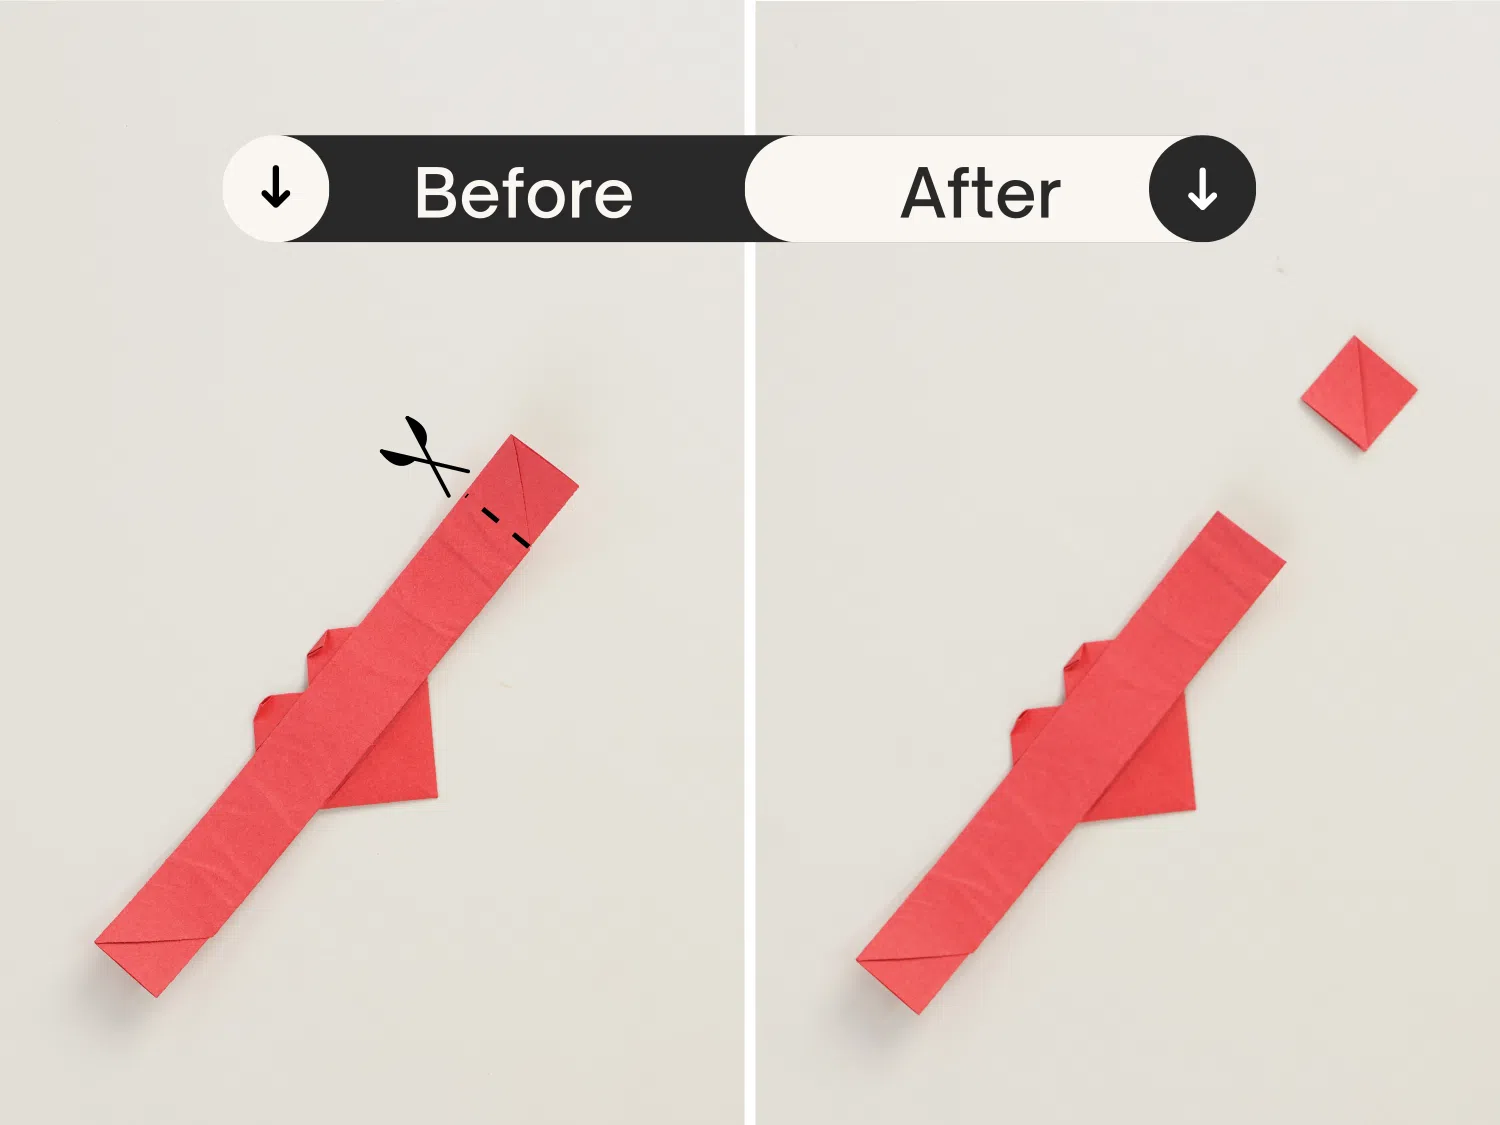
Step 35
Sharp the left end.
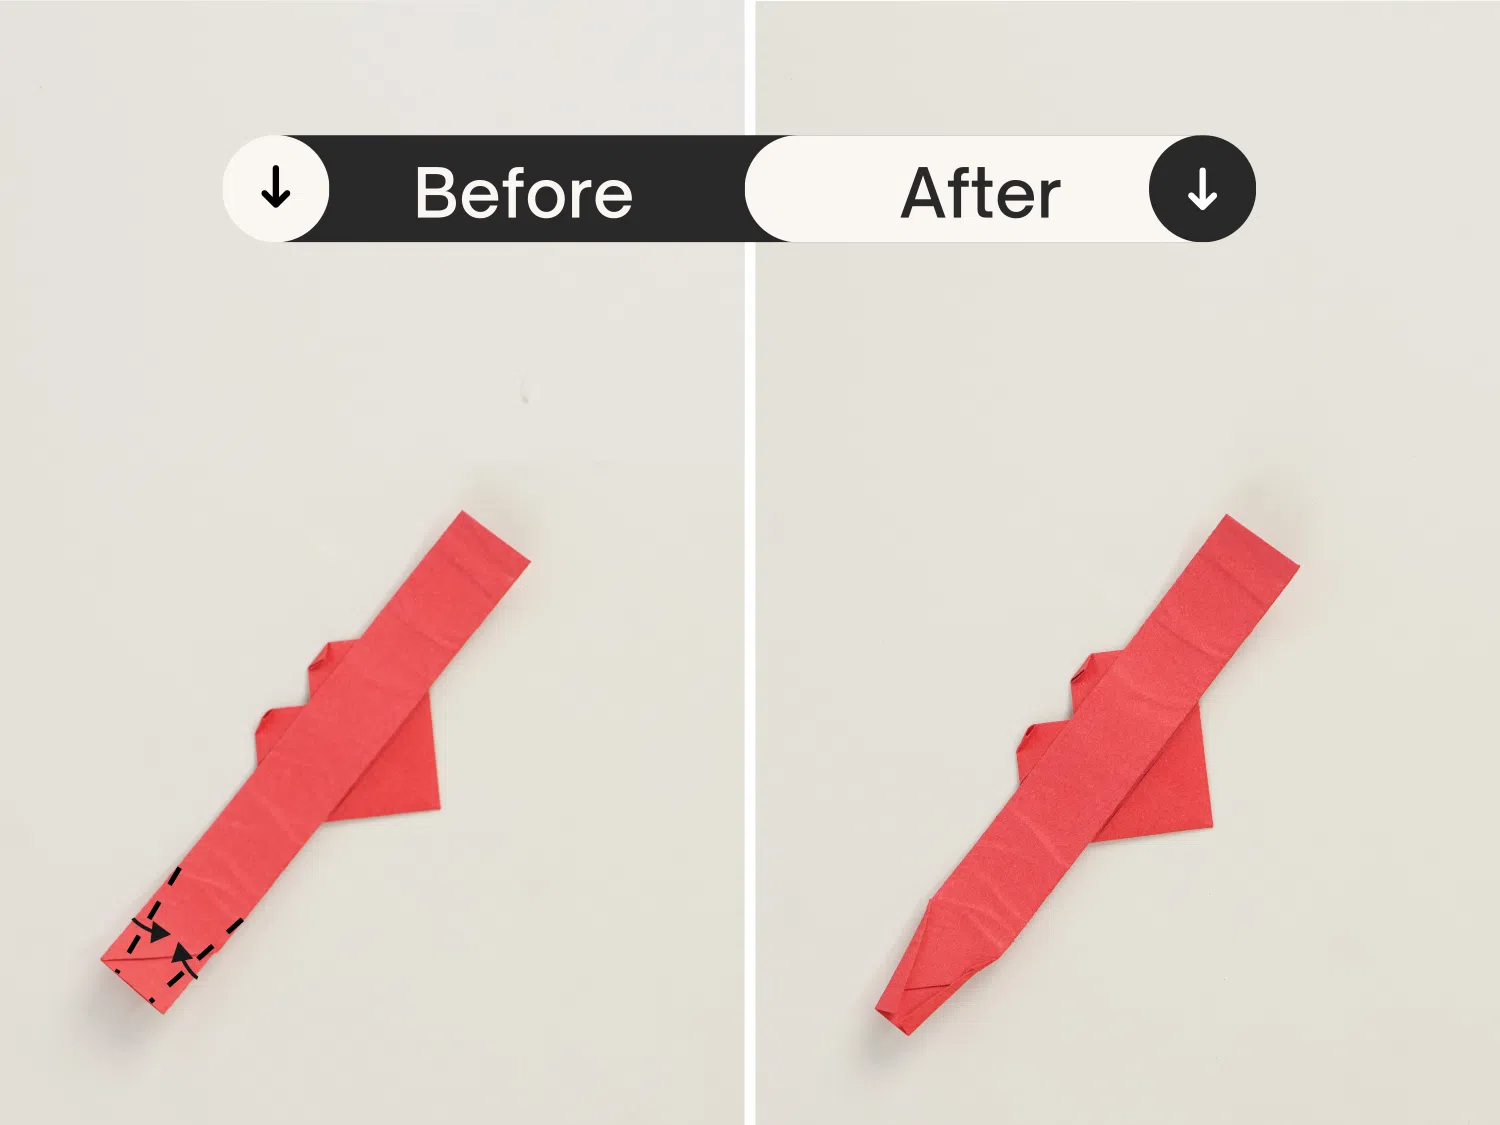
Step 36
Roll both ends toward the center.
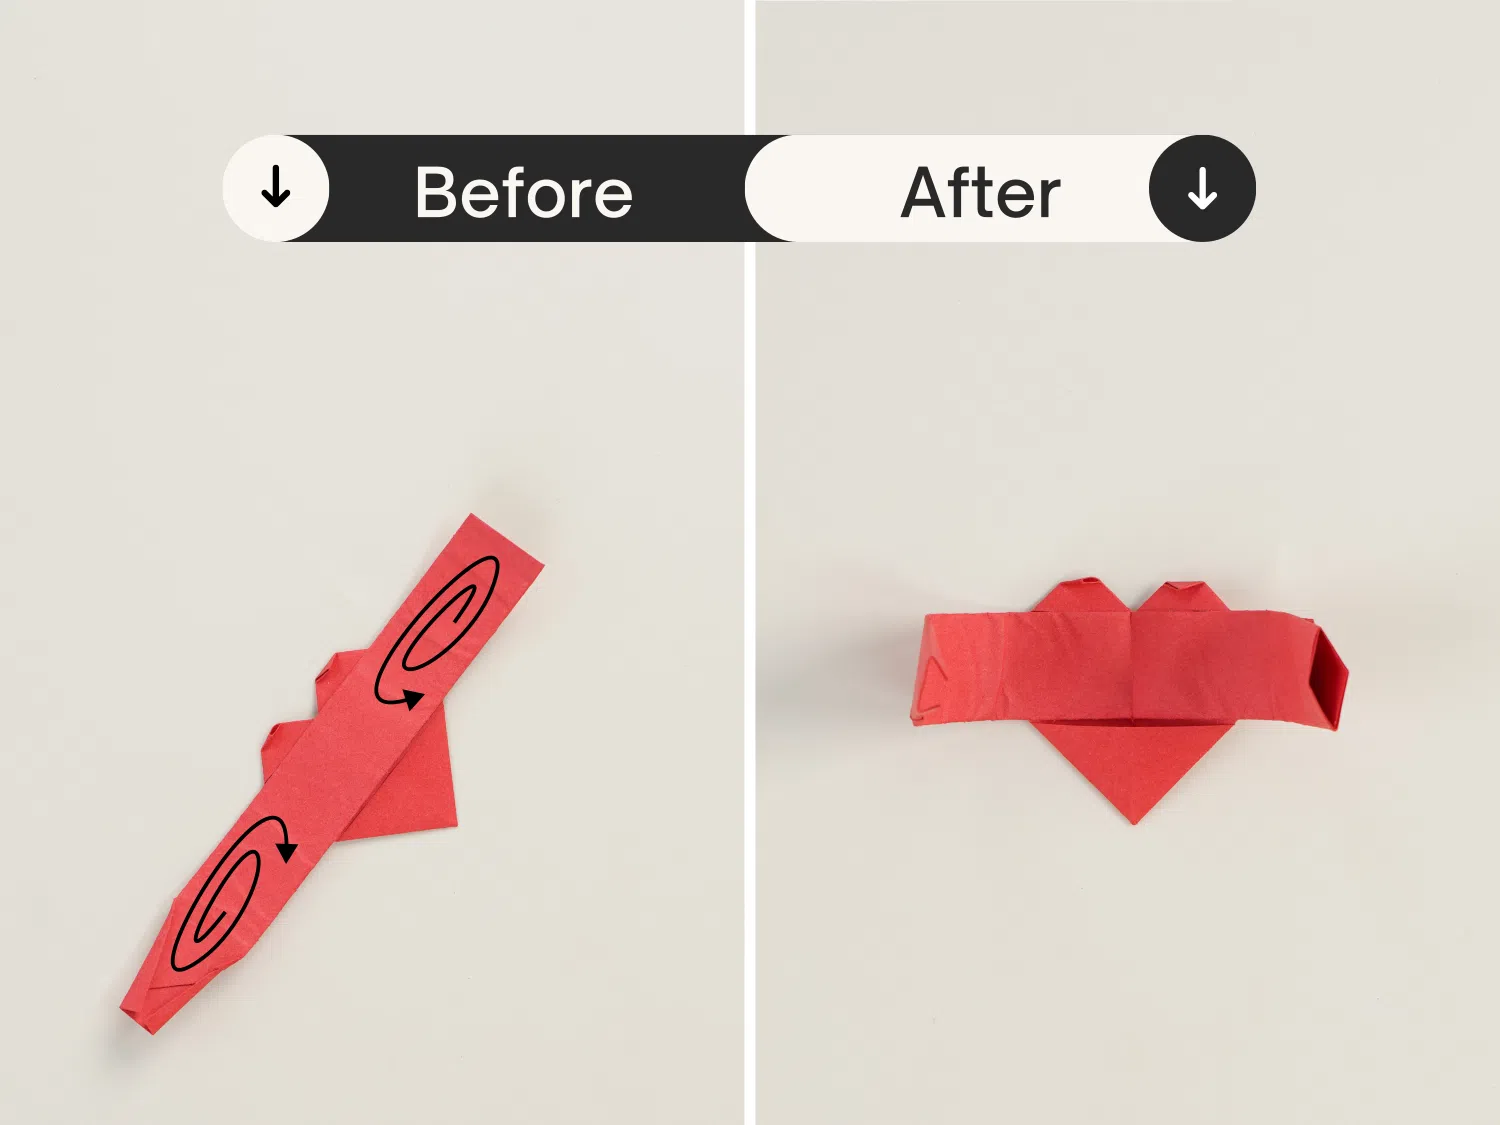
Step 37
Insert the left end into the hole on the right end.
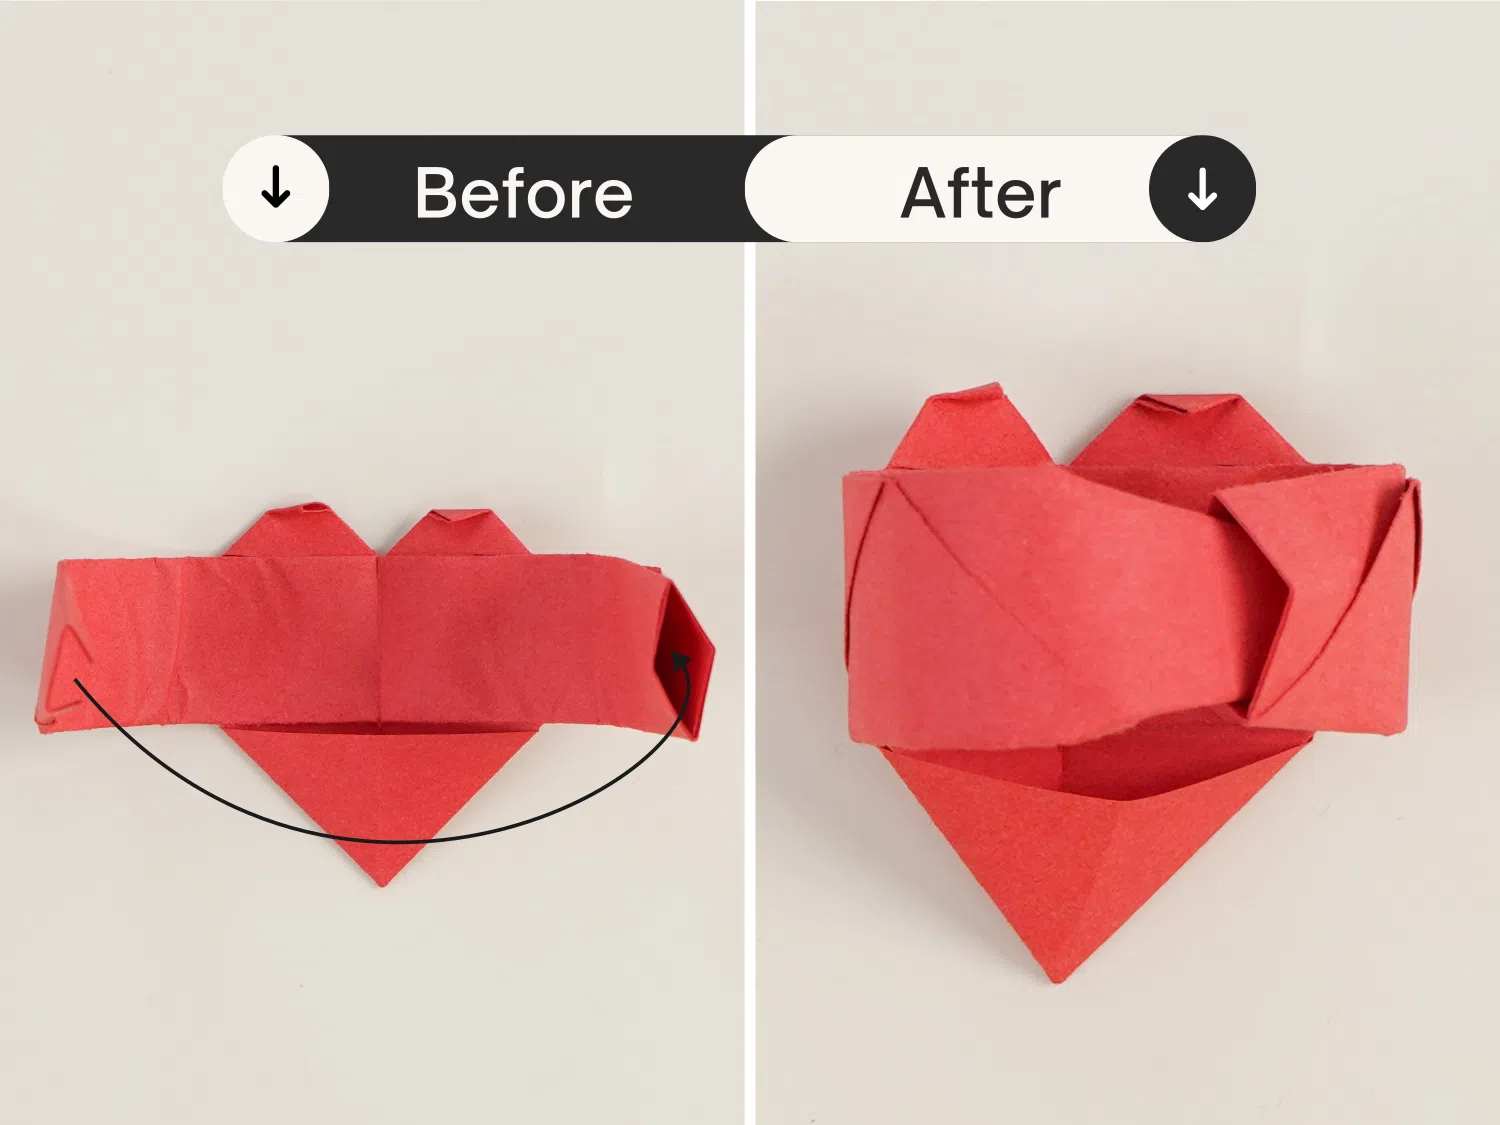
Step 38
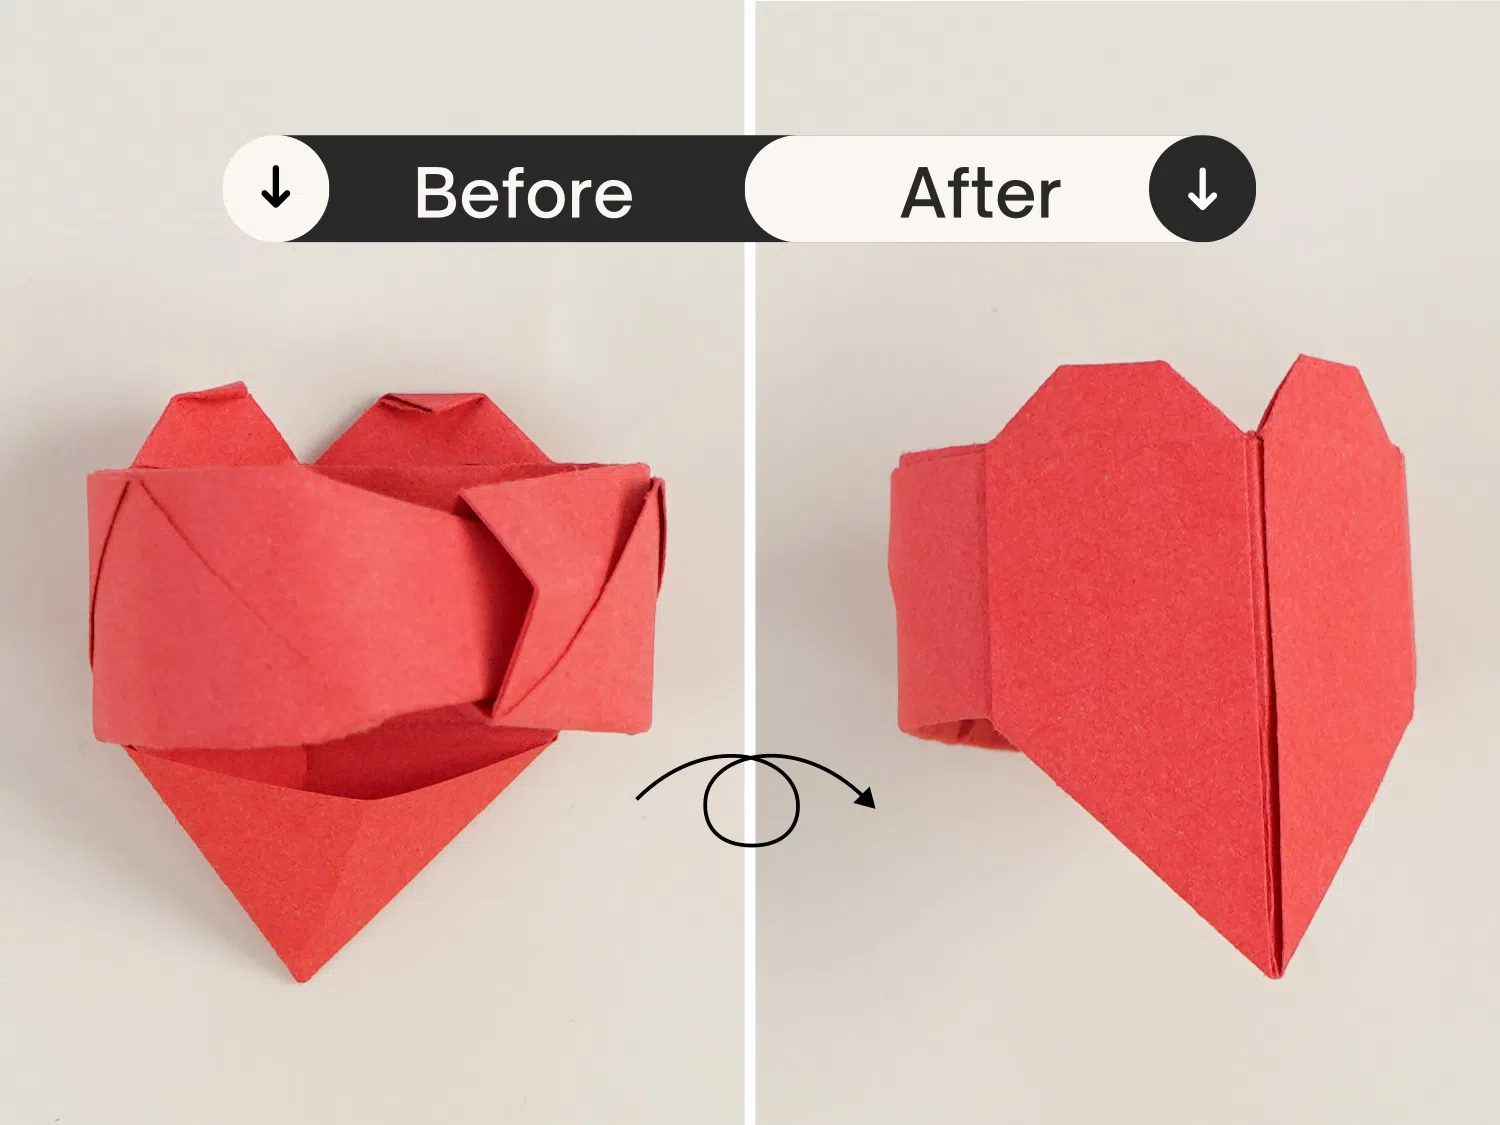
Flip it over, now you get this lovely heart ring, try to put it on your finger.
What’s Next
We have finished this lovely origami heart ring. Explore our collection of origami hearts if you want to find origami ideas that express love and caring.
- Origami Heart Box – using it as a container for rings and gifts.
- Origami Puff Heart—This puffing heart looks like a cutter; you can use it as an extra attachment to the gift.
- Traditional origami heart bookmark—This traditional origami heart bookmark is the most classic way of making a paper heart. It can be used as a bookmark.


