How to Fold an Origami Santa Hat
Step 1
Start with the red side of the paper facing down, and fold the bottom right edge to align with the top left edge, leaving a crease, then unfold it.
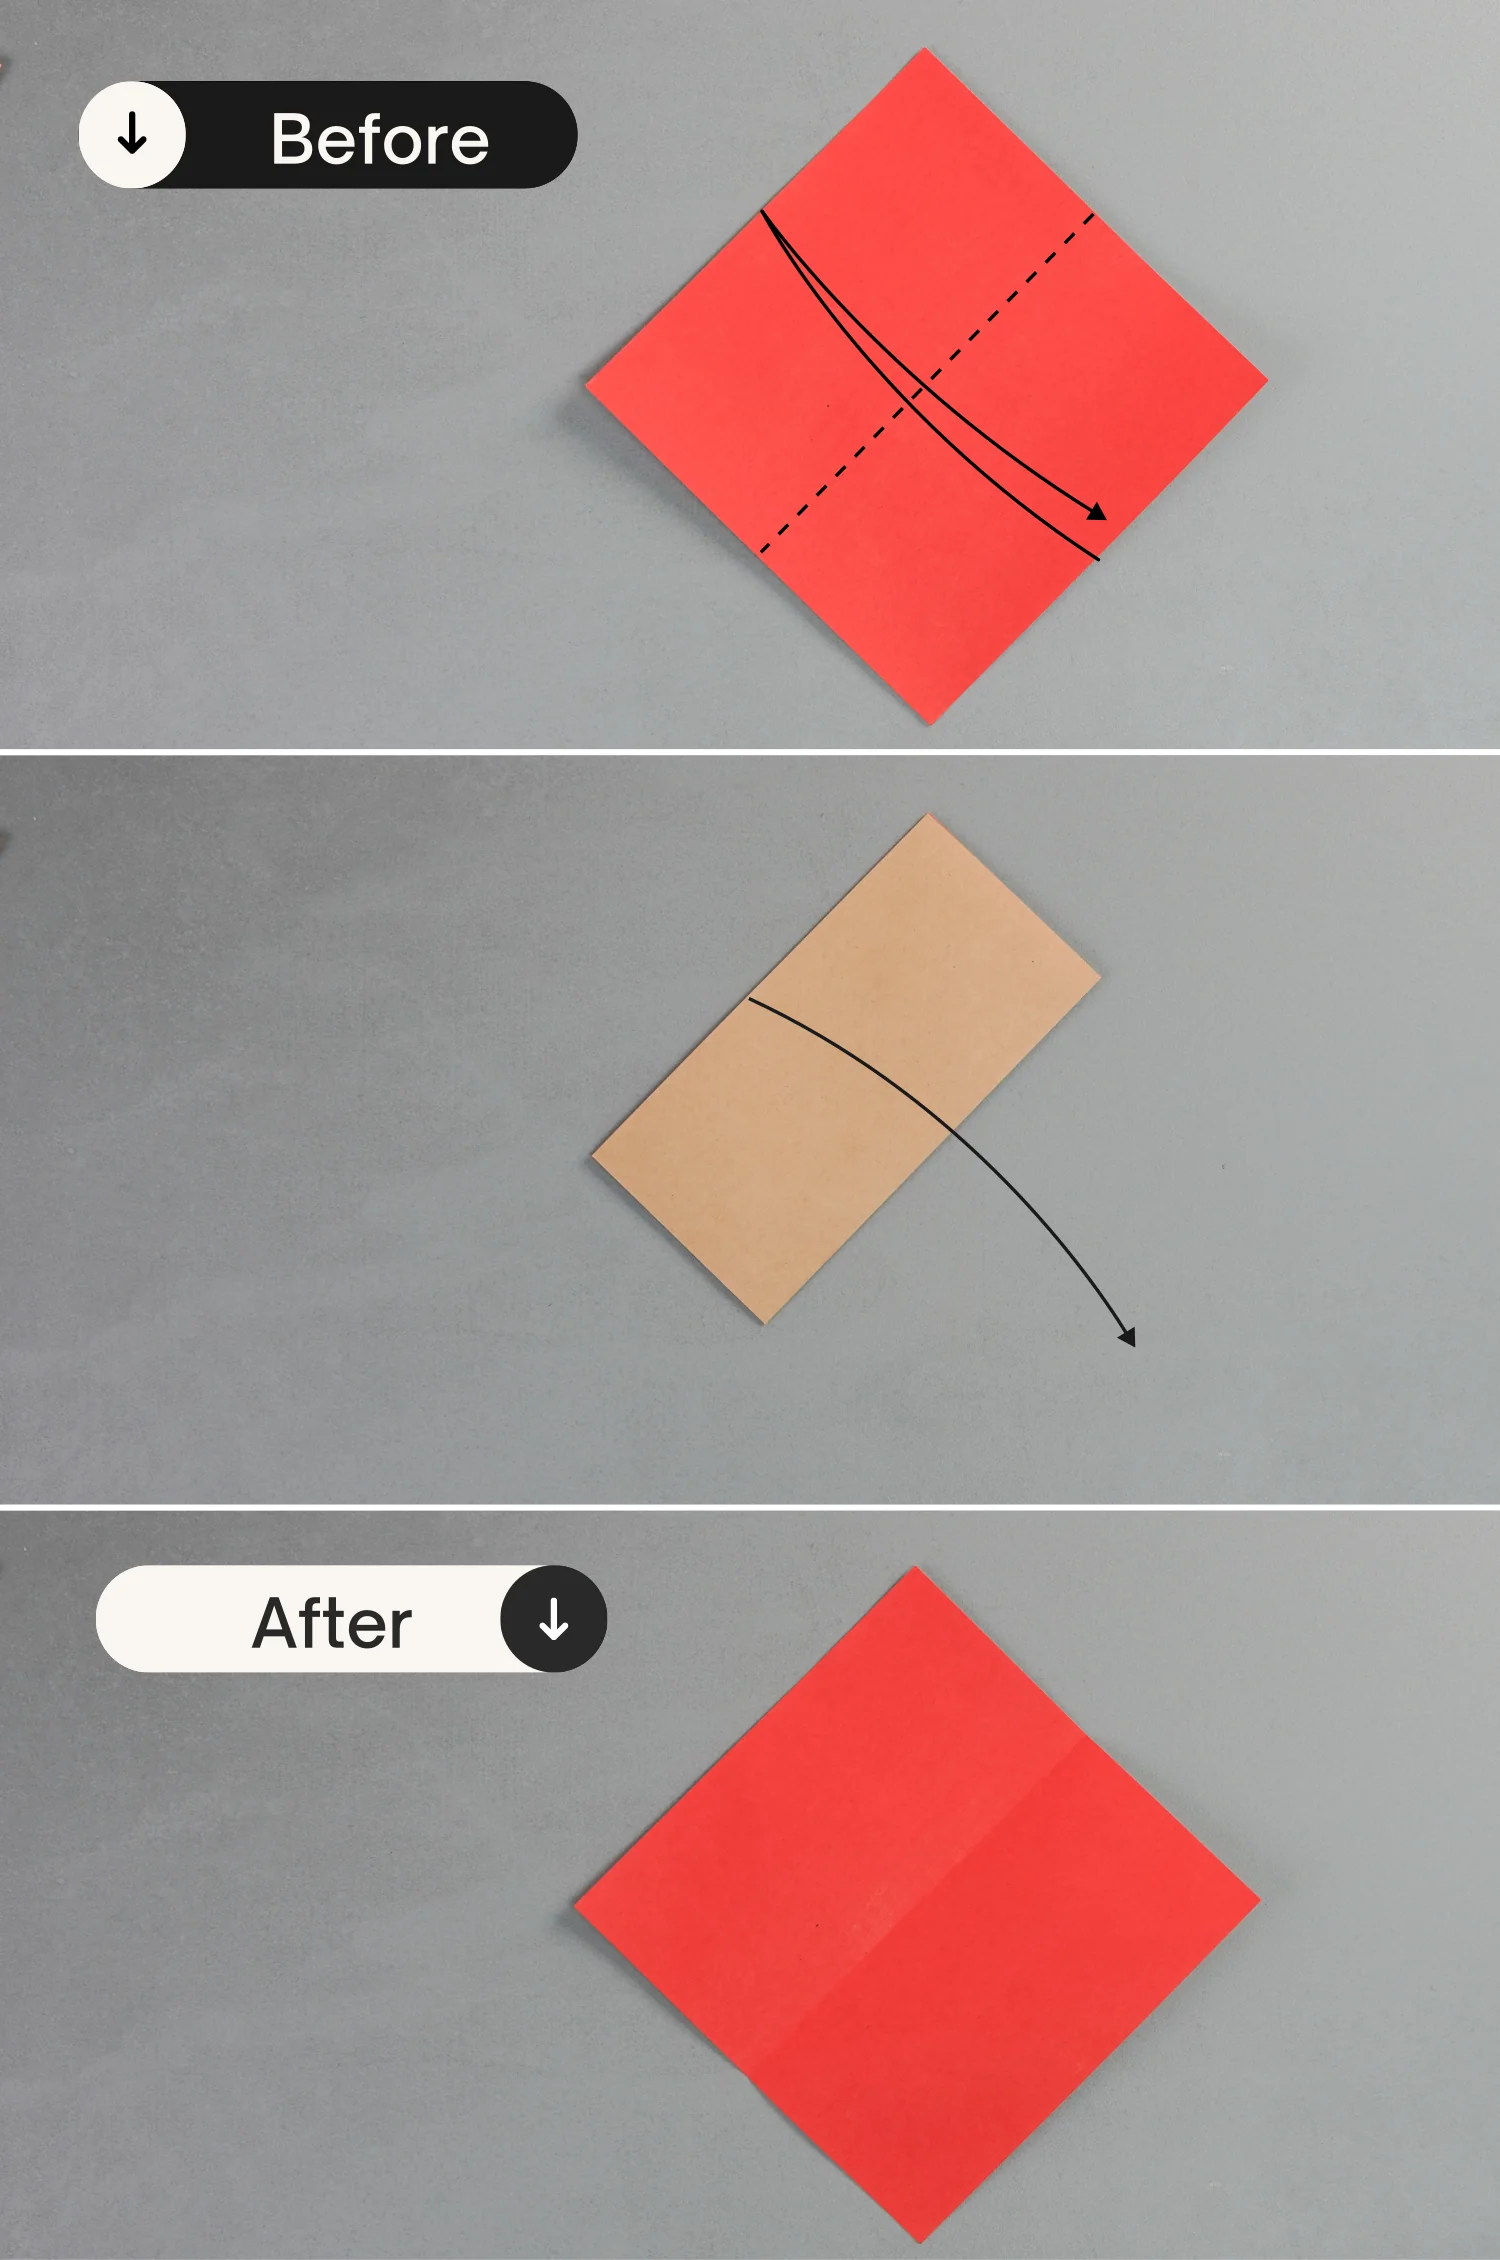
Step 2
Fold the bottom left edge to align with the top right edge, then unfold it.
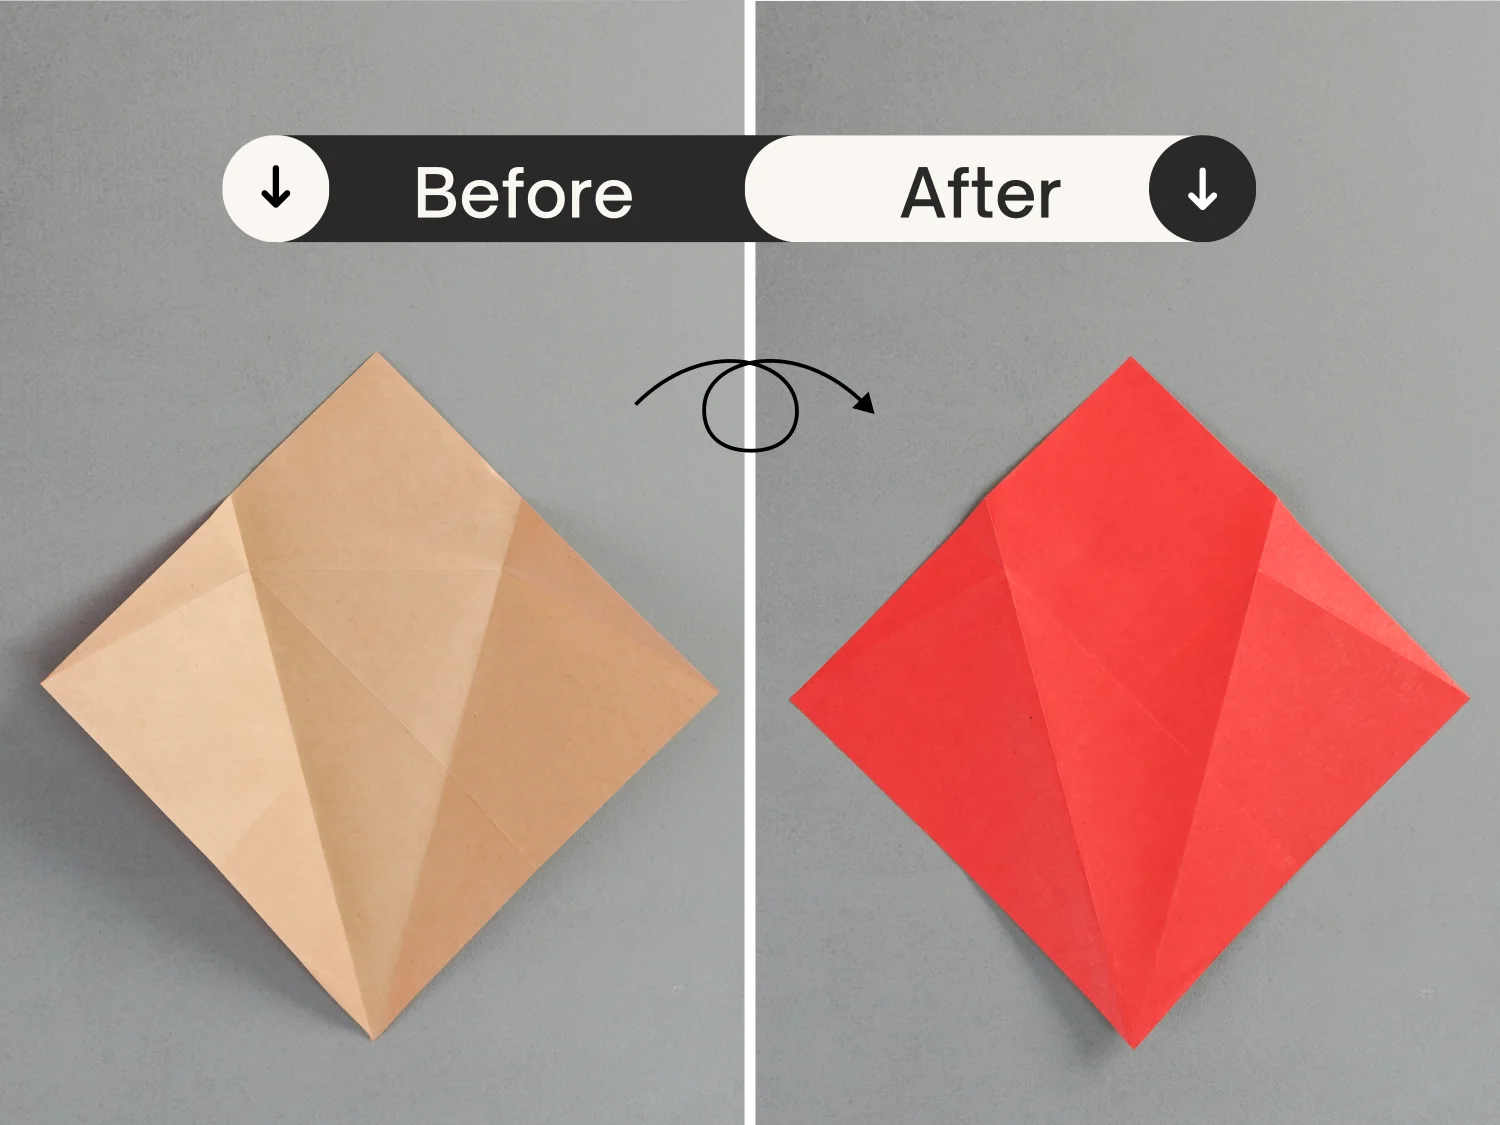
Step 3
Flip the paper over.
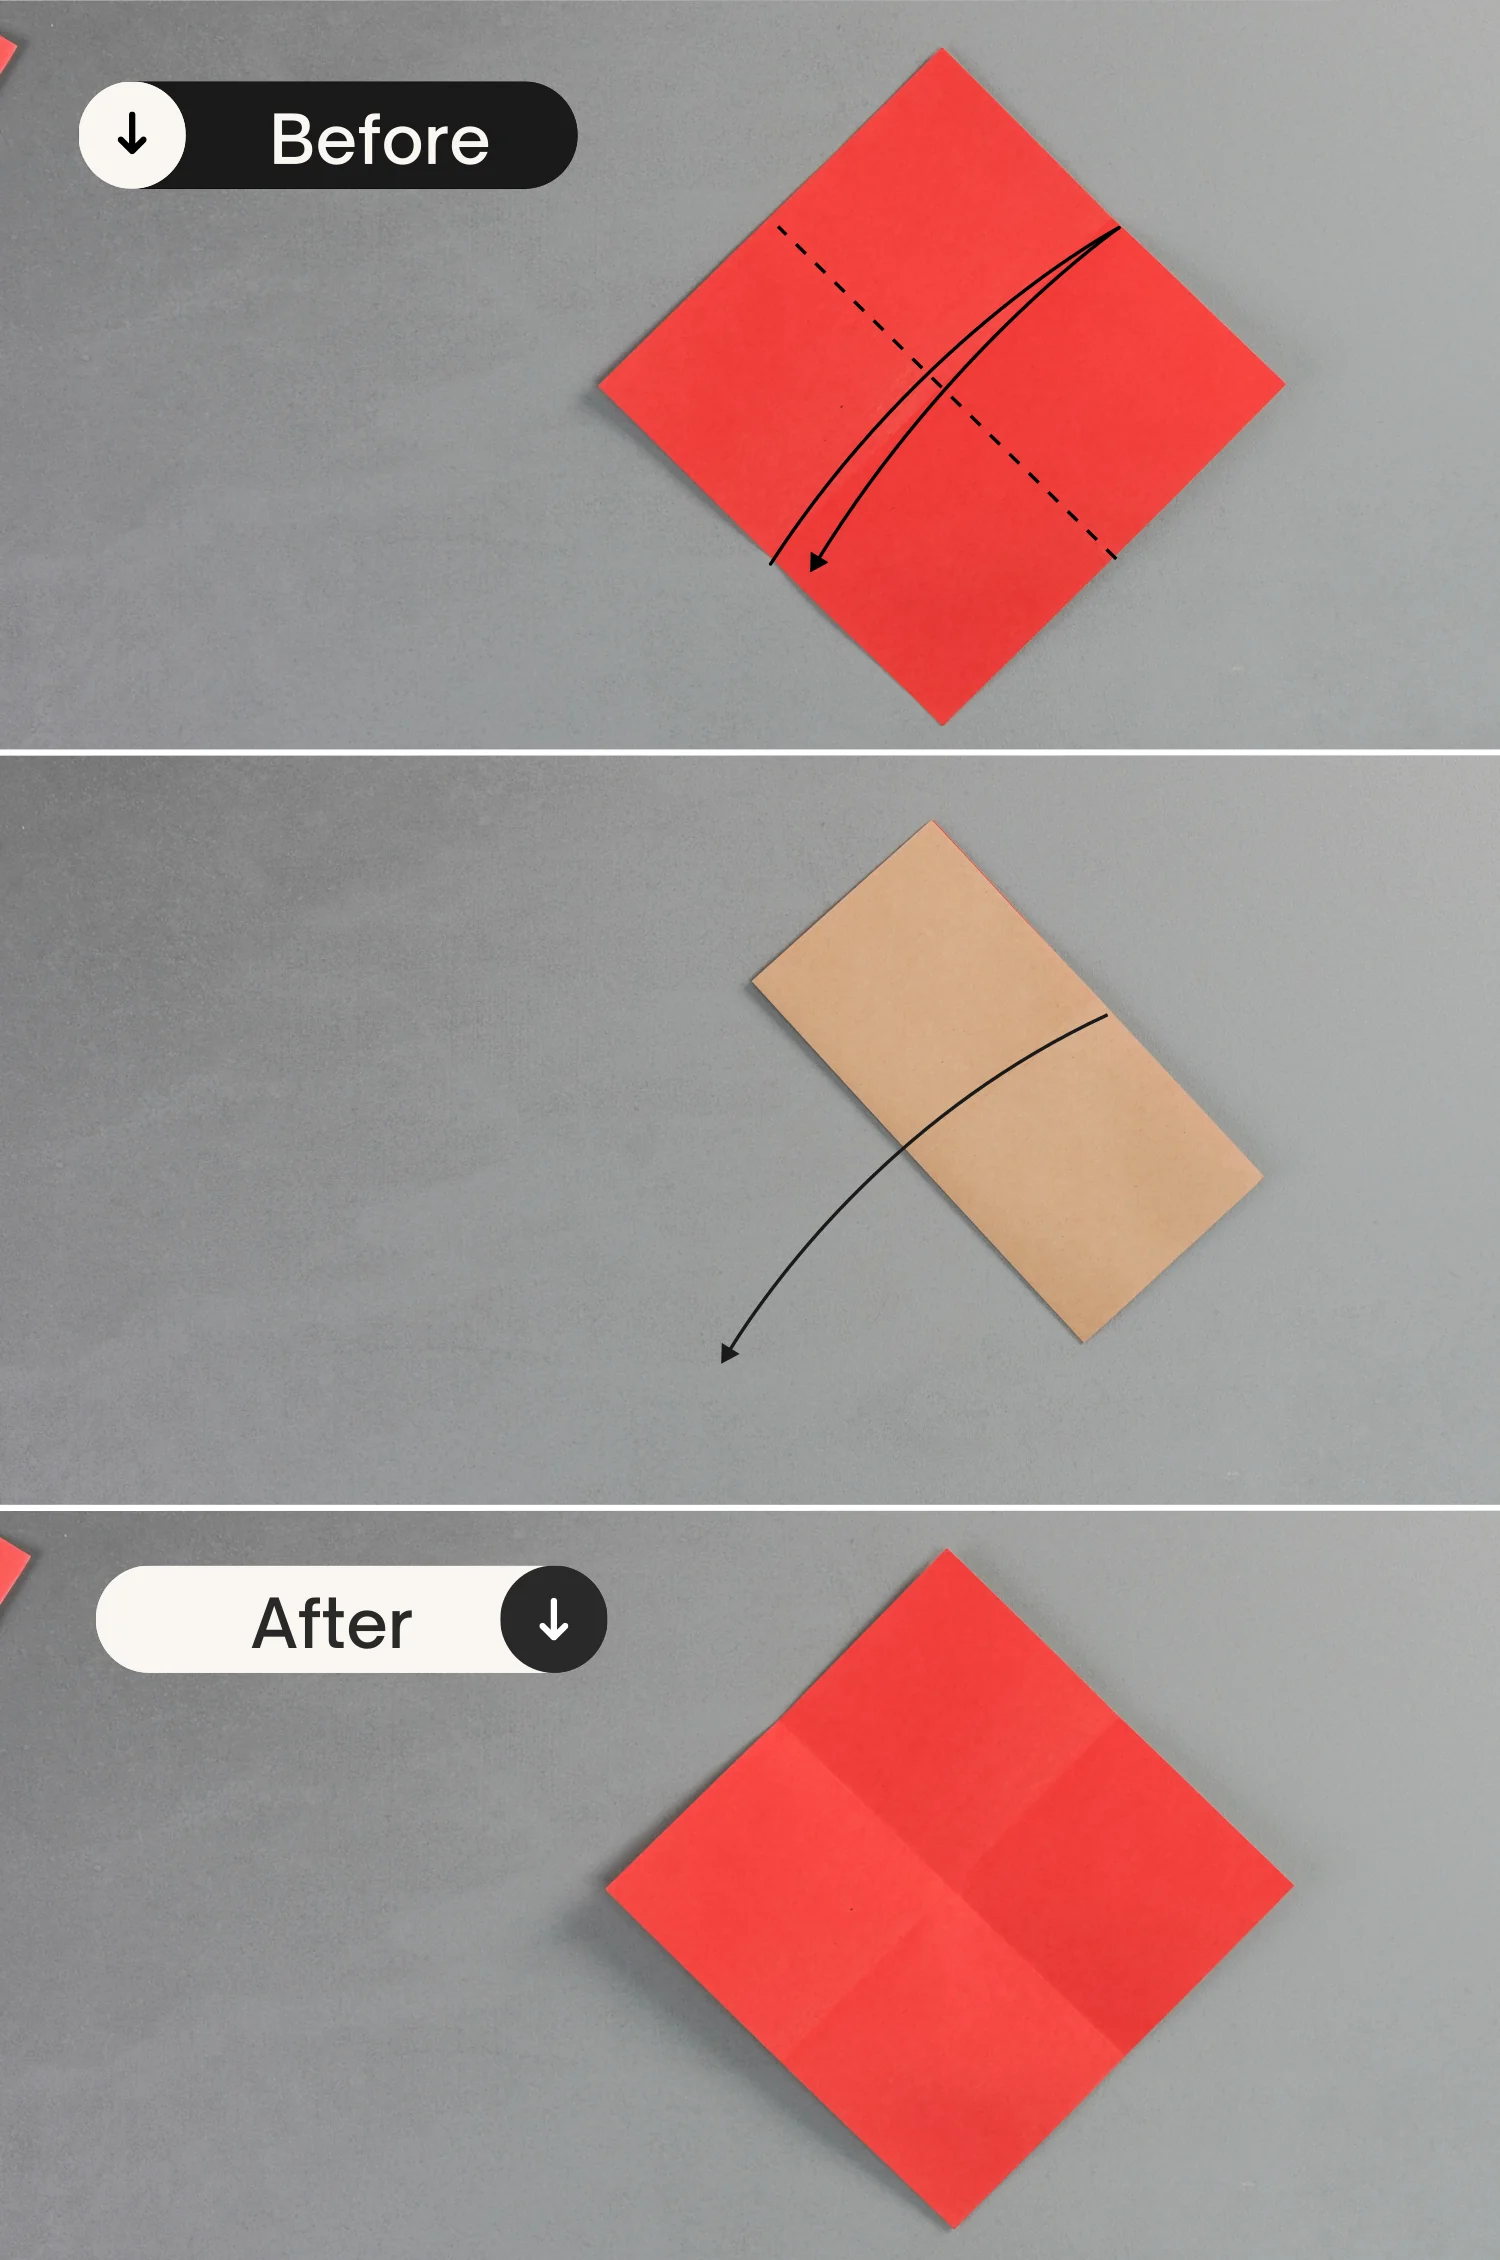
Step 4
Fold the left point to the right side along the dotted line, ensuring it meets the crease you just made.
Similarly, fold the right point to the left side along the dotted line.
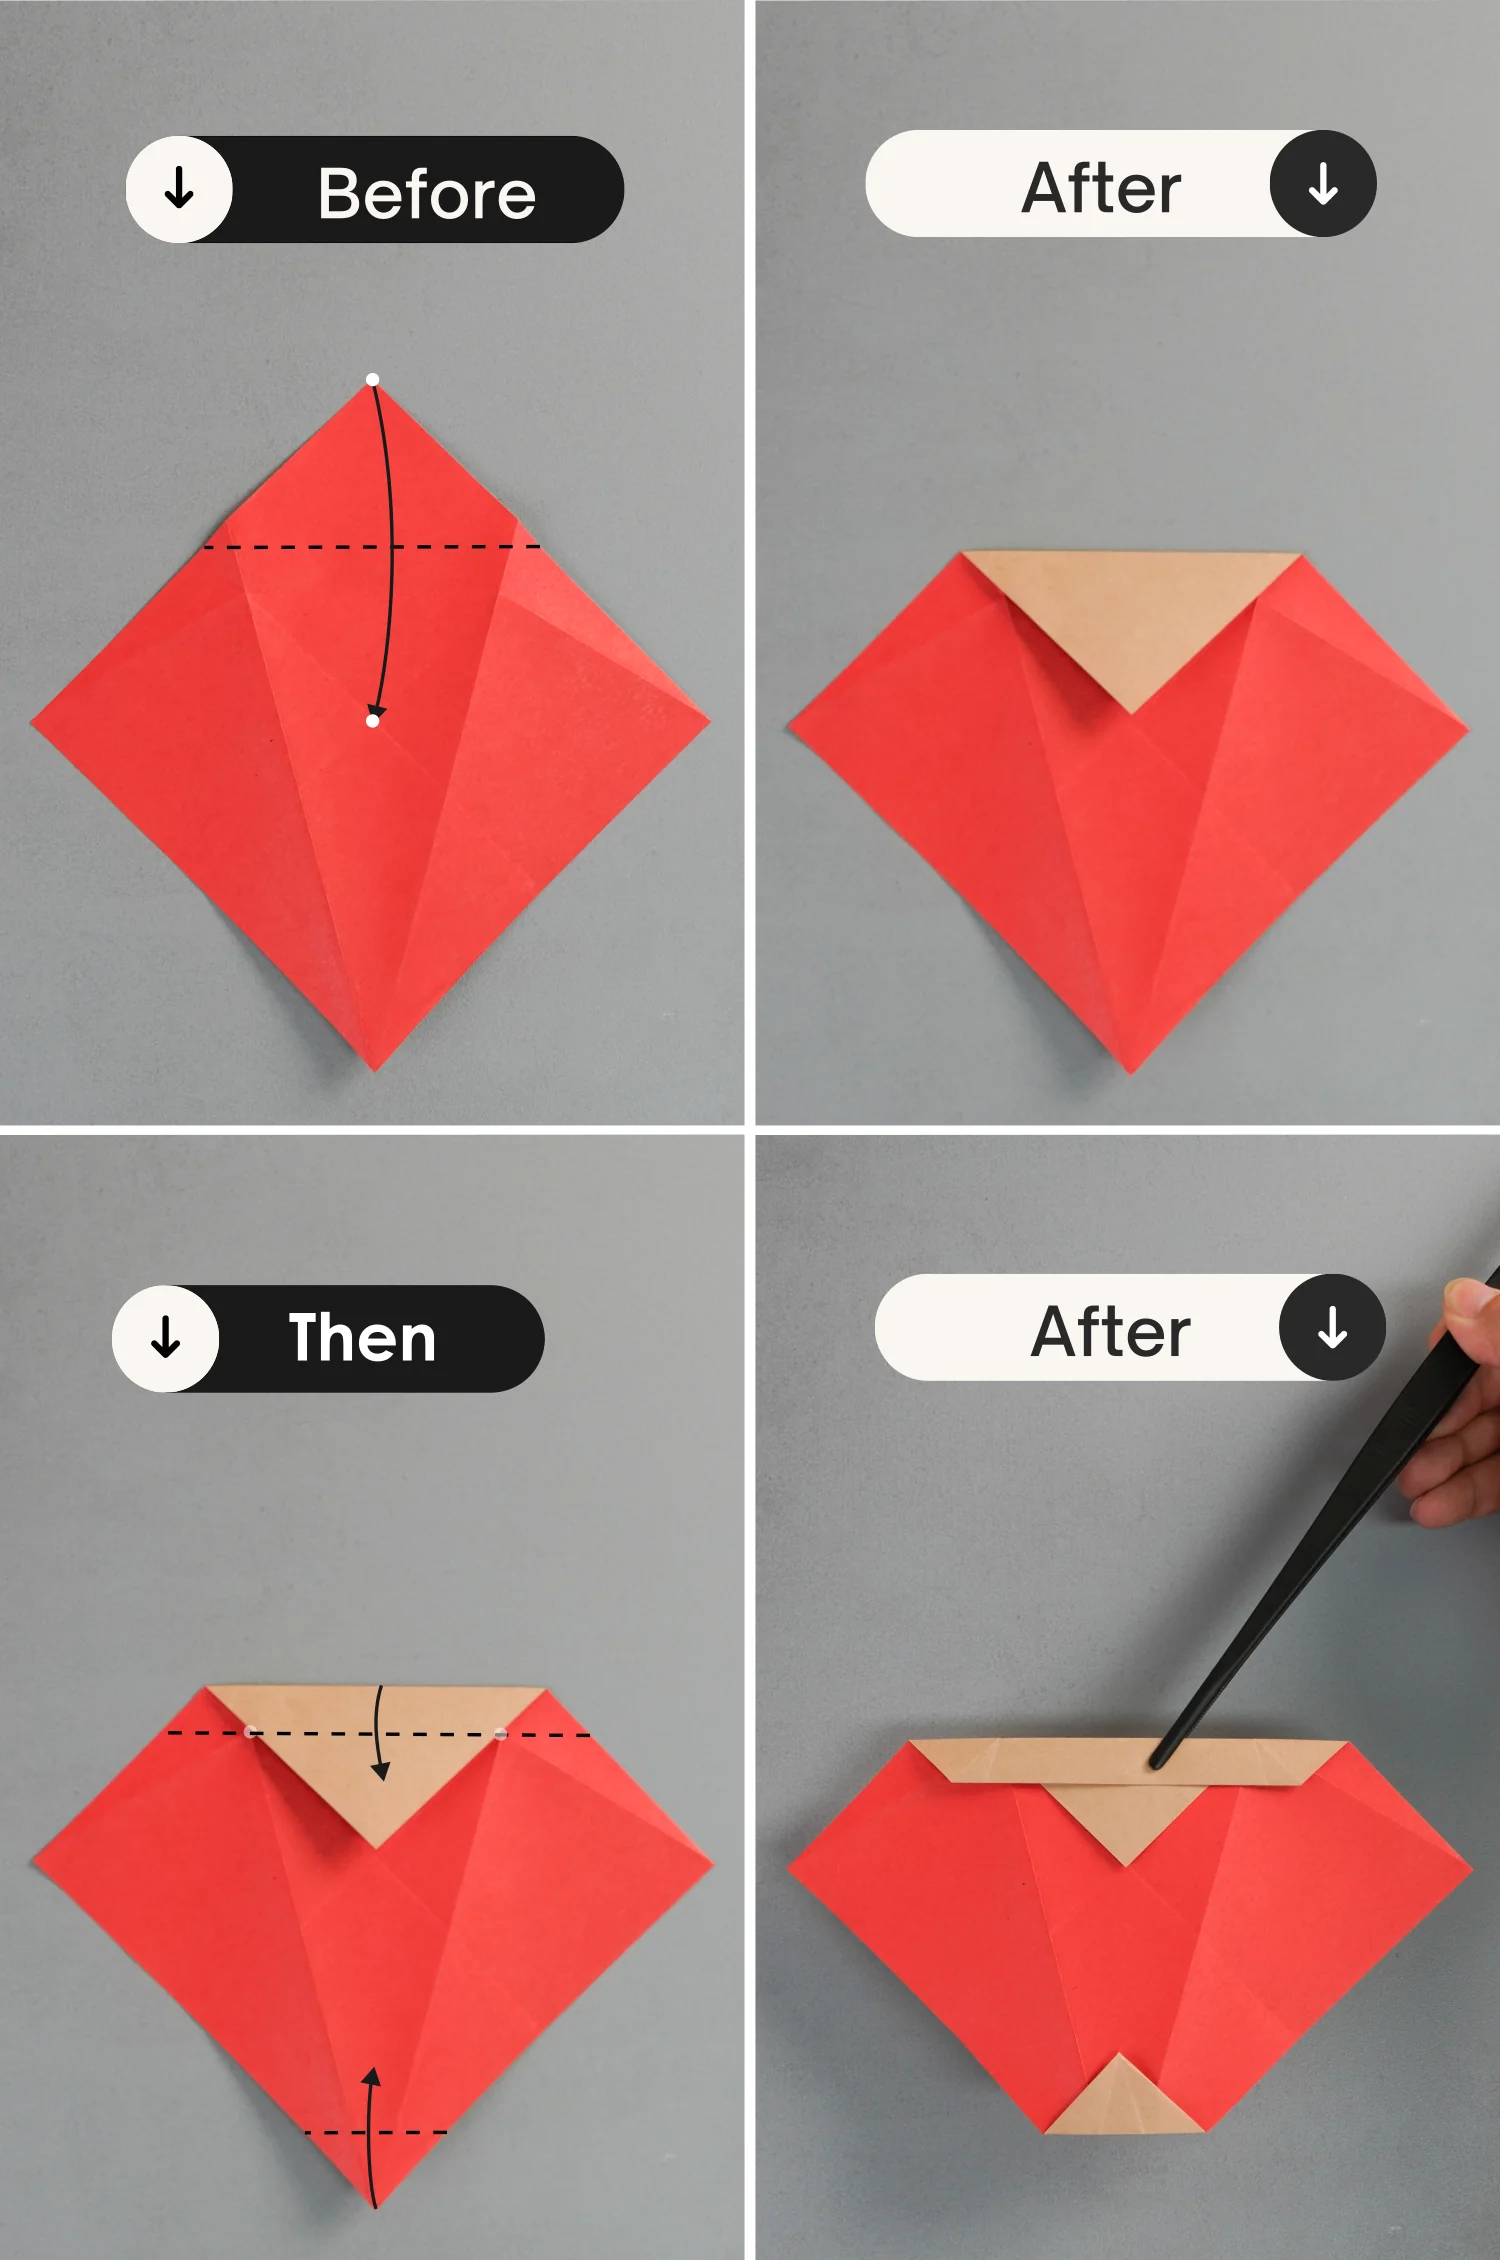
Step 5
Turn over the paper.
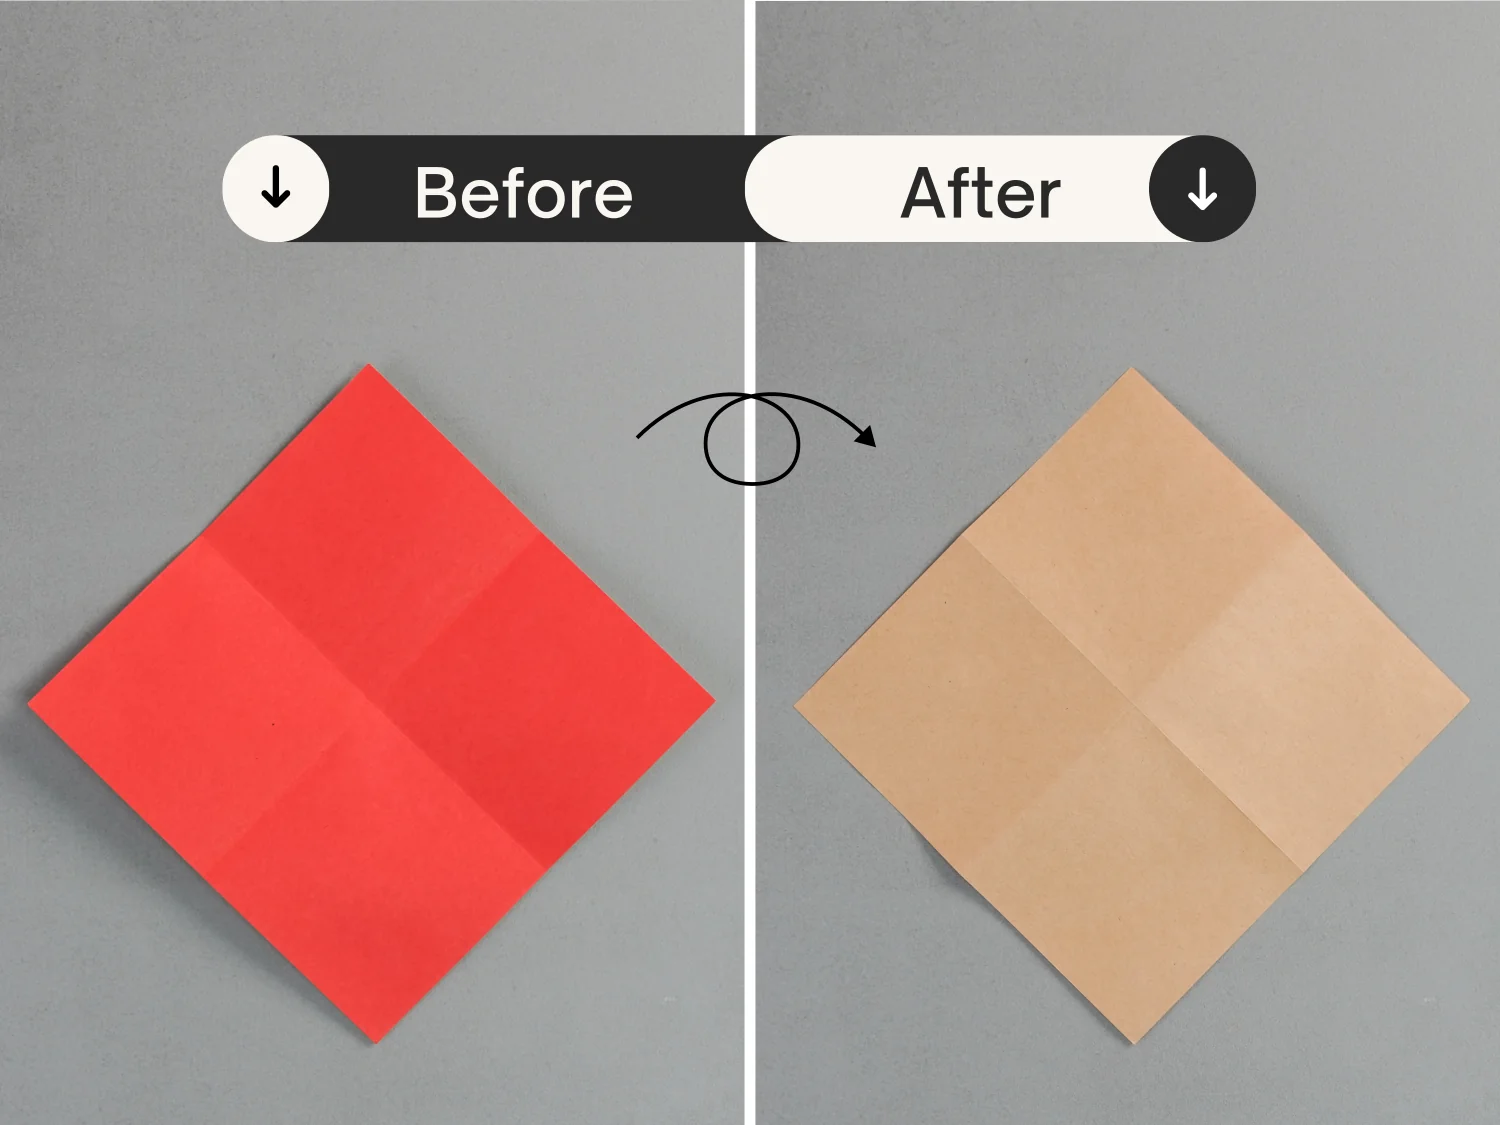
Step 6
Fold the top part down along the dotted line that connects two intersection points formed by the left, and right edges and the creases, crease it well then unfold it.
Step 7
Flip it over.
Step 8
Unfold the paper completely.
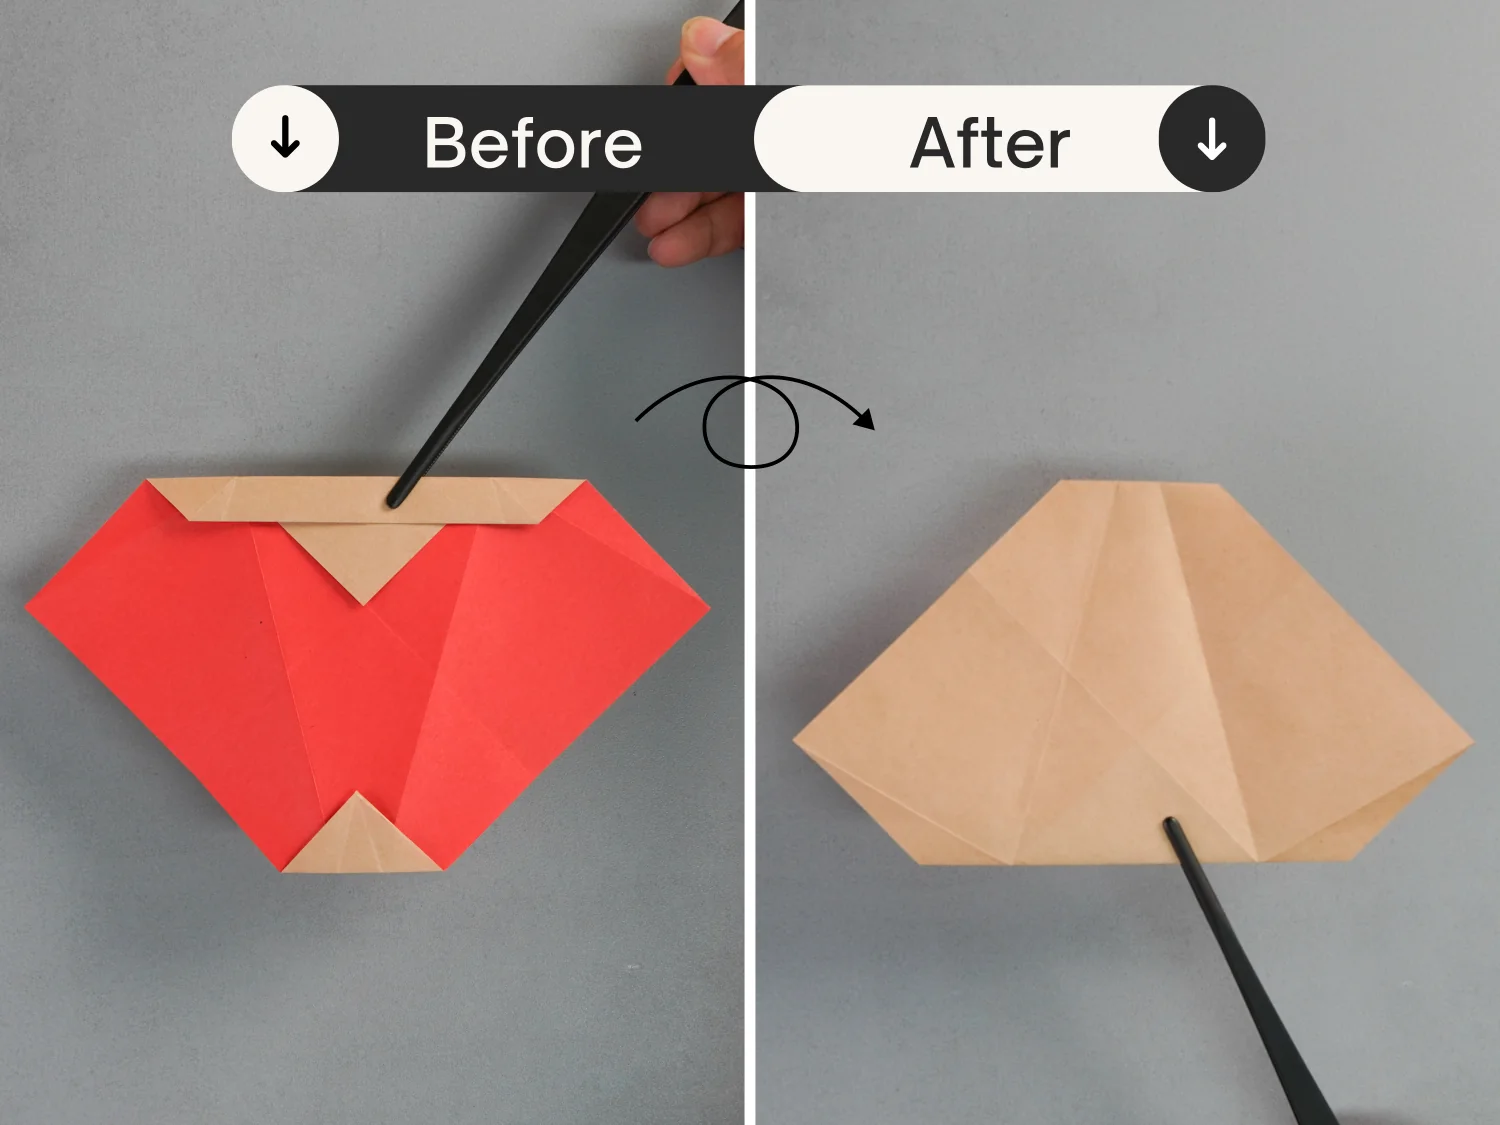
Step 9
Flip it over again.
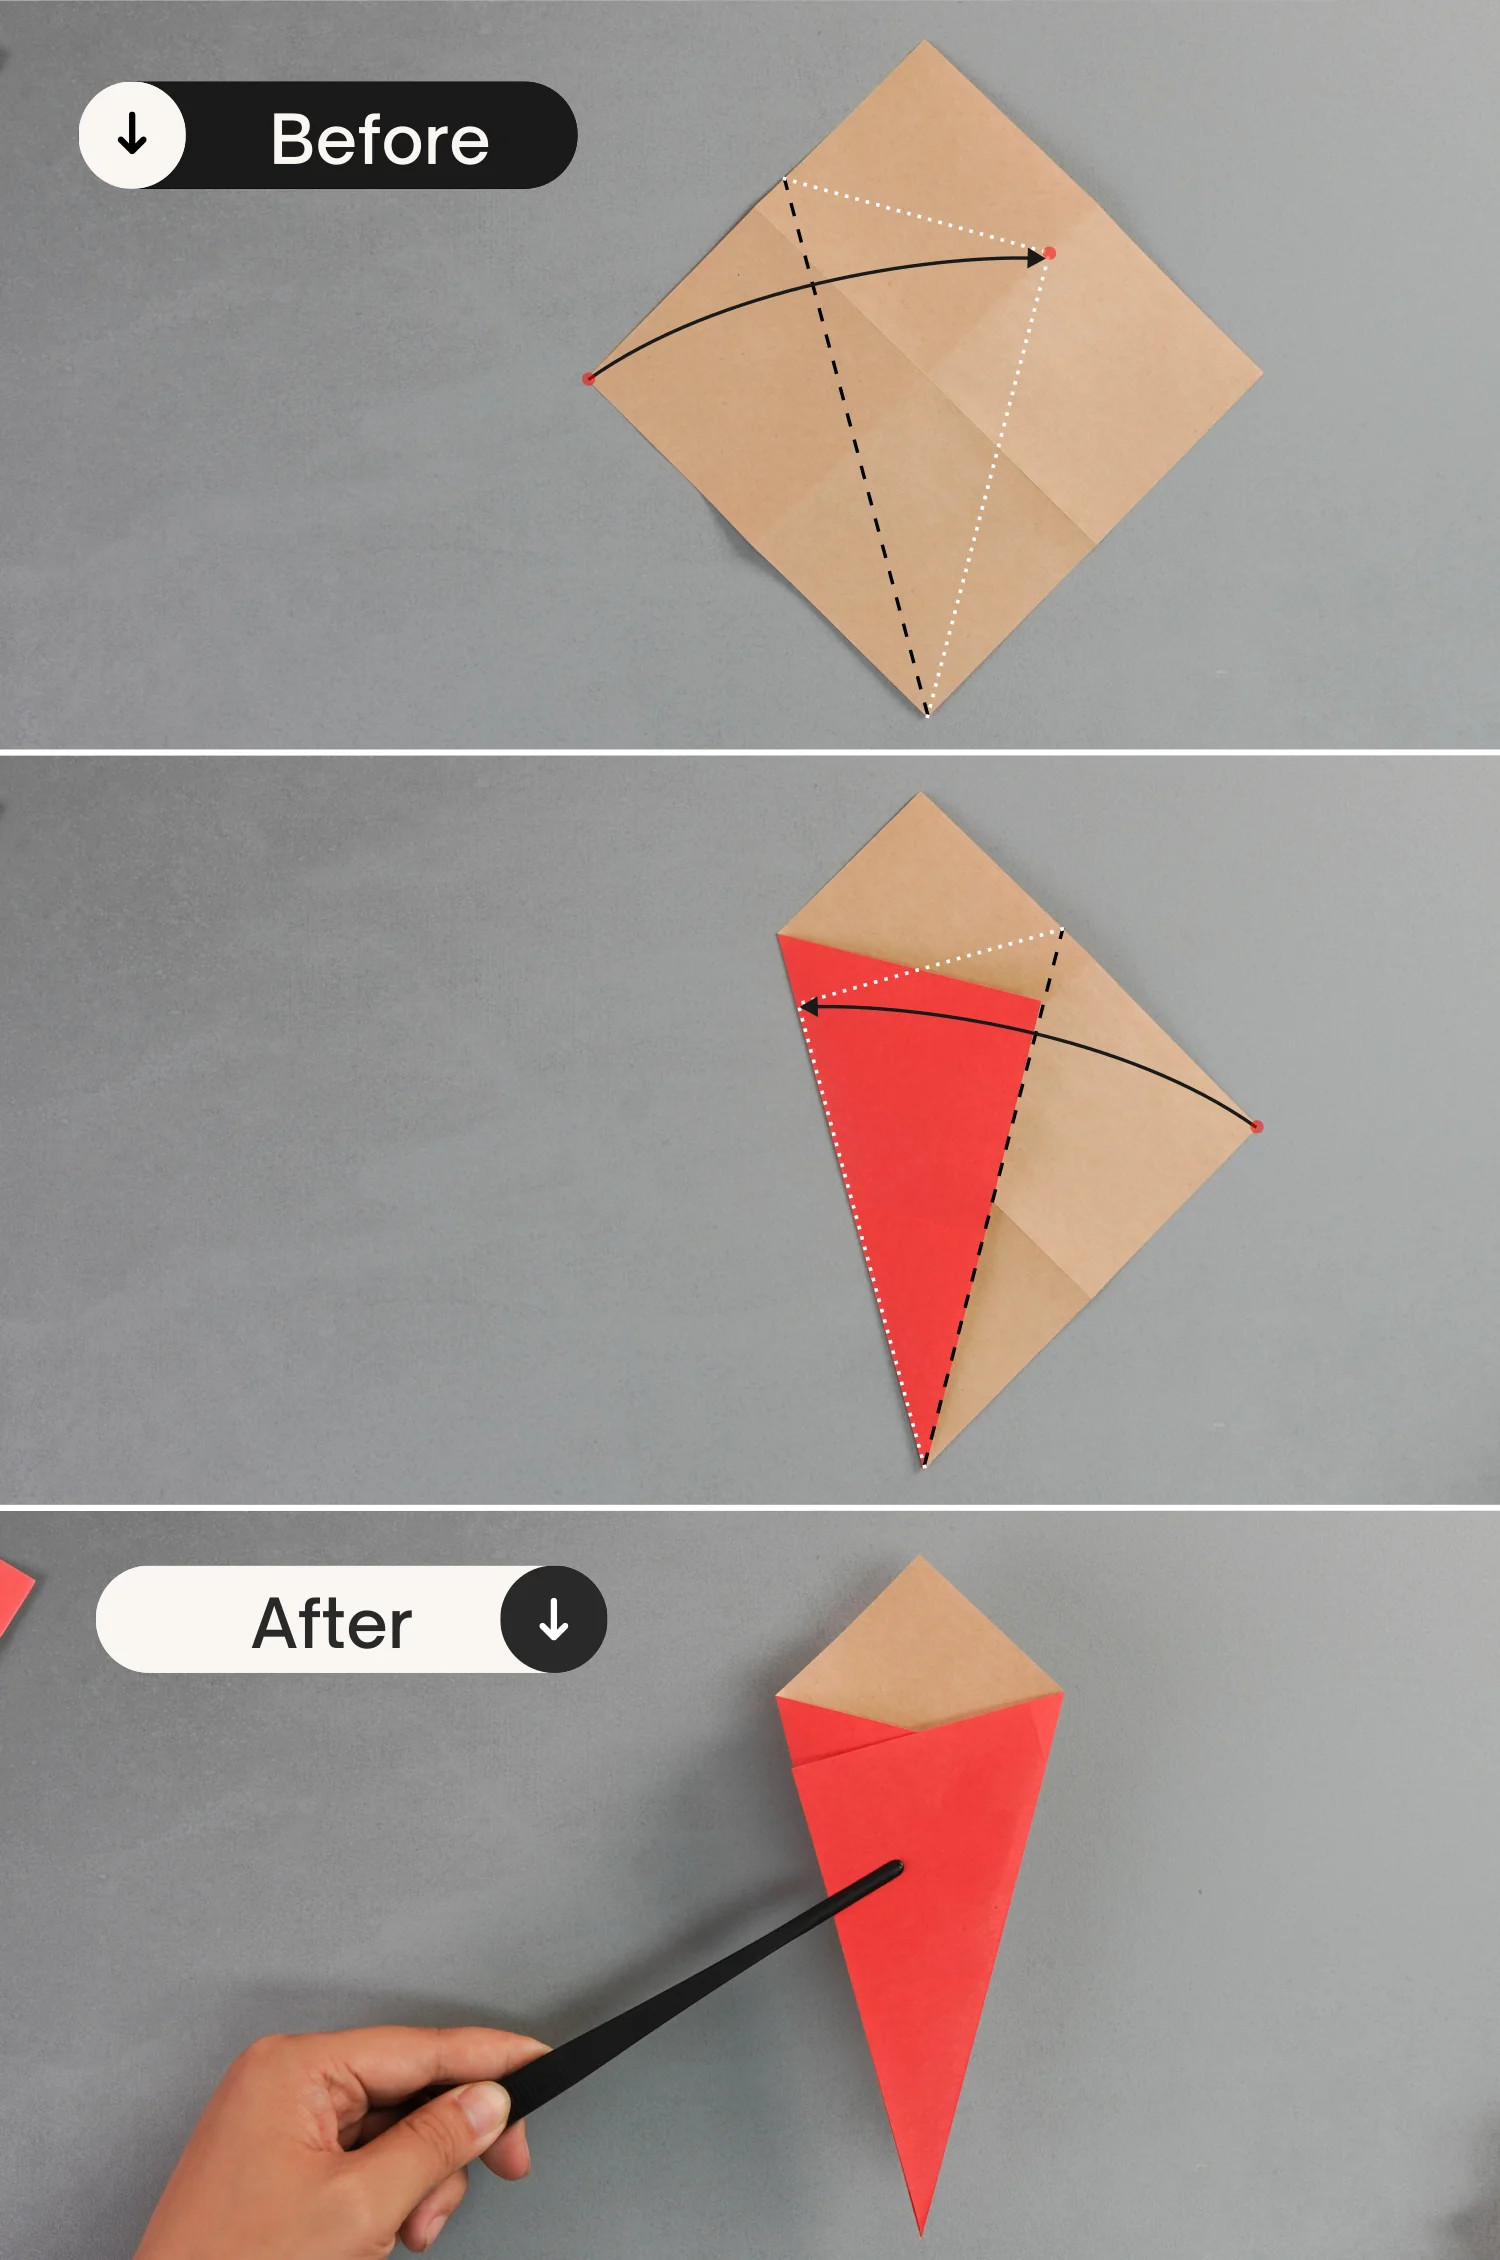
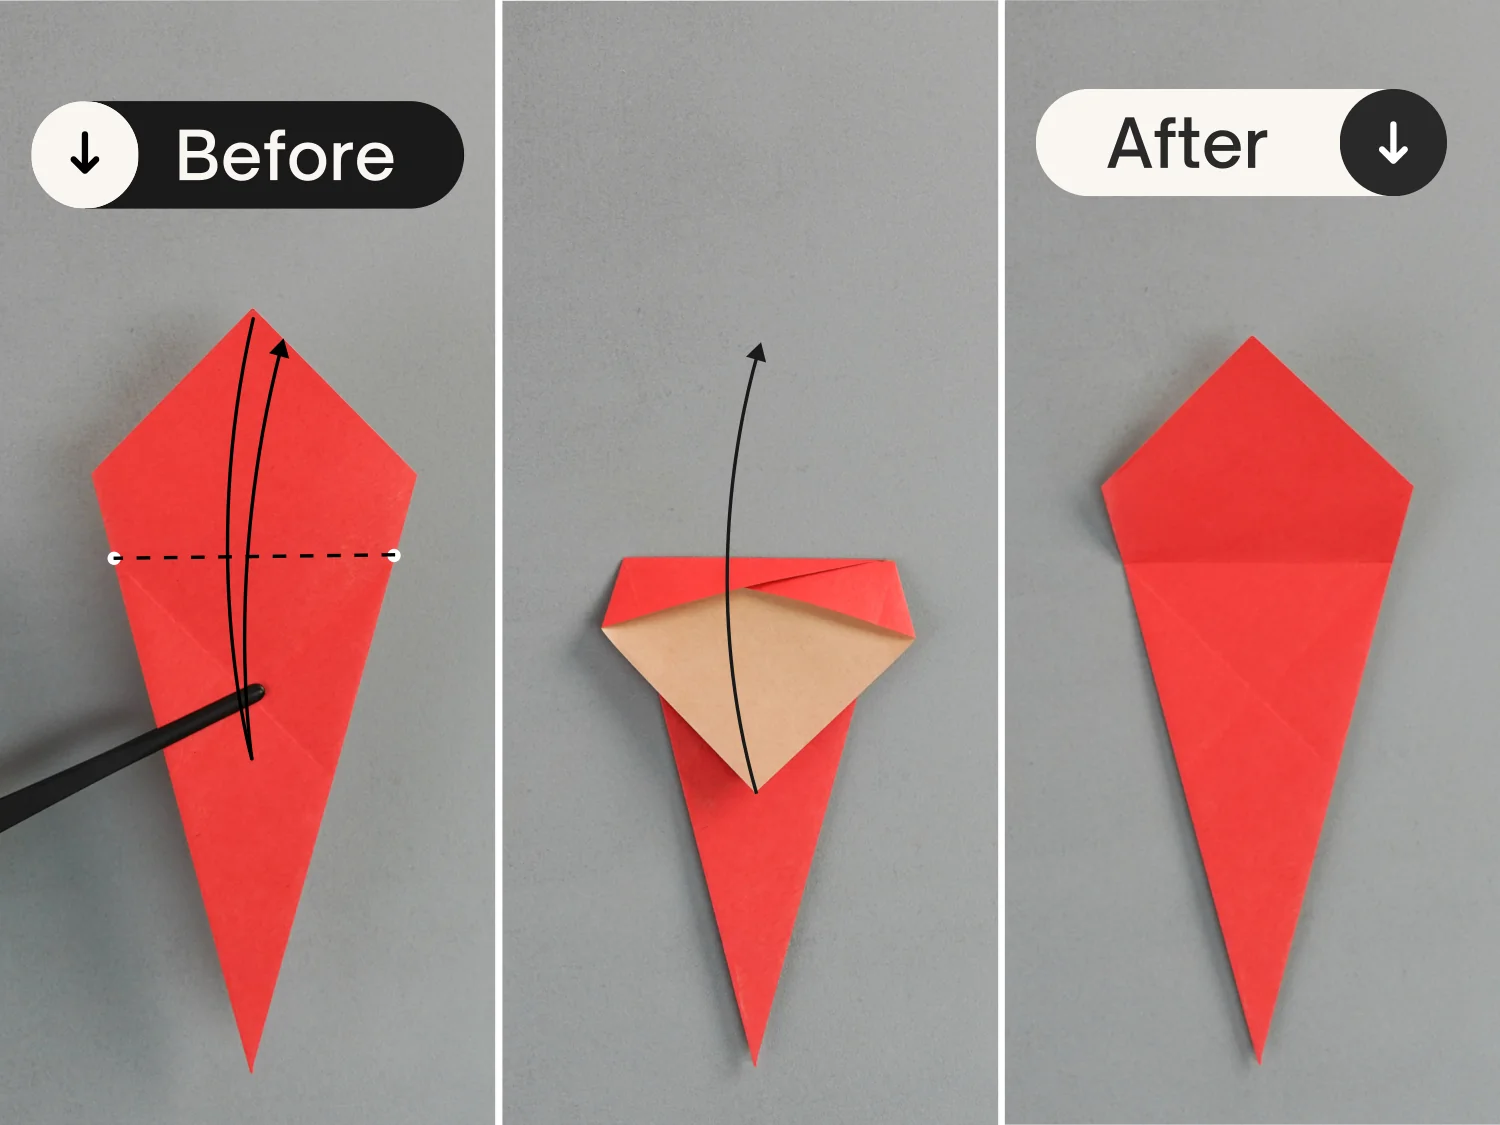
Step 10
Fold the top point down along the dotted line to align with the center intersection point. Then fold the top edge along the crease shown by the dotted line [the third picture], and fold up the bottom point a little.
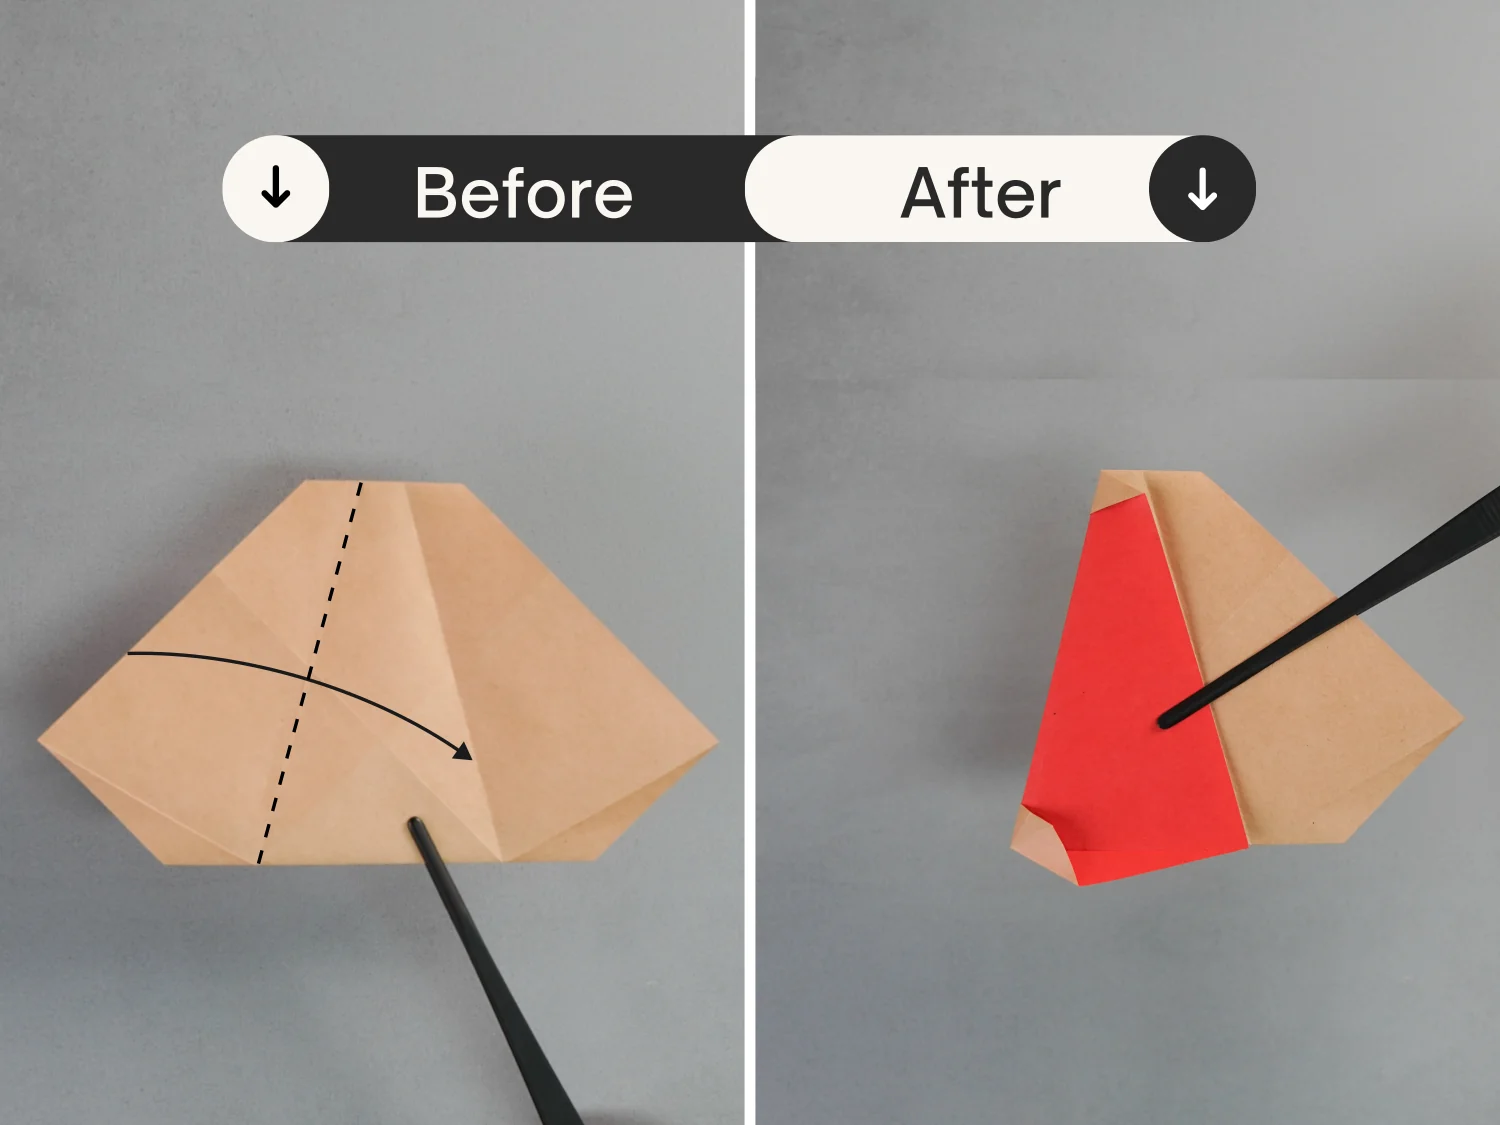
Step 11
Flip the paper over vertically.
Step 12
Fold the left edge toward the right side along the crease indicated by the dotted line.
Step 13
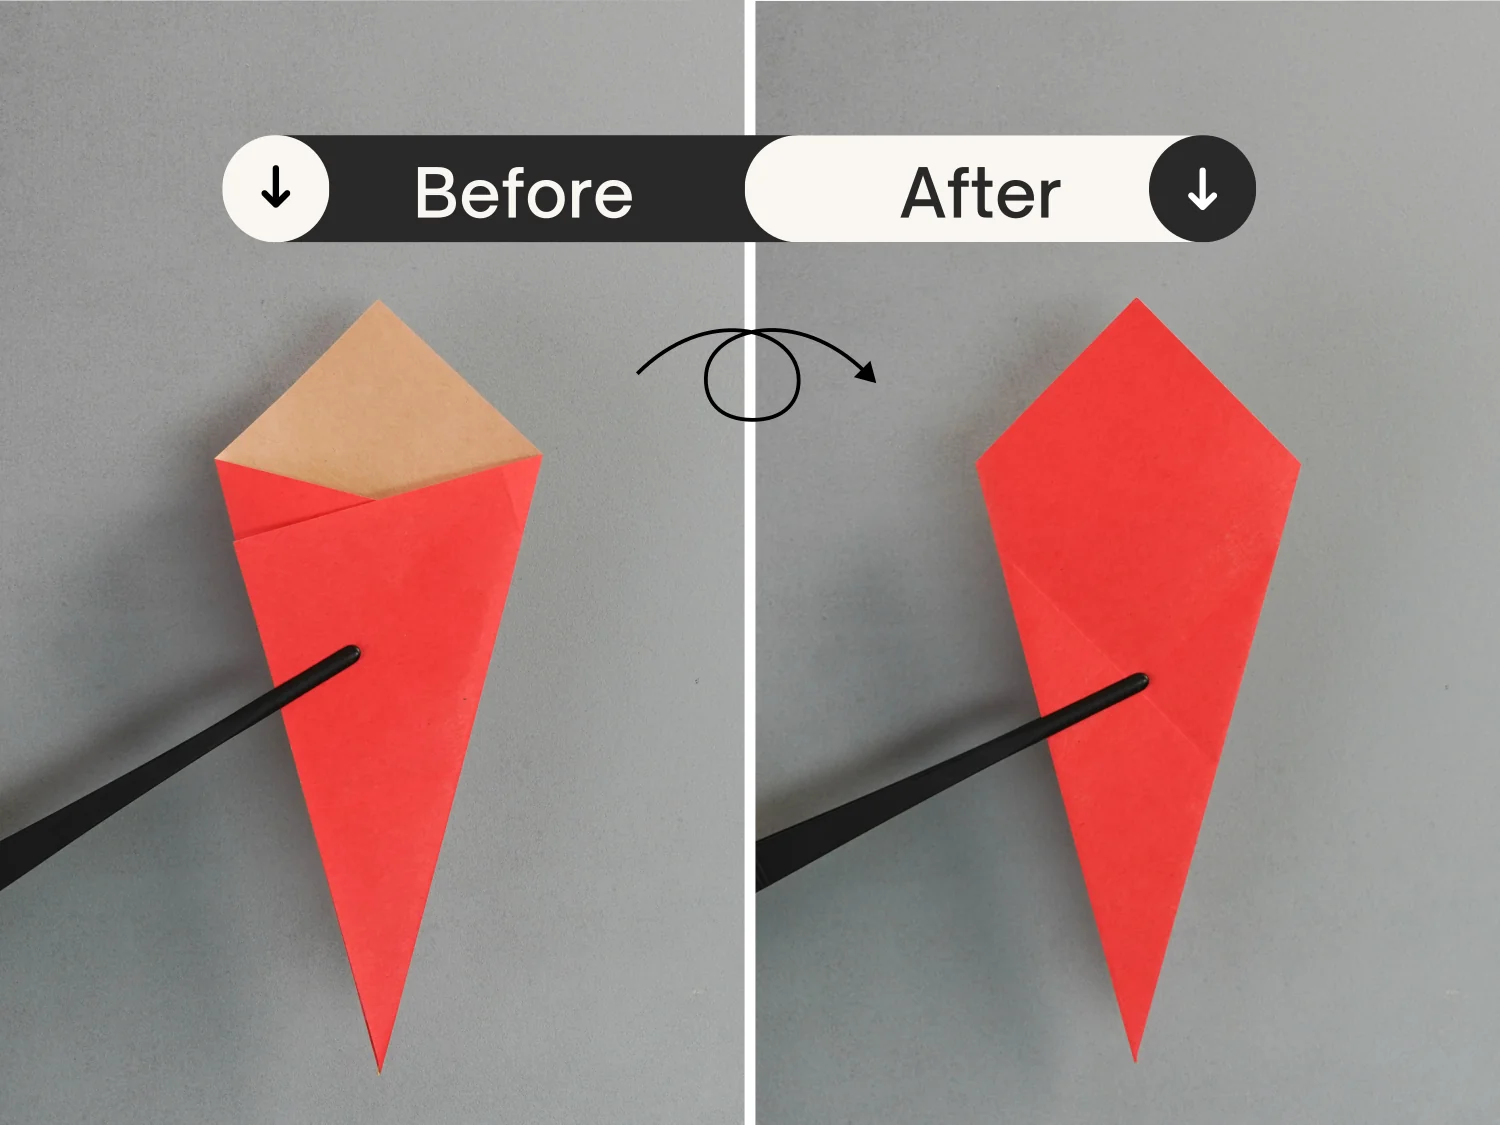
Open the bottom left corner, and push its bottom side upward, then flatten it toward the left along the existing crease.
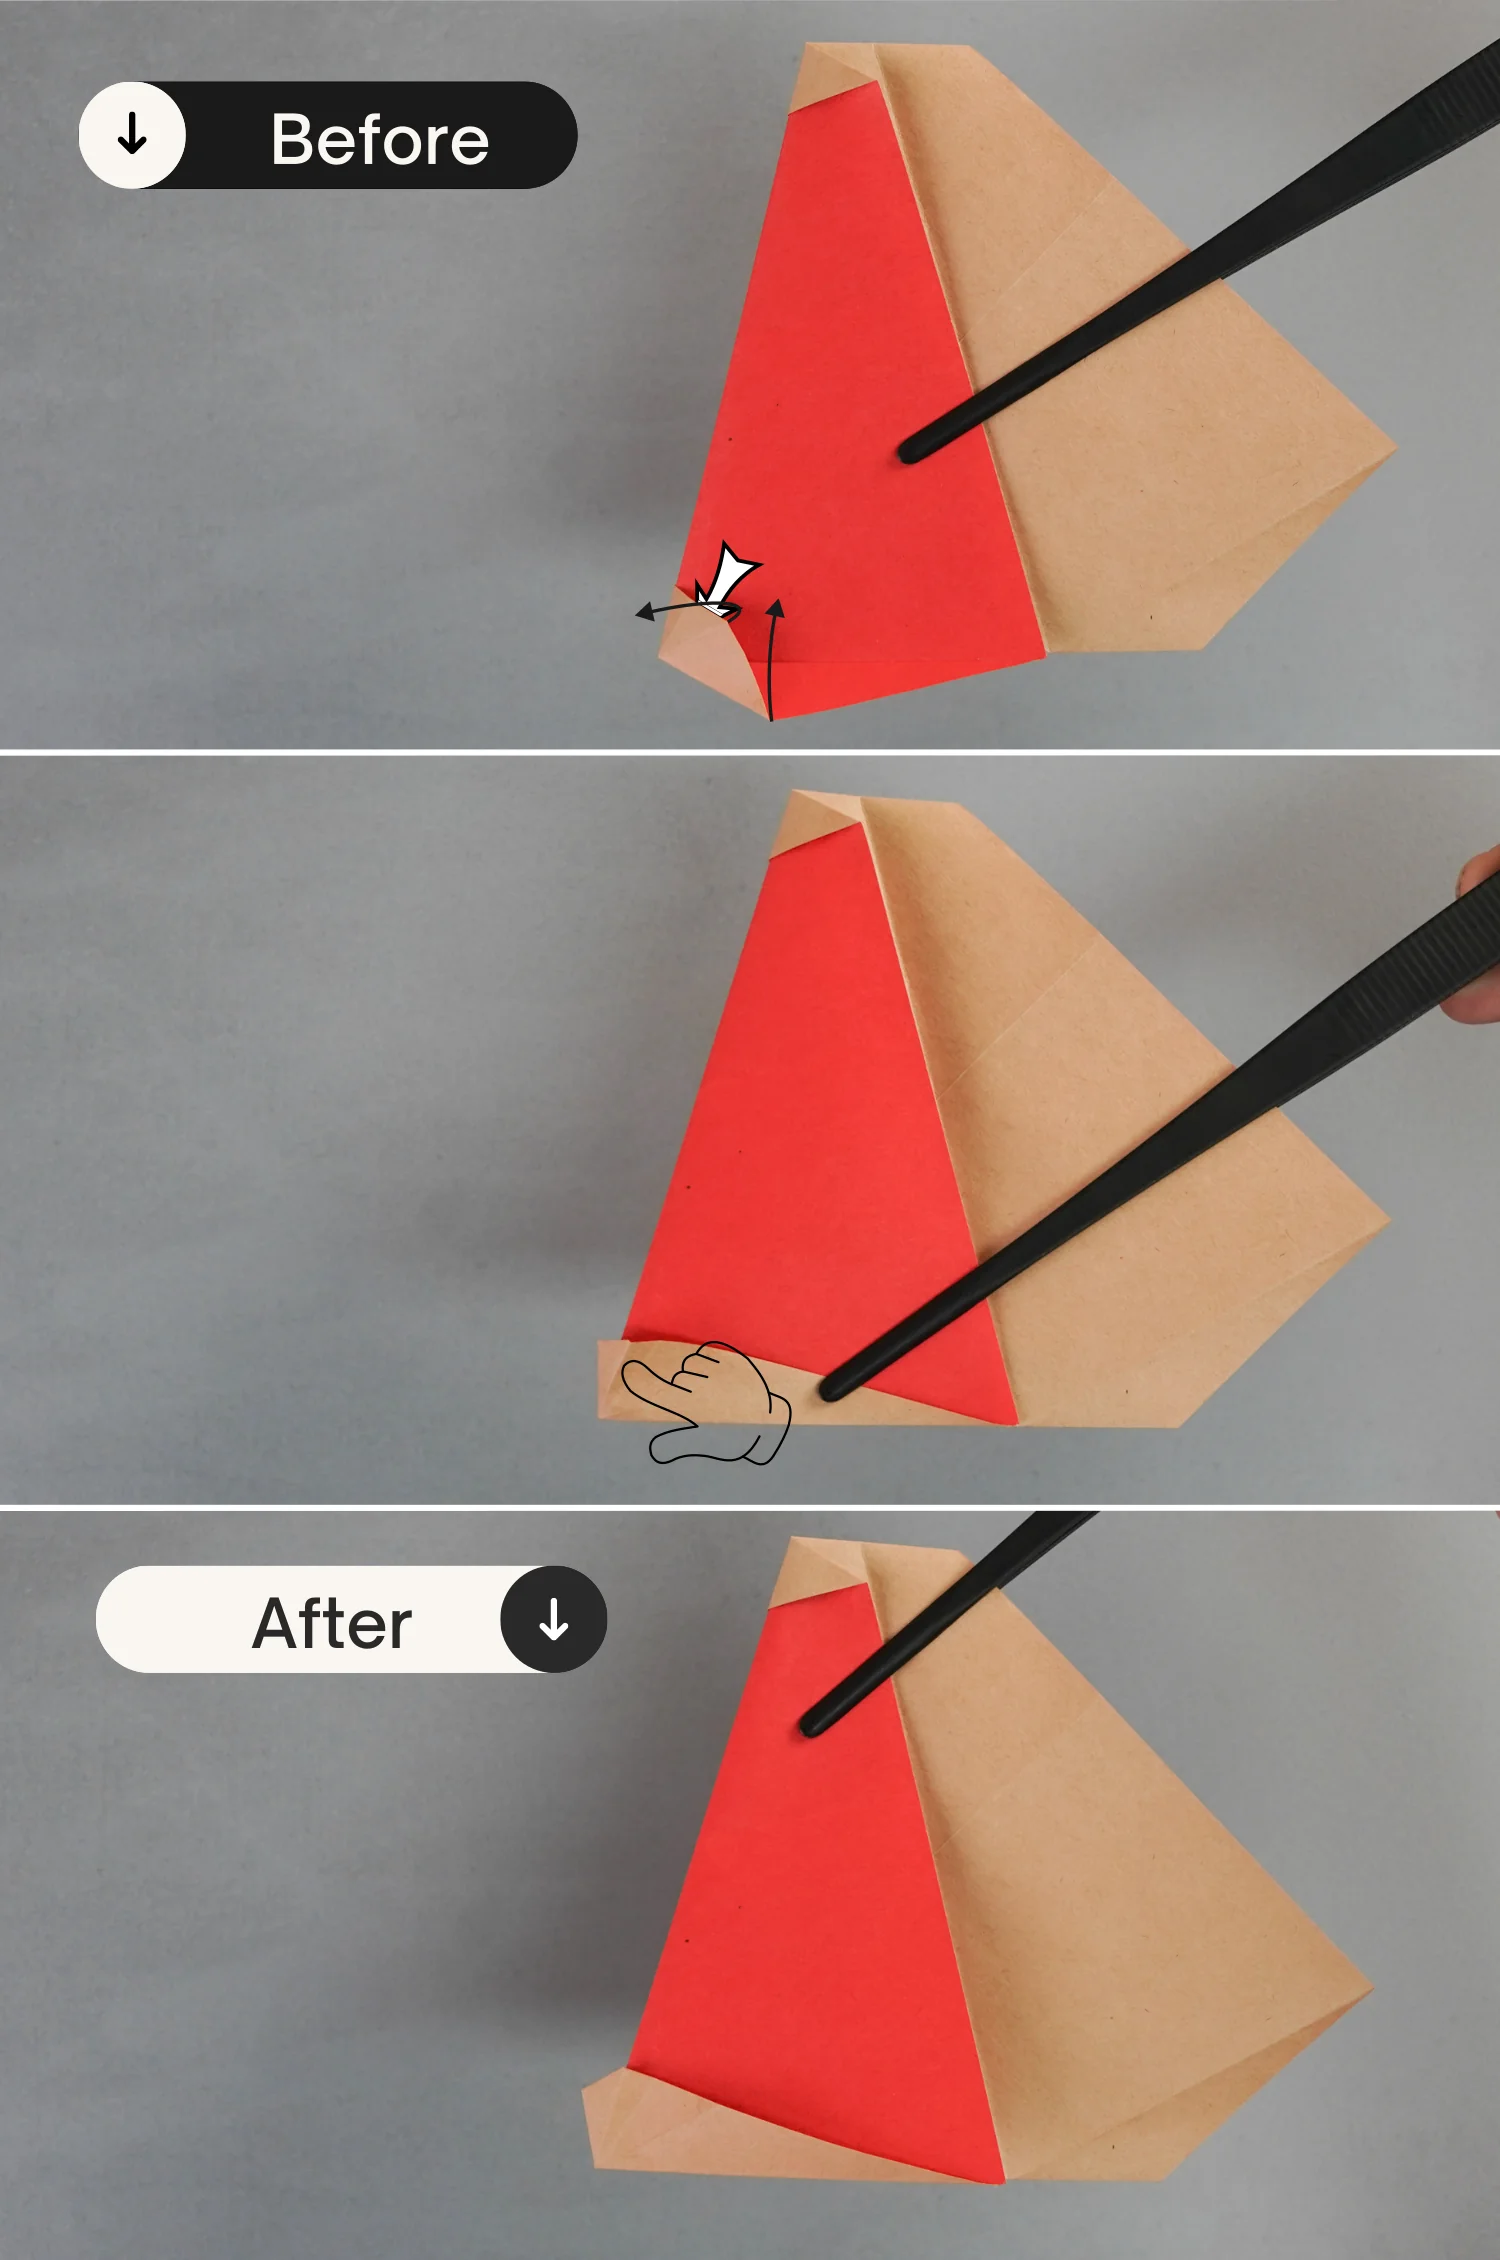
Step 14
Open the top left corner by lifting its upper side, and flatten this corner toward the left along the dotted line that connects the two white spots.
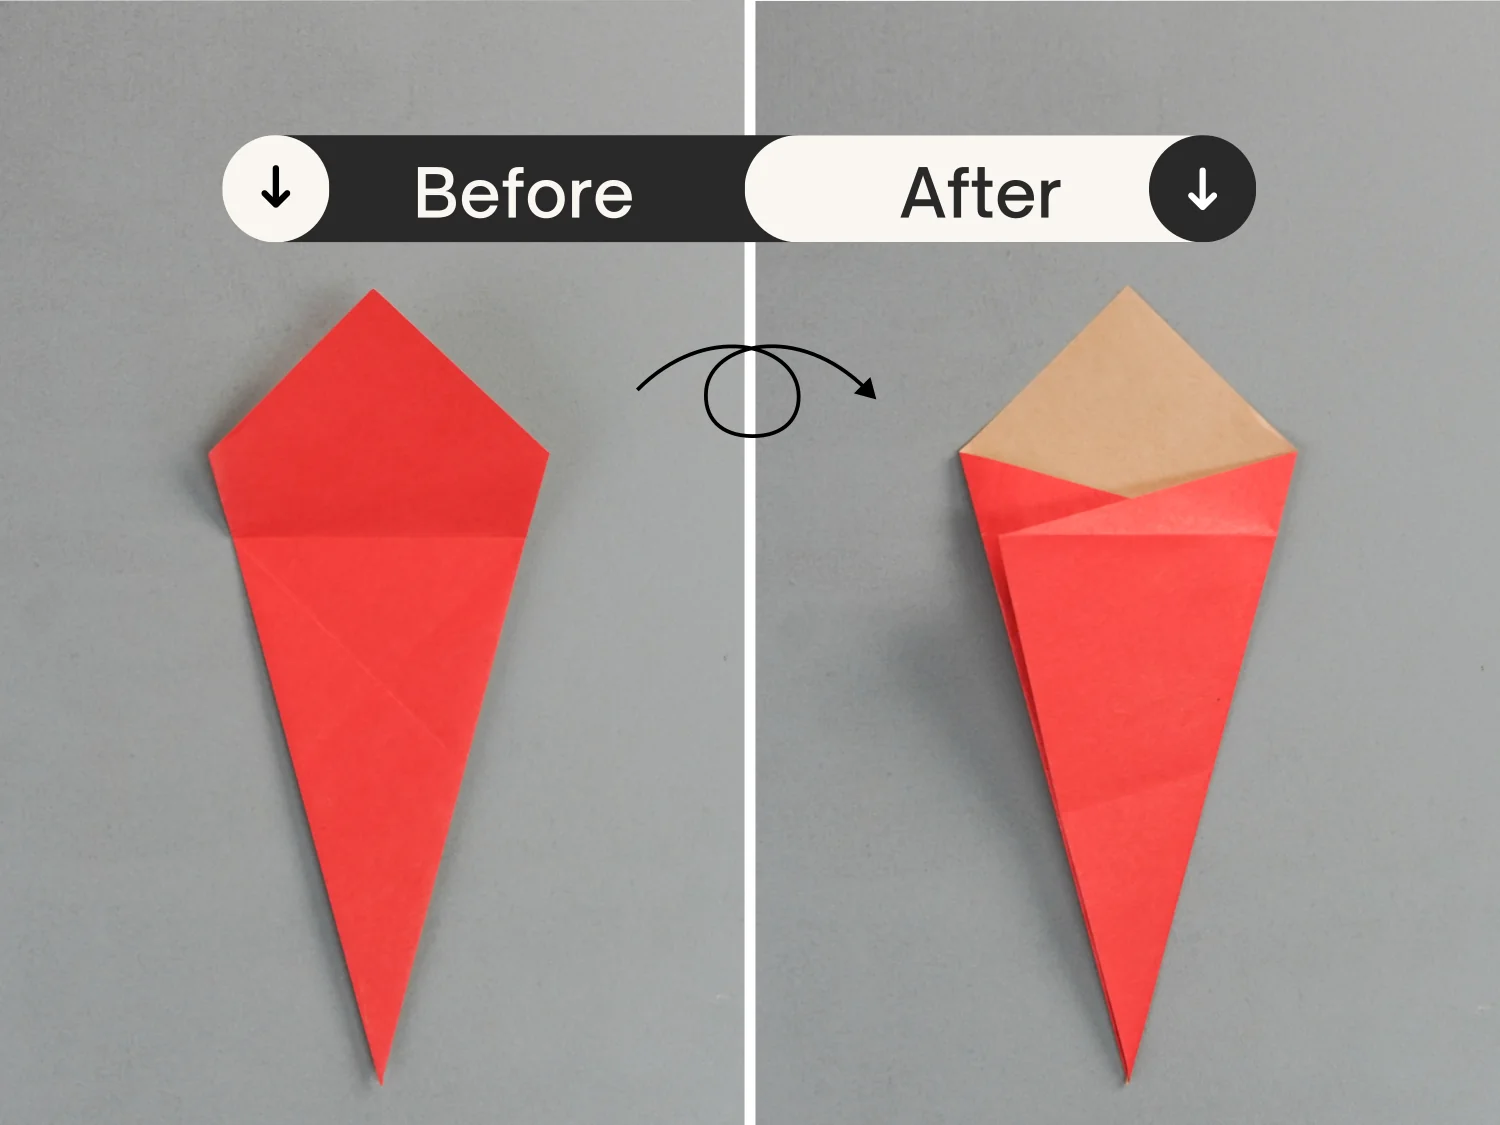
Step 15
Fold the right part to the left.
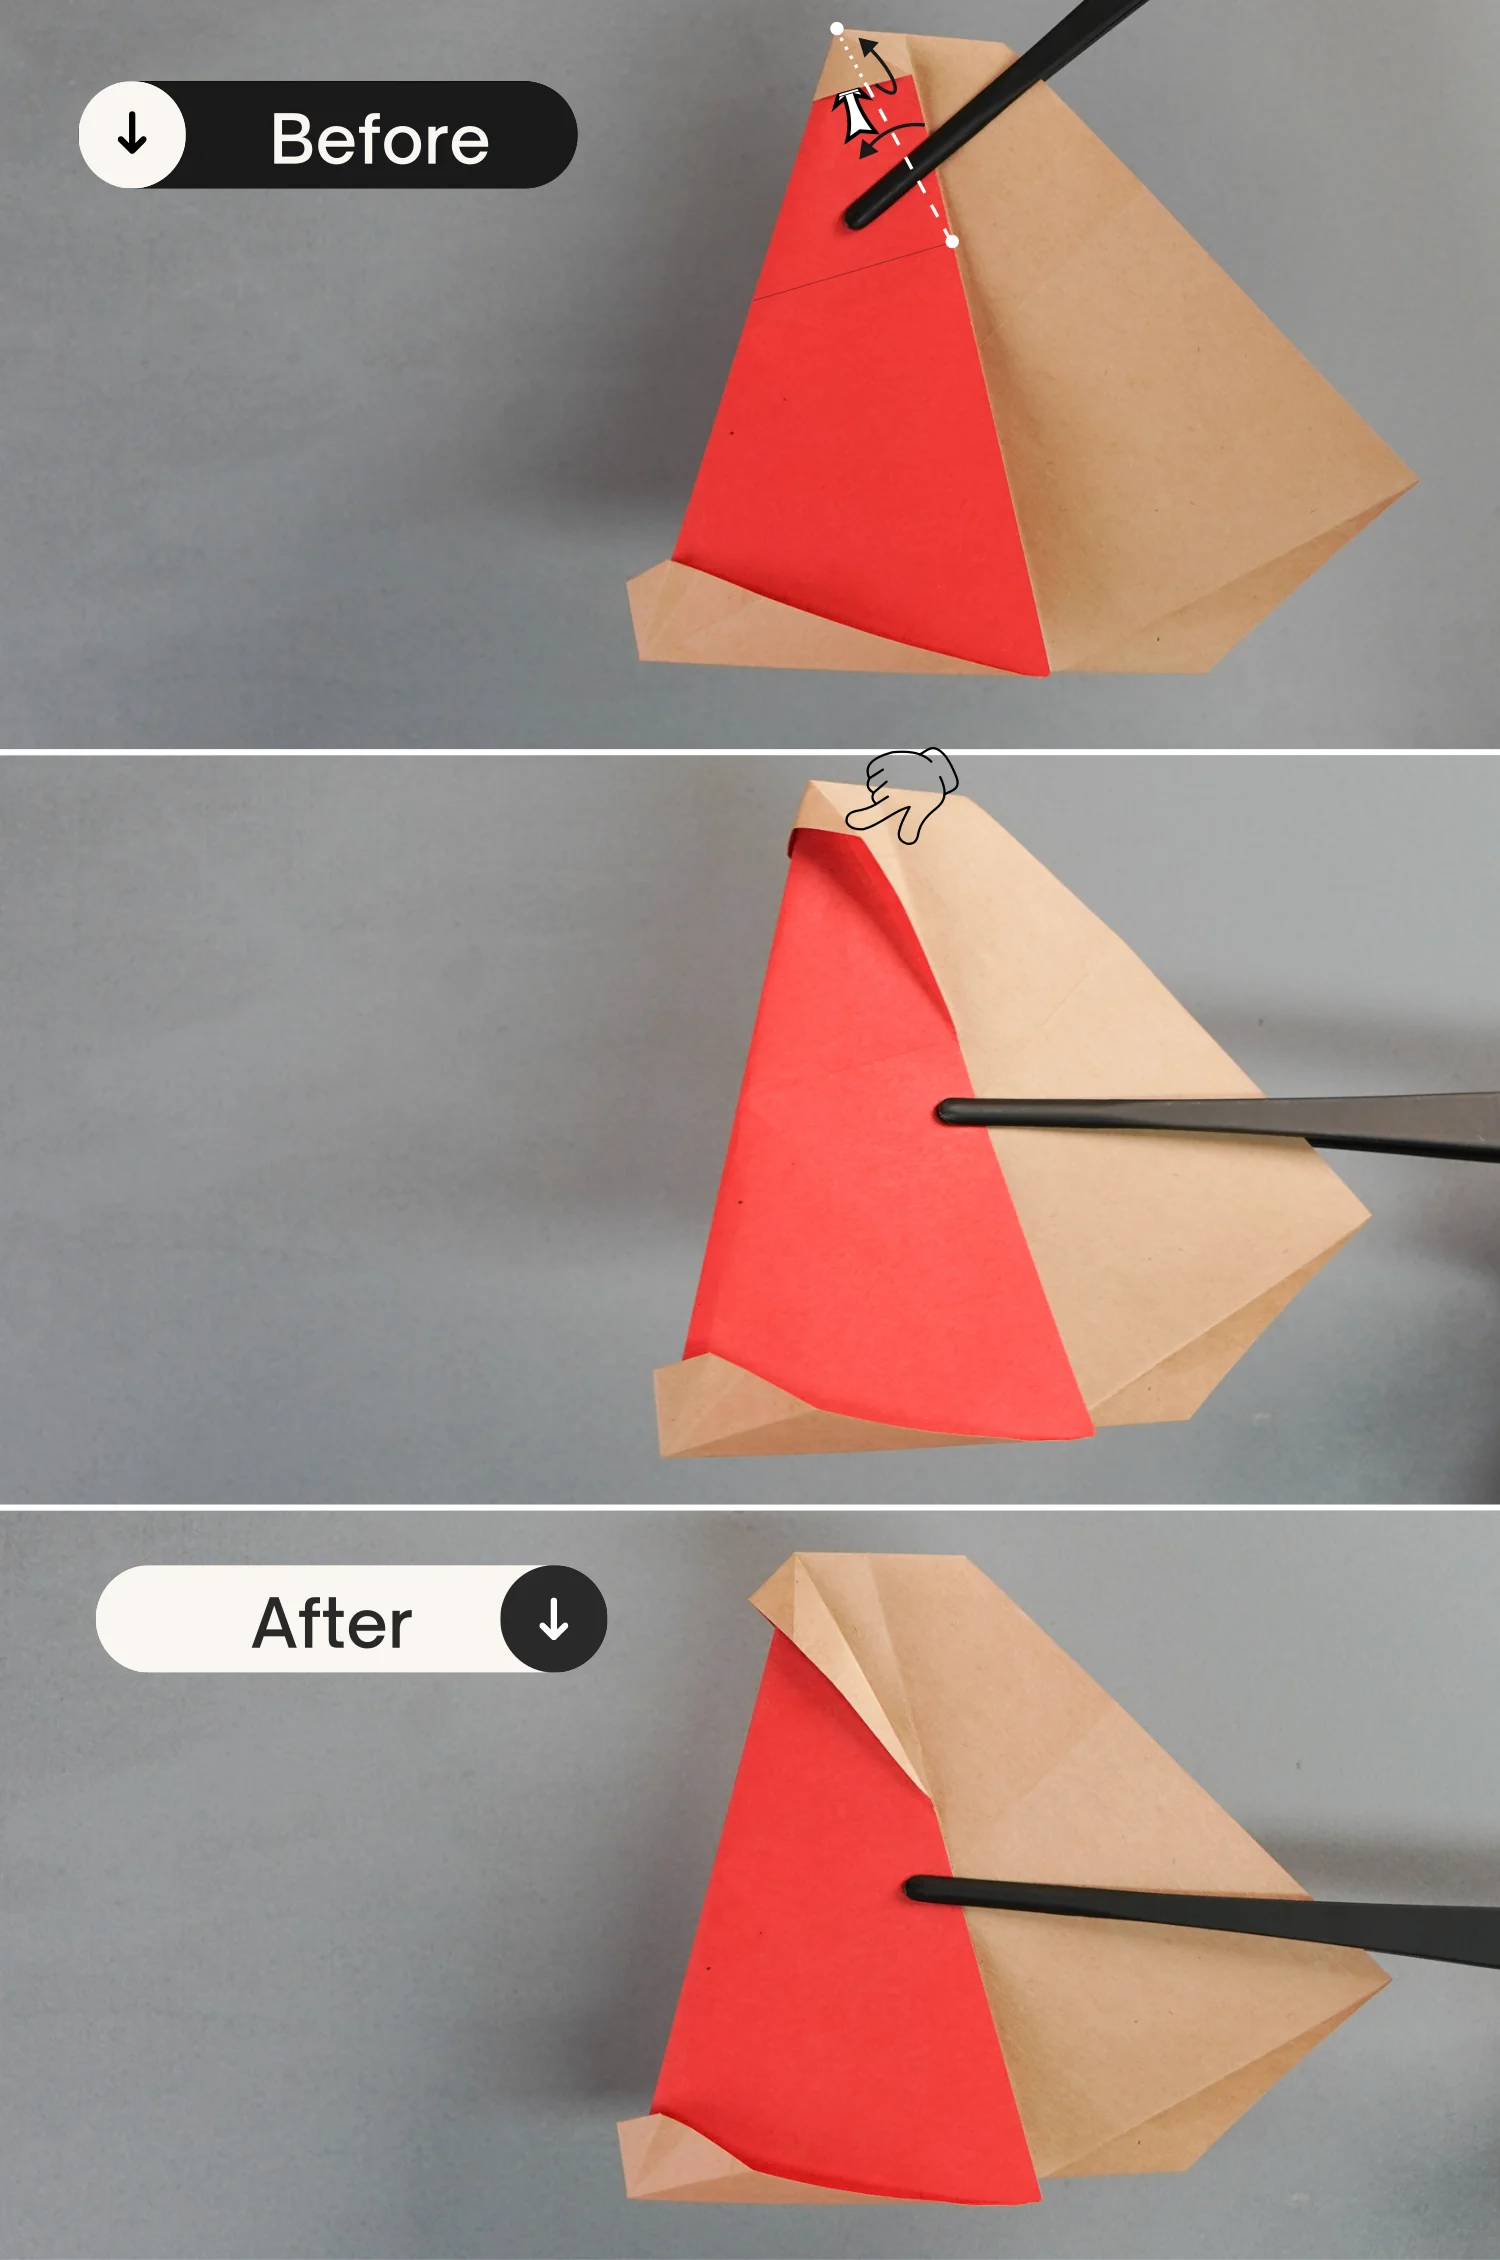
Step 16
Like before, open the bottom right corner, and push its bottom side upward, then flatten it toward the right along the existing crease.
Step 17
Open the top right corner by lifting its upper side, and flatten this corner toward the right side along the dotted line that connects the two white spots.

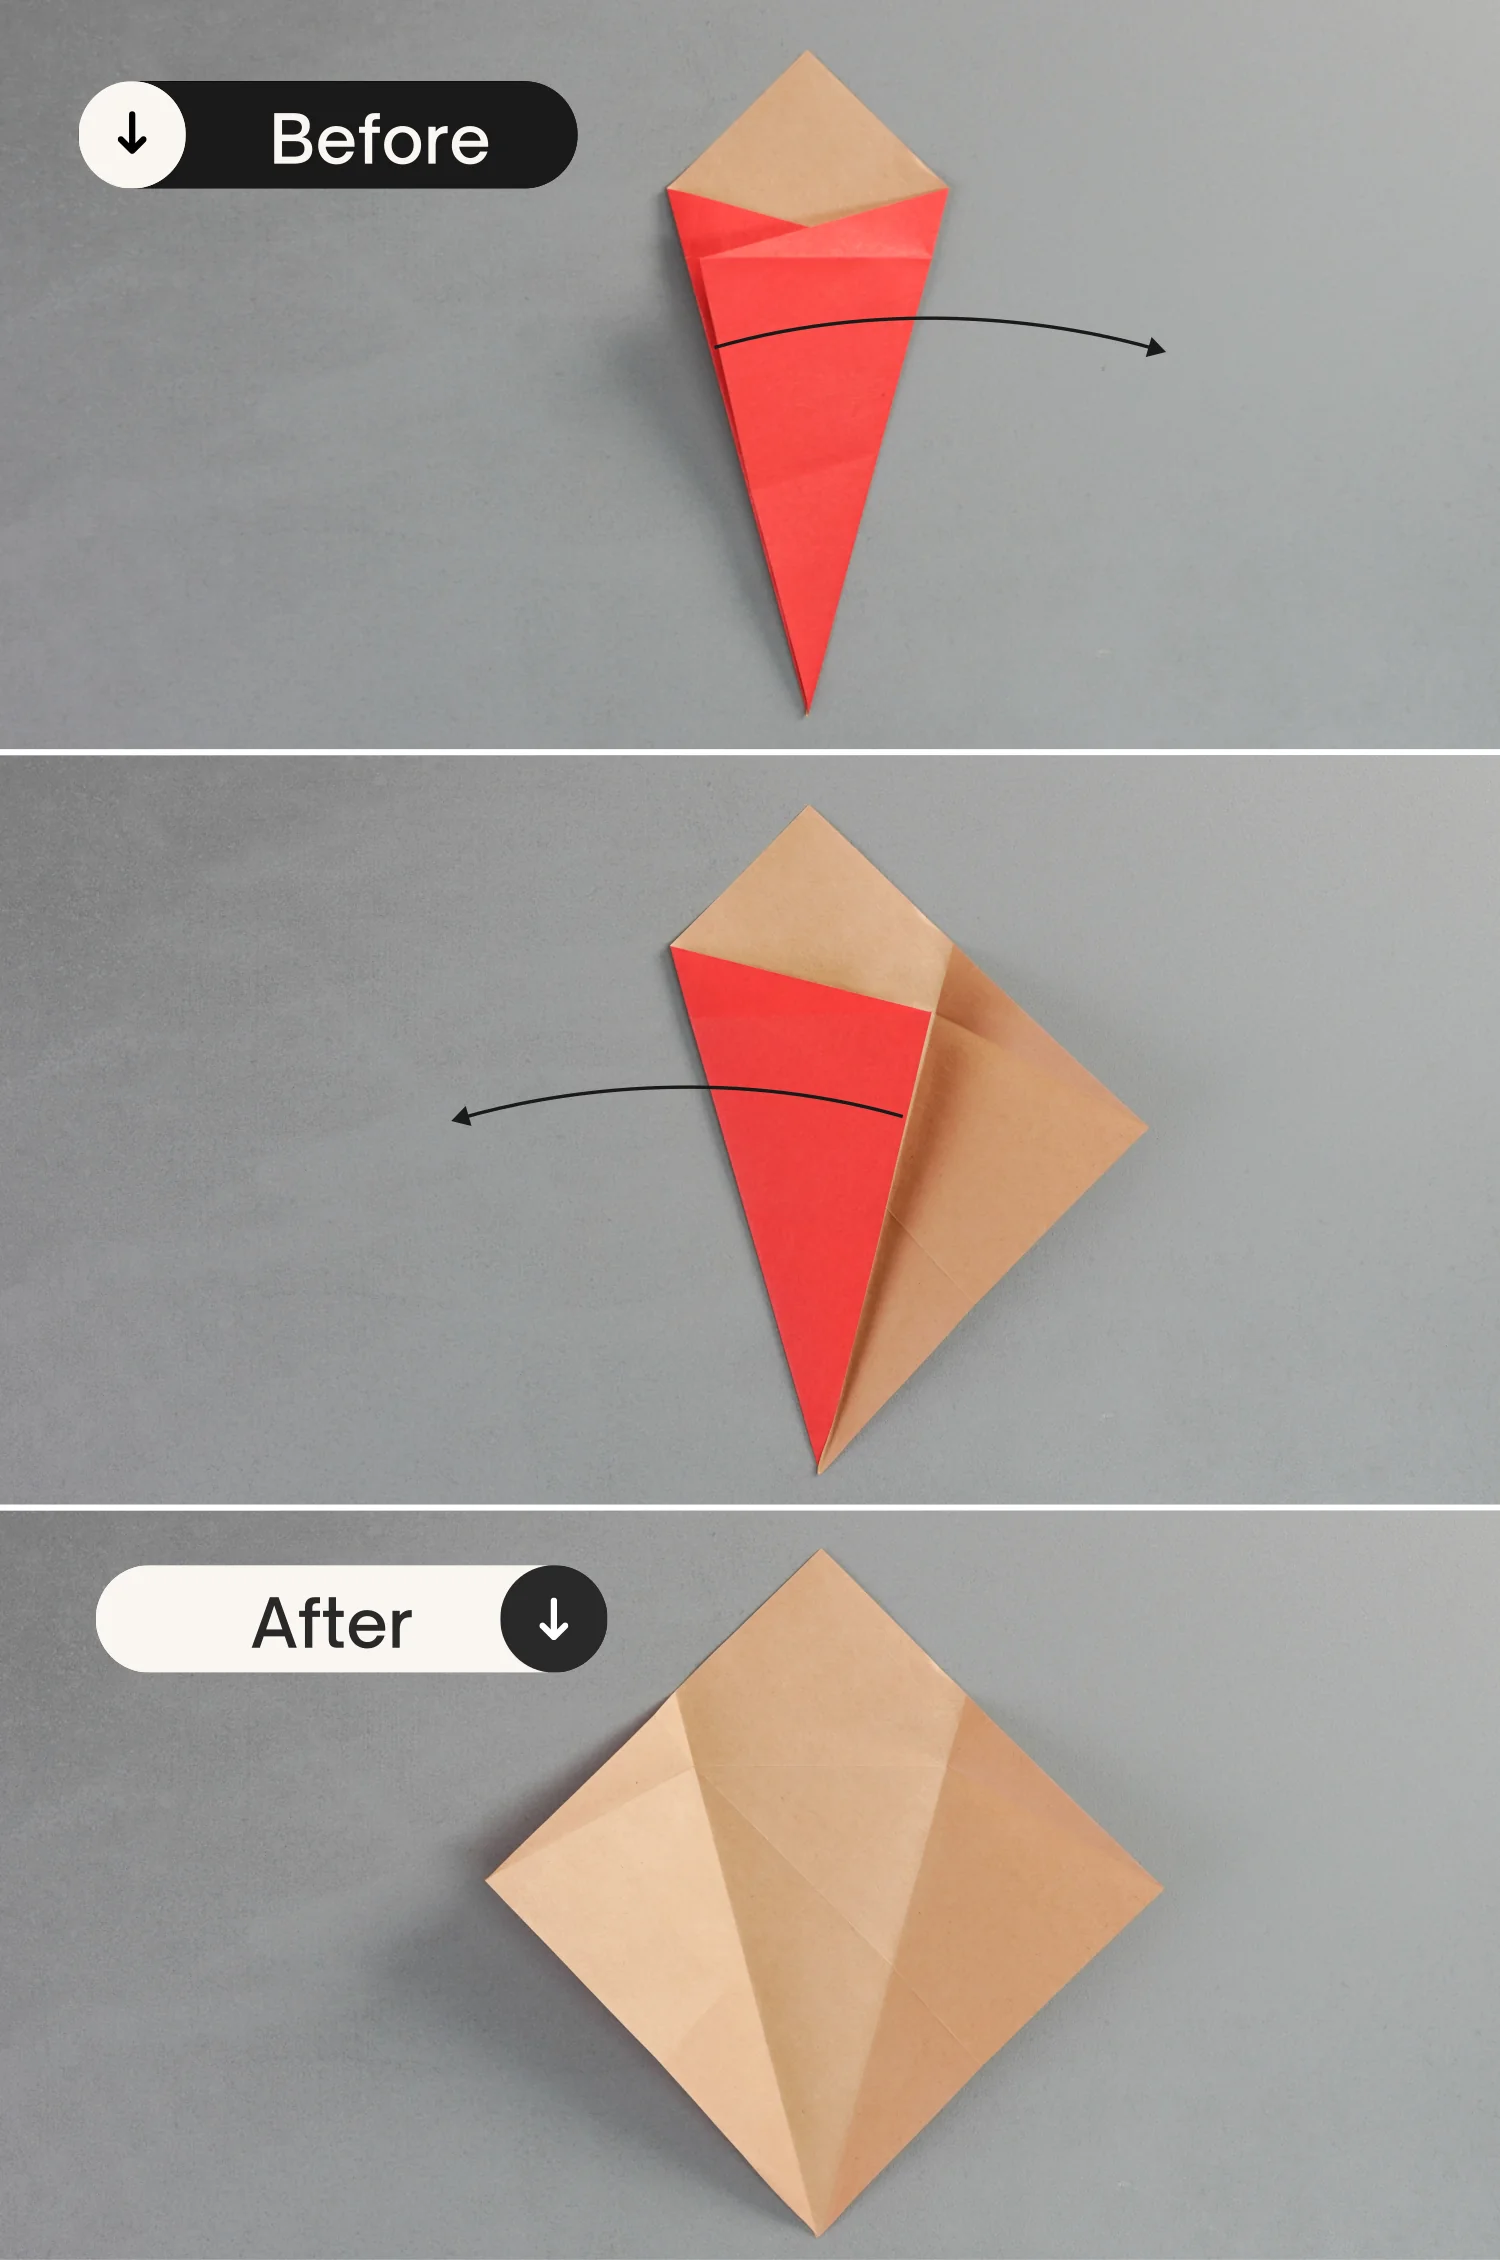
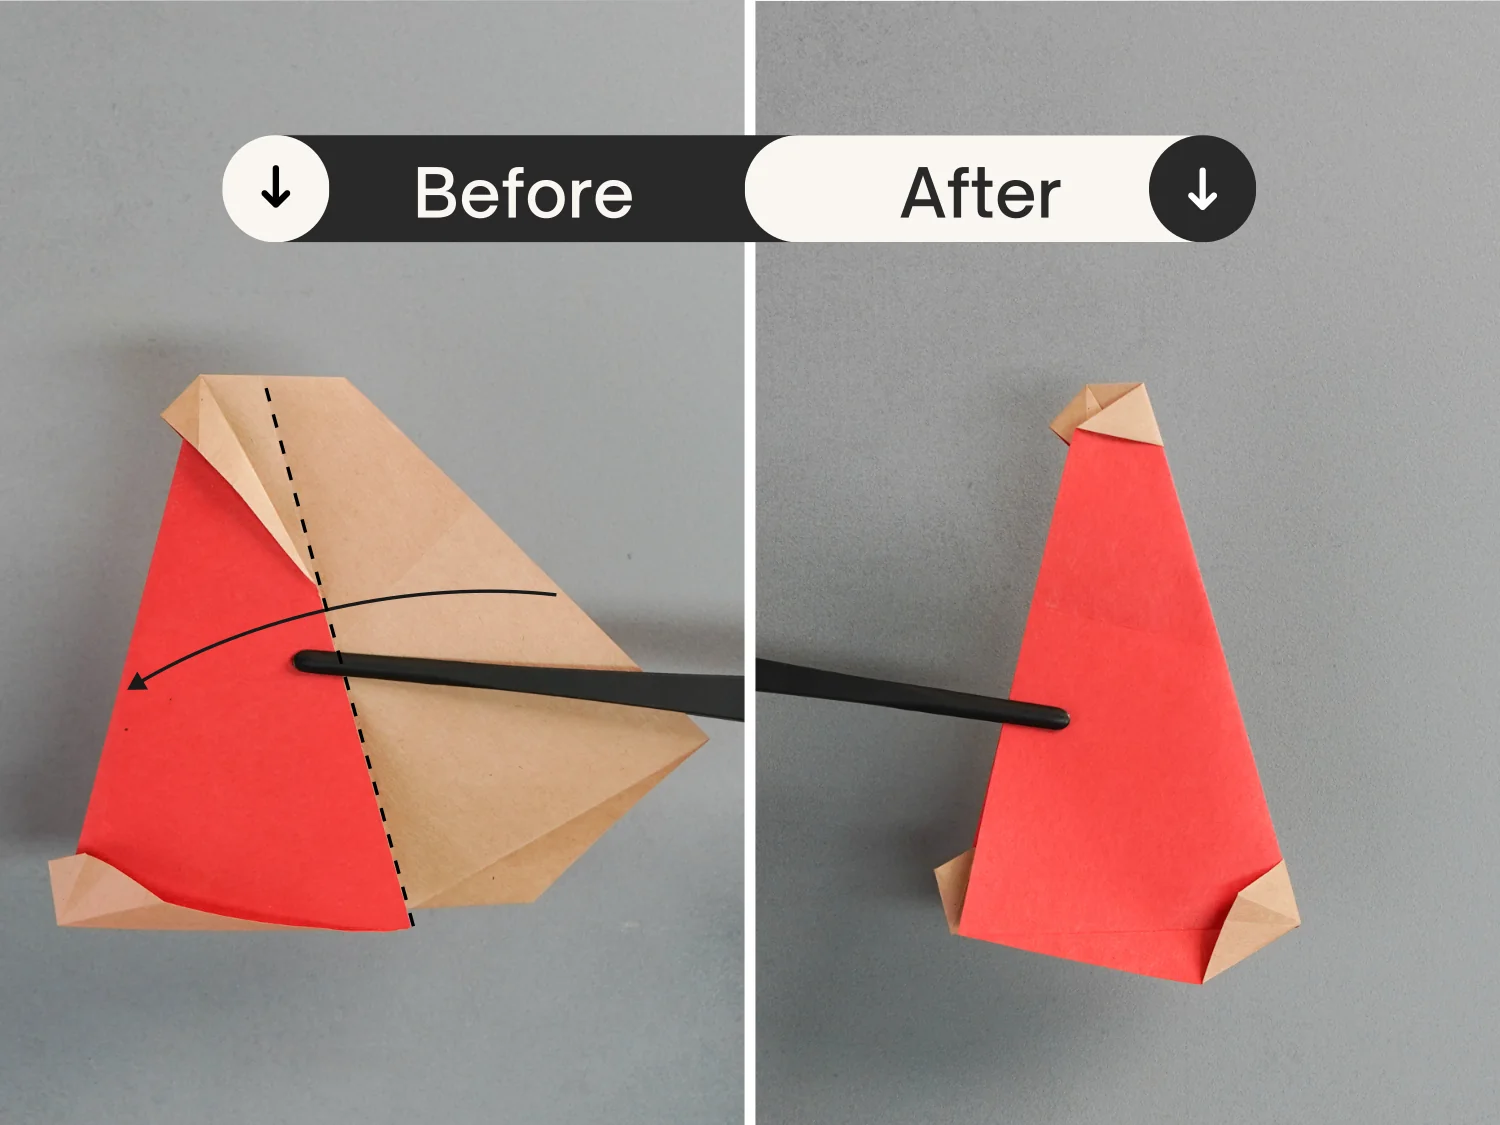
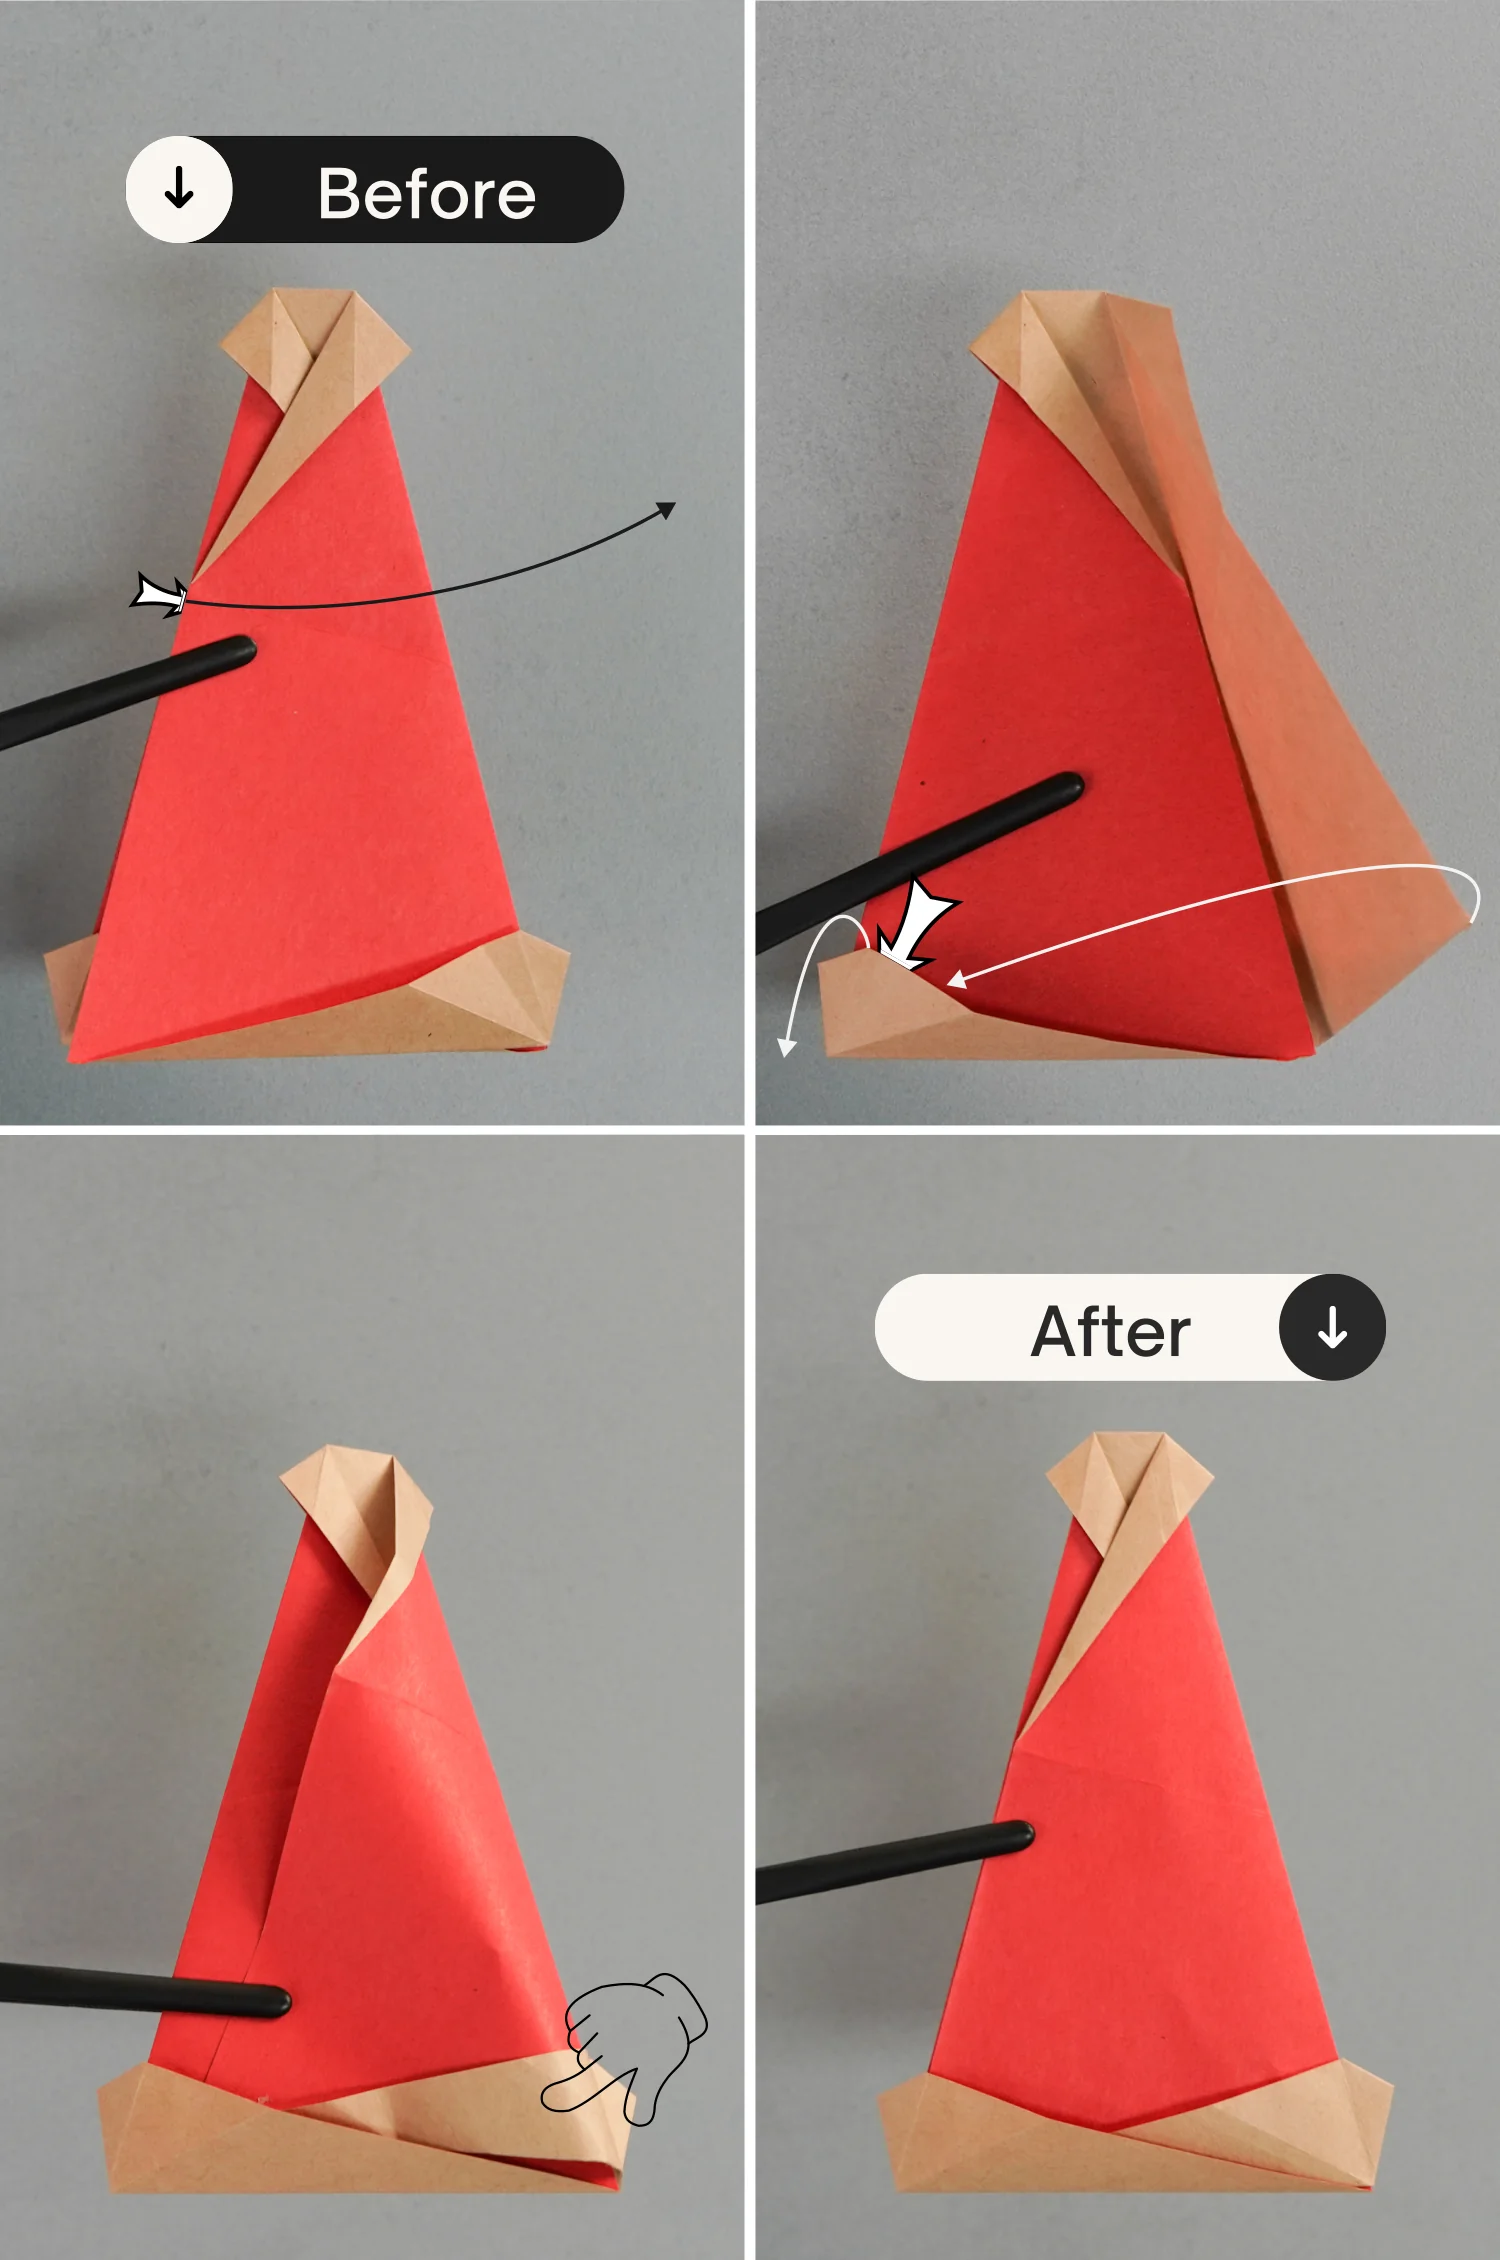
Step 18
Tuck the bottom edge of the top layer into the layers beneath it.
Step 19
Flip the paper over.
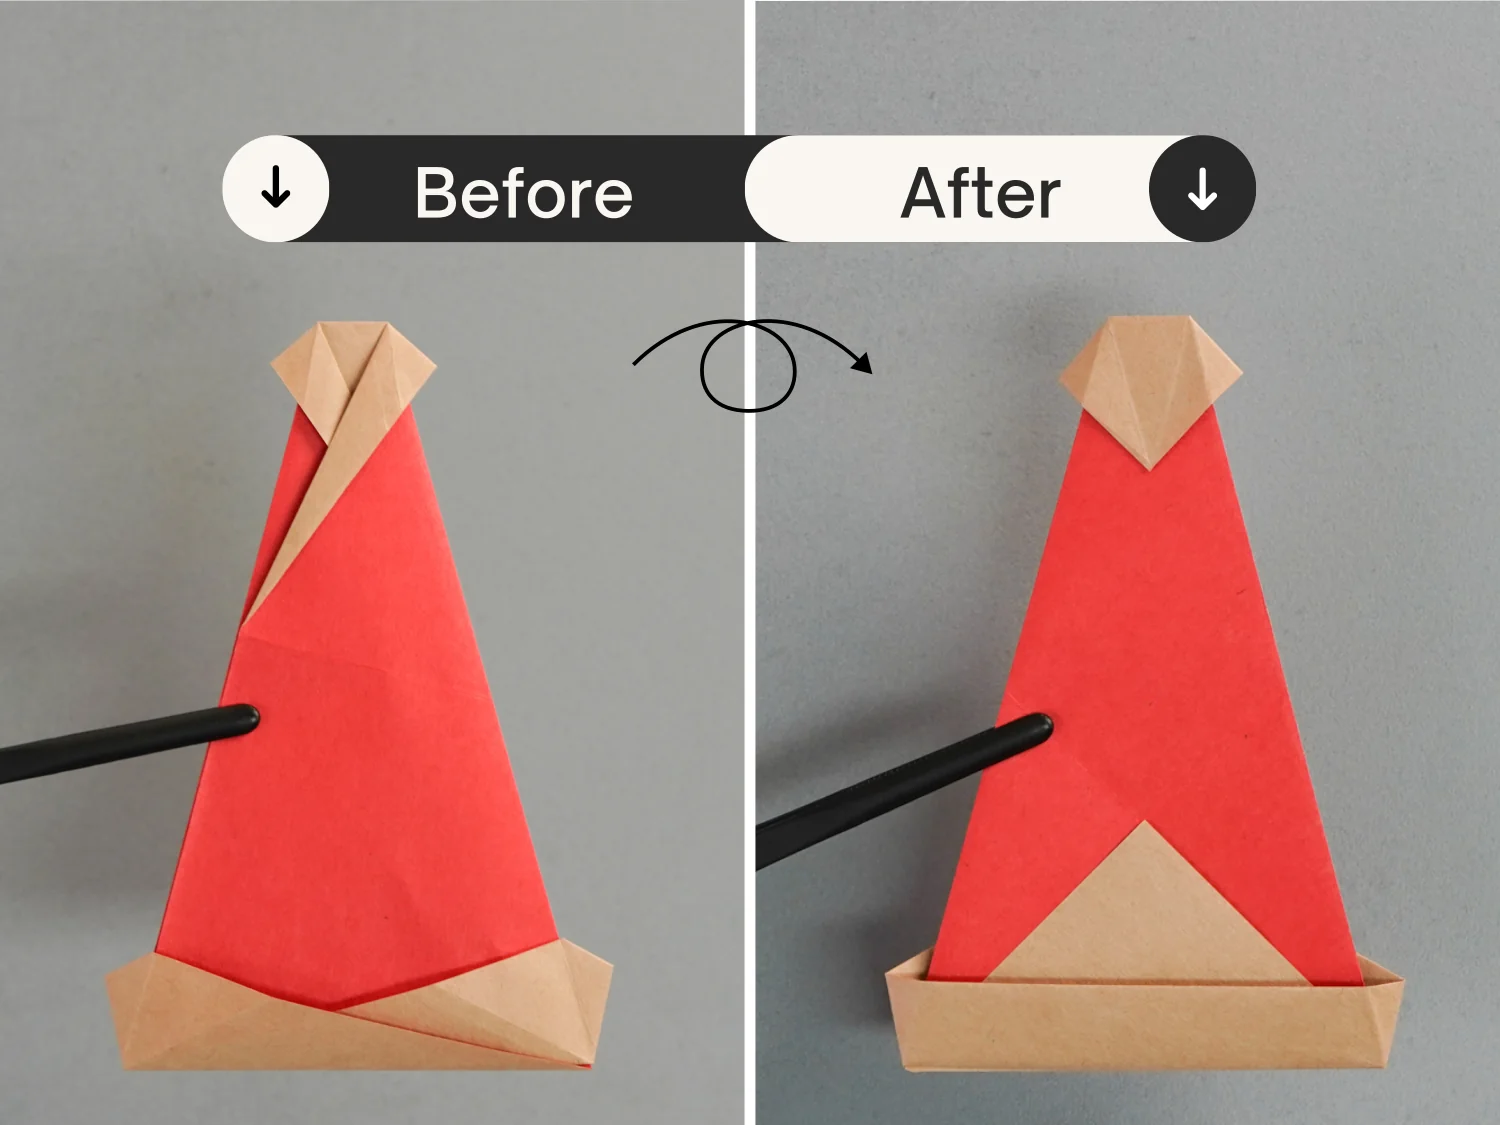
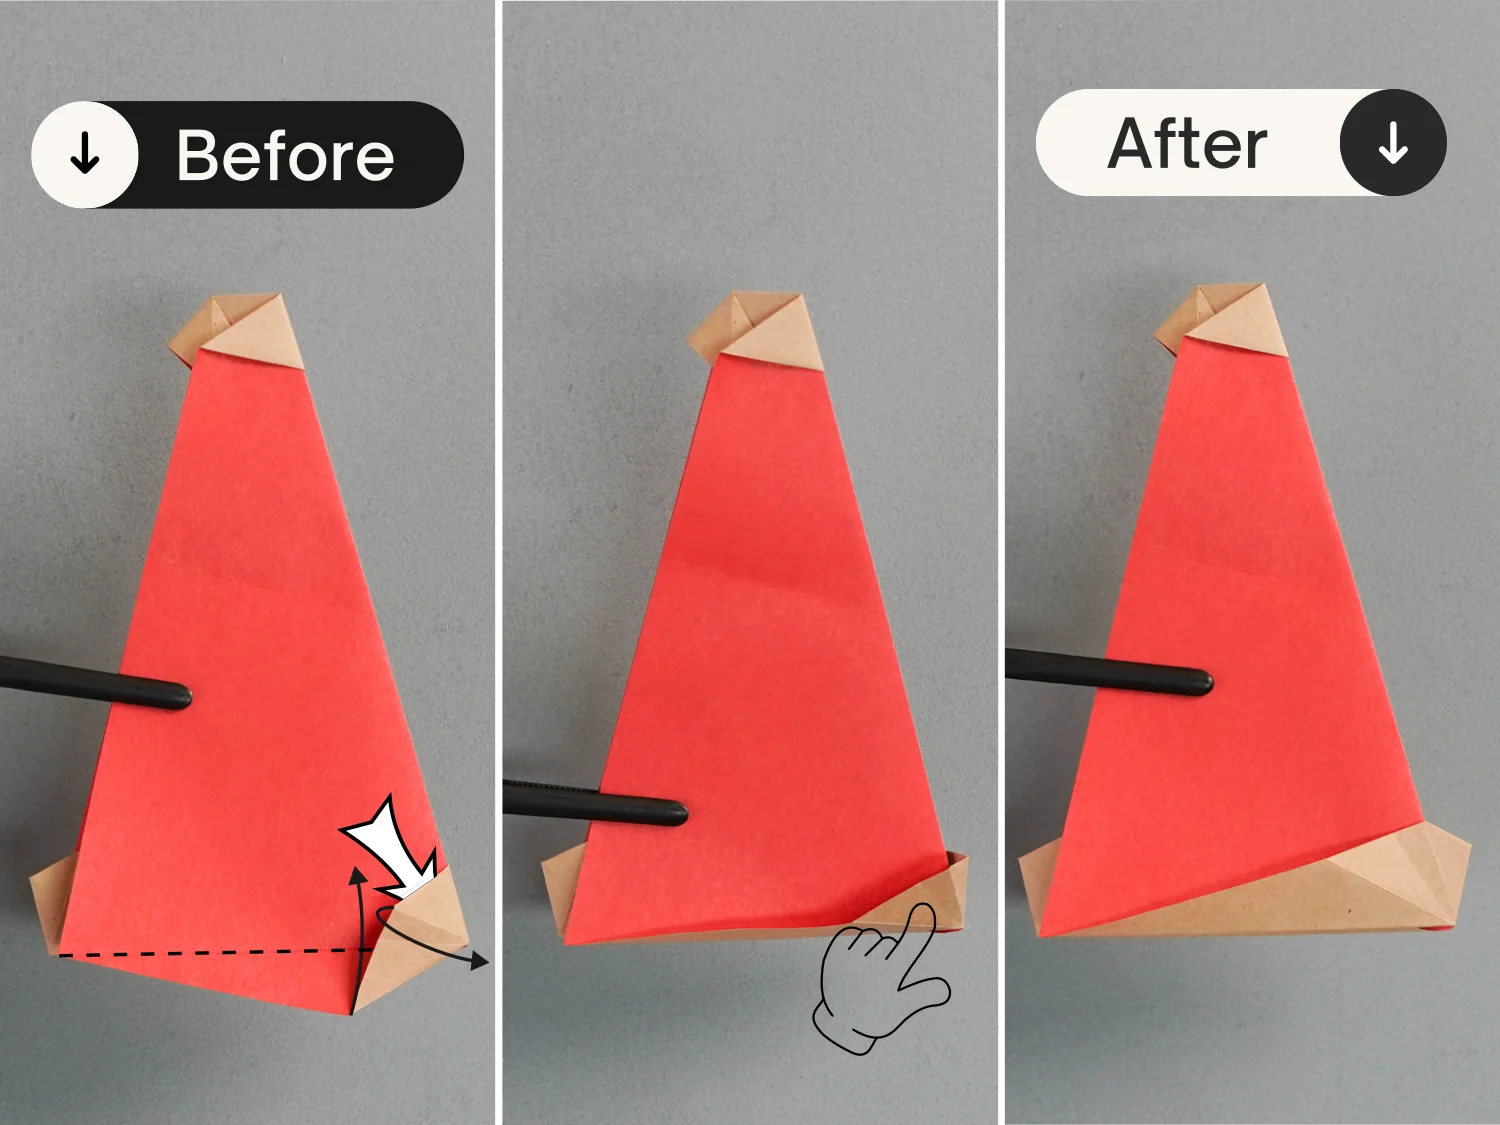
Step 20
Fold the bottom point of the top layer a little backward.
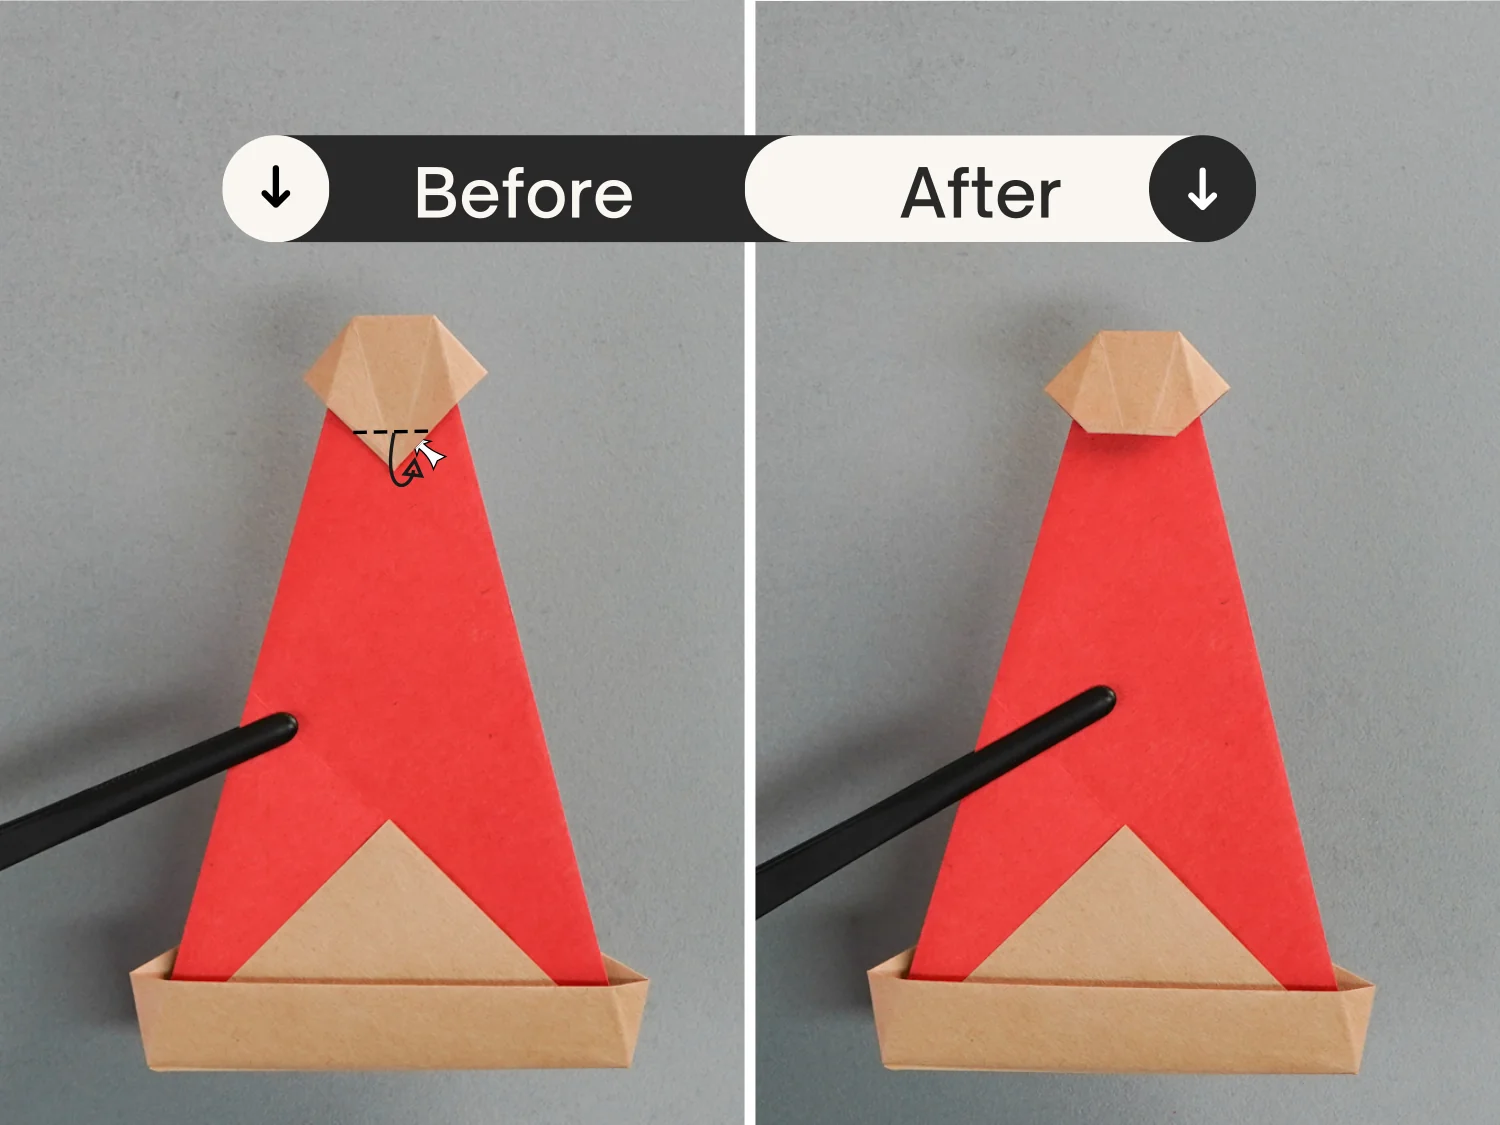
Step 21
Fold the top part down.
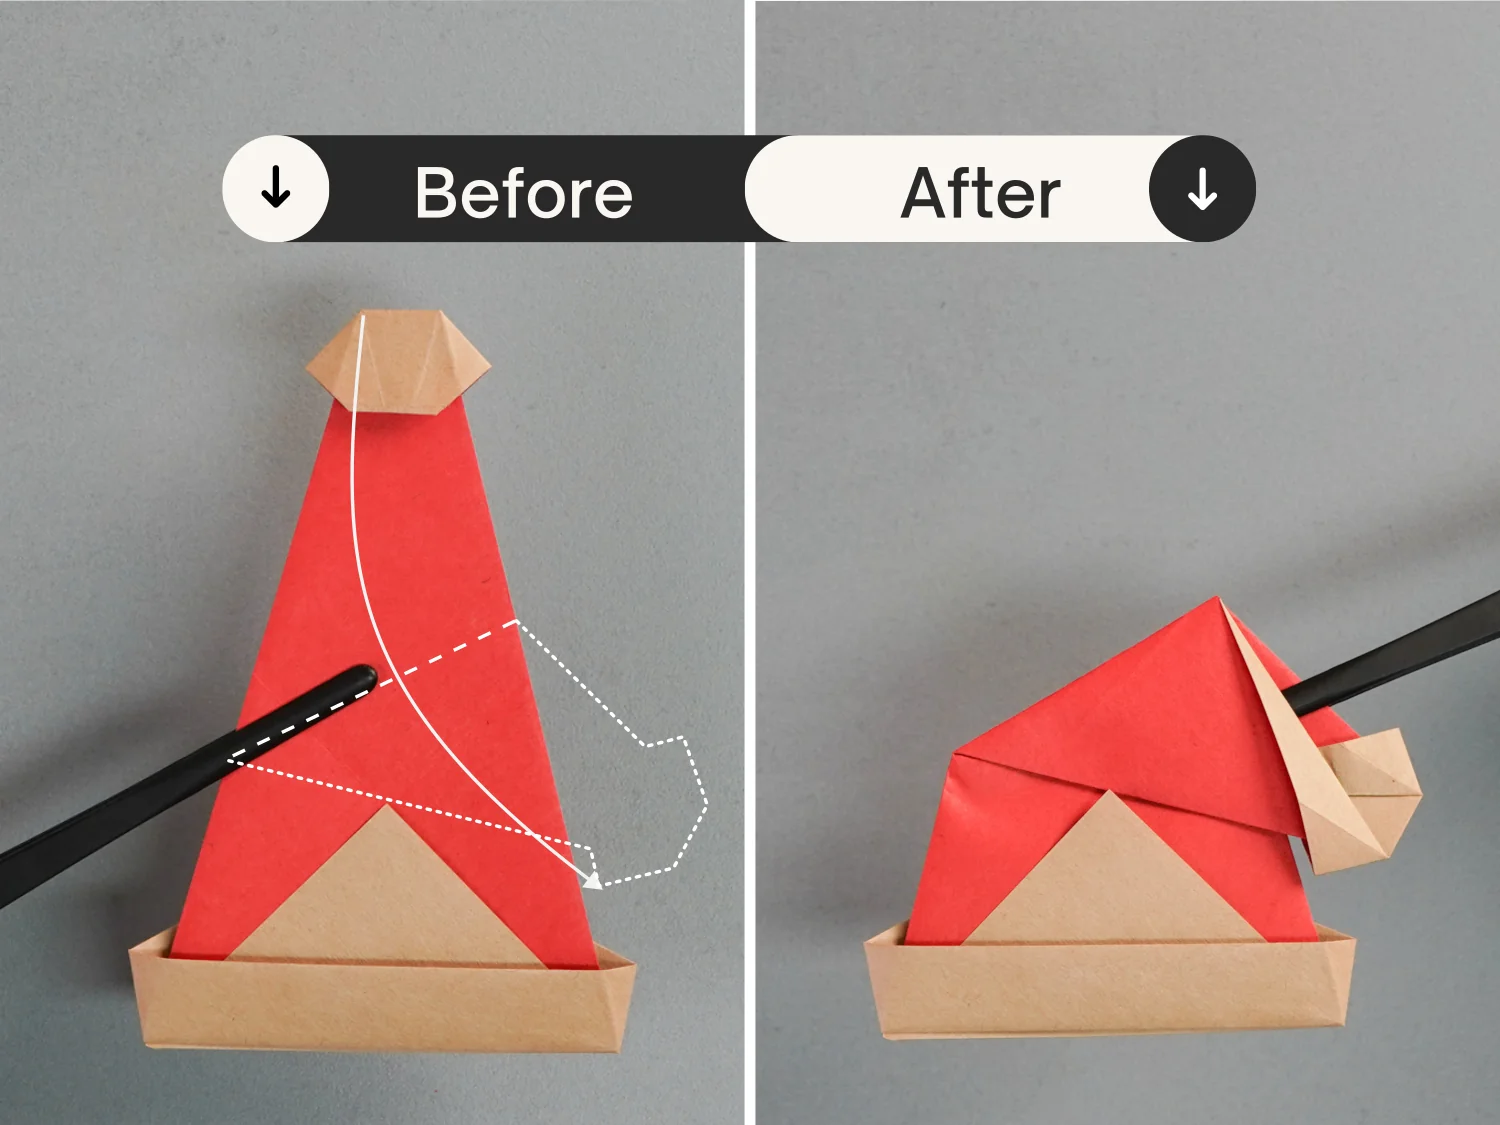
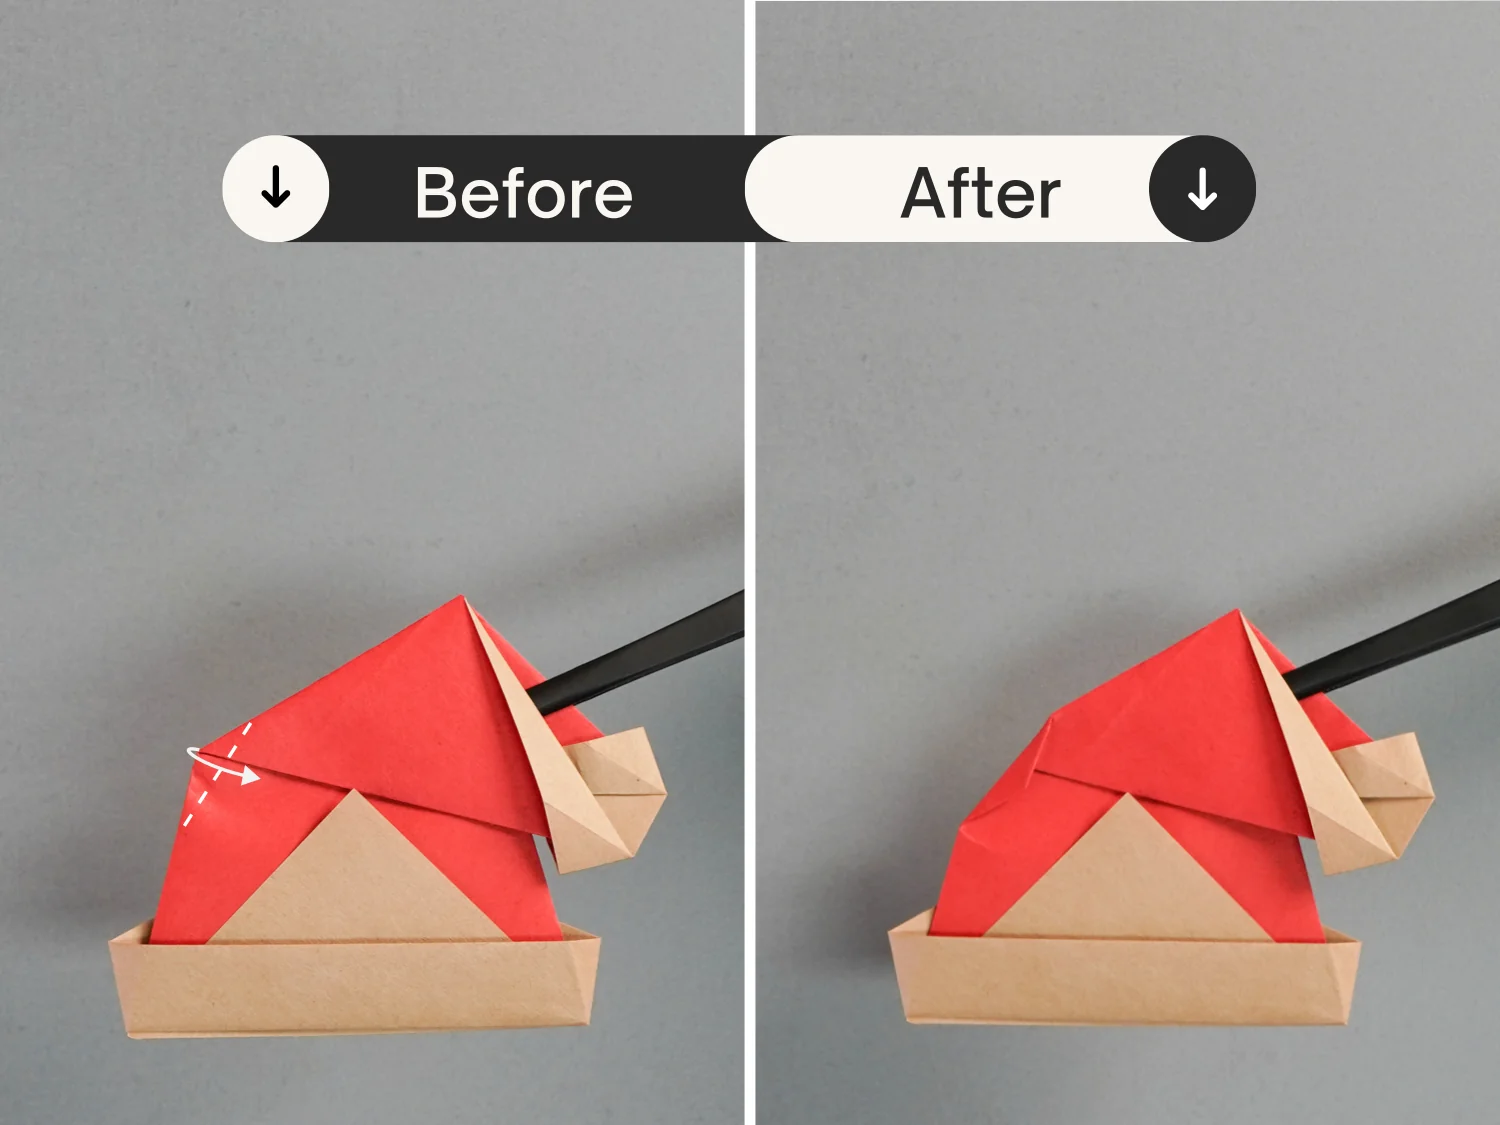
Step 22
Fold this corner a little as the picture shows.
Step 23
Turn over the paper, that’s your lovely origami Santa hat.
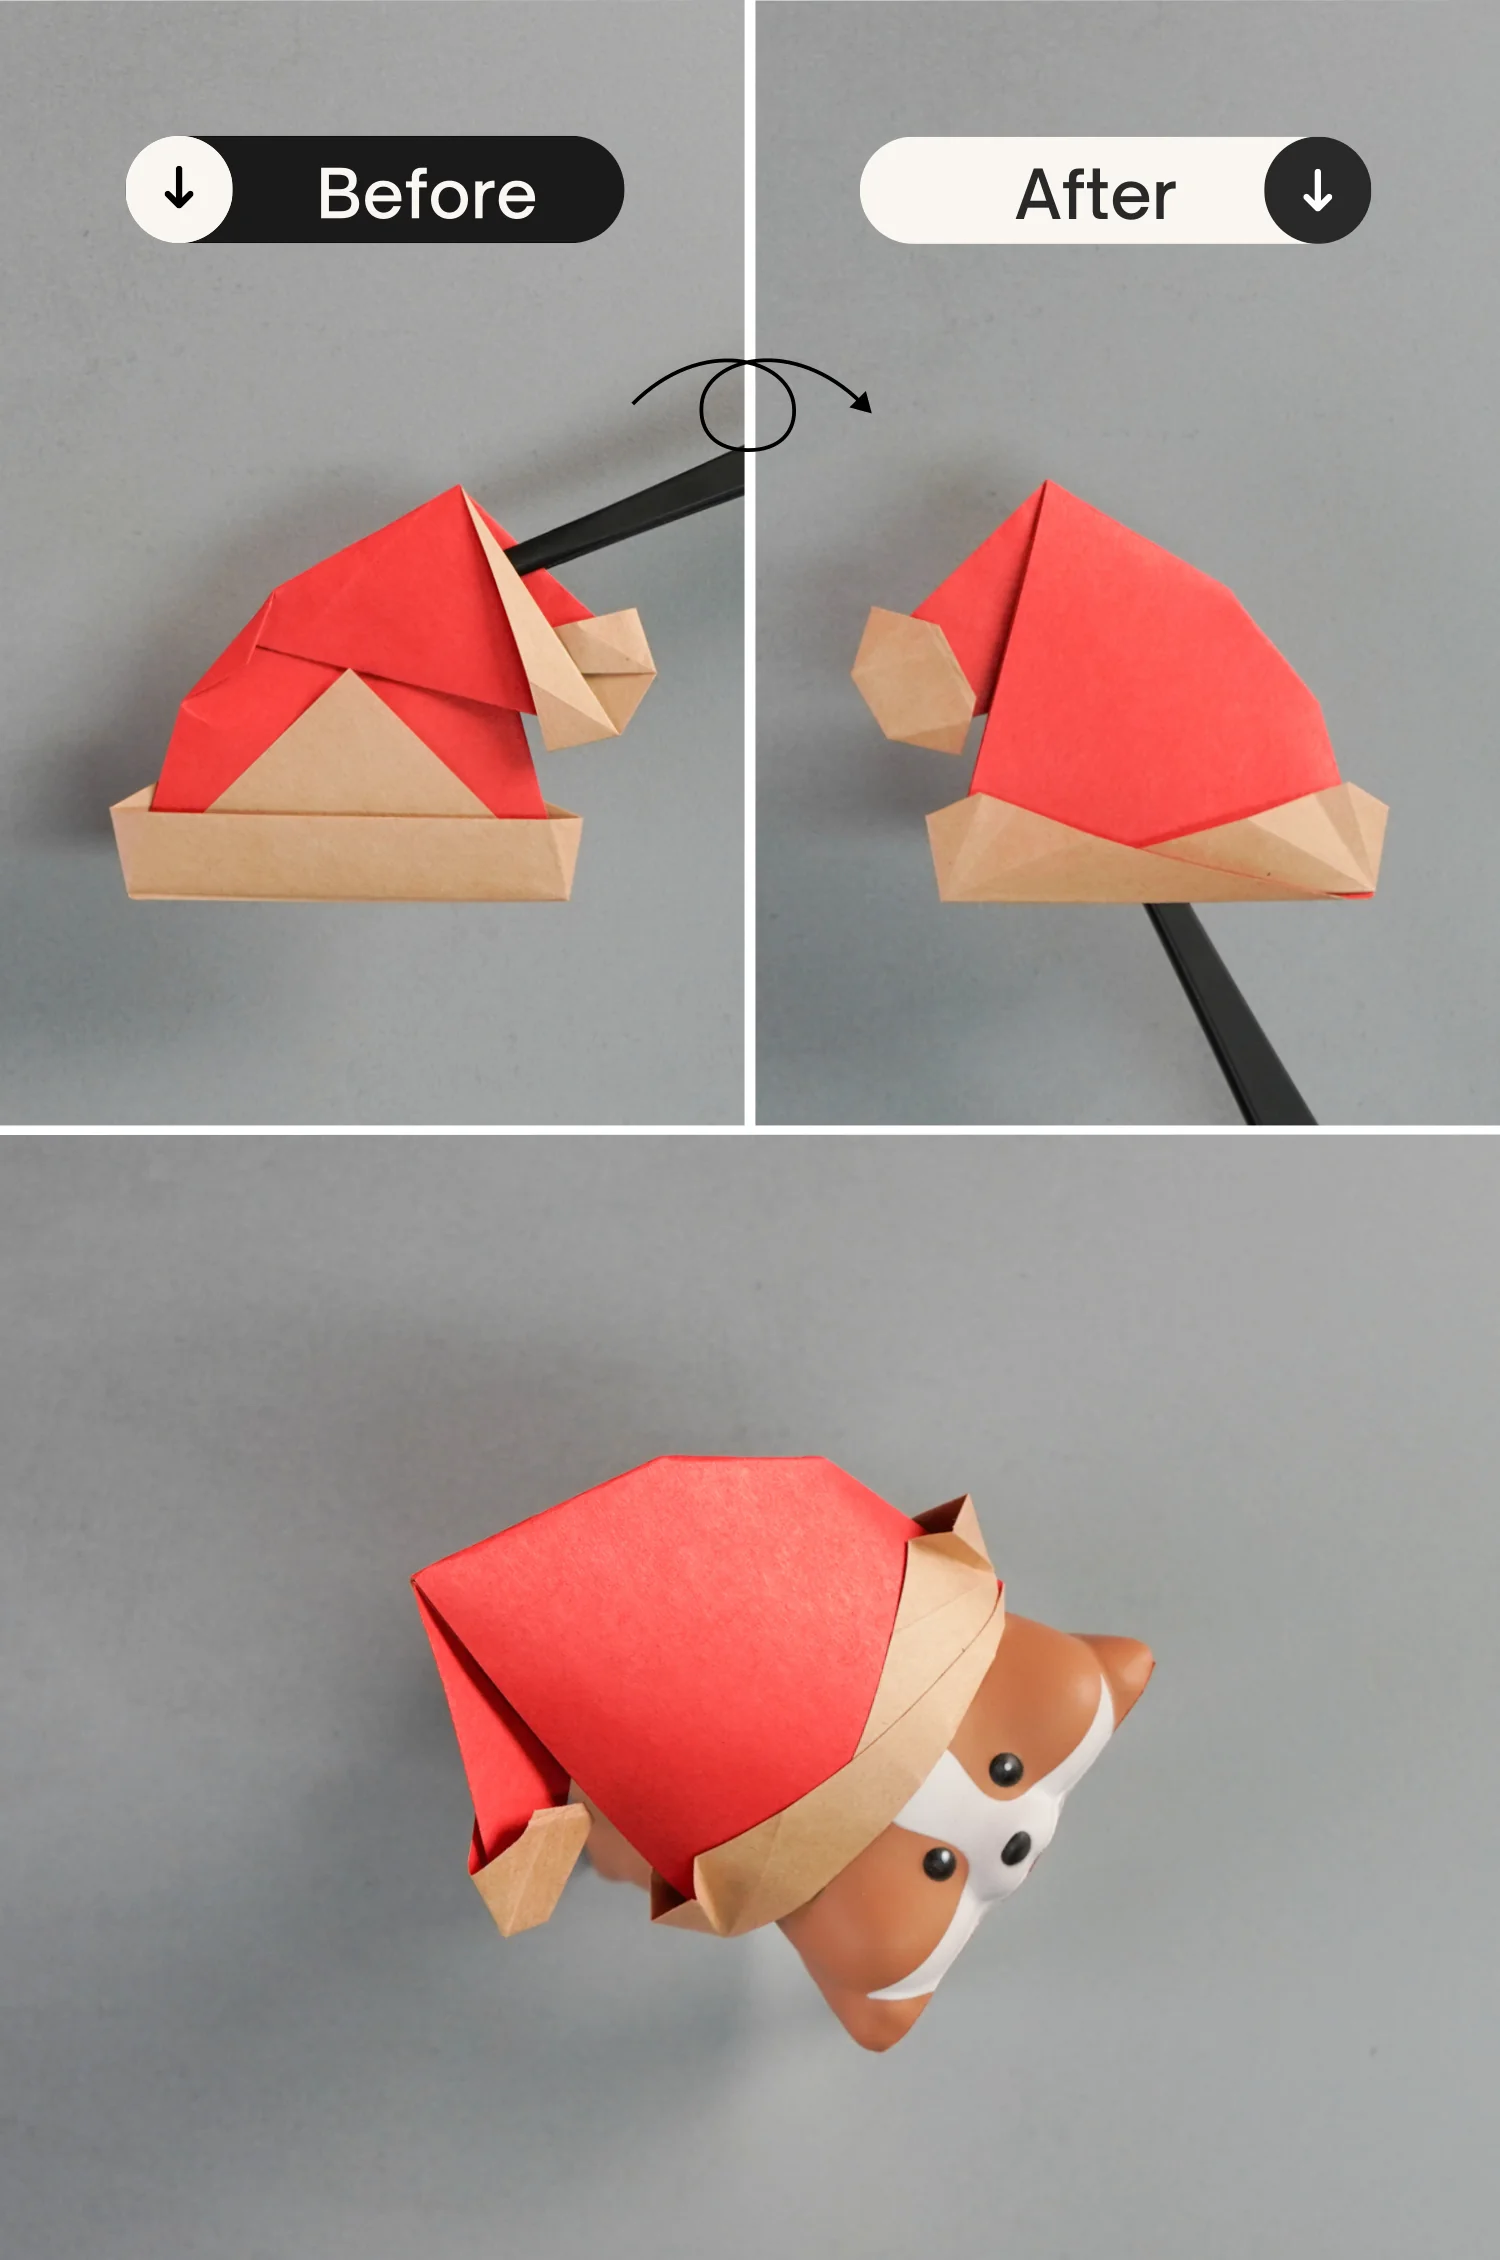
What’s Next
This is the final shape of an origami Santa hat. Now you can go ahead and explore our other origami instructions with Christmas elements. Happy folding!


