How to Make an Origami Samurai Hat
Step 1
Start with the color of the bottom part of our hat facing up, and fold it in half vertically, leaving a crease then unfold it.
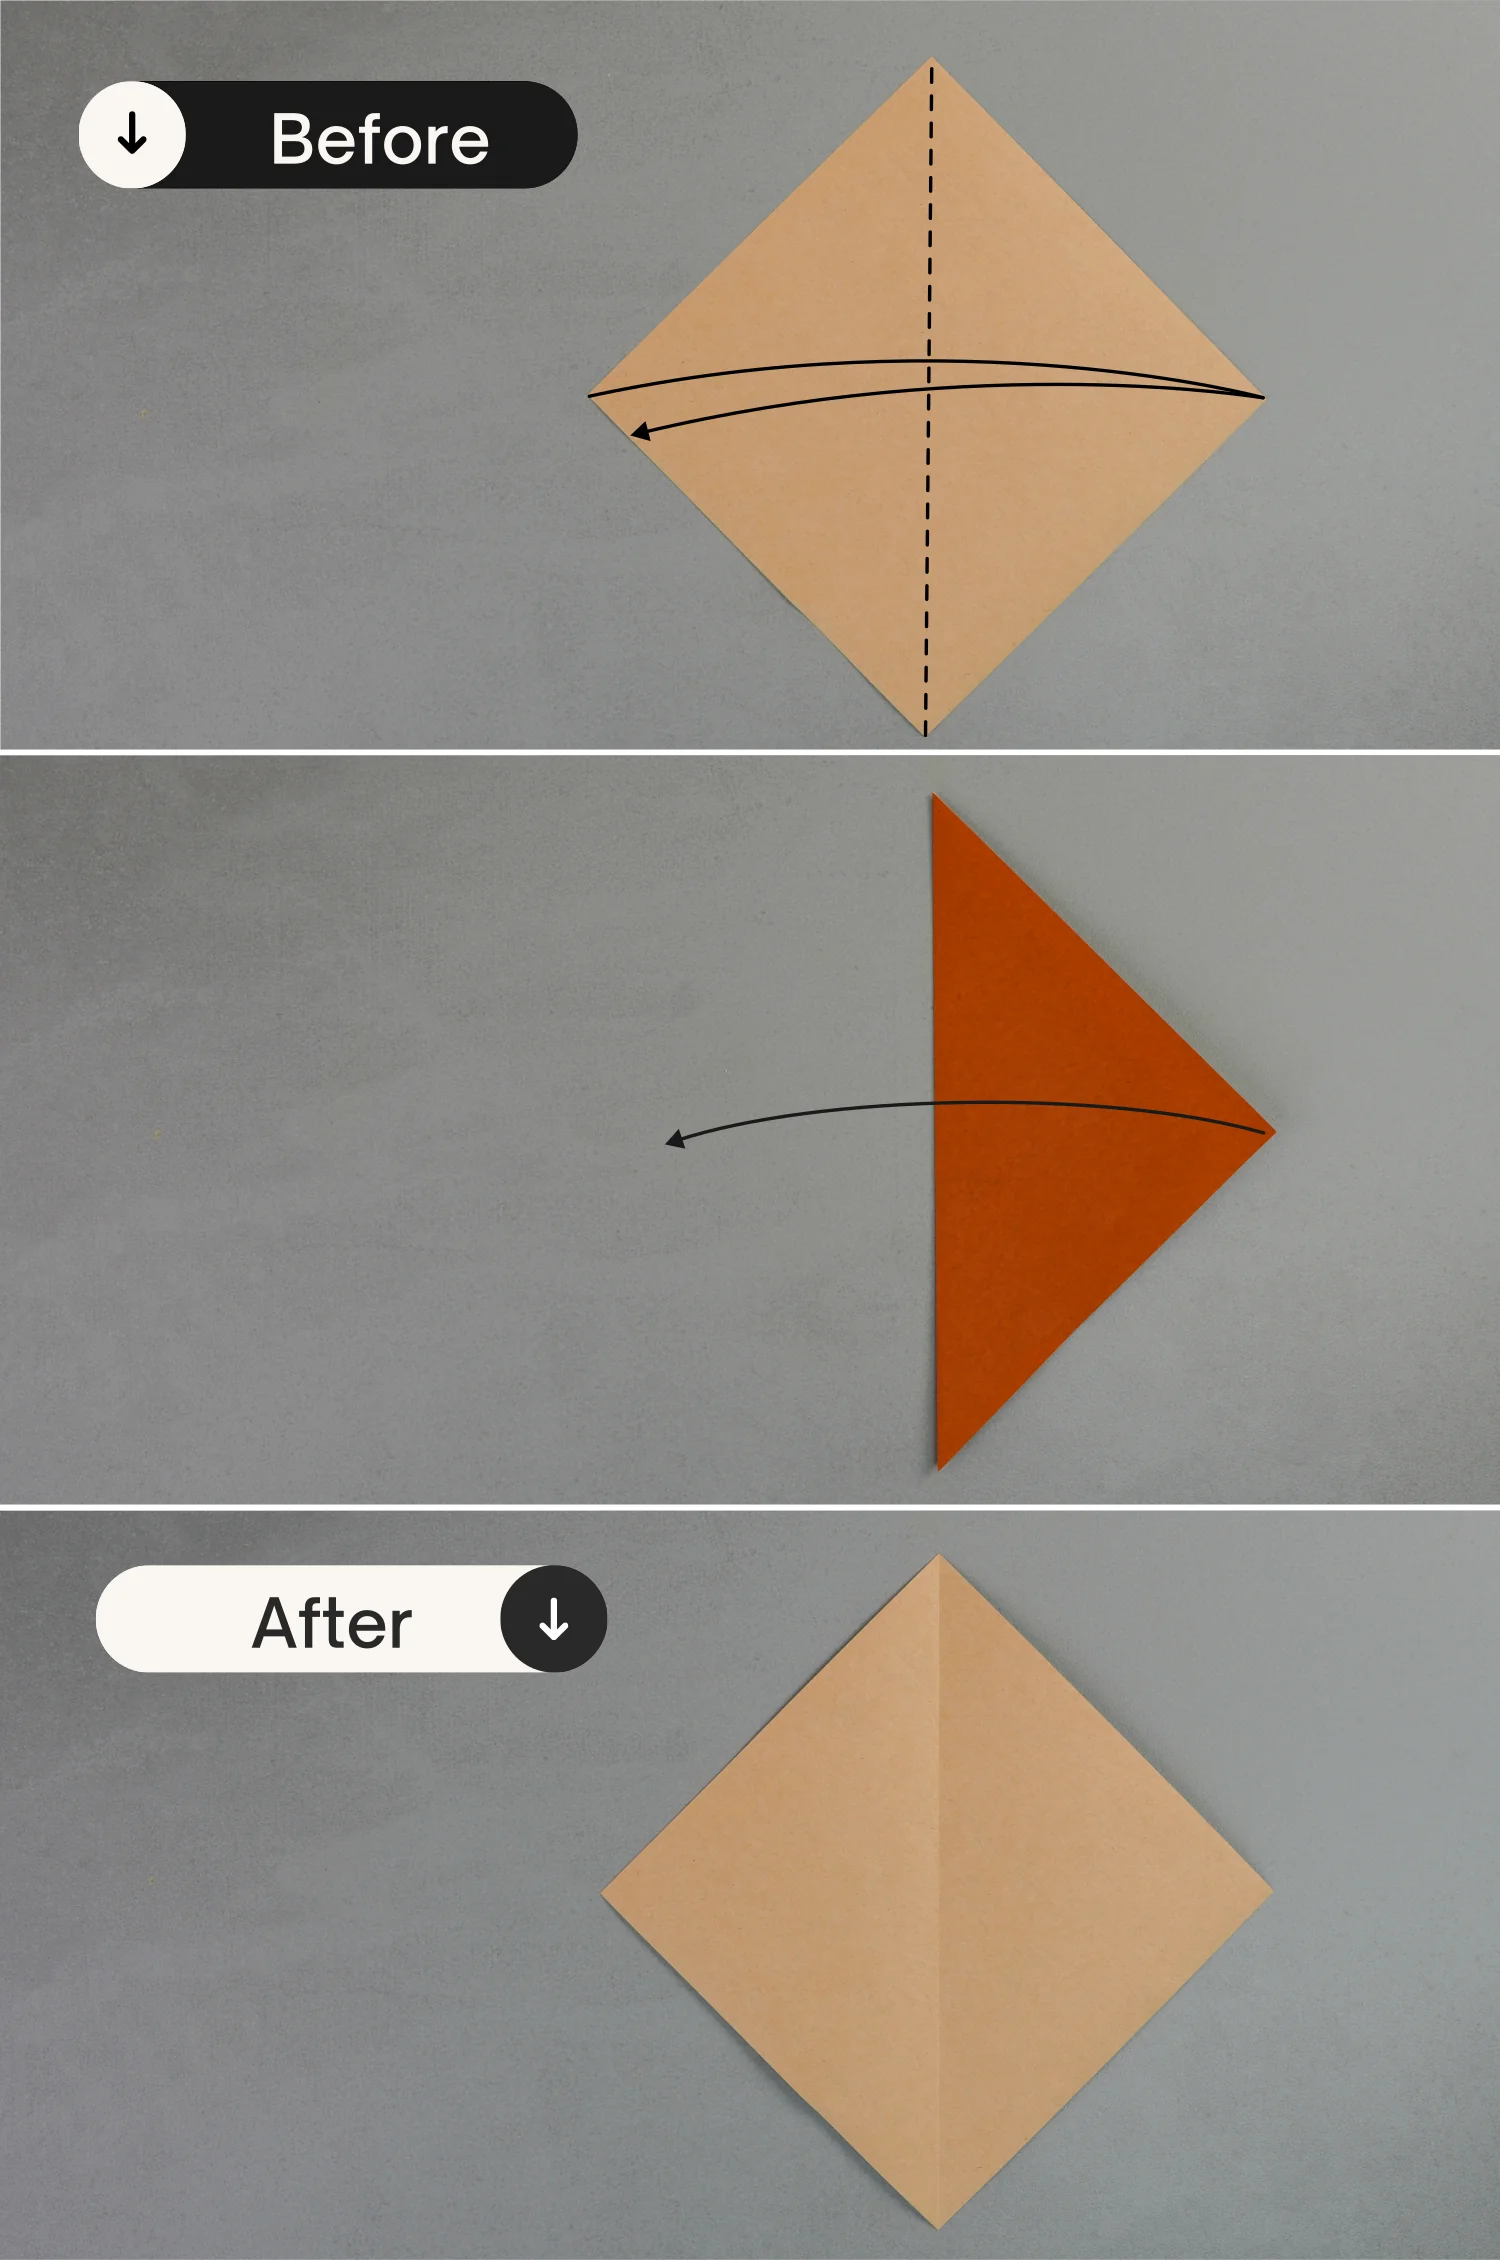
Step 2
Fold the paper in half horizontally from the top to the bottom.

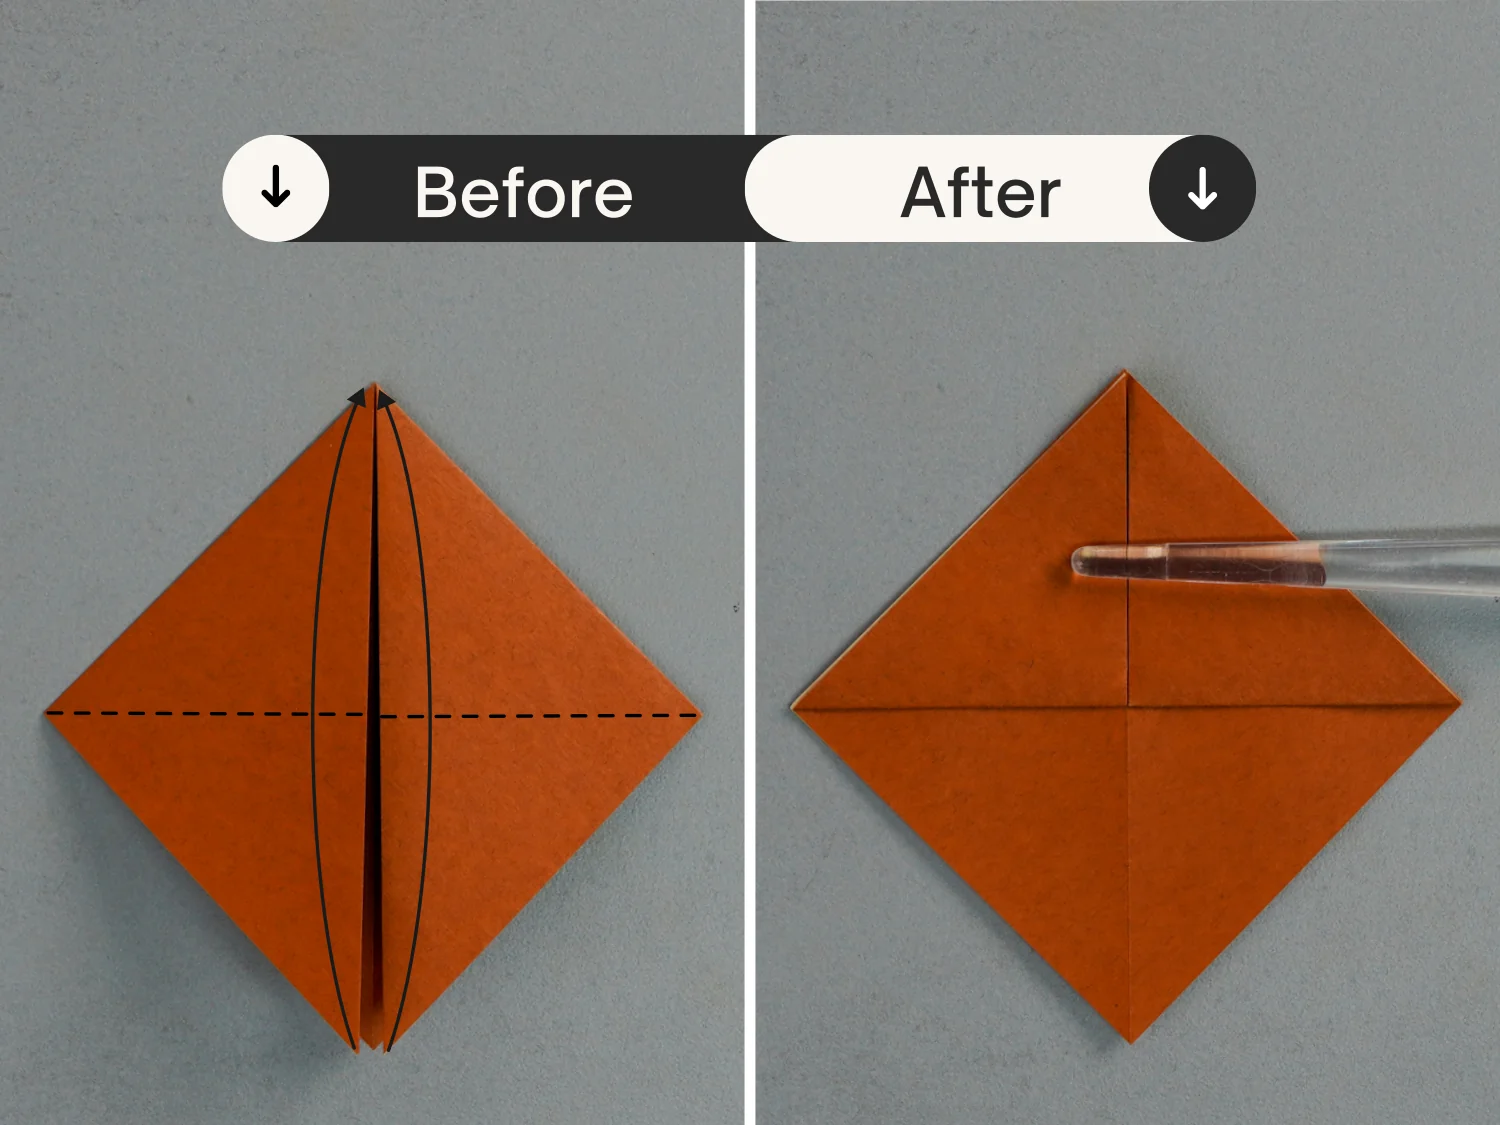
Step 3
Fold the left and right points to meet the bottom point.

Step 4
Then fold them up to meet the top point.
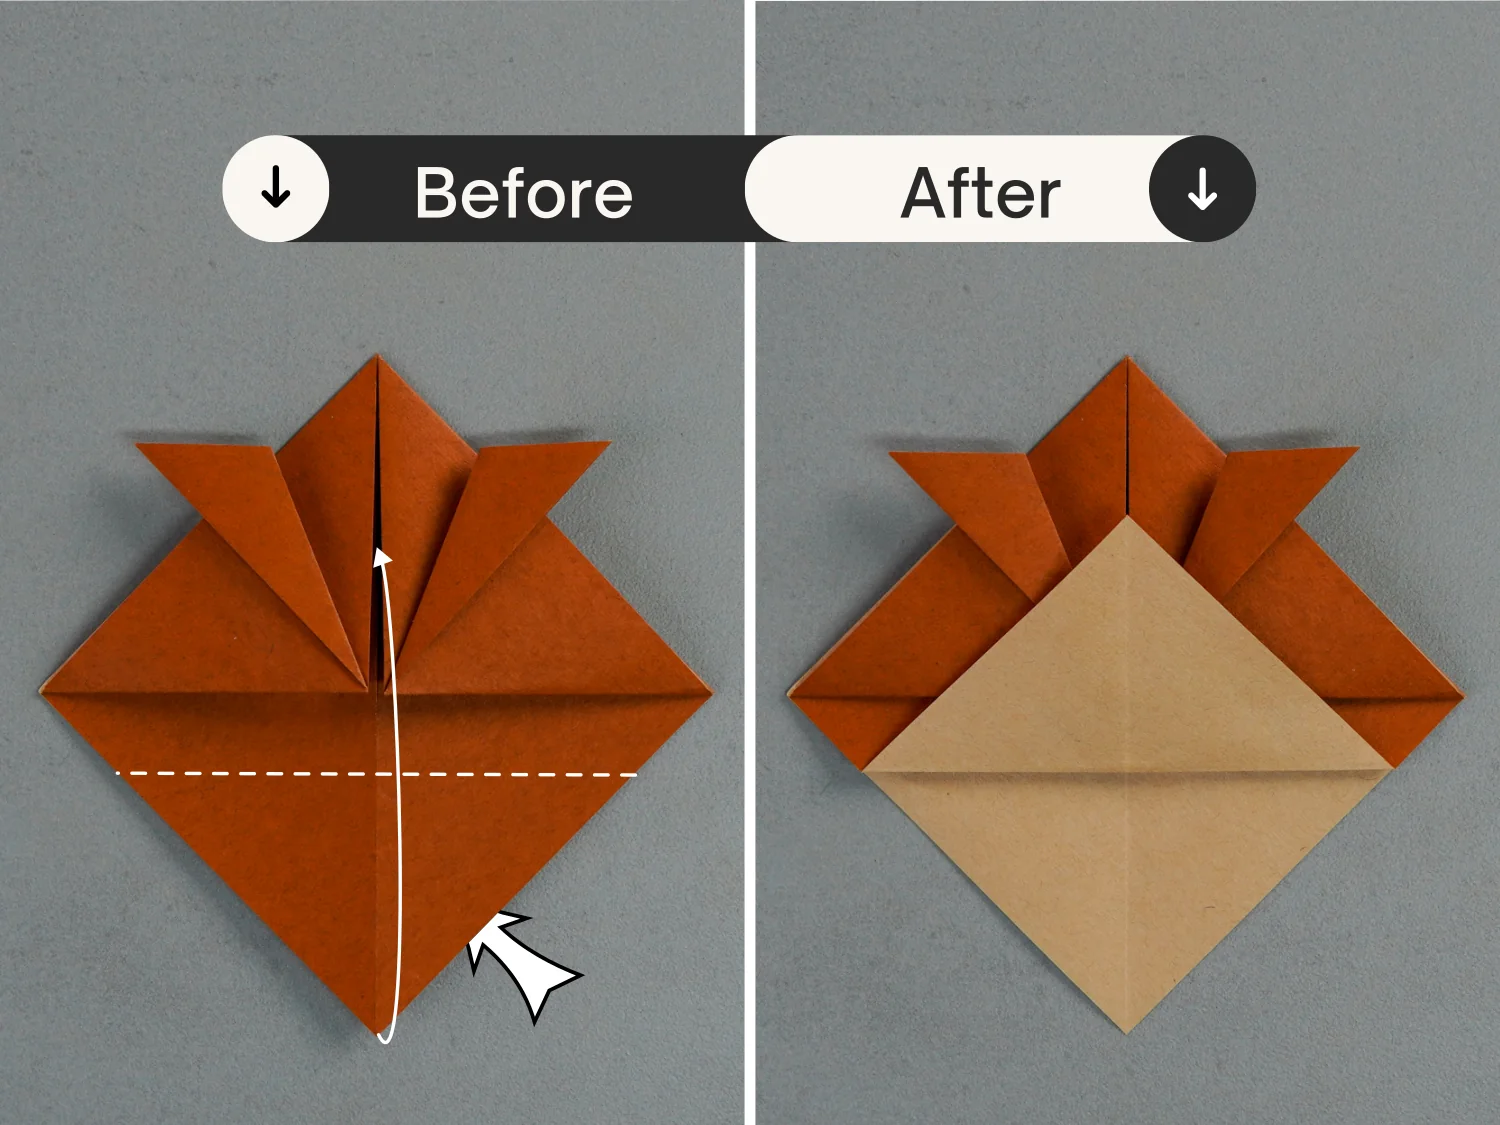
Step 5
Fold the top right corner to the right, and fold the top left one to the left.

Step 6
Fold up the bottom point of the top layer along the dotted line.
Step 7
Then fold it down along the dotted line.
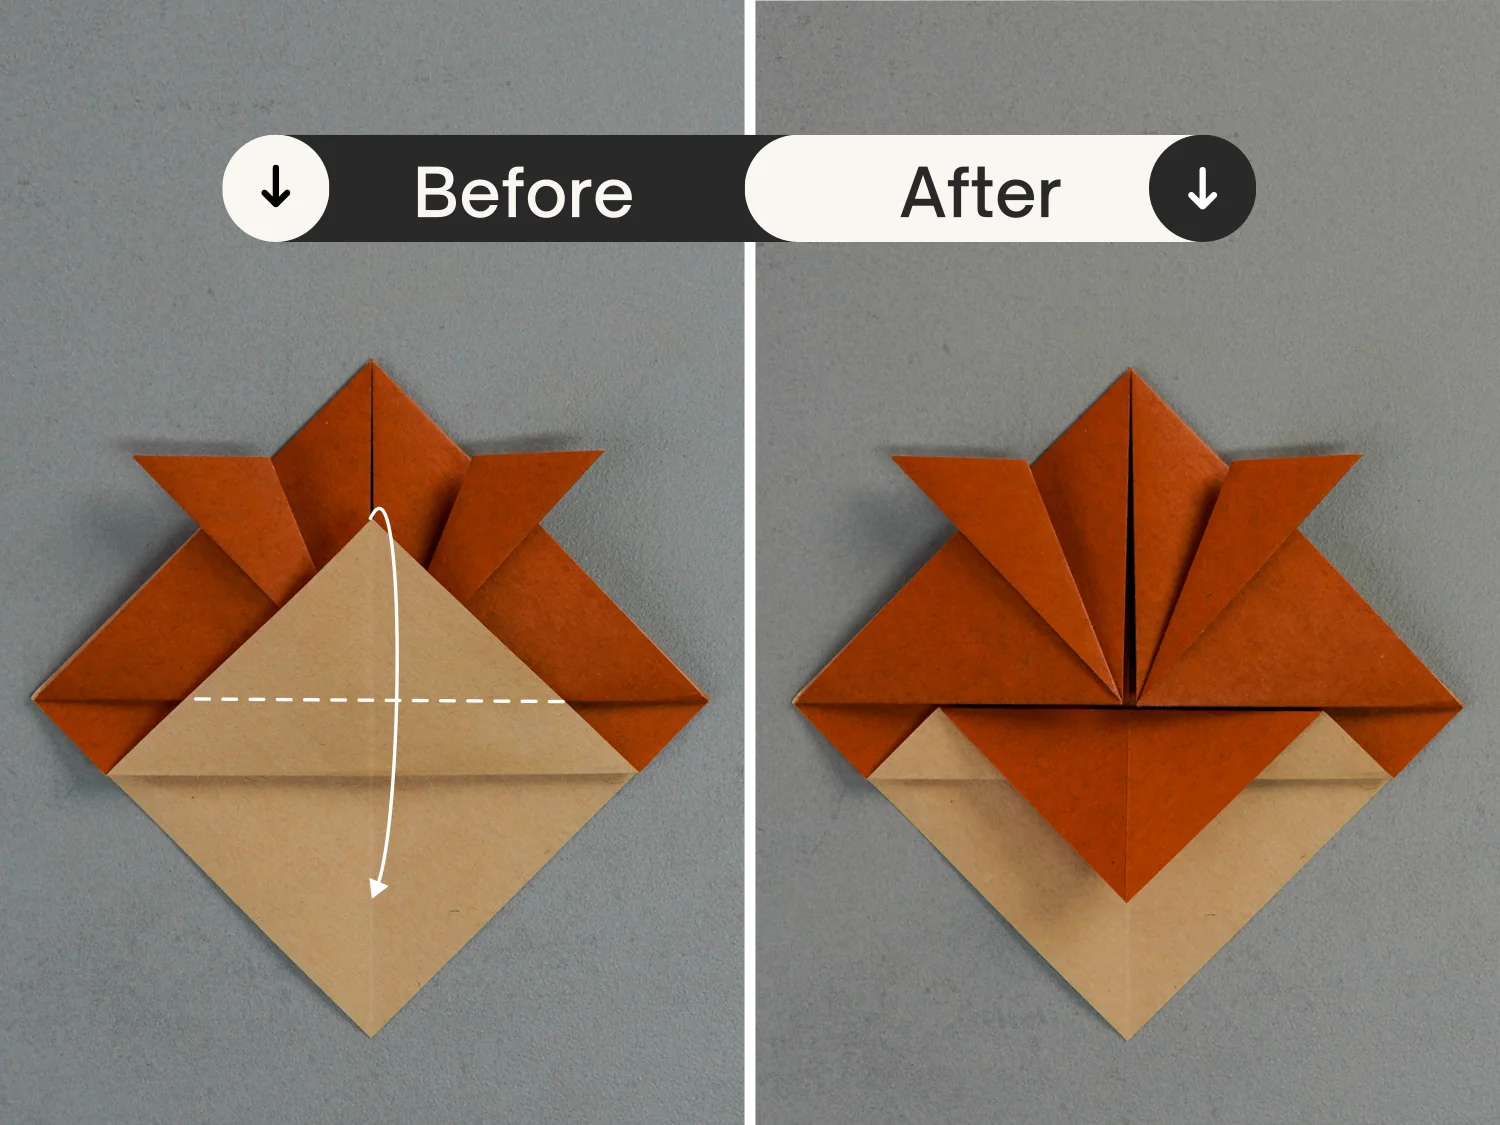
Step 8
Fold the top two layers up along the edge indicated by the dotted line.
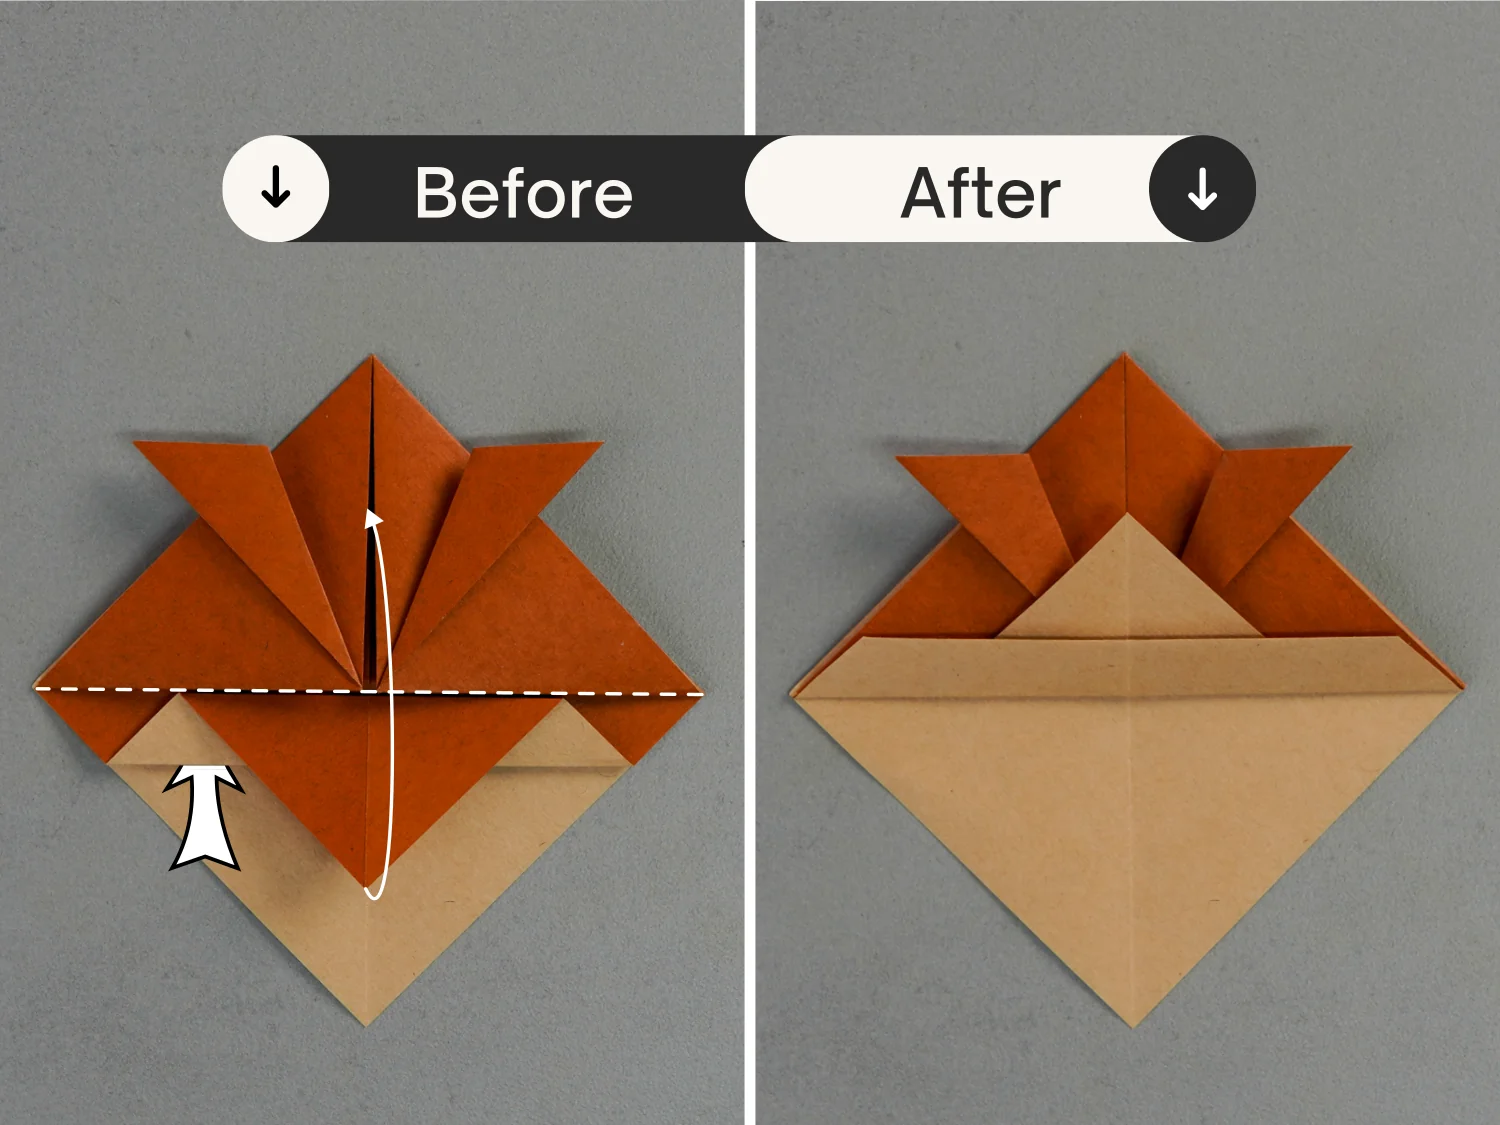
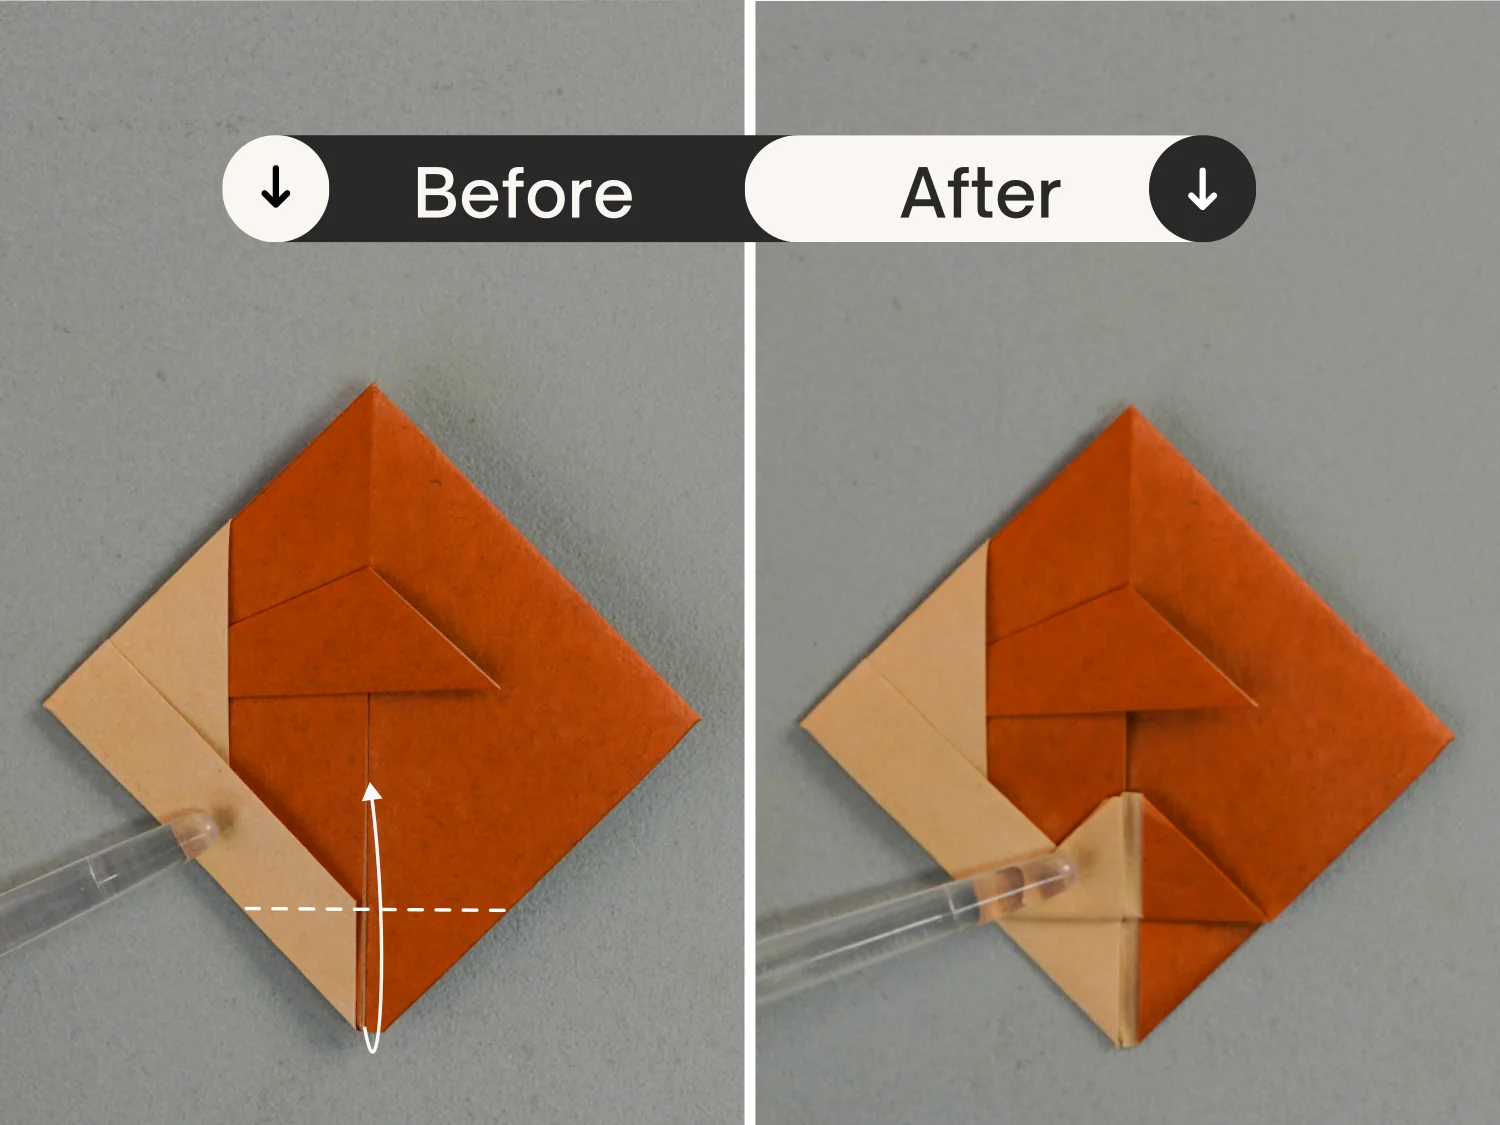
Step 9
Fold the bottom triangle up, and unfold it.
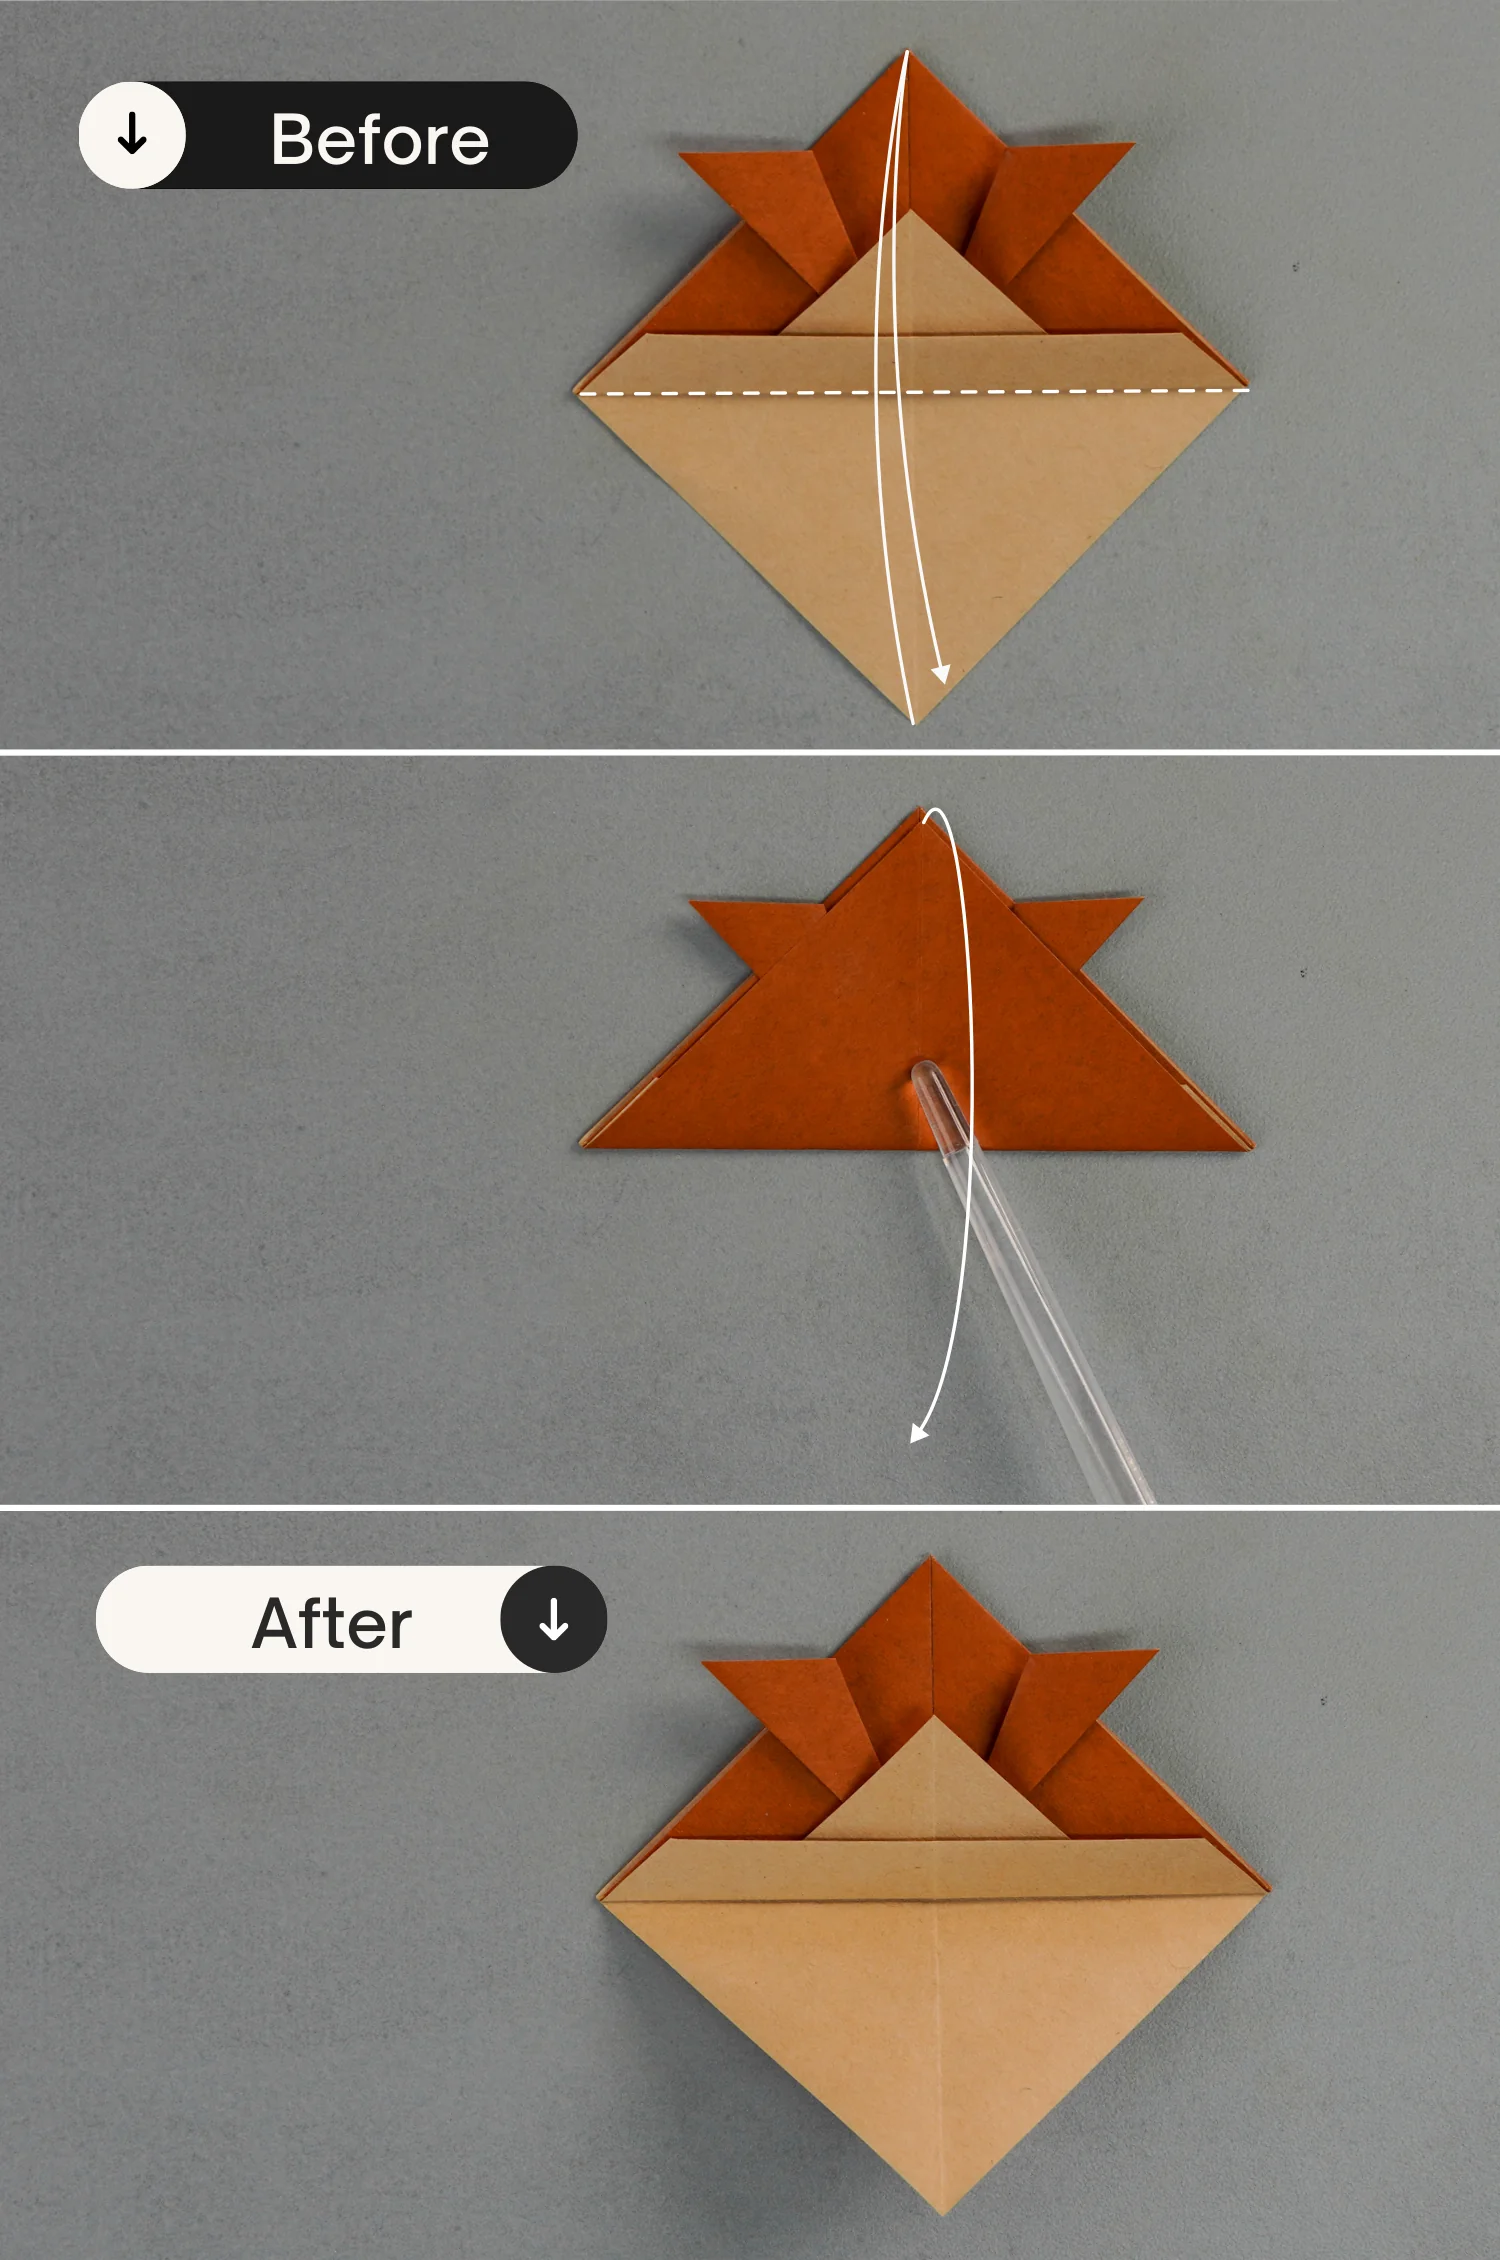
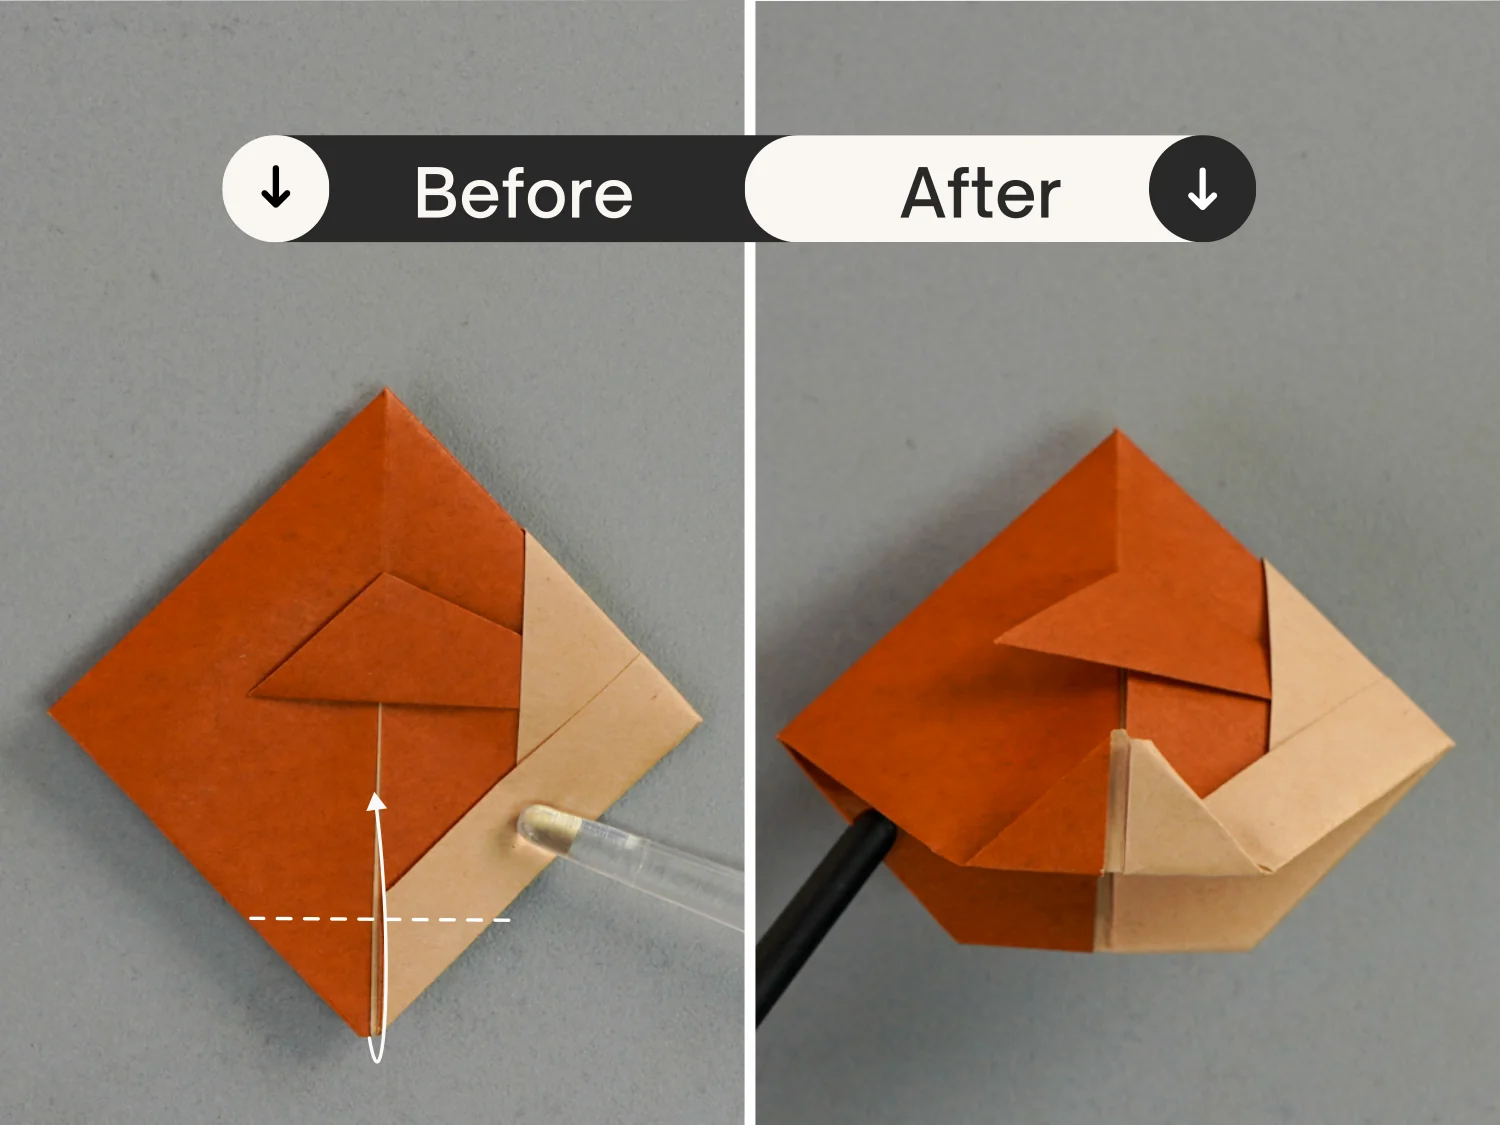
Step 10
Repeat step 9, but tuck the bottom triangle into the top pocket.
Step 11
Rotate it 90 degrees vertically from the right to the left, and slightly open the bottom opening, then press the top point to the bottom point.
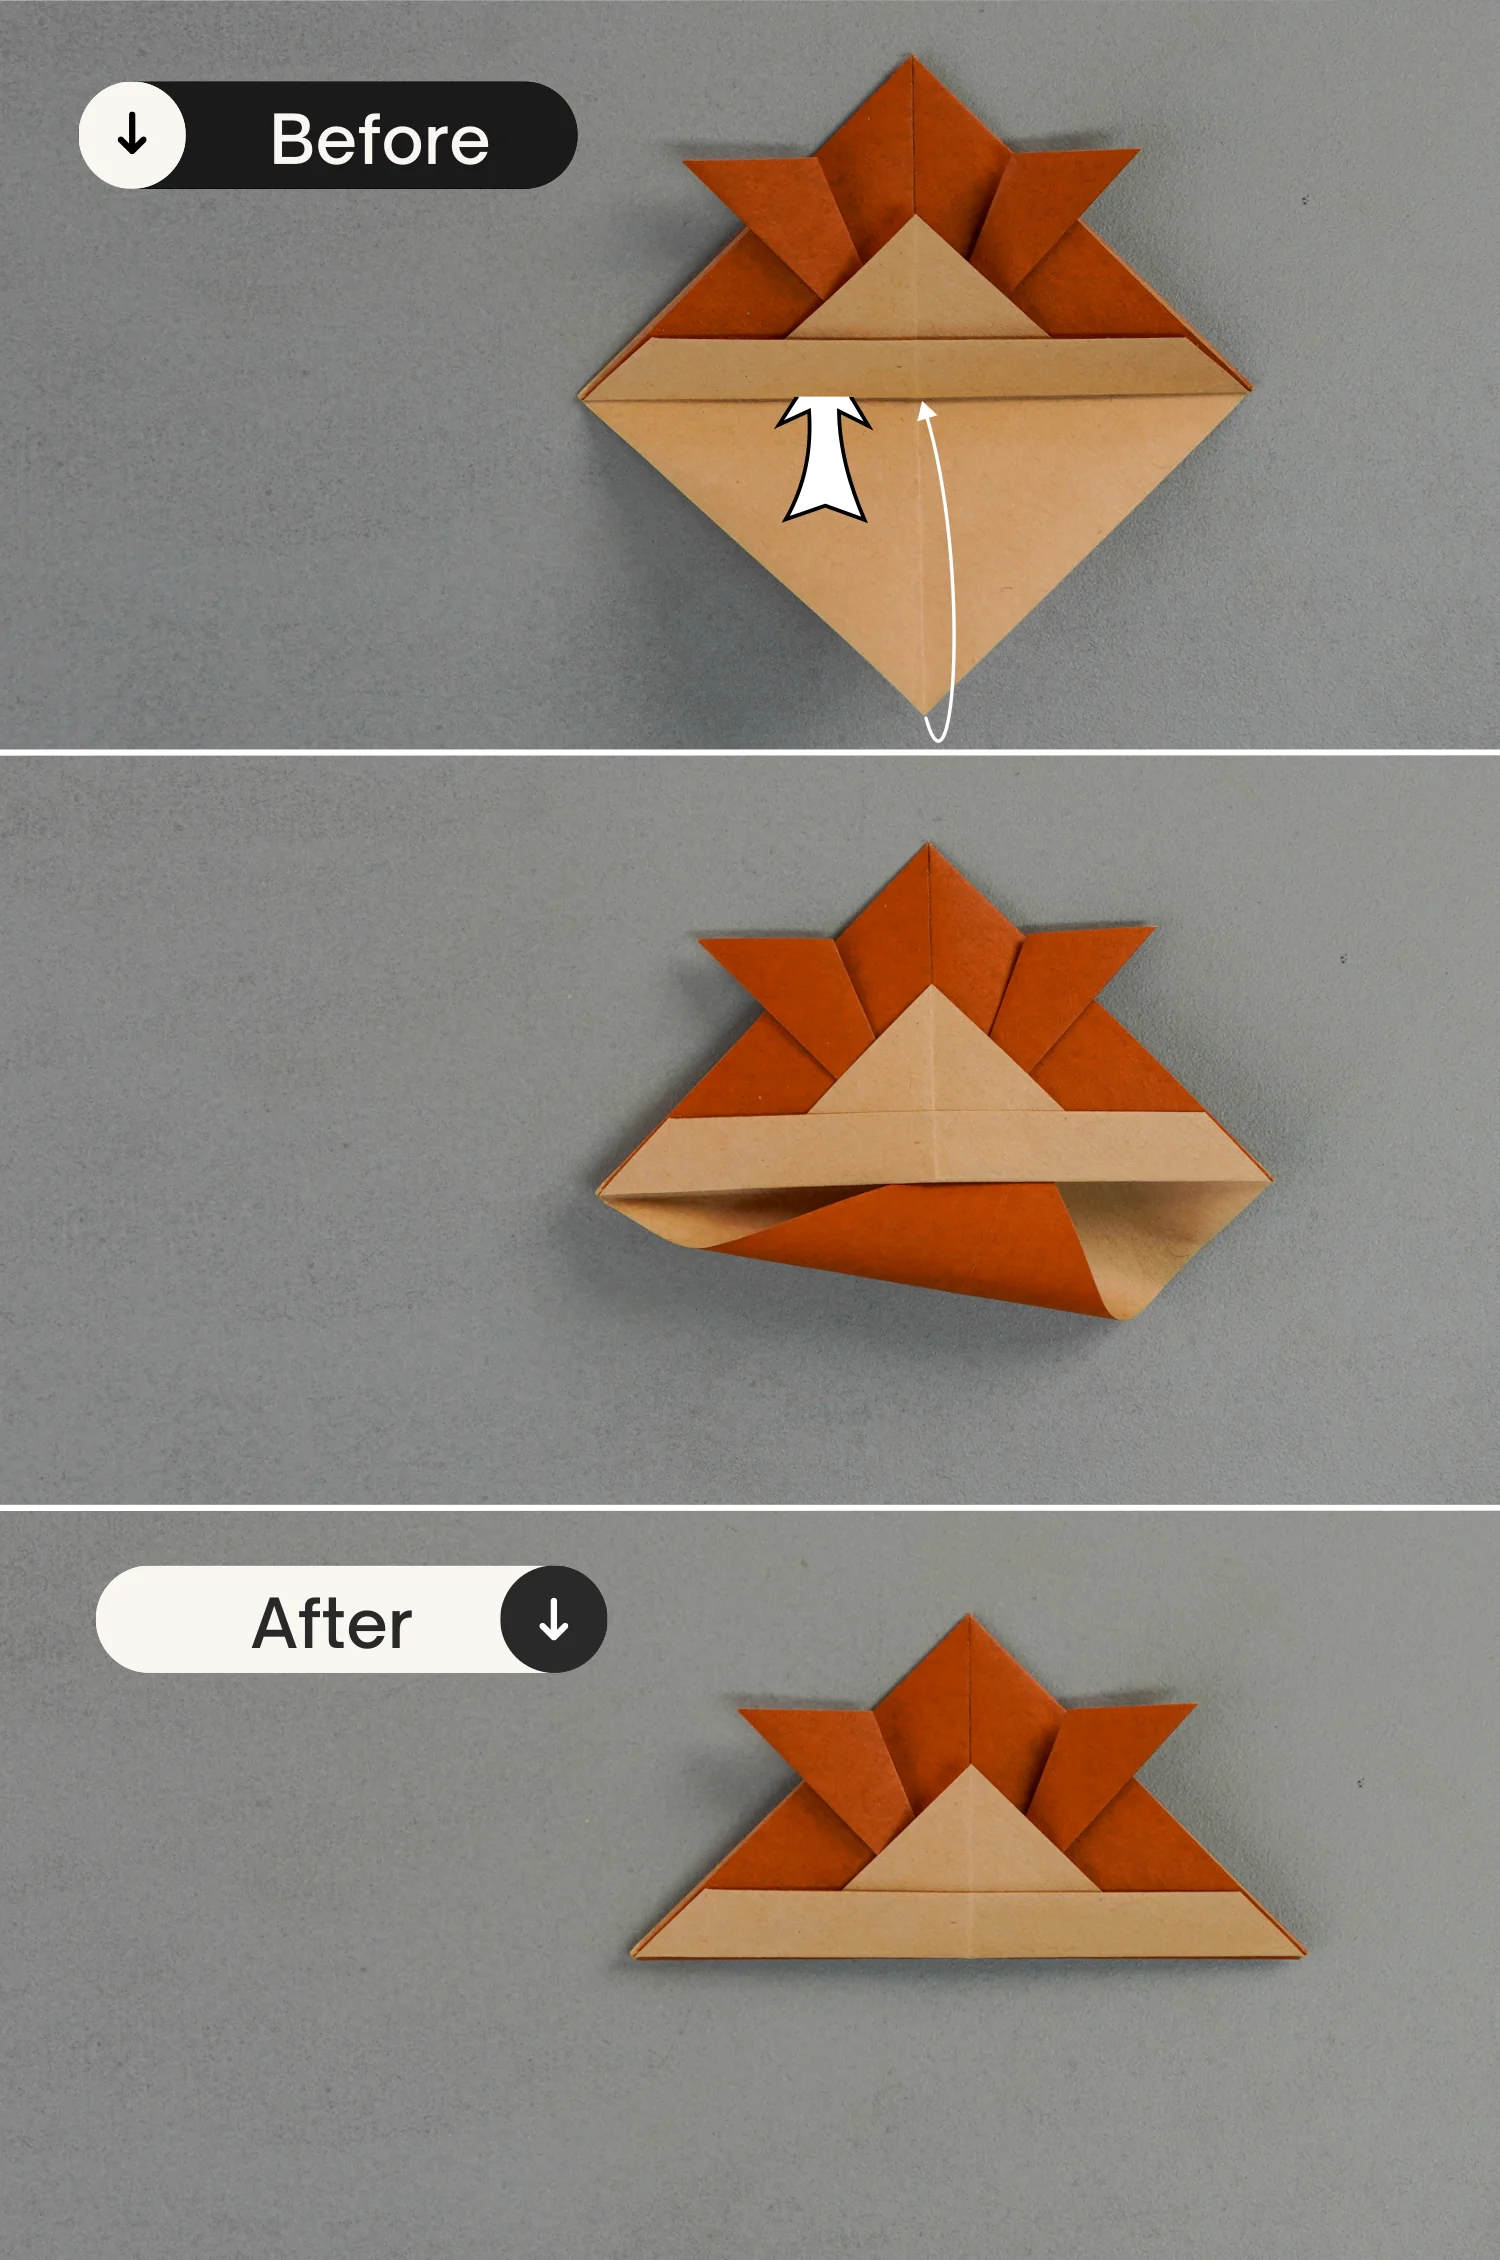
Step 12
Fold up the bottom point of the top layer.
Step 13
Flip the paper over.

Step 14
Similarly, fold the bottom point up to make the two bottom edges overlap.
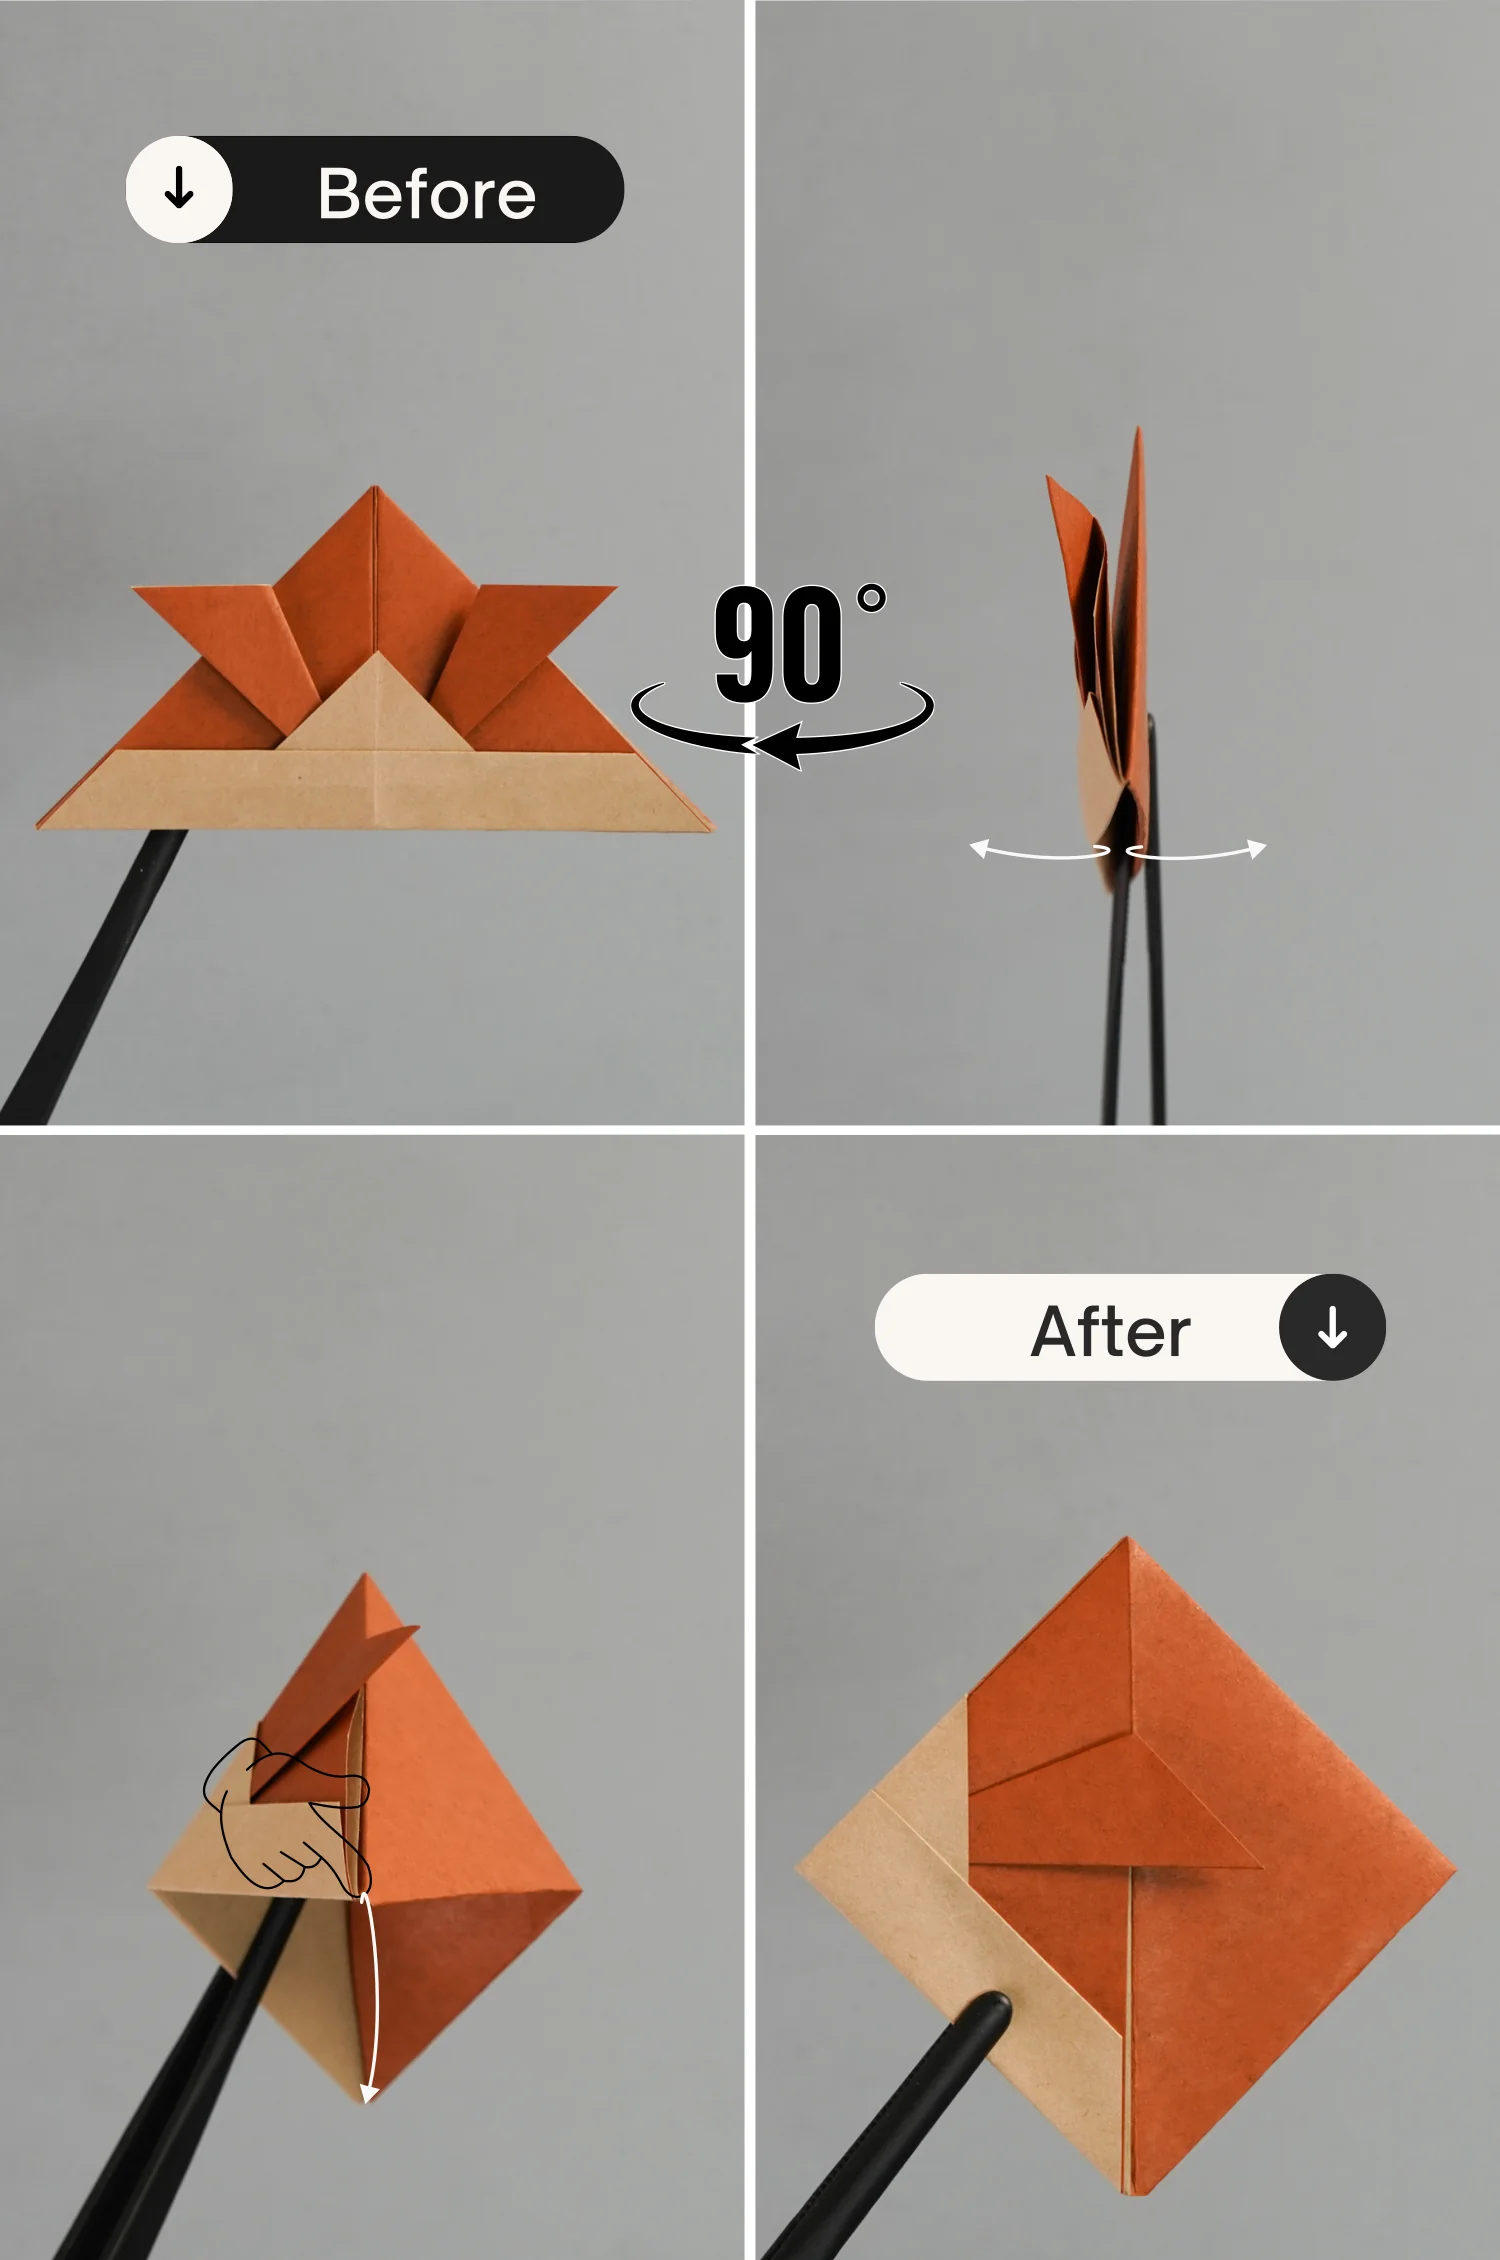
Step 15
Slightly open the bottom opening, push the left and right points together, then rotate the model 90 degrees vertically from the right to the left.
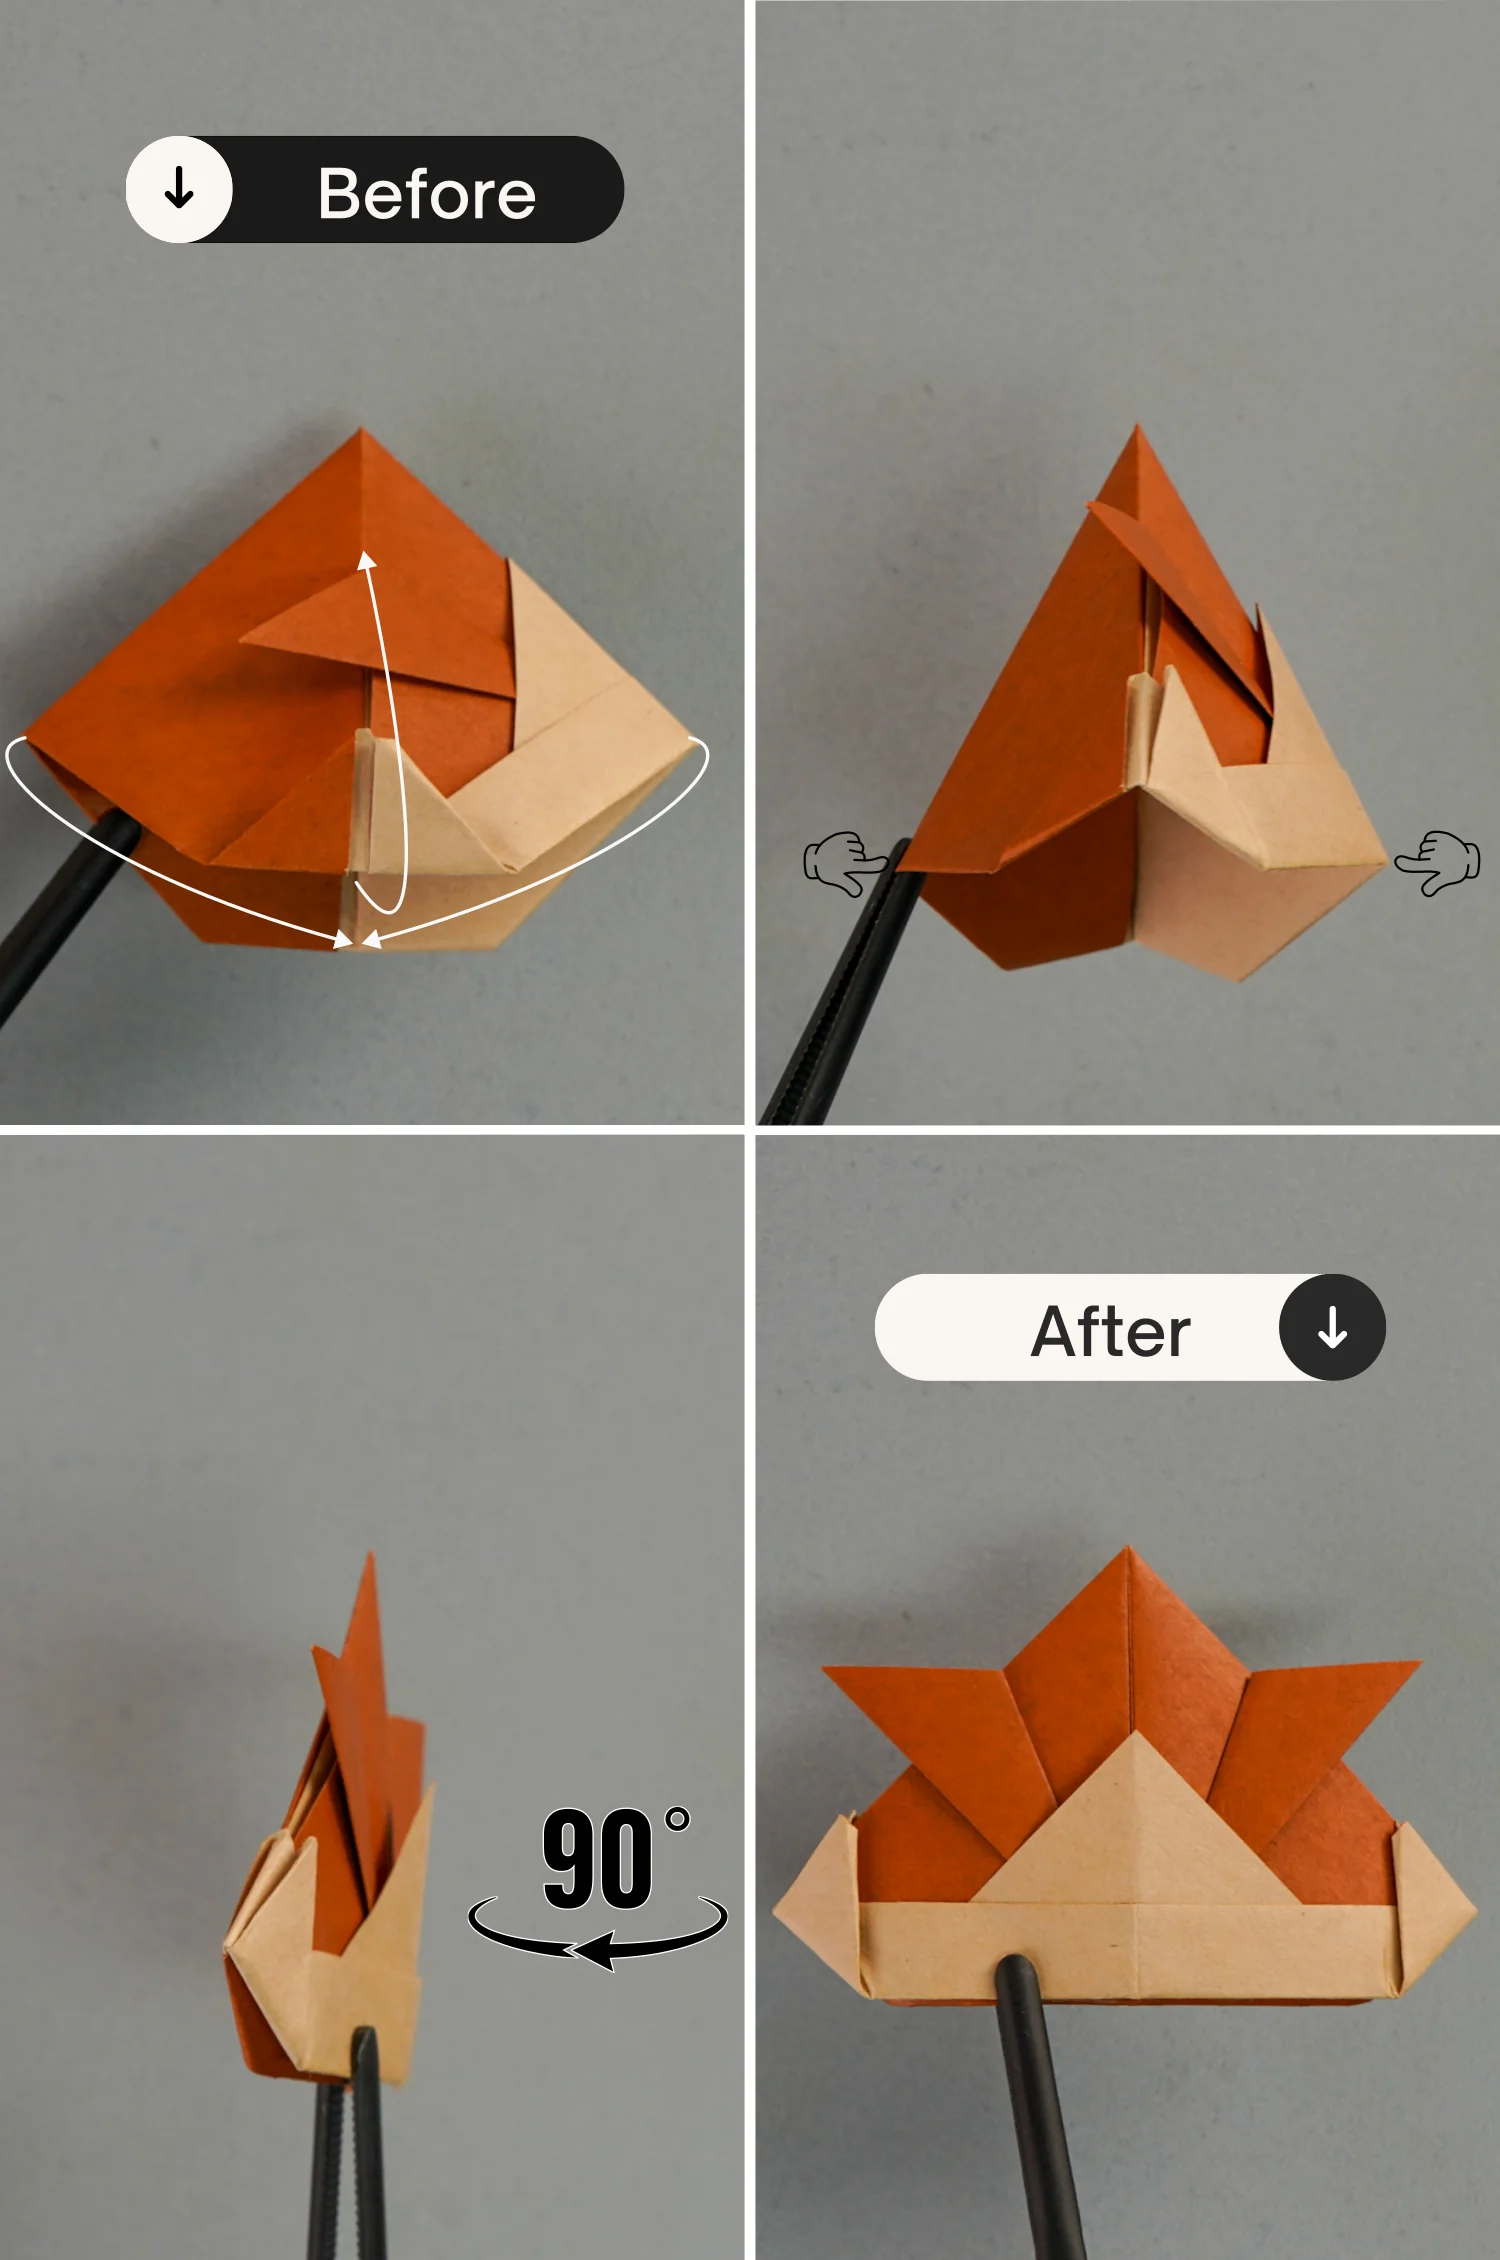
What’s Next
This is the final shape of your origami samurai hat, wearing it at a party would also be a great idea. Now you can explore our other interesting origami instructions. Happy folding!


