How to Fold an Origami Rectangle Box with Lid
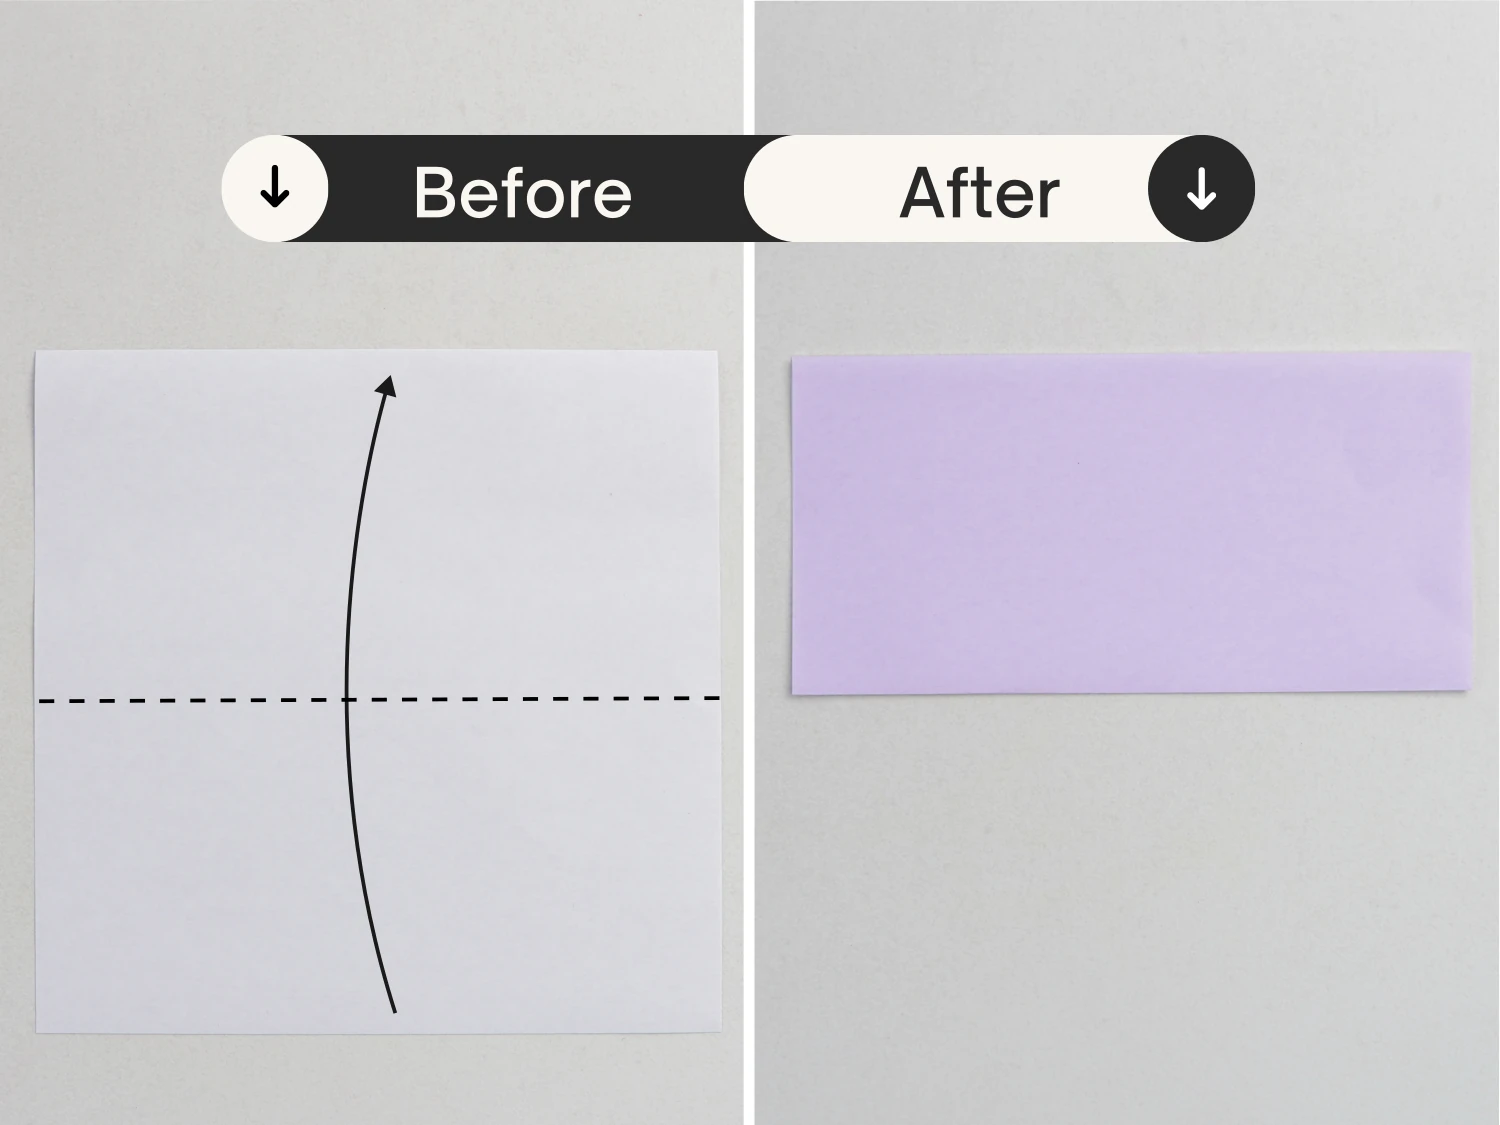
Step 1
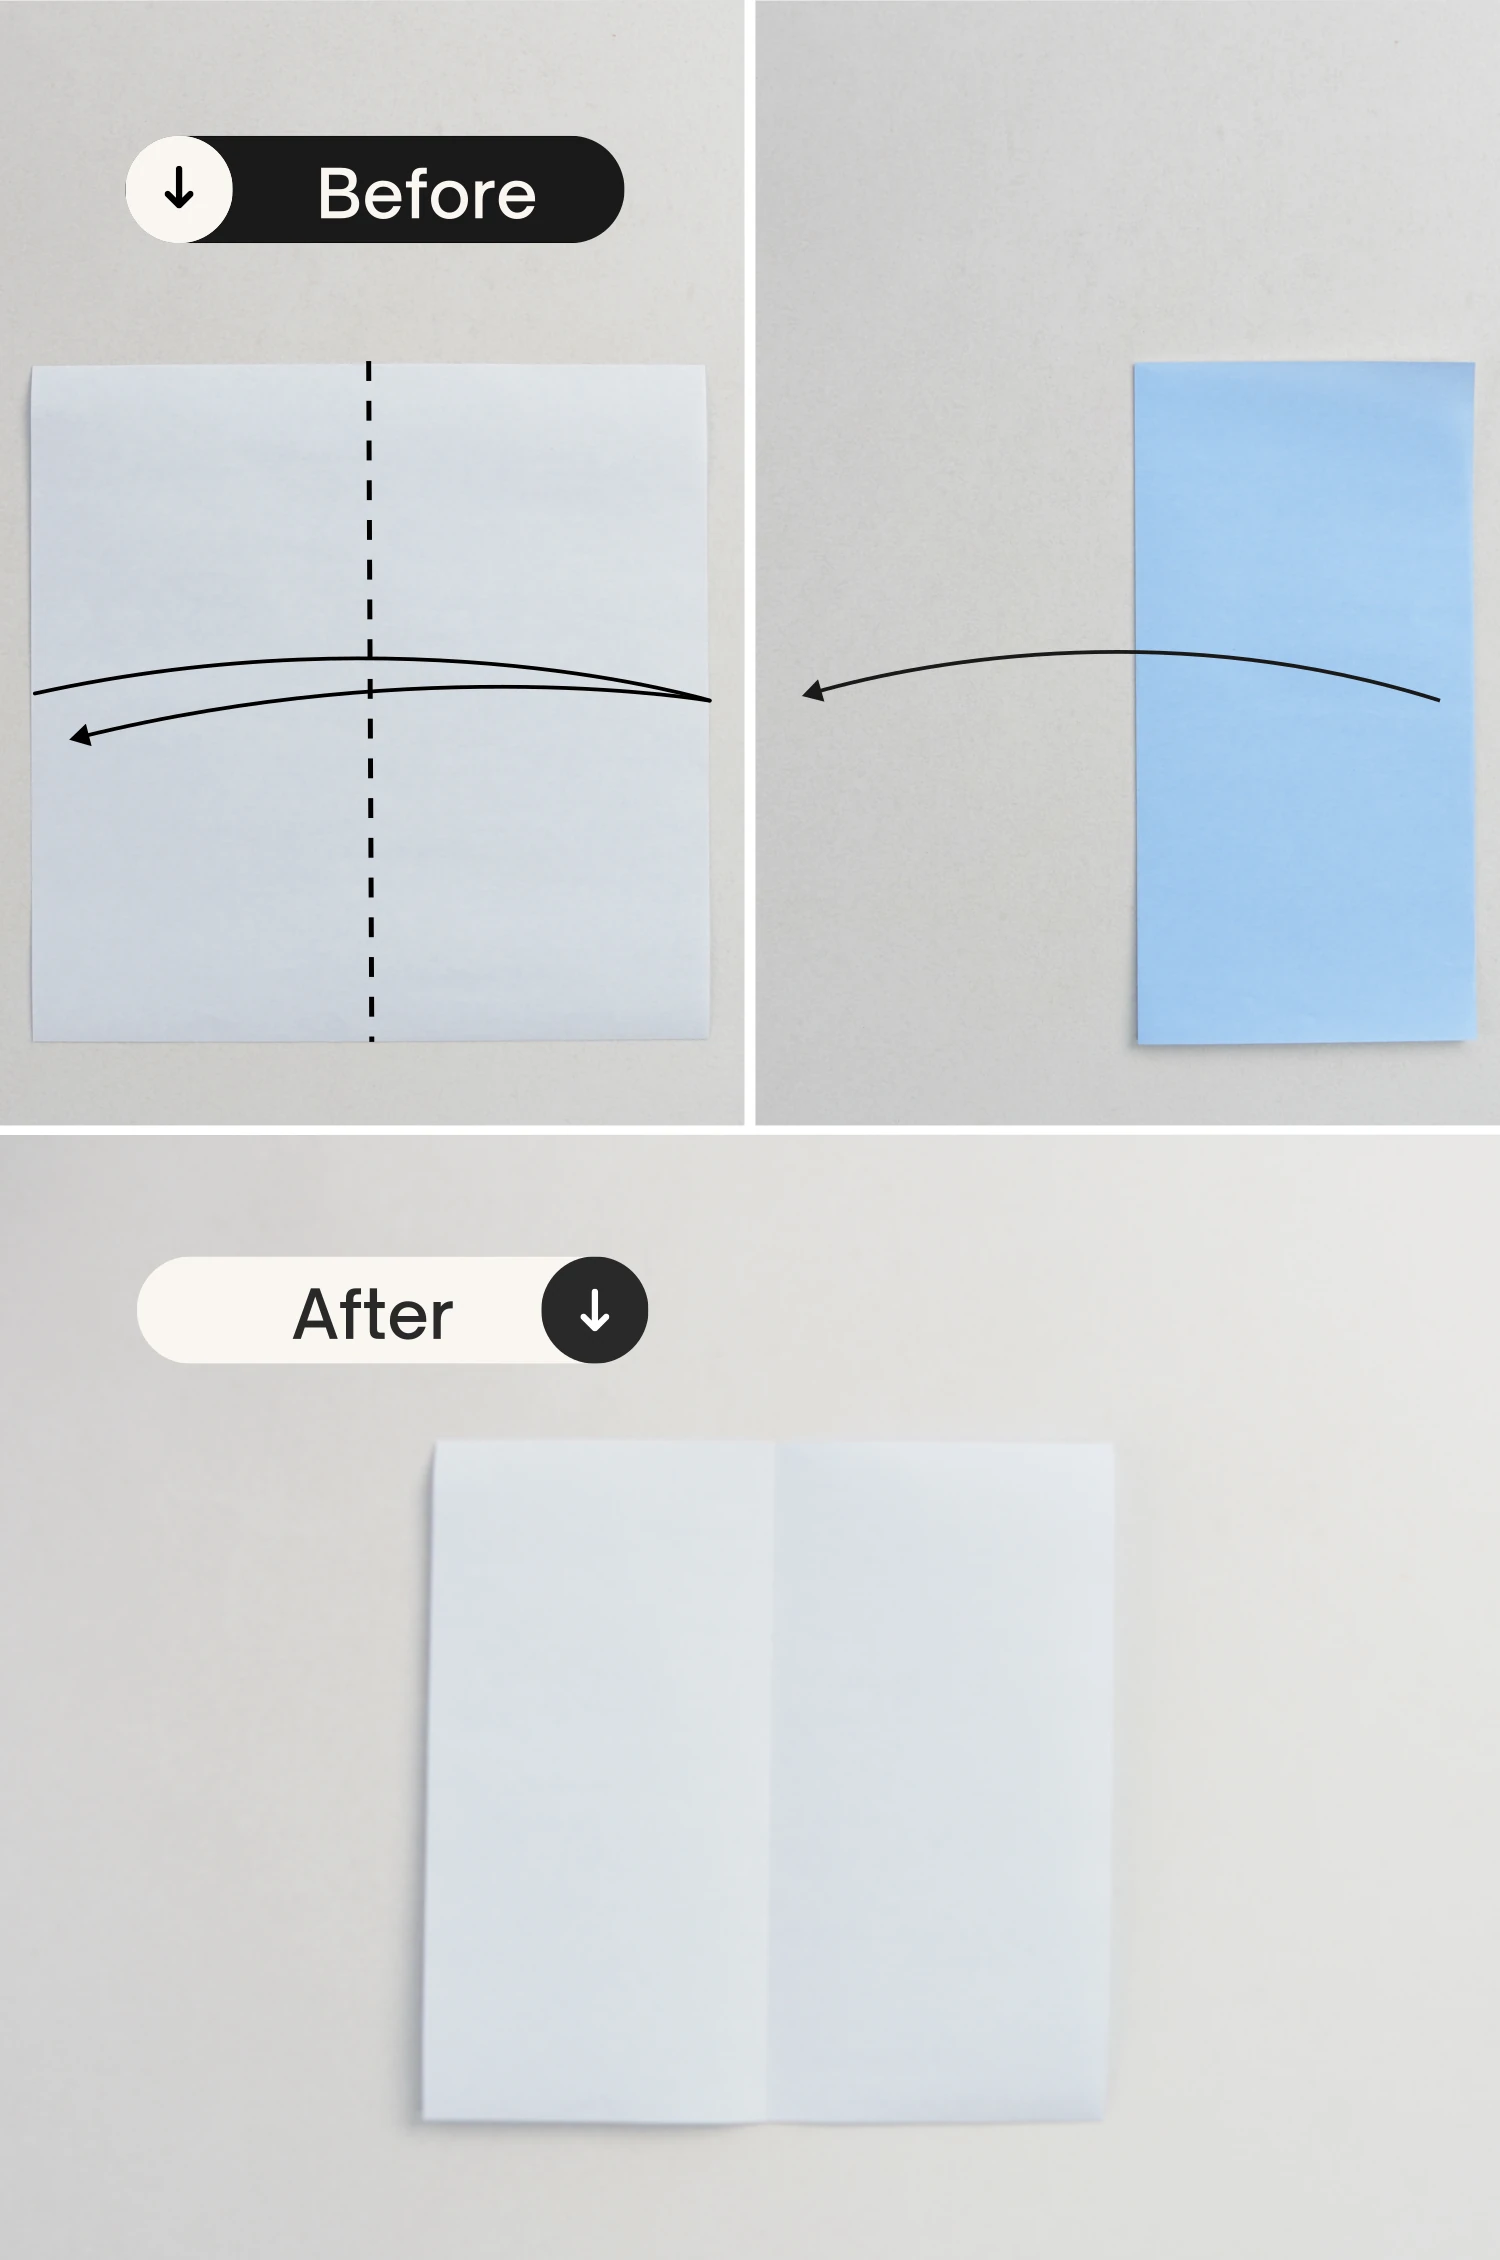
Take out one of the papers, and start with the white side of the paper facing up. Fold in half horizontally.
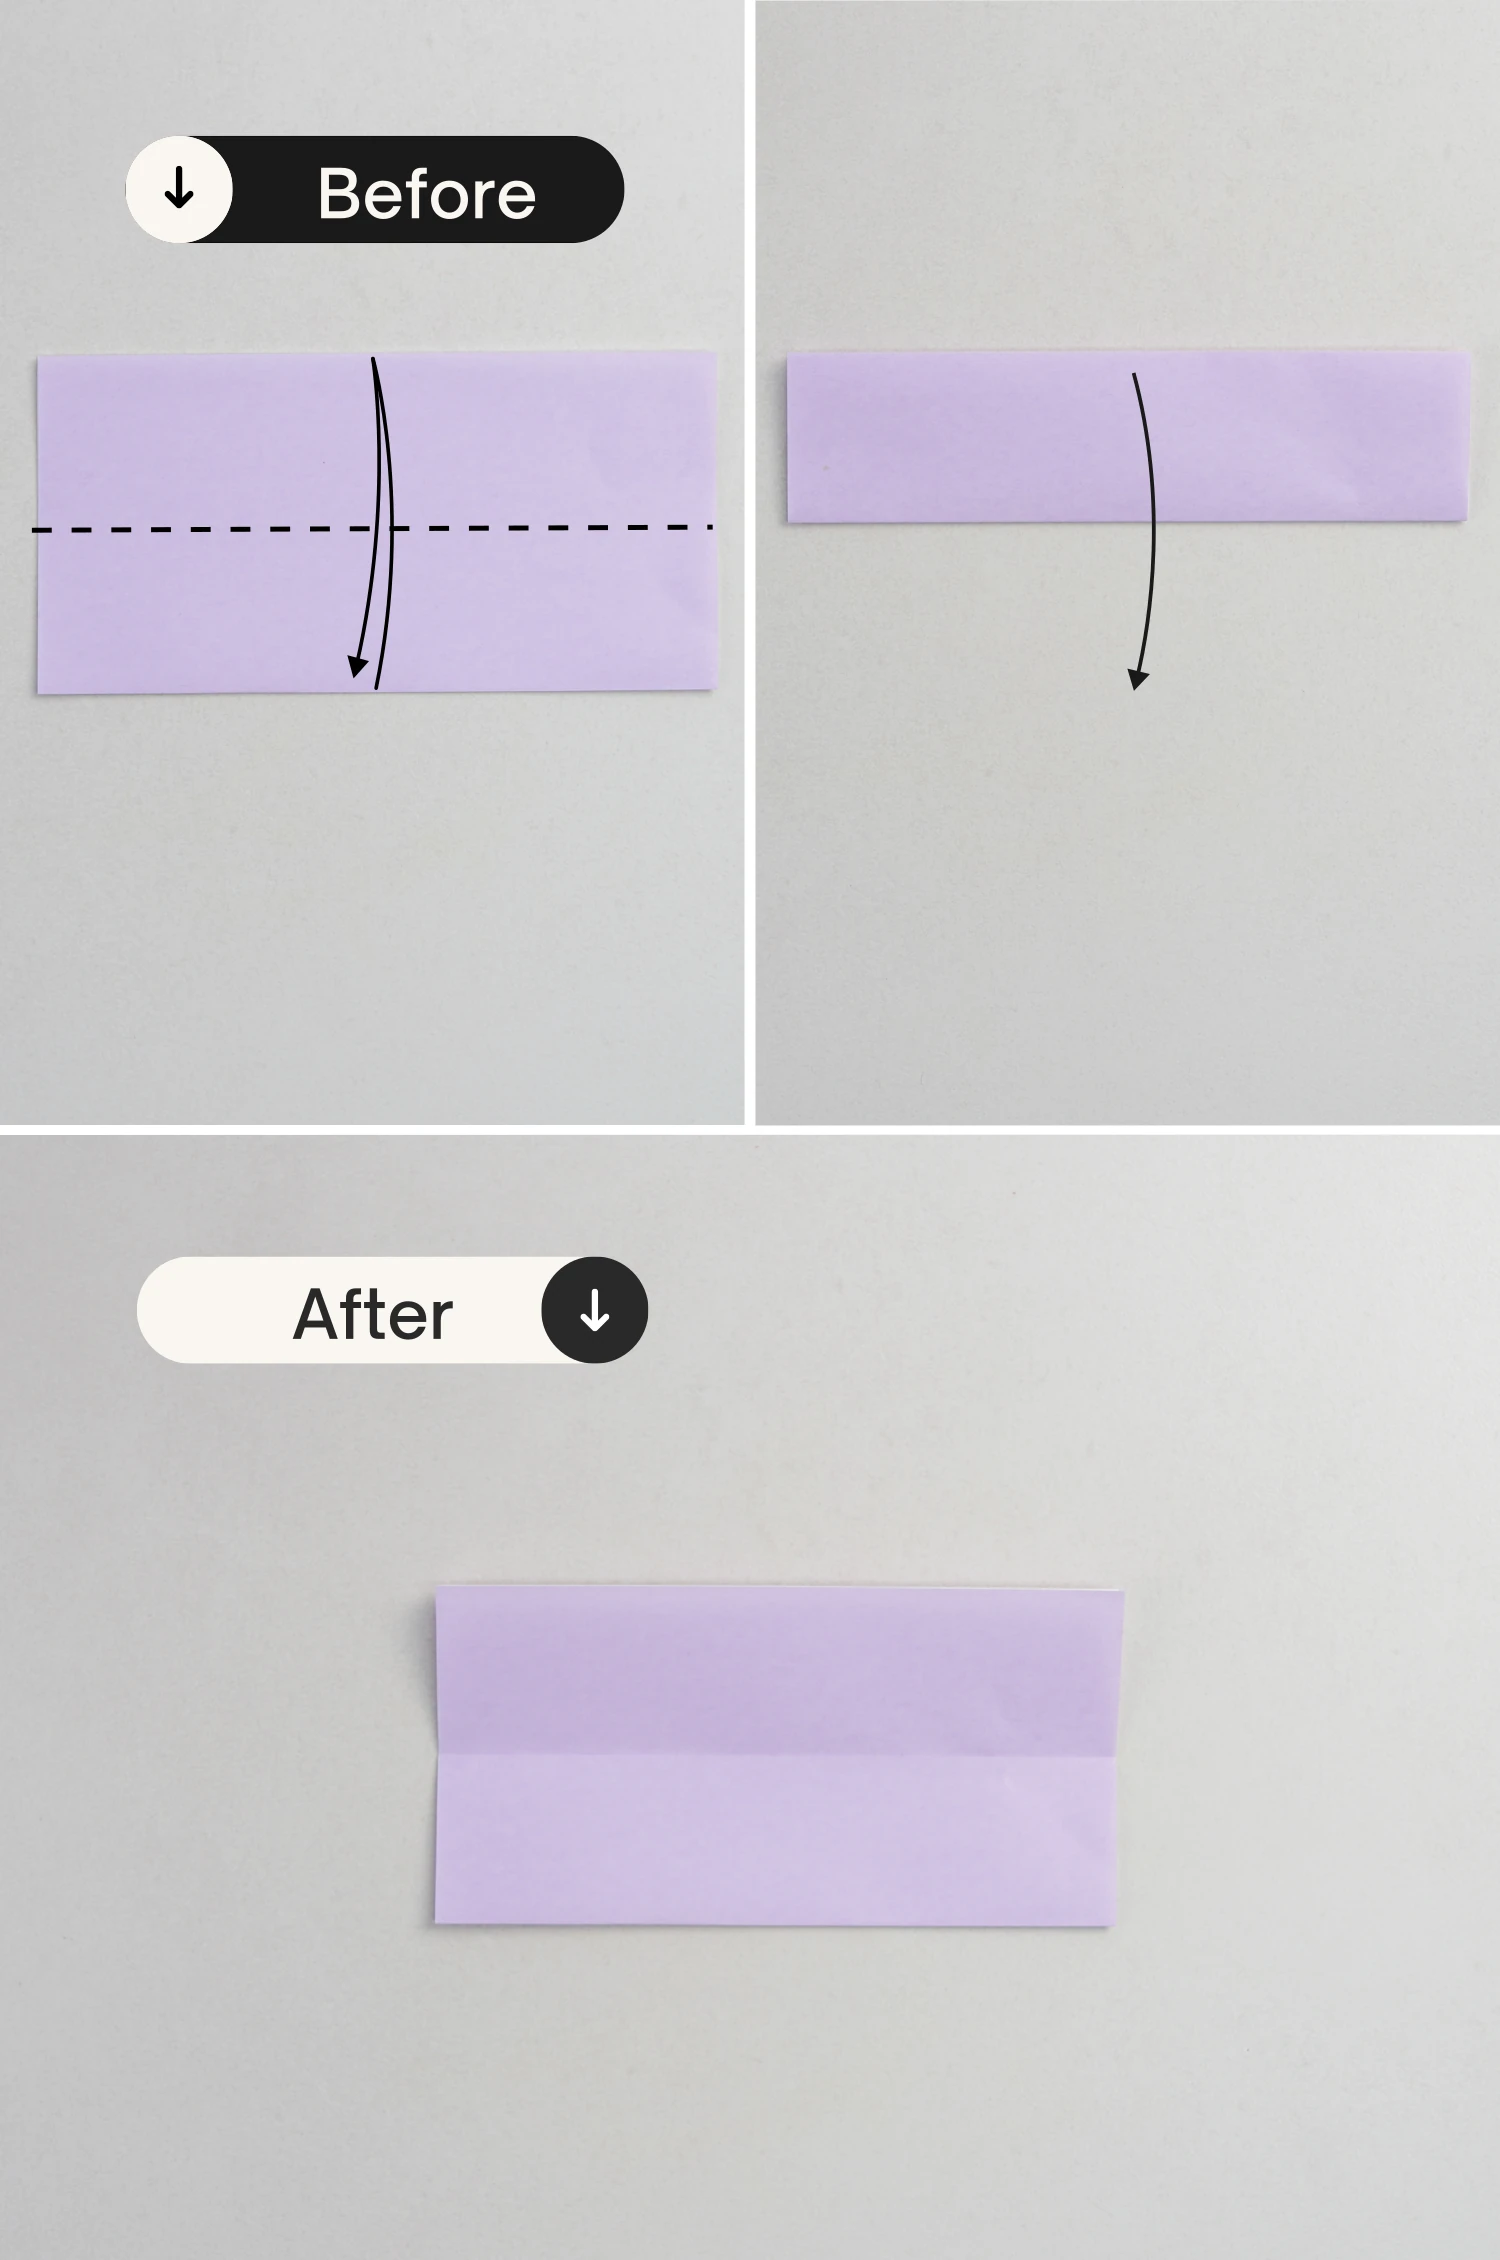
Step 2
Fold it in half horizontally again, crease it well then unfold.
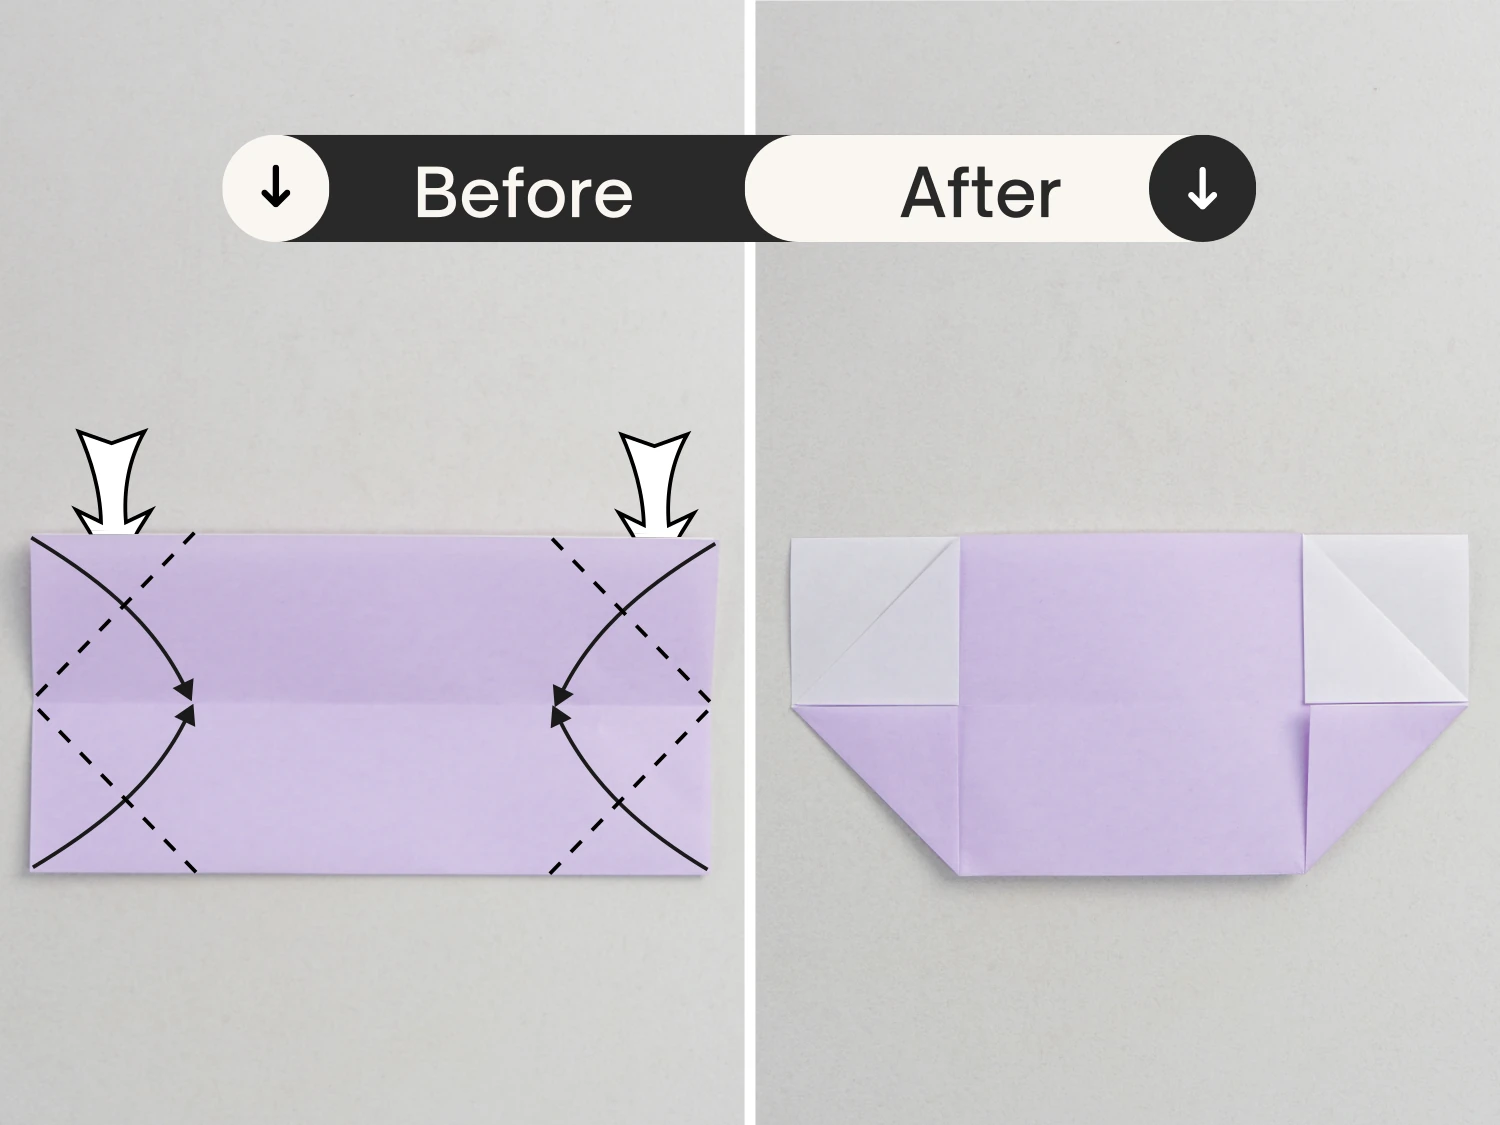
Step 3
Fold the top left and top right corners of the top layer down diagonally to meet the horizontal crease.
Repeat this for the bottom left and bottom right corners.
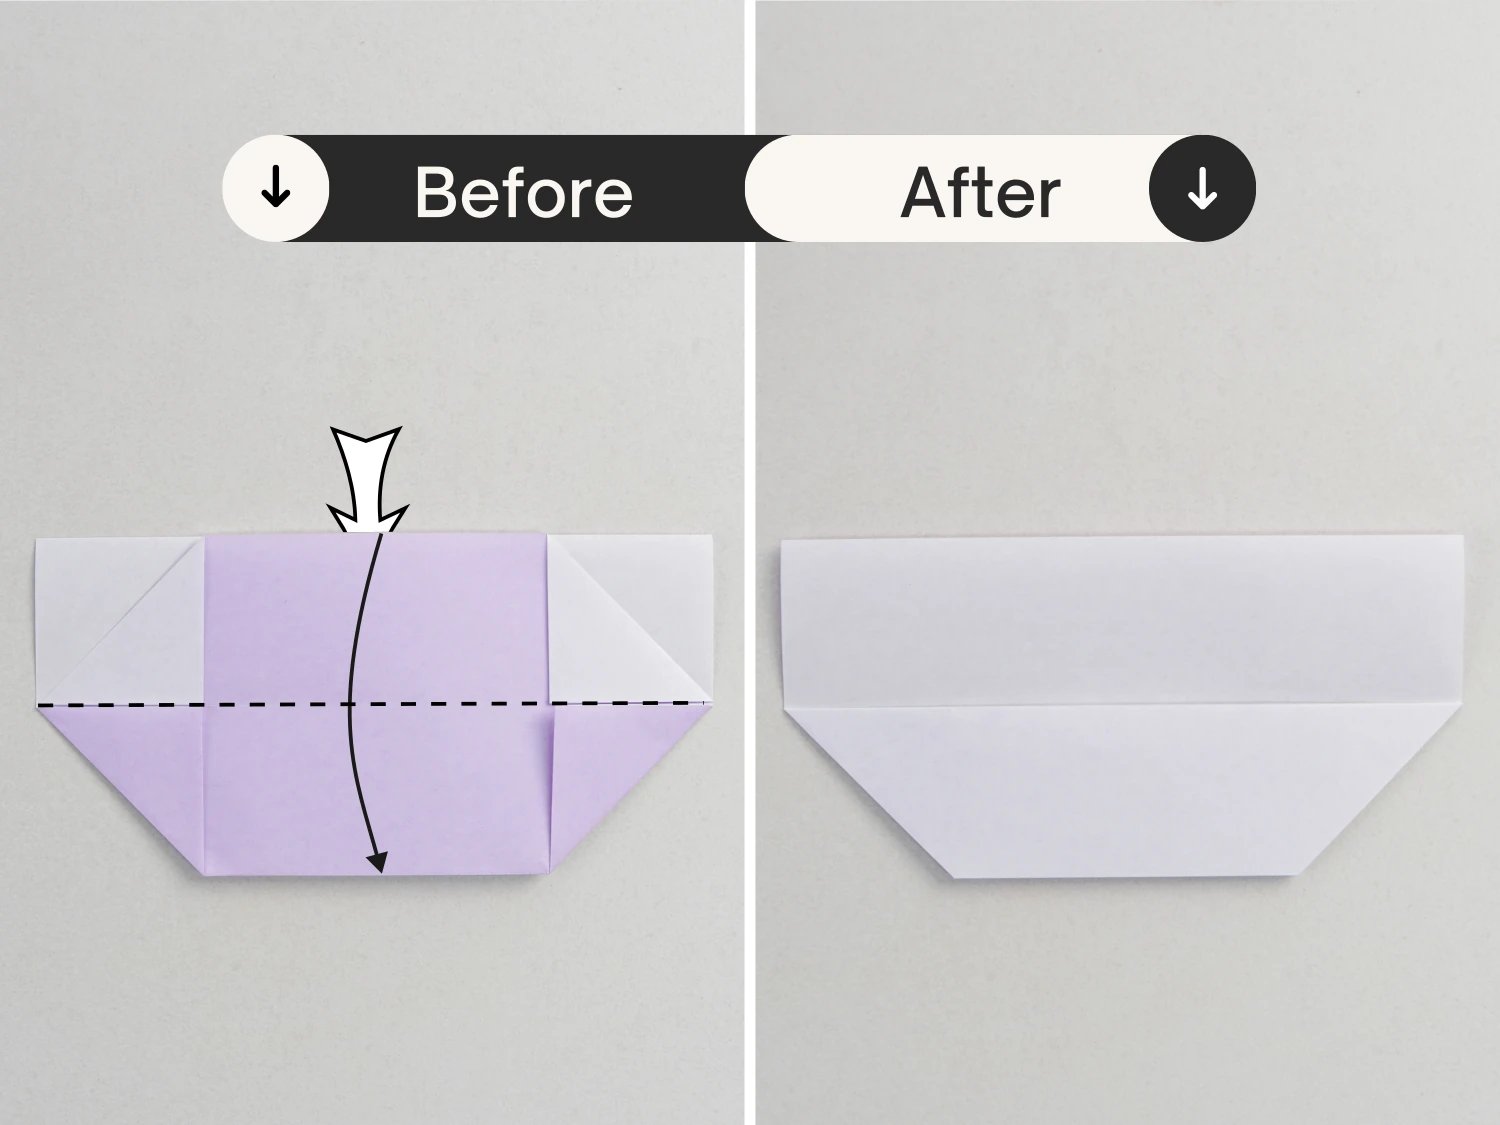
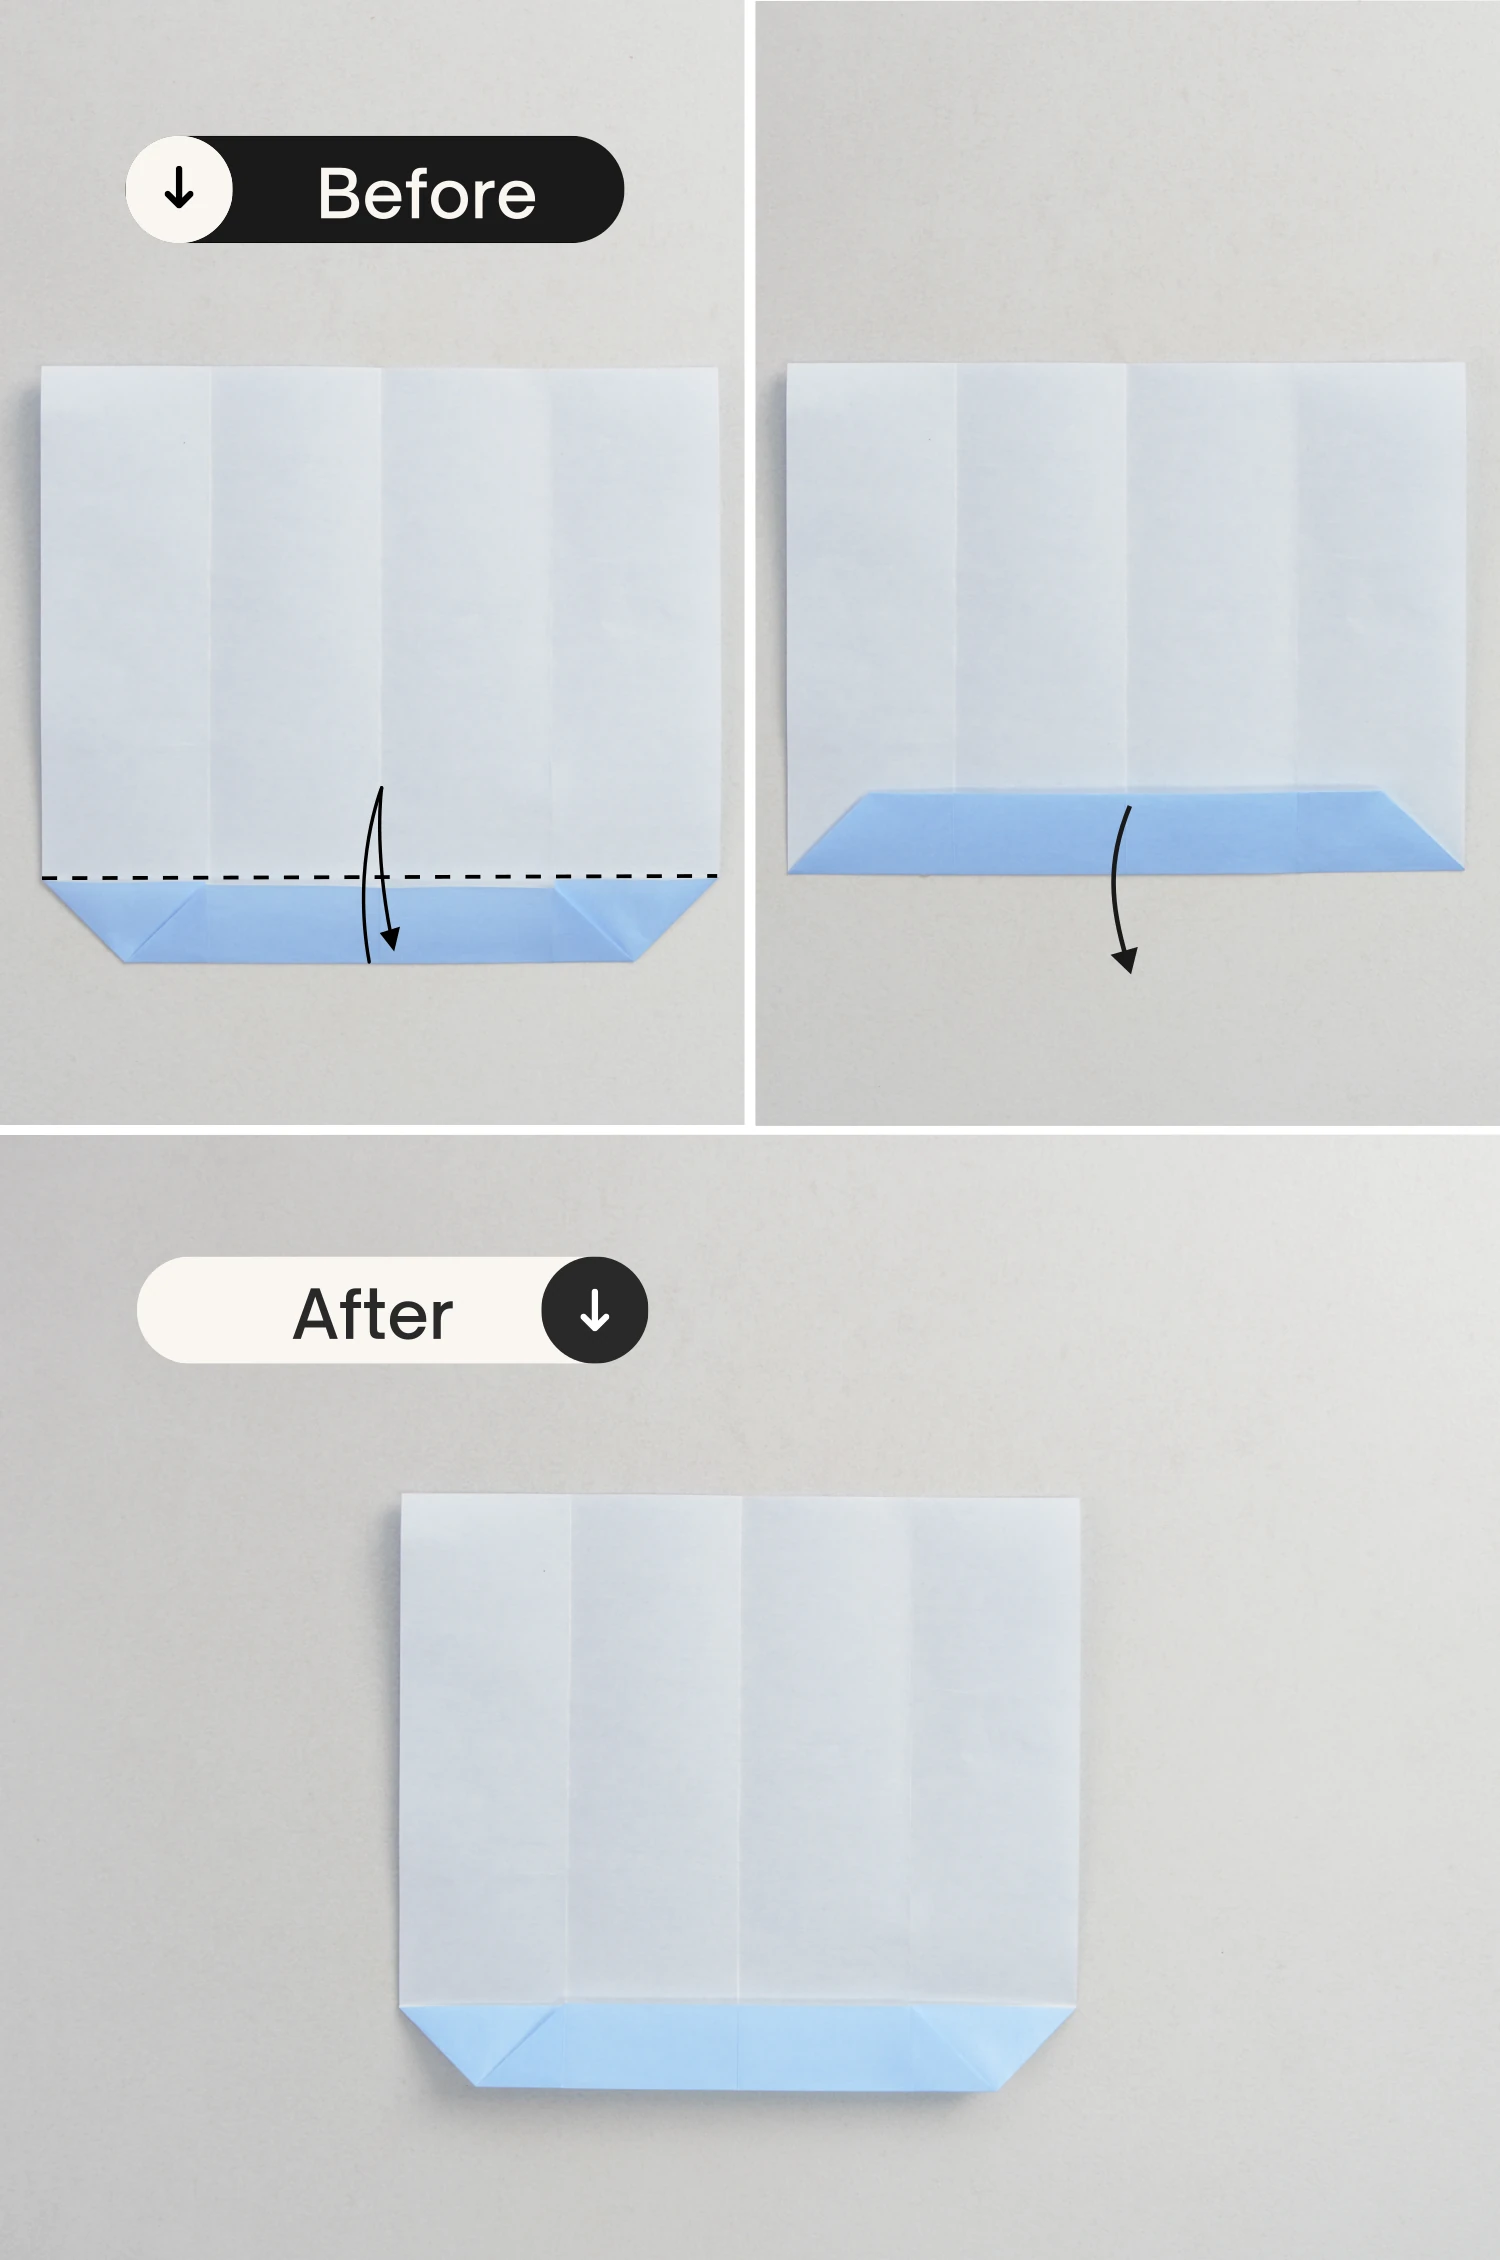
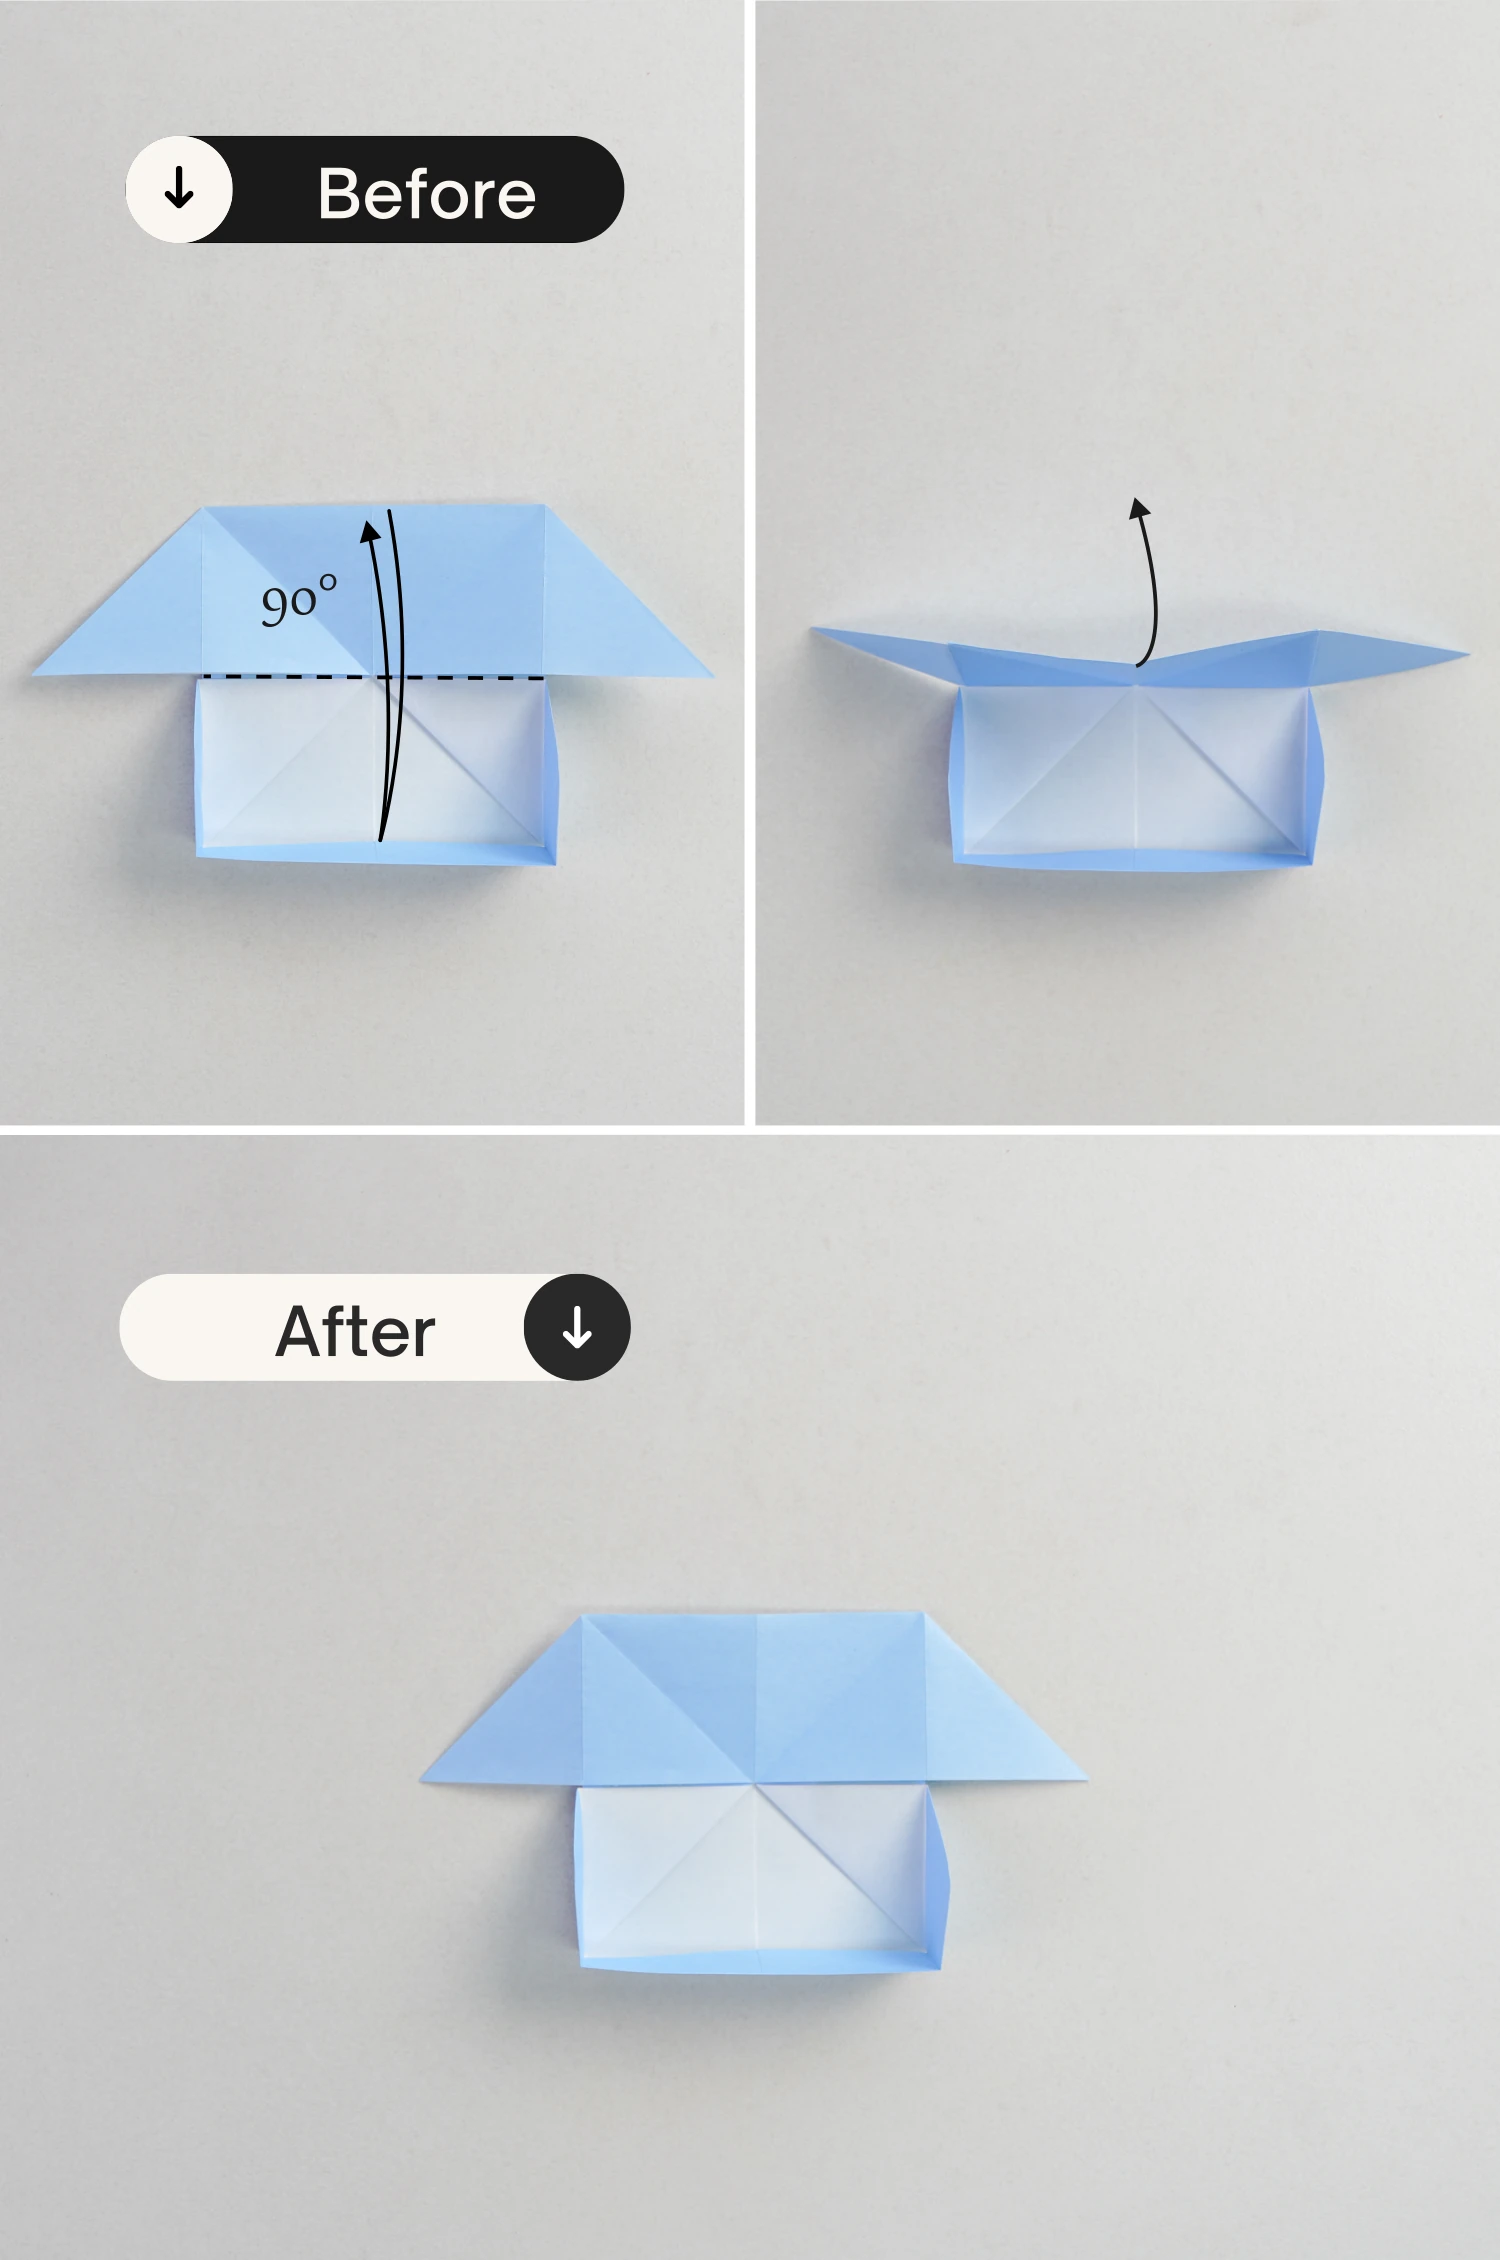
Step 4
Fold the top edge of the top layer down along the horizontal crease.
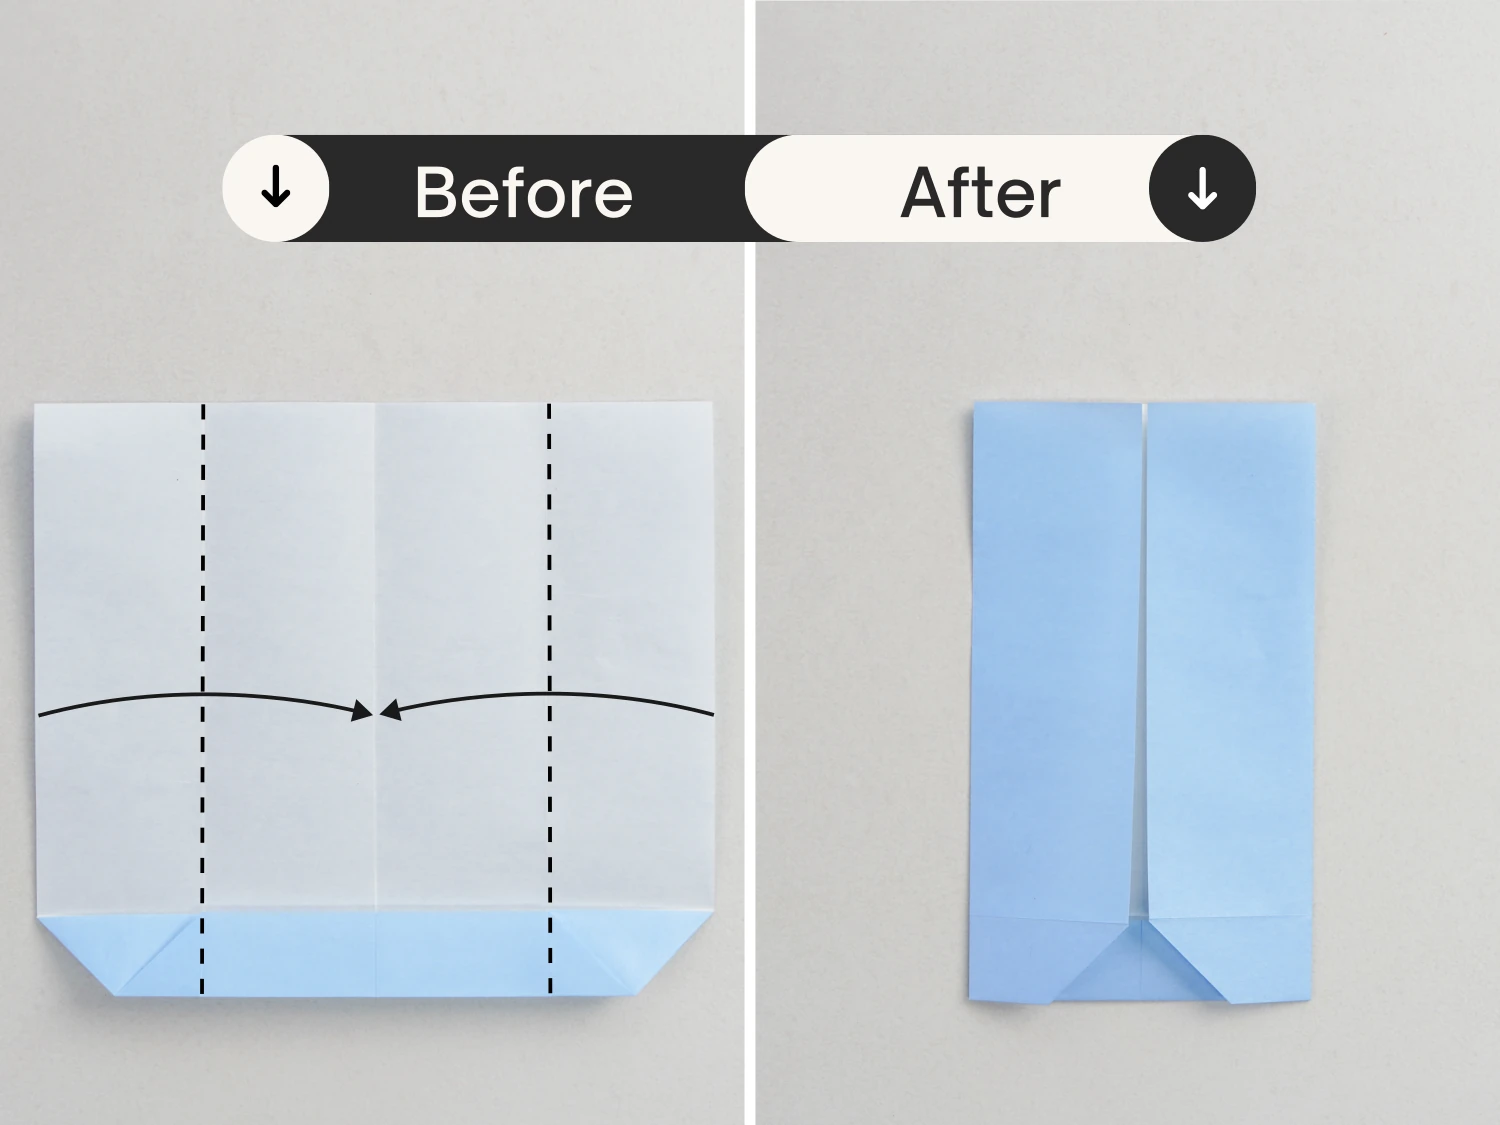
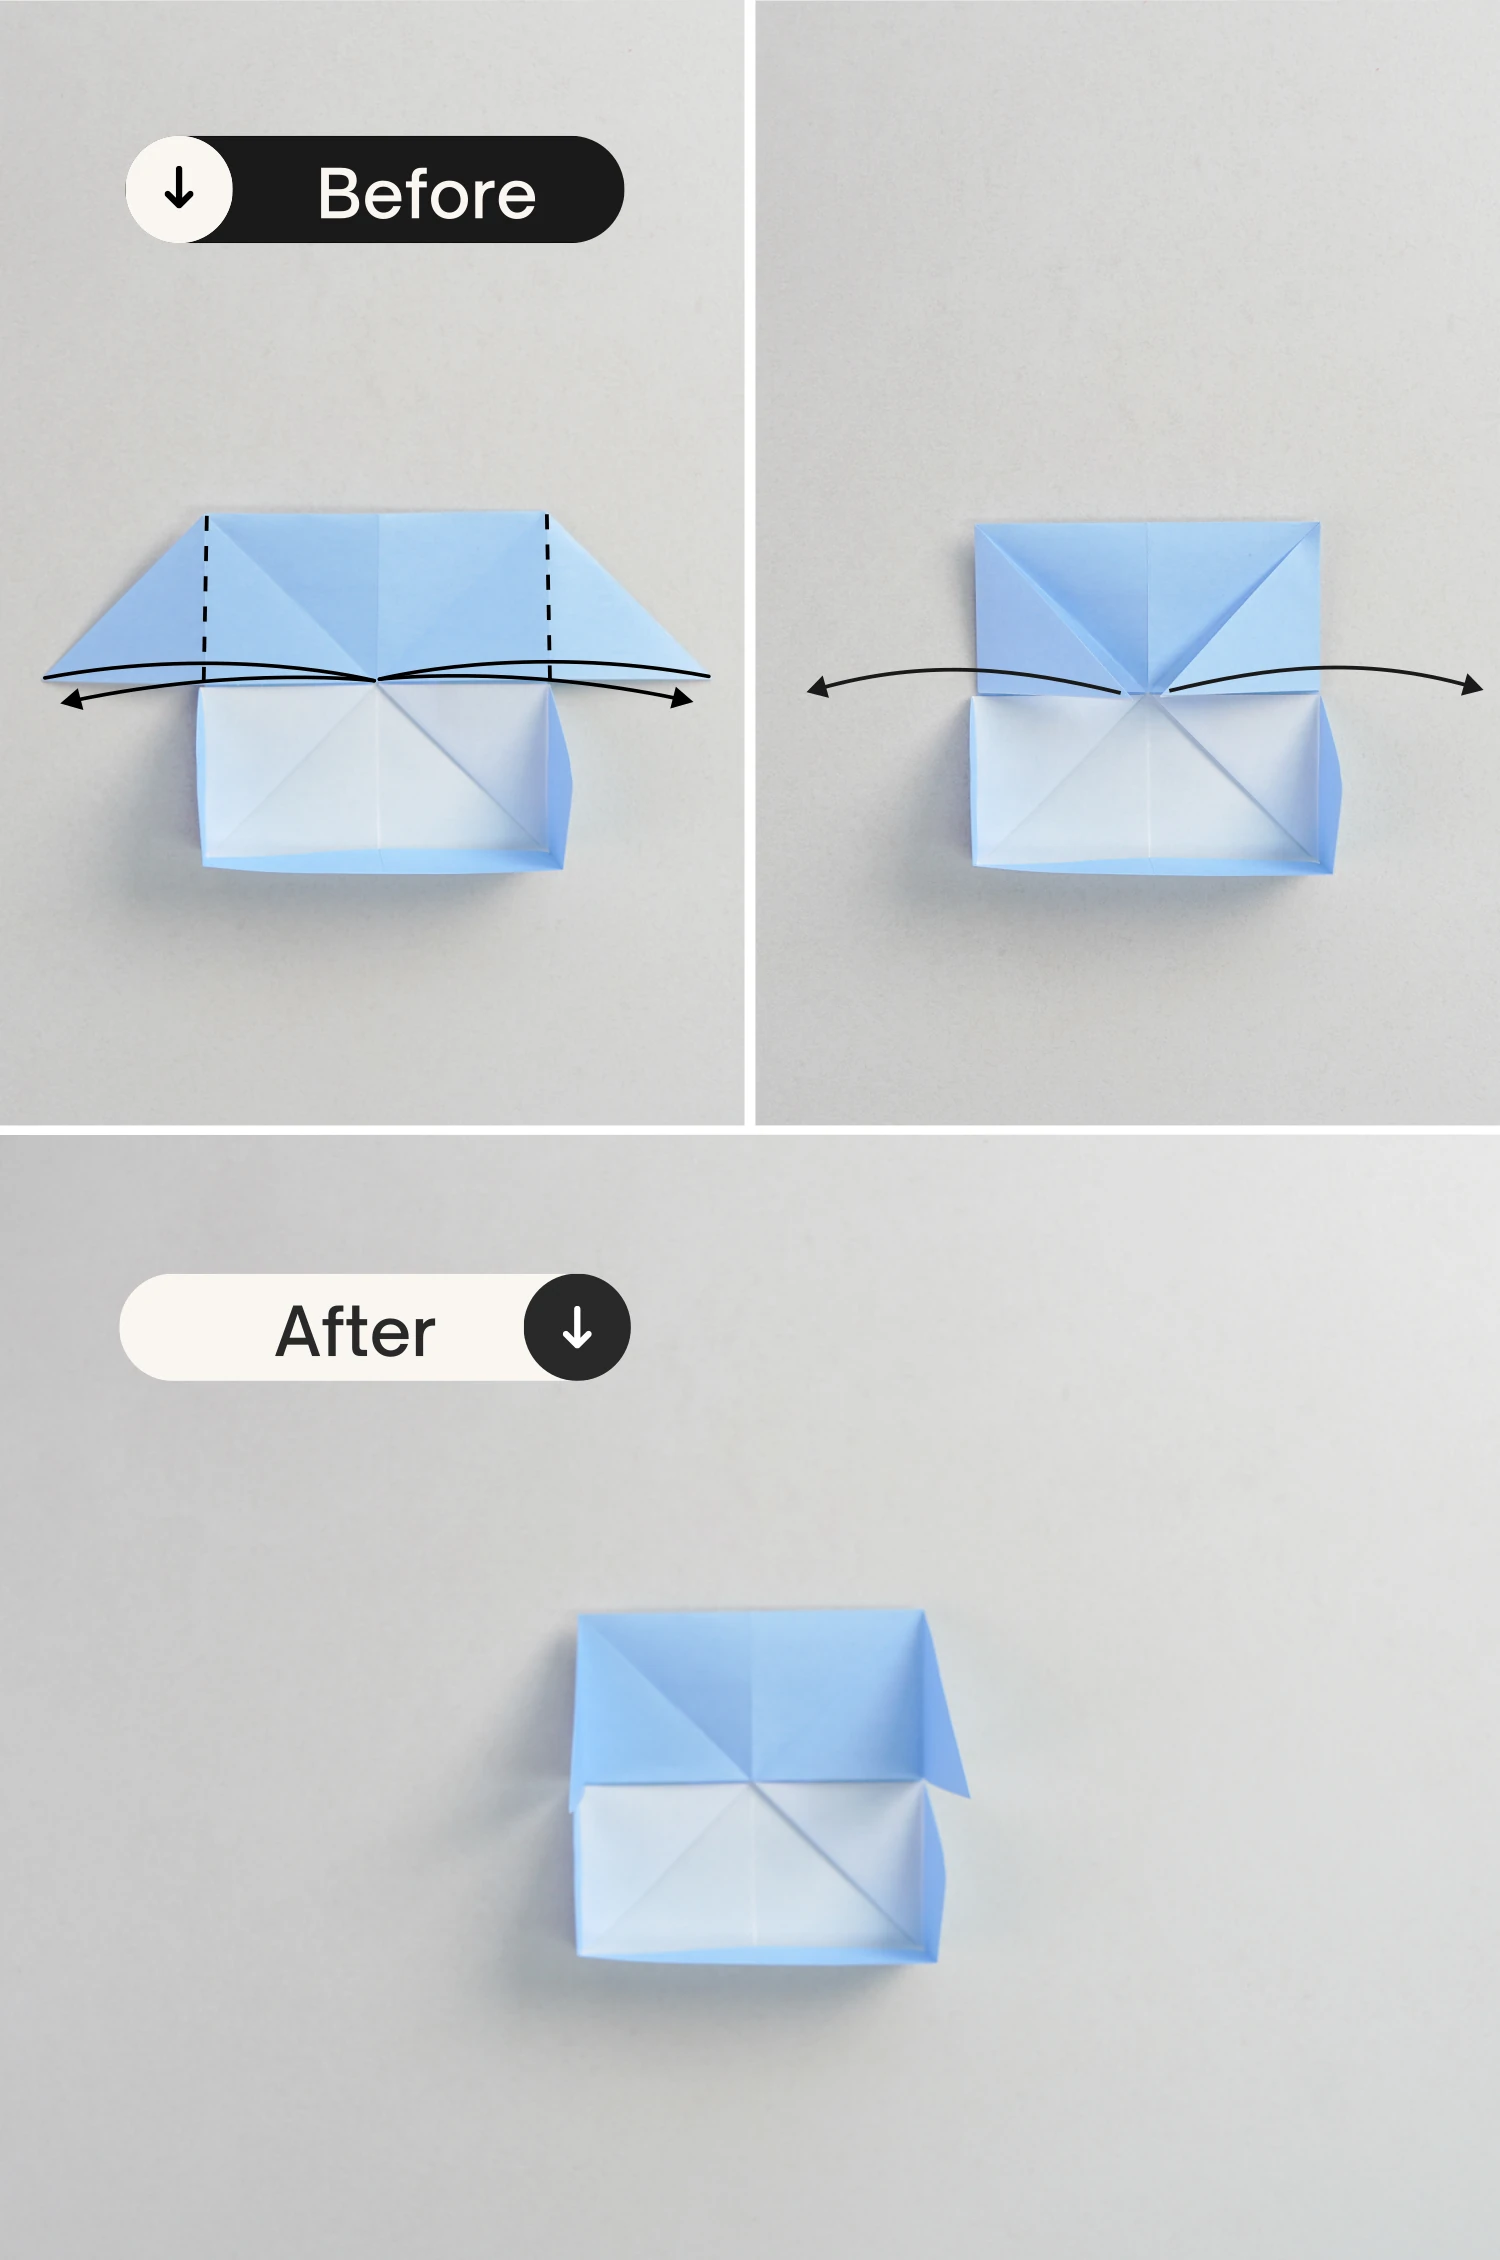
Step 5
Fold both the left and right edges toward the center along the dotted lines, making them meet at the center, crease well then unfold.

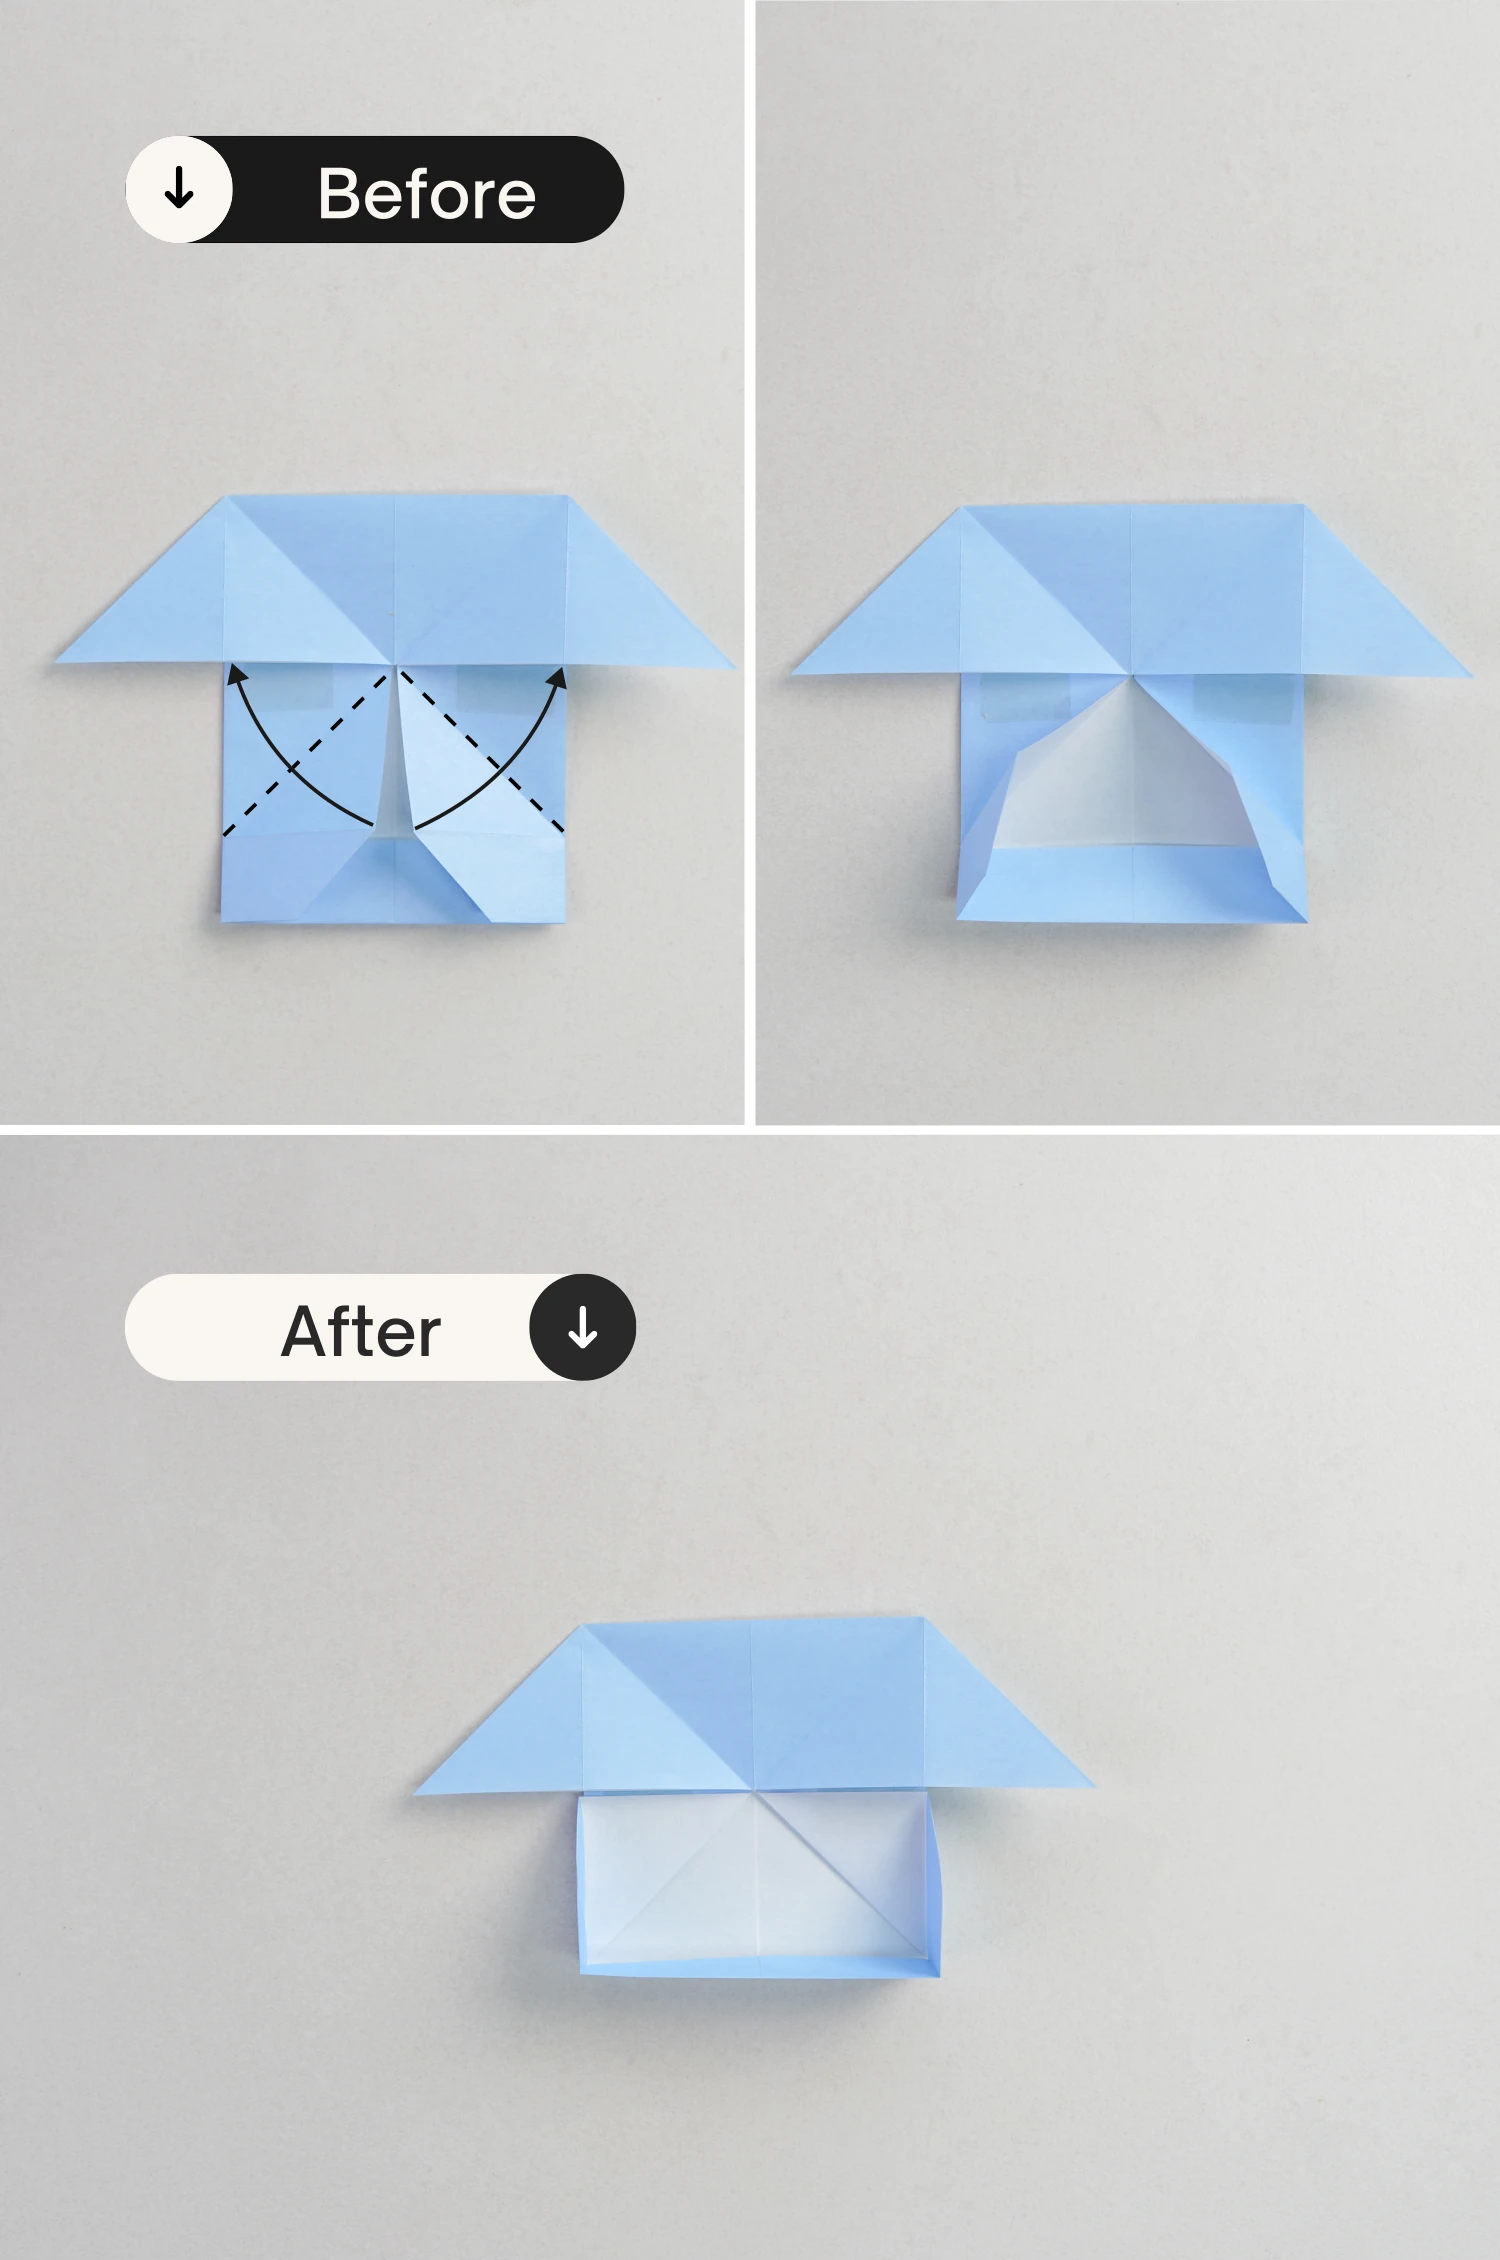
Step 6
Lift the top layer to make it stand, adjust and shape two right angles along the creases you made in the previous step.

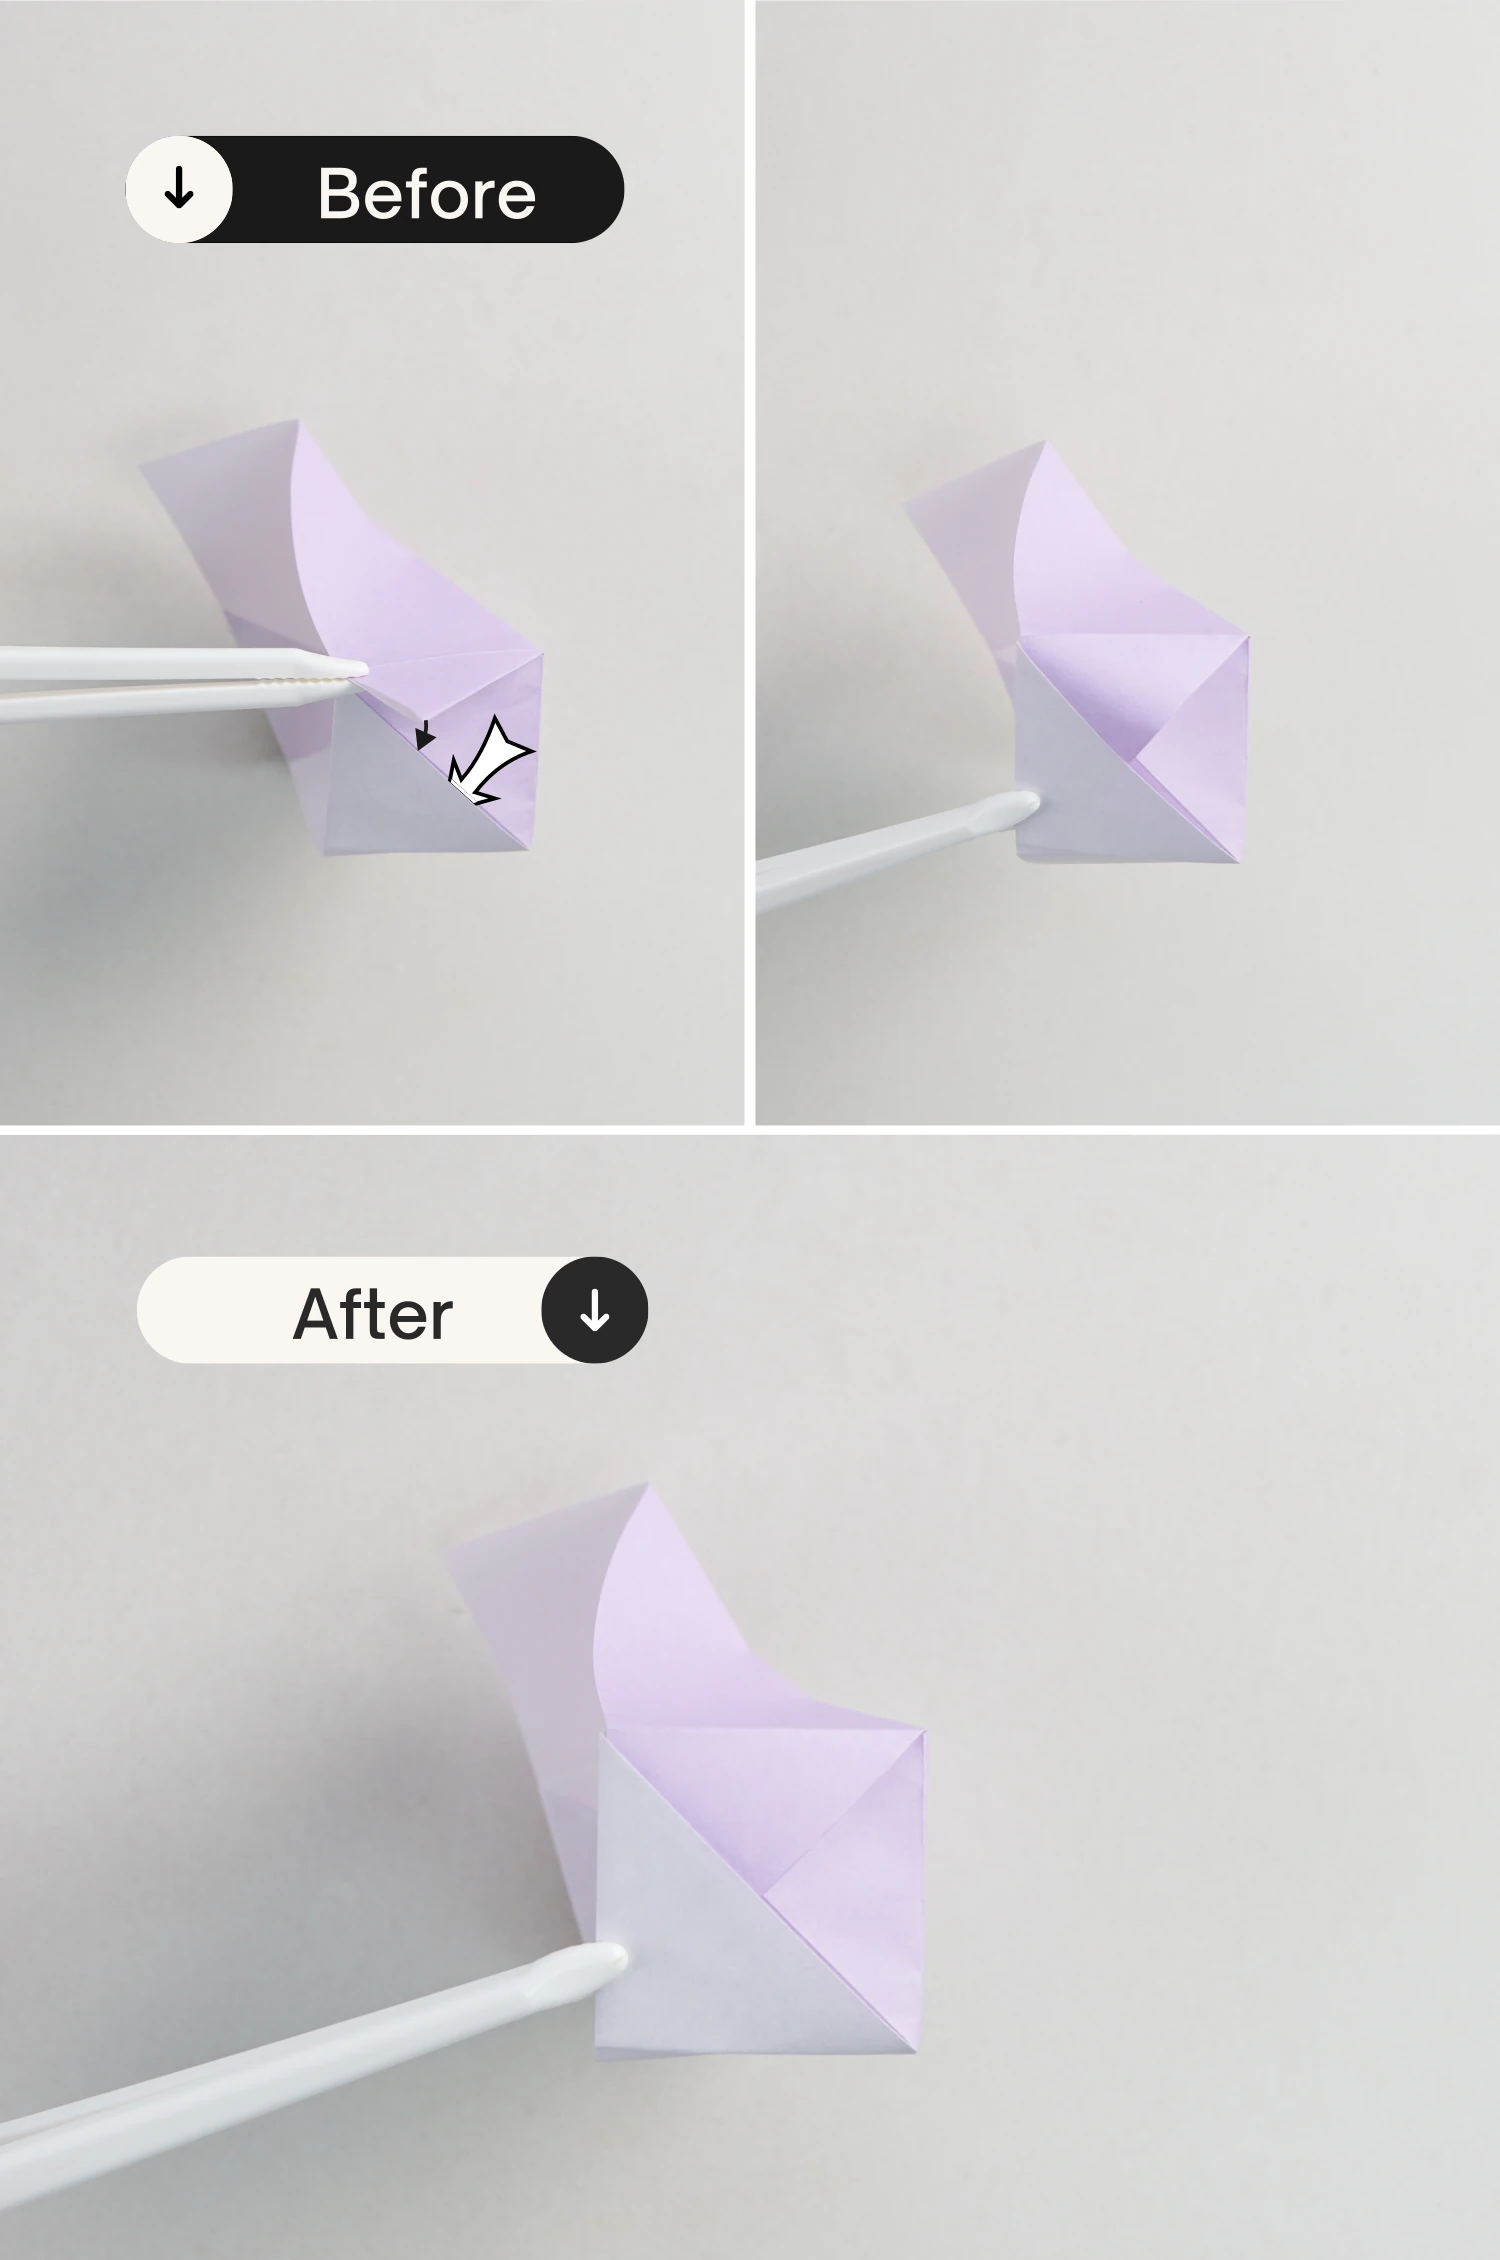
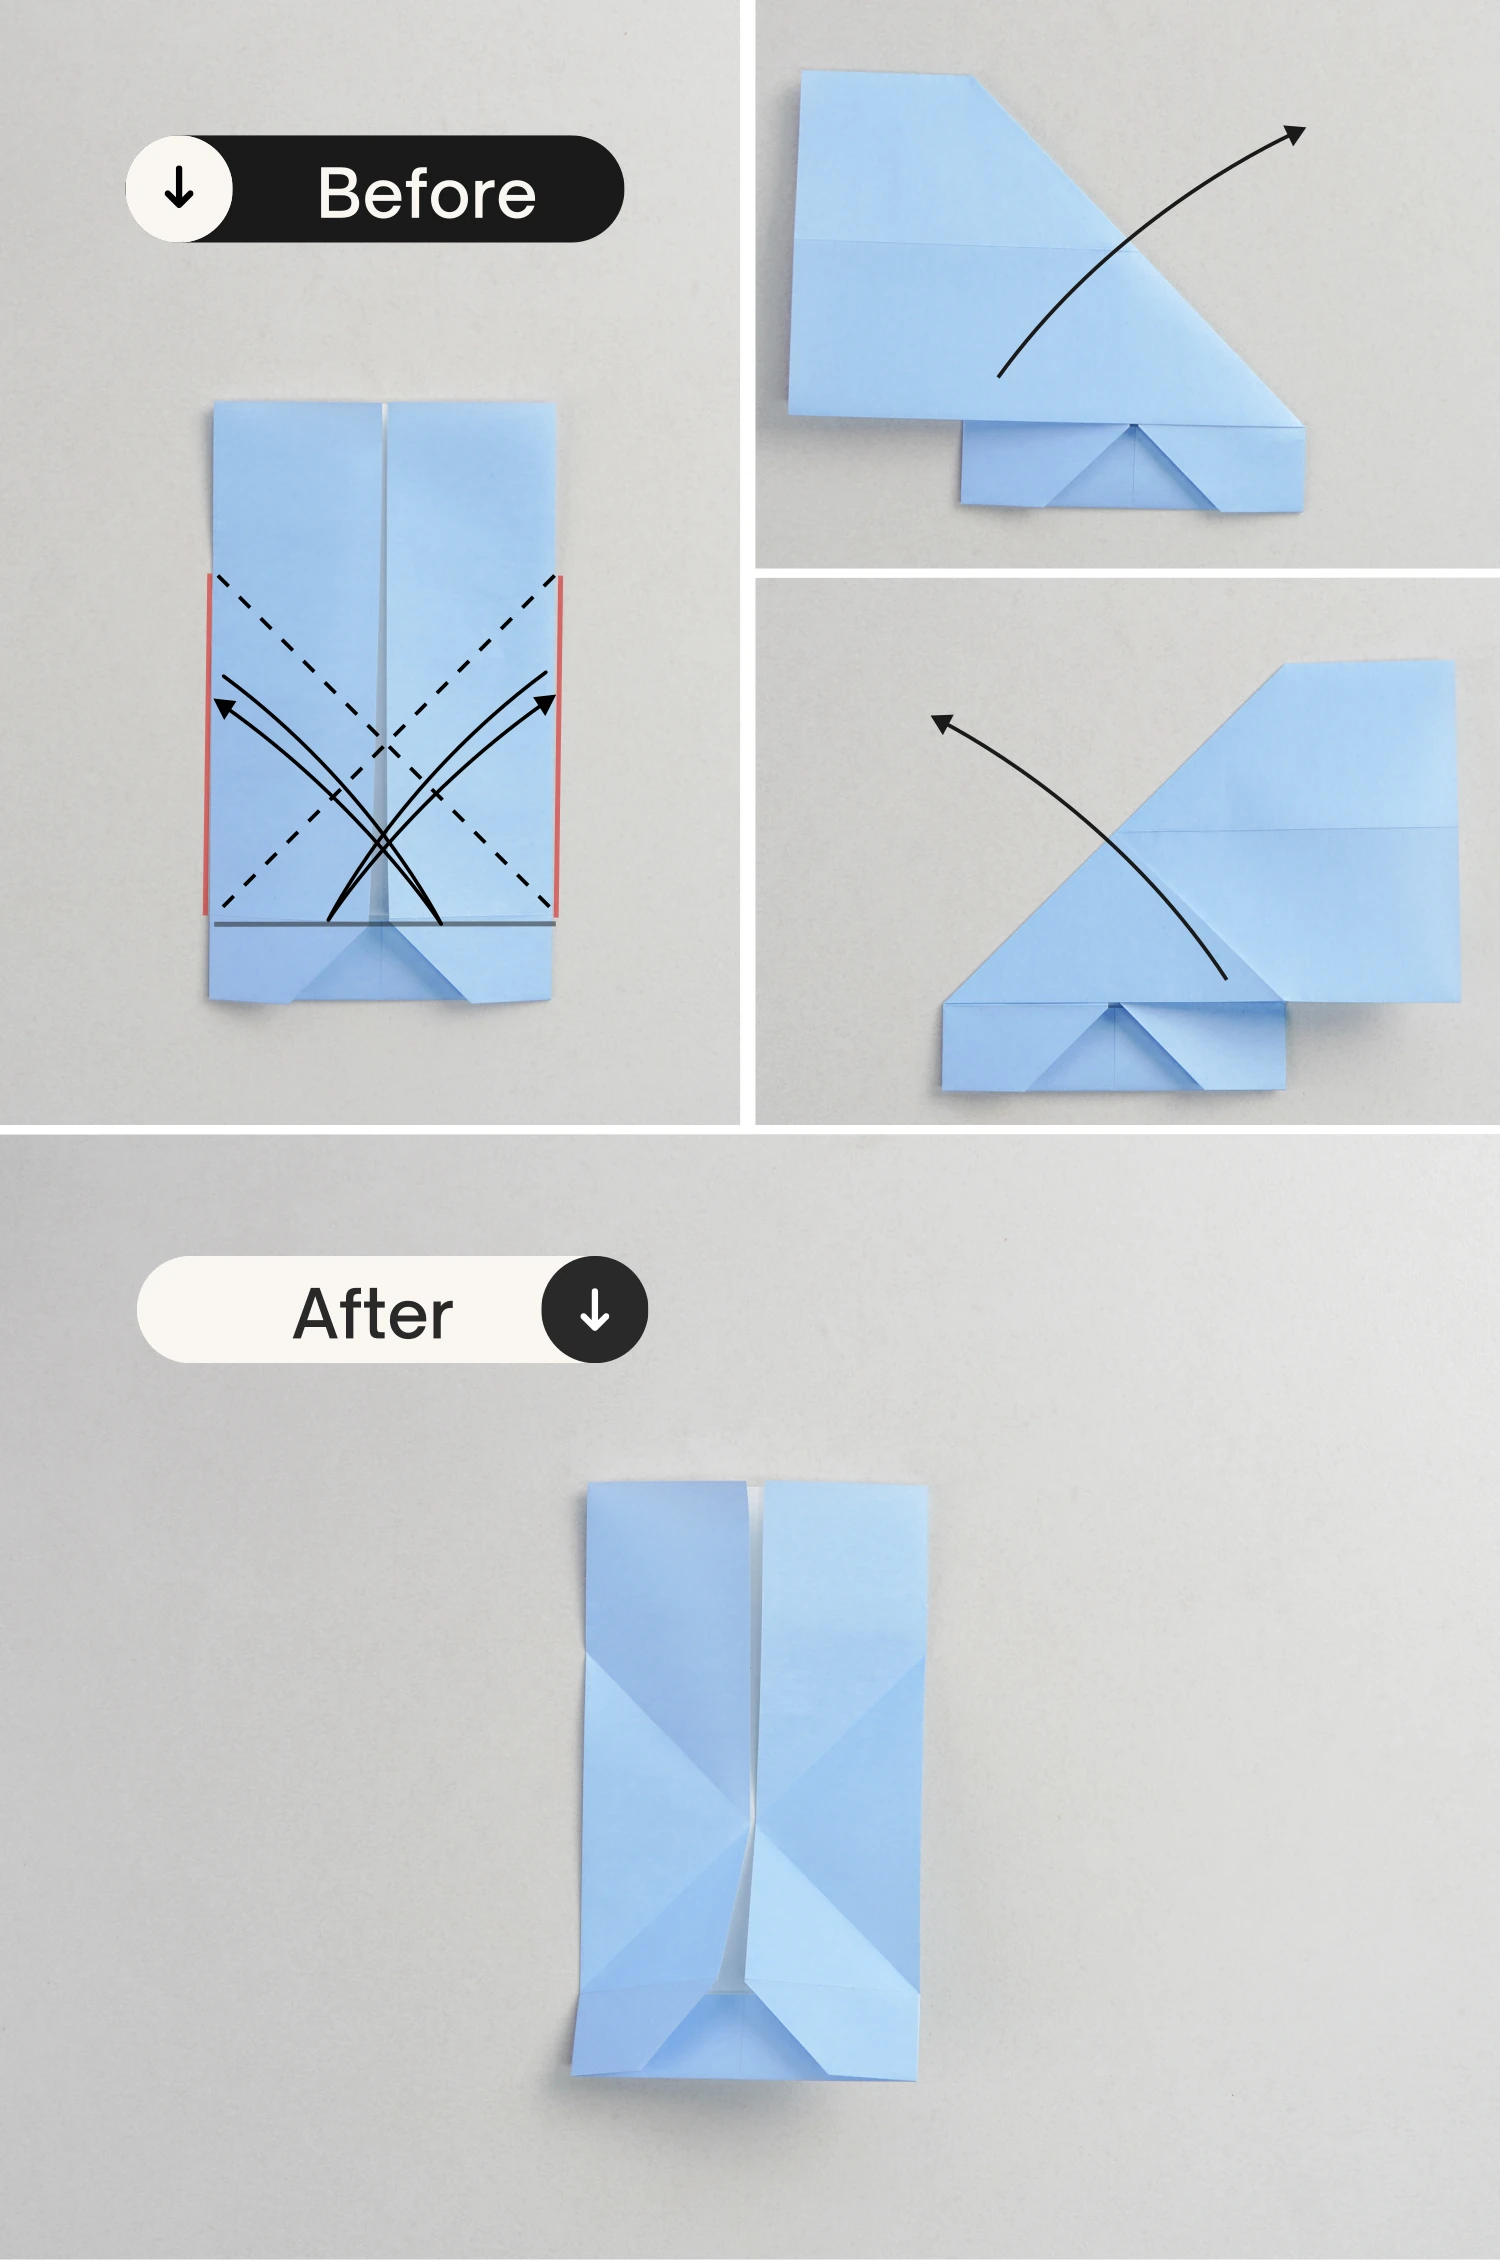
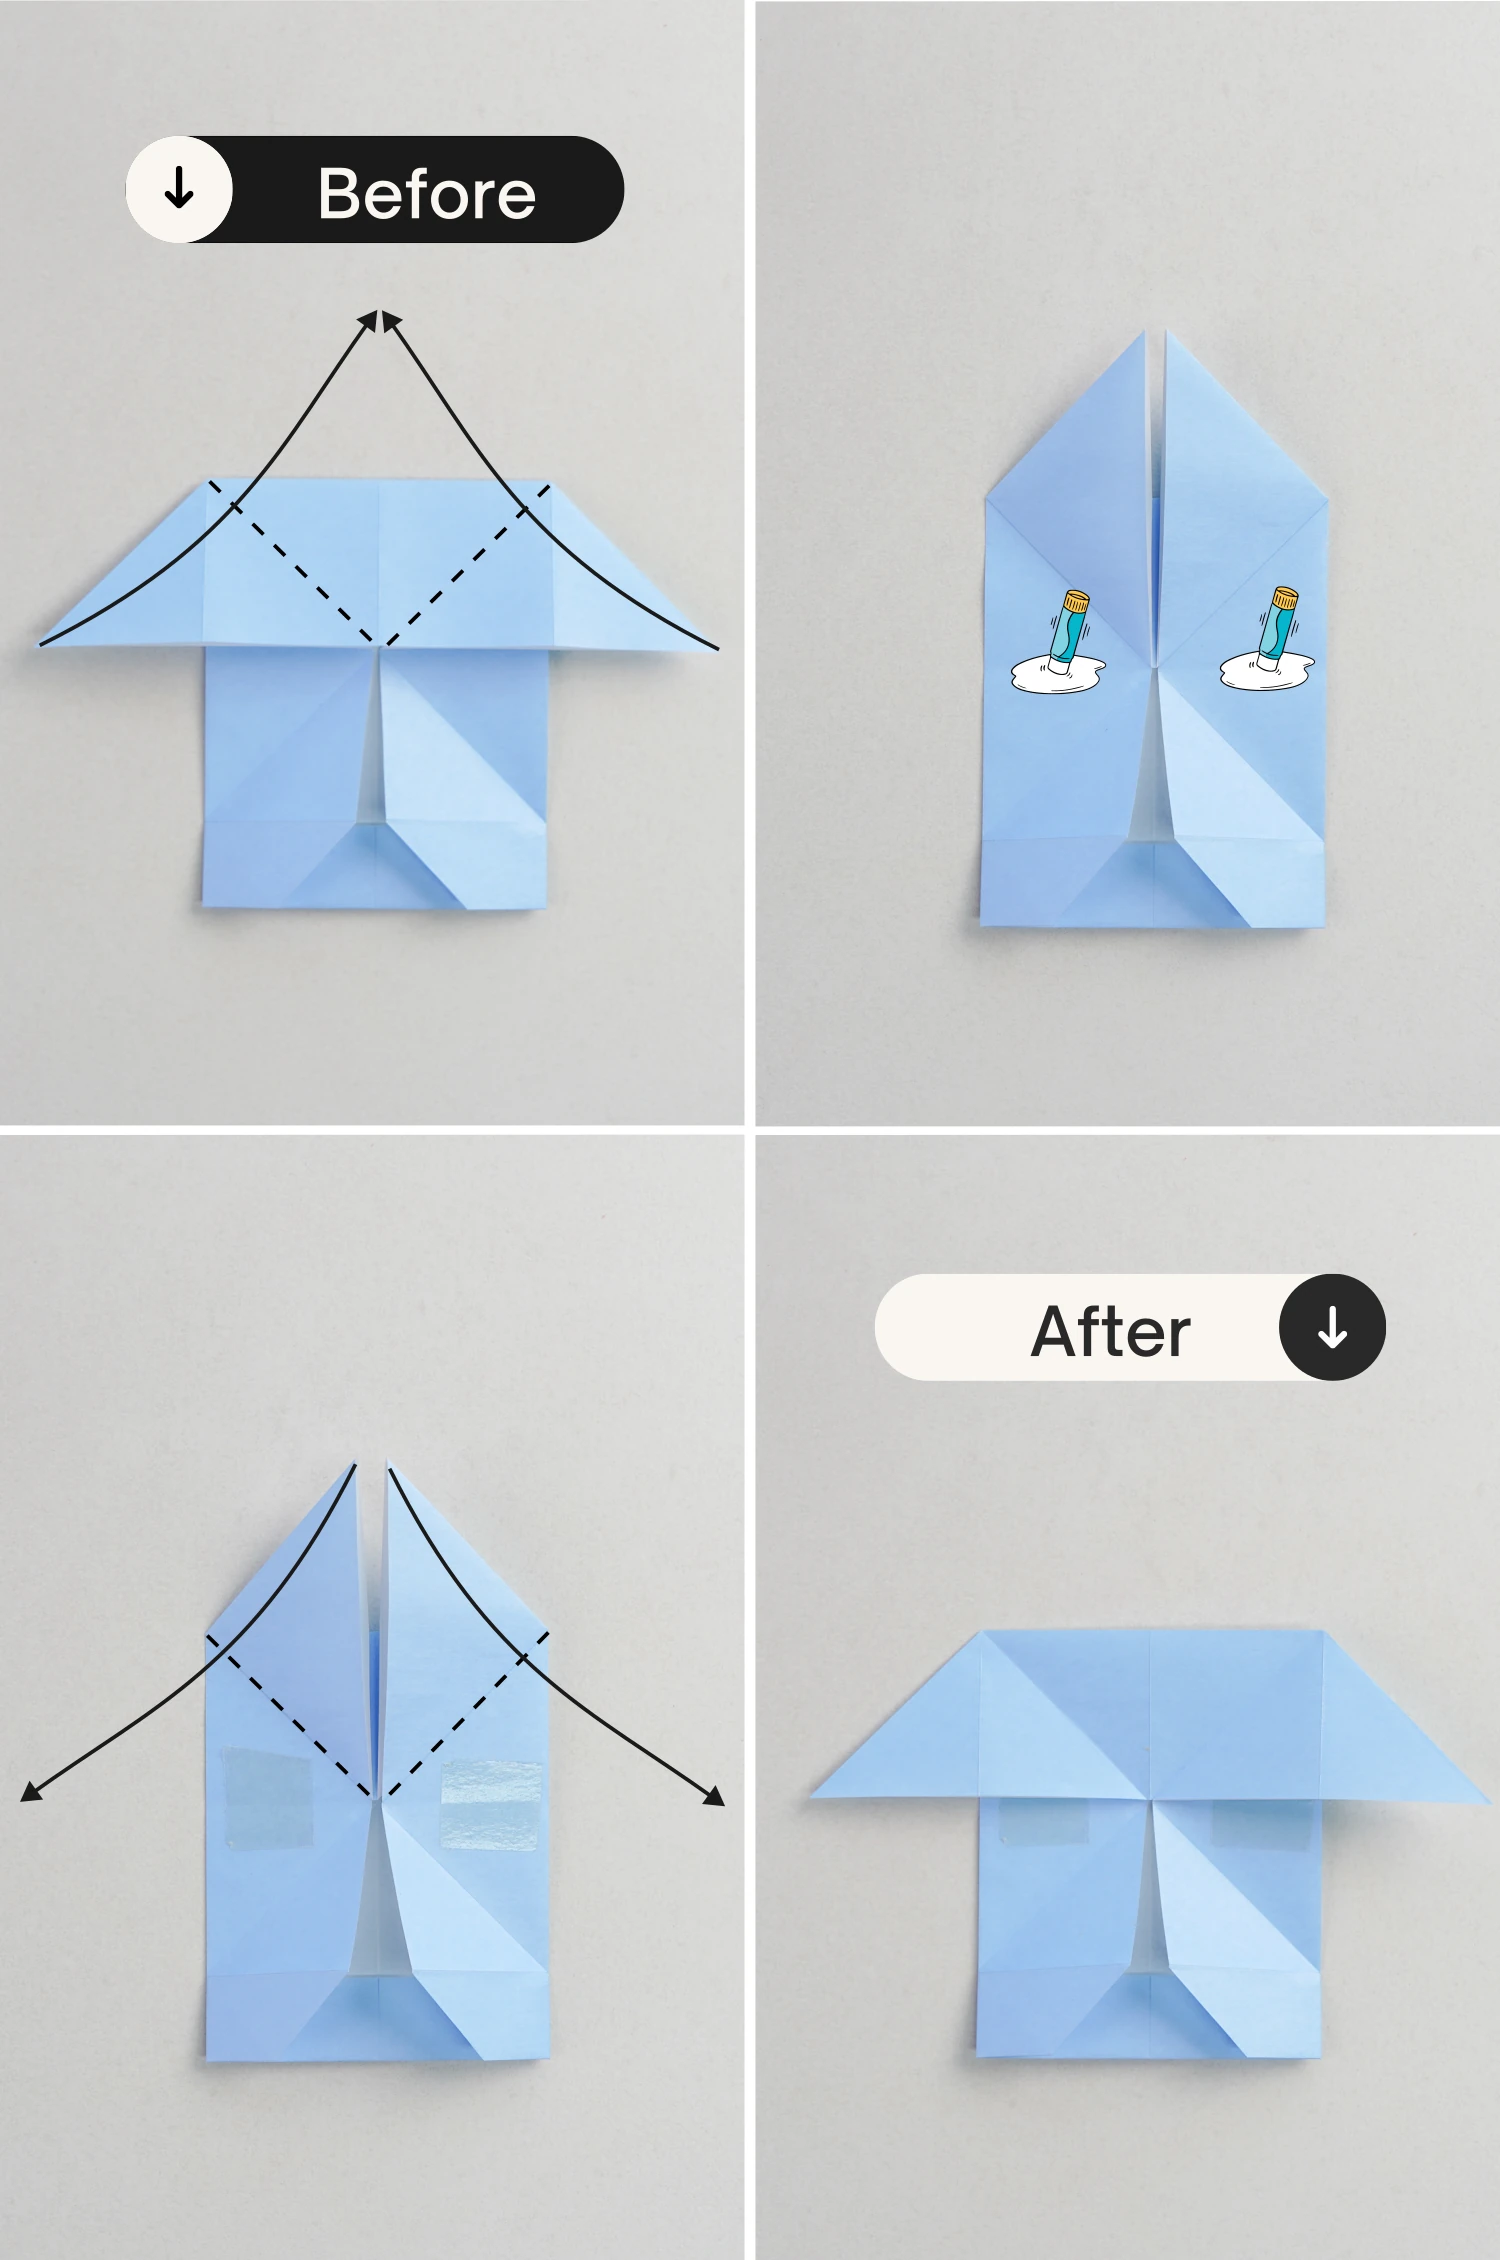
Step 7
View it from the right side. Pinch up the diagonal line of the top small square shown by the red dashed line, to sharpen the top left corner. Then fold this corner down diagonally along the middle horizontal crease.

Step 8
Tuck the corner under the small white triangle to better fix them, creating a square.
Step 9
Flip the model over.
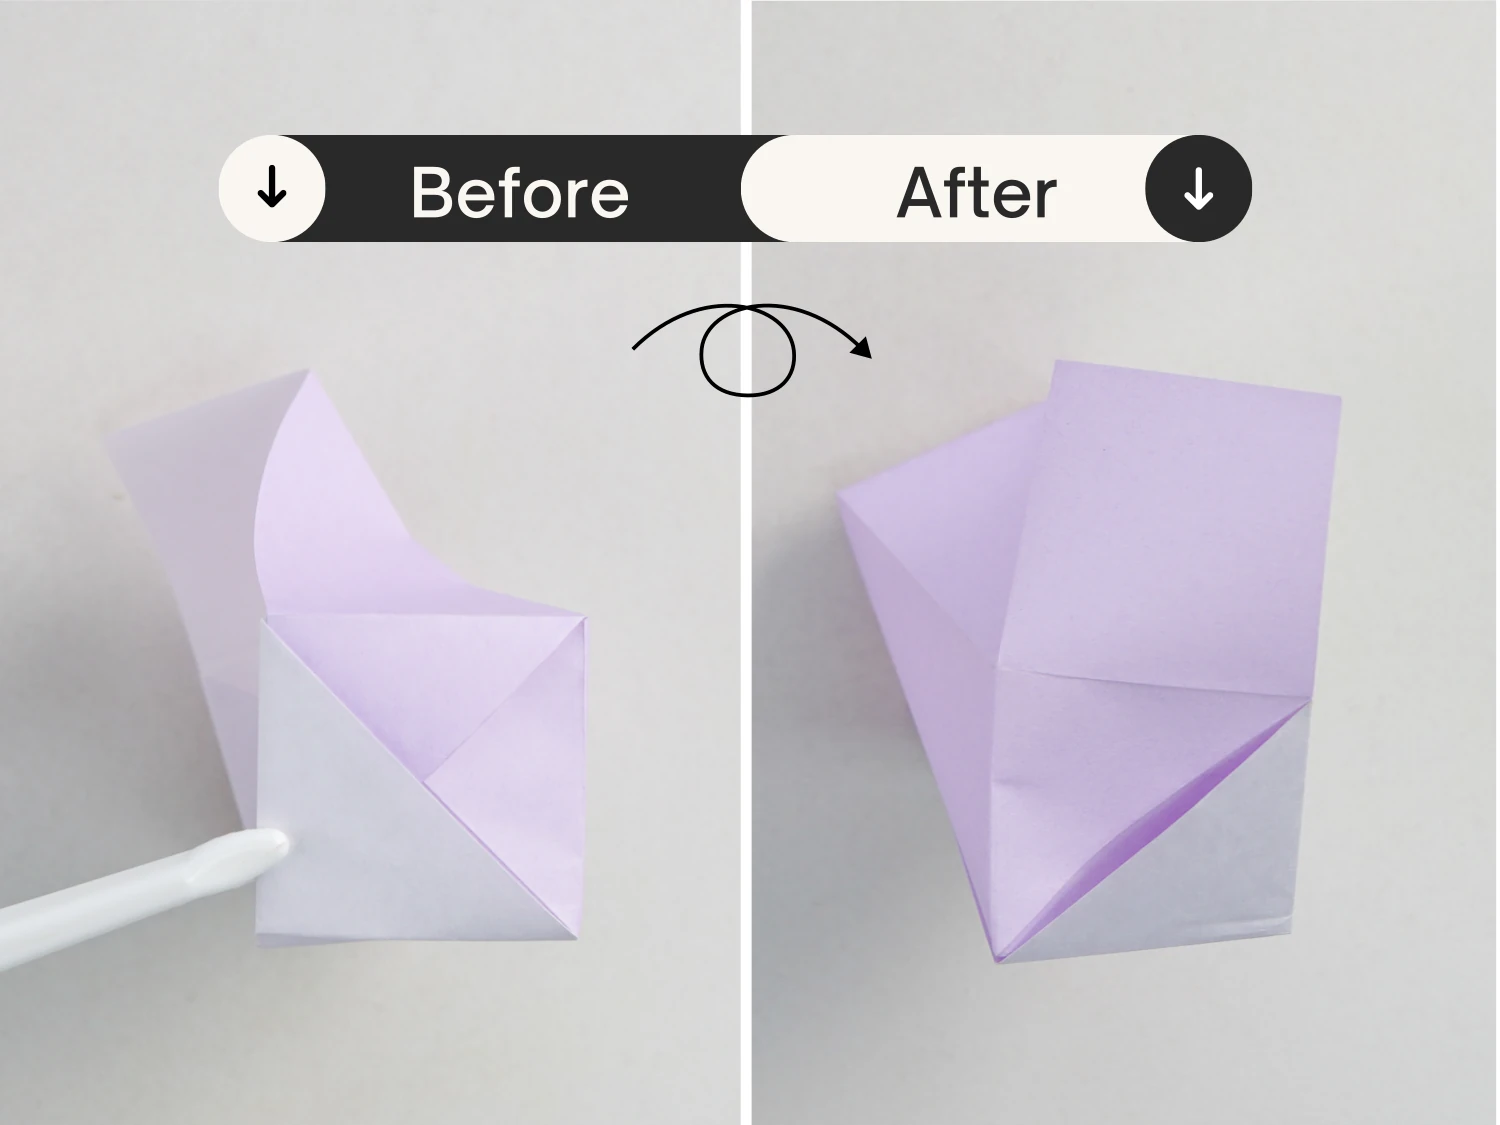
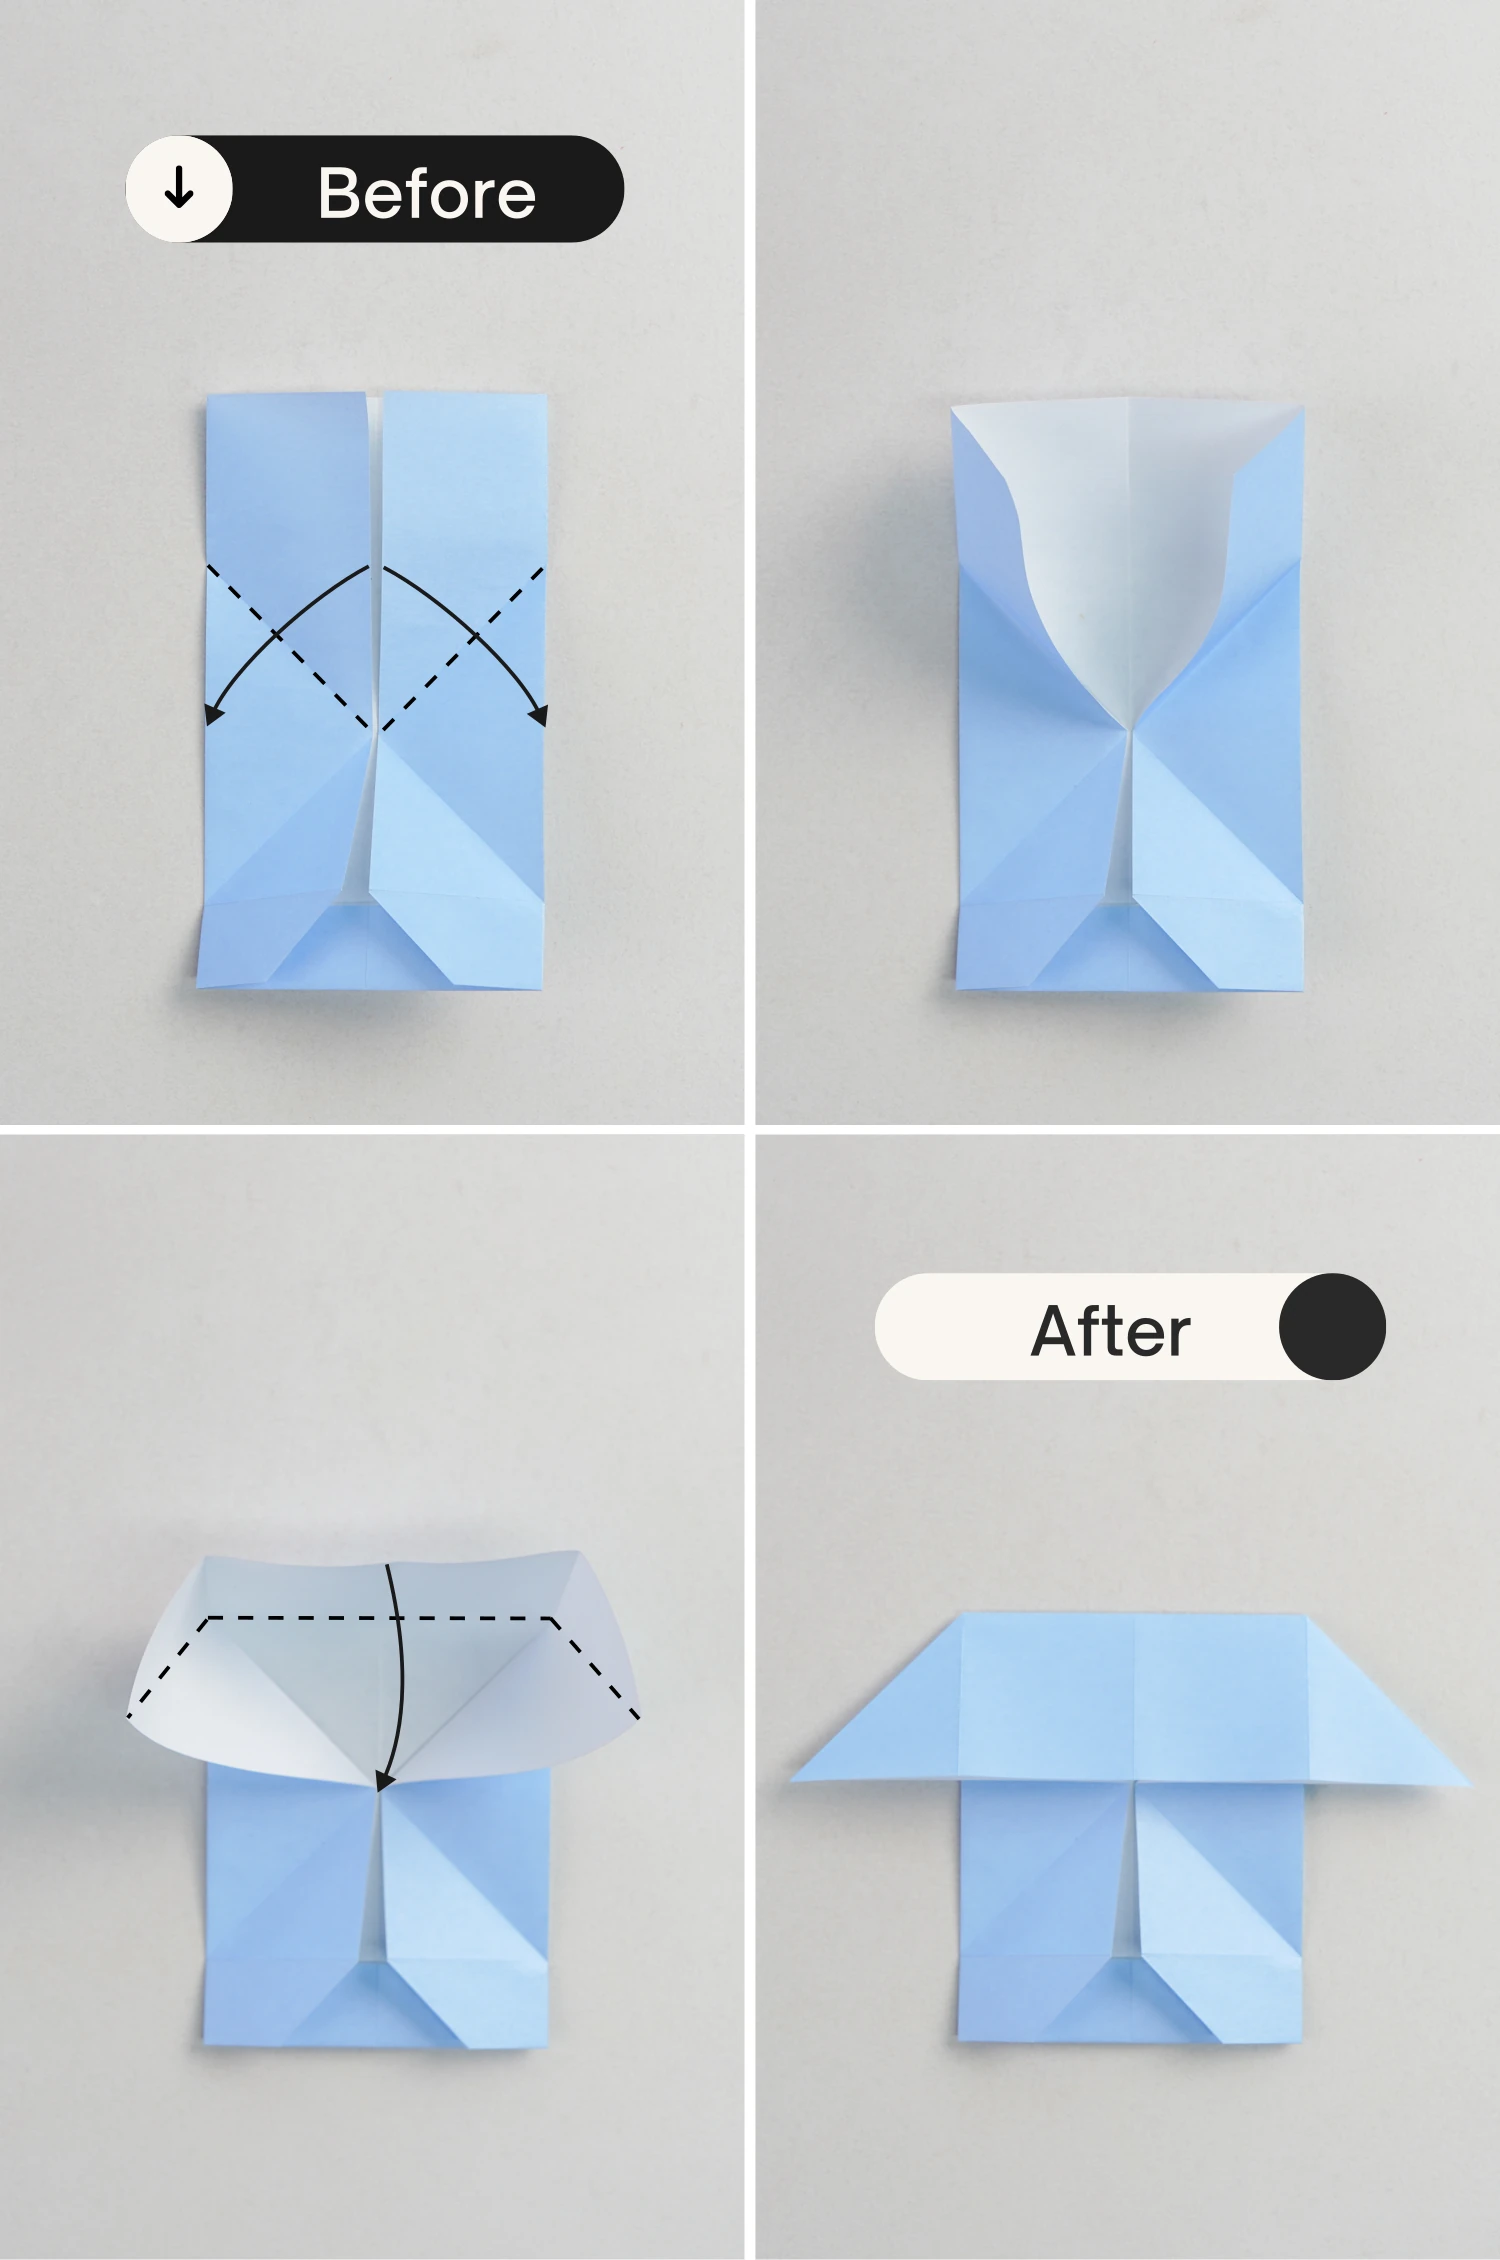
Step 10
Repeat step 7, pinch up the diagonal line shown by the dashed line to sharpen the top right corner.

Step 11
Then fold it down diagonally along the middle crease, and tuck it under the white triangle.
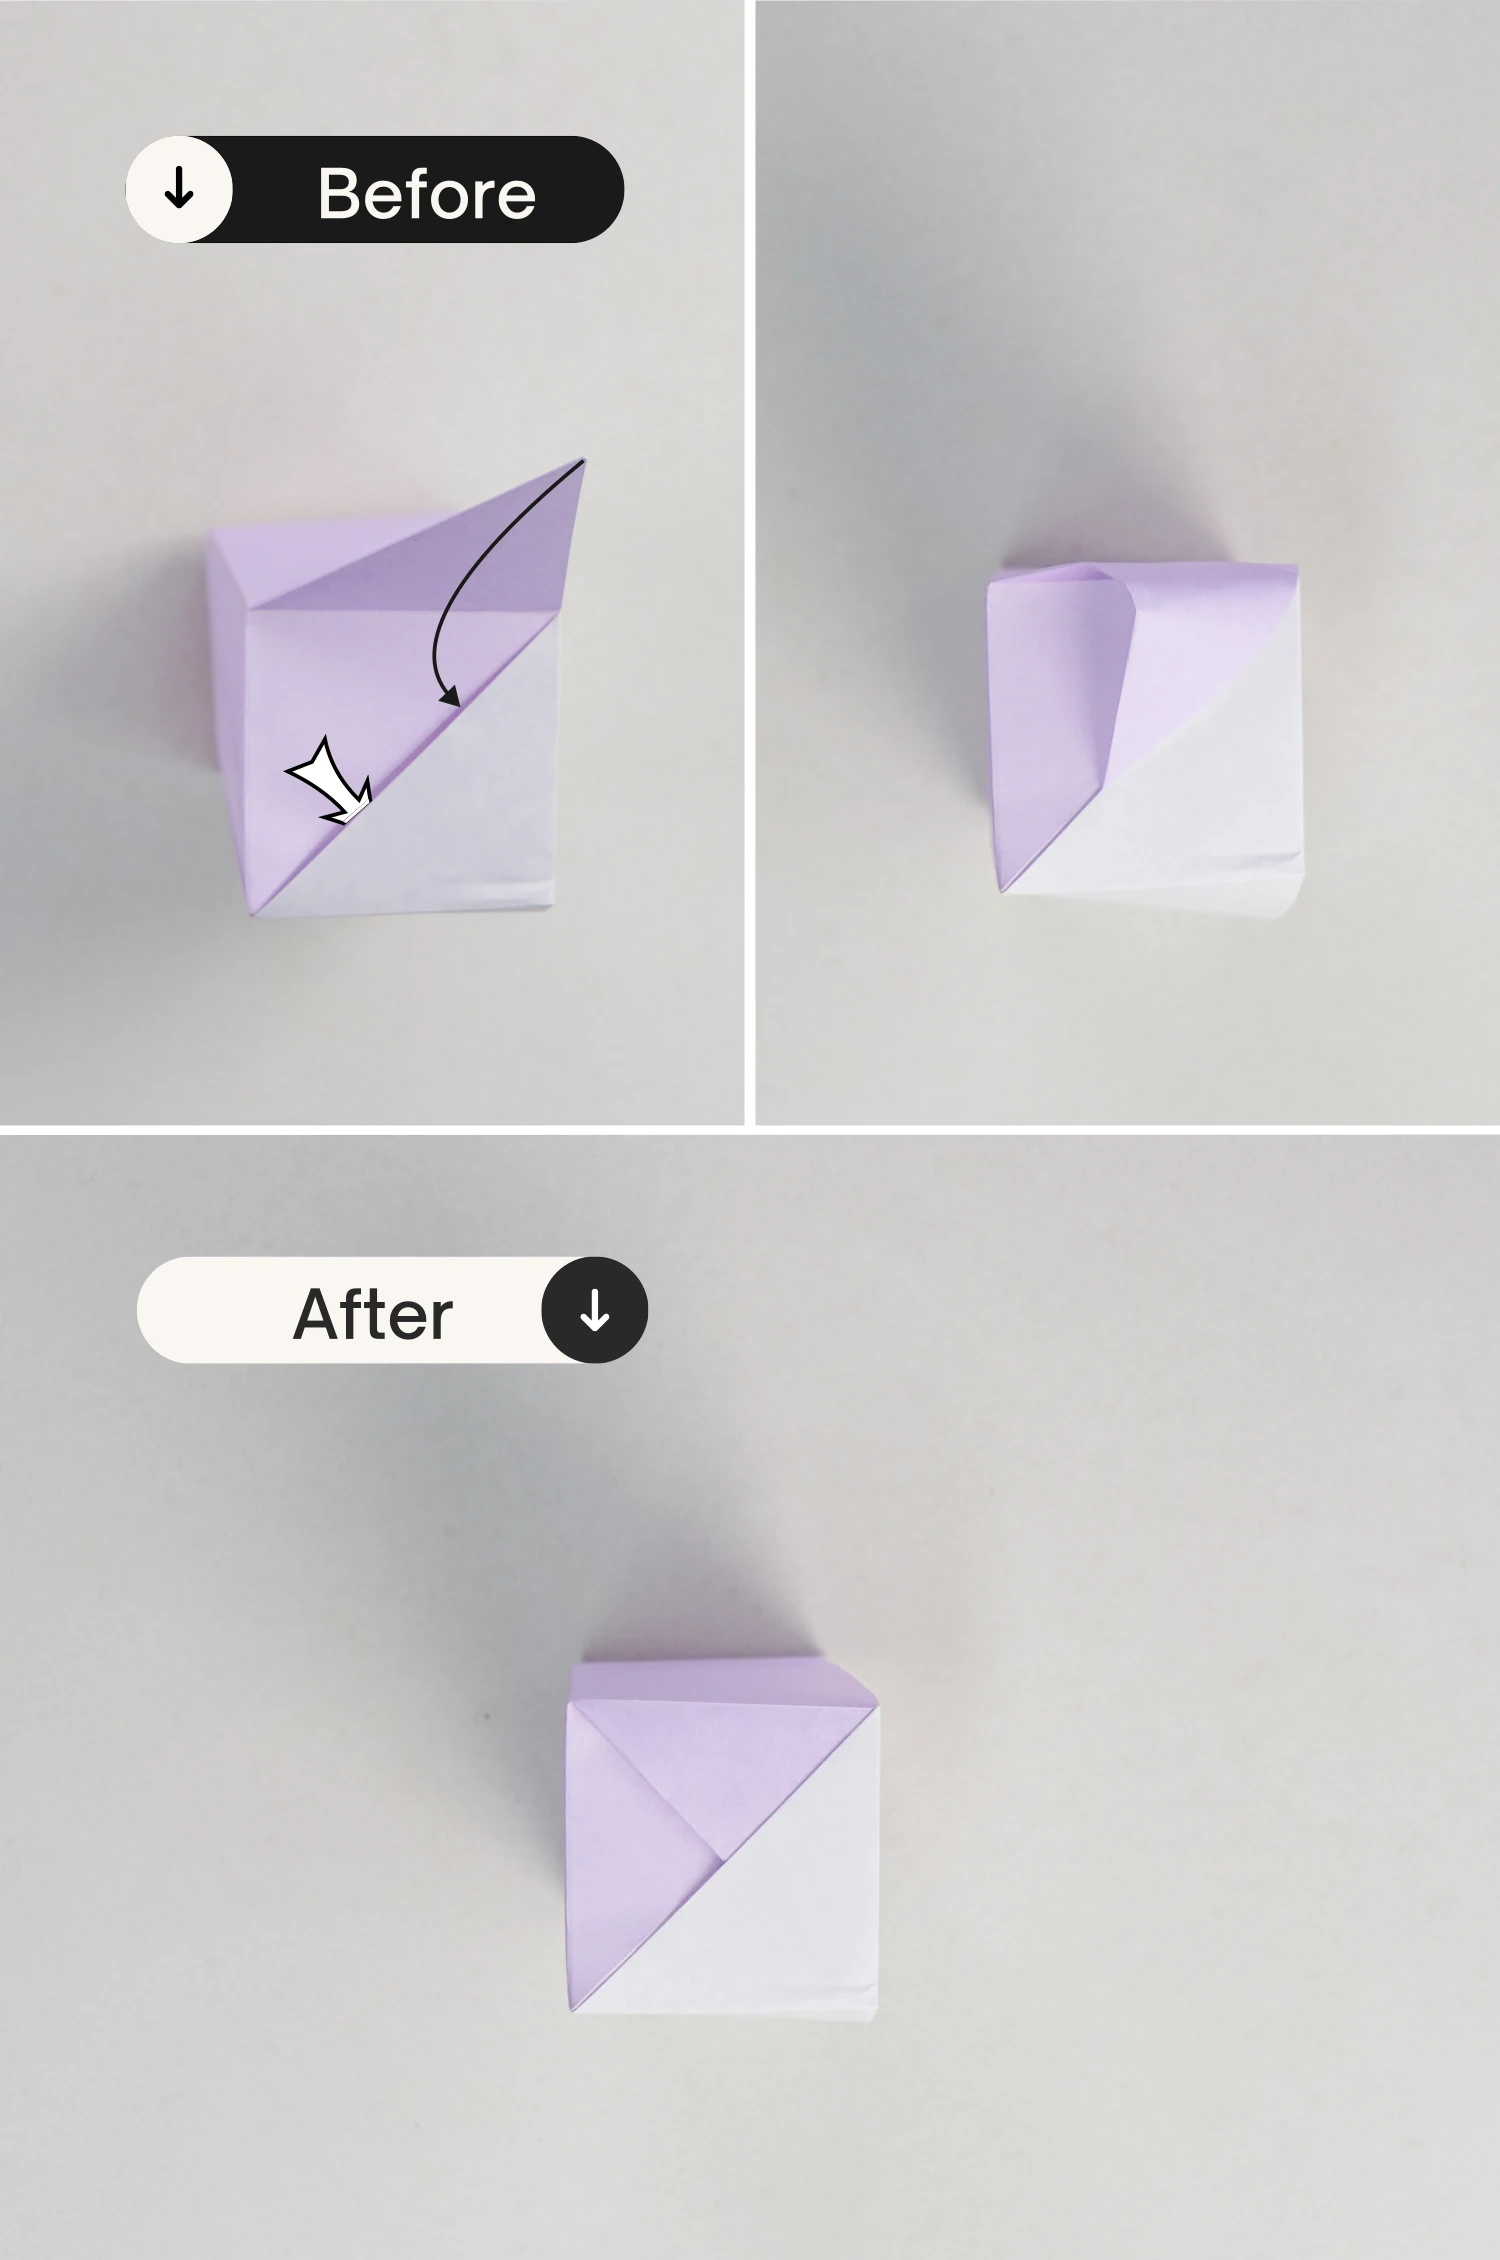
Step 12
Now we get the base part of this rectangle box.
Step 13
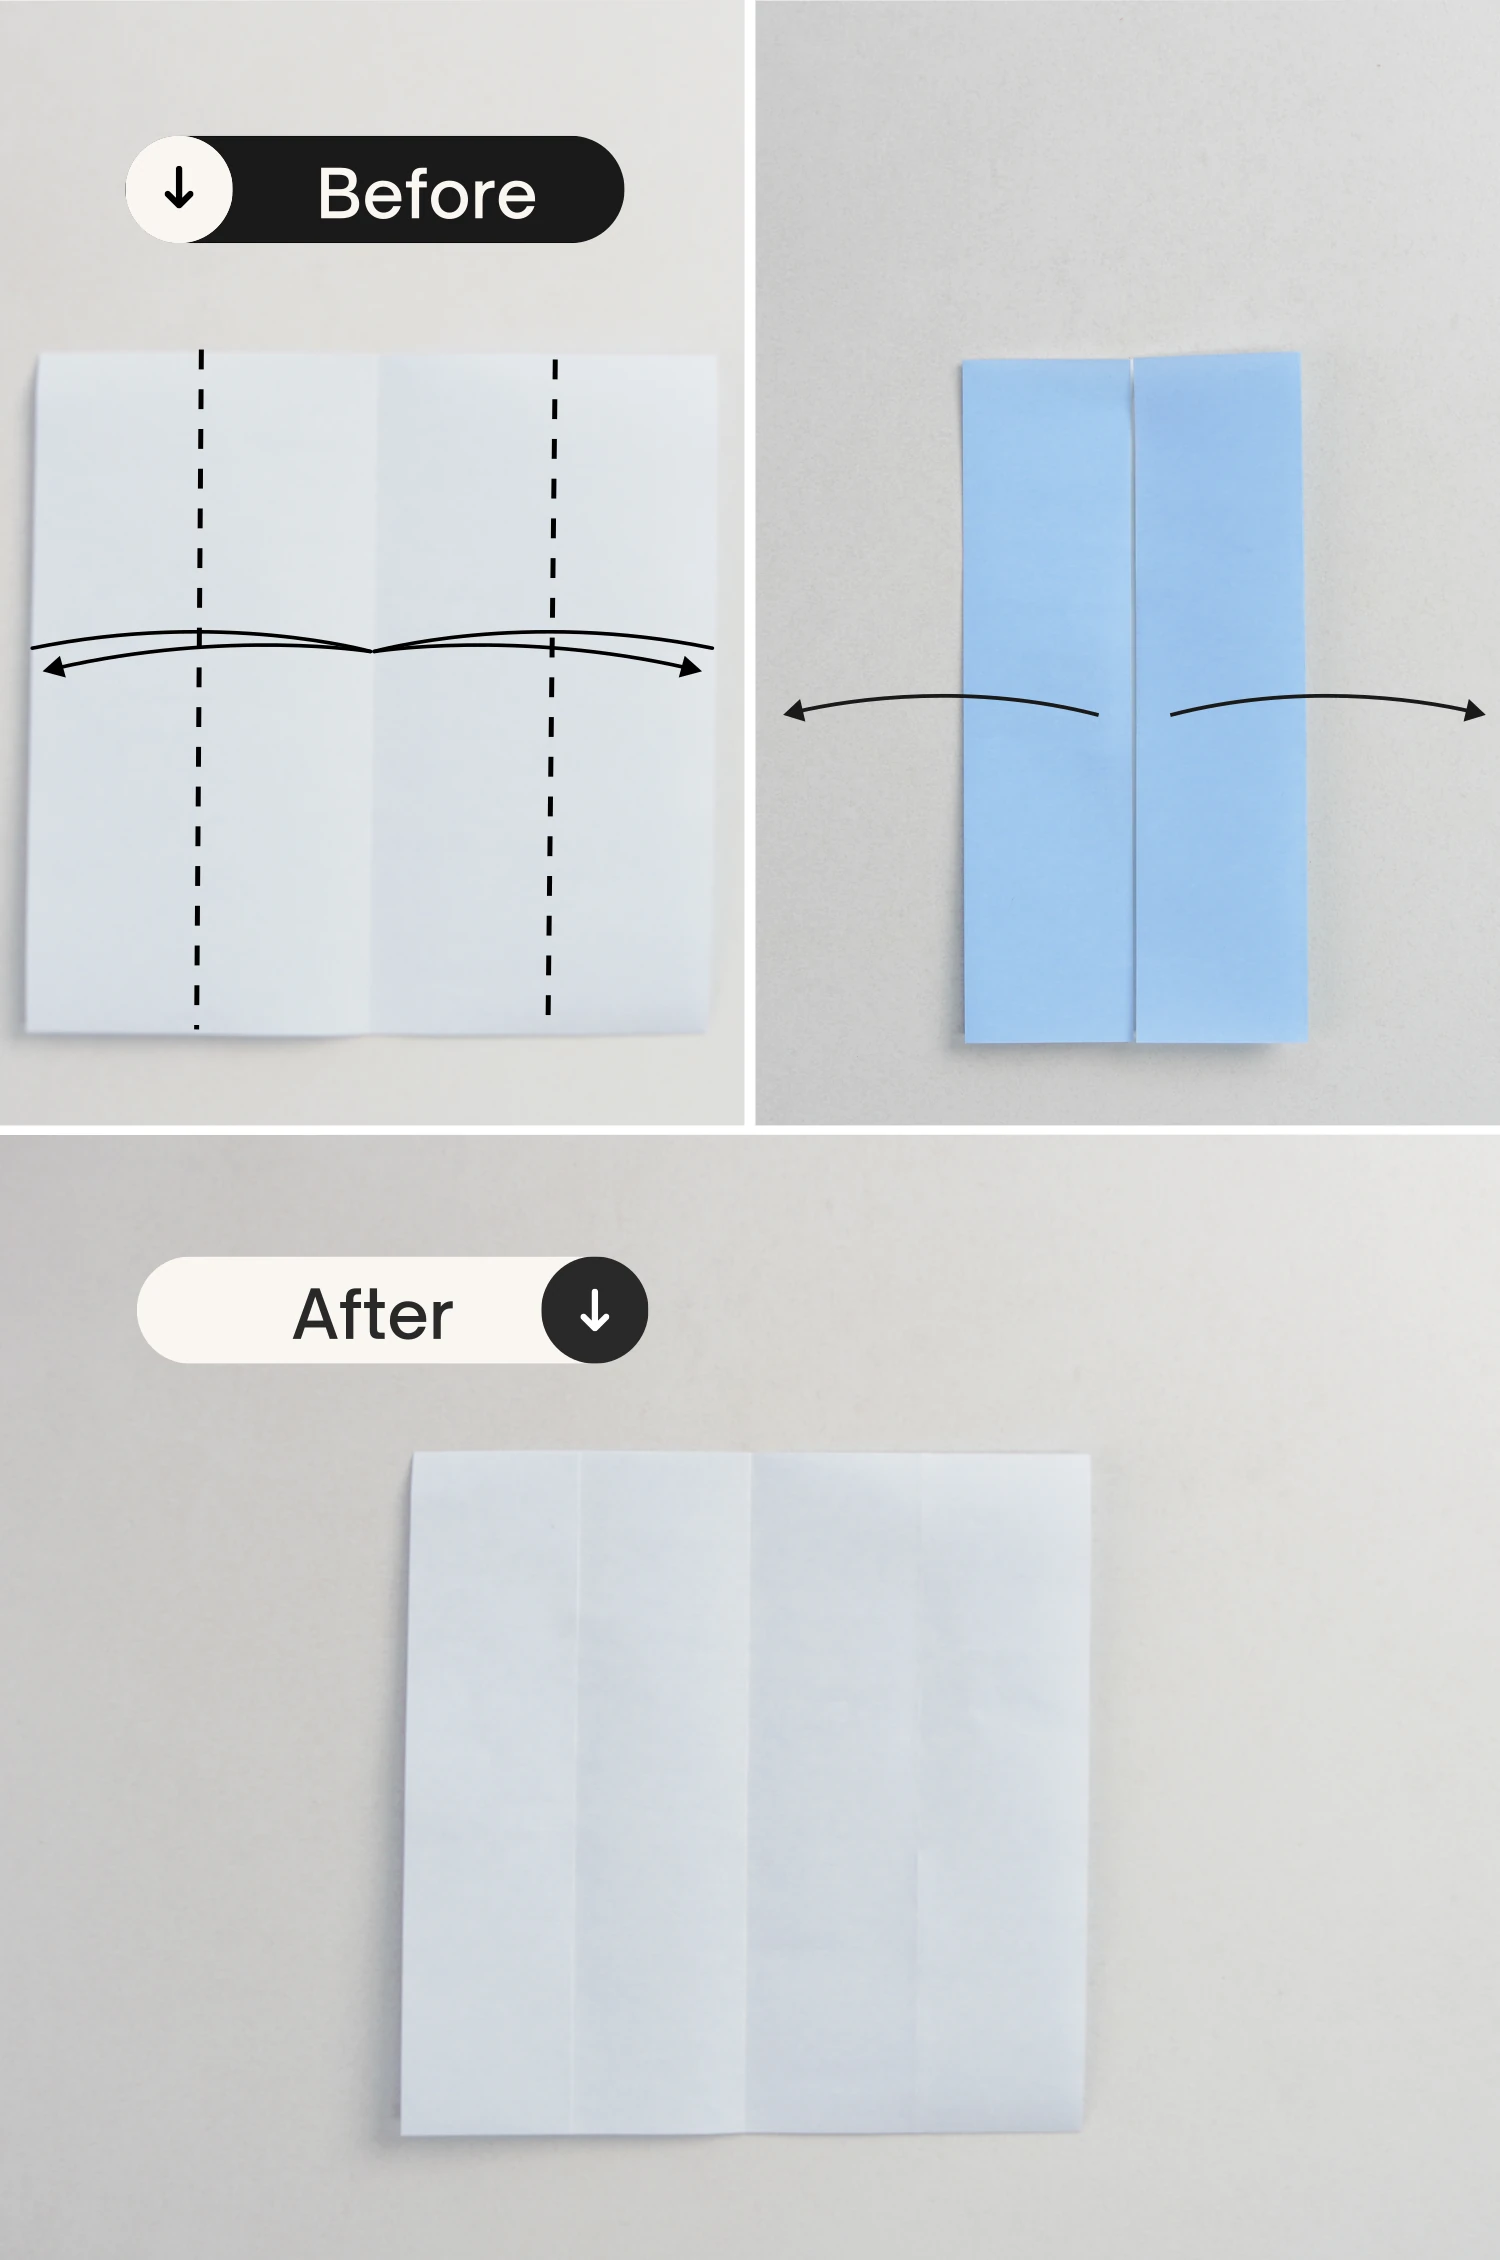
Now take out another piece of paper, start with the white side facing up, and fold it in half vertically, then unfold it.
Step 14
Fold both the left and right edges to align with the vertical crease, then unfold getting two new creases.
Step 15
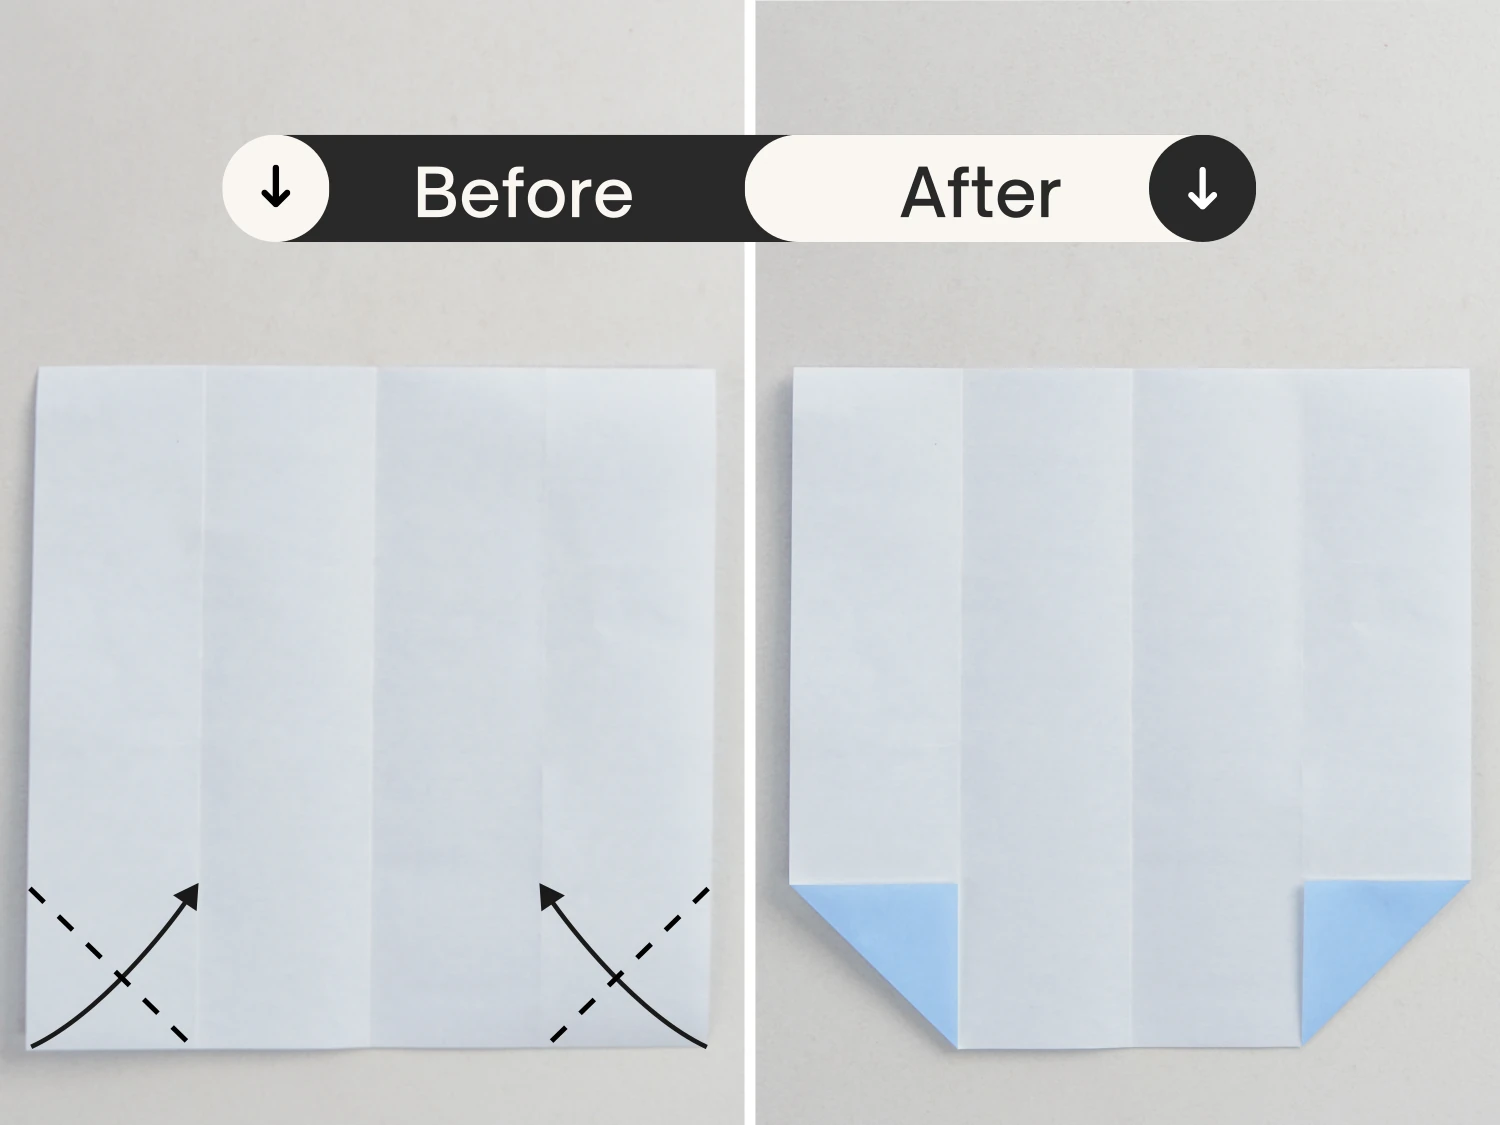
Fold both the bottom left and bottom right points diagonally along the dotted lines, to meet the creases you made in the previous step.
Step 16
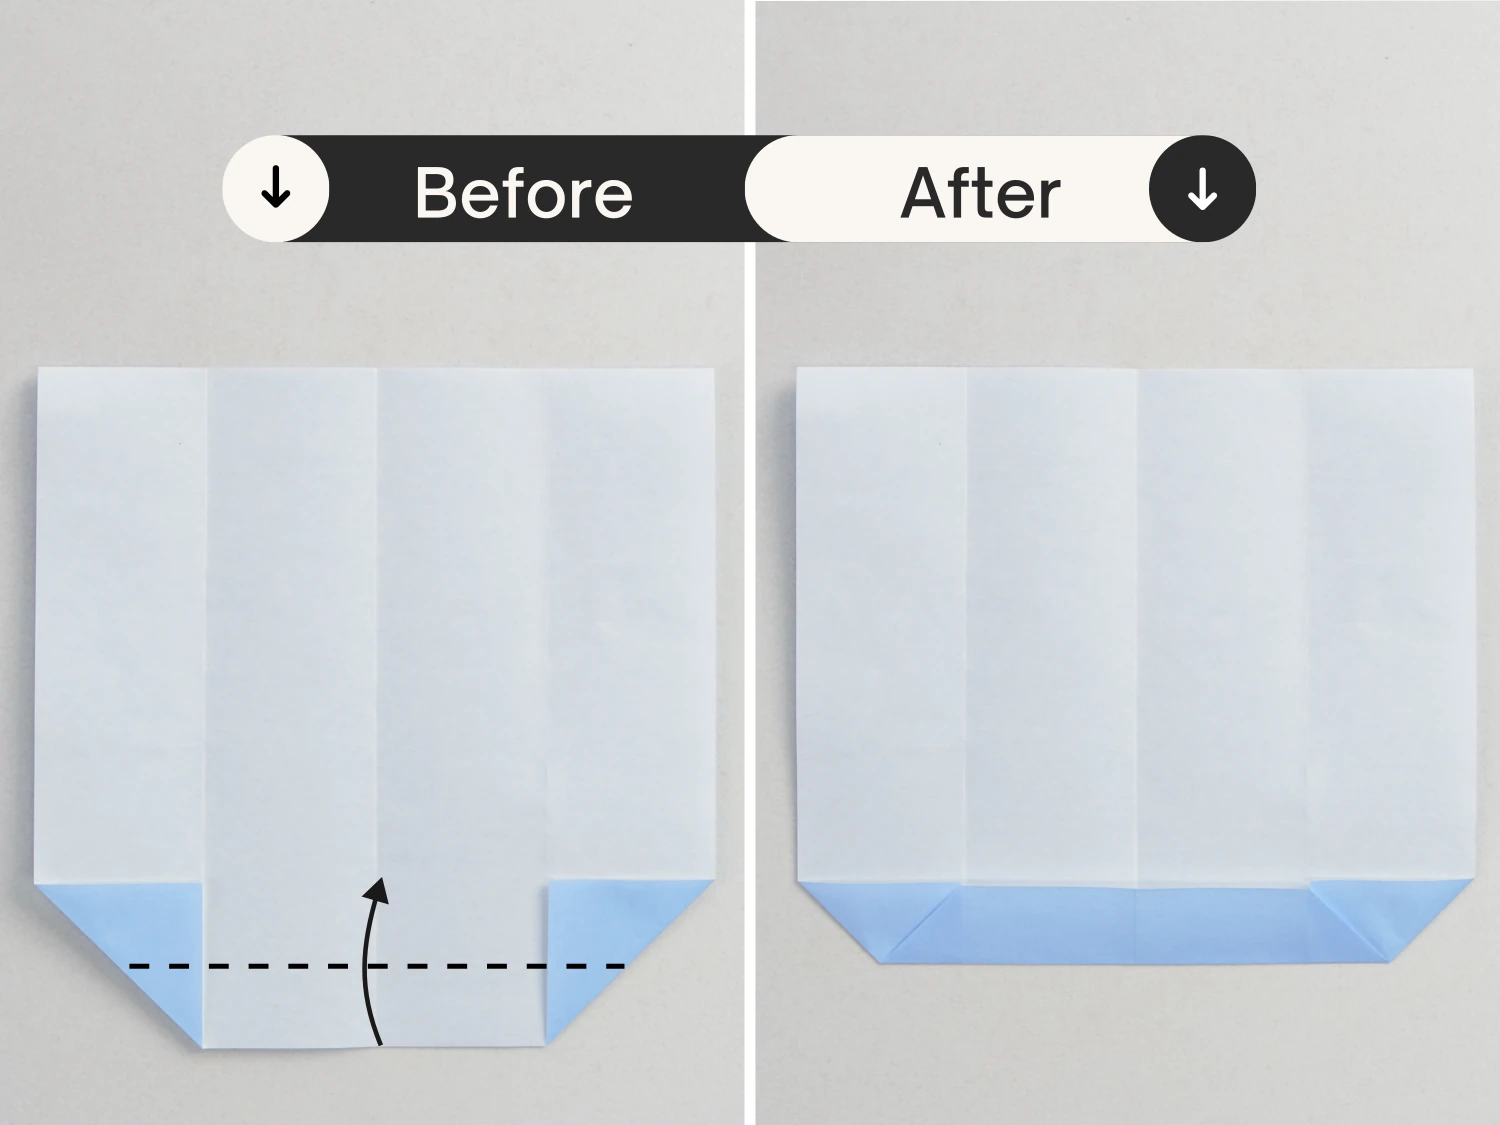
Fold the bottom edge up along the dotted line to align with the edge you folded in the previous step.
Step 17
Fold the bottom blue part up horizontally, crease well then unfold.
Step 18
Fold both the left and right edges to align with the vertical crease, getting two new vertical creases on the left and right.
Step 19
Fold the right edge down to align with the crease you made in step 17, crease it well then unfold.
Repeat this for the left edge. Getting two new slanted creases.
Step 20
Lift the top two layers along the creases shown by the black dotted lines, then press the top part down making the top edge meet the intersection point of the two creases you made in the previous step. Finally, flatten it.
Step 21
Fold the left and right corners up along the dotted lines, apply glue to the underside of the two folded parts, then put them down and glue on.
Step 22
Similarly, lift the two top layers on the bottom along the creases shown by the dotted lines, then press them down and lift the bottom edge. Next, adjust and shape two right angles by the existing creases.
Step 23
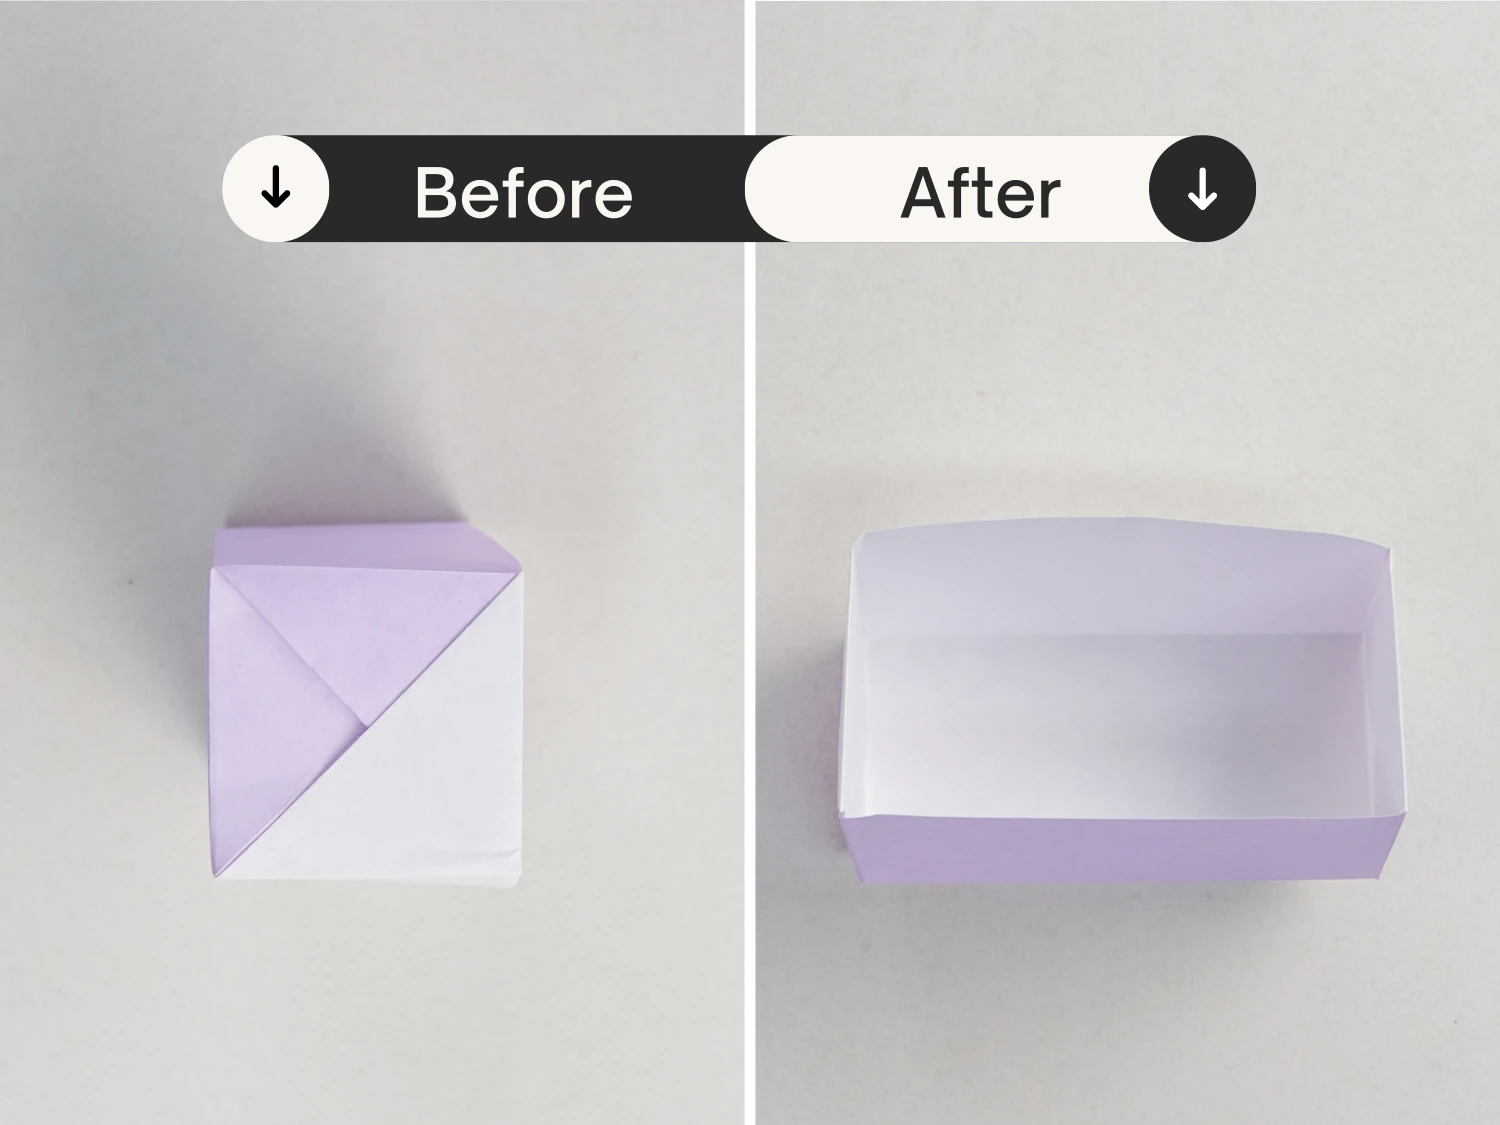
Lift the top edge to make it stand, then press it down.
Step 24
Fold both the left and right corners to the center diagonally and unfold them 90 degrees only, so that they stand. Now you get the lid of the box.
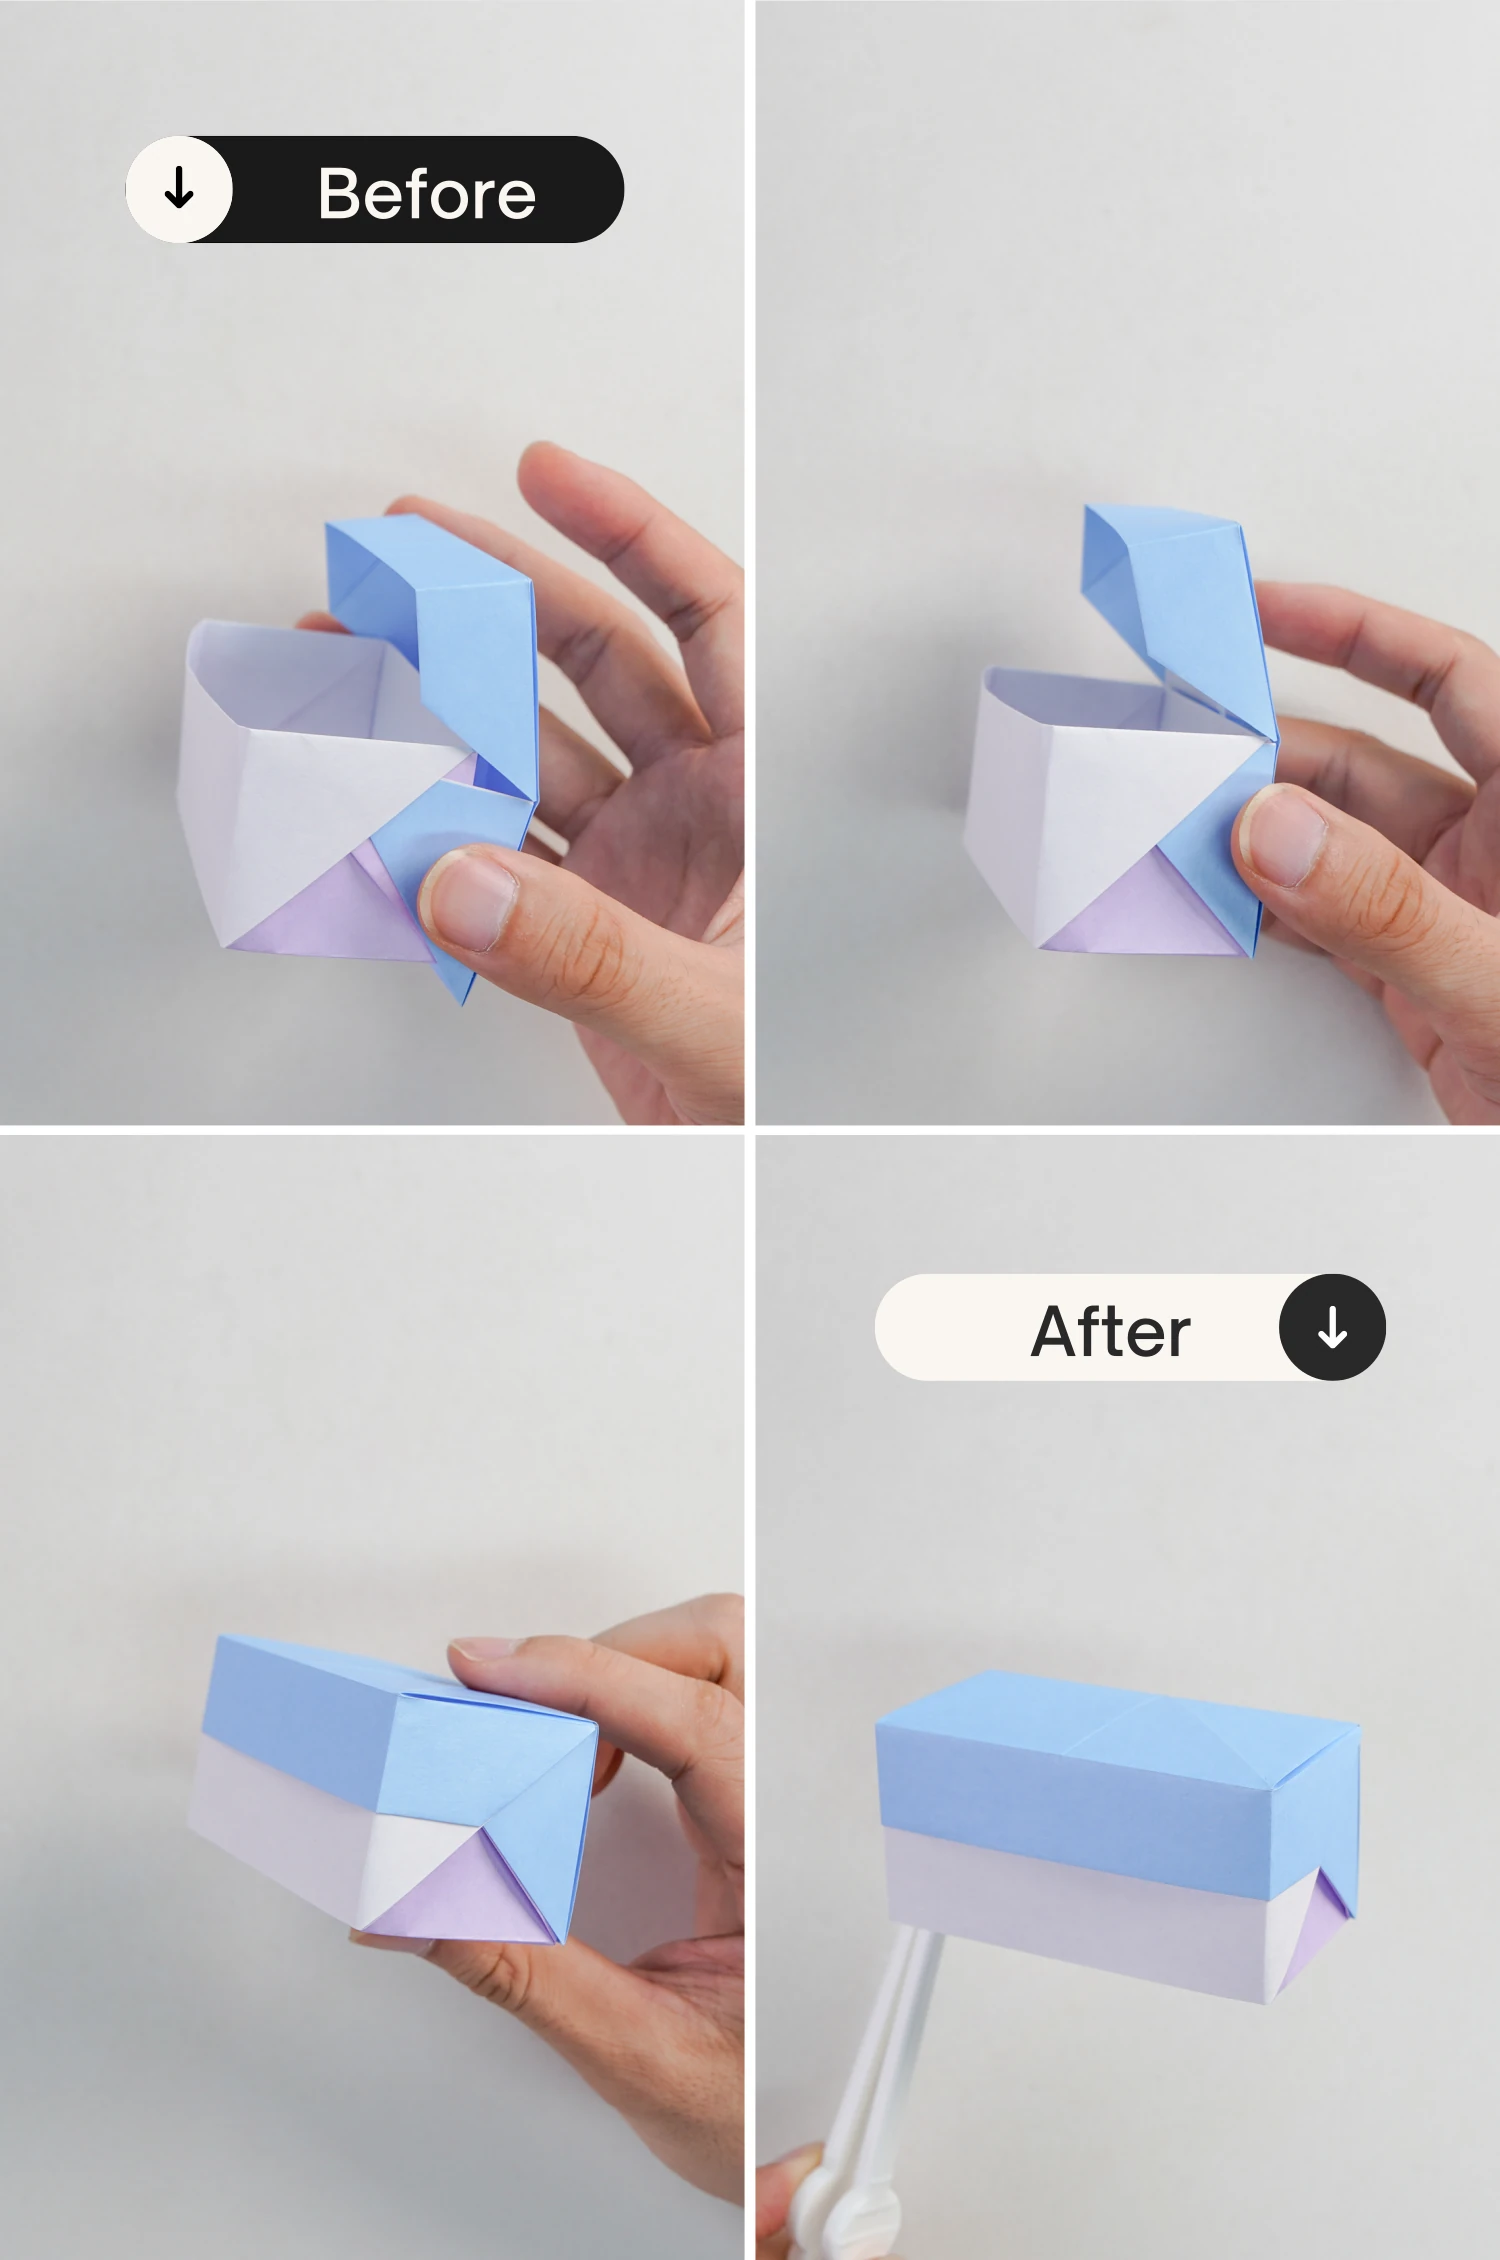
Step 25
As the picture shows, tuck the corners you folded in the previous step between the layers of the base to assemble the box.
What’s Next
Now that we have completed this rectangle box, we have many other origami box tutorials, you can explore and learn freely. Enjoy folding!


