How to Make an Origami Gift Box with Lid
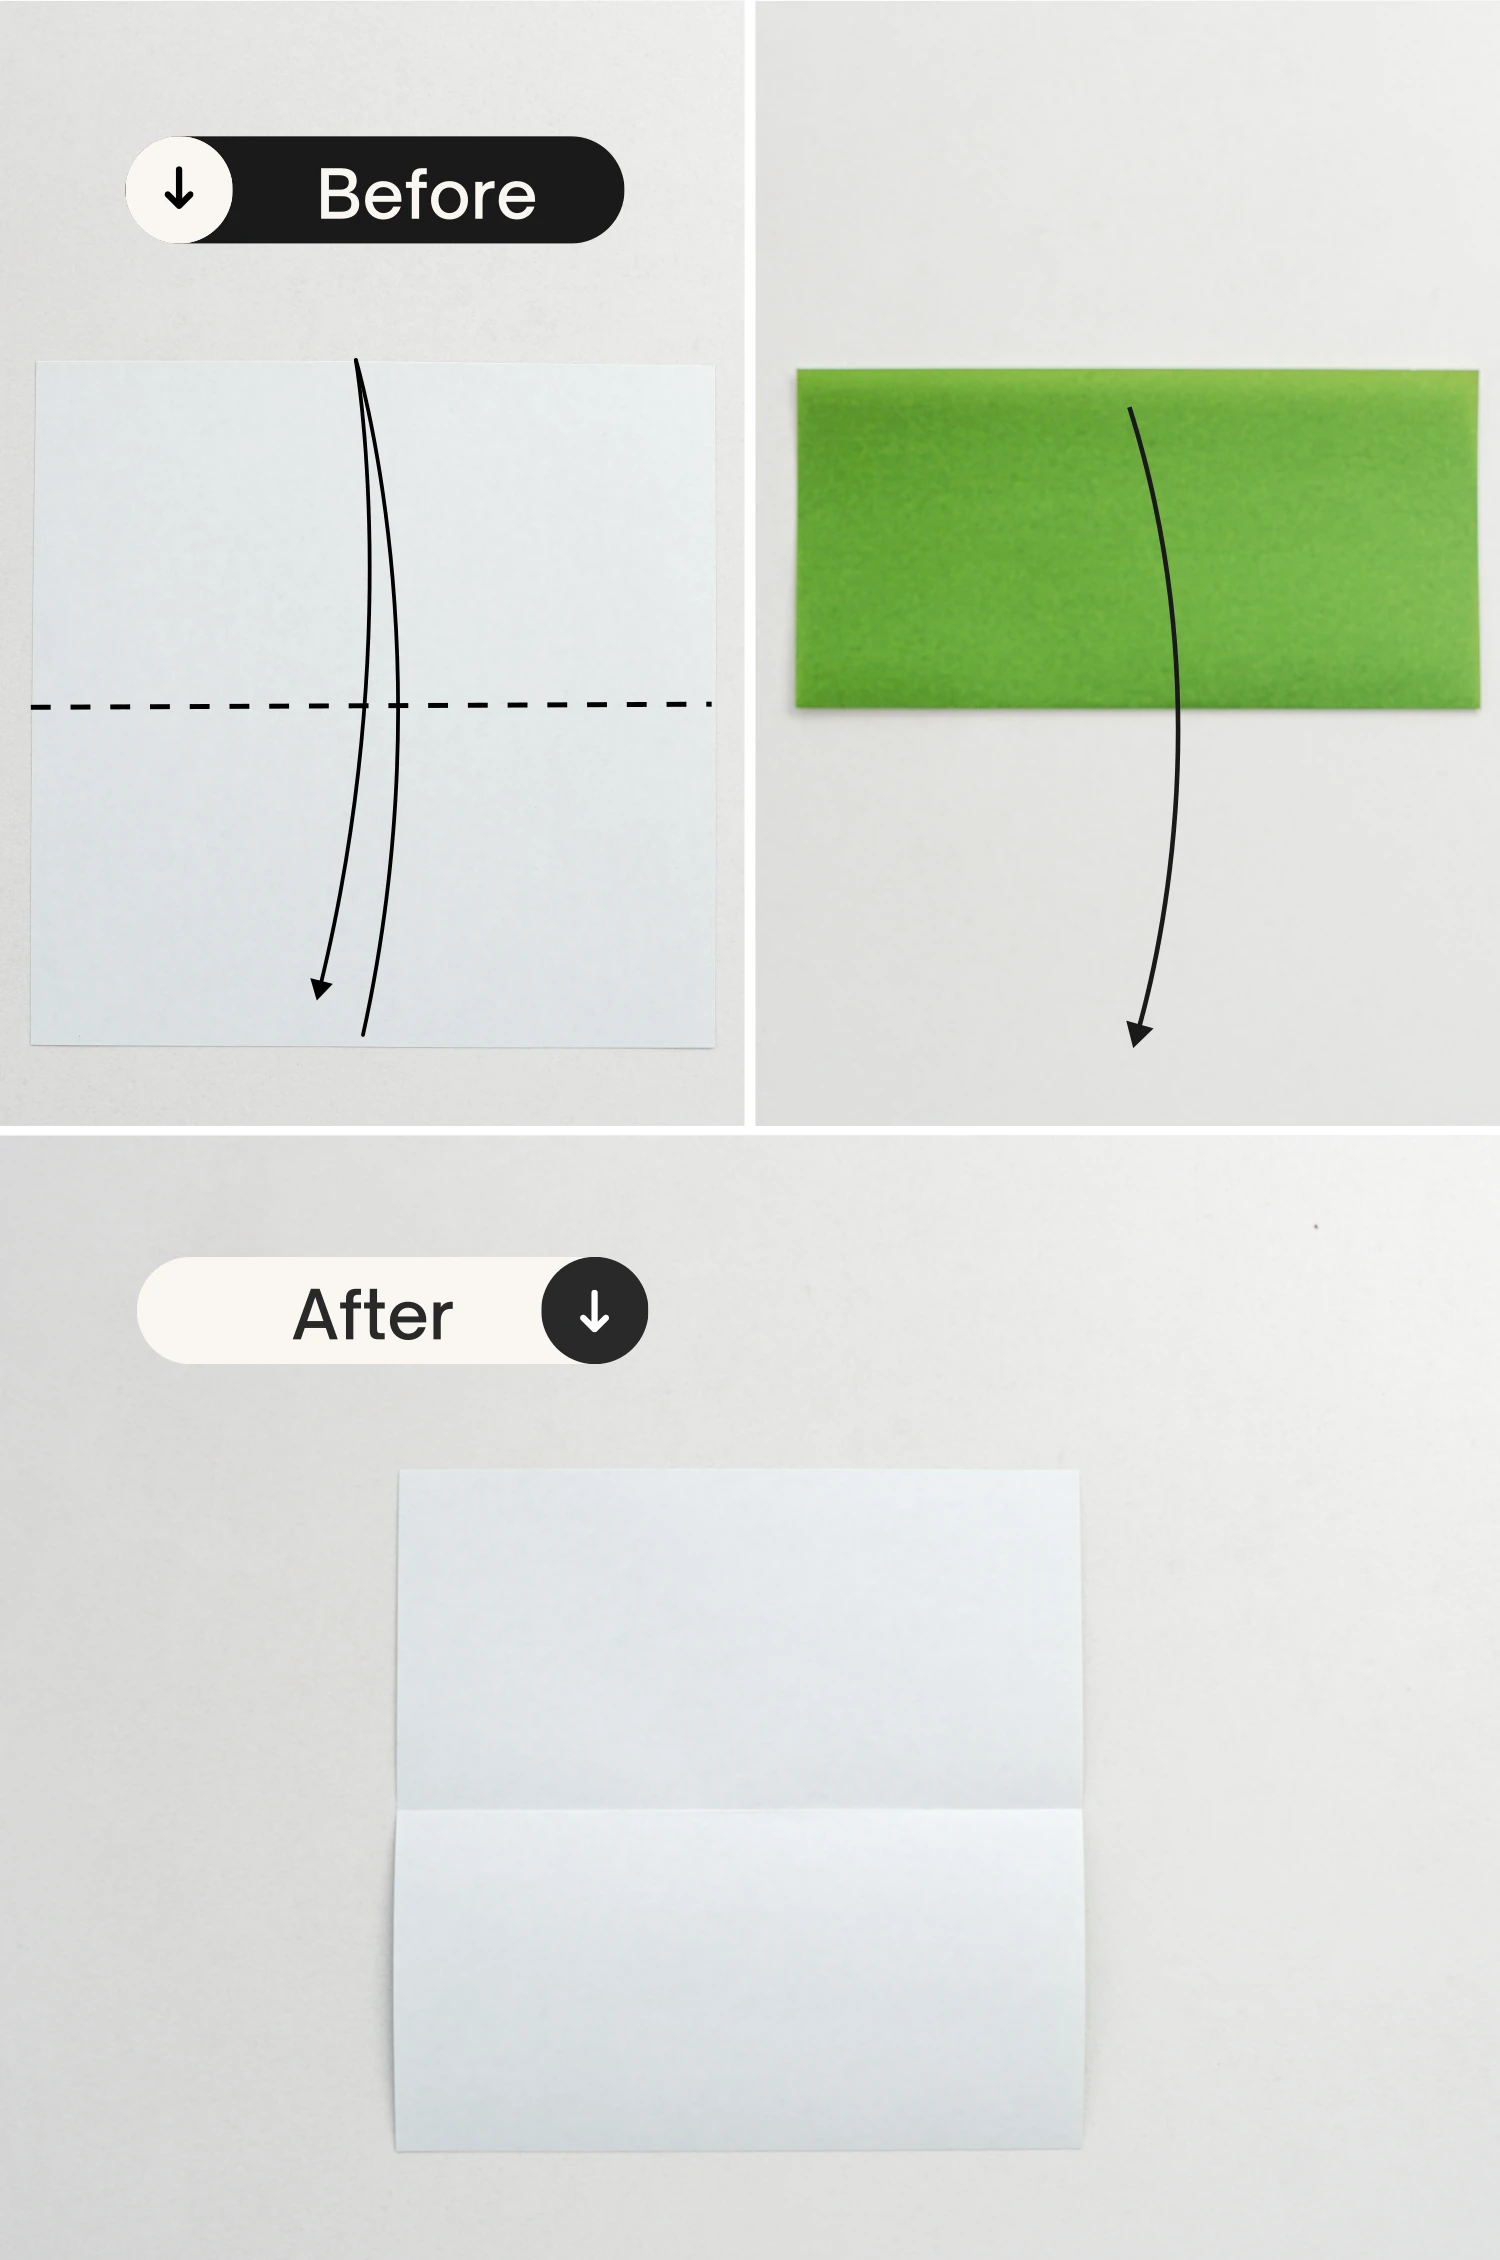
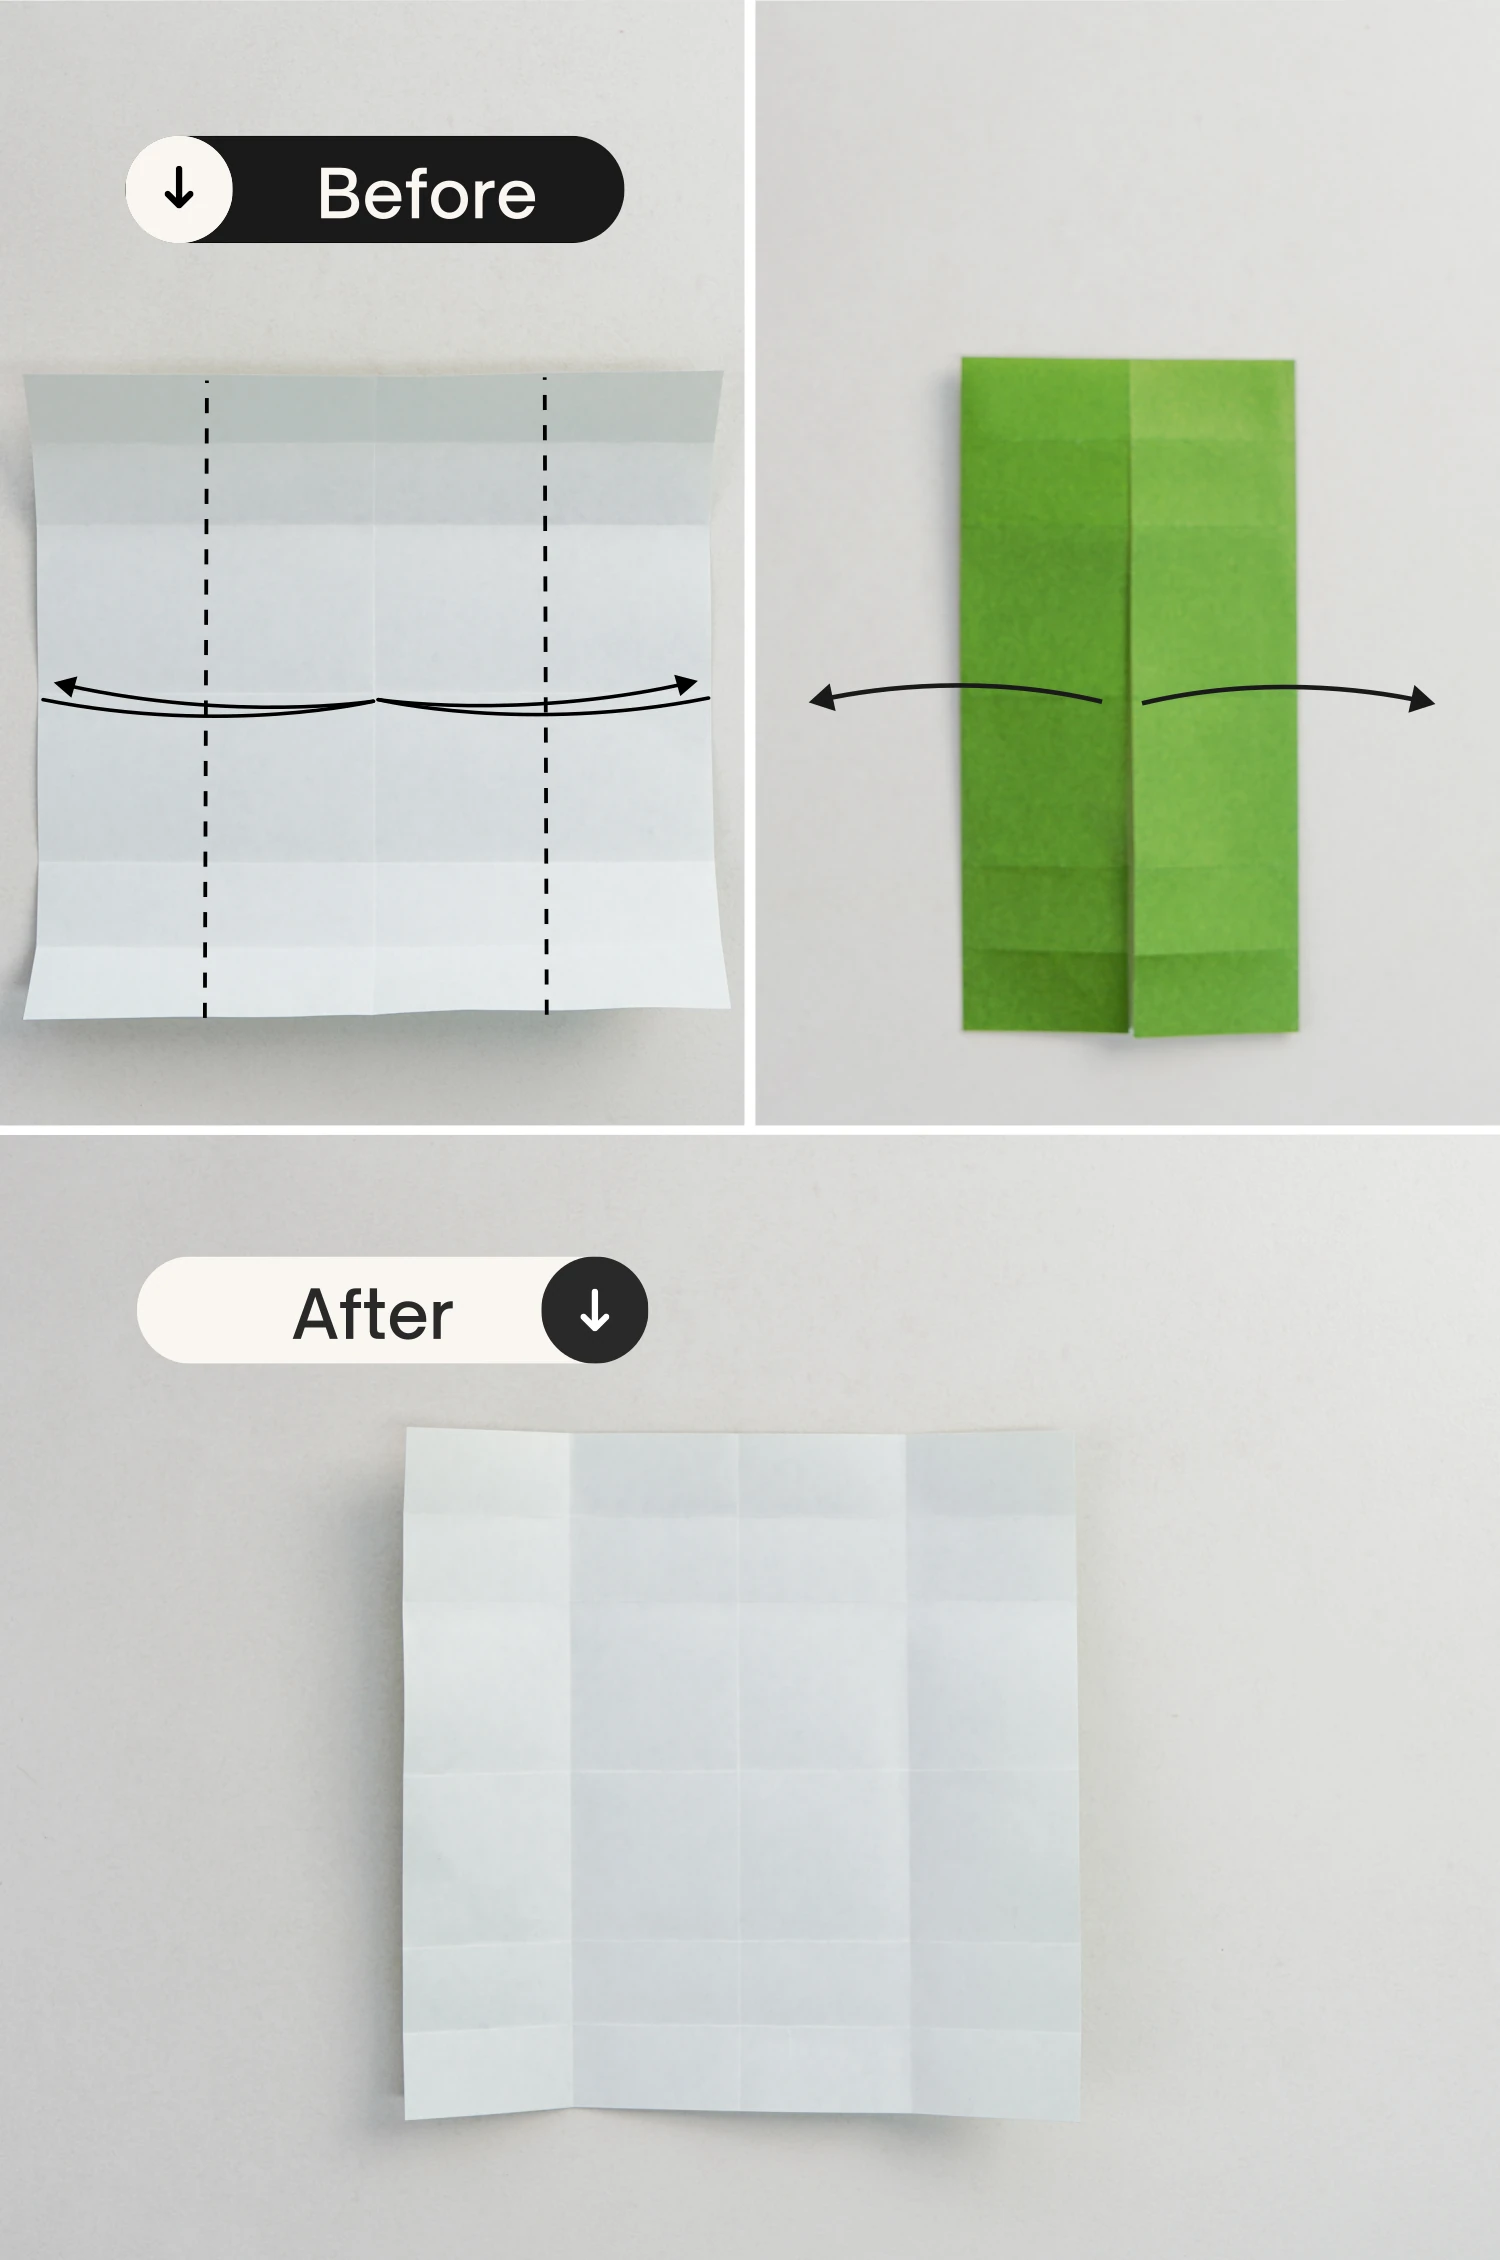
Step 1
Take out the green paper, and start with the white side of the paper facing up. Fold in half horizontally and unfold.
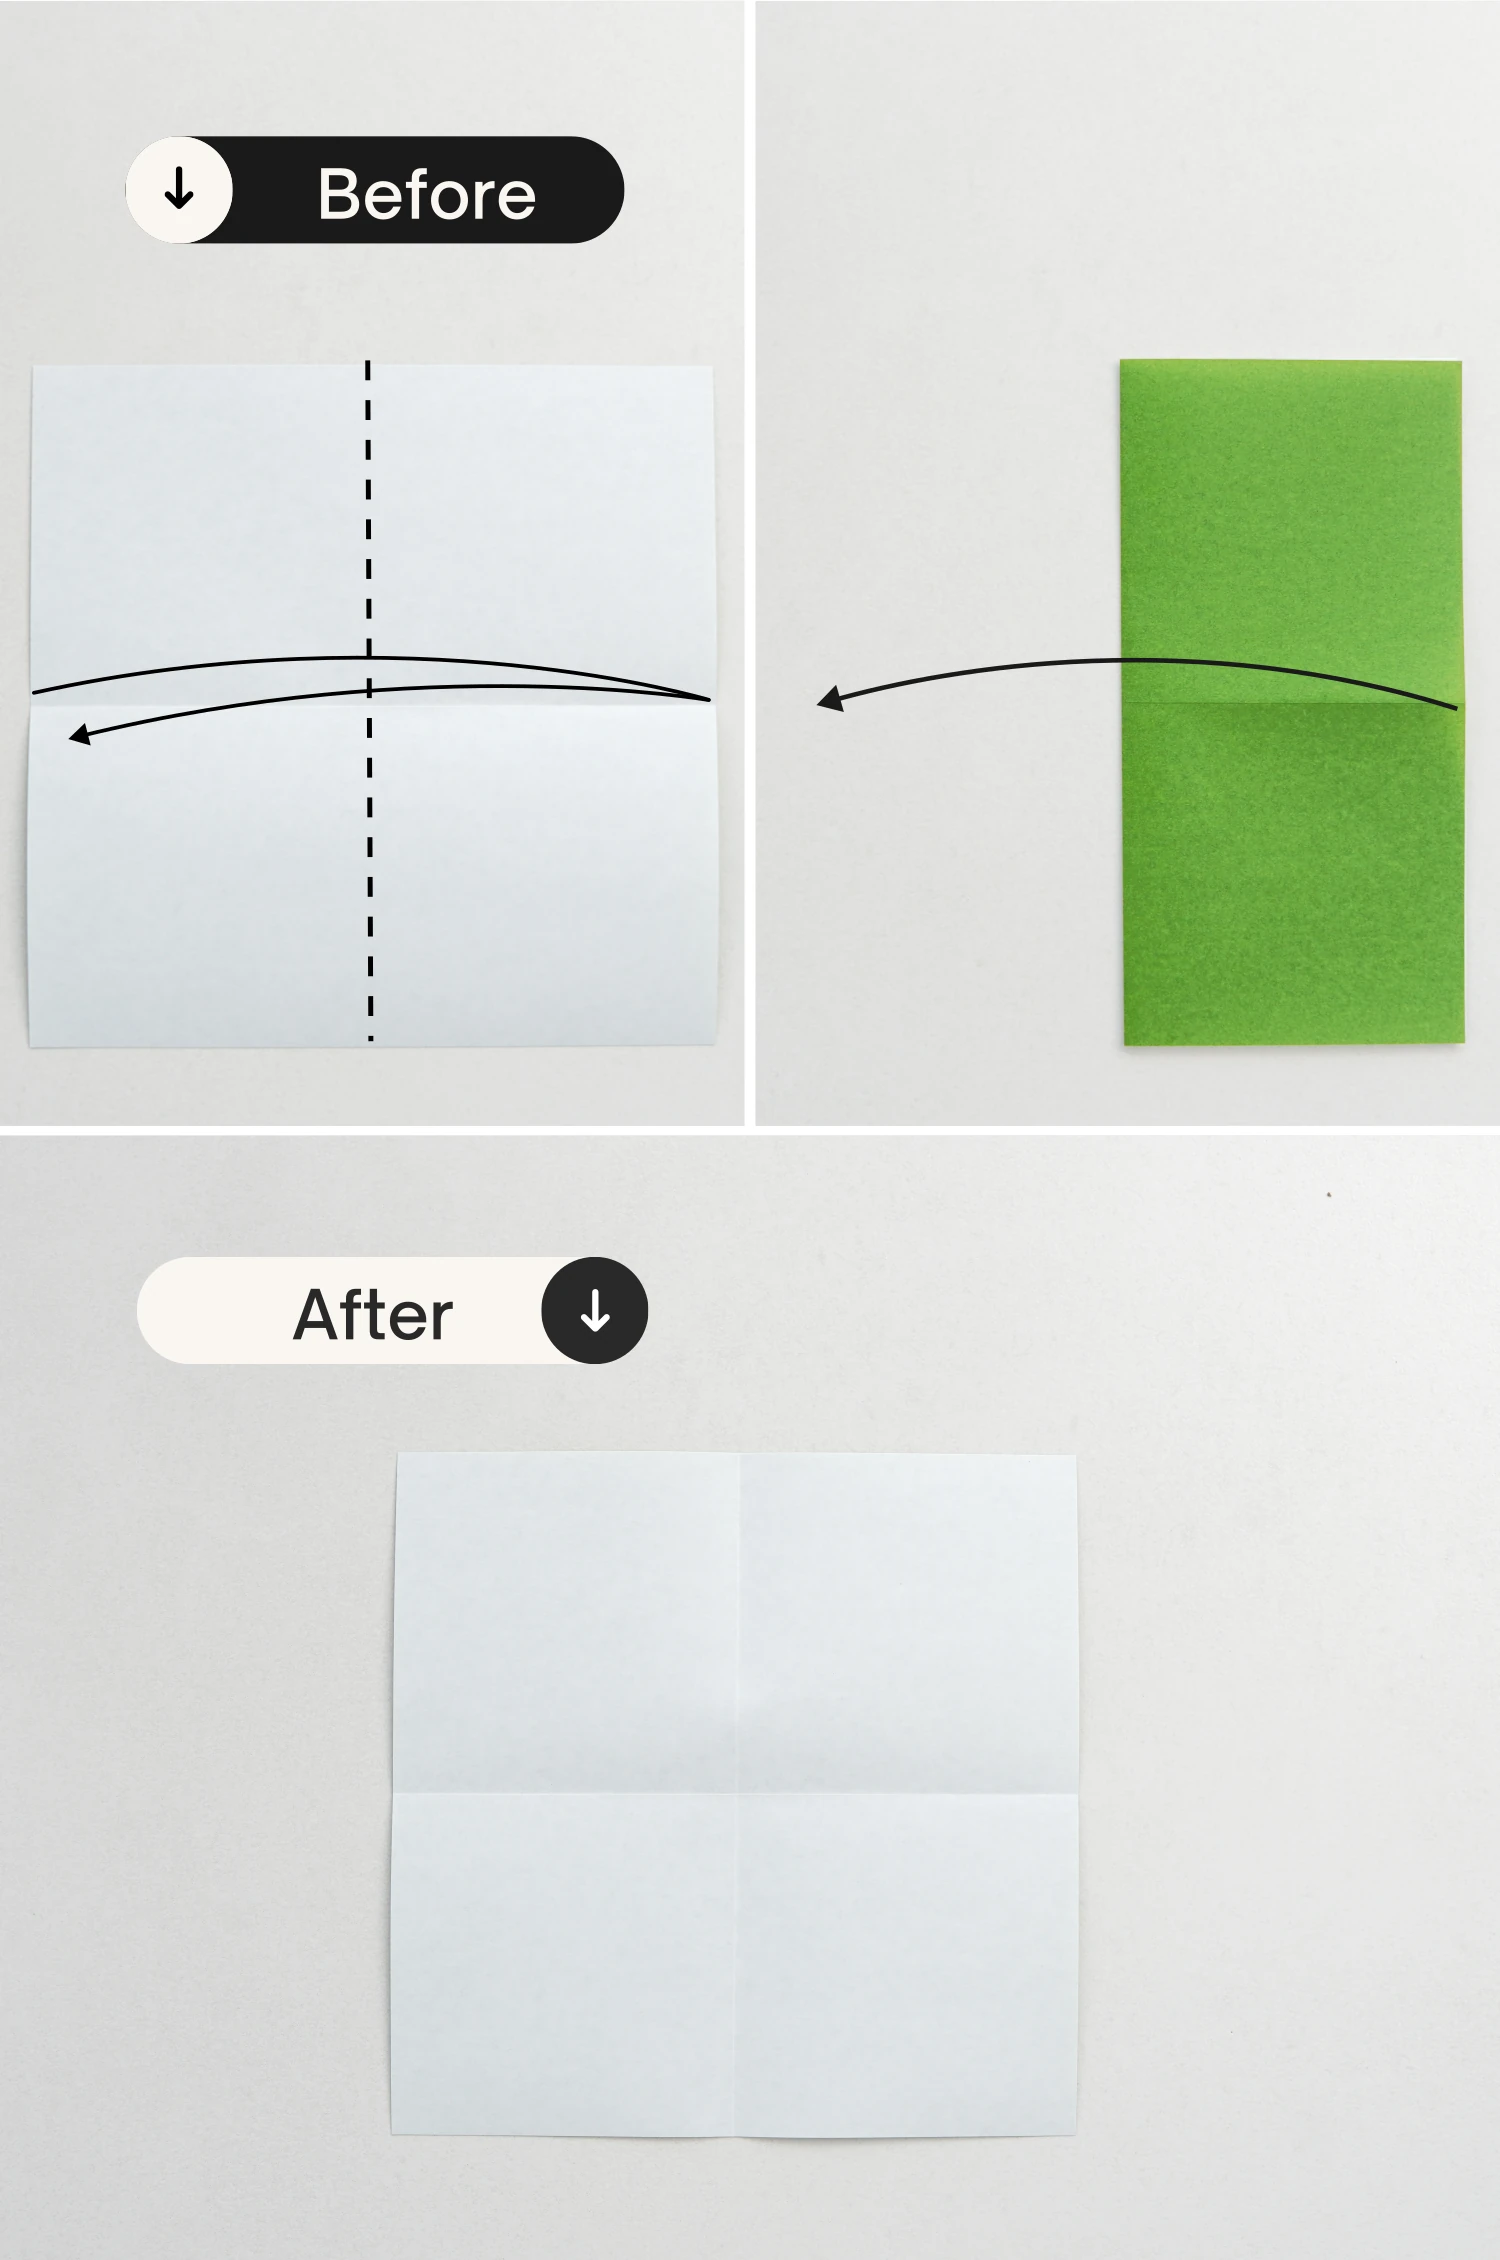
Step 2
Fold it in half vertically, then unfold it to create a new crease.
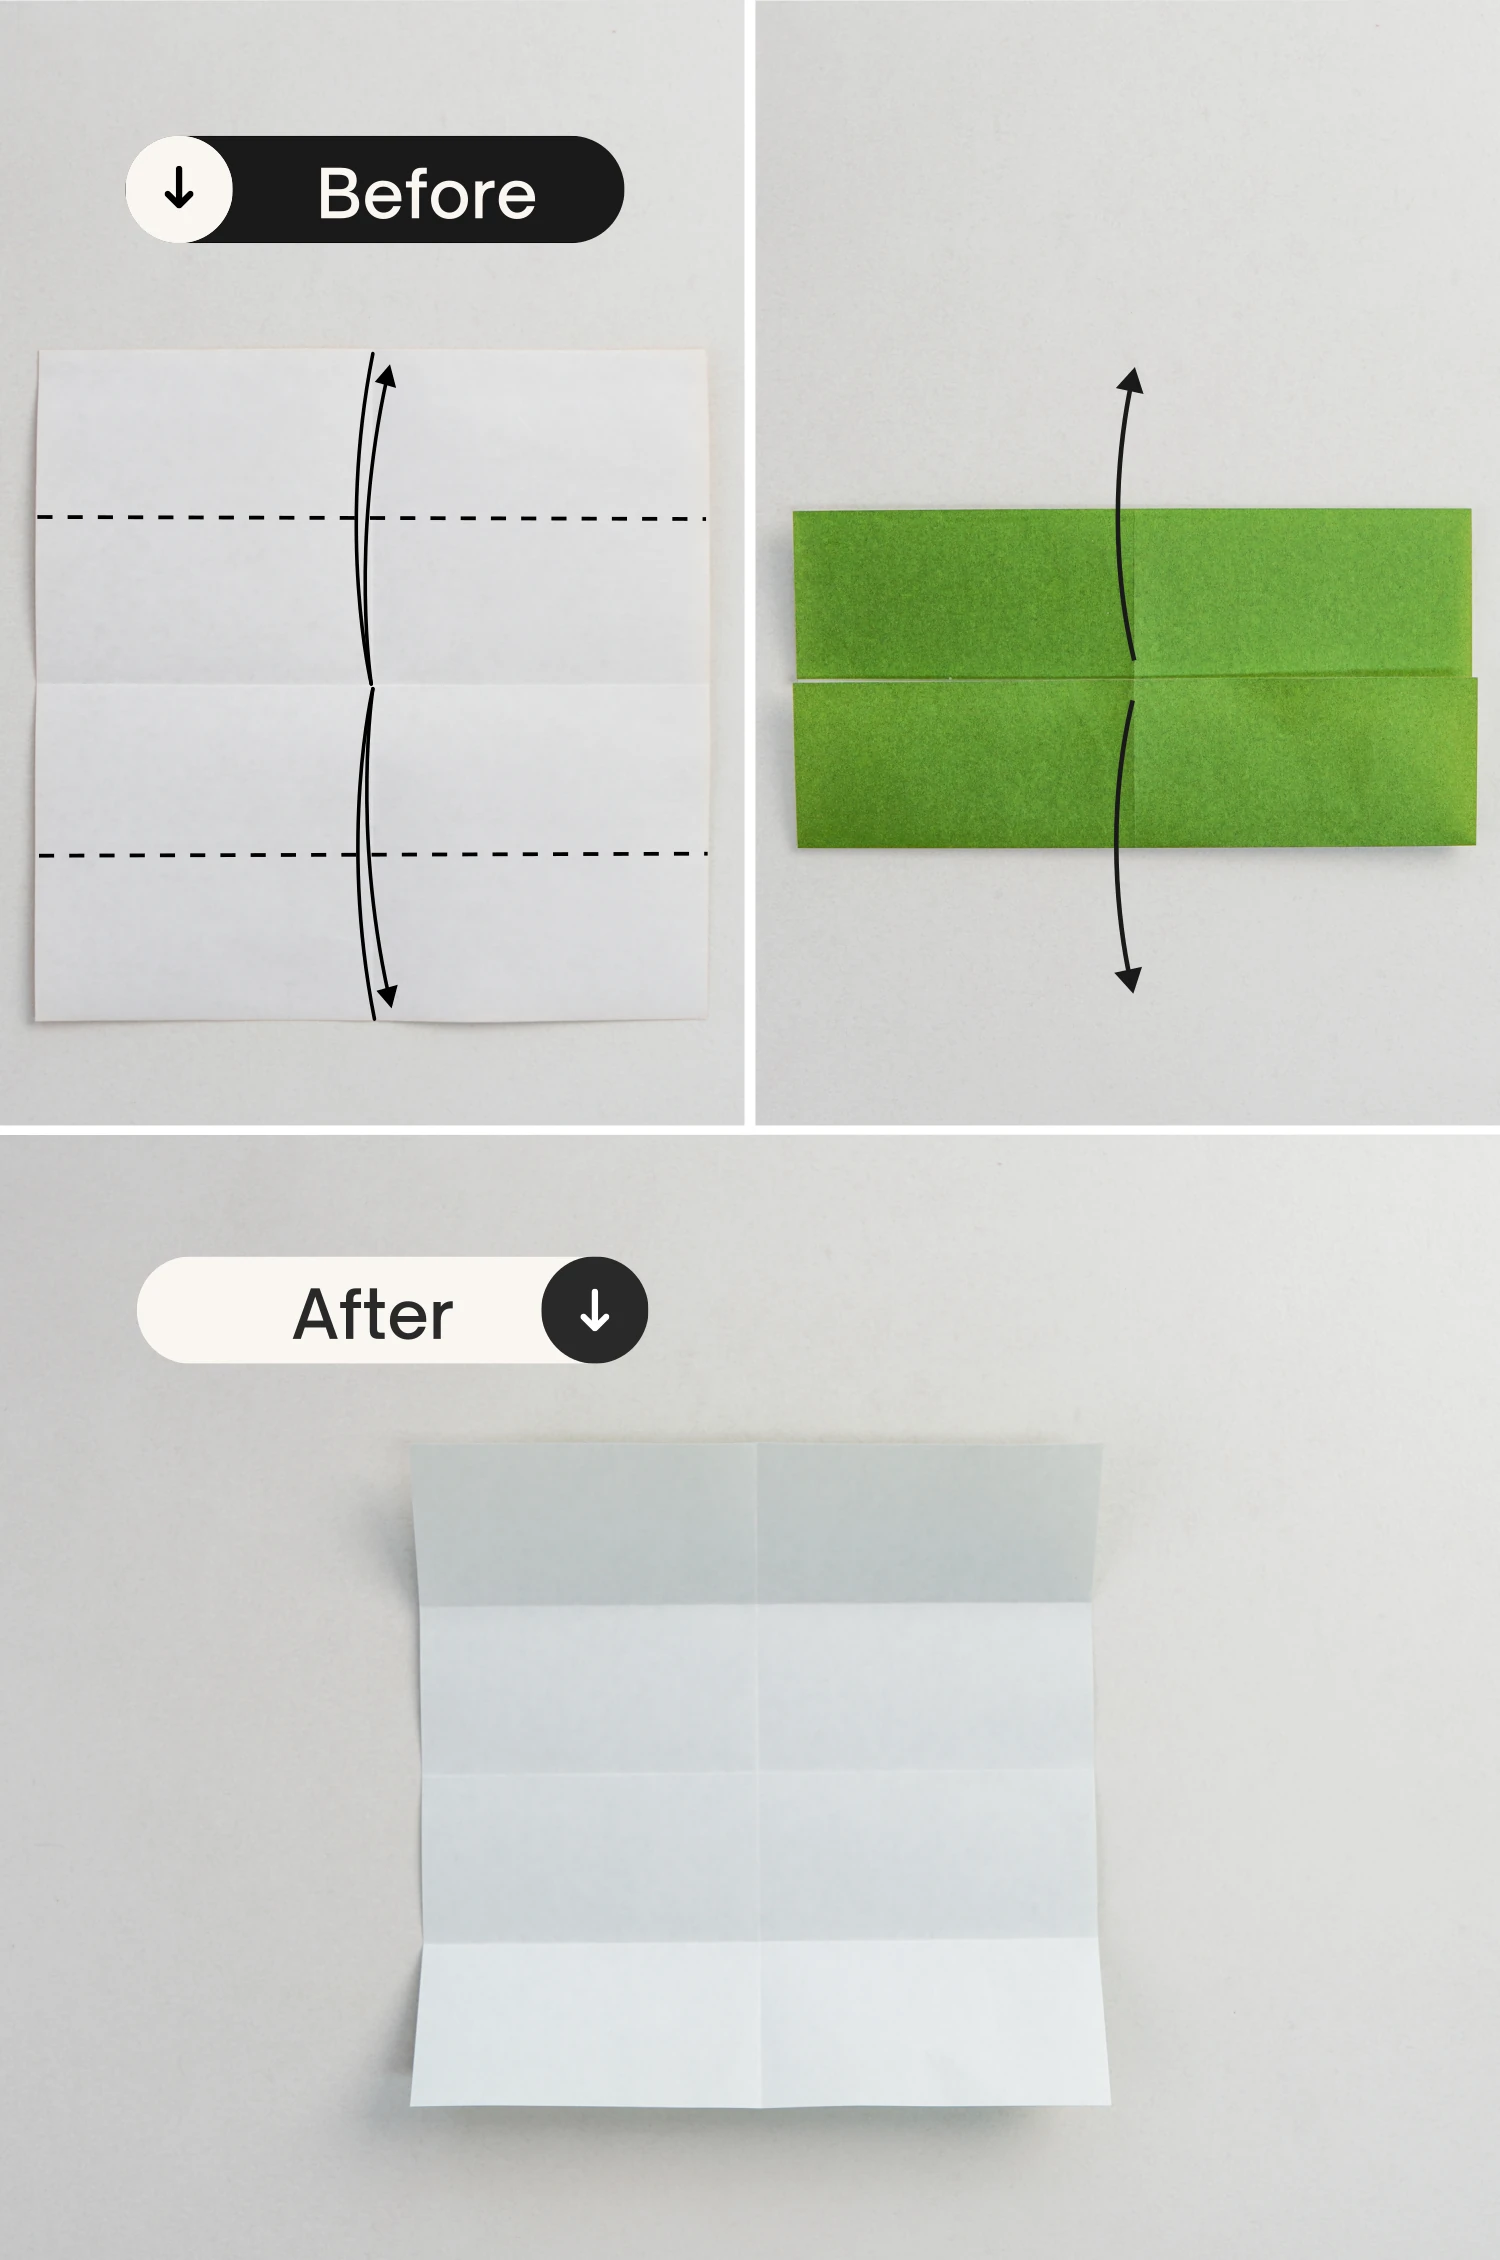
Step 3
Fold both the top and bottom edges toward the center to meet the horizontal crease, crease them well then unfold, getting two new creases.
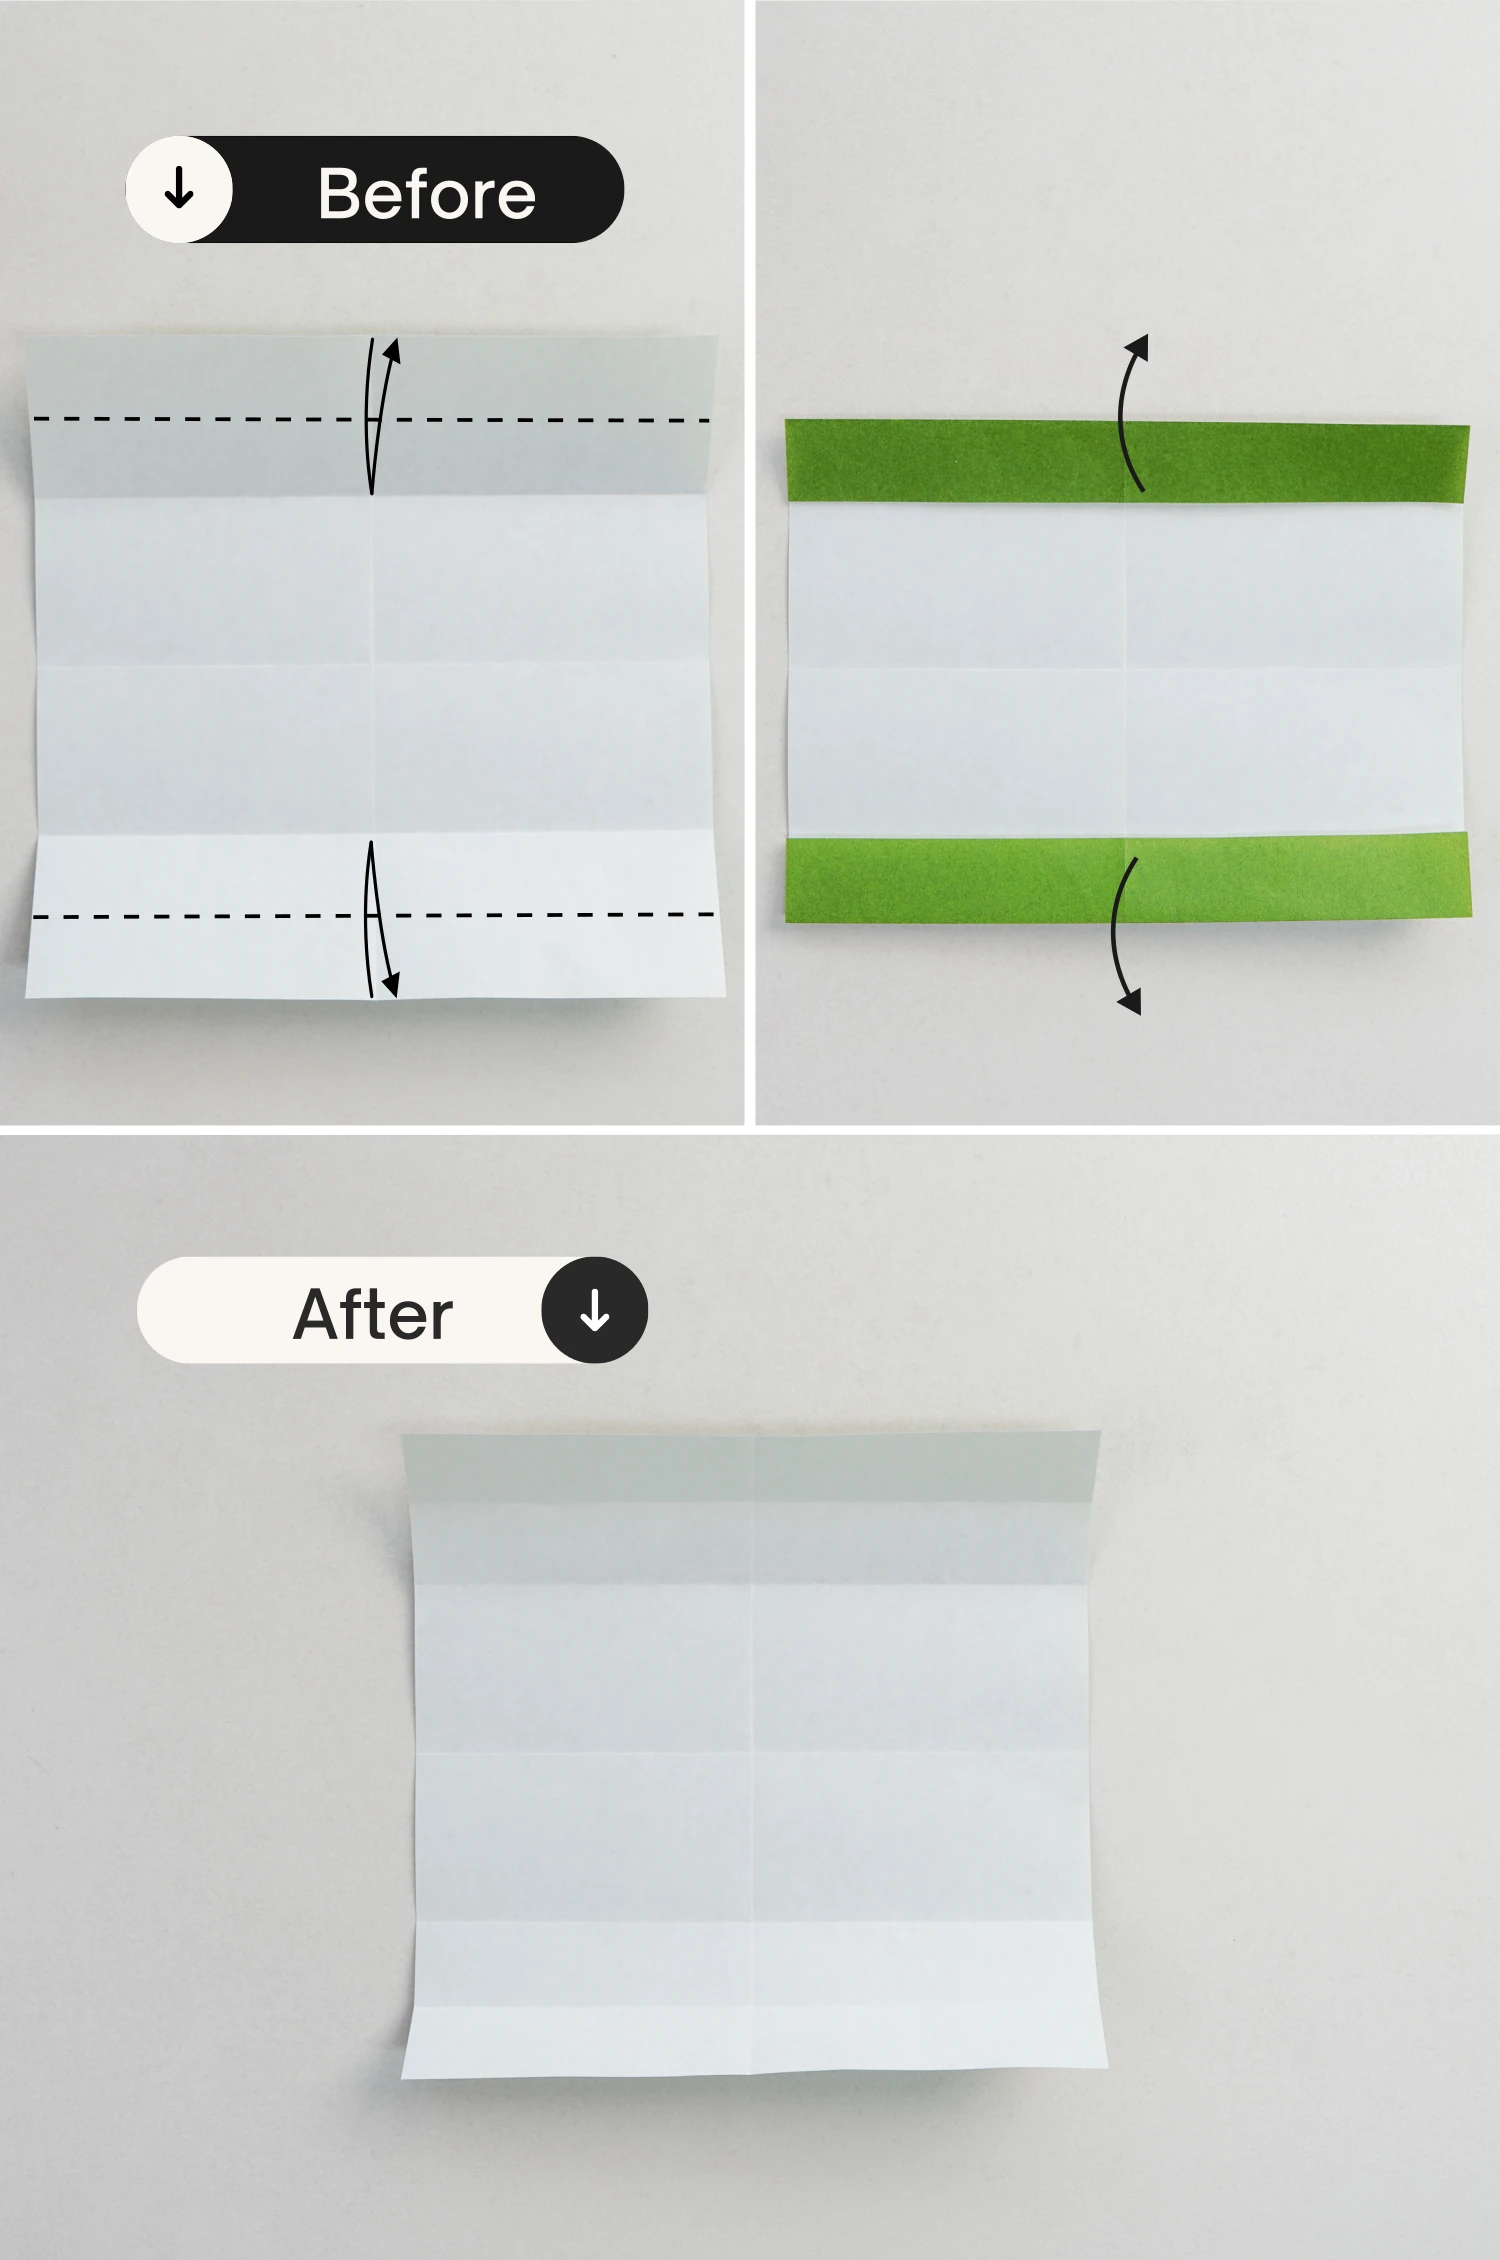
Step 4
Fold the top and bottom edges toward the center again, to meet the two creases you made in the previous step, and unfold.
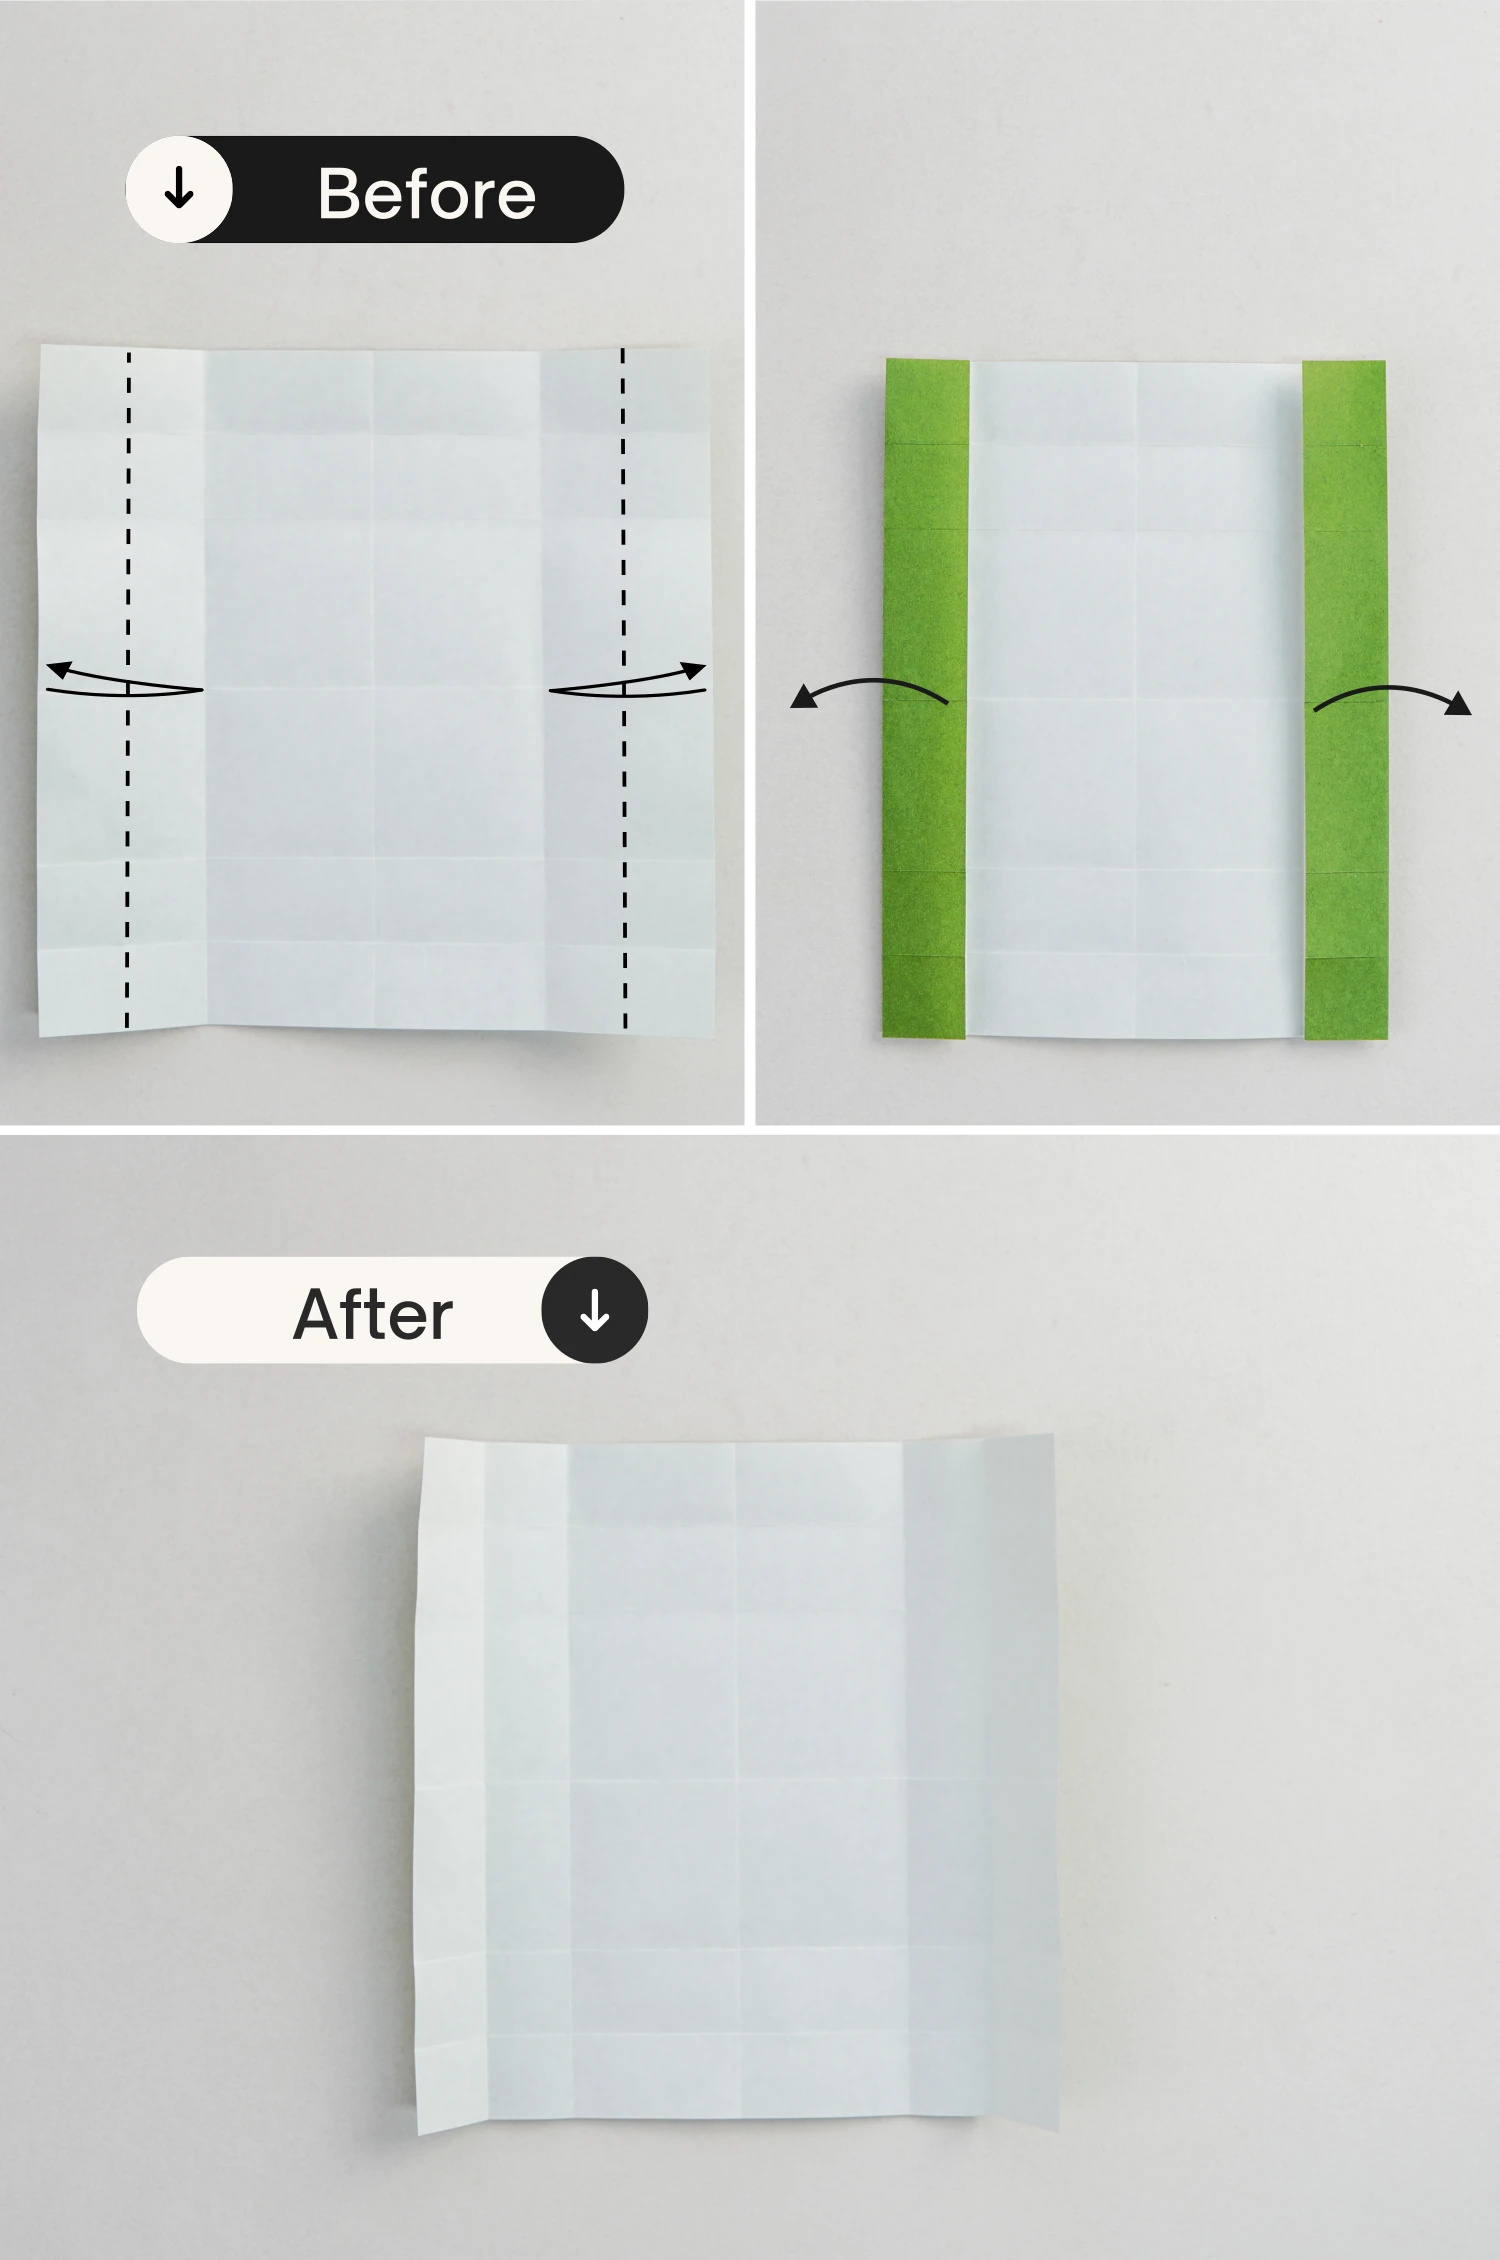
Step 5
Fold the left and right edges to meet the vertical crease, and unfold.
Step 6
Fold the left and right edges to meet the creases you made in the previous step, crease well then unfold.
Step 7
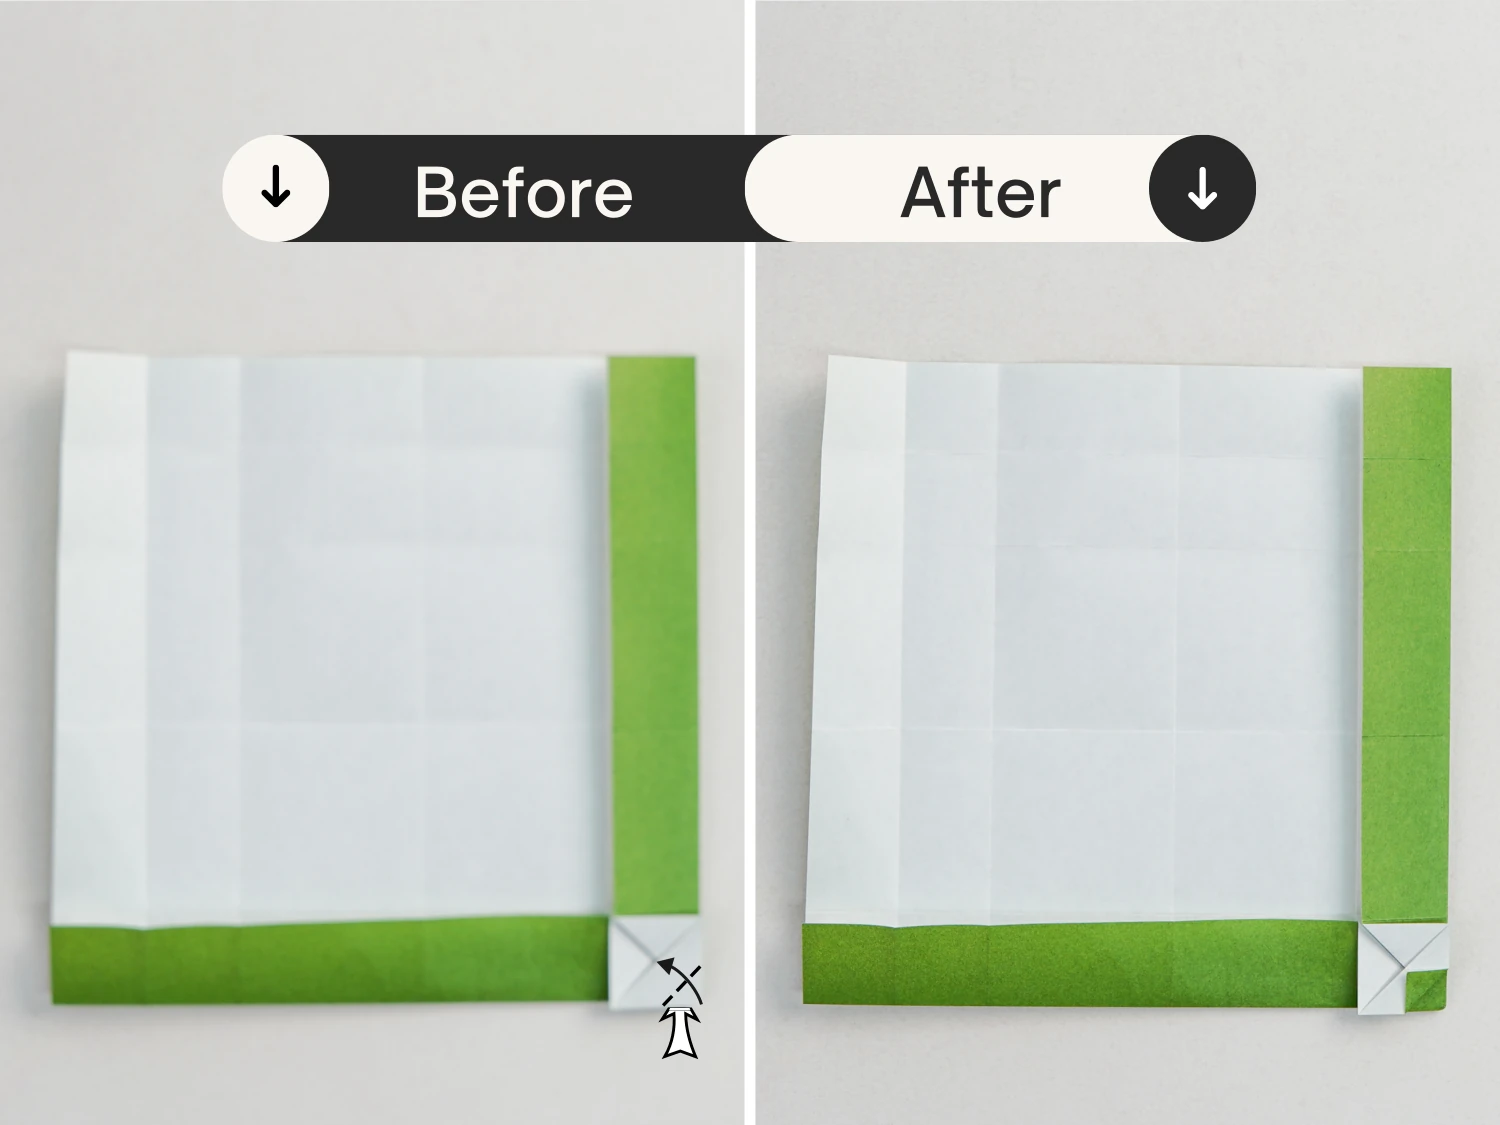
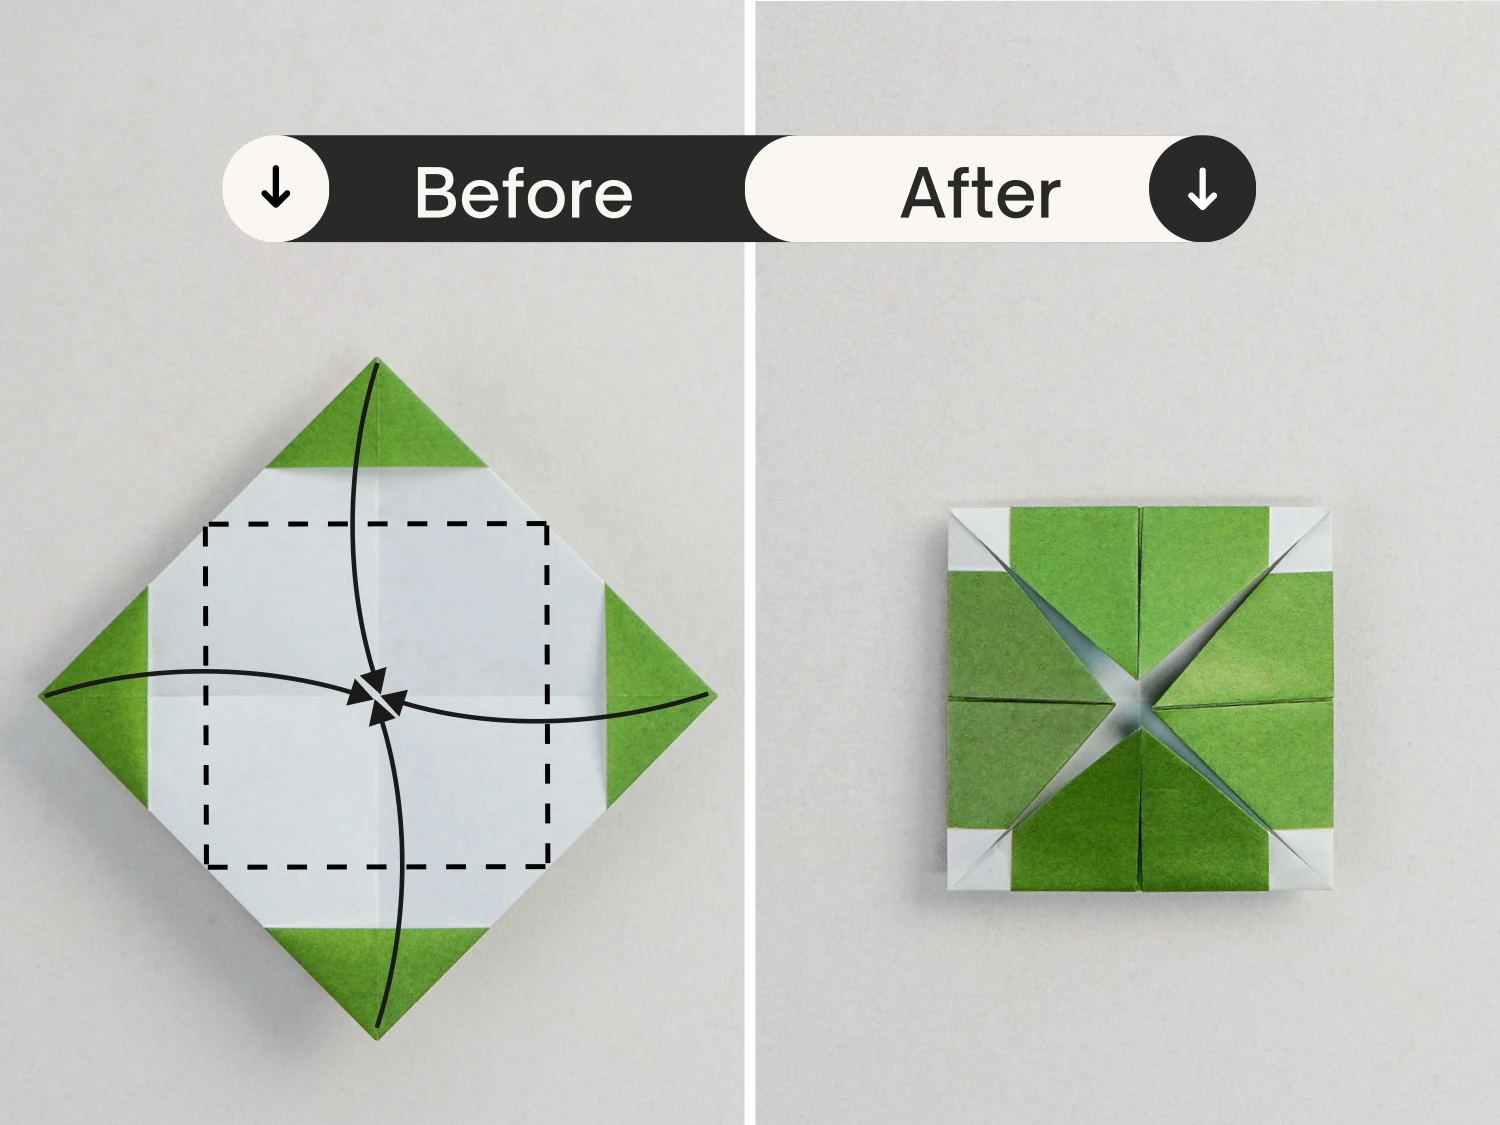
Lift the right and bottom edges to make them stand, and expand the bottom right corner.
Press down the two edges along the creases, and flatten the bottom right corner to make the bottom right point of the paper meet the intersection point formed by two creases, creating a small square.
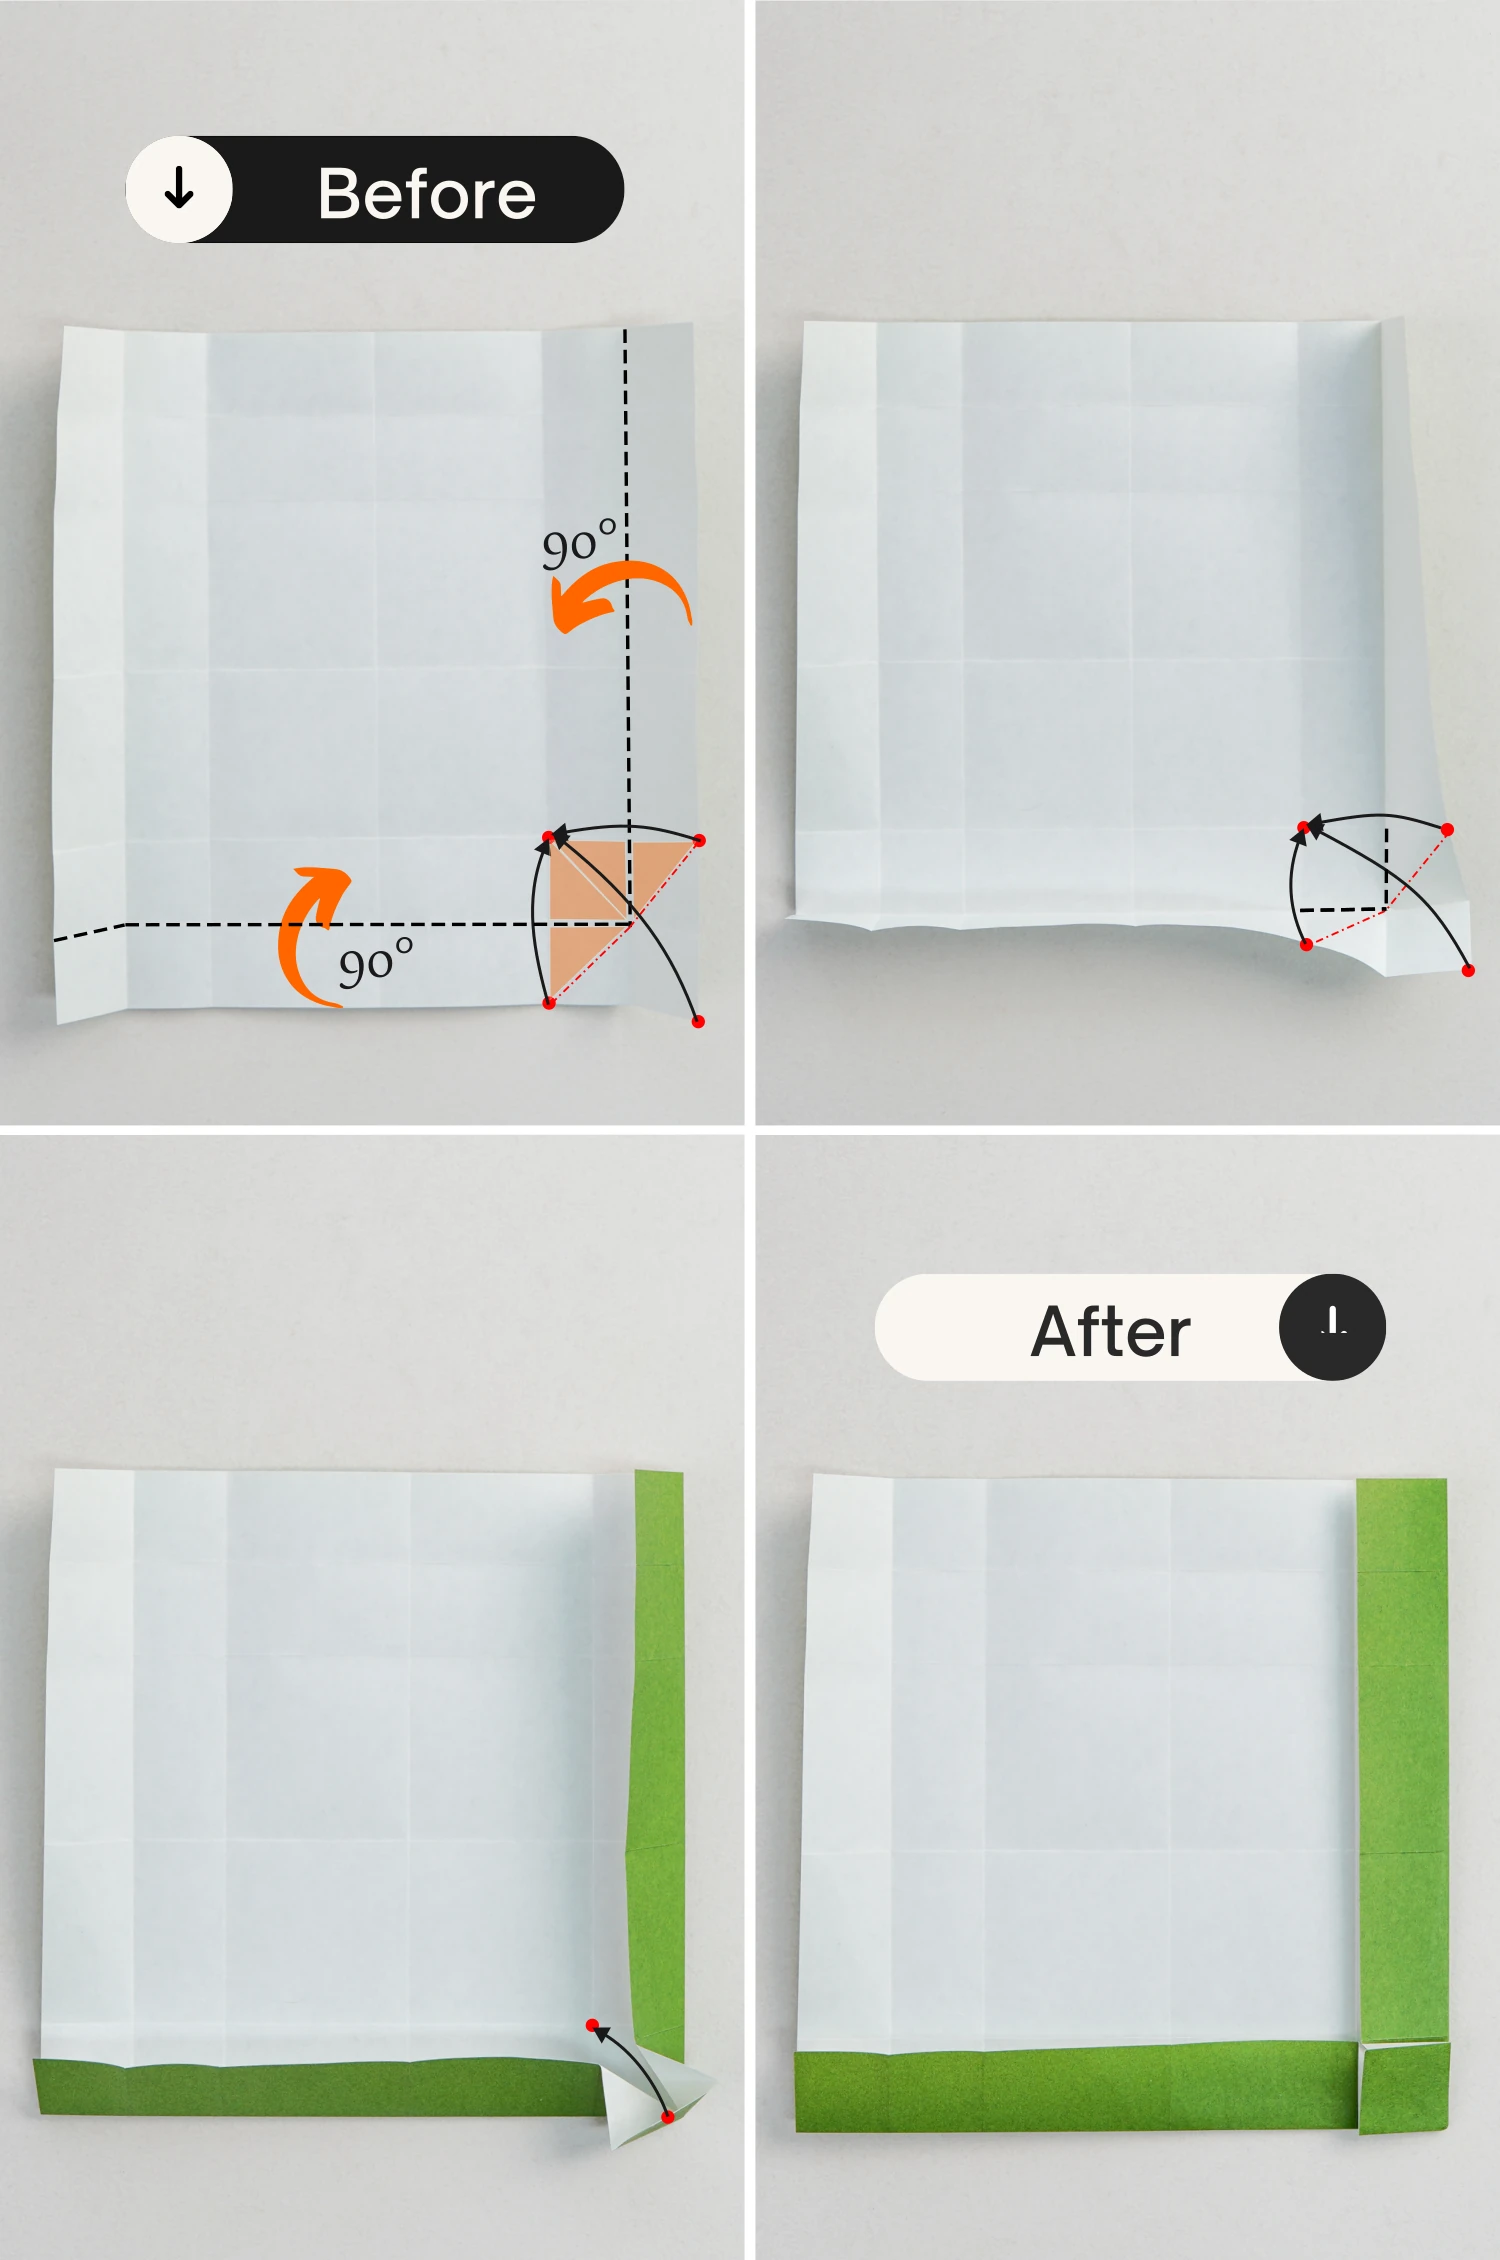
Step 8
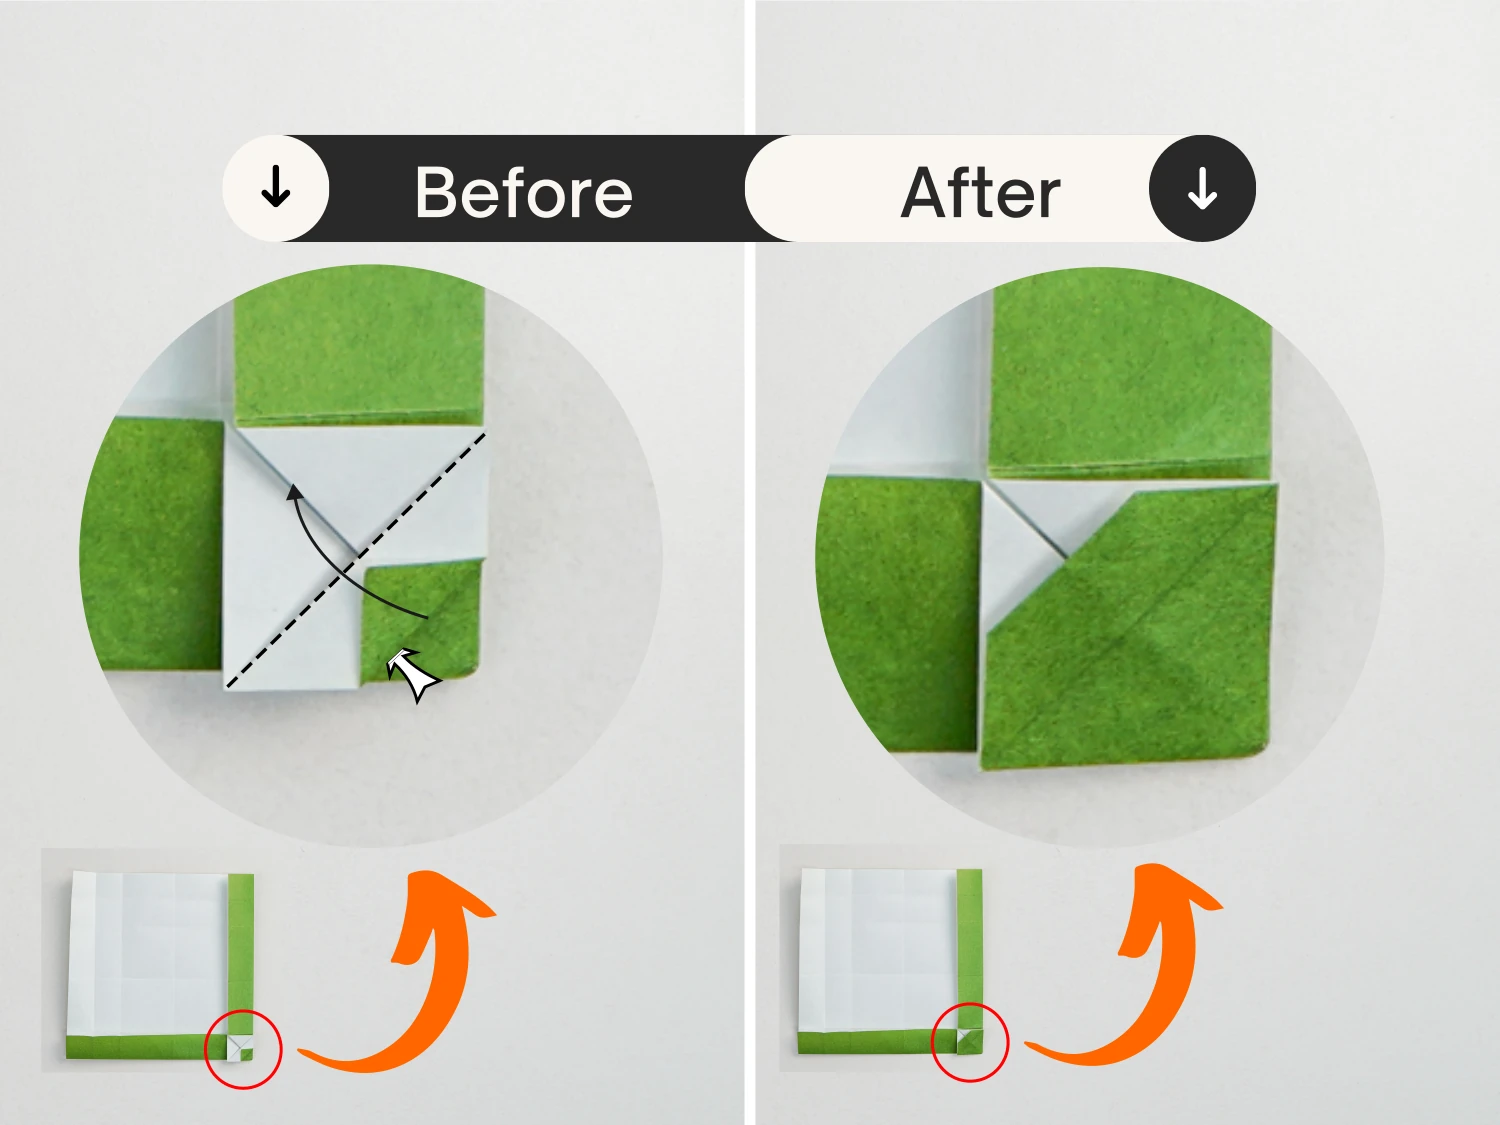
Lift the top left point of the small square, and fold it to the bottom right diagonally.
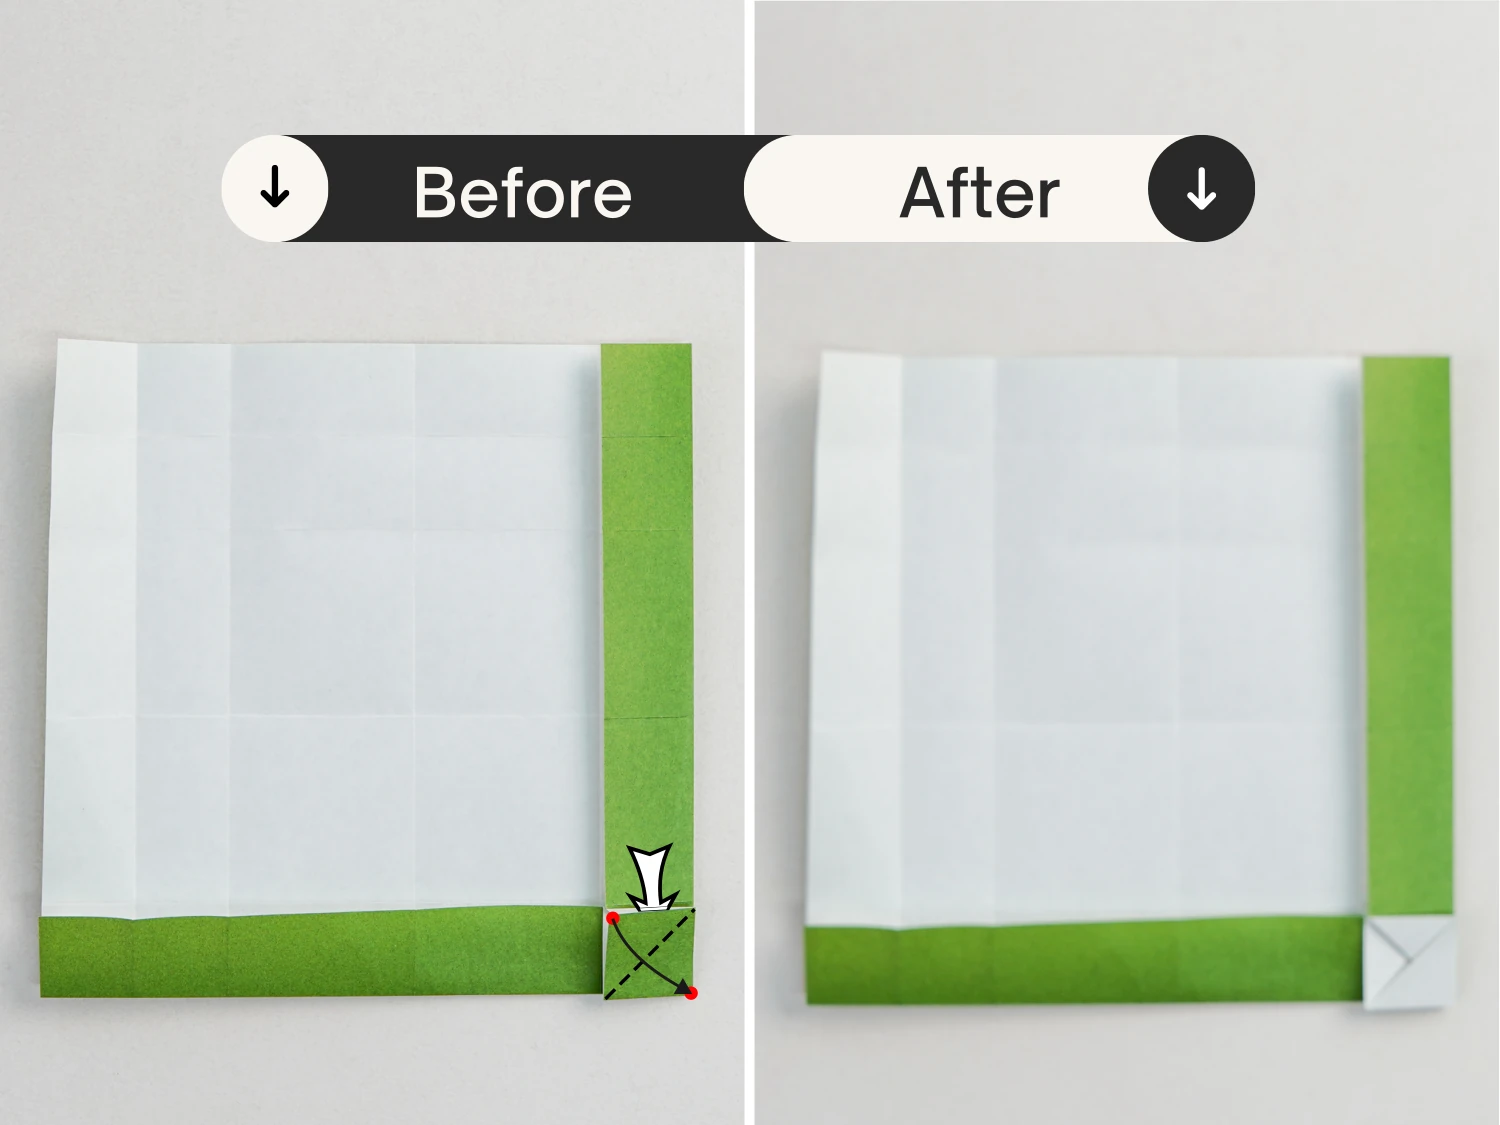
Step 9
Then fold this point toward the top left to meet the diagonal edge.
Step 10
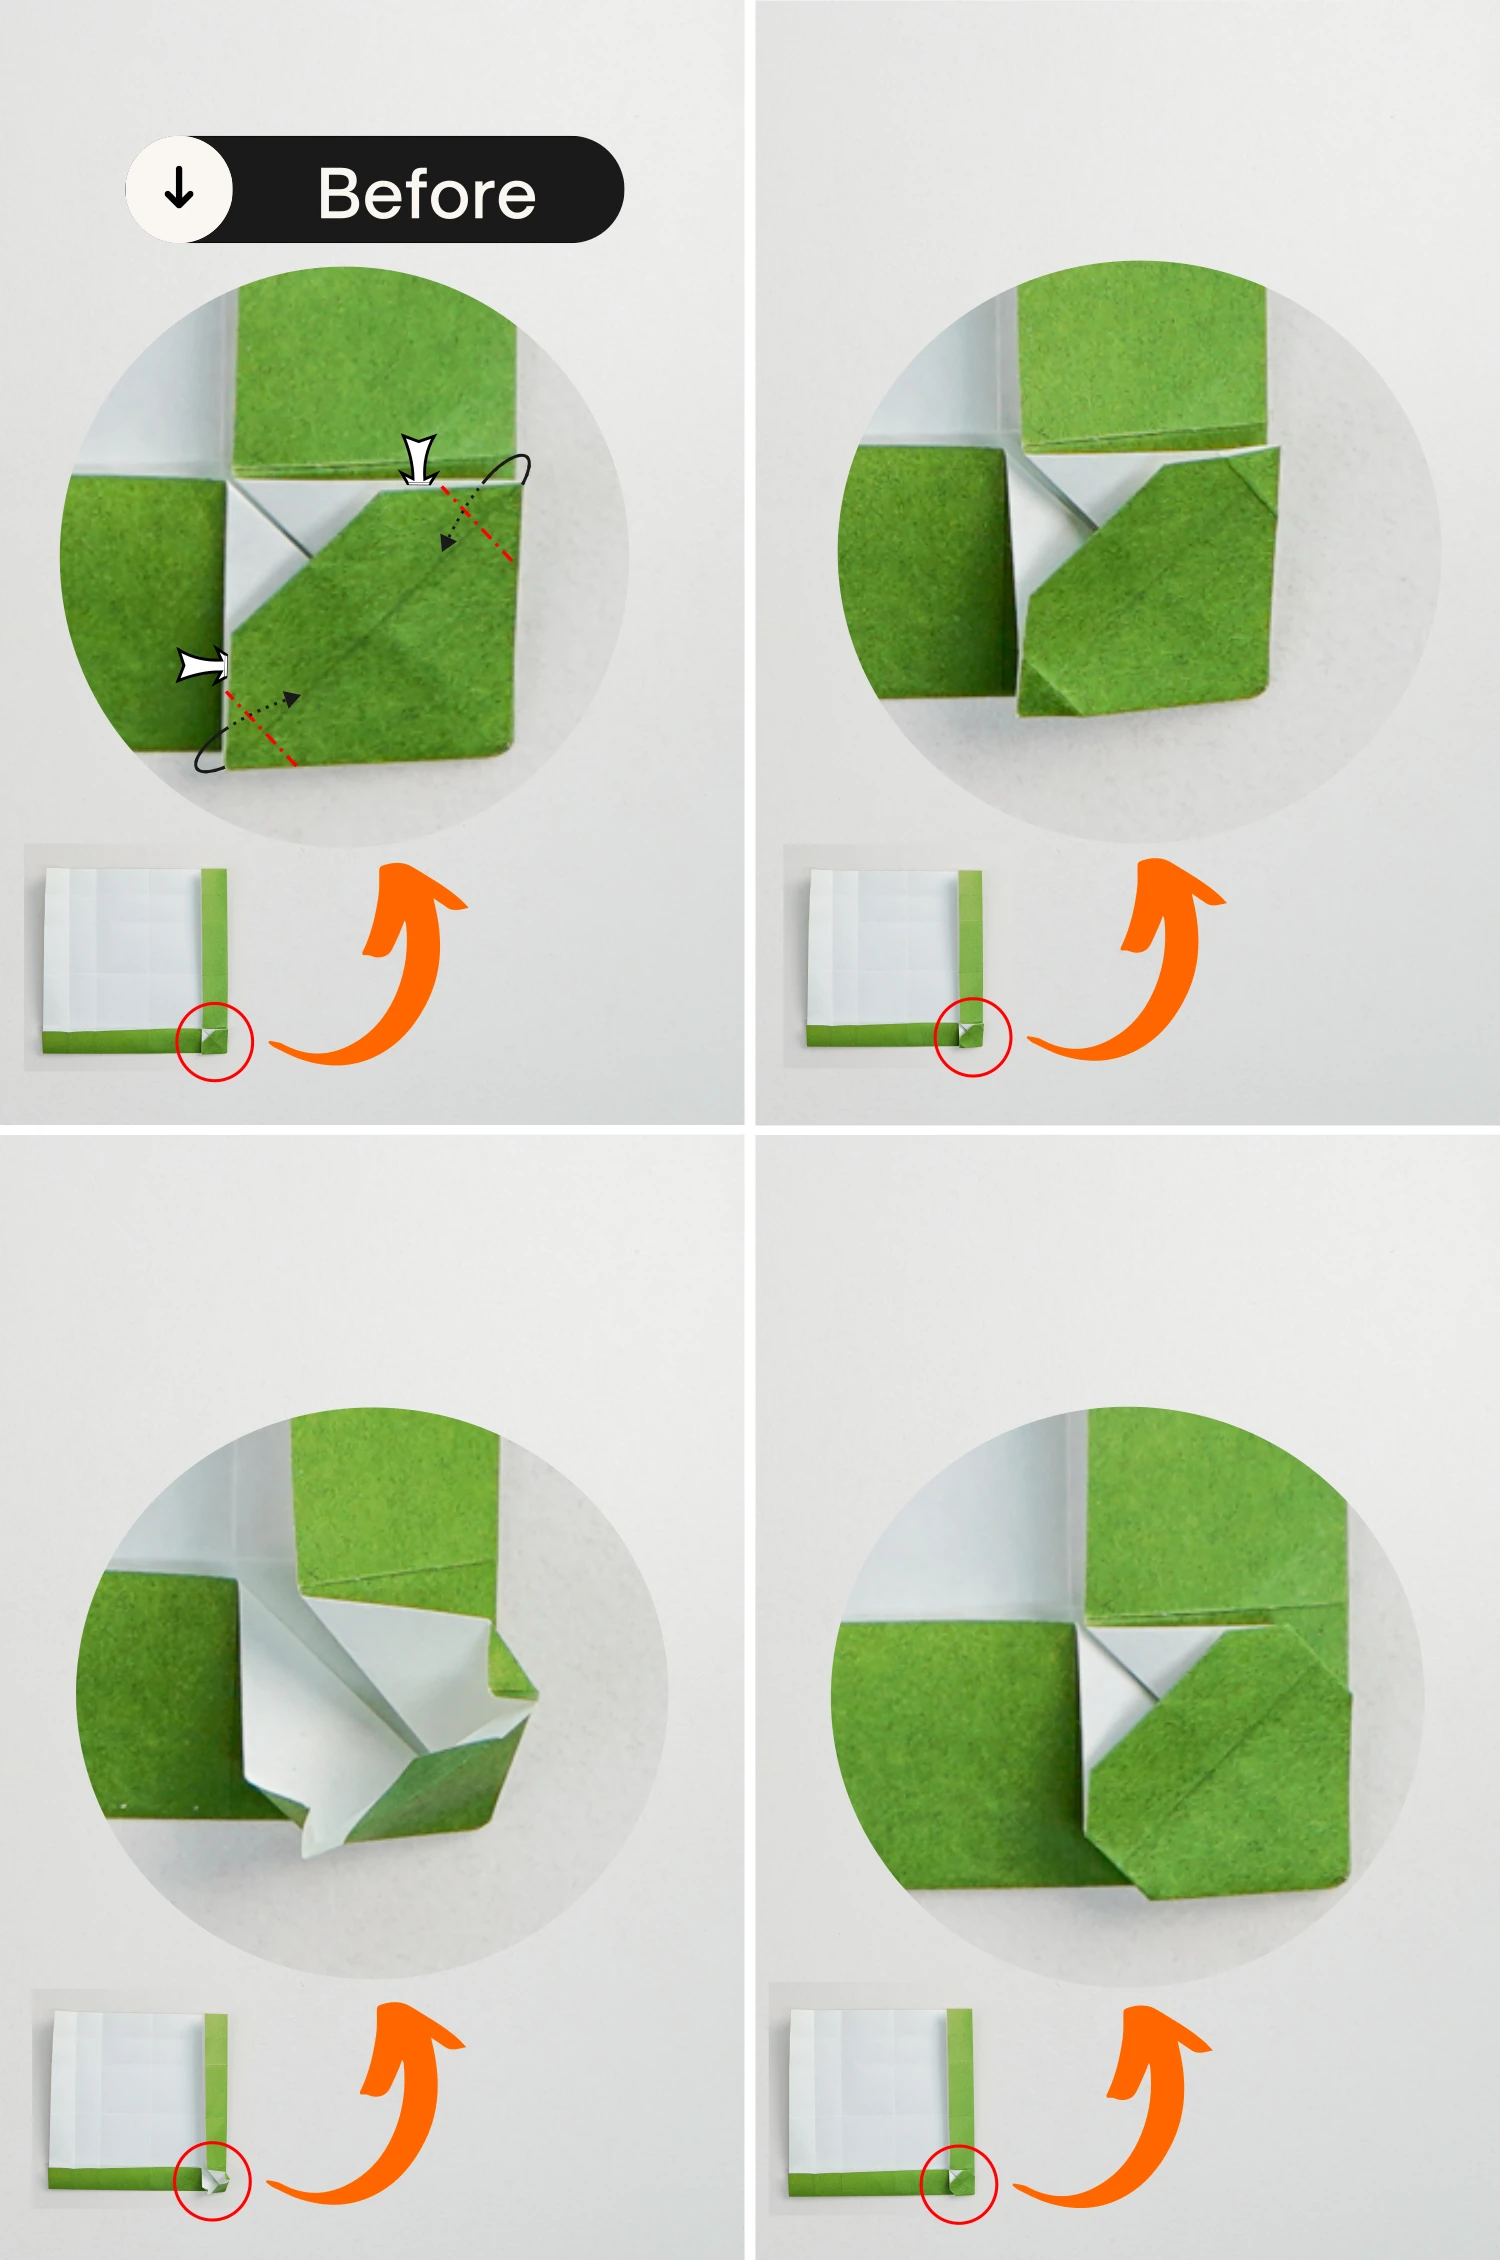
Take the top flap above the small square, and fold it to the top left along the dotted line, creating a diamond shape.
Step 11
Fold the top right corner and bottom left corners of the small square backward a little, getting two creases perpendicular to the diagonal crease.
Then slightly lift the diamond layer, and push its left and right corners toward the center, next, flatten them along the two creases you just made.
Step 12
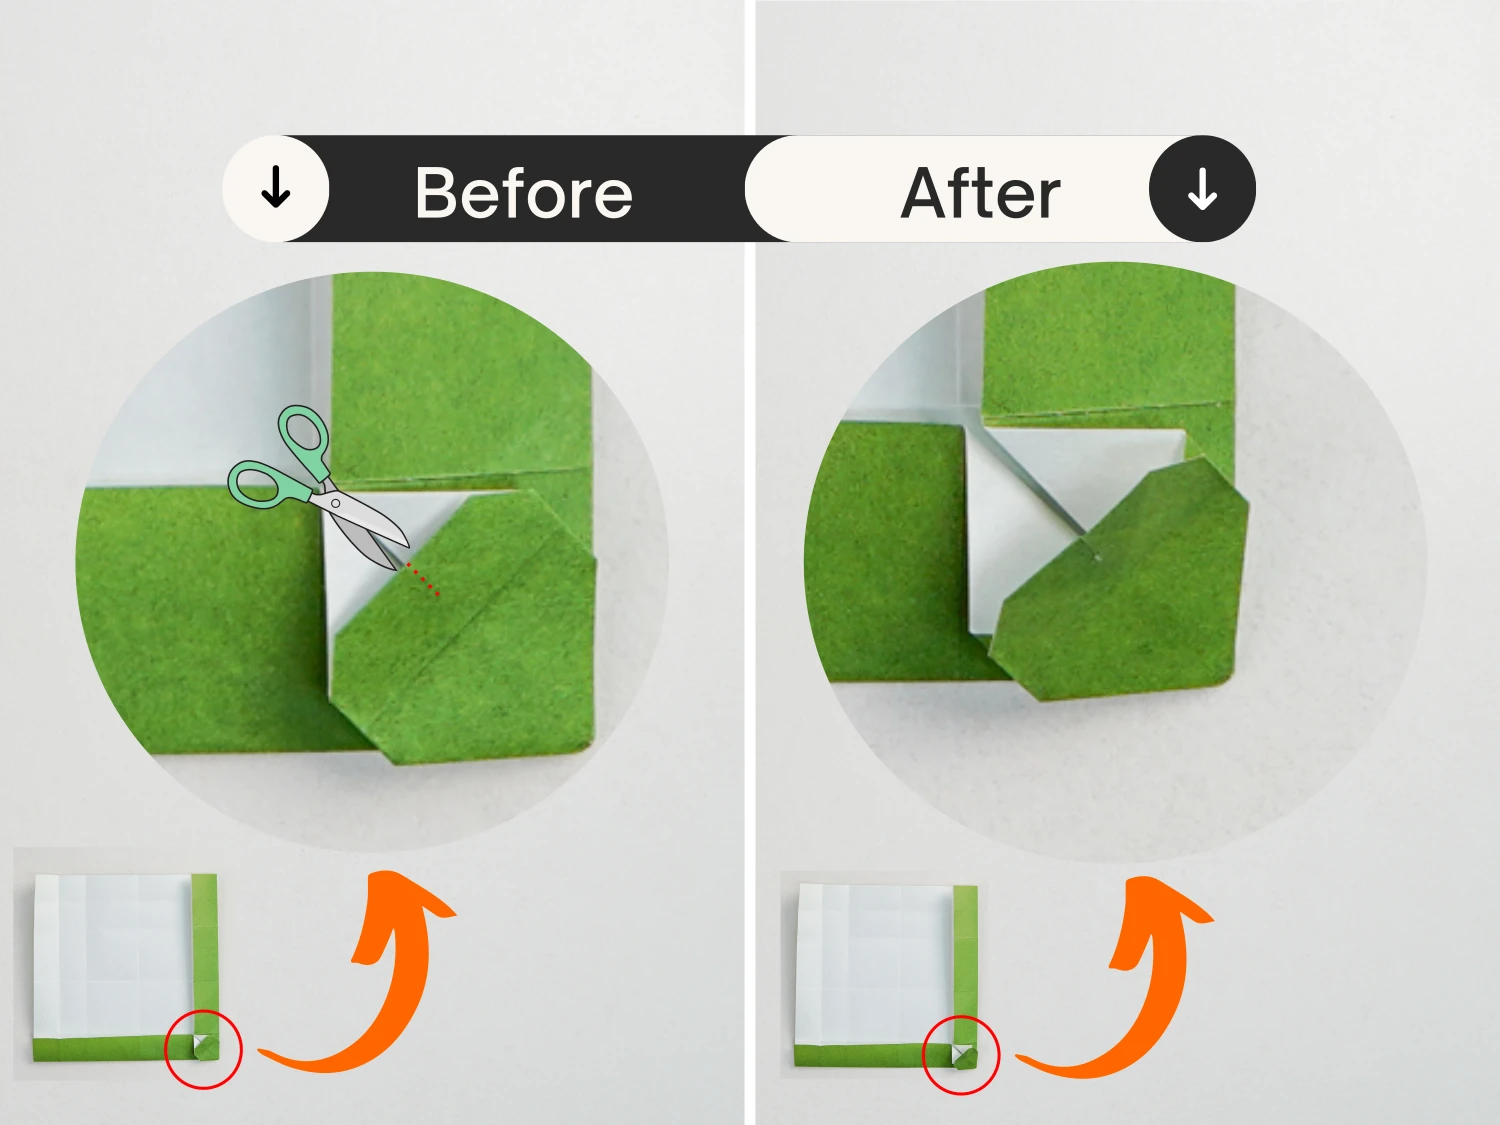
Cut the top edge of the diamond a little as the picture shows.
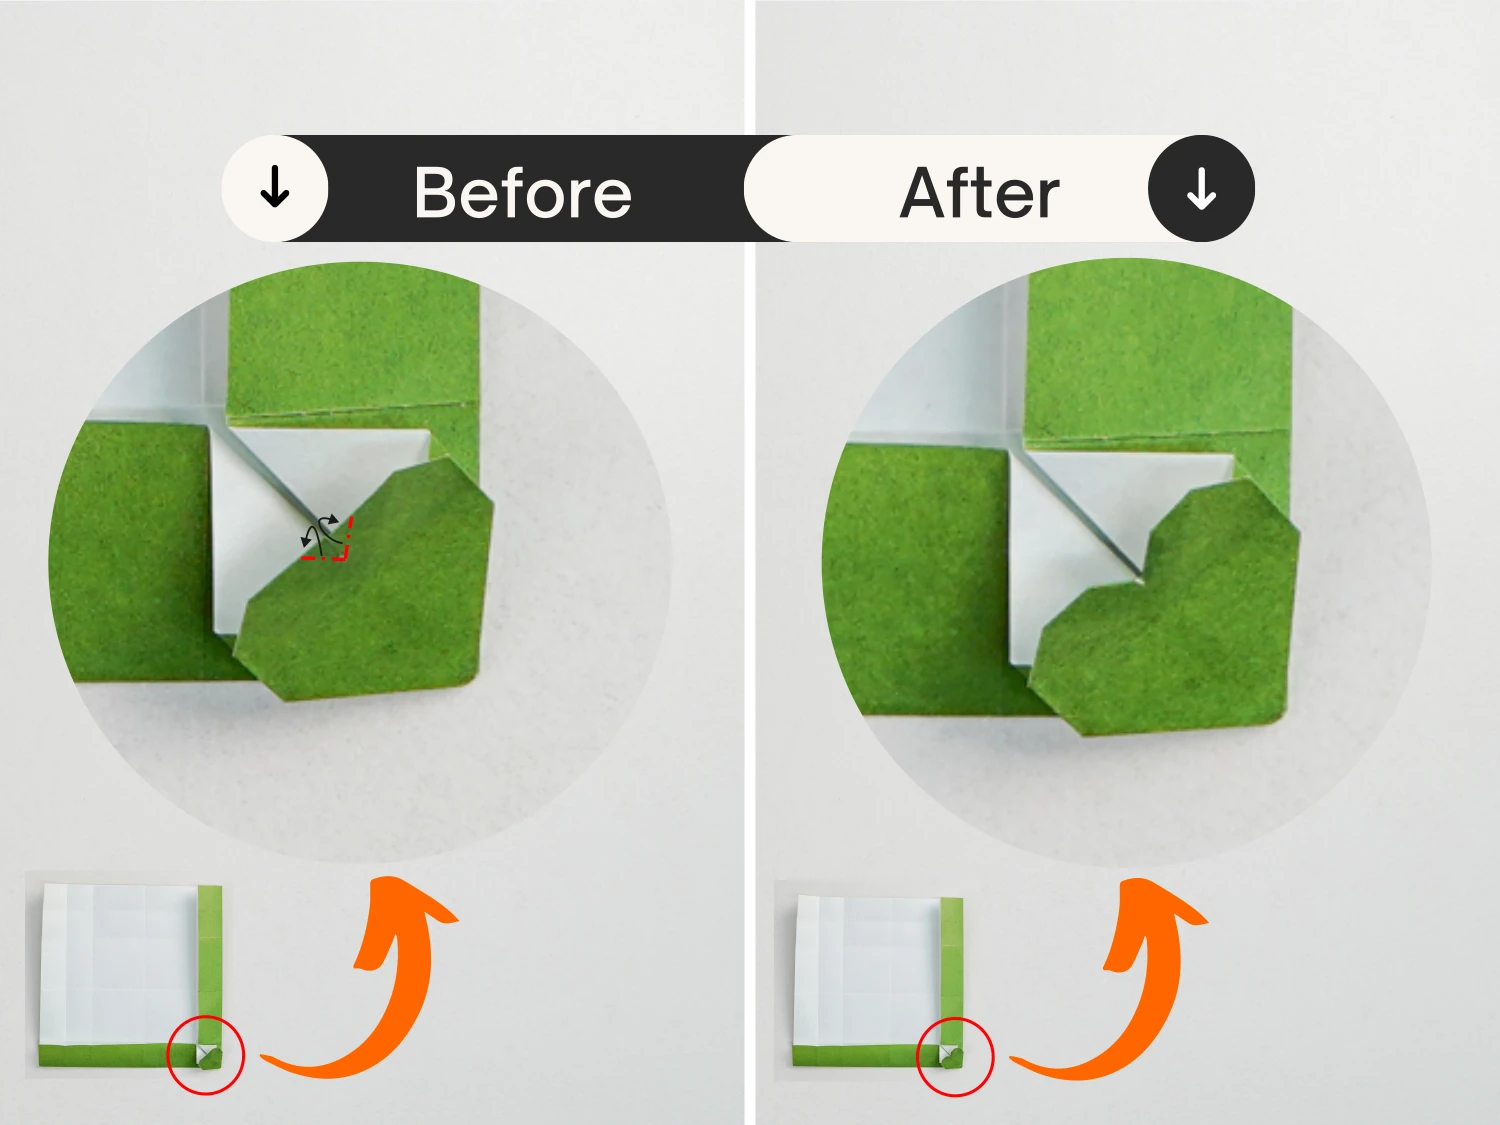
Step 13
Fold the two cut edges backward a little bit, creating a heart shape, you may need to be patient with this delicate step.
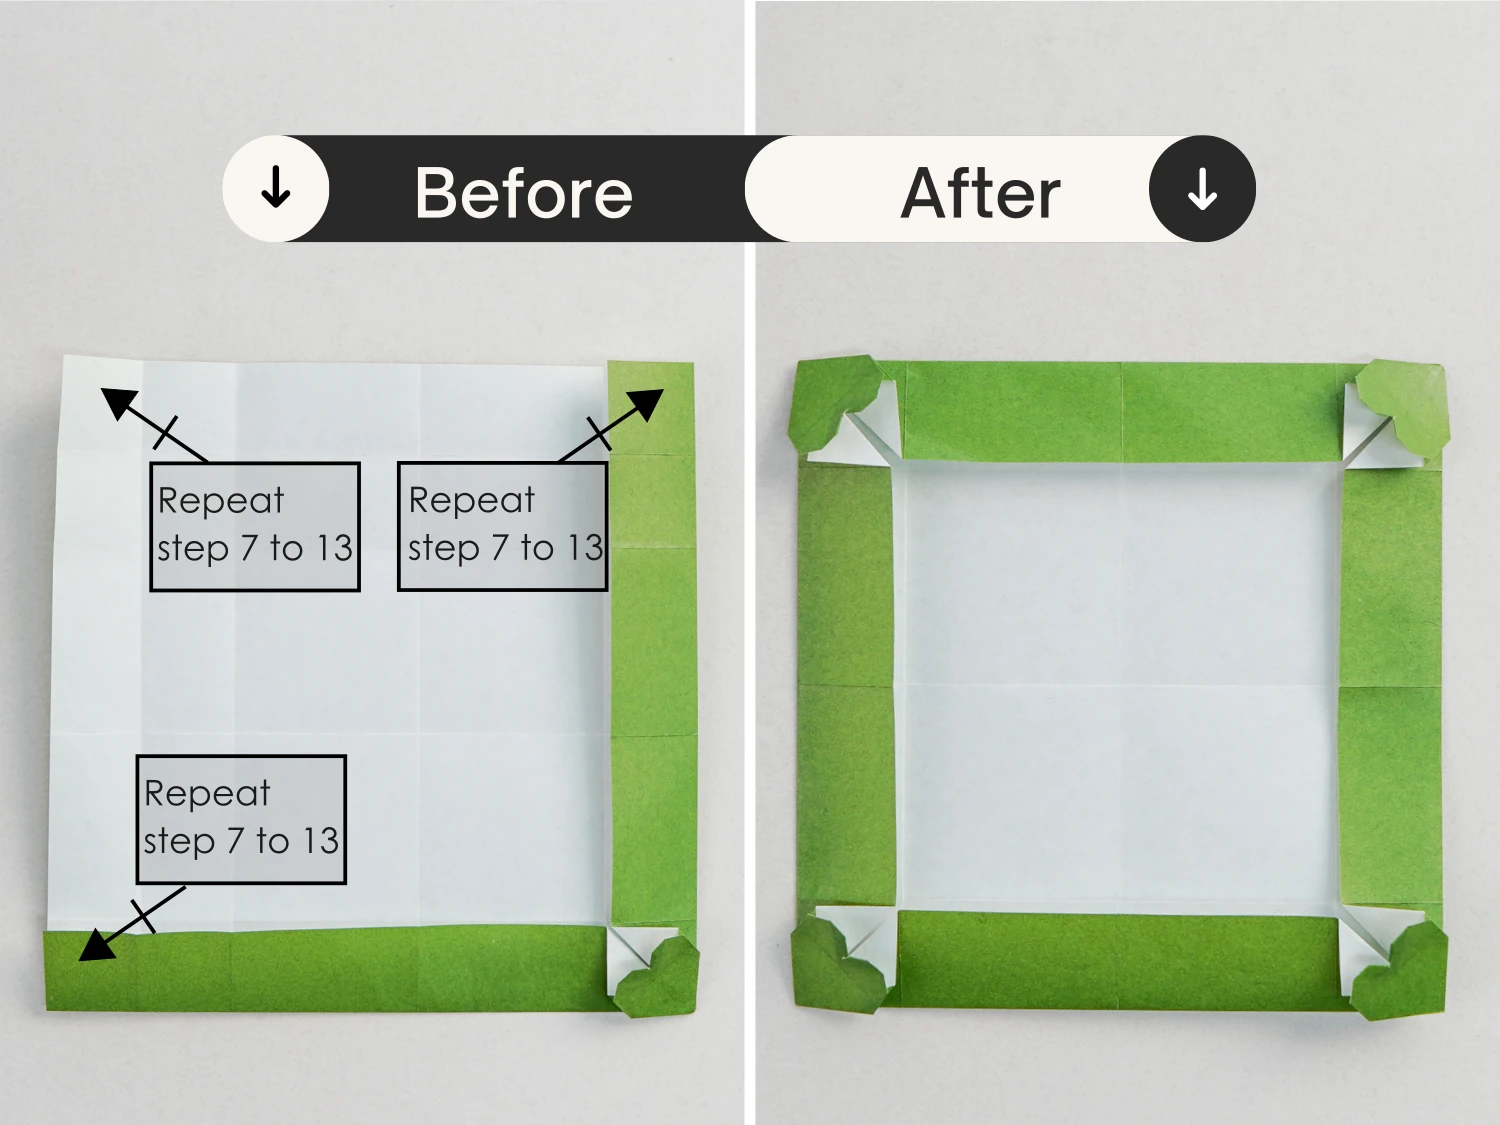
Step 14
Repeat steps 7 to 13 for the remaining three corners to create another three hearts.
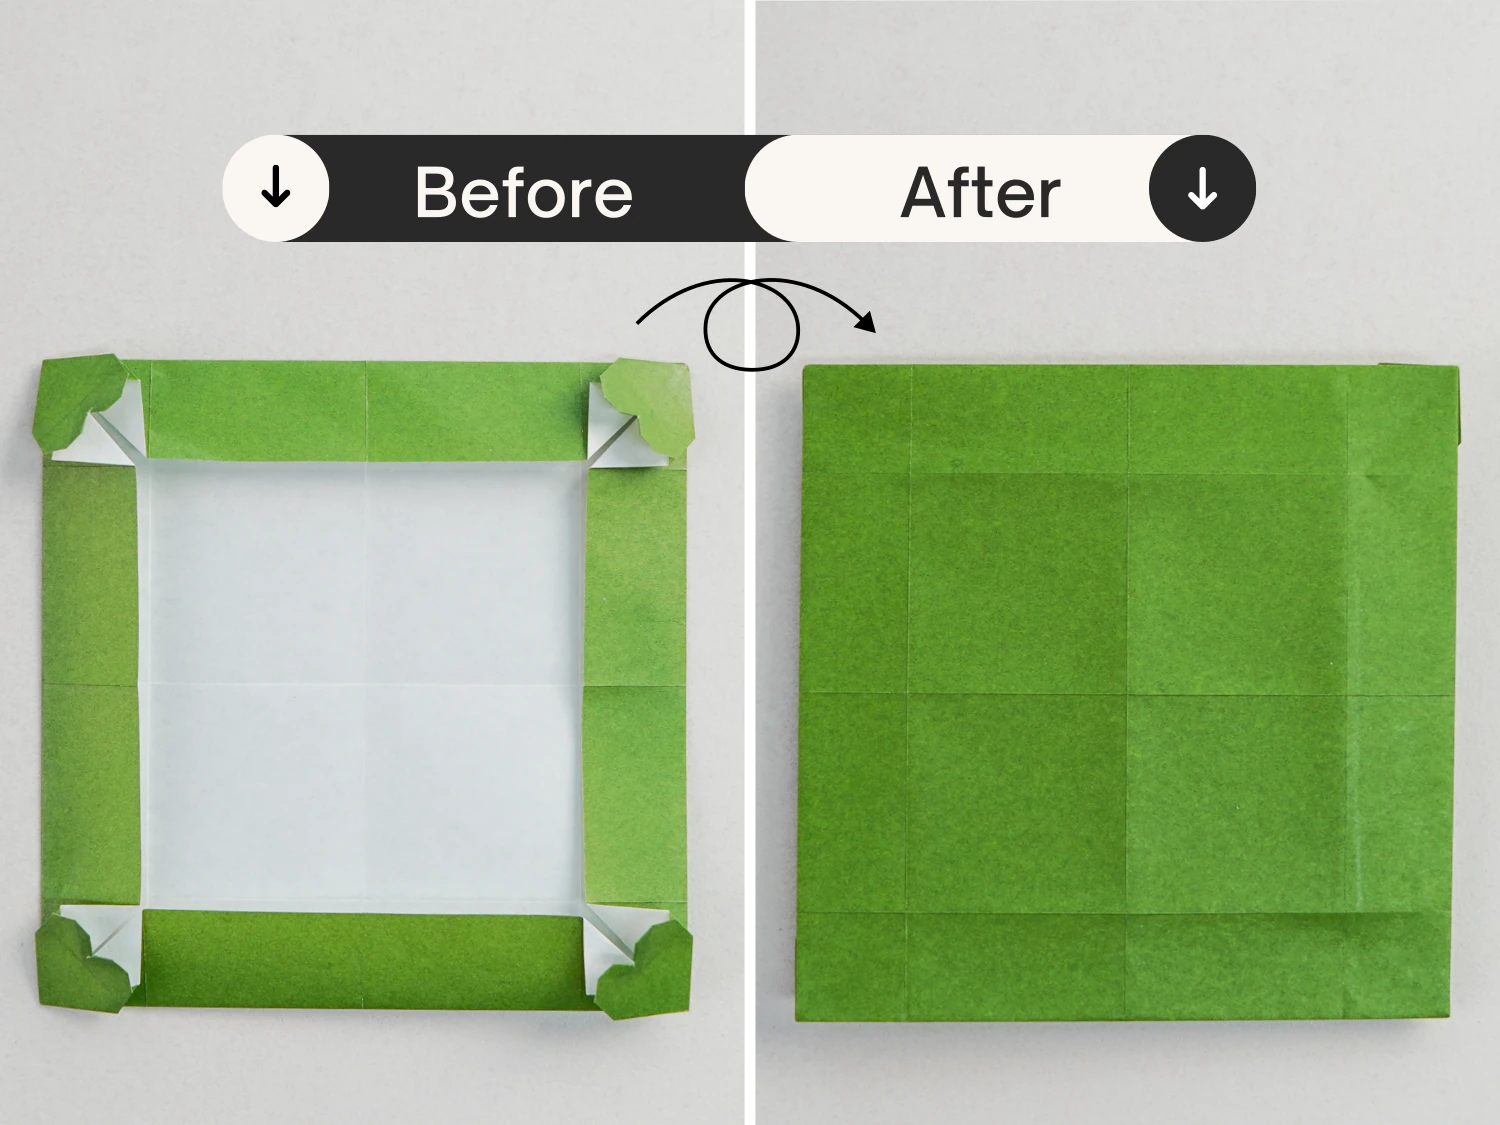
Step 15
Flip it over.
Step 16
Fold the four corners to the middle intersection point.

Step 17
Flip the model over.
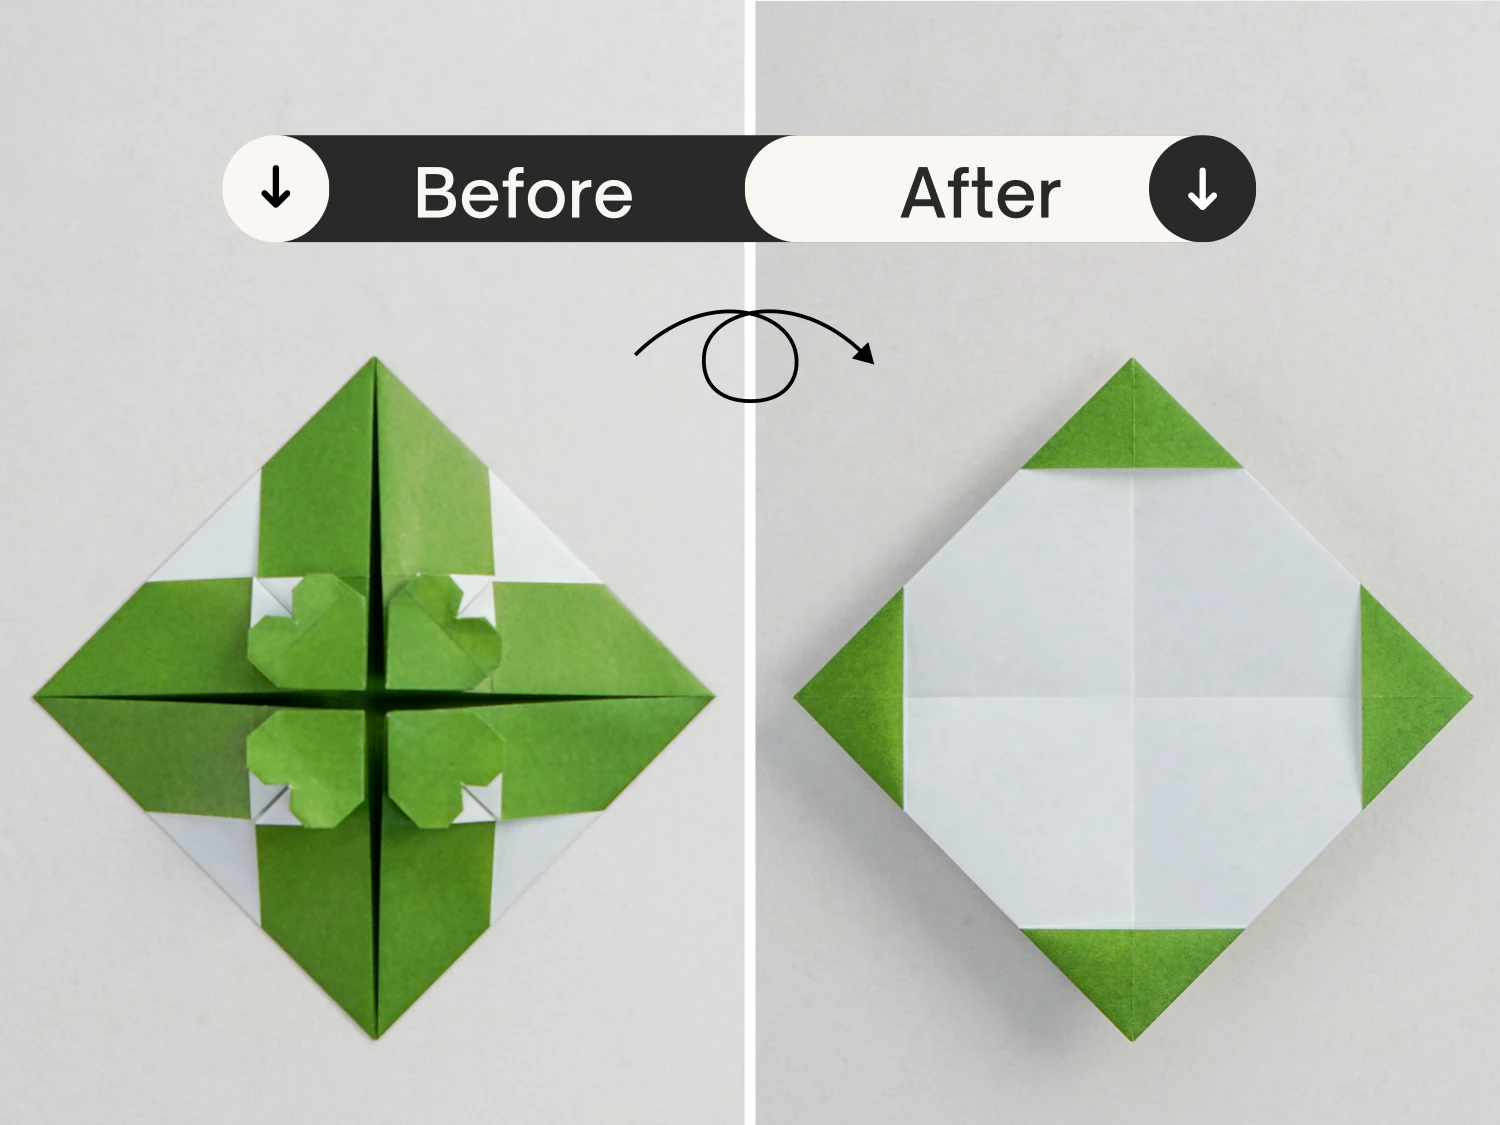
Step 18
Similarly, fold the four corners to the middle intersection point diagonally.
Step 19
Fold the bottom edge up a little along the dotted line, crease well then unfold.
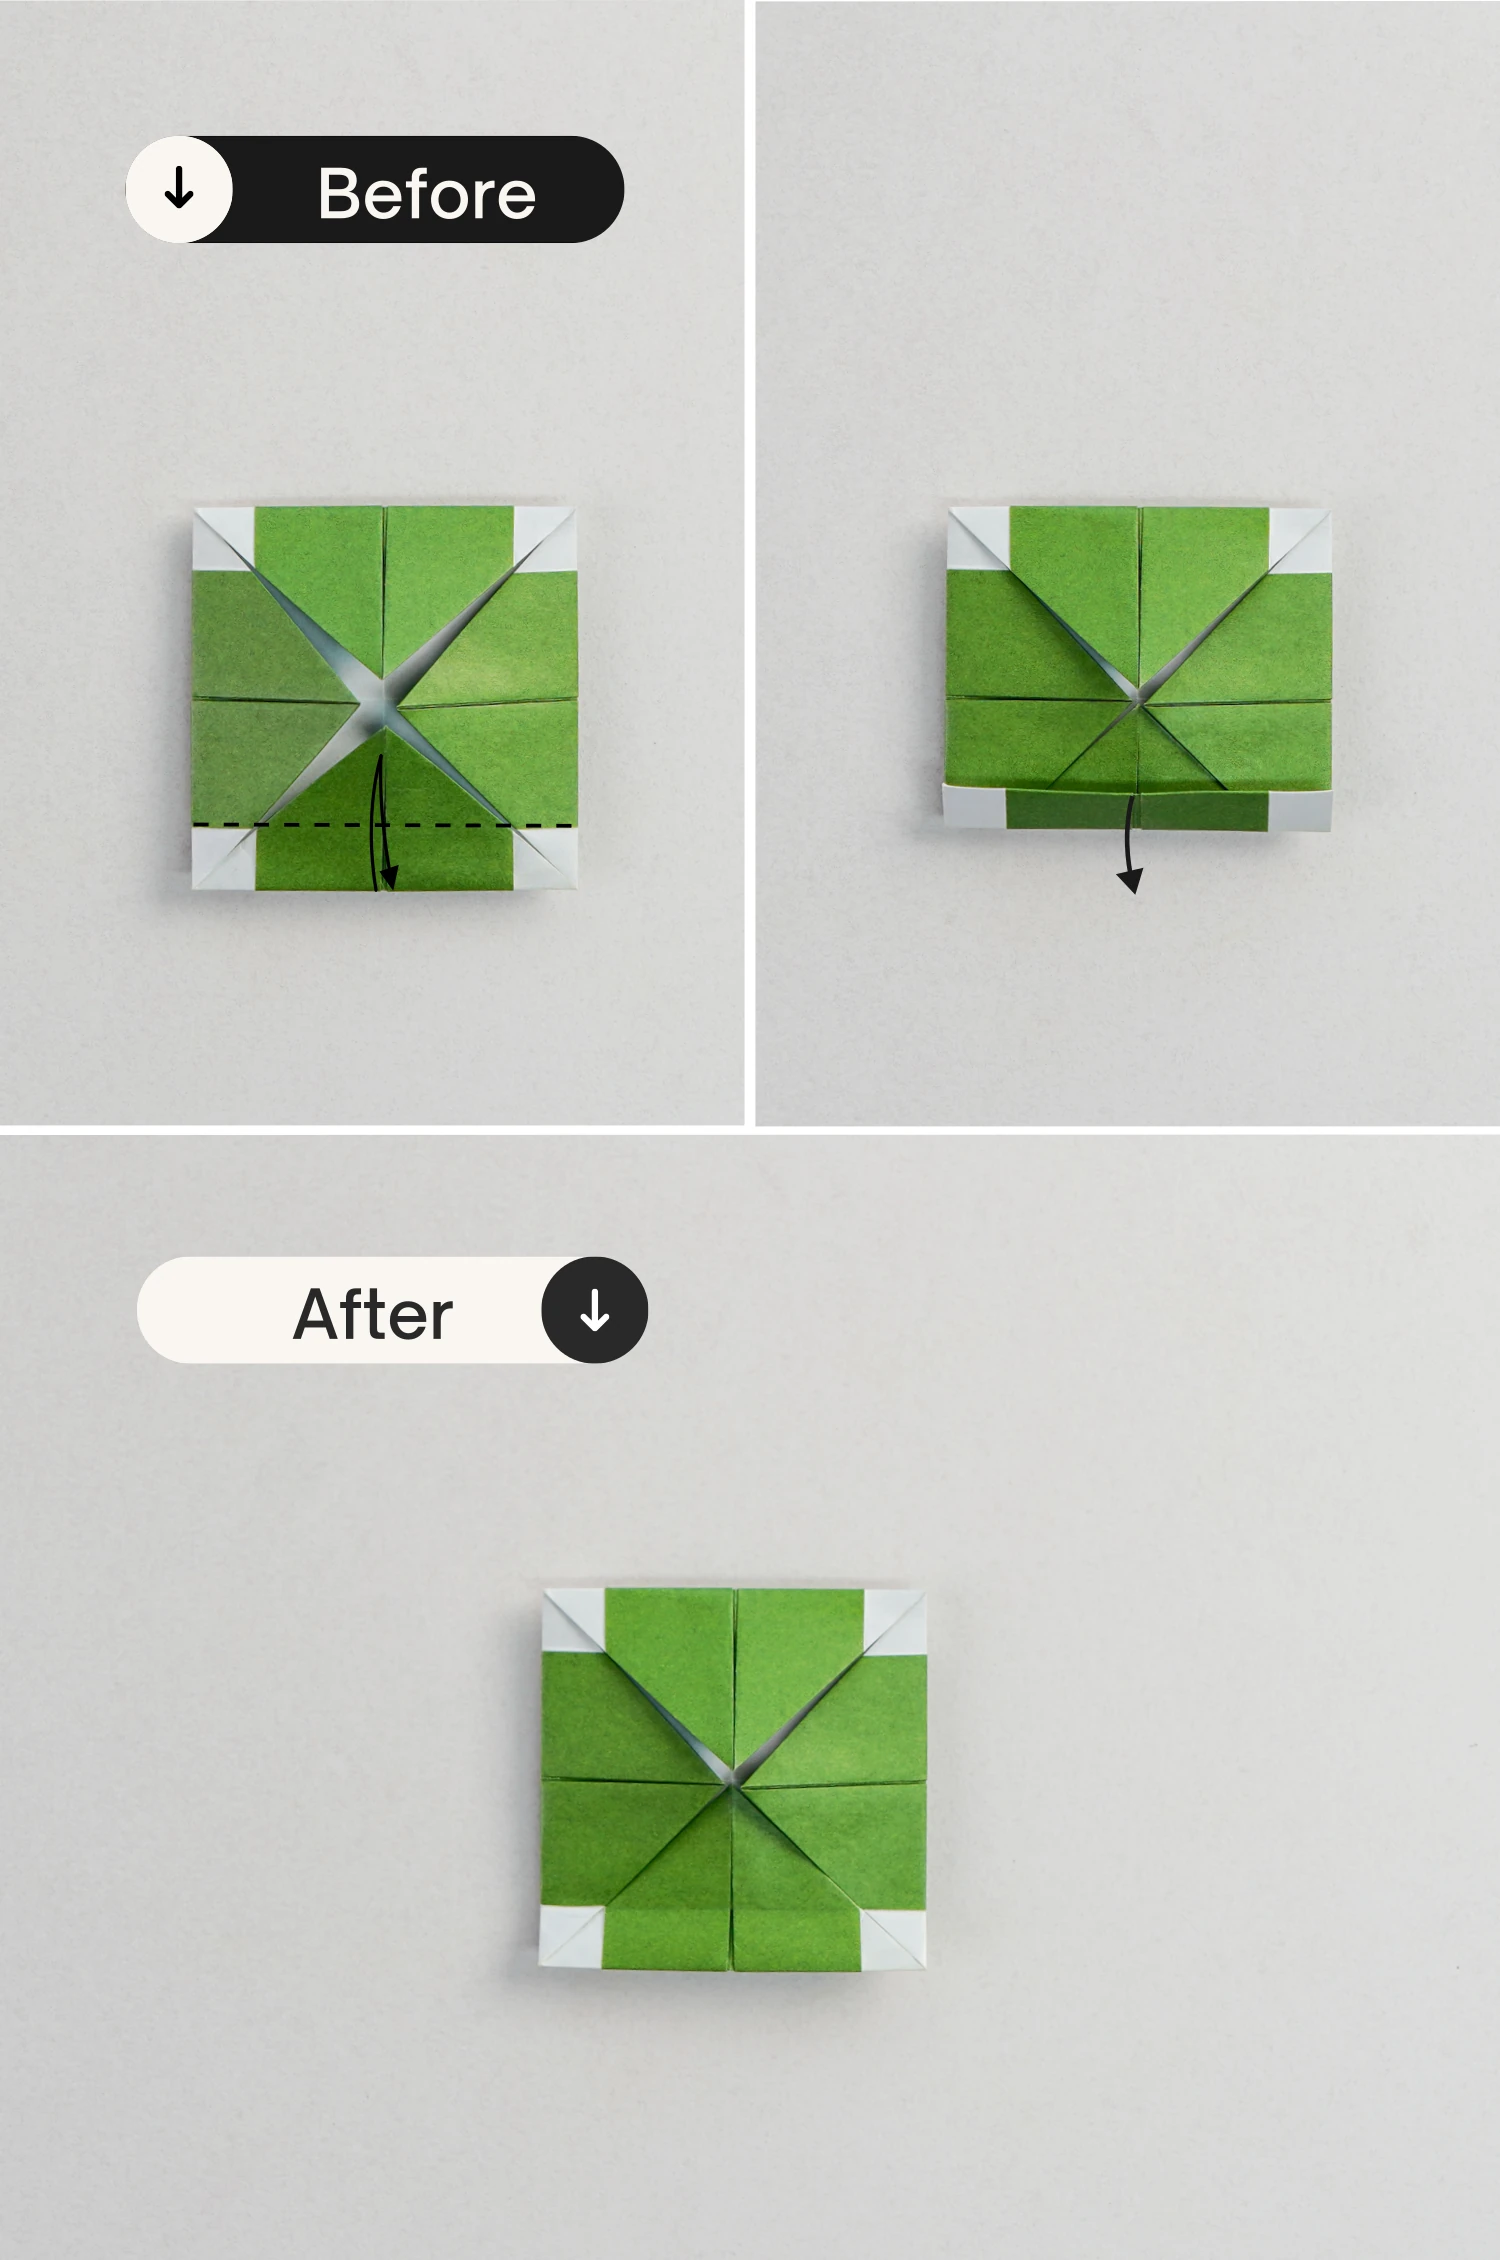
Step 20
Repeat this for the remaining three edges.
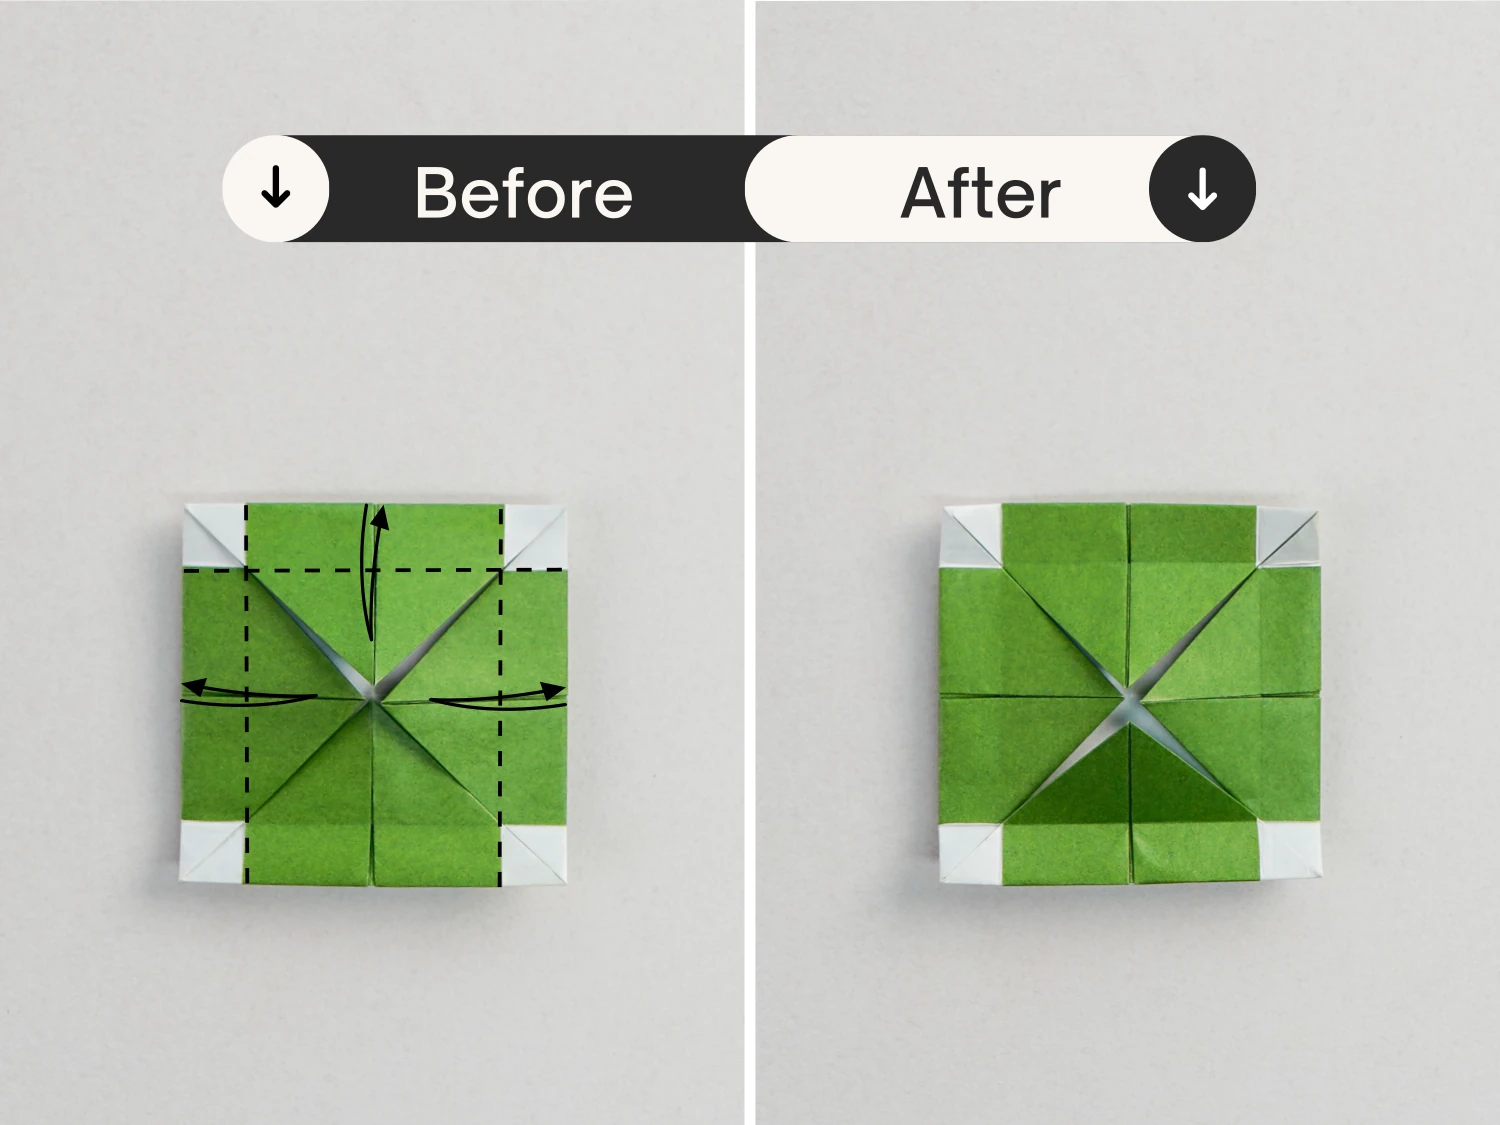
Step 21
Unfold the top and bottom flaps.
Step 22
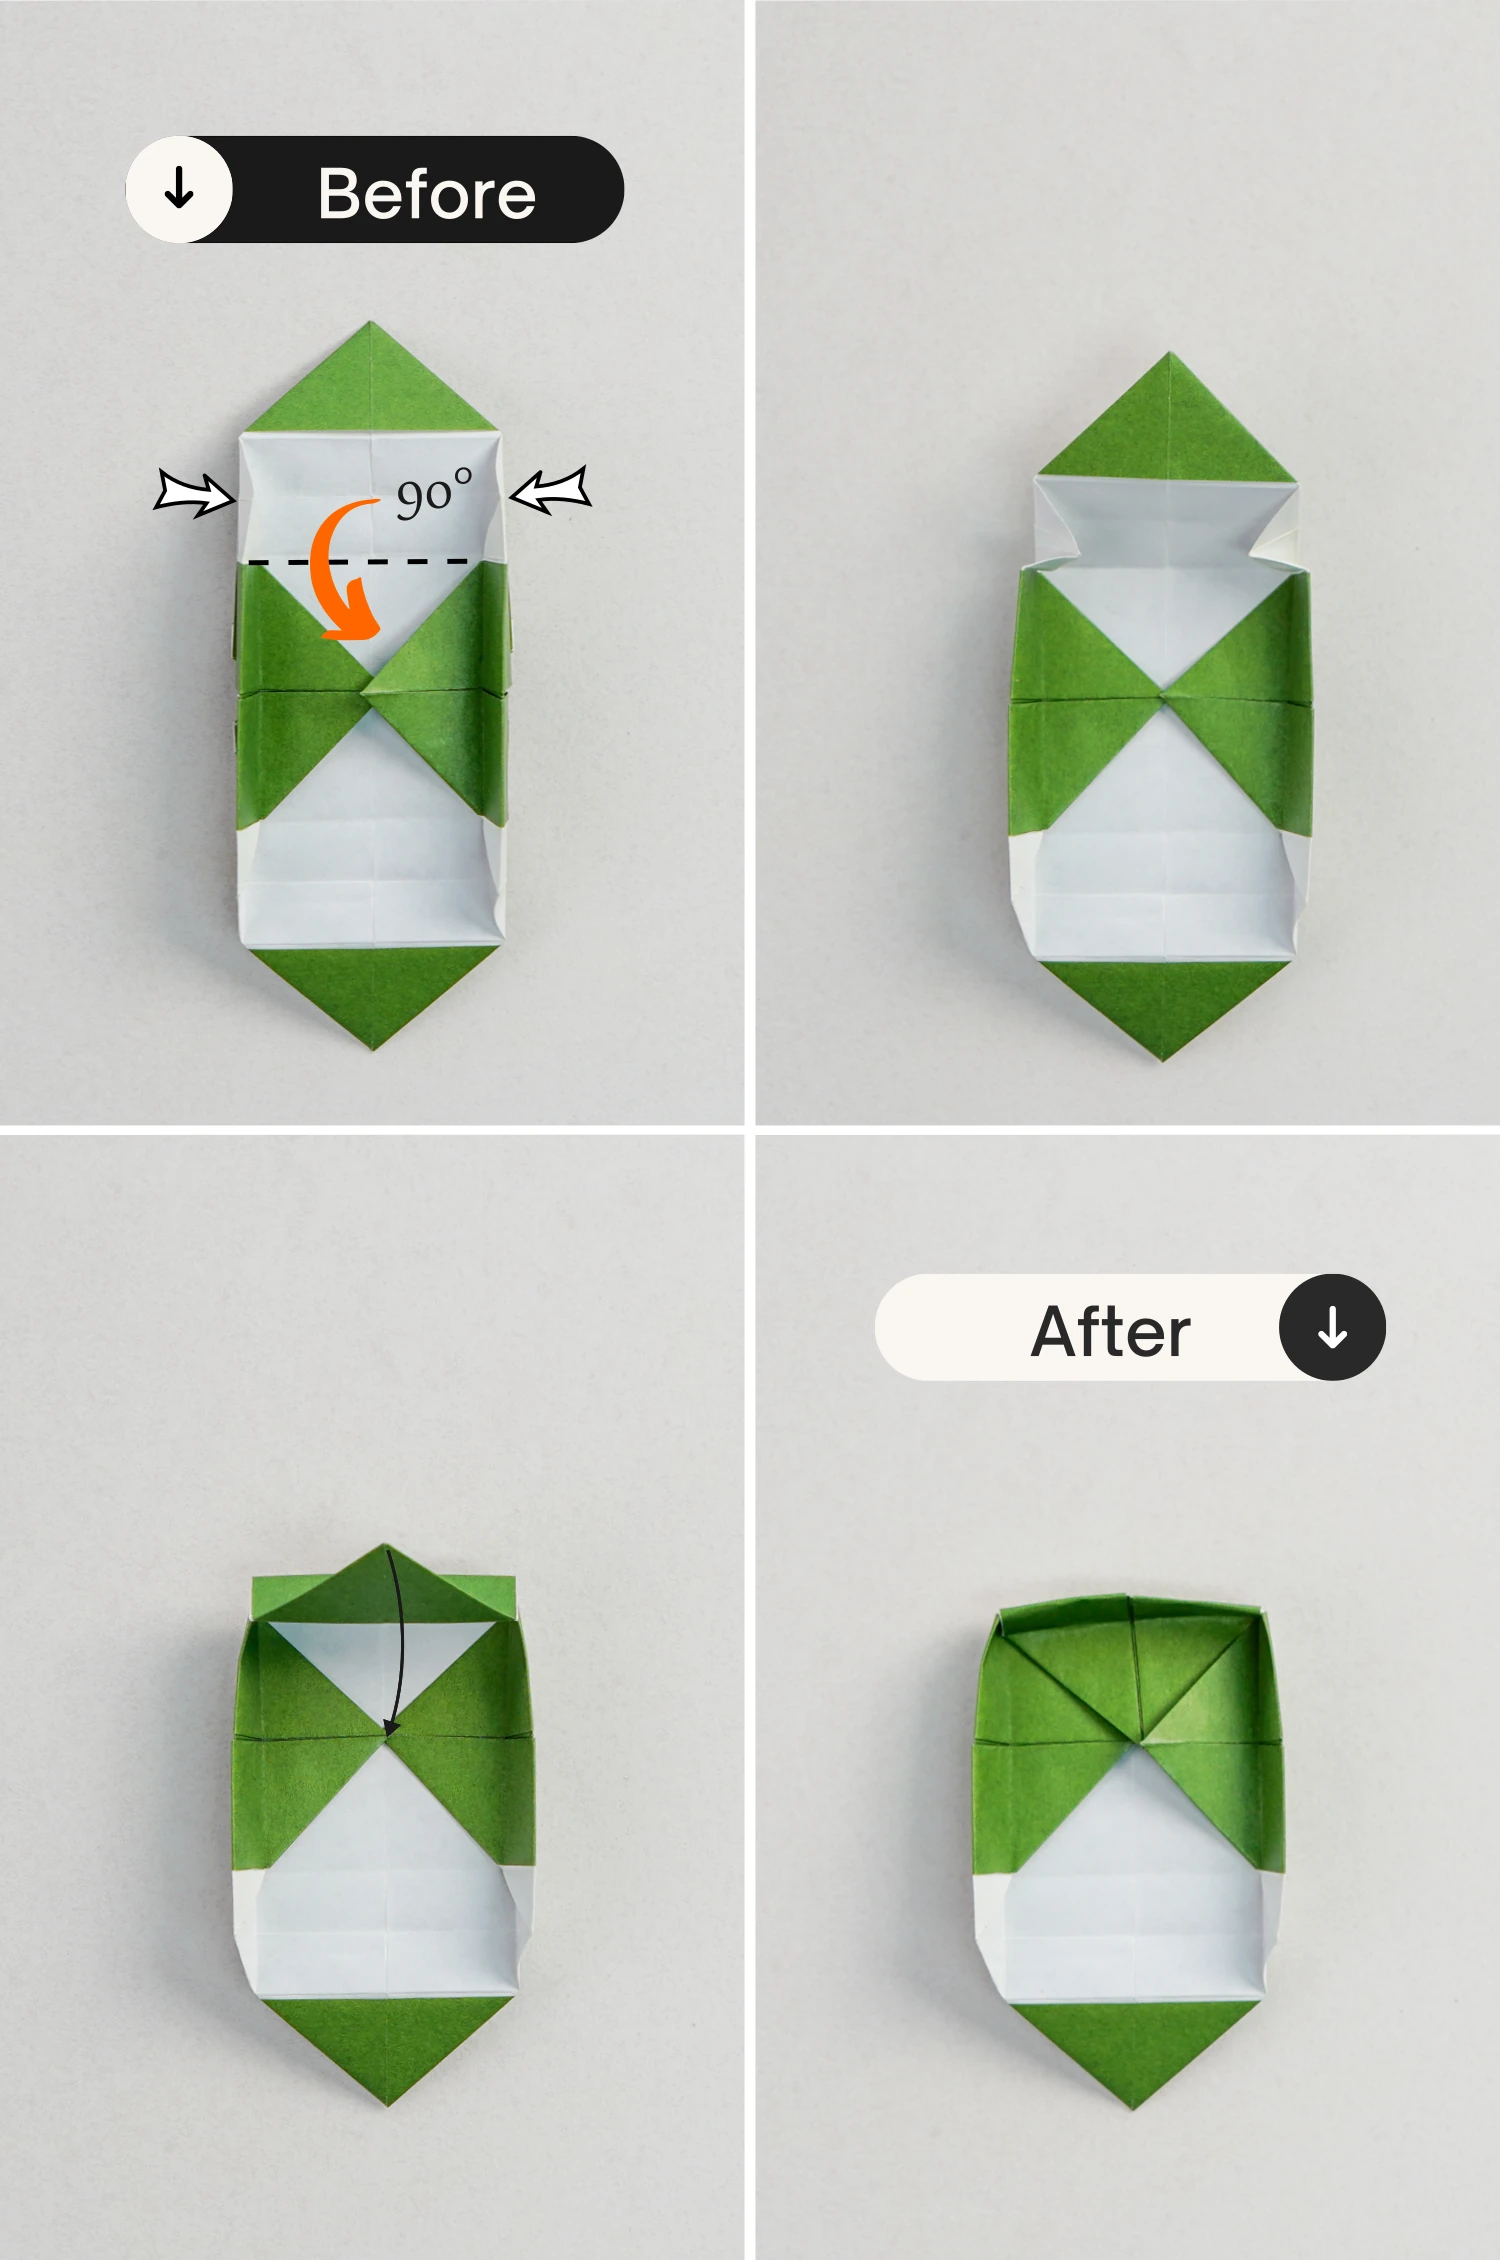
Lift the left and right edges along the creases you just made to make them stand.

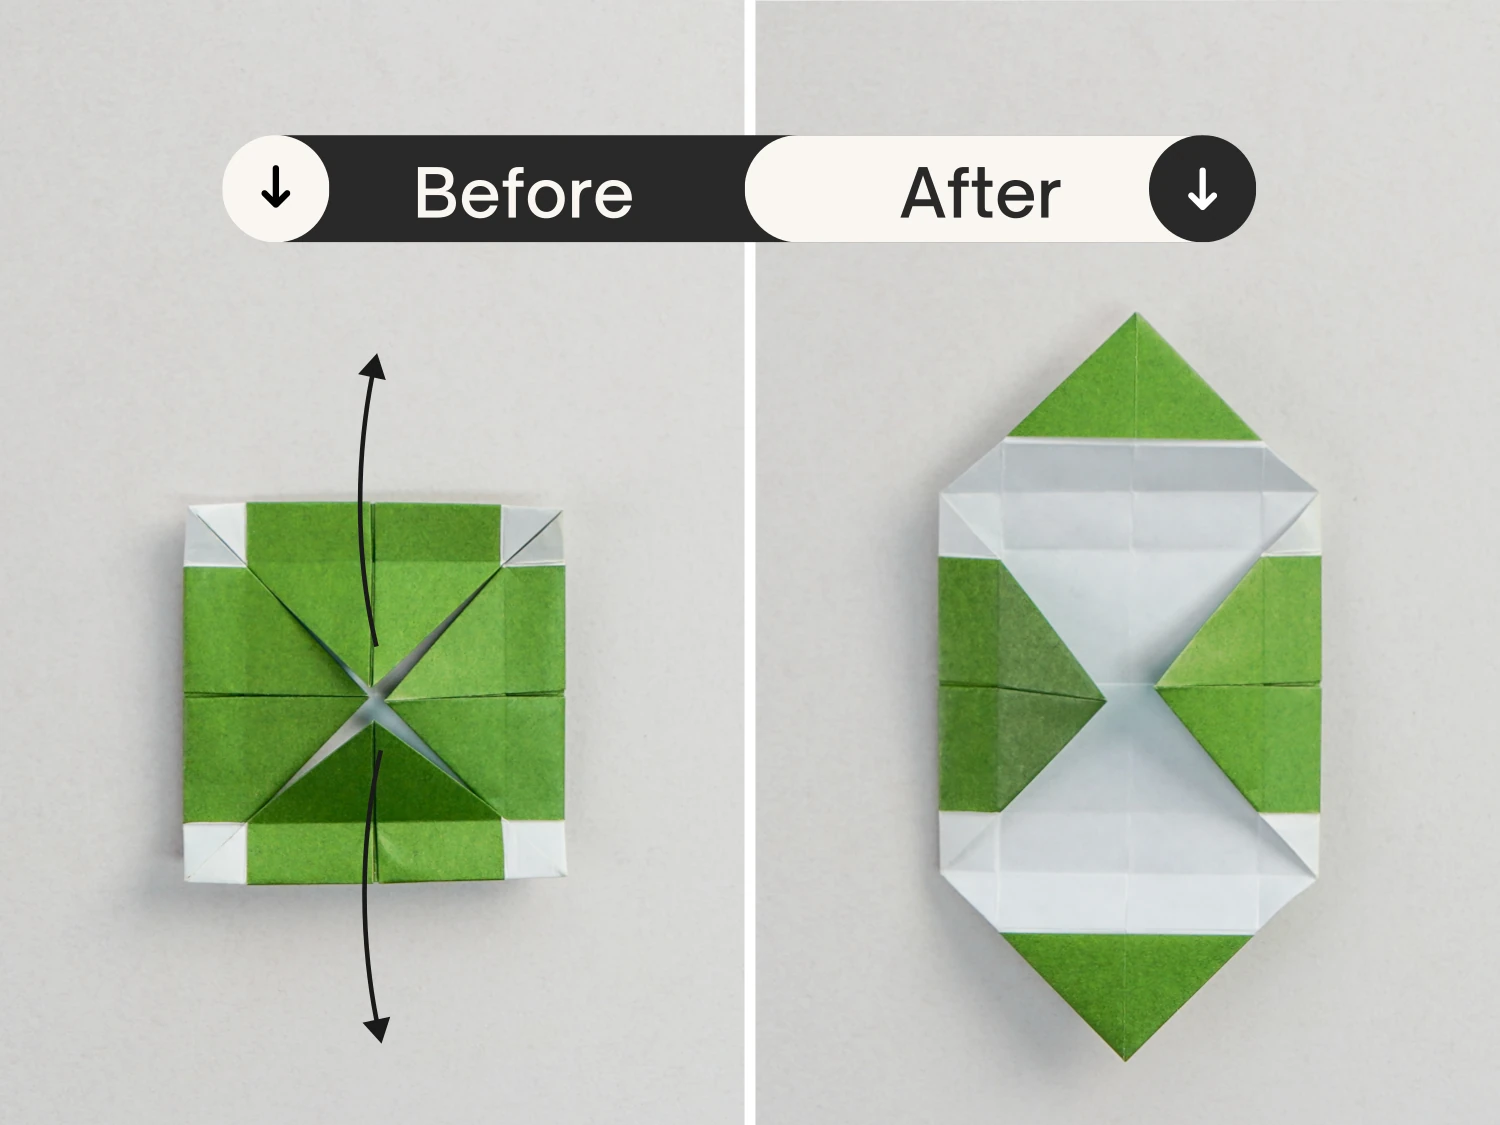
Step 23
Lift the top part along the crease shown by the dotted line, and make it stand. Next, push the left and right sides of the lifted top part toward the center.
Then press the top part down, and flatten it along the existing creases. Make the top triangle perfectly fill the white part of the bottom, and shape an edge.
Step 24
Repeat this for the bottom part.
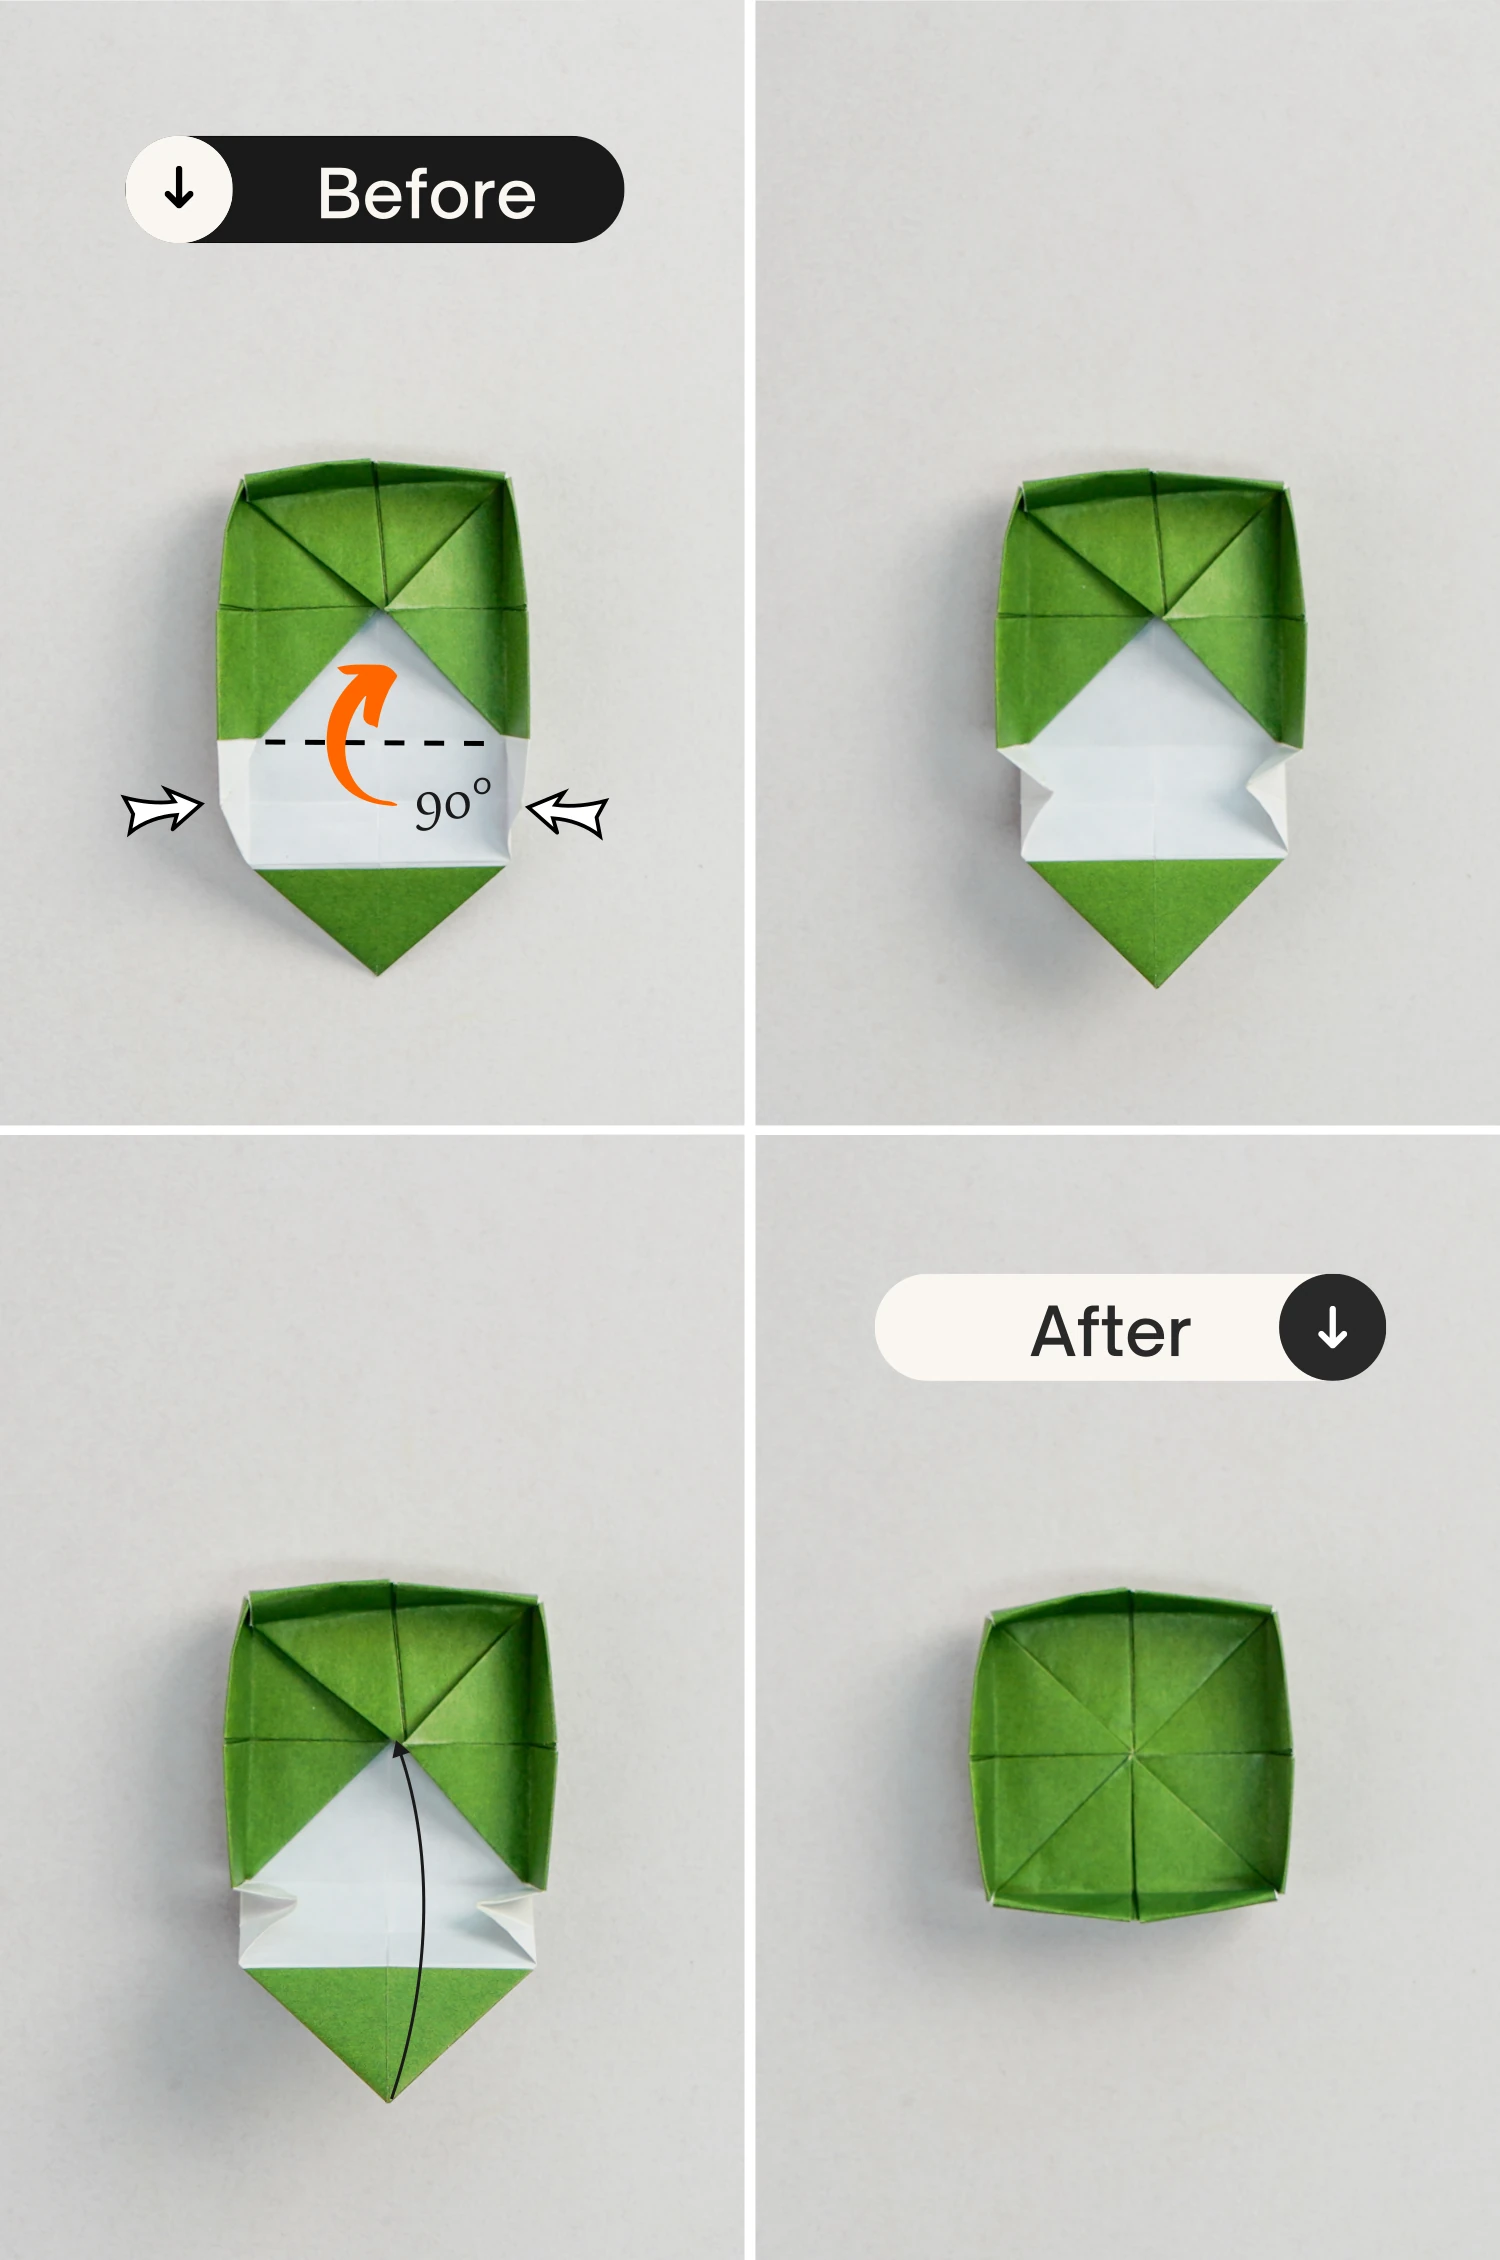
Step 25
Flip the model over, now we get a complete lid.

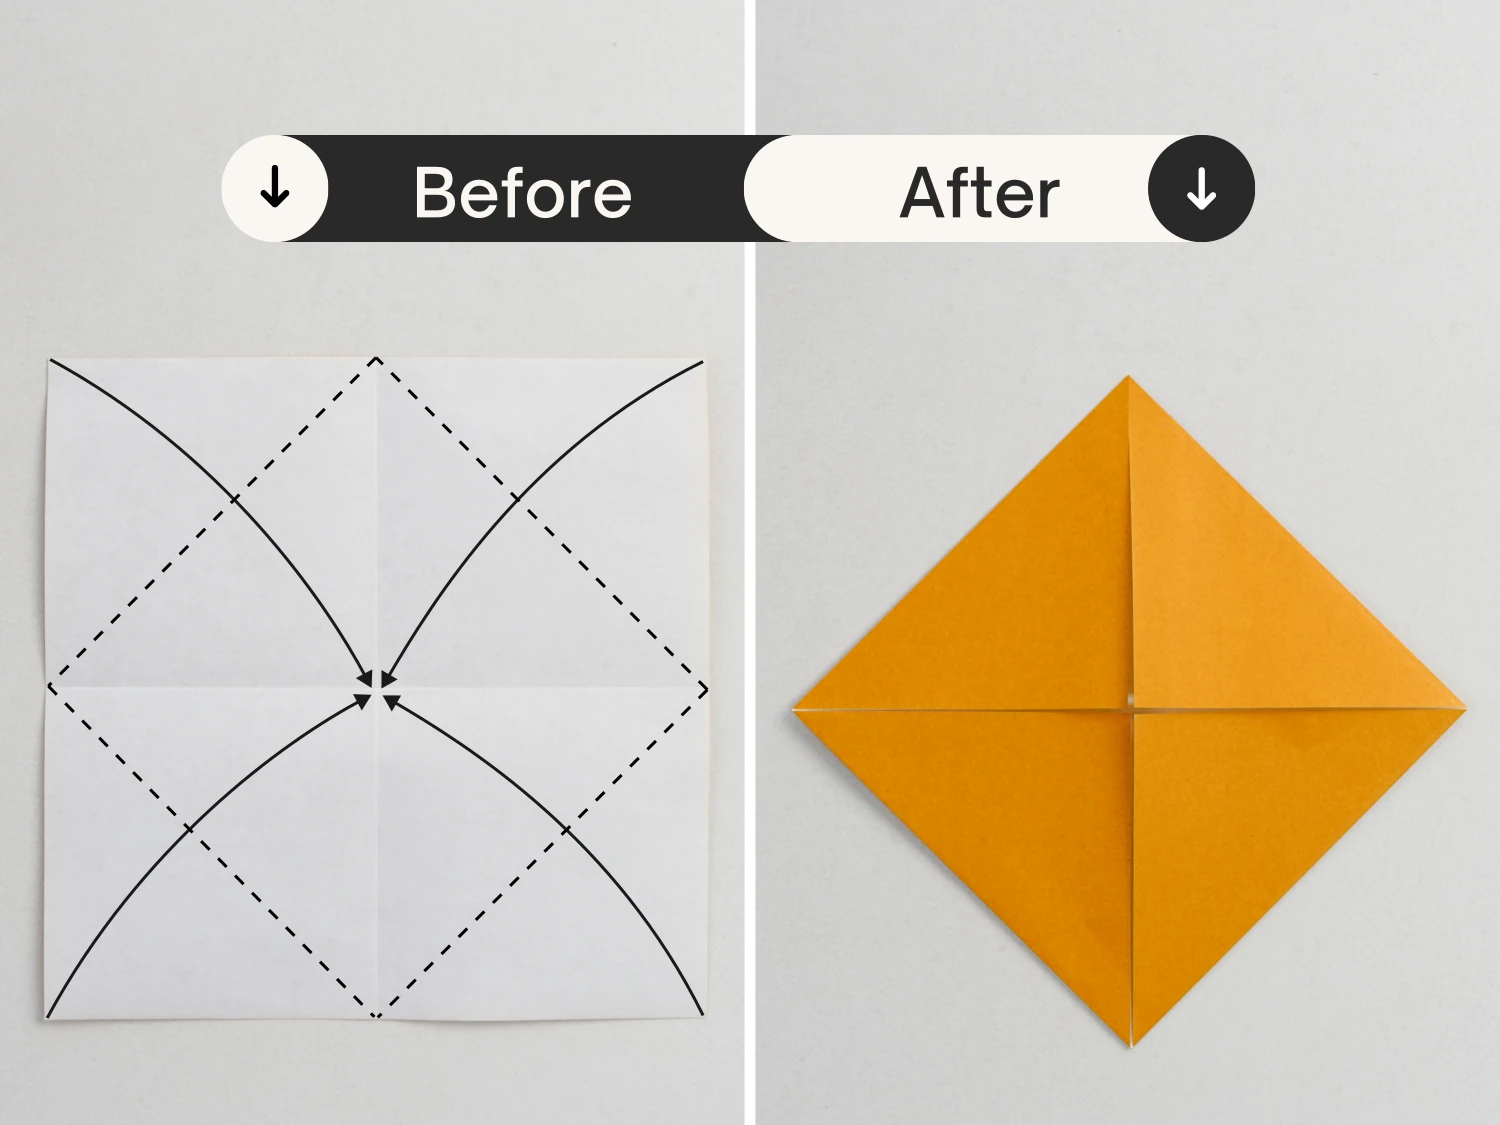
Step 26
Take out another piece of paper, start with the white side of the paper facing up, crease it well then unfold.
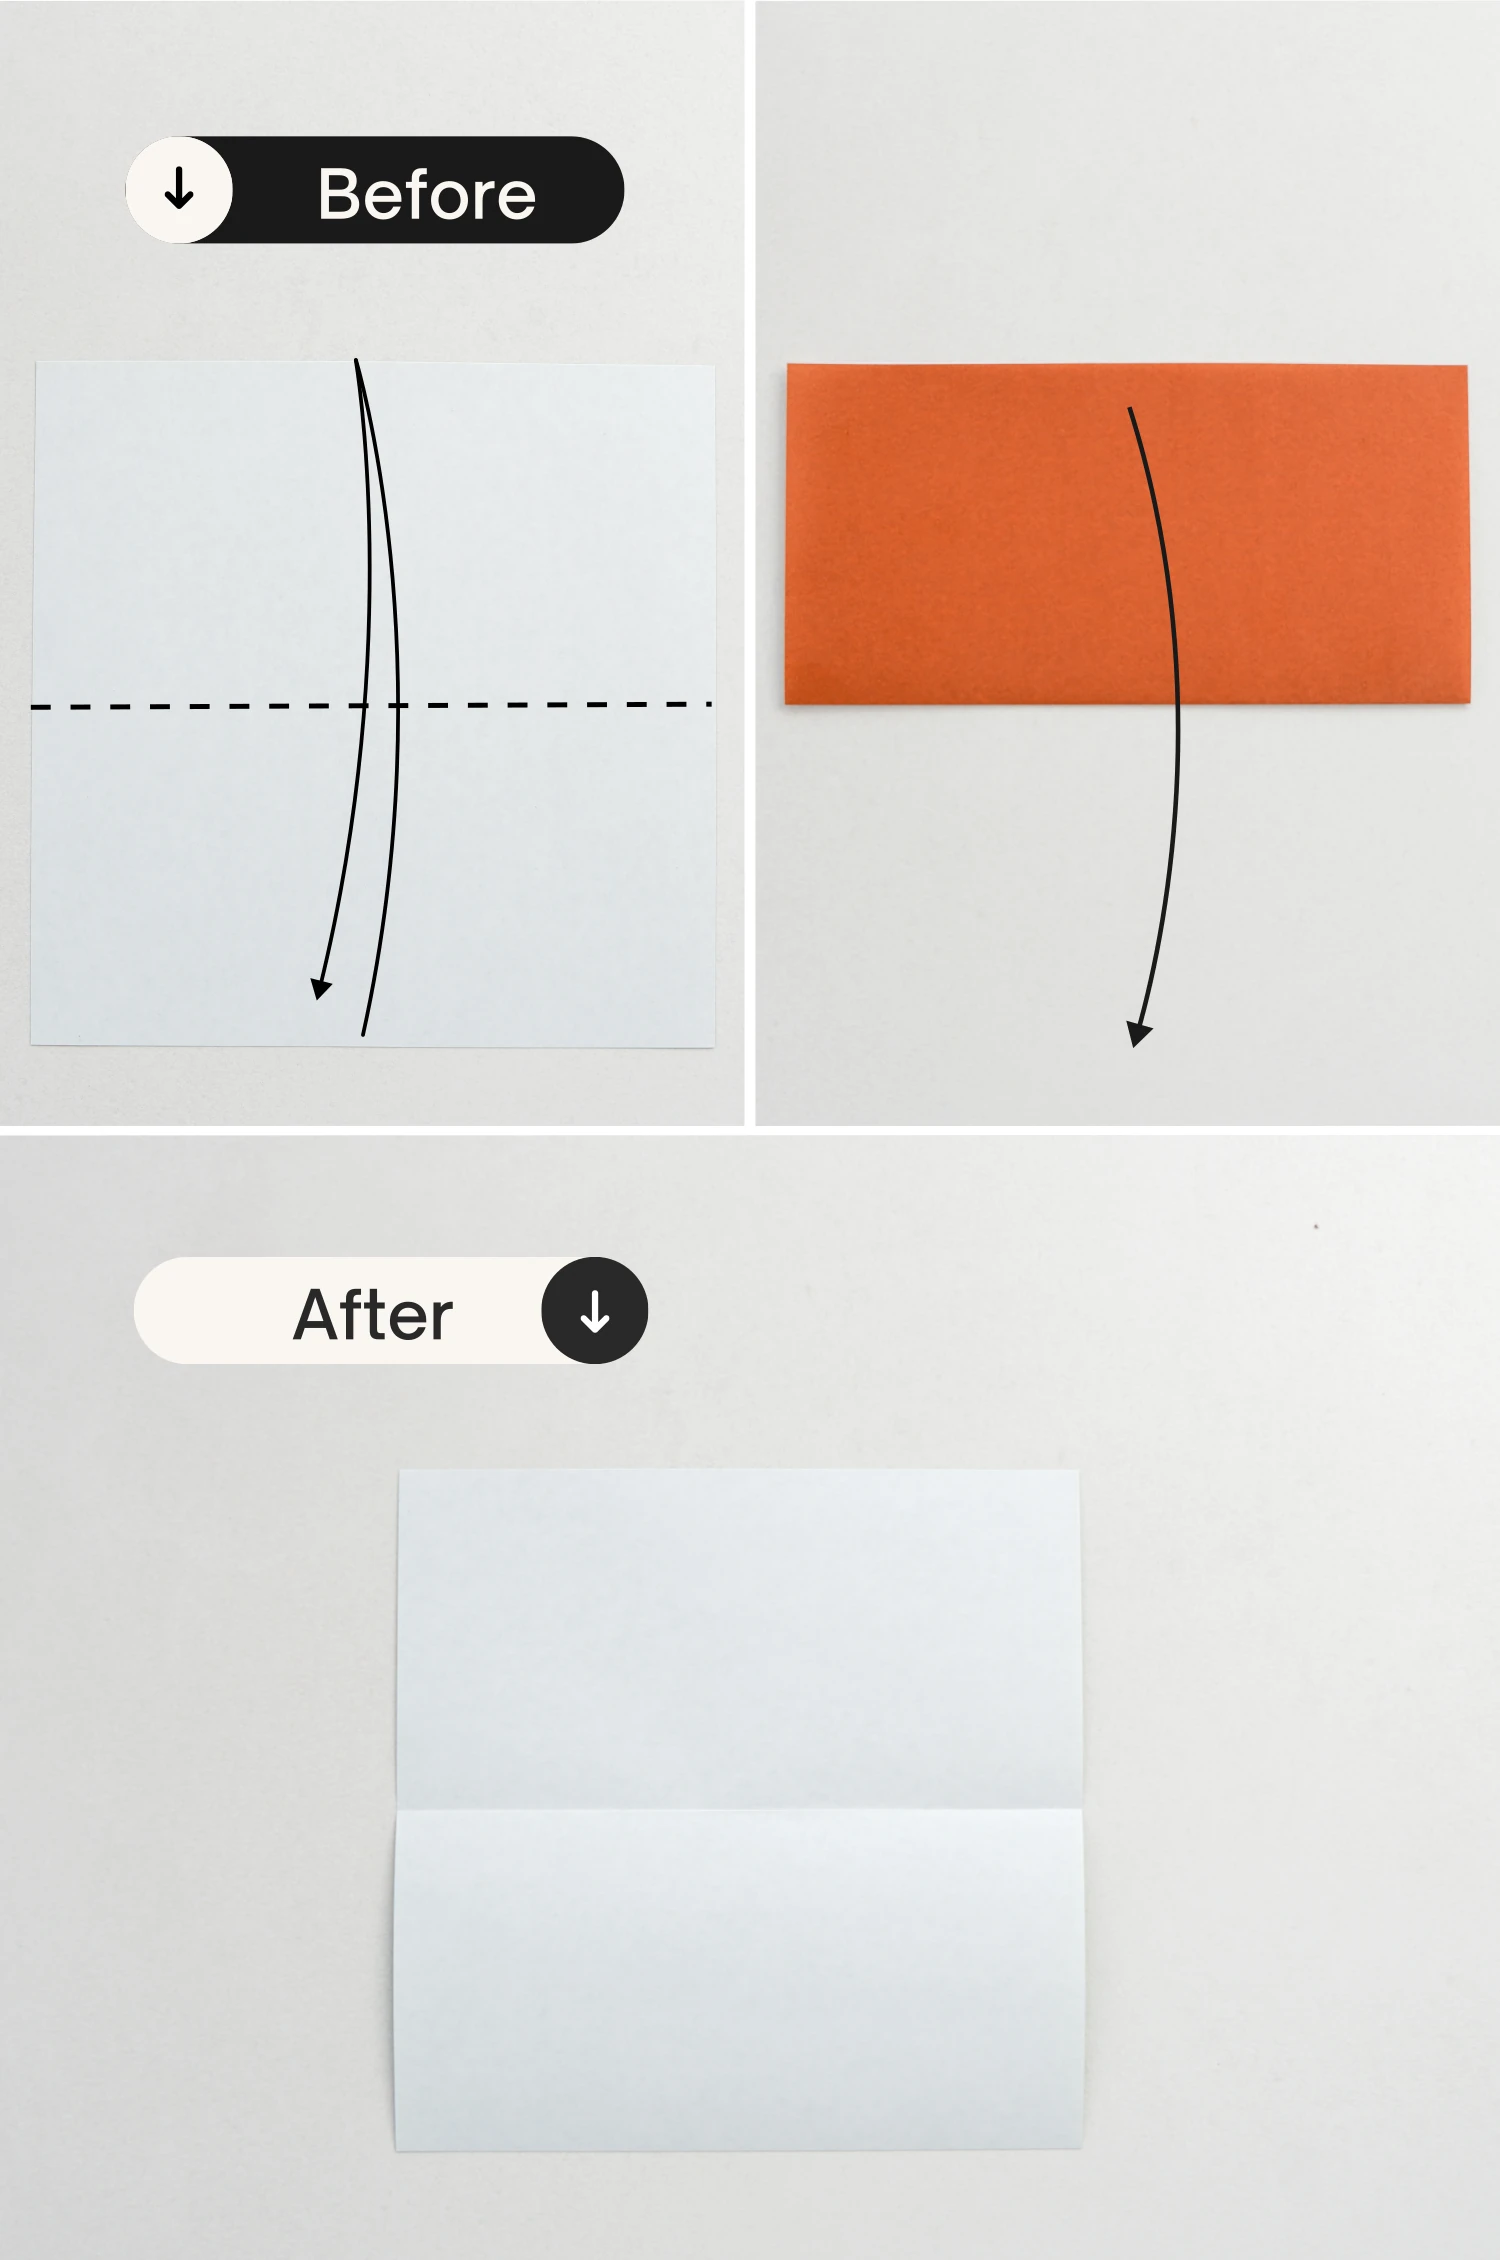
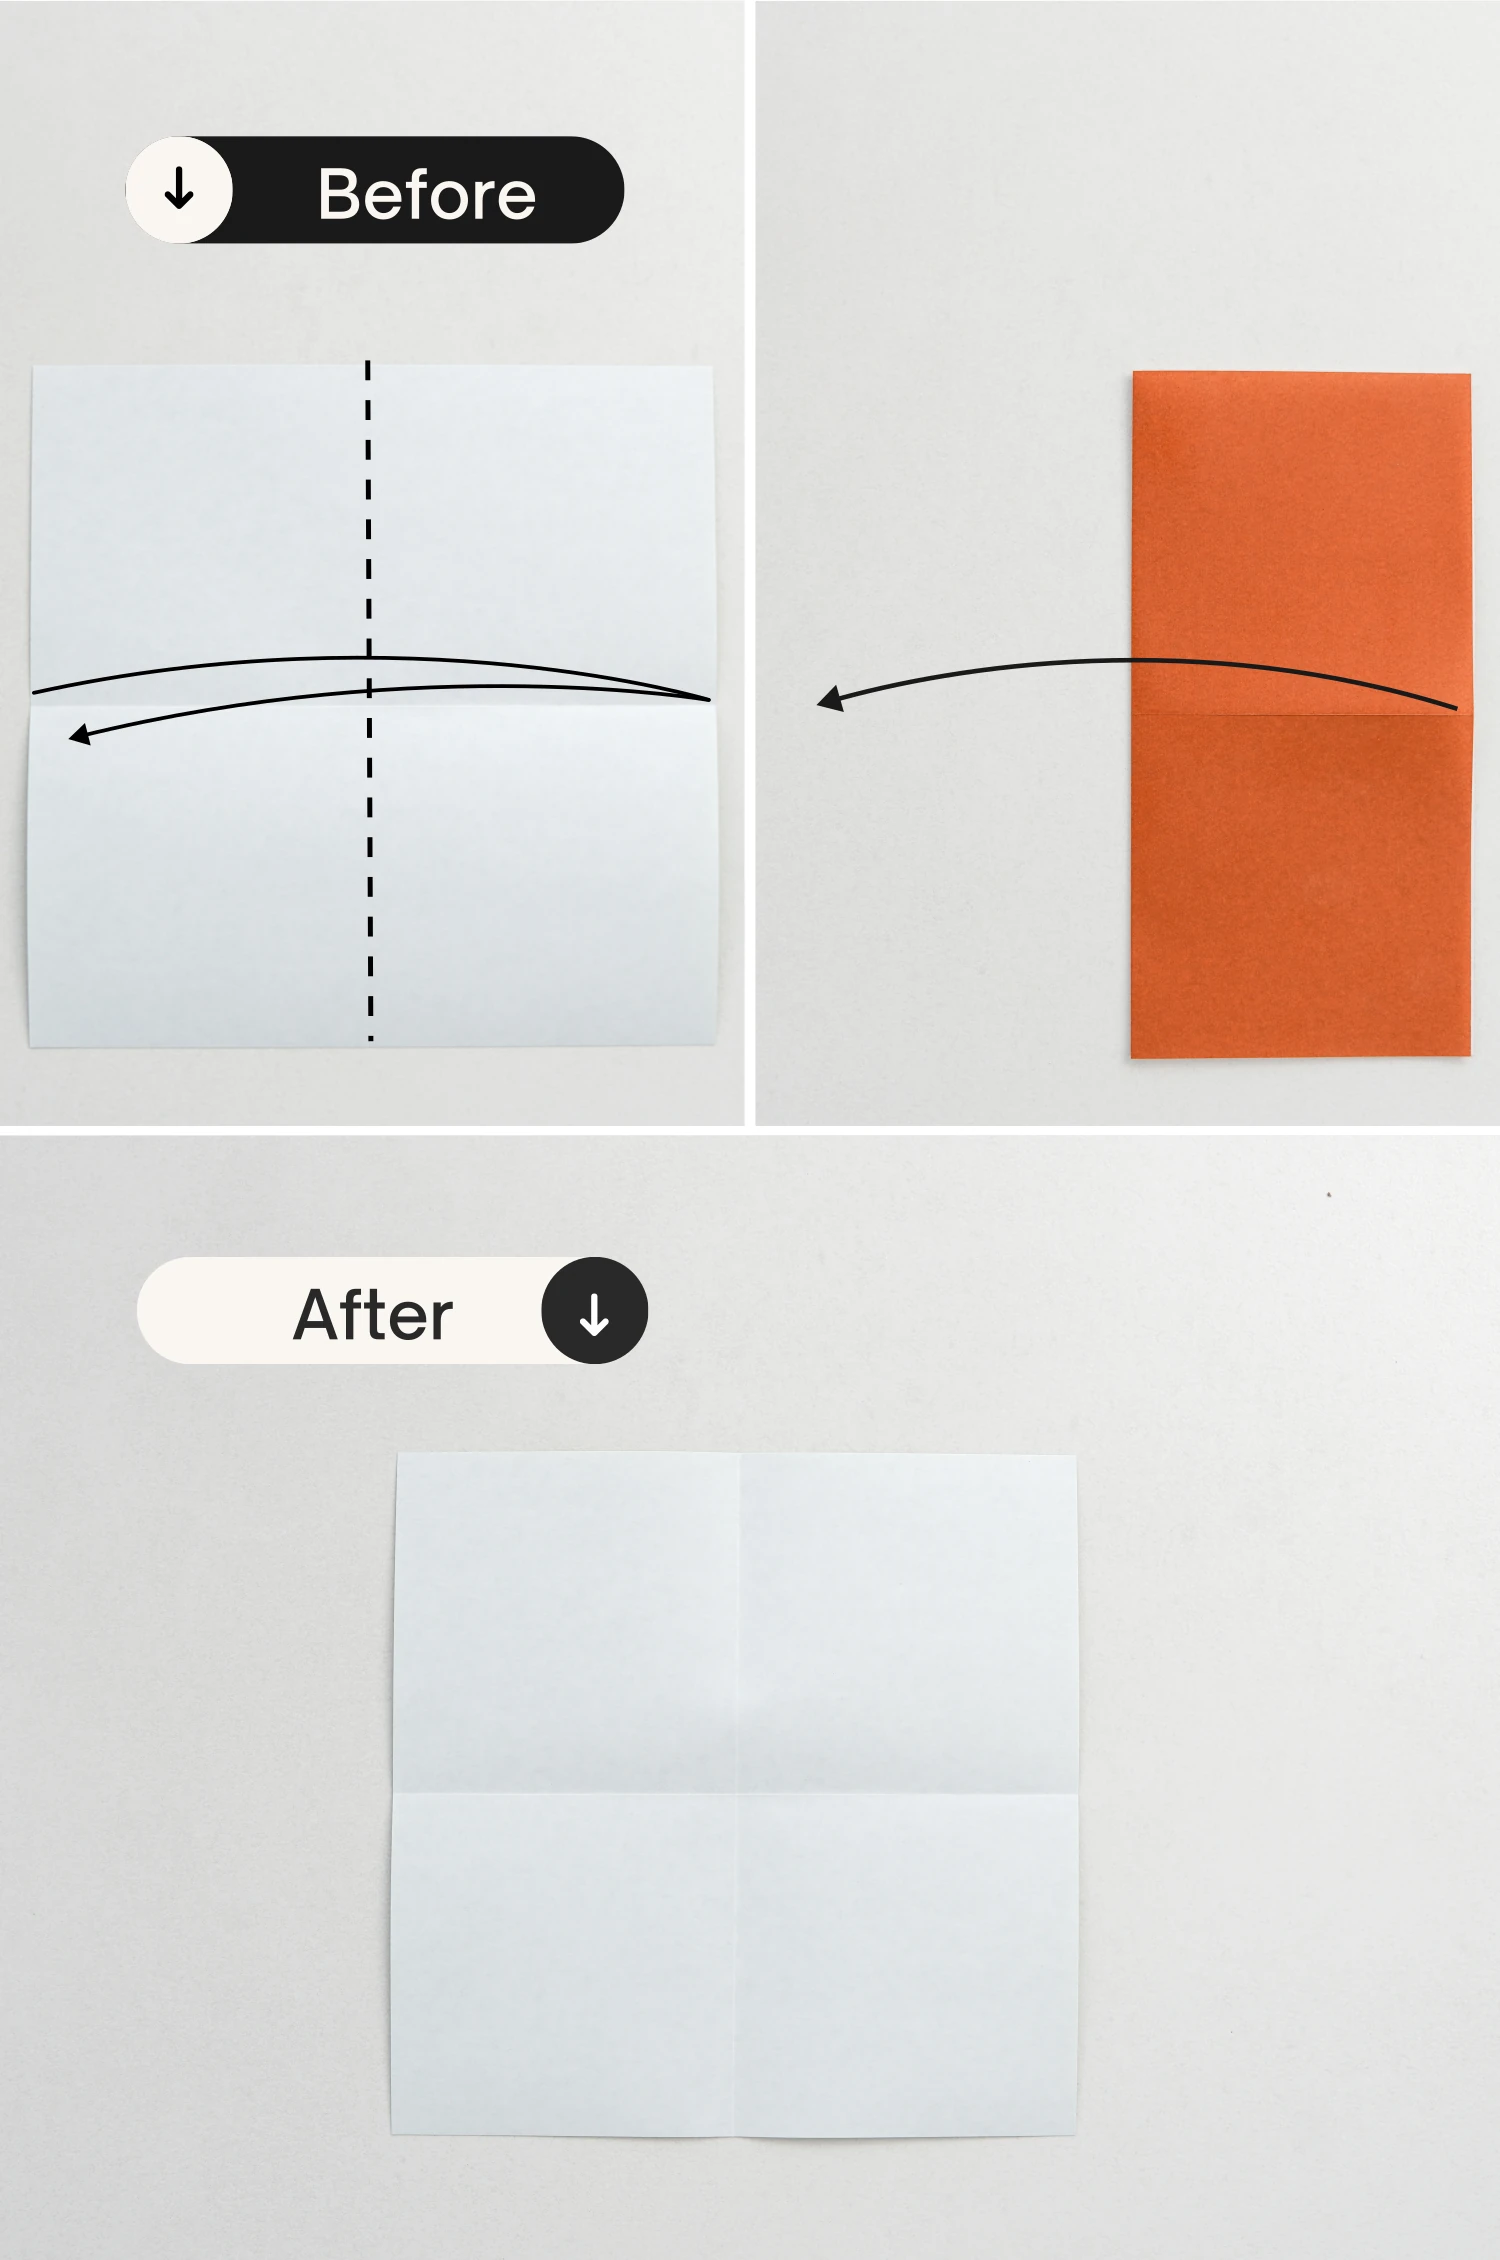
Step 27
Fold it in half vertically, crease it well then unfold.
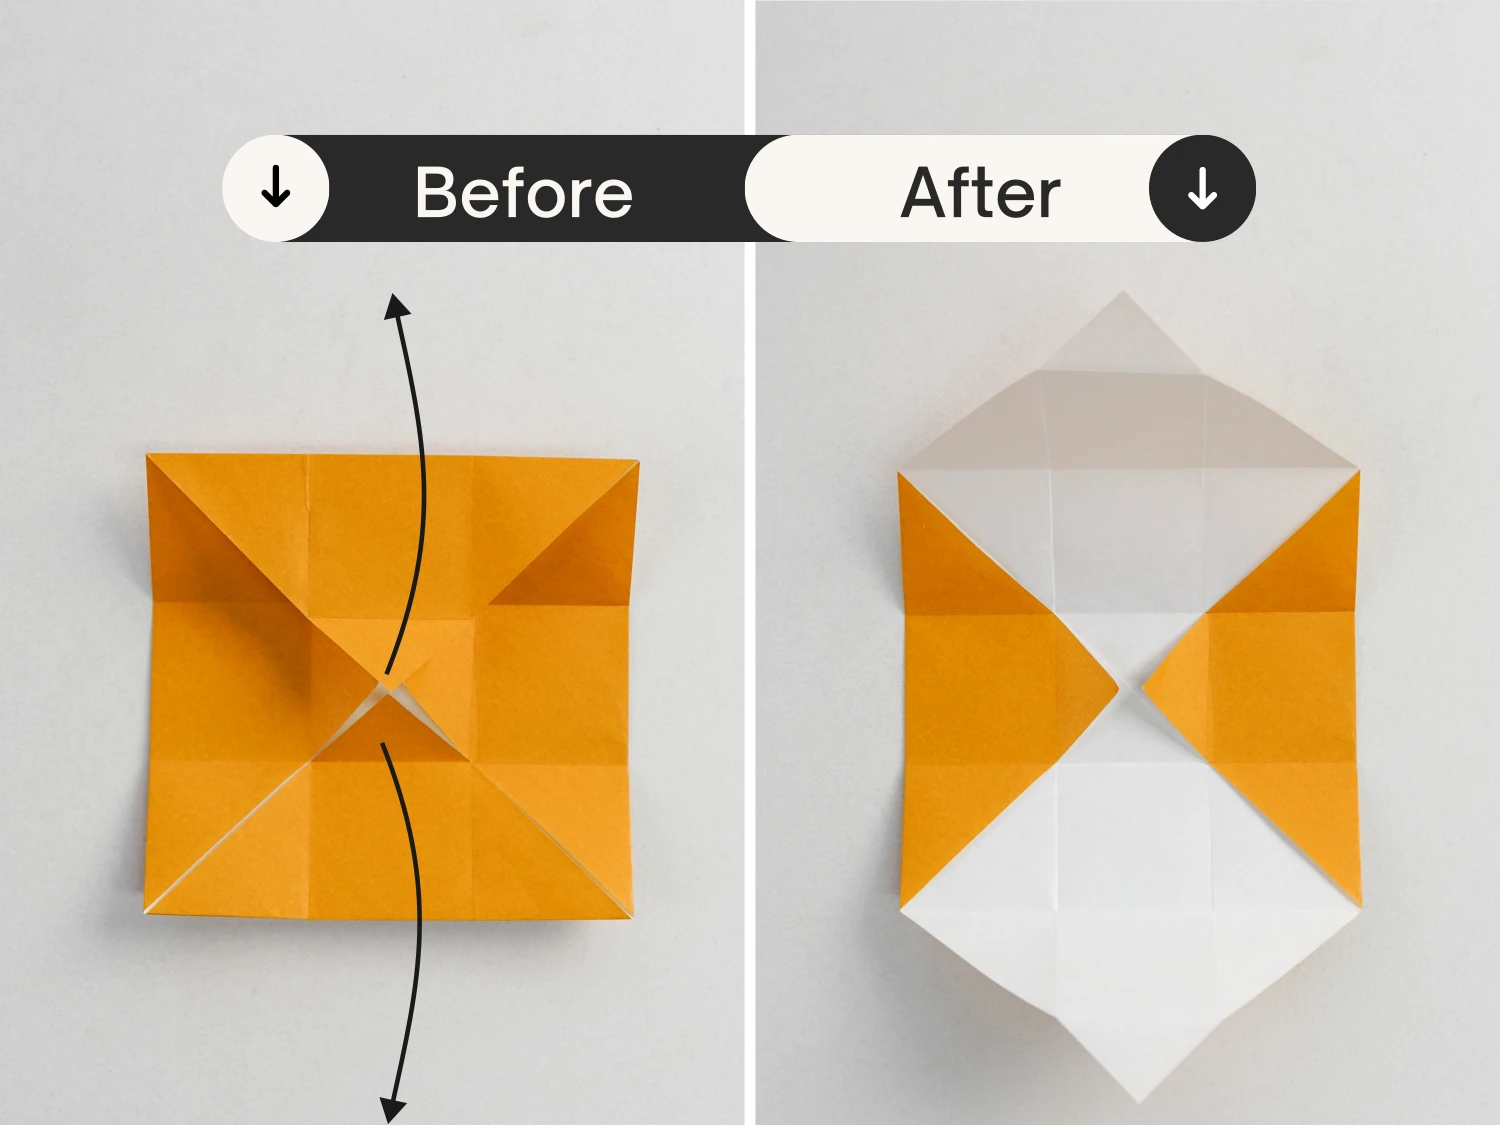
Step 28
Fold the four points to the center intersection point.
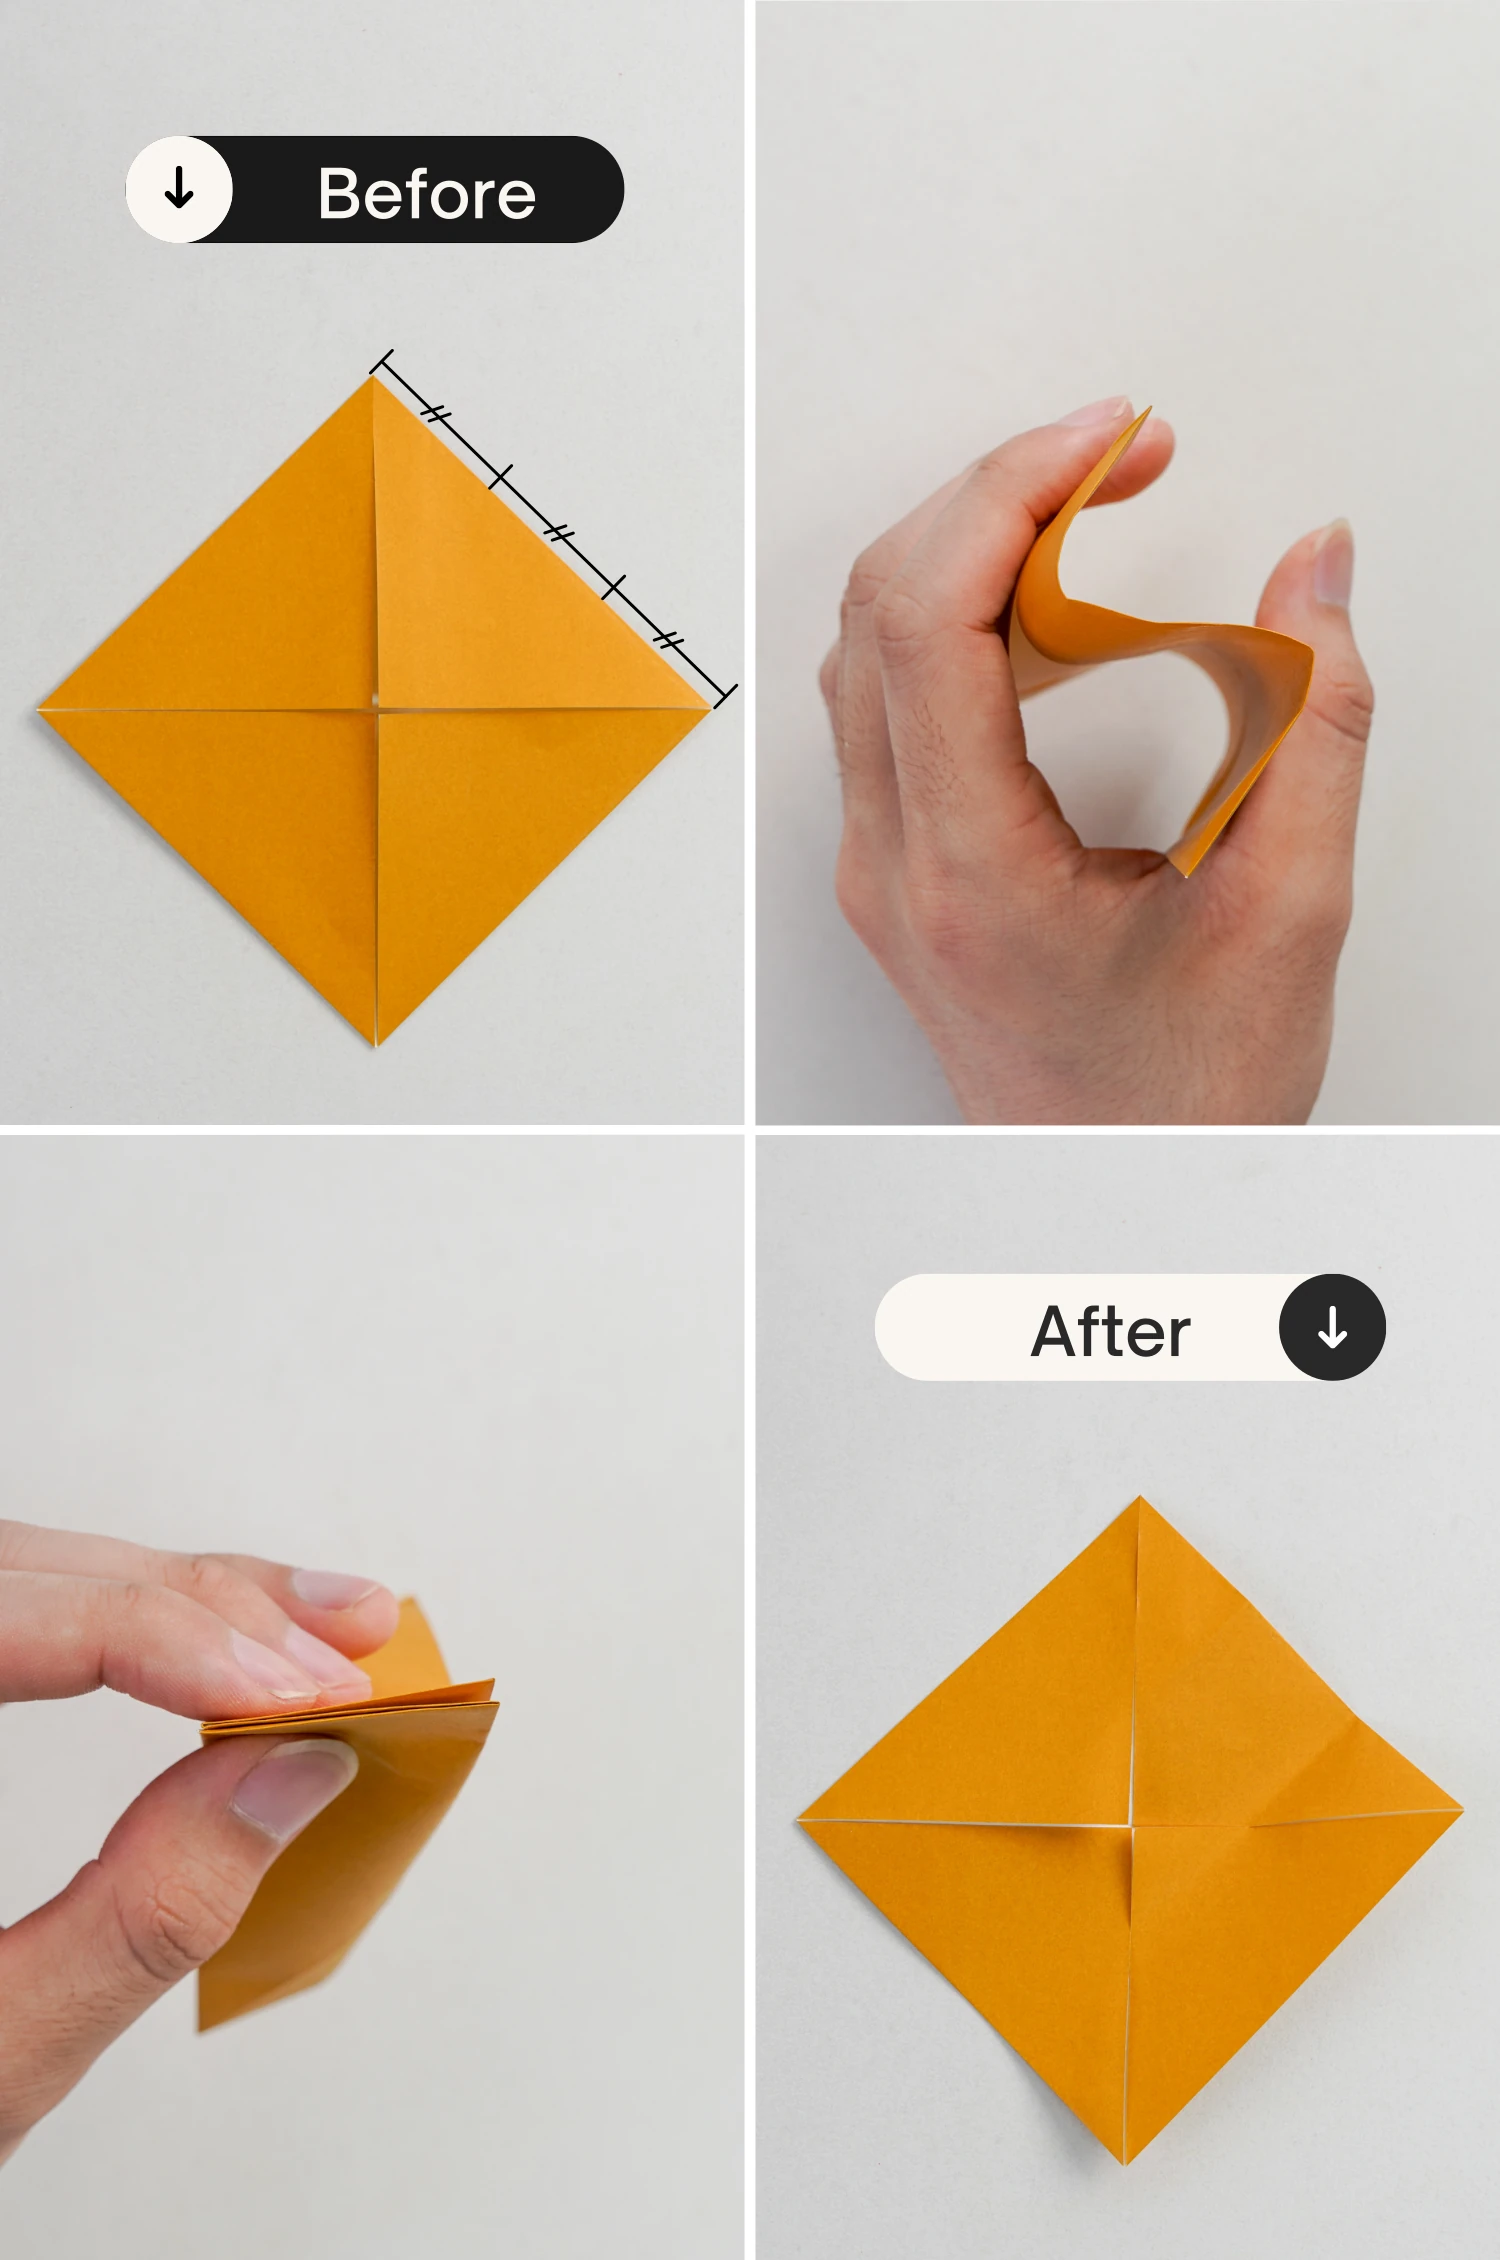
Step 29
Hold the model in your hand so that it bends in the same way as the picture shows, like an “S”, then flatten this edge, creating two creases to divide this edge into three equal parts.
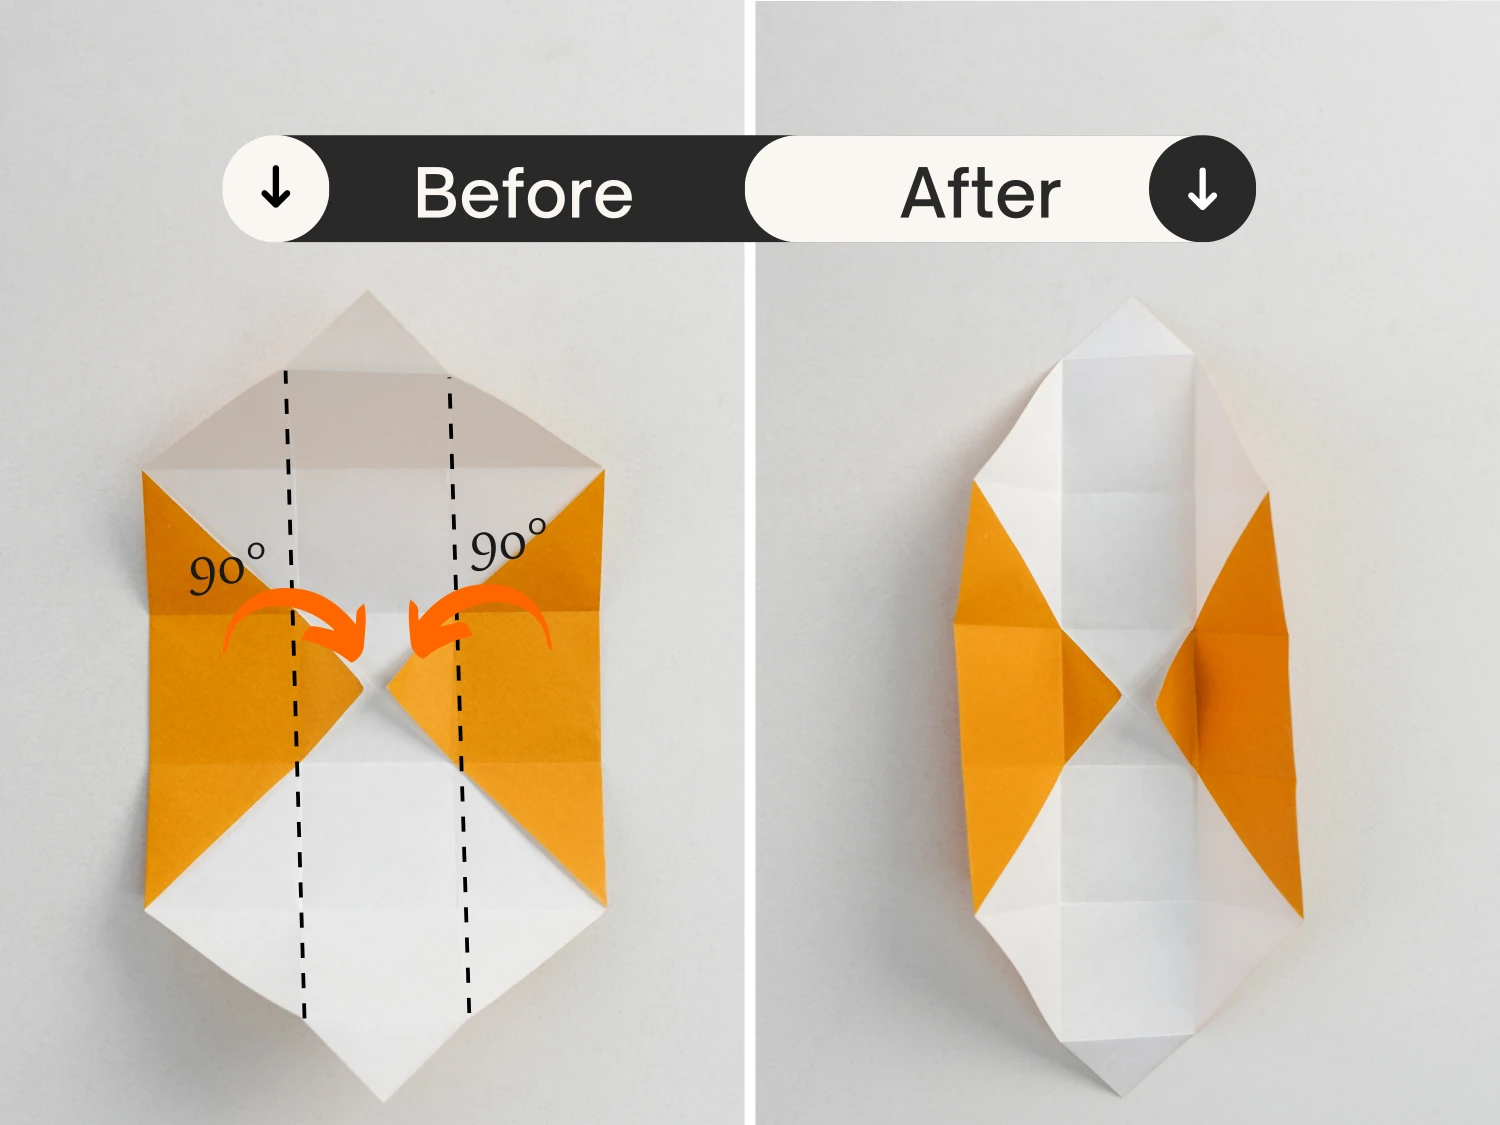
Step 30
Fold the bottom right edge toward the top left along the dotted line (formed by extending vertically from the point you just made to the bottom left edge). Crease it well then unfold.
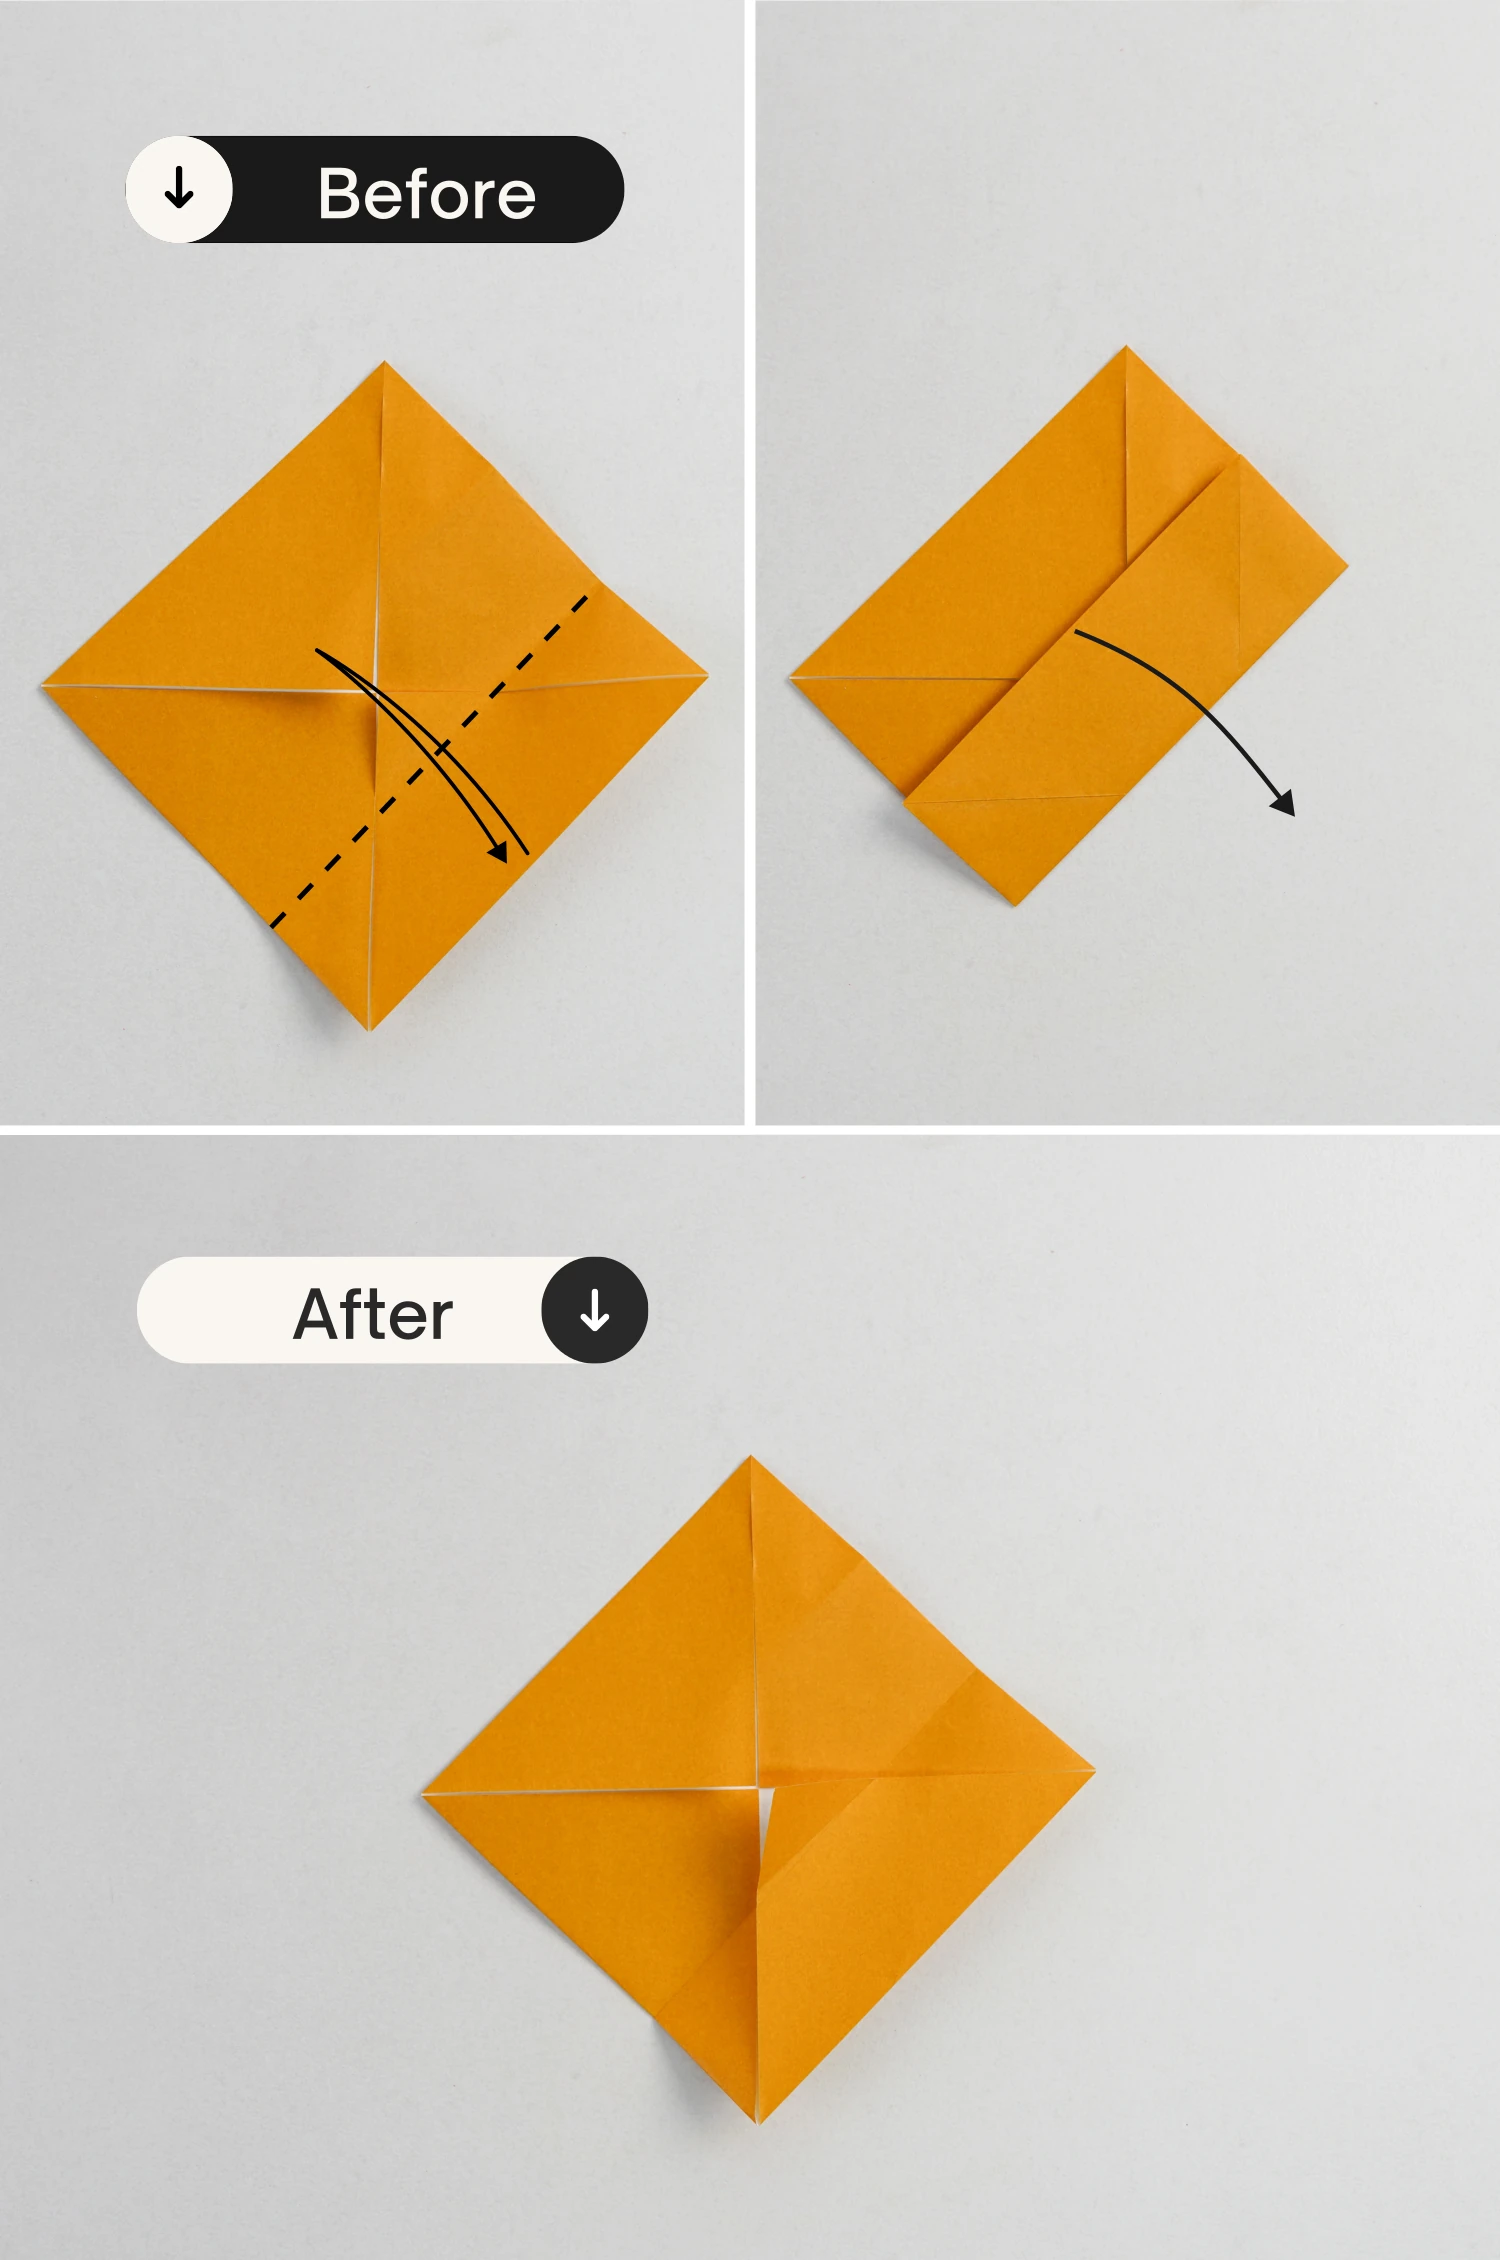
Step 31
Repeat this for the top left edge.

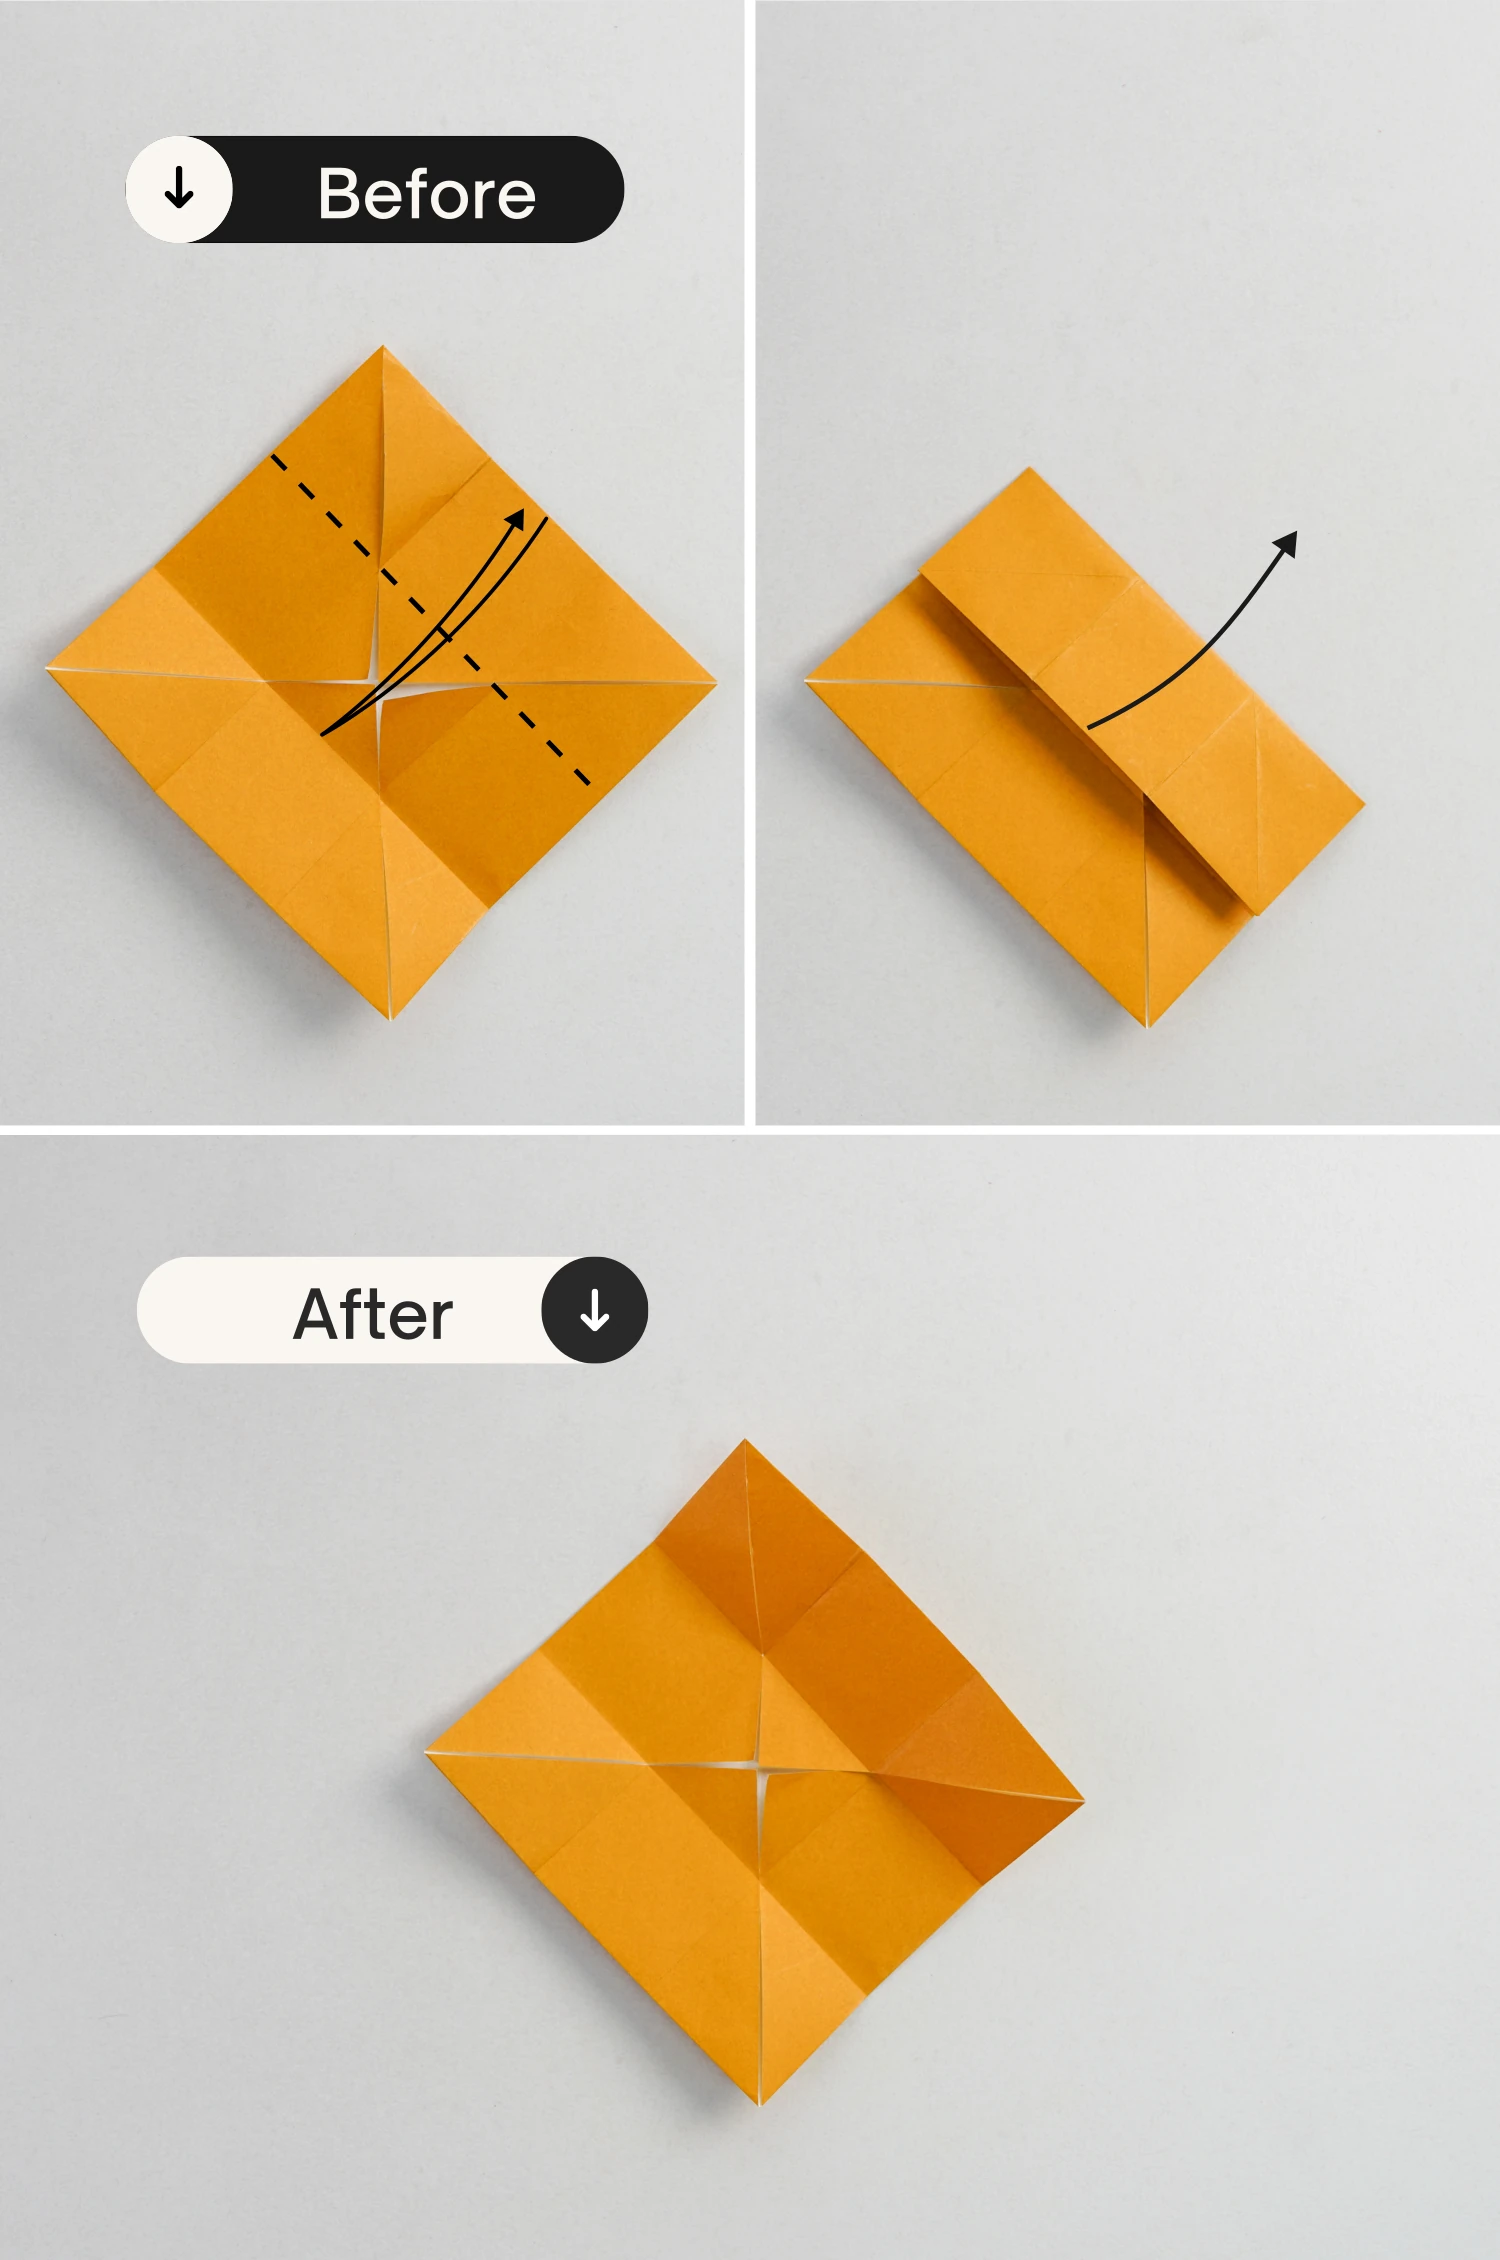
Step 32
Fold the bottom left edge toward the top right along the dotted line, to align with the line connecting by the two red points. (the red points are formed by the intersection of the two creases you just made and the slits).
Crease it well then unfold.

Step 33
Repeat this for the top right edge.
Step 34
Rotate it for 45 degrees clockwise.

Step 35
Unfold the top and bottom triangles.
Step 36
Lift the left and right edges along the creases shown by the dotted lines, making them stand.
Step 37
Lift the top part and make it stand along the crease shown by the dotted line.
Pinch up the creases on the left and right shown by the red dotted lines. Then flatten the standing part.
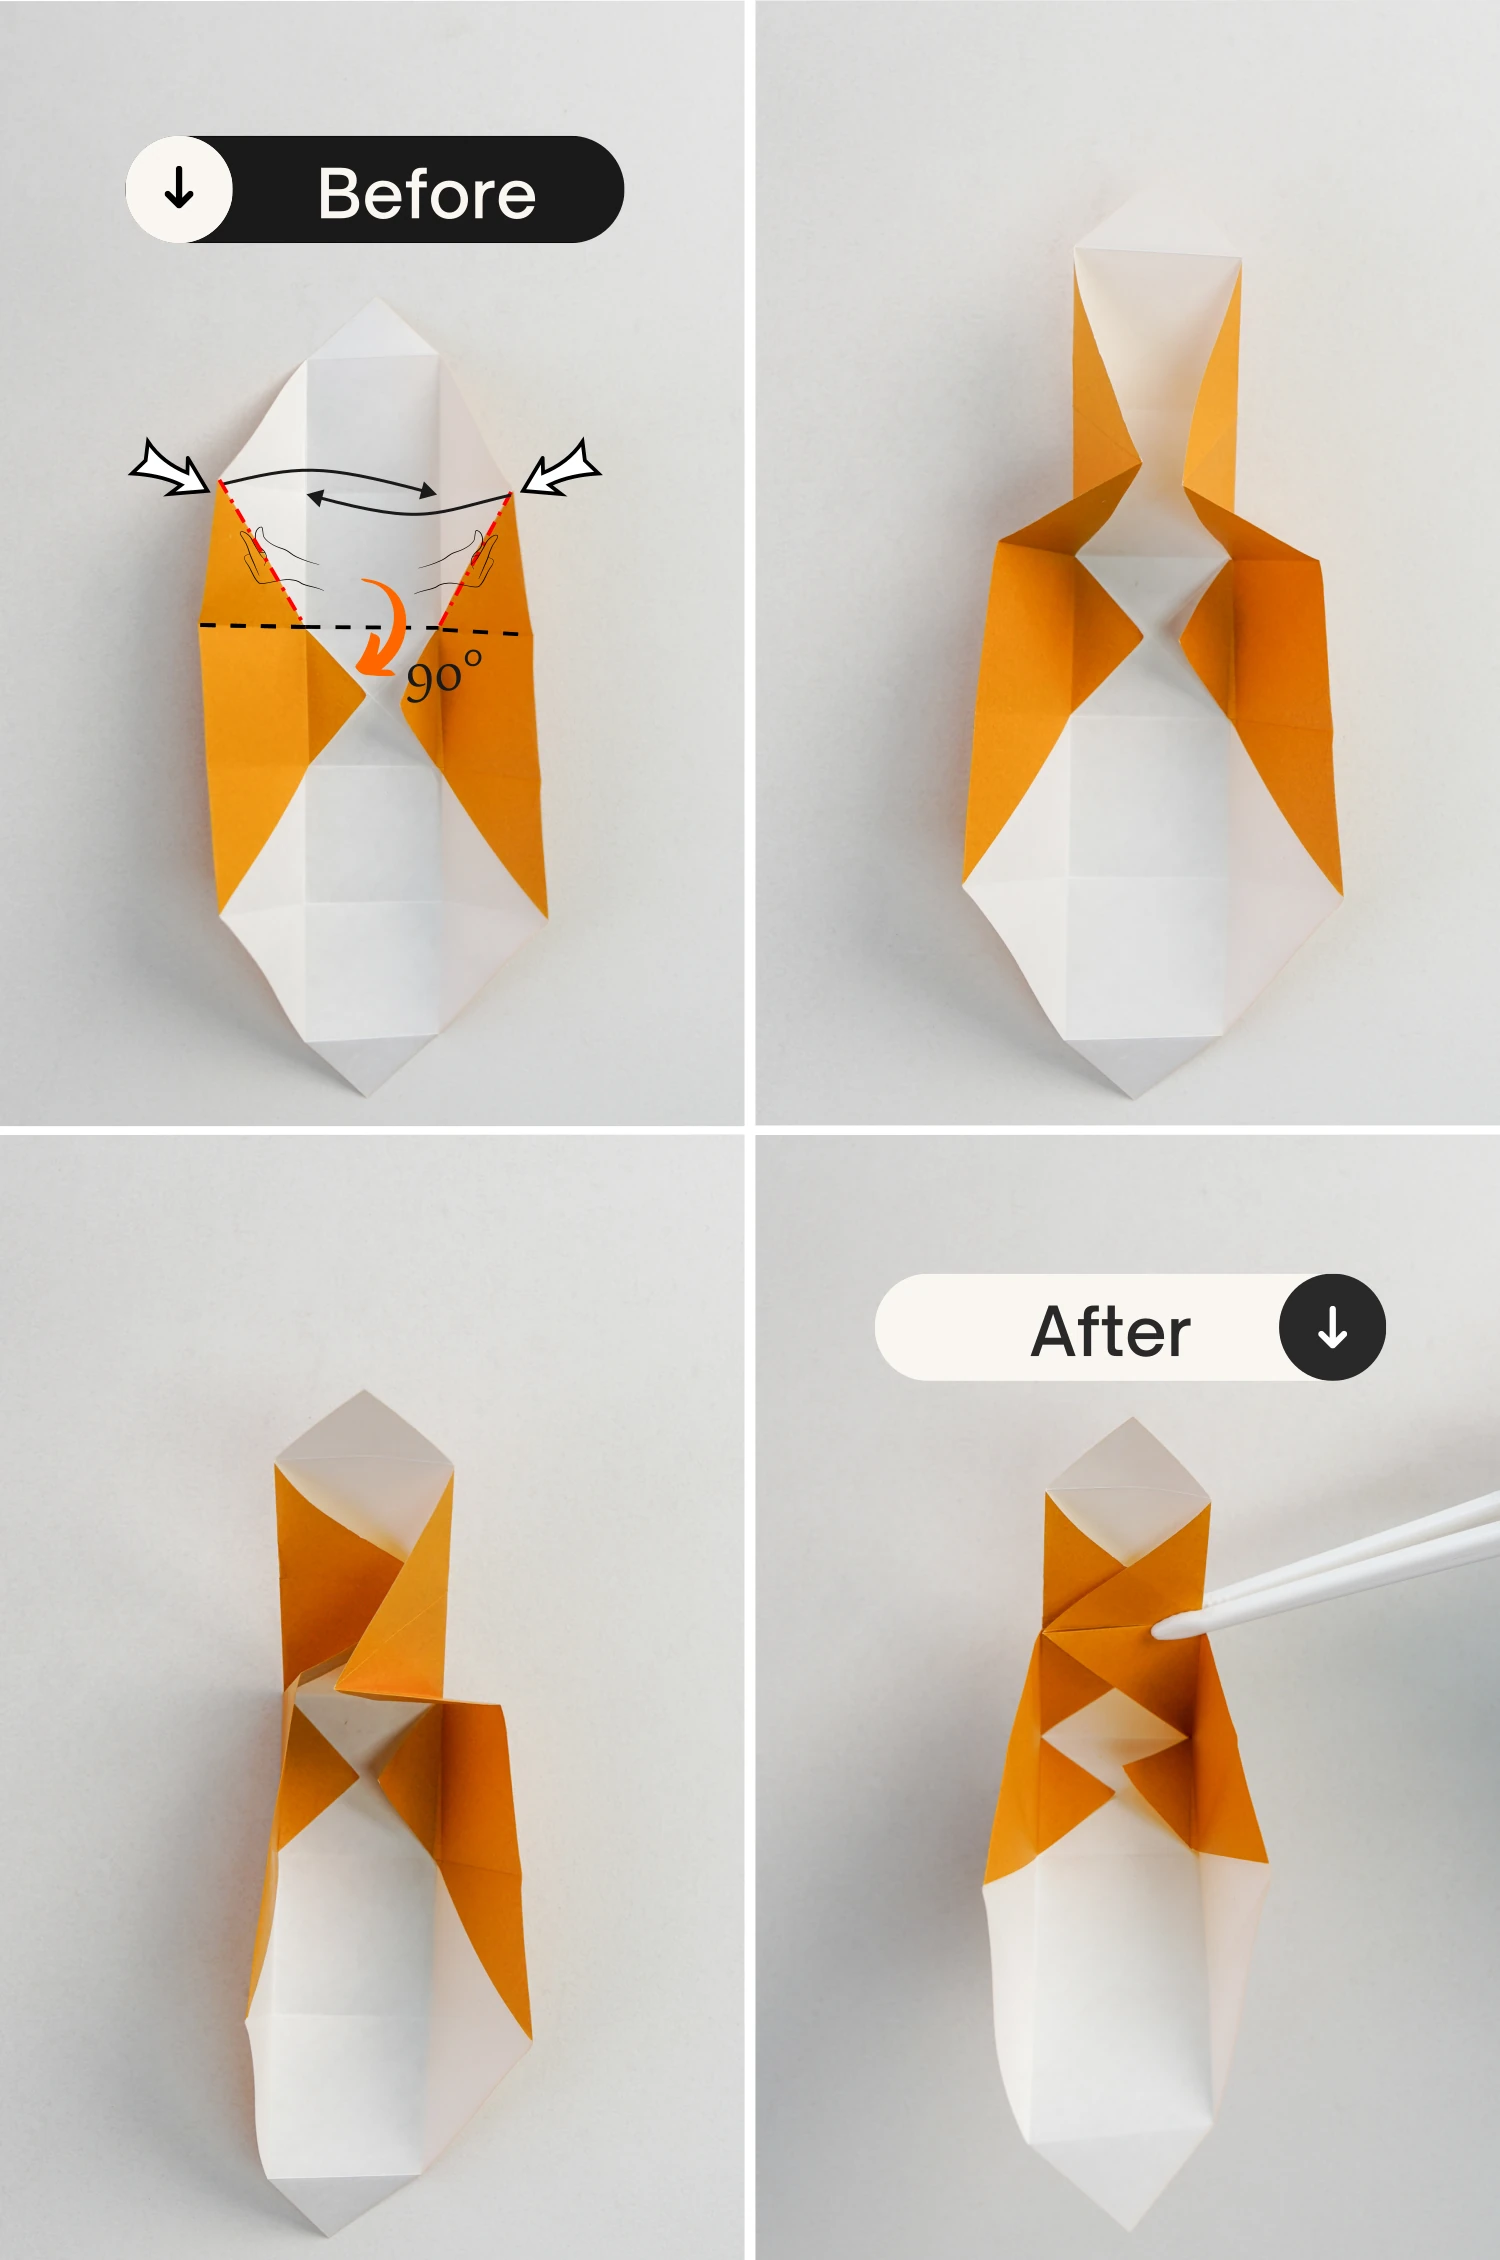
Step 38
Fold the top point down along the dotted line, adjust it well, and get one of the sides of the box’s base.

Step 39
Repeat the step 37. Lift the bottom part, and pinch up the left and right creases, finally flatten it.
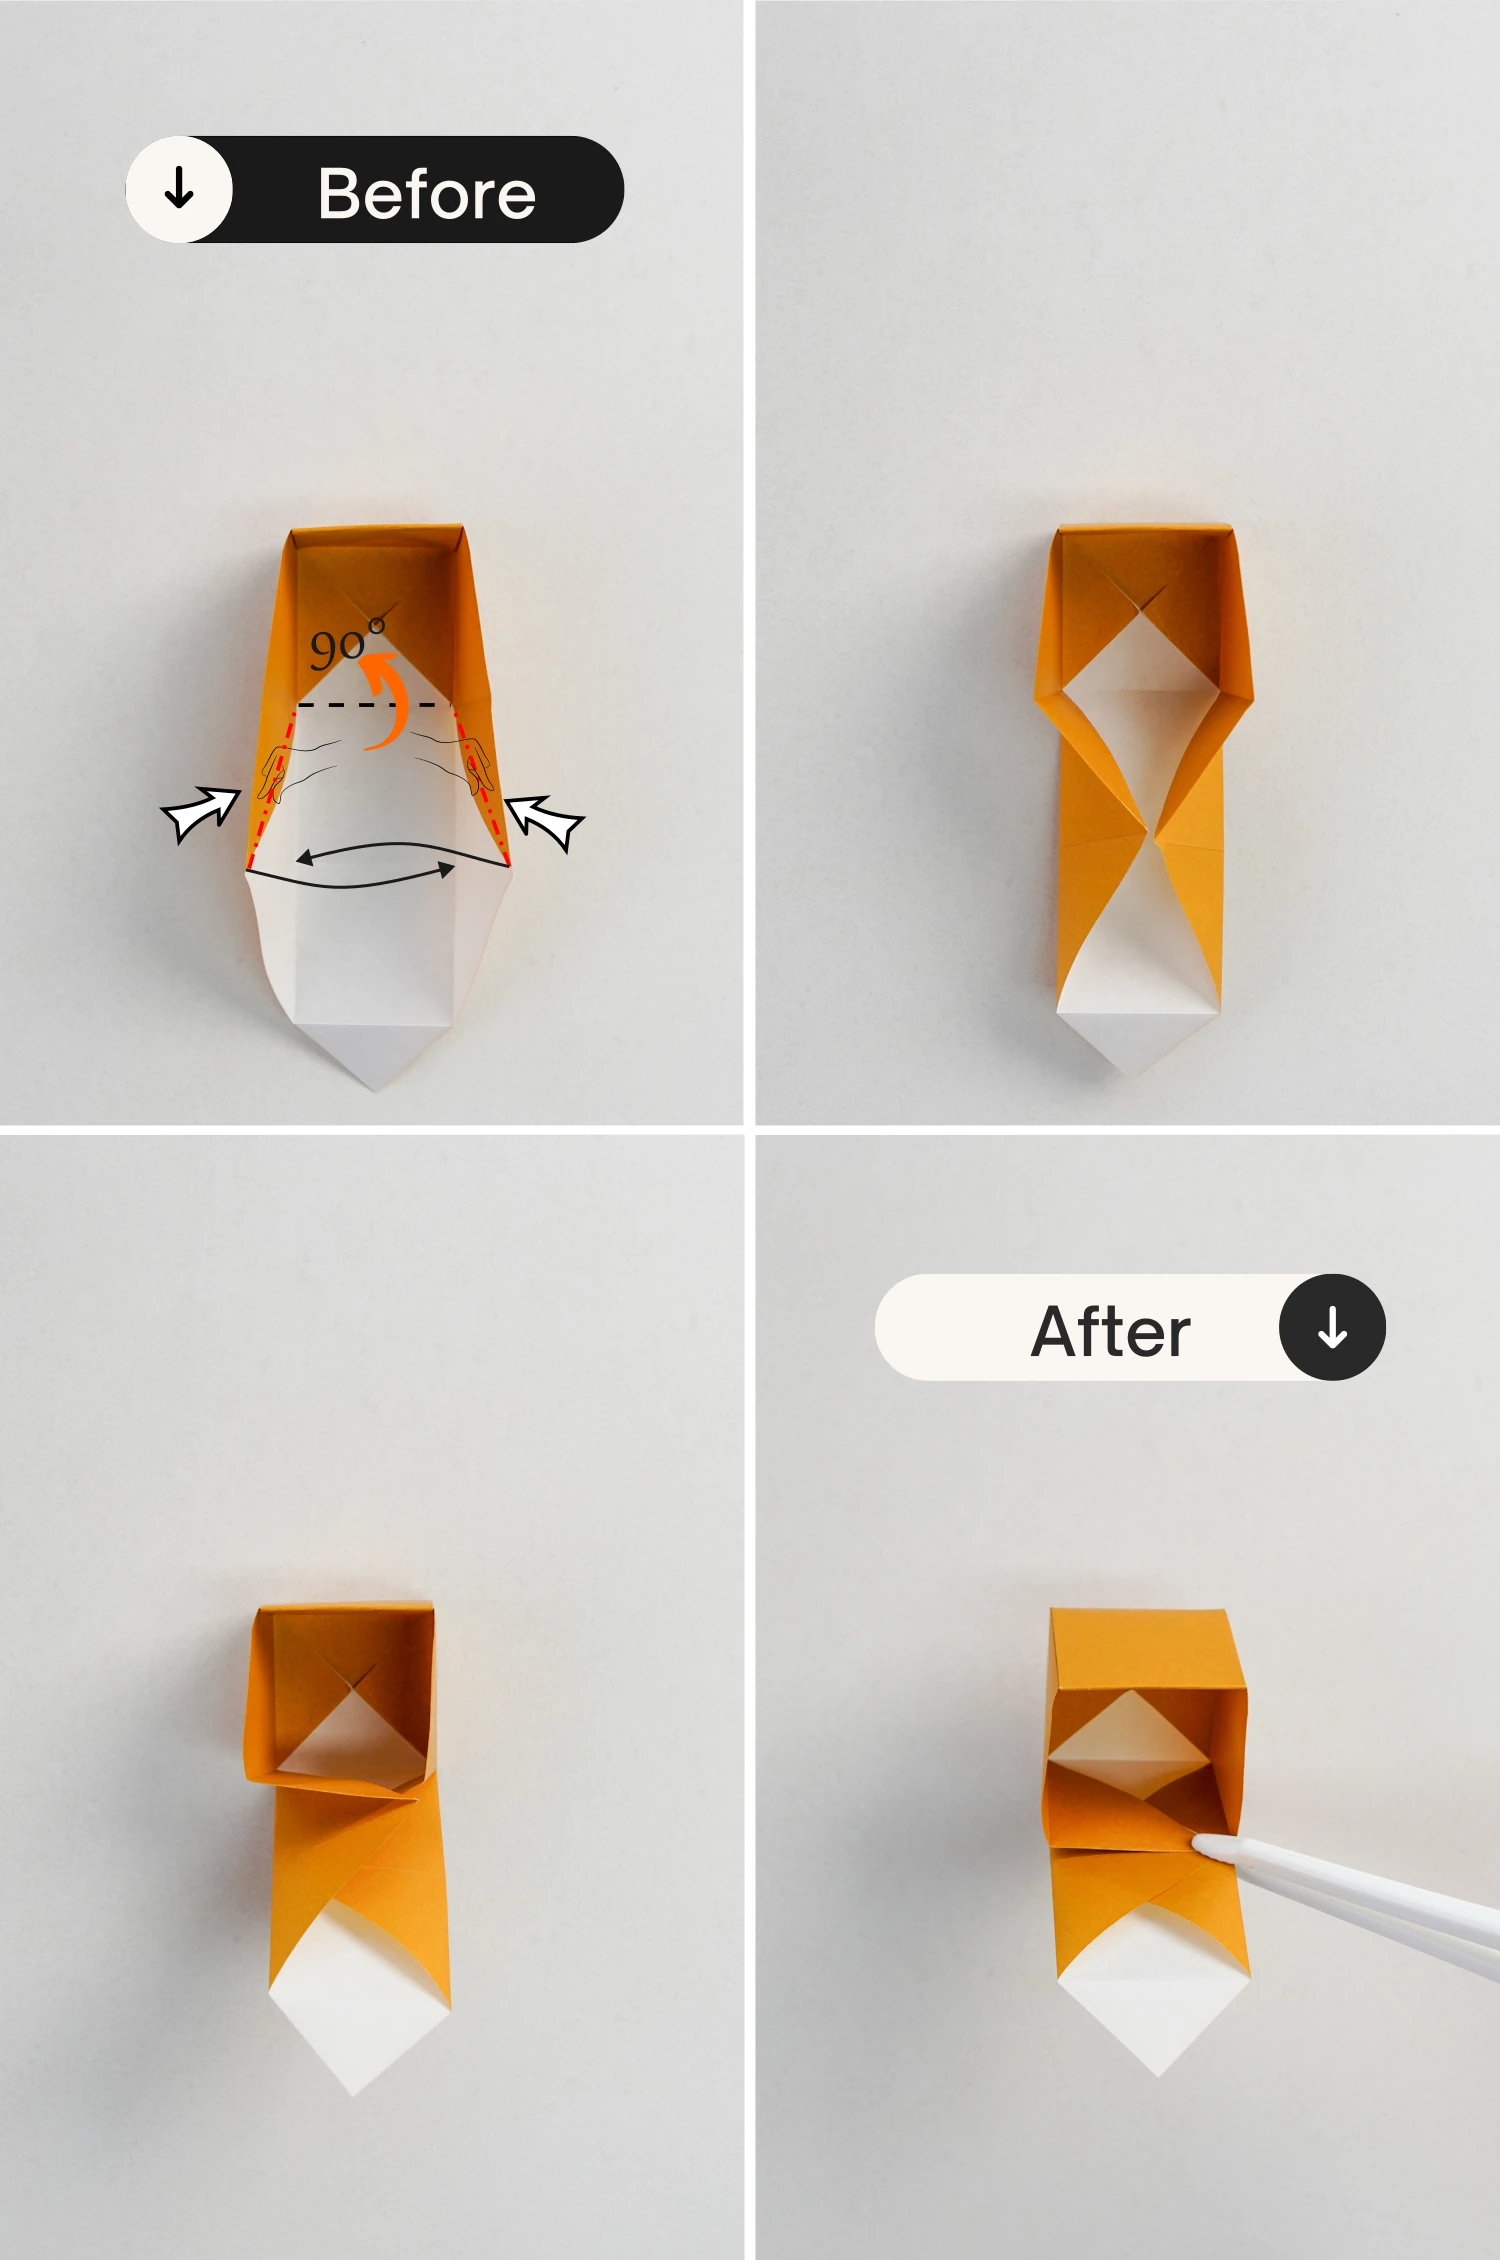
Step 40
Repeat step 38, and fold the point down creating a complete base.

Step 41
Now assemble the gift box.
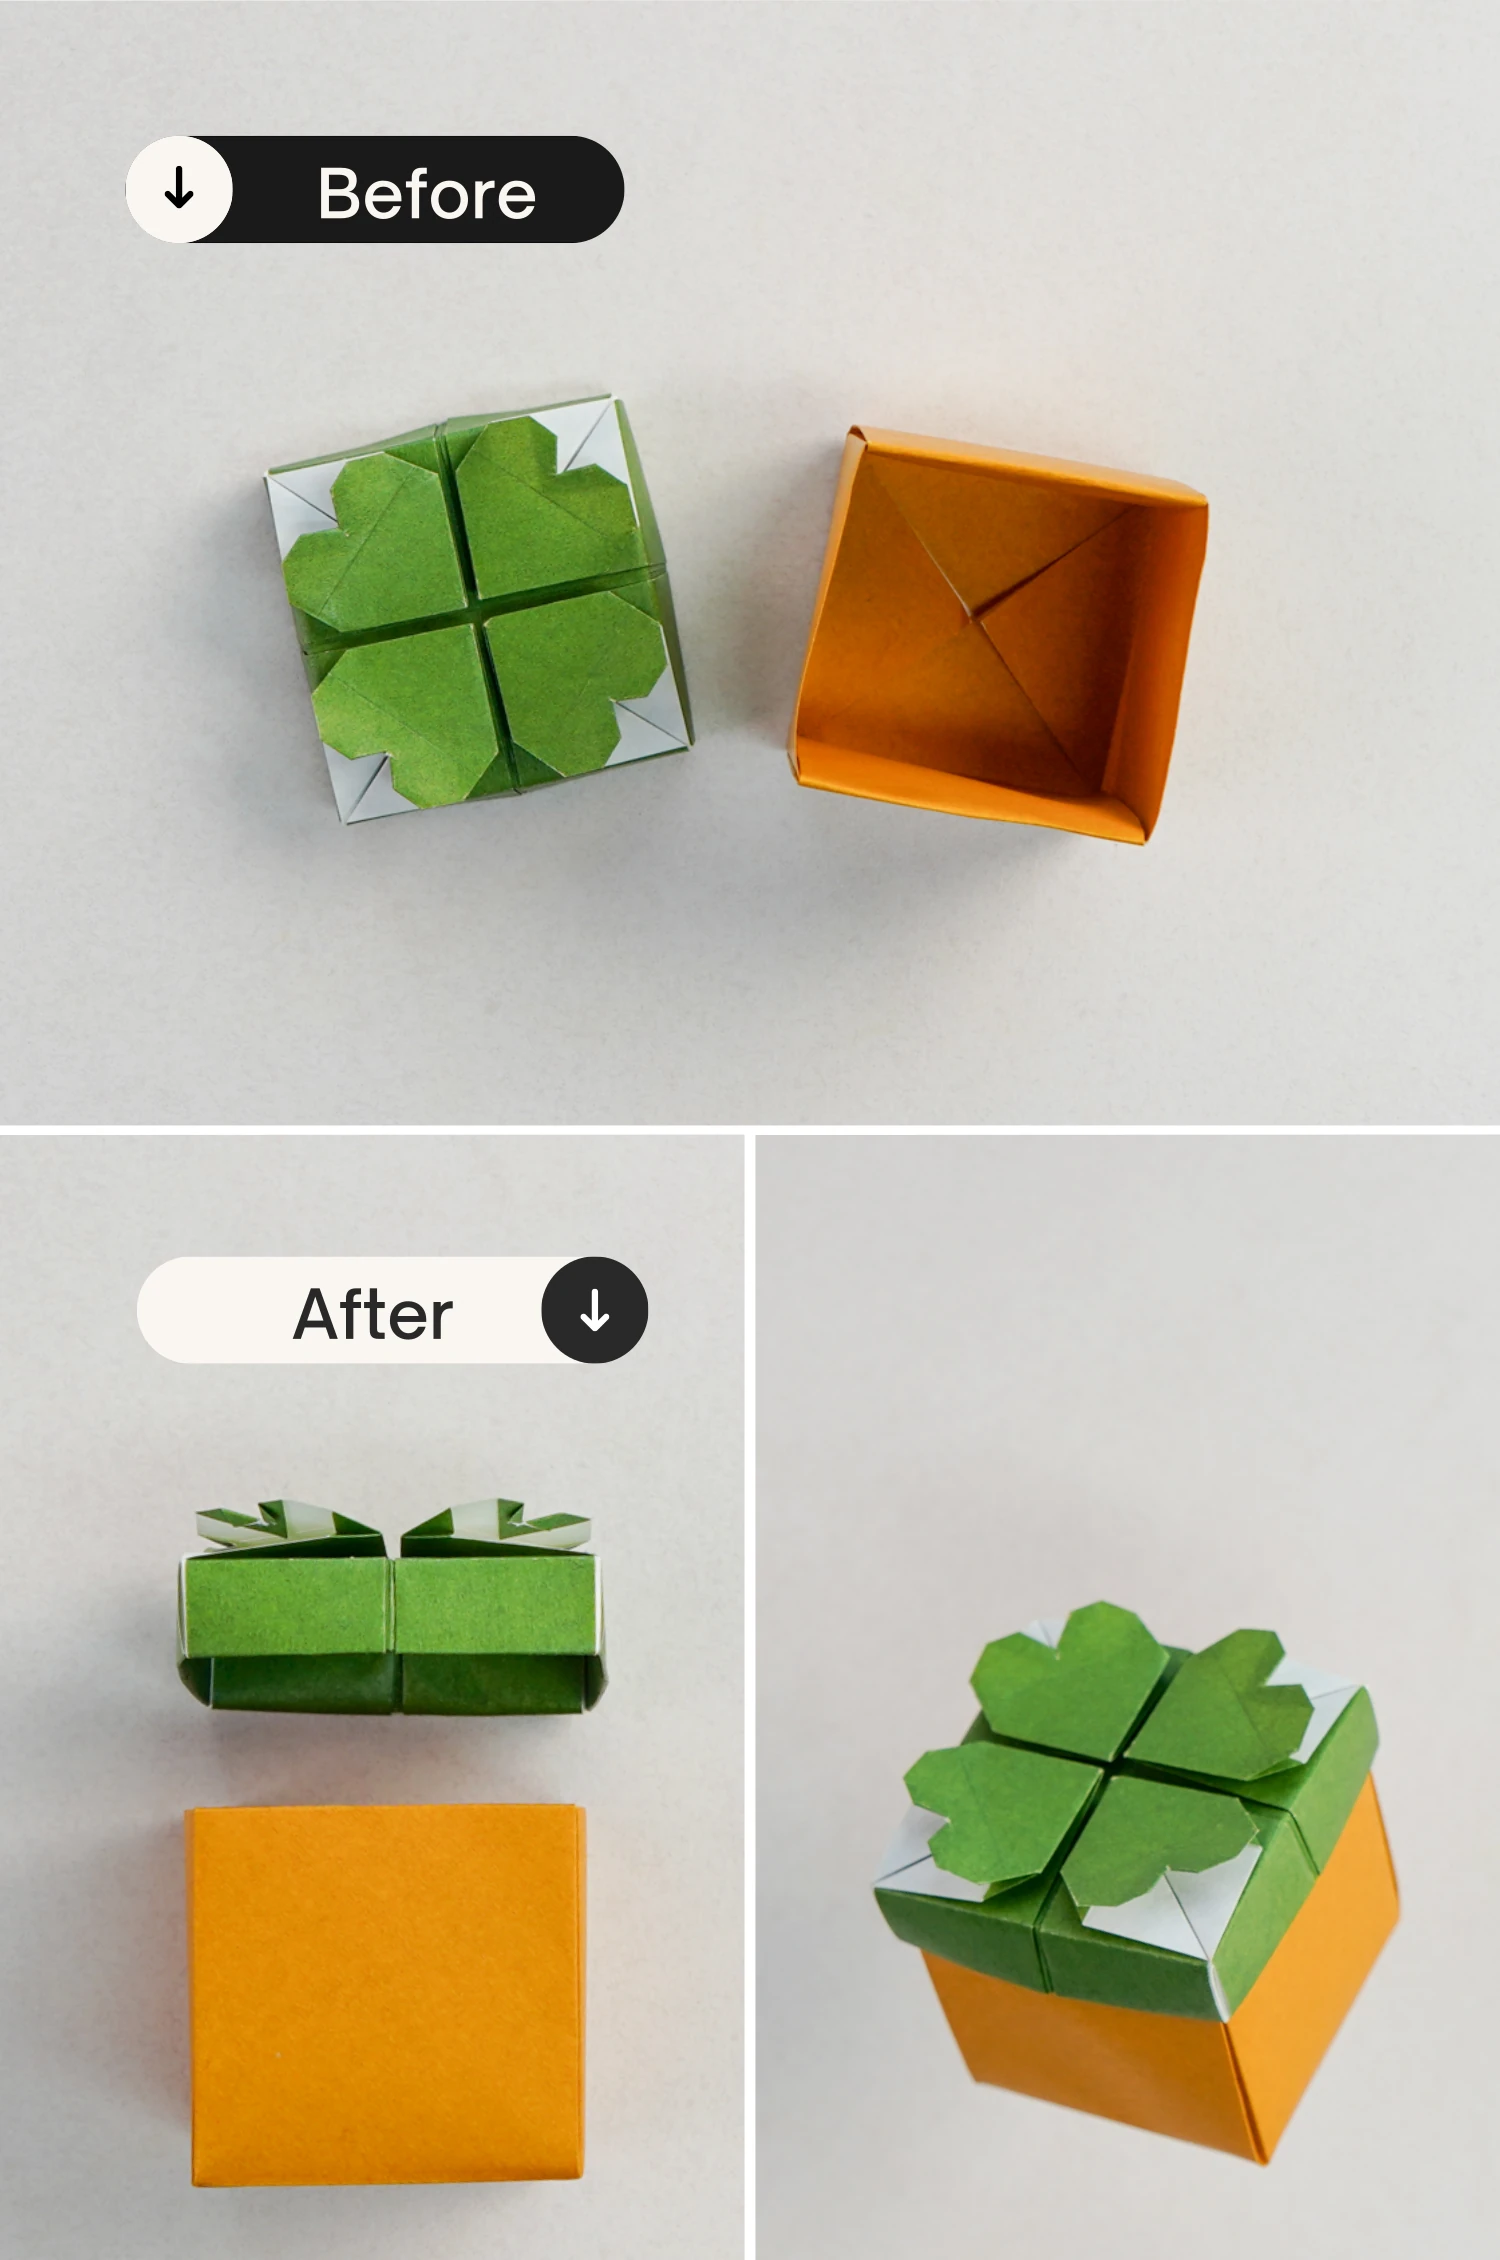
What’s Next
This is the final shape of a gift box, now you can check our other box instructions, you can fold many boxes for different purposes. Enjoy folding!


