How to Fold an Origami Rose Box
Step 1
Take out the green paper, and start with the white side of the paper facing up. Fold in half horizontally and unfold.

Step 2
Fold it in half vertically, then unfold it to create a new crease.

Step 3
Fold both the left and right edges to meet the middle vertical crease, crease it well and unfold, creating two intersection points on the left and right formed by two creases you made.

Step 4
Fold the top left corner down diagonally to the left intersection point mentioned in the previous step.
Repeat with the bottom left corner and top right corner.

Step 5
Take the bottom left corner, and fold it up diagonally to meet the center intersection point, crease it well then unfold.
We will repeat this for three times for the three points on the bottom edge.

Step 6
Take the point where the middle vertical crease meets the bottom edge, and fold it up diagonally to meet the right intersection point you made in step 3, crease it well and unfold.

Step 7
Similarly, take the point where the right crease (you made in step 3) meets the bottom edge, fold it up diagonally, crease it well then unfold.
Now you have three short-slanted creases.

Step 8
Fold the first slanted crease again, that is repeat step 5. Note that only flatten the triangle you folded, and make the top part stand along the existing crease.

Step 9
Lift the top edge to make it stand along the horizontal crease.

Step 10
Flip it over.

Step 11
Pinch up the crease shown by the red dotted line, and fold the left part to the right along the vertical crease shown by the black dotted line, making the middle point of the bottom edge meet the bottom right corner.
Rotate it to set it straight.

Step 12
In the same way, pinch up the slanted crease shown by the red dotted line, then fold the bottom right corner up diagonally toward the top right.
Note that the bottom right corner should cross through the bottom right seam of the top square, to meet the top right corner on the back side, and better fix this side. Finally, flatten it.

Step 13
Flip the model over.

Step 14
Now take the red paper, star with the white side facing up, fold it in half horizontally, and unfold it.

Step 15
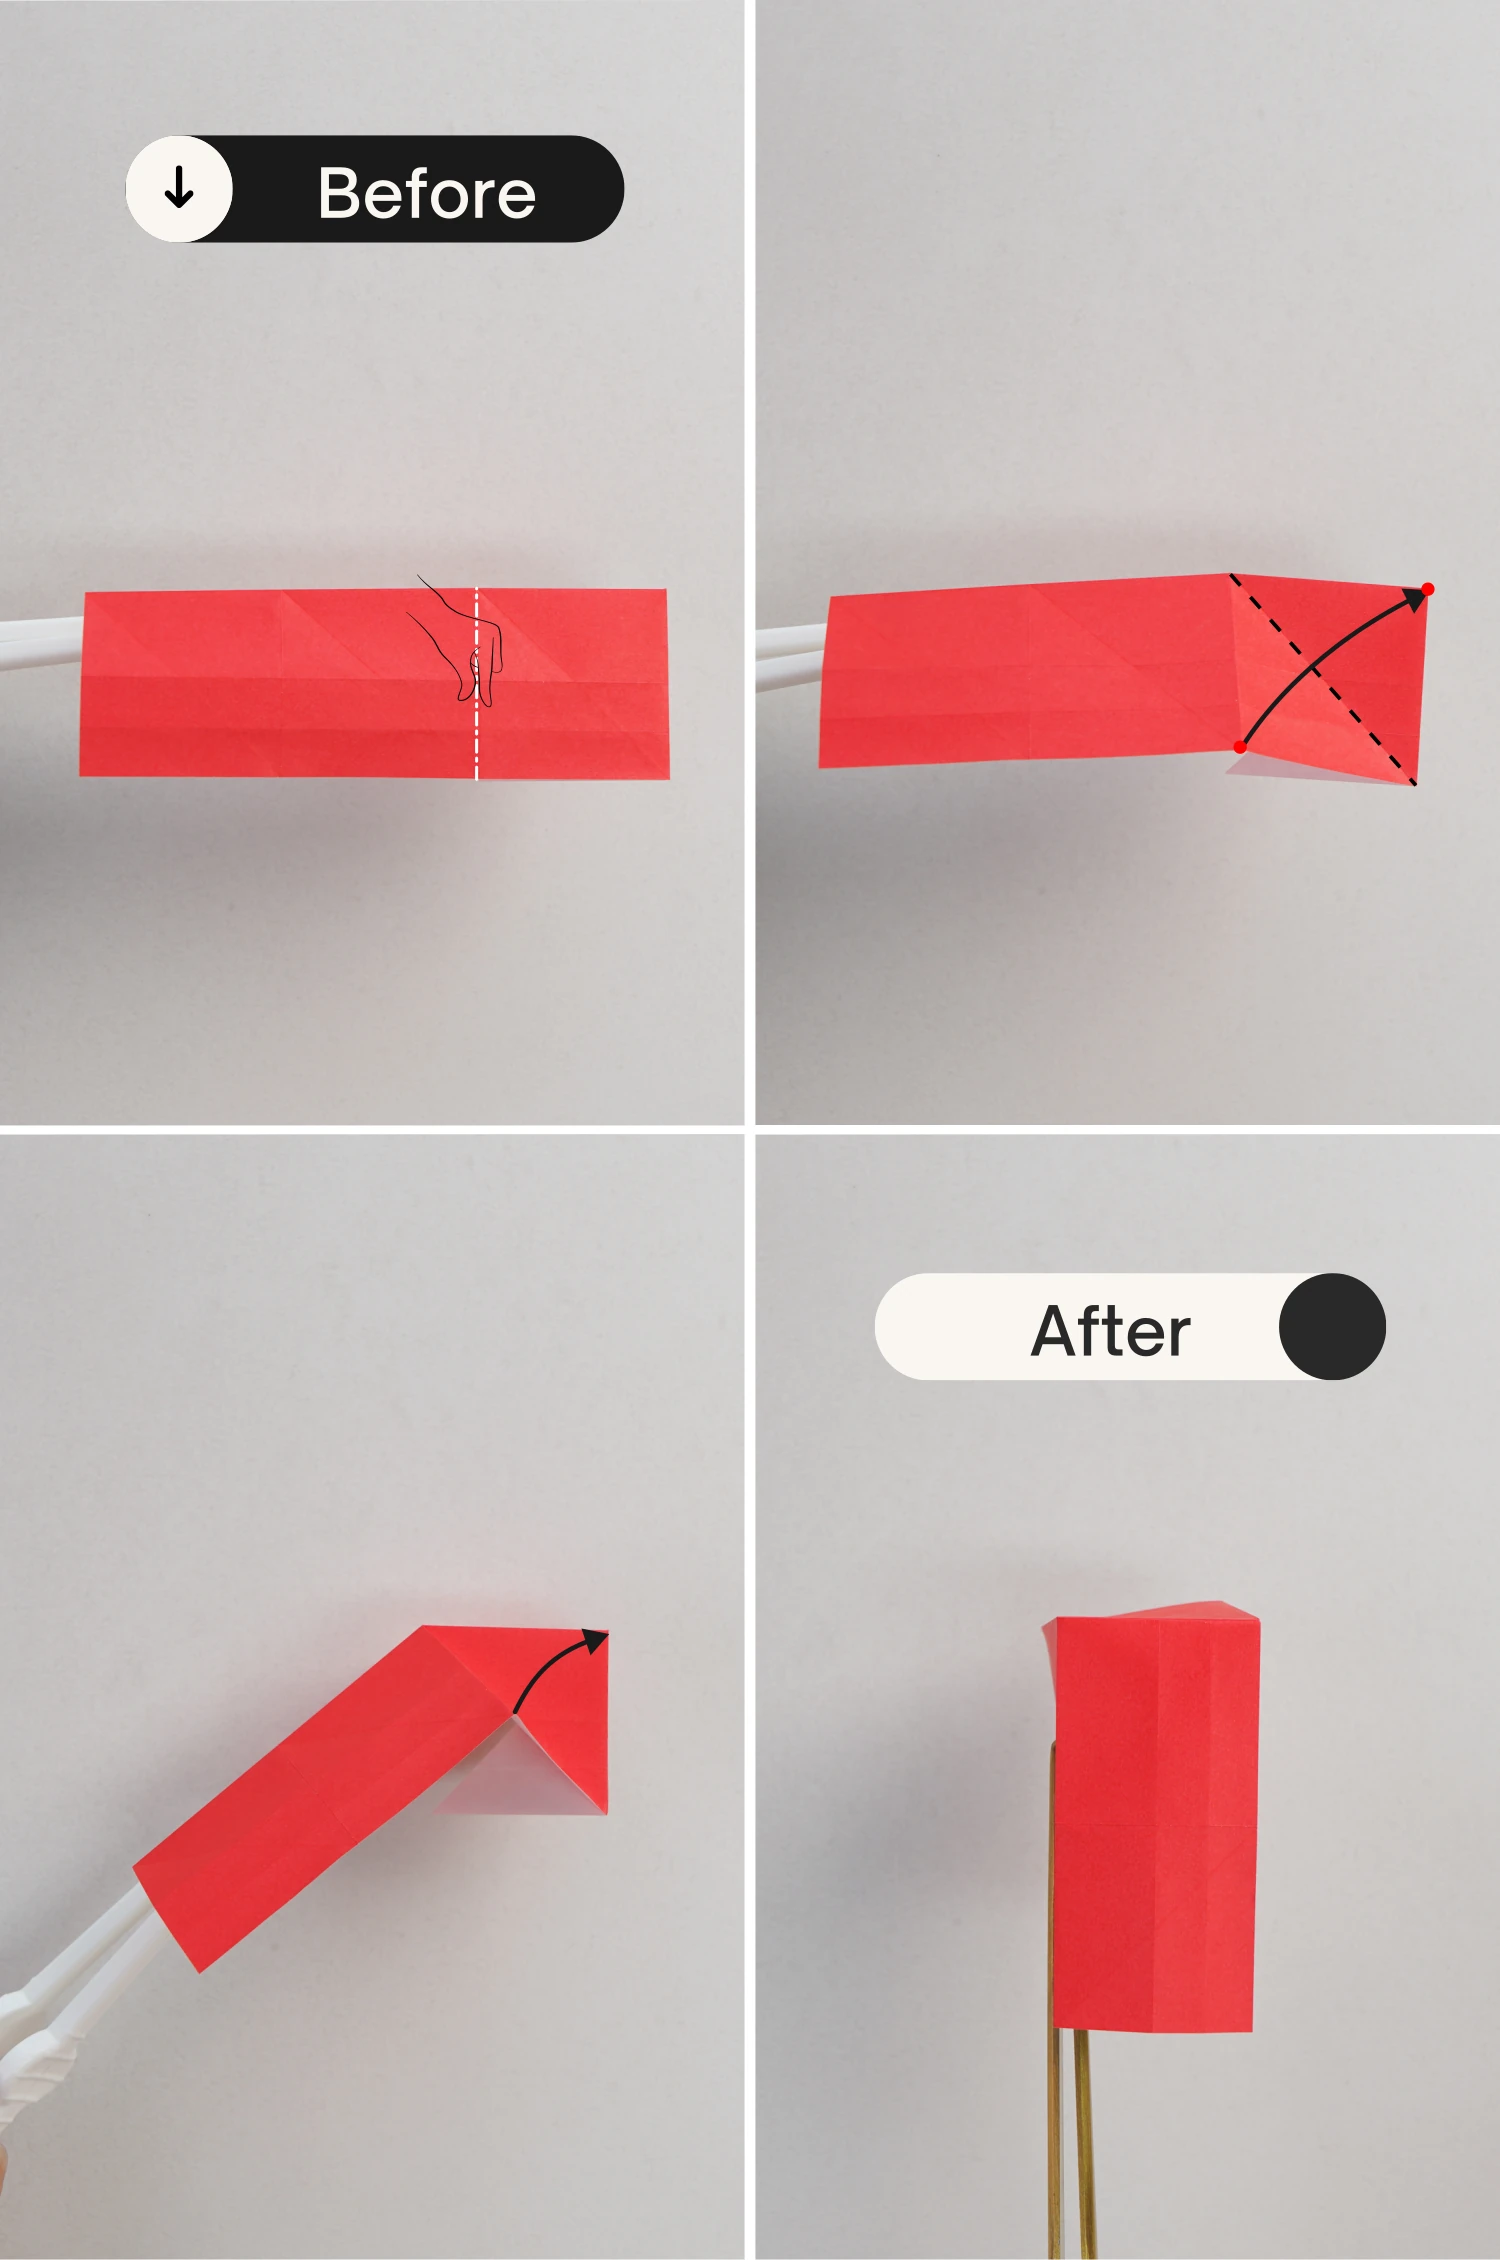
Fold it in half vertically, crease it well, and unfold it.

Step 16
Fold both the left and right edges to meet the middle vertical crease, and unfold, creating two intersection points on the left and right sides.

Step 17
Take the top left point, and fold it diagonally along the dotted line to meet the intersection point formed by the horizontal crease and the left crease you made in the previous step.
Repeat this for the top right point.

Step 18
Flip the paper over.

Step 19
Take the bottom left corner, and fold it up diagonally to meet the left intersection point, crease it well then unfold.
We will repeat this four times at the four points on the bottom edge.

Step 20
Take the point where the left vertical crease and bottom edge meet, fold it to the center intersection point, and unfold it.

Step 21
Fold the middle point of the bottom edge to the right intersection point, crease it well then unfold.

Step 22
Similarly, take the point where the right crease and bottom edge meet, and fold it diagonally along the dotted line, crease it well then unfold.
Now you have made four short diagonal creases on the bottom.

Step 23
Flip the paper over.

Step 24
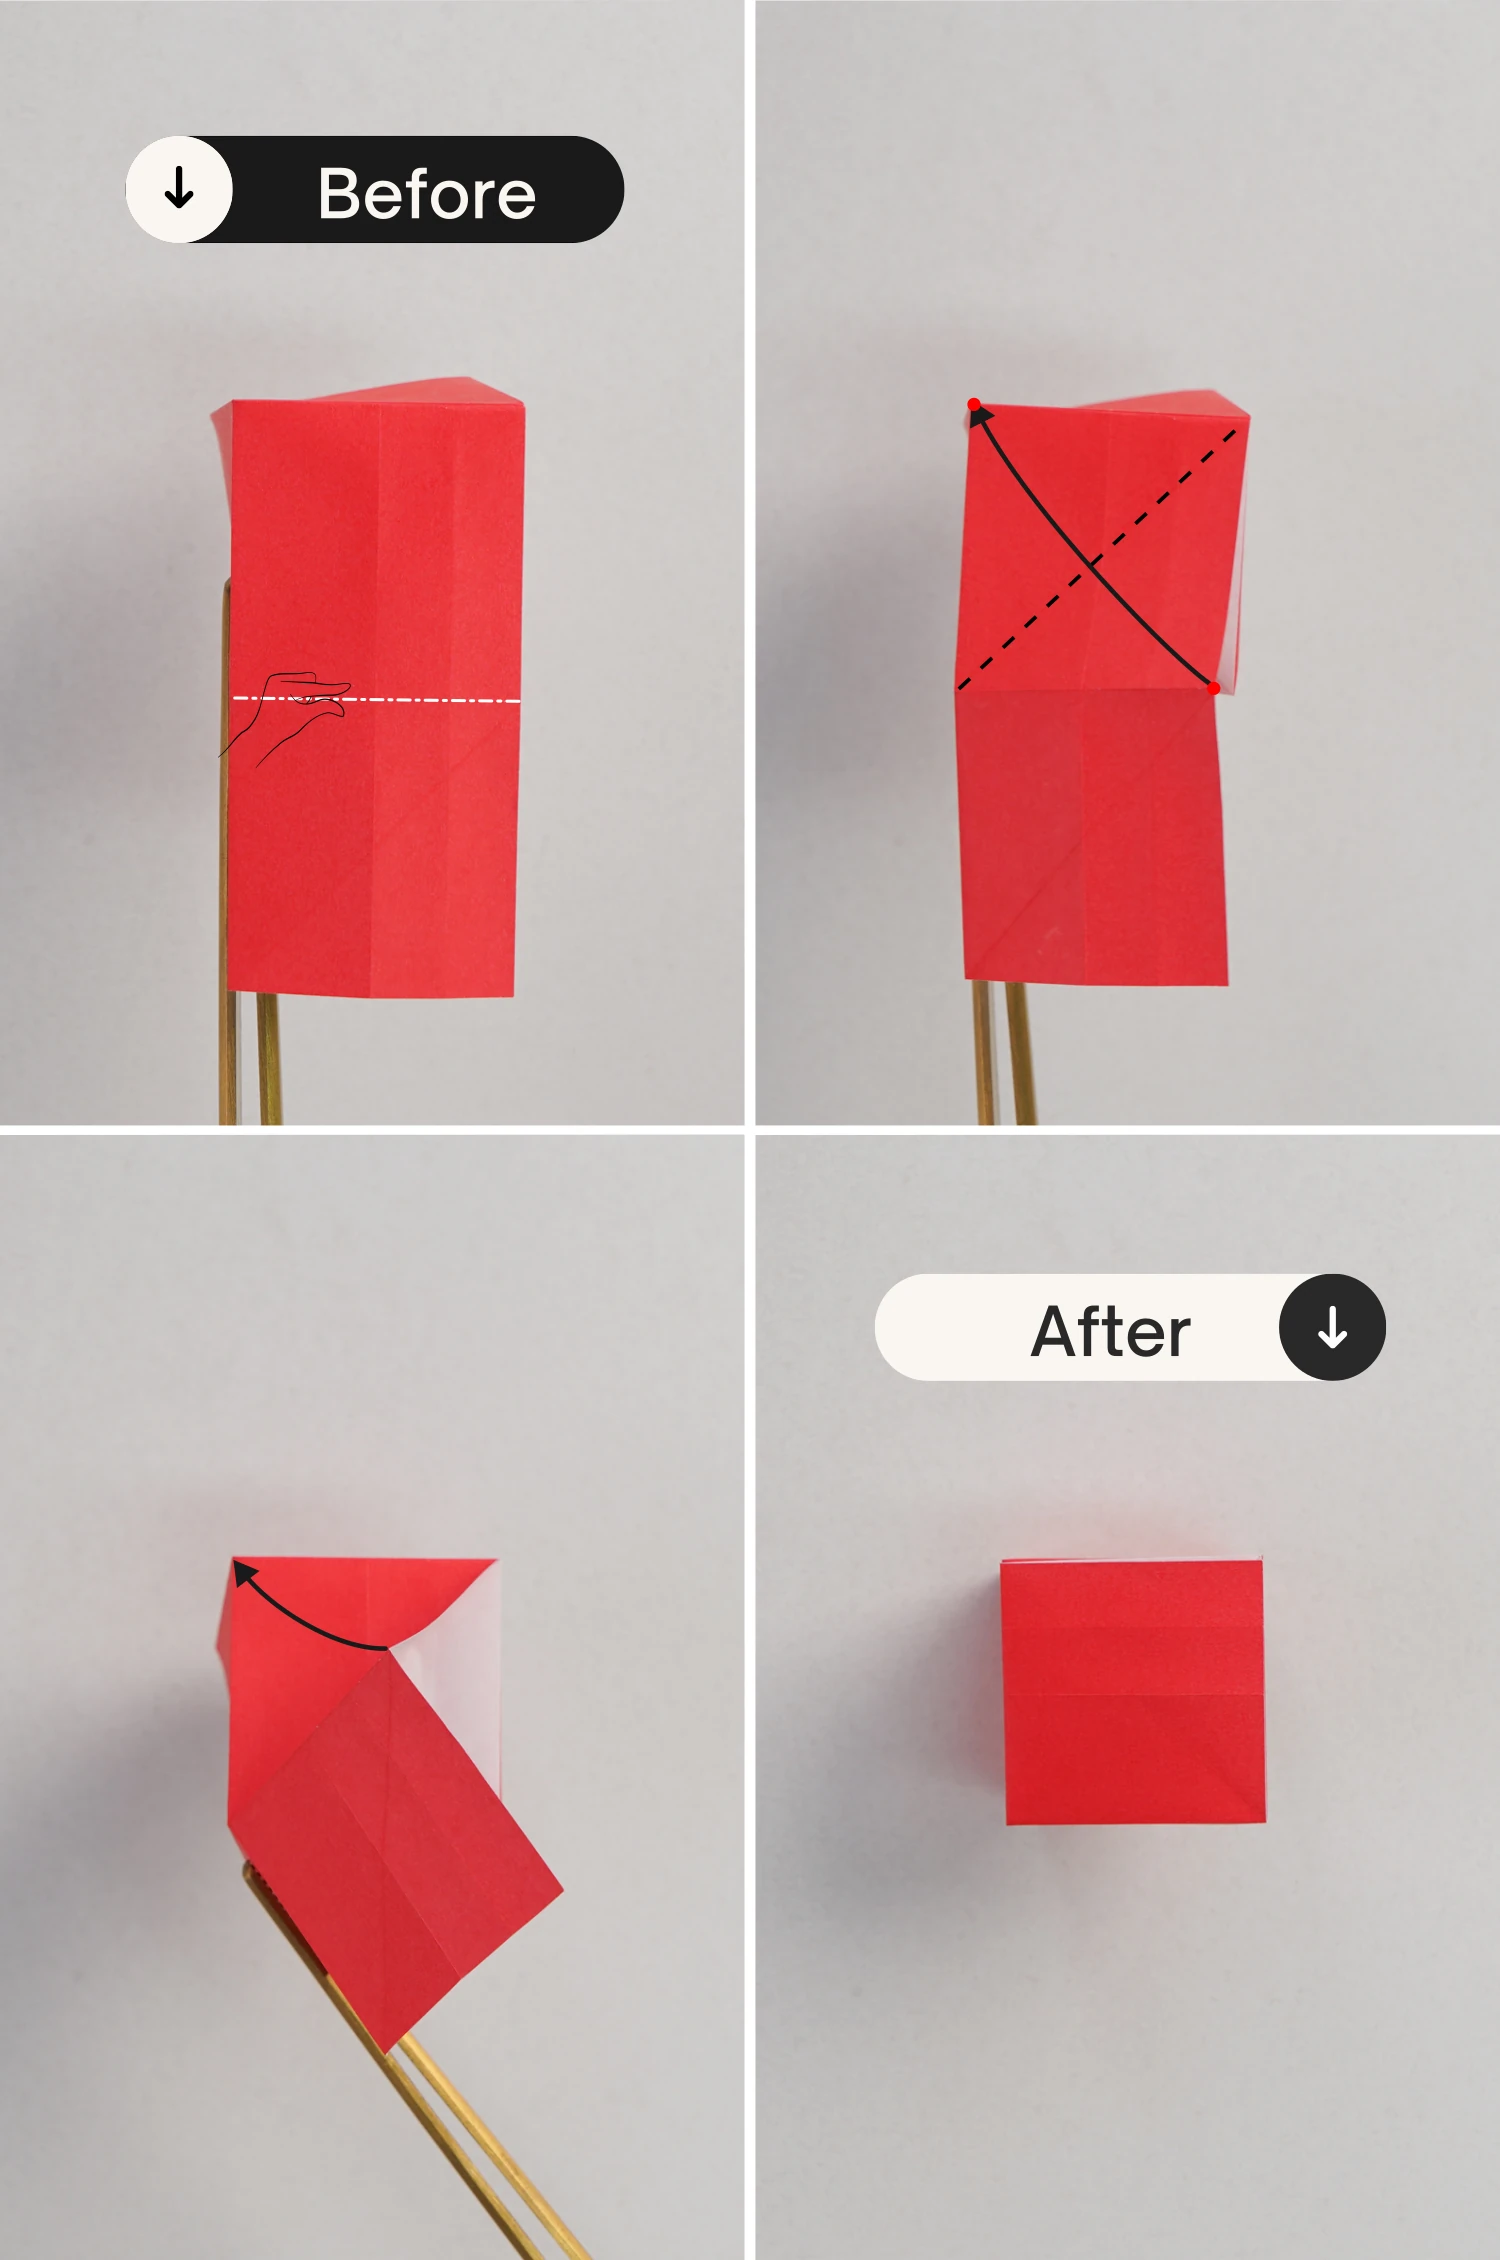
Fold the bottom edge up to meet the middle crease, crease it well then unfold.

Step 25
Fold the bottom edge up to align the crease you made in the previous step, crease it well then unfold.

Step 26
Lift the top edge to make it stand along the horizontal crease.
Pinch up the first diagonal crease on the left, and fold the bottom left point to the middle point of the bottom edge diagonally.

Step 27
Flip the model over.

Step 28
Pinch up the crease shown by the white dotted line
Fold the bottom left point of the right small square to the top right diagonally. (Note that you only need to fold the top layer, the bottom flap is not involved.)
Finally, place it straight.
Step 29
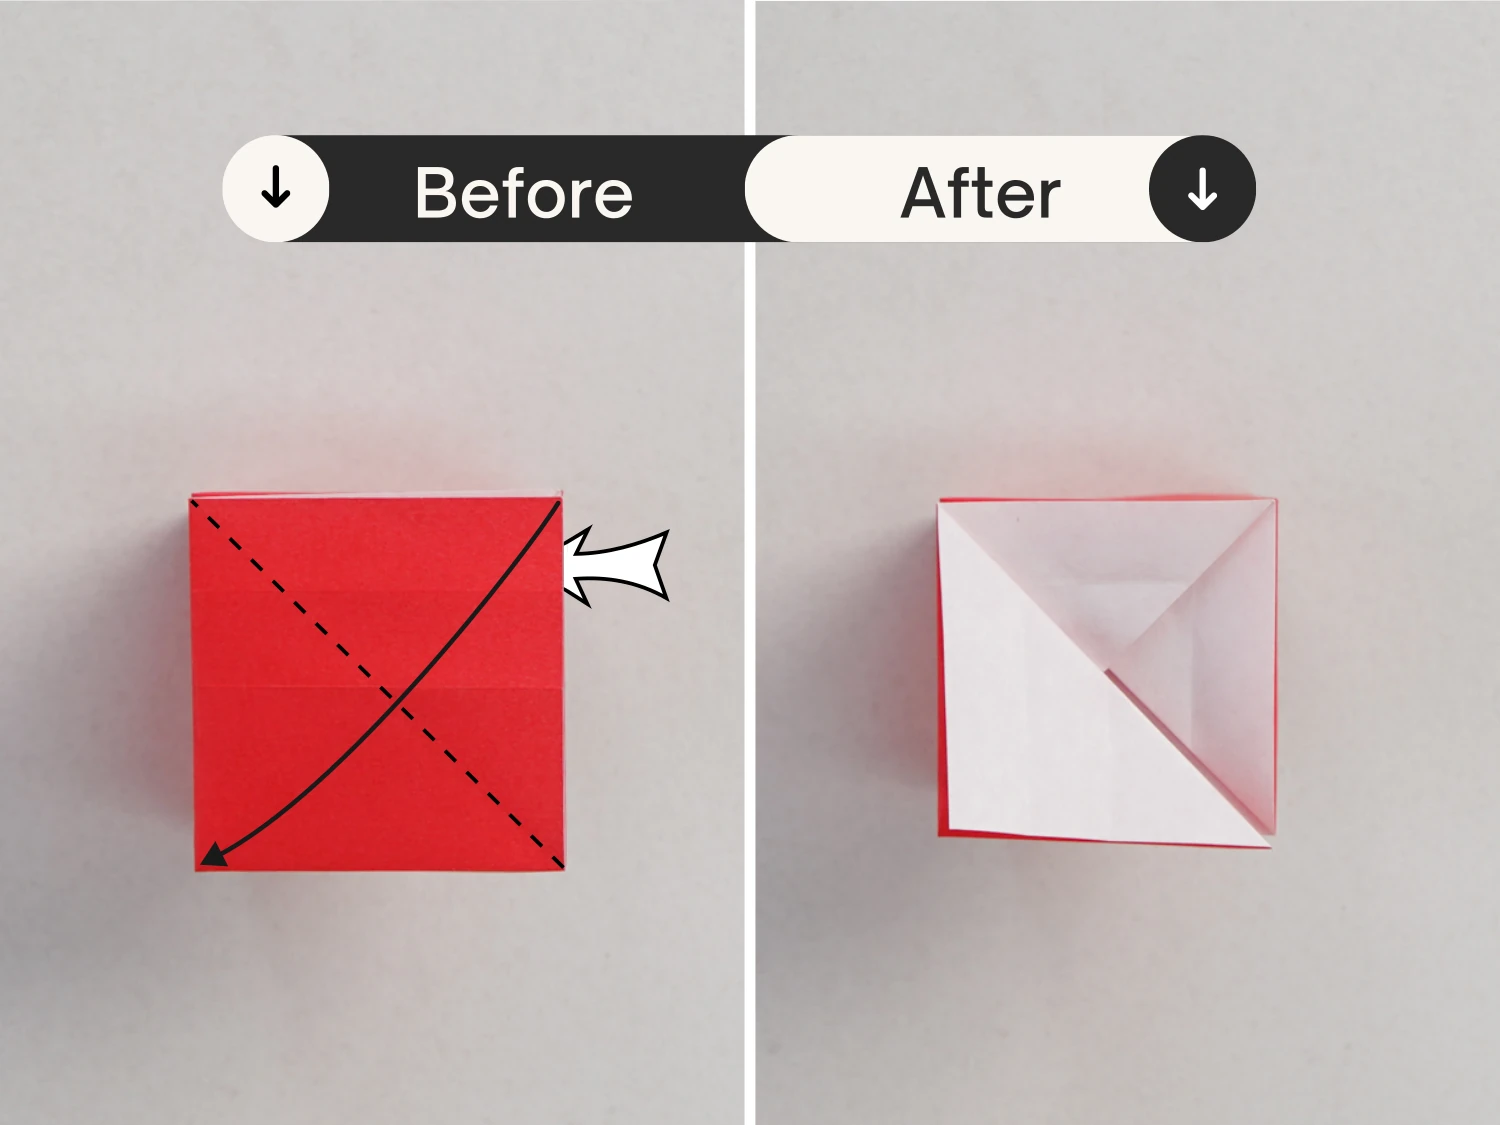
Pinch up the middle crease, and fold the middle point of the right edge to the top left, creating a small square.
Step 30
Take the top right point of the top layer, and fold it to the bottom left diagonally, forming a white triangle.
Step 31
Take out the flap under the triangle and place it on top.
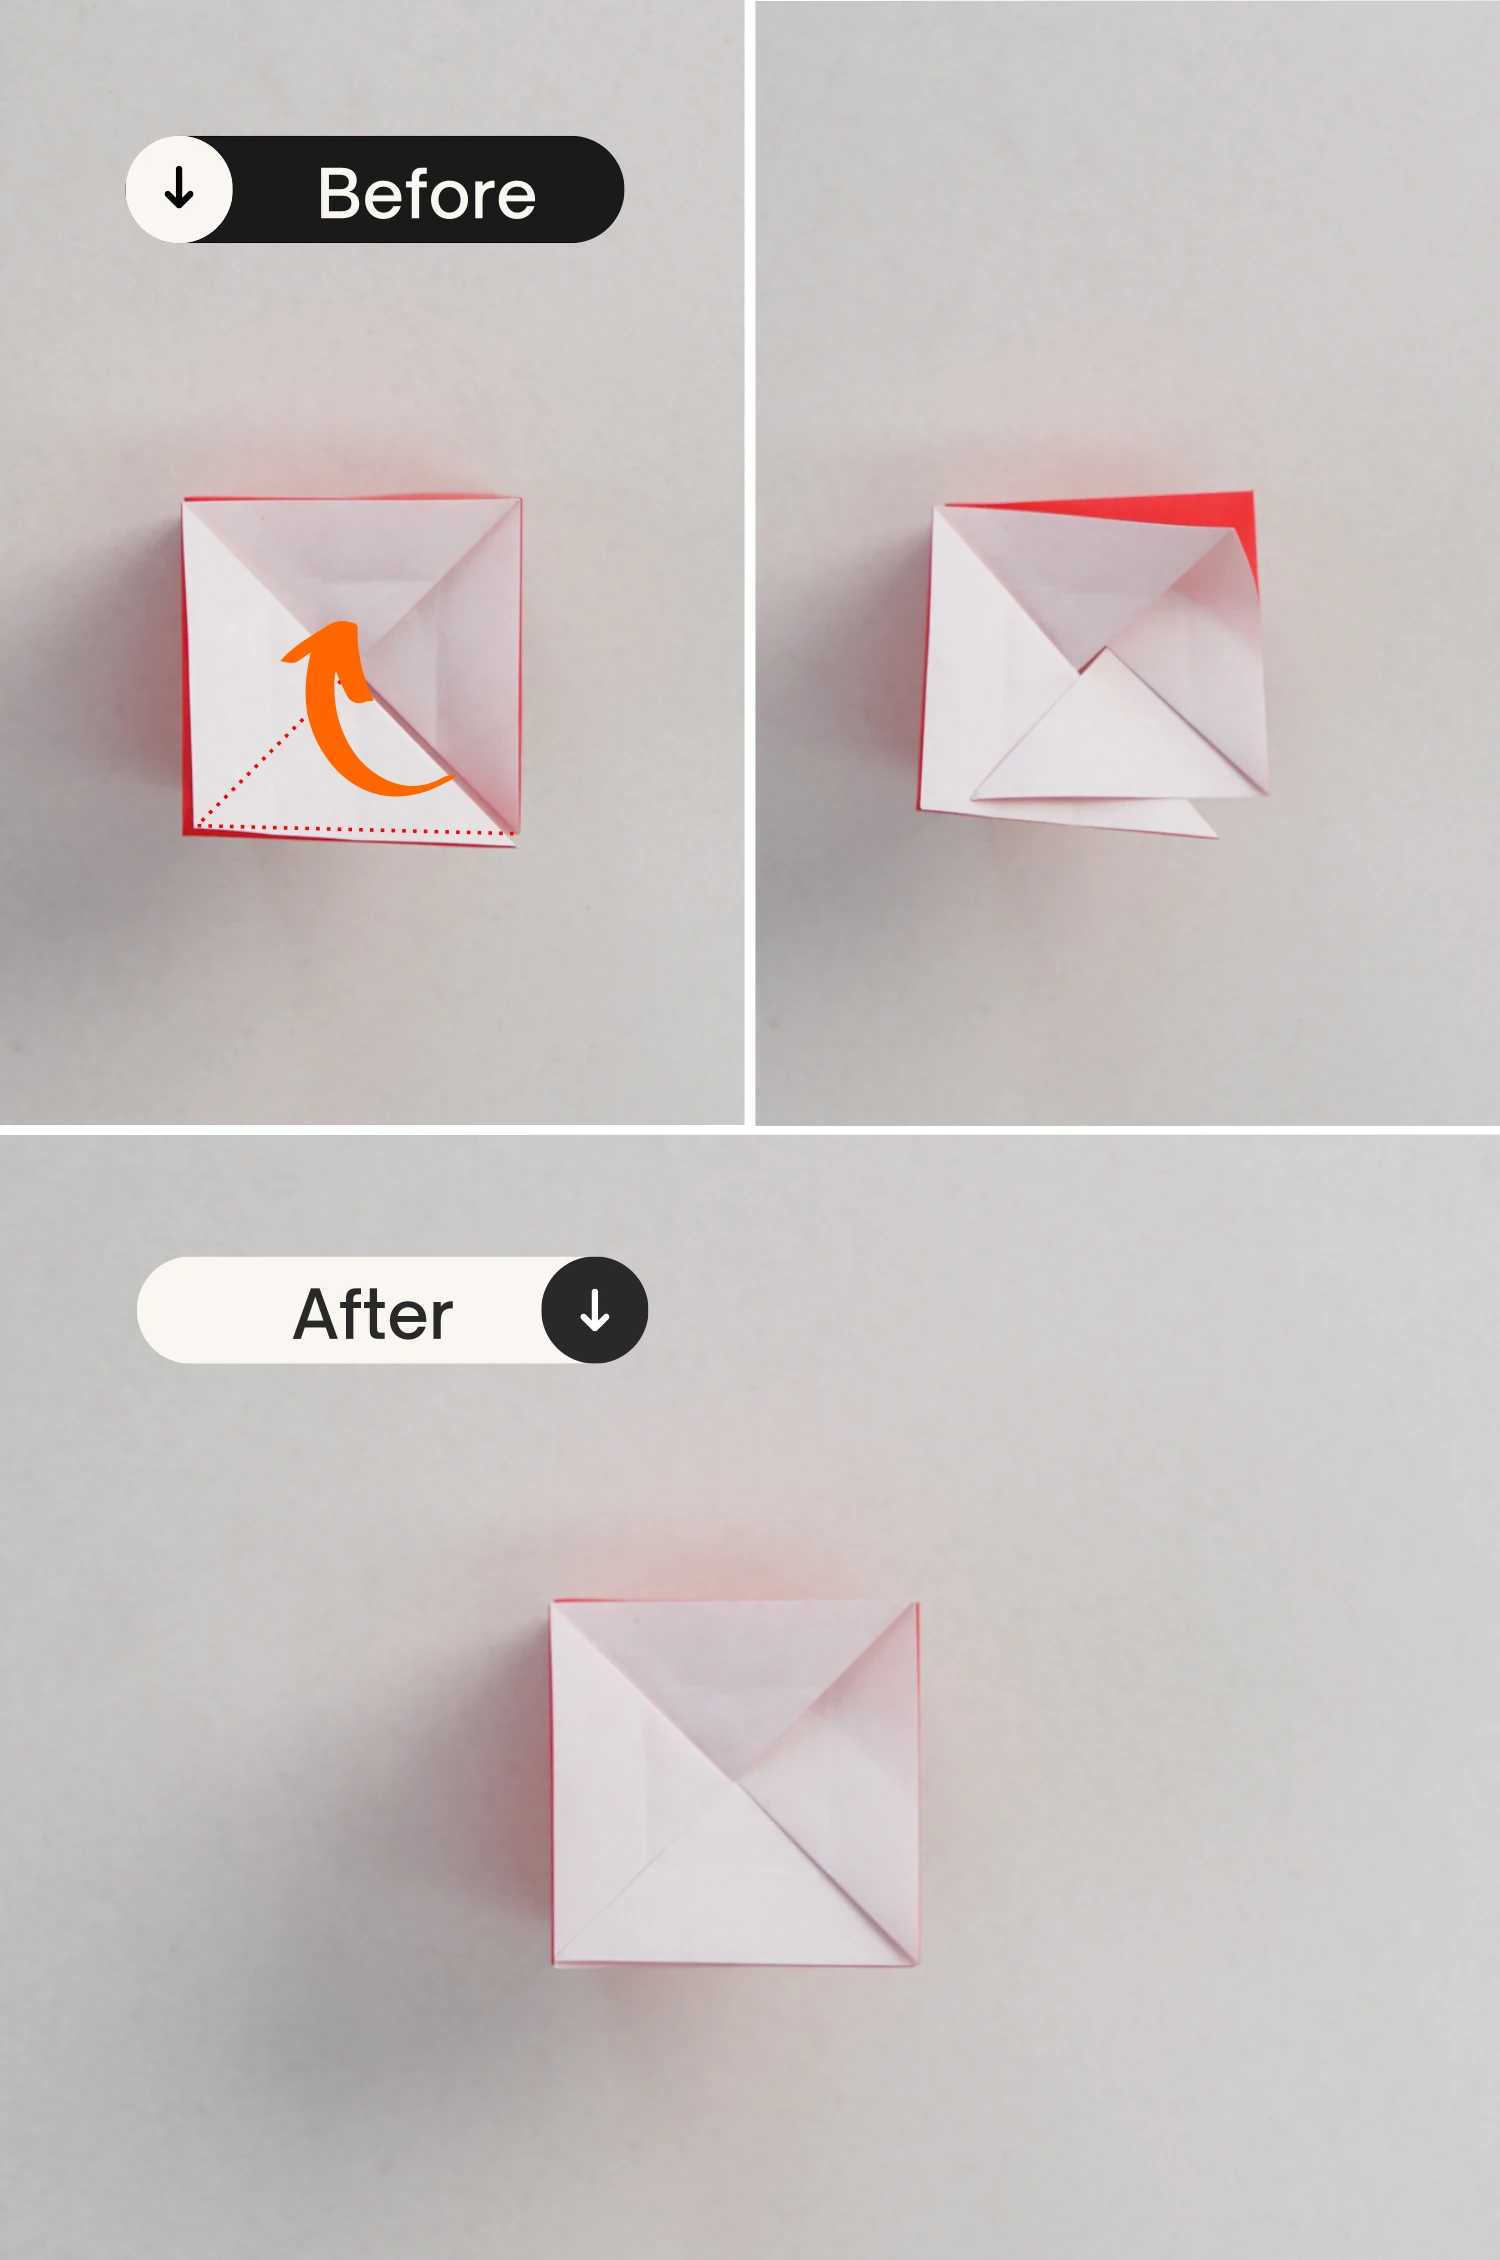
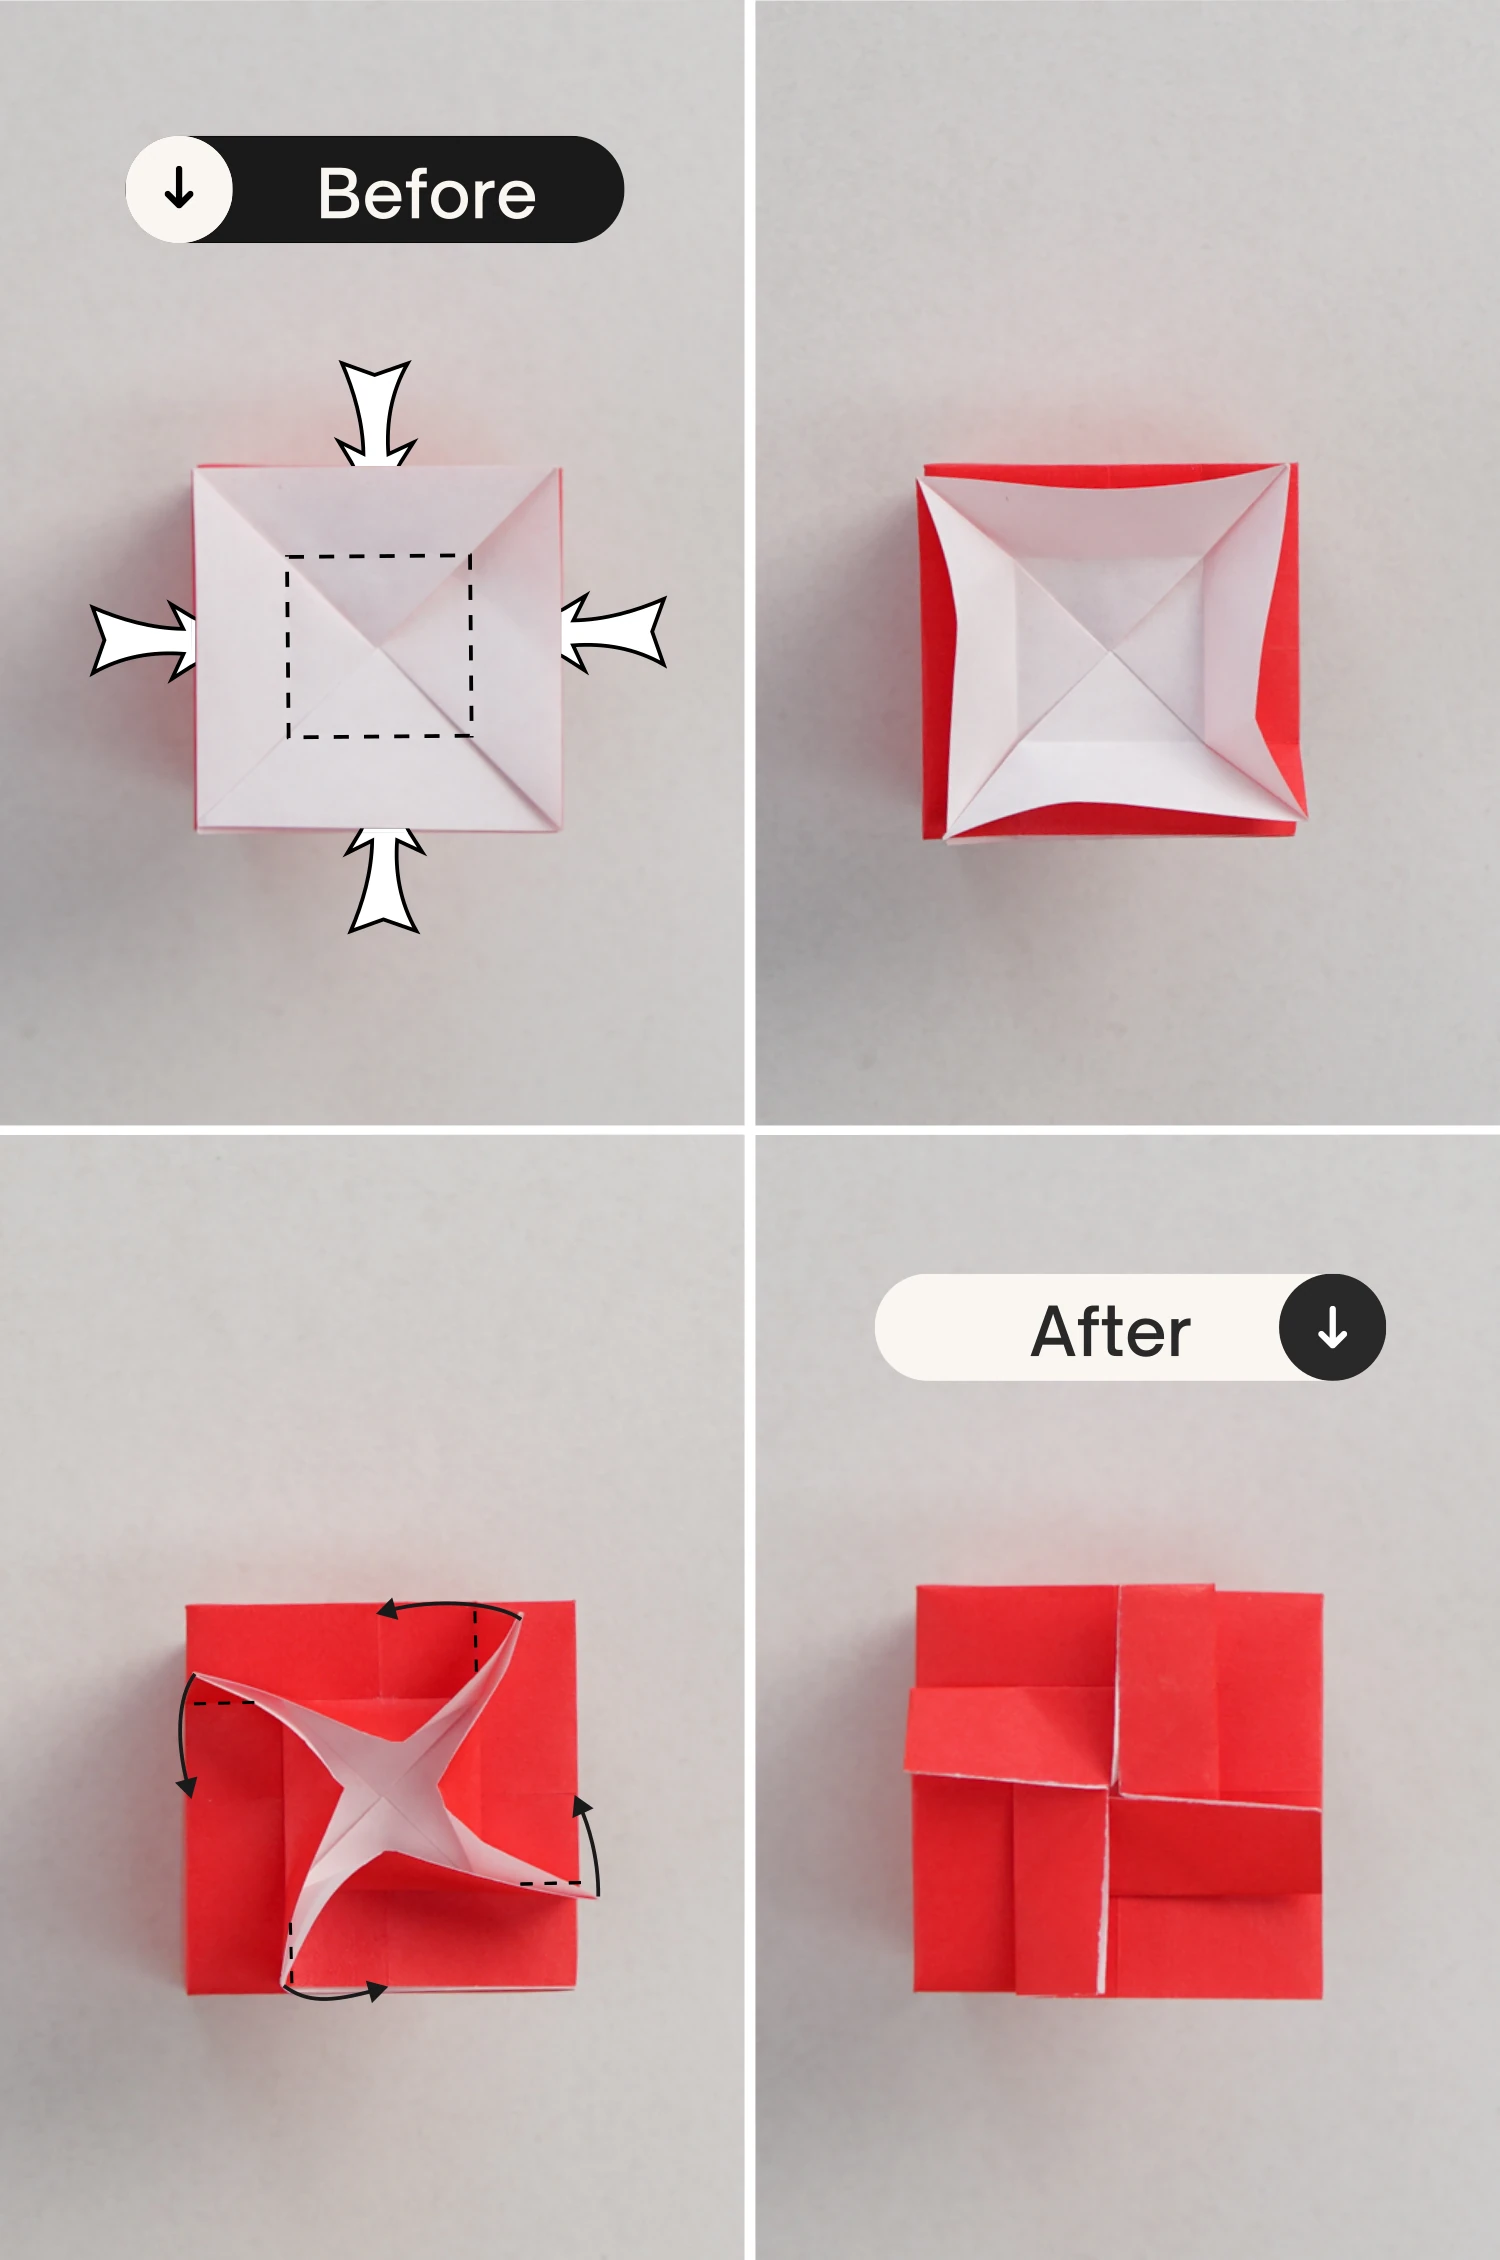
Step 32
Push the four edges of the top layer toward the center to sharpen the four corners, then push these four corners down clockwise
Finally, flatten them to form four rectangles as the picture shows, this may take a lot of time to adjust to get the final shape, so be patient.
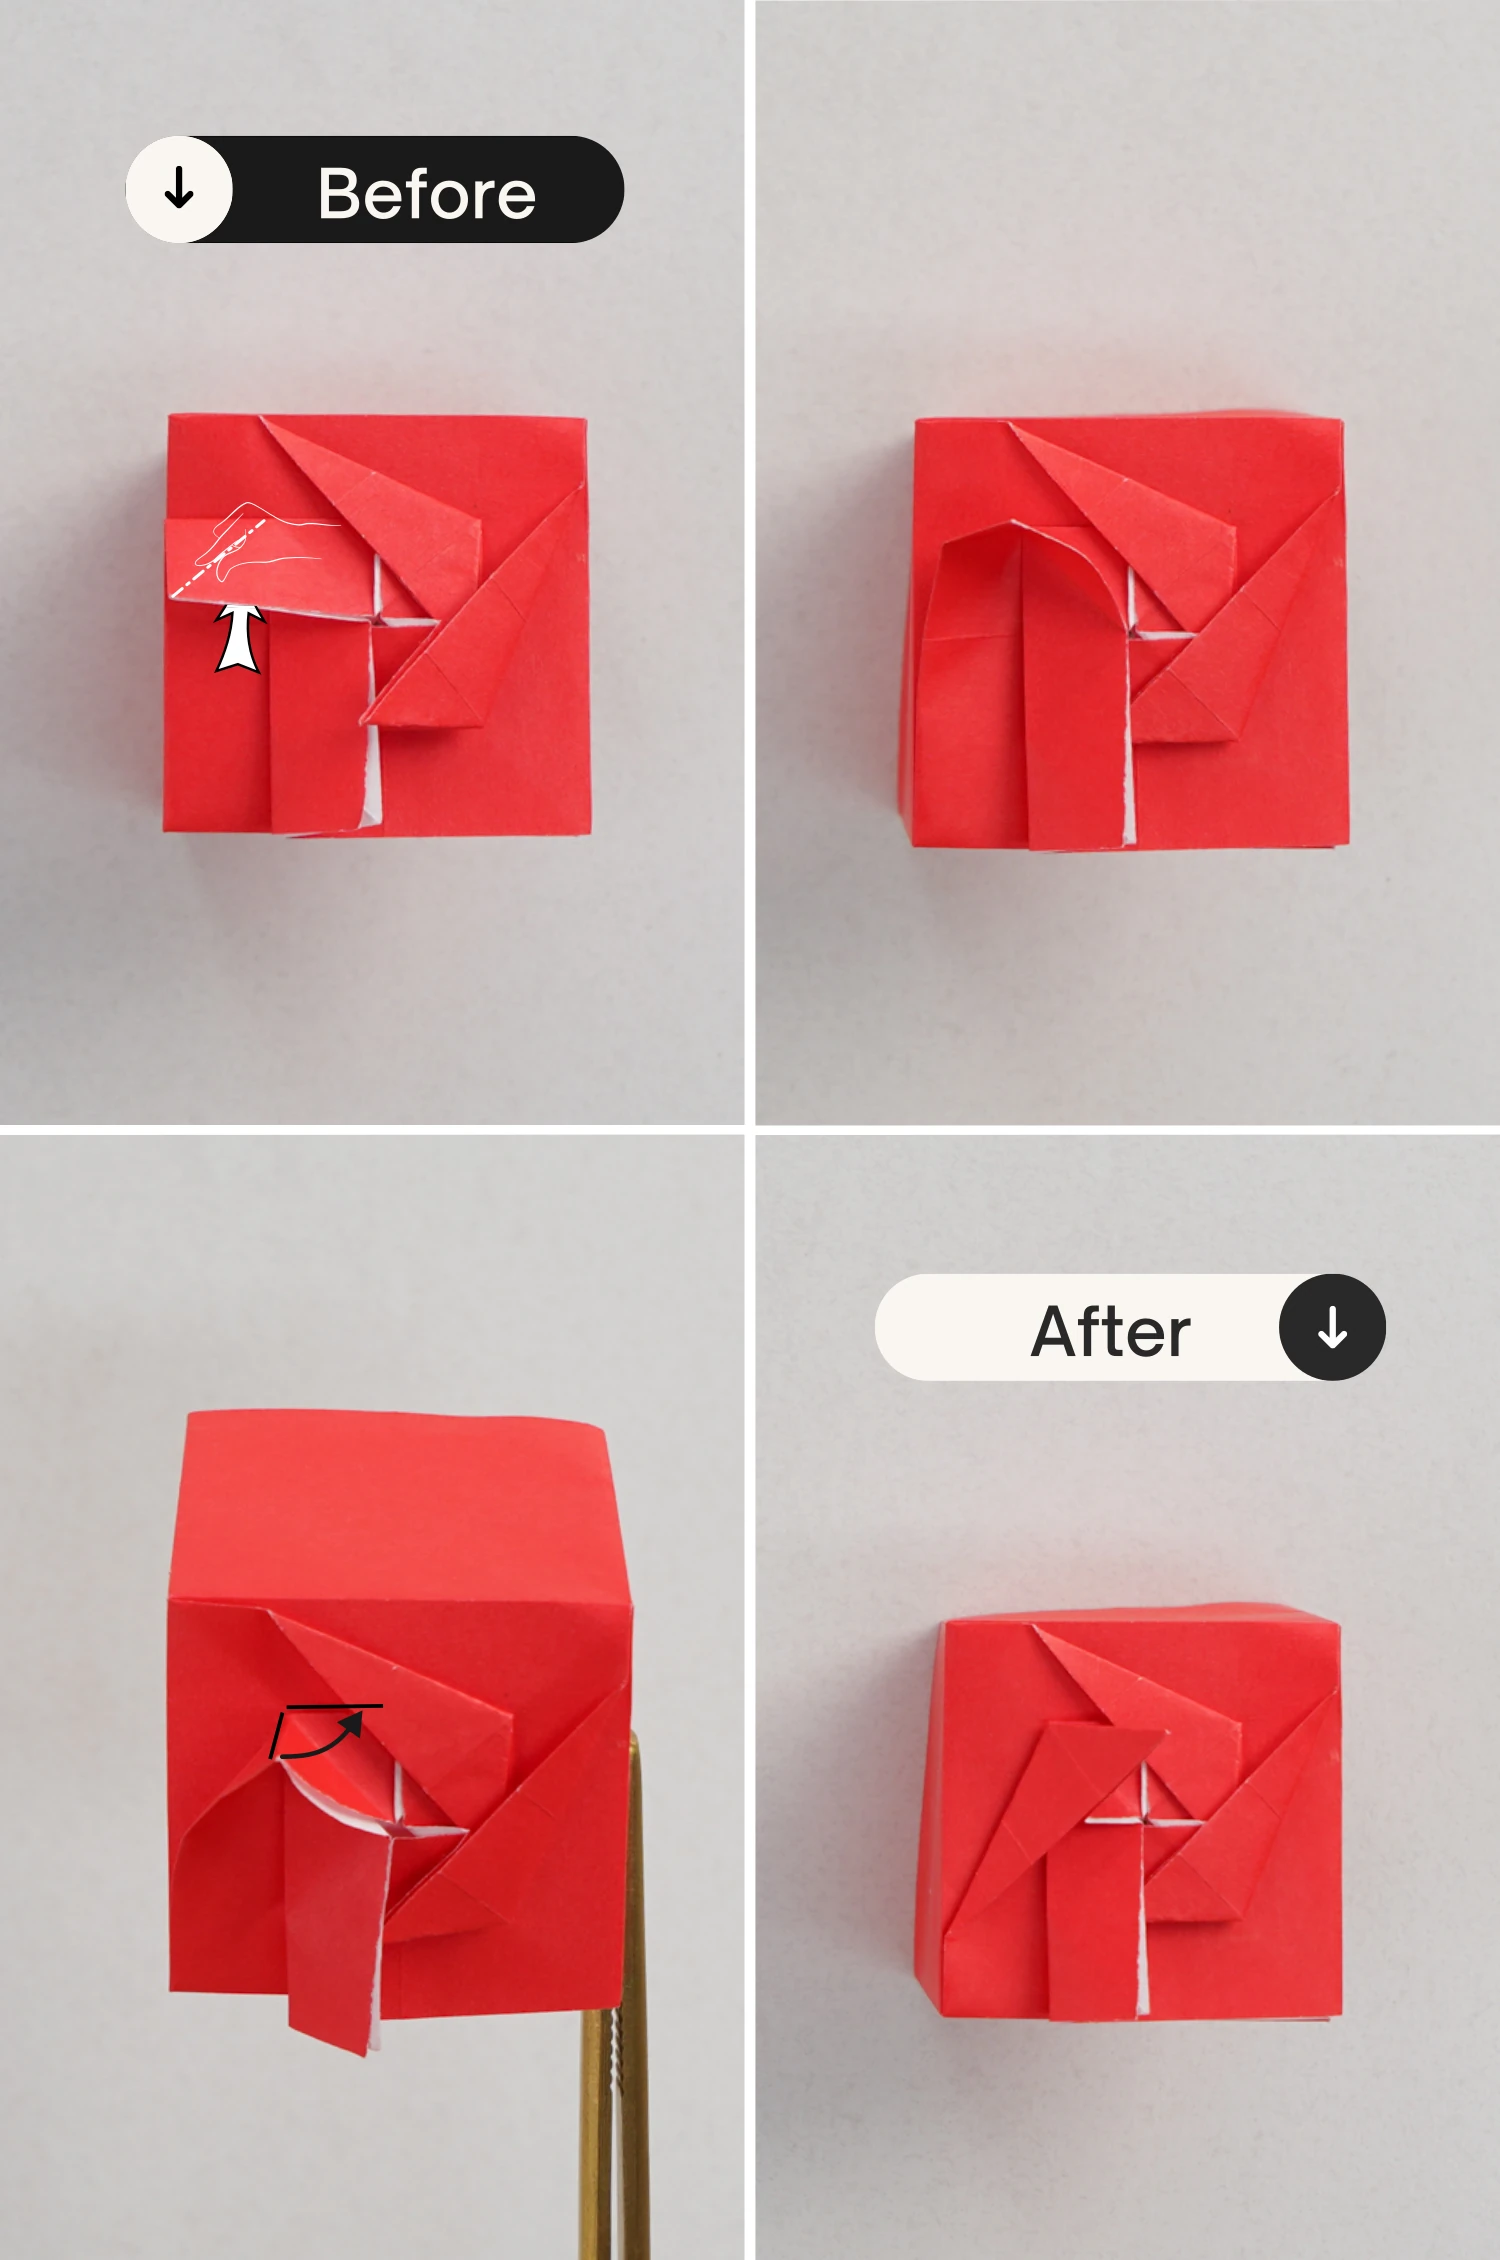
Step 33
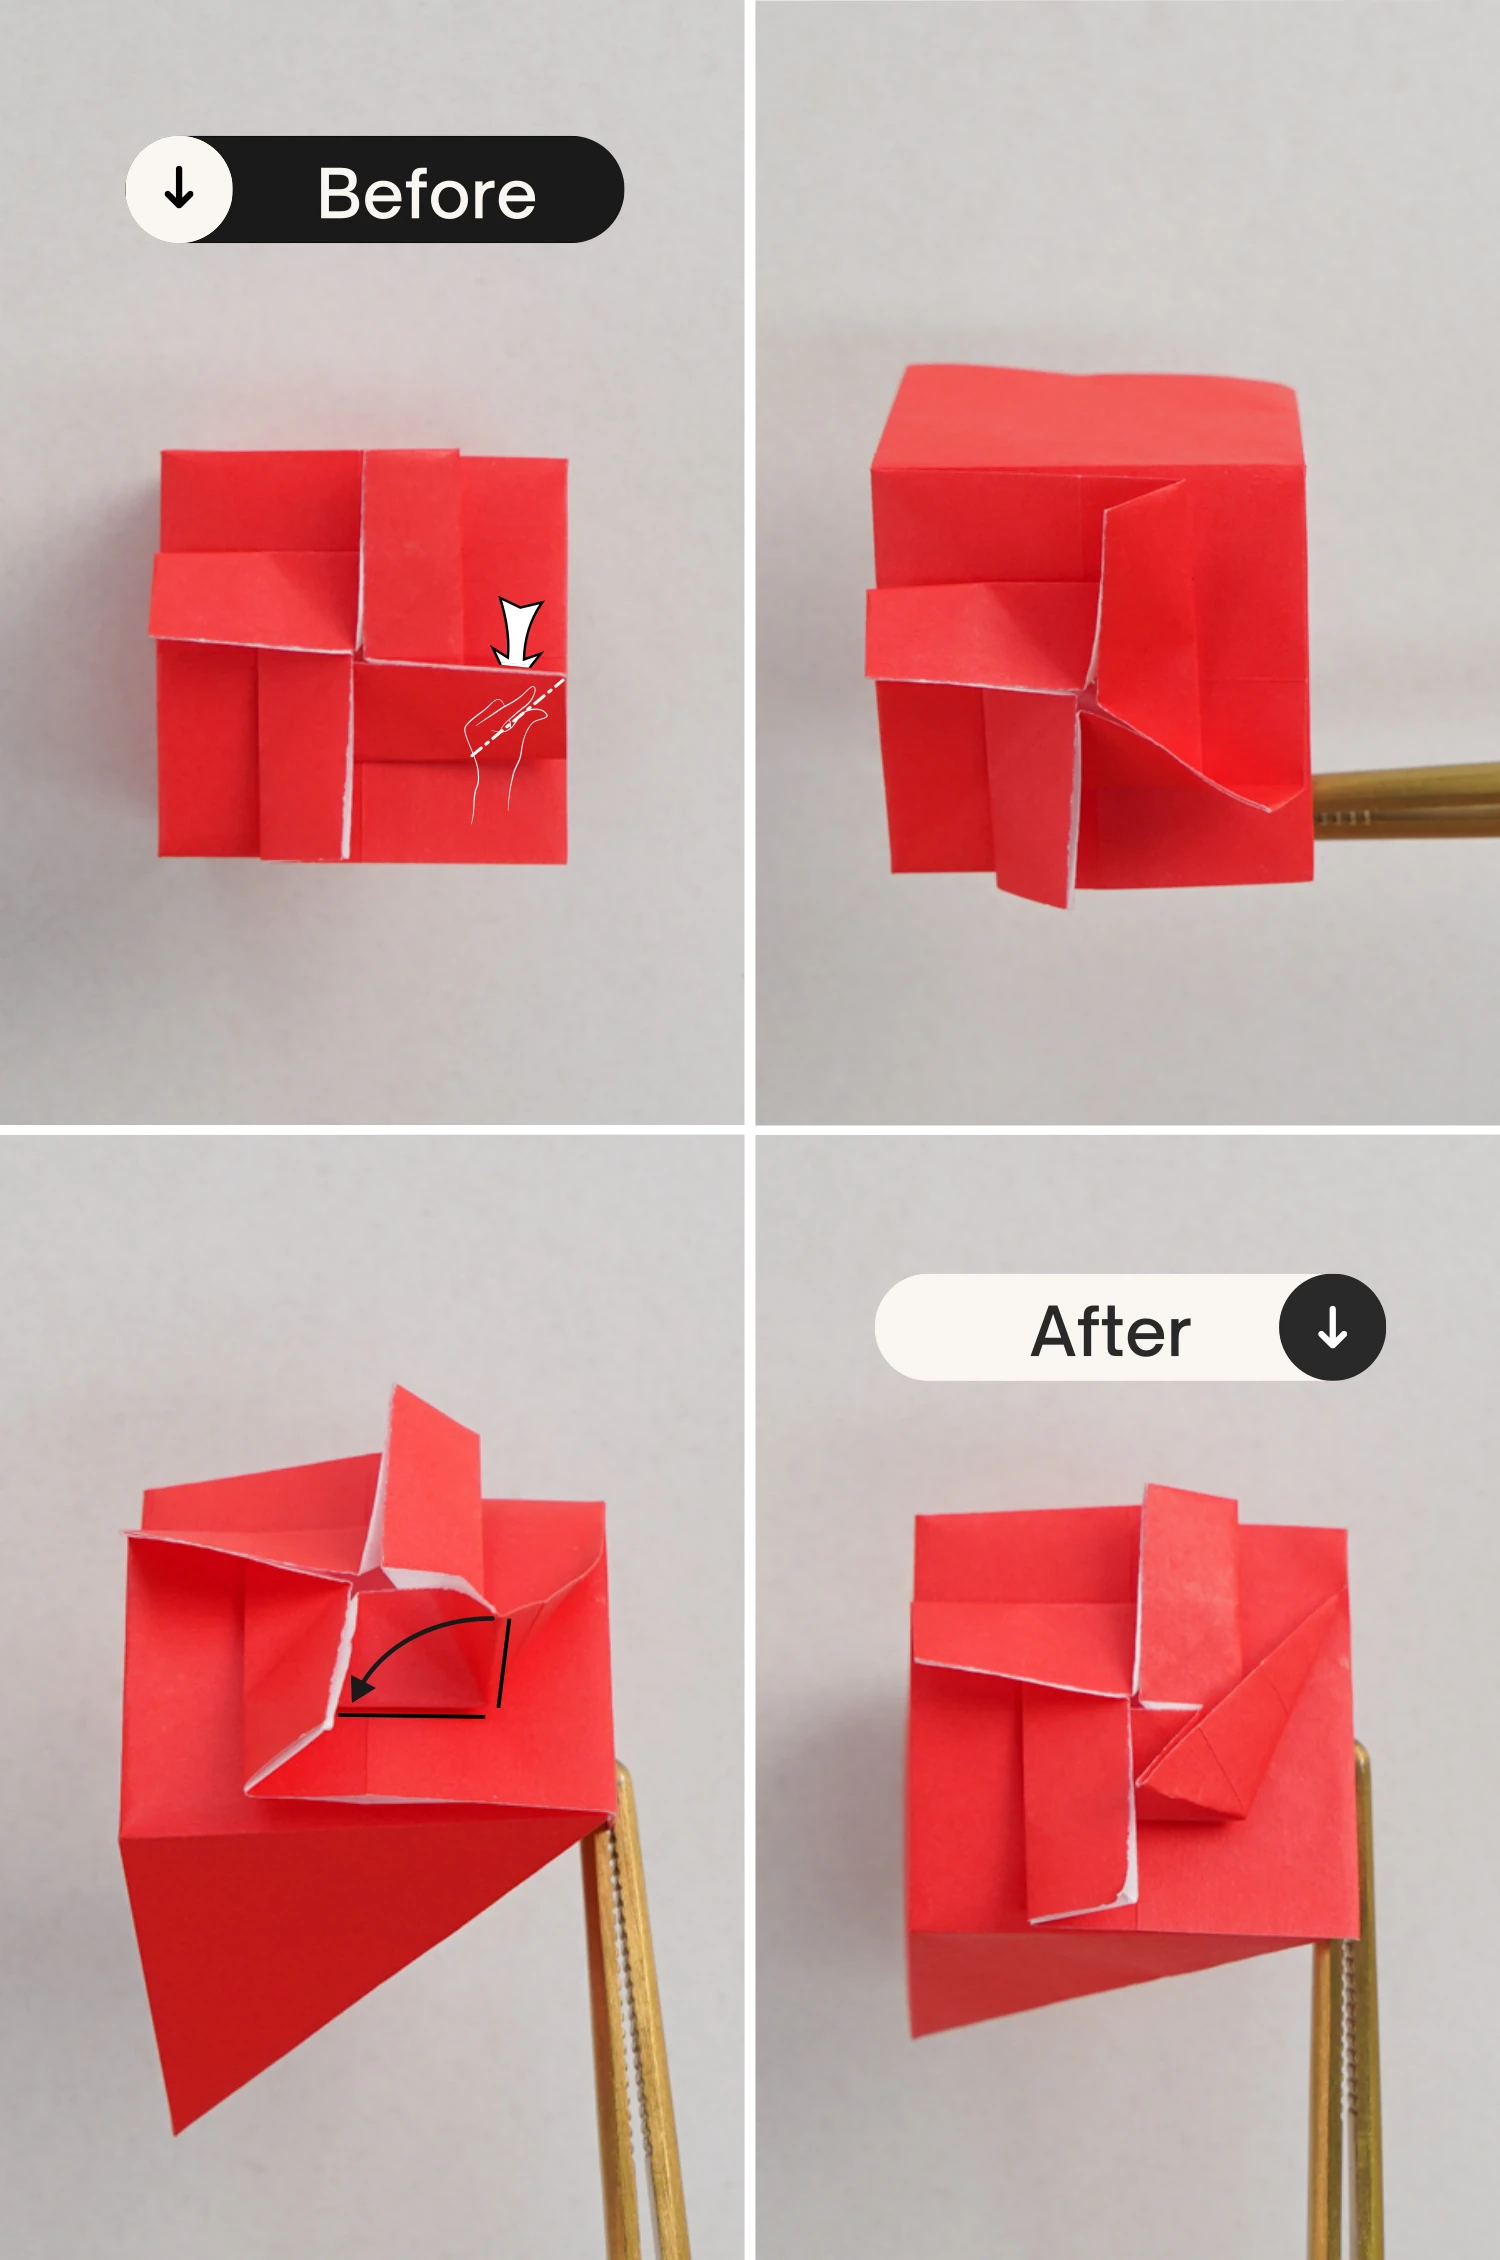
Slightly lift the right rectangle, pinch its top right corner, and fold it down to the left.
Step 34
Lift the top rectangle, pinch, and sharp its top left corner, then fold it down.
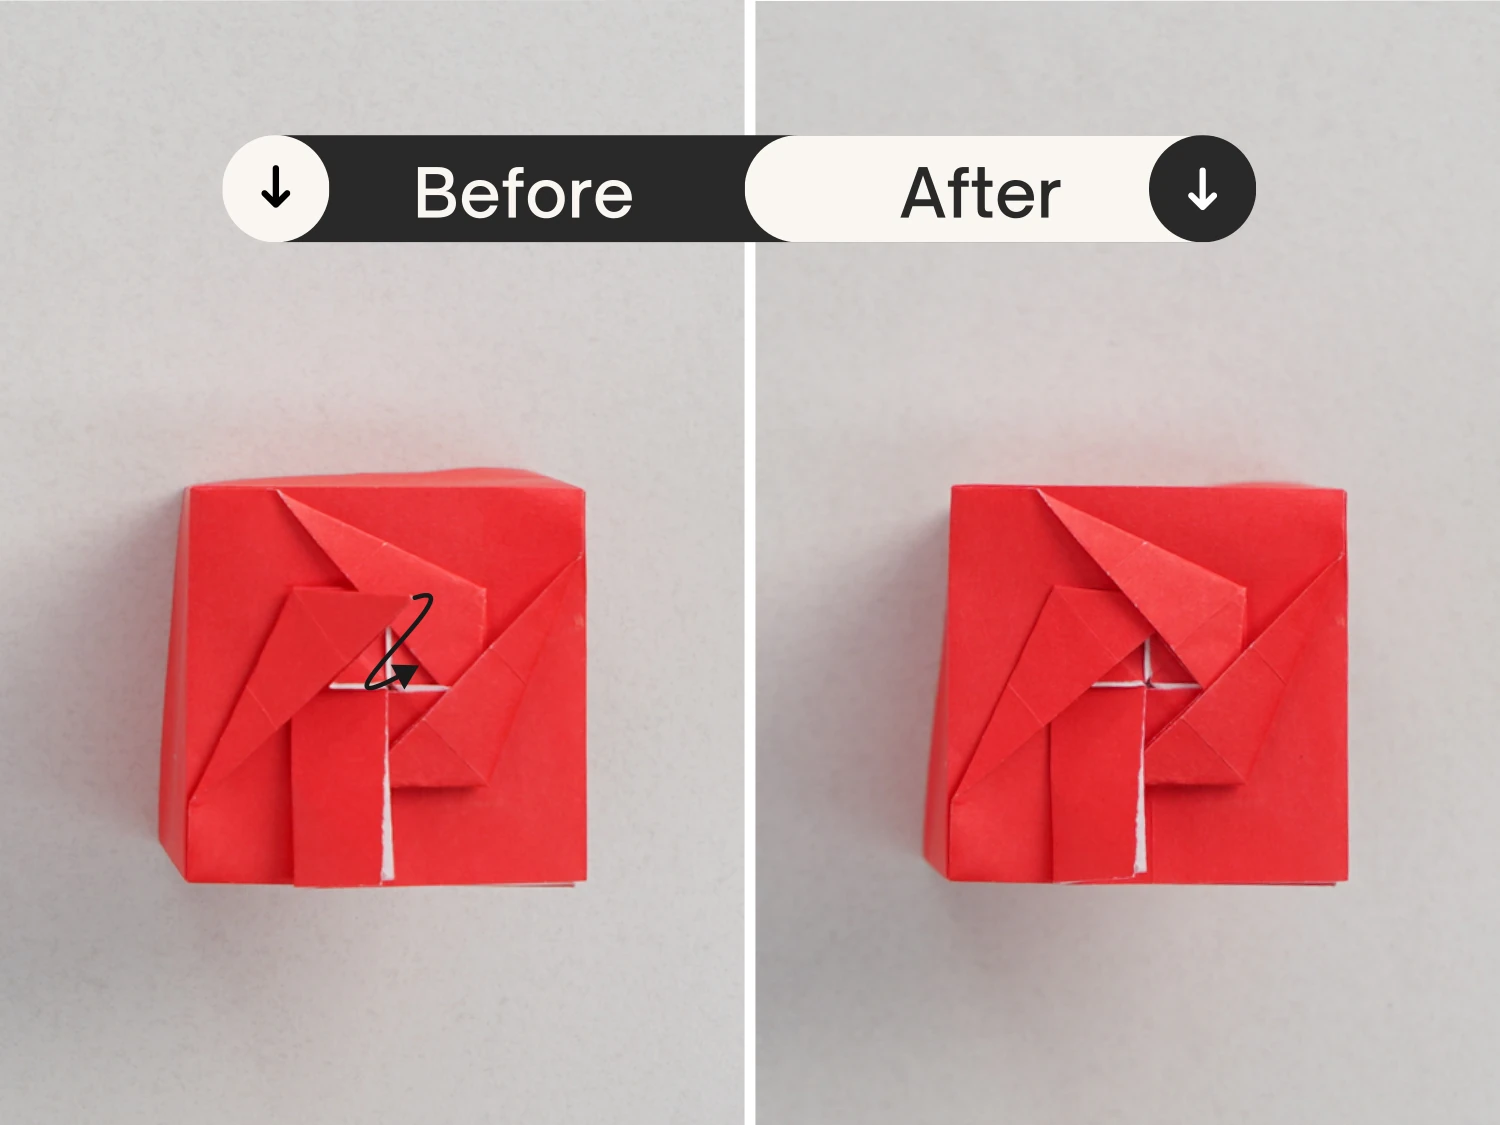
Step 35
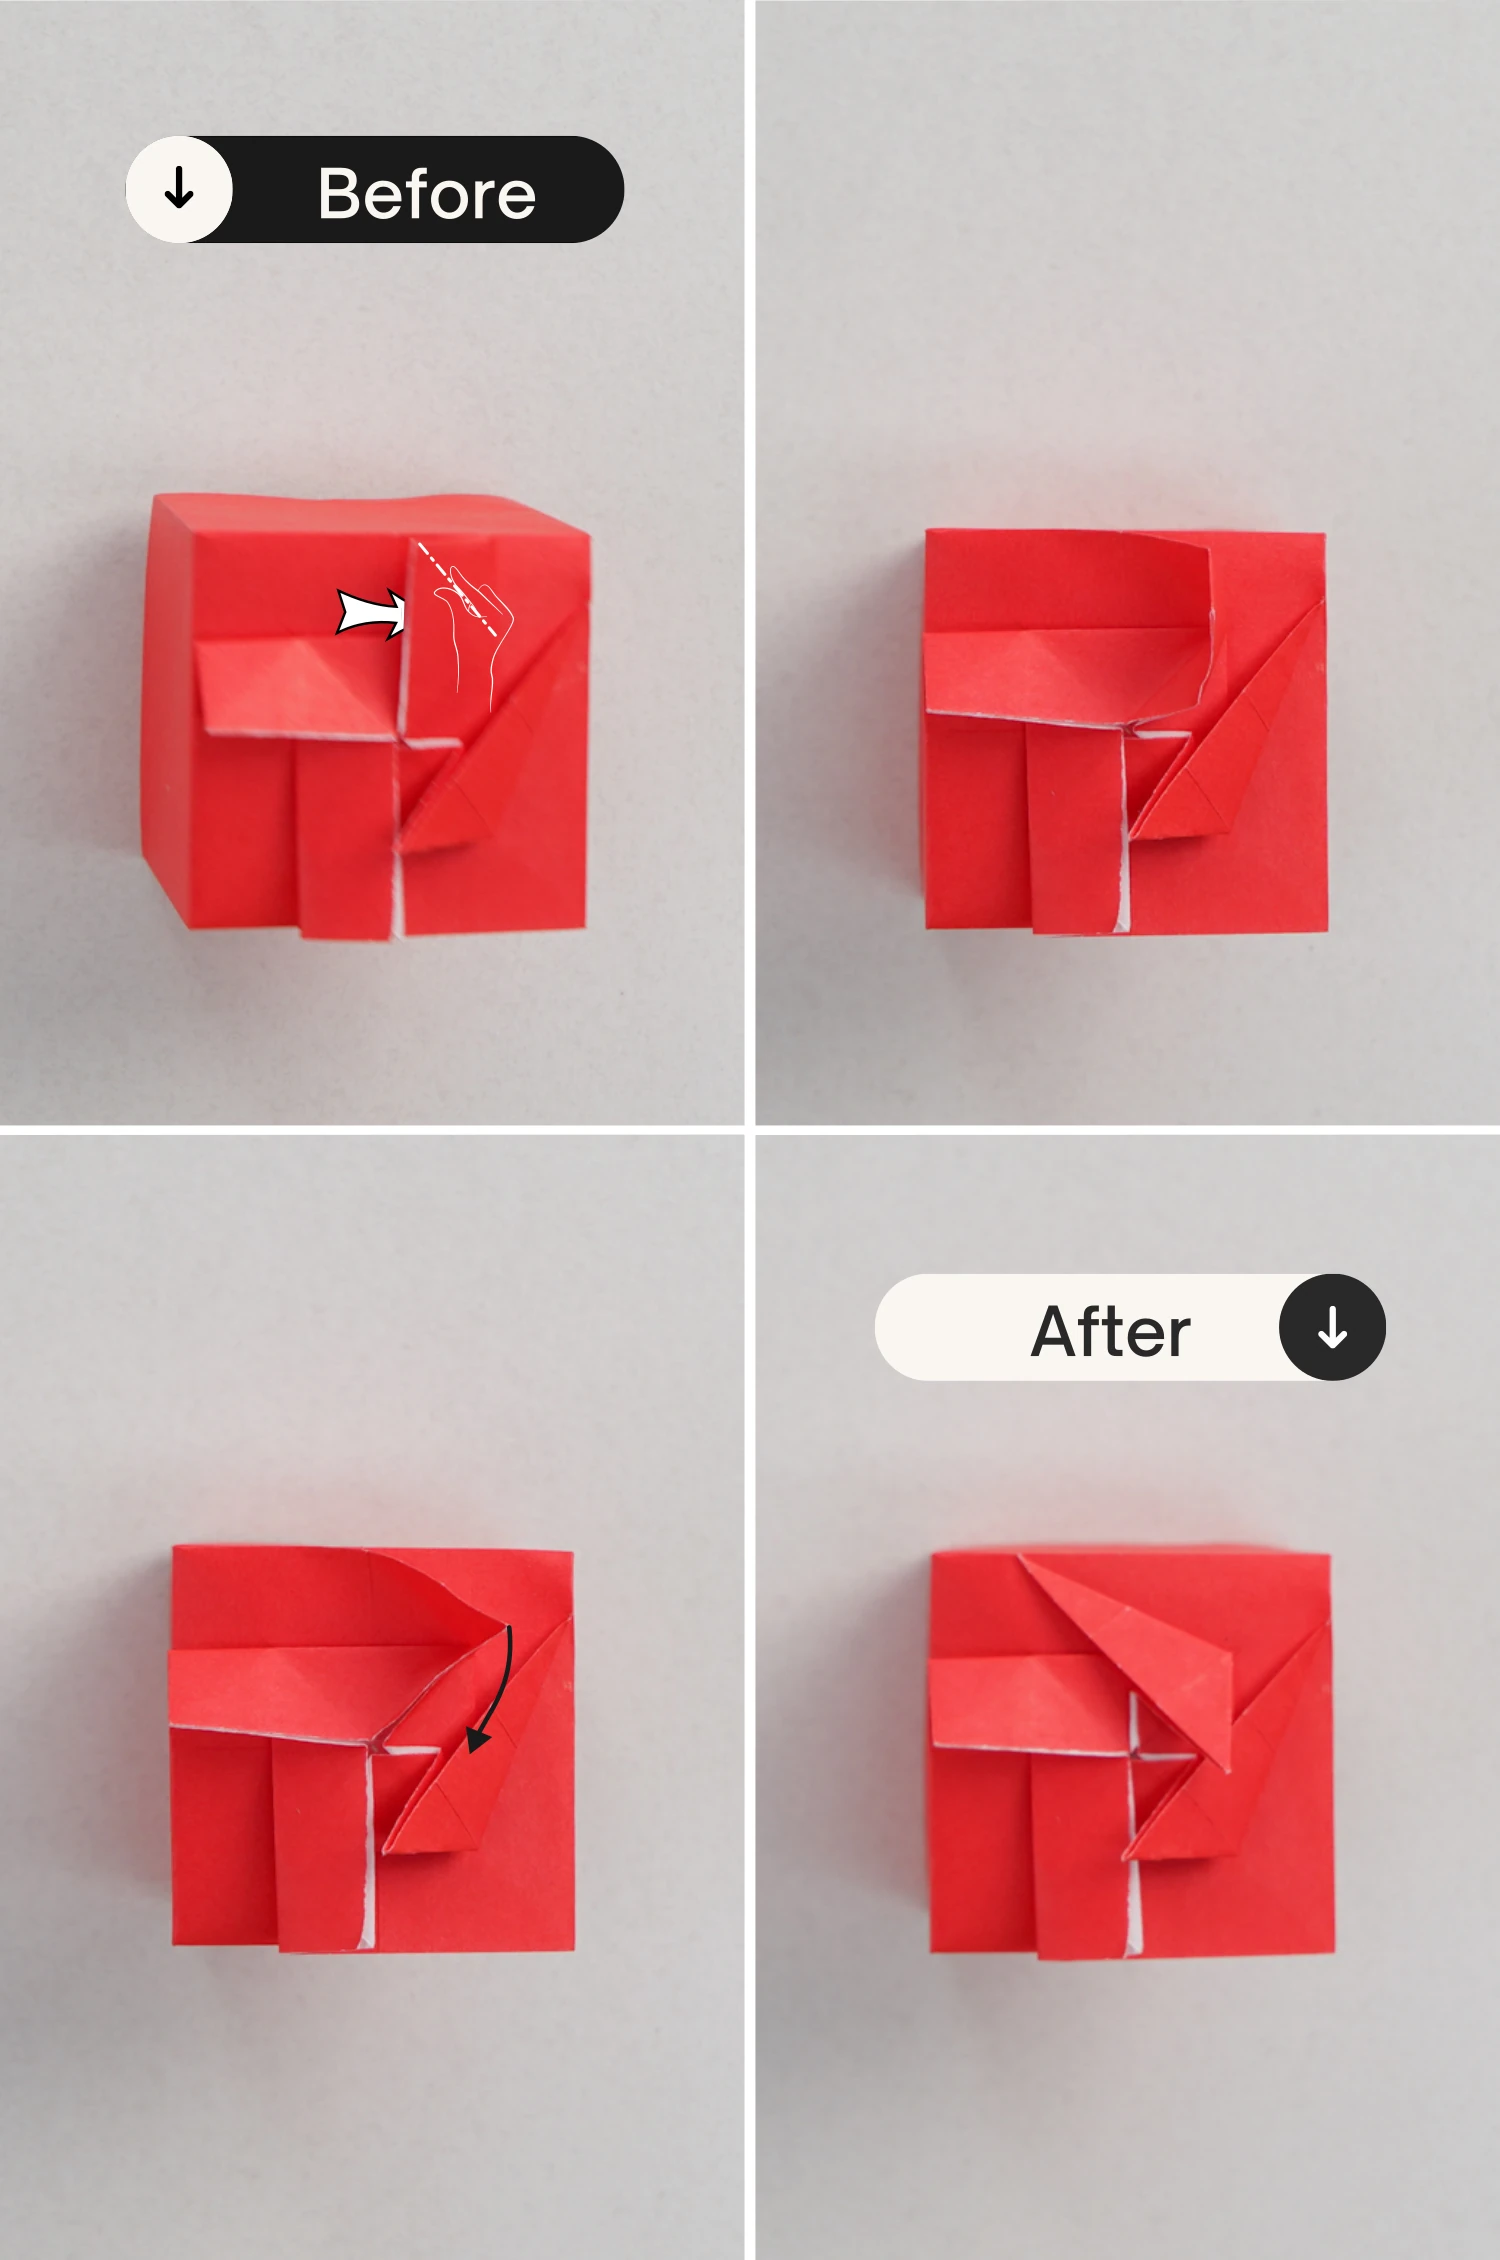
Place the corner you made in the previous step under the flap you made in step 33.
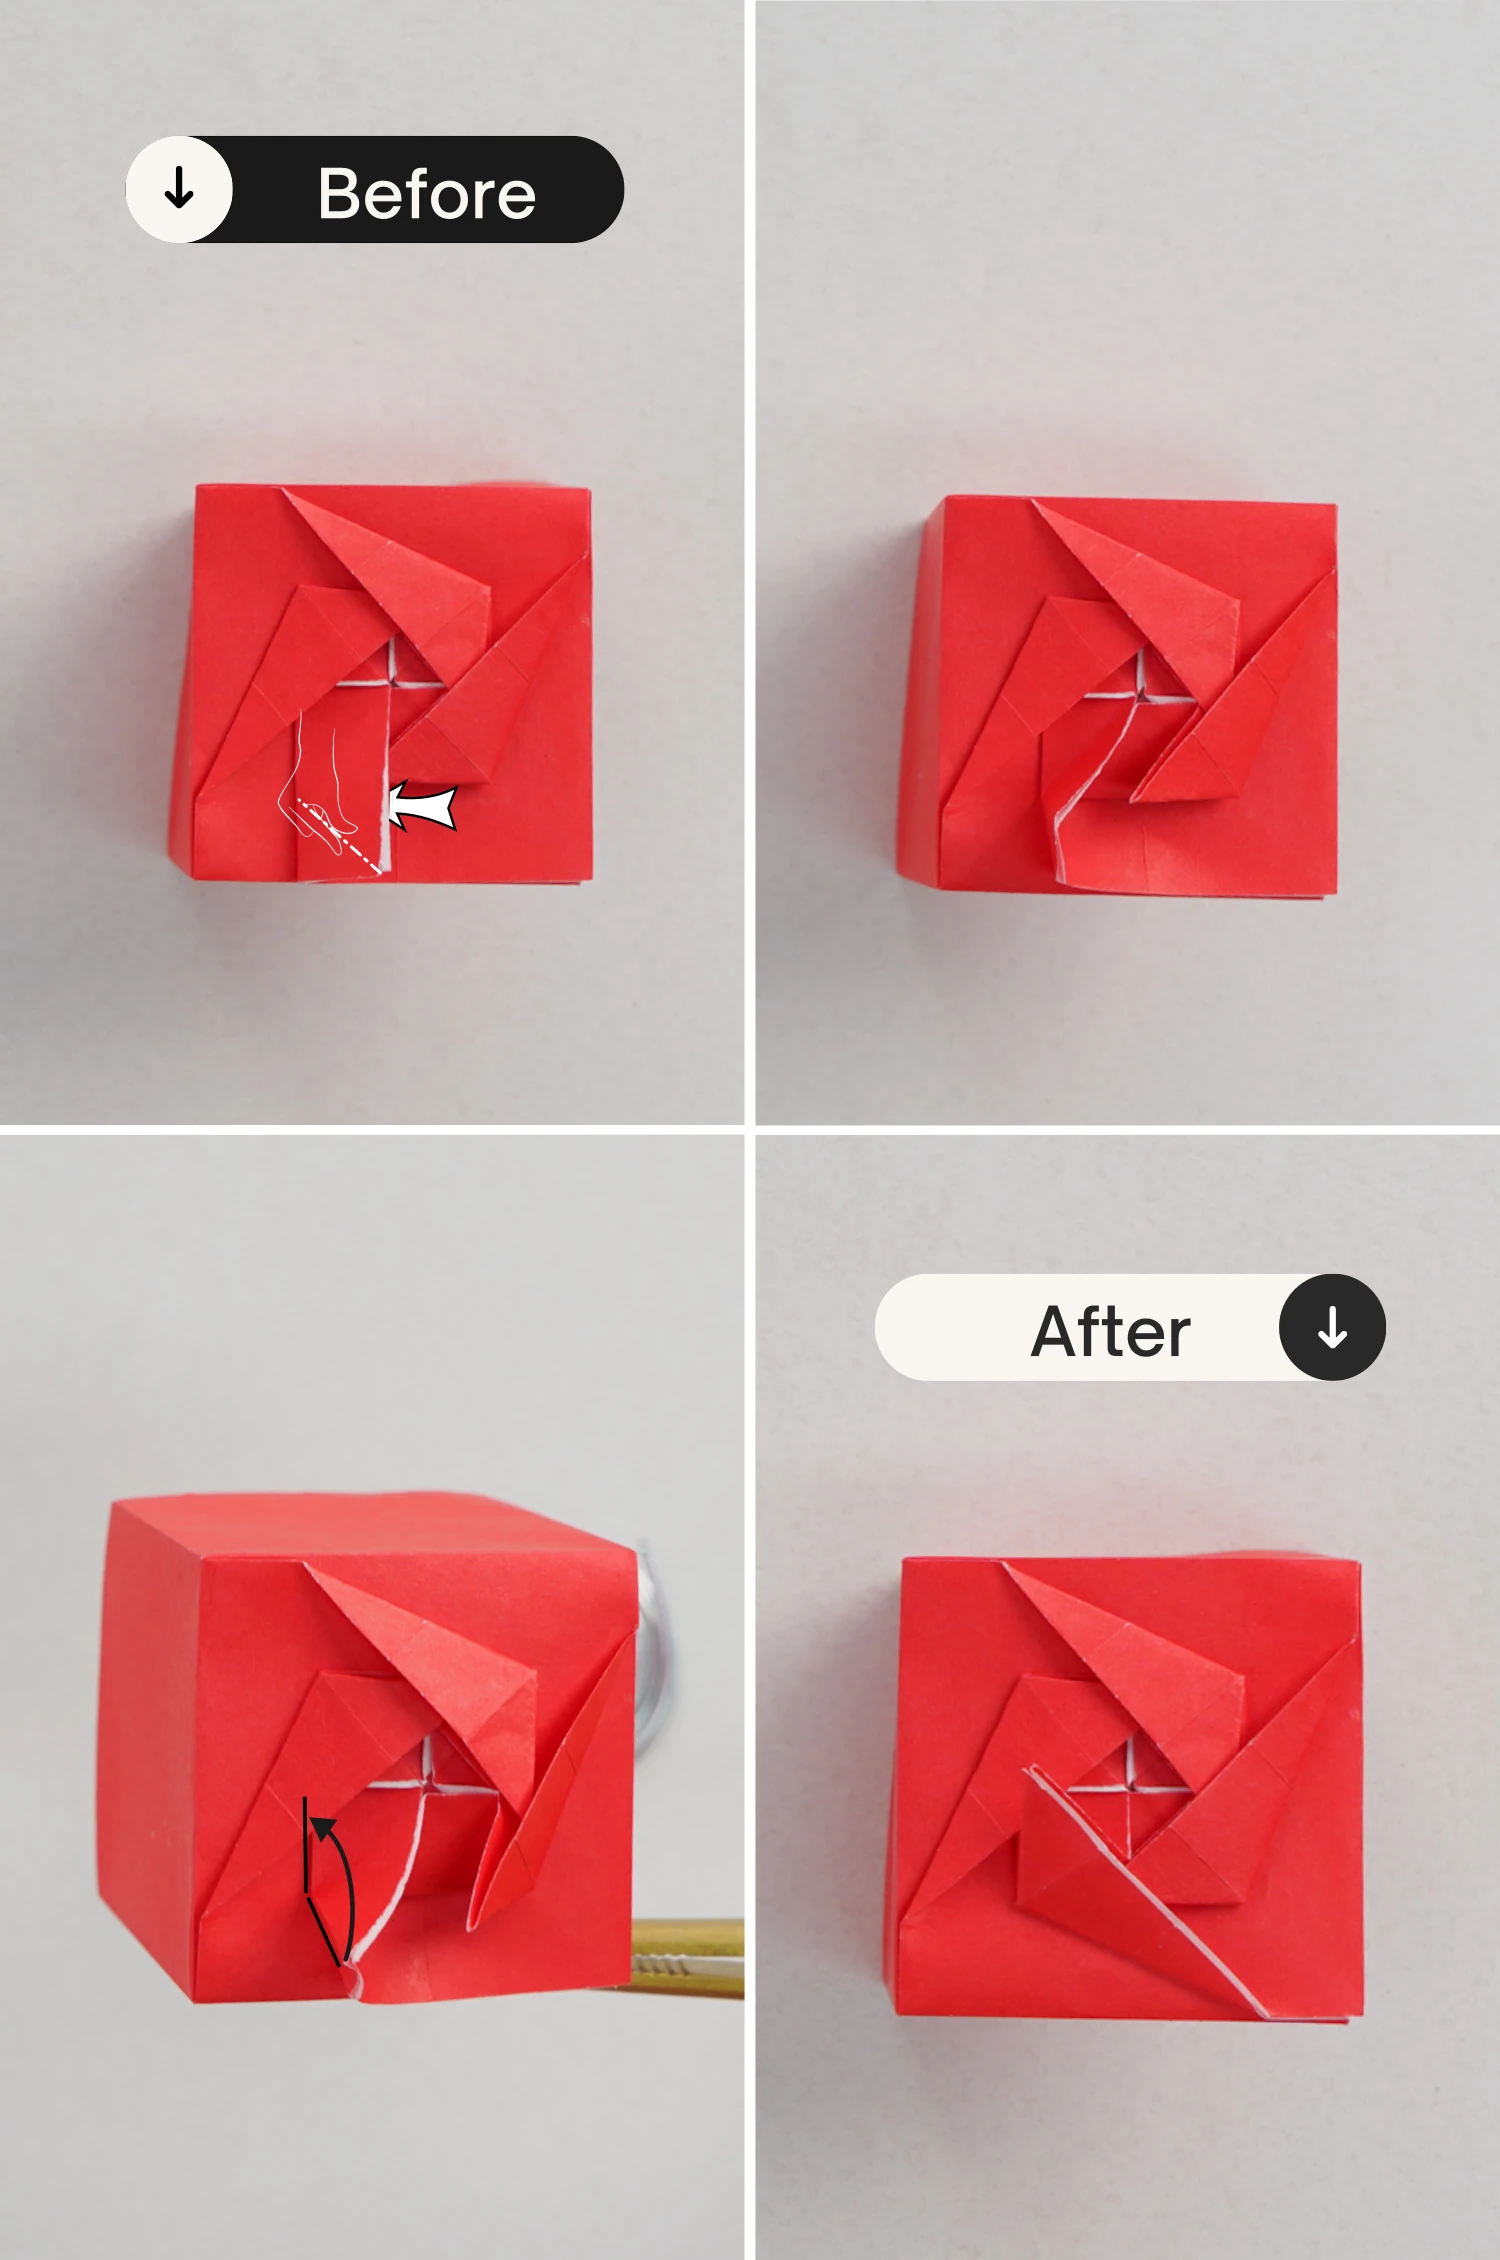
Step 36
Similarly, lift the left rectangle, pinch its bottom left corner, and fold it to the right.
Step 37
Place the corner you just made under the flap below it.
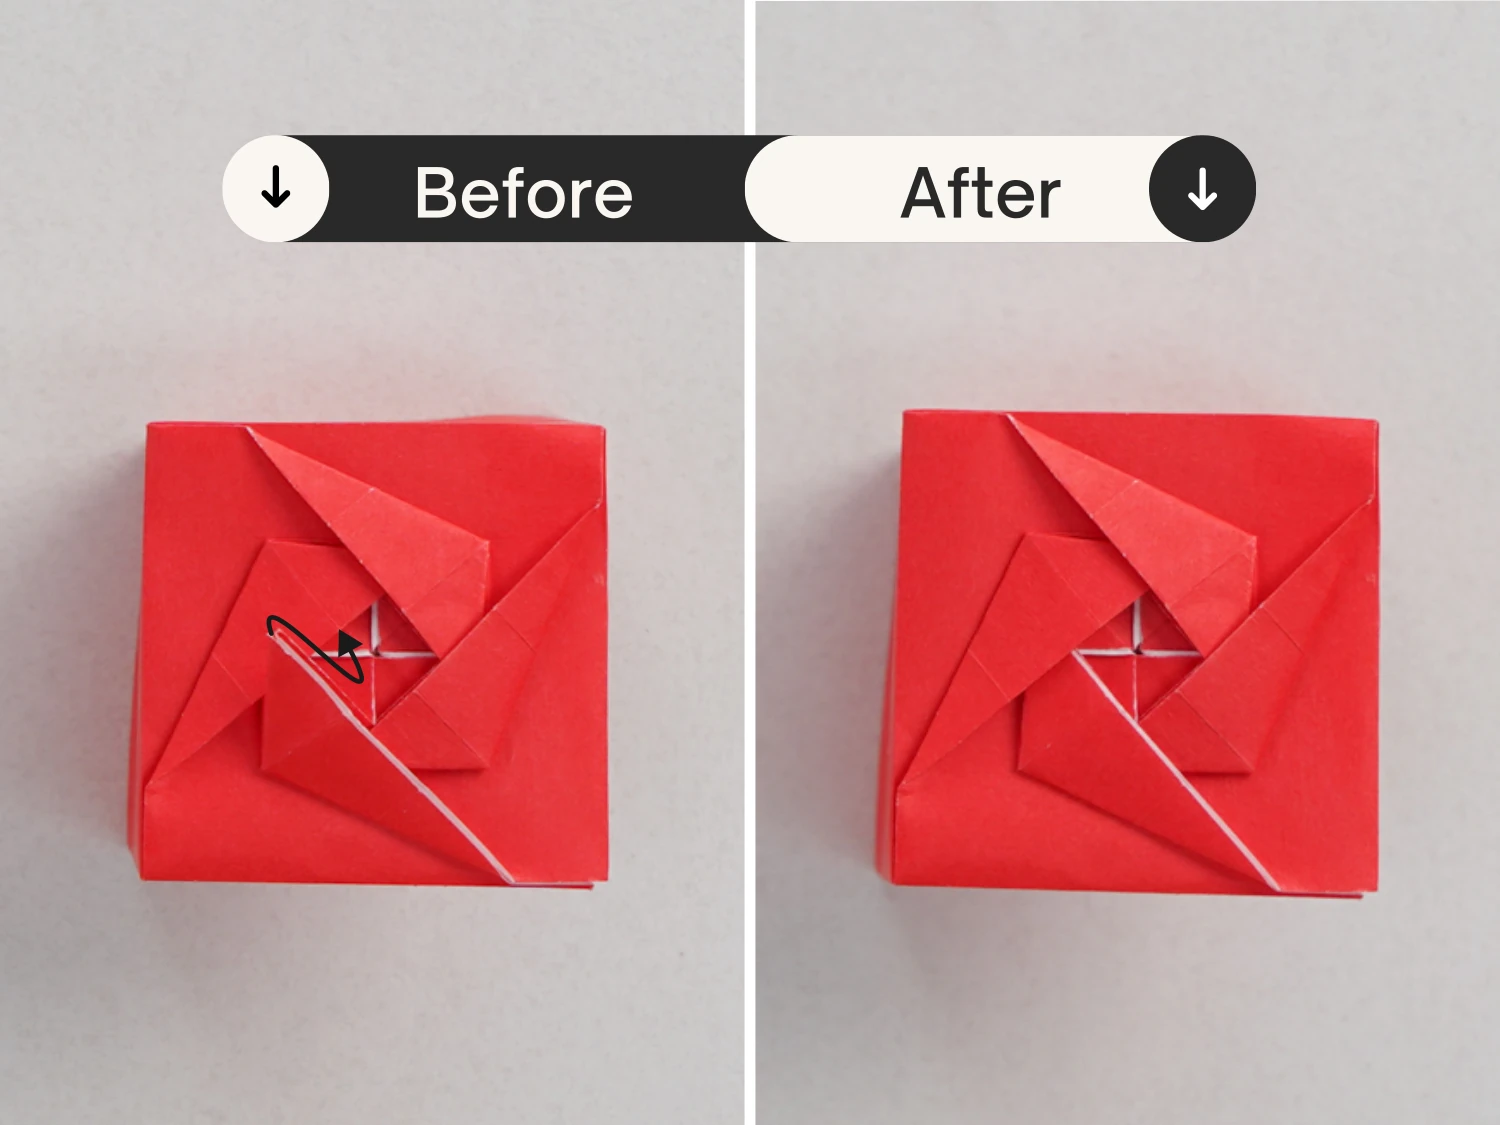
Step 38
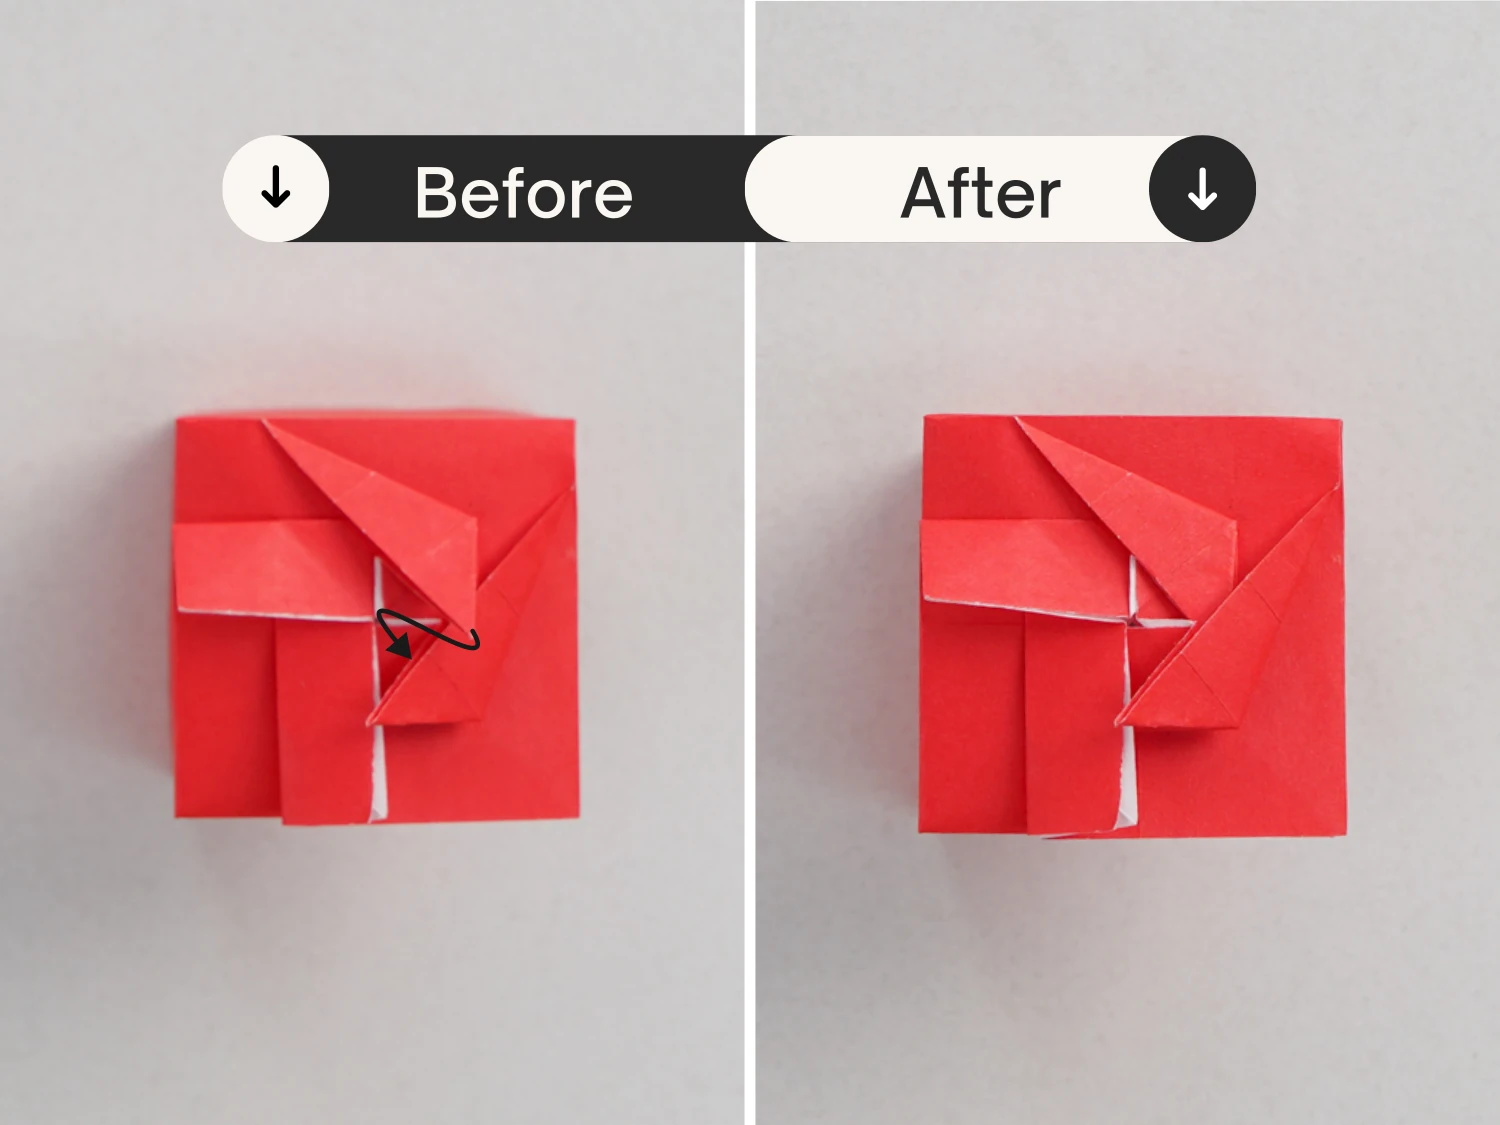
Lift the bottom rectangle, pinch its bottom right corner, and fold it to the top.
Step 39
Place the corner under the flap below it.
Step 40
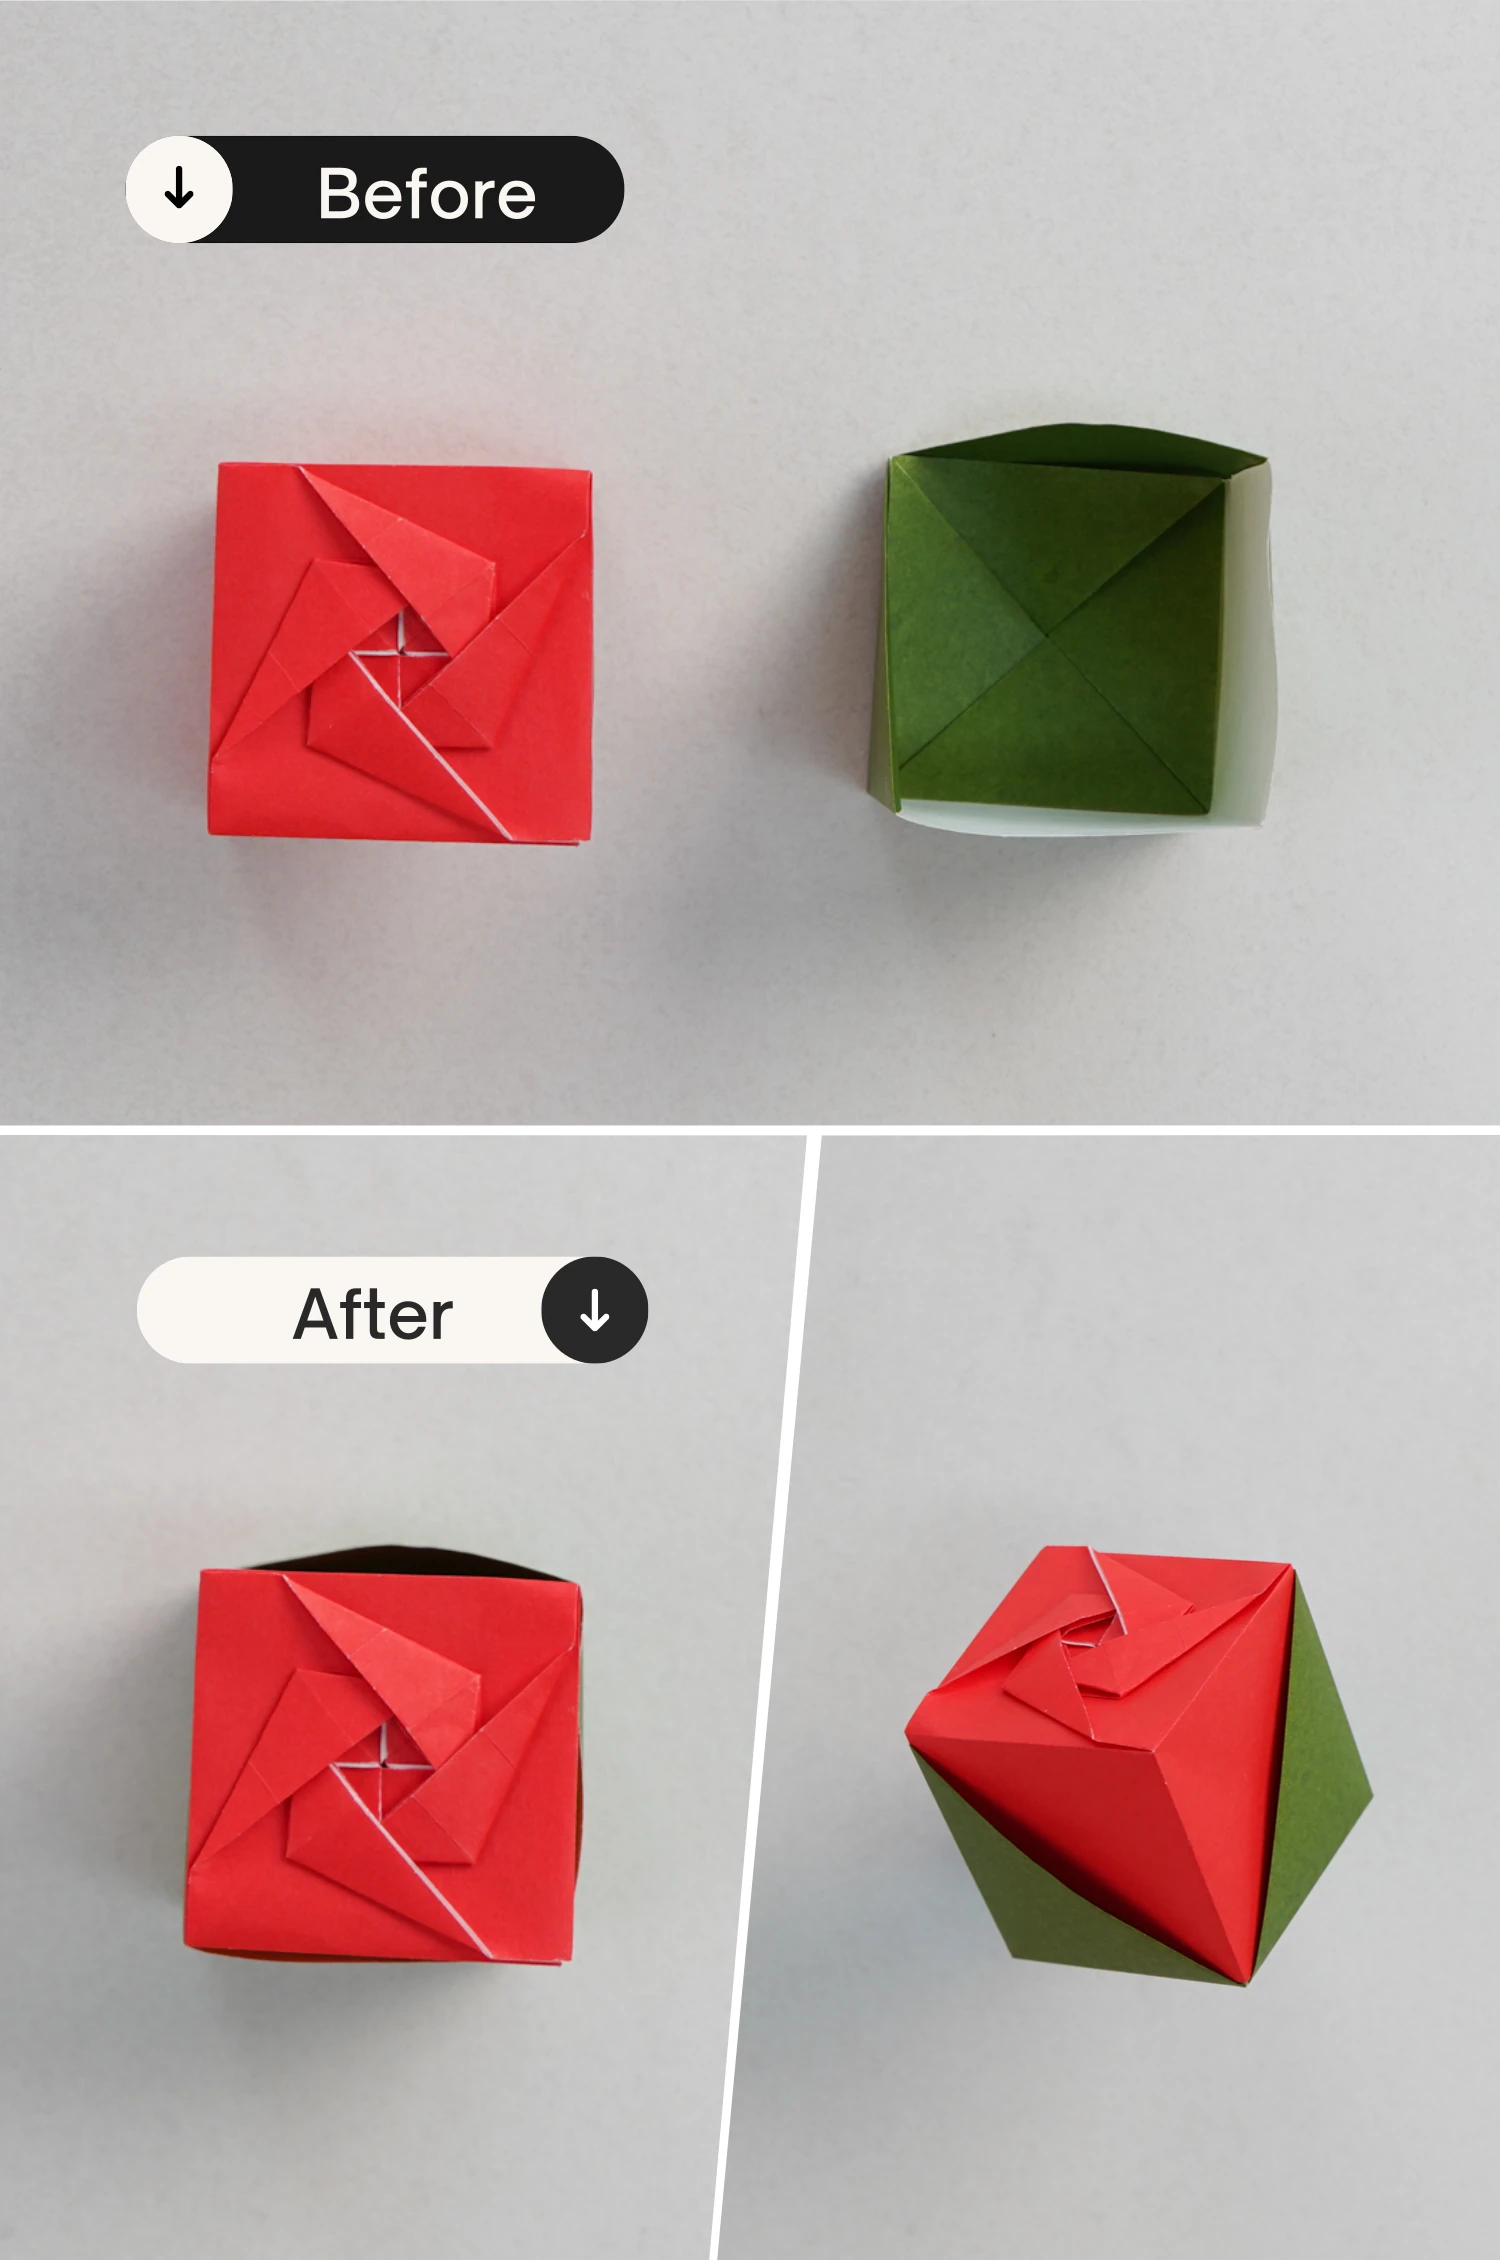
Take out the two models, and assemble them as the picture shows, getting a cute rose box.
What’s Next
That’s your super cute rose box, now please check our other origami boxes, they are all lovely, and would never let you down, happy folding!


