How to Make an Origami Easy Christmas Tree – Flatten Version
Step 1
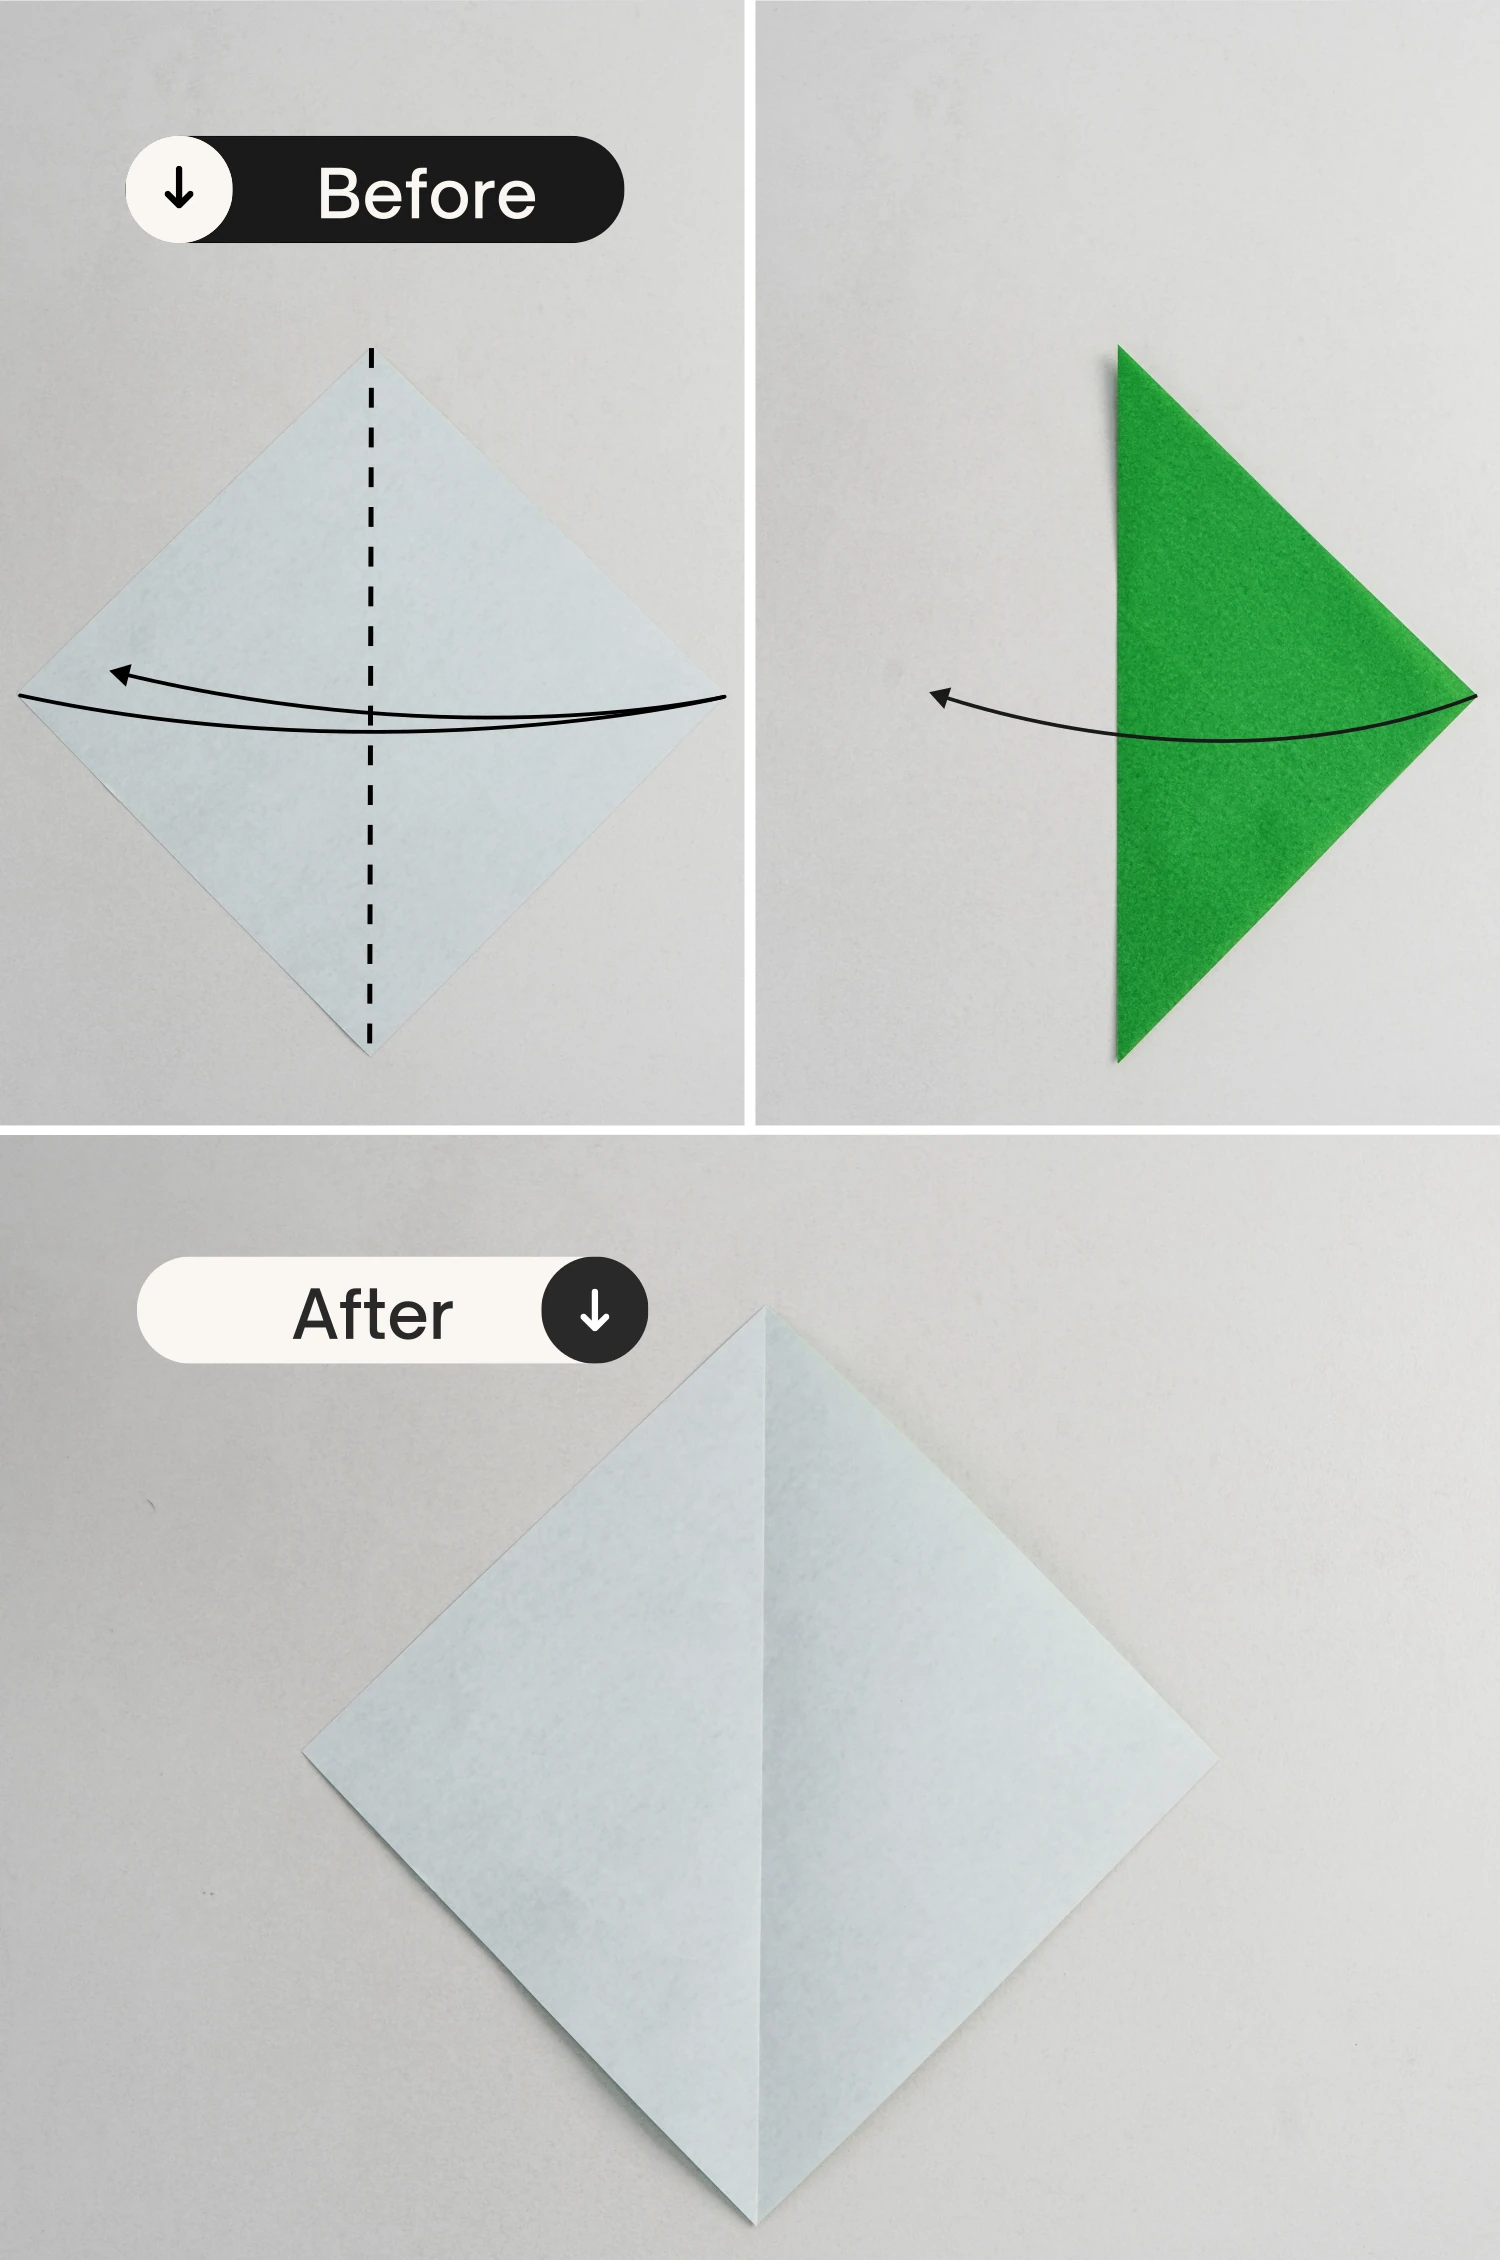
Start with the white side of the paper facing up, and fold it in half diagonally, crease it well then unfold.
Step 2
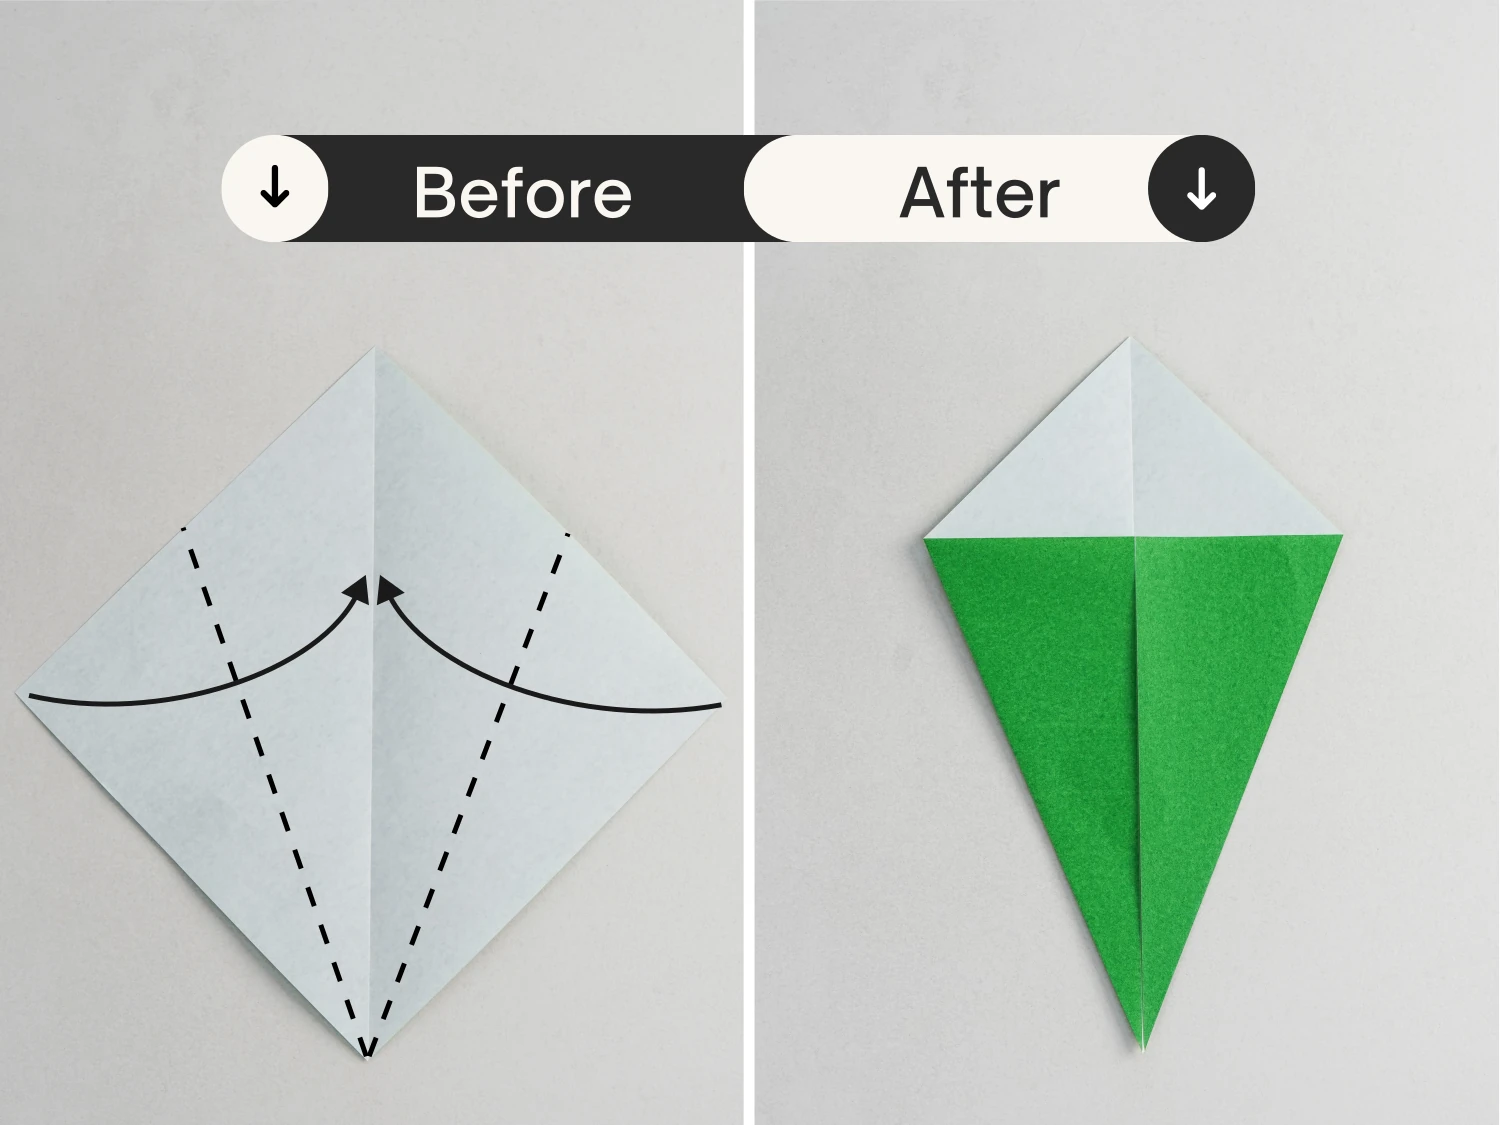
Fold the bottom left and right edges along the dotted line to meet the middle crease.
Step 3
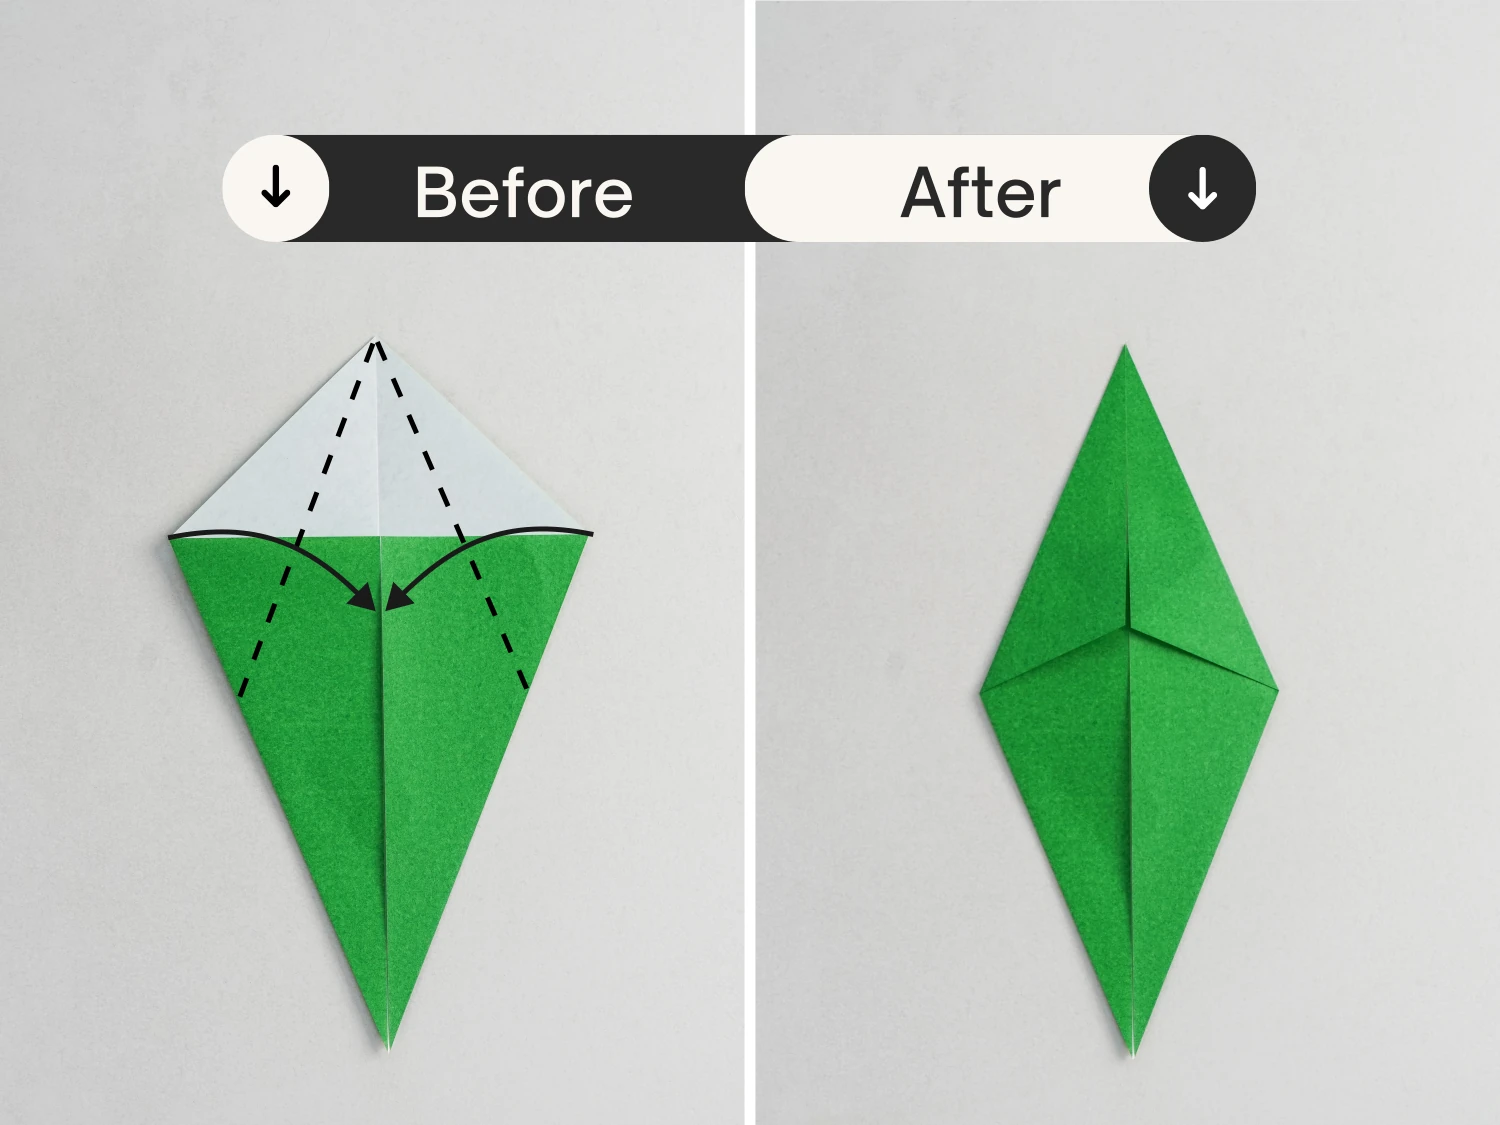
Then fold the top left and right edges to meet the middle crease.
Step 4
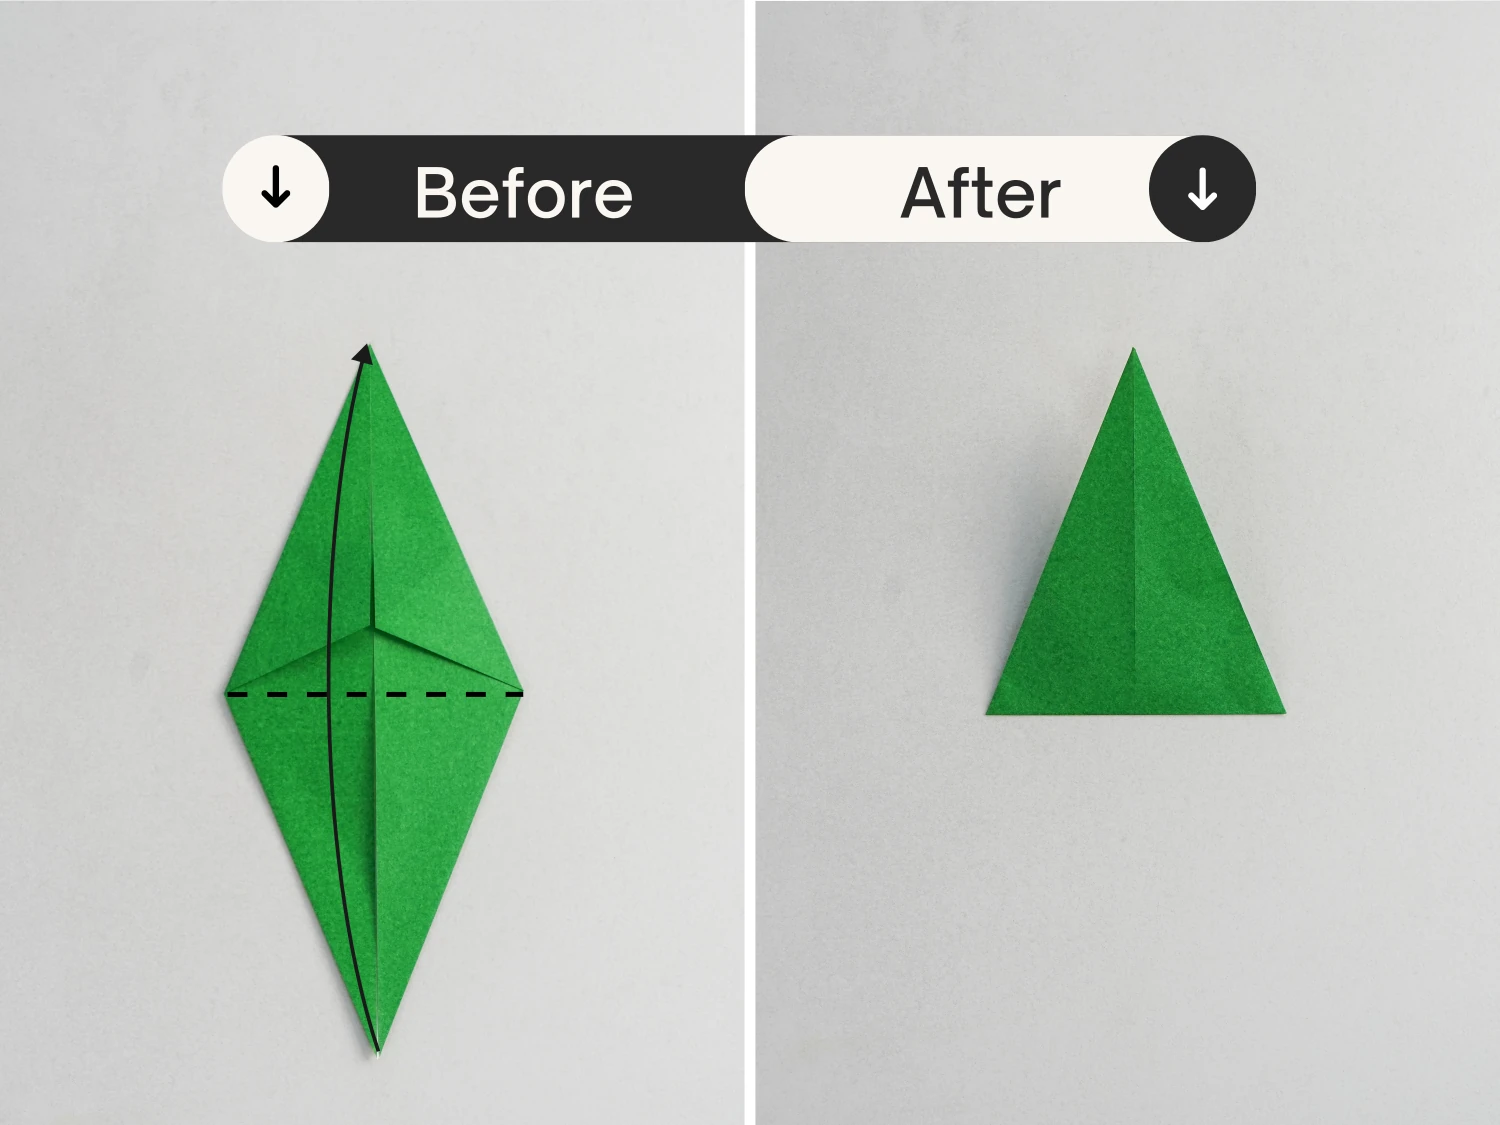
Fold the bottom corner up diagonally to the top corner.
Step 5
Then fold it back to the bottom along the dotted line.
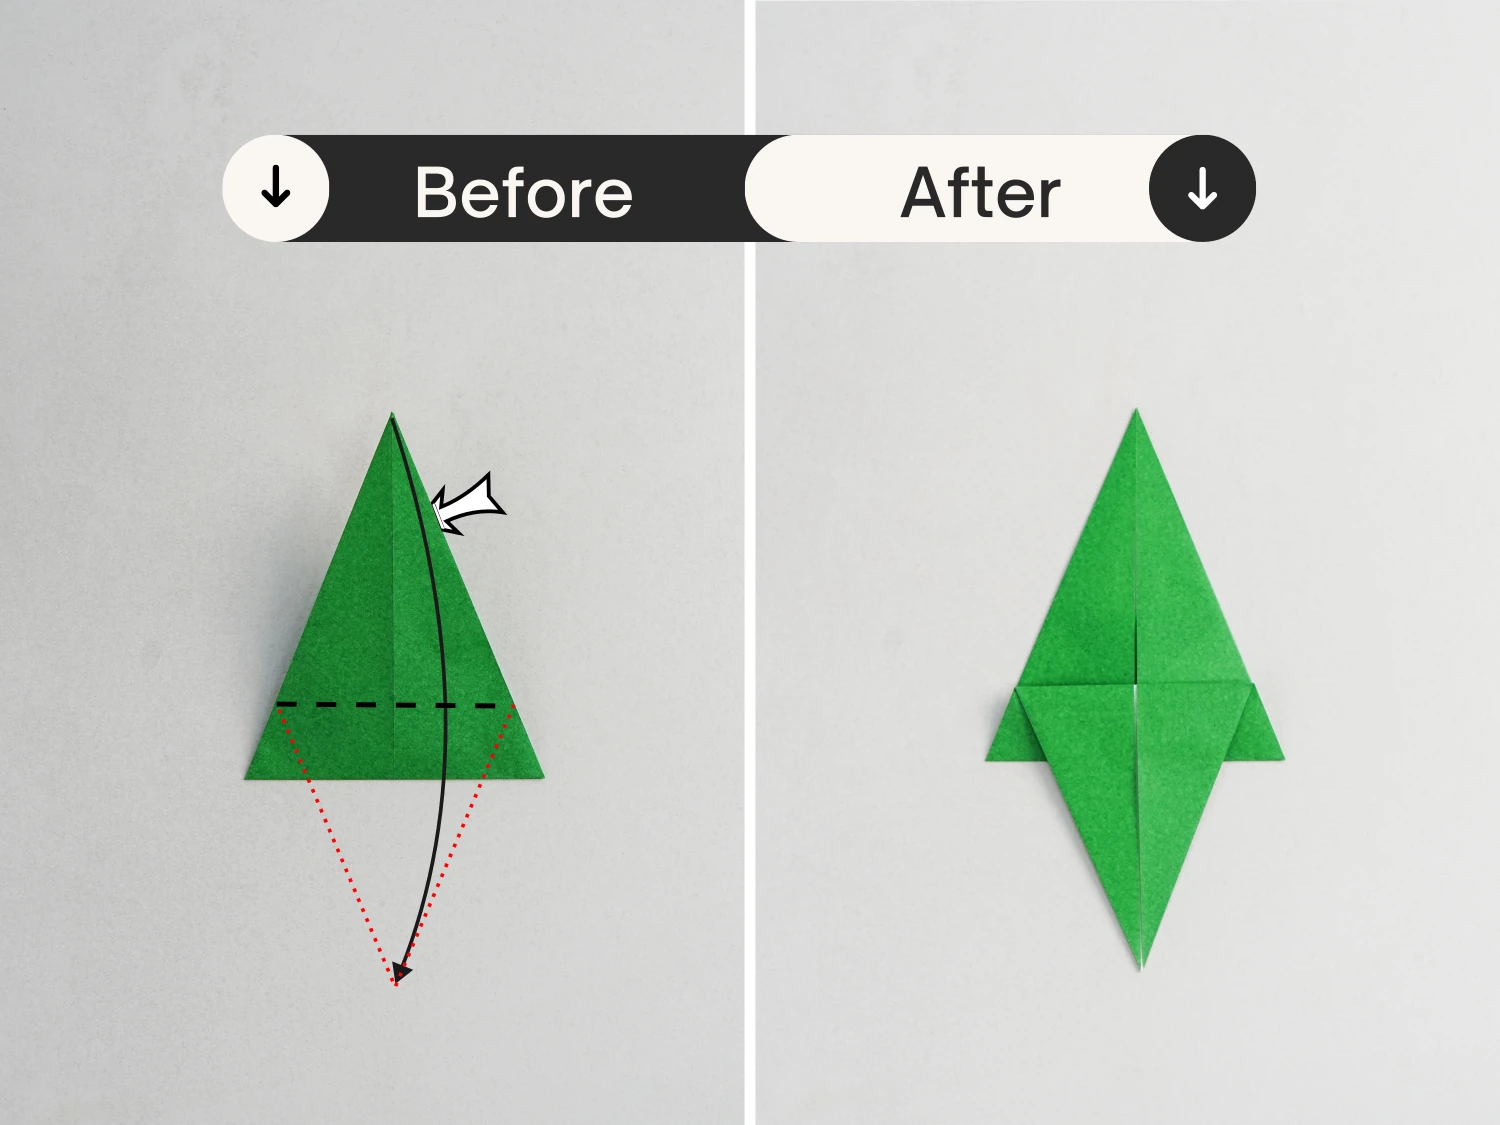
Step 6
Fold it up again along the dotted line to meet the top edge of the below flap.
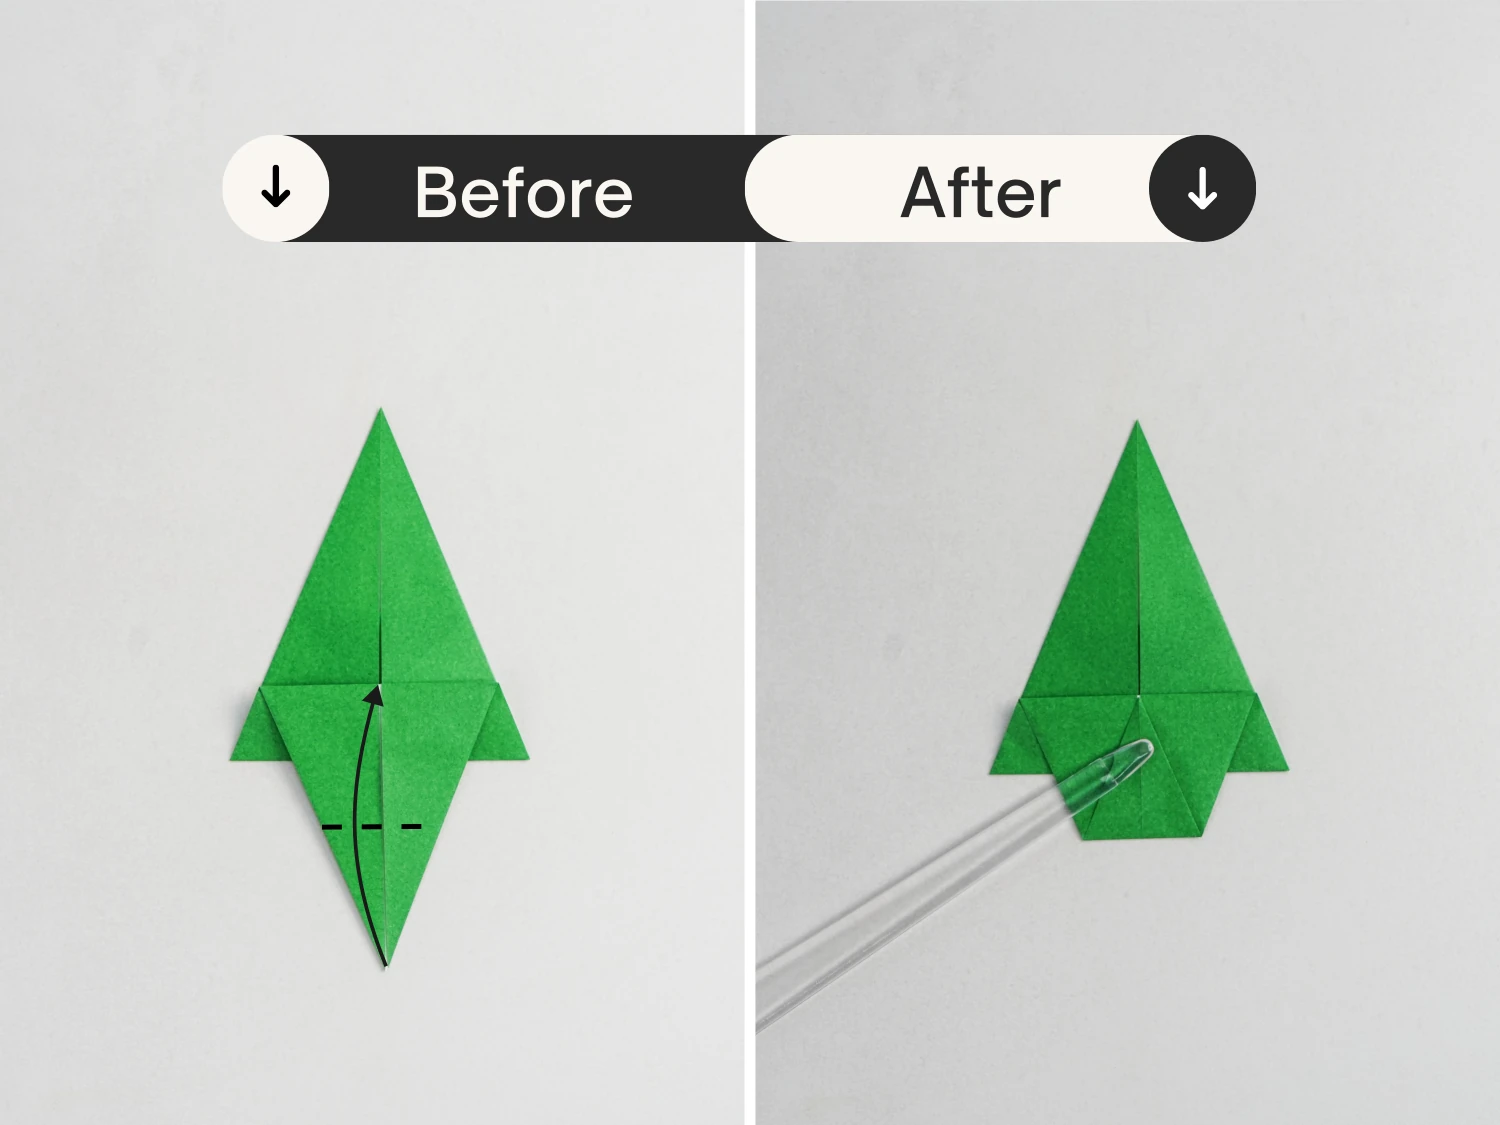
Step 7
Fold the left and right edges of the middle flap downward along the dotted line, to meet its bottom edge, crease them well then unfold.
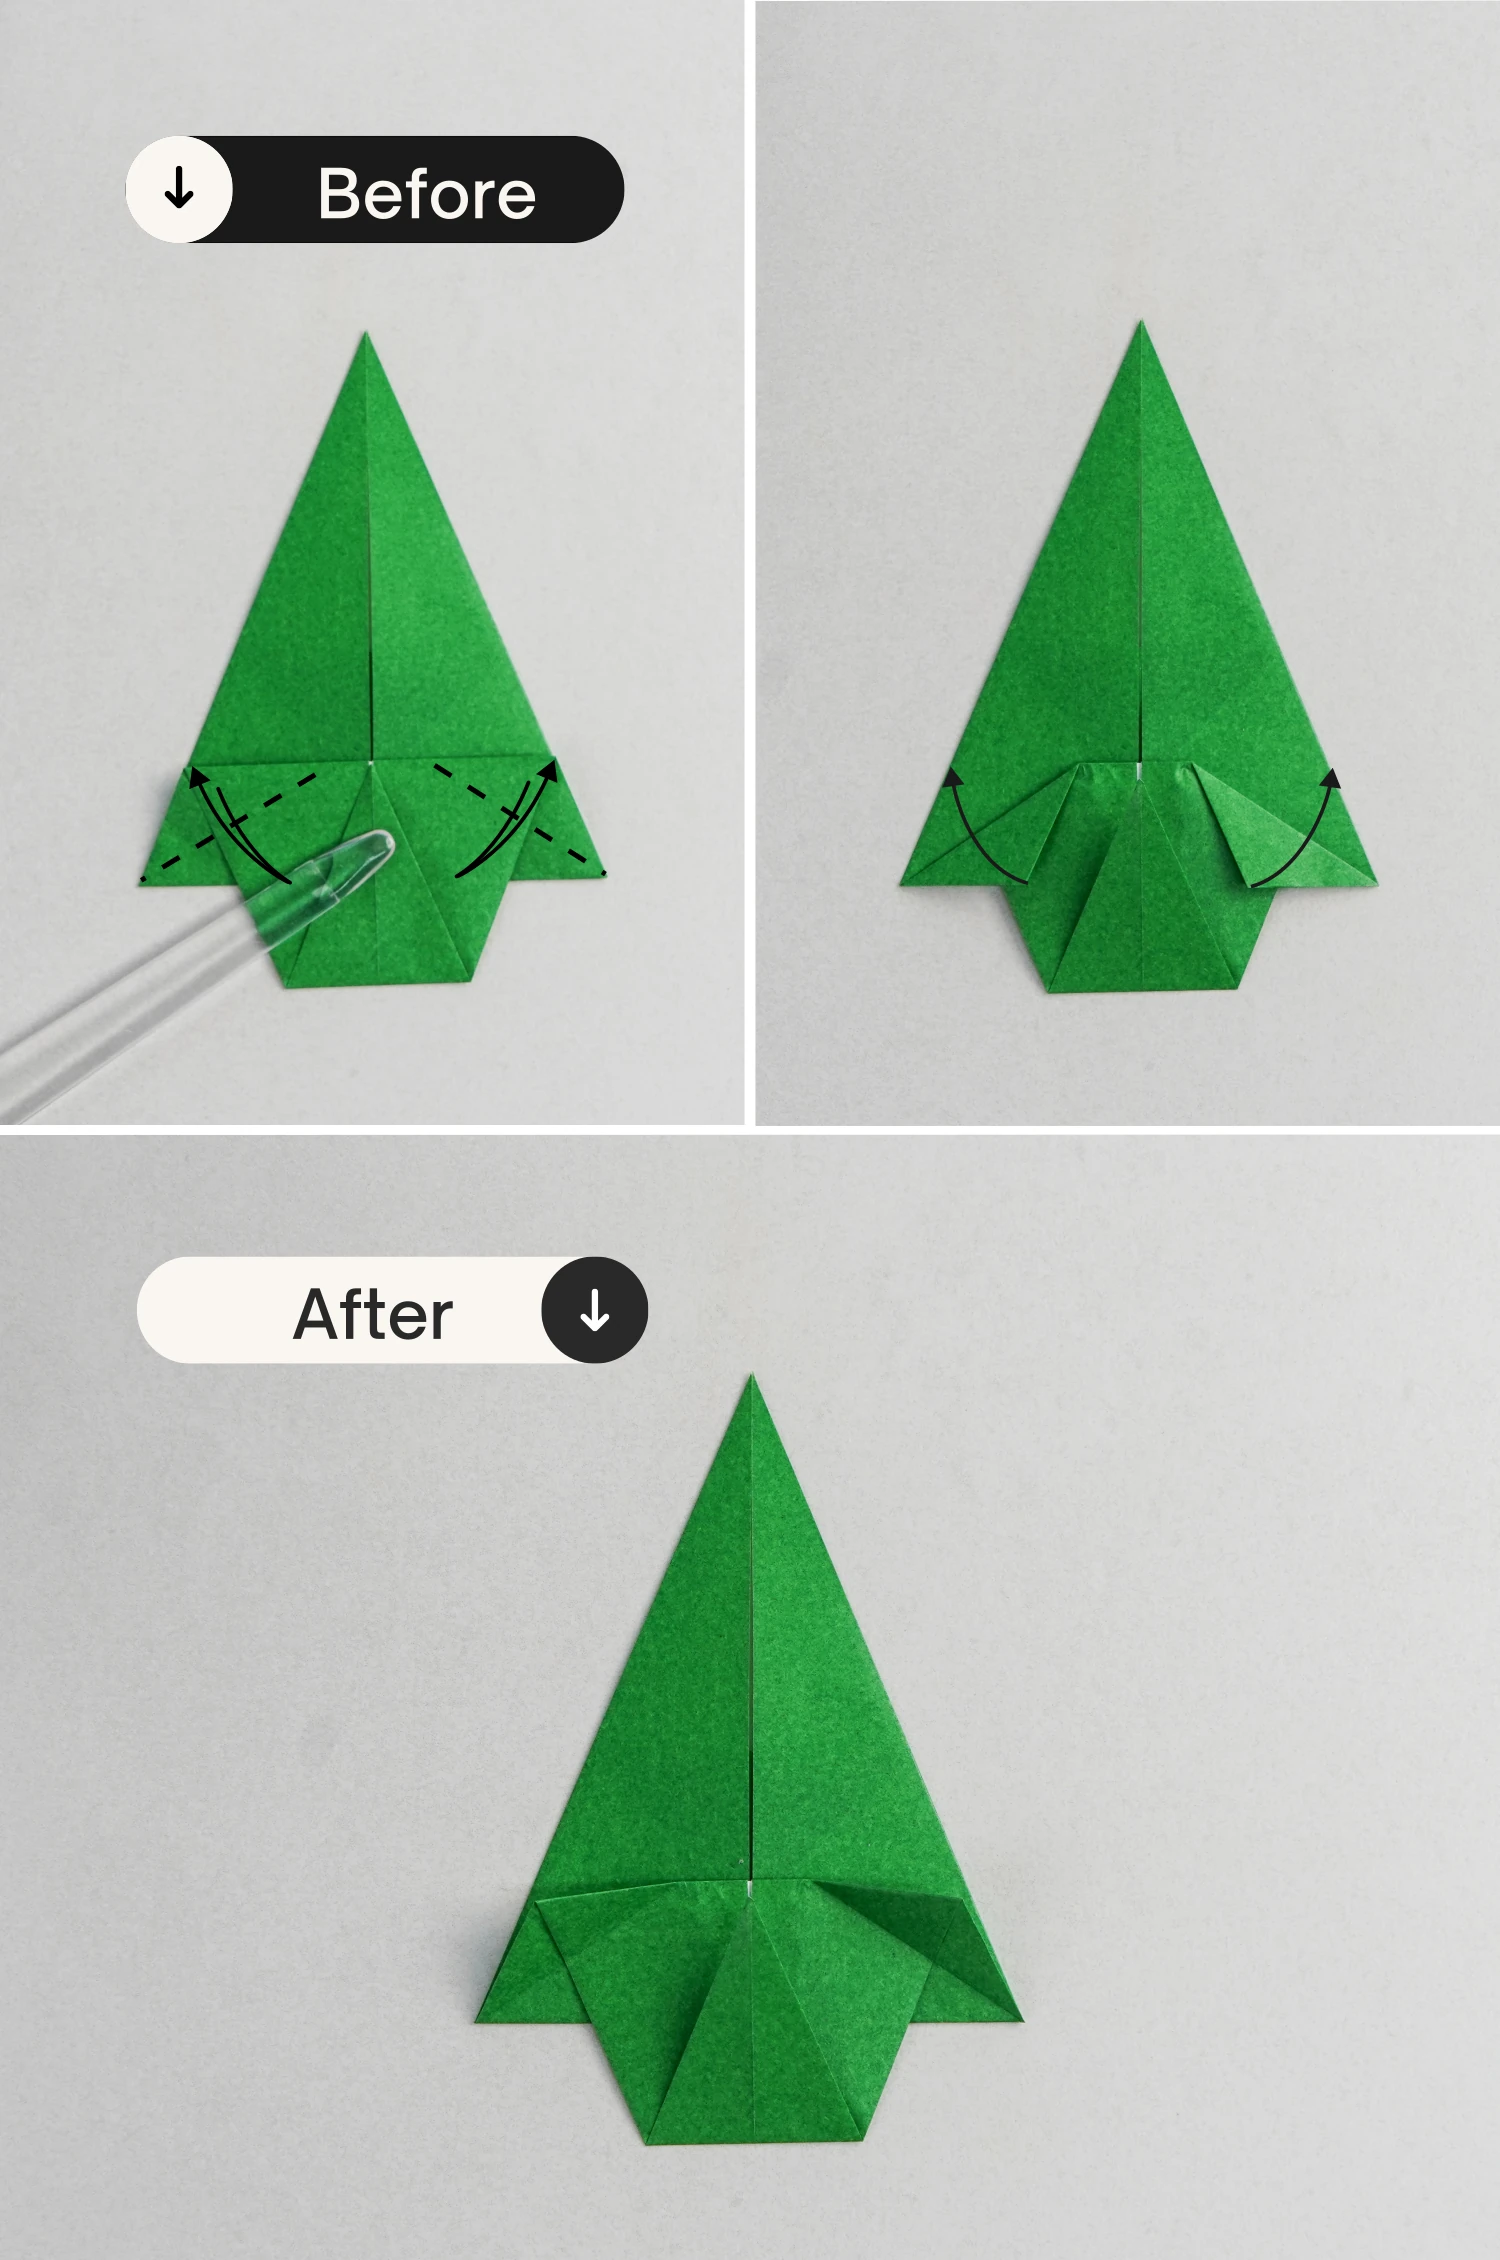
Step 8
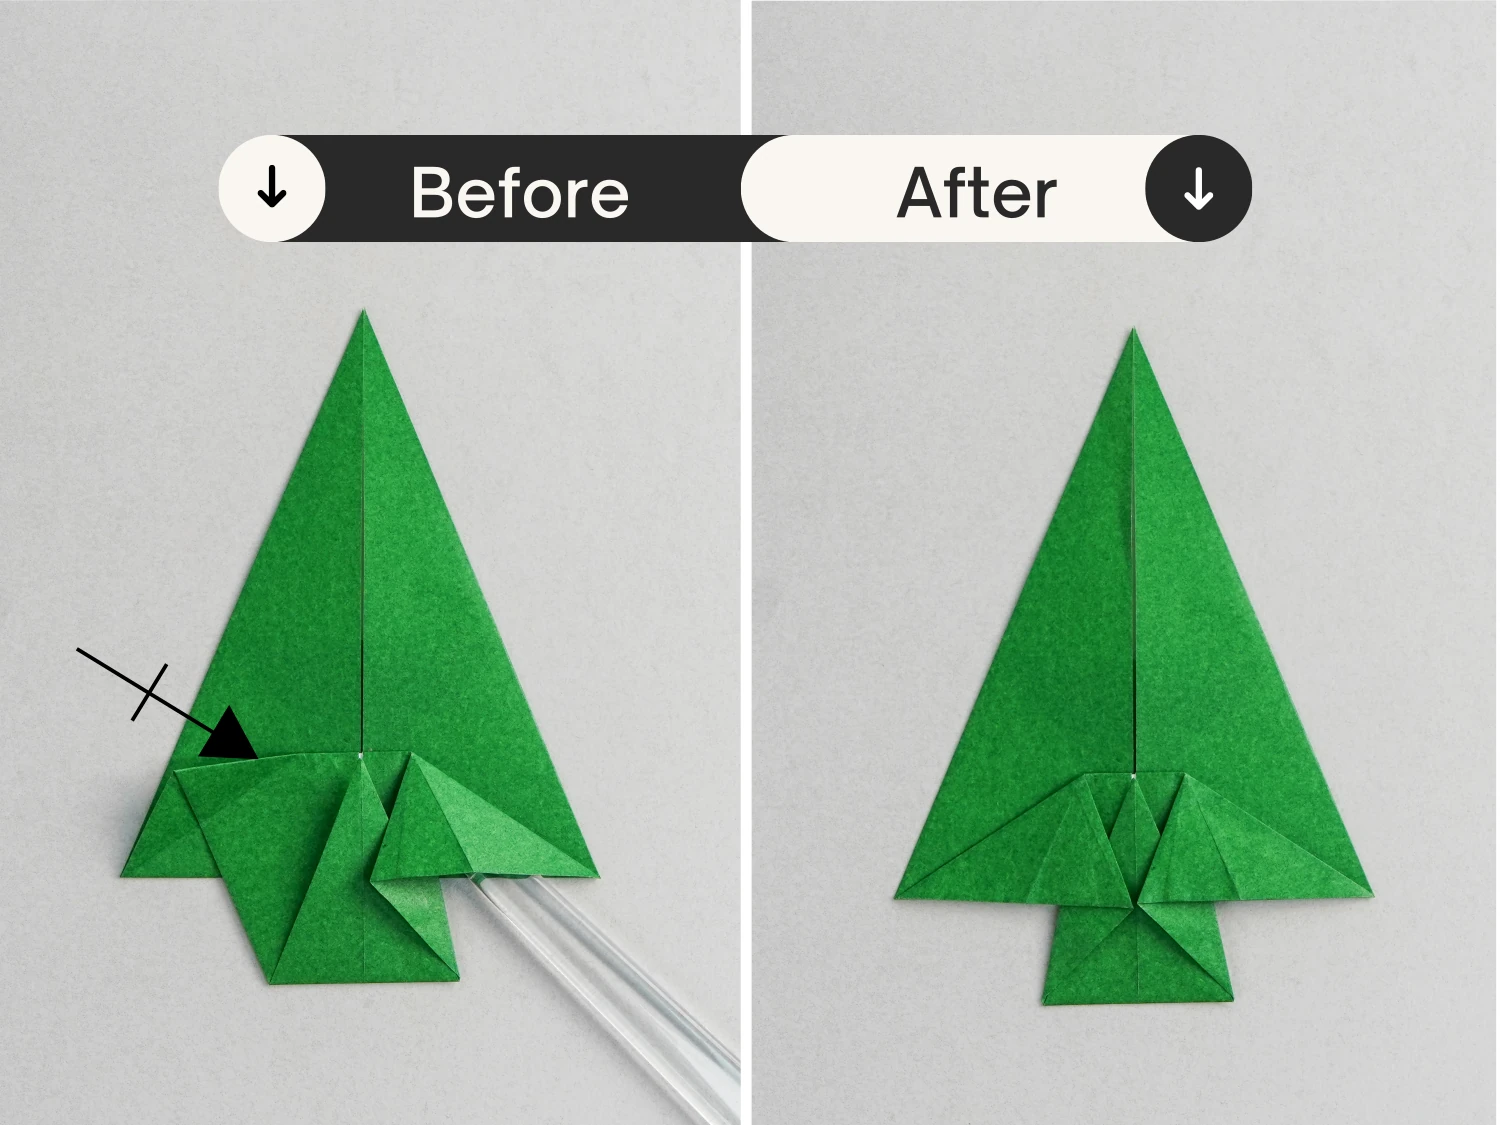
Open the right corner, and flatten it along the existing creases.
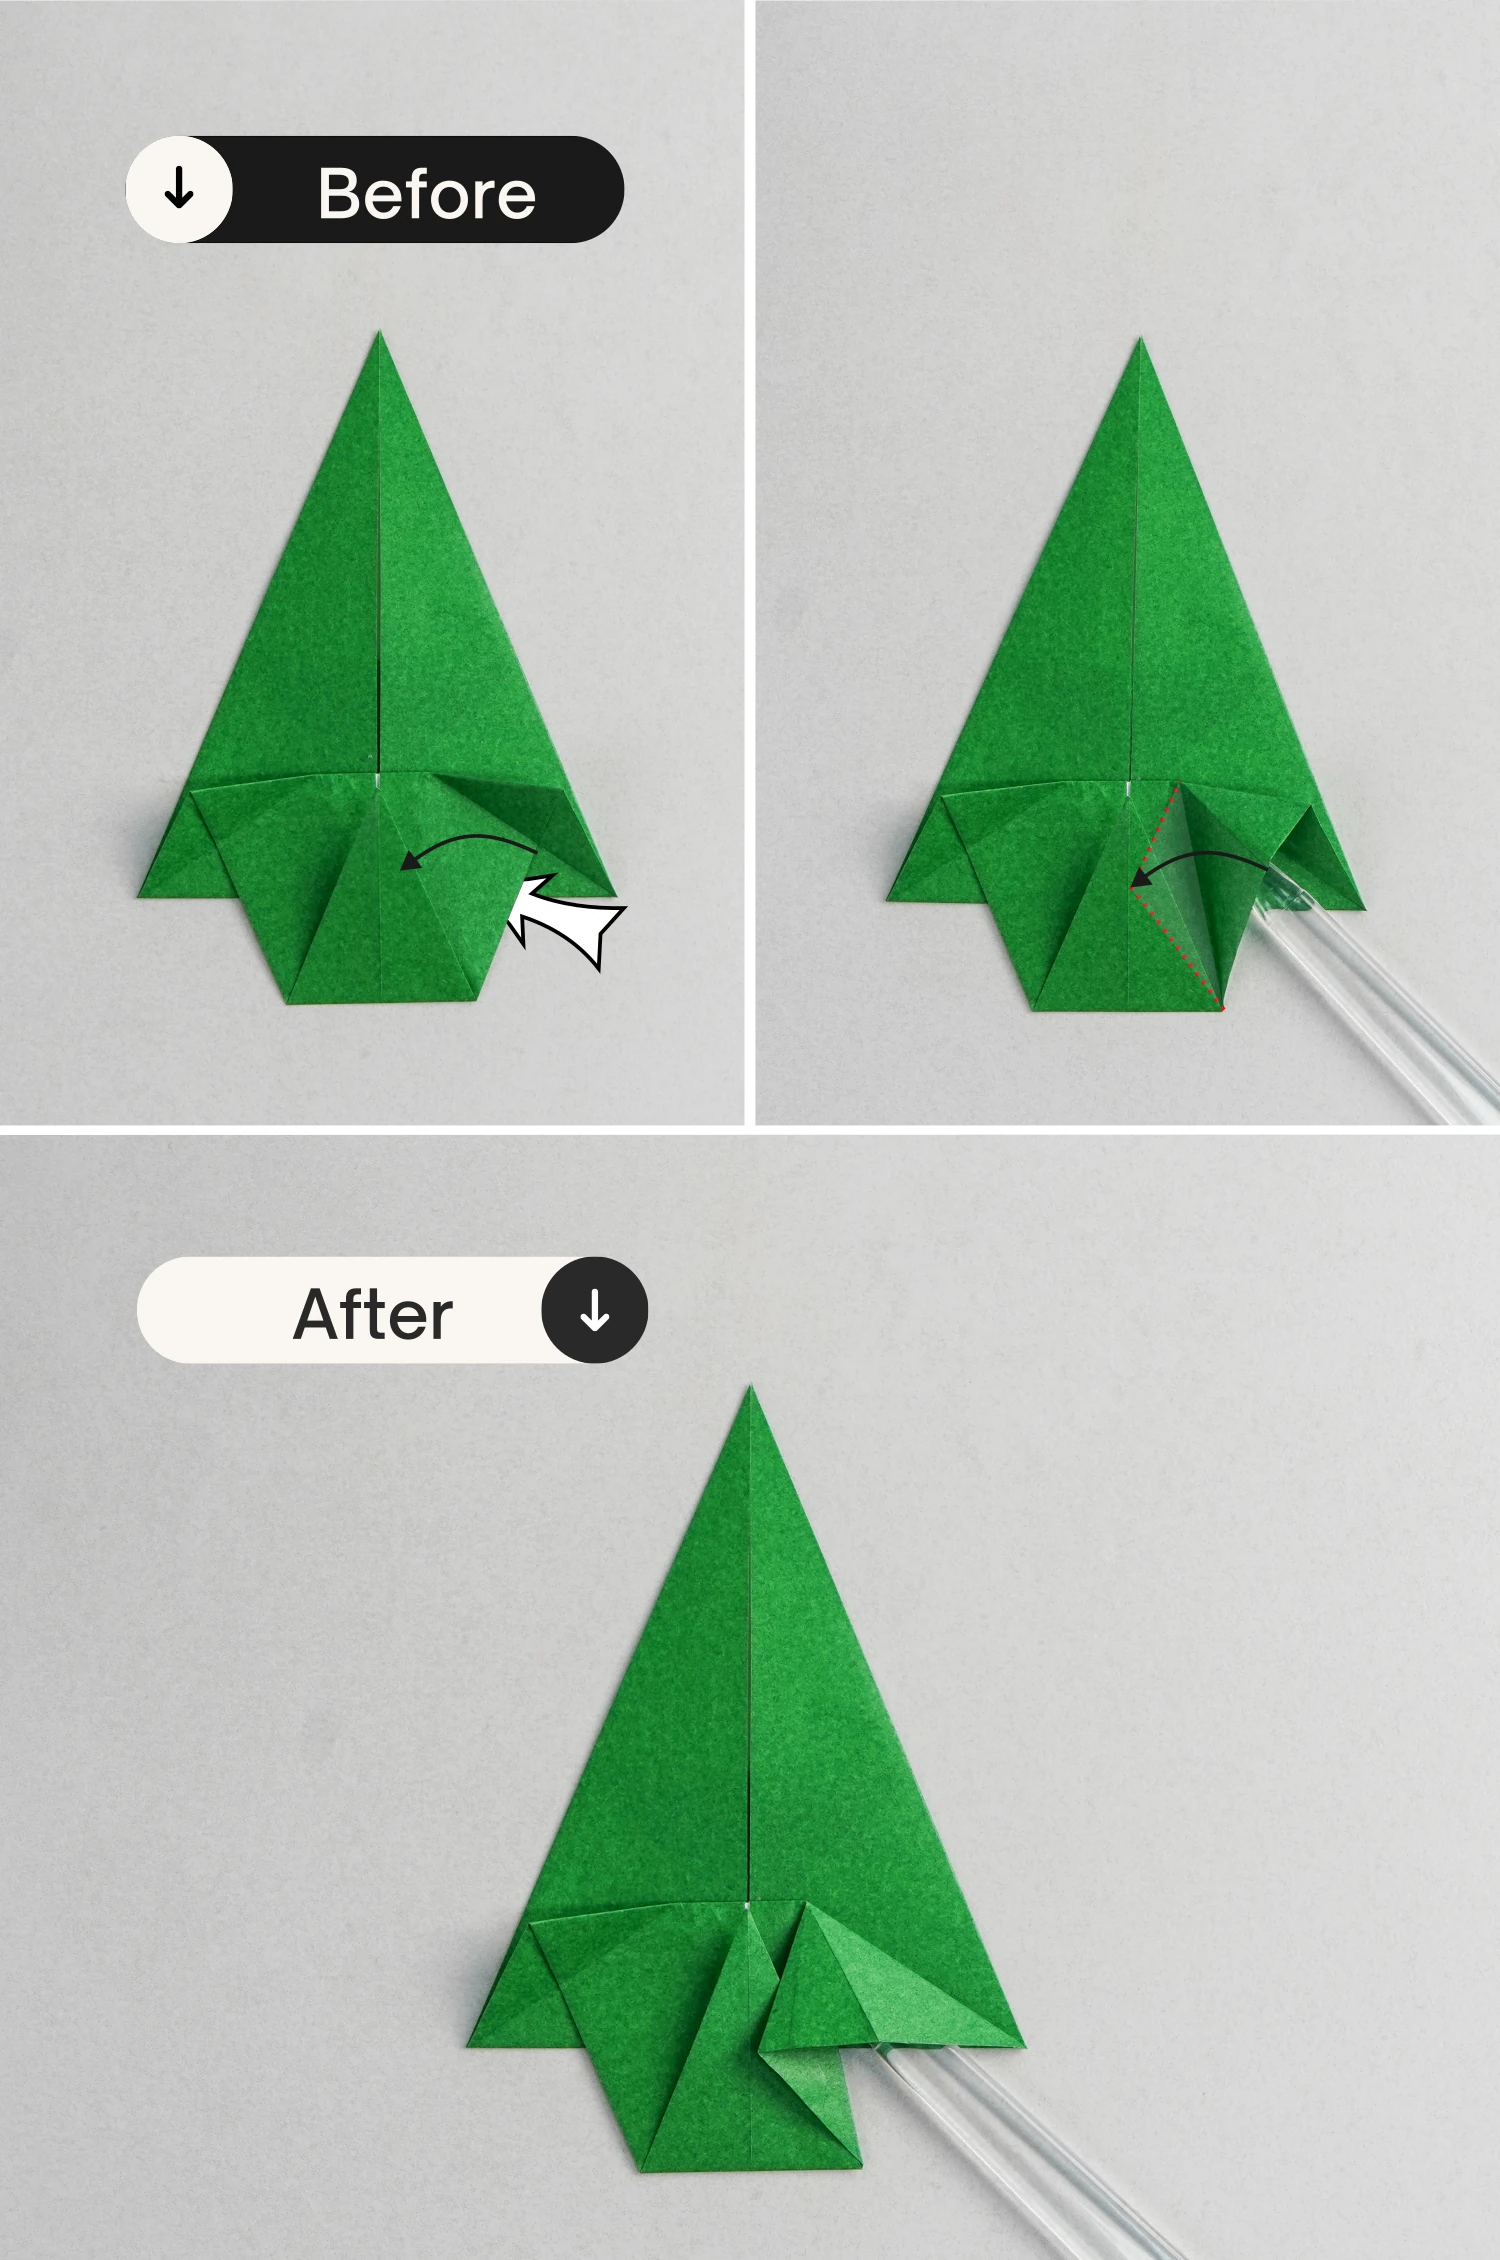
Step 9
Repeat this for the left side.
Step 10
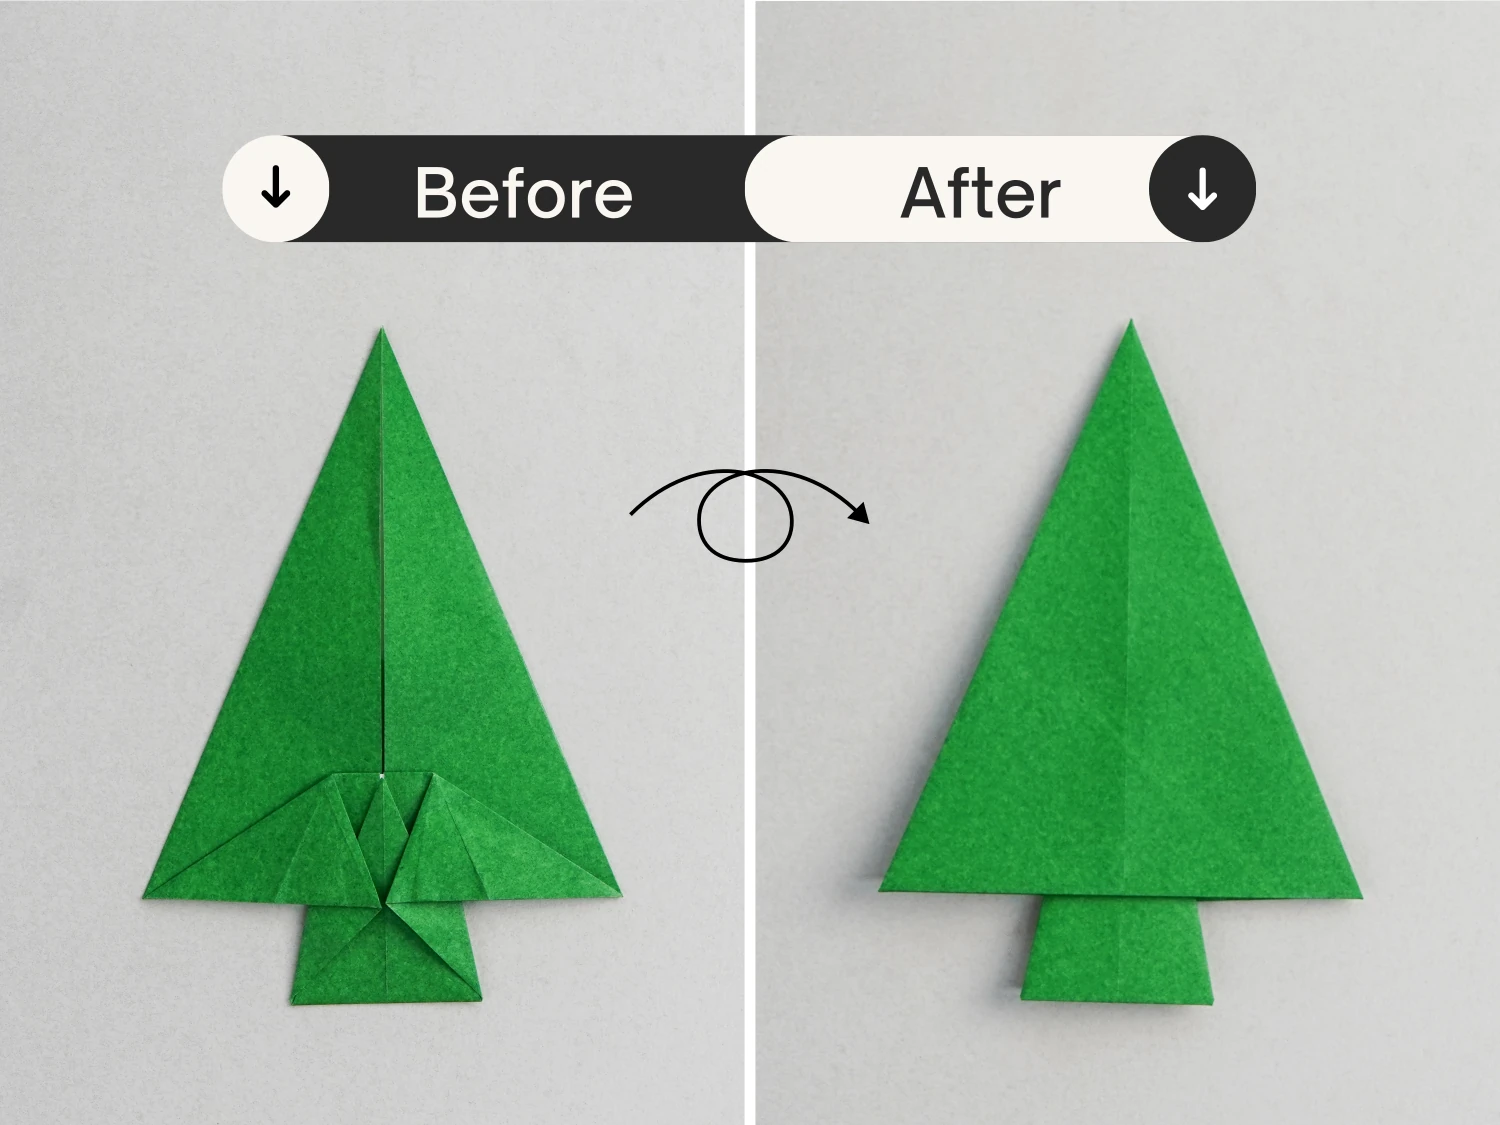
Flip the paper over, this is the final shape of the Christmas tree, and you can decorate your Christmas tree with pens.
What’s Next
For the Christmas series, I would recommend the Christmas Santa, it is also very lovely, and we will continue to update in the future. Here are some other easy origami, hope you will like them!


