How to Make an Easy Origami Bell
Step 1
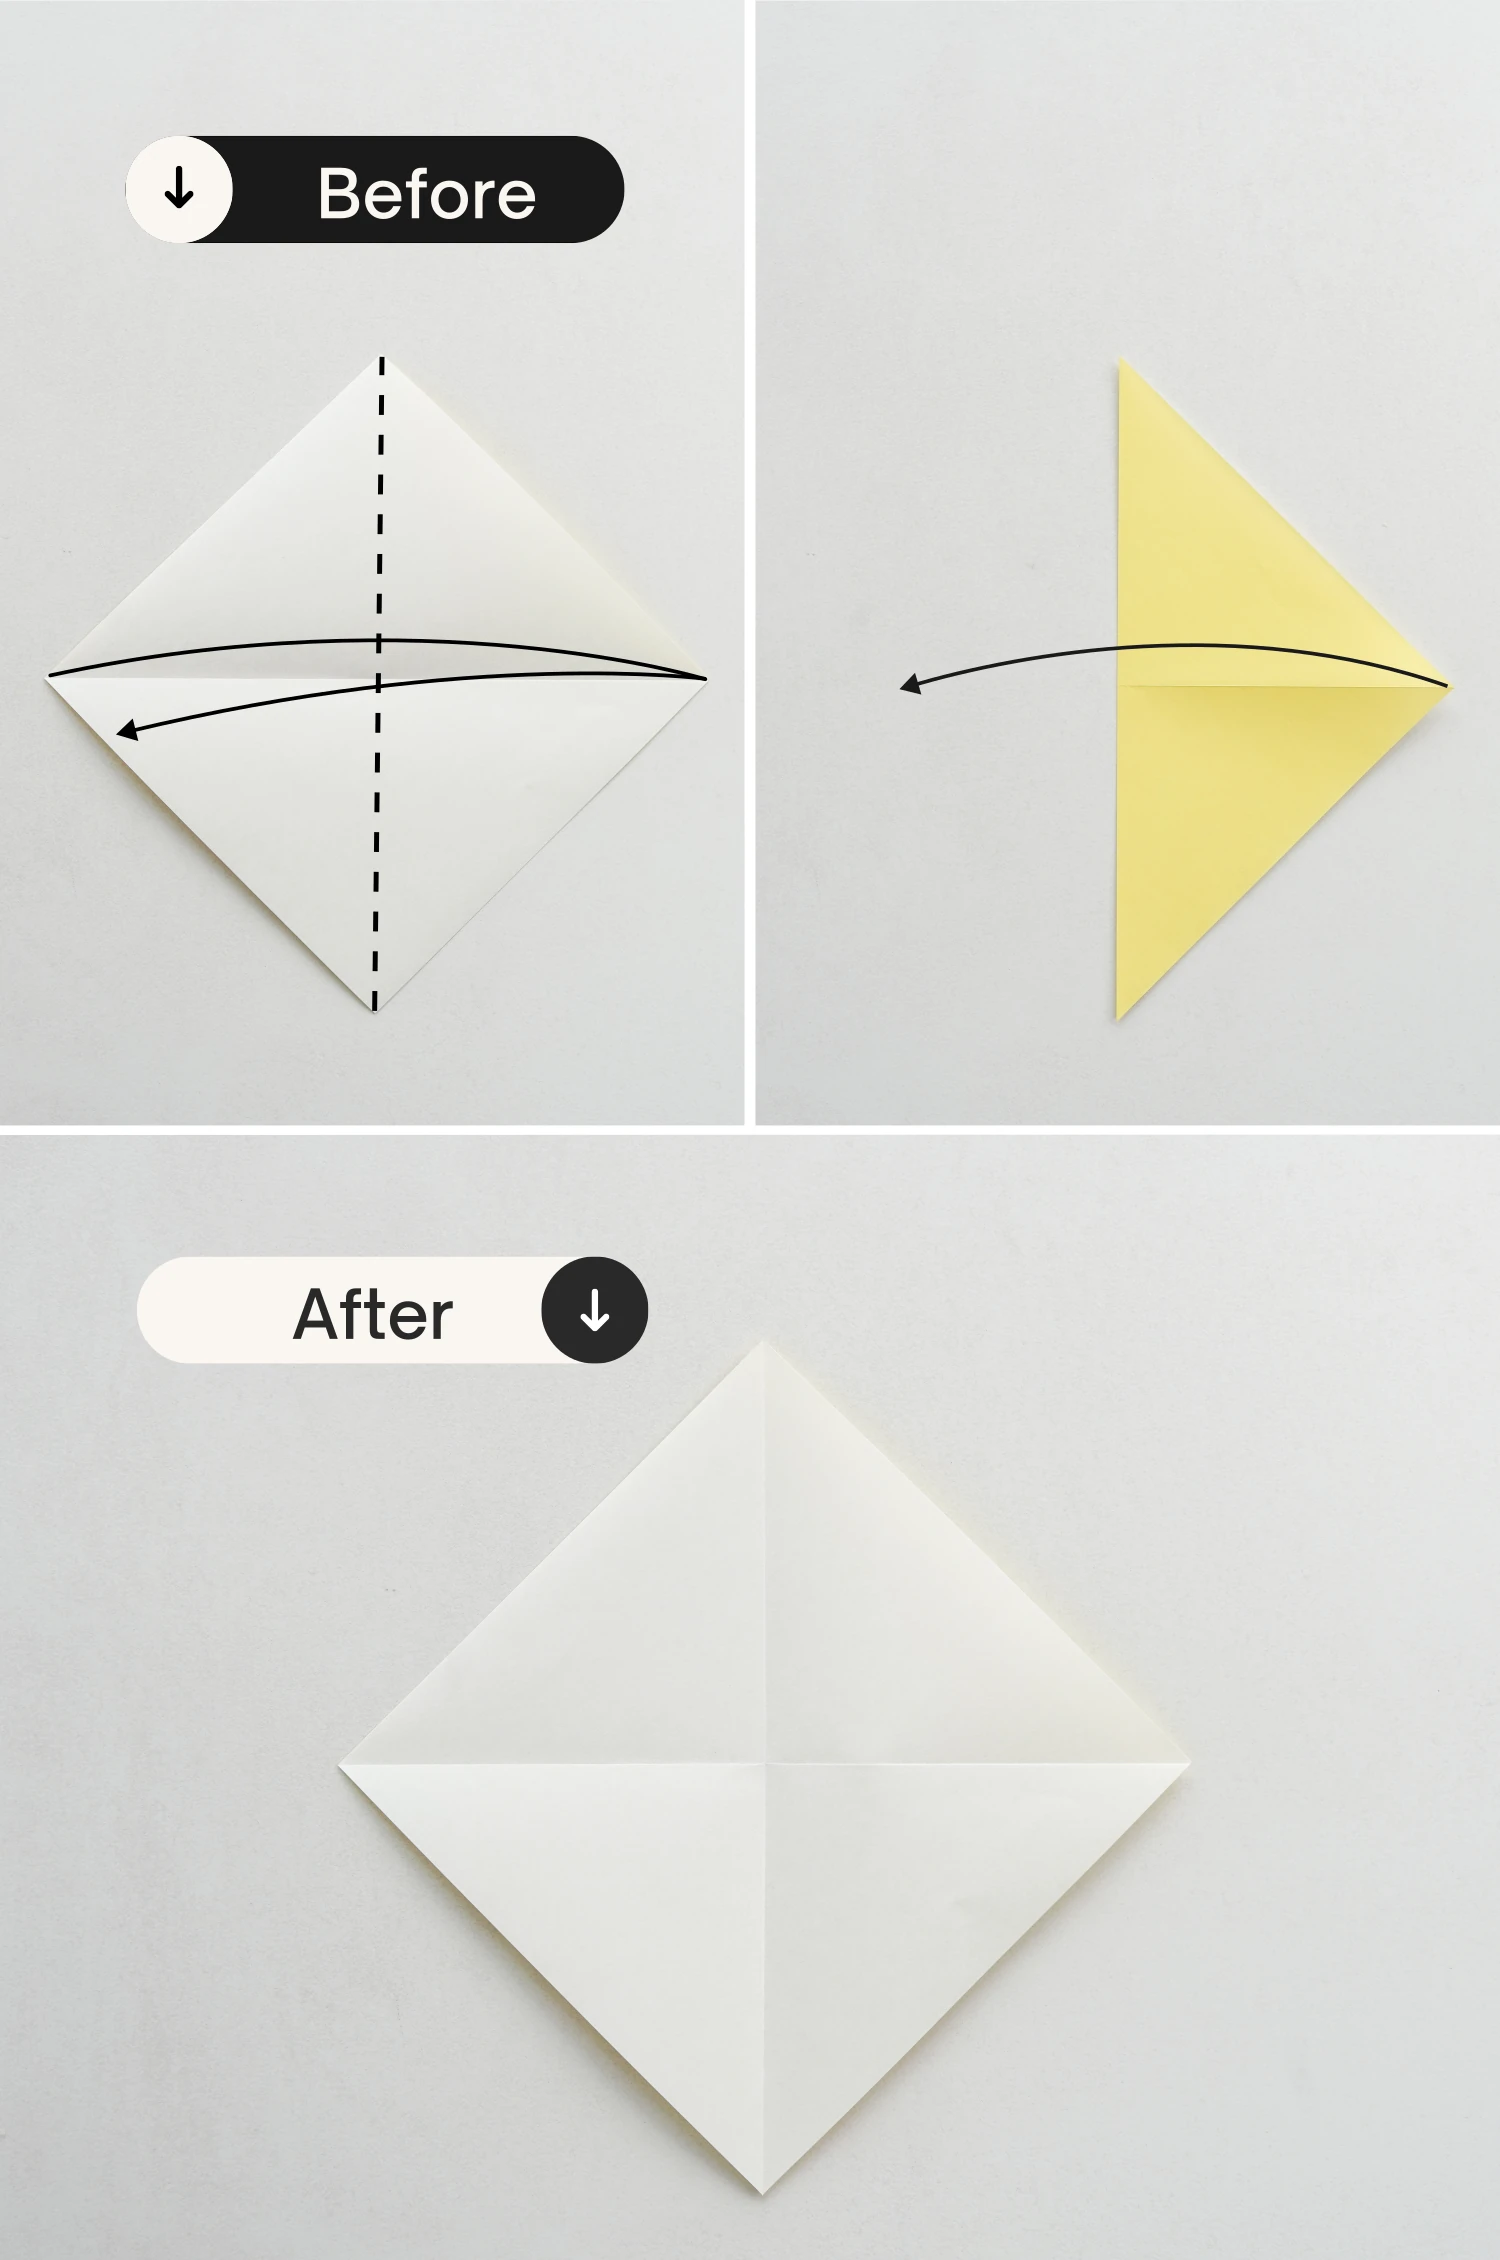
Start with the white side of the paper facing up and fold it in half diagonally, crease it well and unfold it.

Step 2
Fold it in half vertically, crease it well then unfold.
Step 3
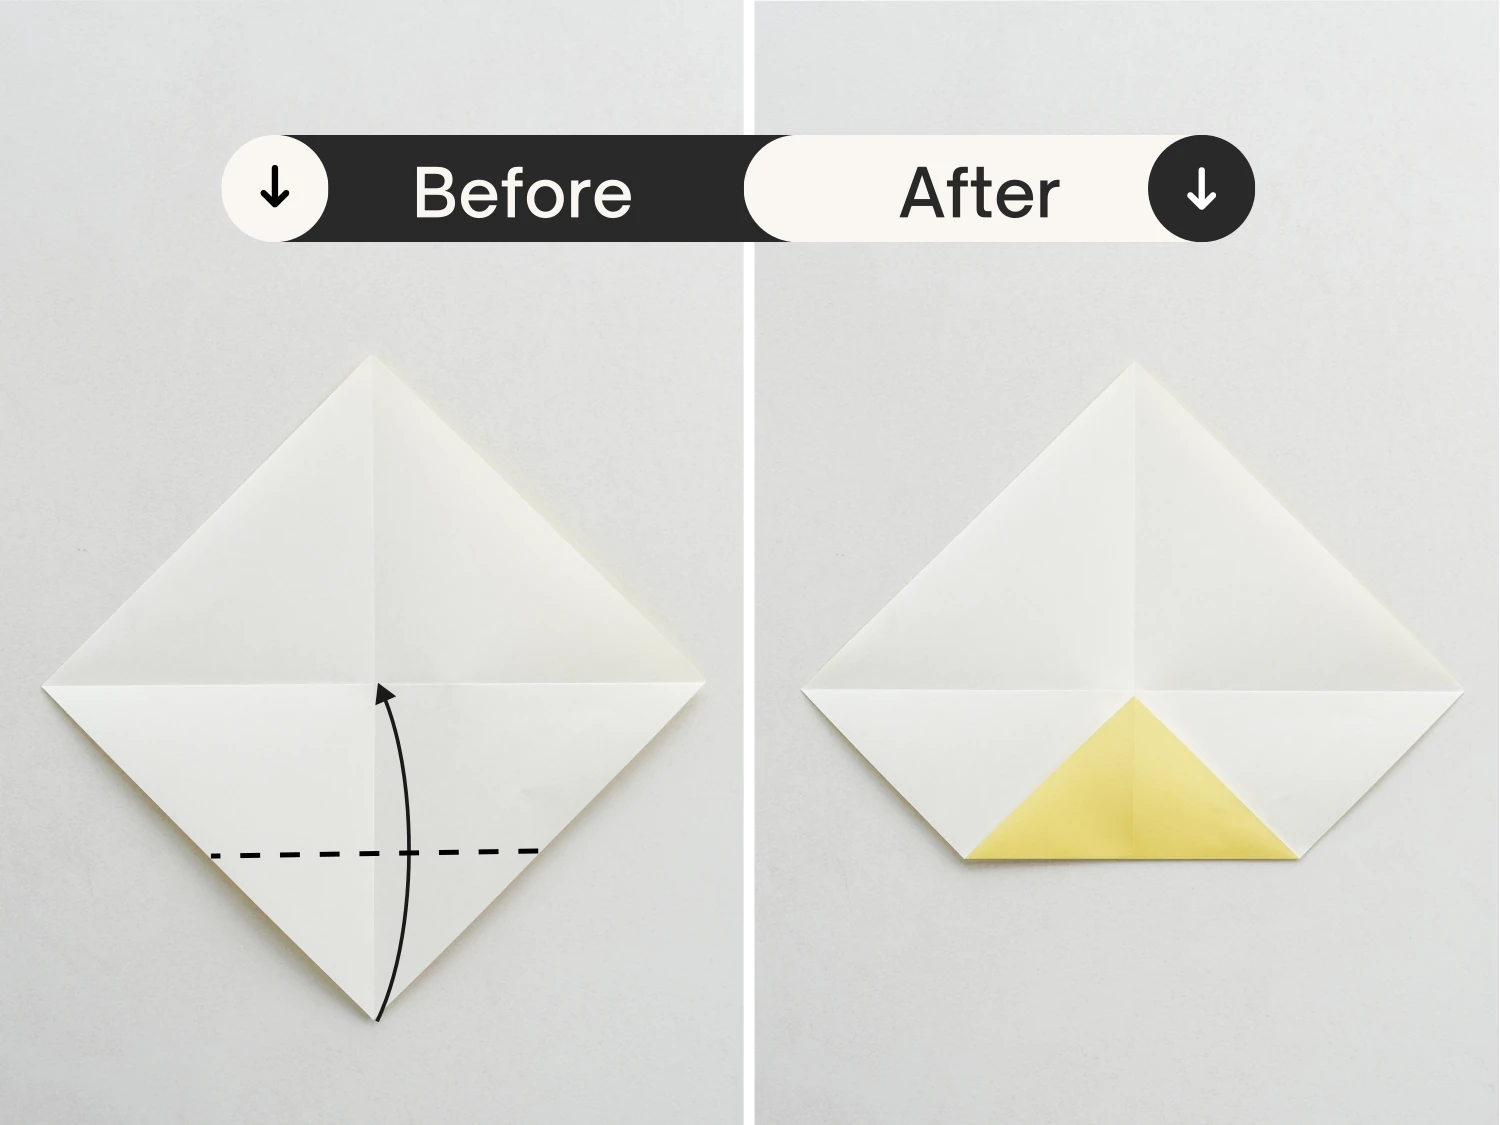
Fold the bottom point up diagonally to meet the middle intersection point.
Step 4
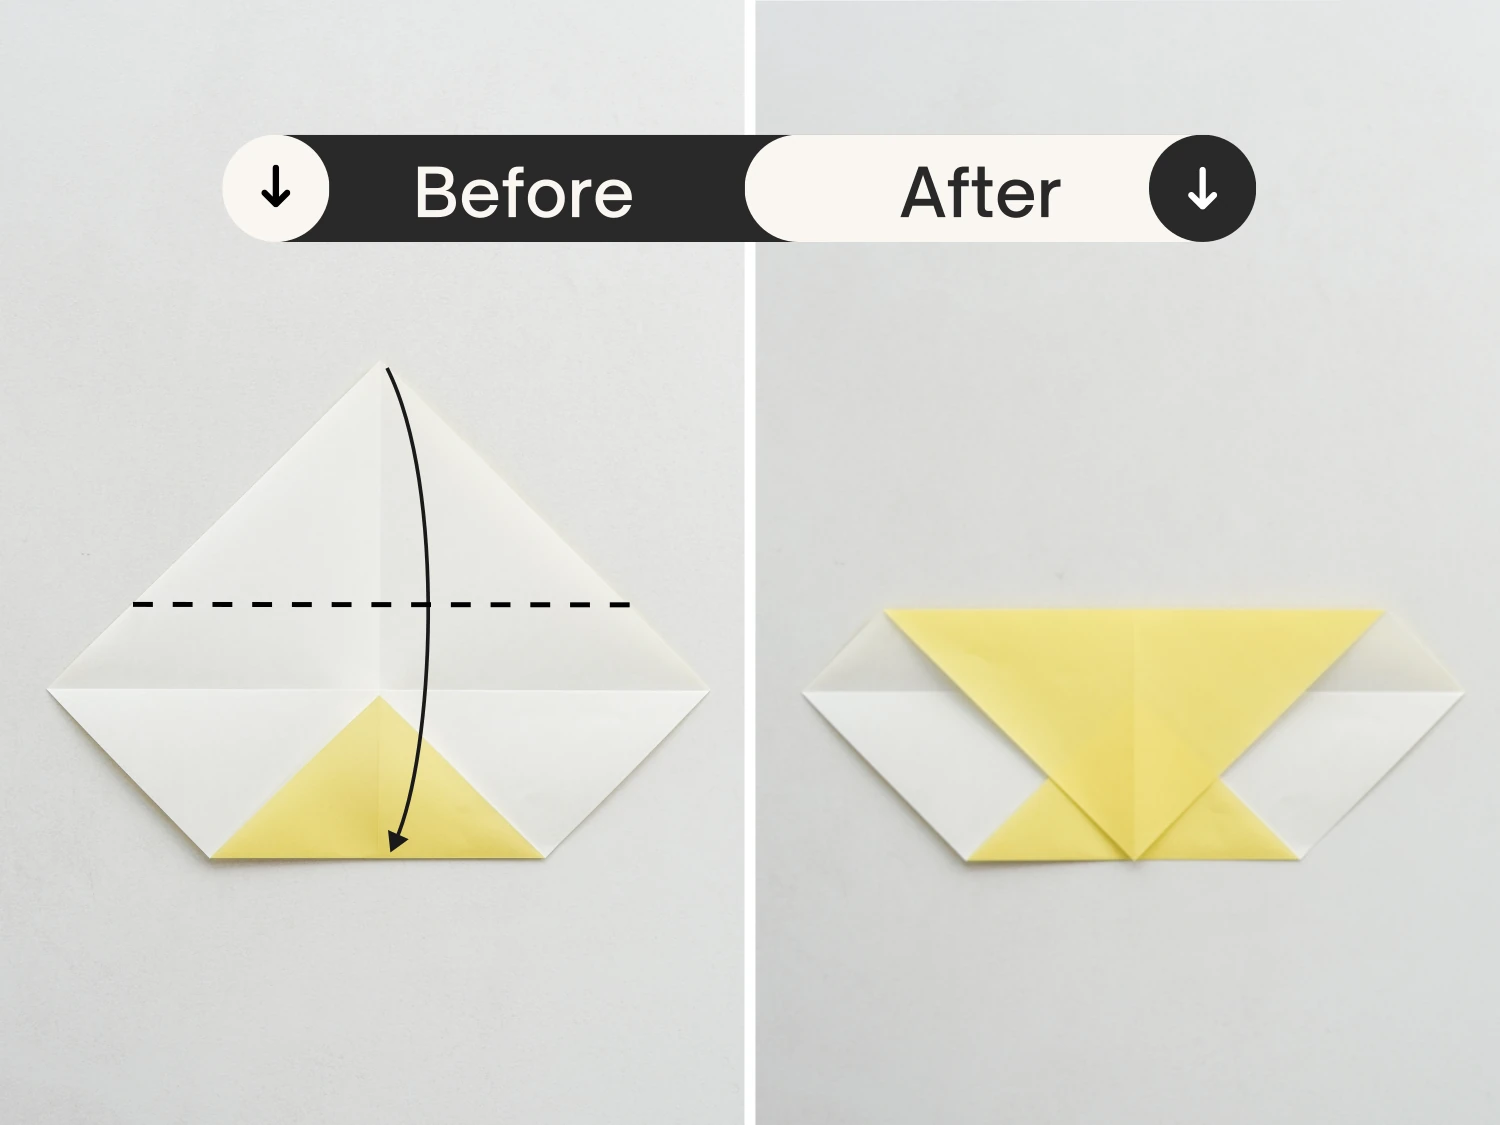
Then fold the top point to meet the midpoint of the bottom edge.
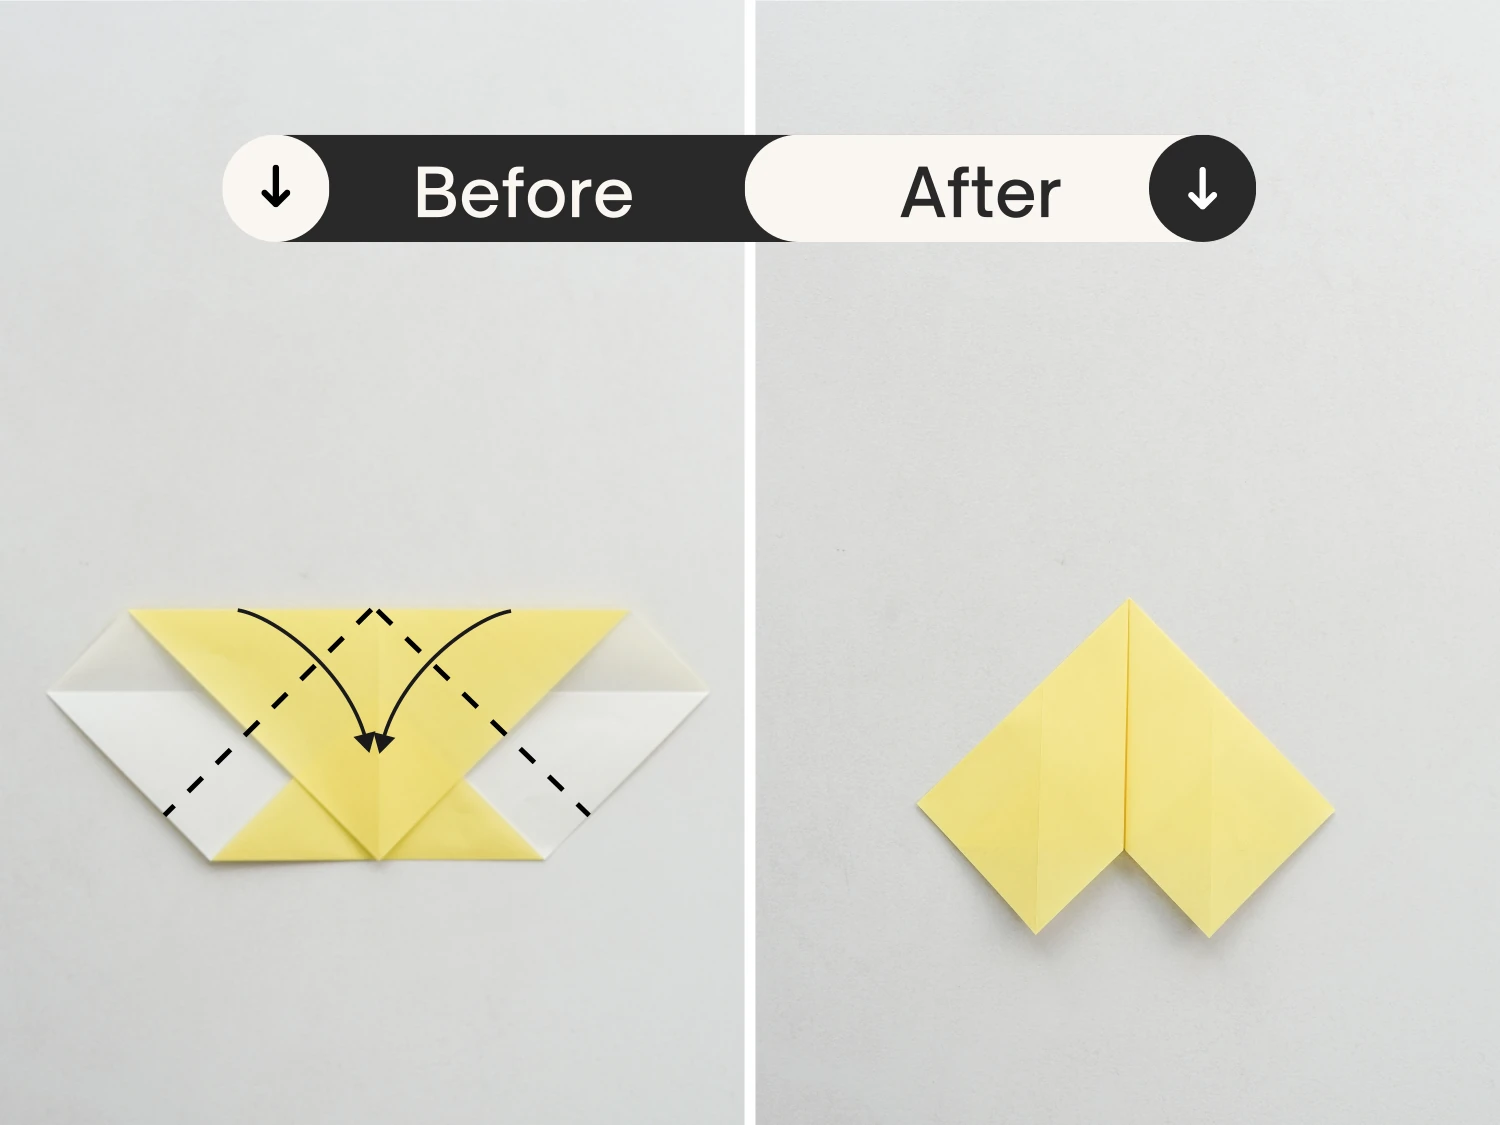
Step 5
Fold both the top left and top right edges down along the dotted lines, to meet the middle crease.
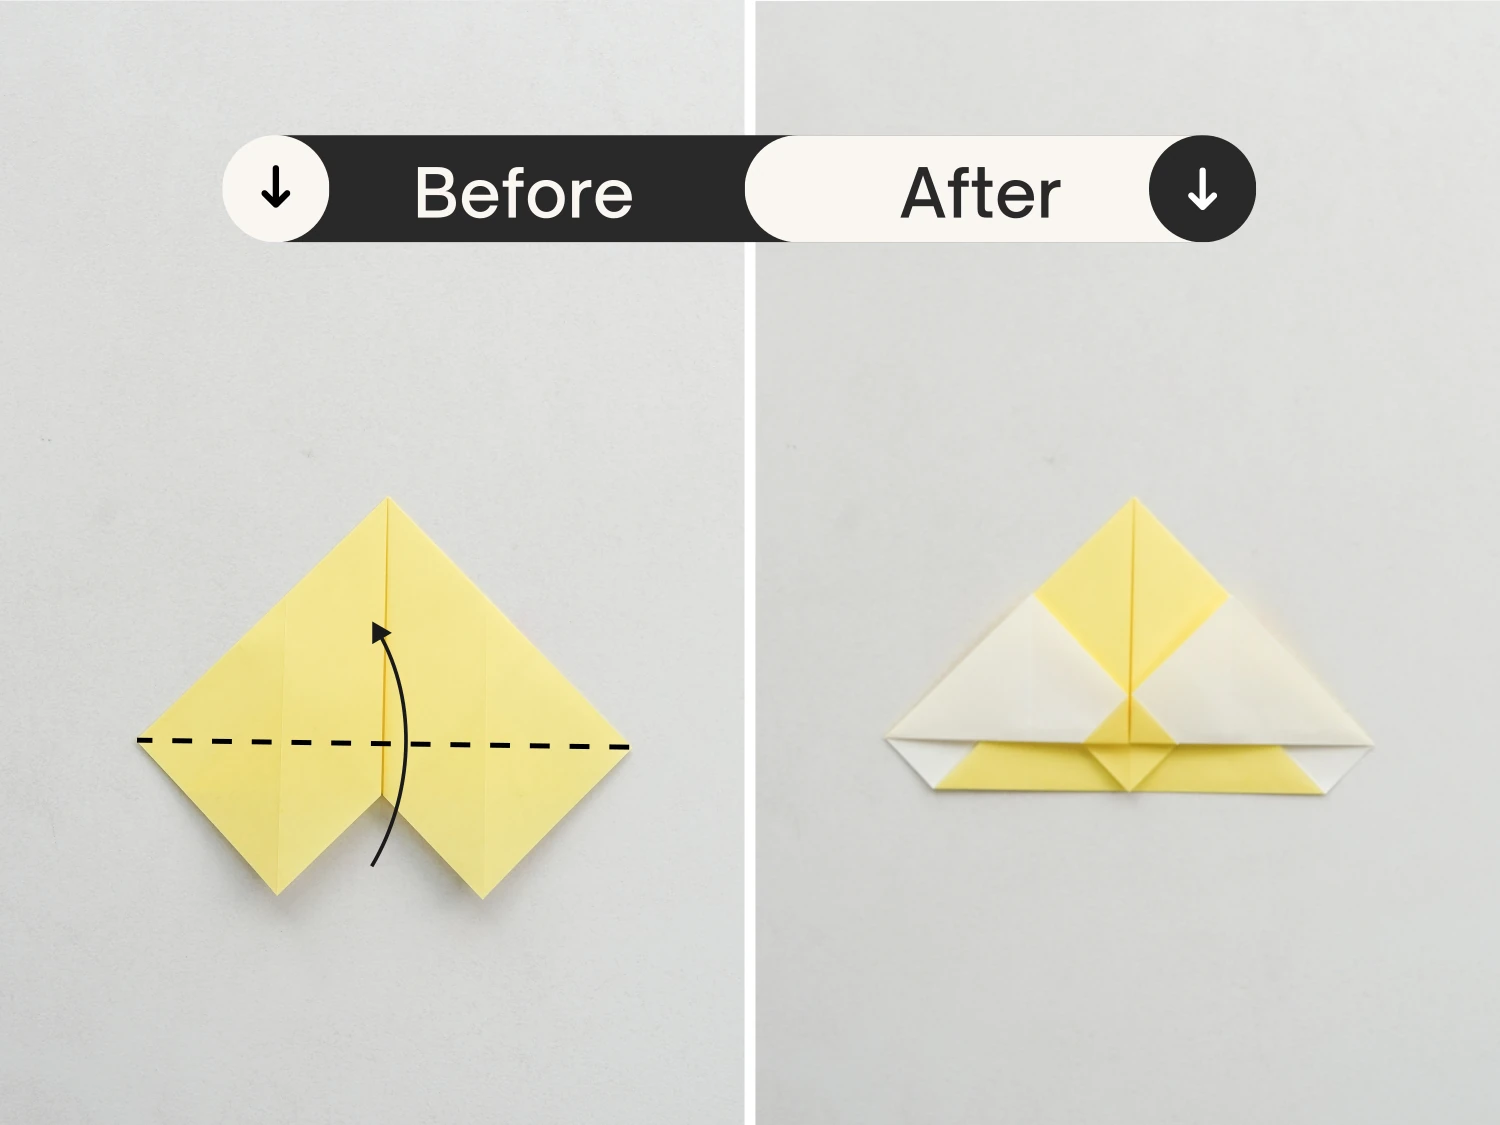
Step 6
Fold both the bottom left and right corners up along the dotted line, to align the left and right edges of the triangle.
Step 7
Flip it over.

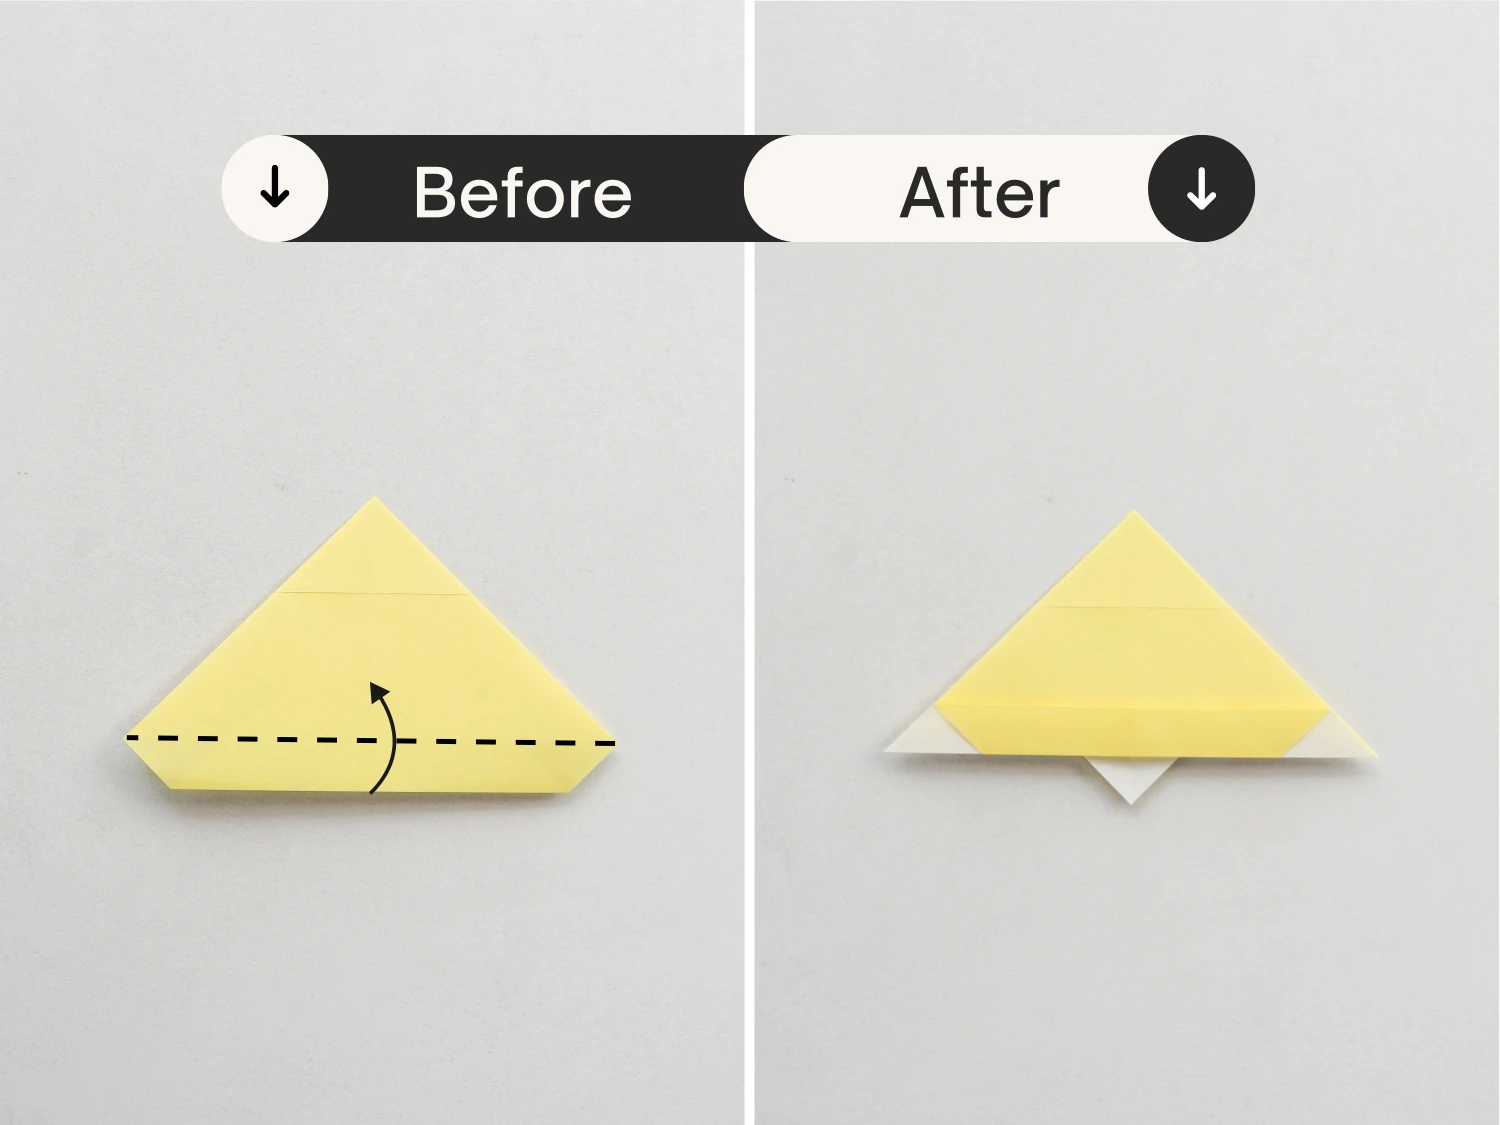
Step 8
Fold the bottom edge up slightly along the dotted line to reveal a small triangle at the bottom.
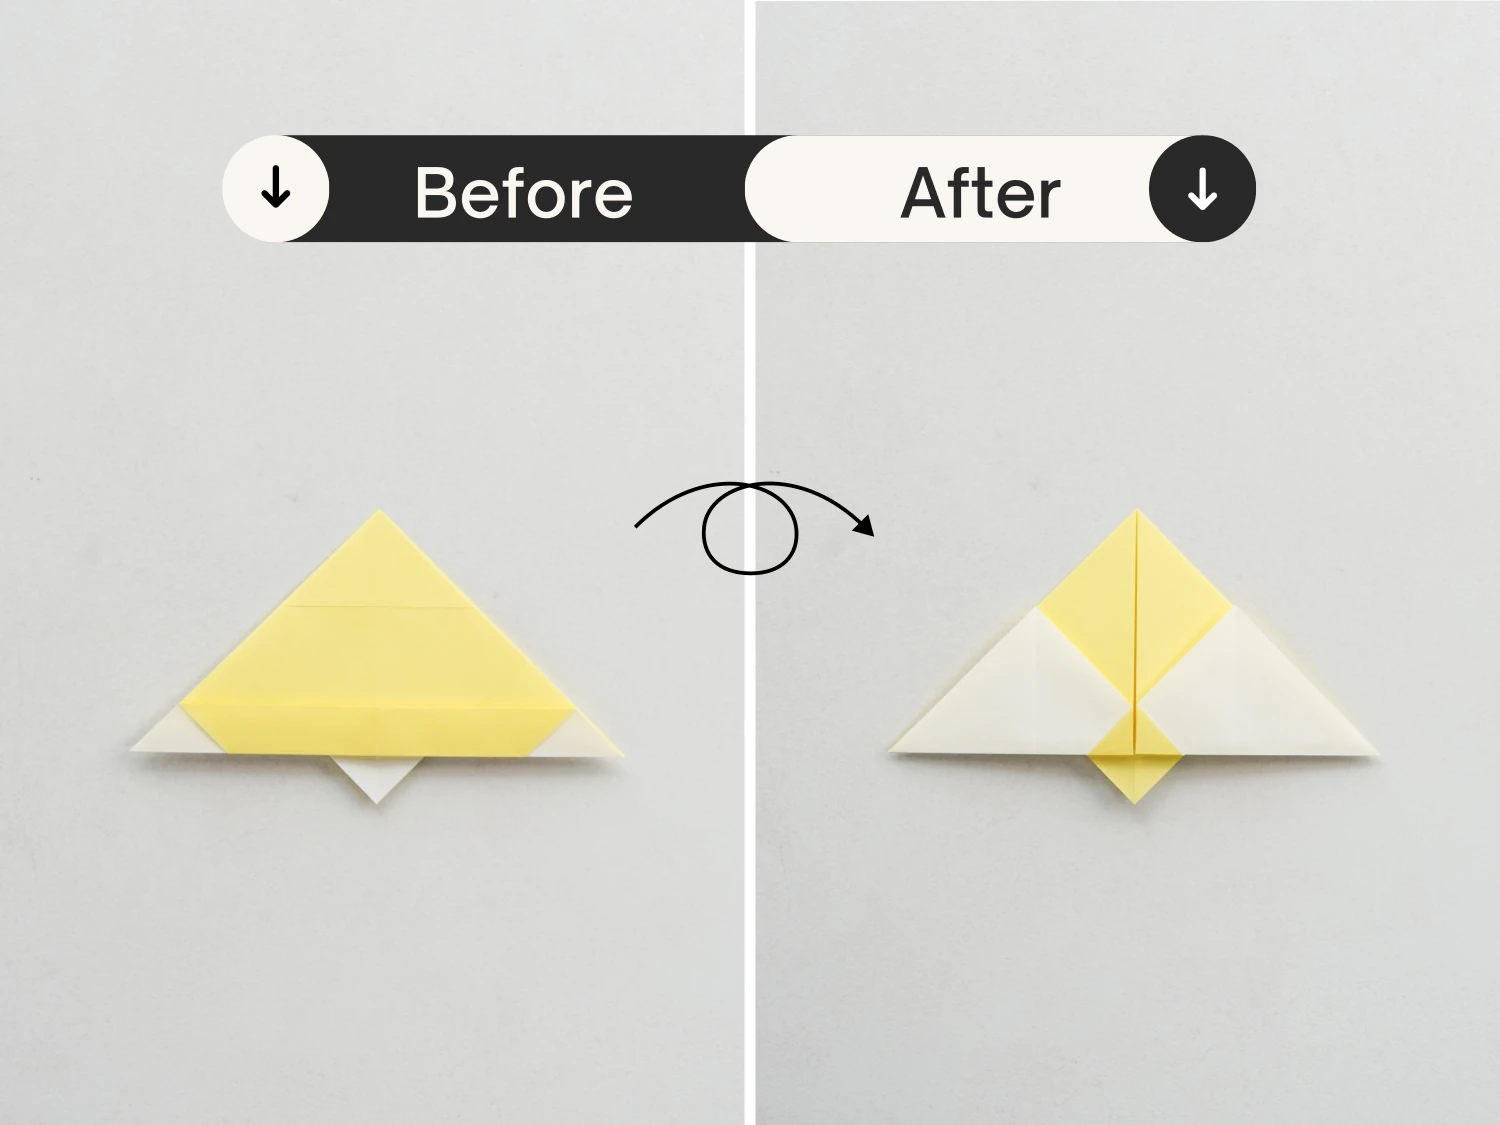
Step 9
Flip it over again.
Step 10
Fold the right corner to the left along the dotted line.
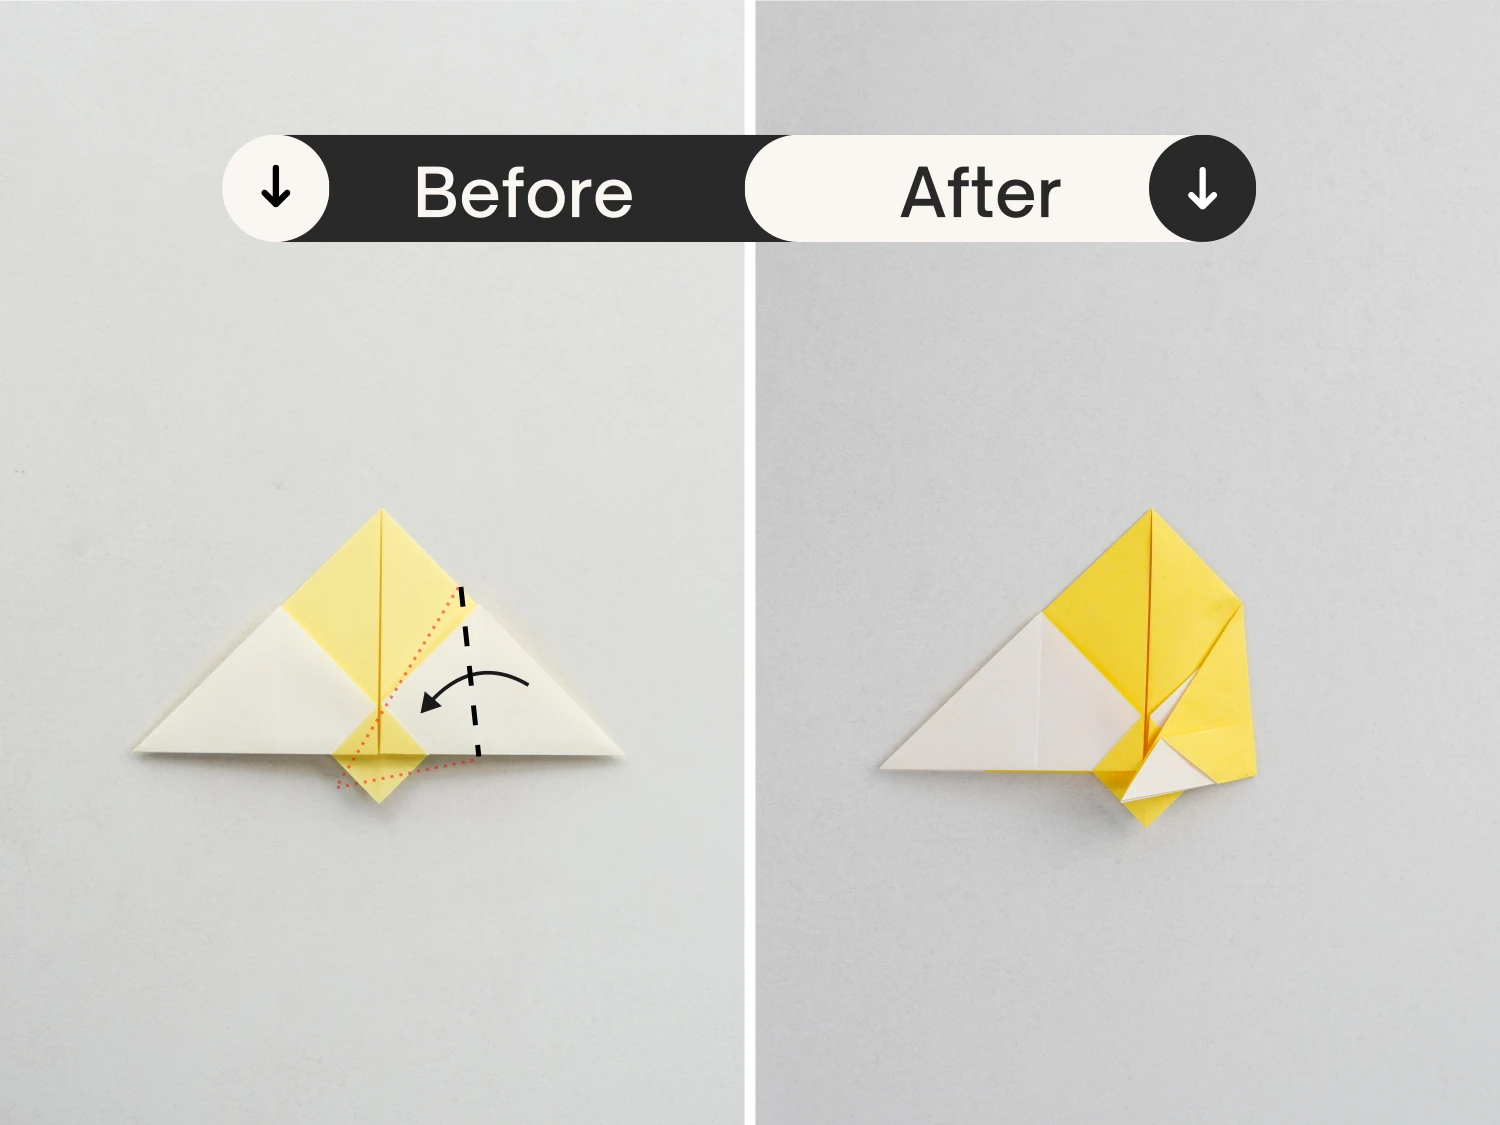
Step 11
Repeat this for the left side.
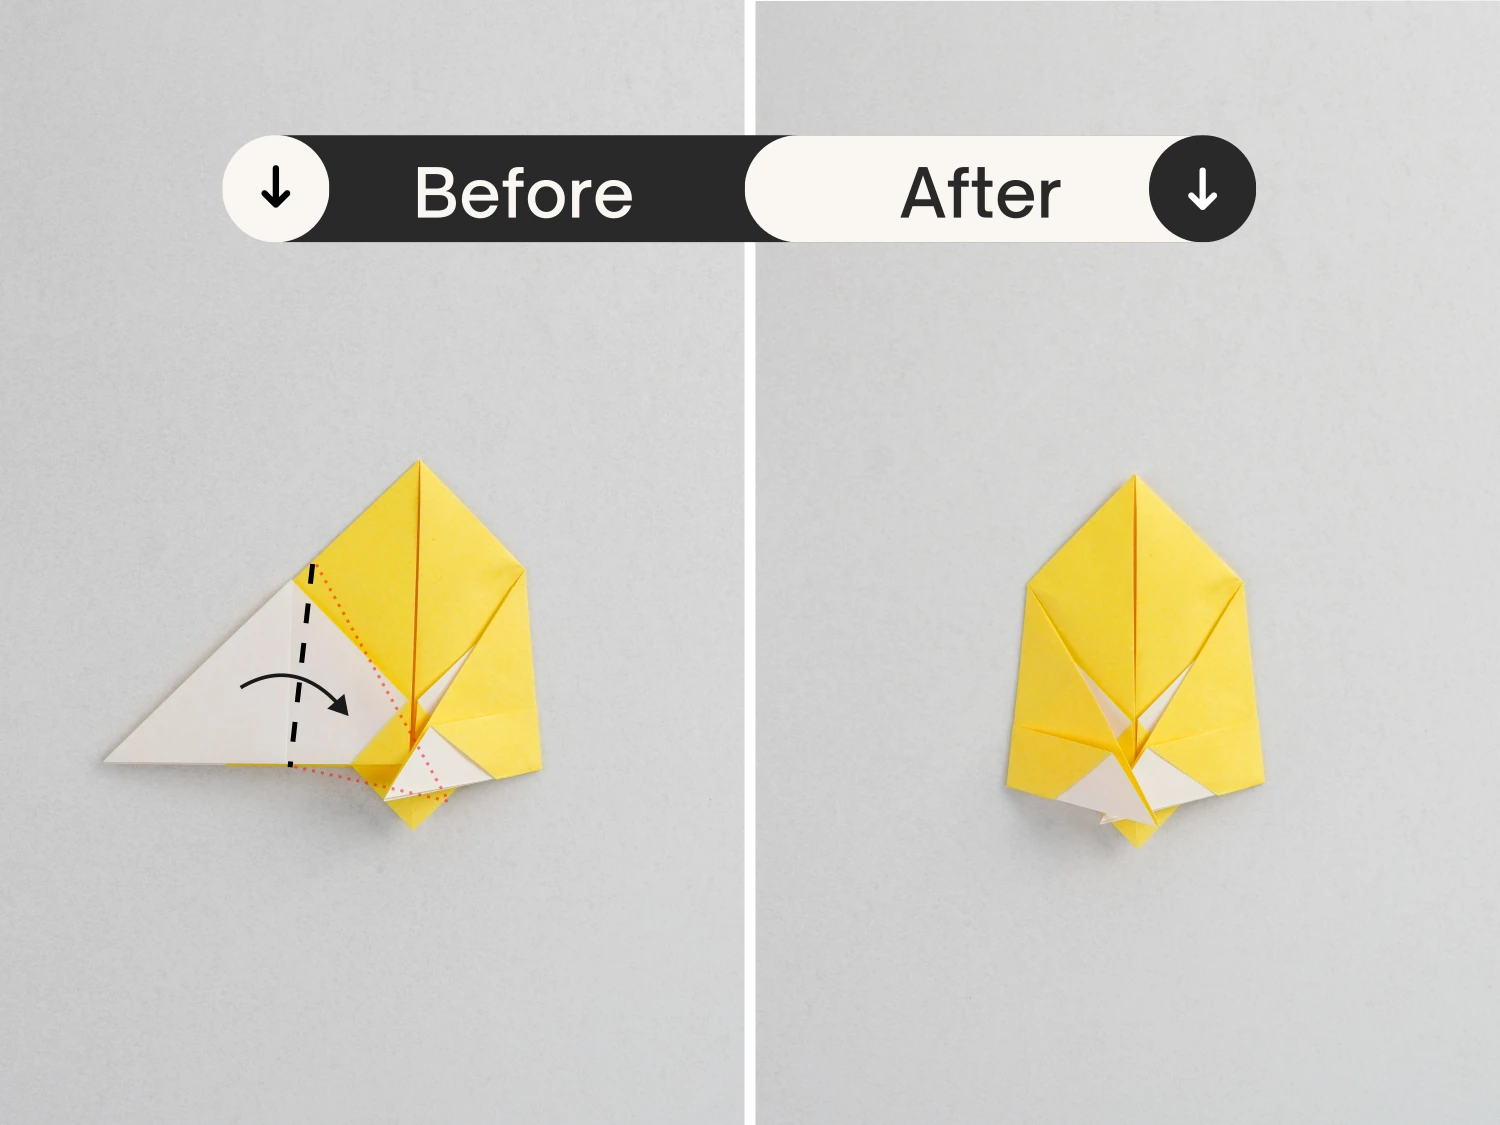
Step 12
Open the left corner in the manner shown in the first picture, then flatten it again at a slight upward angle along the dotted line, so that the bottom edge of the flattened part is aligned with the bottom edge of the below part.
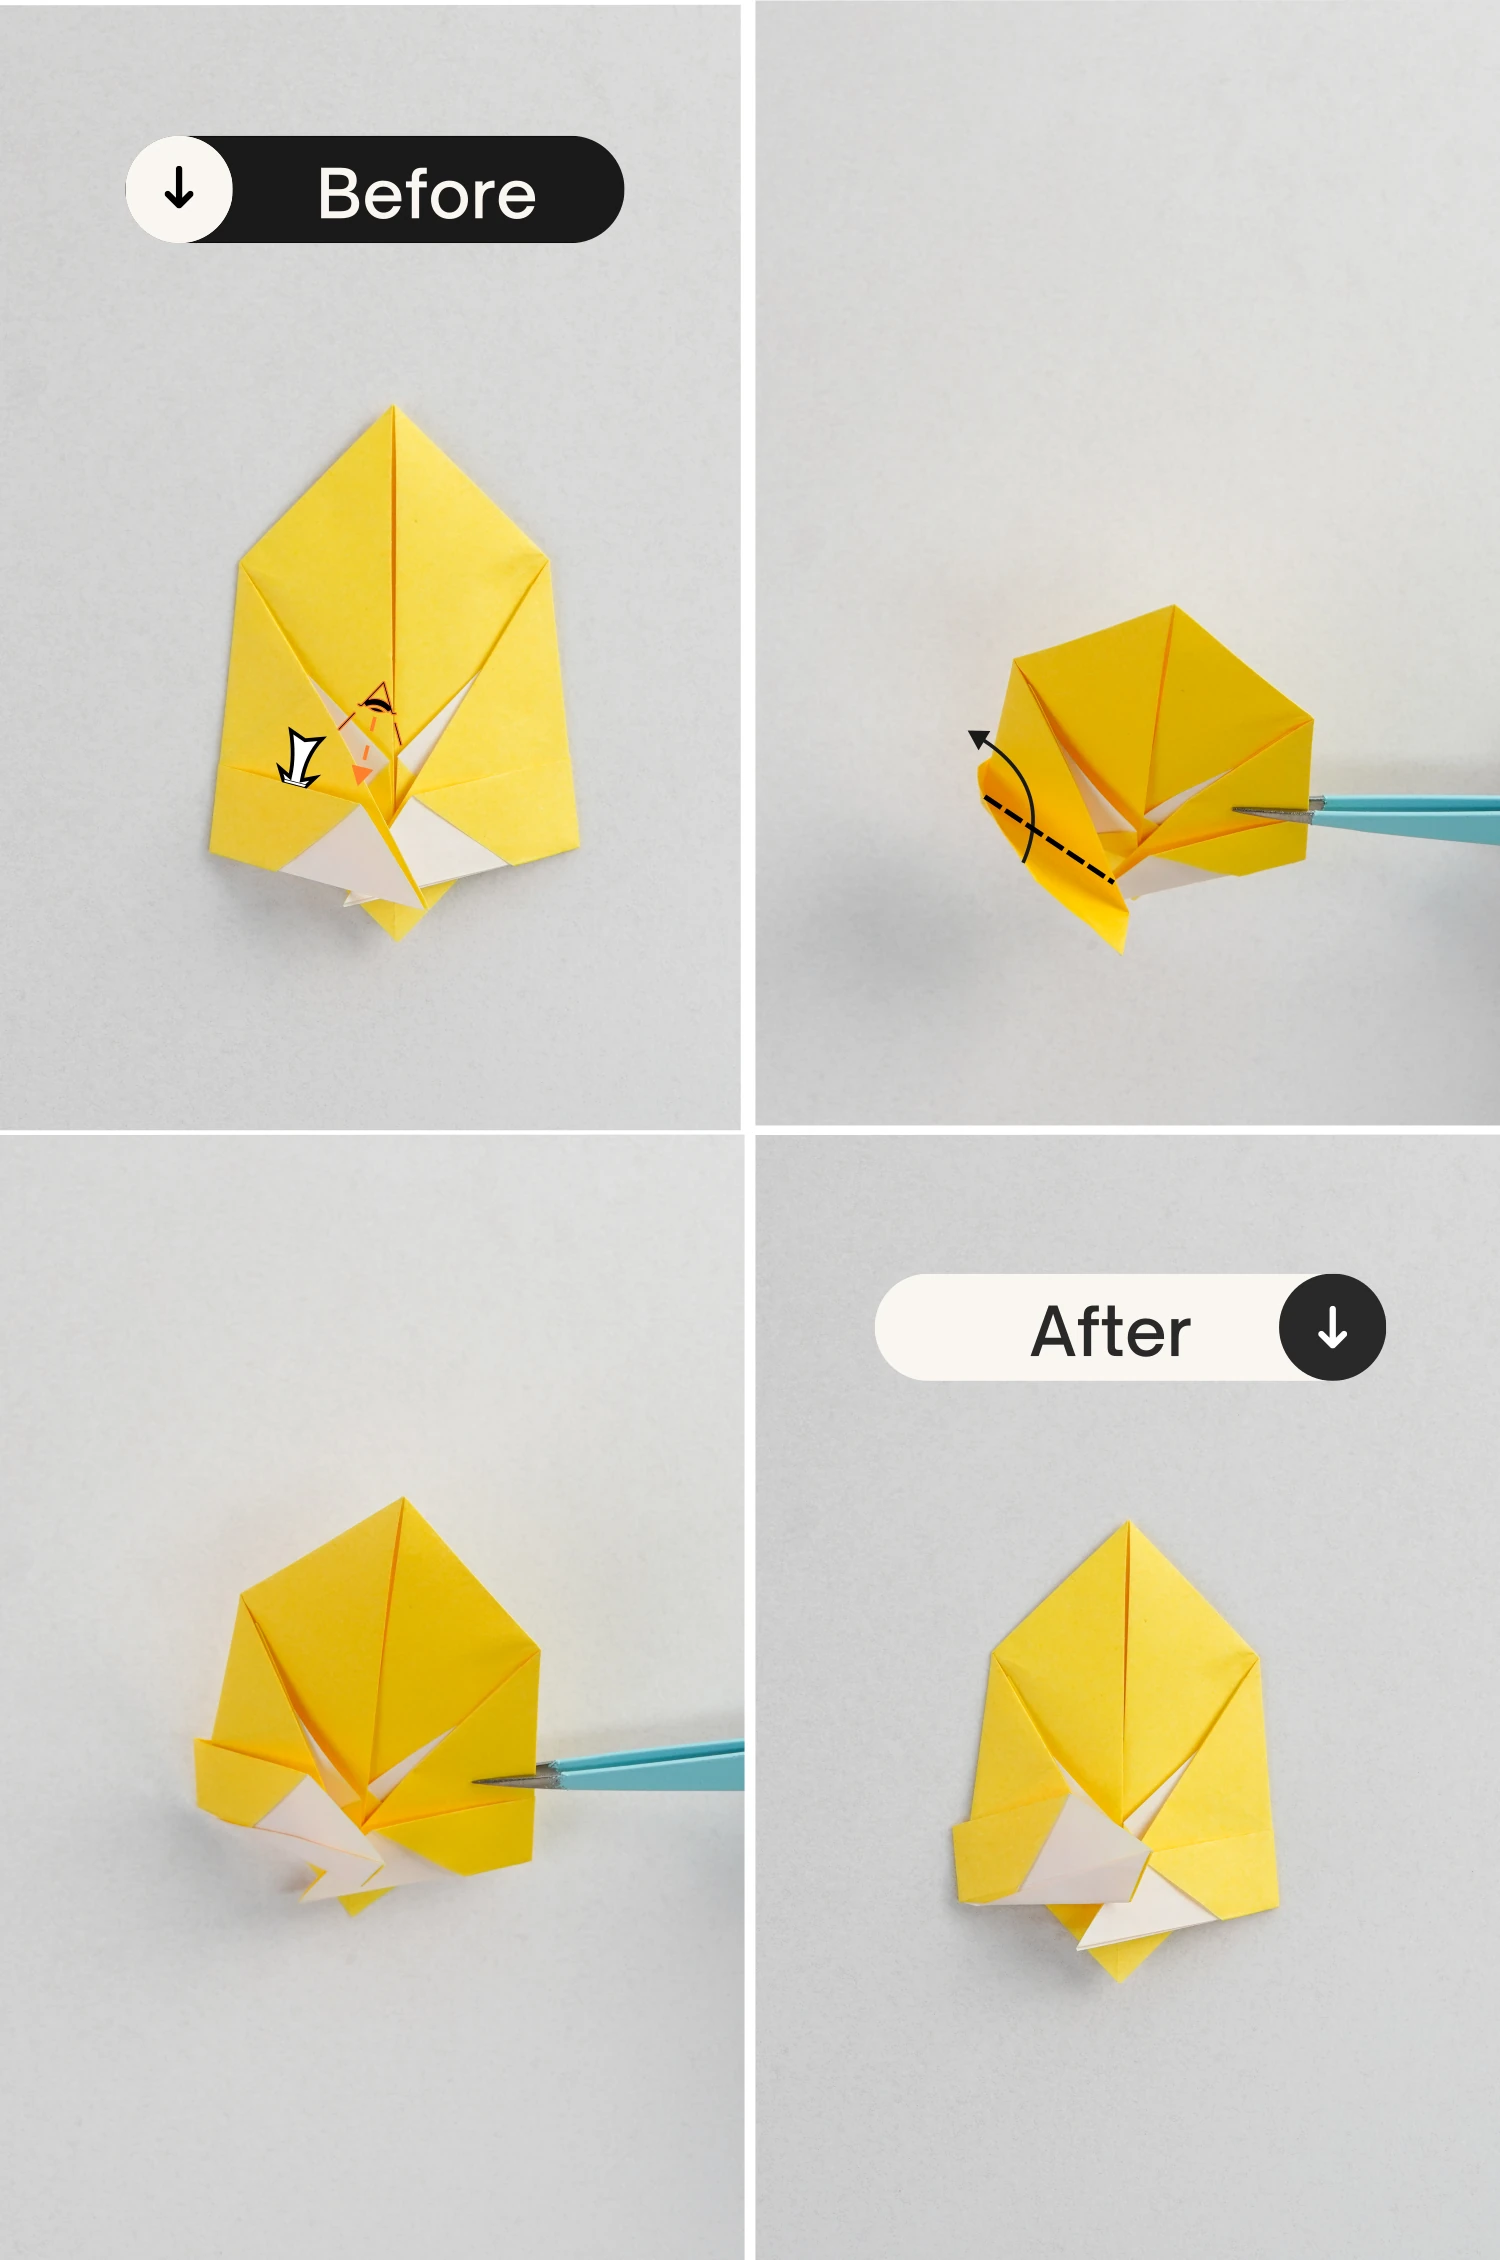
Step 13
Lift the right flap and place the left flap underneath it.
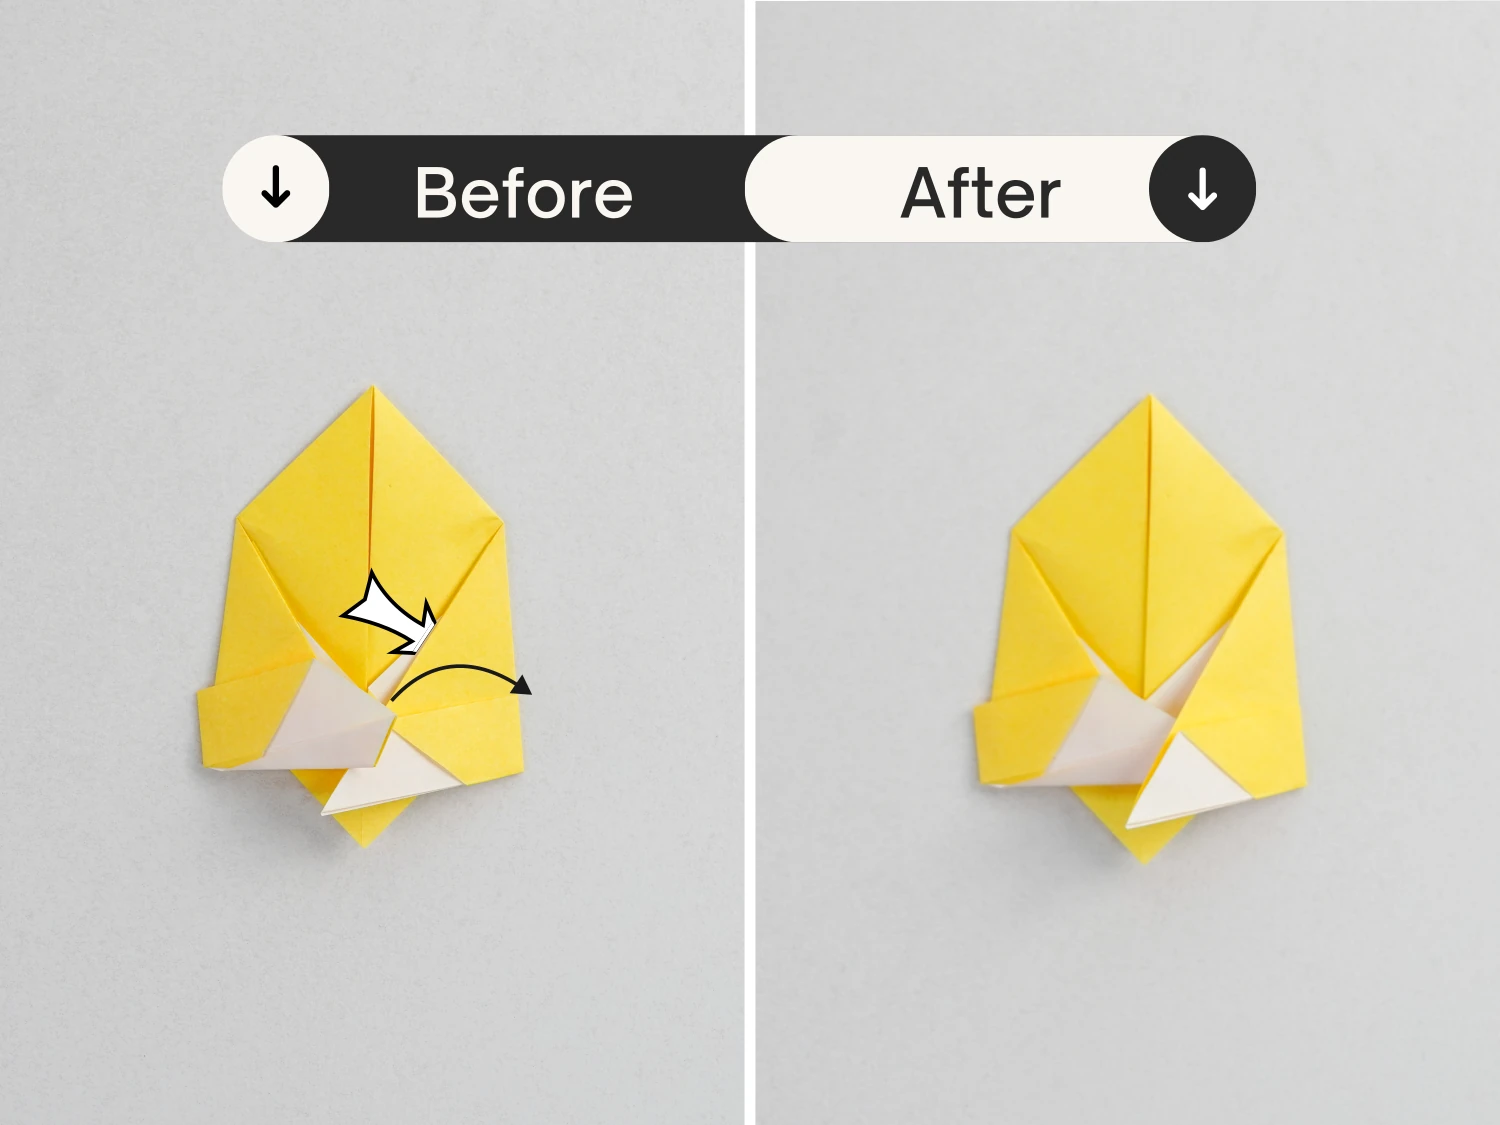
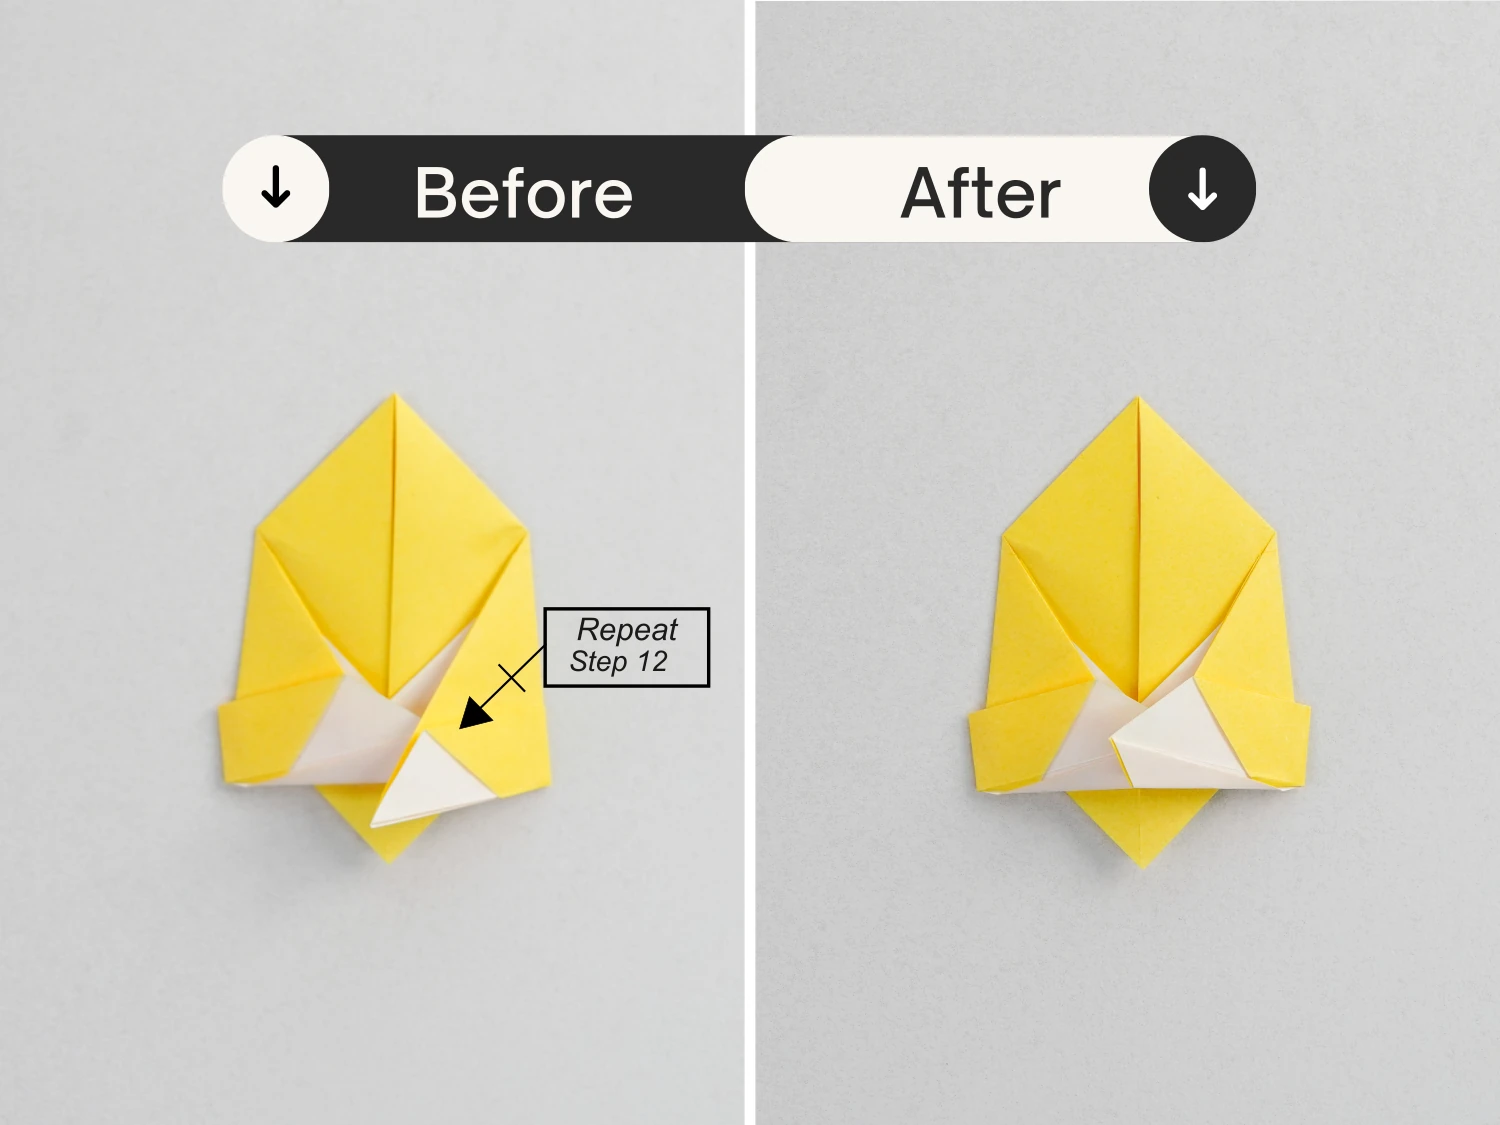
Step 14
Now repeat the step 12 for the right flap.
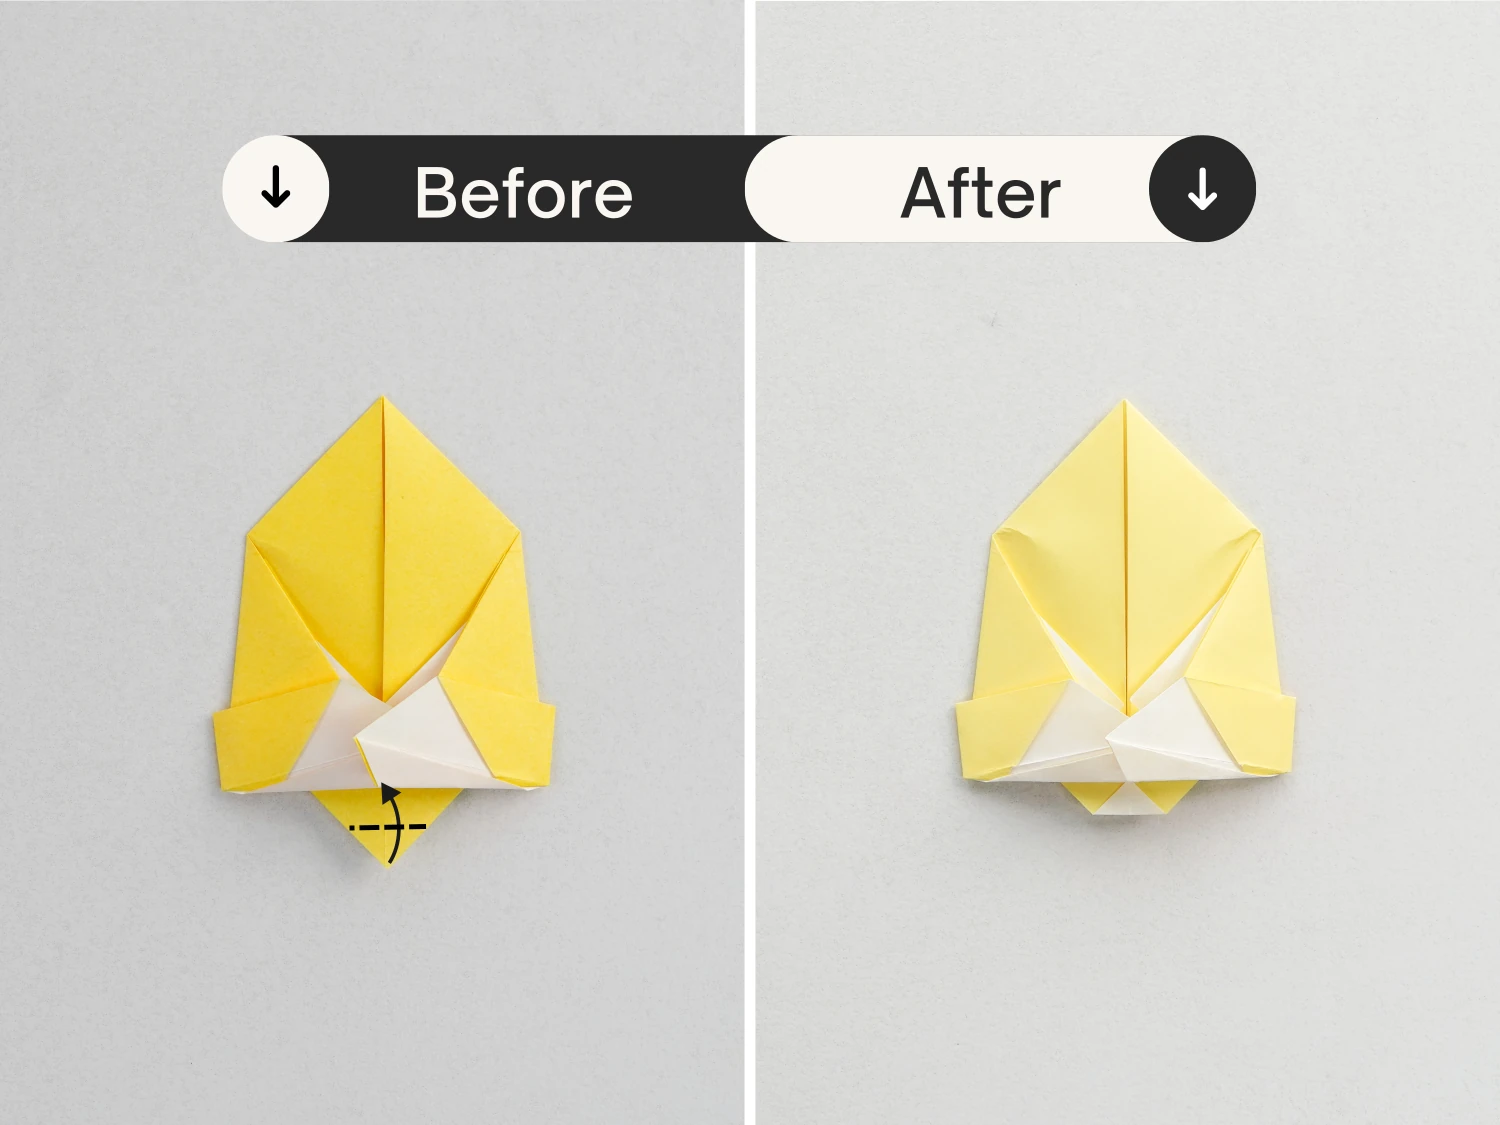
Step 15
Fold the bottom point up a little.
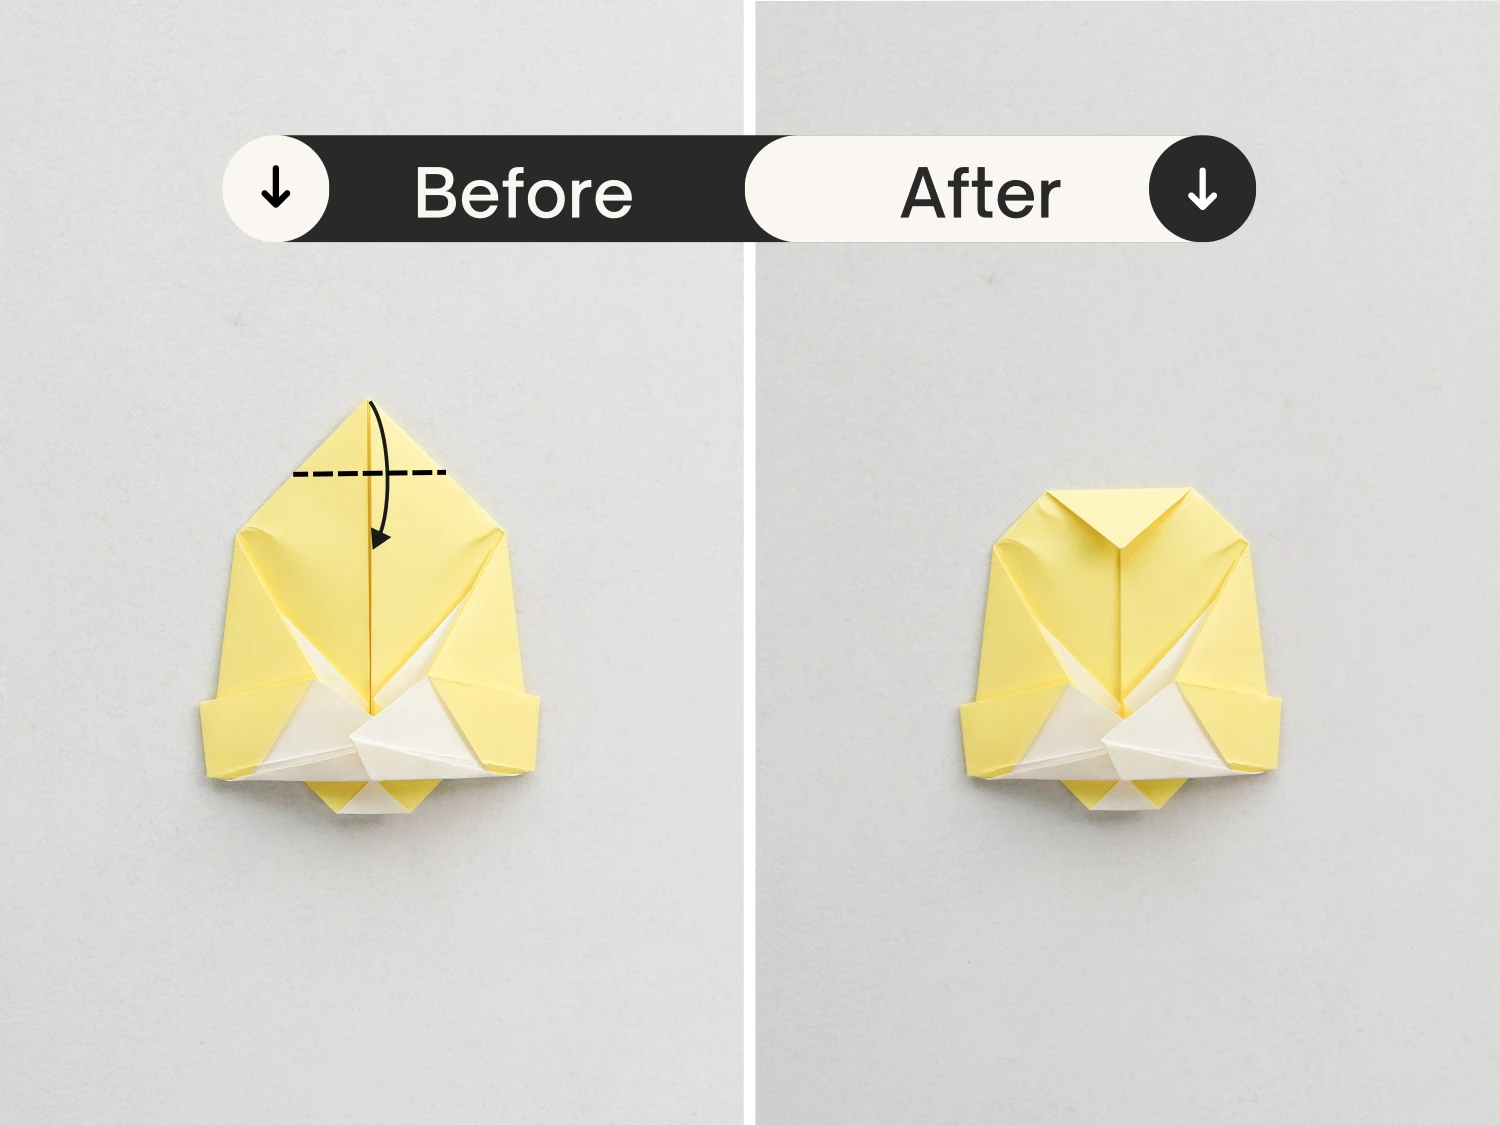
Step 16
Fold the top corner down a little as well.
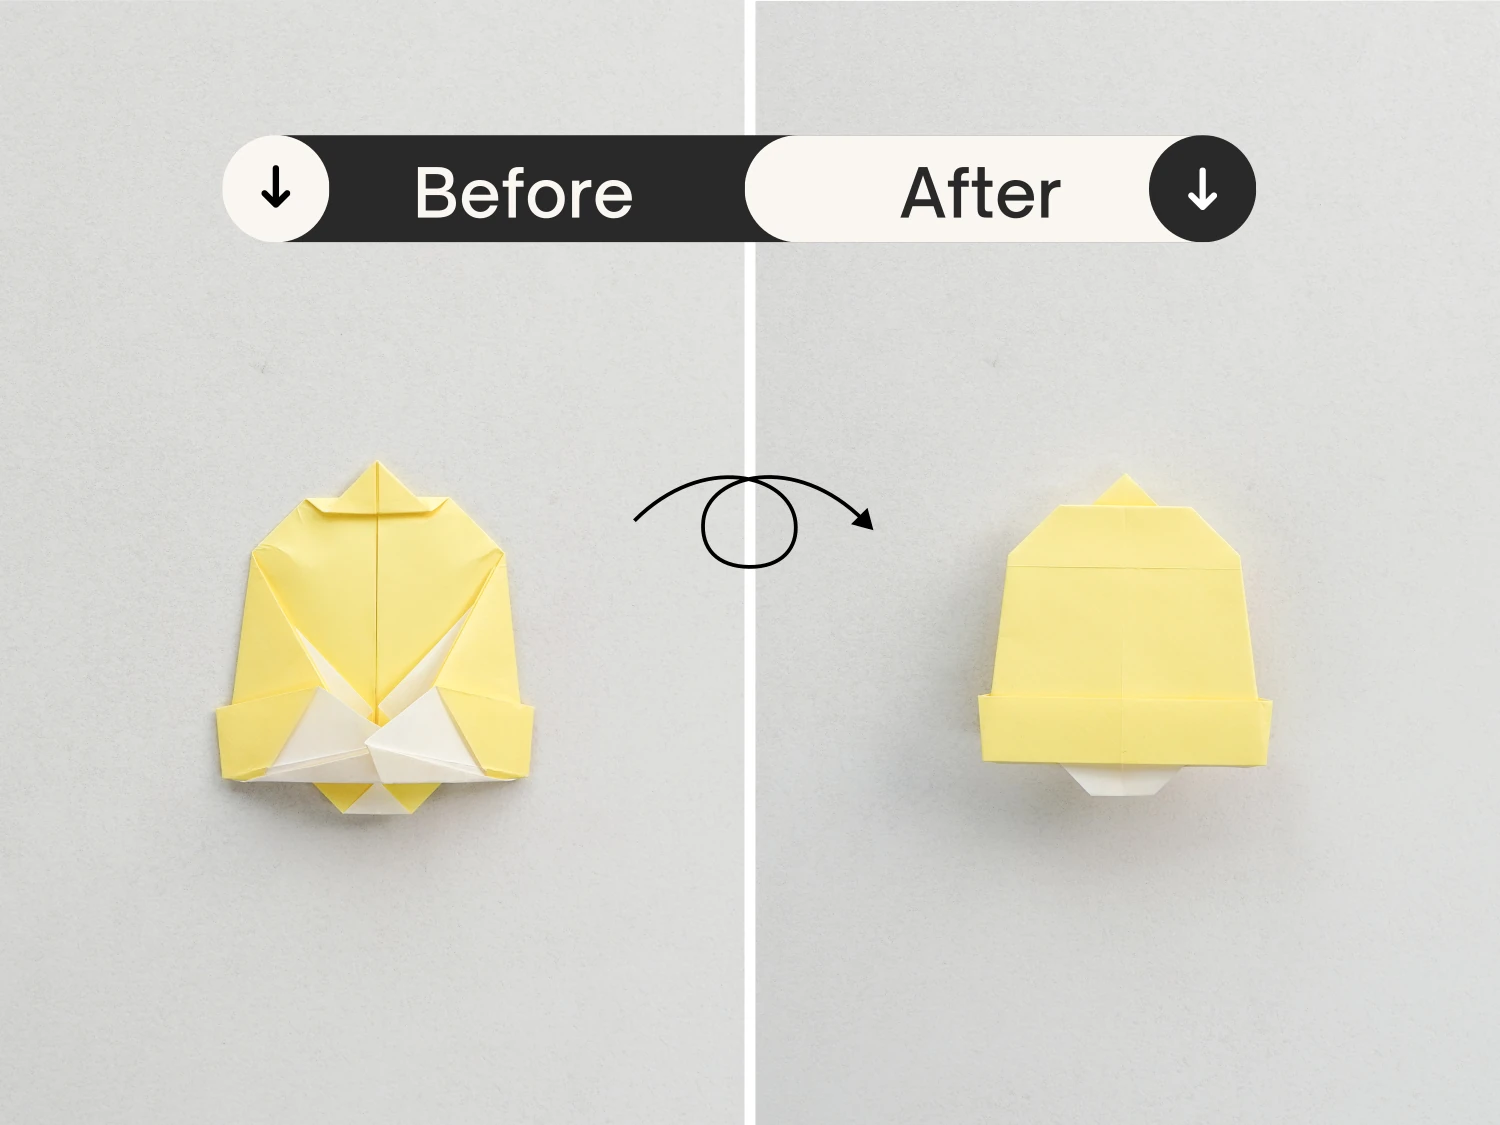
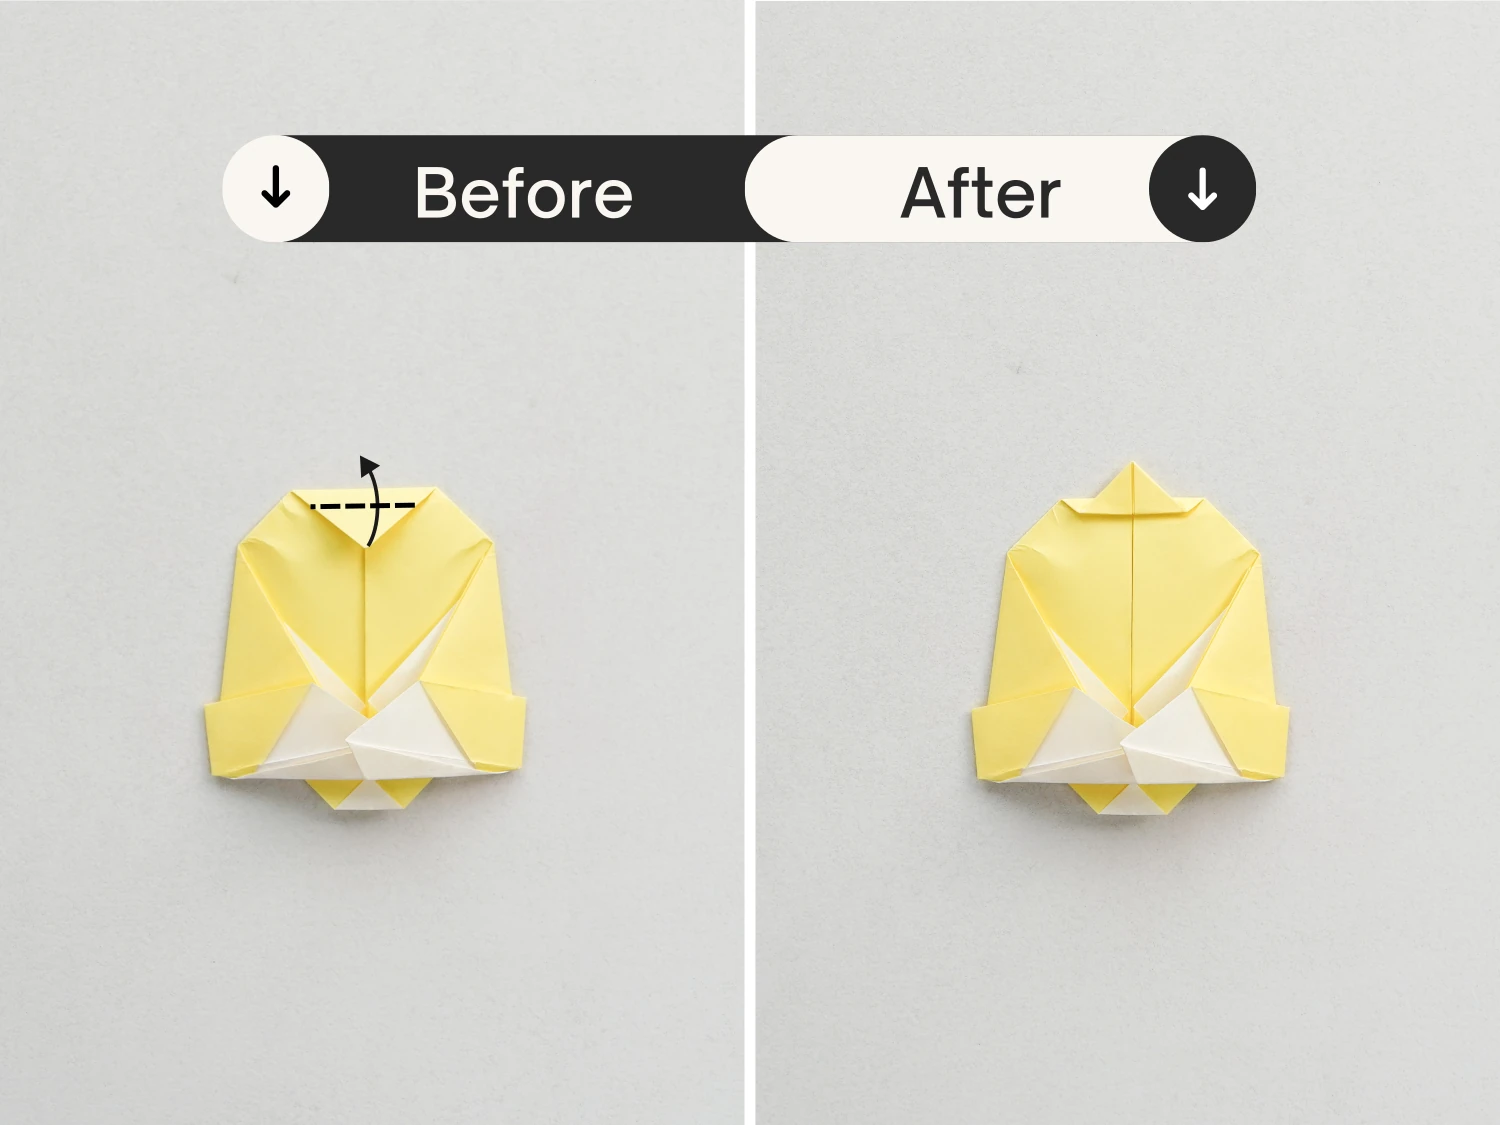
Step 17
Then fold it back to the top along the dotted line.
Step 18
Flip the paper over, this is the final shape of the lovely bell.