How to Make an Origami 3D Star
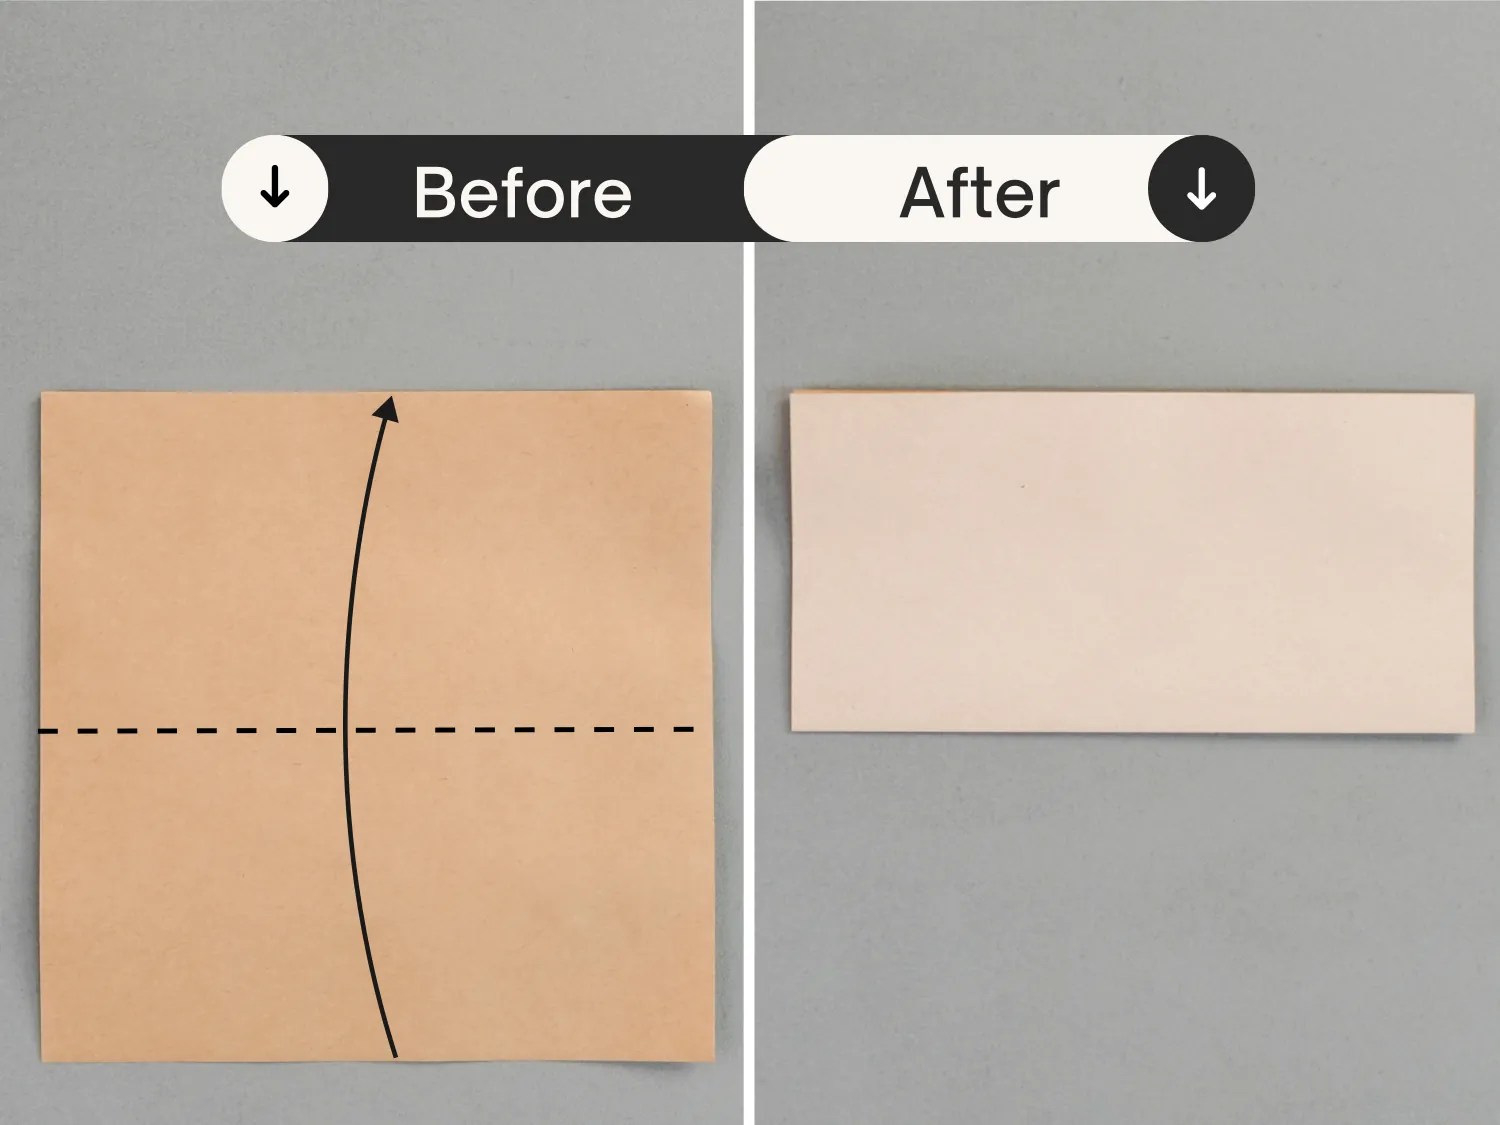
Step 1
Place the paper with the desired display color side down to begin folding, and fold it in half horizontally from the bottom to the top.
Step 2
Fold the right edge to align with the top edge, and press only a short section in the middle, then unfold it.
Step 3
Similarly, fold the right edge to align with the bottom edge, and press only a short section in the middle, then unfold it.

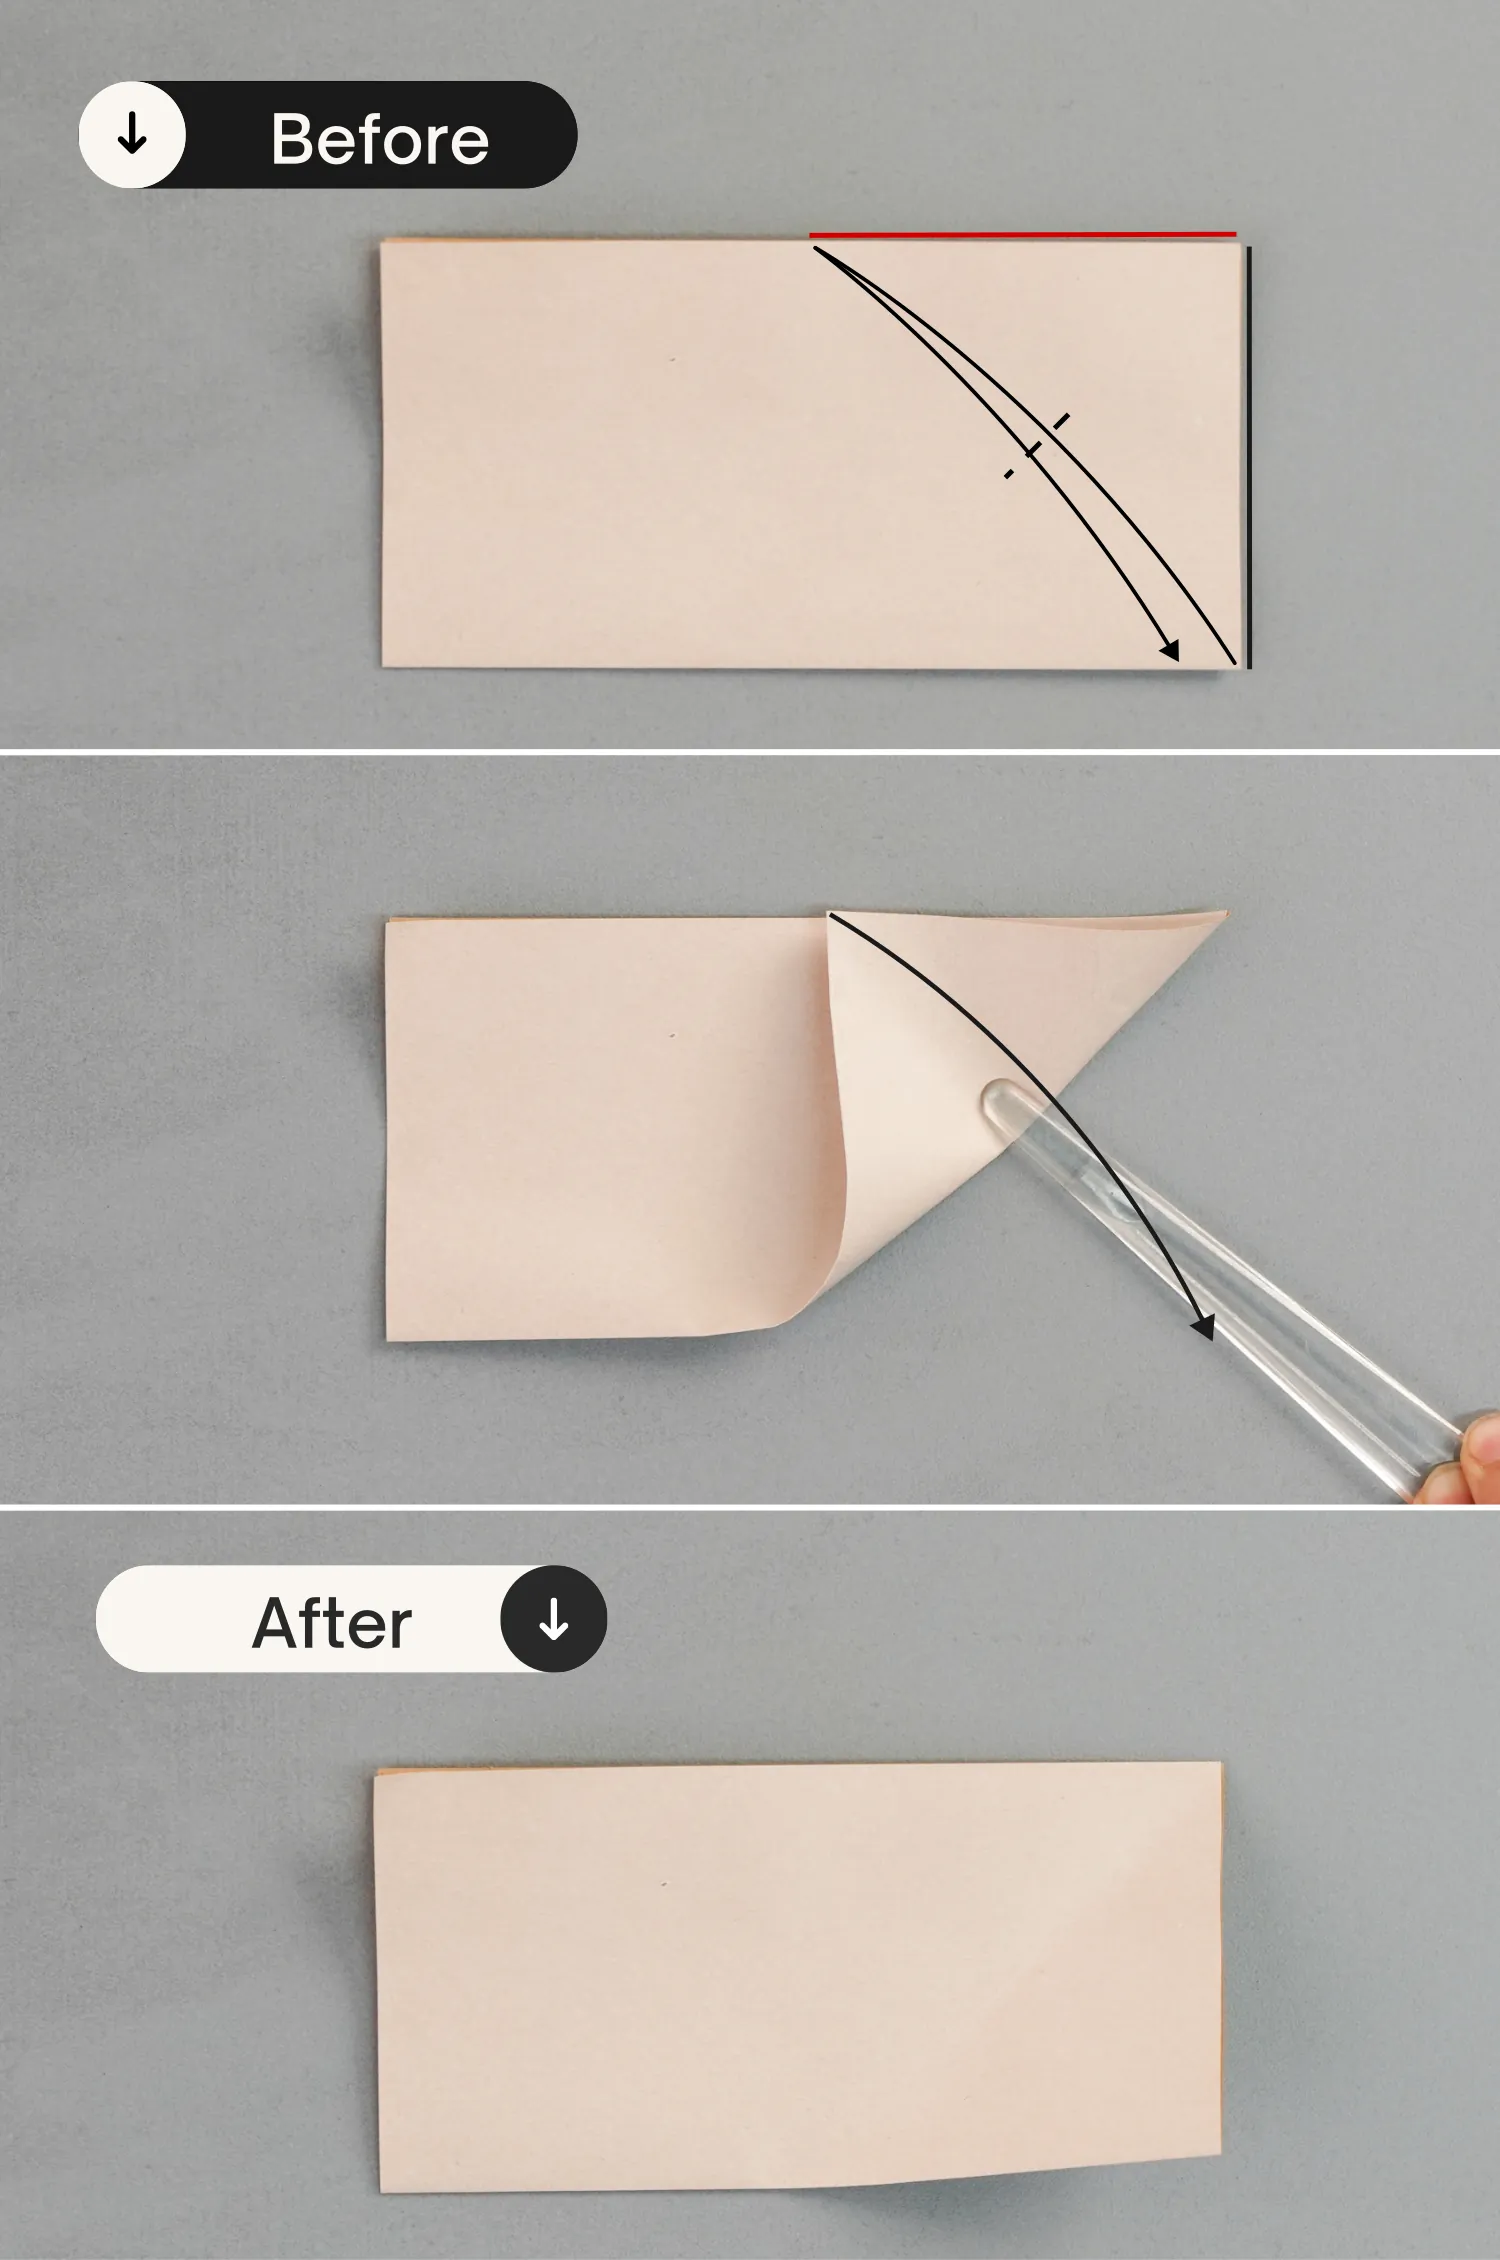
Step 4
Fold the bottom left point to meet the intersection point formed by the two creases you made in the previous step.

Step 5
Fold the bottom right edge of the left layer to align with its bottom left edge.

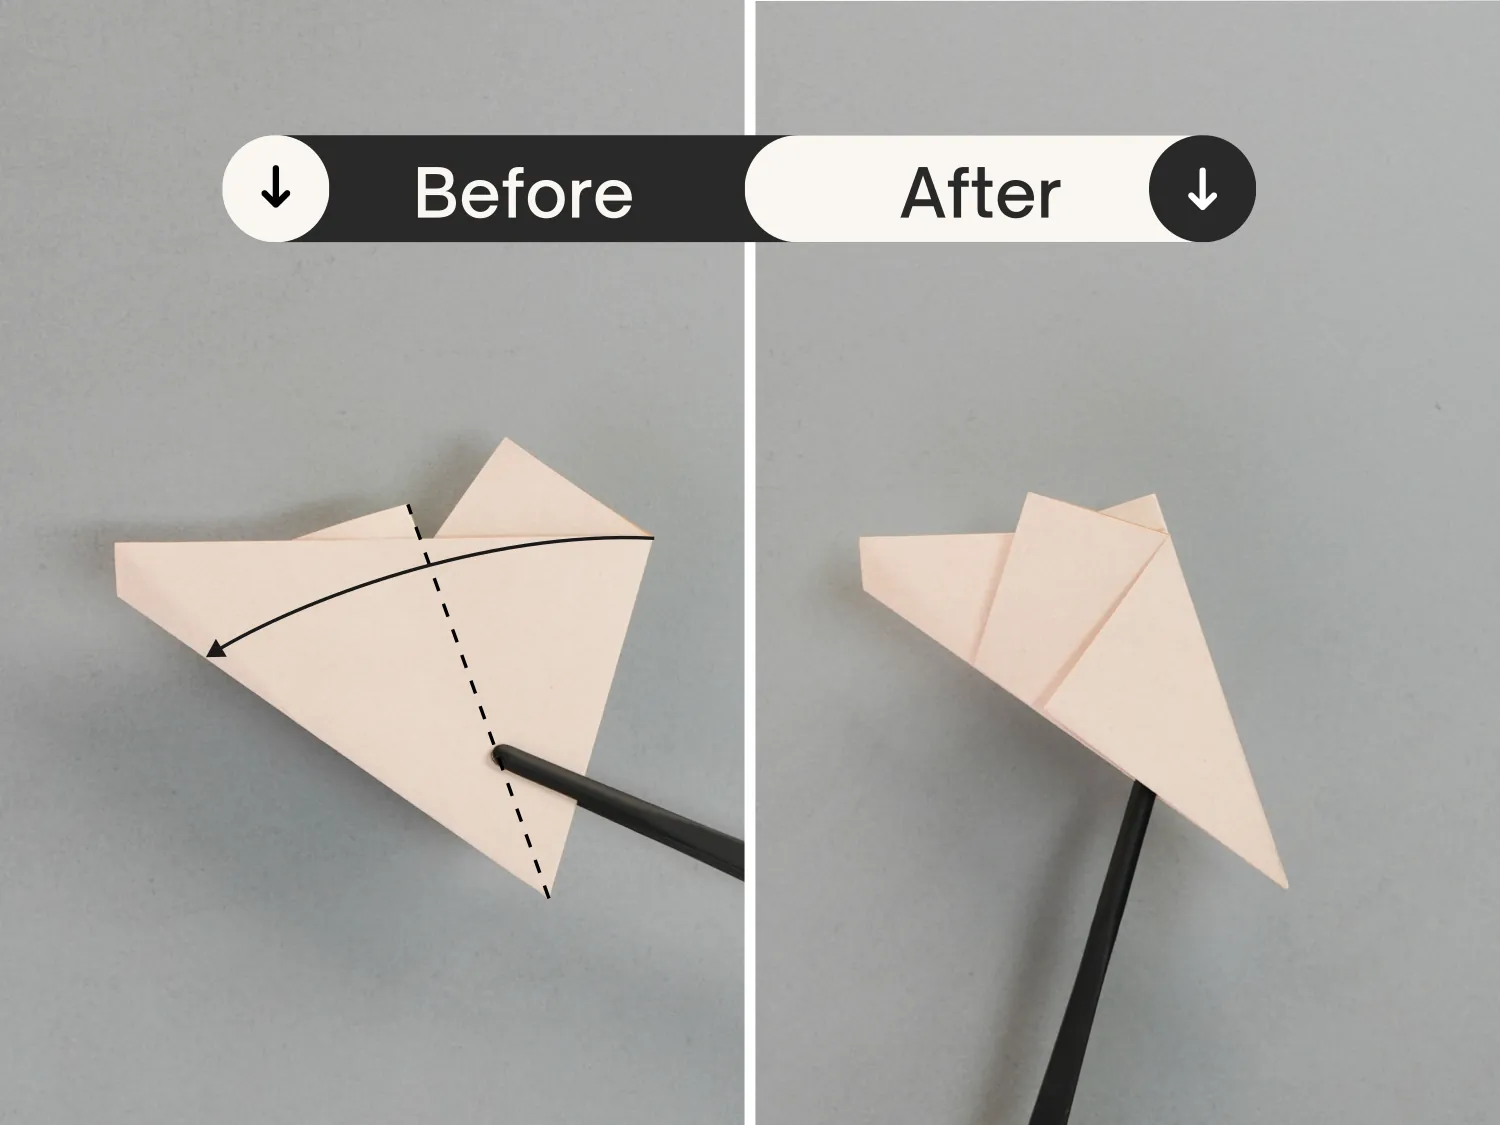
Step 6
Fold the bottom edge to align with the edge indicated by the red line.
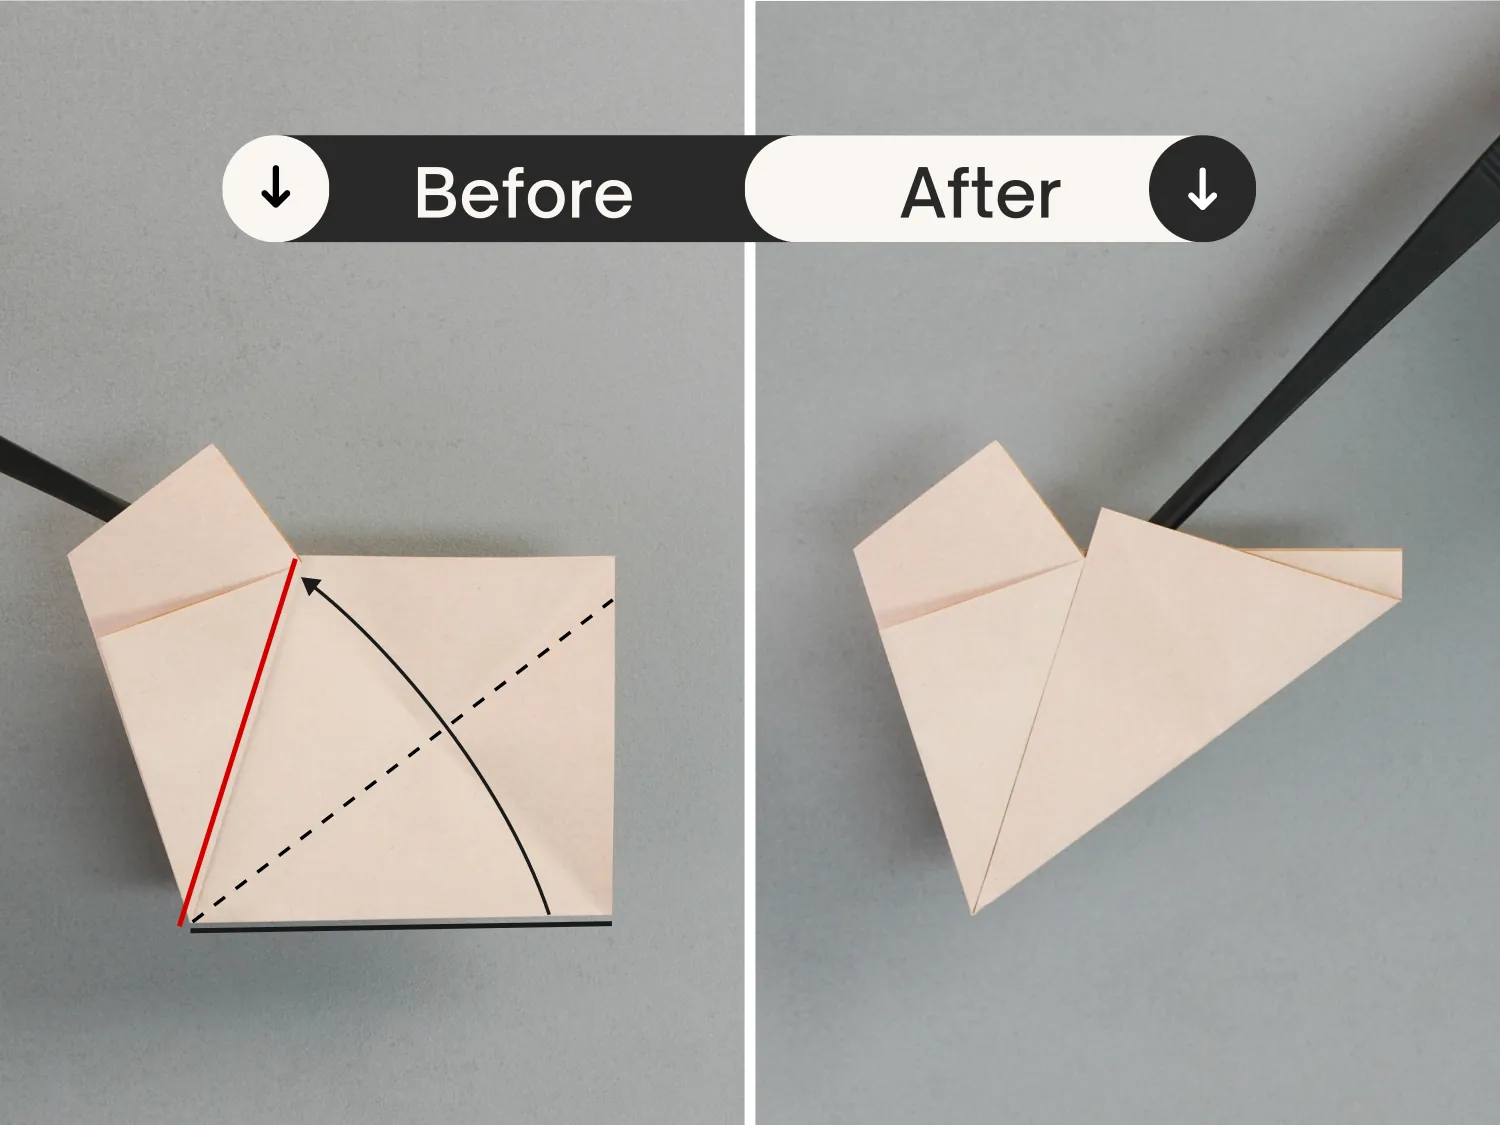
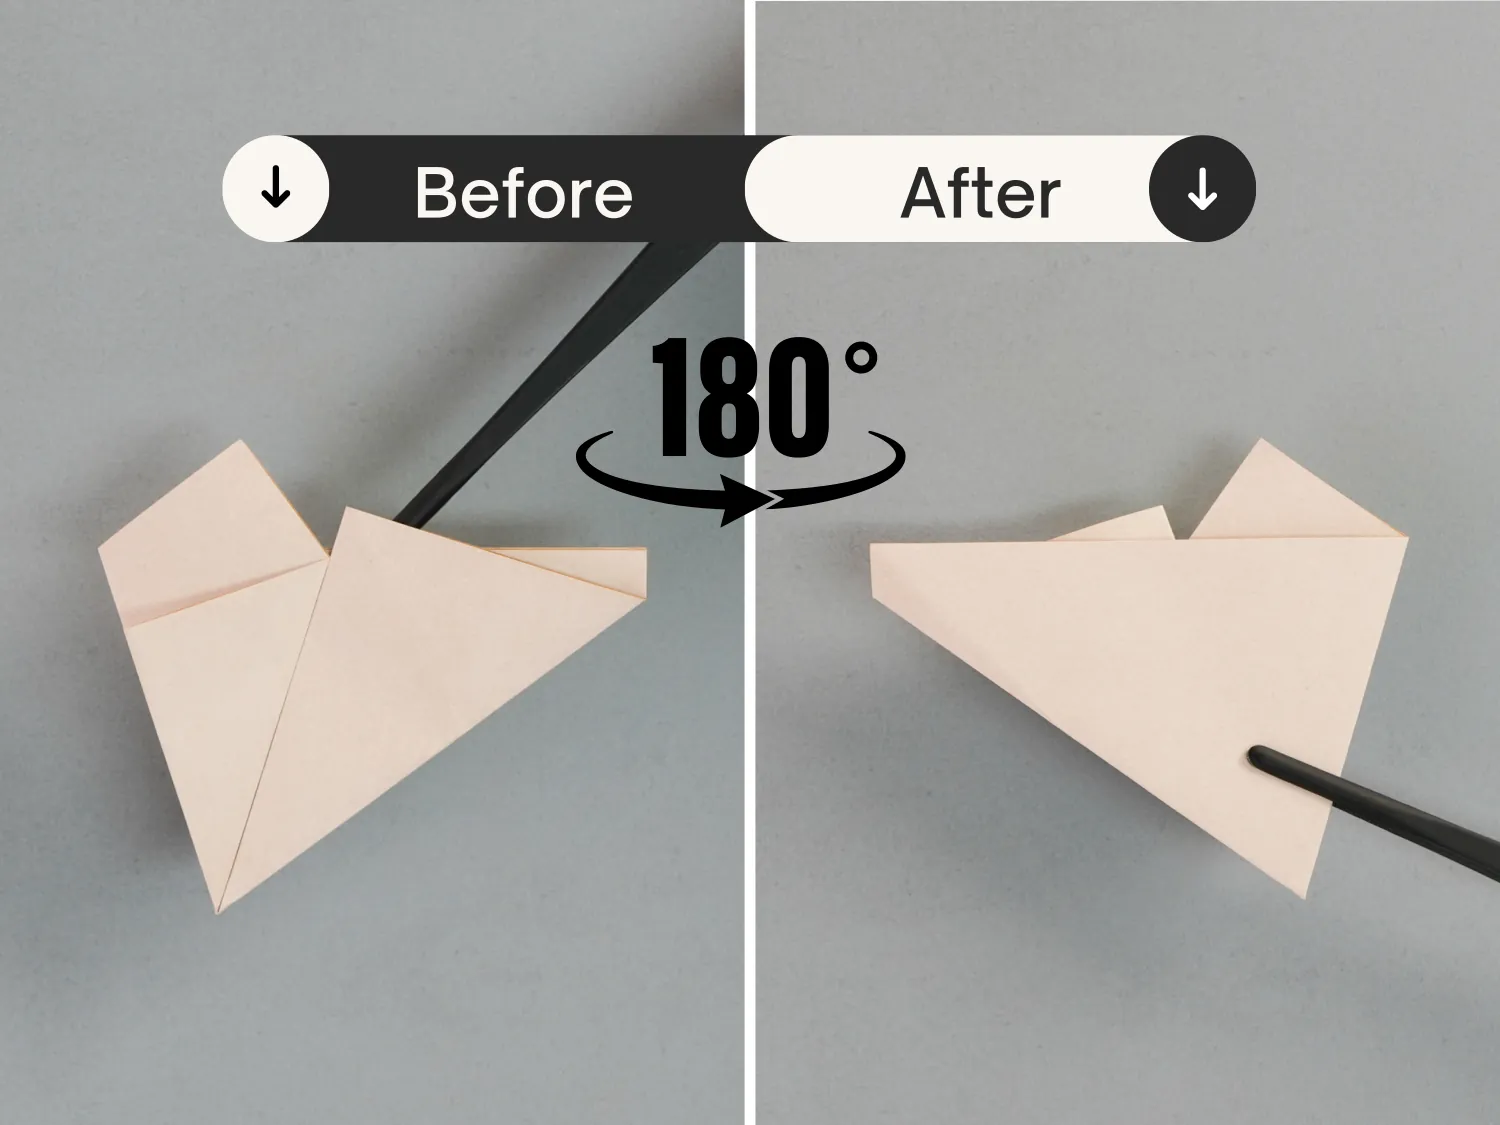
Step 7
Rotate it 180 degrees to flip the aper over.
Step 8
Fold the bottom right edge to align with the bottom left edge.
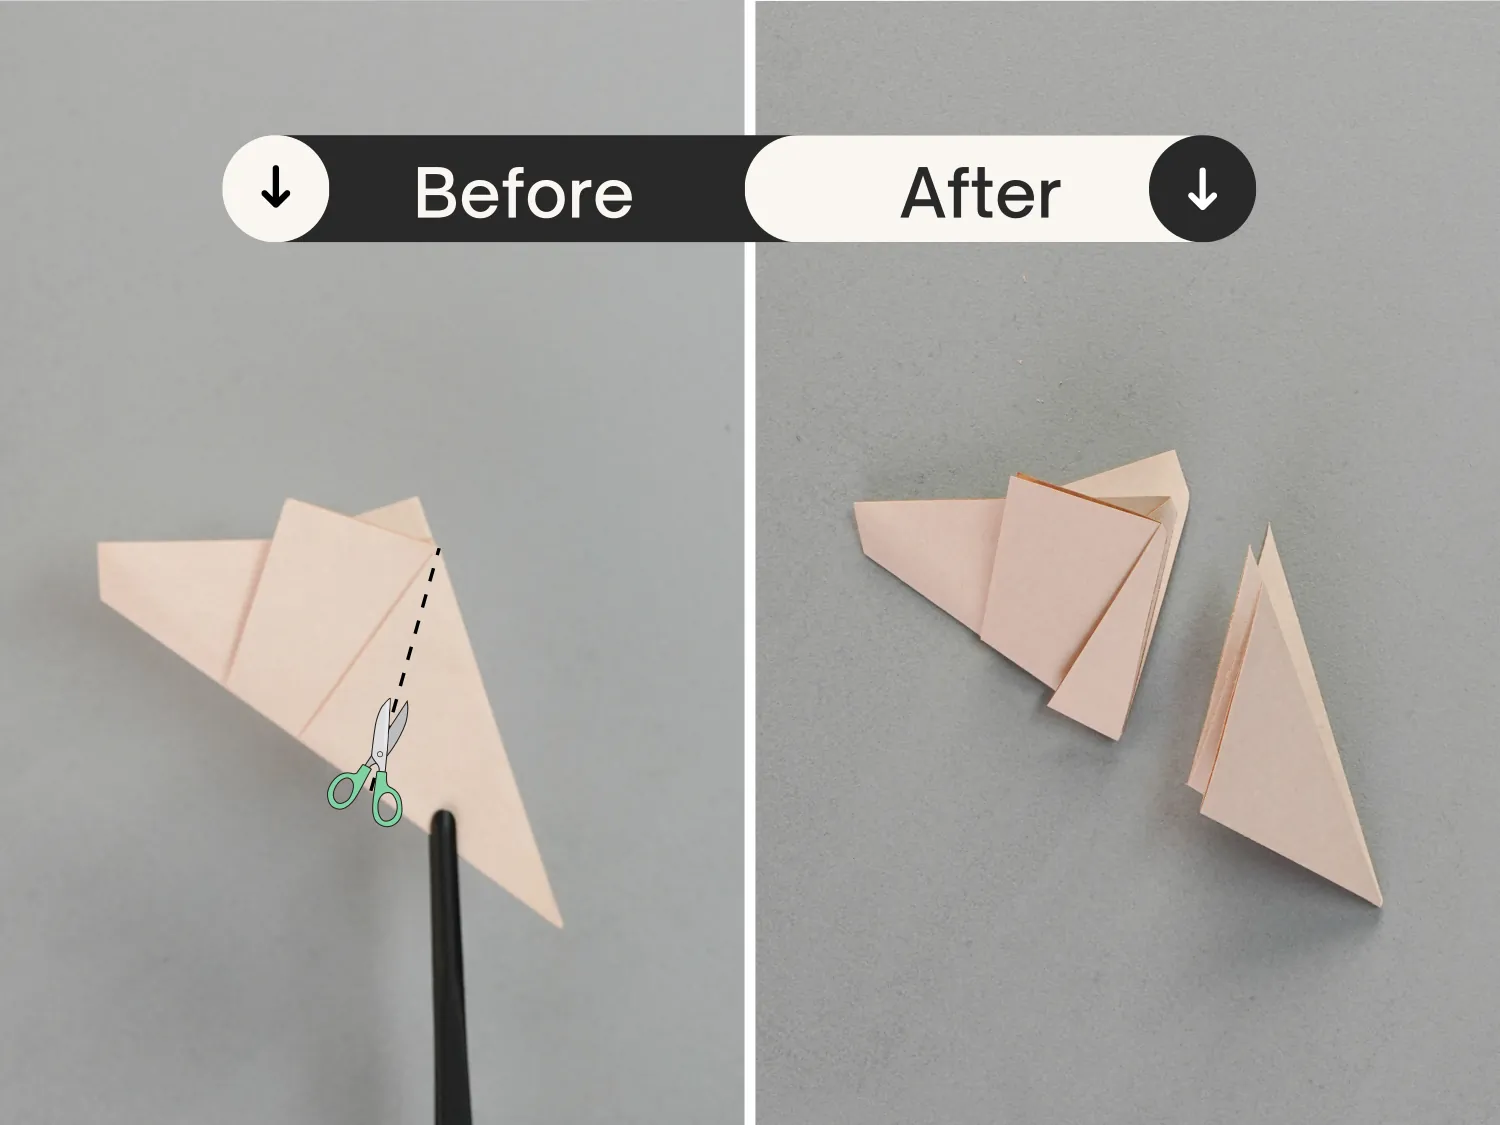
Step 9
Cut the paper along the dotted line.
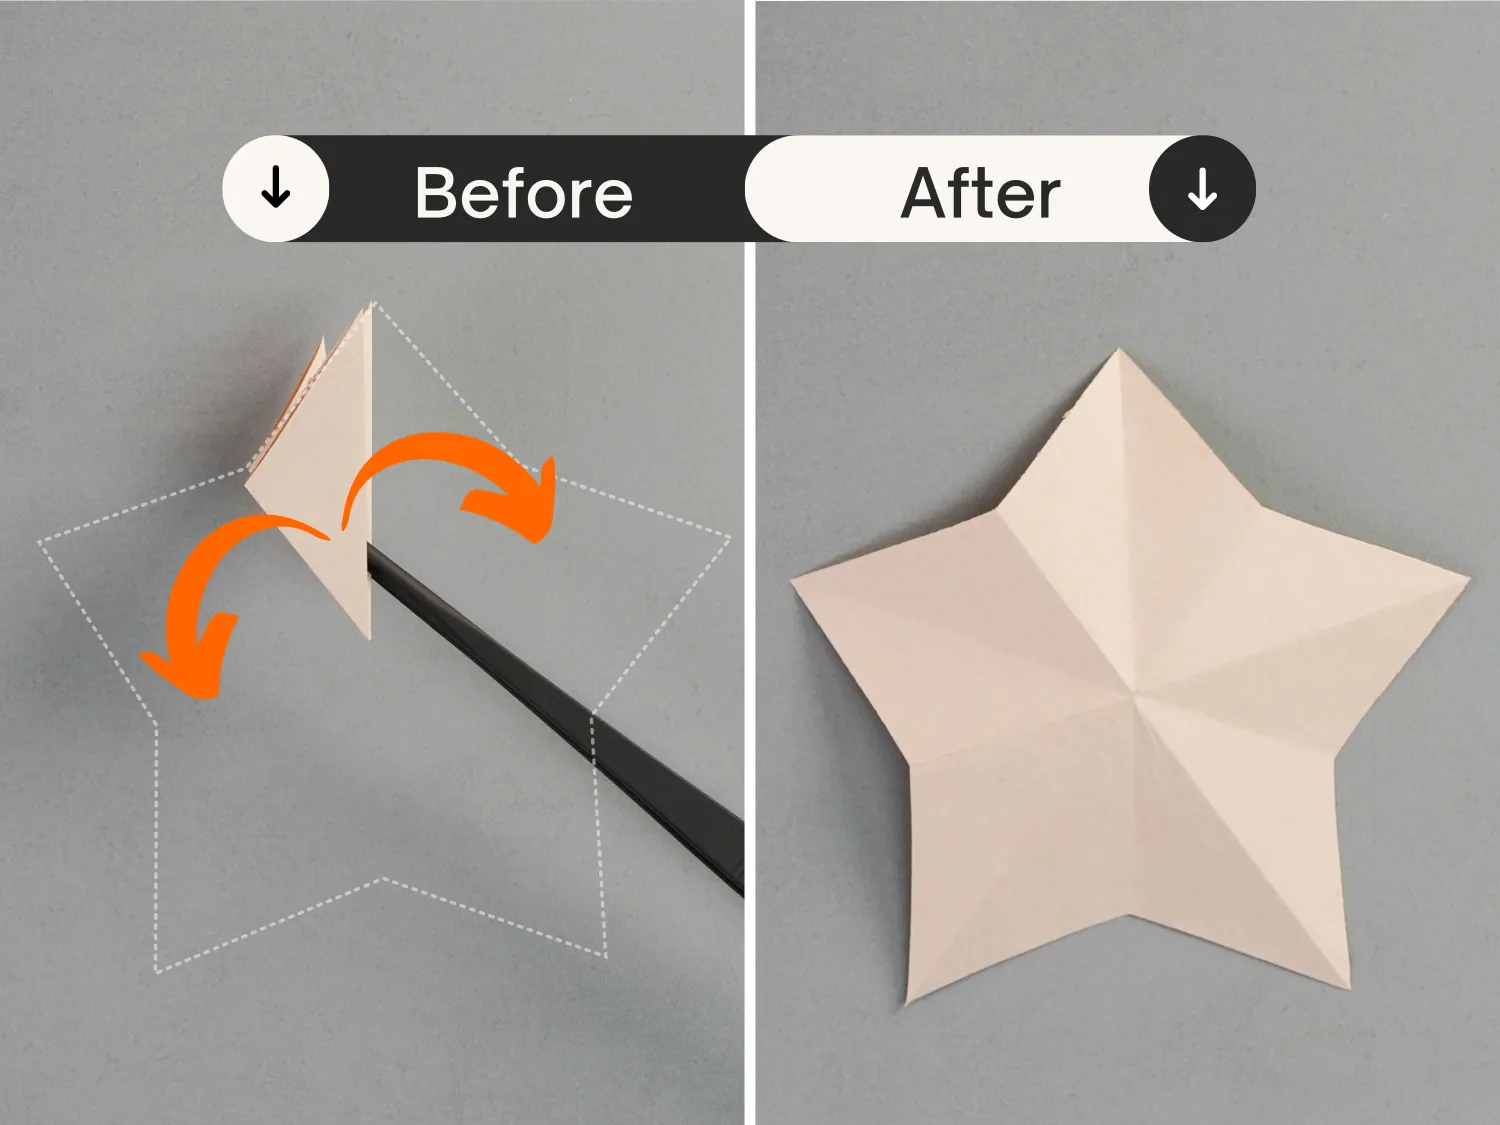
Step 10
Expand the paper completely.
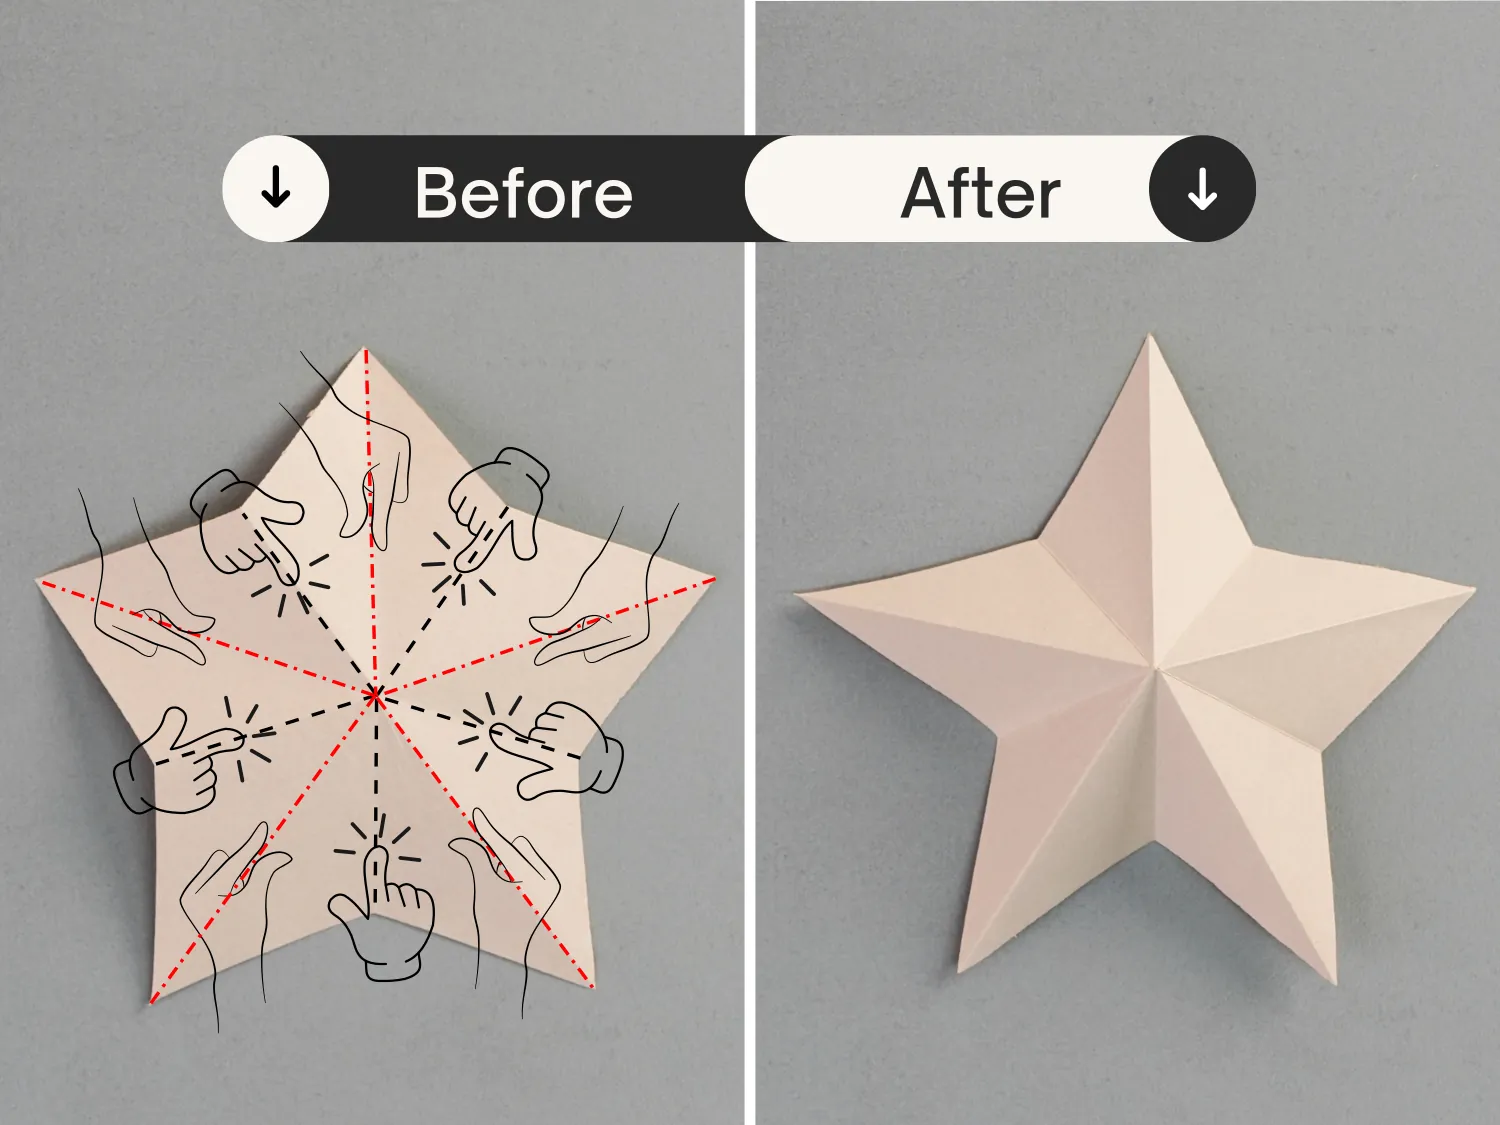
Step 11
Mountain fold the creases indicated by the red dotted lines, and valley fold the creases indicated by the black dotted lines.
What’s Next
This is the final shape of your origami 3D star. Now you can explore our other interesting and easy origami instructions. Happy folding!


