How to Fold an Origami Combined Christmas Tree
Step 1
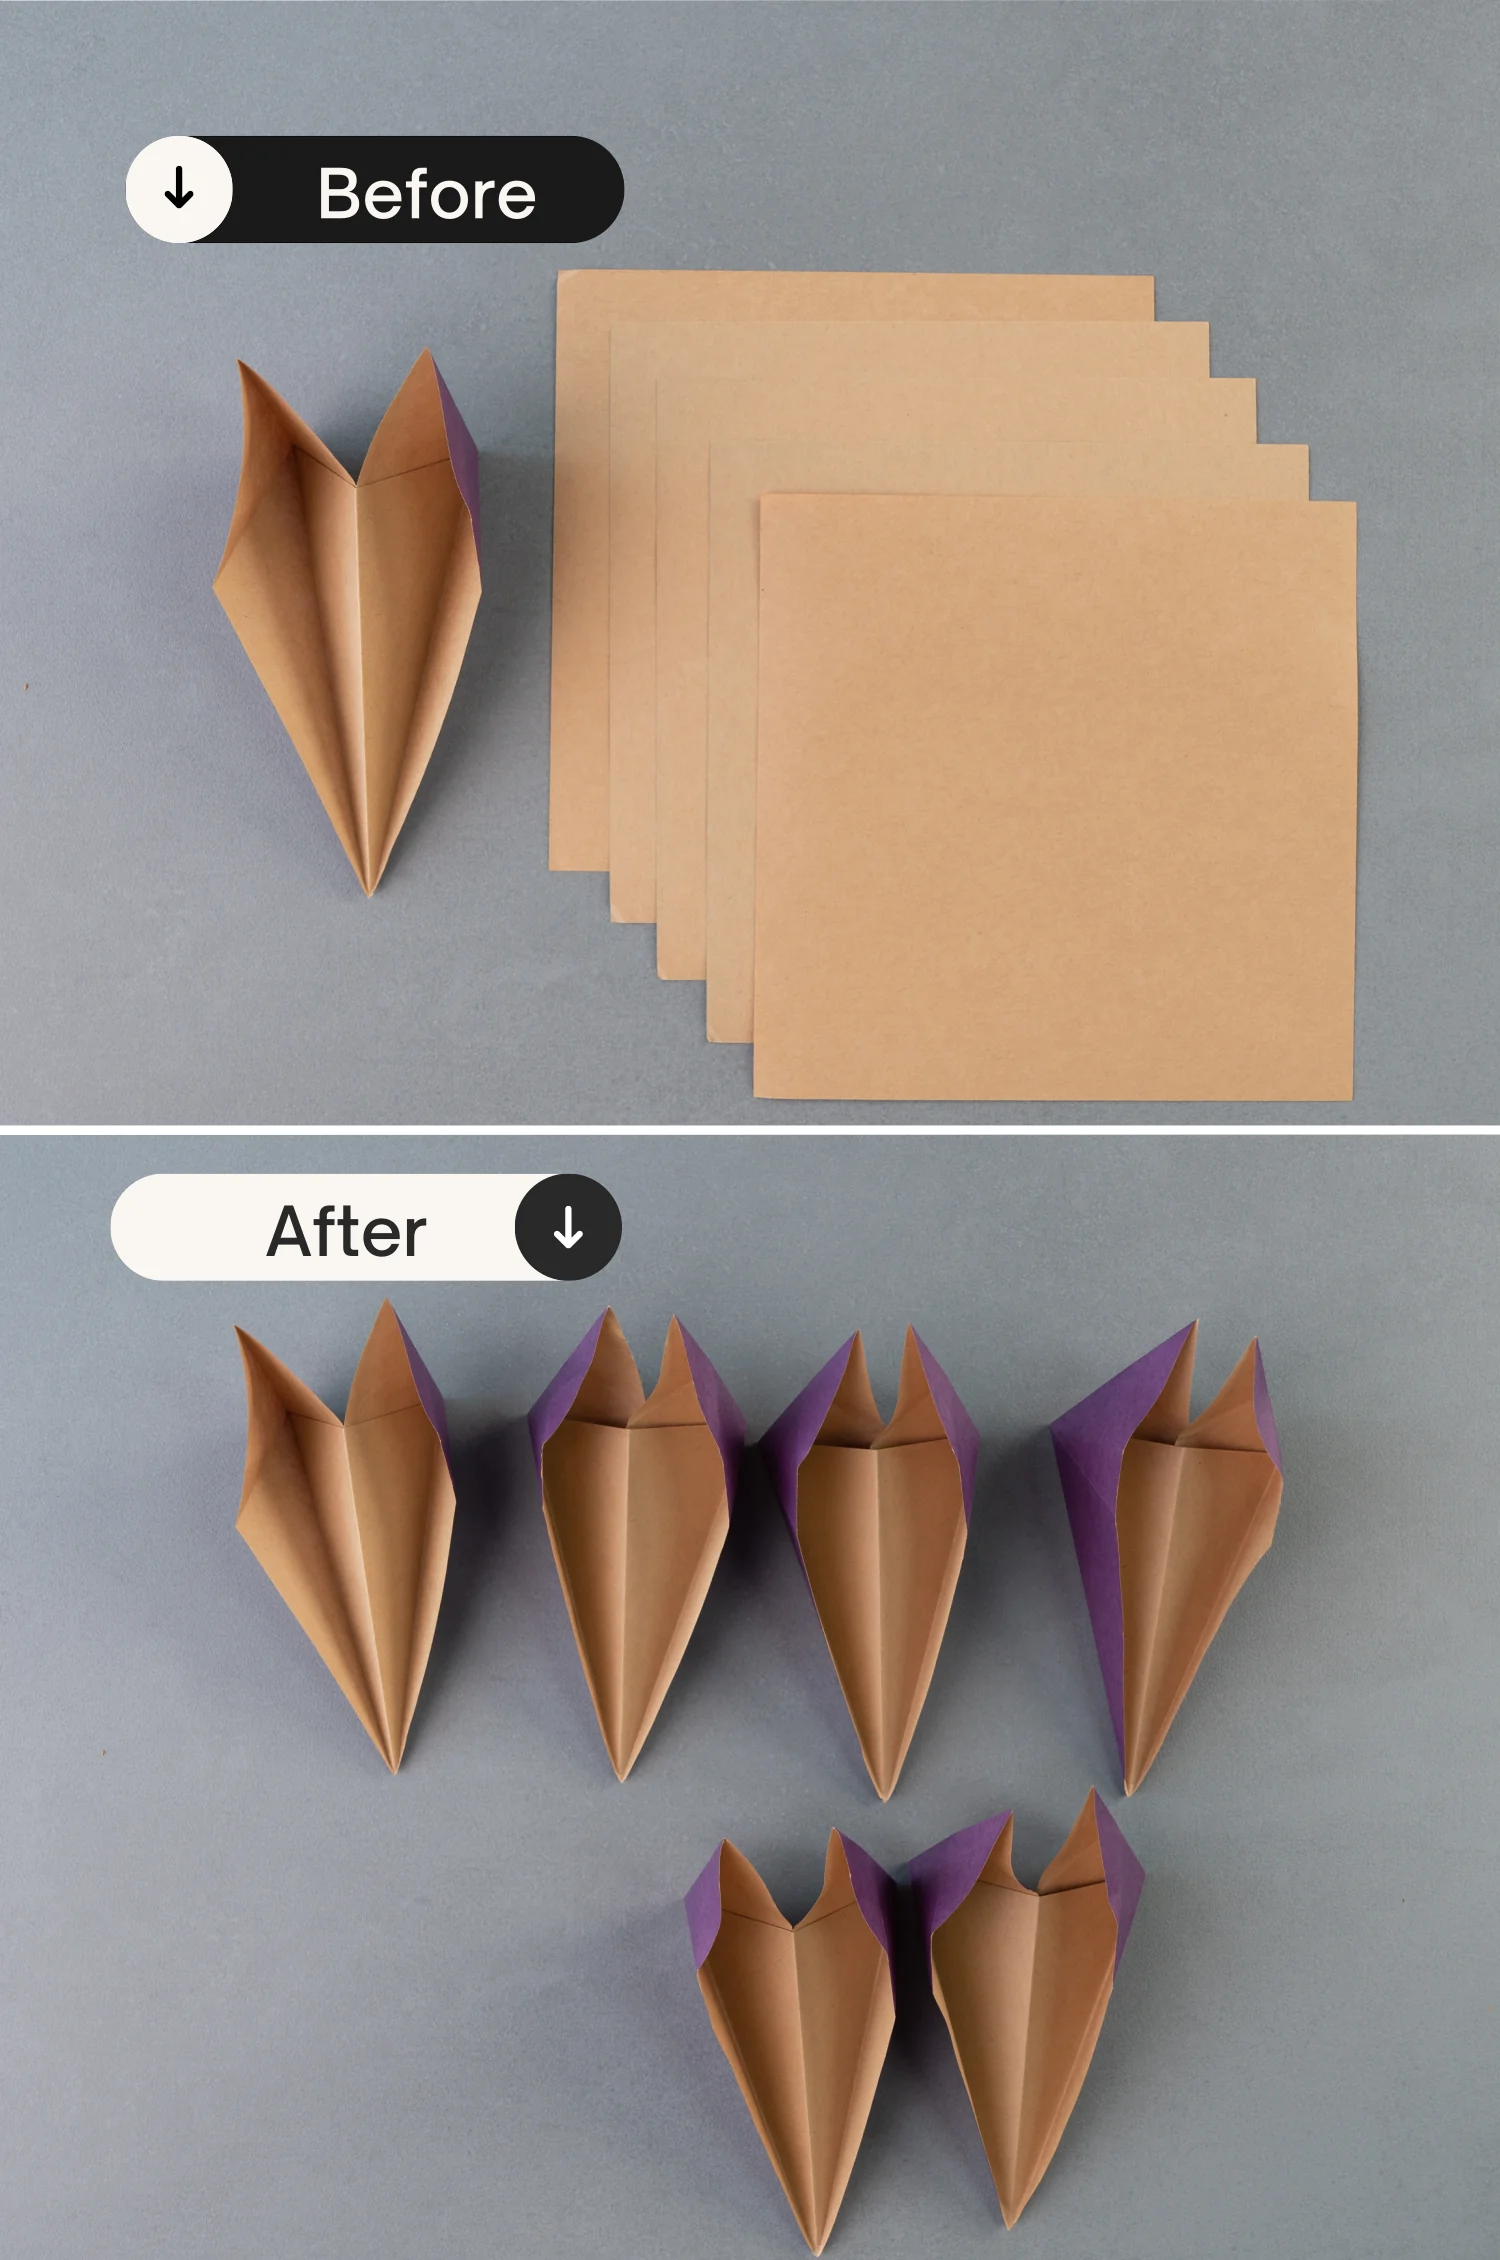
Take out one of the 15×15 cm purple papers and fold it in half horizontally, leaving two creases, and unfold it.
Step 2
Fold it in half vertically, and unfold it.
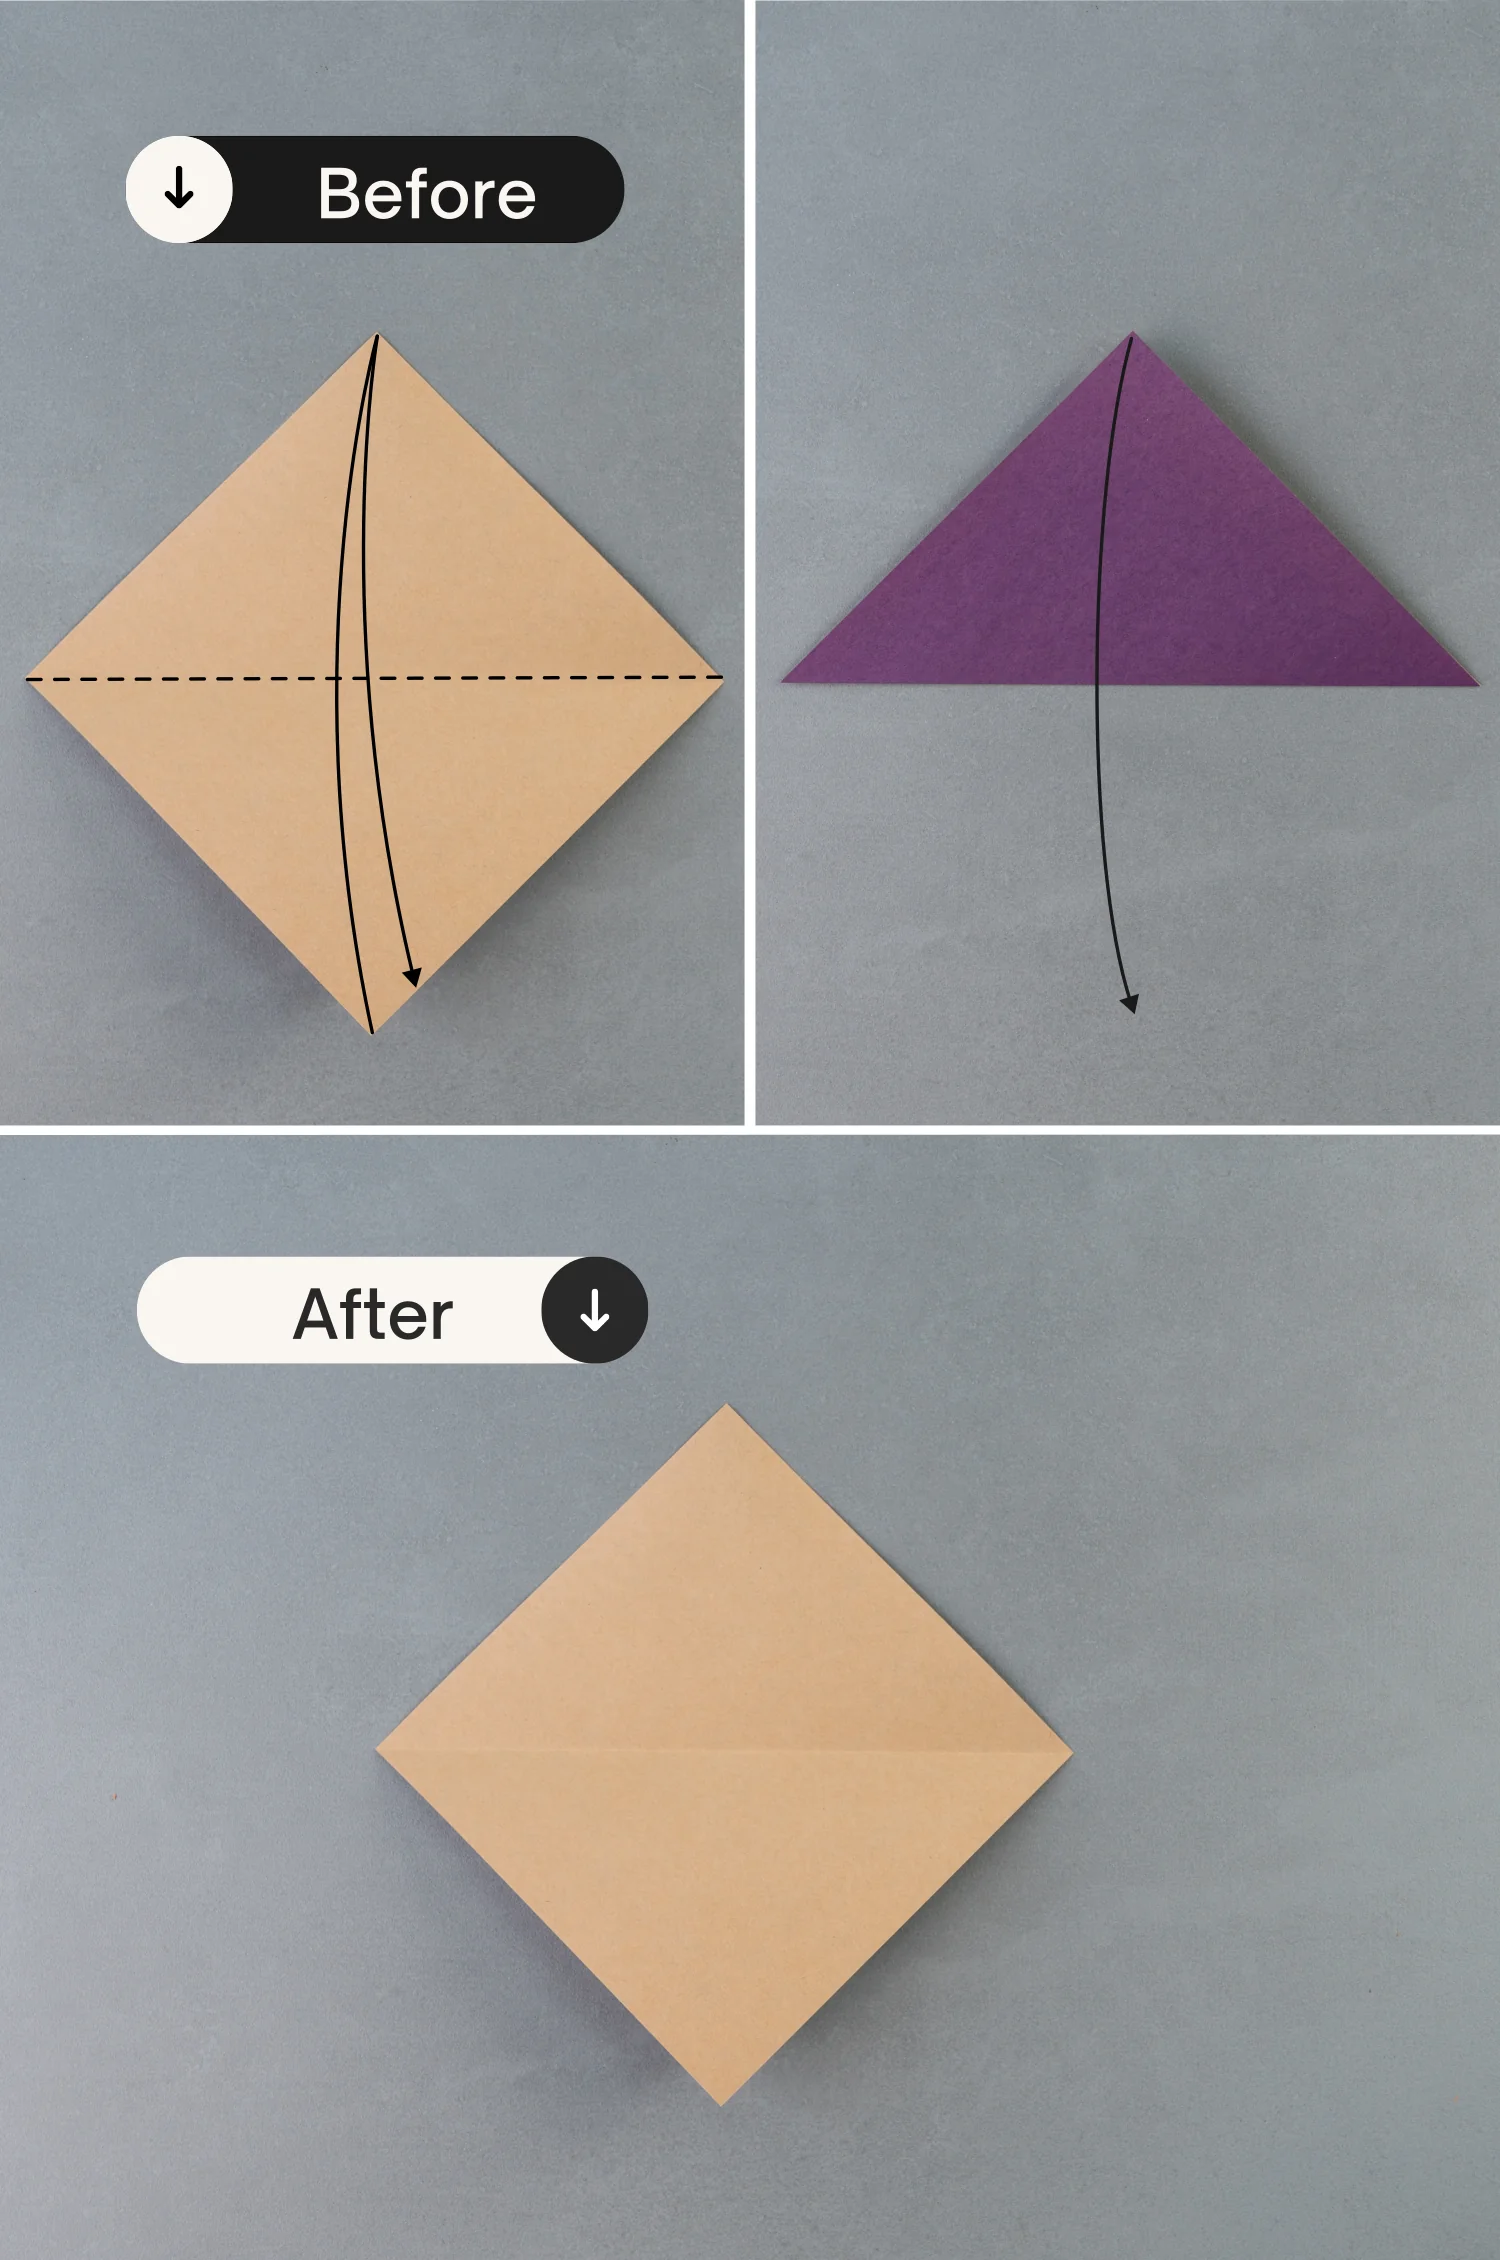
Step 3
Fold the top left and right edges to align with the middle vertical crease, and unfold them.
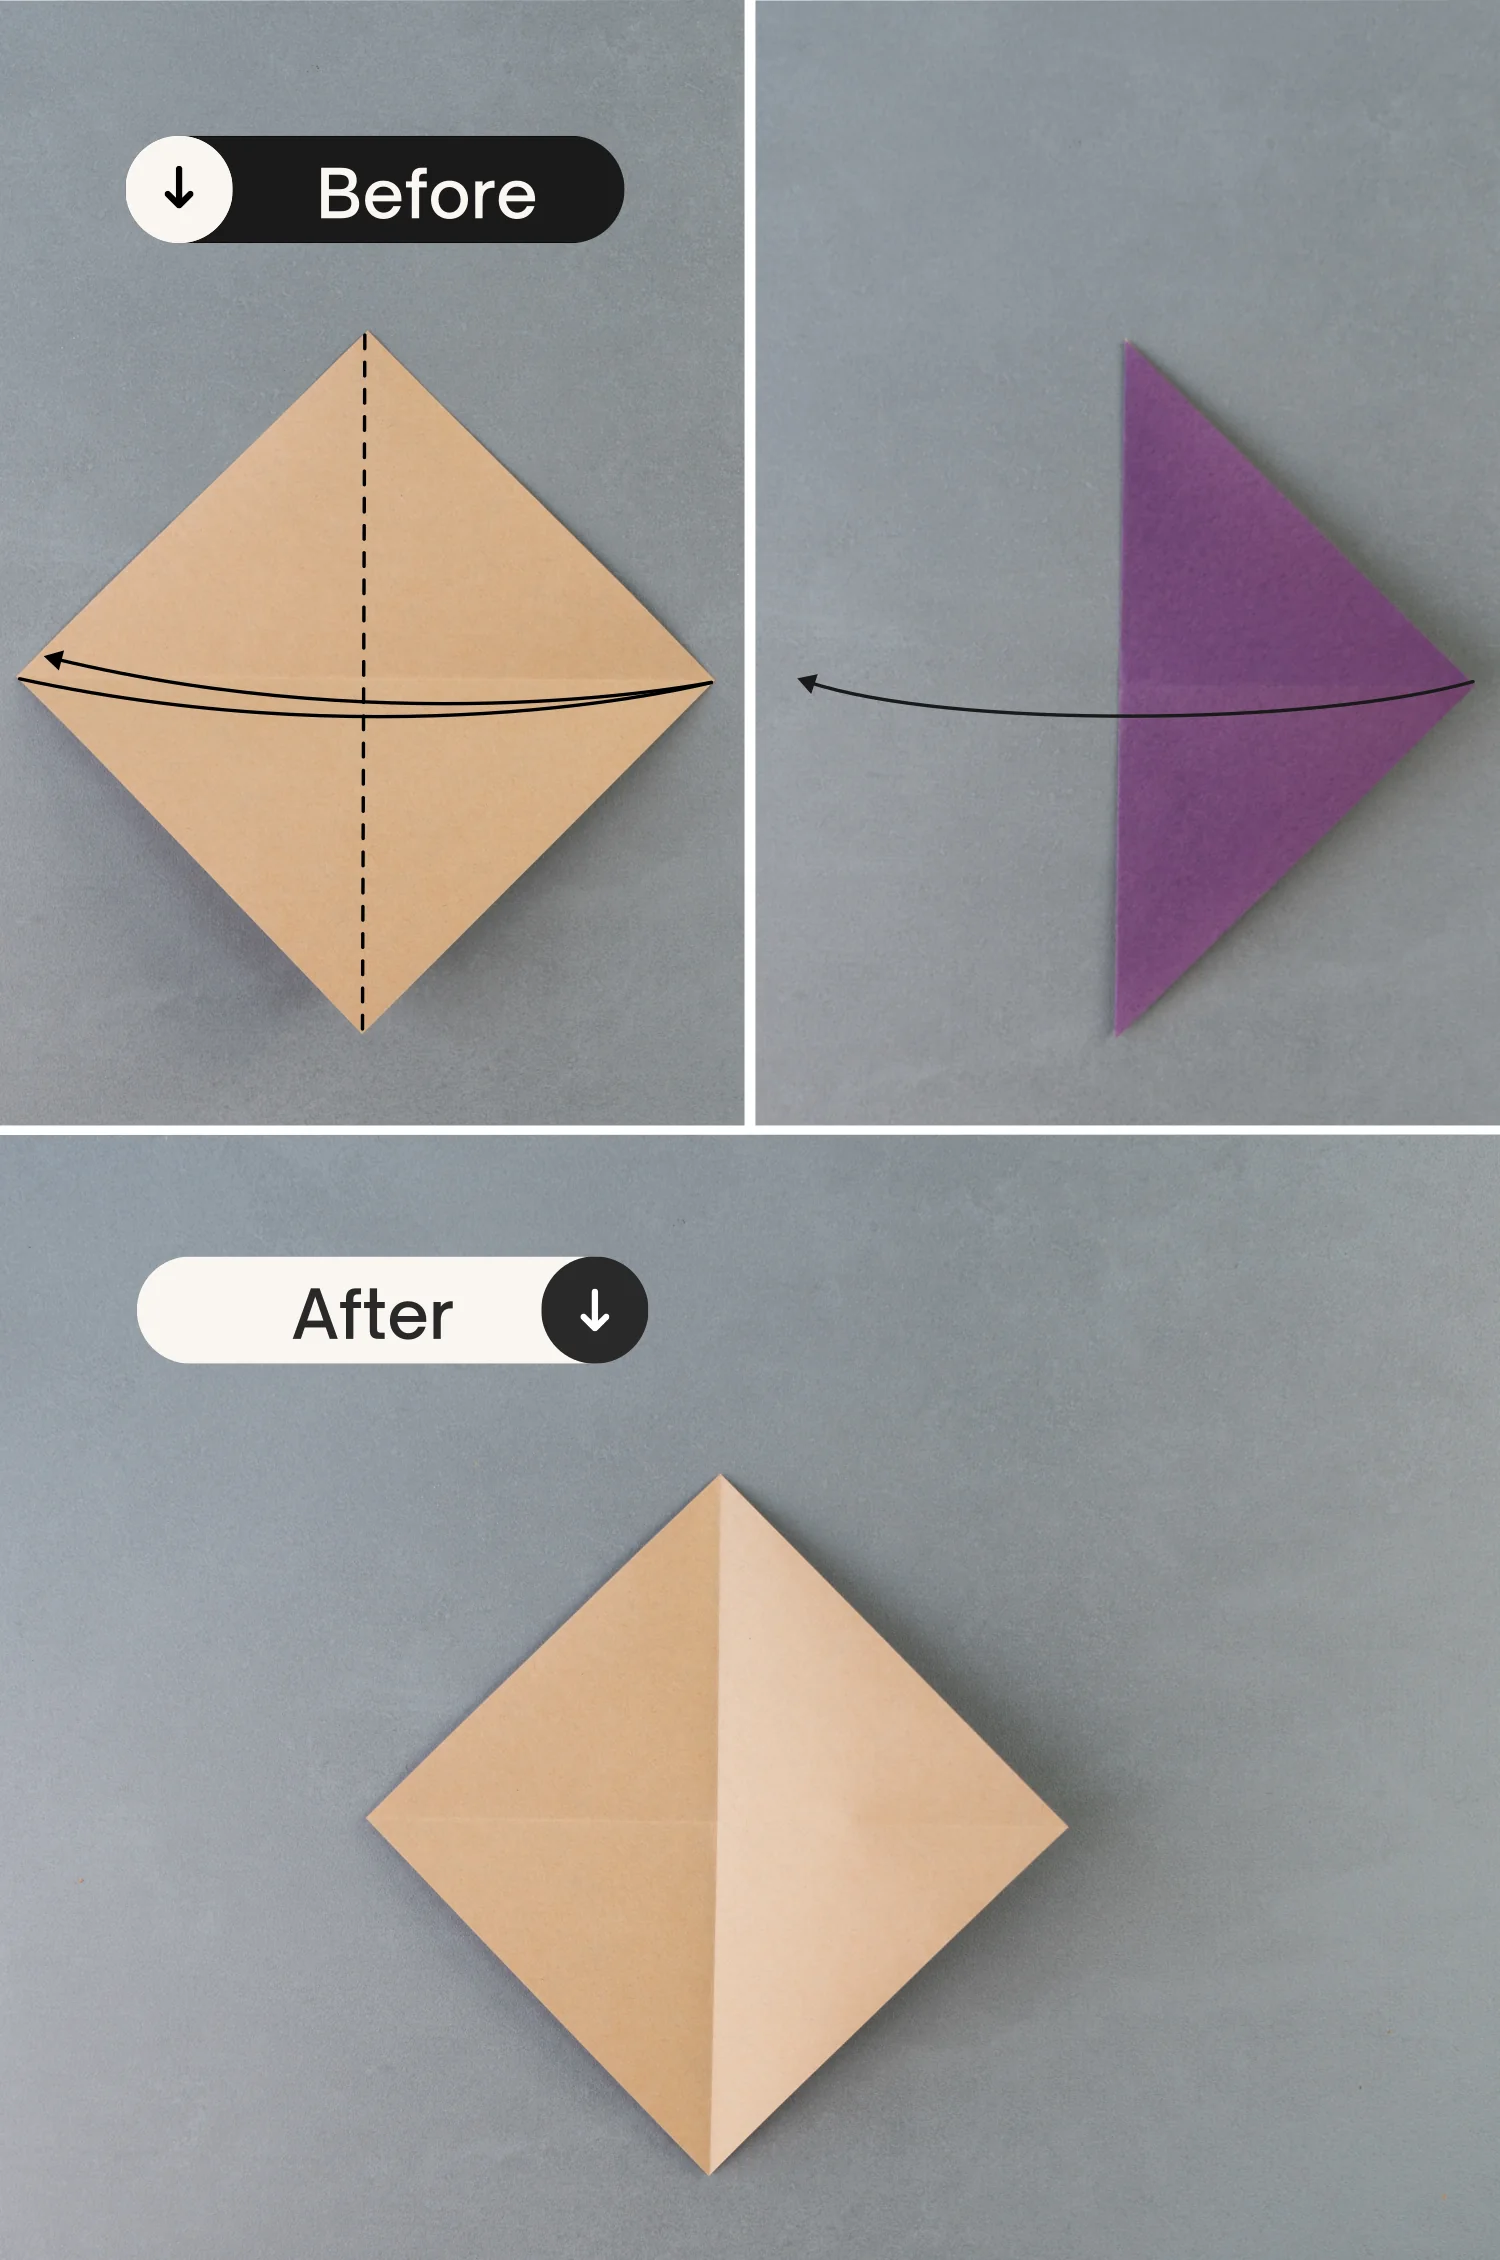
Step 4
Fold the bottom left and right edges to align with the vertical crease.
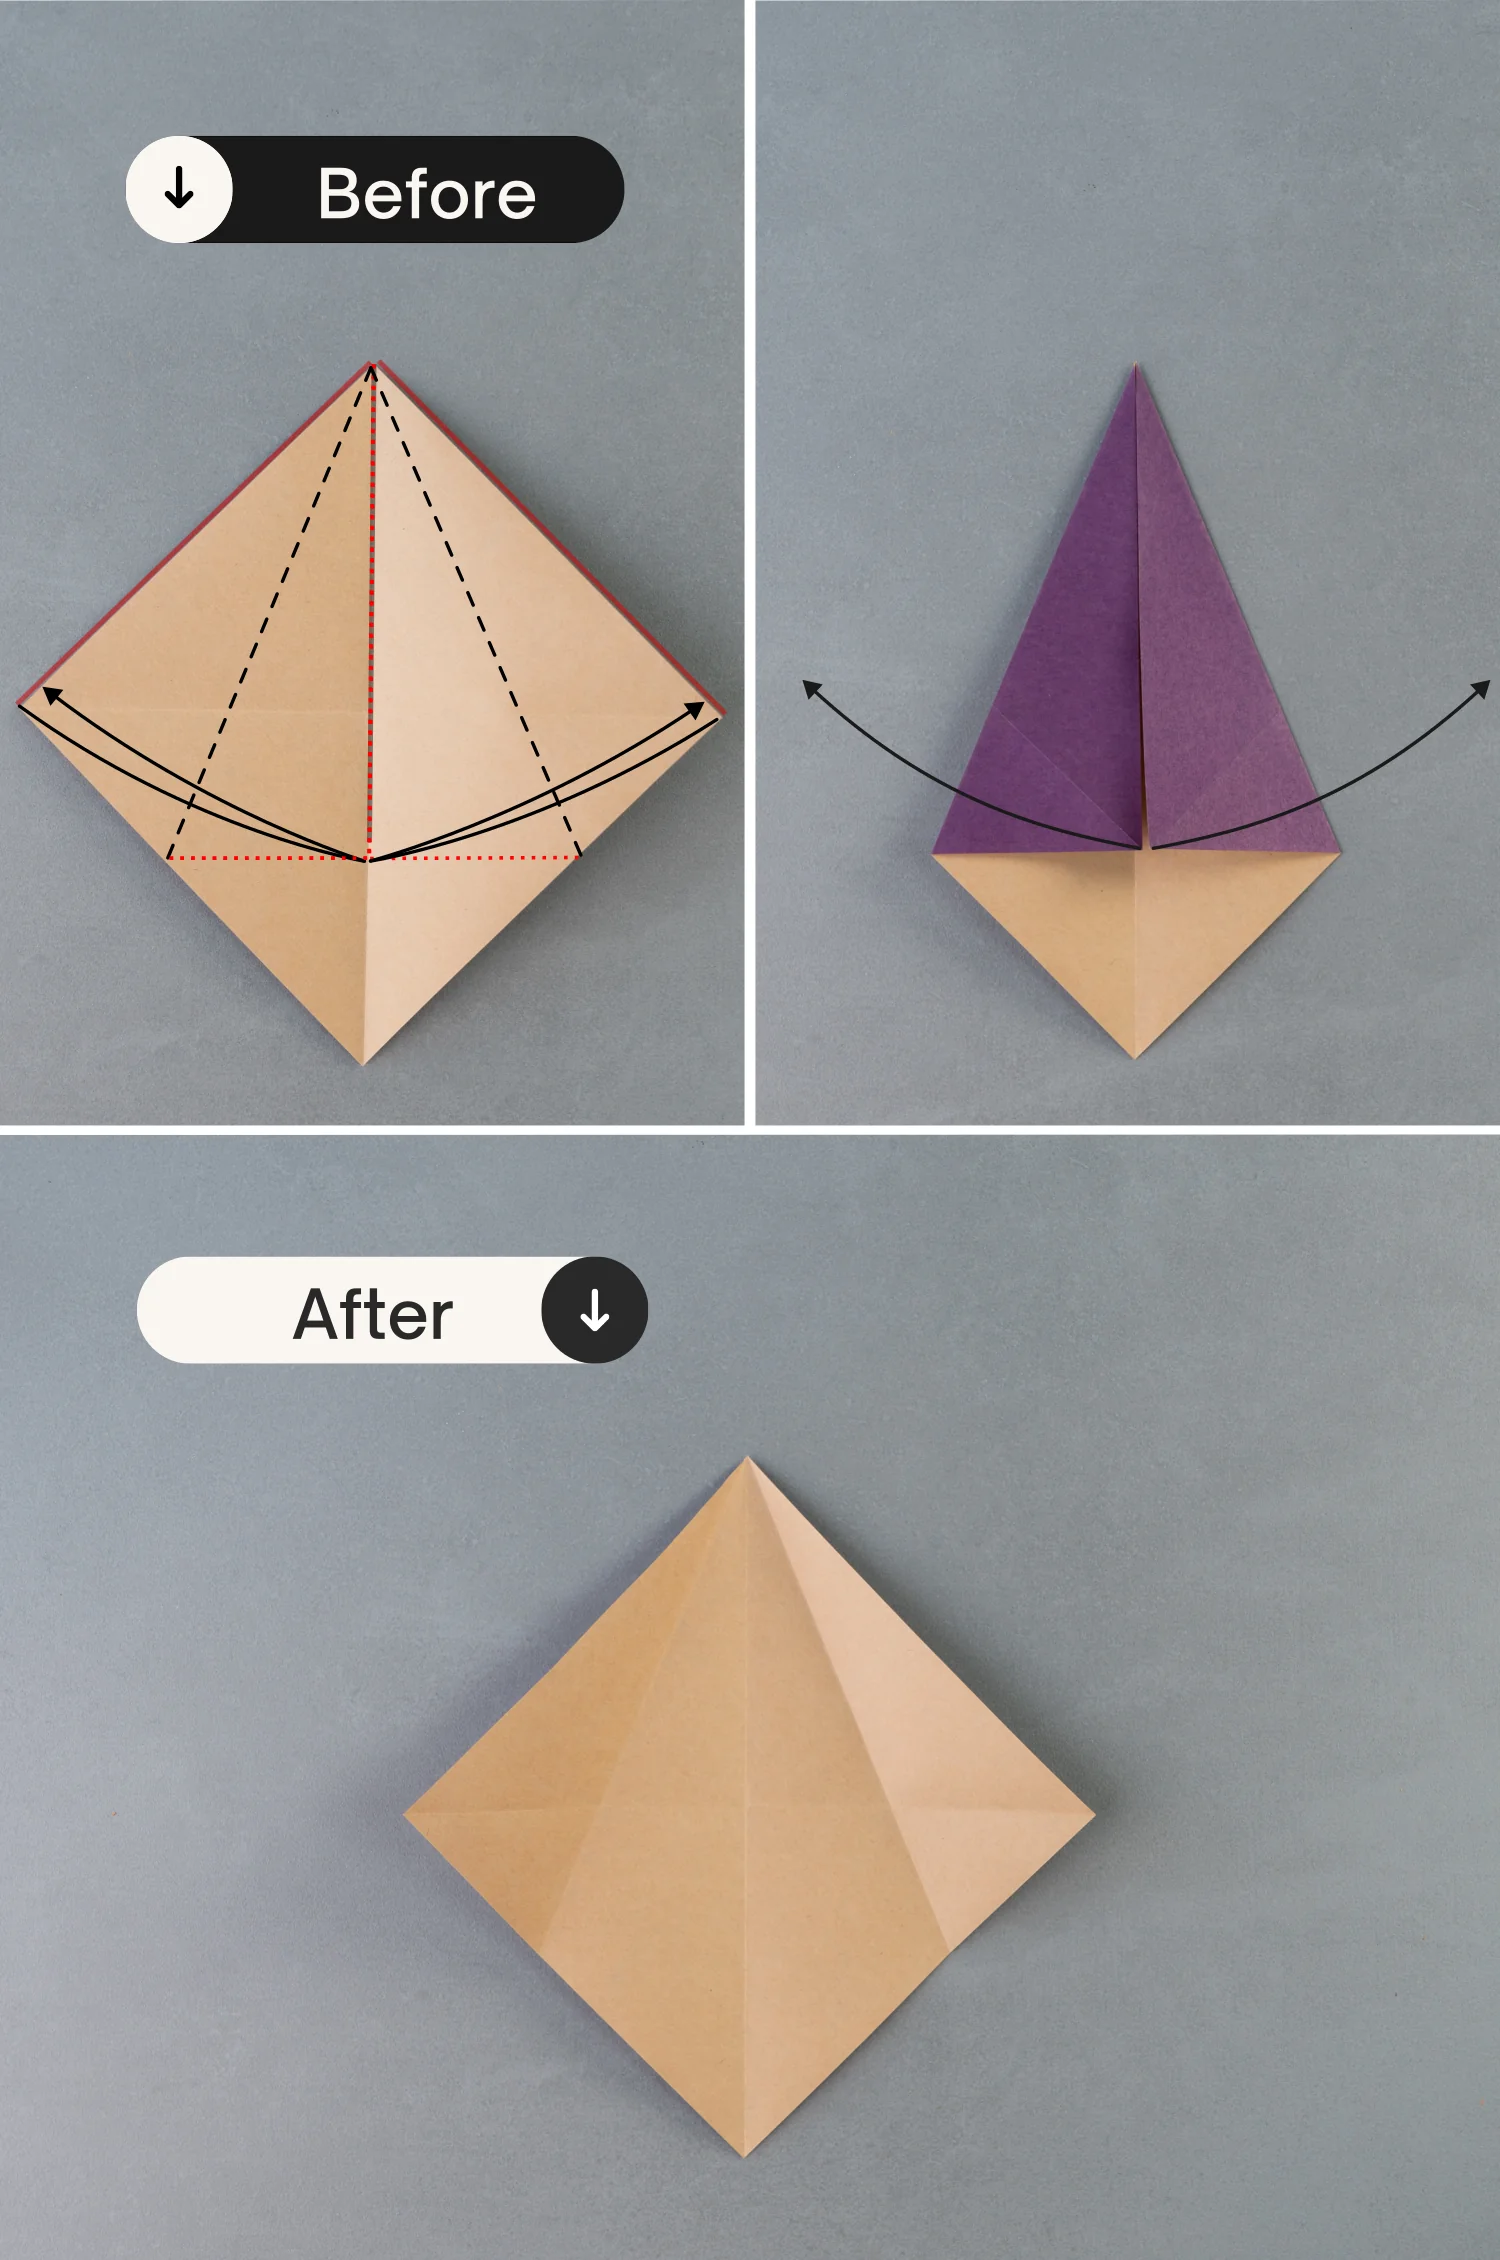
Step 5
Fold both left and right points to the intersection points created by the creases, represented by red dots on each side, and unfold them.
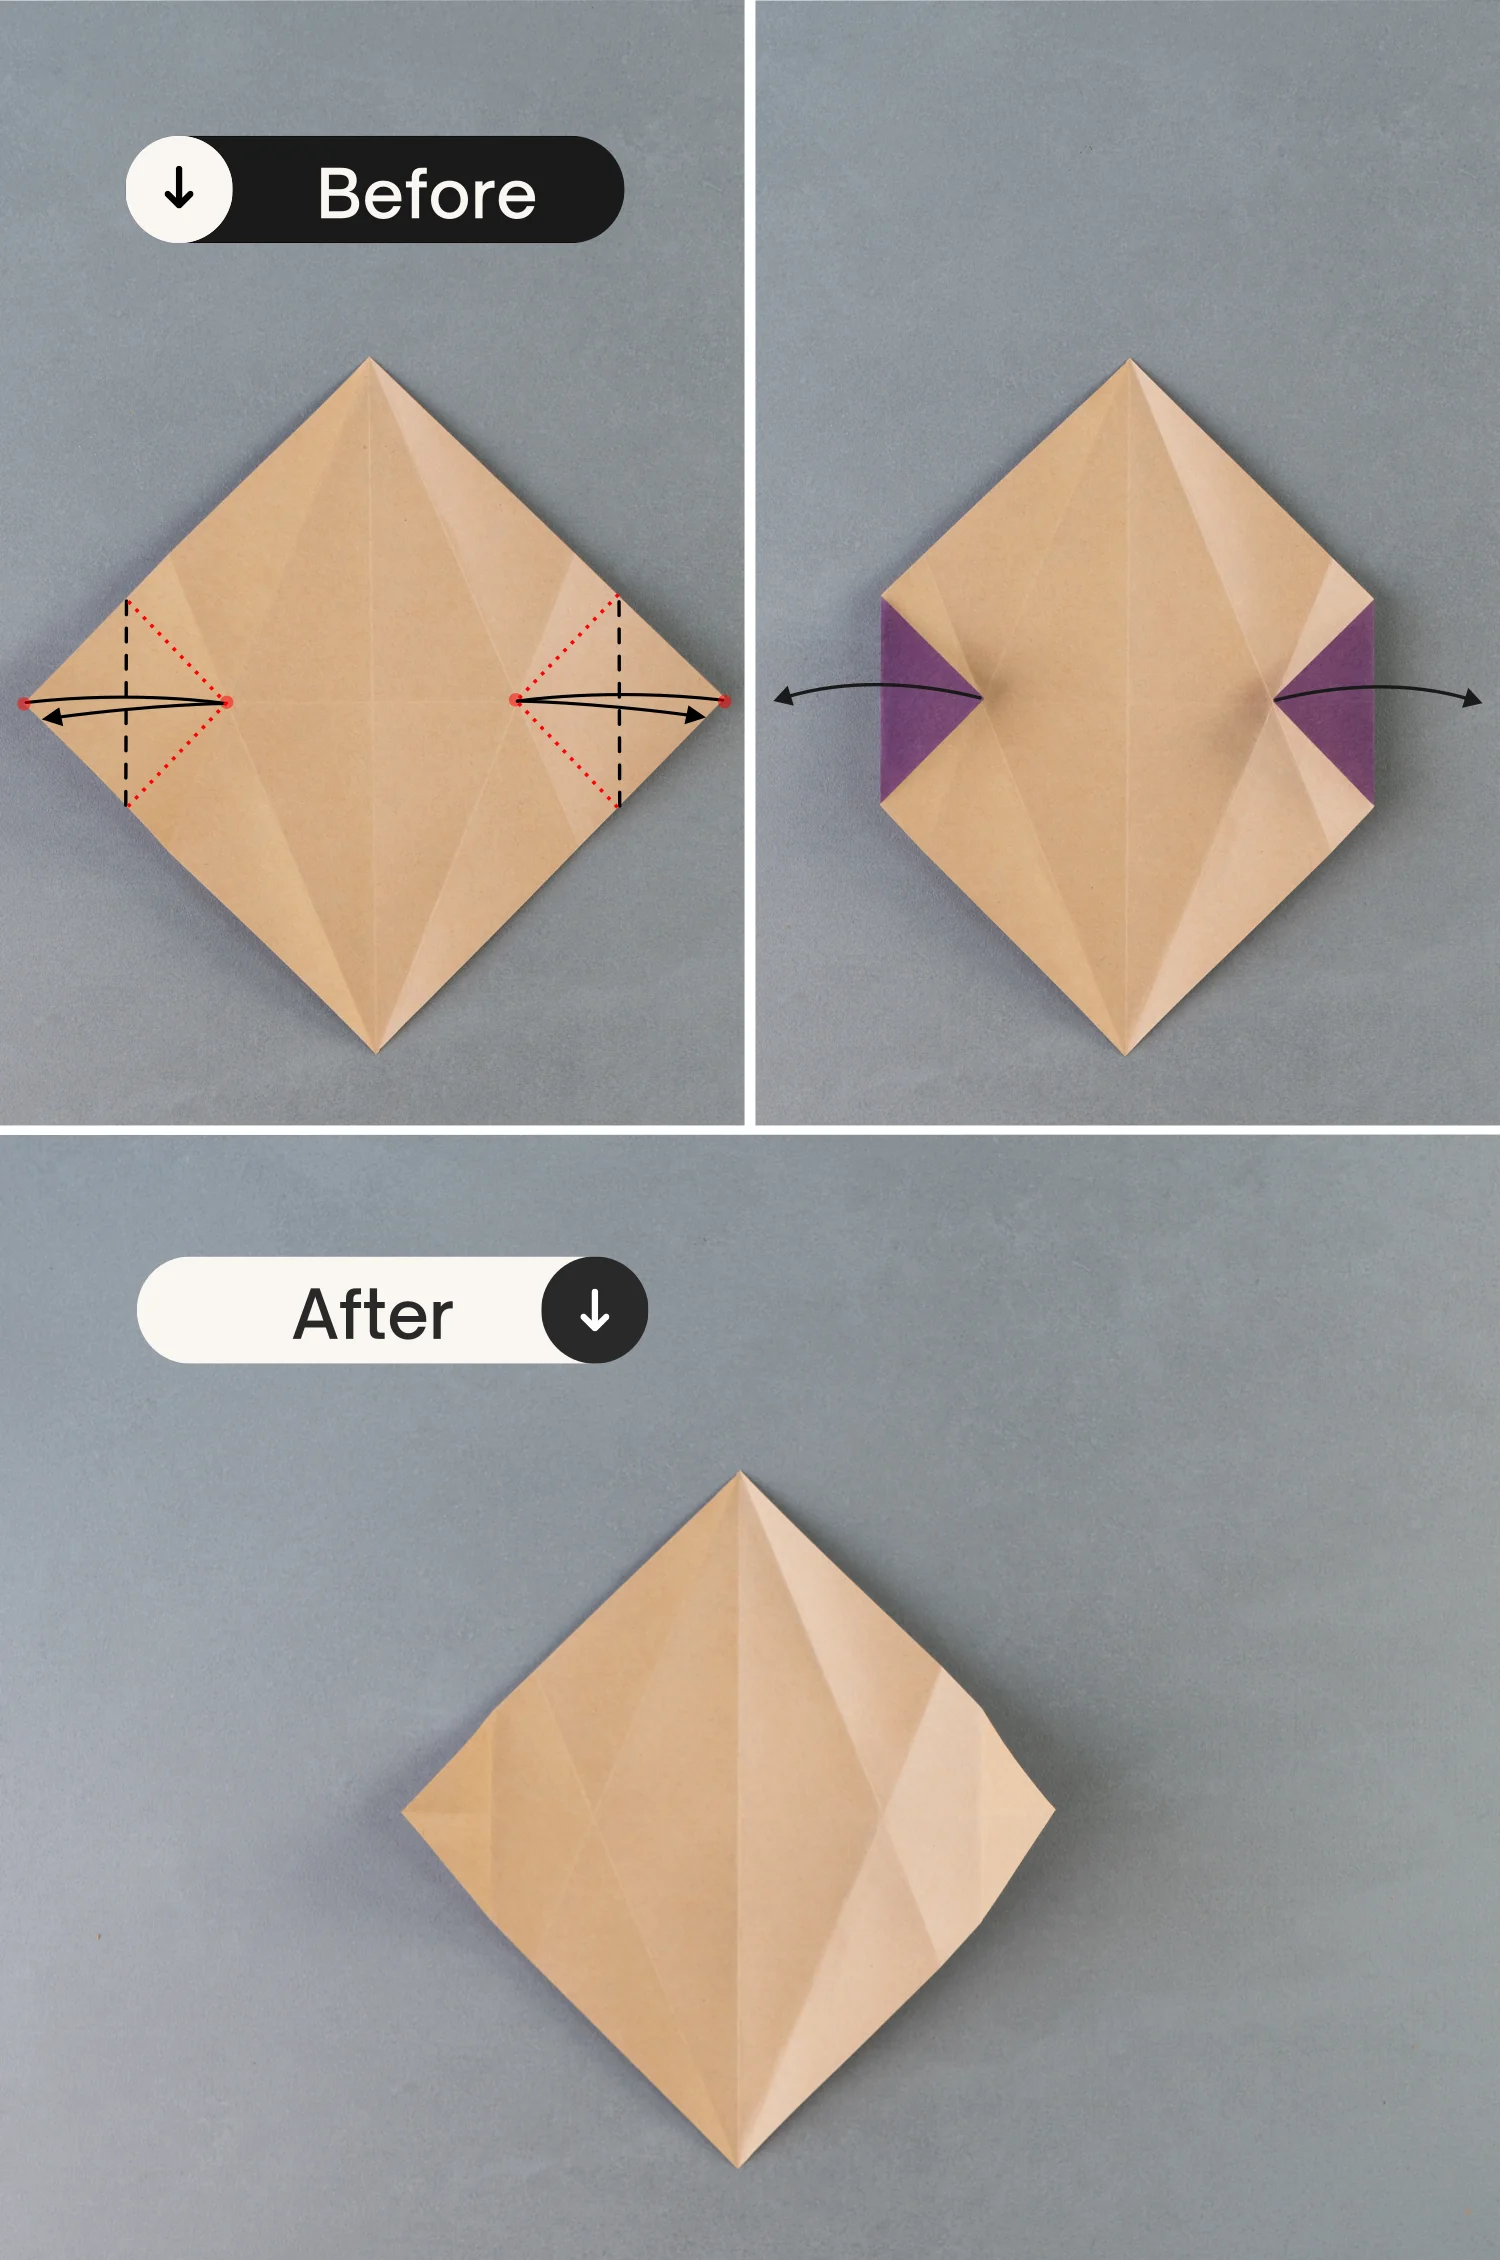
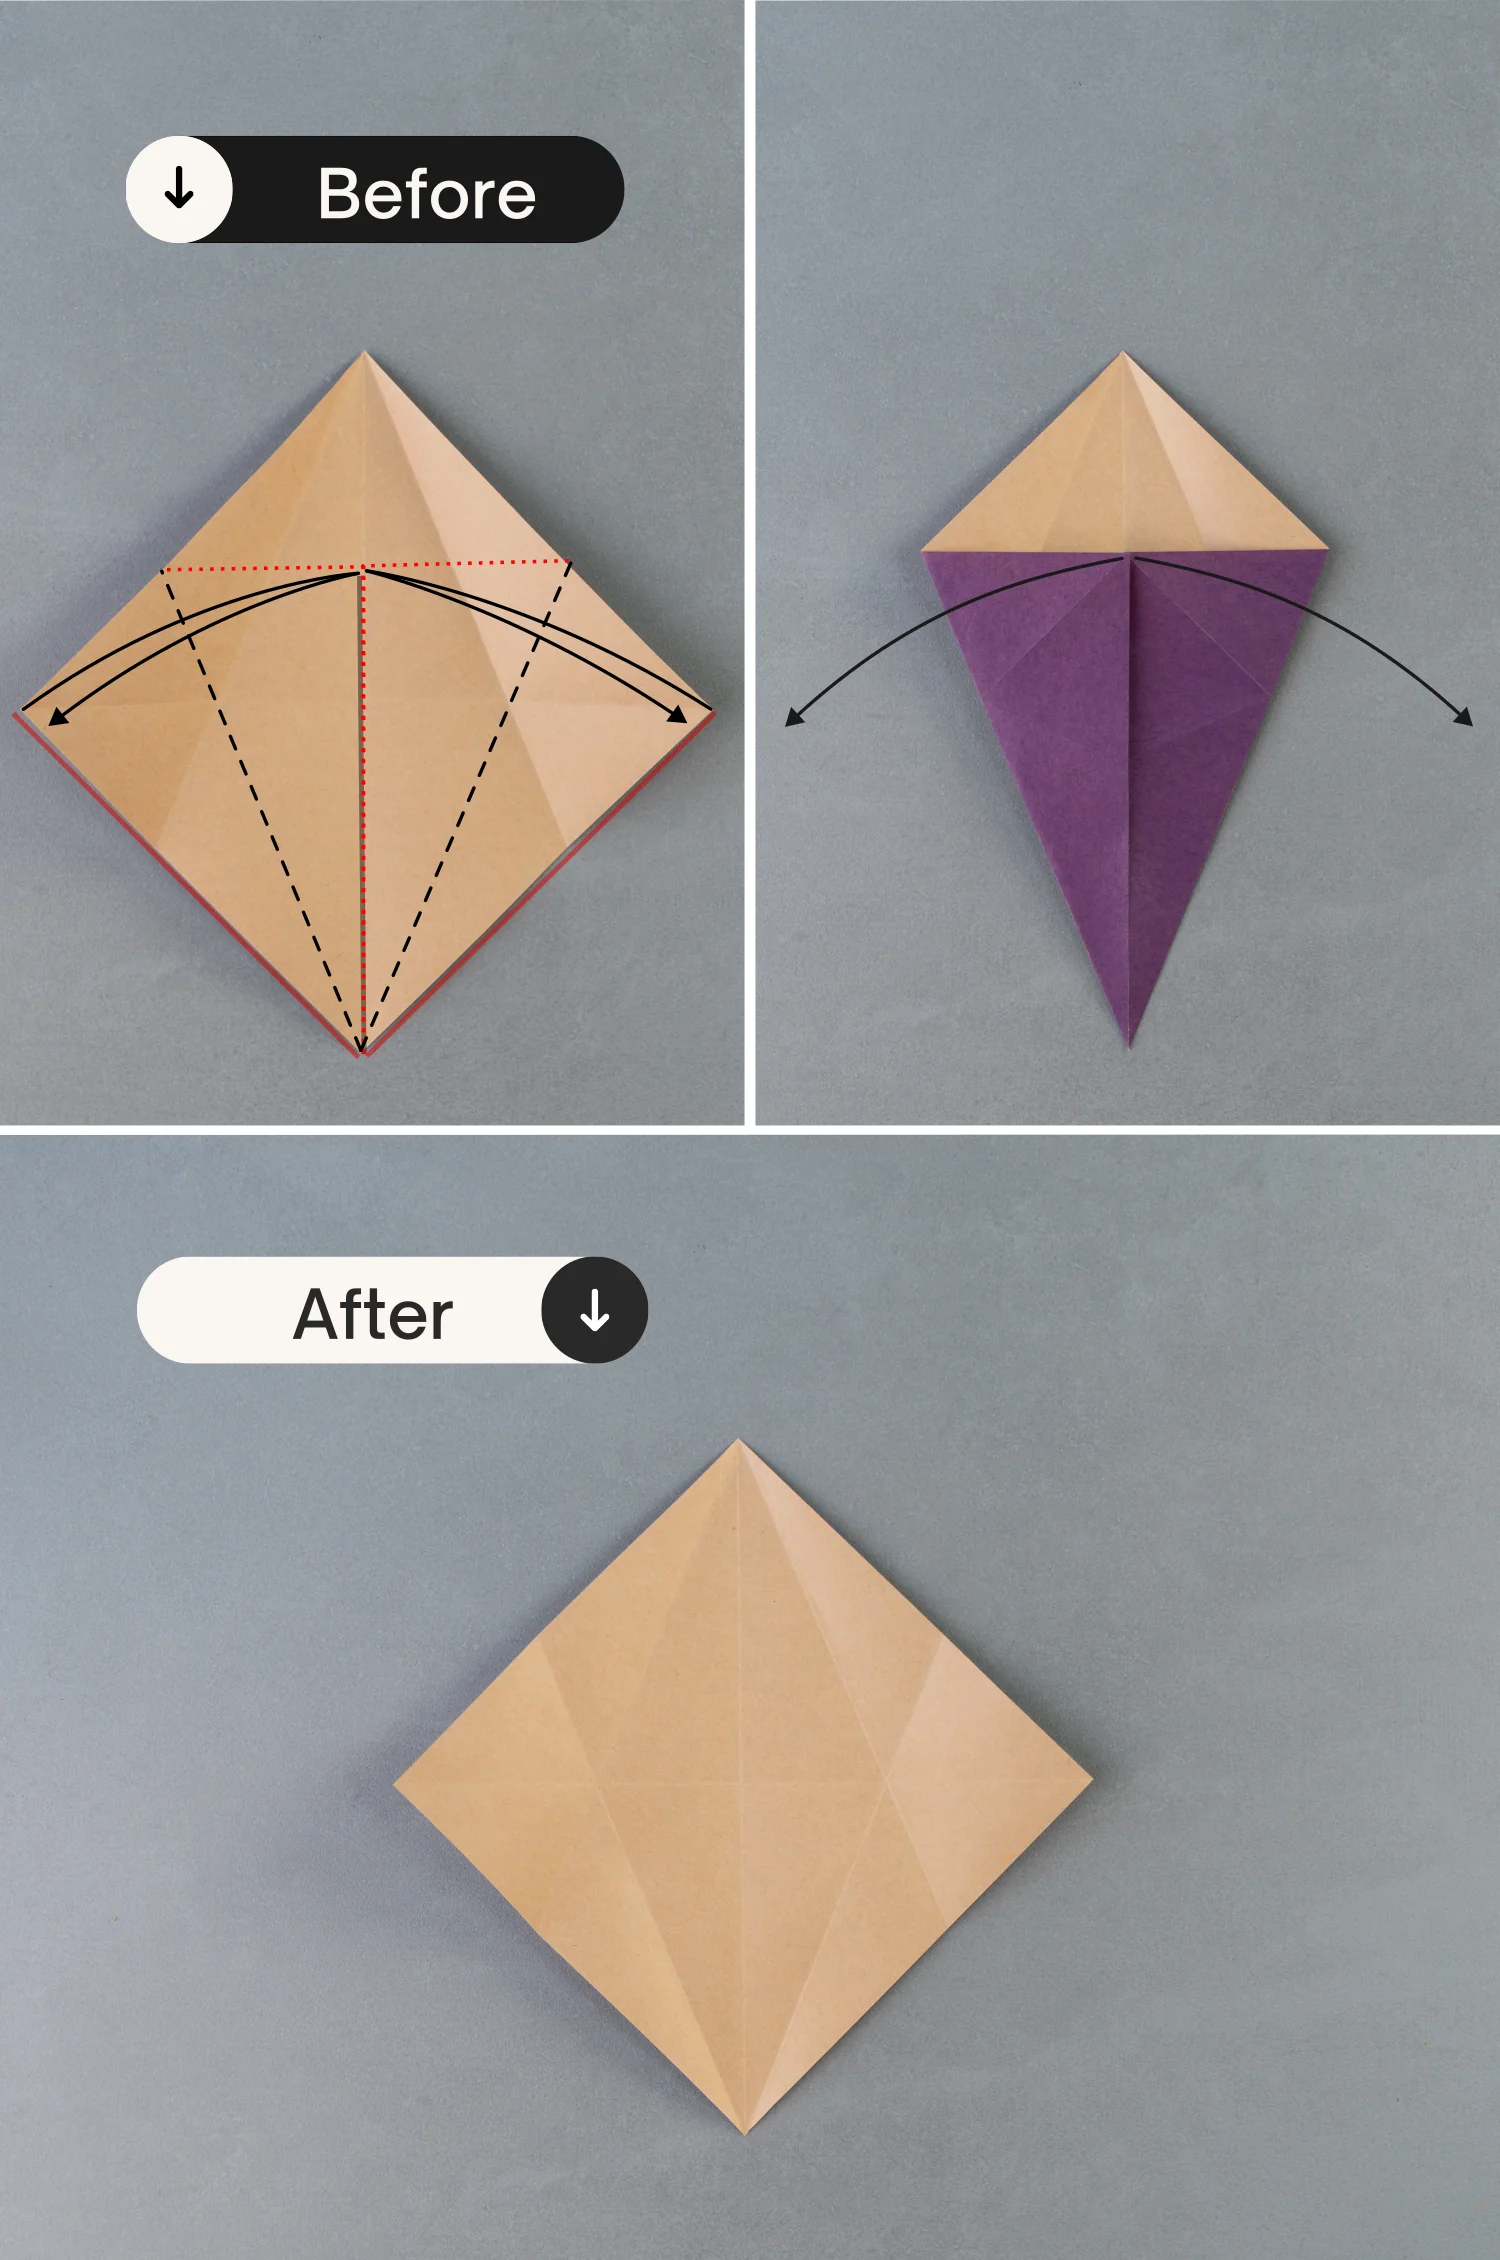
Step 6
Bring up the four edges along the existing creases, then press them down to sharpen the four corners and make the left and right corners stand.
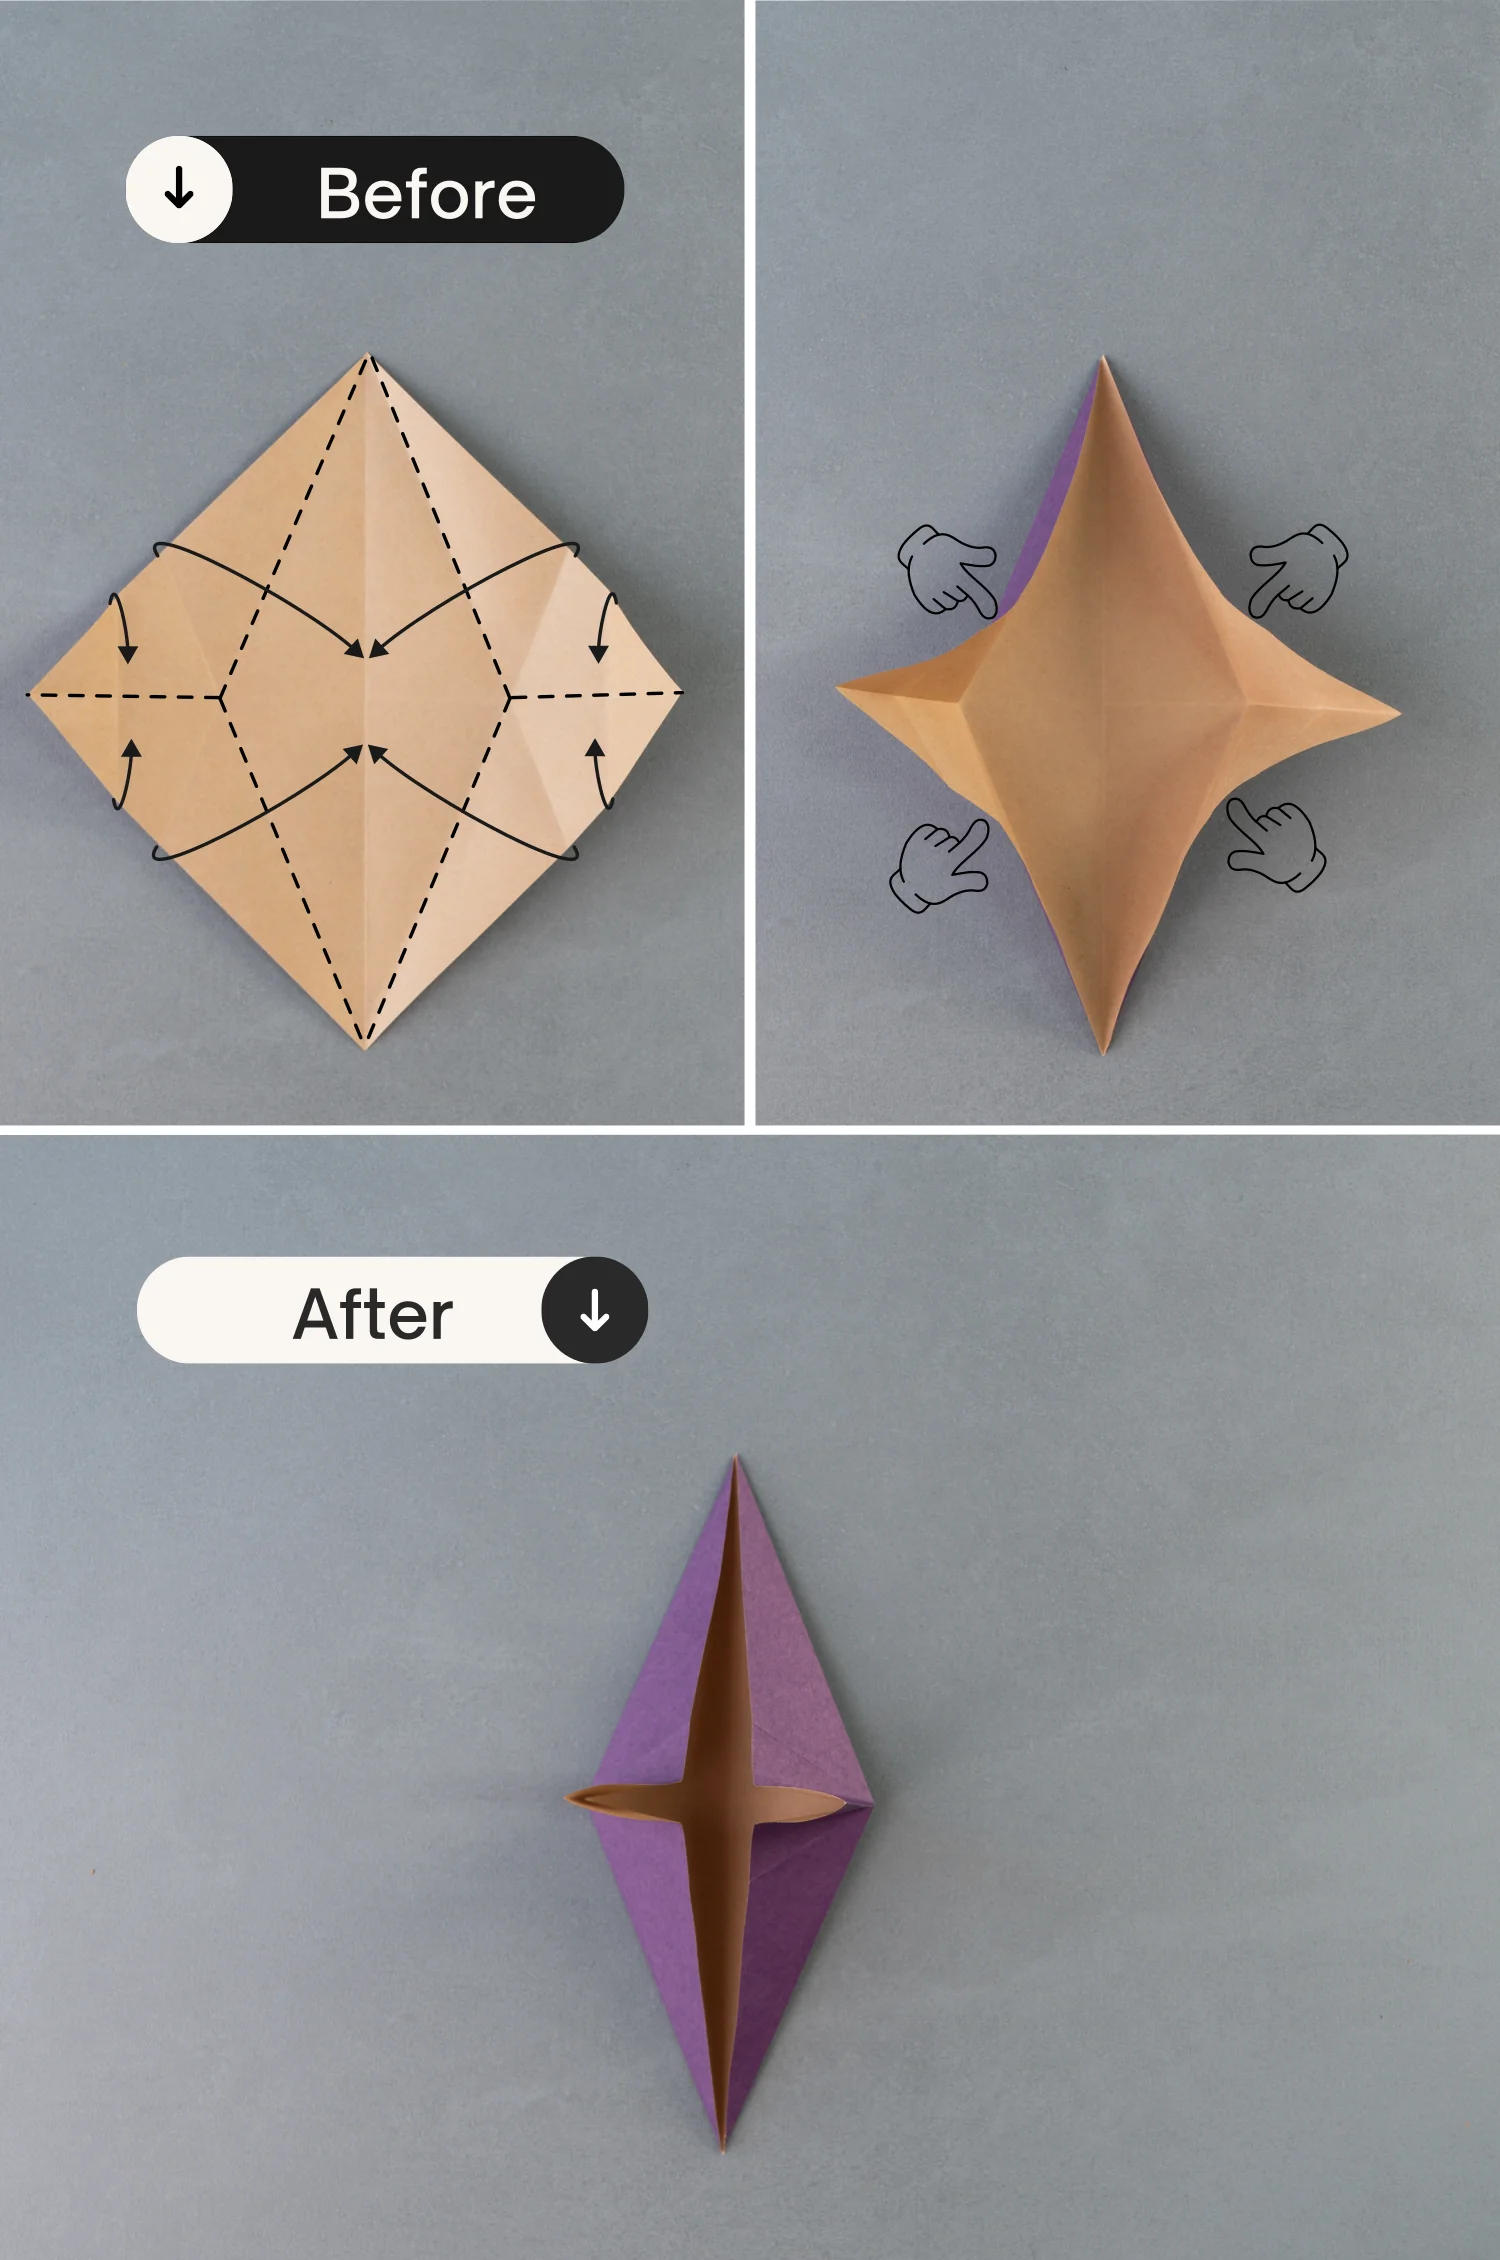
Step 7
Press down the top and bottom layers backward, then rotate the paper 90 degrees from back to front.
Step 8
Fold the paper in half vertically from right to left, then rotate it 90 degrees from right to left, and finally, open these two pocket.
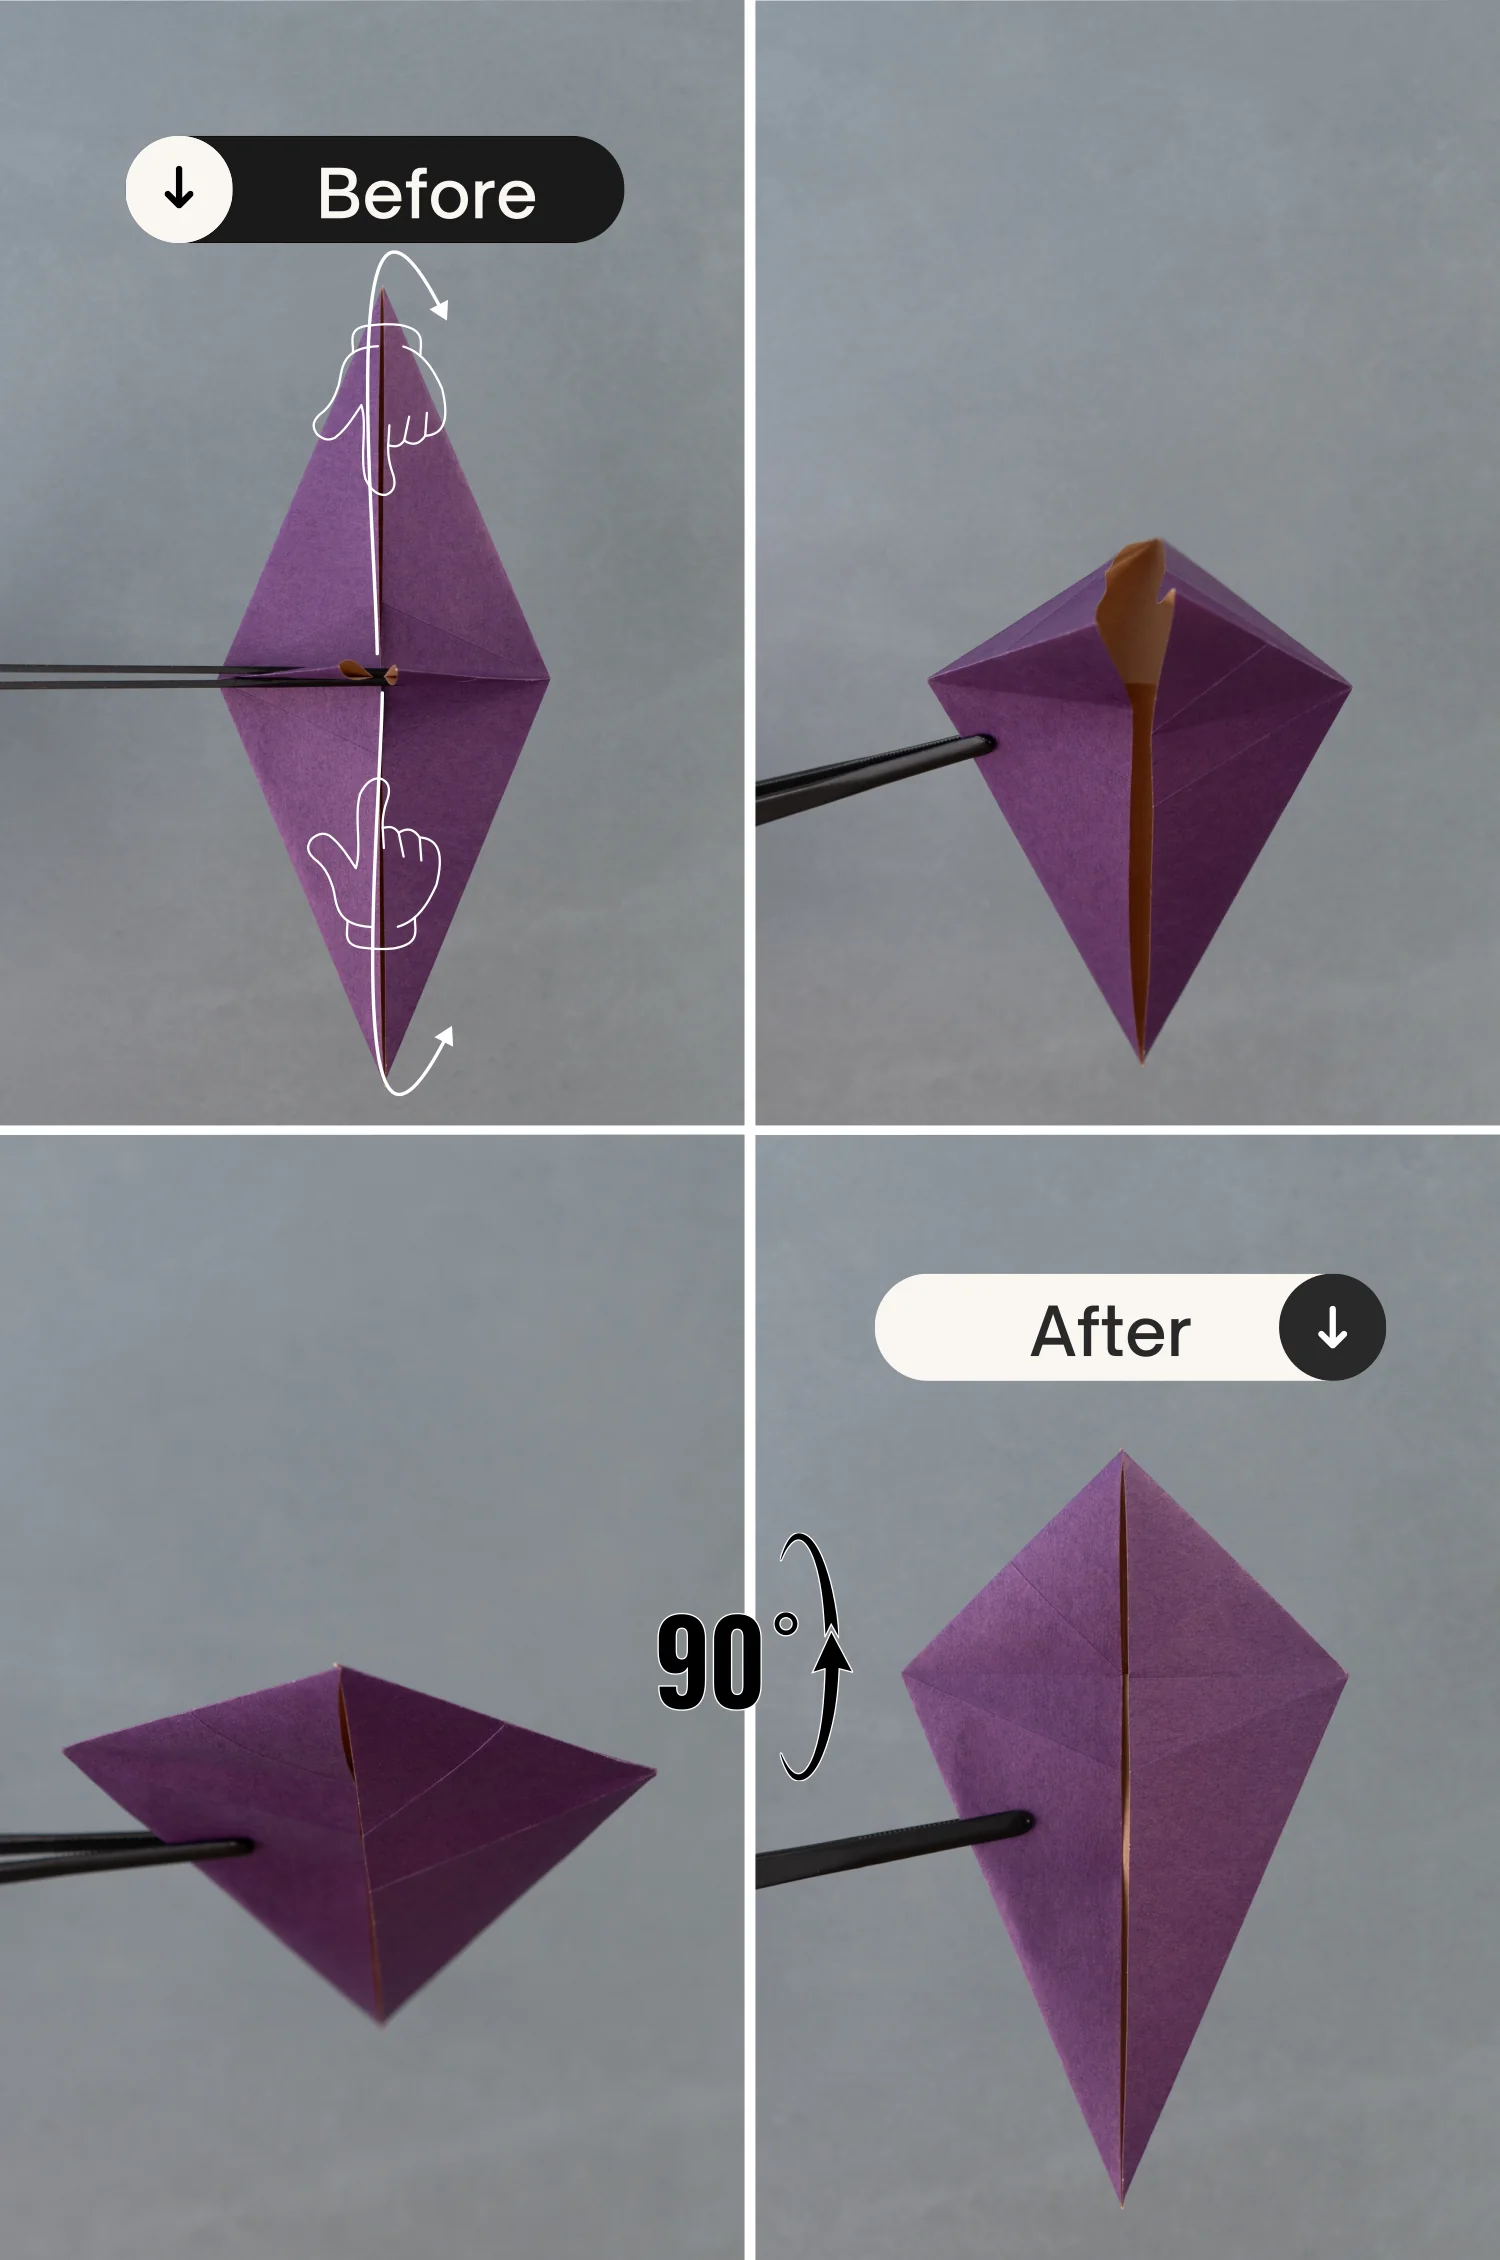
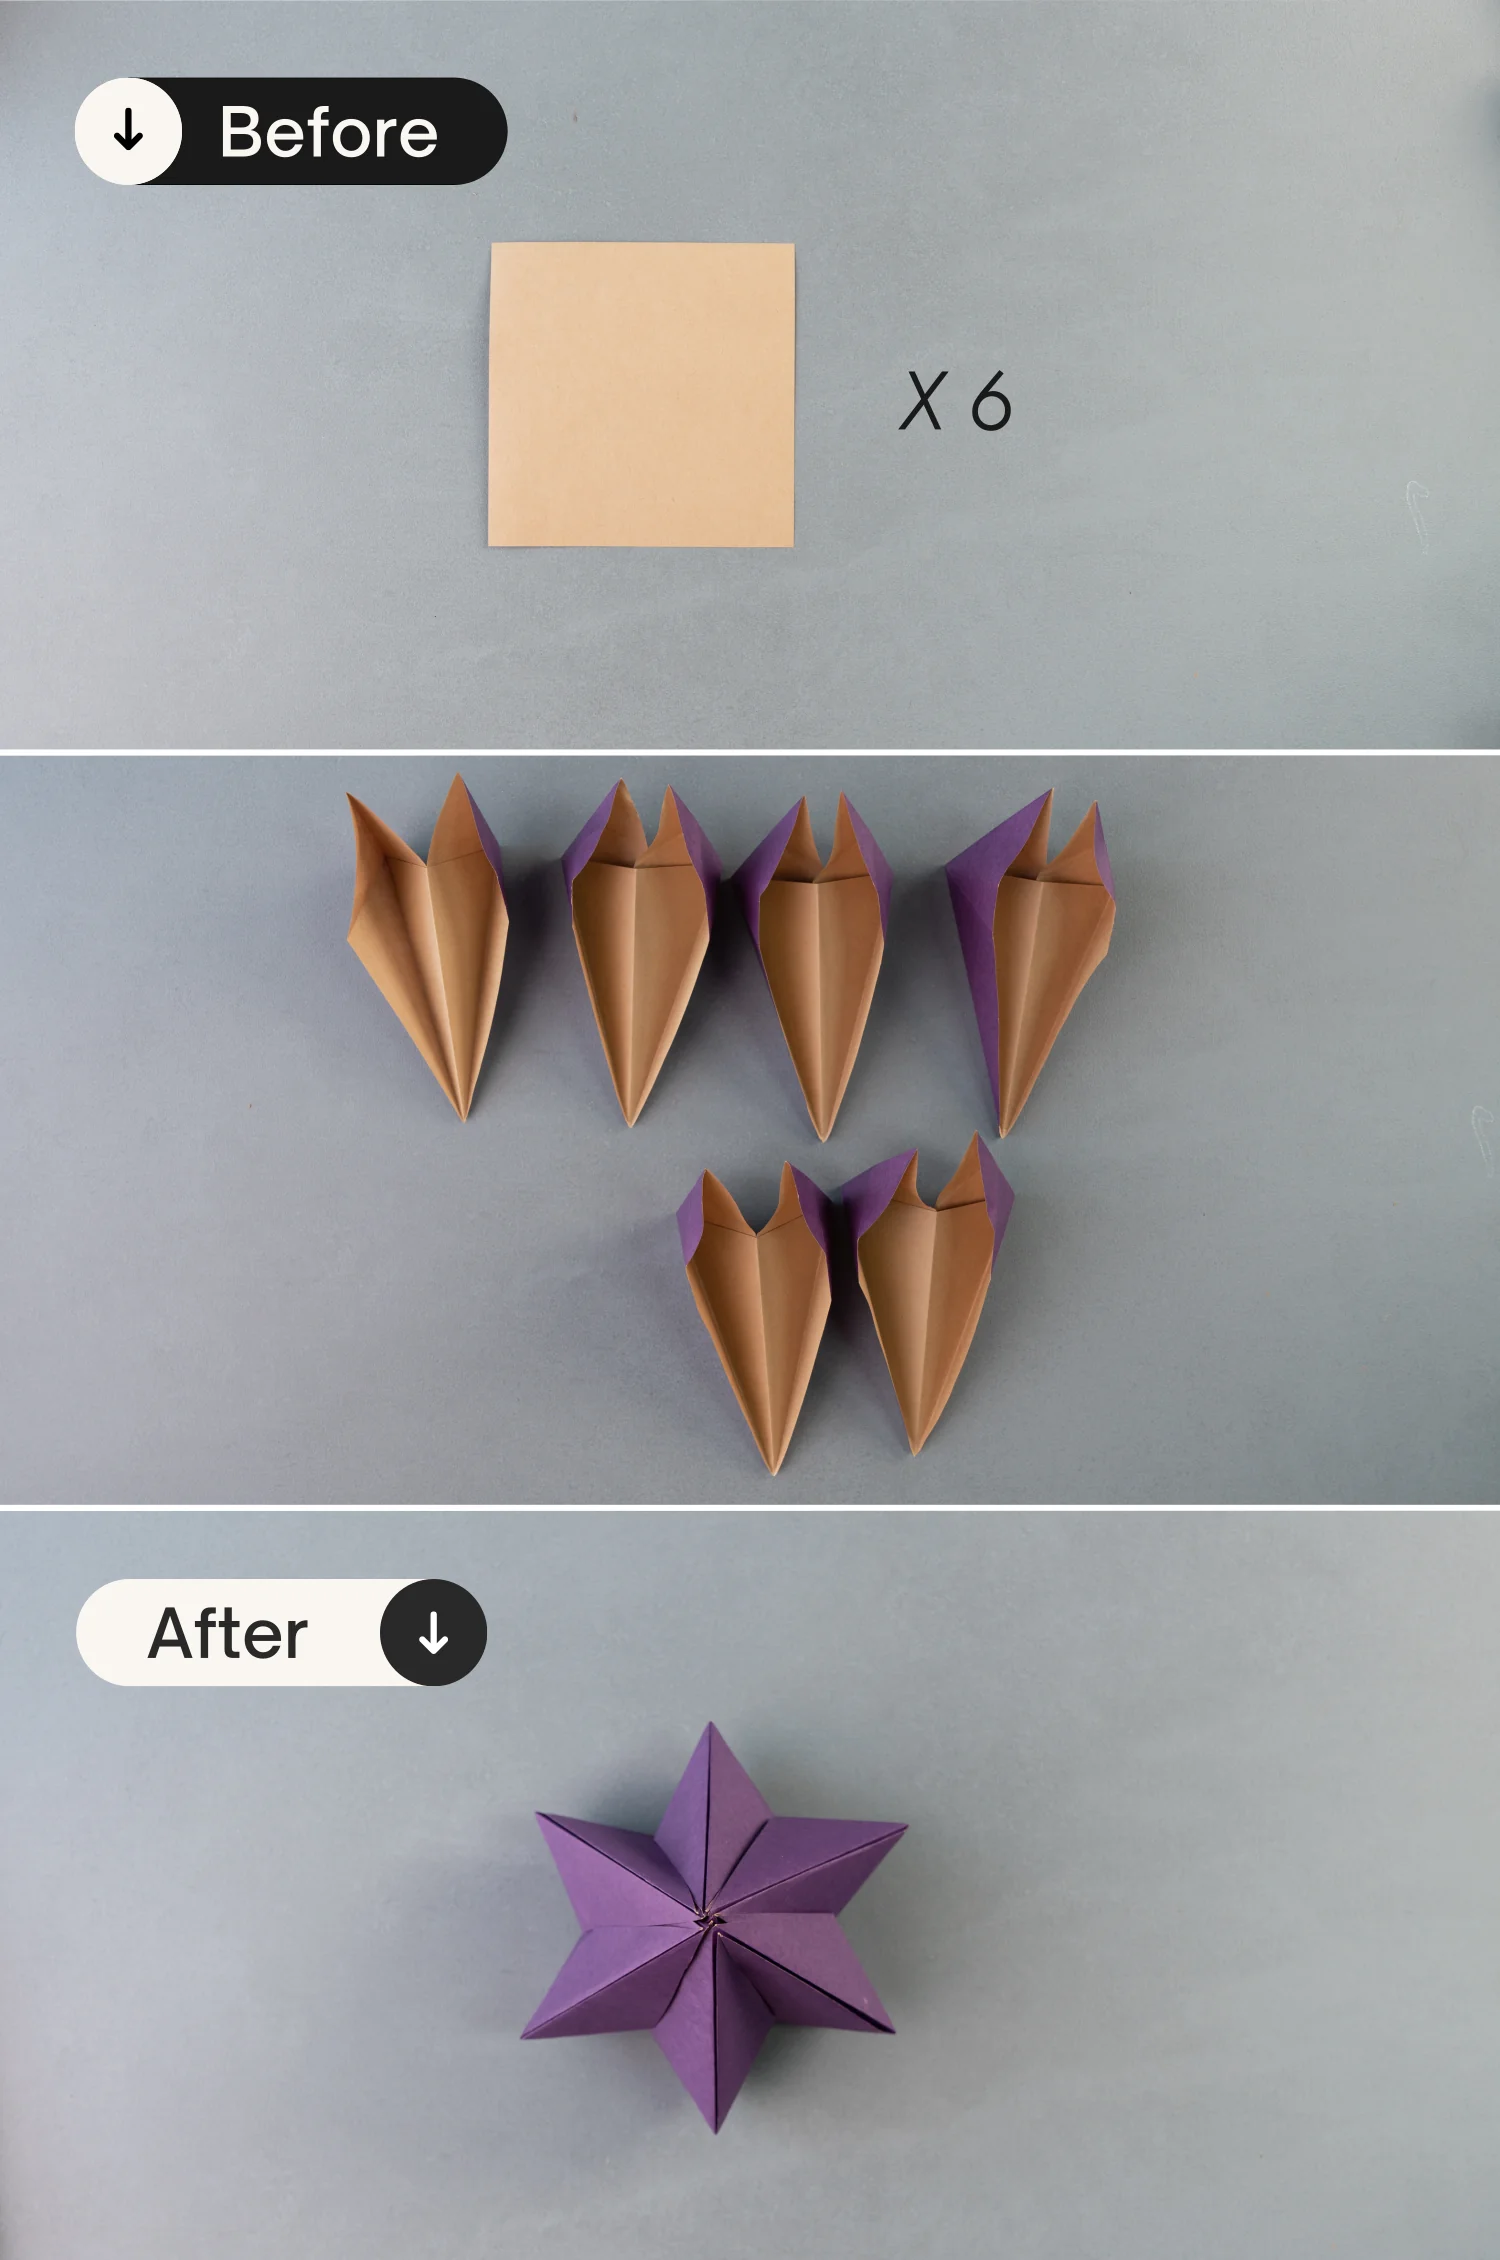
Step 9
Fold another 5 pieces of purple paper in the same manner to get another 5 modules.
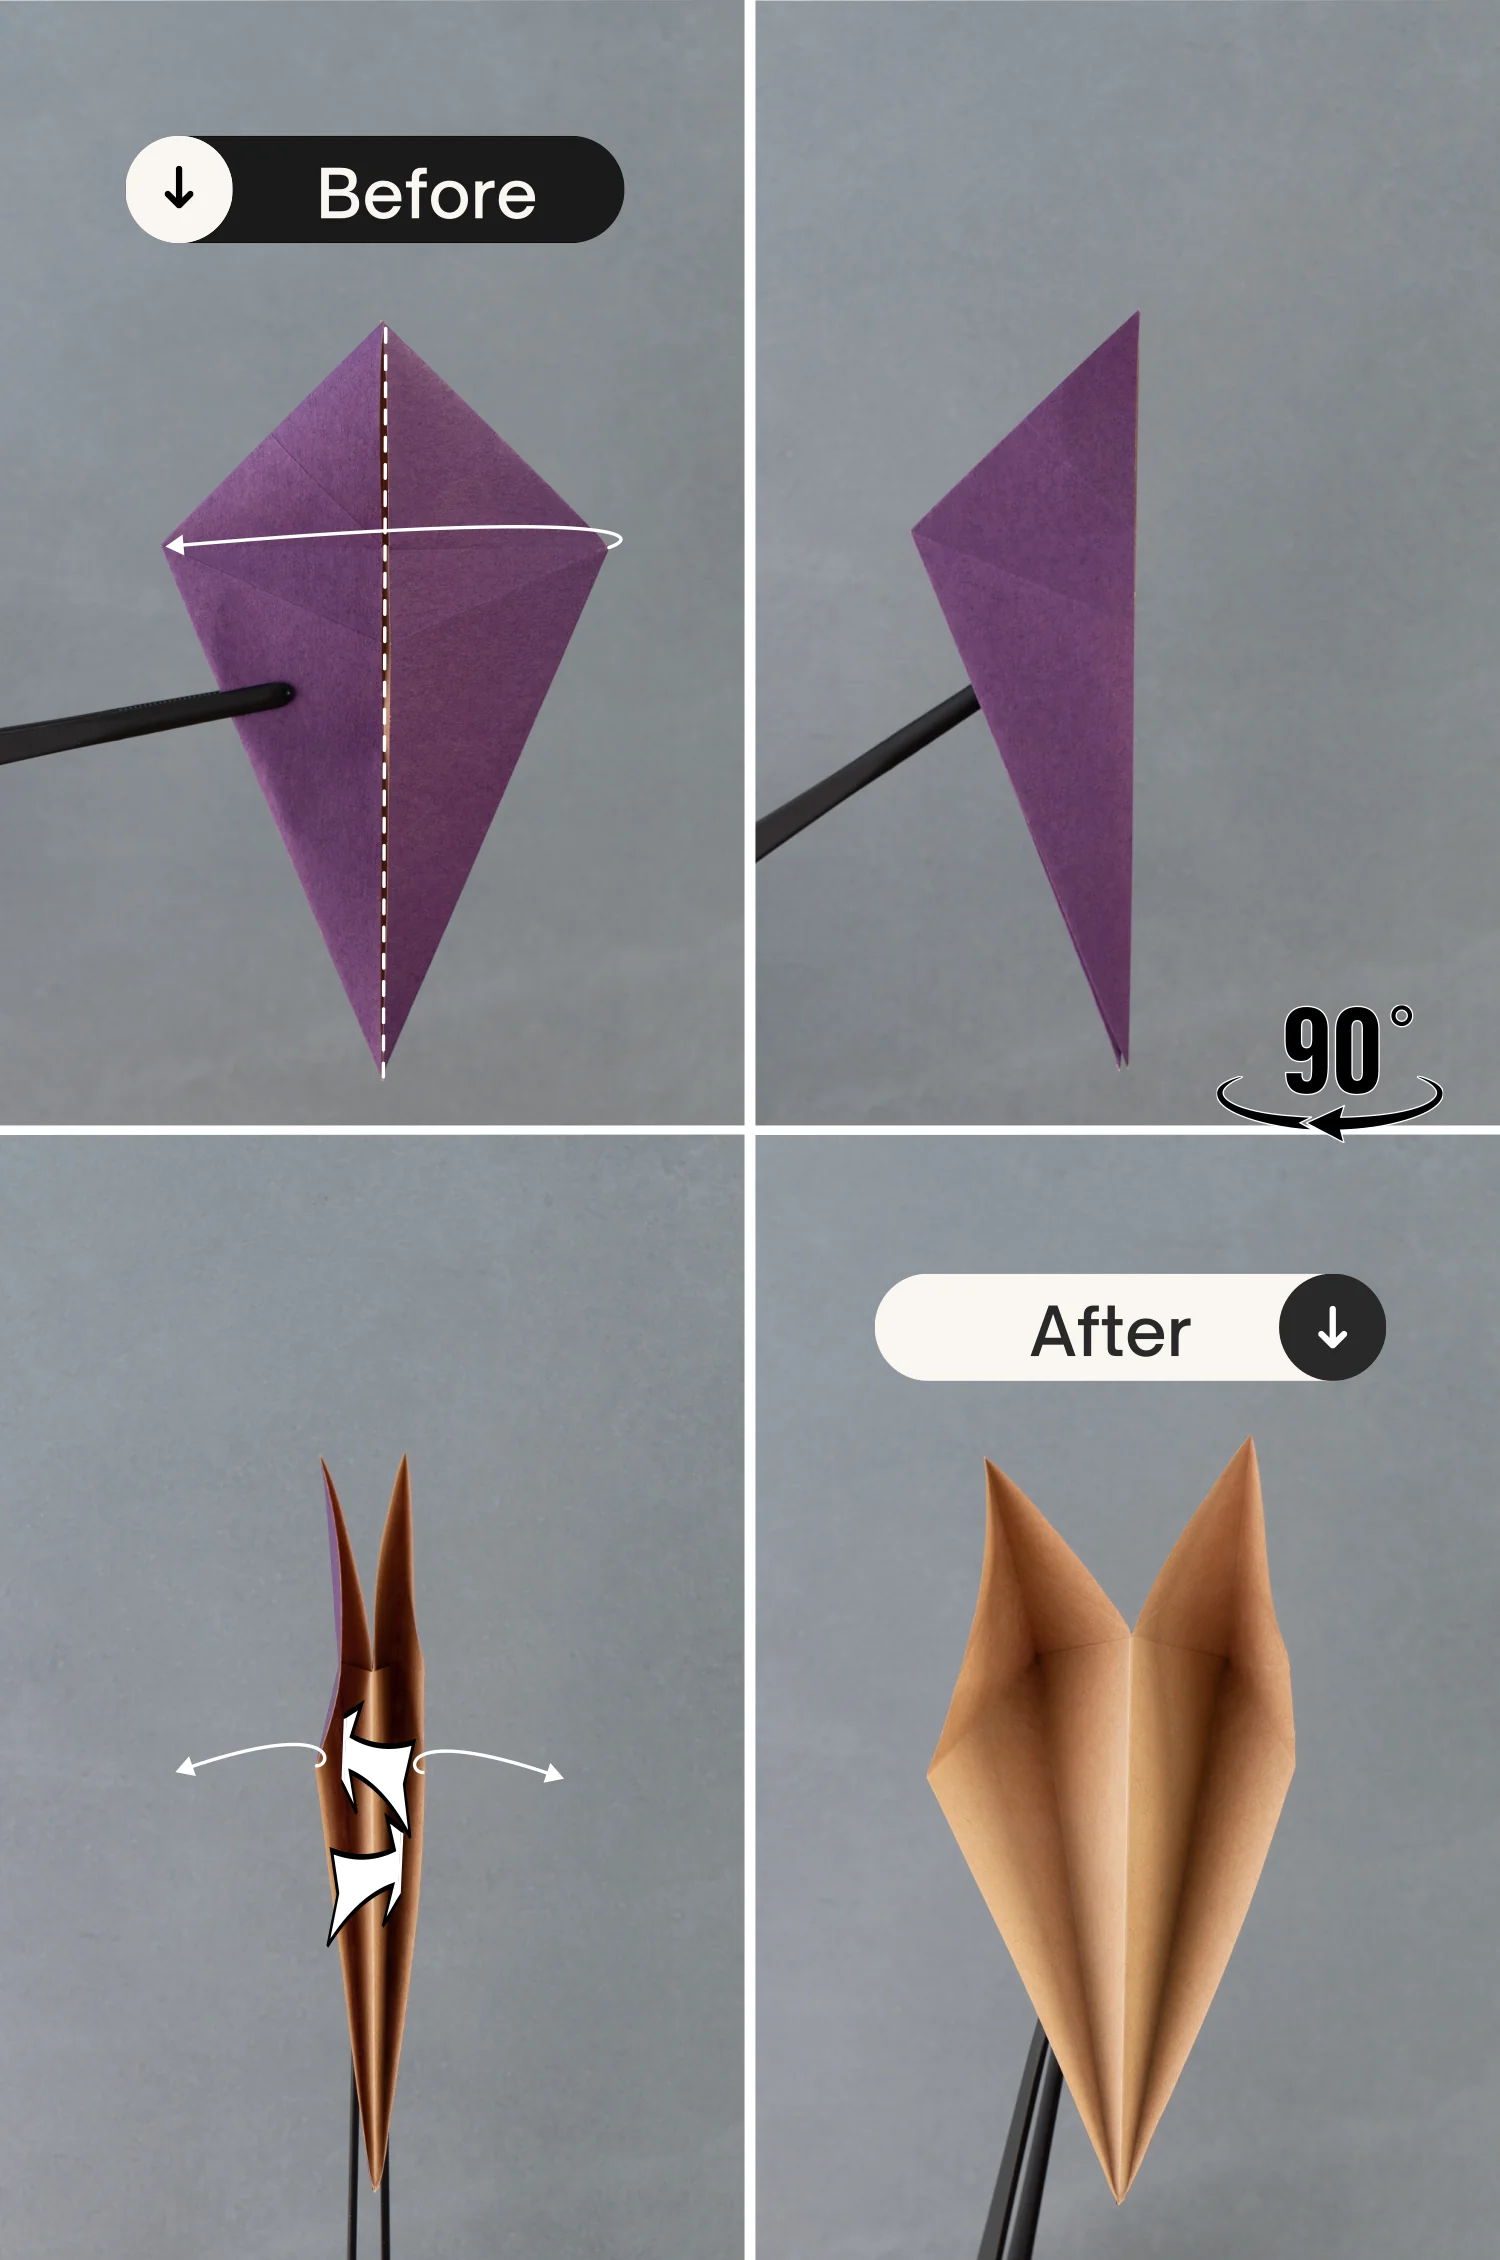
Step 10
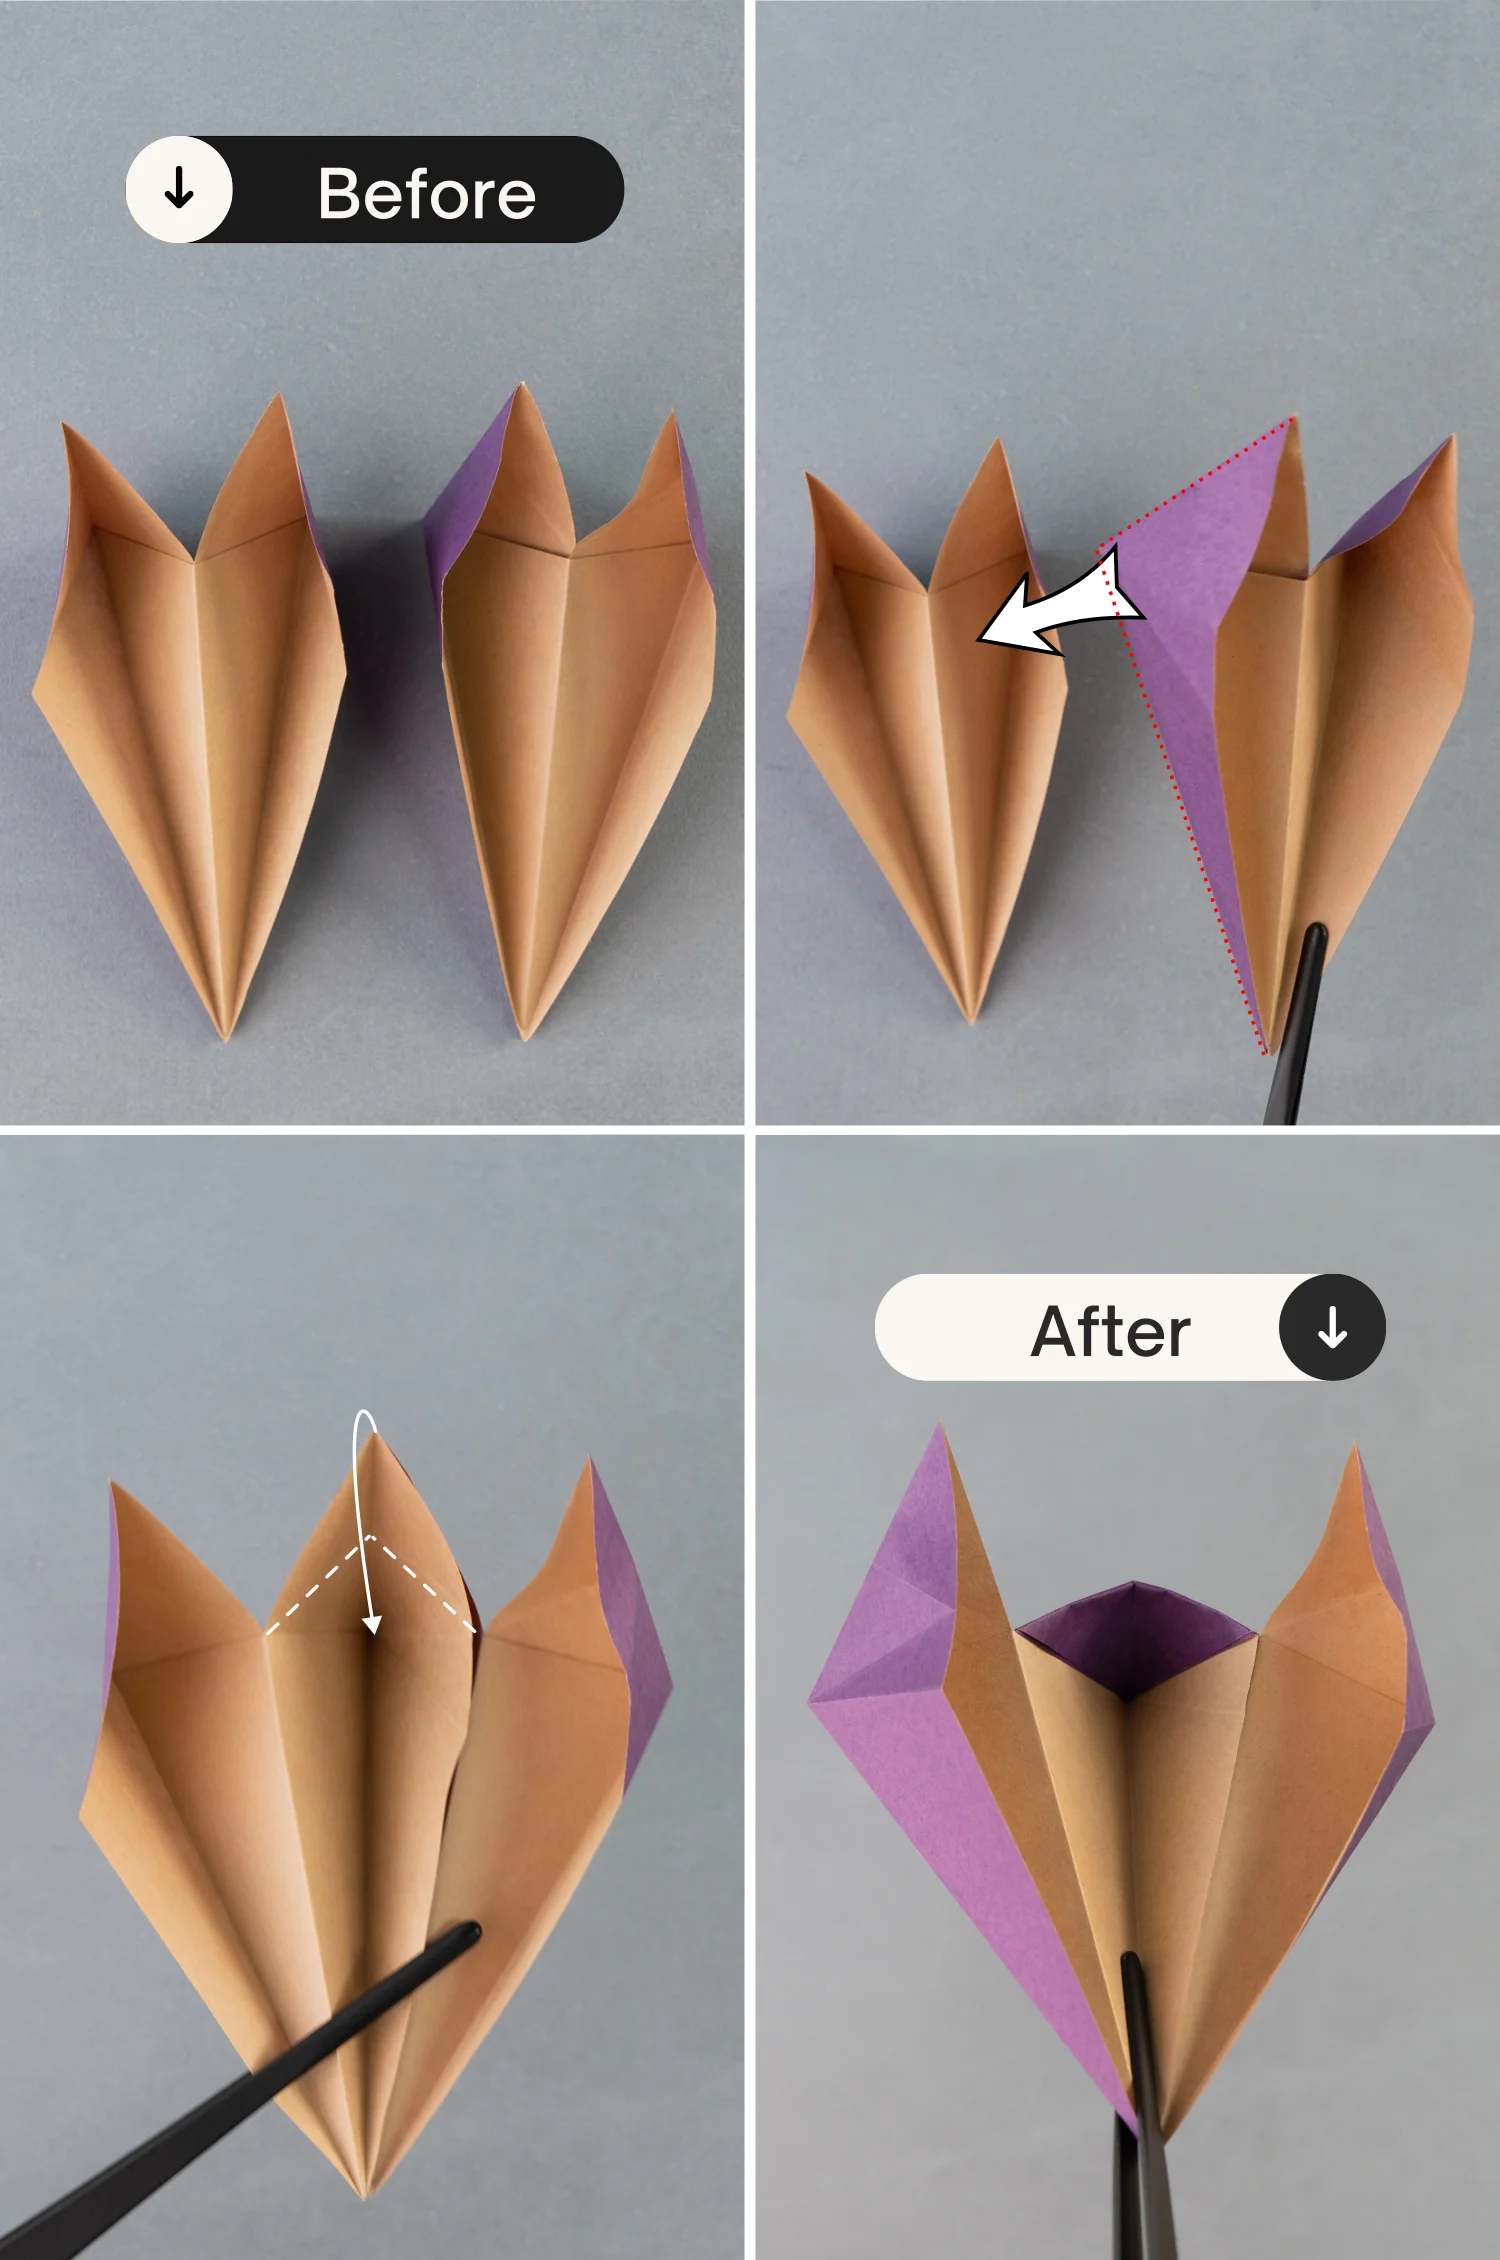
Take out two of the modules, and place them side by side, then put the left part of the right module into the right part of the left module to form a combined module with three parts.
Finally, fold the top point of the middle part down along the crease indicated by the dotted line.
Step 11
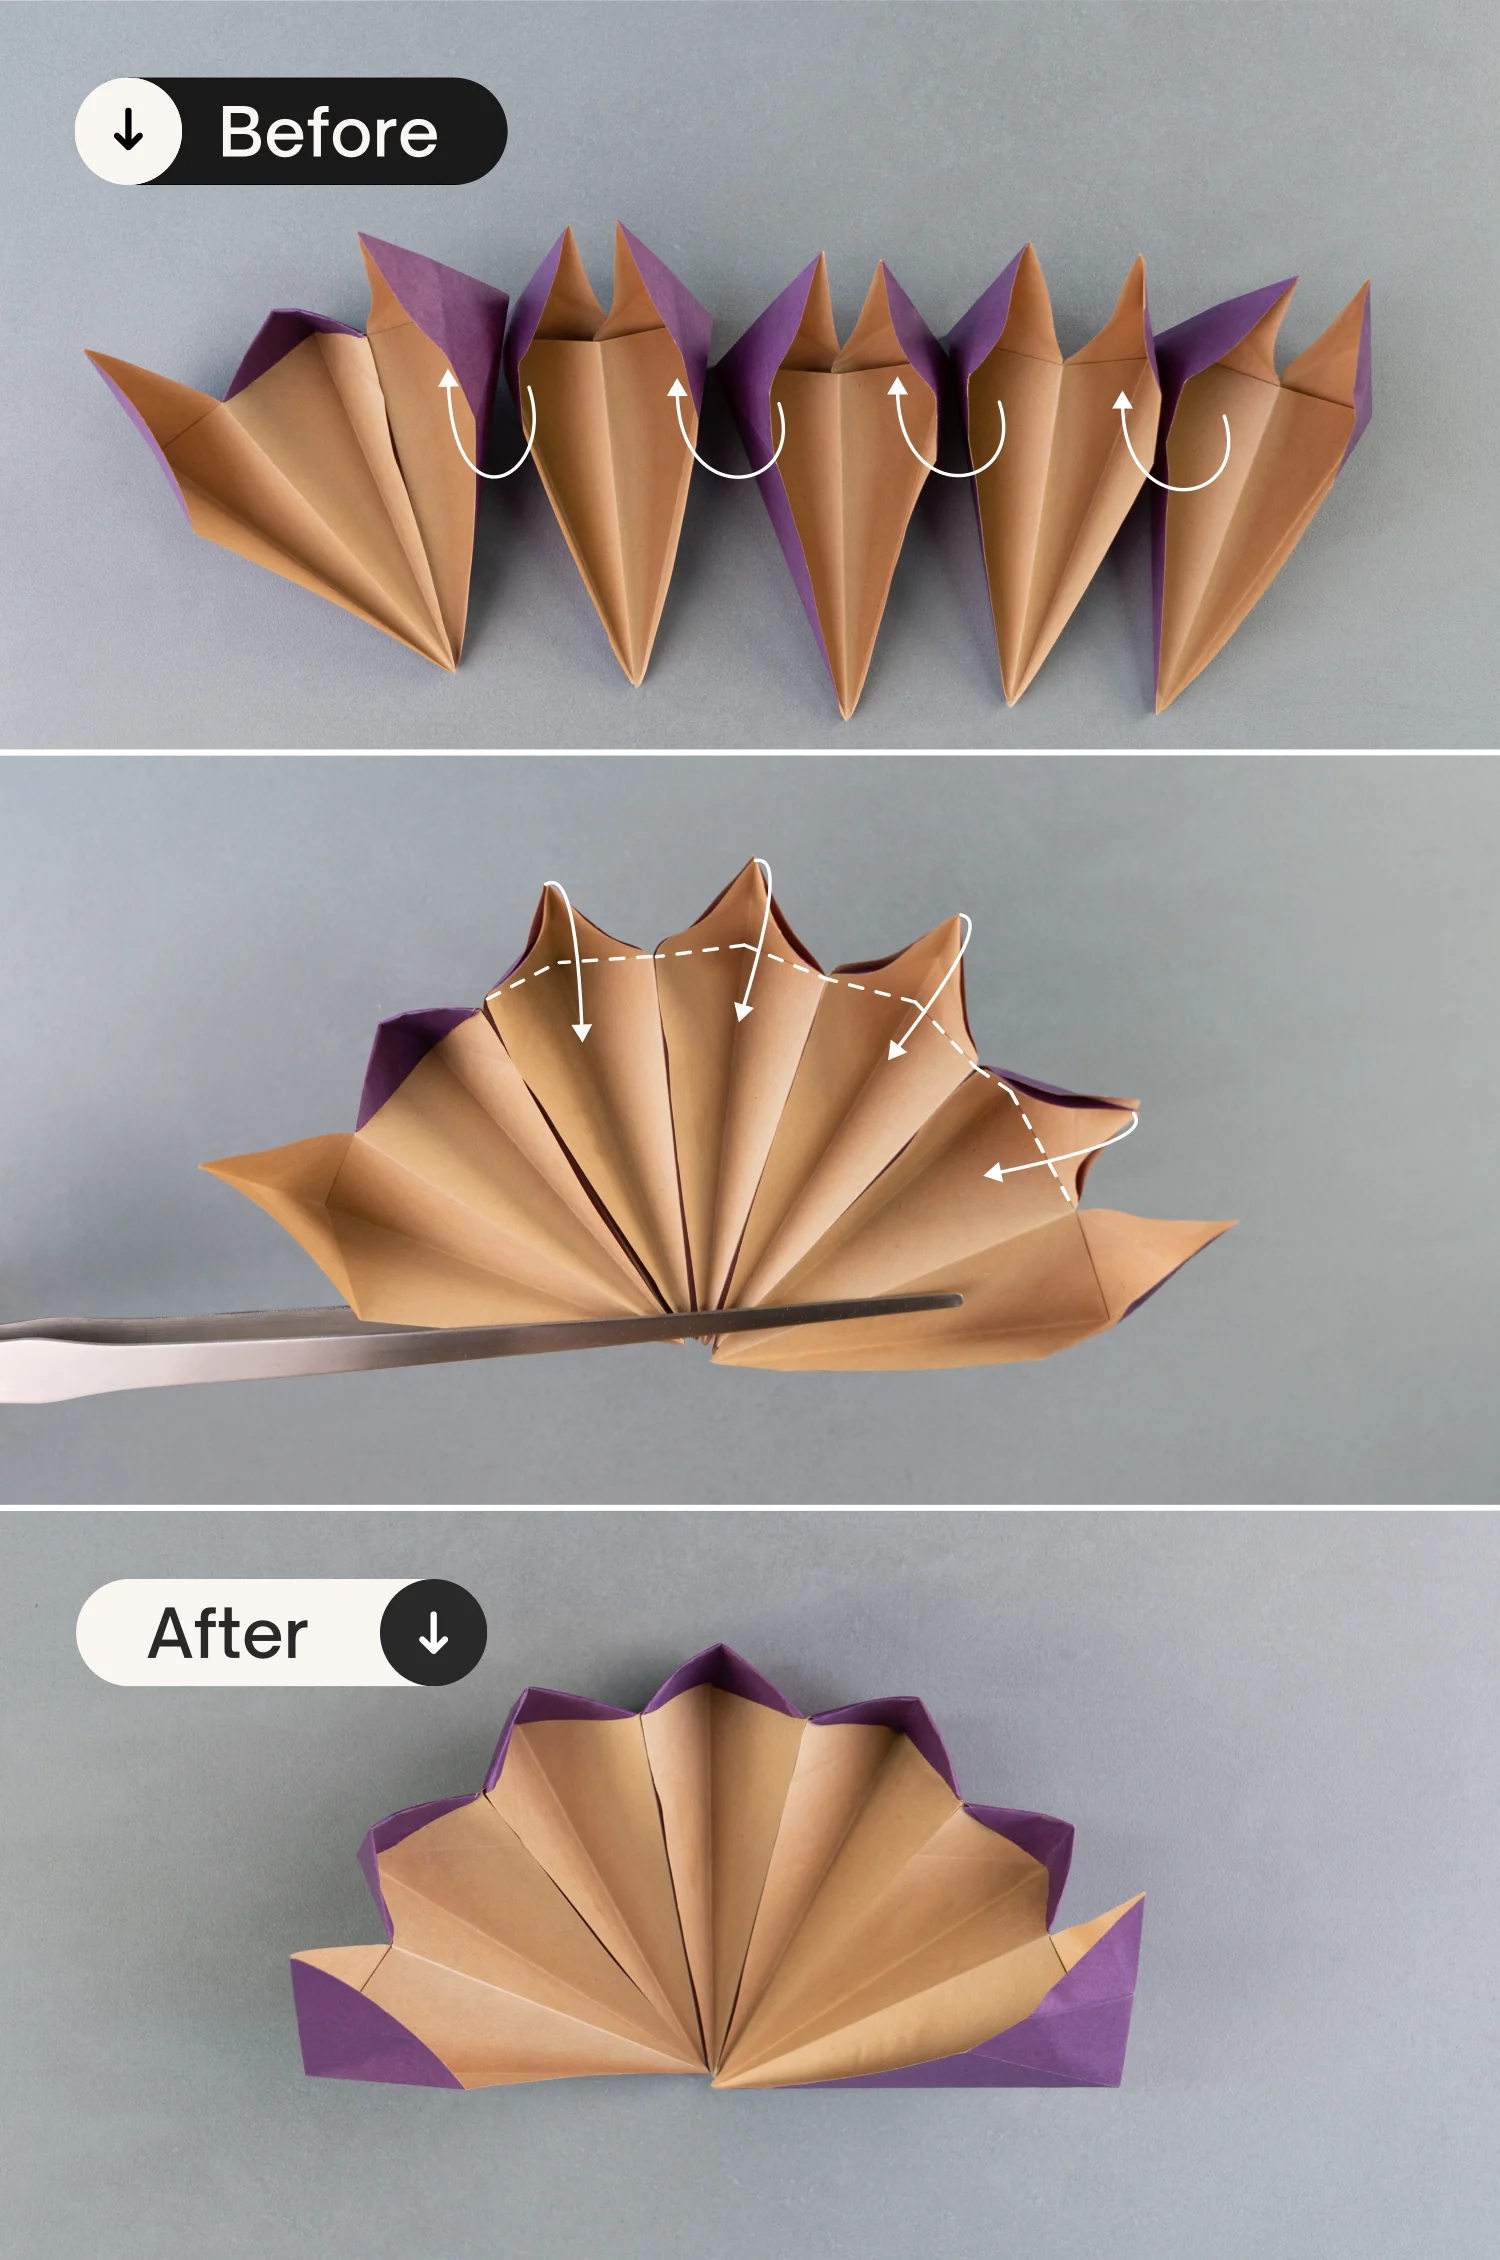
Combine the remaining four modules in the same way as above, and fold down the top point of each overlapping part.
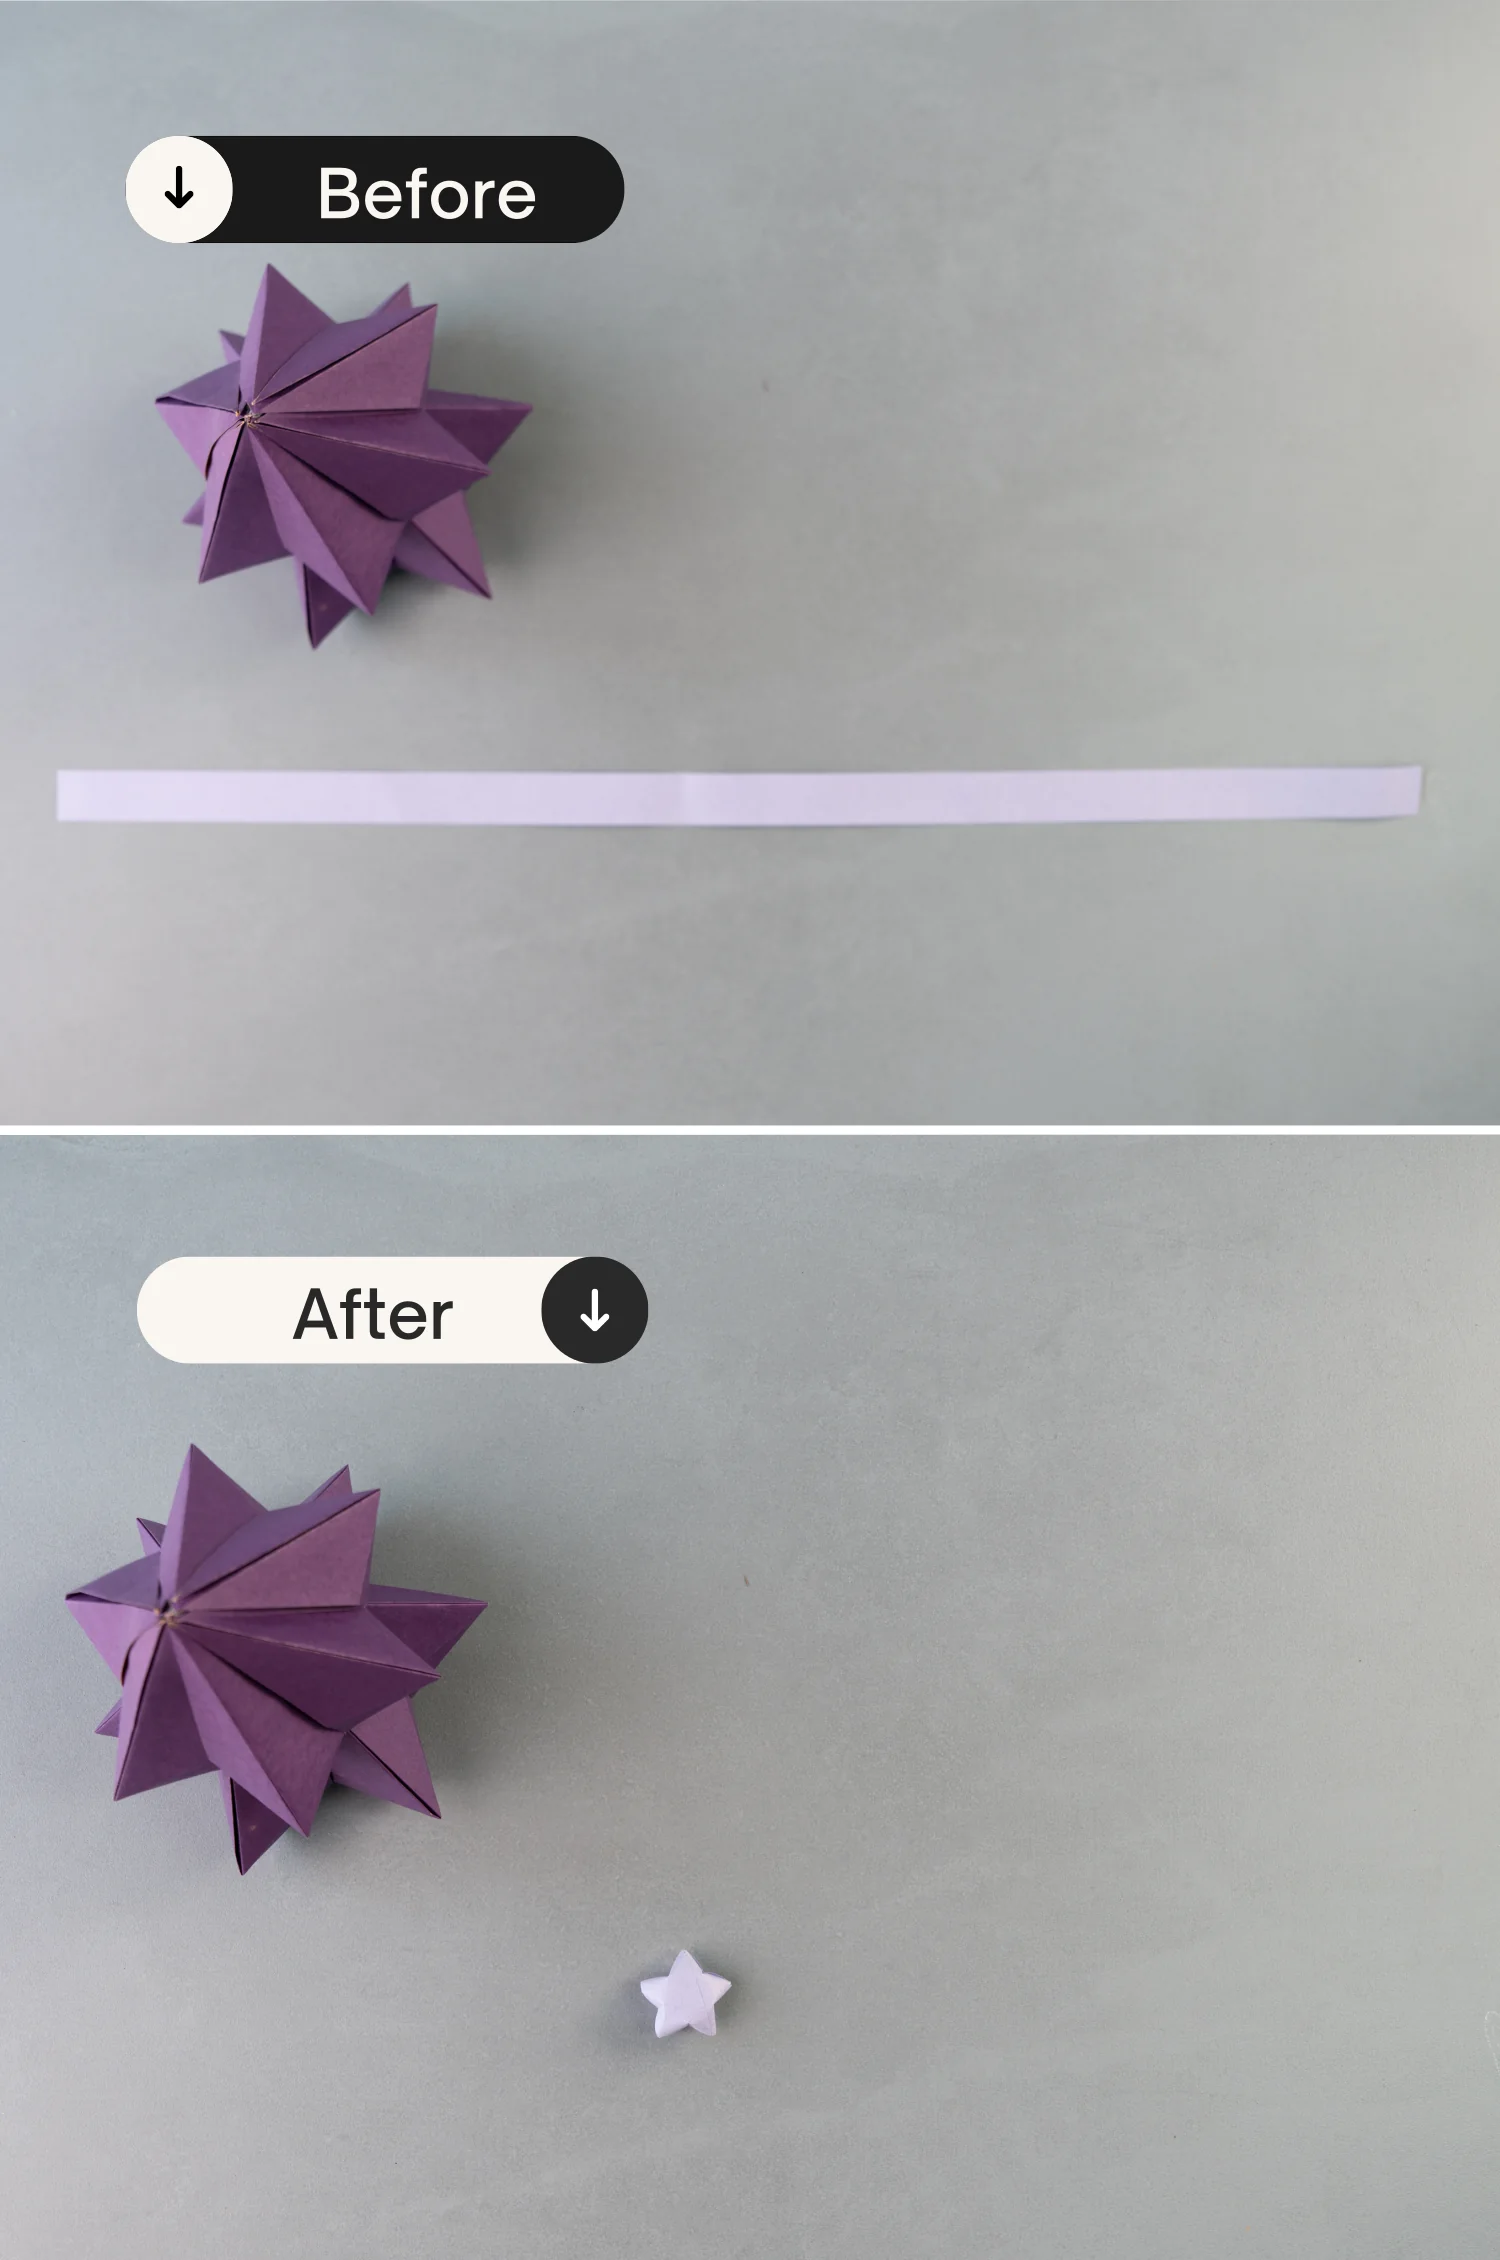
Step 12
Form it into a circle and overlap the two ends just like you did with the individual modules.
Step 13
Rotate it 180 degrees from left to right.

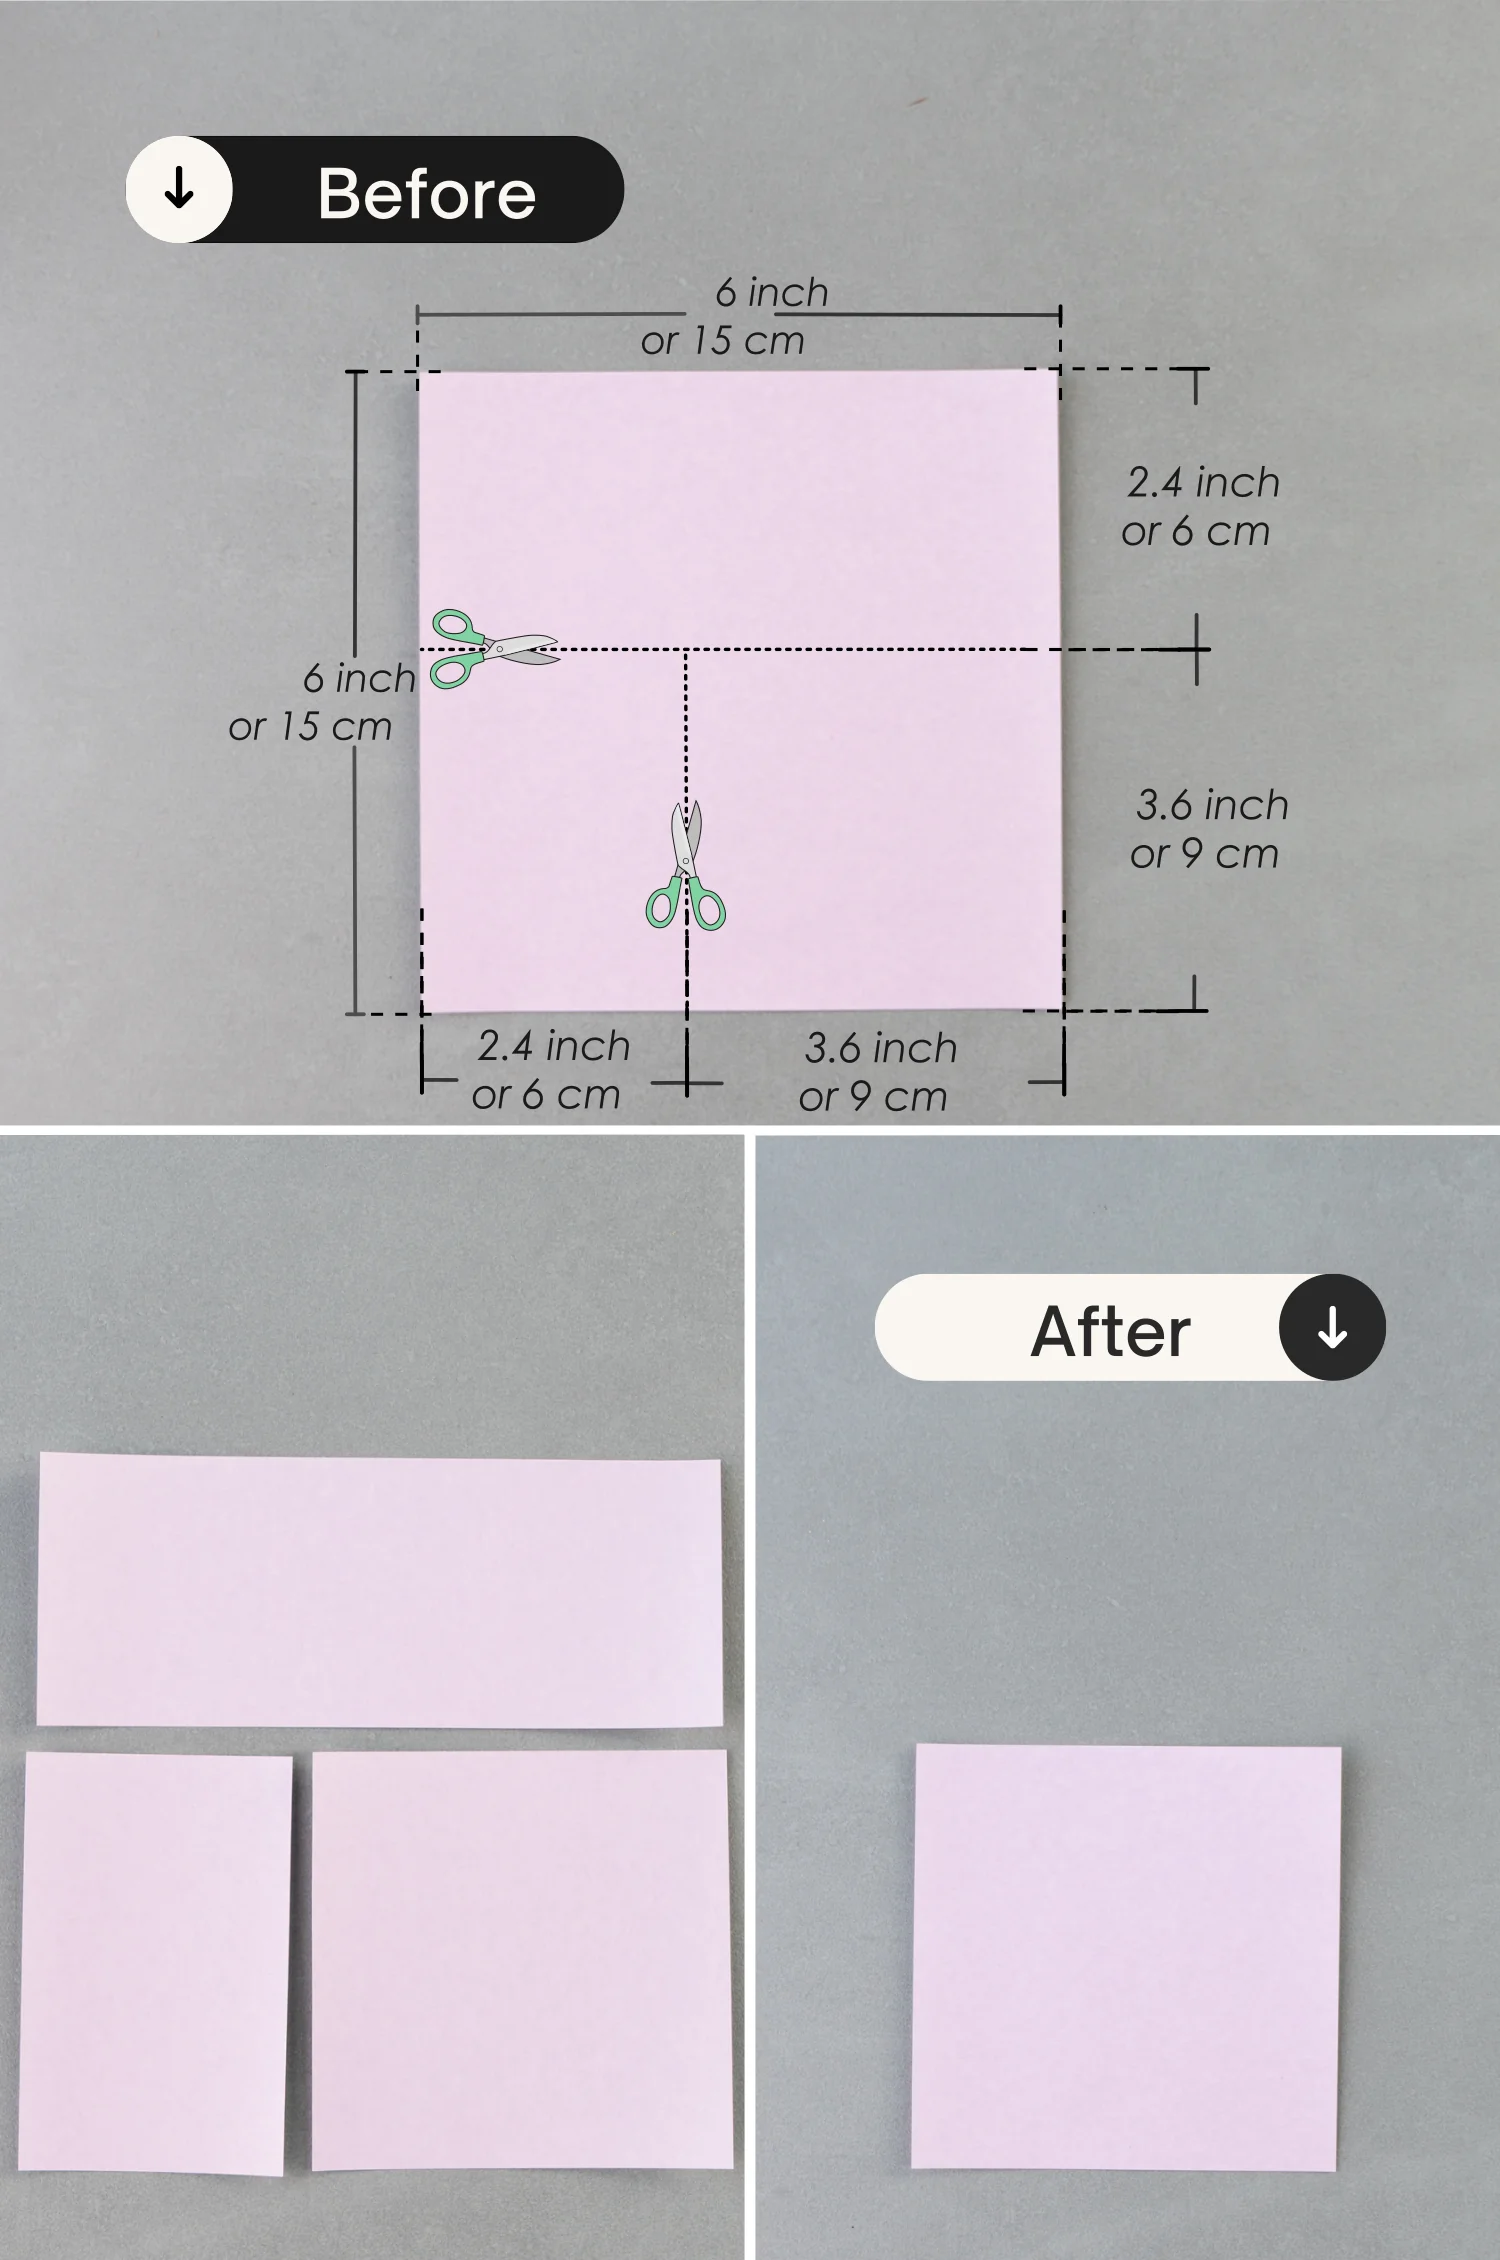
Step 14
Take out another piece of 15×15 cm paper, and cut it as the picture shows to get a 12×12 cm small square.

Step 15
You need to cut out six small square papers of 12cm✖️12cm in total, and fold them into six modules according to the above method, and then assemble them.
Step 16
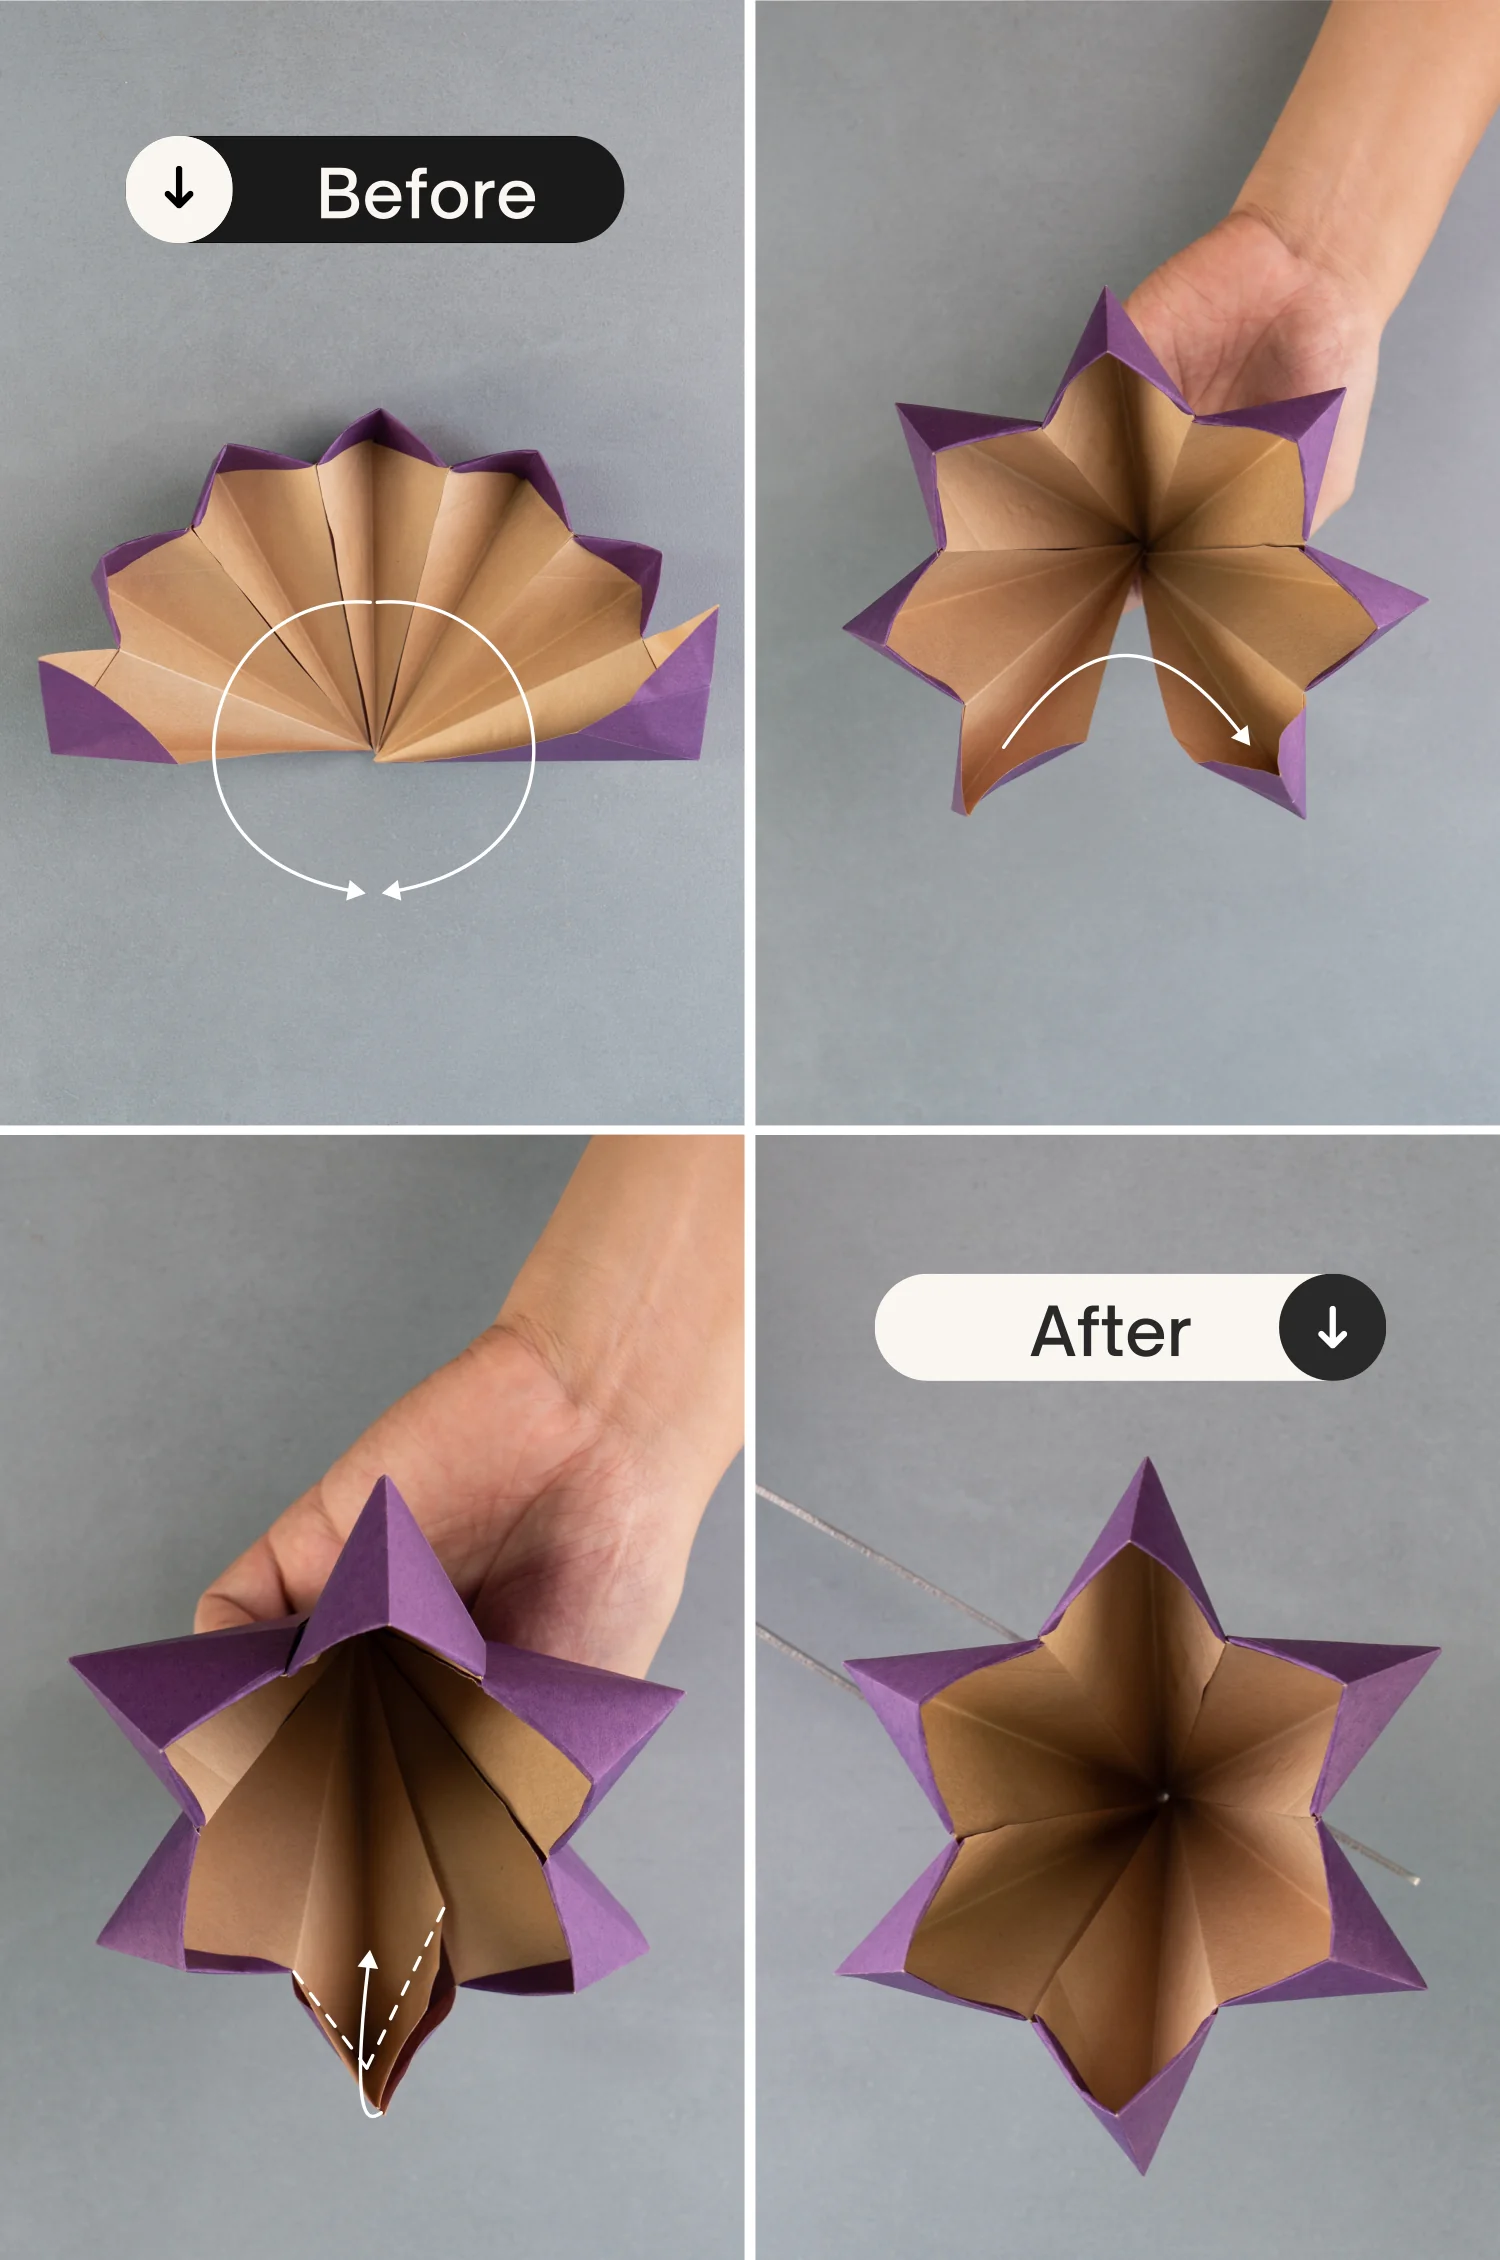
Place the bigger one on top of the smaller one. Now you are done with the Christmas tree part.

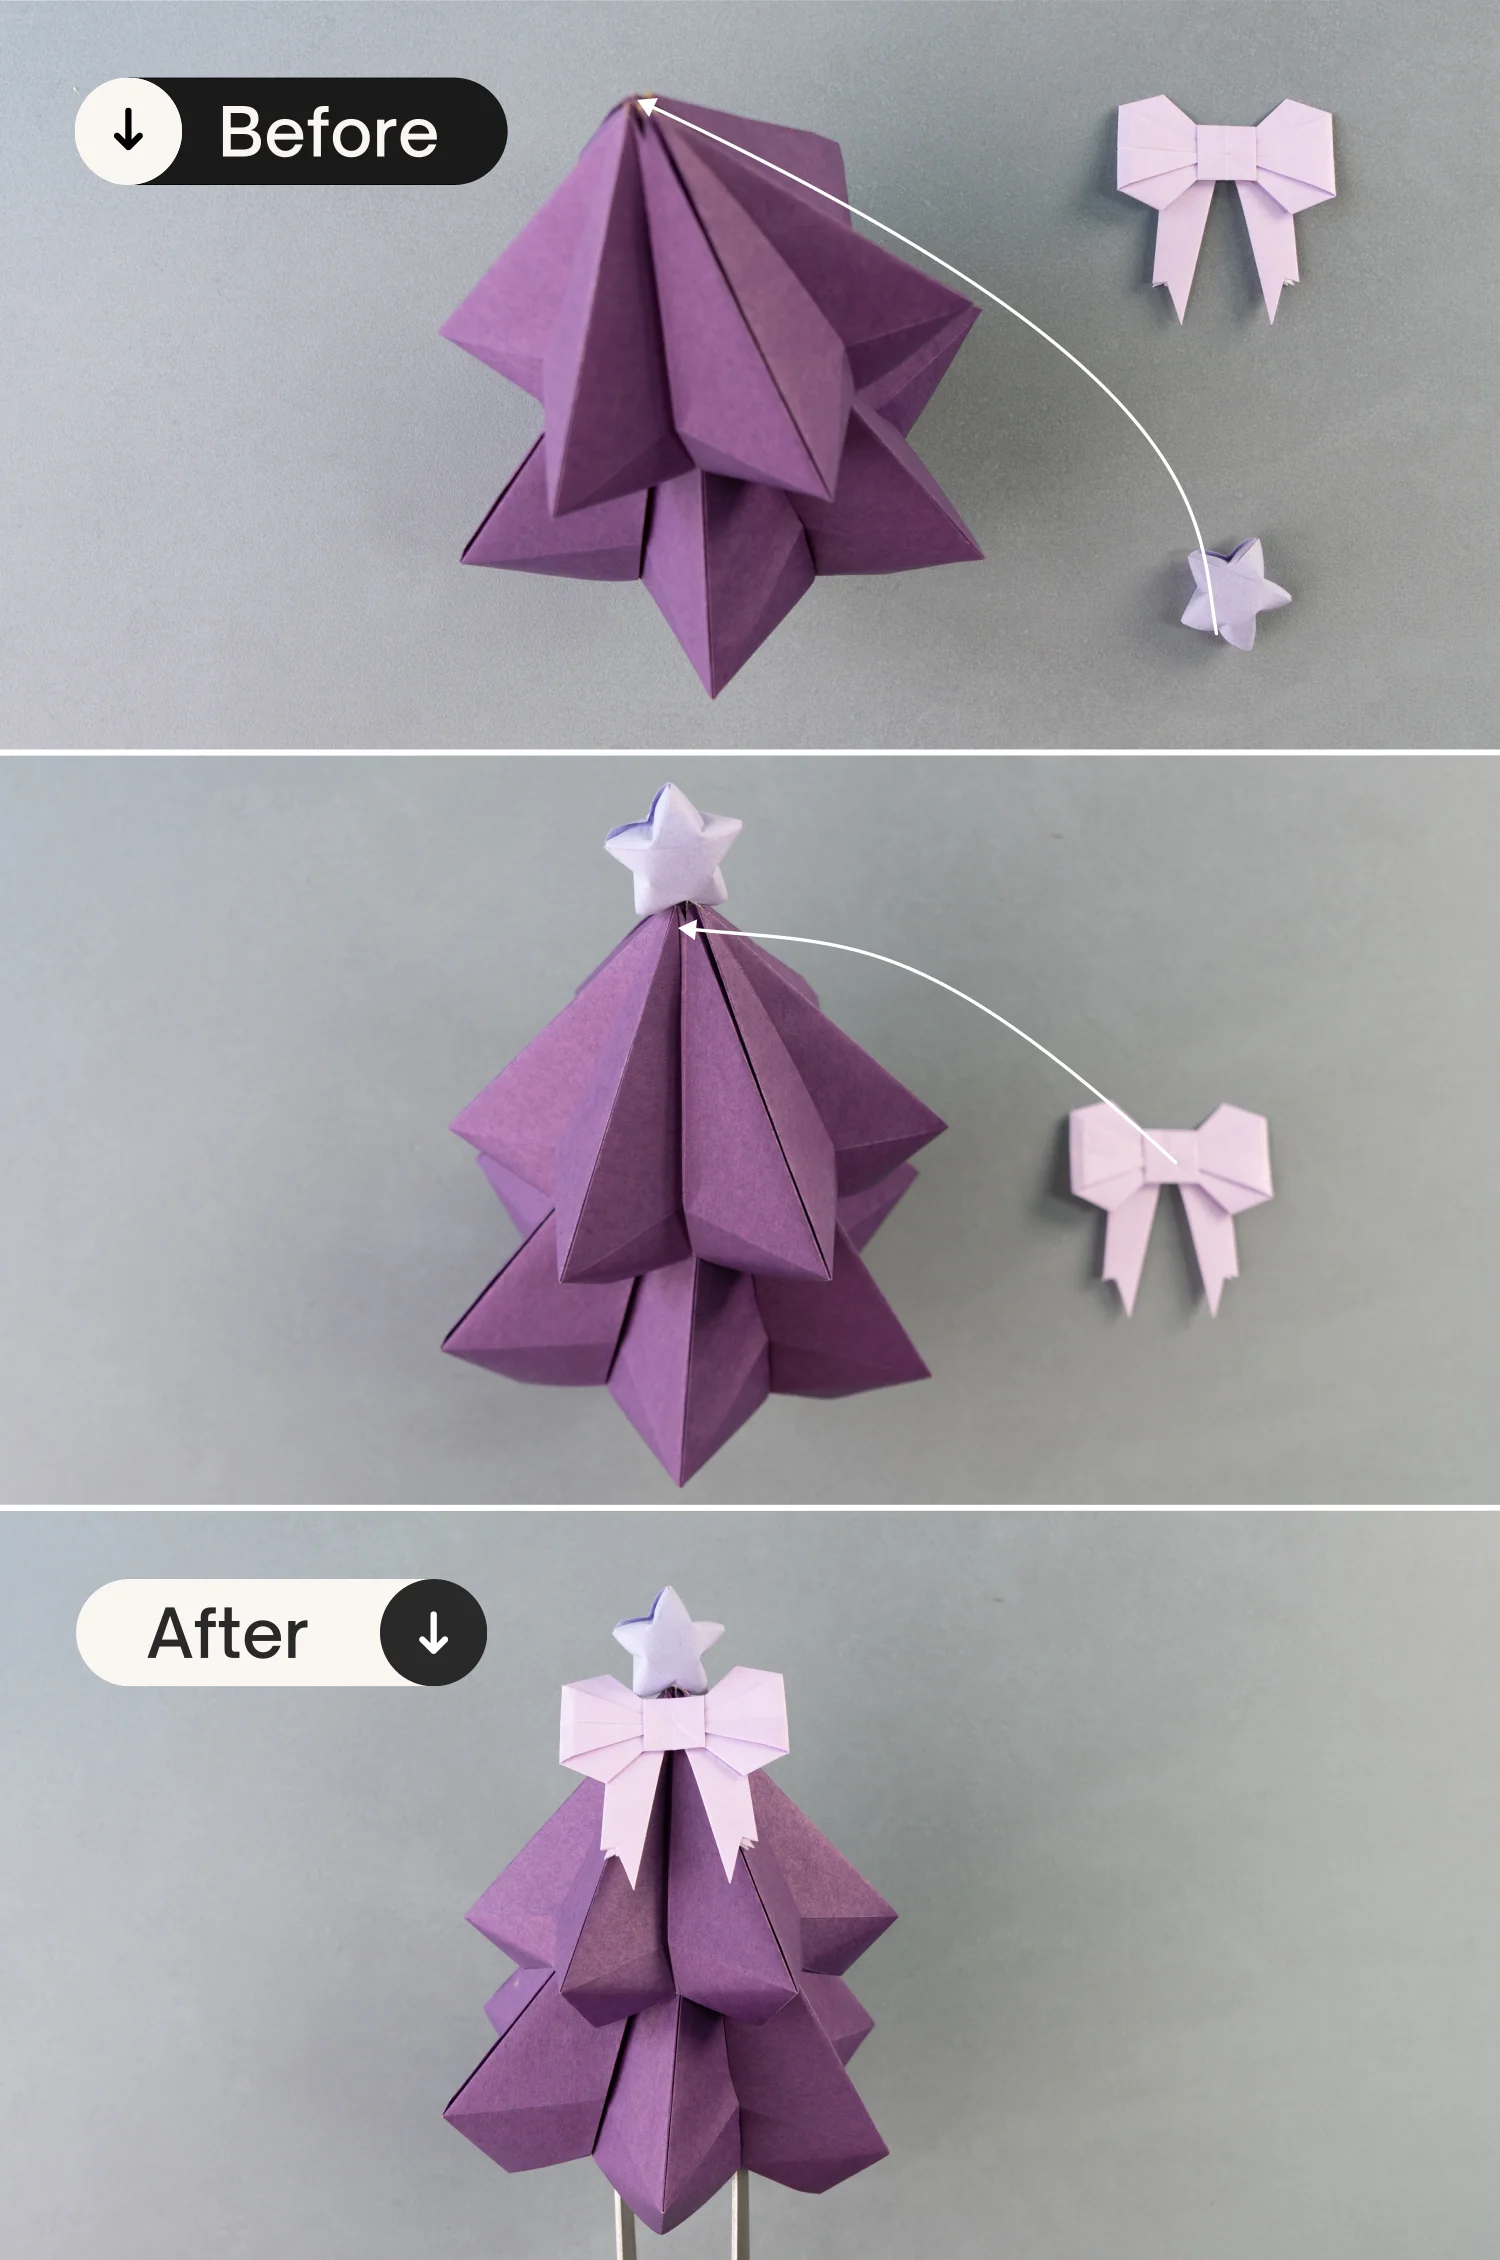
Step 17
Next, we’ll make some small decorations to make the Christmas tree more beautiful. Firstly, an origami lucky star.
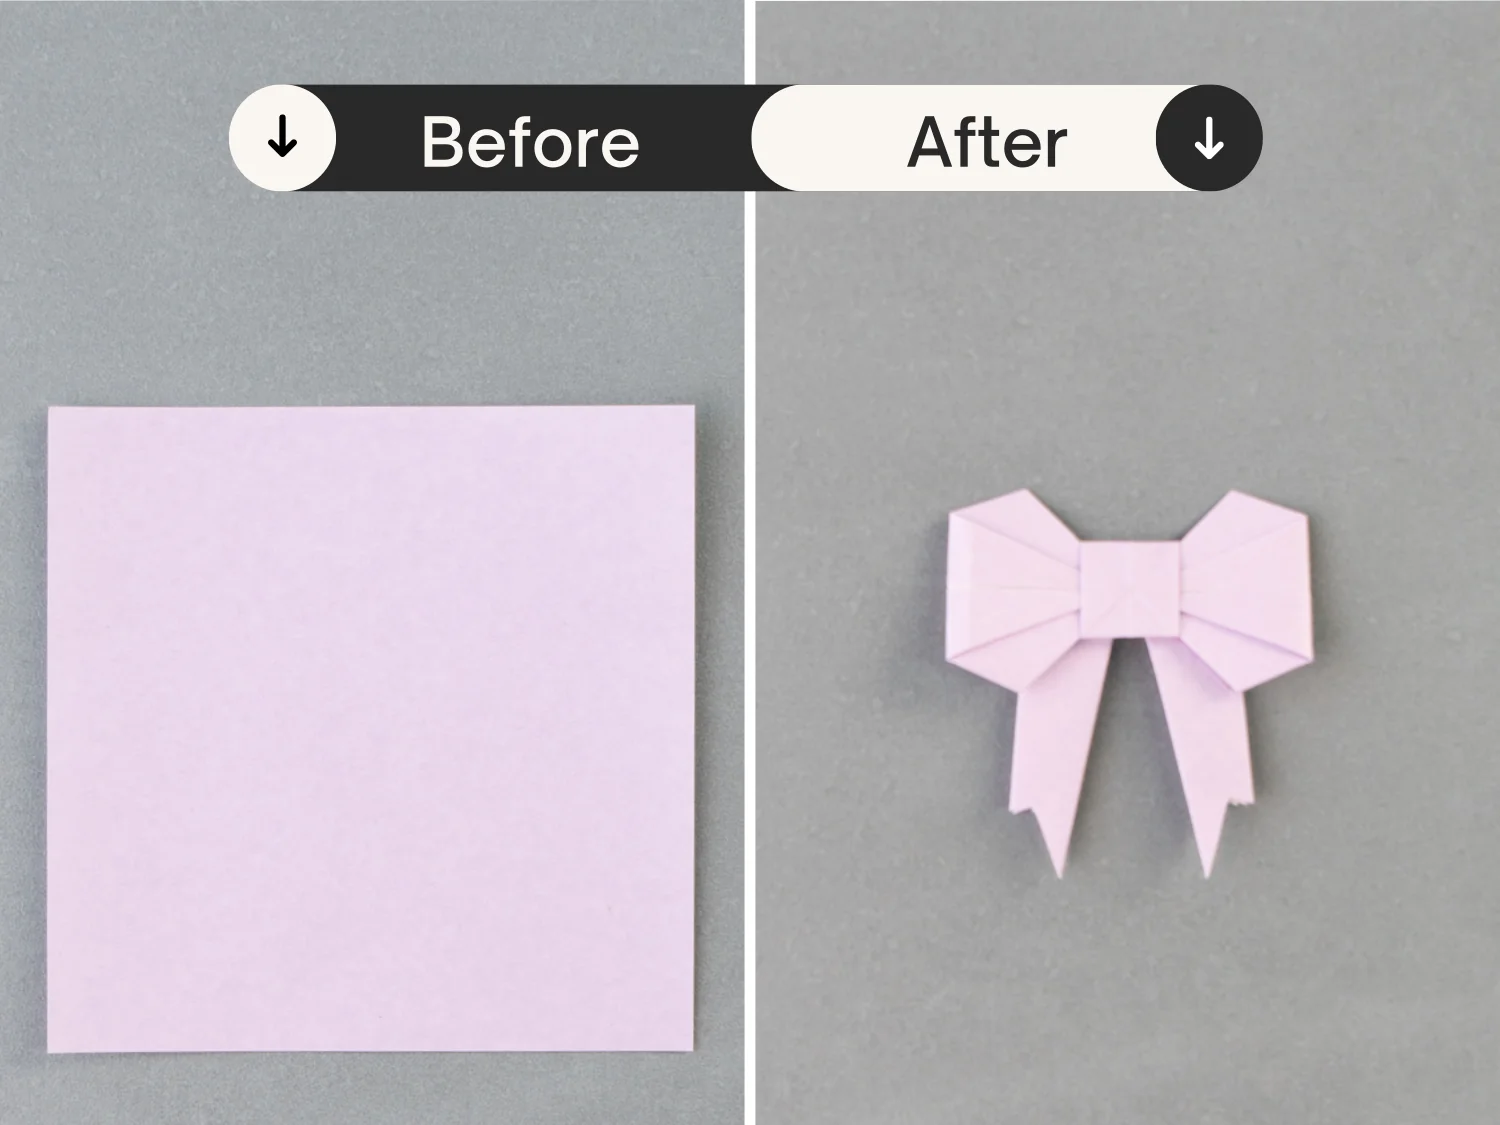
Step 18
Take out another piece of 15×15 cm paper, and cut it as the following picture shows to get a 9×9 cm small square.
Step 19
Use this small square paper to fold an origami bow, check out our Origami Bow for specific folding instructions.
Step 20
Stick the lucky star and bow on the Christmas tree.
What’s Next
That’s your lovely origami Christmas tree. Next, you can explore our other interesting origami instructions for the Christmas festival. Happy folding!


