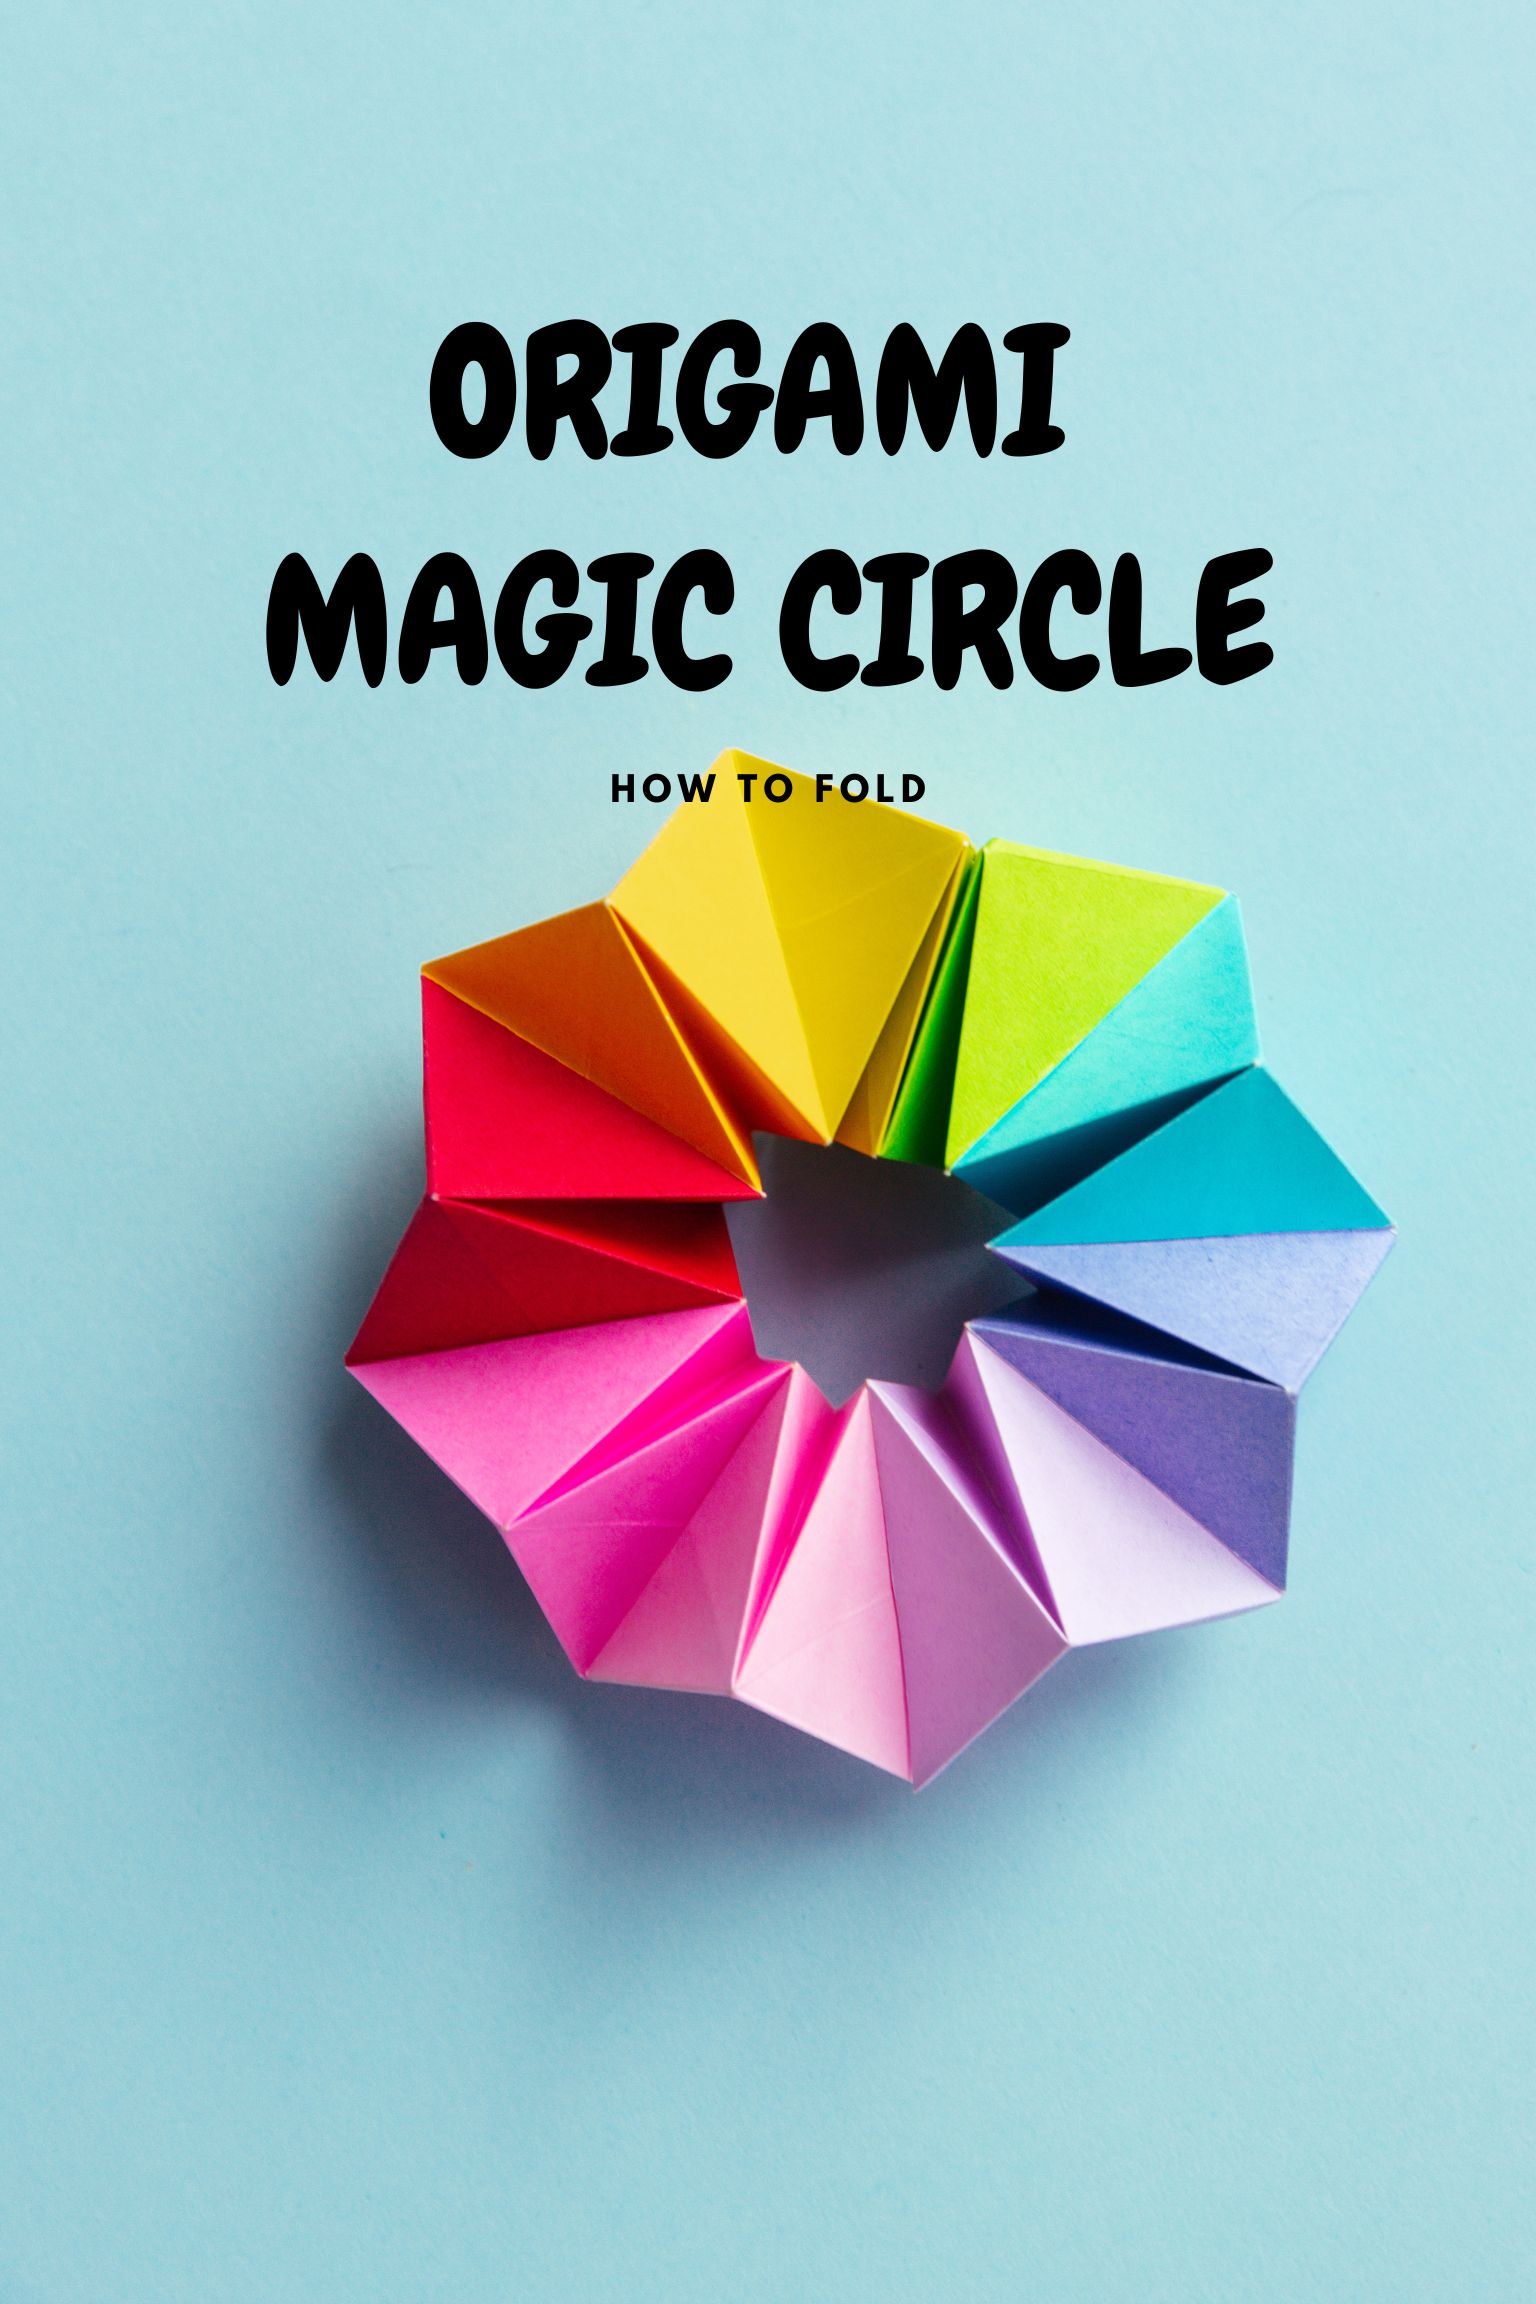
How to Fold an Origami Magic Circle
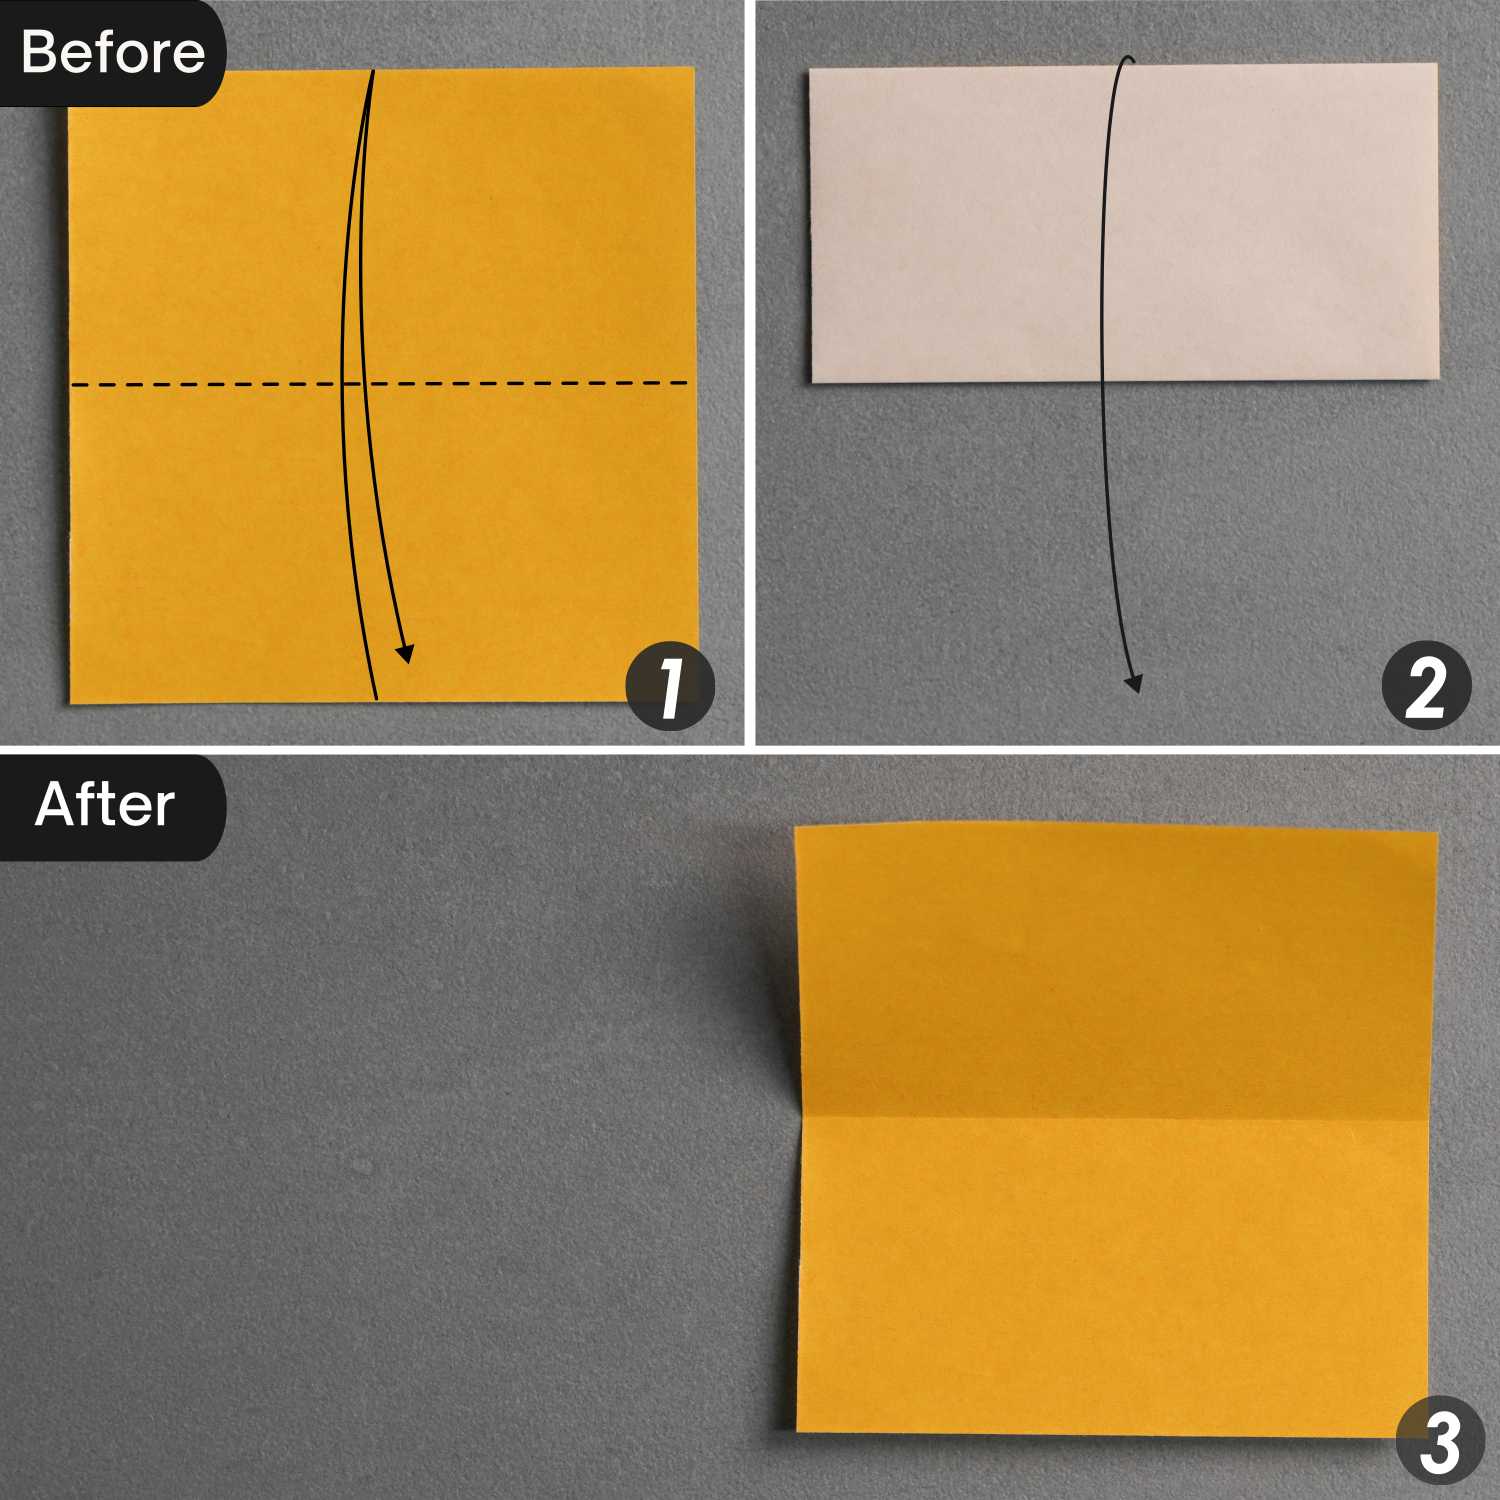
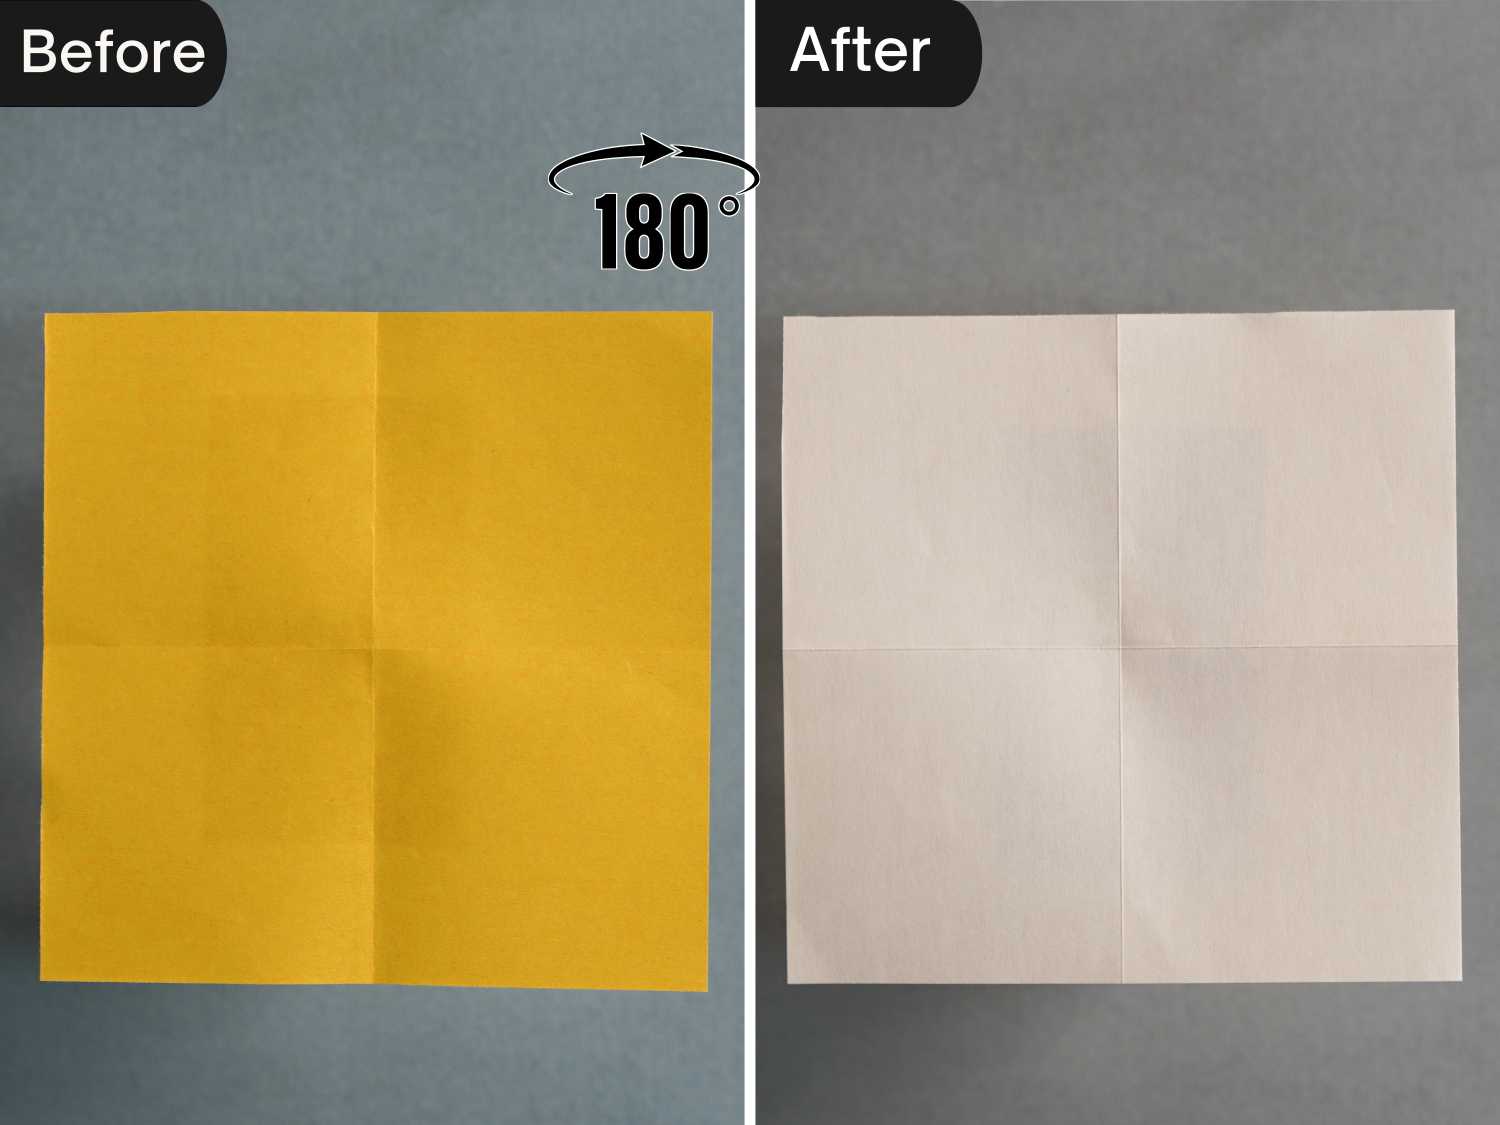
Step 1
Take out one of the sheets of paper. Place it with the colored side facing up. Fold it in half horizontally, leaving a crease, and unfold it.
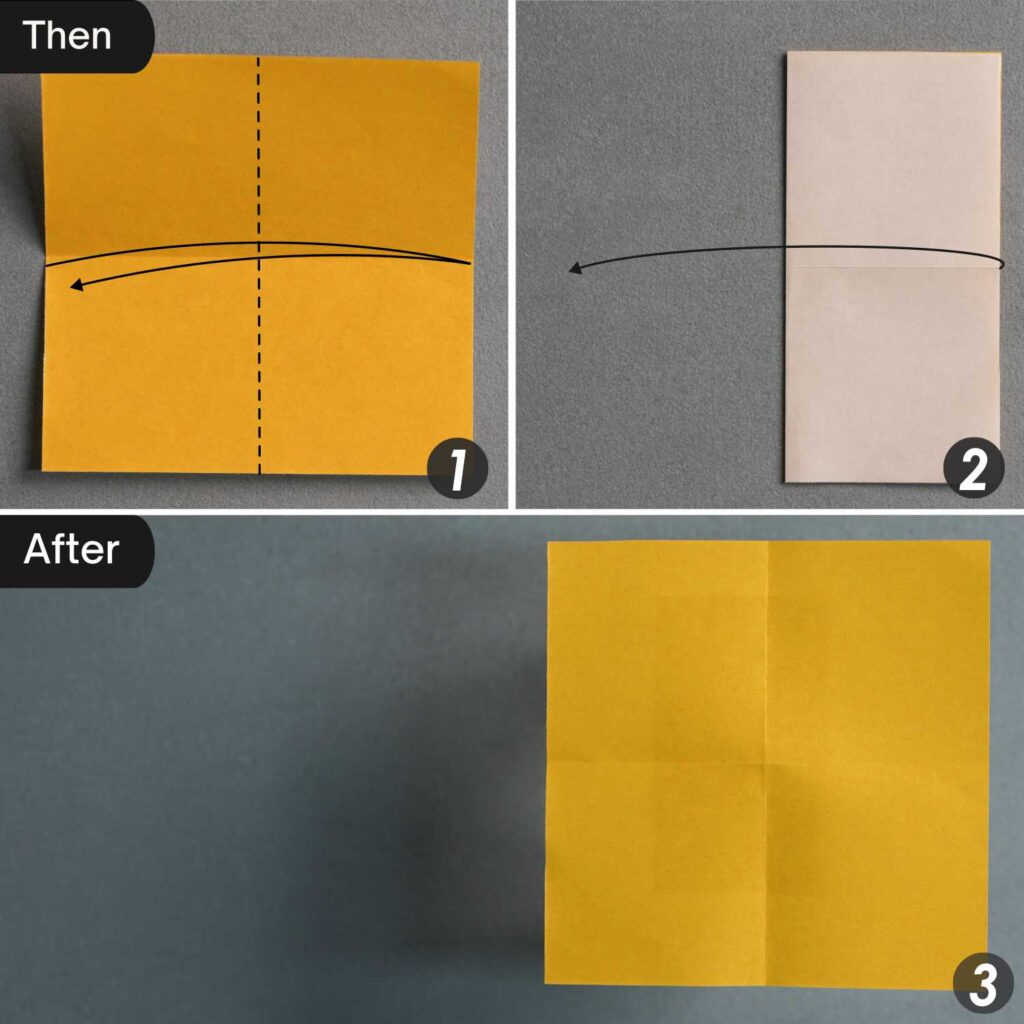
Fold it in half vertically, leaving a crease, and unfold it.
Step 2
Flip the paper from left to right.
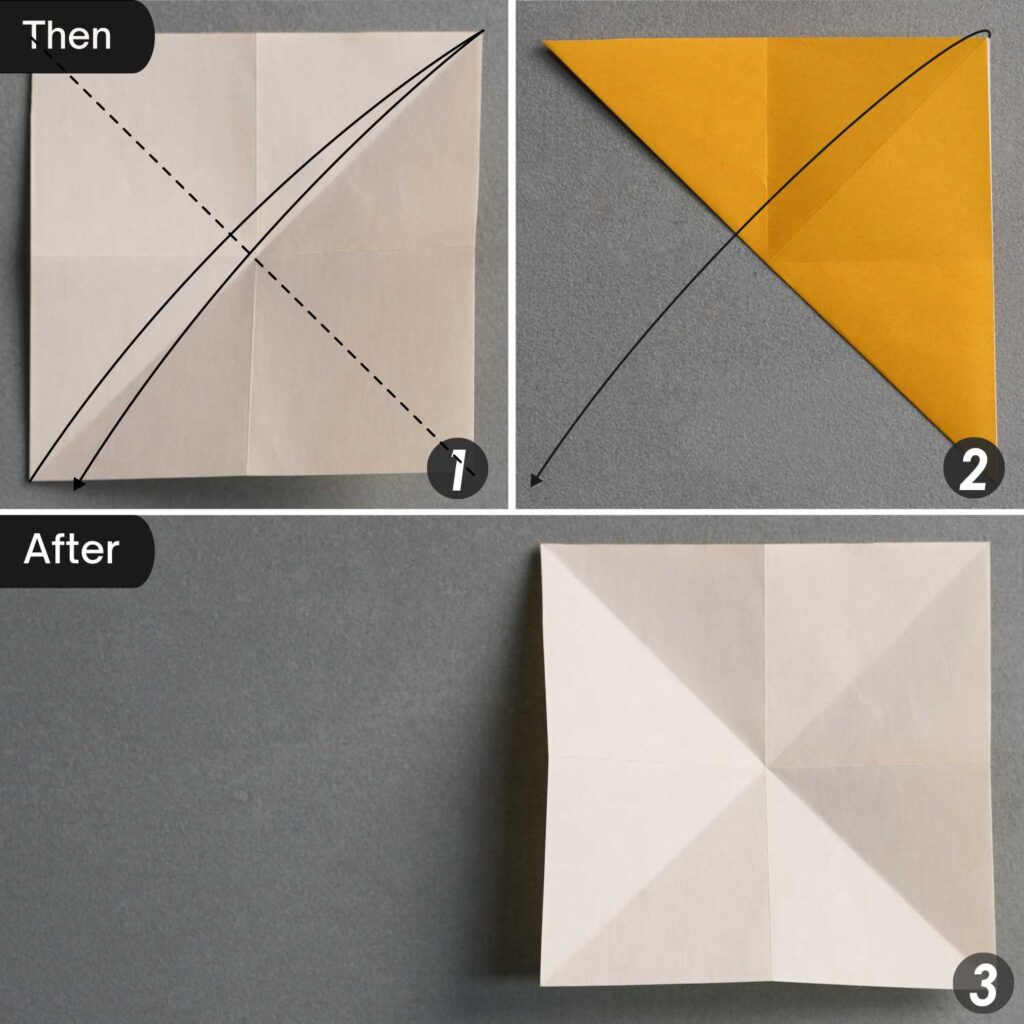
Step 3
Fold the paper in half diagonally from bottom right to top left, leaving a crease, and unfold it.
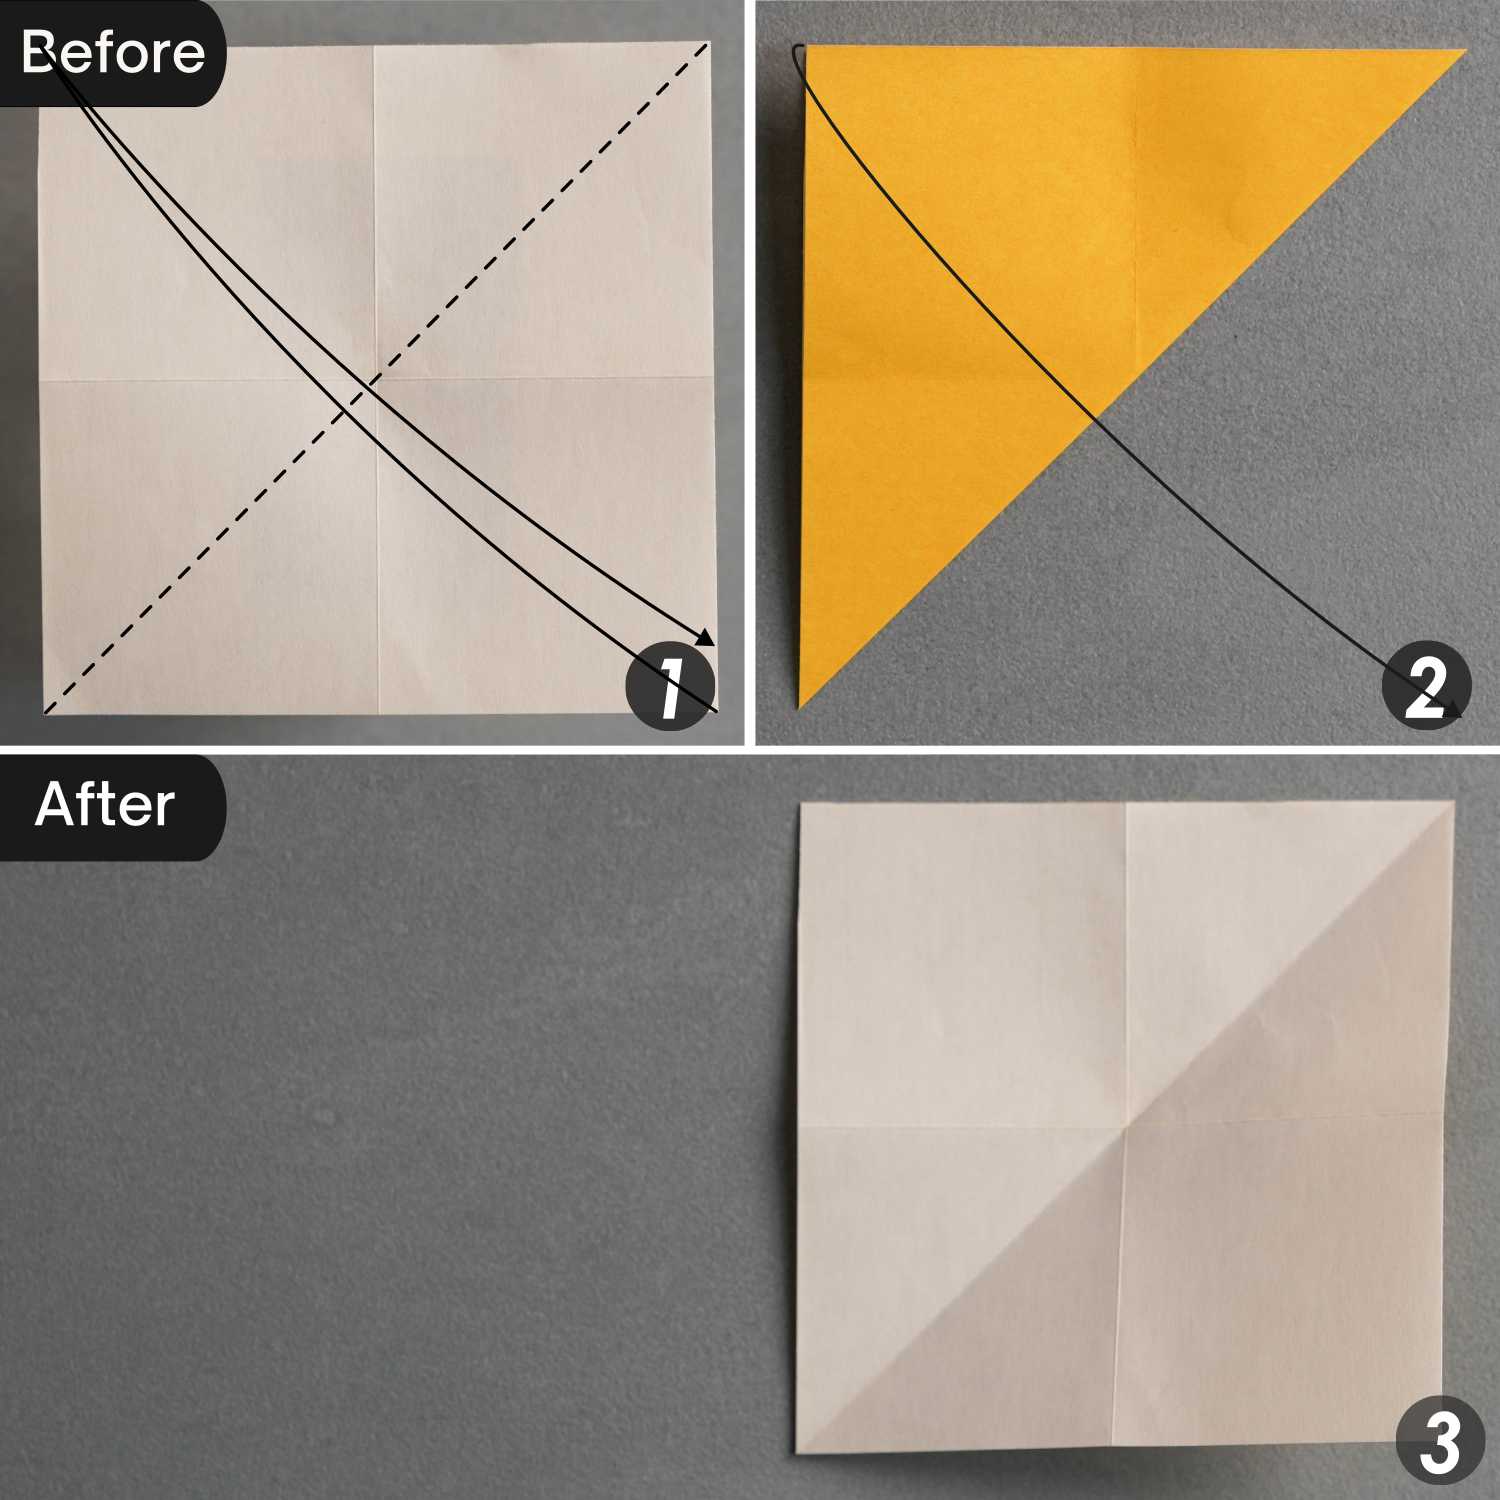
Fold the paper in half diagonally from bottom left to top right, leaving a crease, and unfold it.
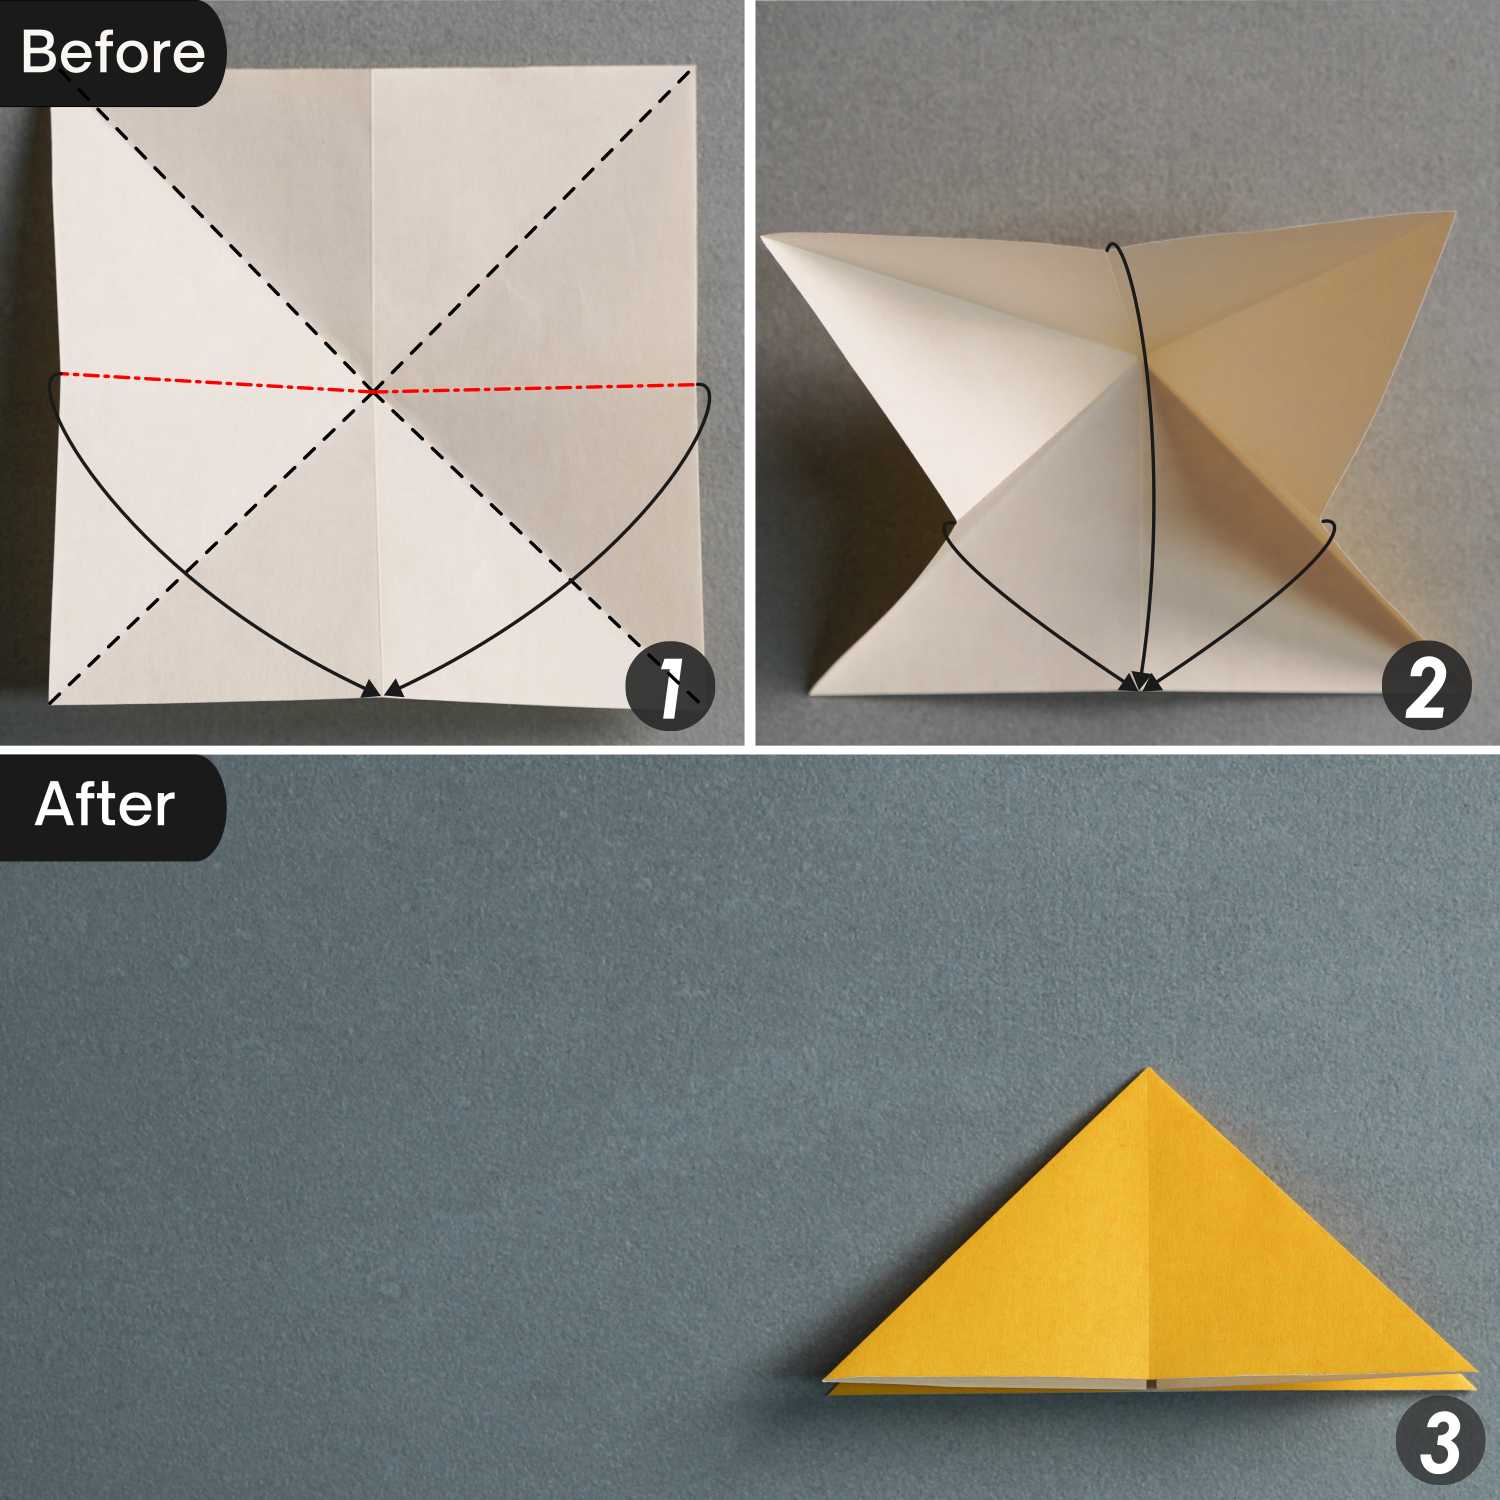
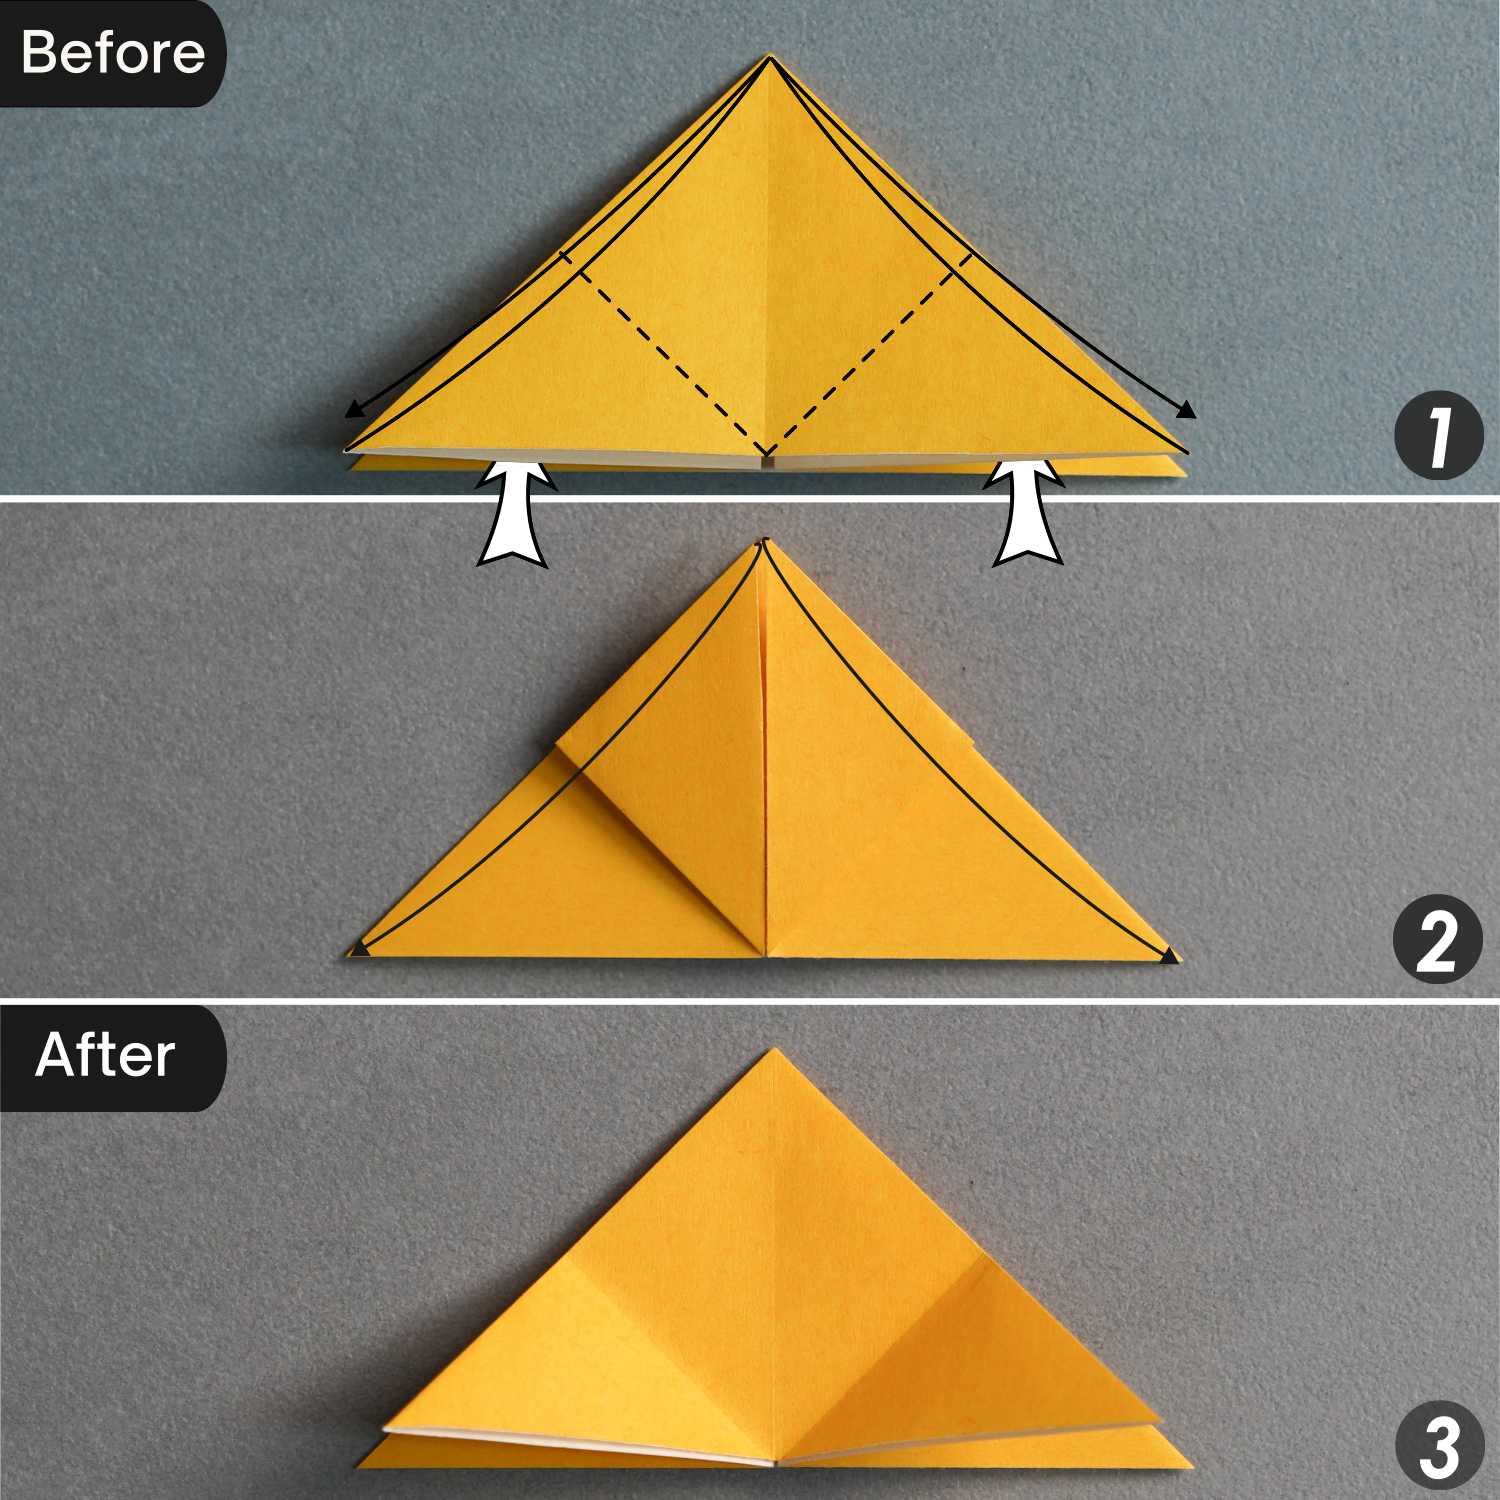
Step 4
Now, use both hands to press the two center points on the right and left edges. Then push them down to make the center points of the three edges meet the center point of the bottom edge.
Flatten the fold to get a triangle.
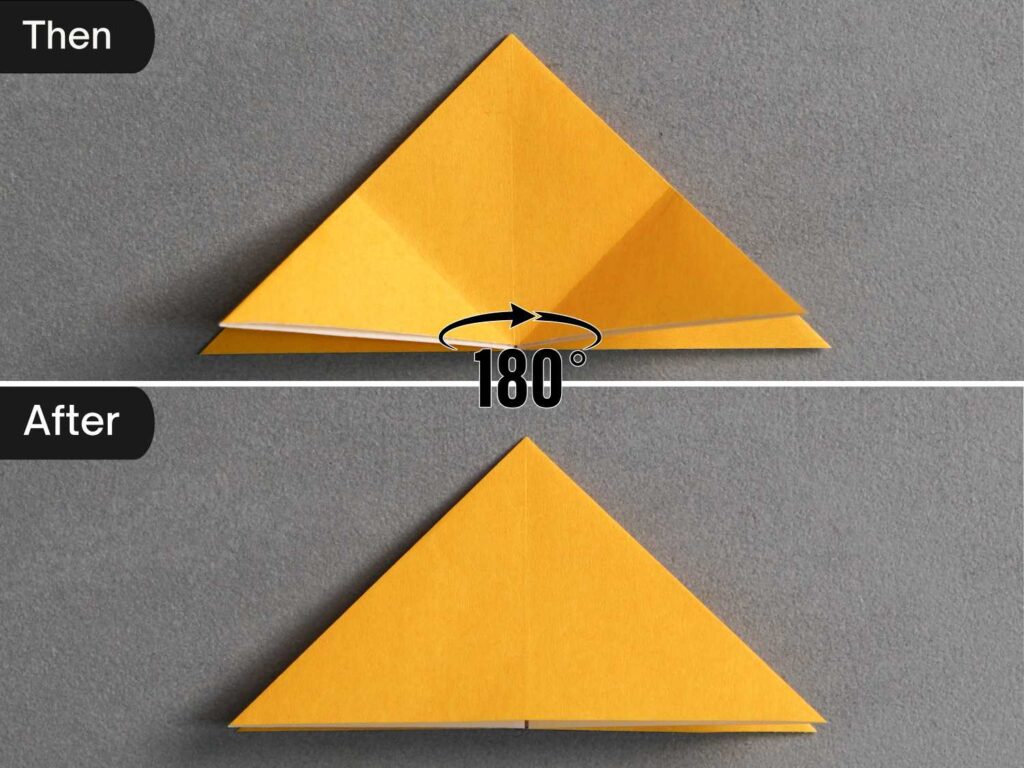
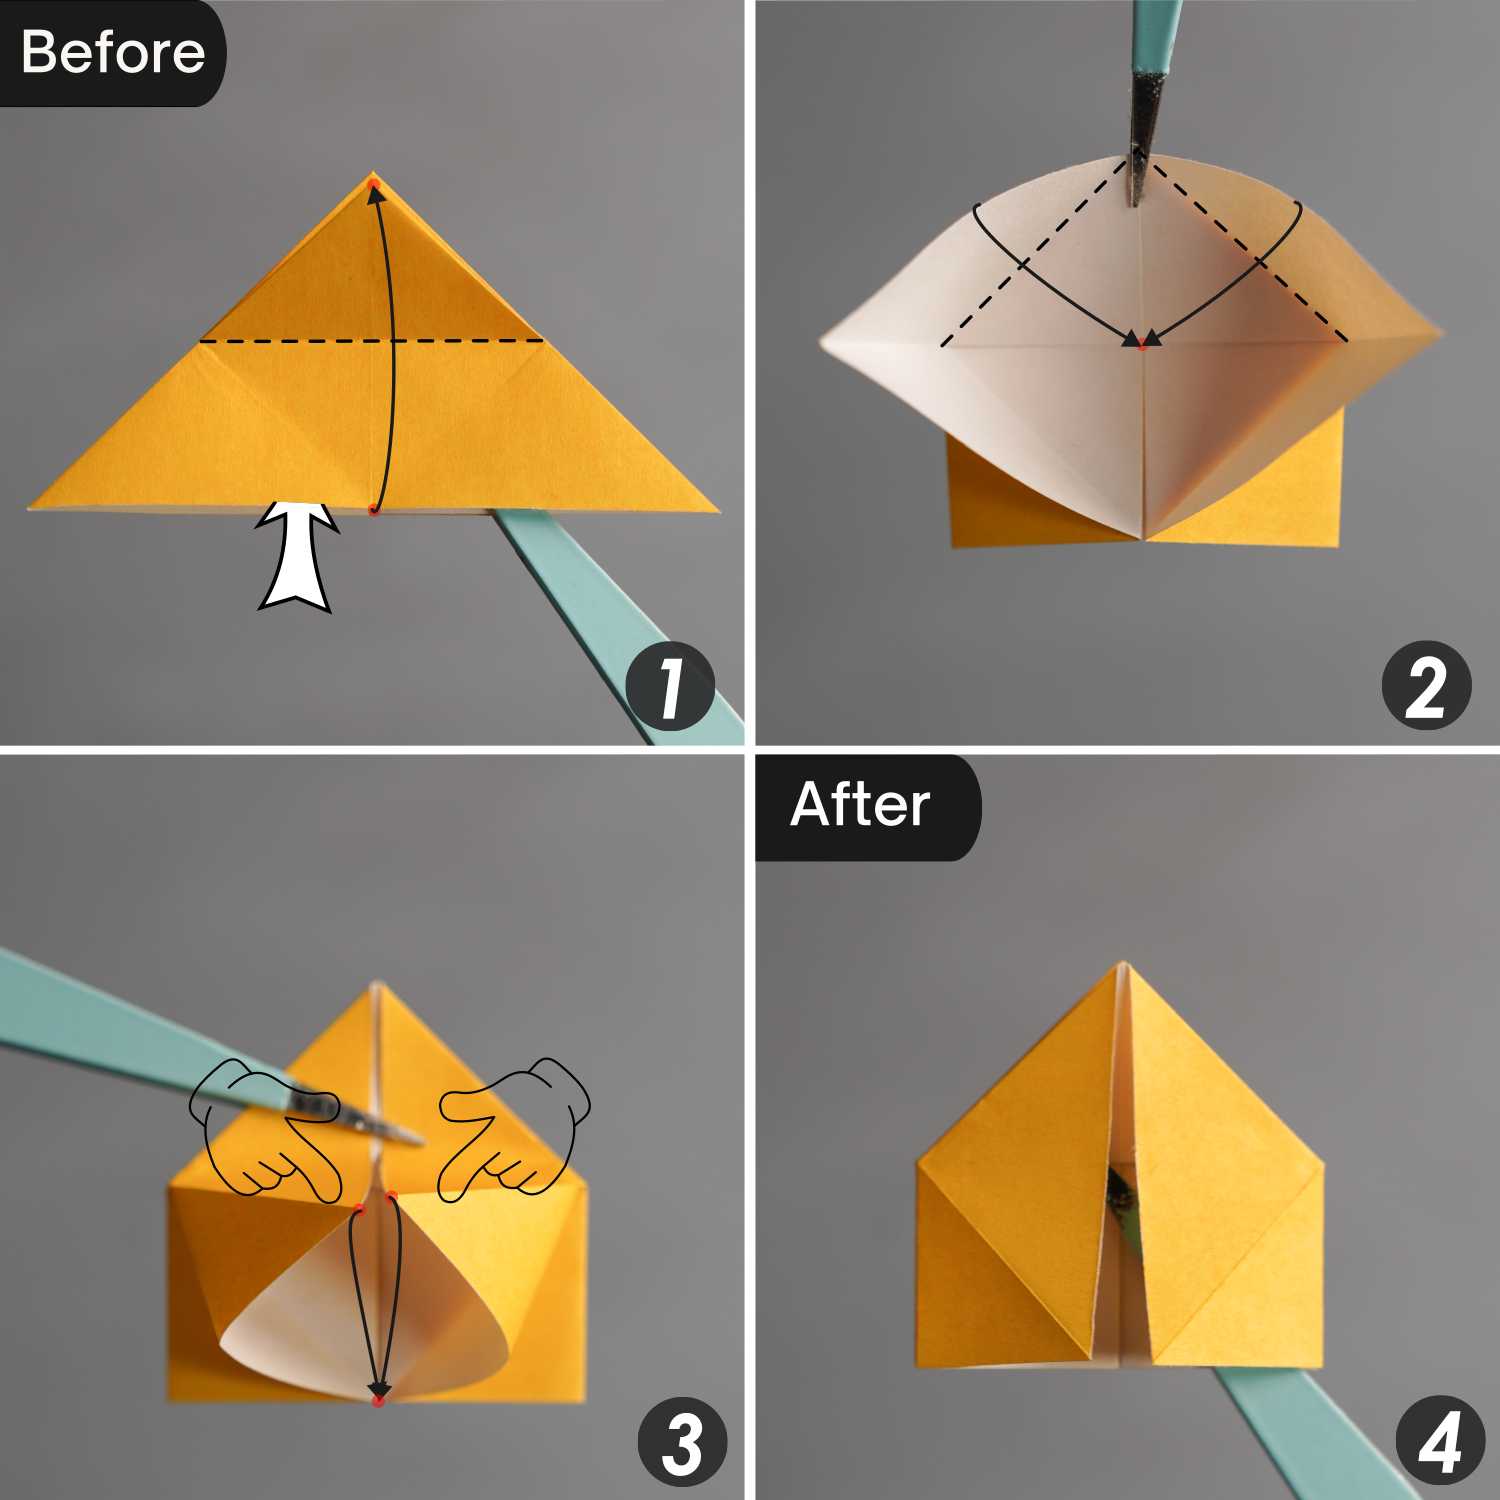
Step 5
Fold the bottom left and right corners of the top layer to meet the top corner, crease them well, and unfold them.
Turn over the paper from left to right.
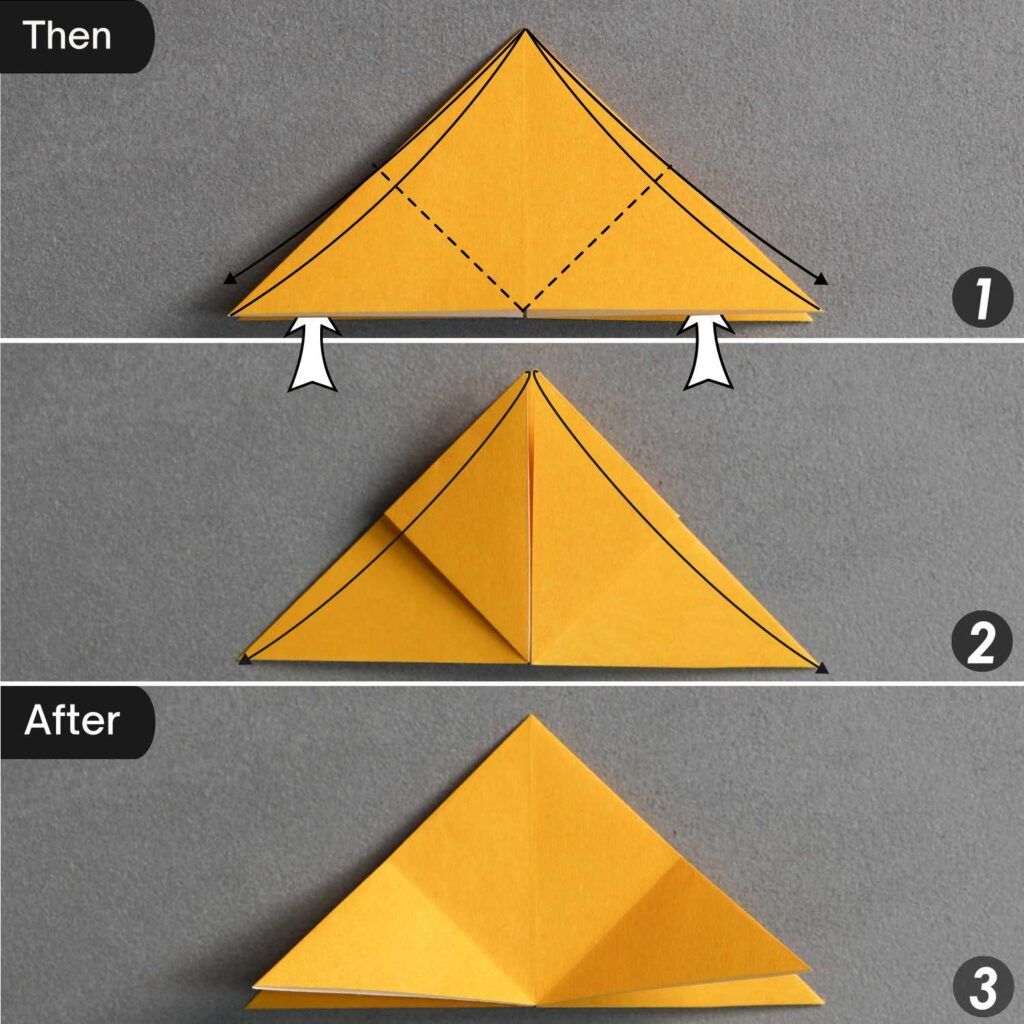
Likewise, fold the bottom left and right corners of the top layer to meet the top corner, crease them well, and unfold them.
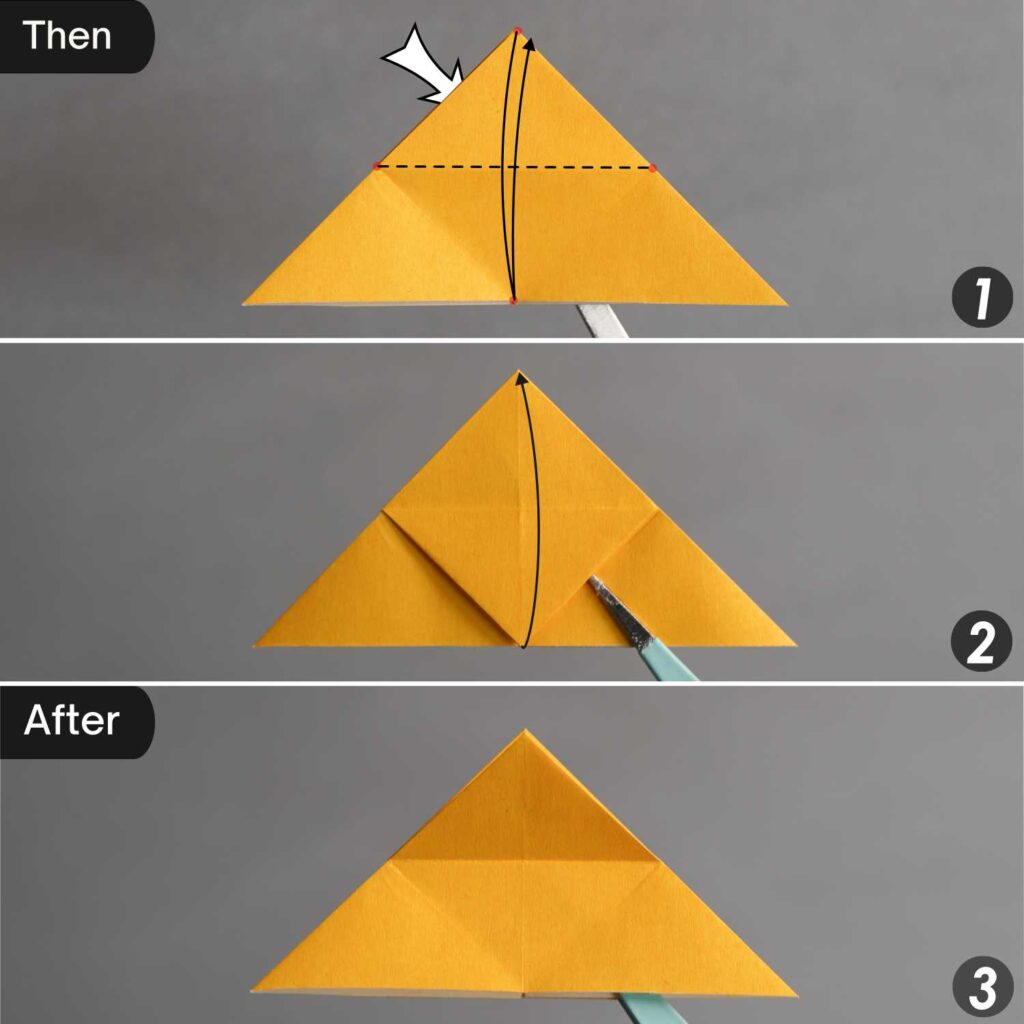
Step 6
Fold down the top point along the dotted line connecting two red spots, leave a crease, and unfold it.

Step 7
Fold up the top layer’s bottom edge along the crease you made in the previous step, then flatten the pocket along the two creases indicated by the dotted lines, making the left and right points meet the bottom edge’s center point.

Step 8
Turn over the paper from left to right.
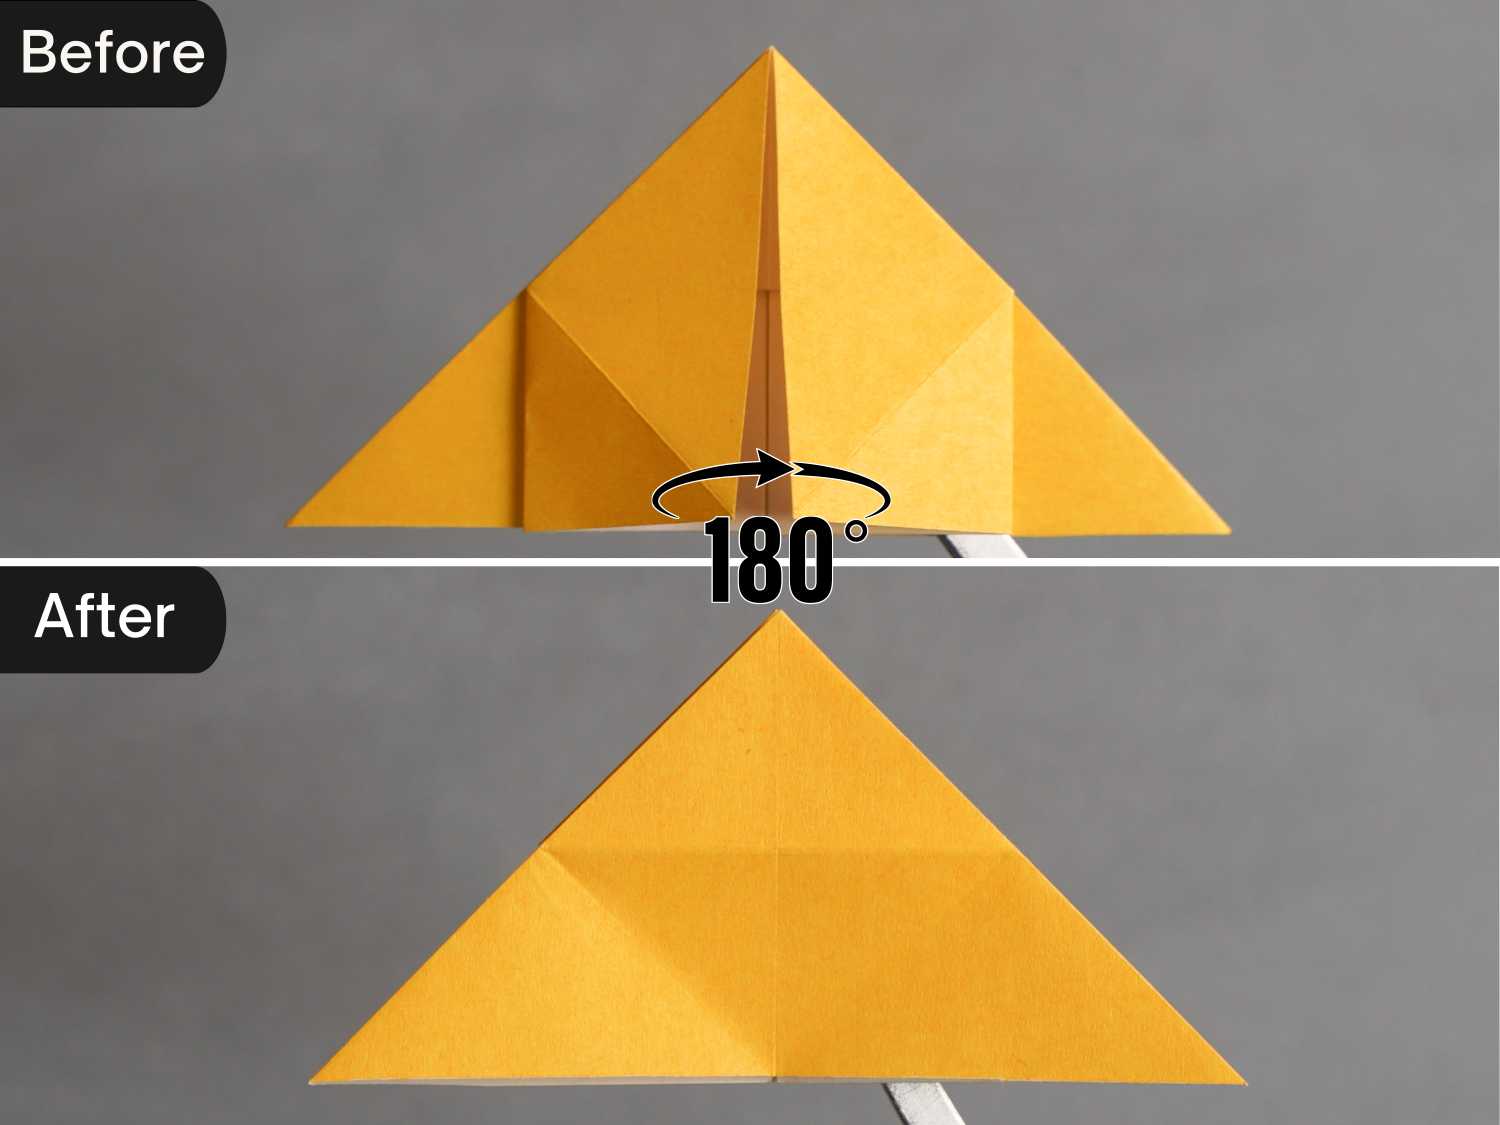
Fold down the top point of the top layer, leave a crease, and unfold it.
Step 9
Repeat step 7, fold up the top layer’s bottom edge along the crease you made in the previous step, then flatten the pocket along the two creases indicated by the dotted lines, making the left and right points meet the bottom edge’s center point.
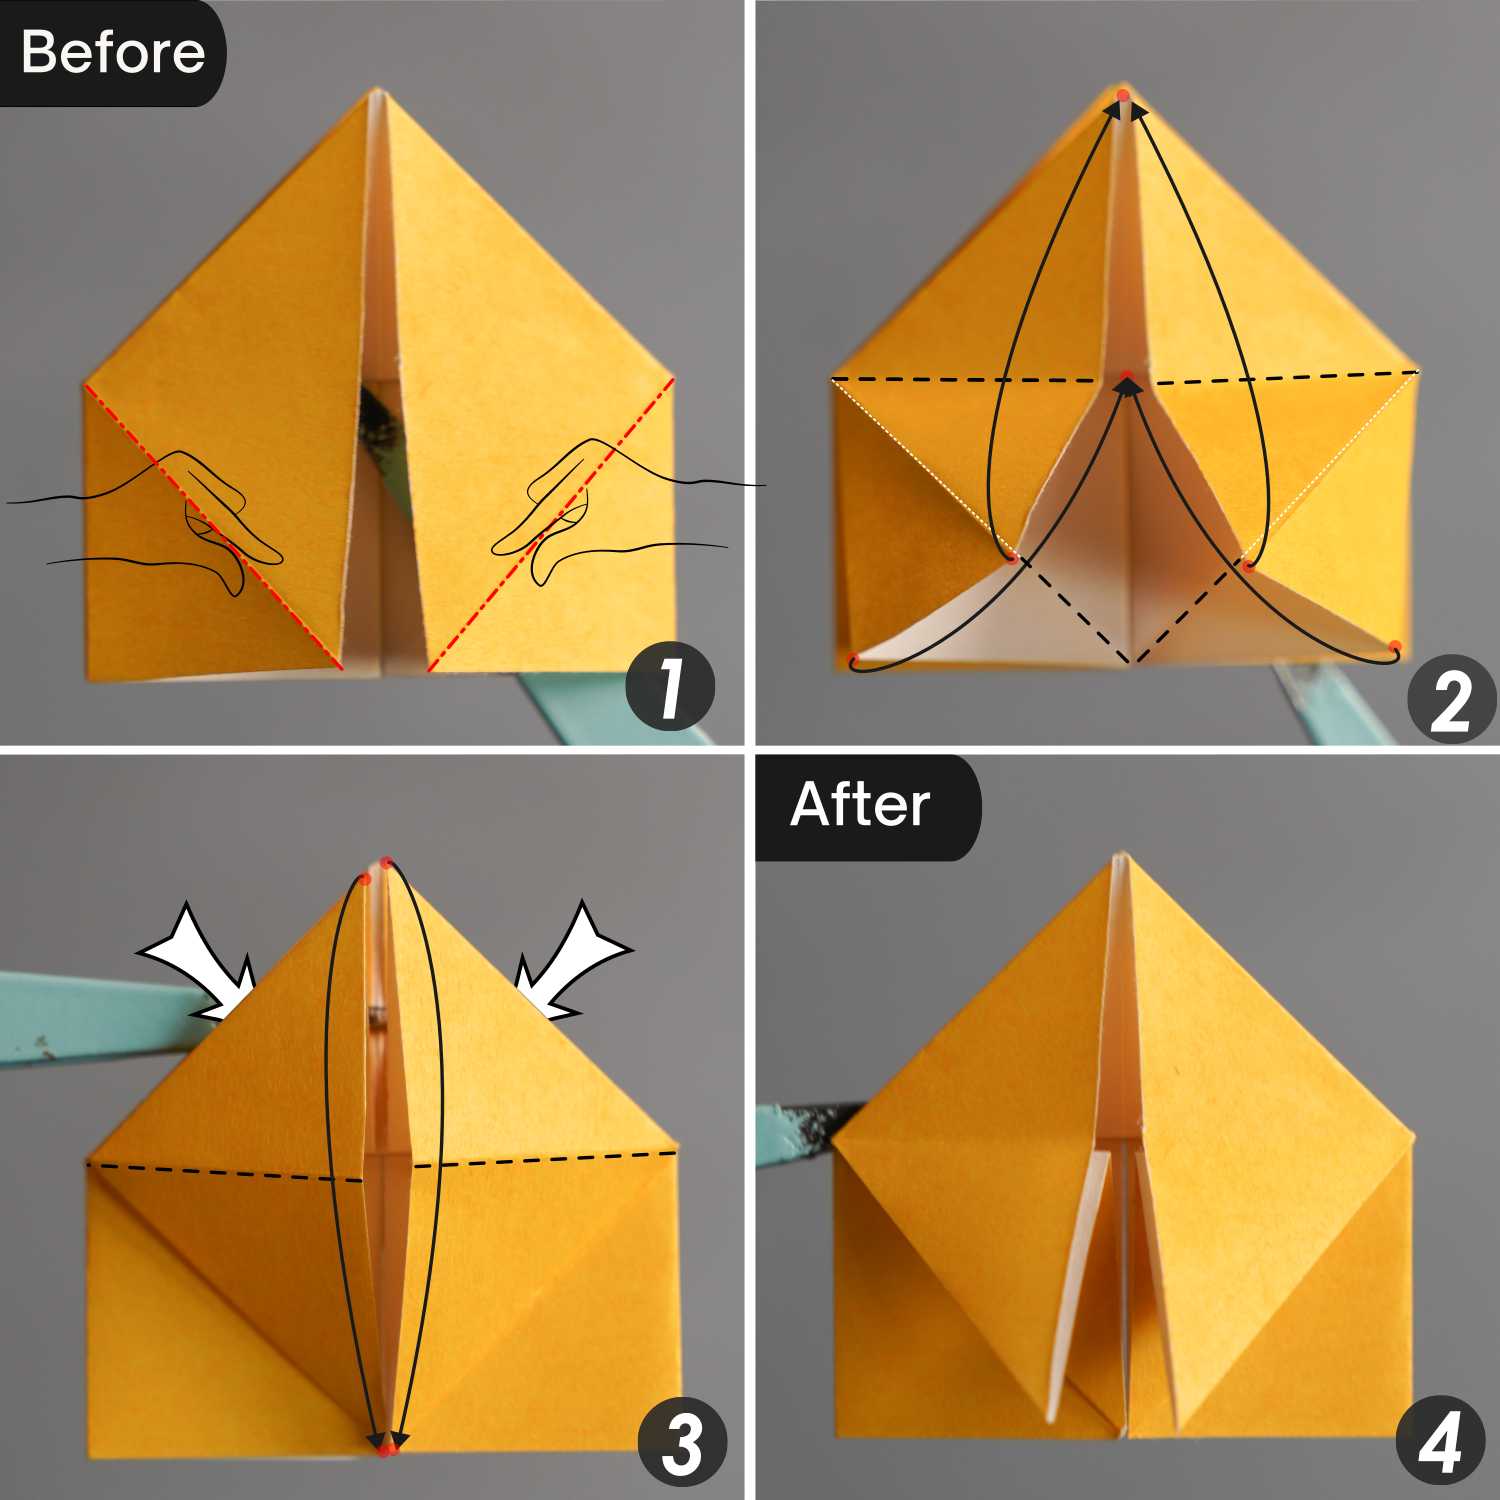
Step 10
Mountain fold the creases indicated by the red dotted lines, then bring up the two points to meet the top point along the horizontal dotted lines, and finally, fold down these two flaps.
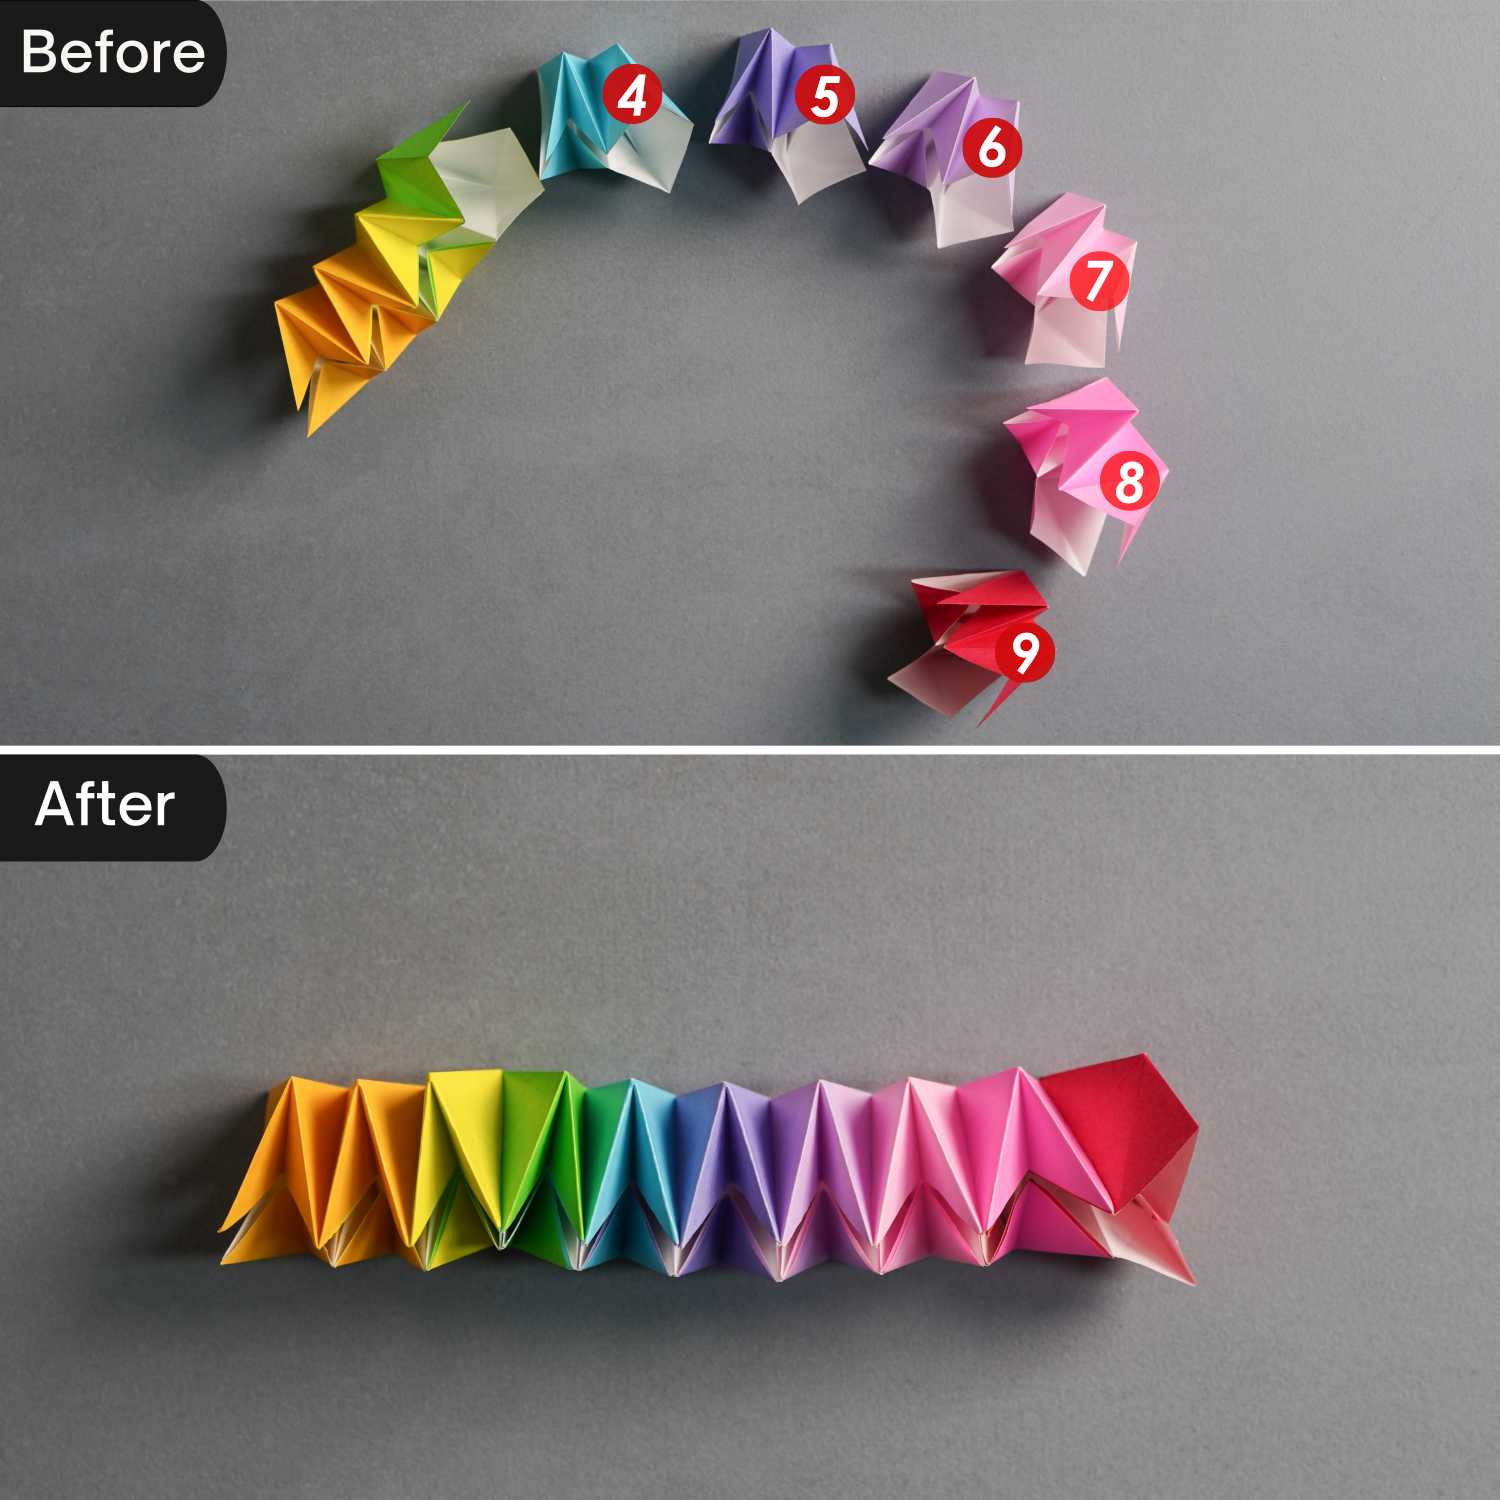
Step 11
Fold another 8 units in this way, for a total of 9.

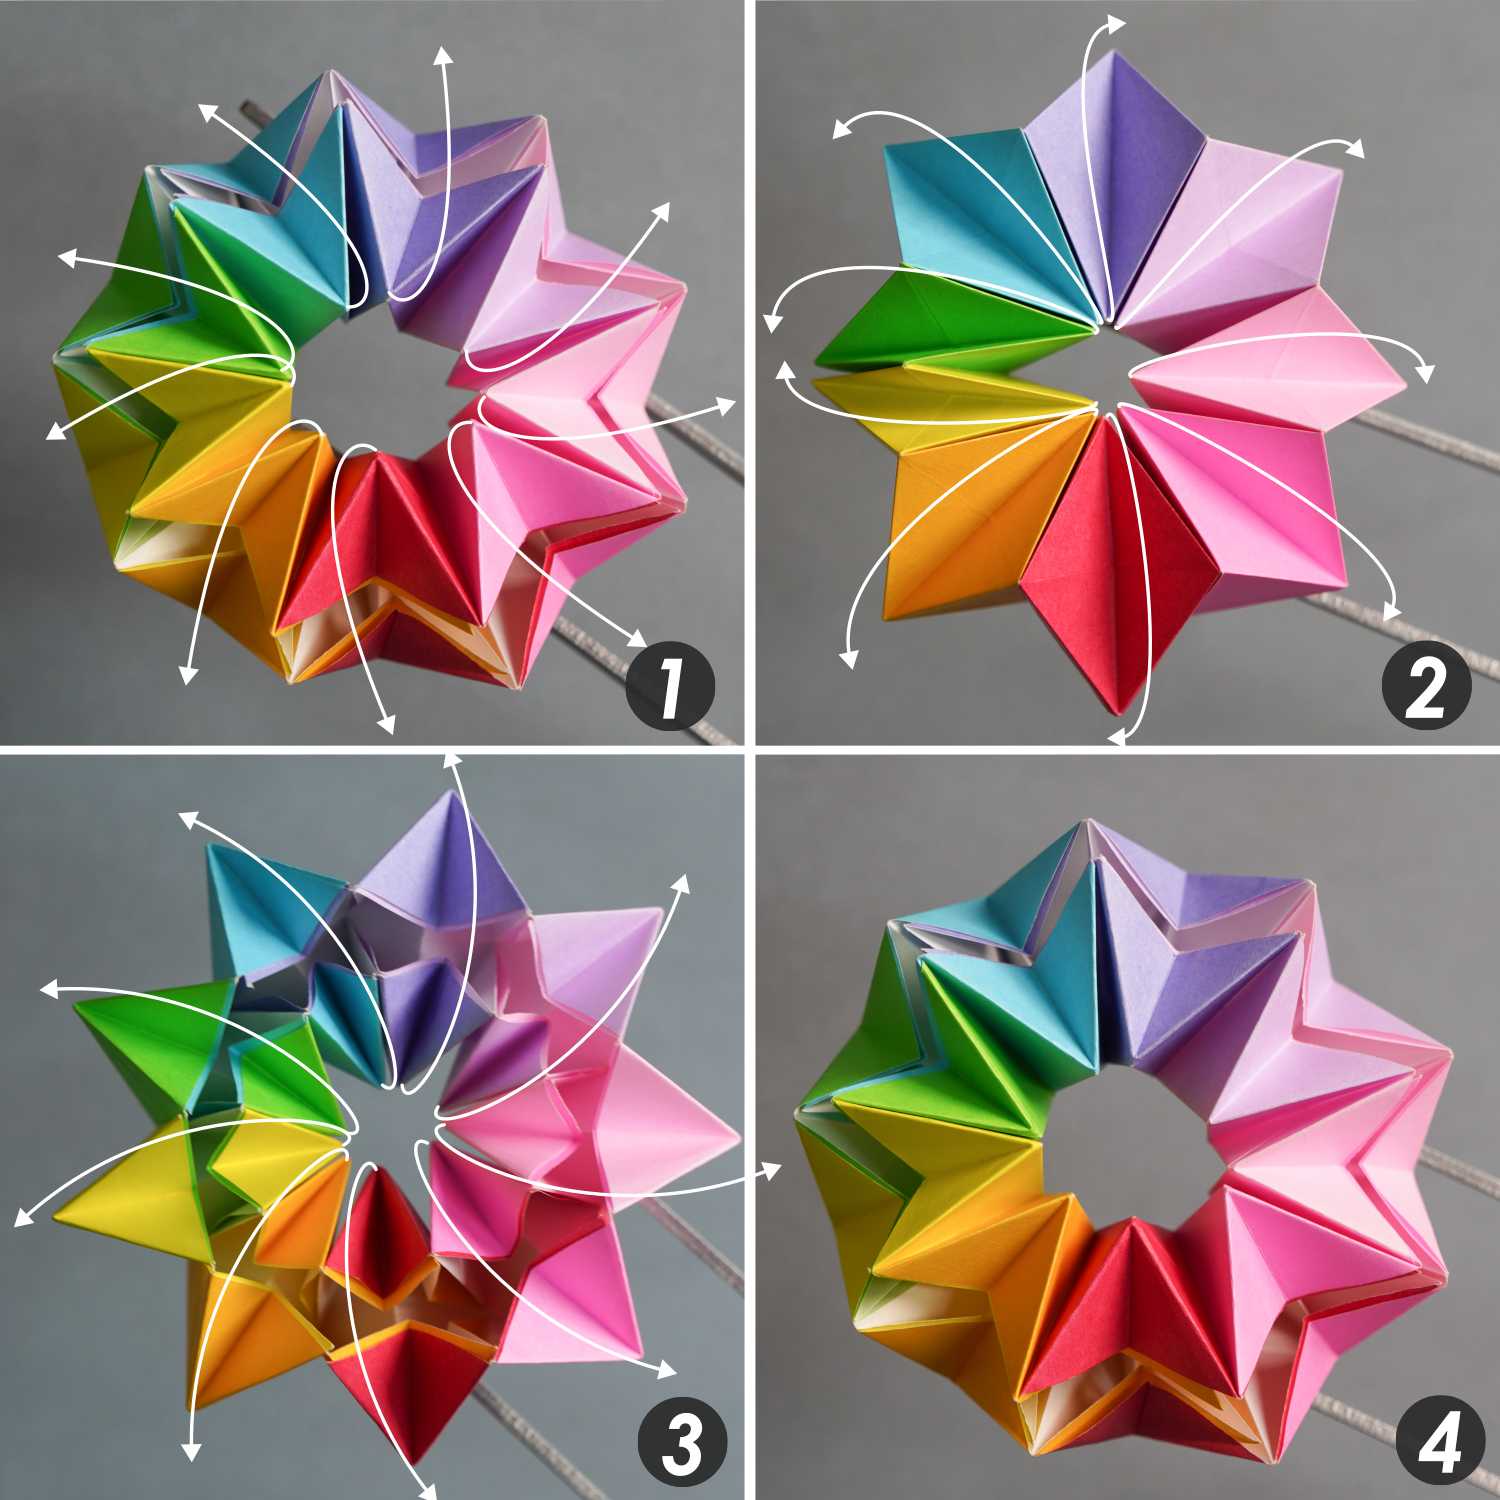
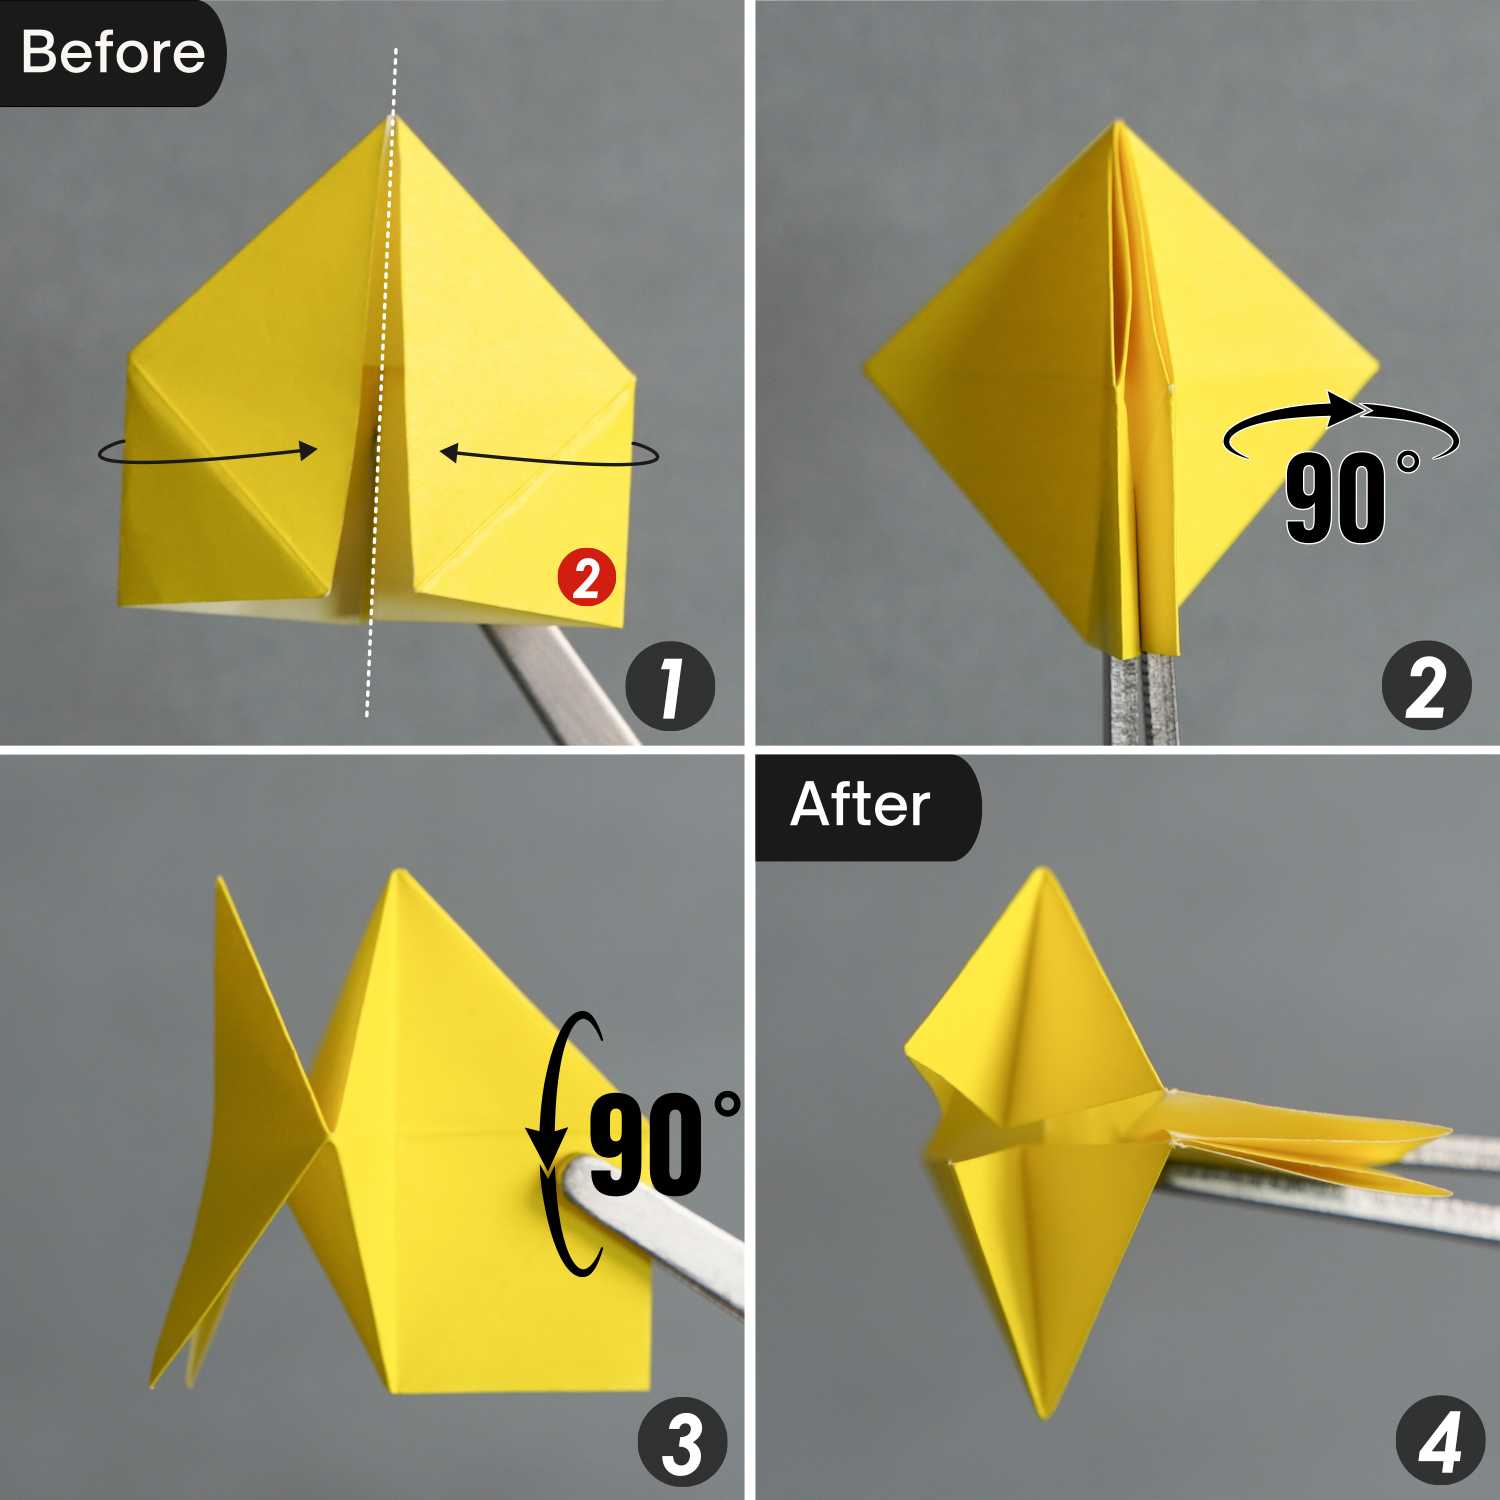
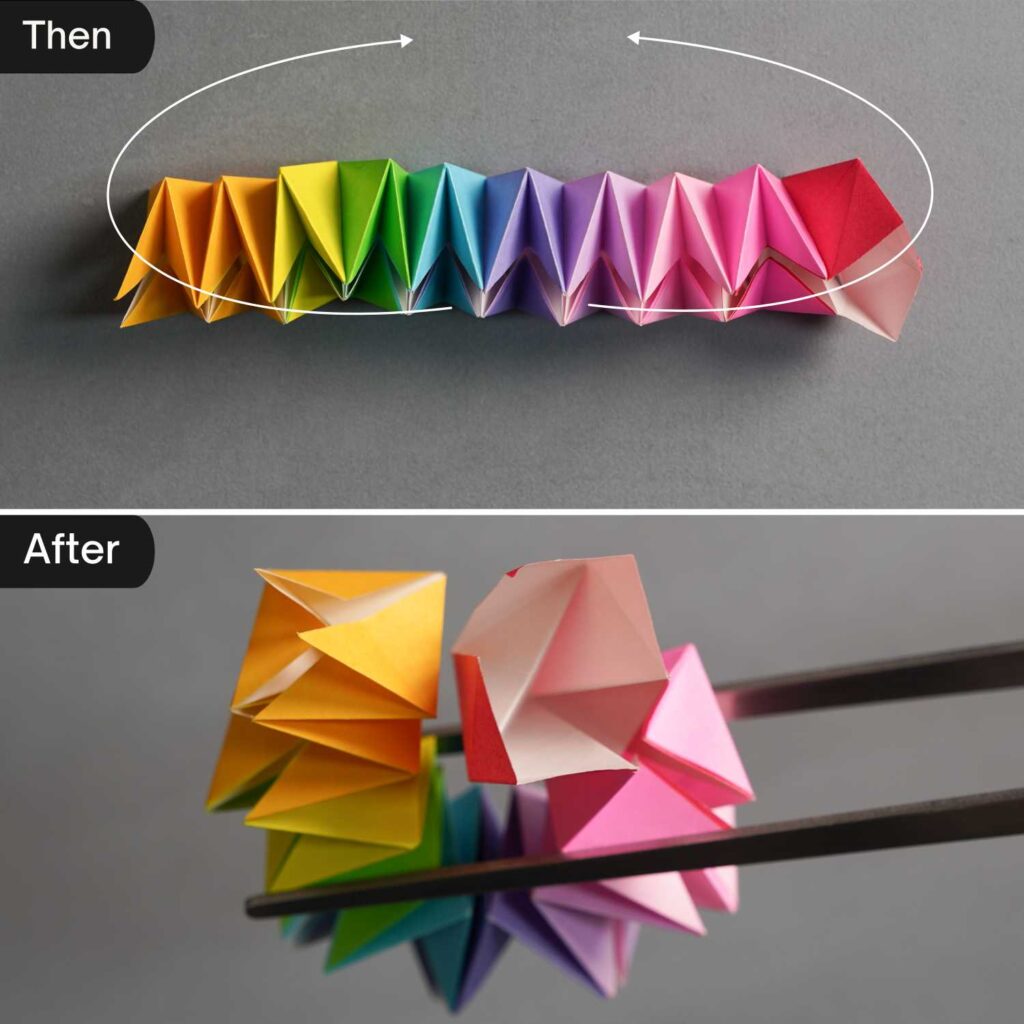
Step 12
Rotate the yellow unit 90 degrees from left to right, then another 90 degrees from back to front, next, expand it slightly to the left and right.
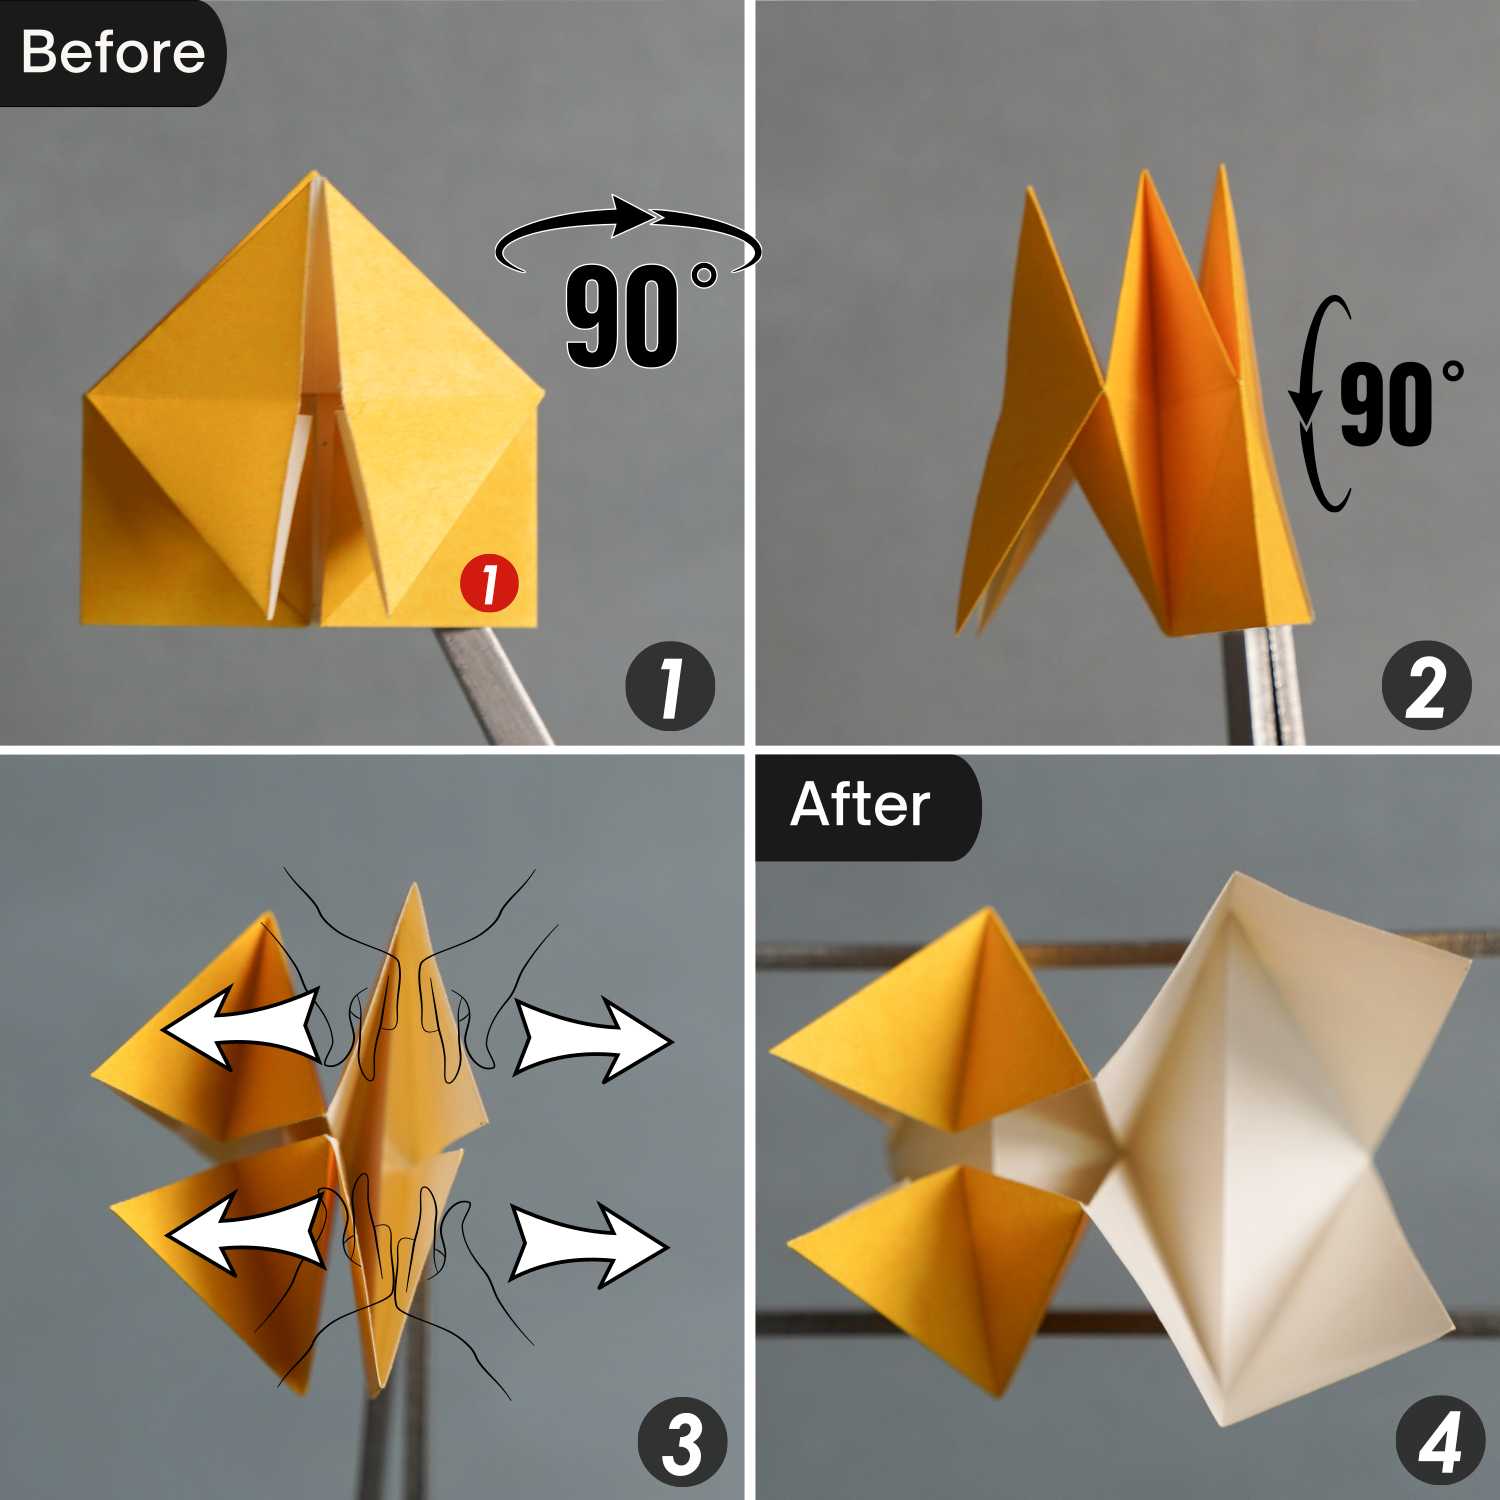
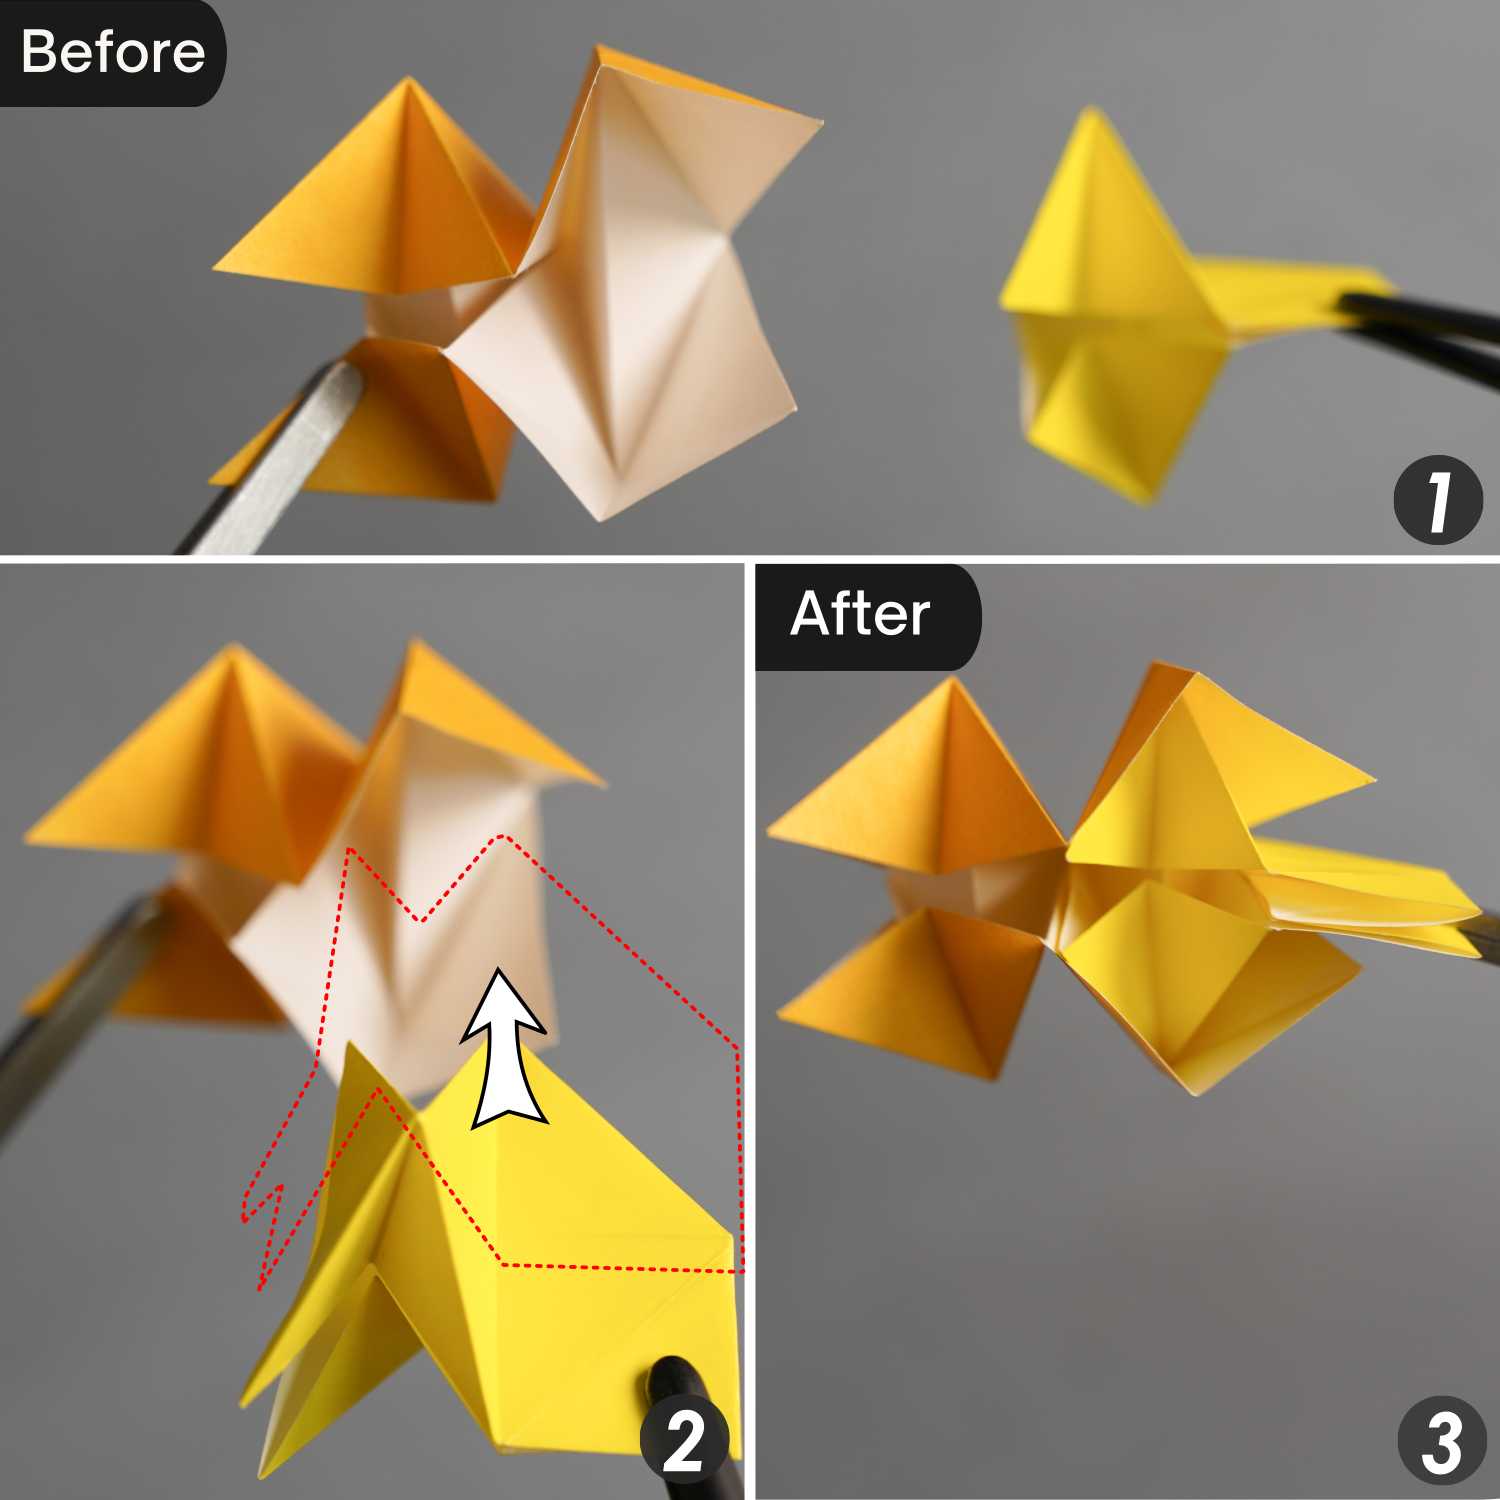
Step 13
Take out another unit, and bring up the left and right layers to make them stand upright. Rotate this unit 90 degrees from left to right, then another 90 degrees from back to front.
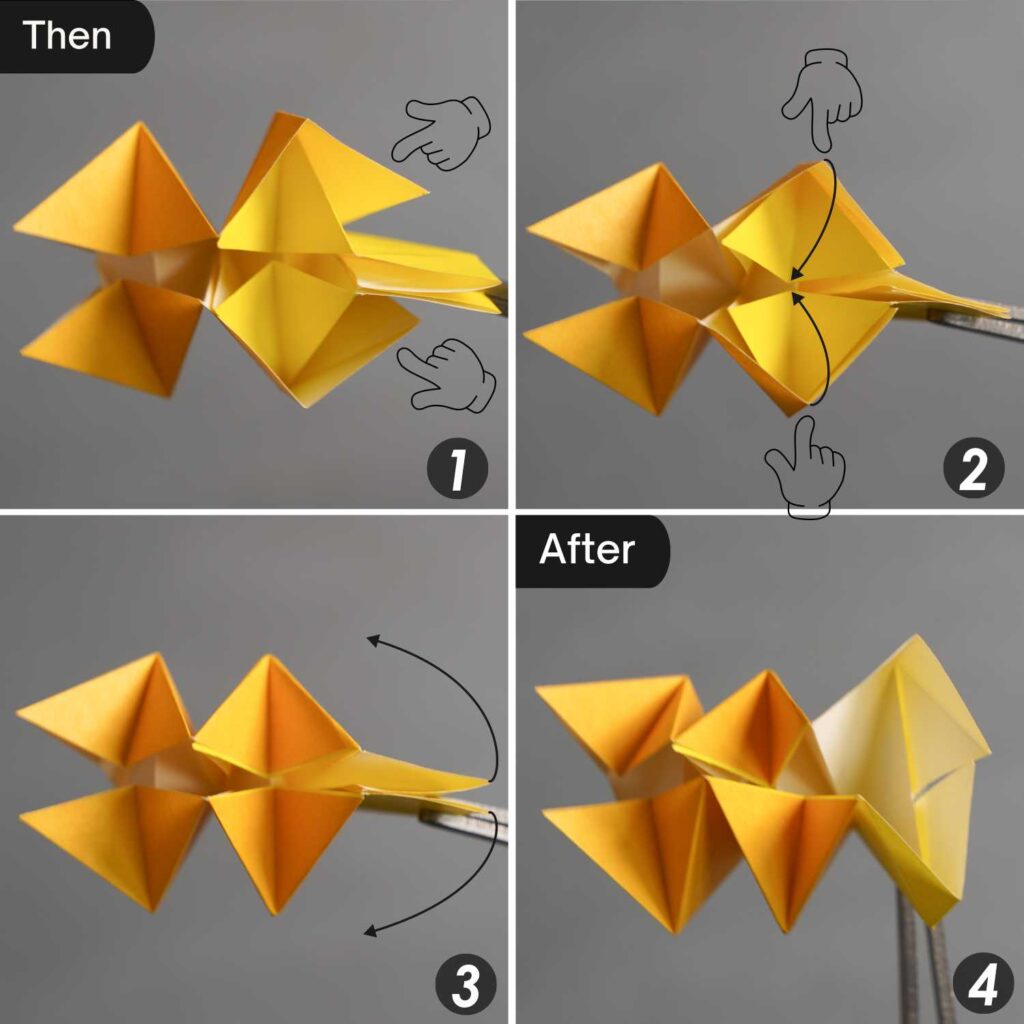
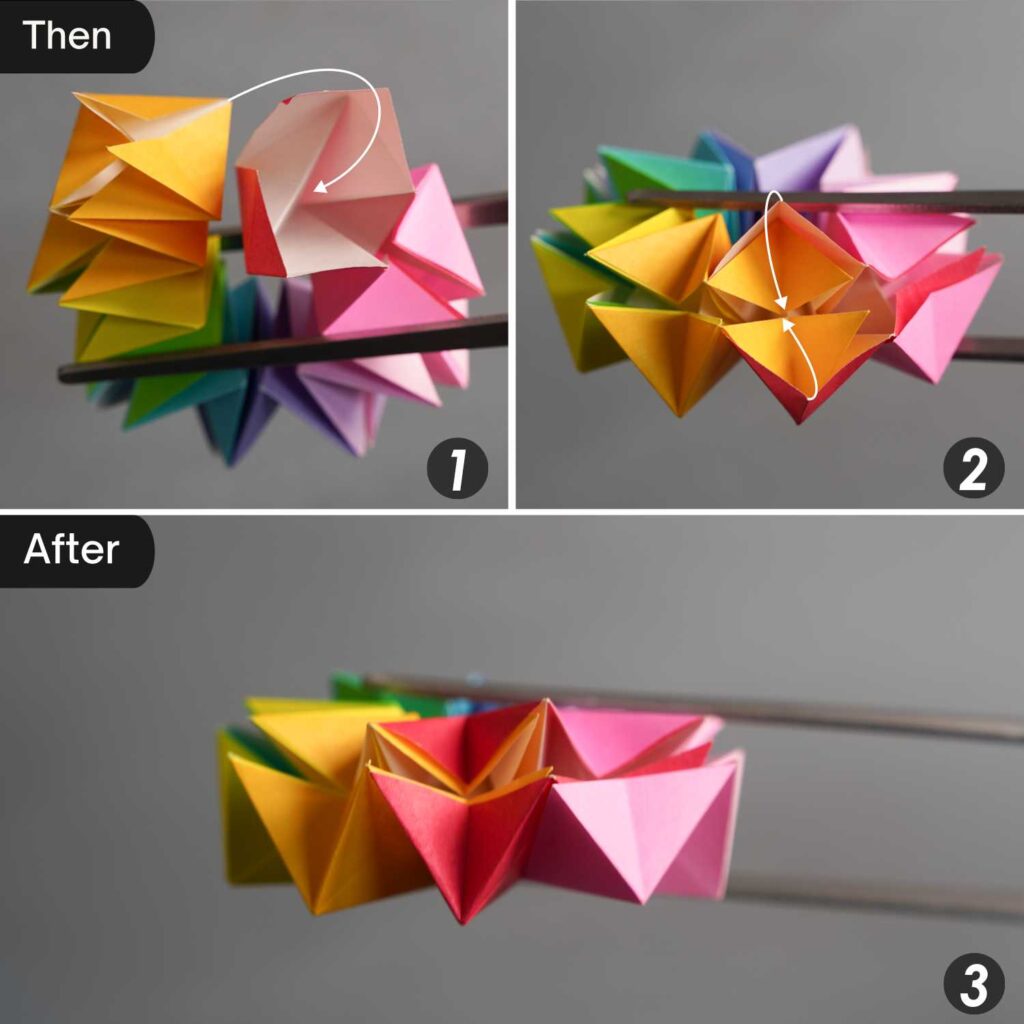
Step 14
Assemble these two units.
Wrap the right unit with the left unit, press down the two mountain folds on the right side of the left unit to turn them into valley folds to better wrap the right unit. Finally, unfold the two flaps on the right side of the right unit.
Step 15
Assemble the other unit in the same manner.
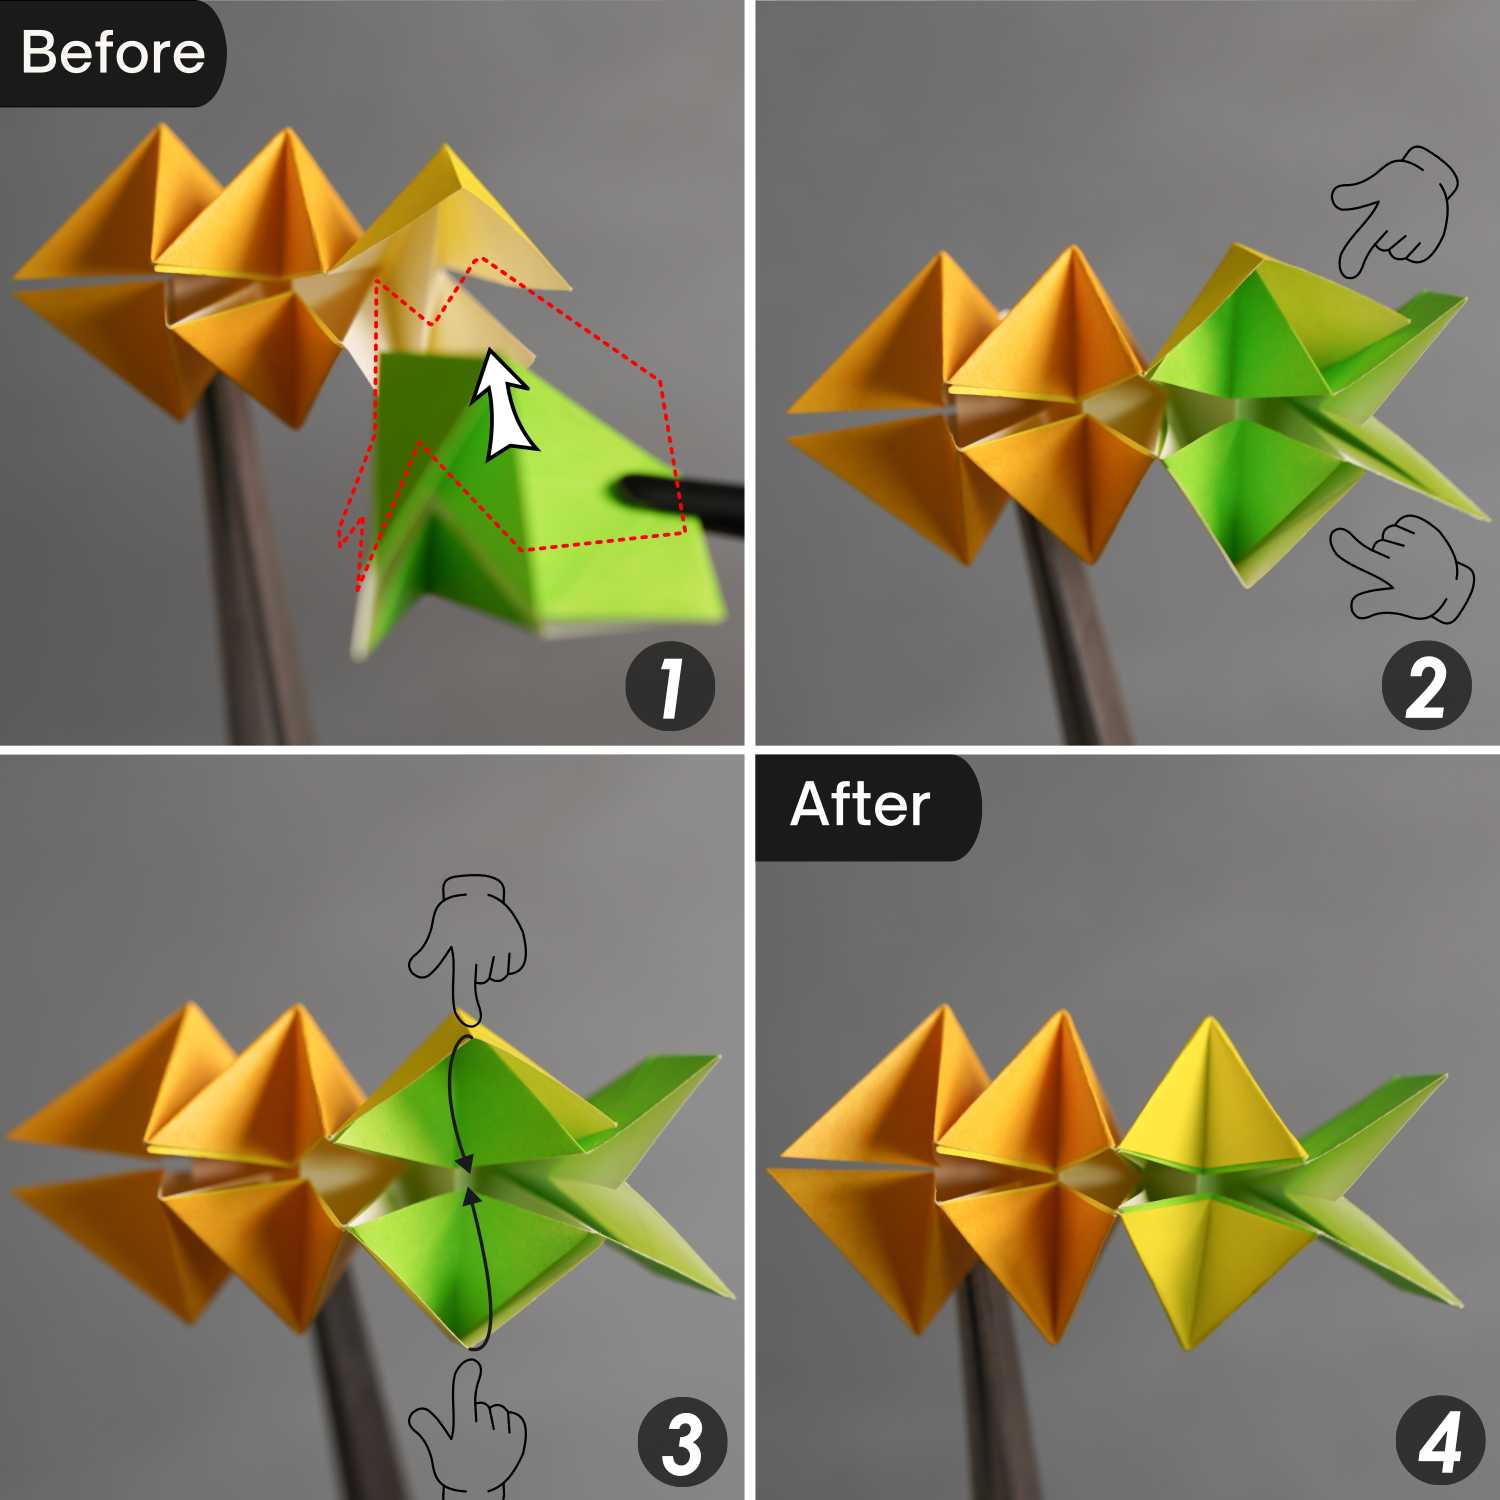
Step 16
Assemble the remaining units.
Bend this model so that its ends meet.
Push the left end into the right end and use the way you assembled the unit above to lock the ends together.
Step 17
Now, you can continually flip this magic circle inside out, revealing a kaleidoscope of magical effects.