How to Make an Origami Kunai
Step 1
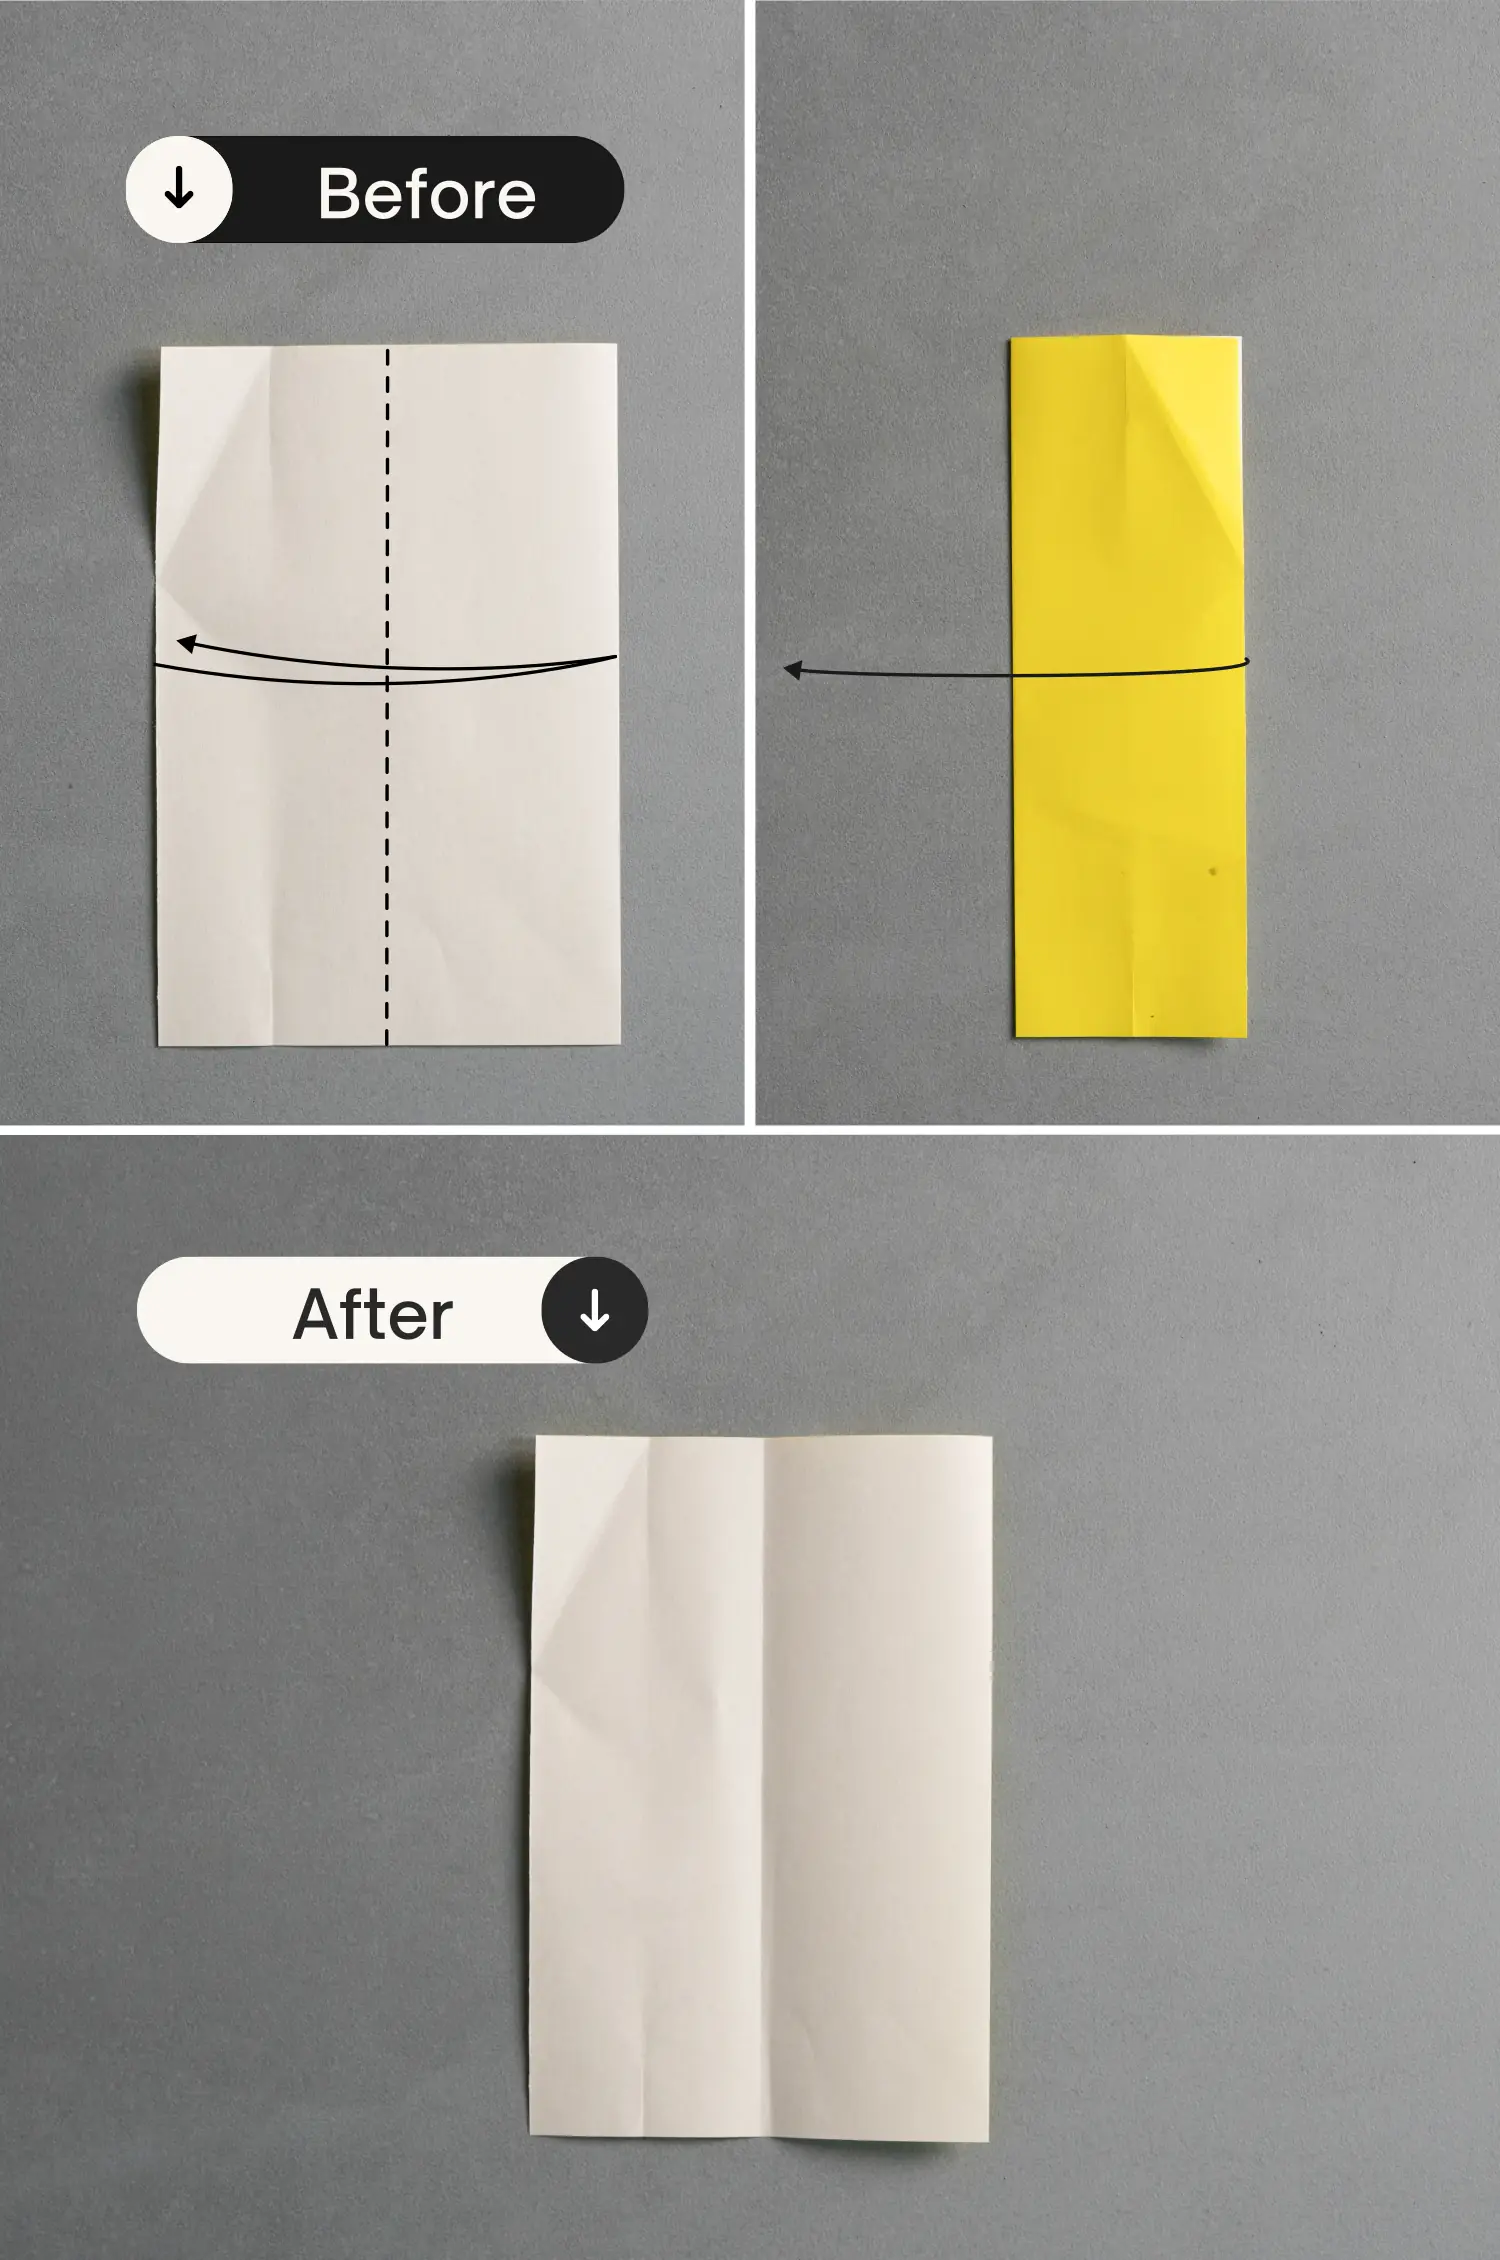
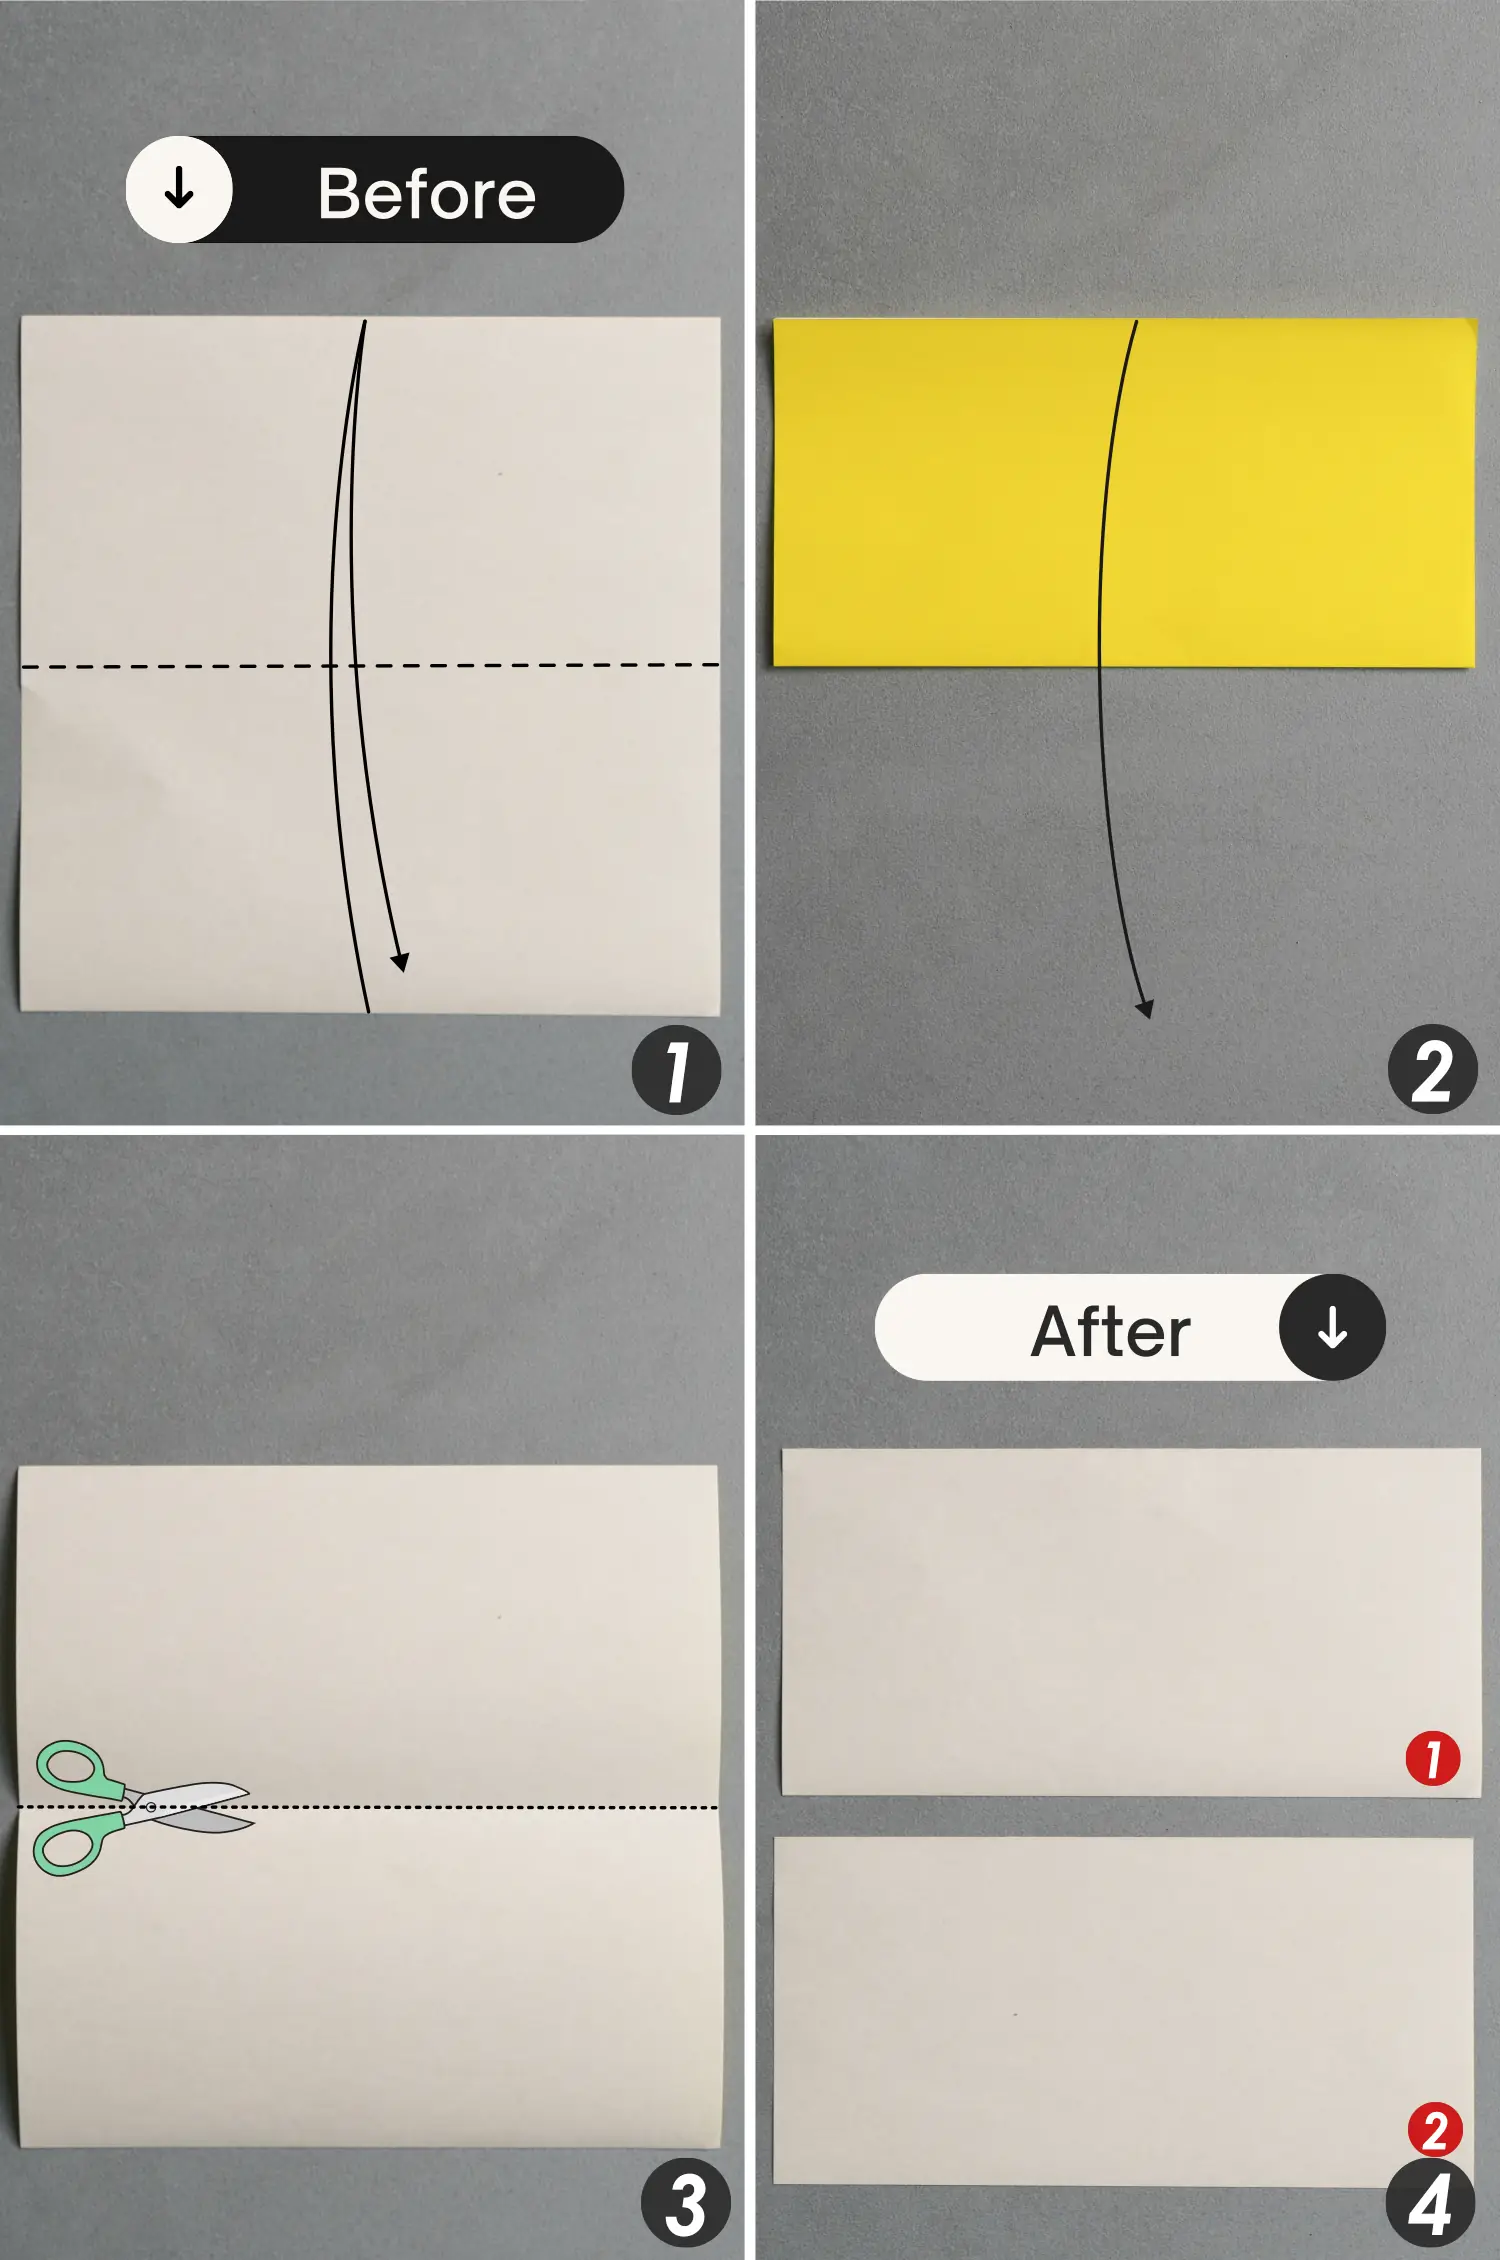
Firstly, we are going to make the blade, here I used two square pieces of paper. Through the cutting from step 1 to step 4, the paper was divided into three equal parts, and the length-width ratio was 3:2, that is, 15cm long and 10cm wide. If you have the rectangular paper with the corresponding length-width ratio, you can start from step 5.
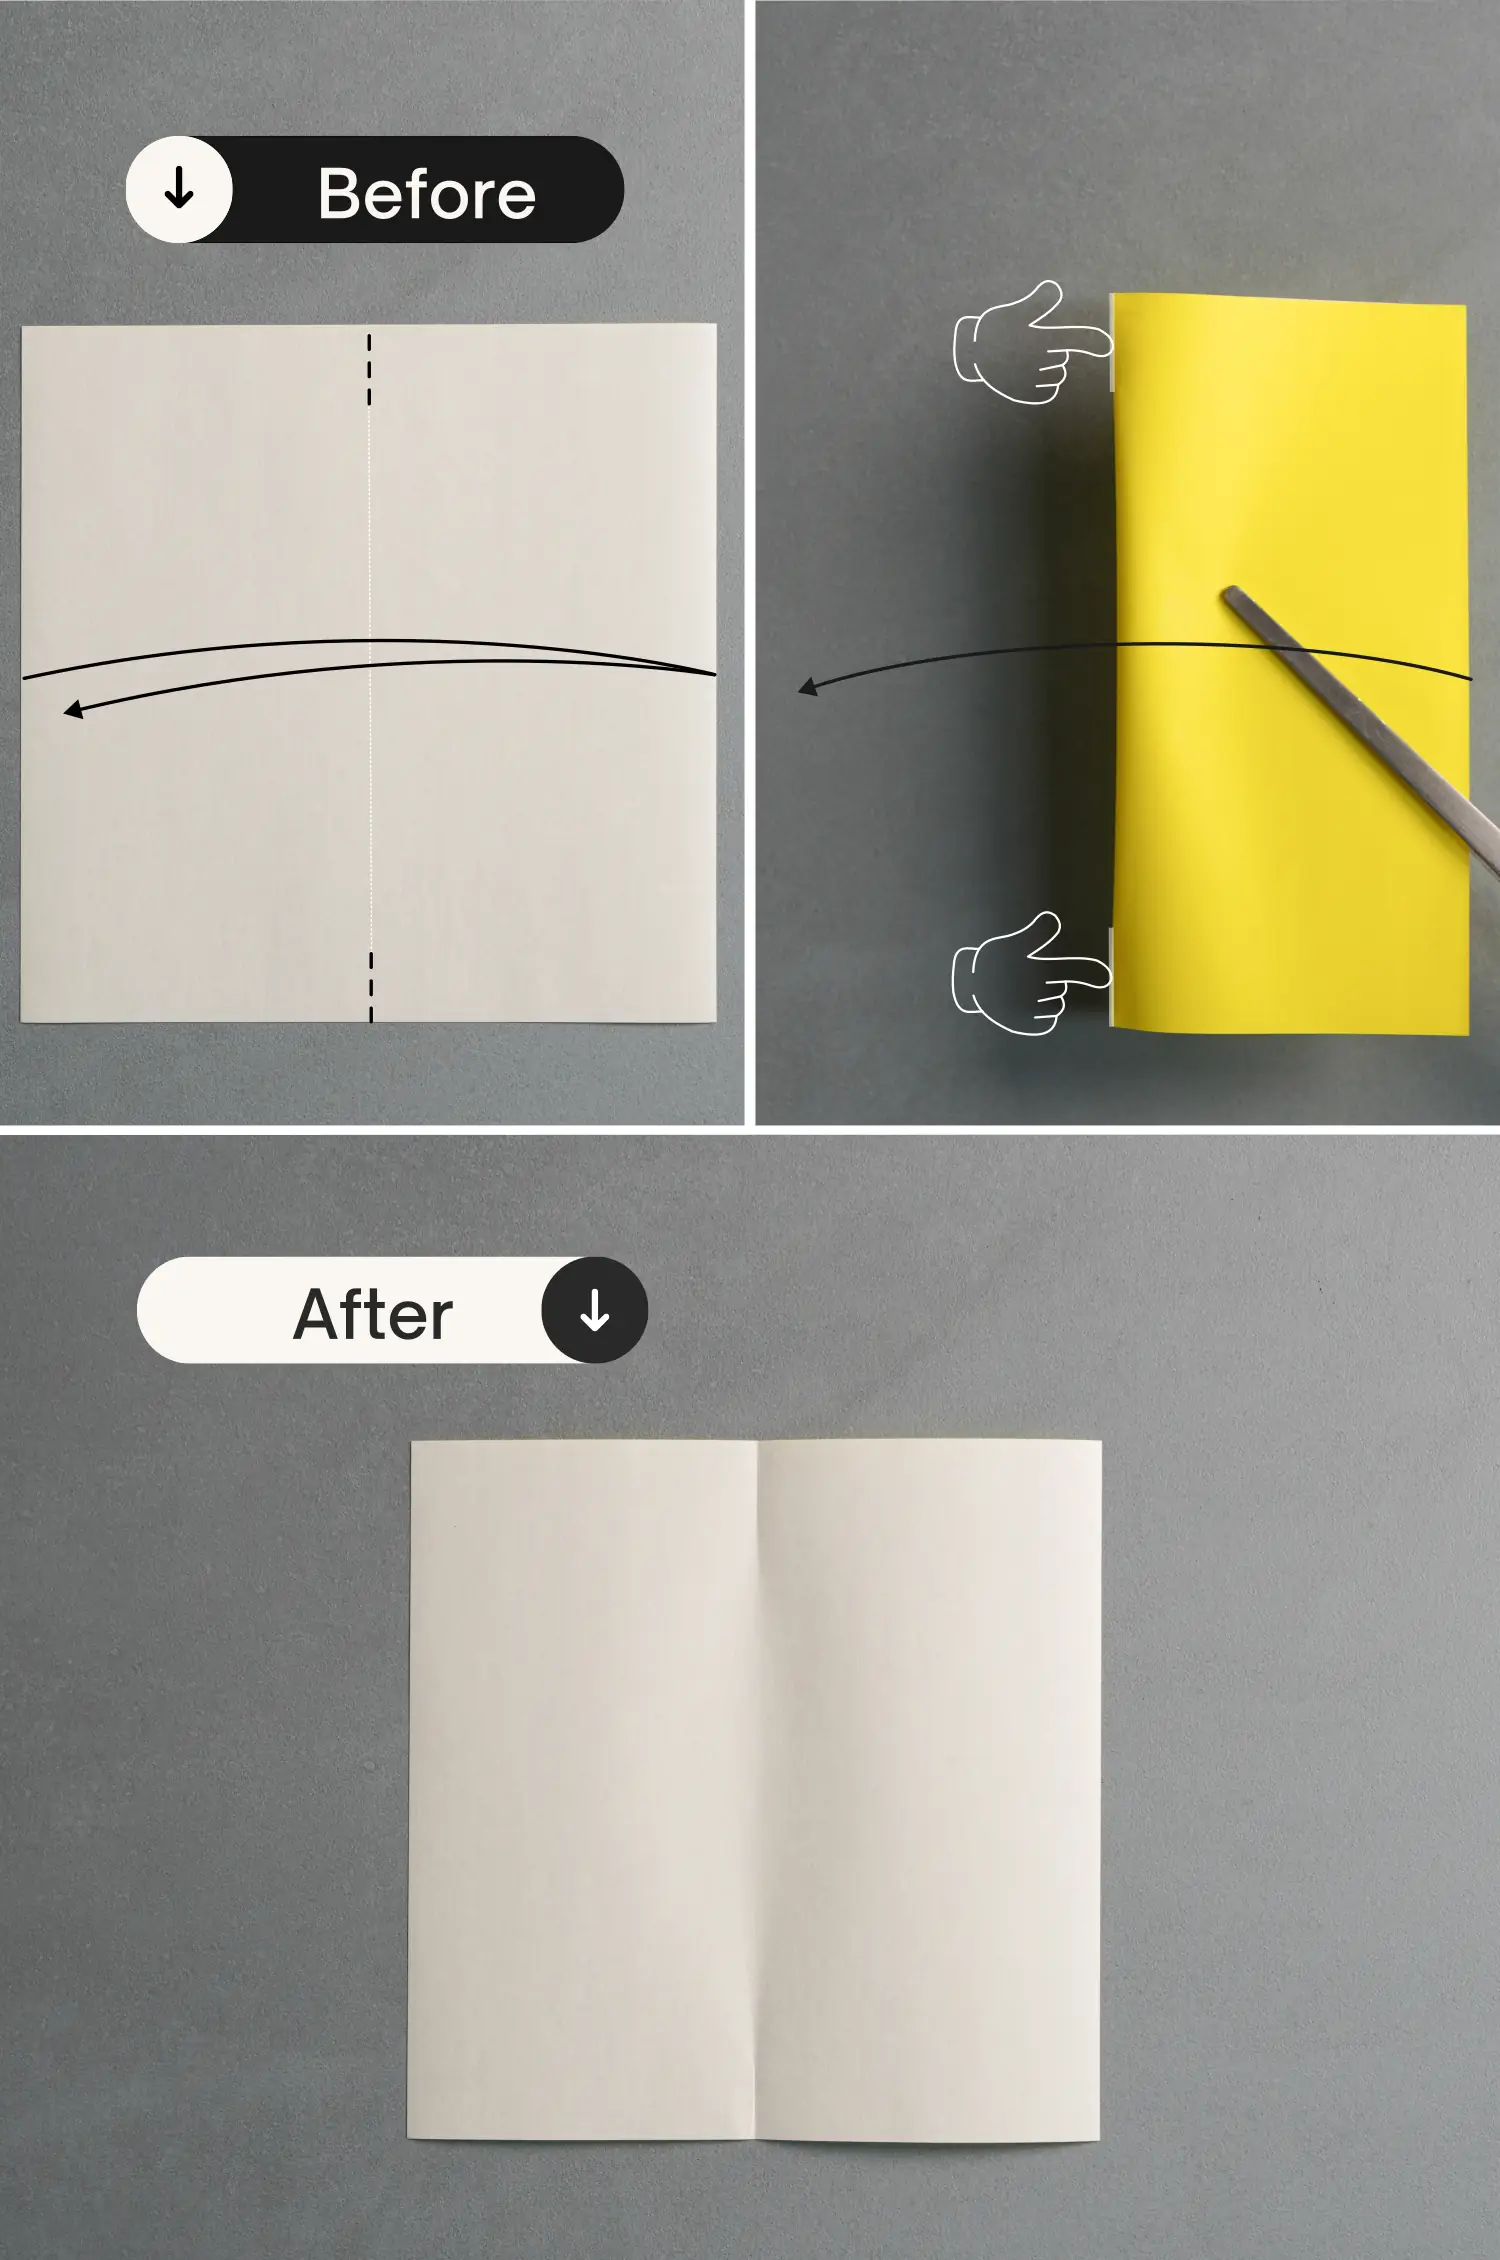
Take out one of the pieces of paper, fold it in half vertically, leaving two short creases on the top and bottom, as the black dotted lines show, and unfold it.
Step 2
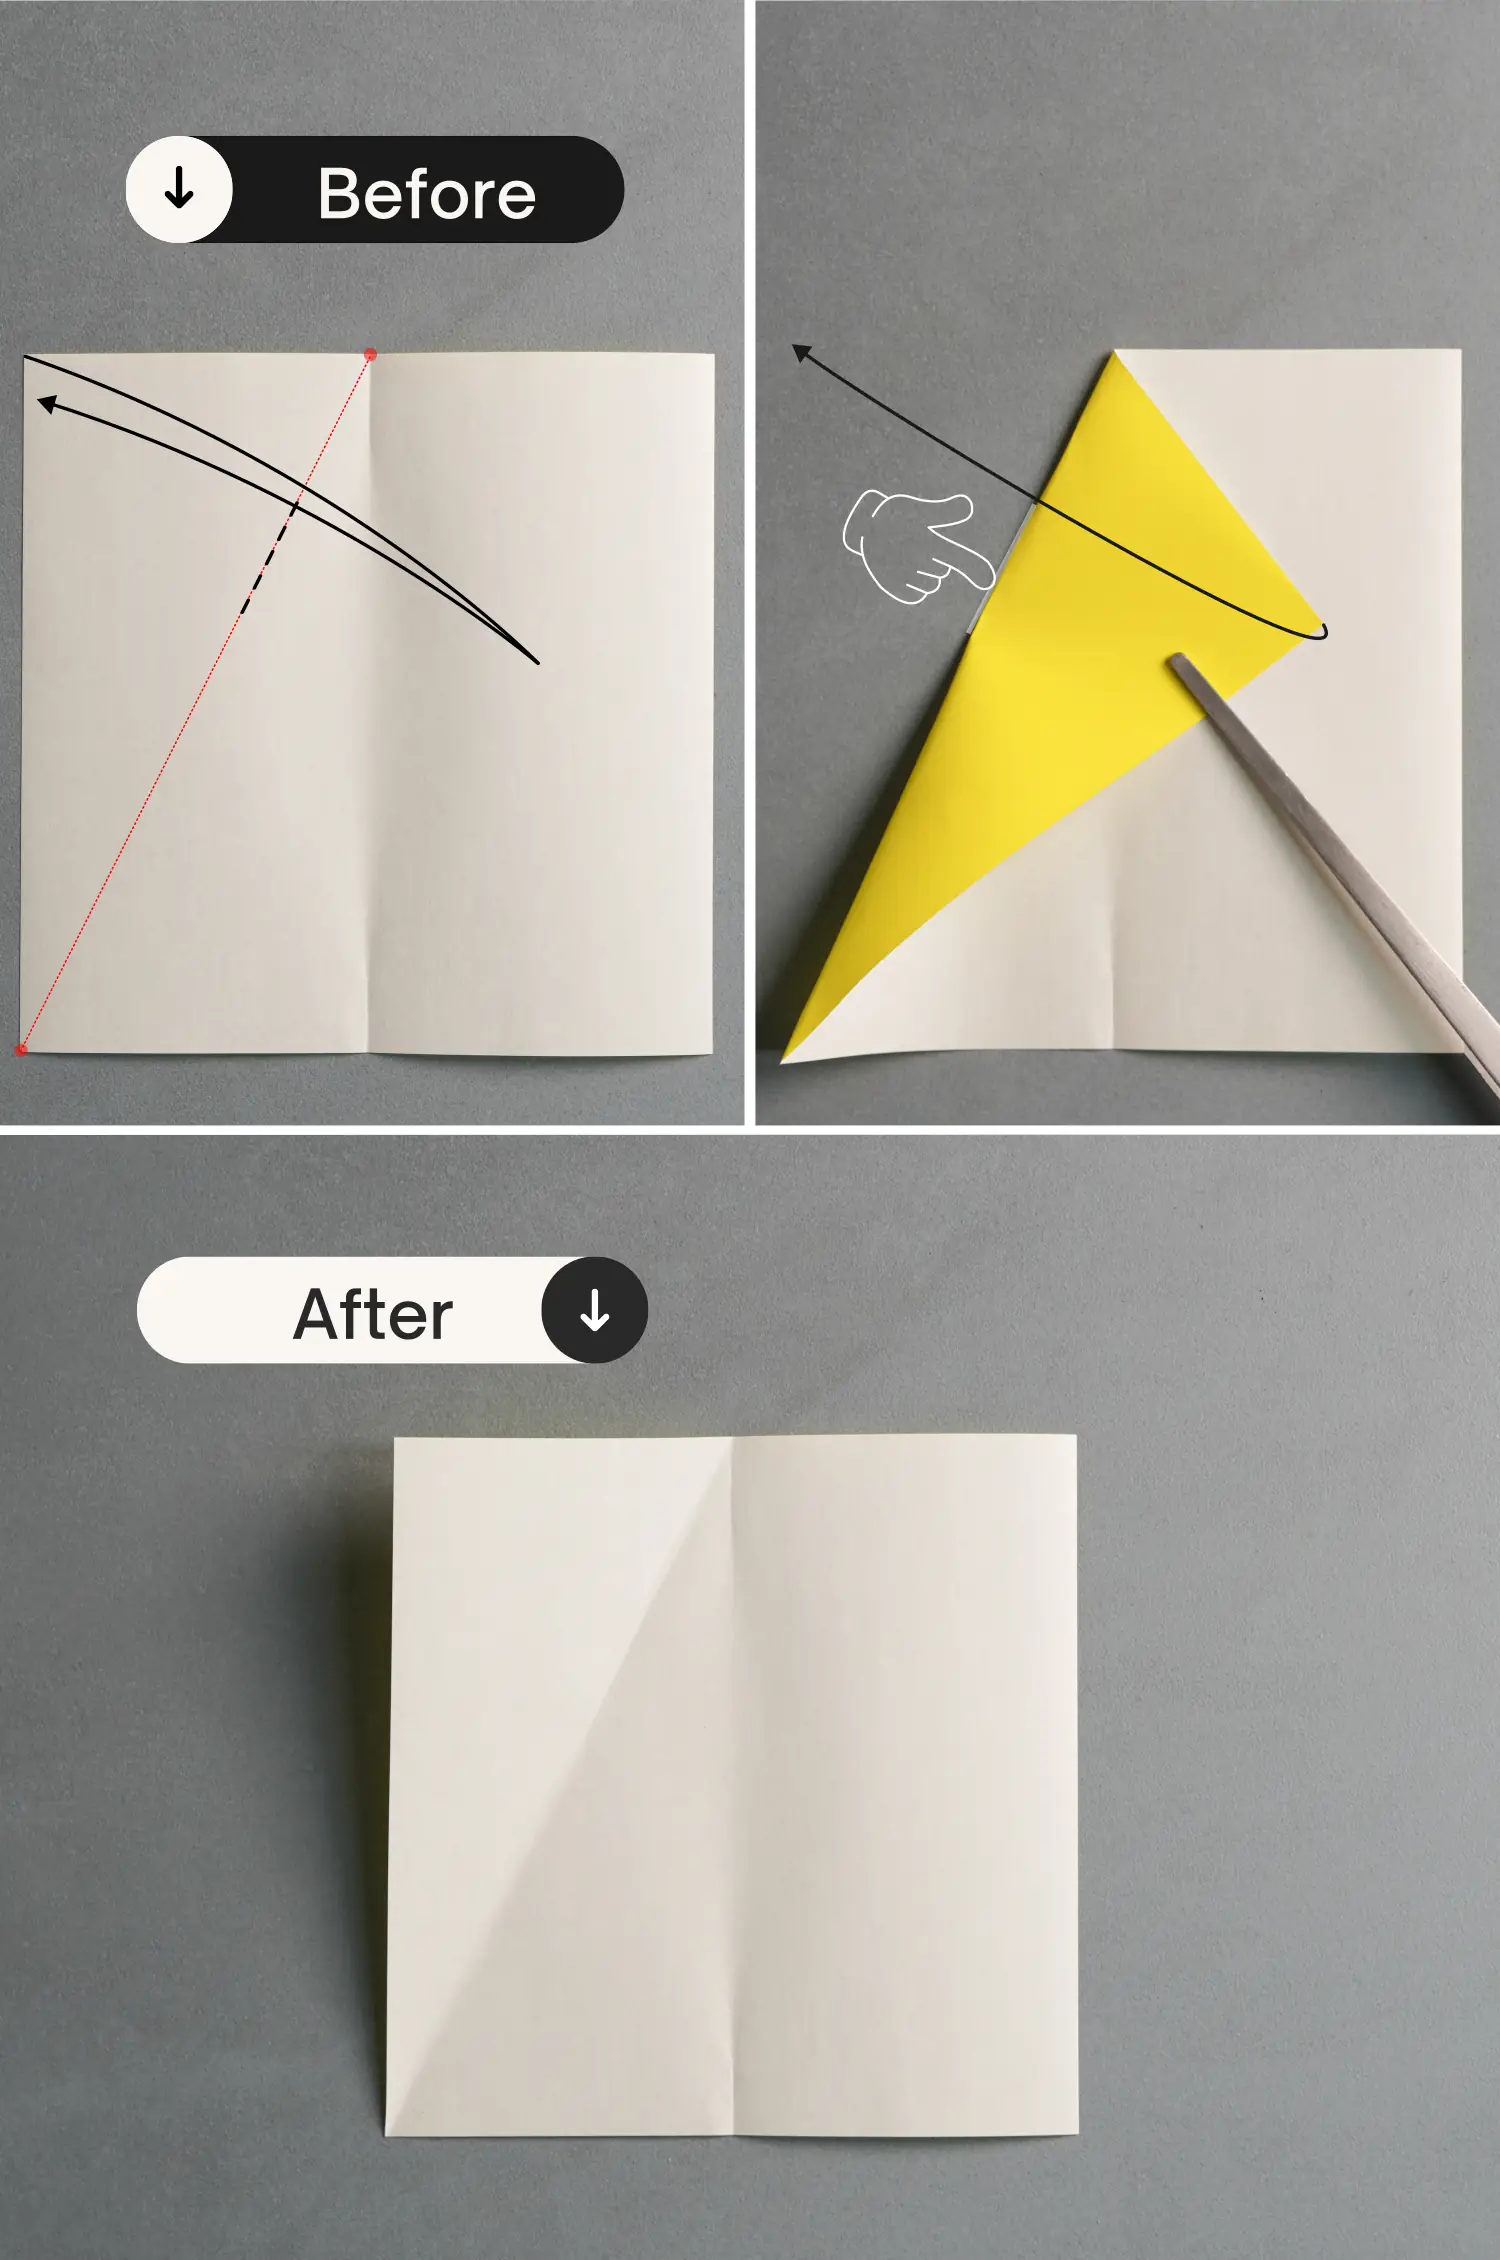
Fold the top left point along the red dotted line that connects the two red spots; one is the midpoint of the top edge, and the other is the bottom left point of the paper. Crease it well, leaving a short crease as the black dotted line shows, and unfold it.
Step 3
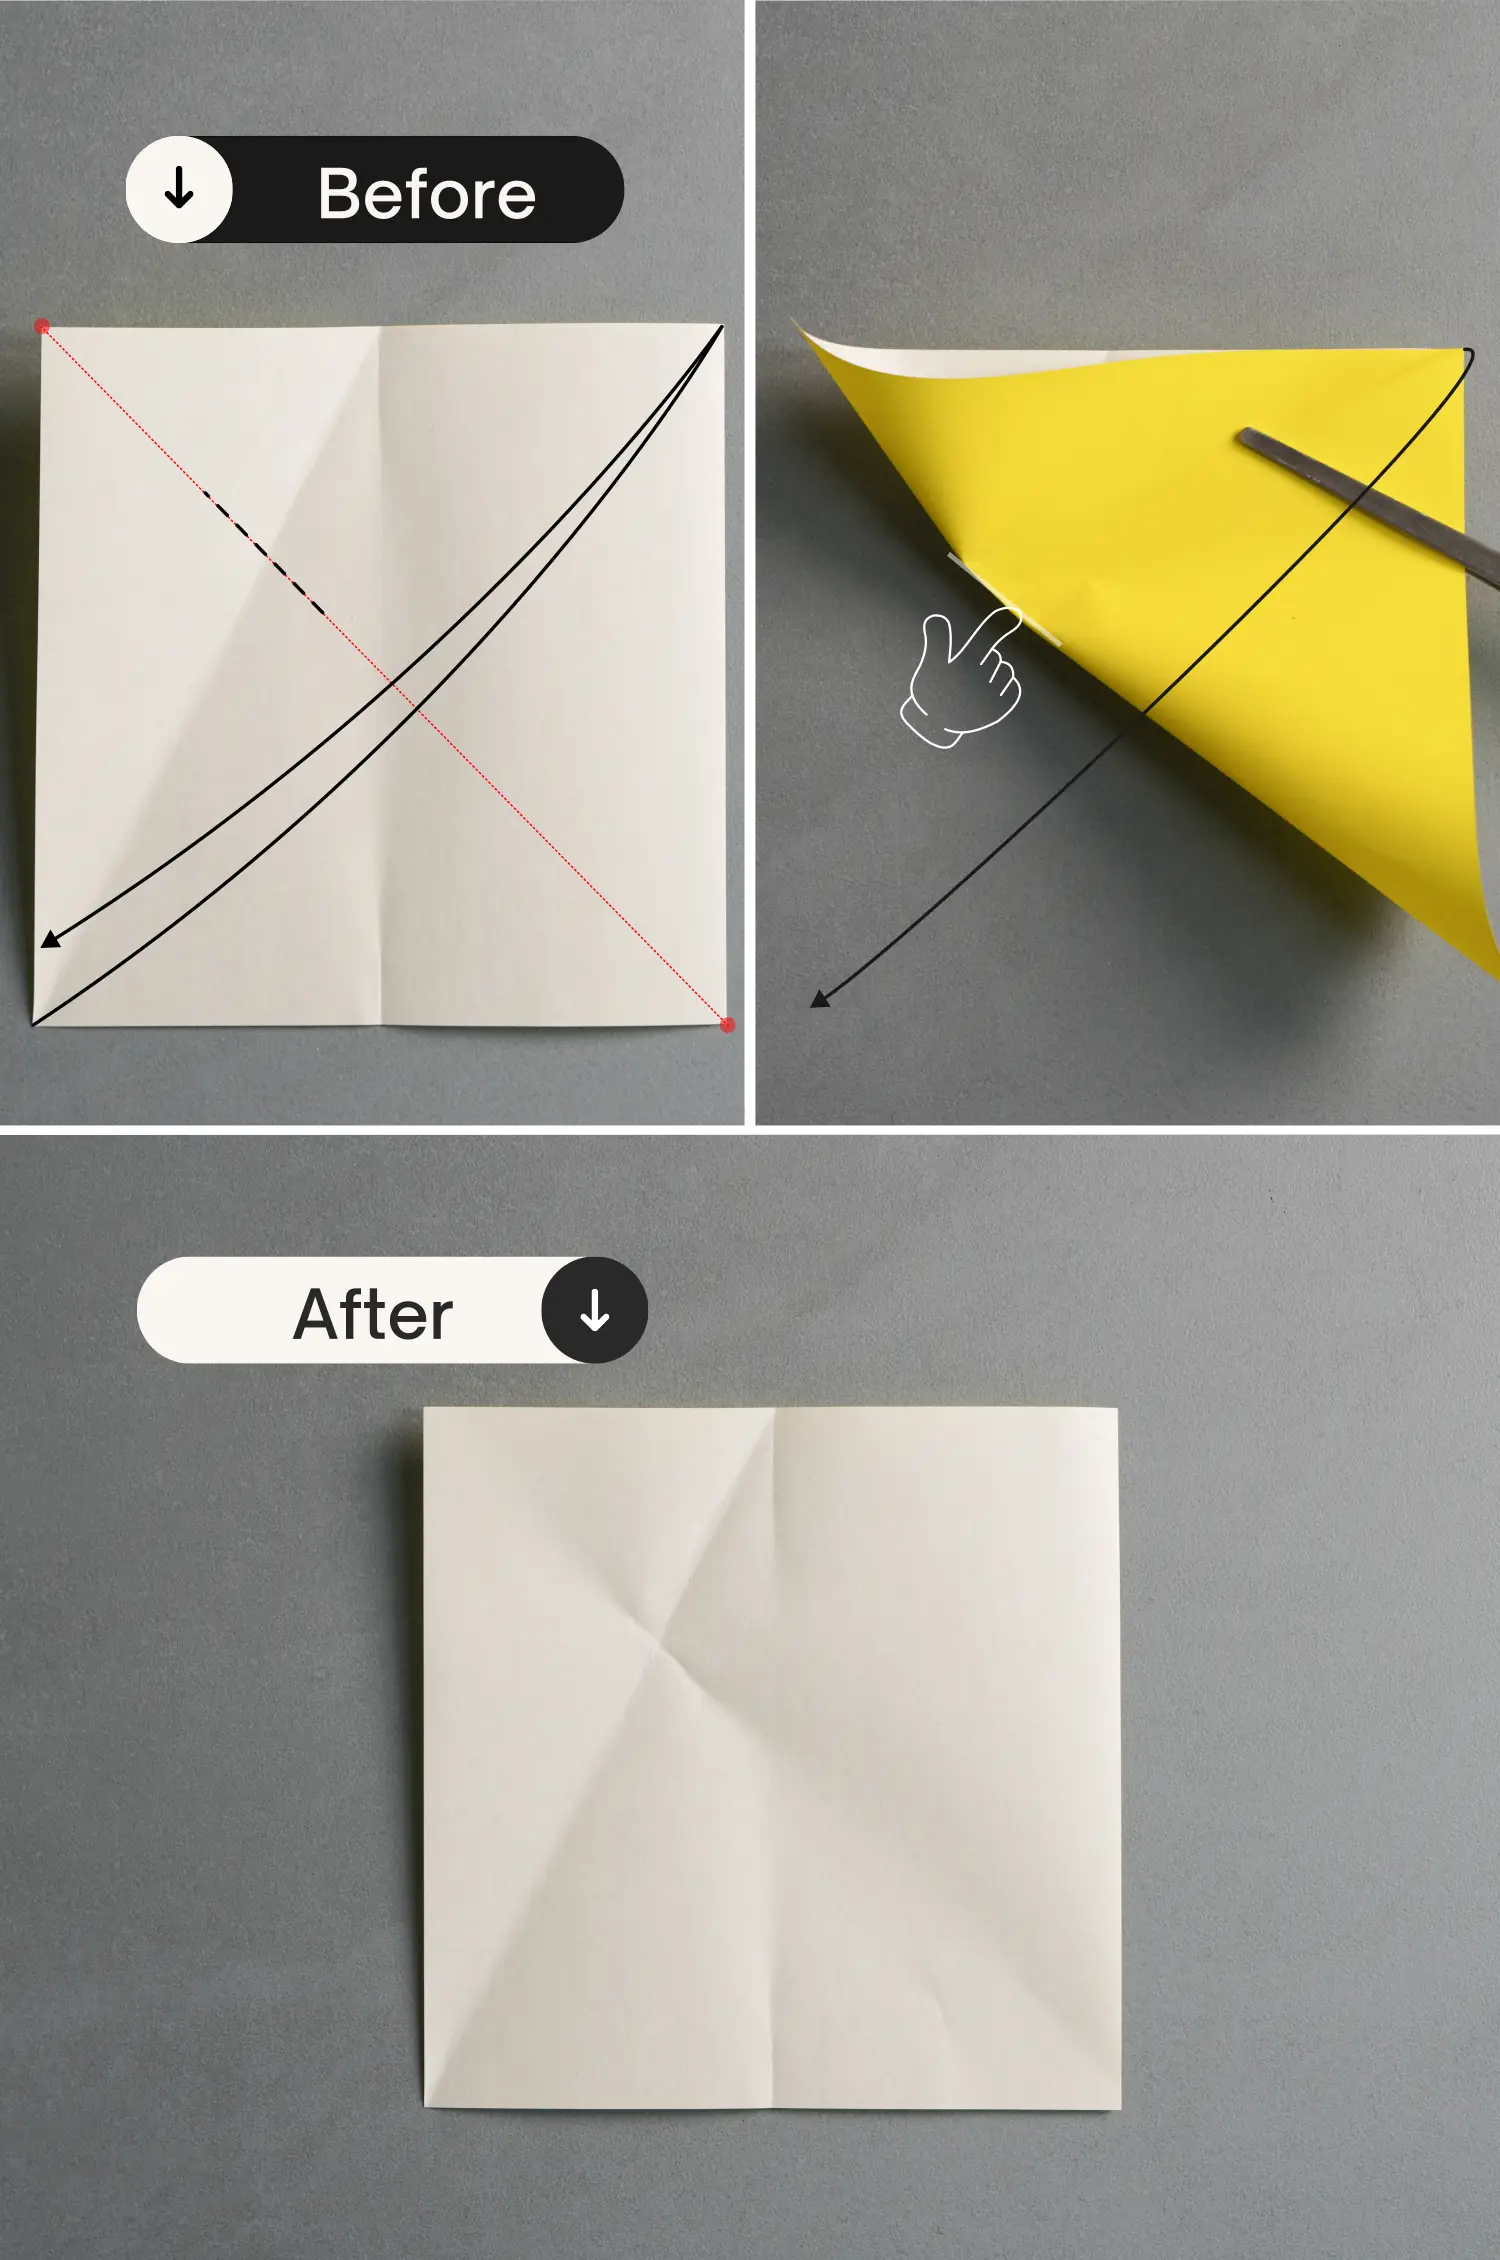
Fold the bottom left point to meet the top right point diagonally, leaving a short crease as the black dotted line shows, which intersects the crease you made in the previous step. Unfold the paper.
Step 4
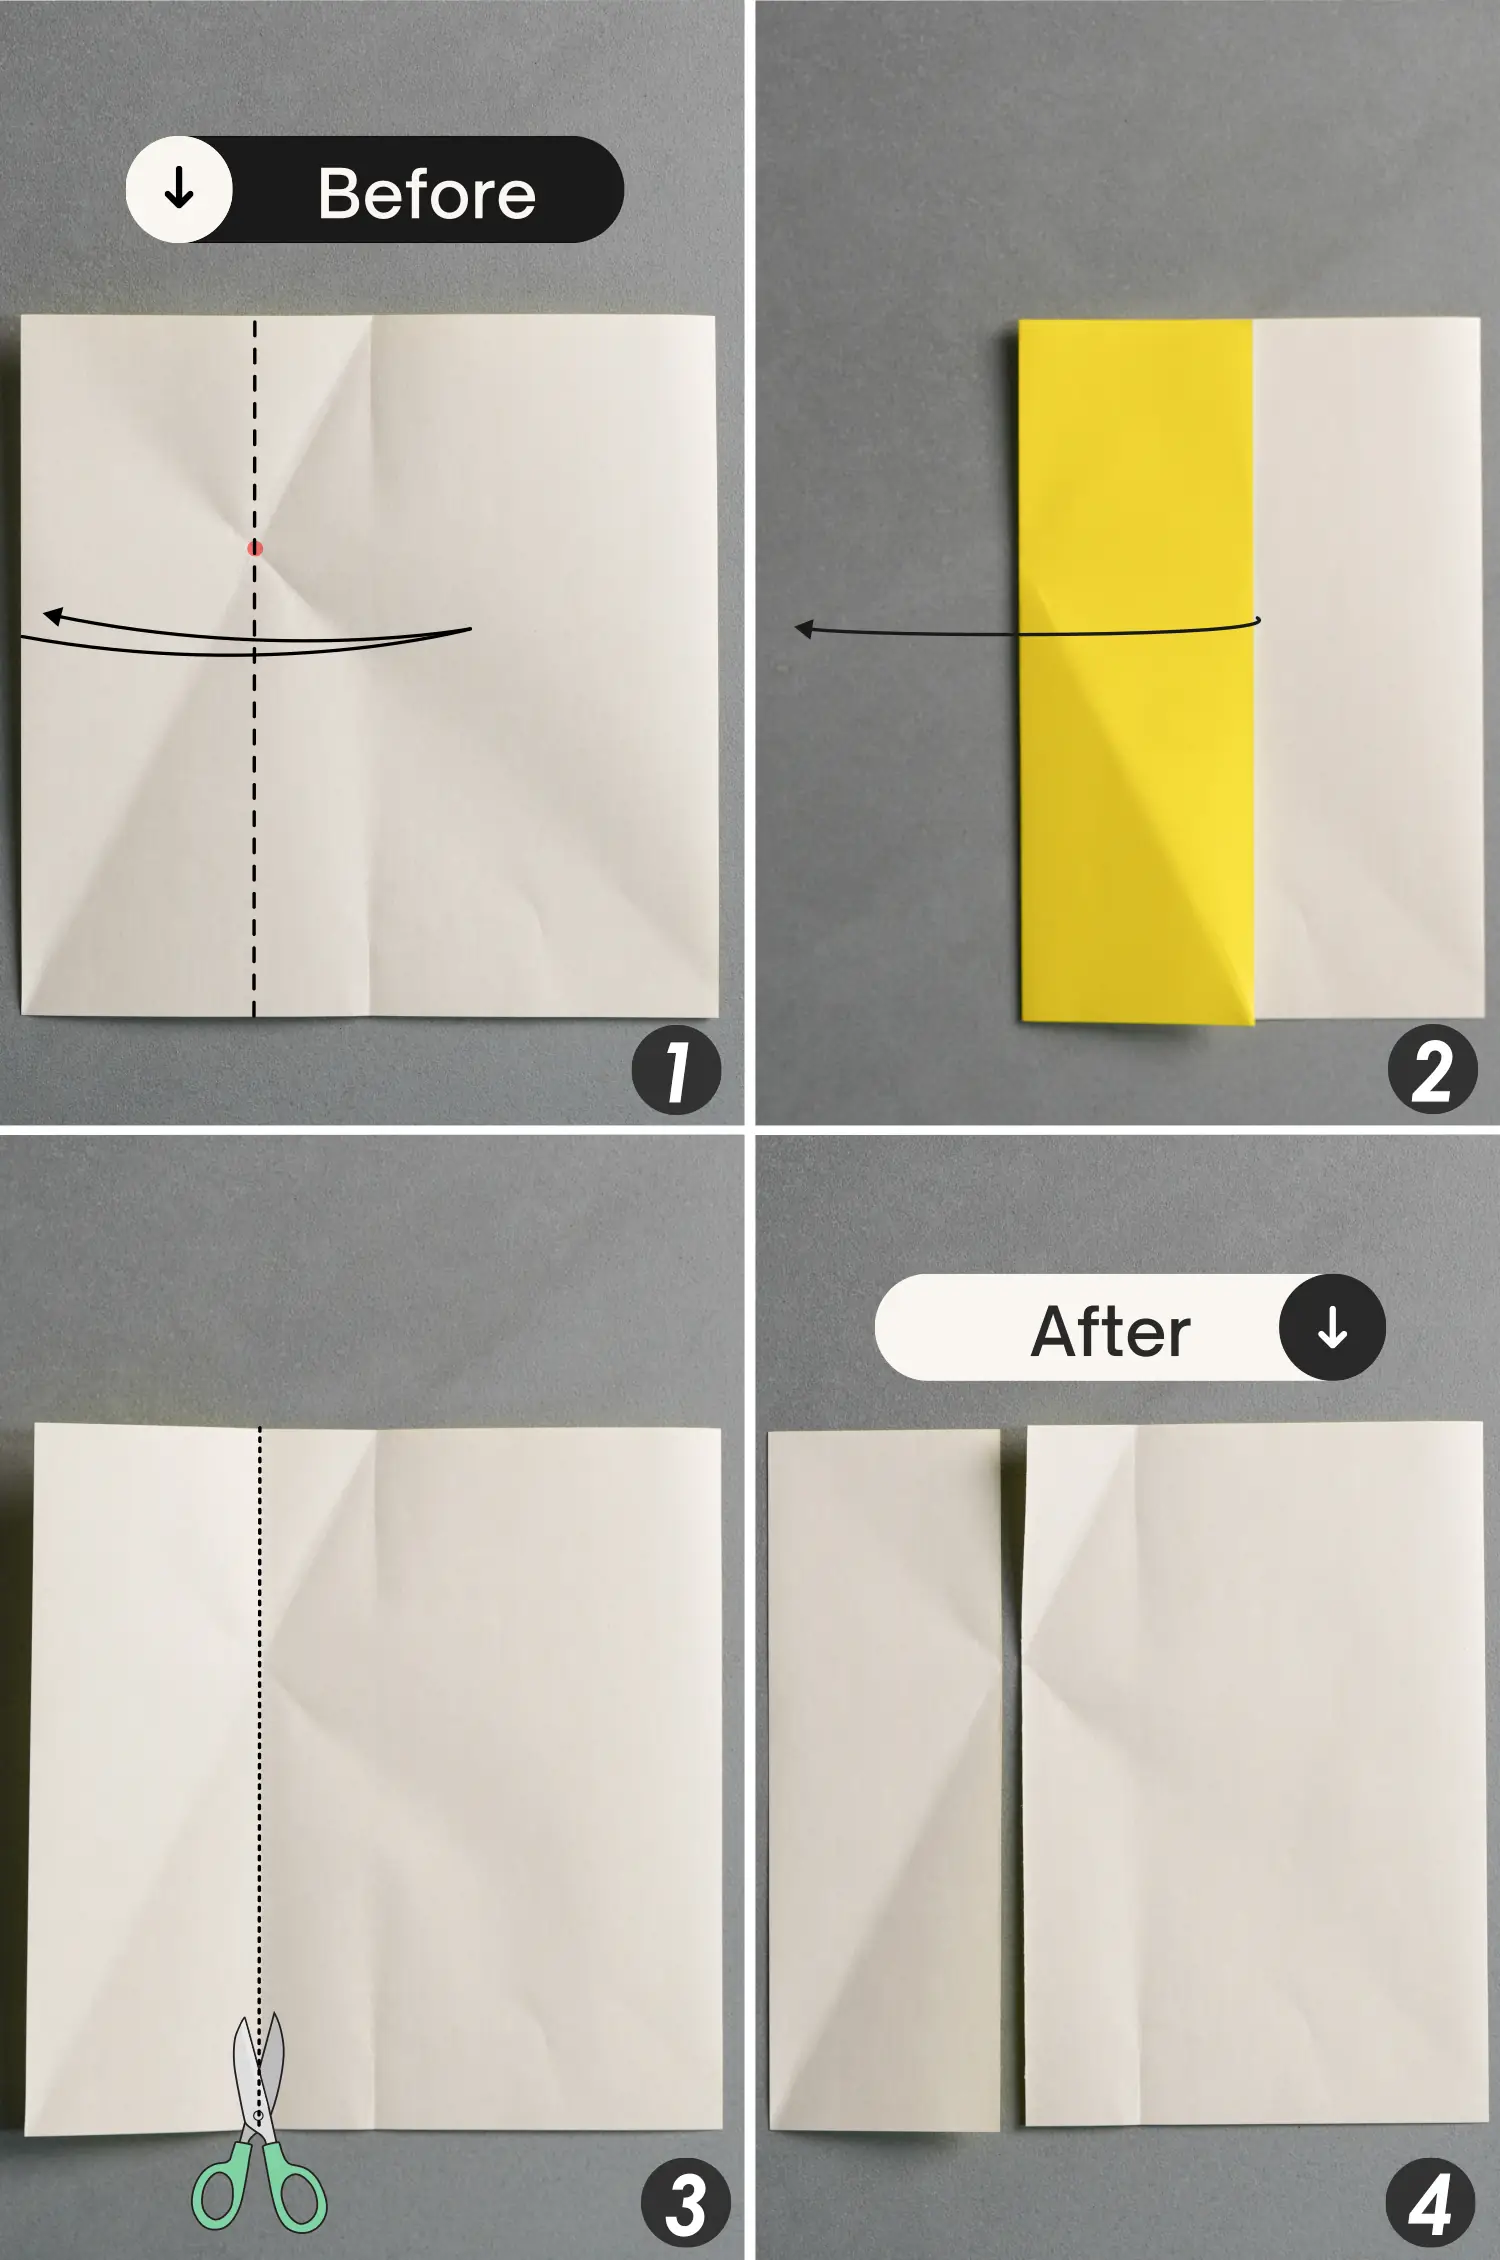
Fold the left edge along the dotted line, which vertically extends from the intersection point indicated by the red spot. Leave a crease and unfold it. Finally, cut the paper along this crease to get two pieces of rectangle paper.
Step 5
Take out the slightly larger rectangular piece of paper, fold it in half vertically, leaving a crease, and unfold it.
Step 6
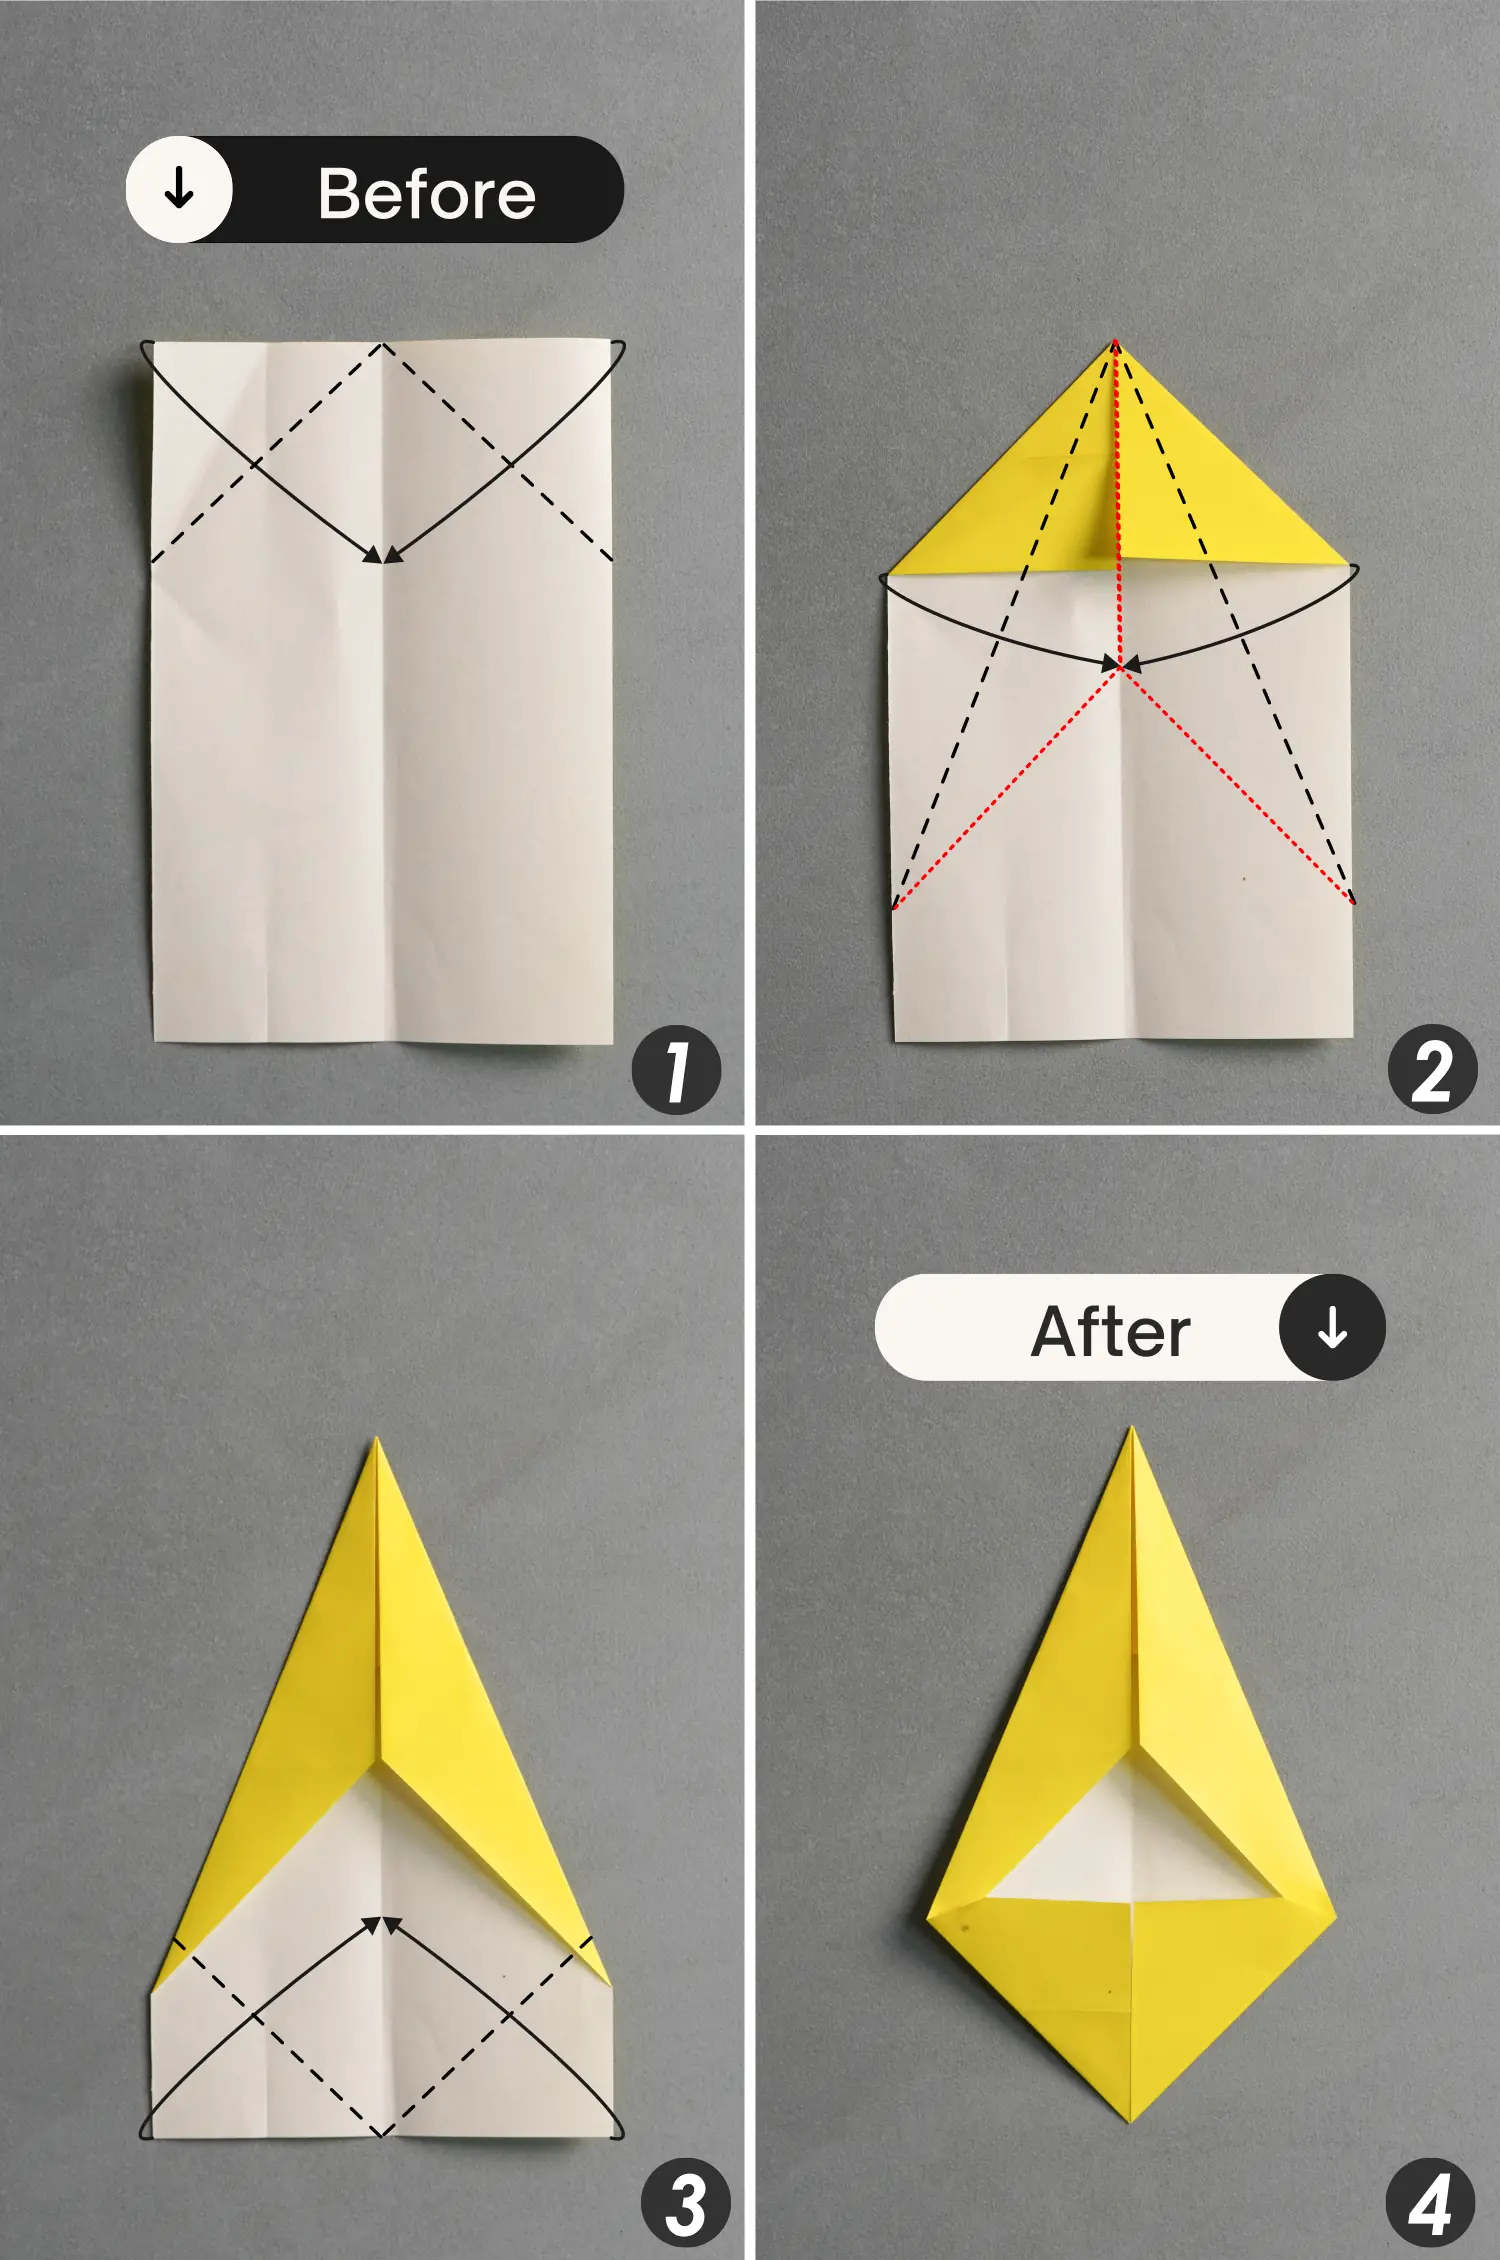
Fold down the top two points diagonally, then fold the top left and right edges to align with the vertical crease, and finally, fold up the bottom two points diagonally.
Step 7
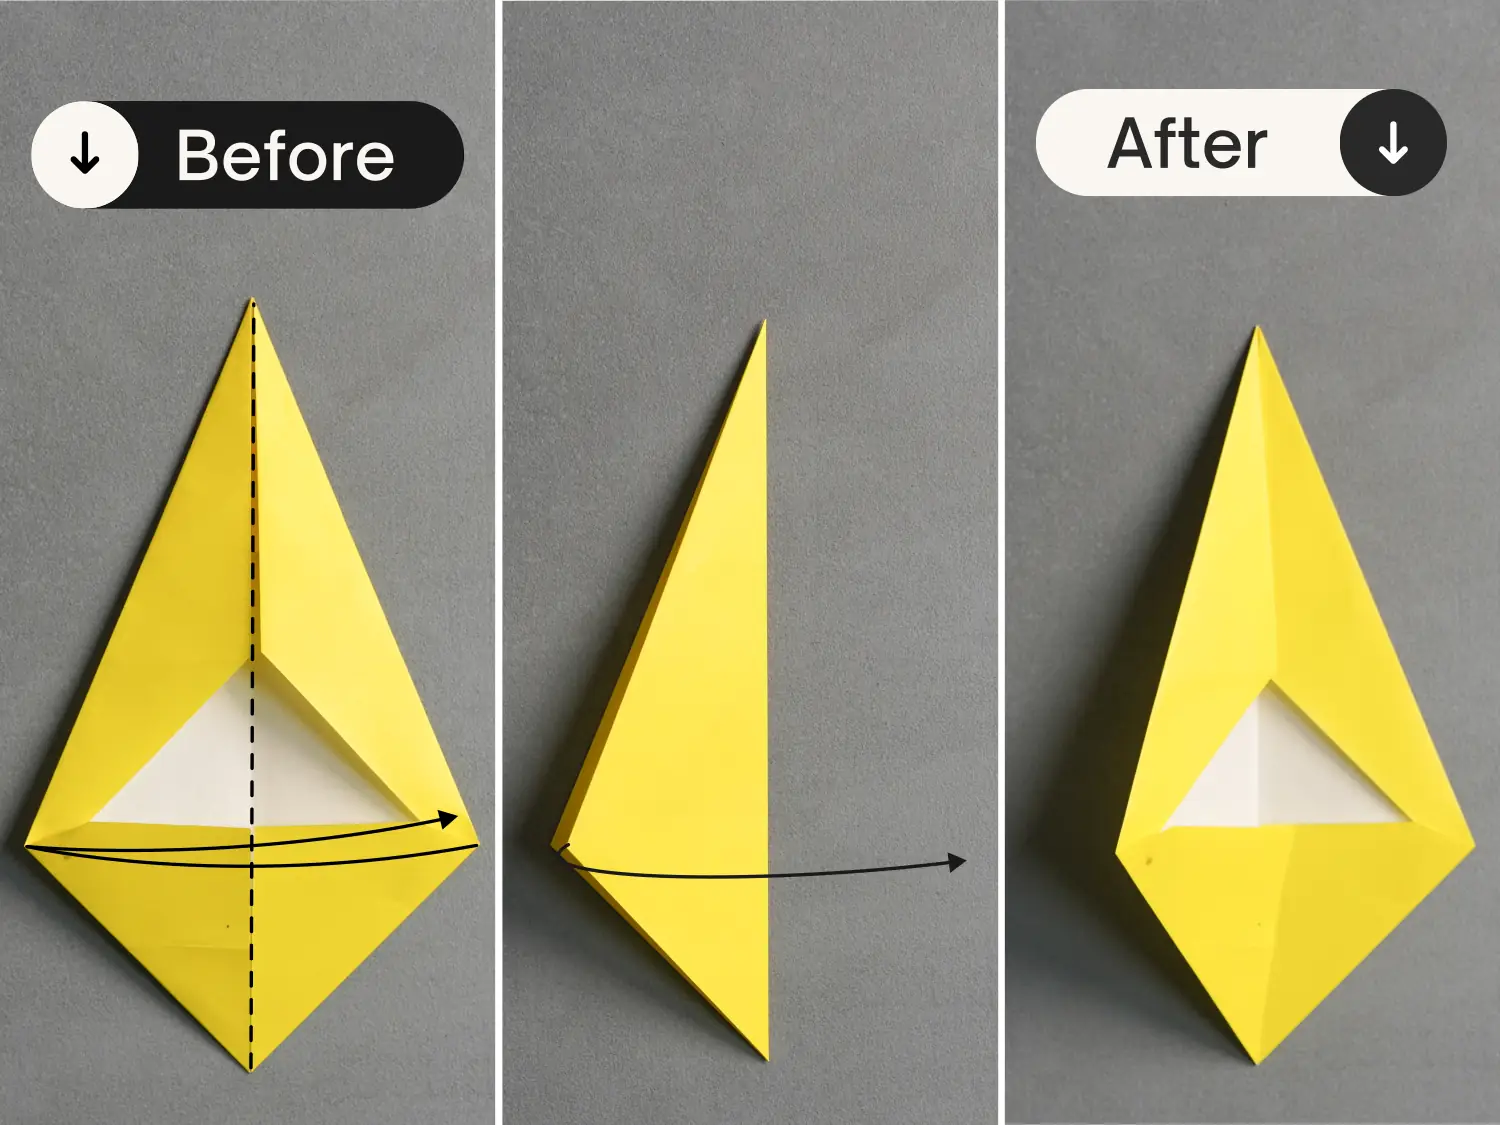
Fold the paper in half vertically, crease it well, and unfold it.
Step 8
Make another unit in the same way as above.

Step 9
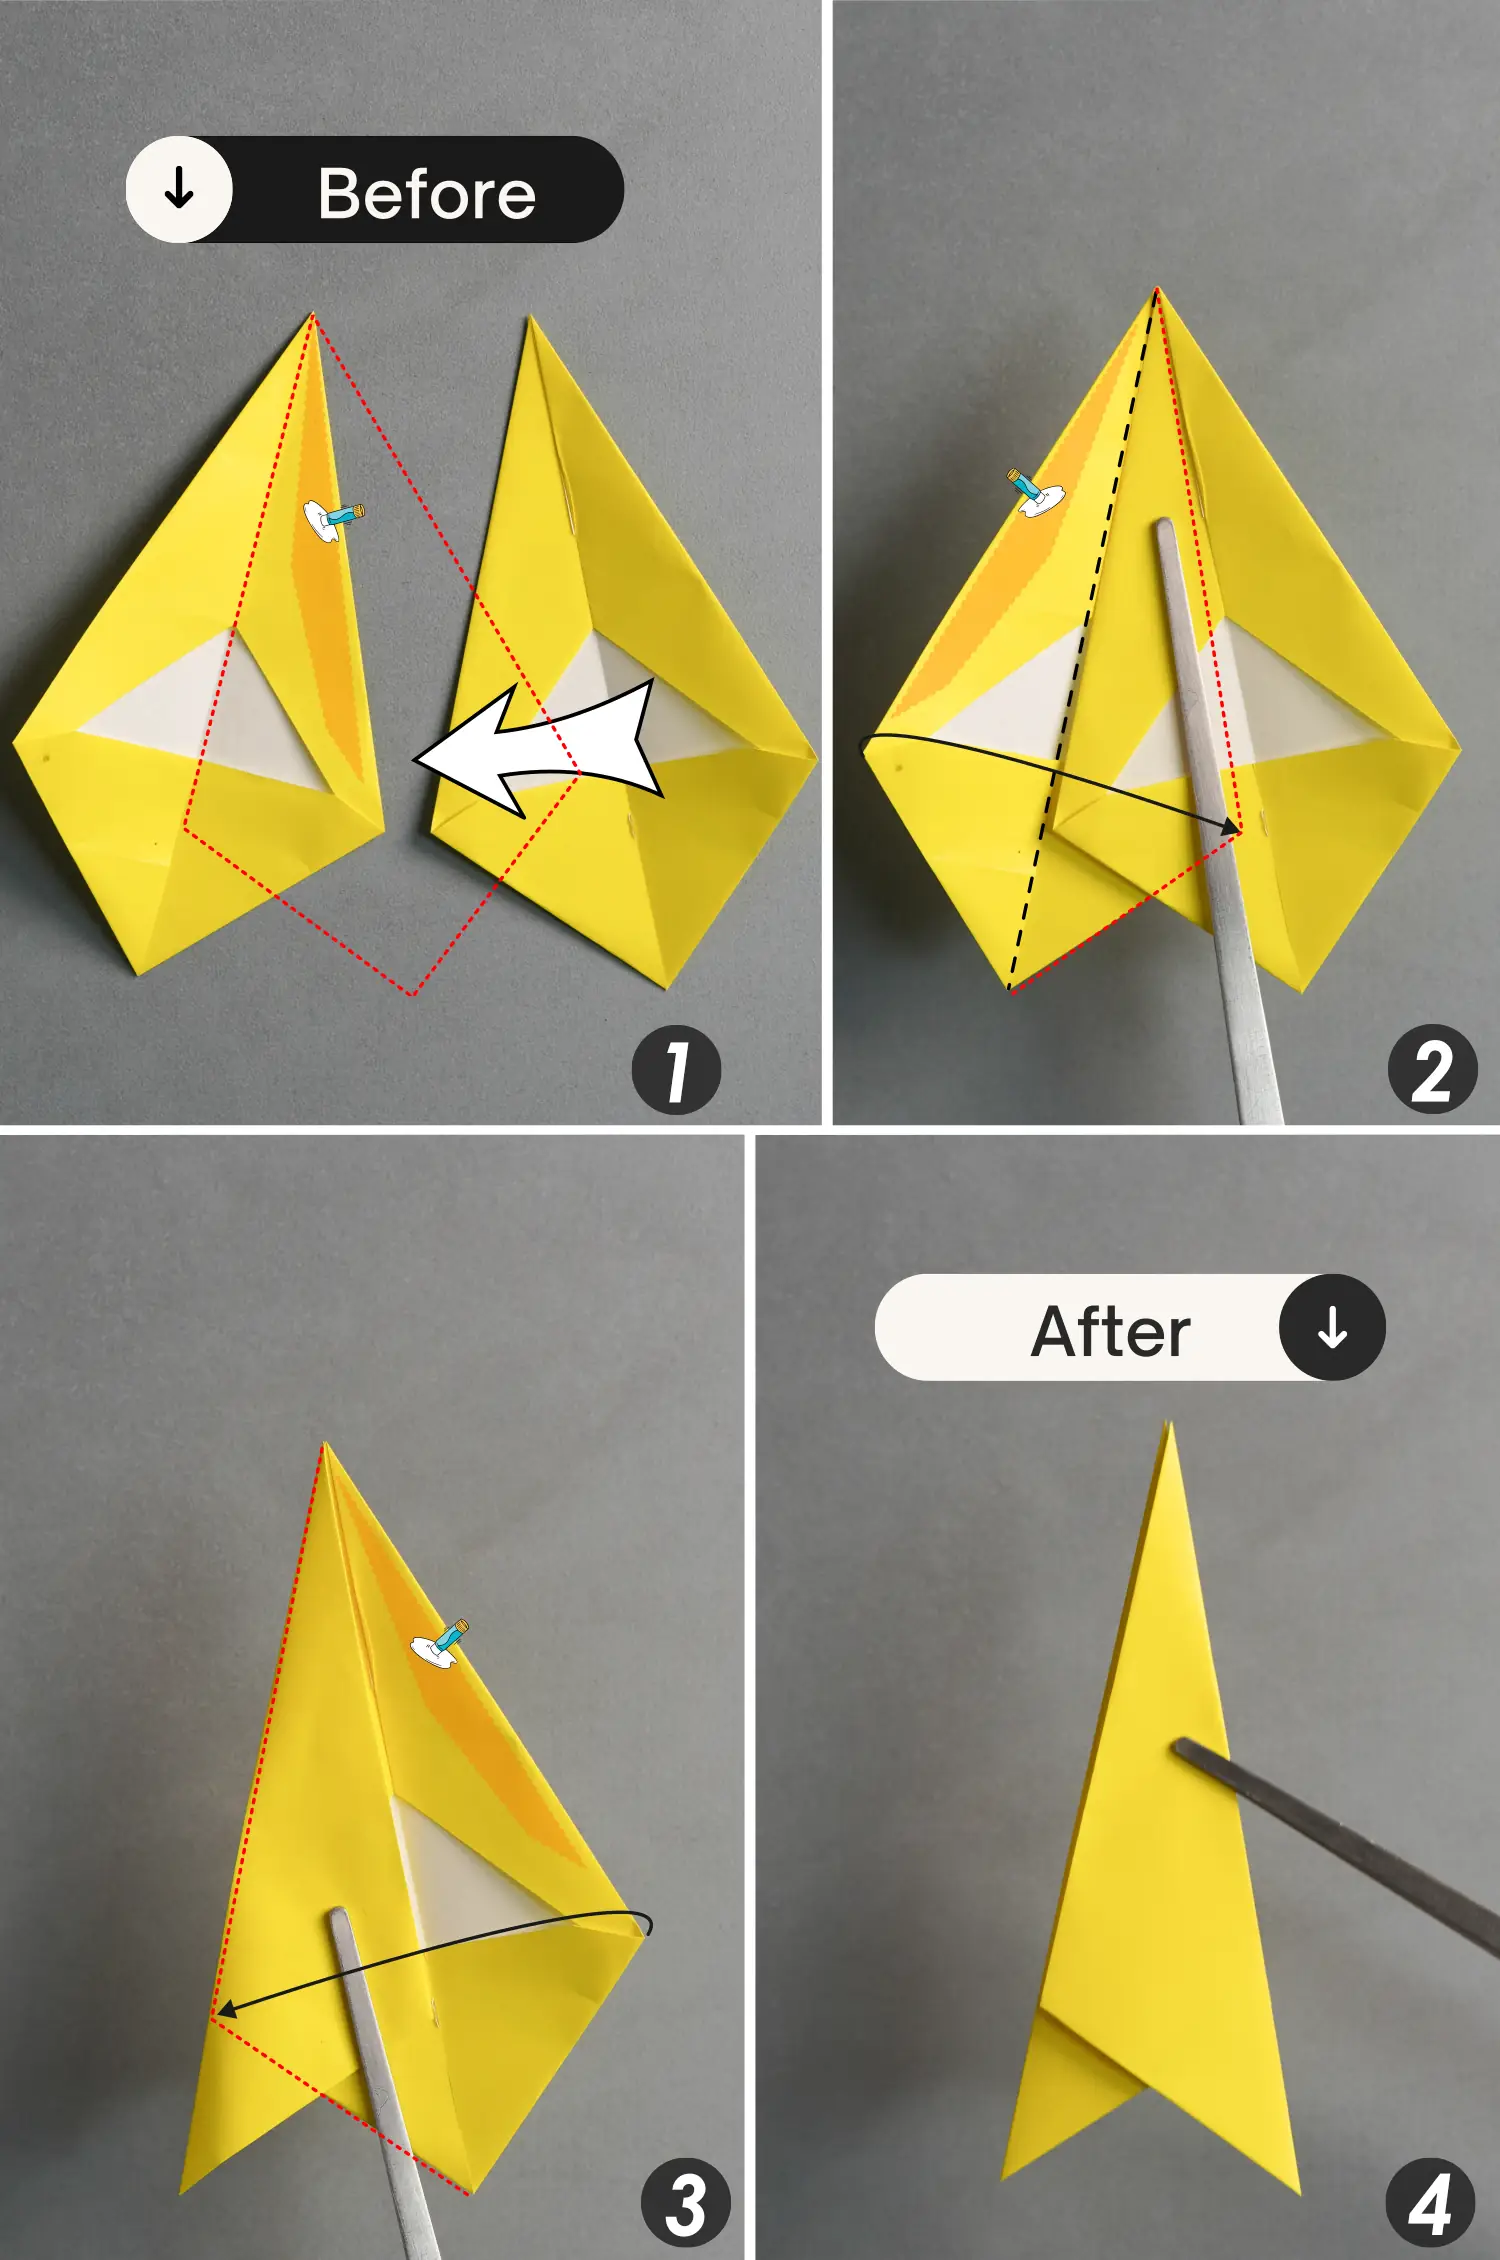
First, apply glue to the right side of the left unit, then place the right unit on top and glue it so that its left edge is aligned with the middle vertical crease of the left unit.
Then apply glue to the left side of this assembled unit and fold it to the right along the middle crease of the left unit. Apply glue to the right edge as well and fold it to the left.
Step 10
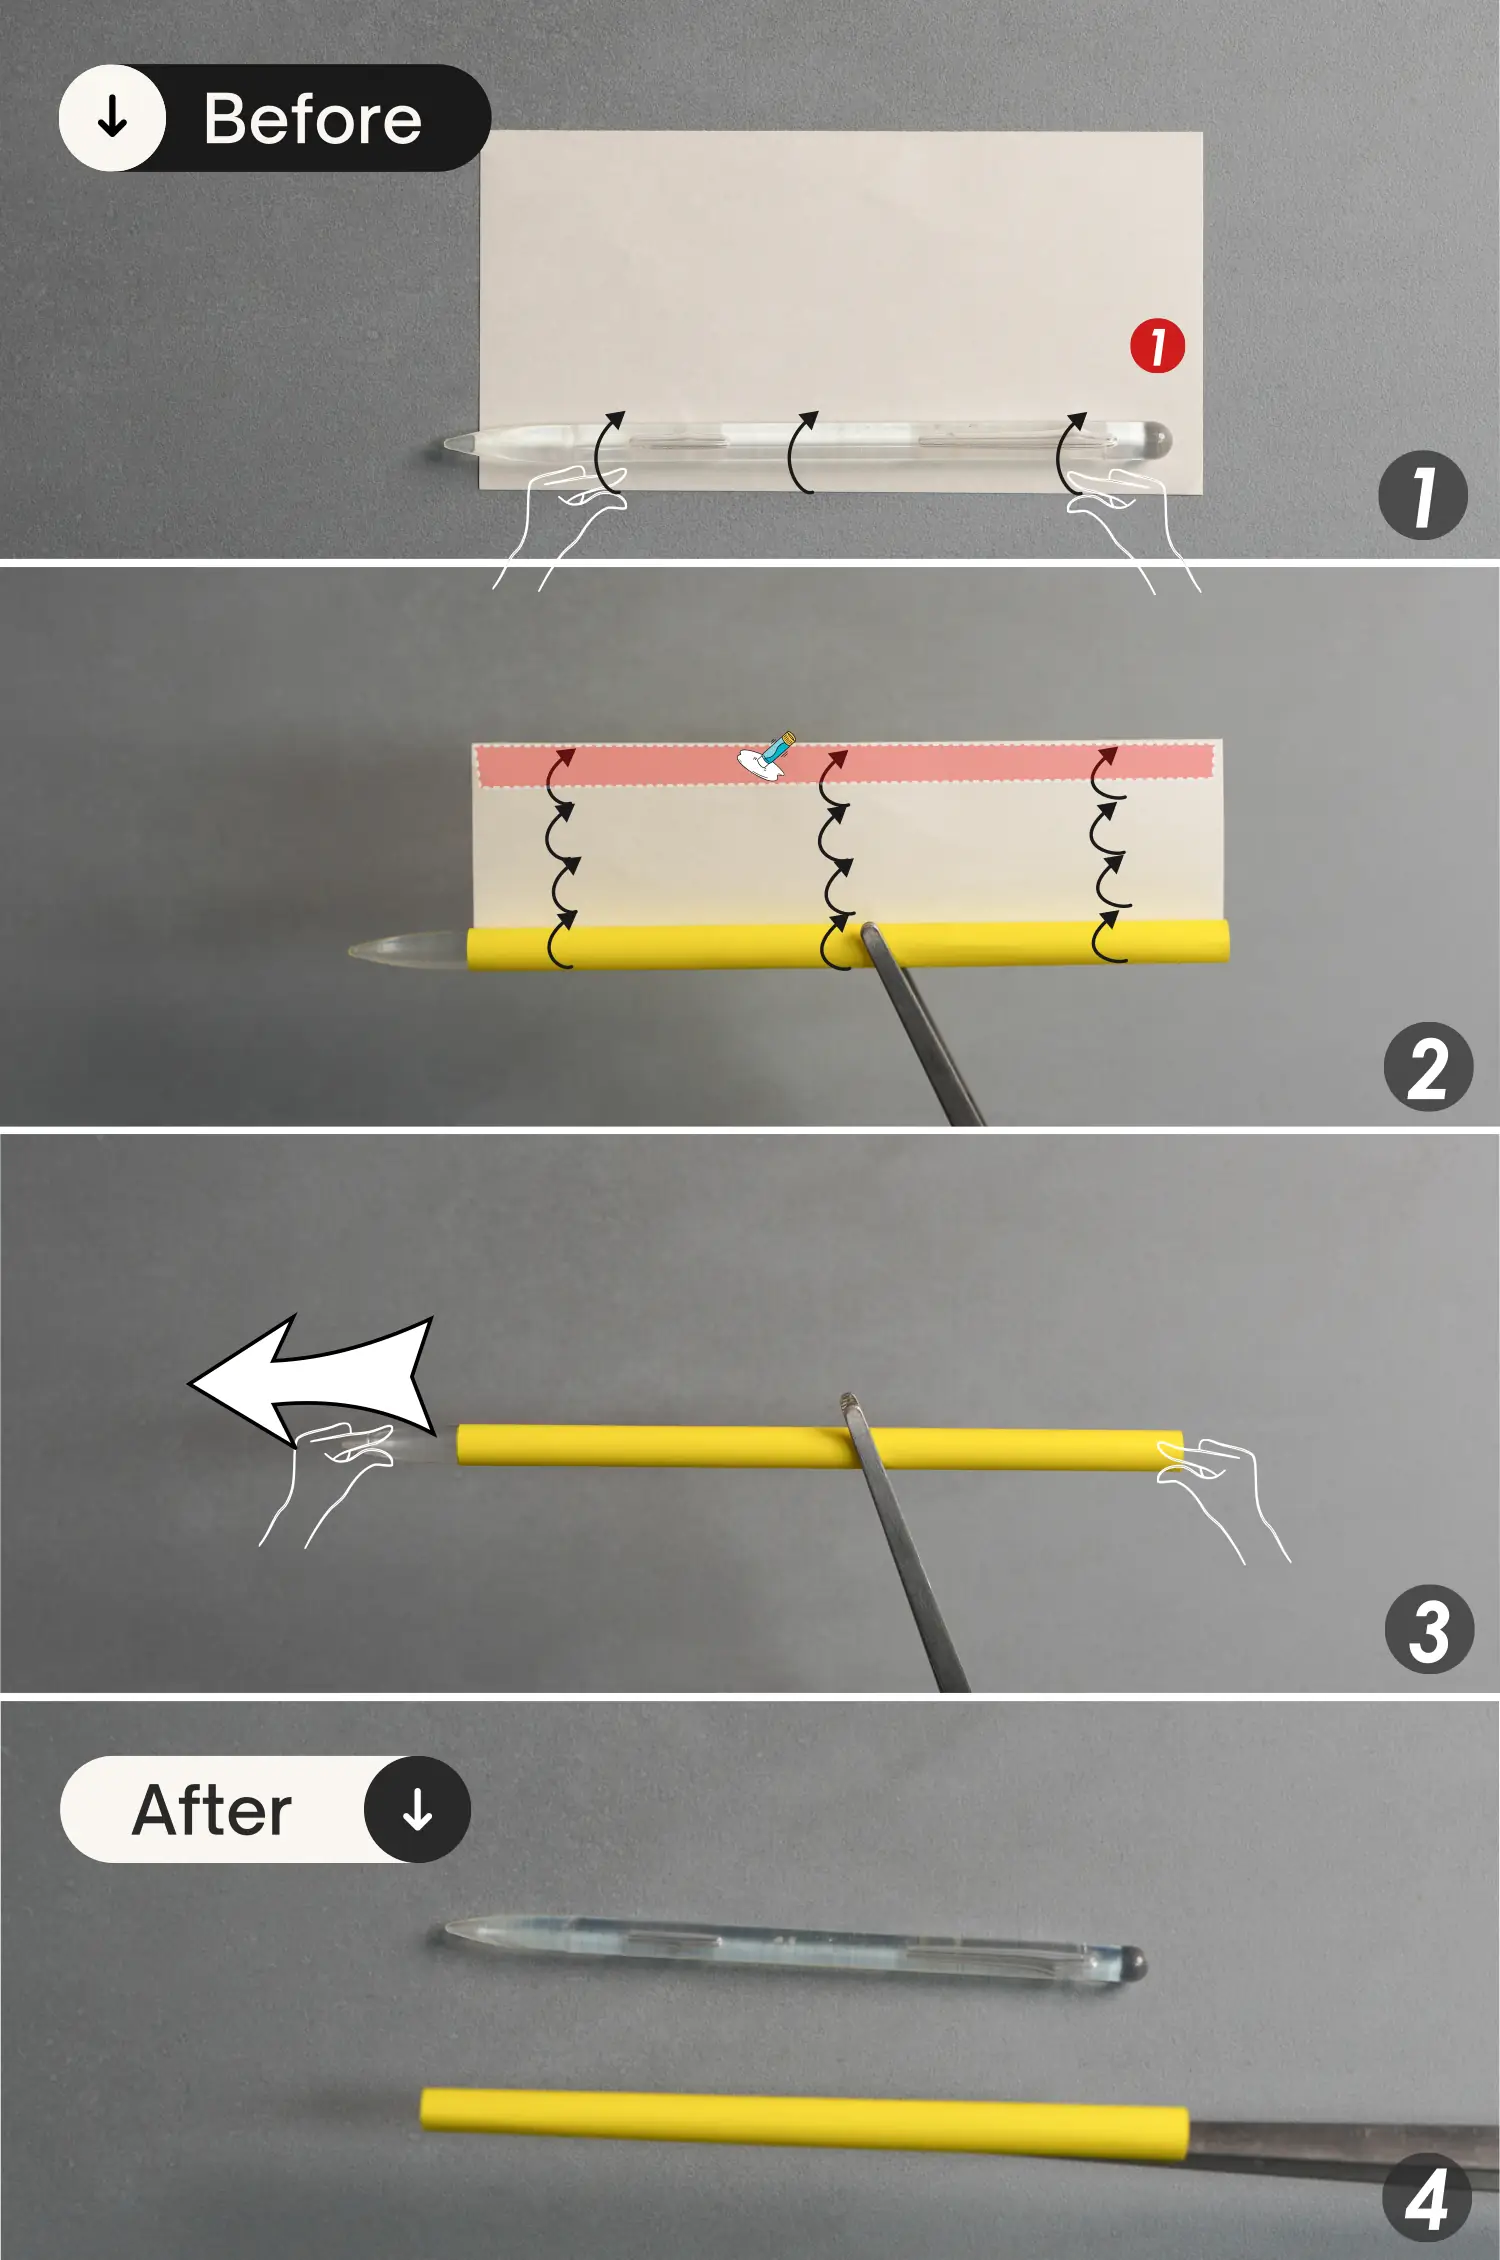
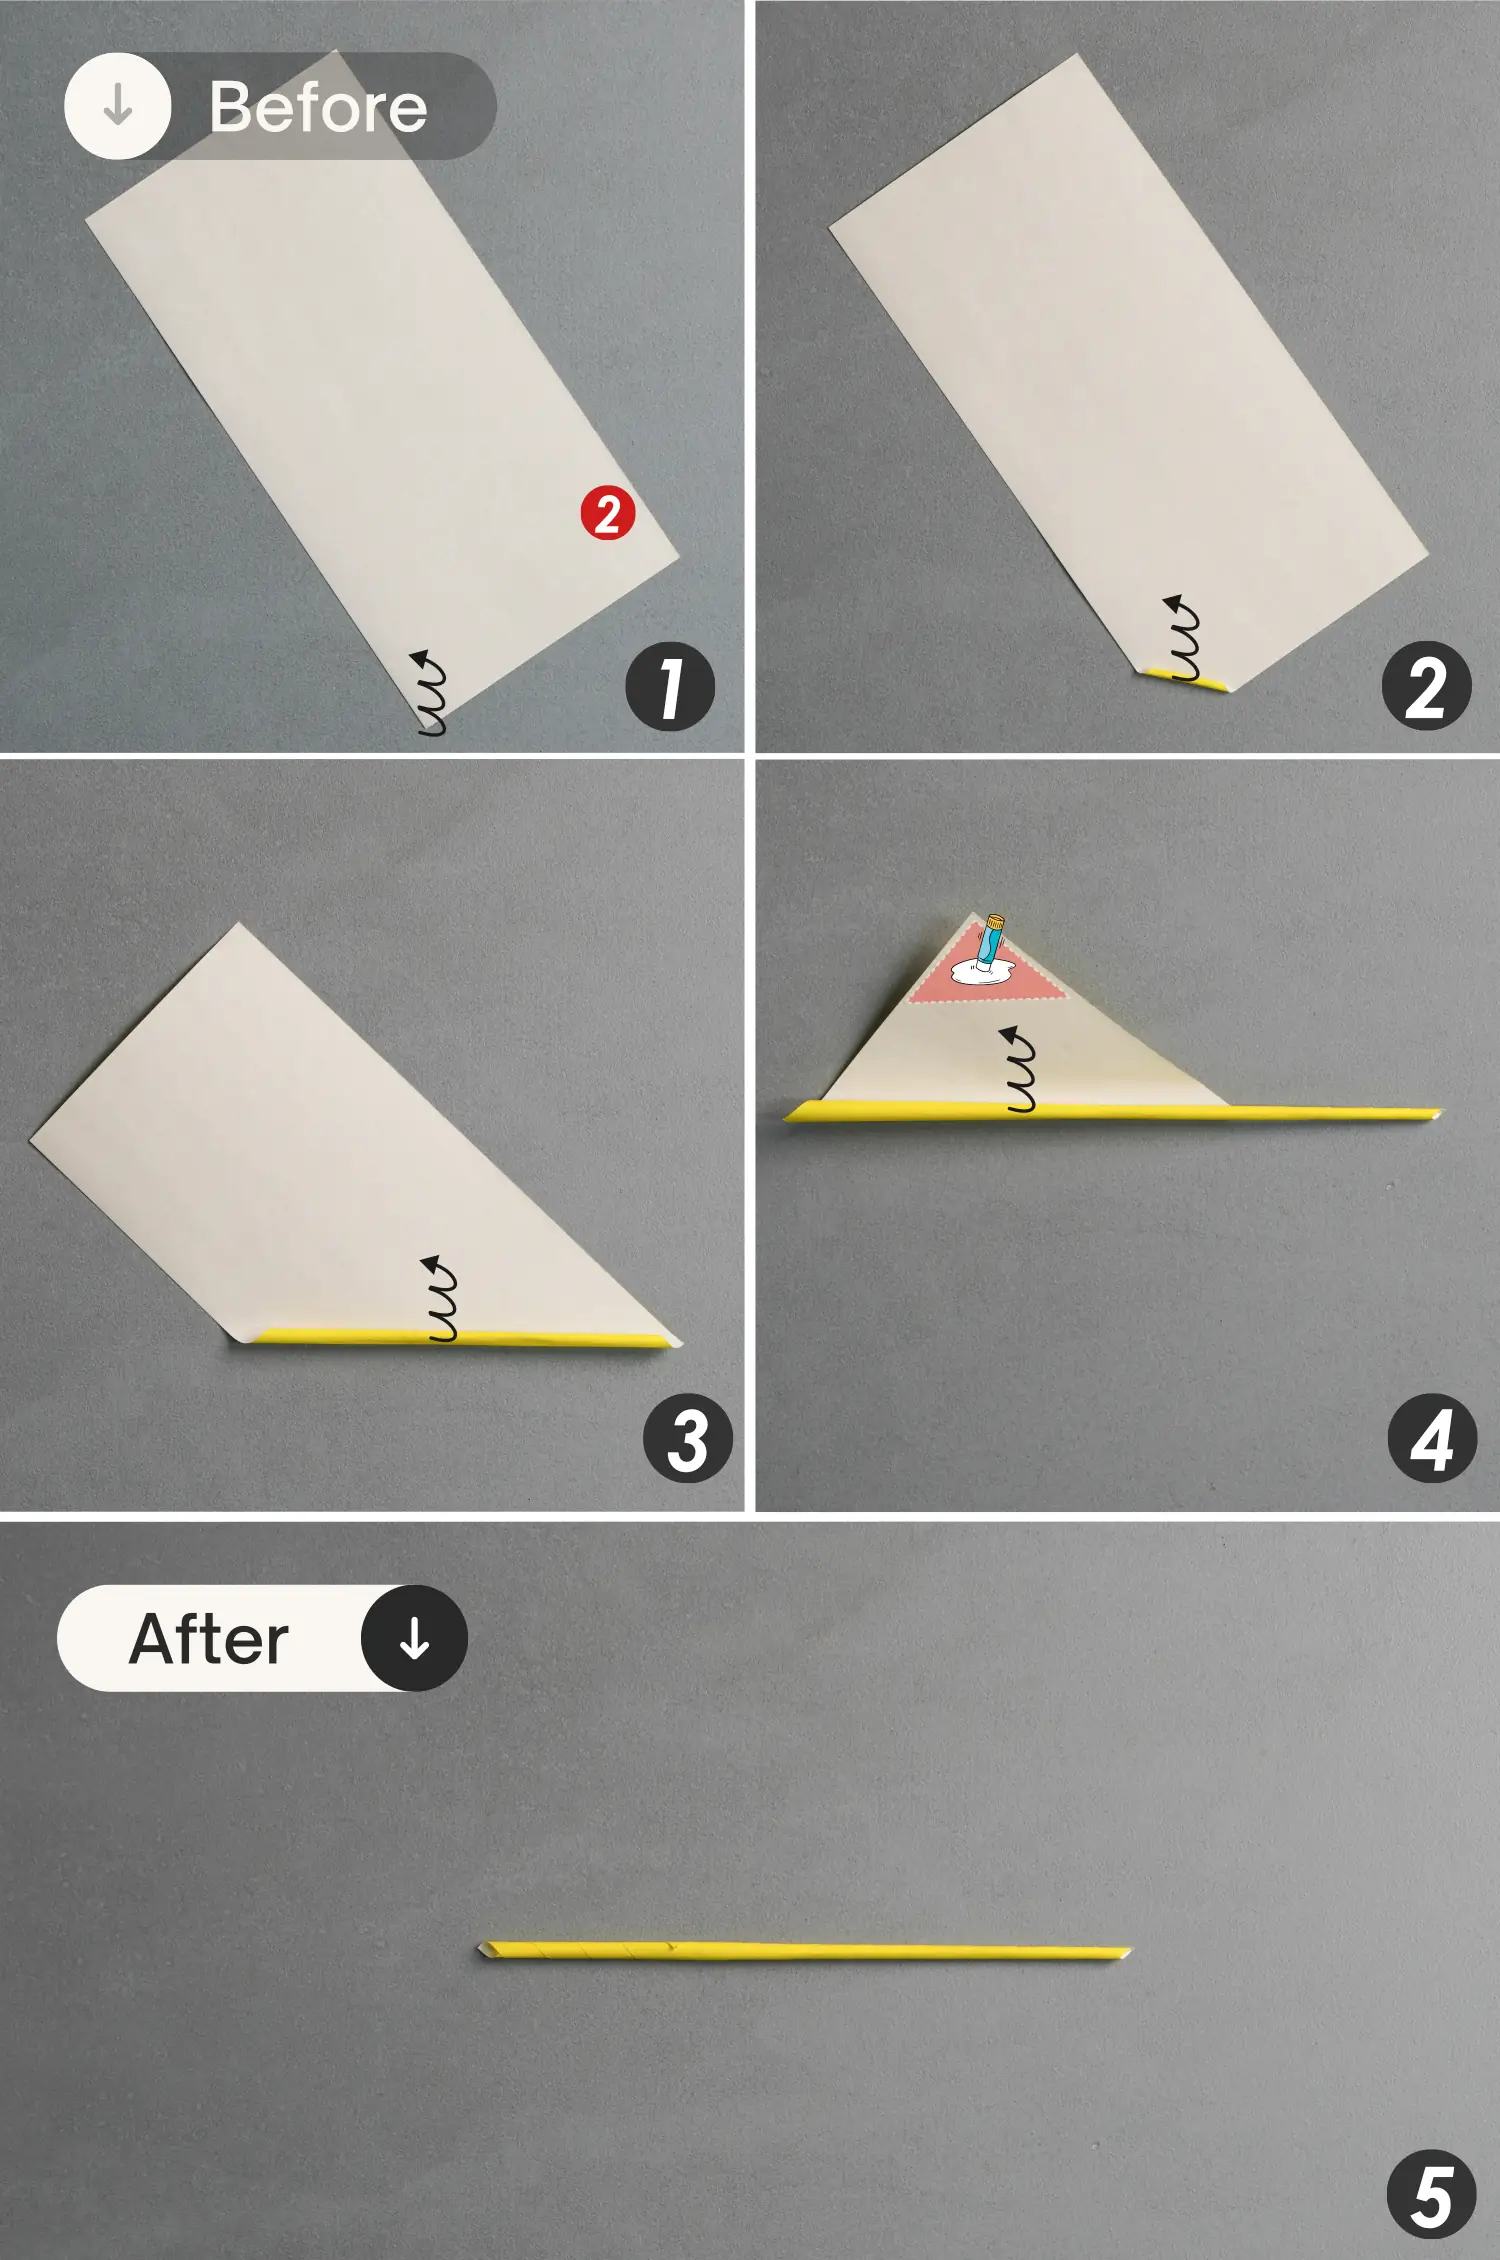
Take out the last piece of paper, fold it in half horizontally, leaving a crease, and unfold it, then cut this paper along this crease. Get two pieces of small rectangle paper that we marked as No.1 and No.2.
Step 11
Roll the first rectangle of paper from bottom to top. You can use a pen to help you roll it better and create a perfect paper roll tube. Apply glue to the top edge and secure it in place.
Step 12
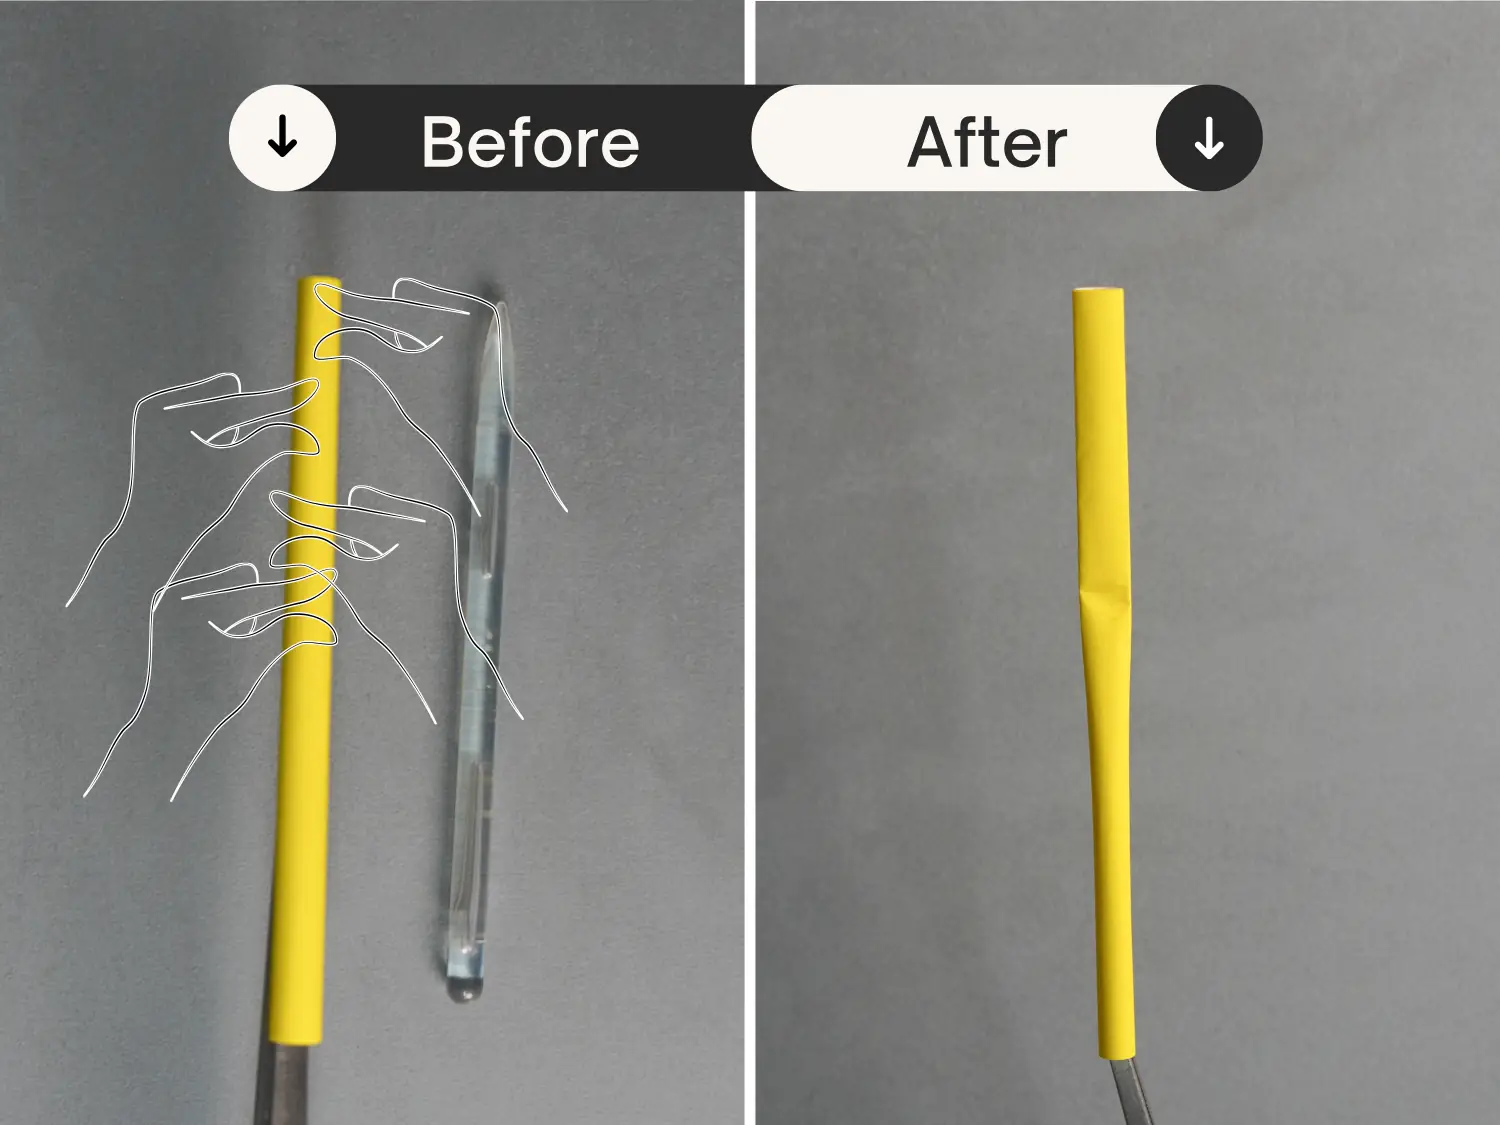
Flatten the top of the paper stick.
Step 13
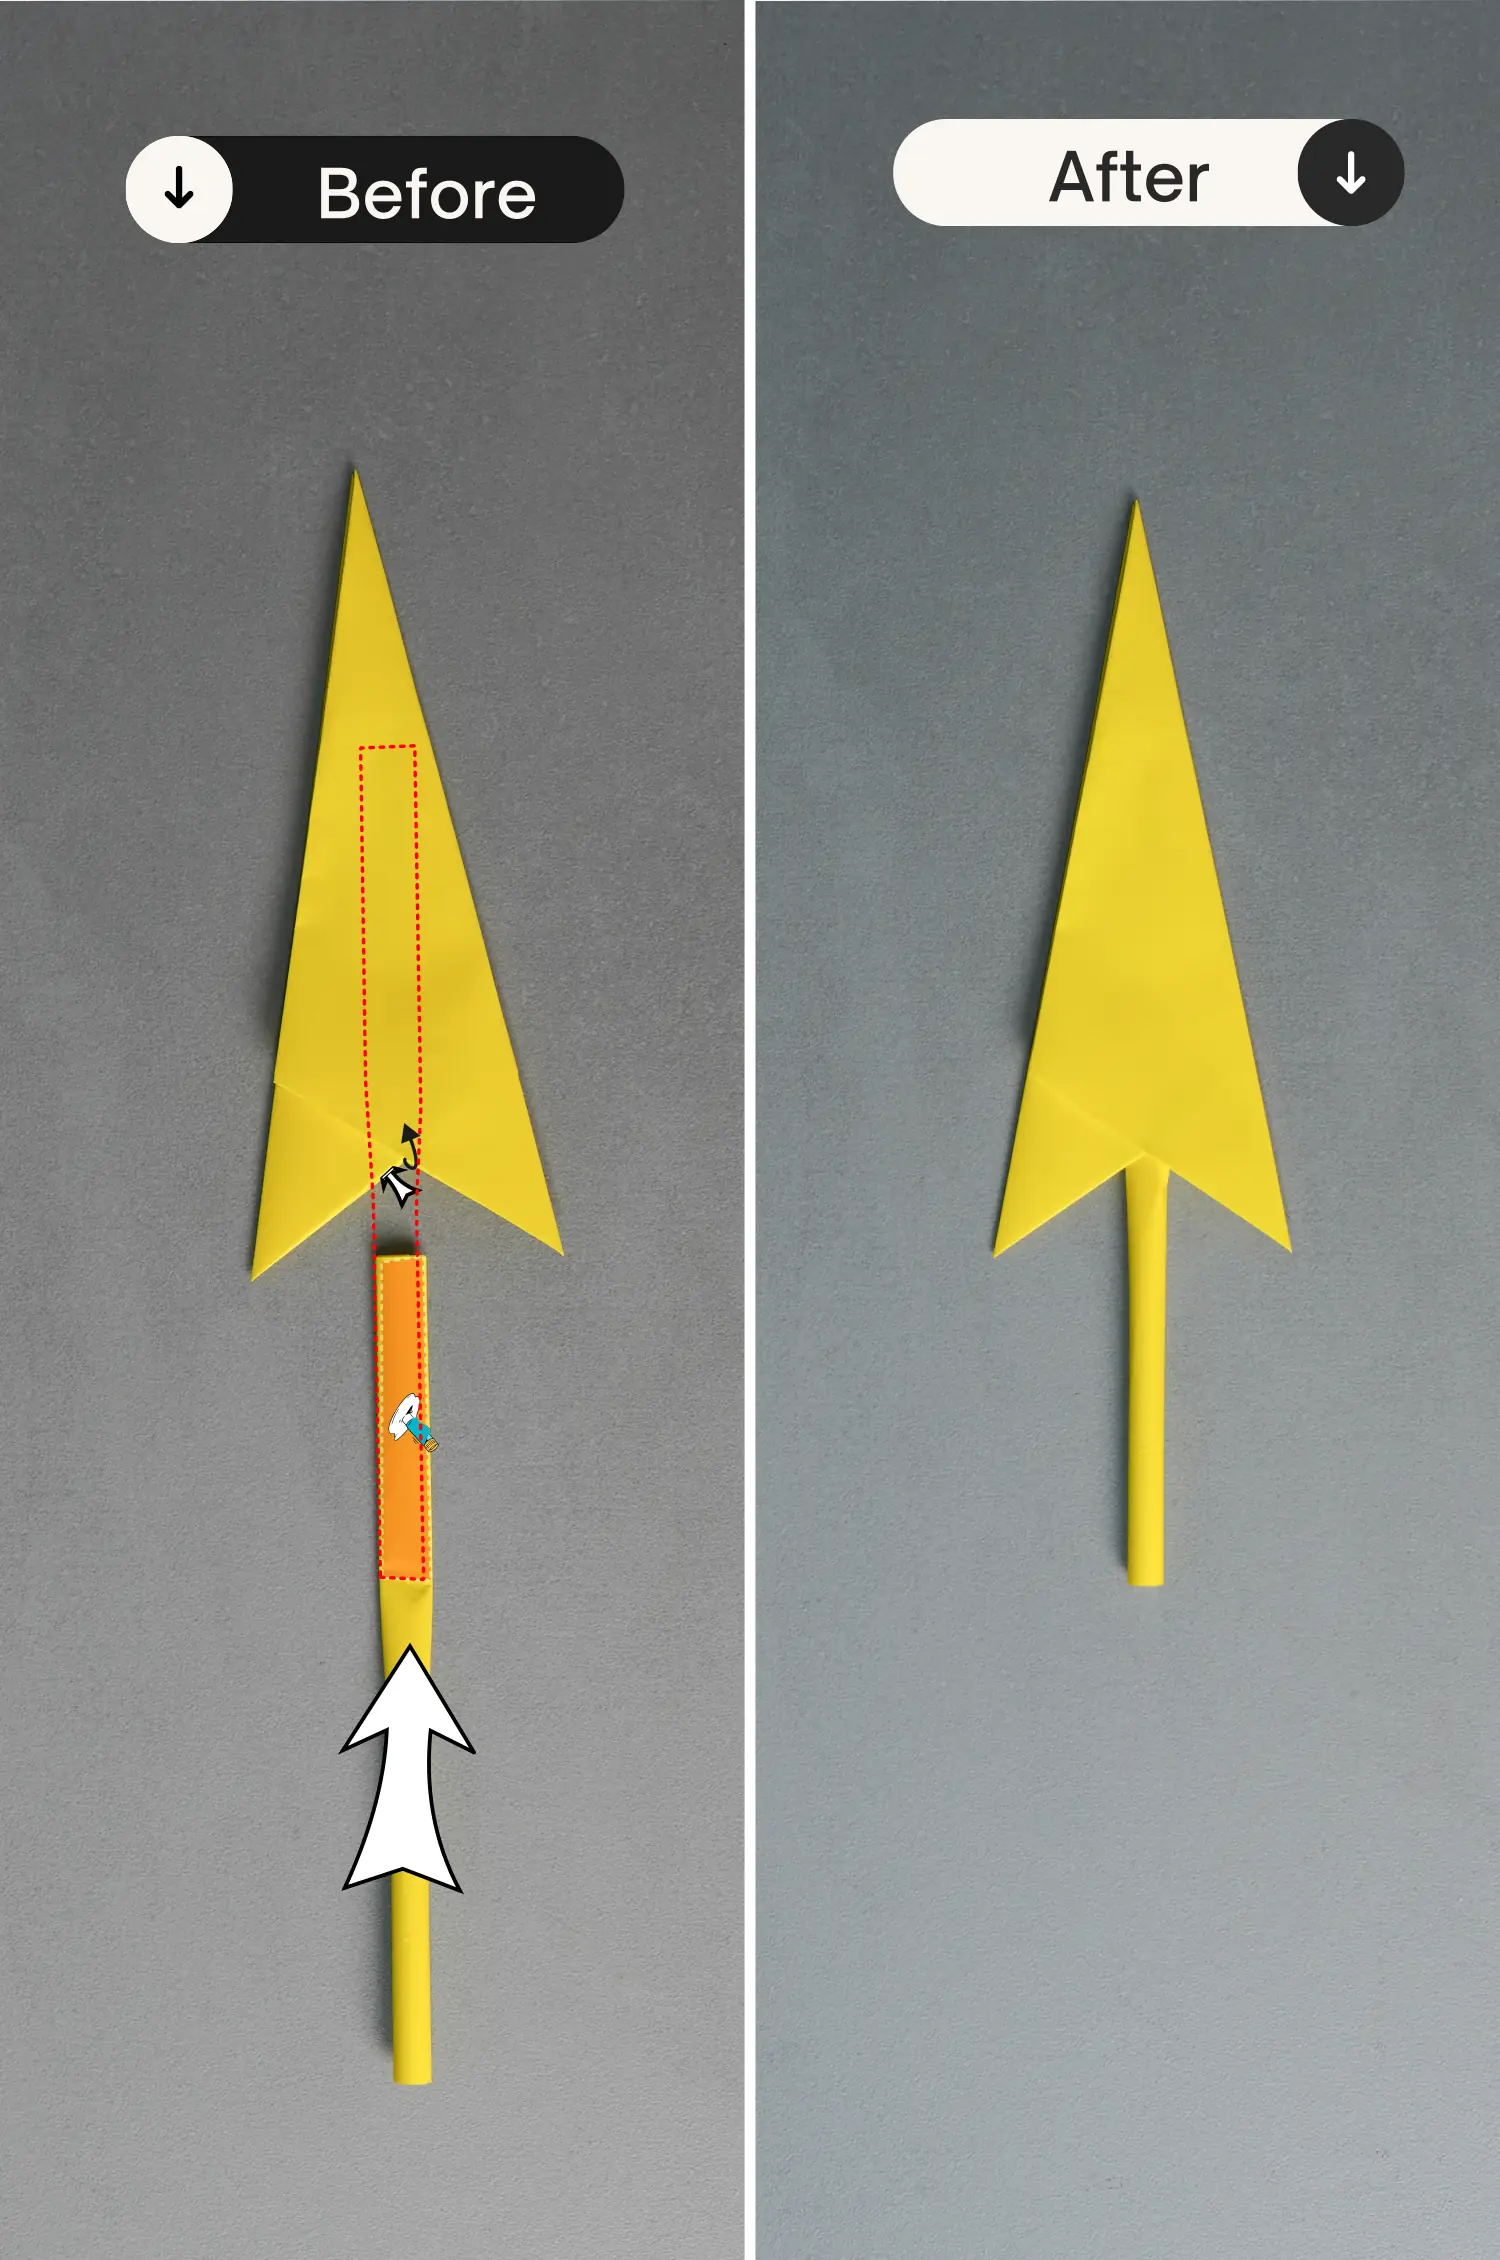
Apply glue to the flattened upper part of the stick and insert it from the bottom into the assembled unit.
Step 14
Fold up the bottom left point of the top knife part along the black dotted line, leaving a crease, and unfold it. Then fold up this point again along this crease and tuck it under the top layer.
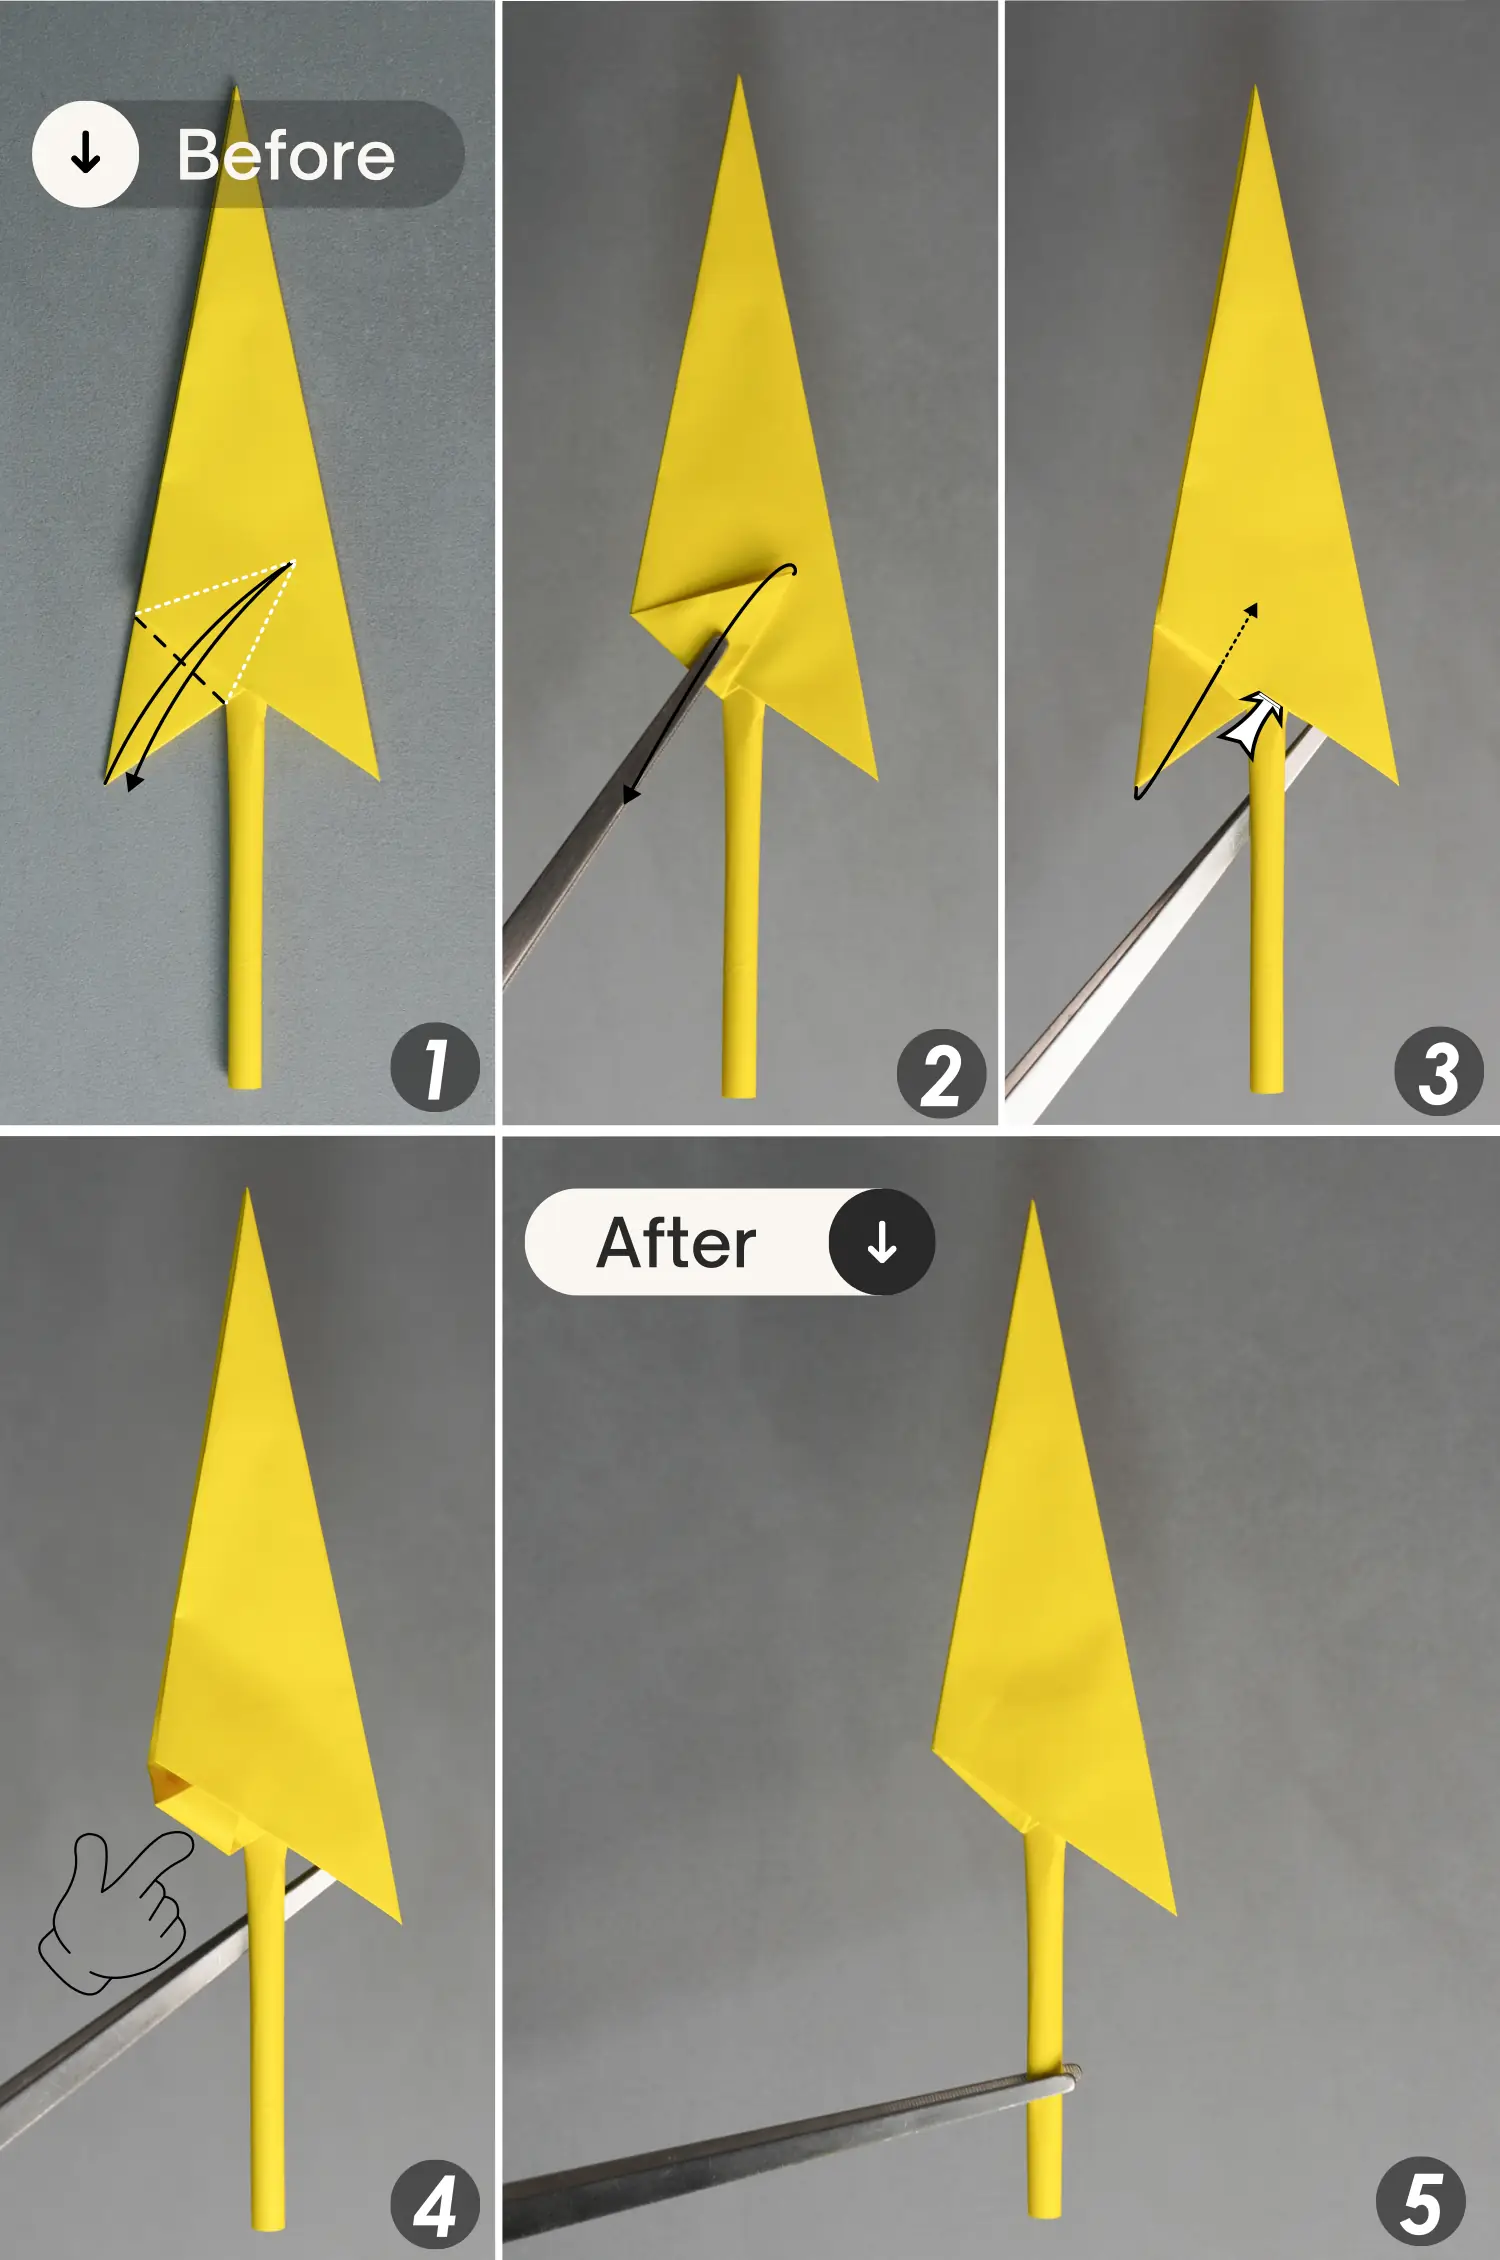
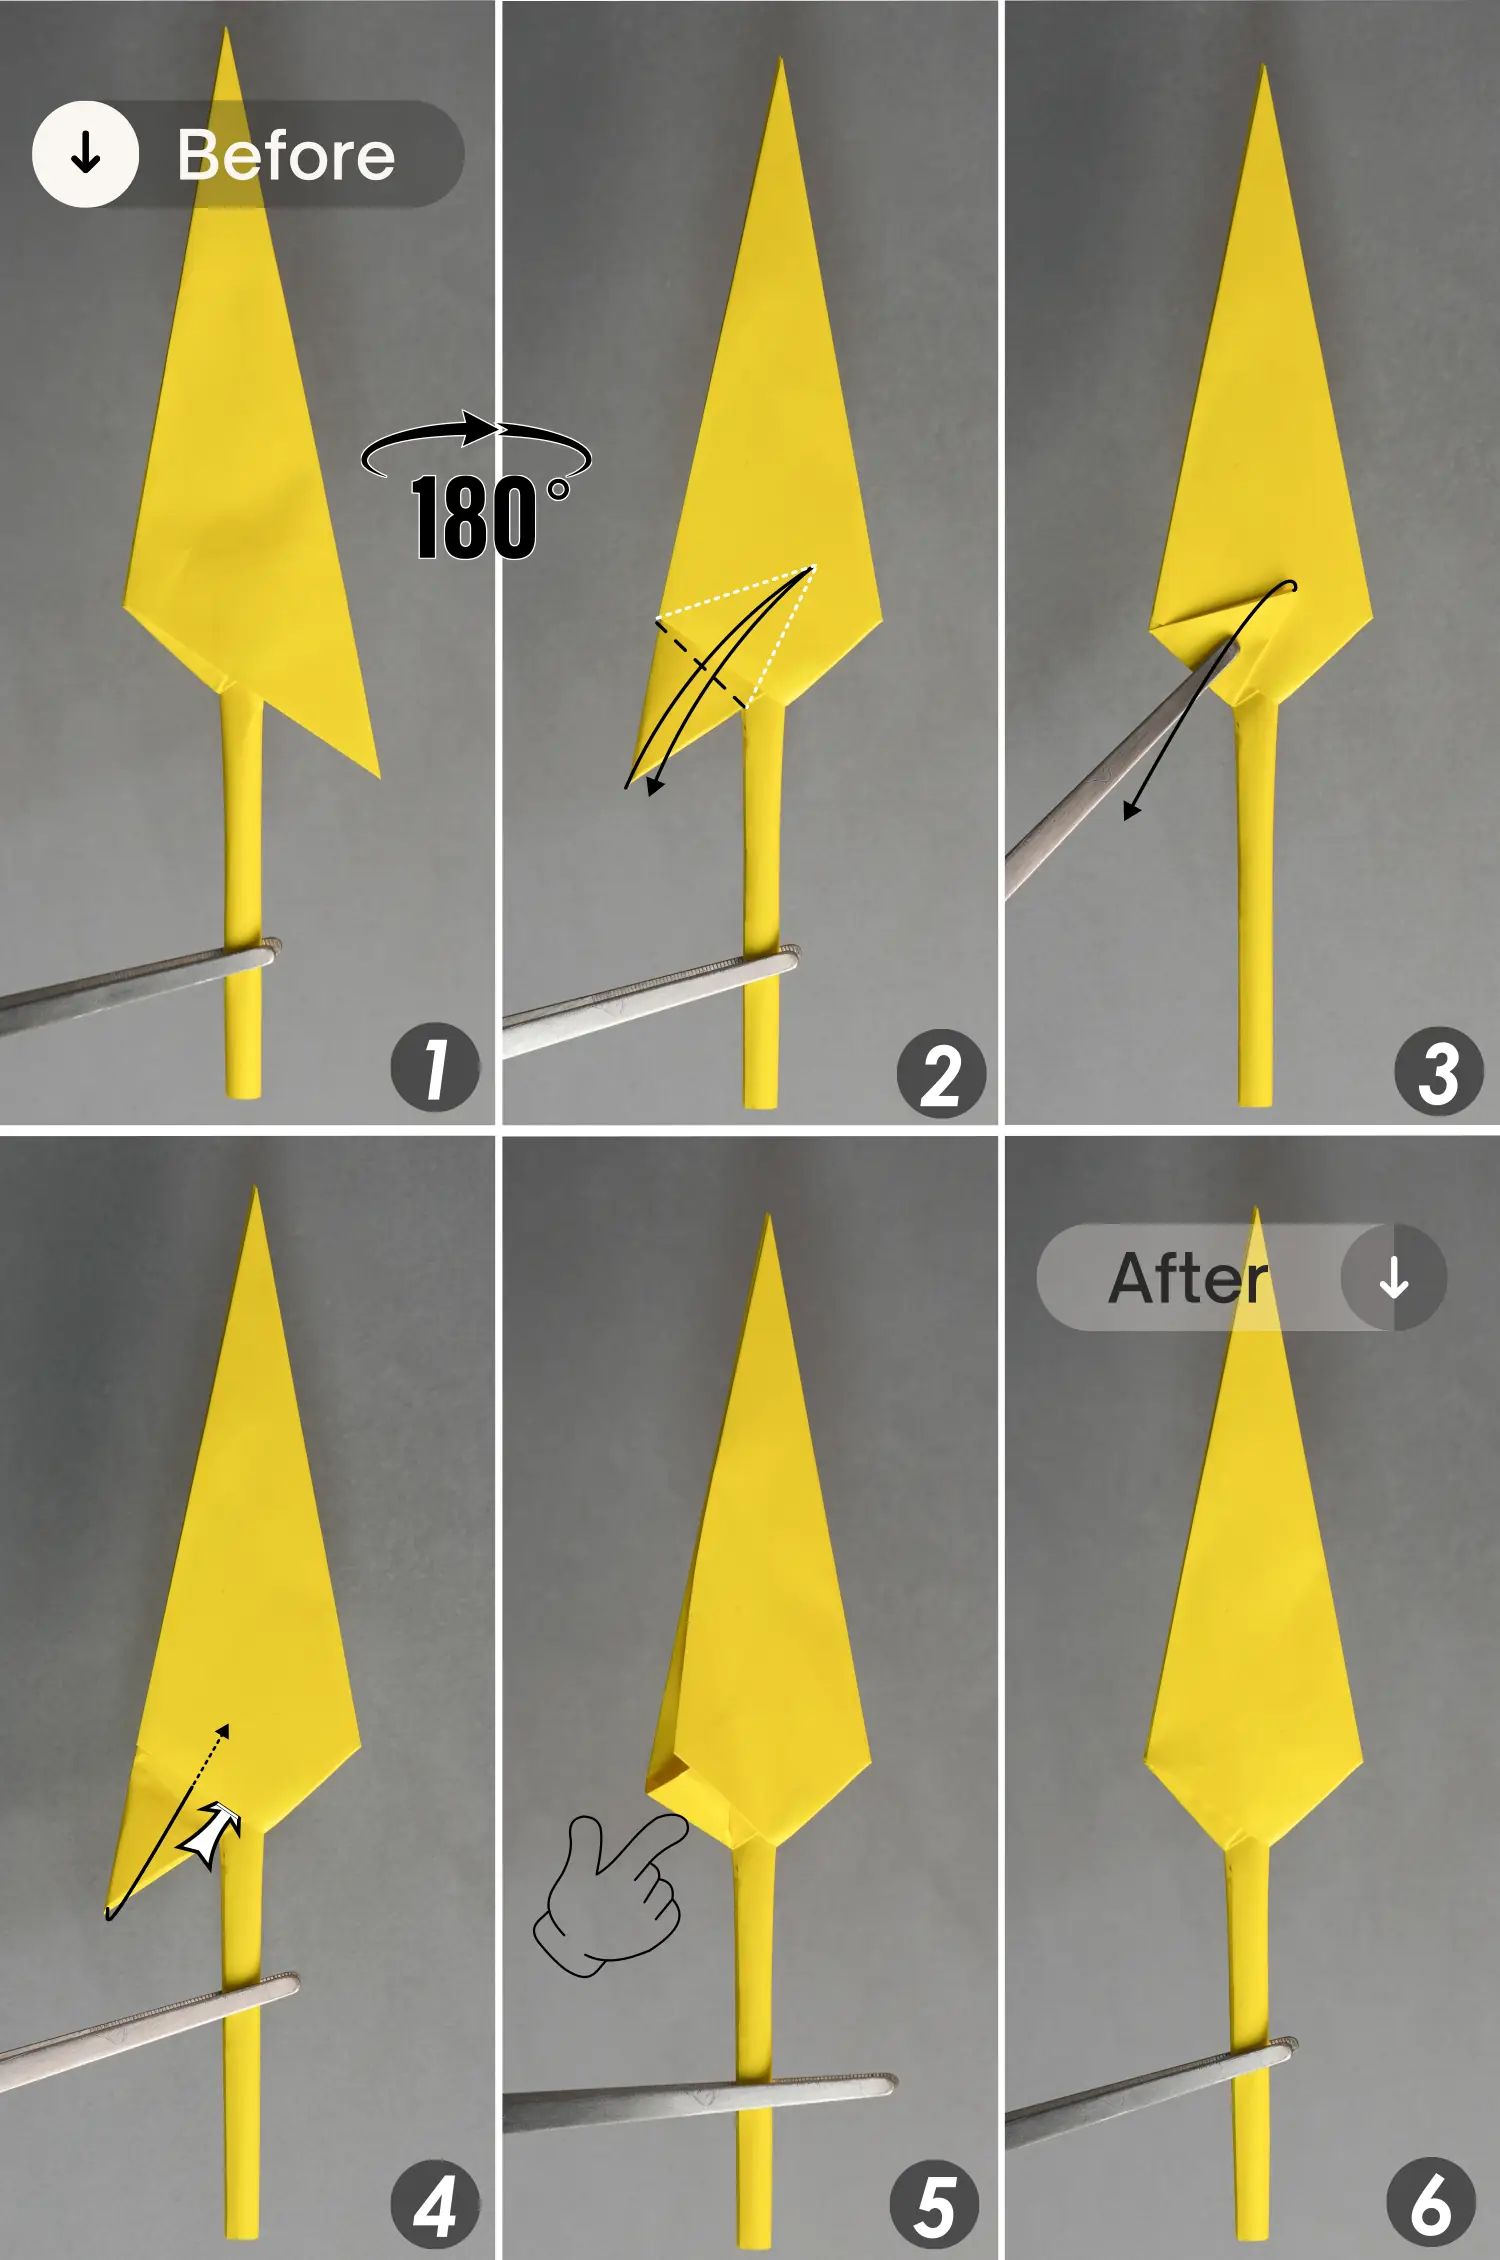
Step 15
Turn over the model from left to right, then repeat the previous step.
Step 16
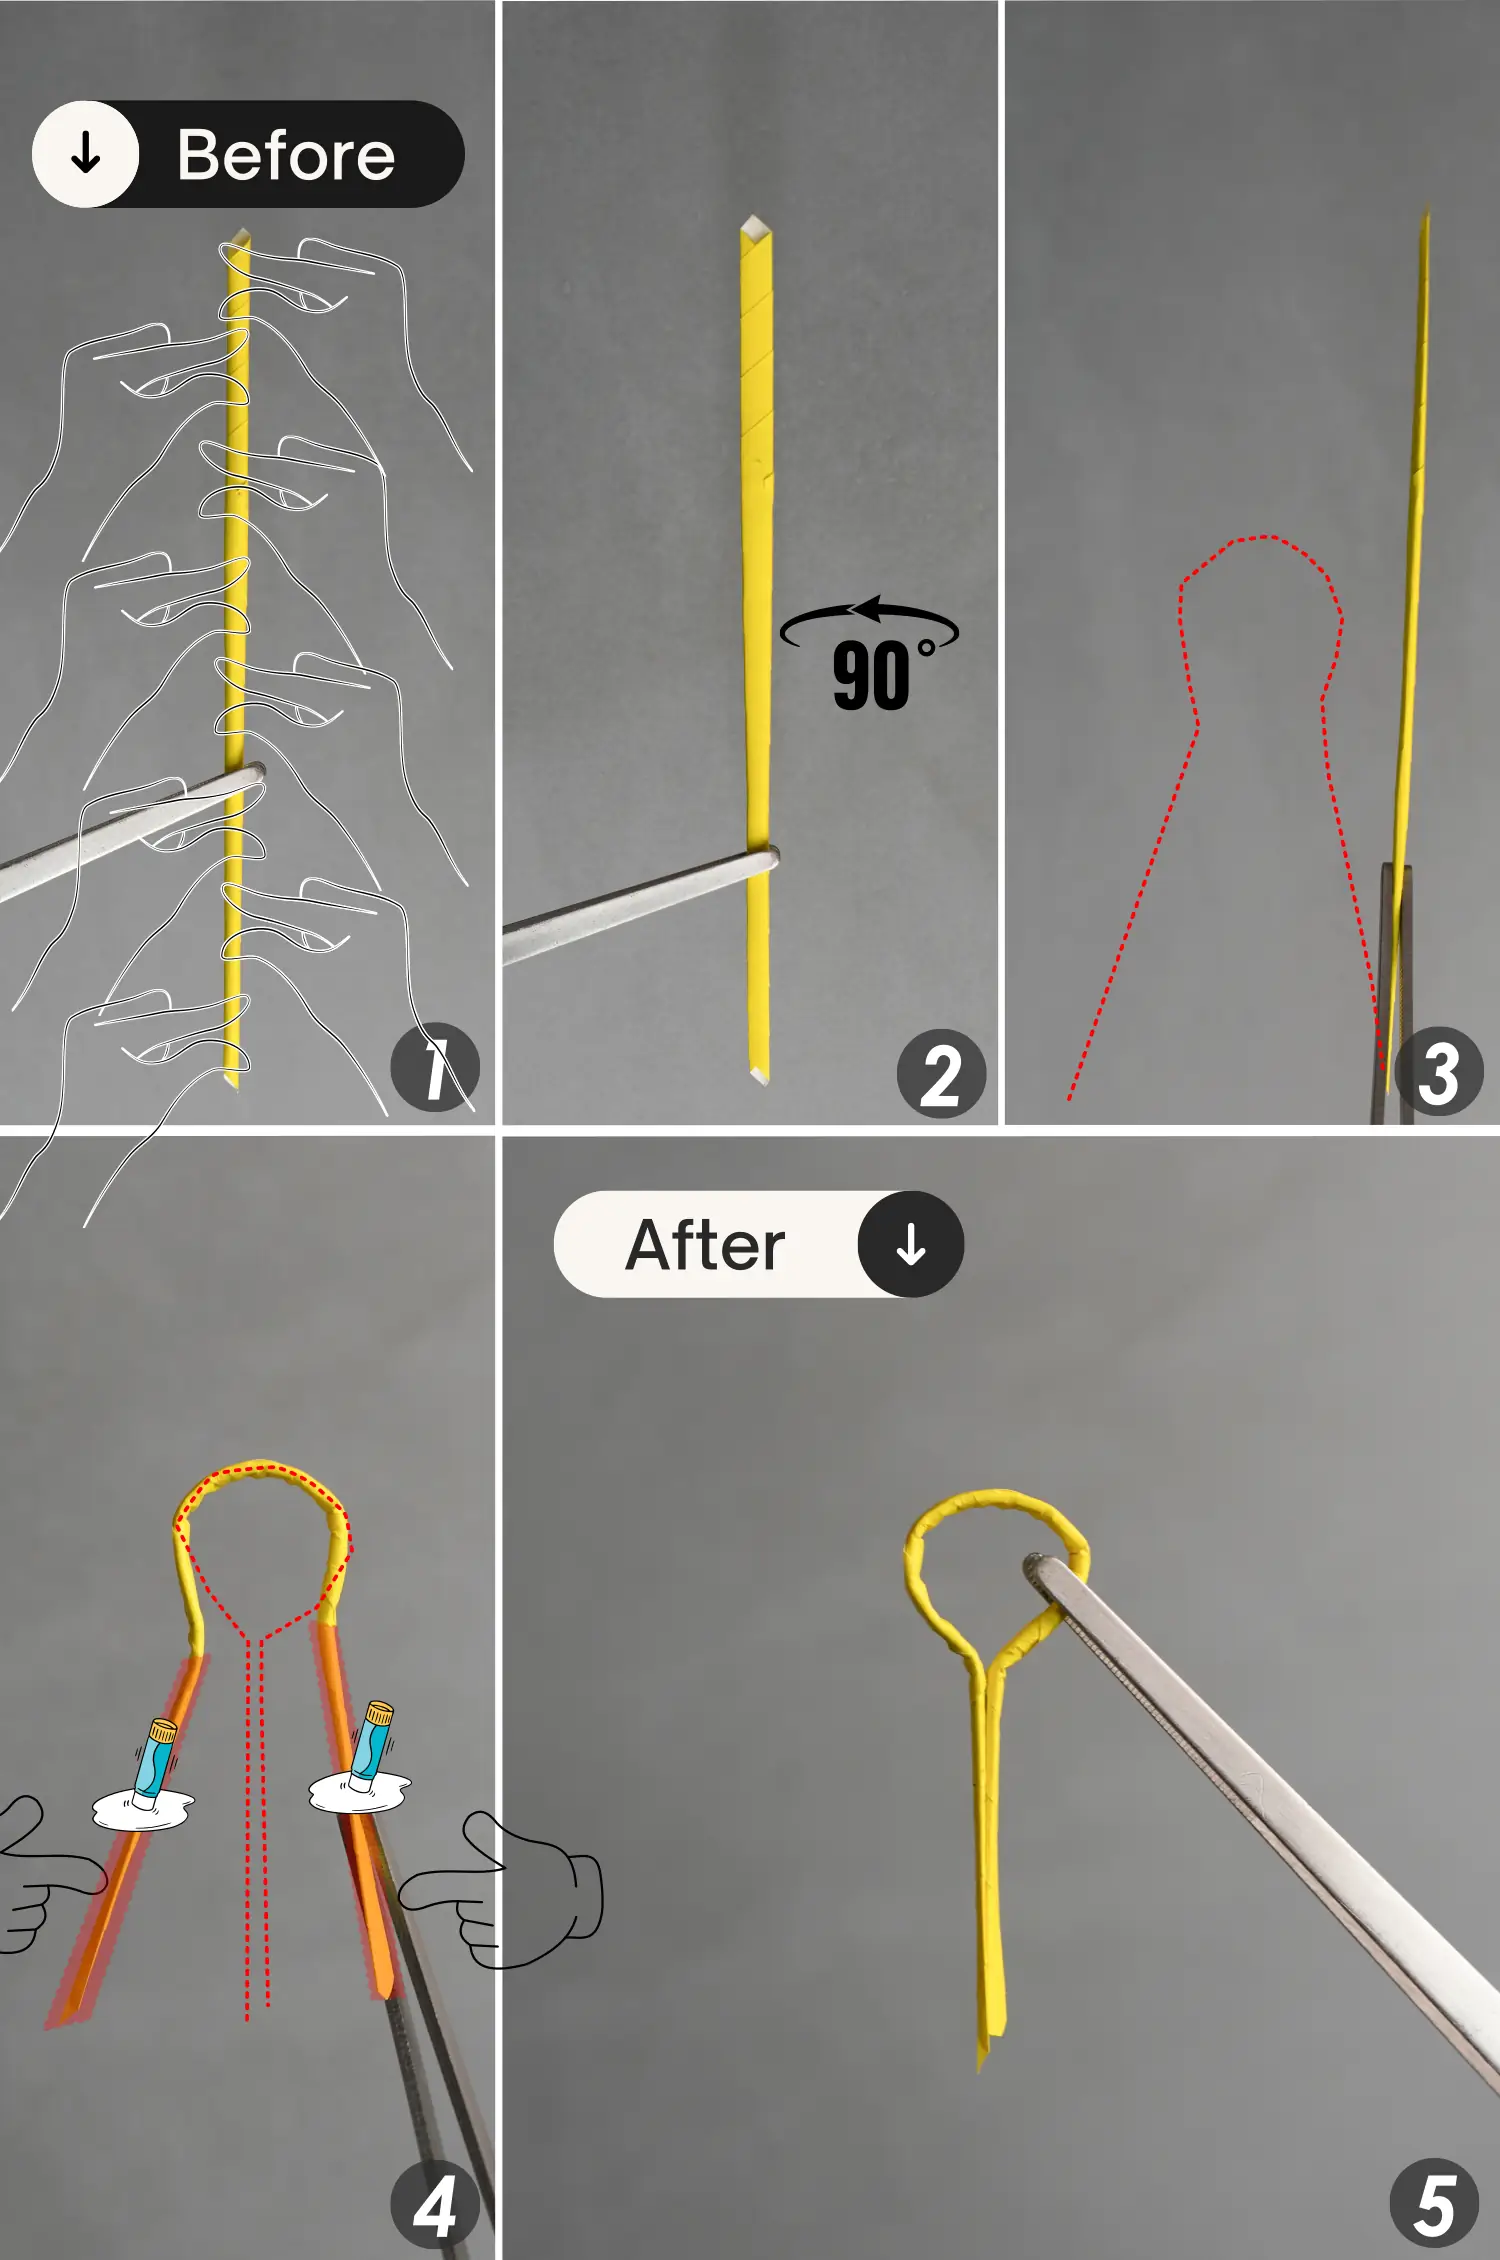
Take out the No.2 rectangle paper, roll it from the bottom, and apply glue to the top to secure it in place to get a small paper stick.
Step 17
Flatten this small paper stick and rotate it 90 degrees from right to left. Then, bend it into a key shape and glue the bottom ends together. The ratio of this ring can be modified according to actual needs.
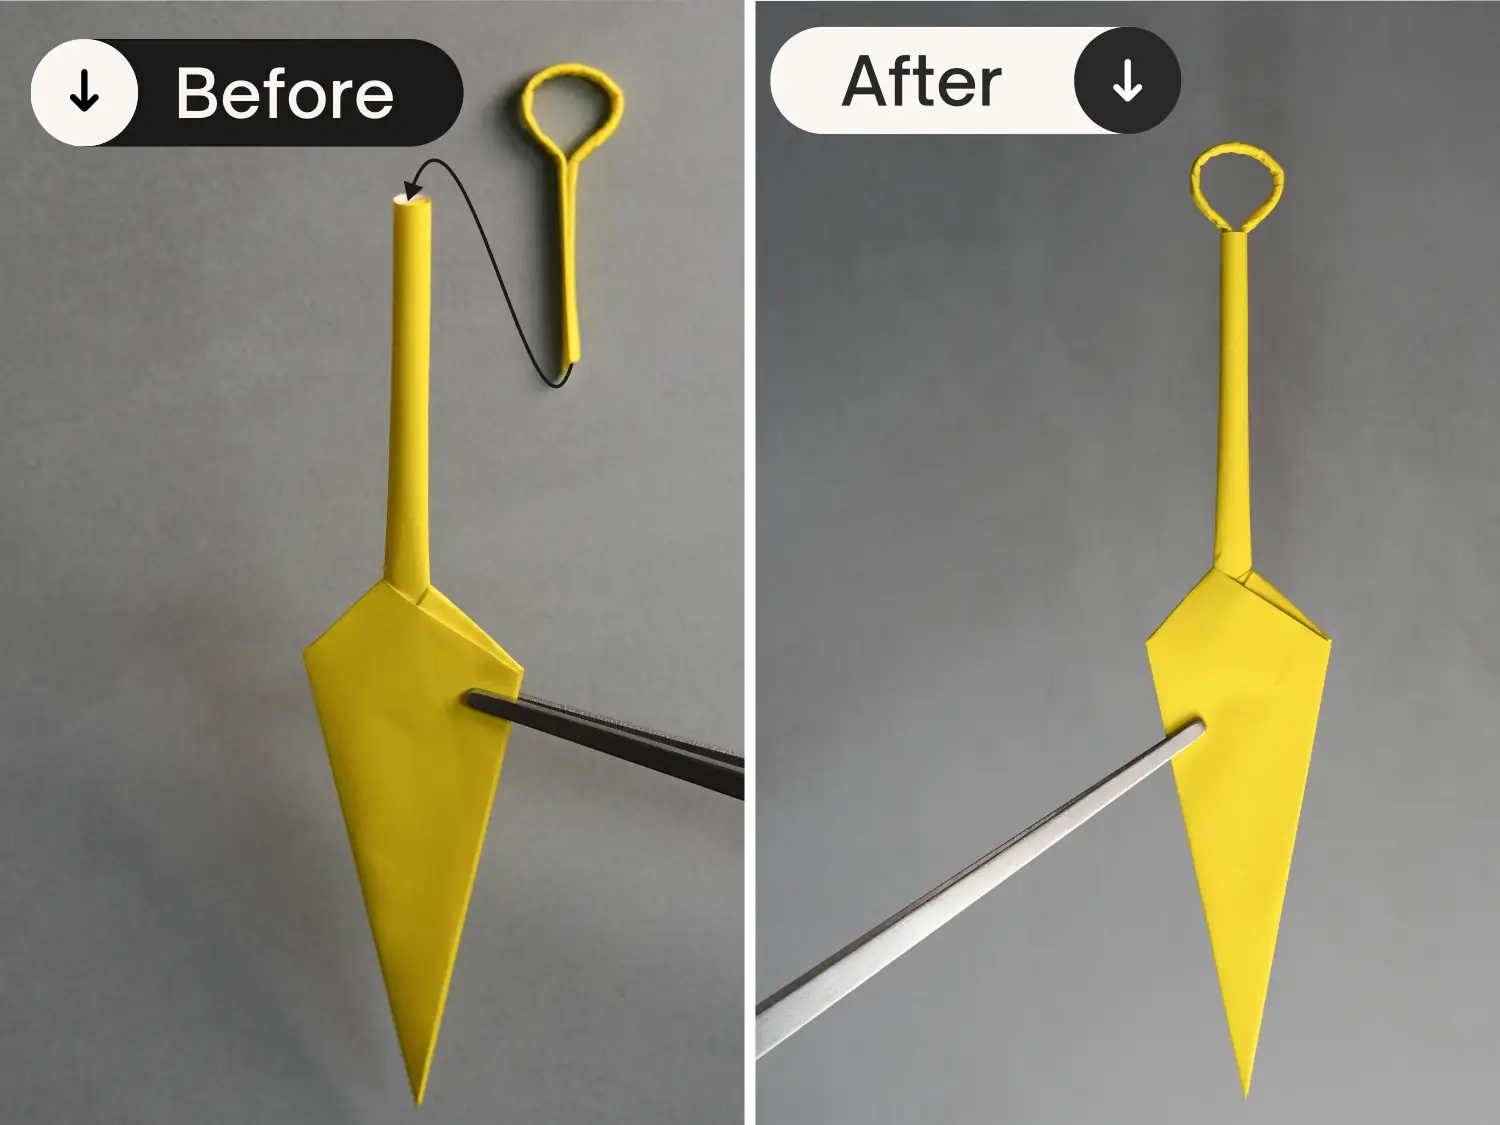
Step 18
Assemble this “small key” as the following pictures show.
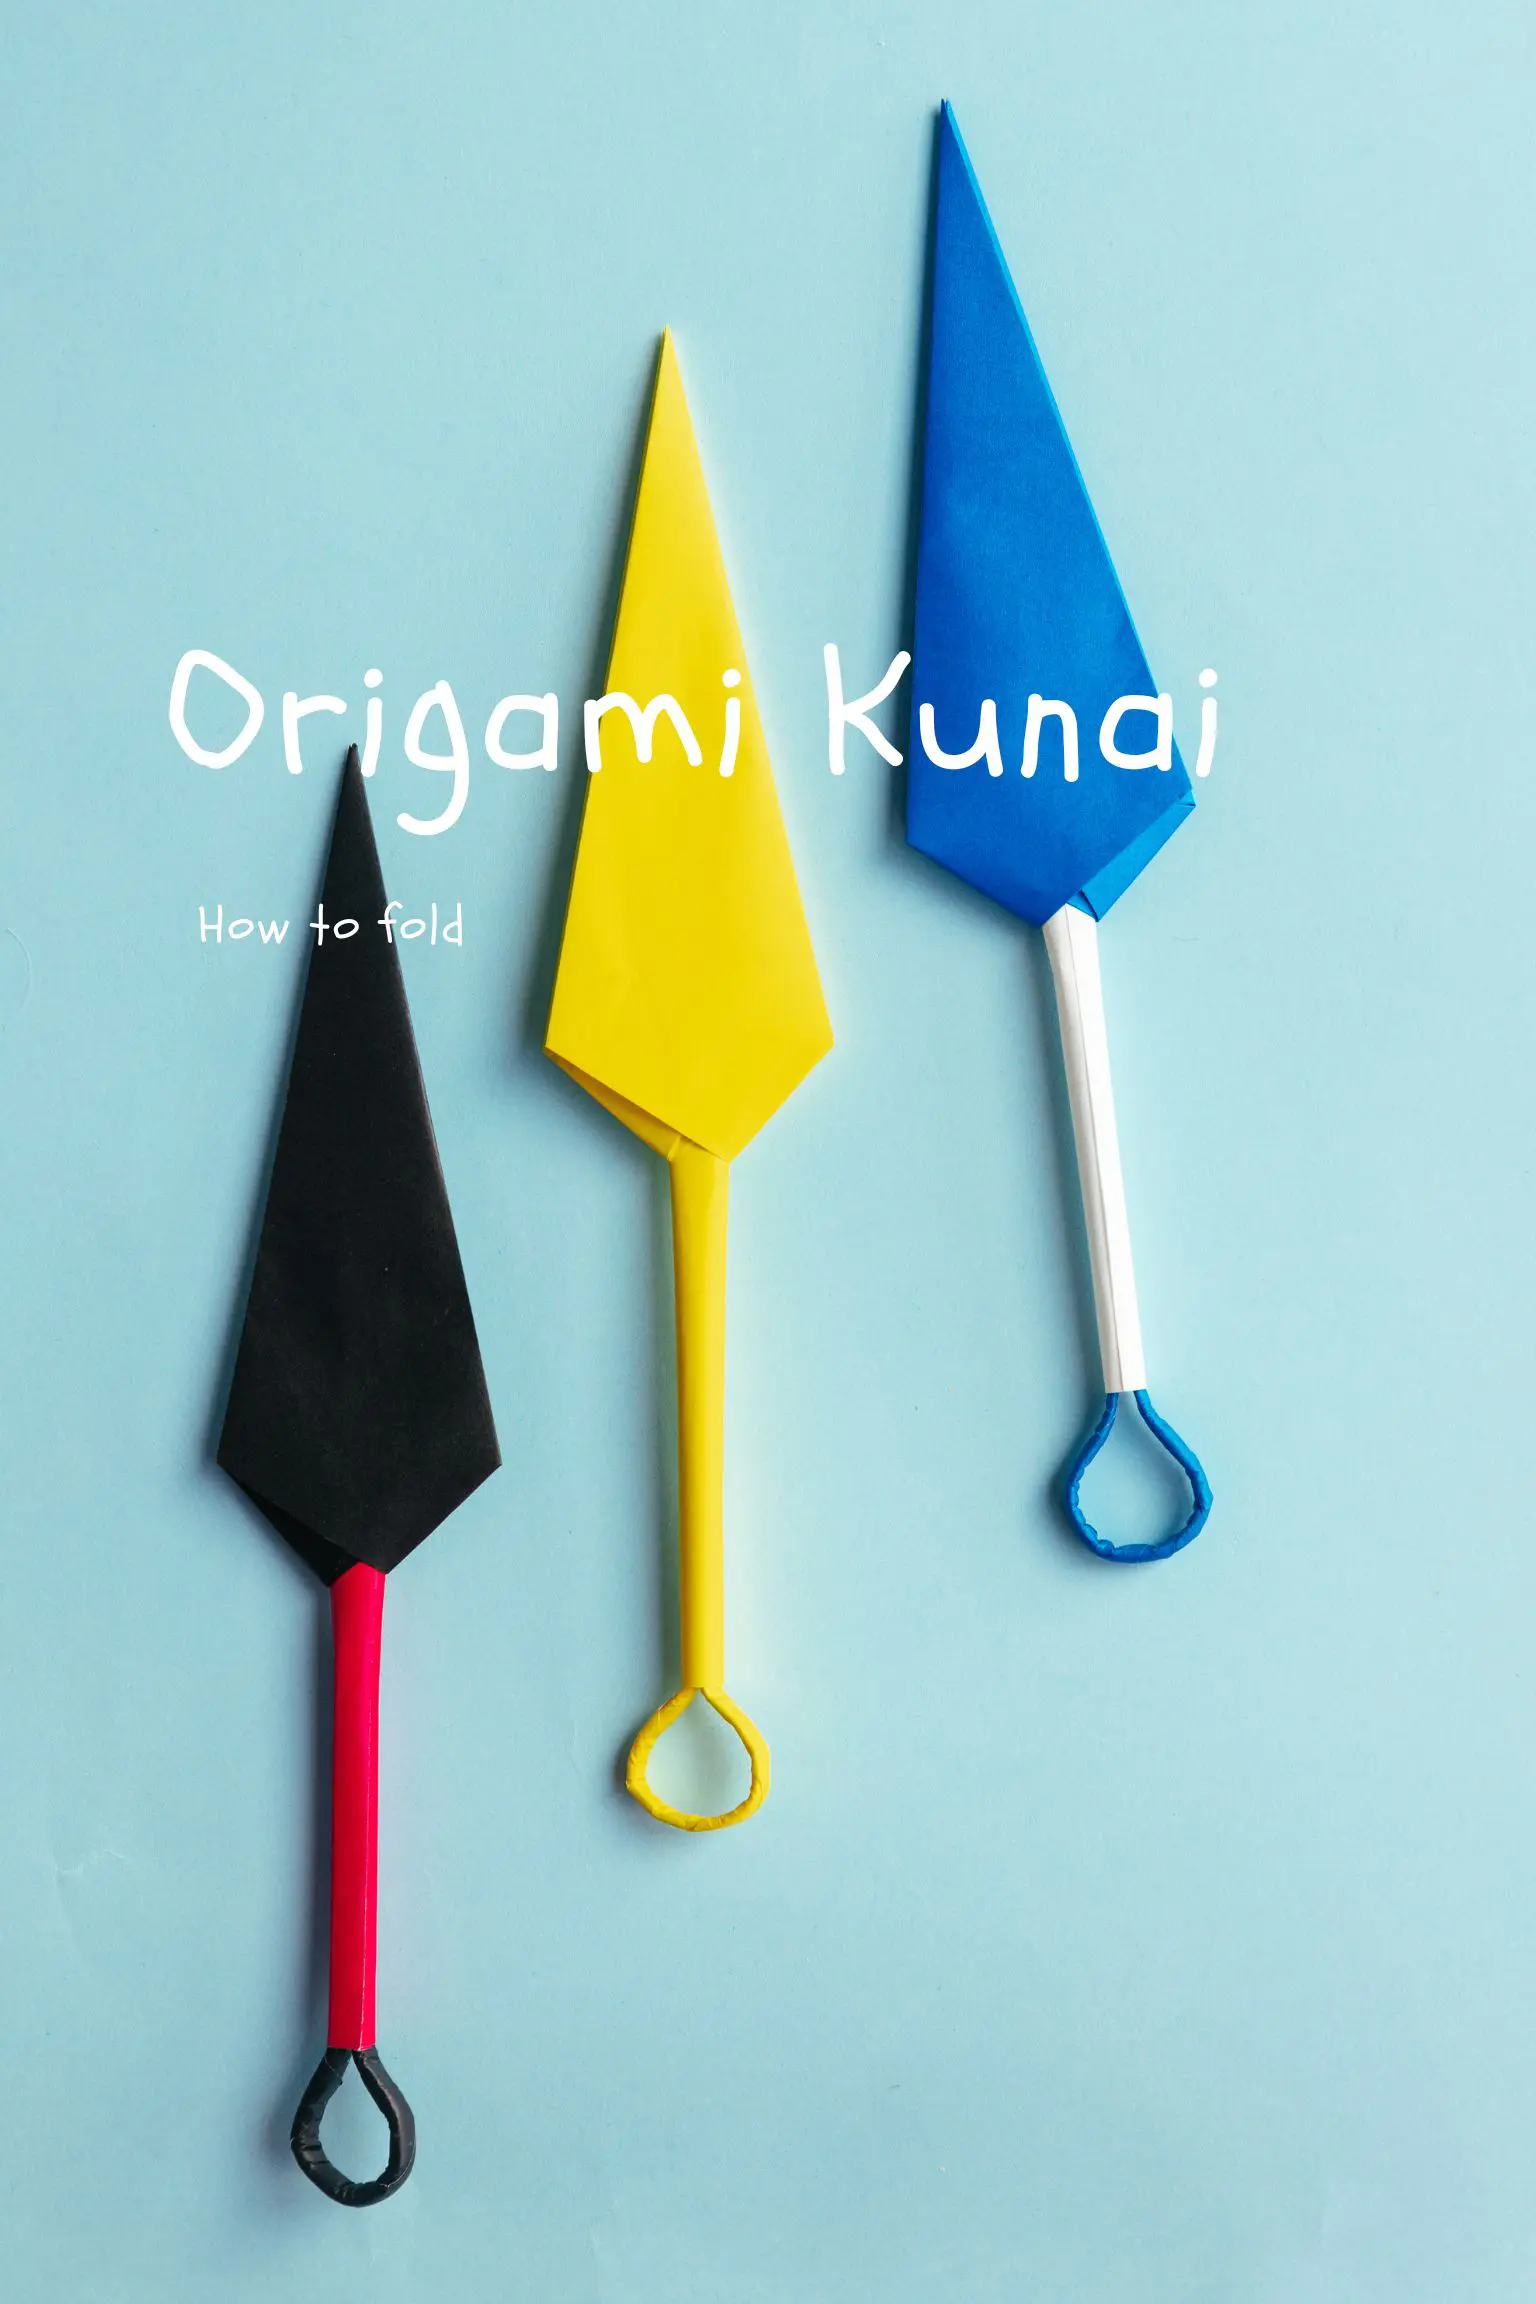
This origami Kunai is easy to make and suitable for children and beginners for origami. Its long handle makes it easy to hold, and the loop at the end of the handle means you can hang it, either for decorative purposes or for storage.
It’s perfect for themed parties, as an environmental decoration, or as an accessory for ninja role-playing. Even if you use it just as a bonding activity with your child on a rest day, it’s still a great choice. Plus, because it’s made of paper, you don’t have to worry about any safety issues at all—it’s a non-sharp knife!
If you are interested in Japanese culture or ninja culture, then you can check out our Origami Ninja Stars. It is another type of weapon used by ninja warriors in Japanese folklore.
Here is an Origami Sword that I guess you may also be interested in. It’s easy to make and super cool.
If you are new to origami, start here from our beginner guide to know the basics and how to read the step-by-step instructions.

Origami Ninja Star

Origami Sword
What’s Next
This is the final shape of an origami kunai. You can now explore our other interesting origami toy instructions. Happy folding!


