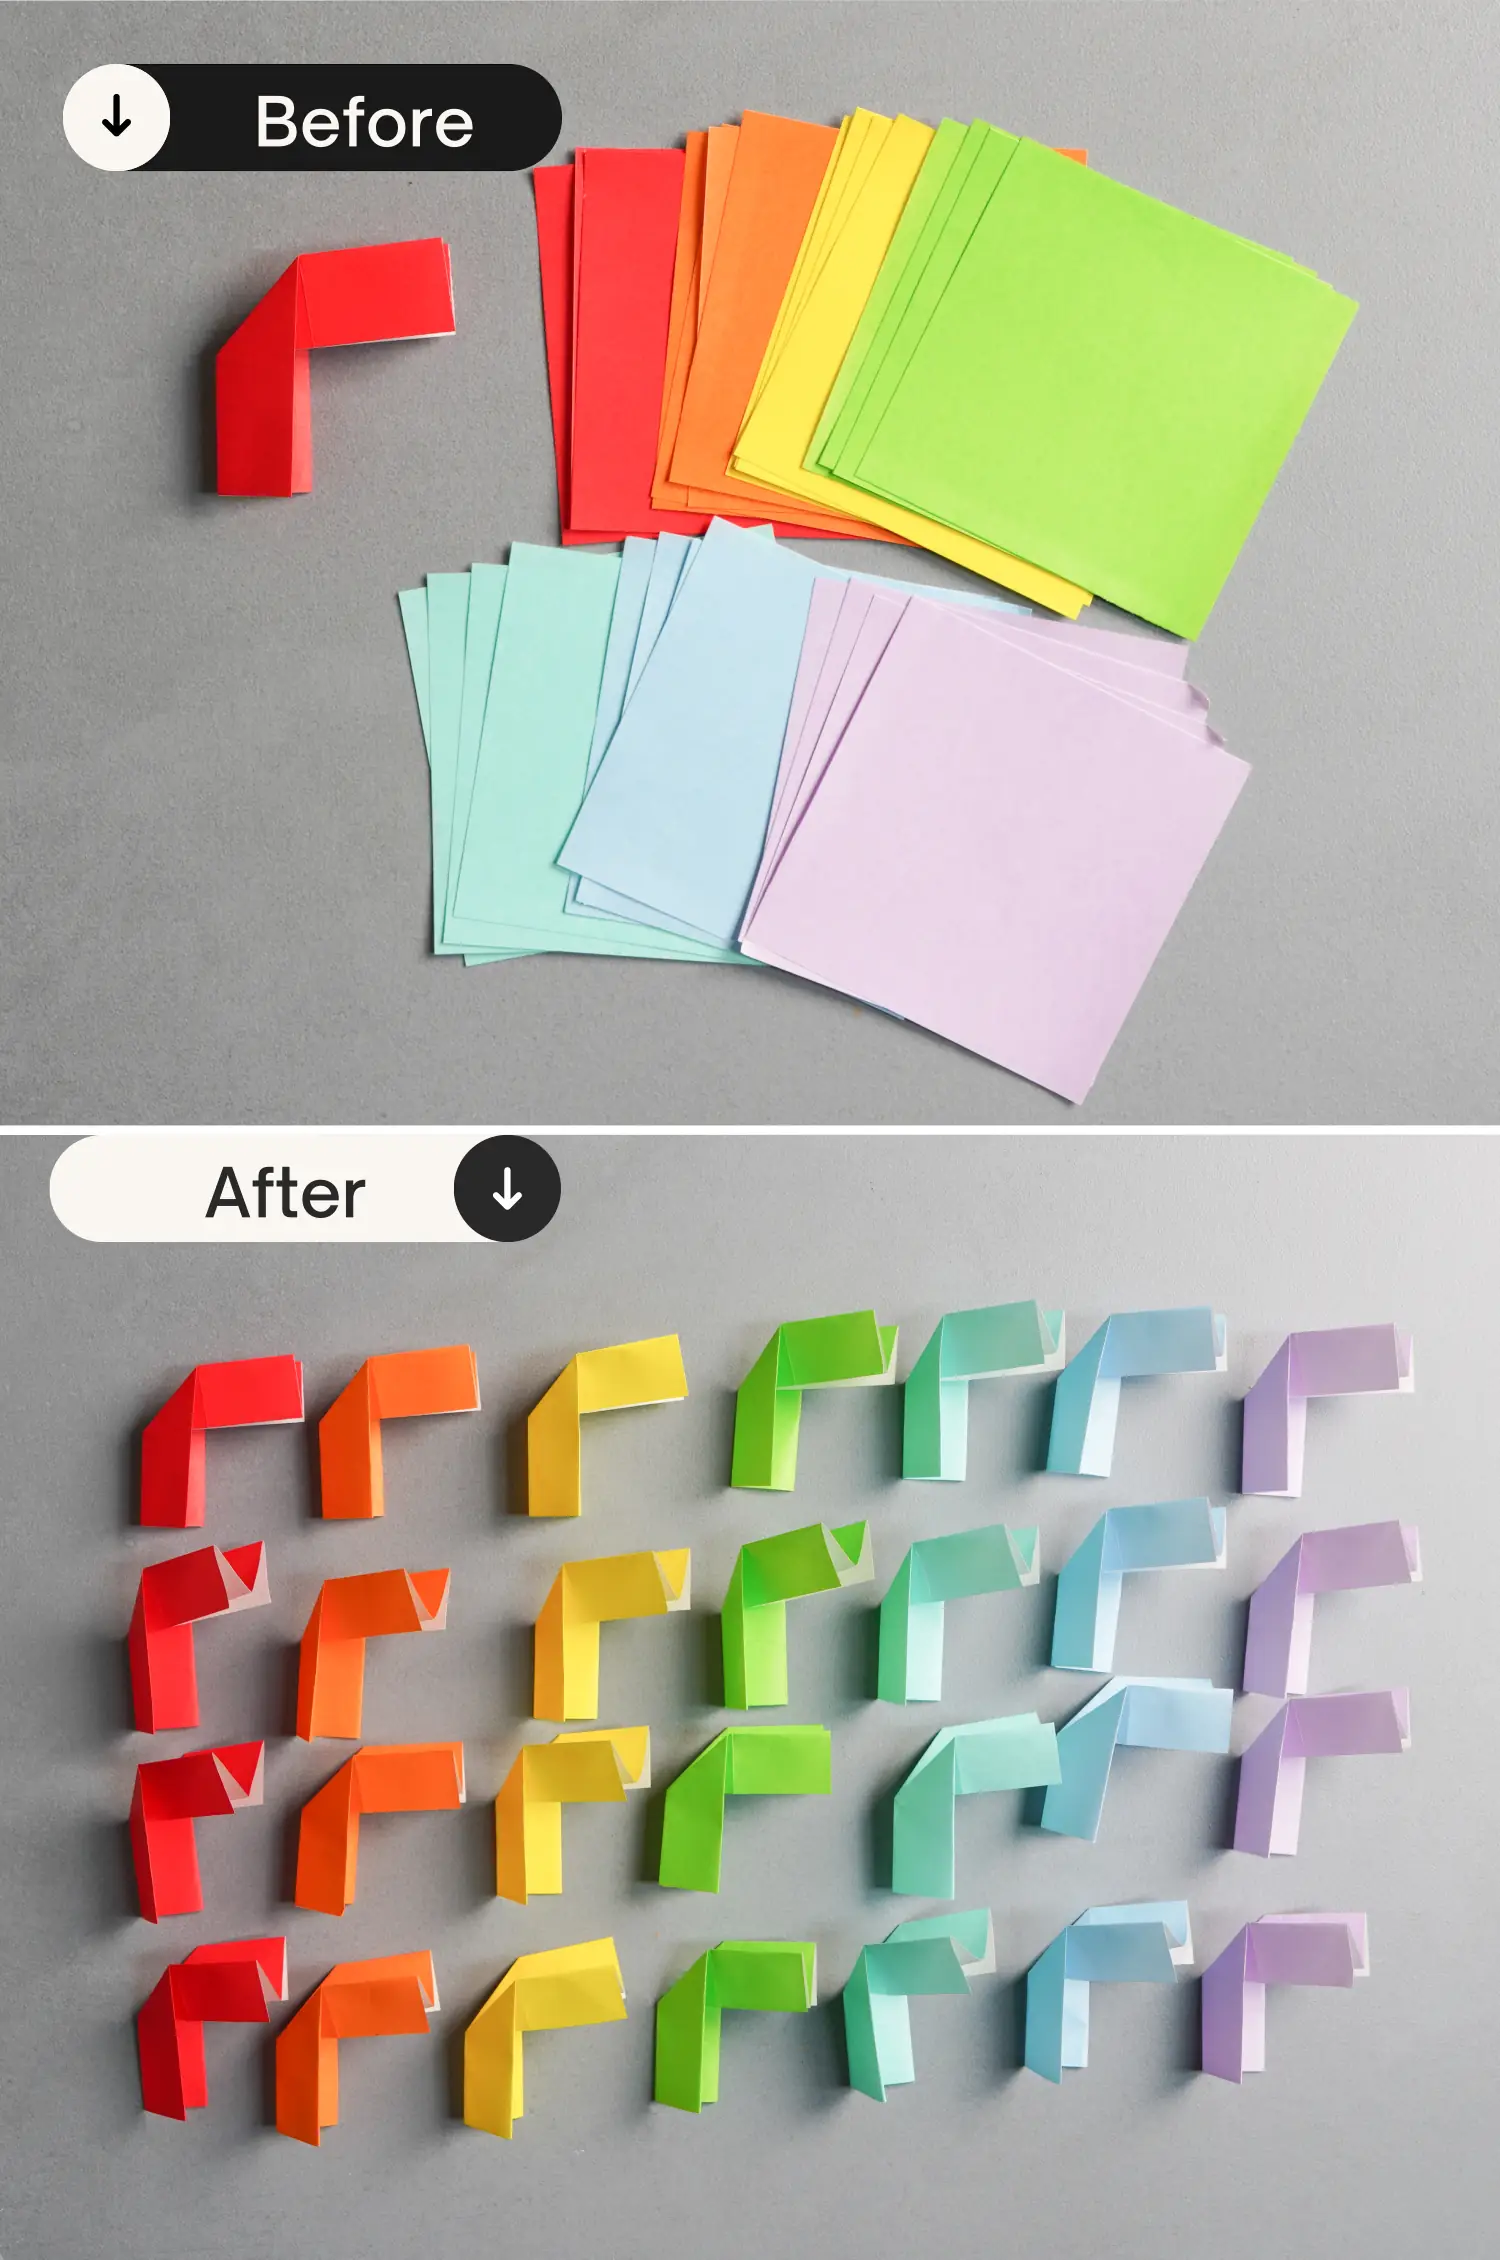
How to Fold an Origami Rainbow Chain
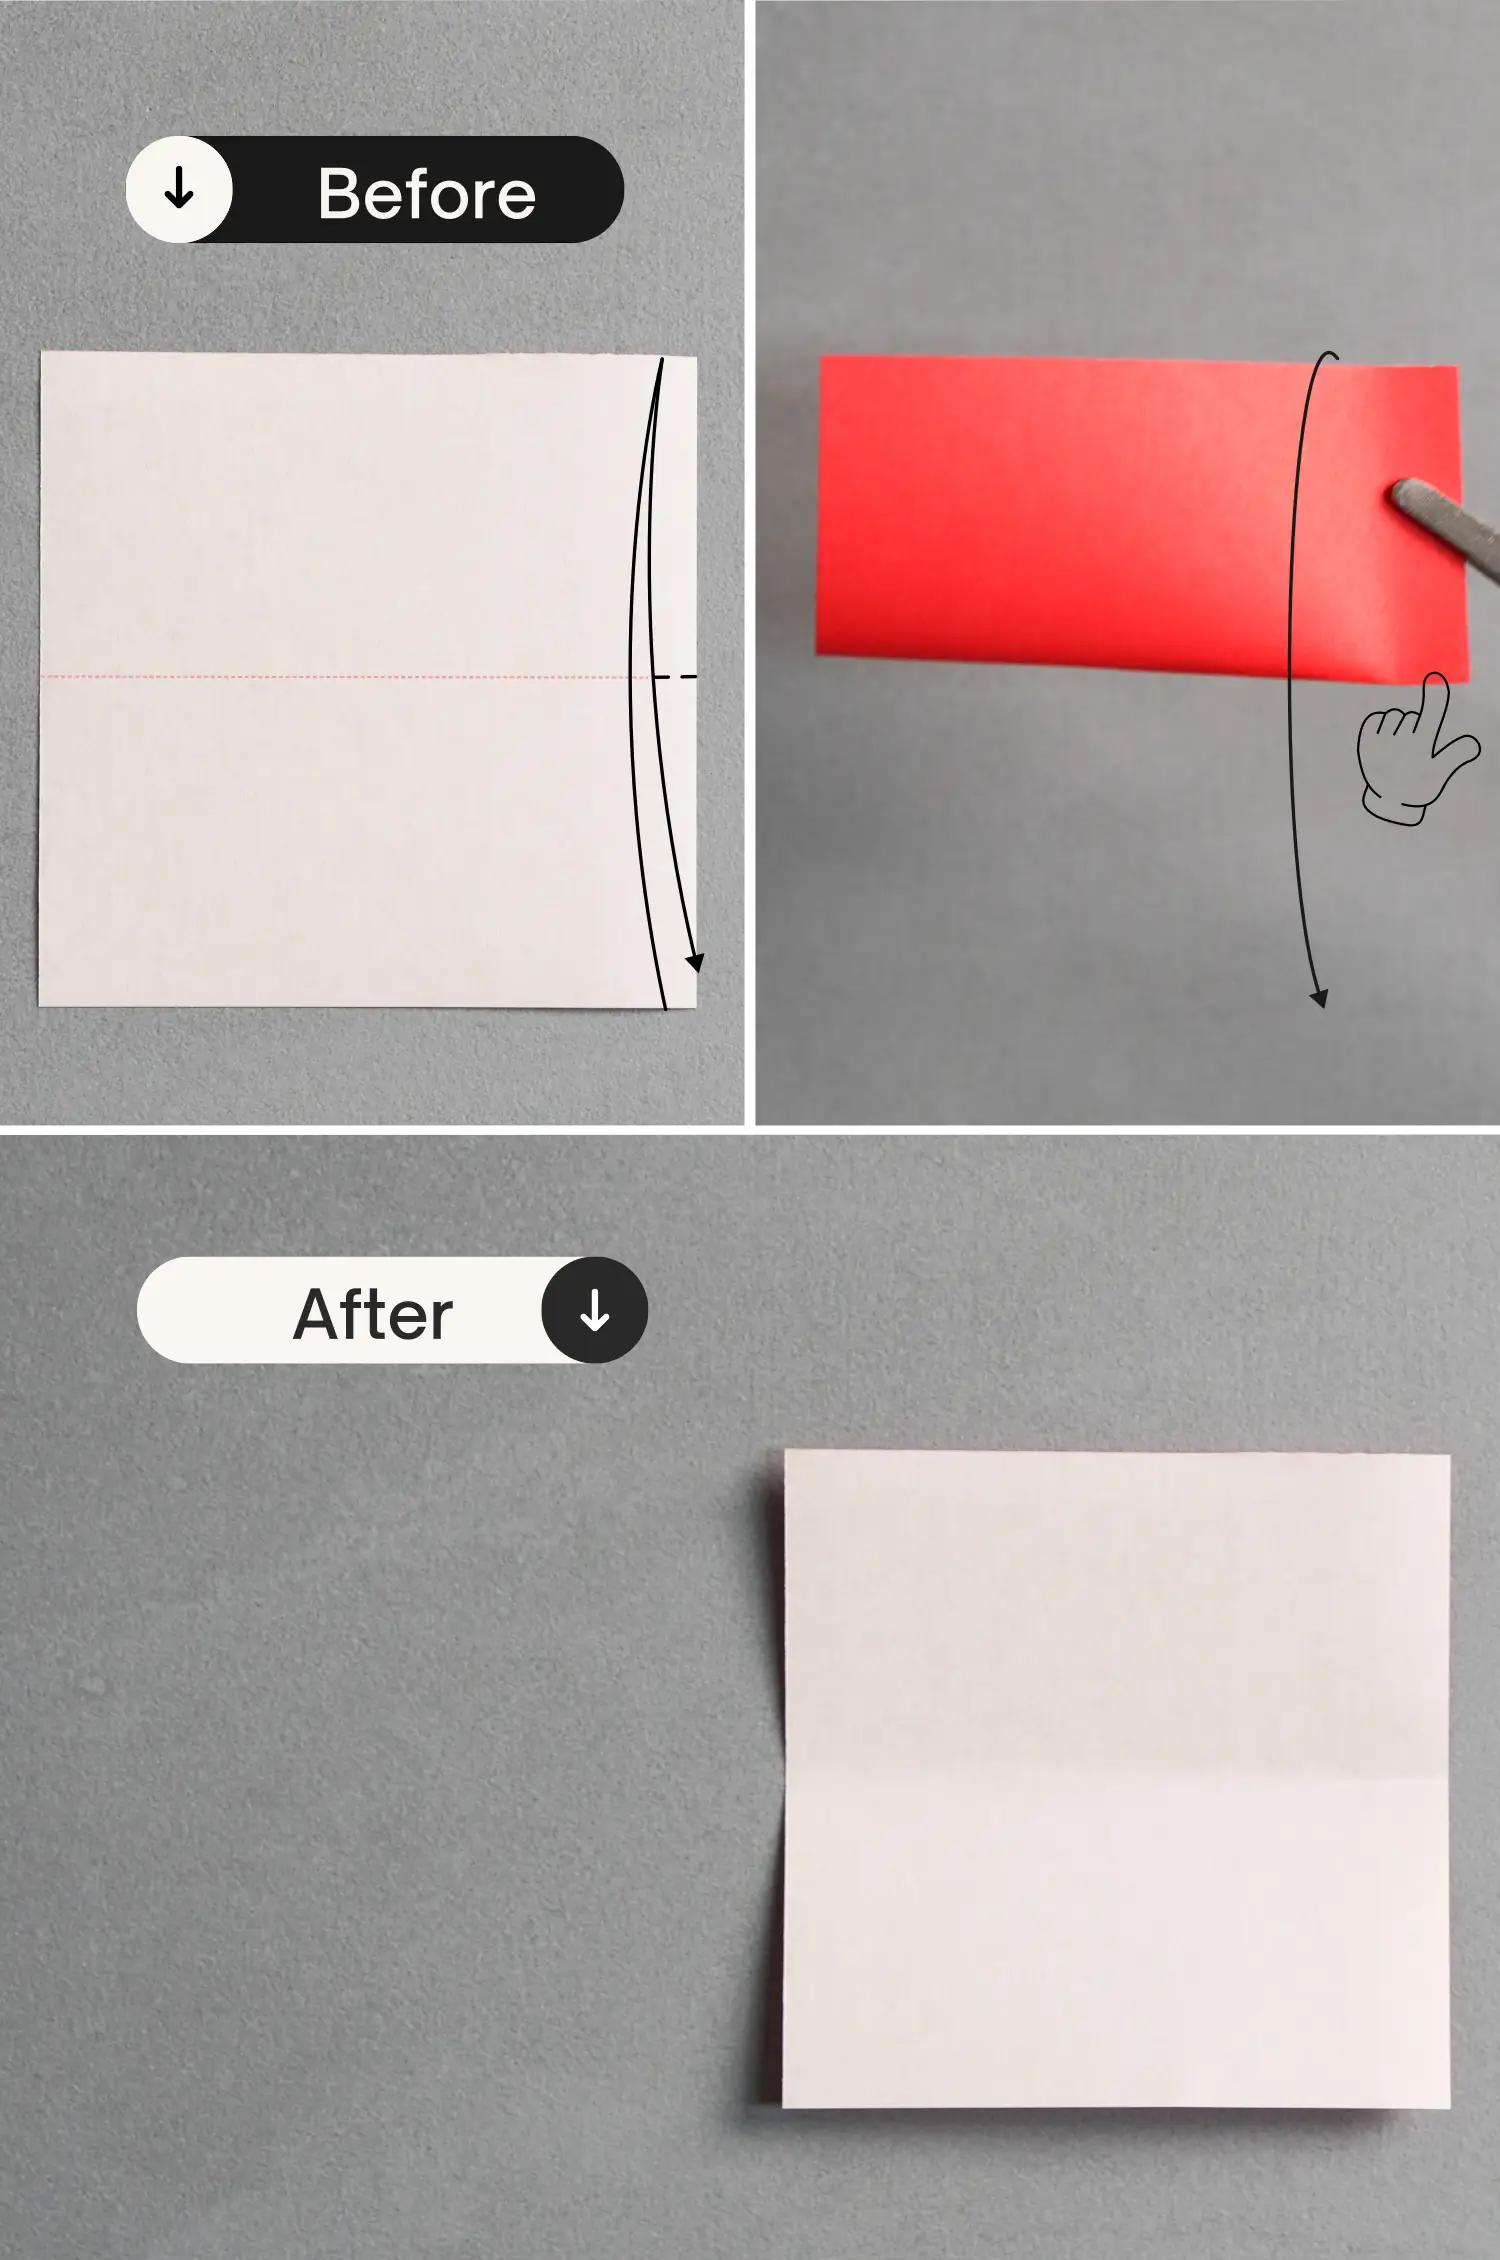
Step 1
Take out one of the papers, and place it with the desired display side facing down to begin folding. Fold it in half horizontally, leaving a short crease on the right side, and unfold it.
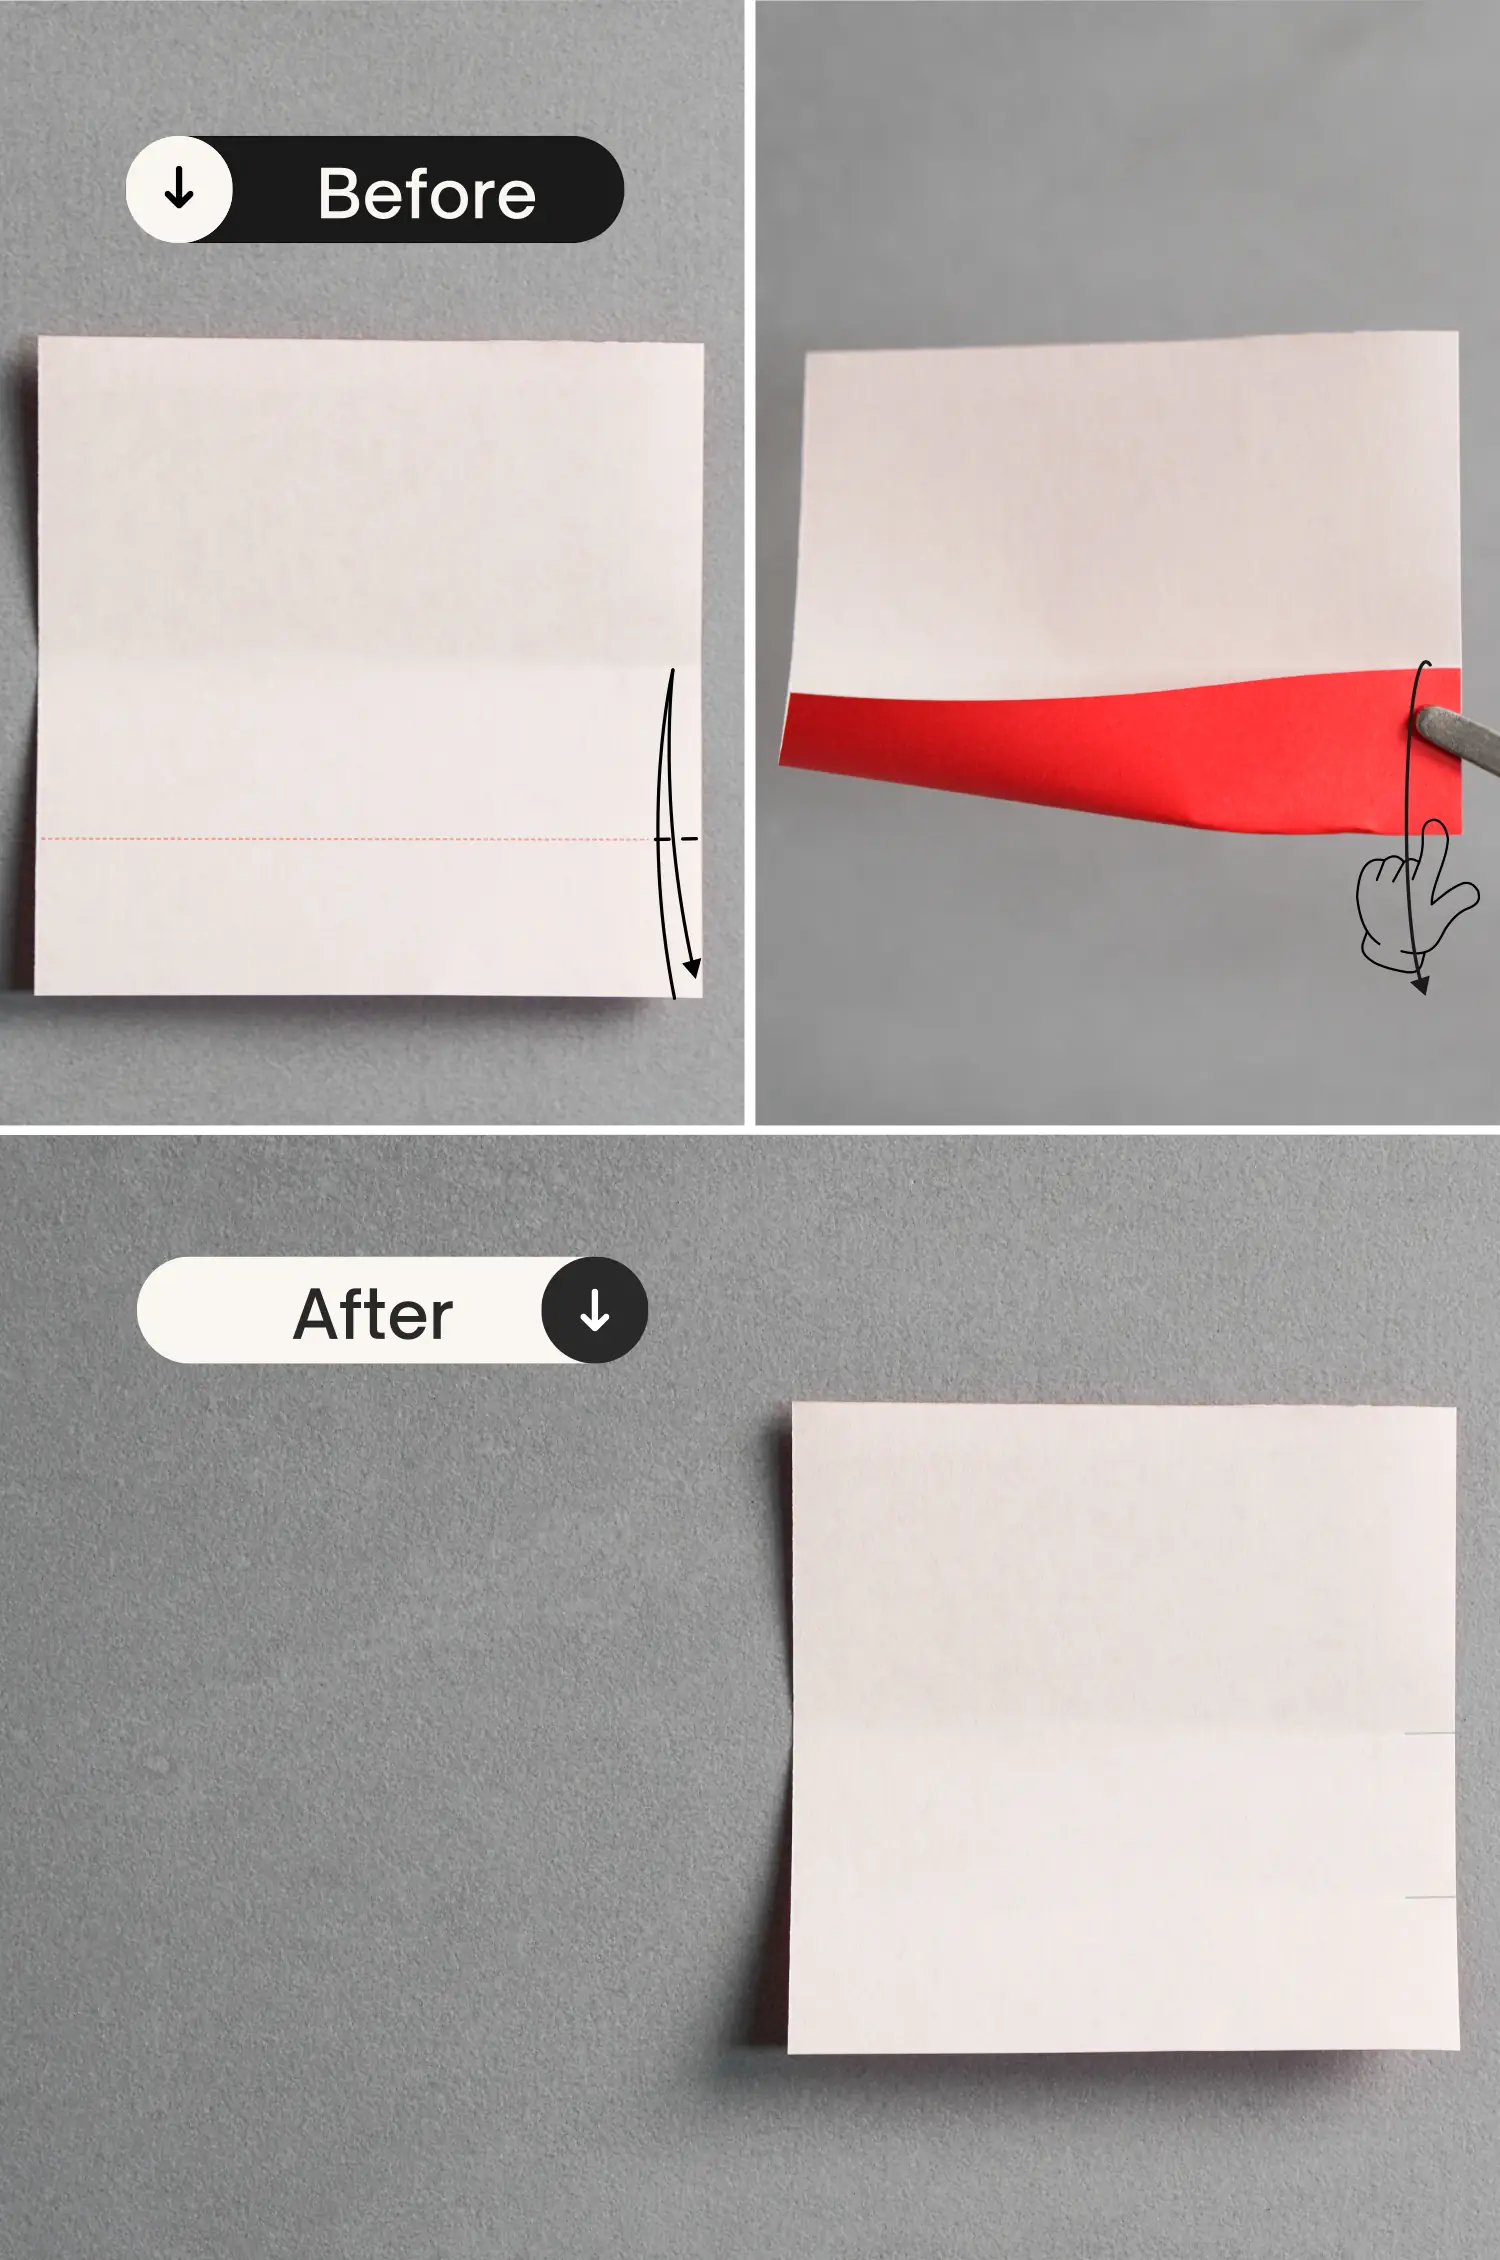
Step 2
Fold the bottom edge to align with this crease, leaving a short crease on the right side, and unfold it.
Step 3
Fold the top edge to align with the line, extending from the red spot, leaving a crease, and unfold it.

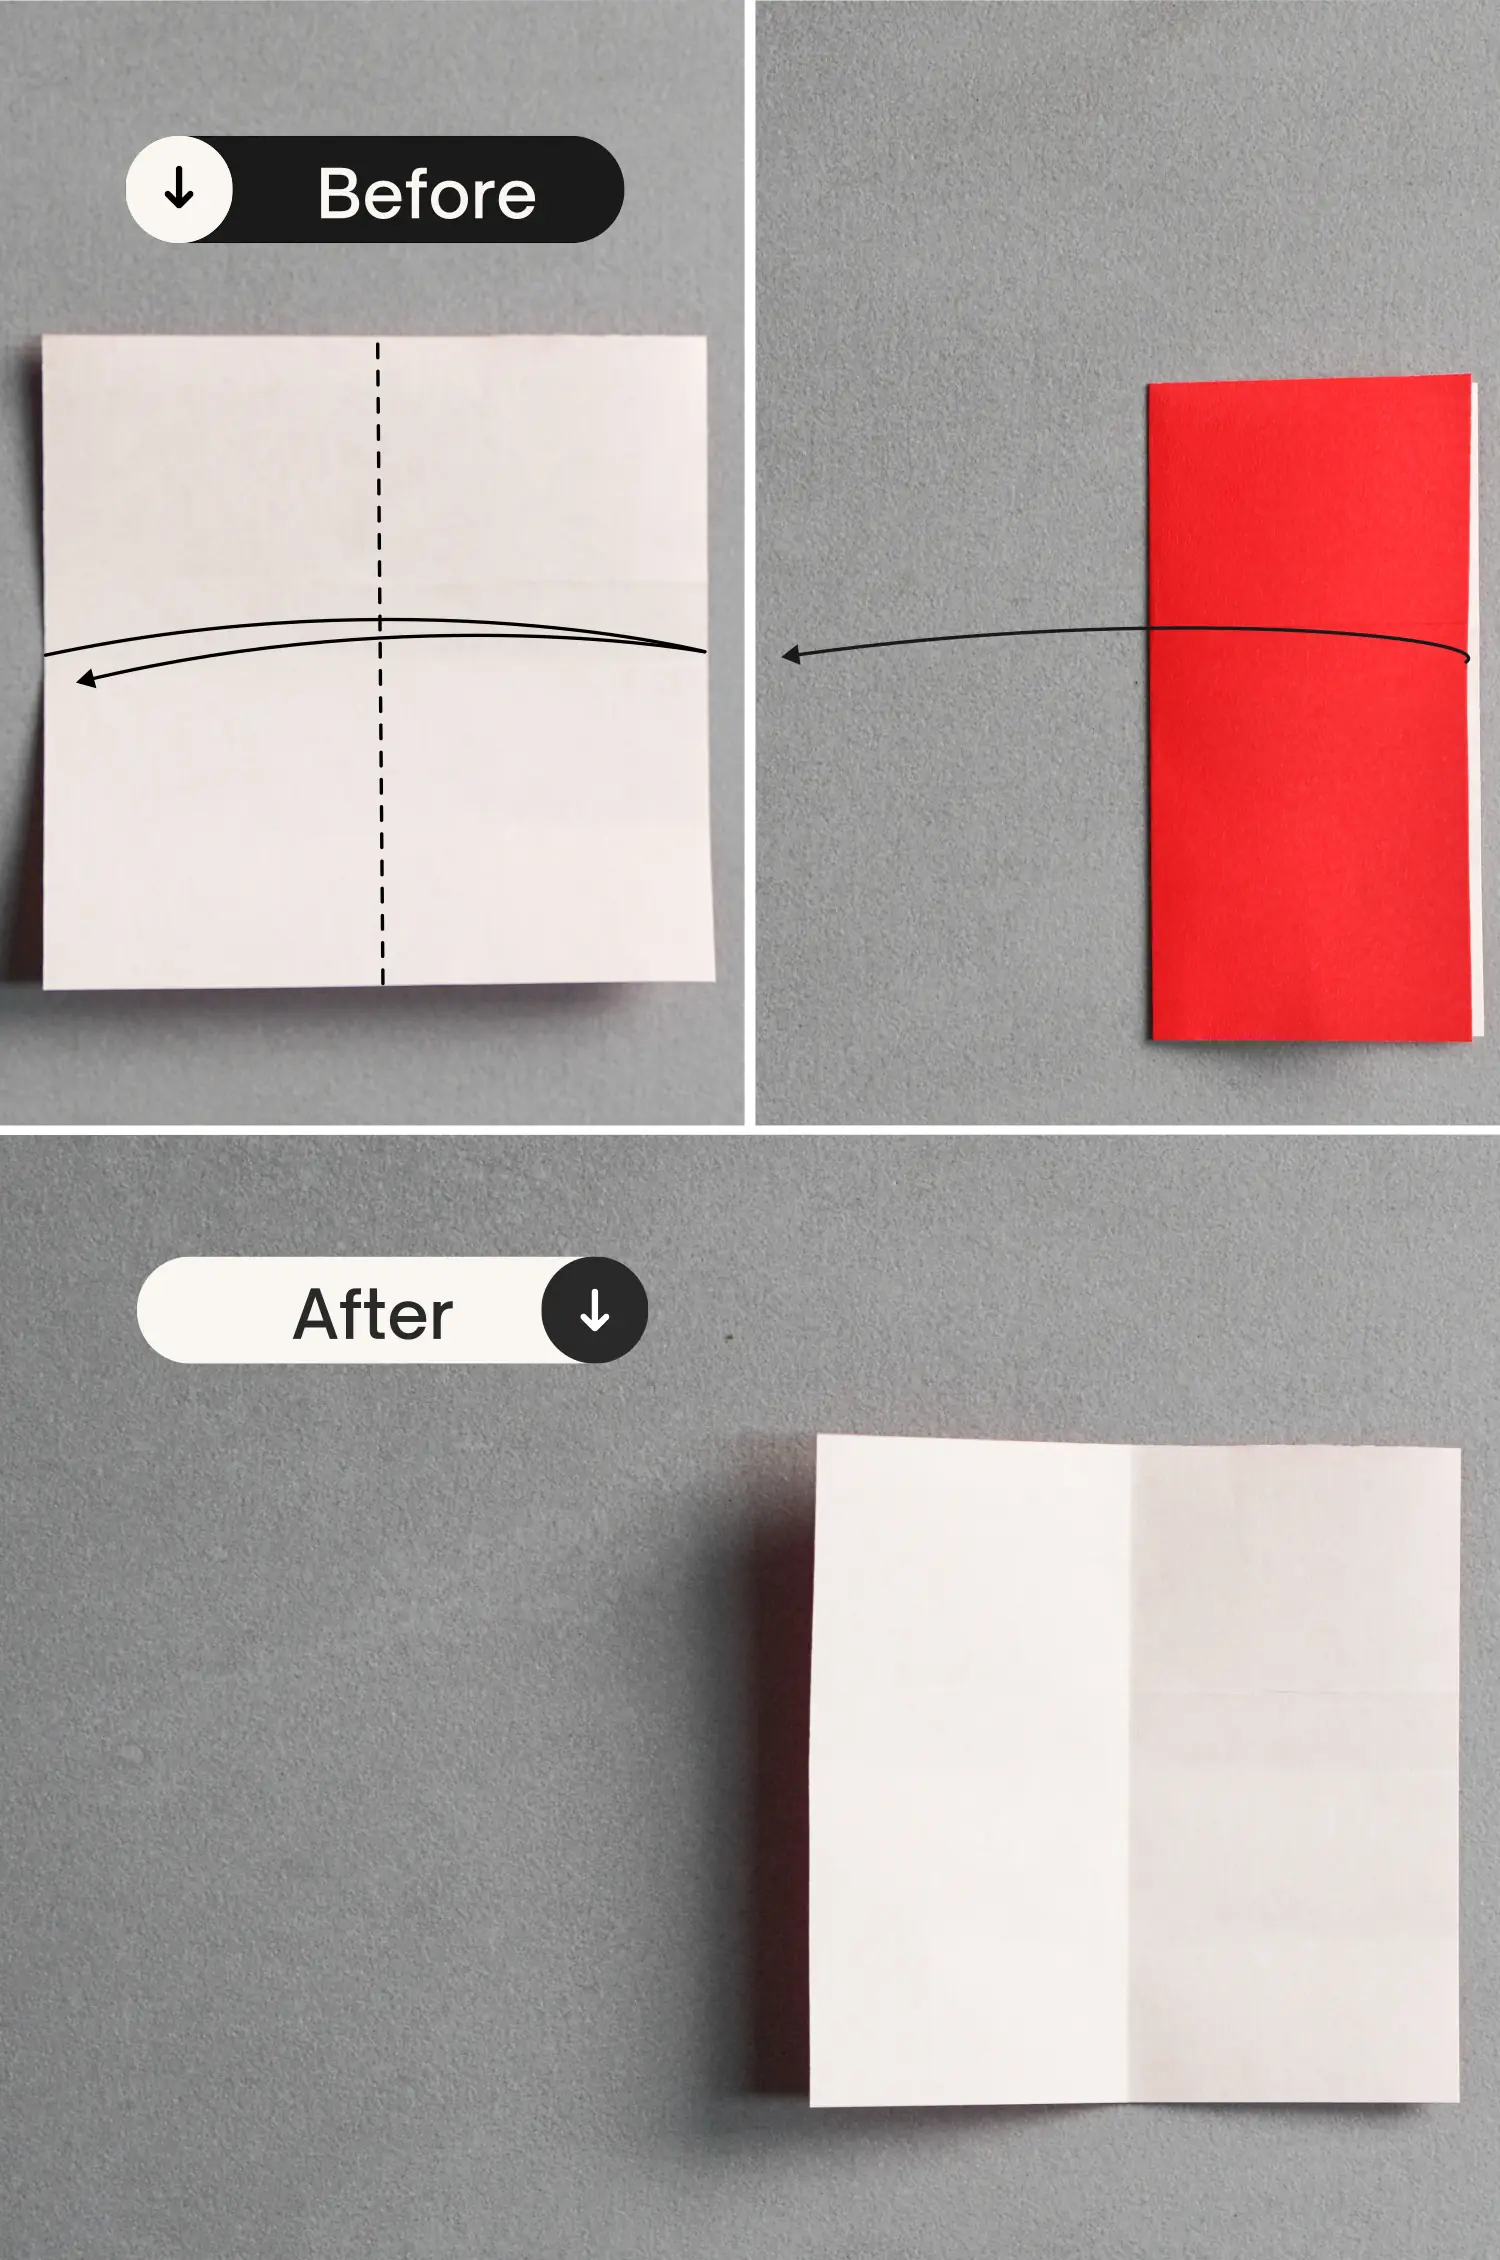
Step 4
Fold the paper in half vertically, leaving a crease, and unfold it.
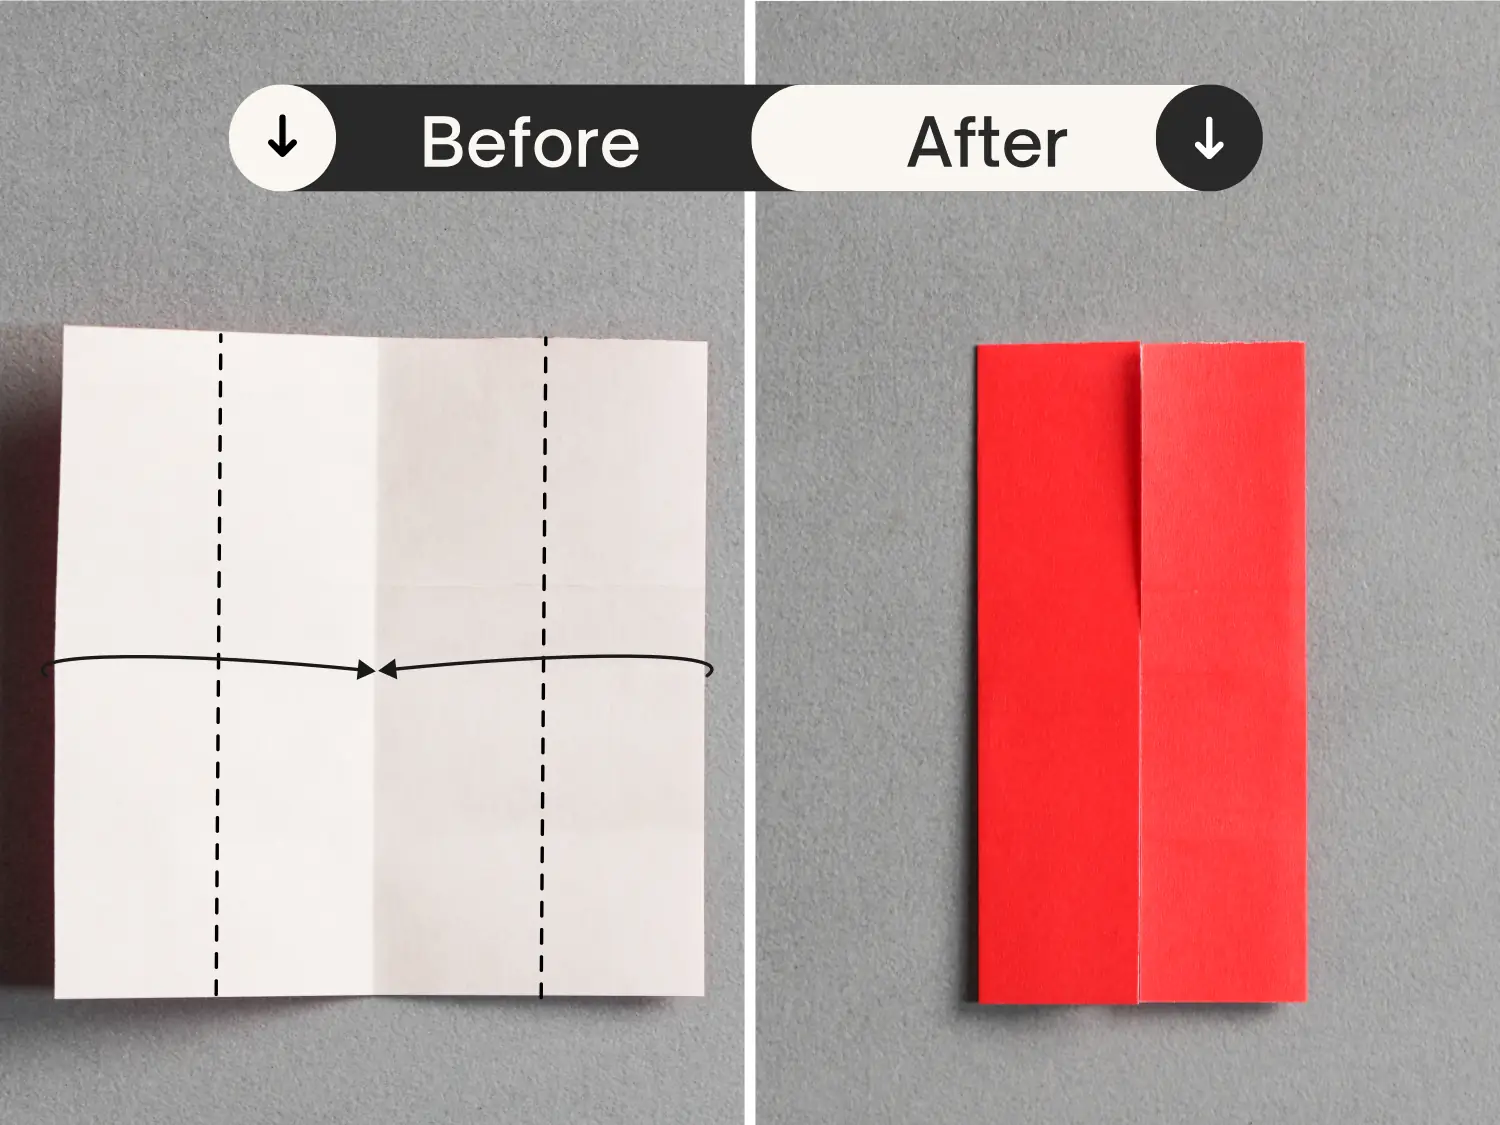
Step 5
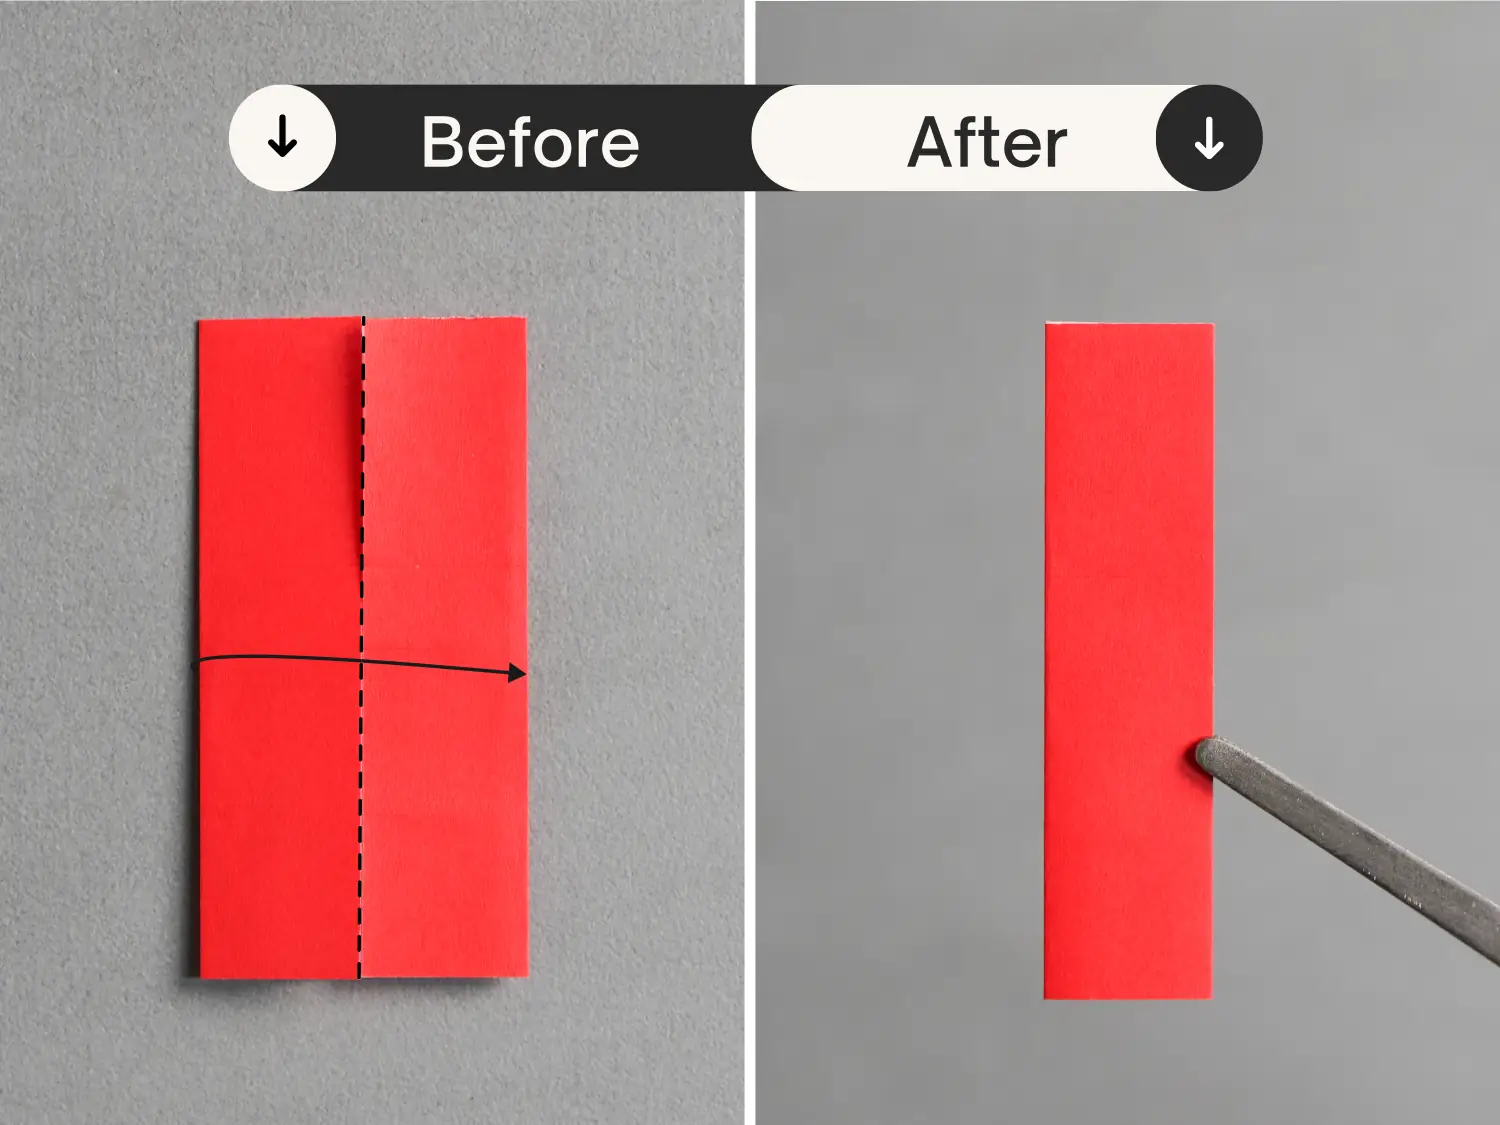
Fold both the left and right edges to align with the middle vertical crease.
Step 6
Fold the paper in half vertically from the left to the right.
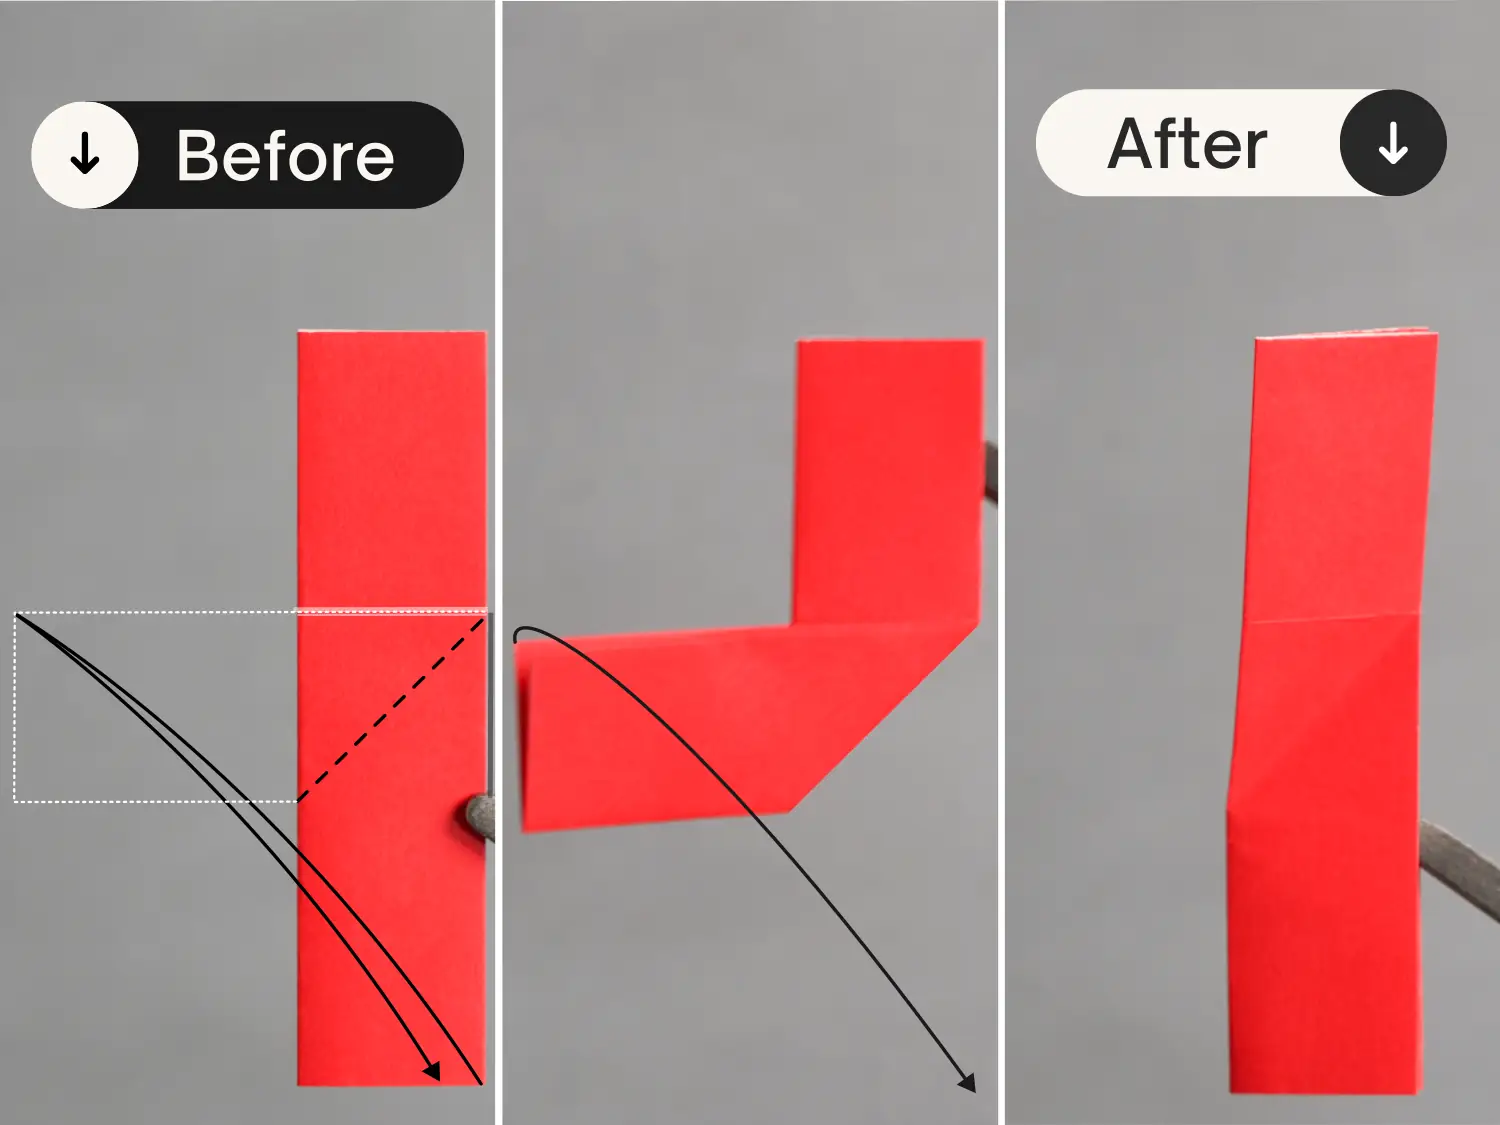
Step 7
Fold up the bottom section of the paper to the left side, aligning the right edge with the horizontal crease. Leaving a crease, and unfold it.
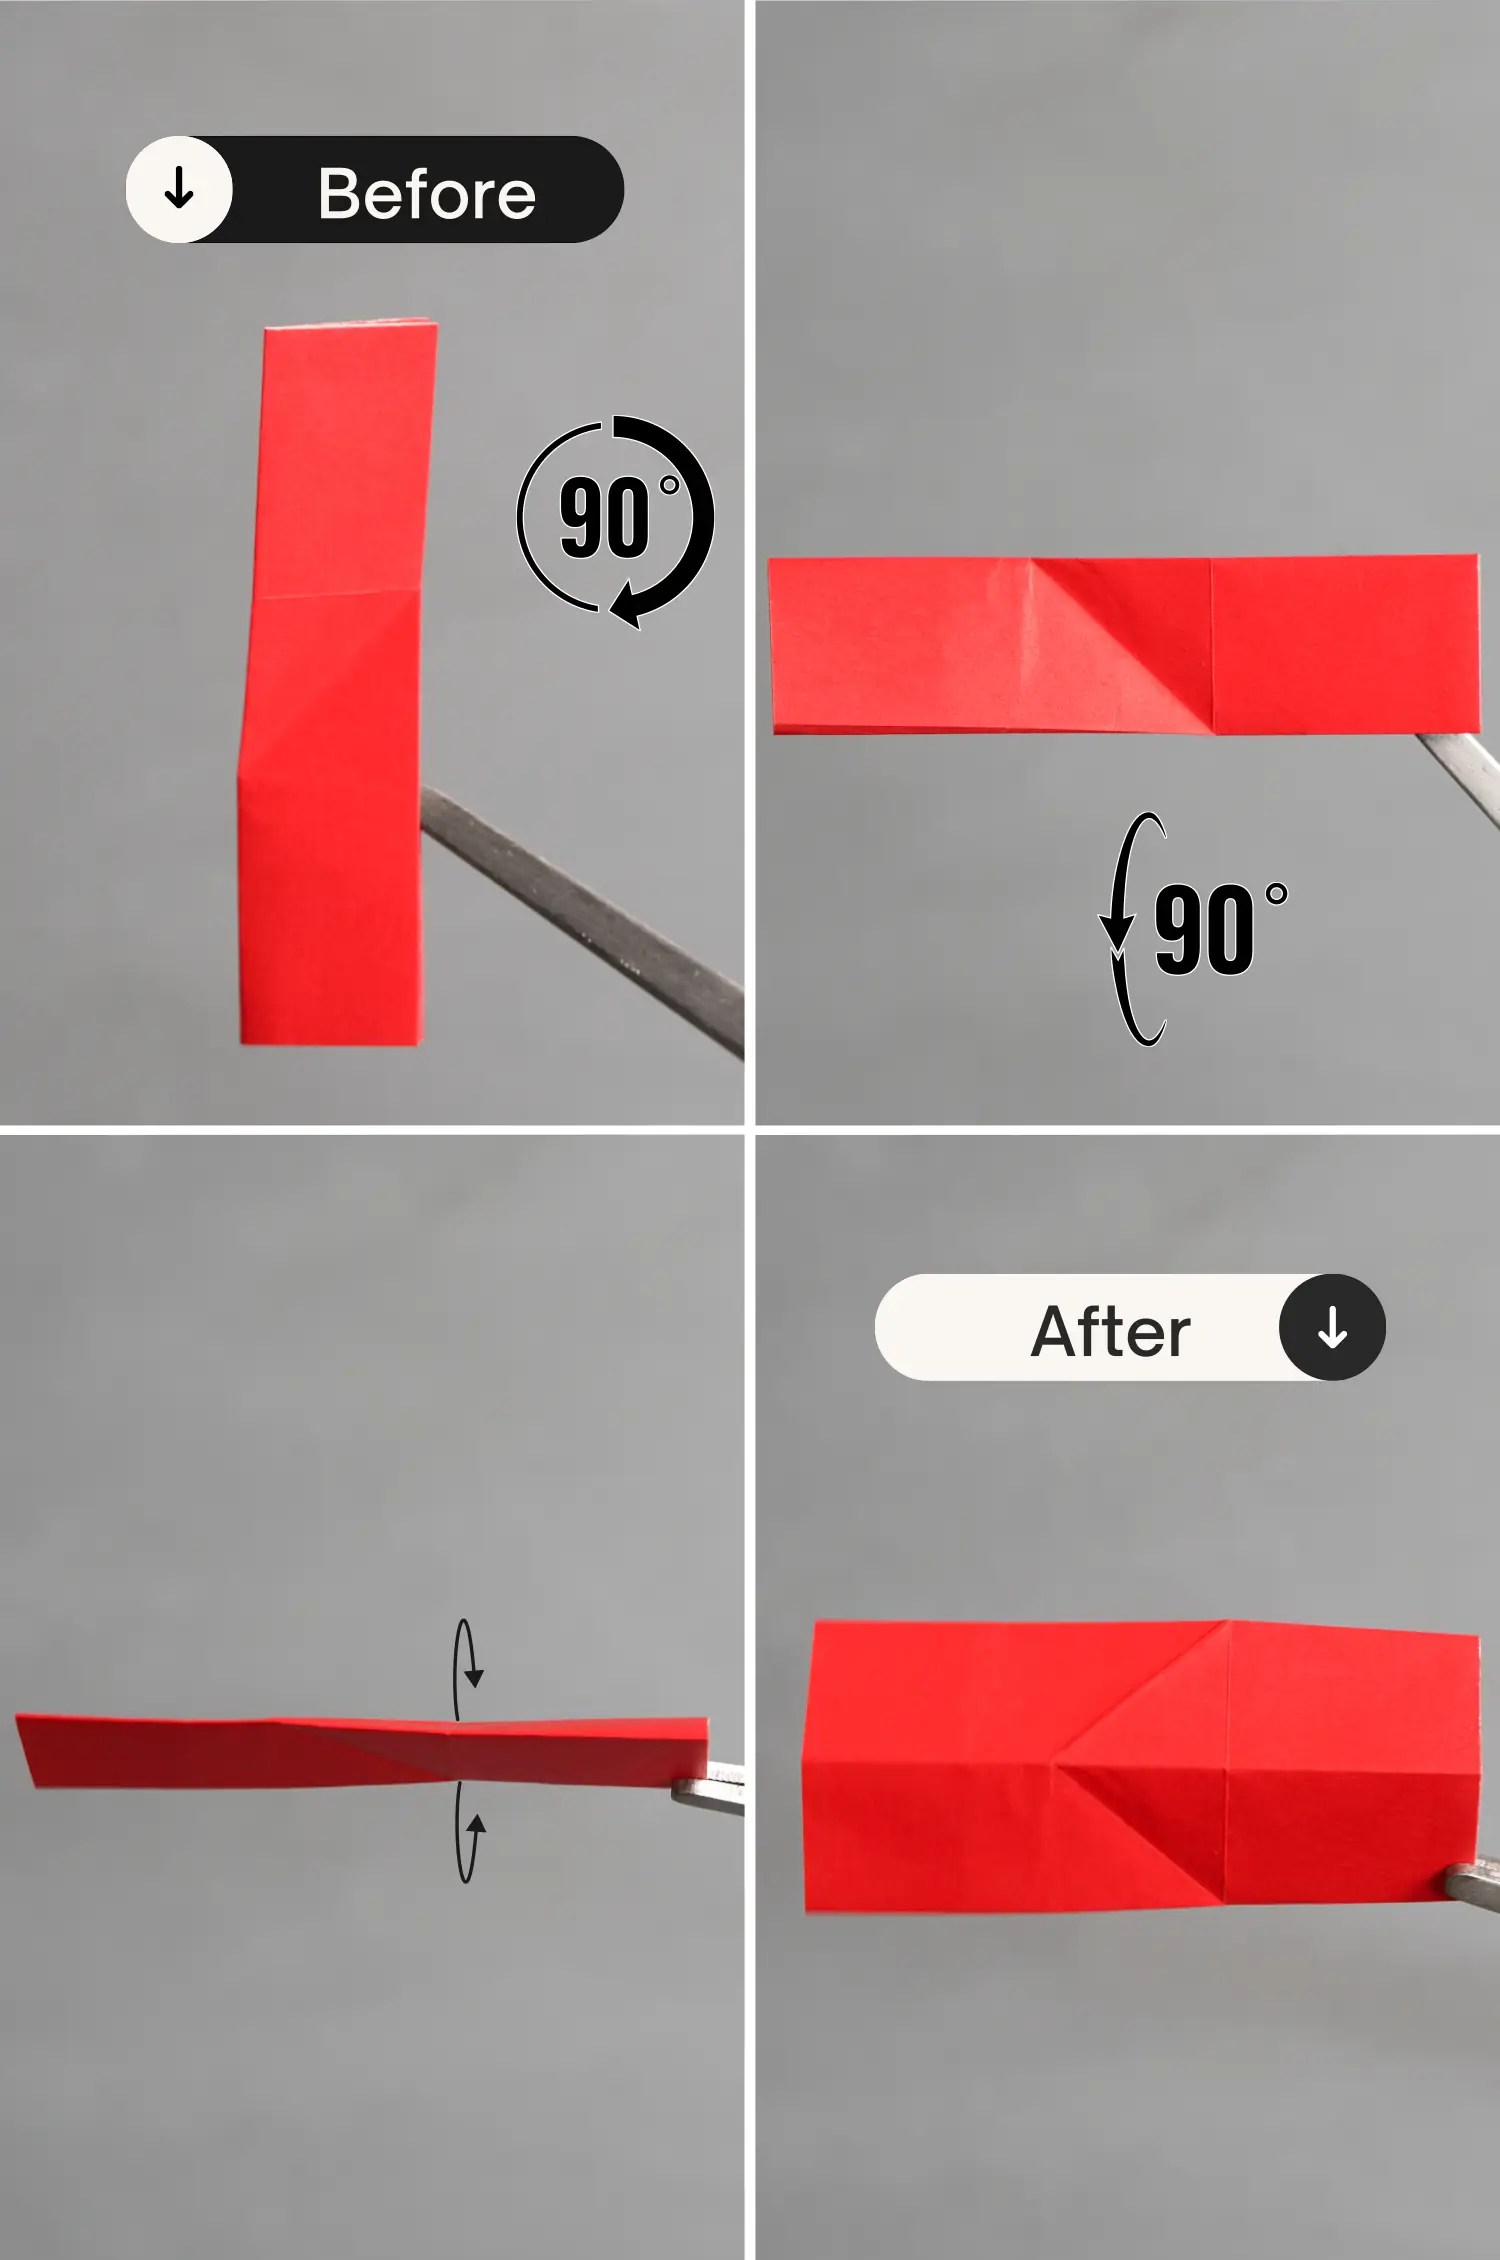
Step 8
Rotate the paper 90 degrees clockwise, then another 90 degrees from front to back, and finally, expand the paper from the bottom.
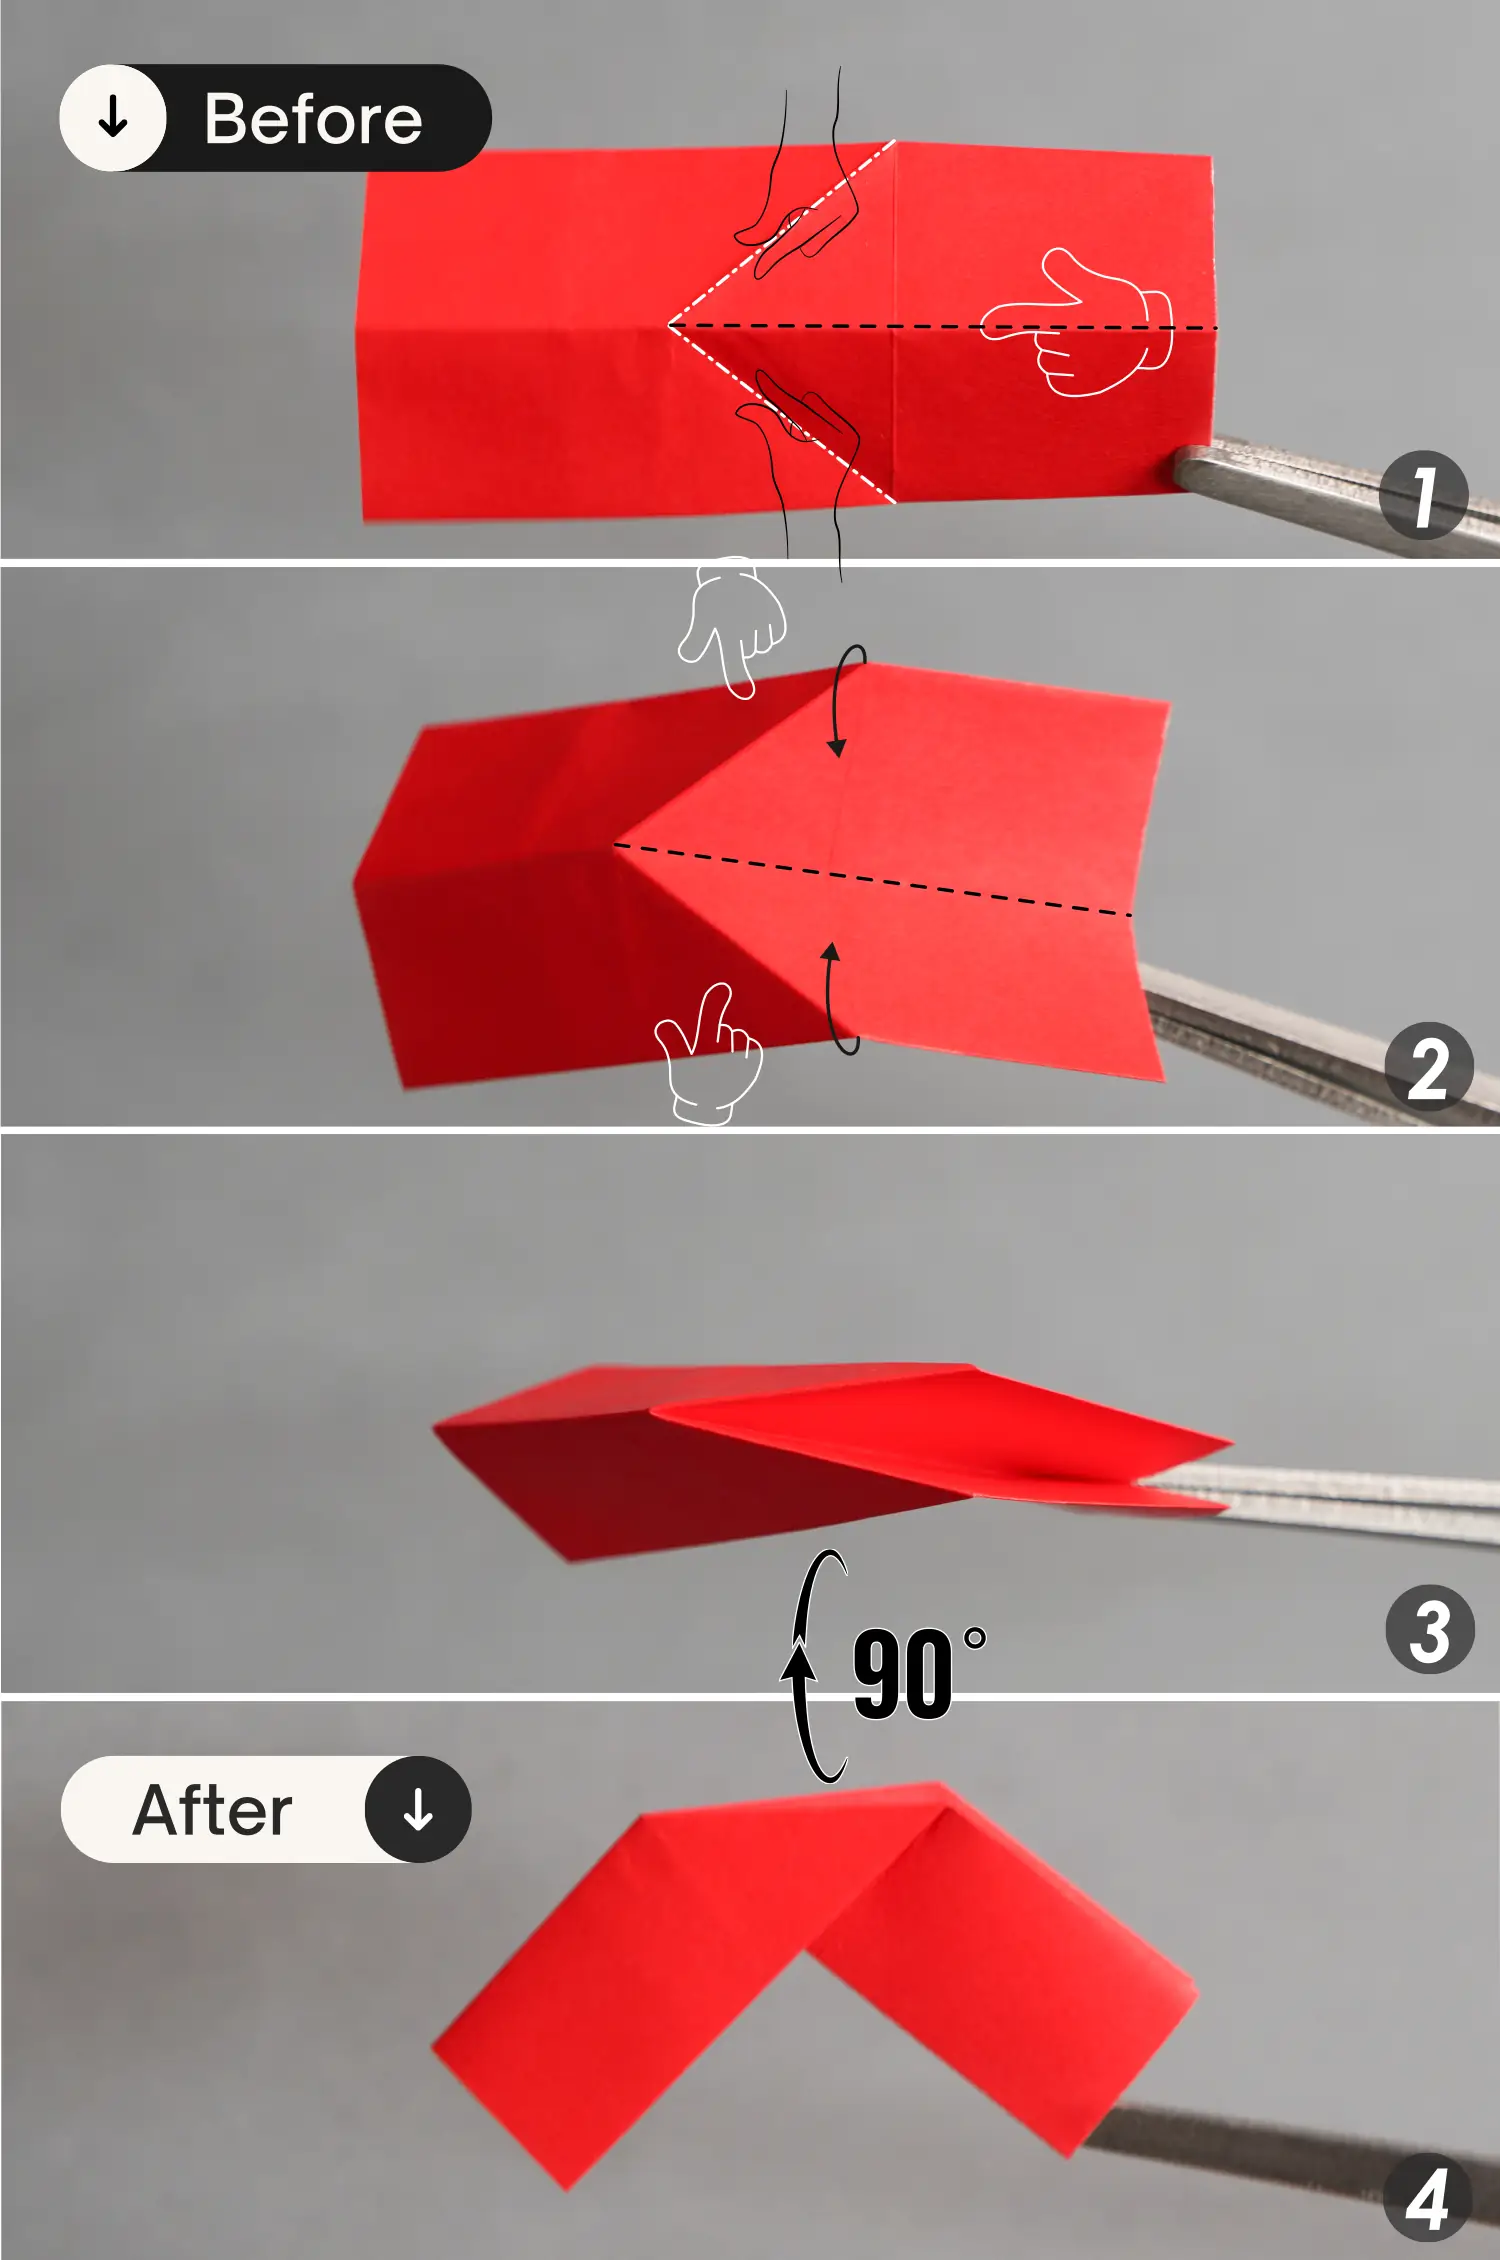
Step 9
Mountain fold the two creases indicated by the white dotted lines, press down the right side, and valley fold the crease indicated by the black dotted line. Finally, close this opening and rotate the paper 90 degrees from back to front.
Step 10
Fold the remaining papers in the same manner above to get 28 units in total.
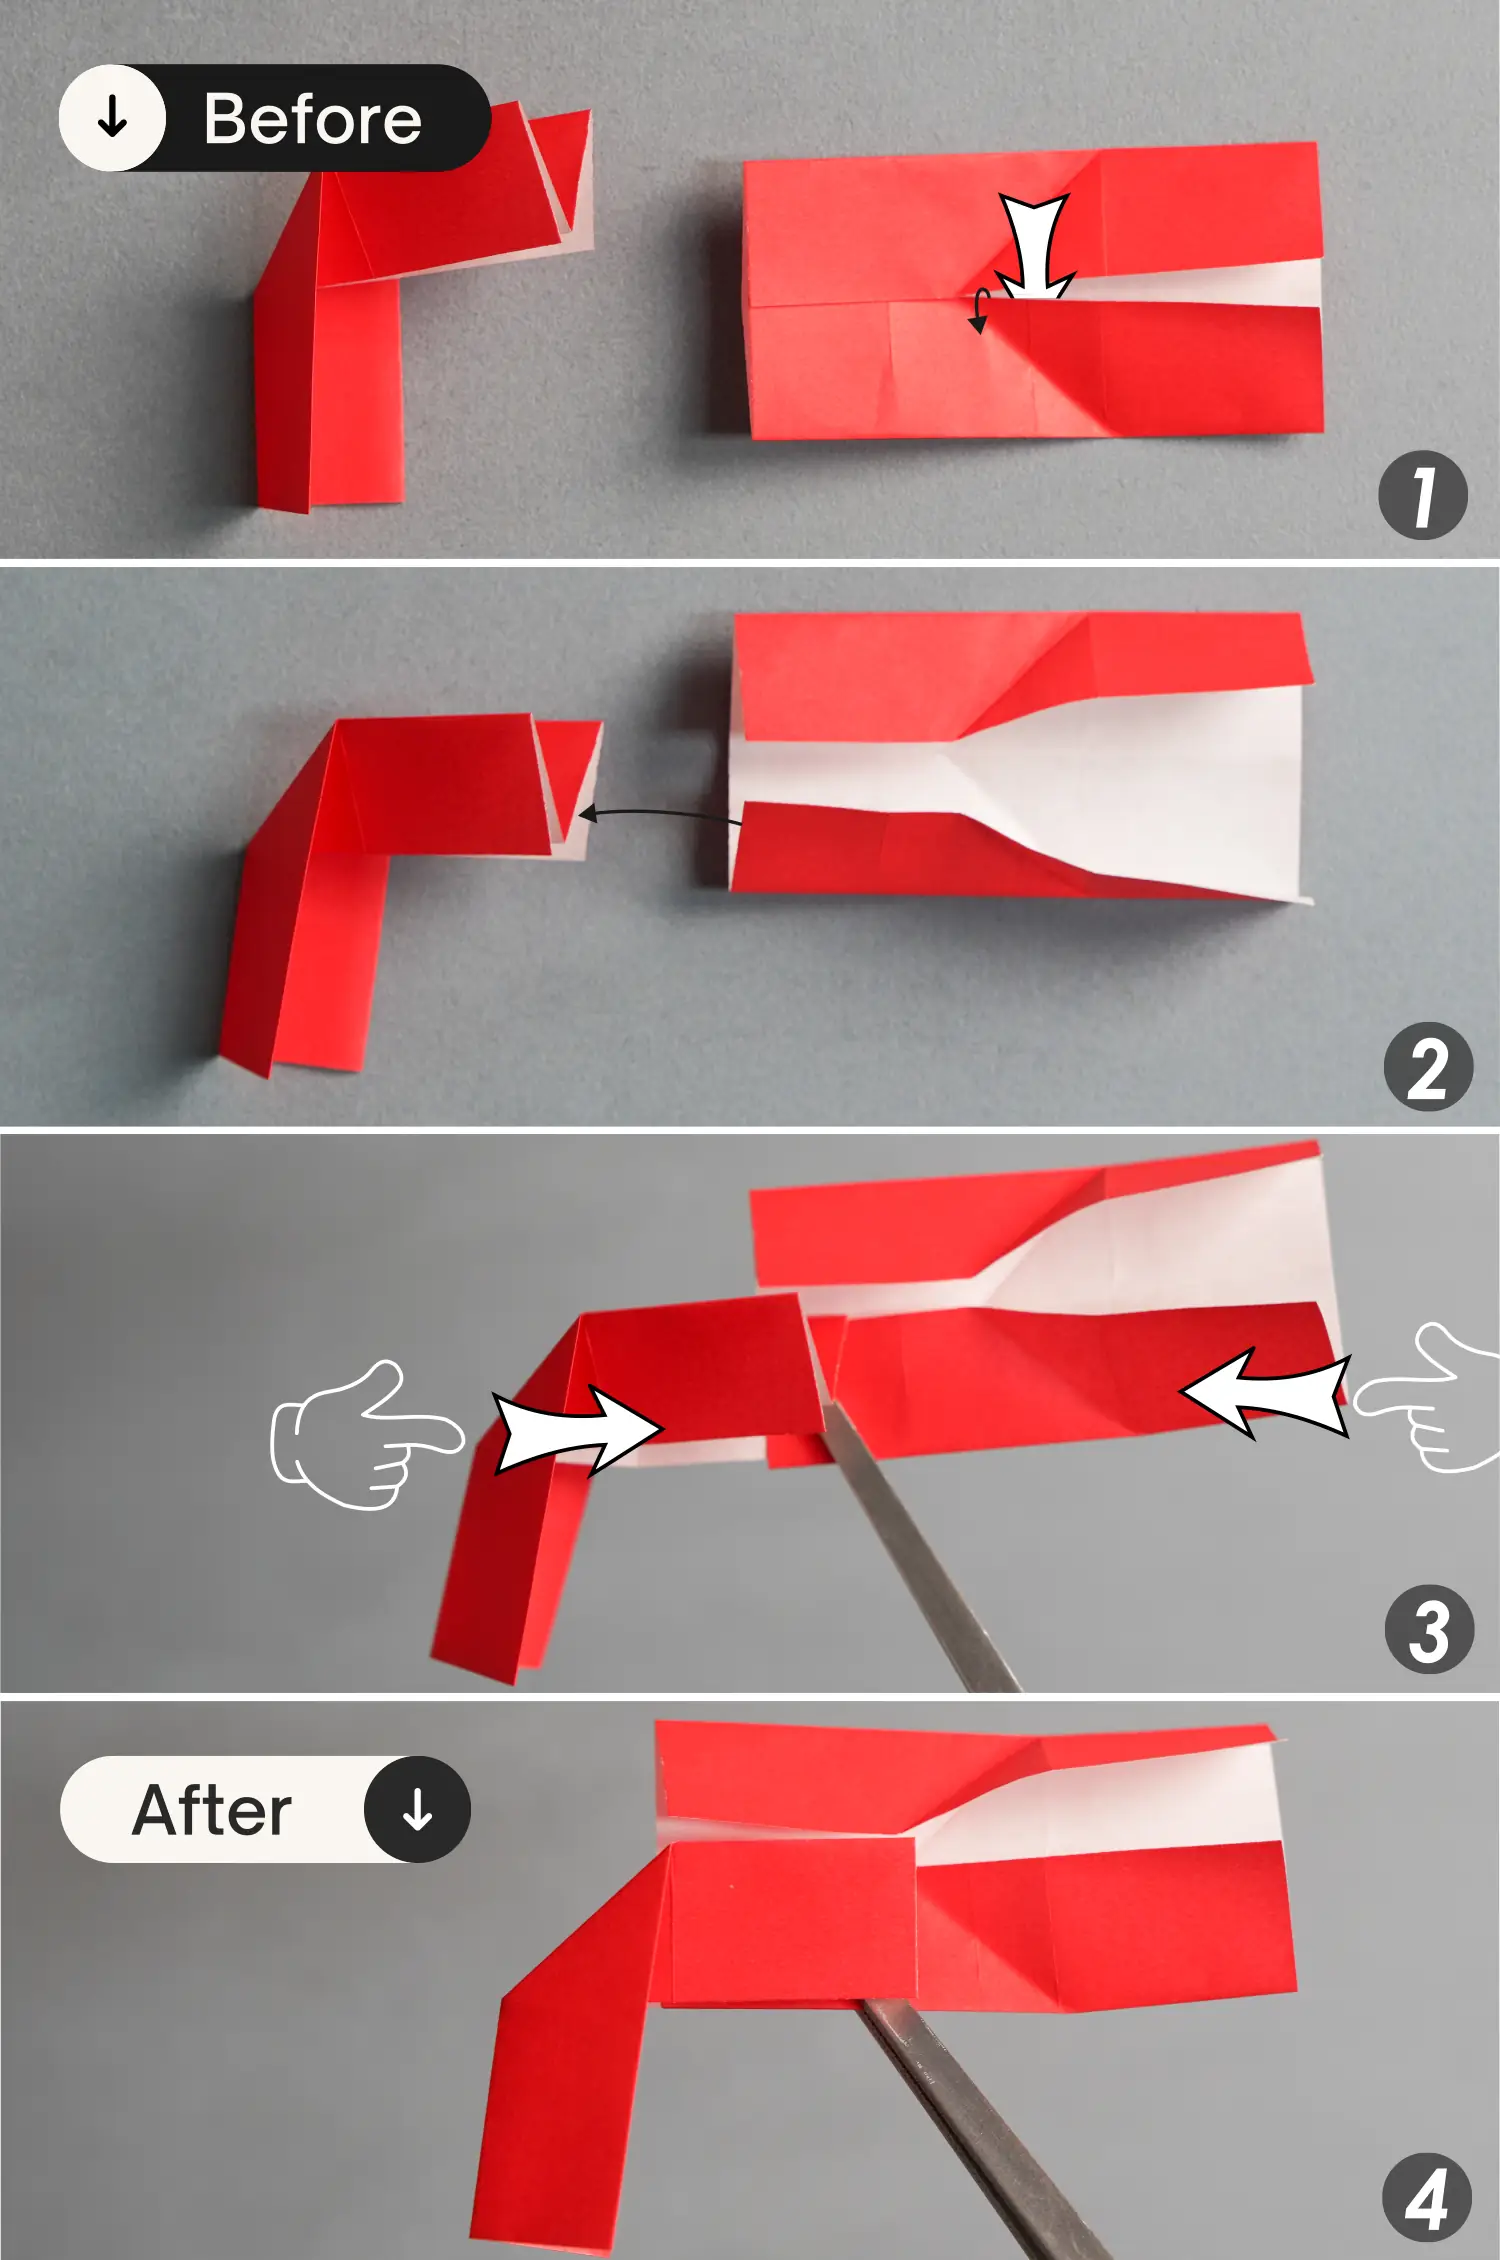
Step 11
Take out two units, rotate the right one 90 degrees clockwise, and then expand it.

Step 12
To assemble the two units, lift the bottom layer of the right unit and tuck it between the layers of the left unit.
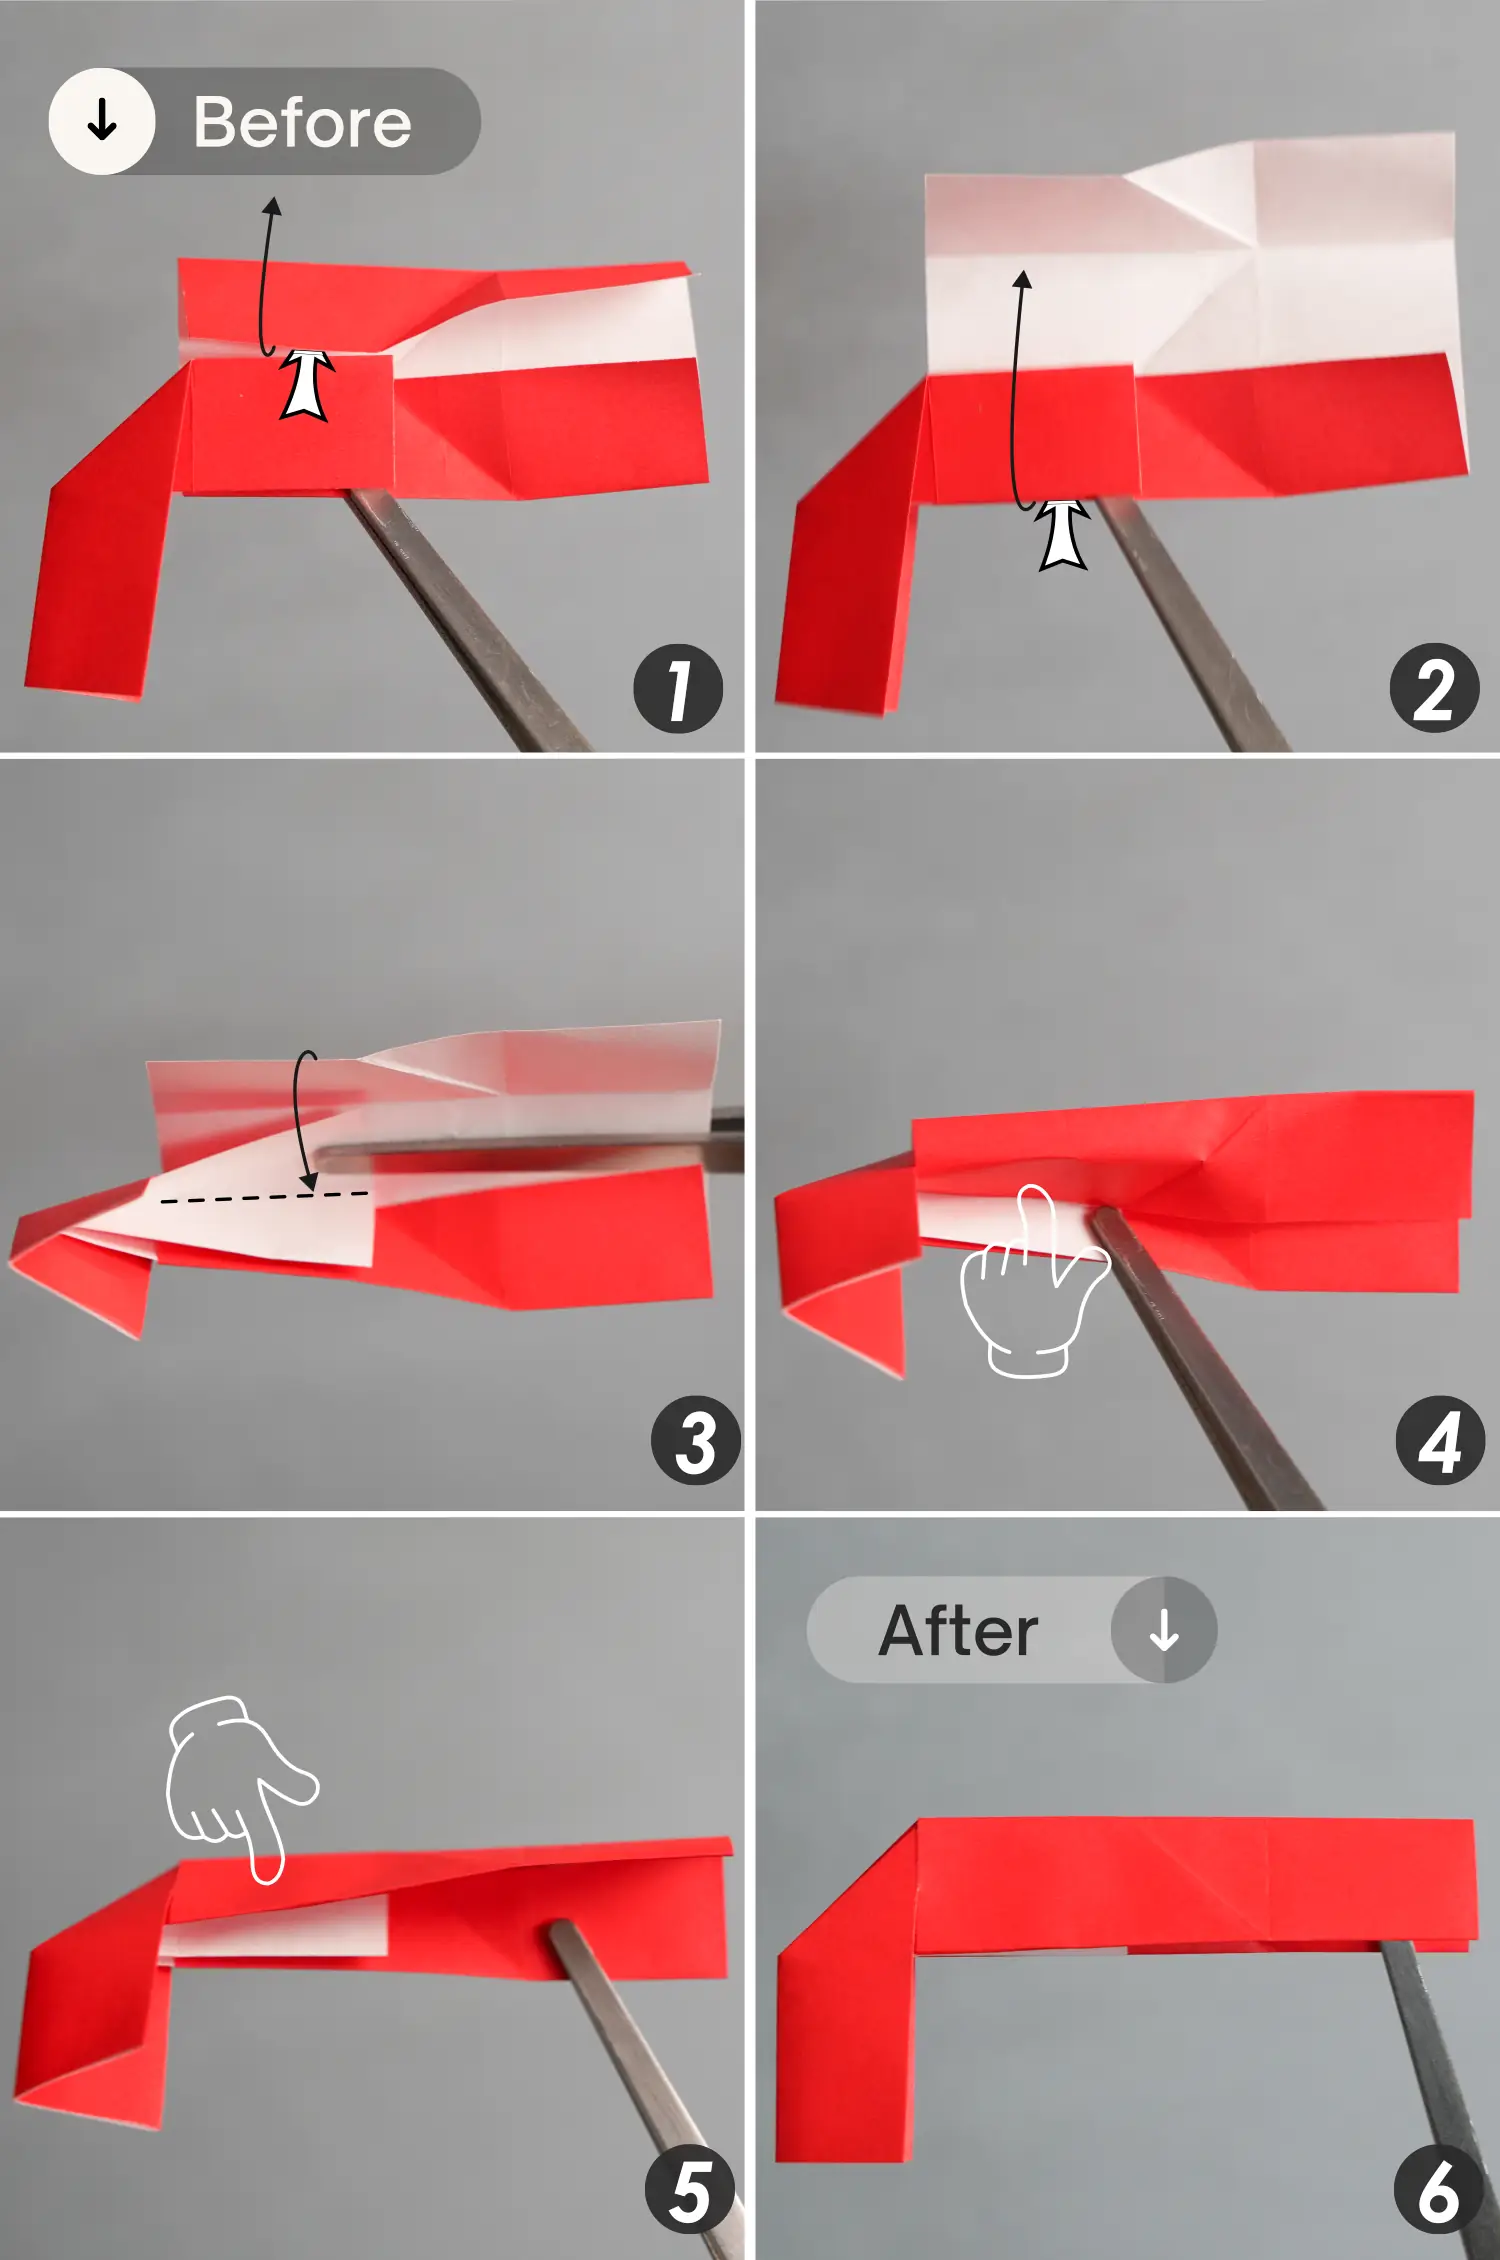
Step 13
Lift the top layer on the right unit and the left unit’s top layer, then press down the top layer of the right unit, making it wrap the left unit’s top layer.
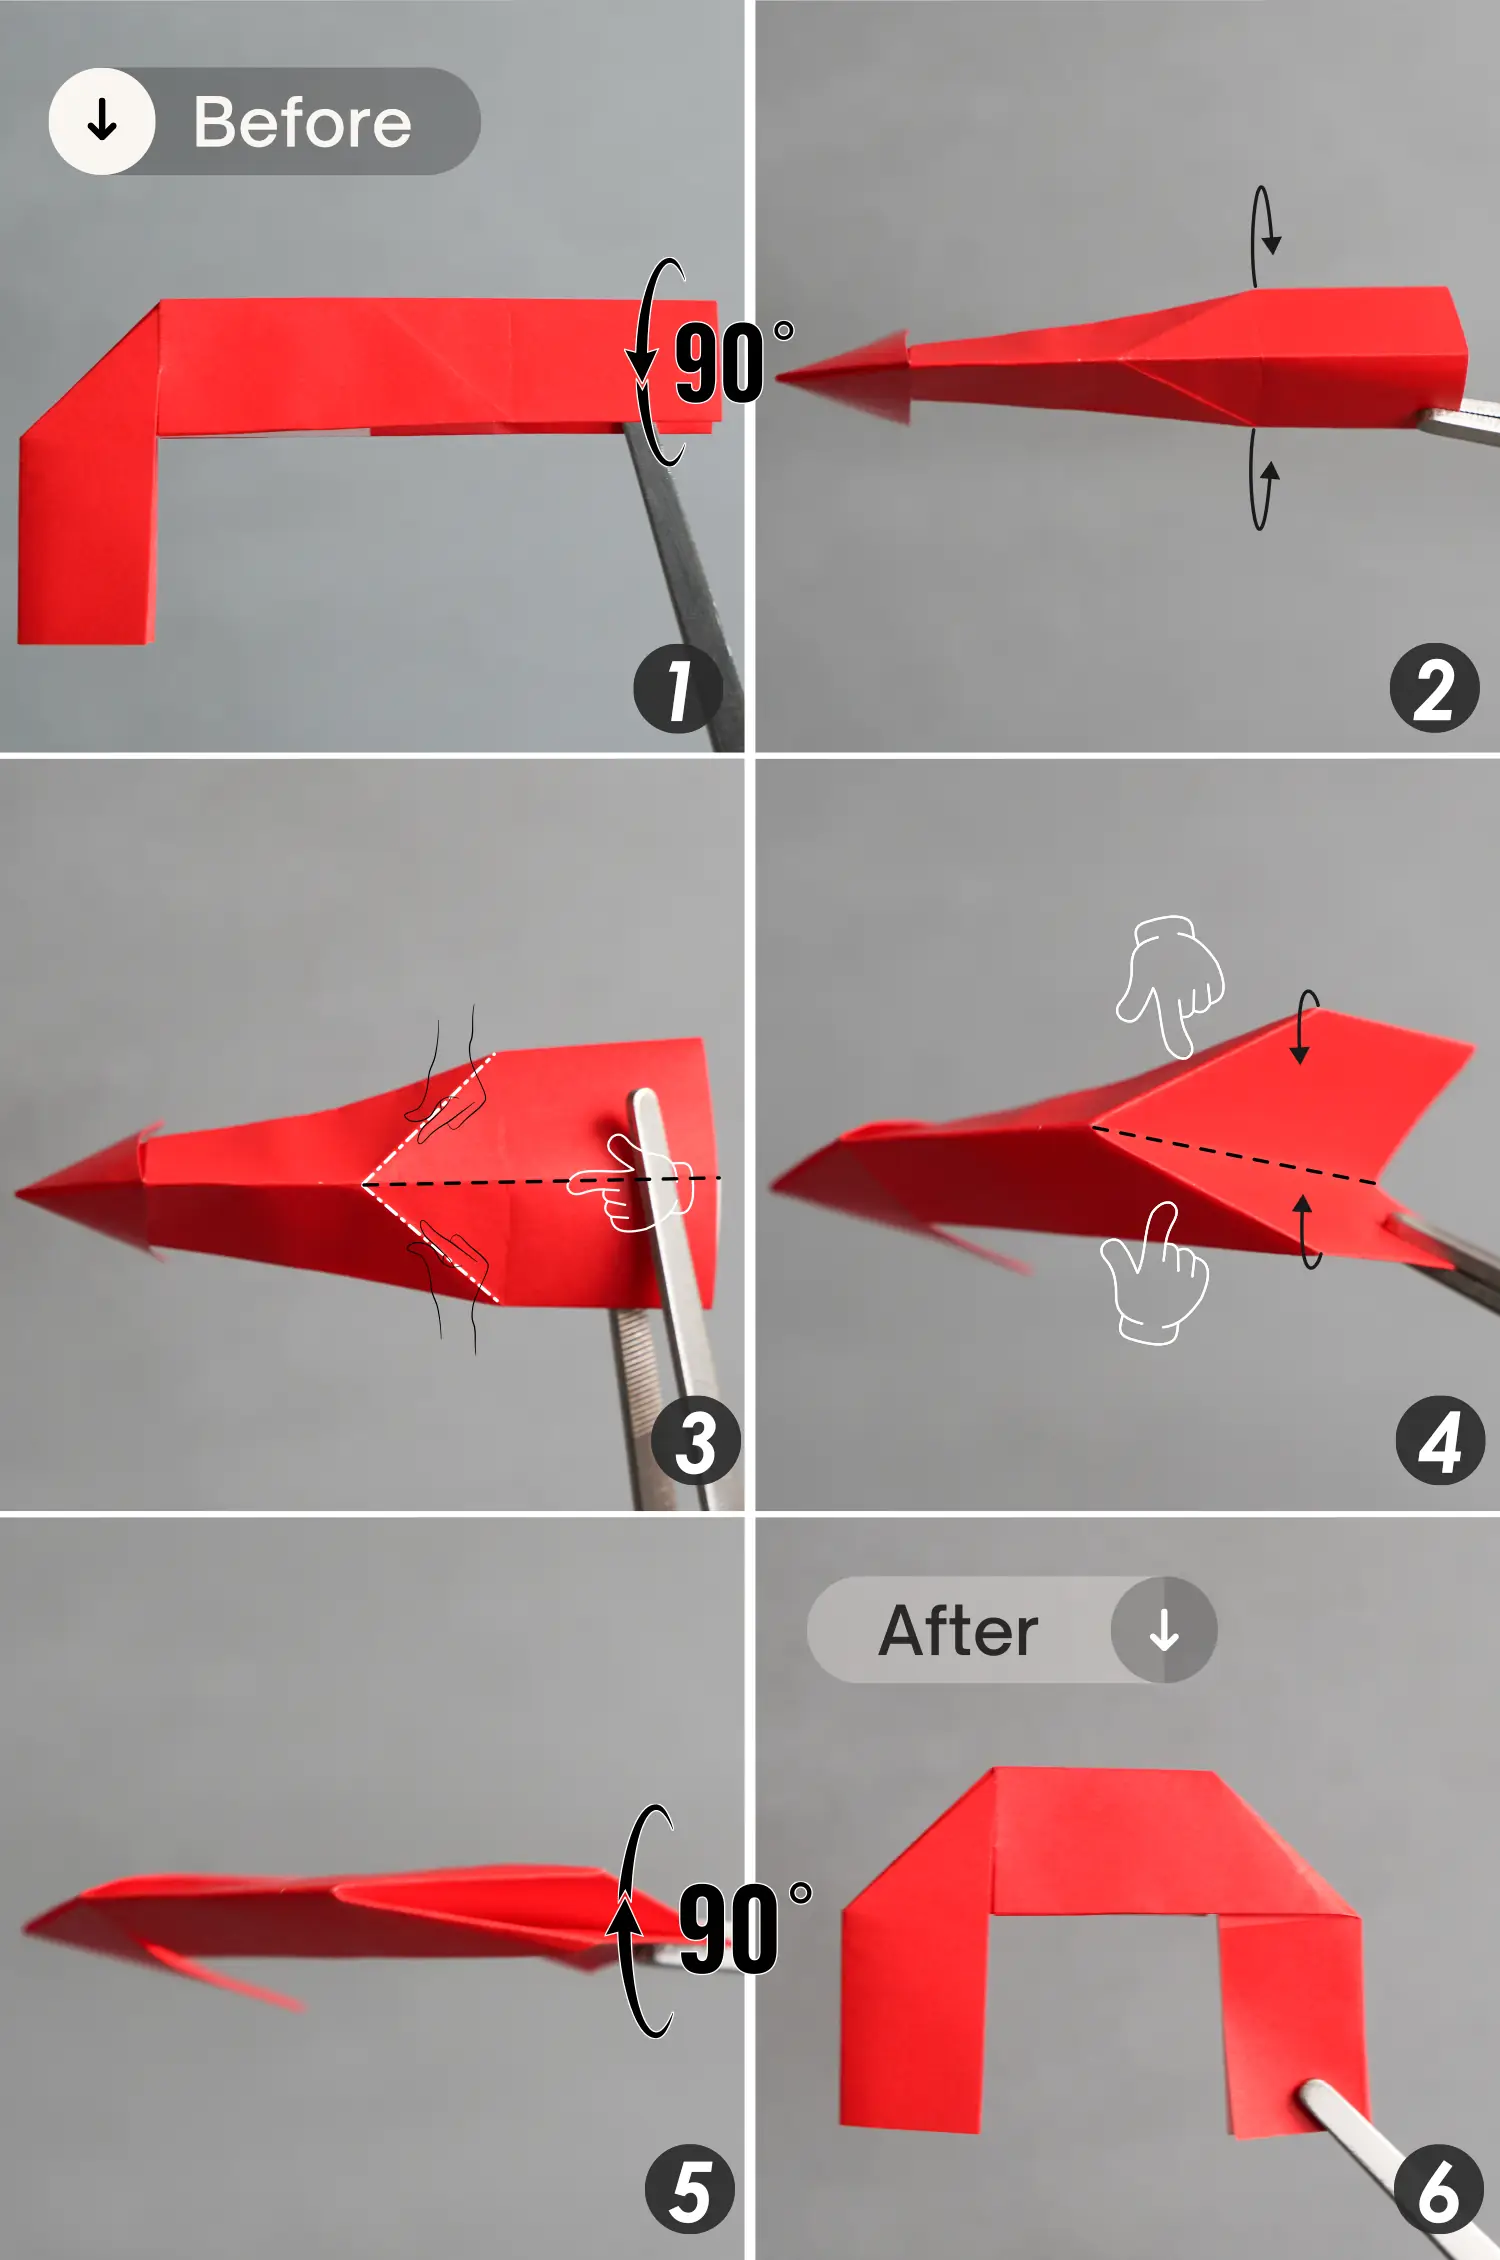
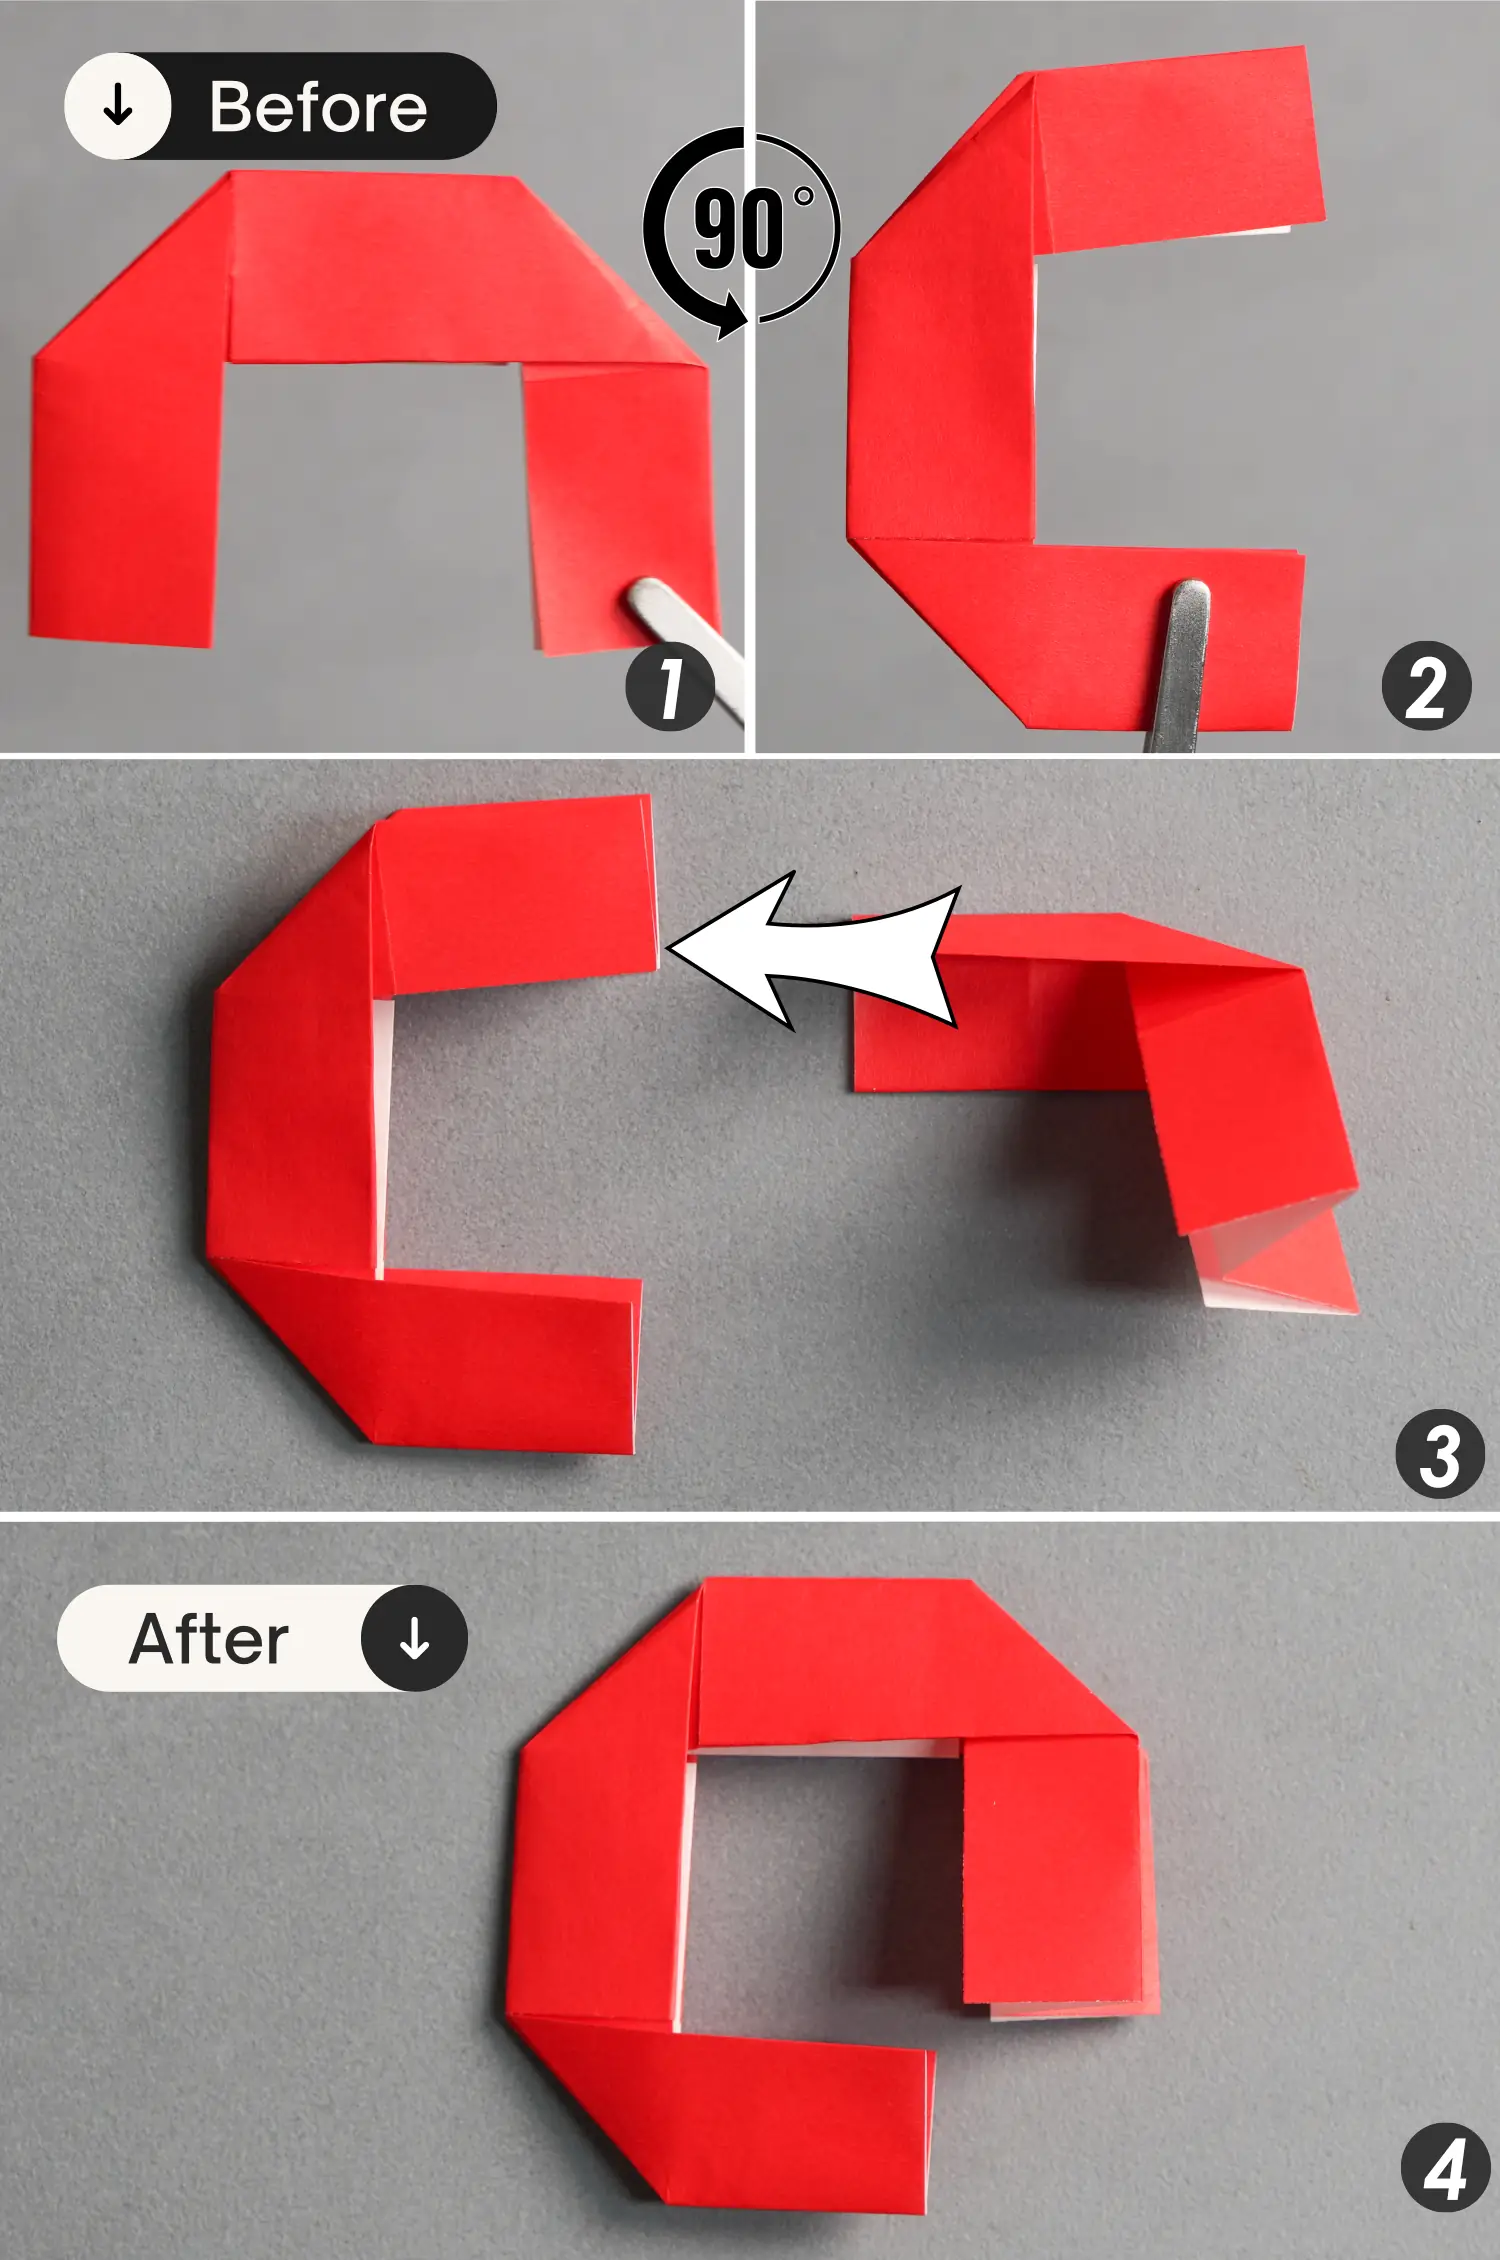
Step 14
Rotate the paper 90 degrees from front to back, and open the bottom opening. Mountain fold the two creases indicated by the white dotted lines, press down the right side, and valley fold the crease indicated by the black dotted line. Finally, close this opening and rotate the paper 90 degrees from back to front.
Step 15
Rotate the assembled unit 90 degrees counterclockwise, then assemble another unit.
Step 16
Assemble the remaining units in turn.
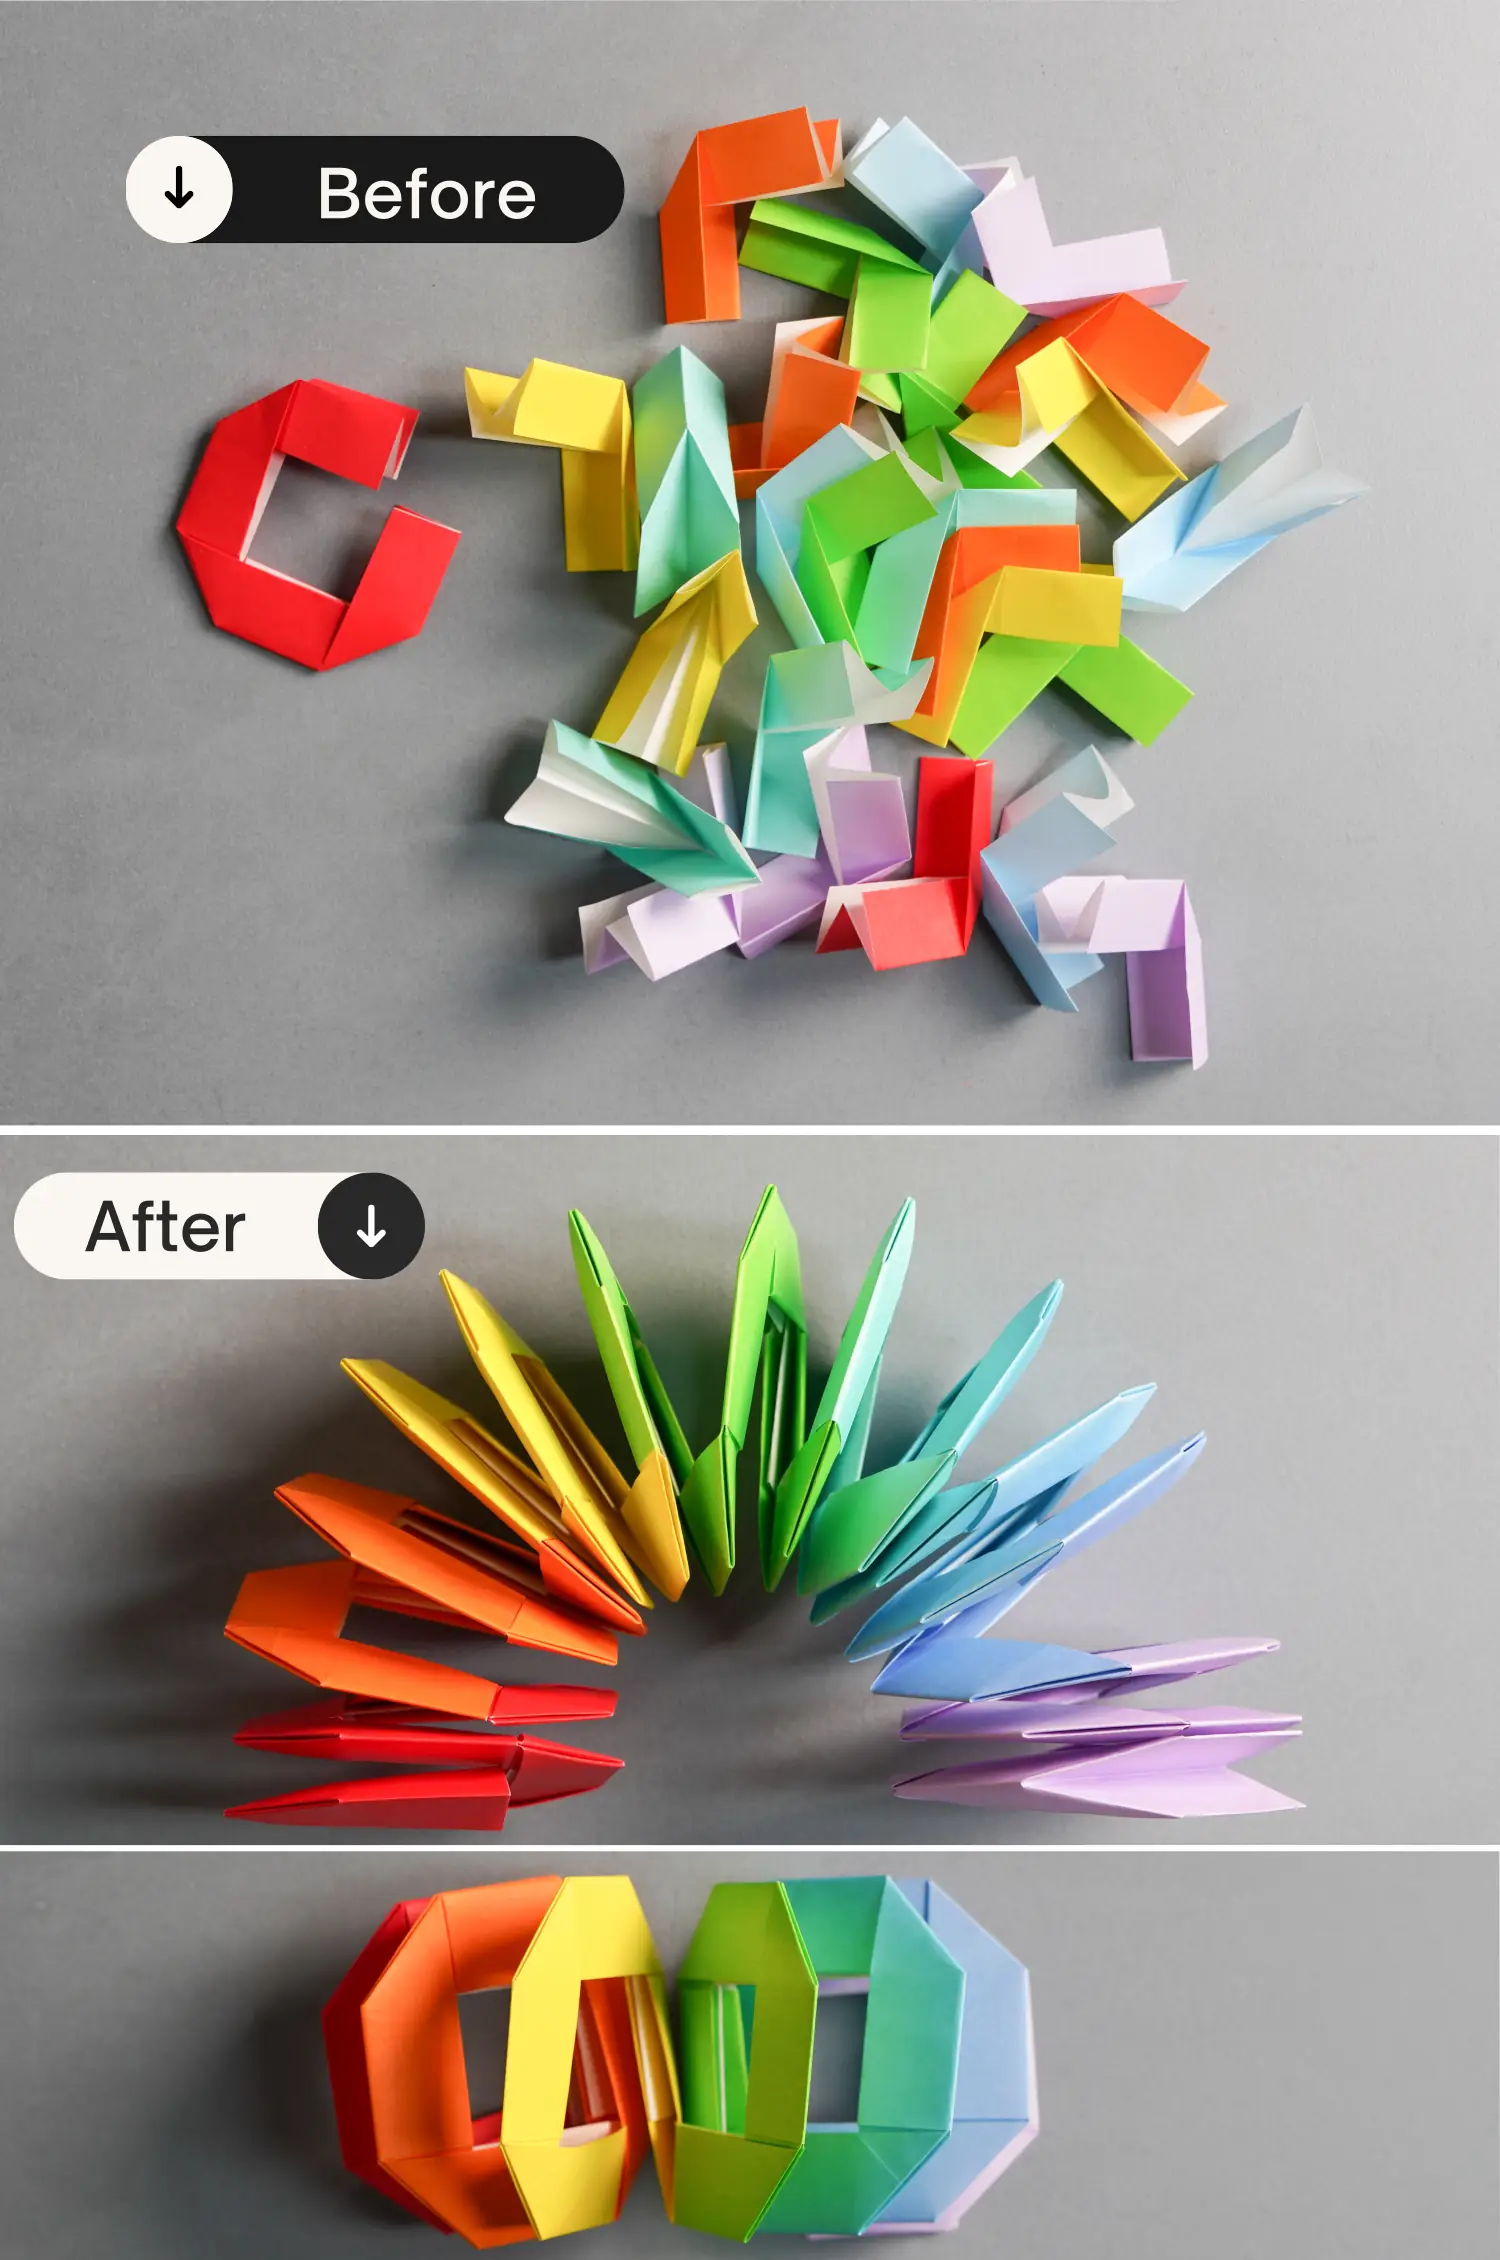
Step 17
This is the final shape of an origami rainbow chain. The finished product shown in the picture below uses 56 sheets of paper, eight sheets of each color.
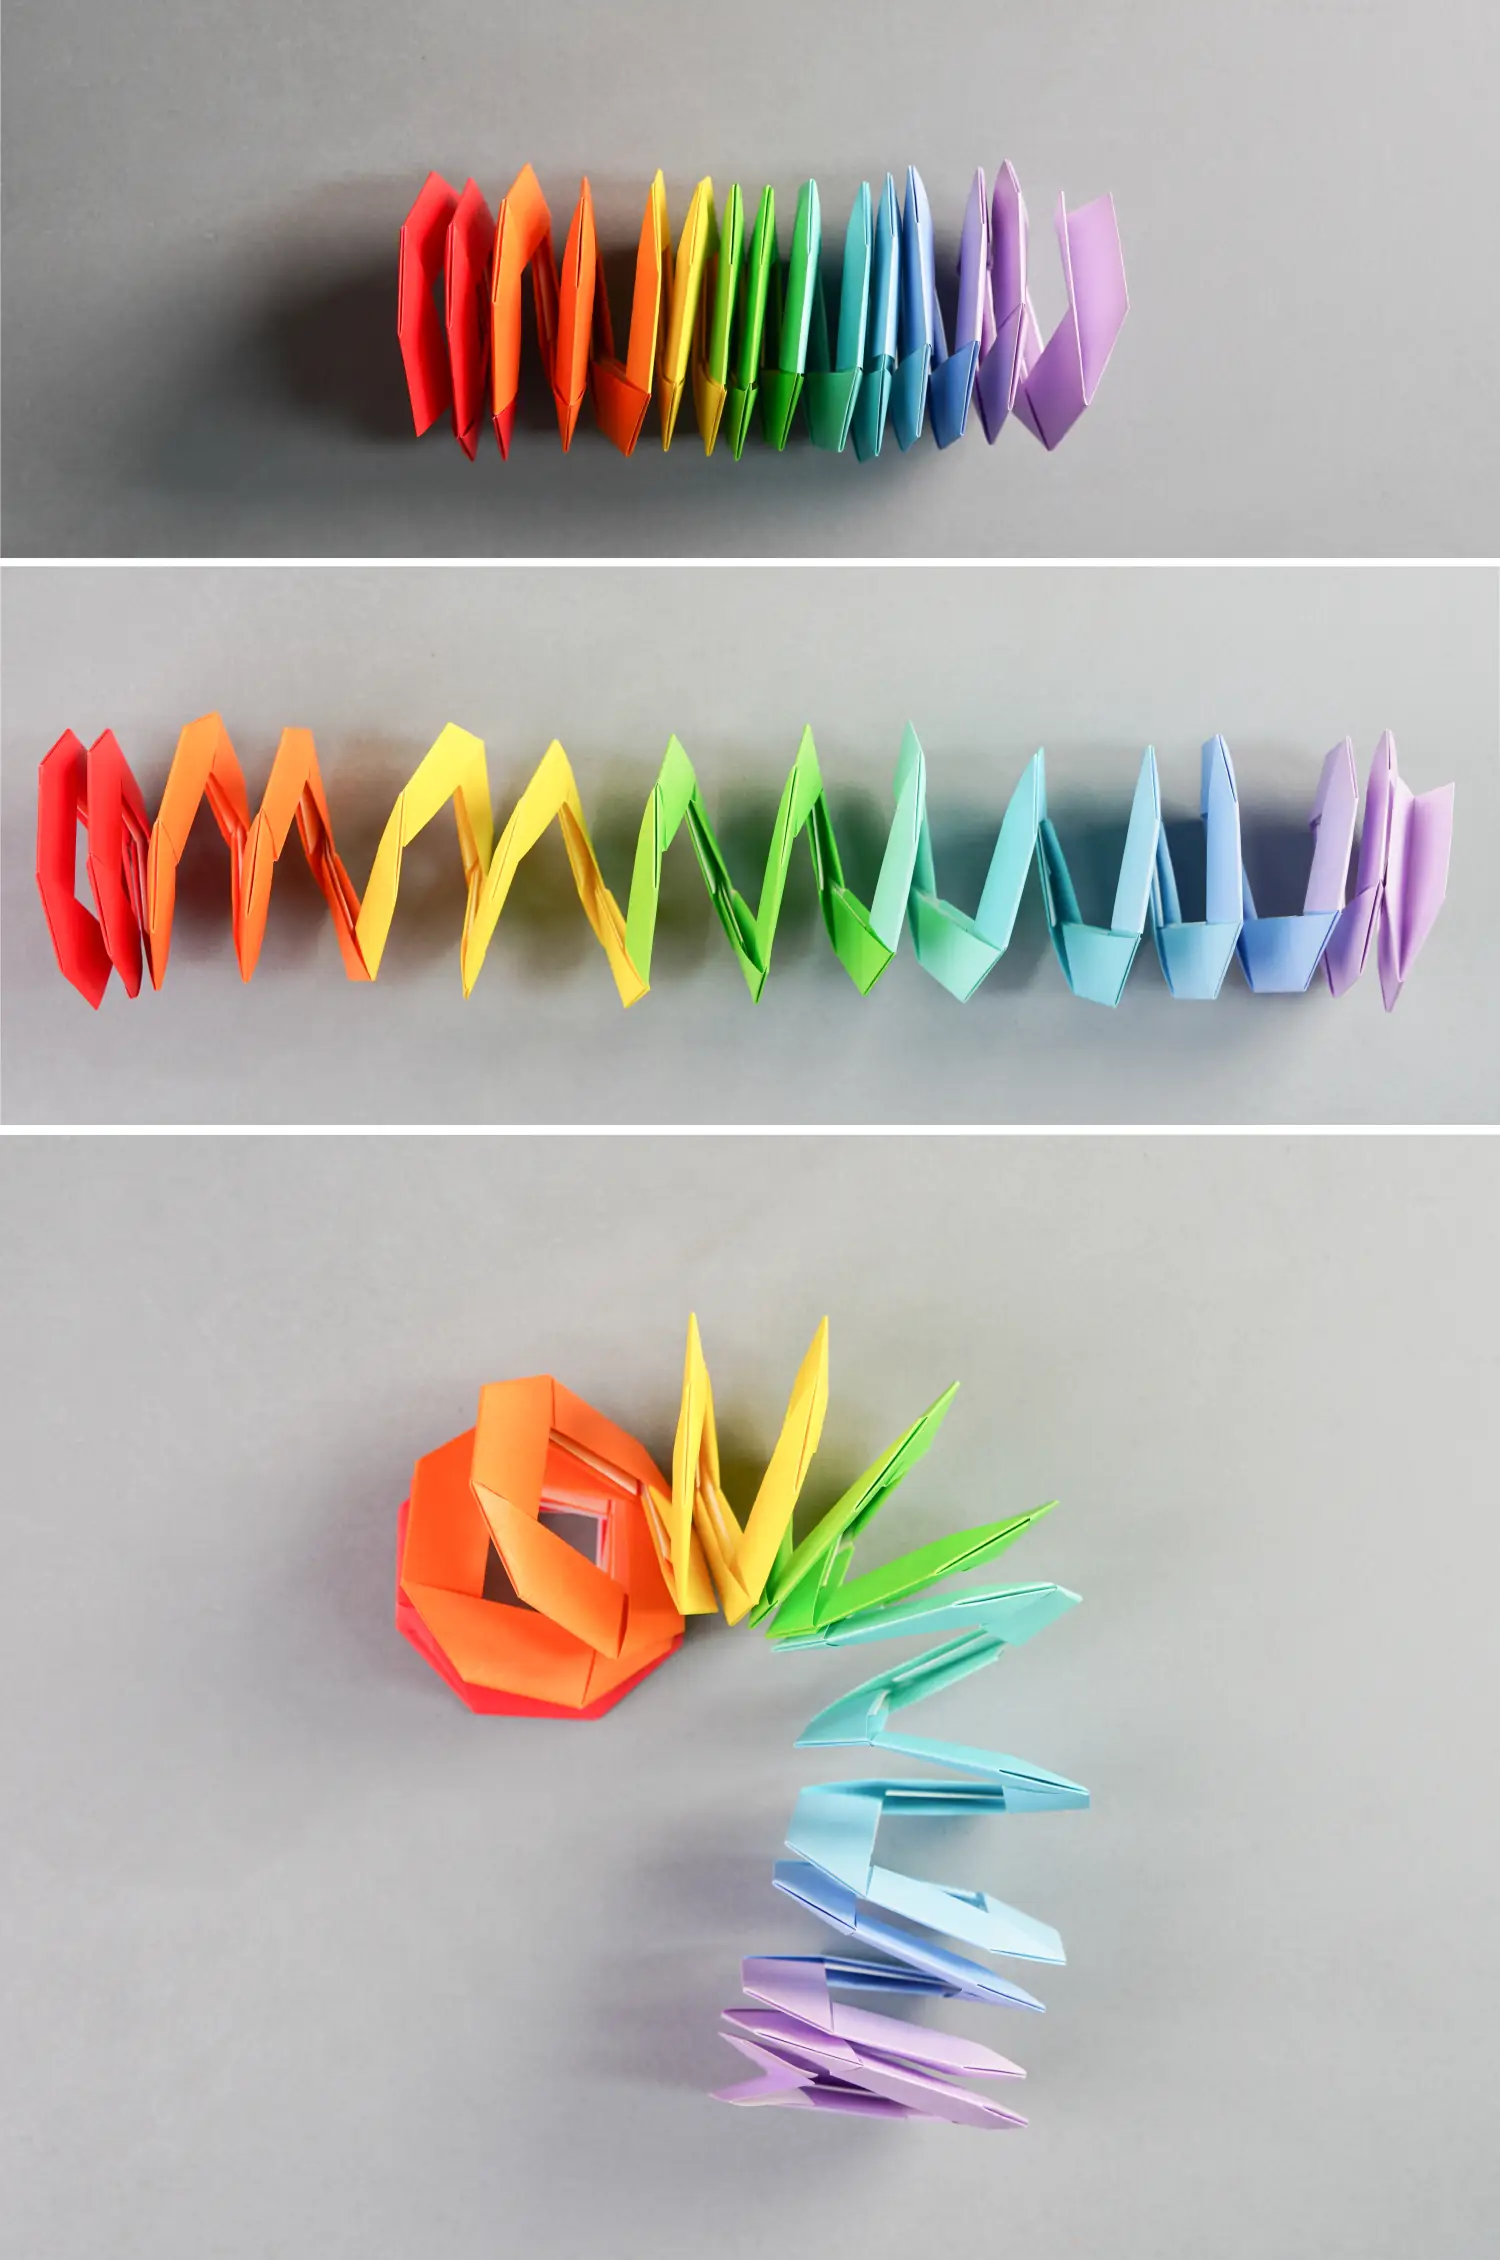

Connecting the two ends of this chain will make it look like a bracelet. We also provide a tutorial for an adorable origami heart bracelet. If you are interested, you can check it out and learn. In addition, the origami spring is also an interesting toy and is much easier to make.

Origami Heart Bracelet

Origami Spring
What’s Next
That’s your origami rainbow chain! Now you can explore our other interesting origami toy ideas. Enjoy folding!