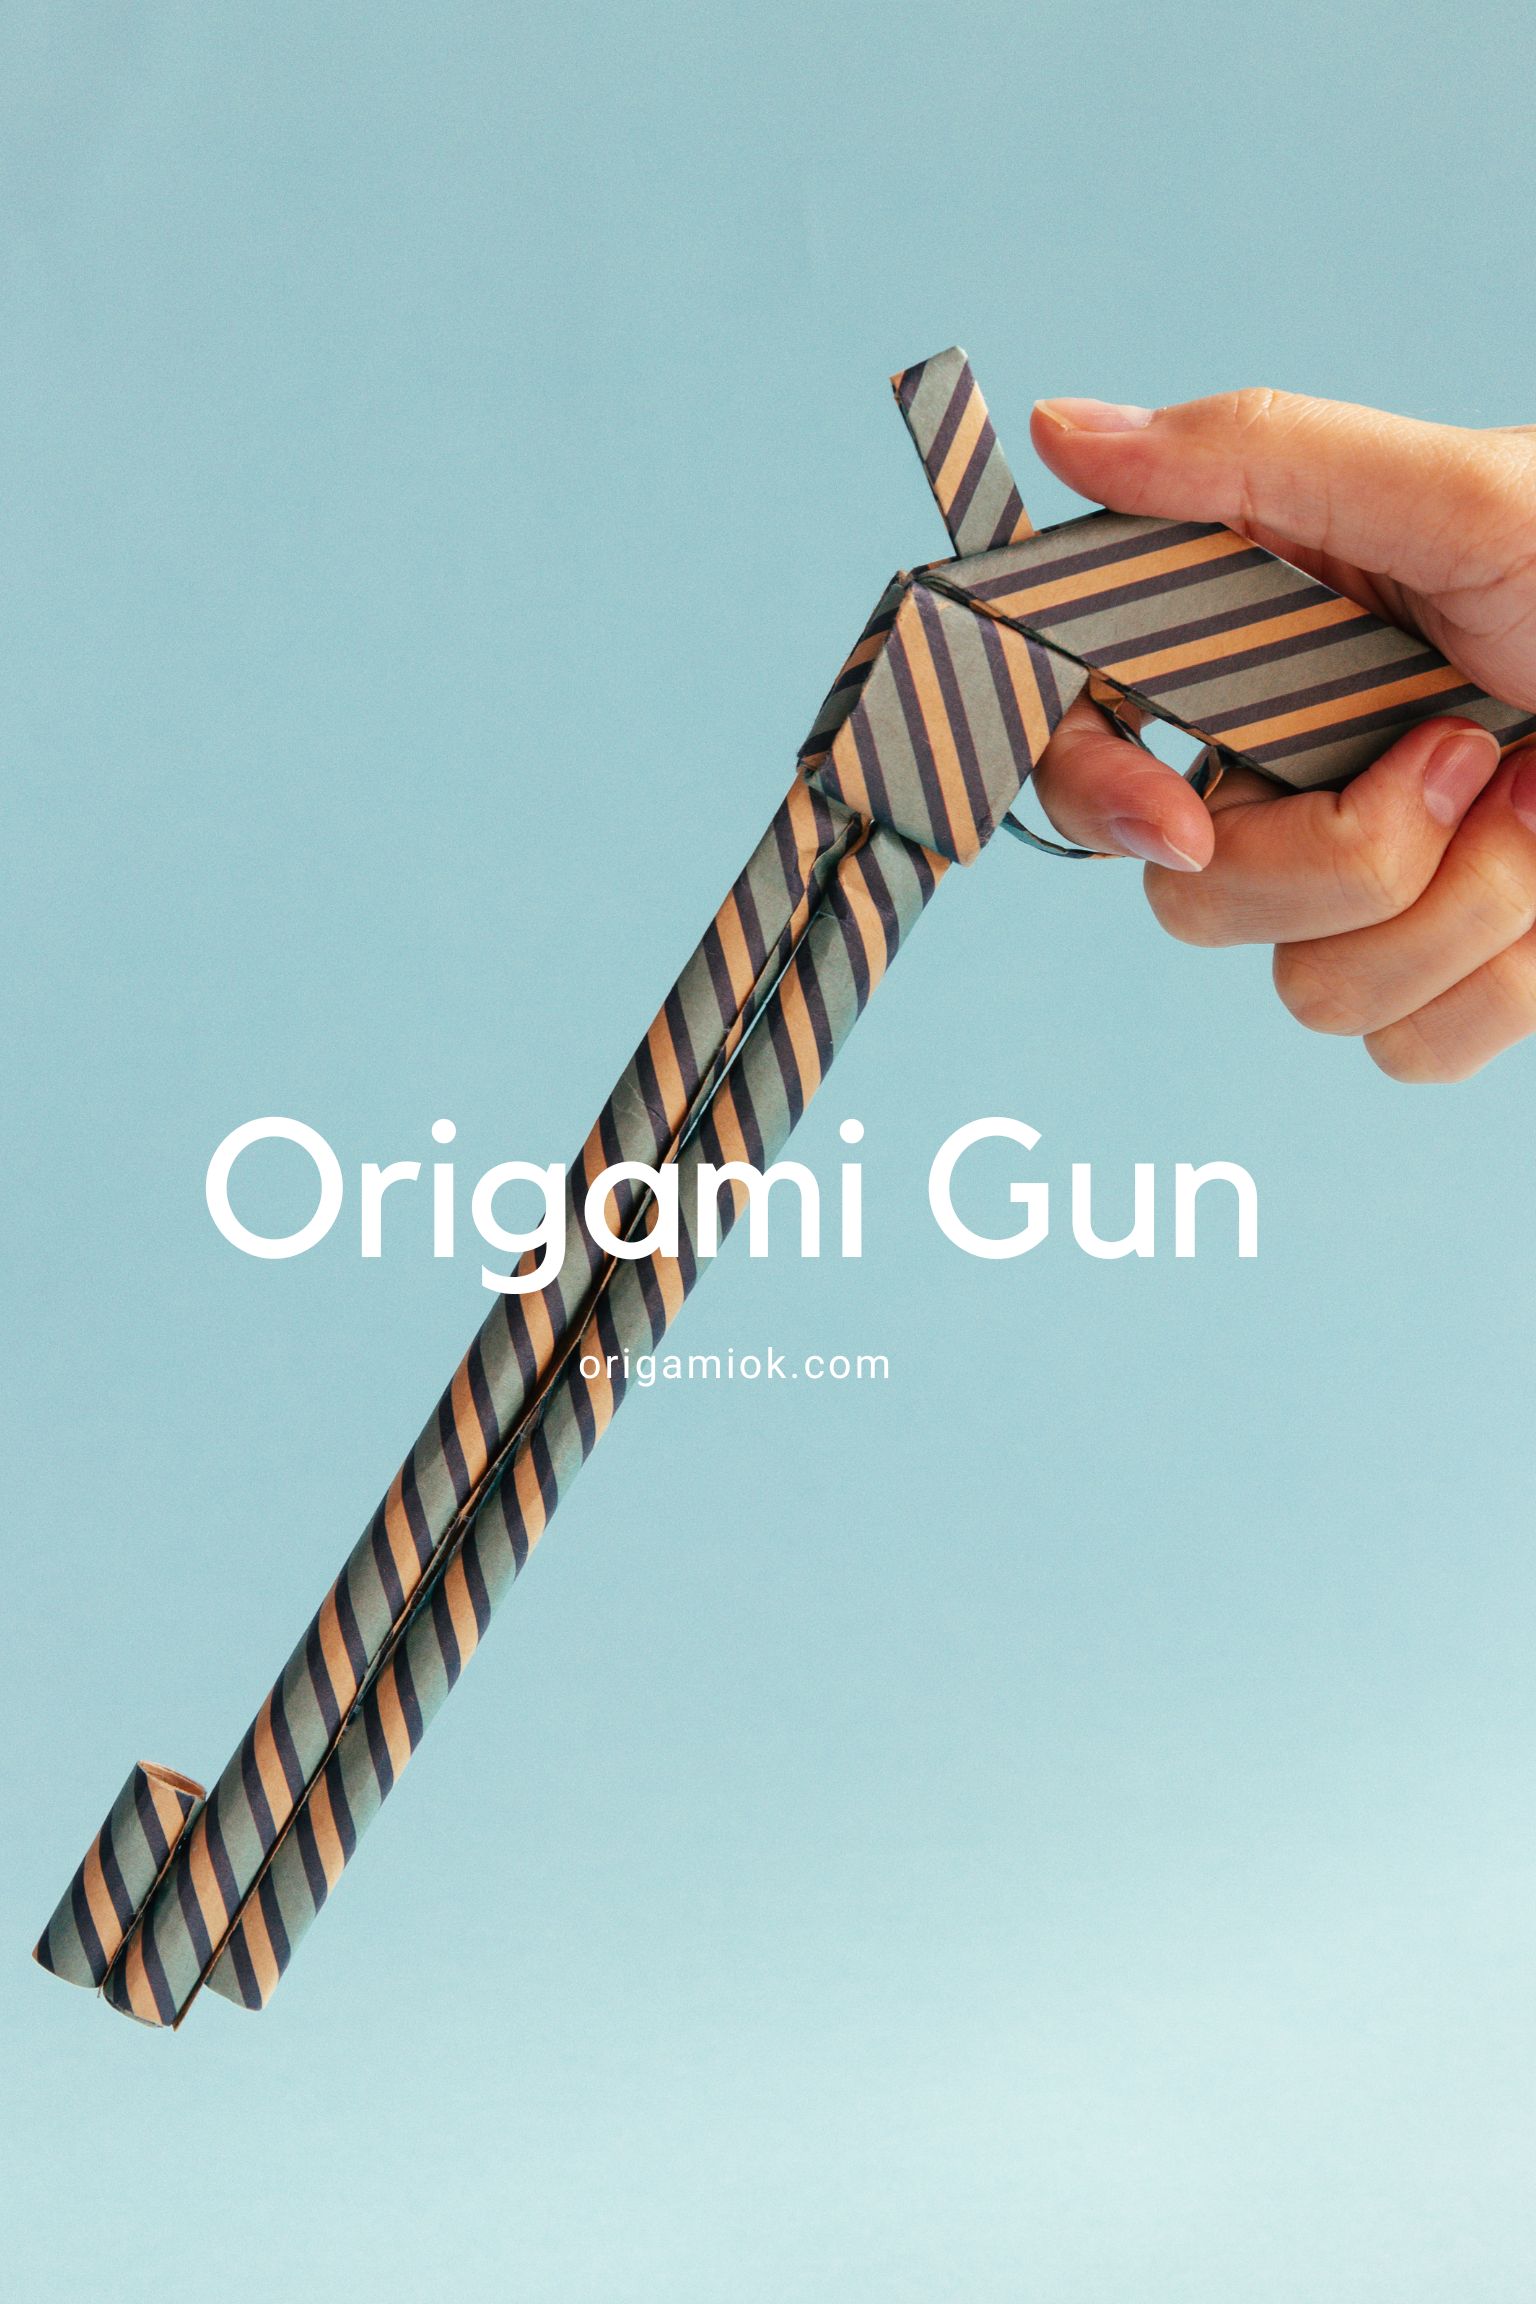
How to Make an Origami Gun
Step 1
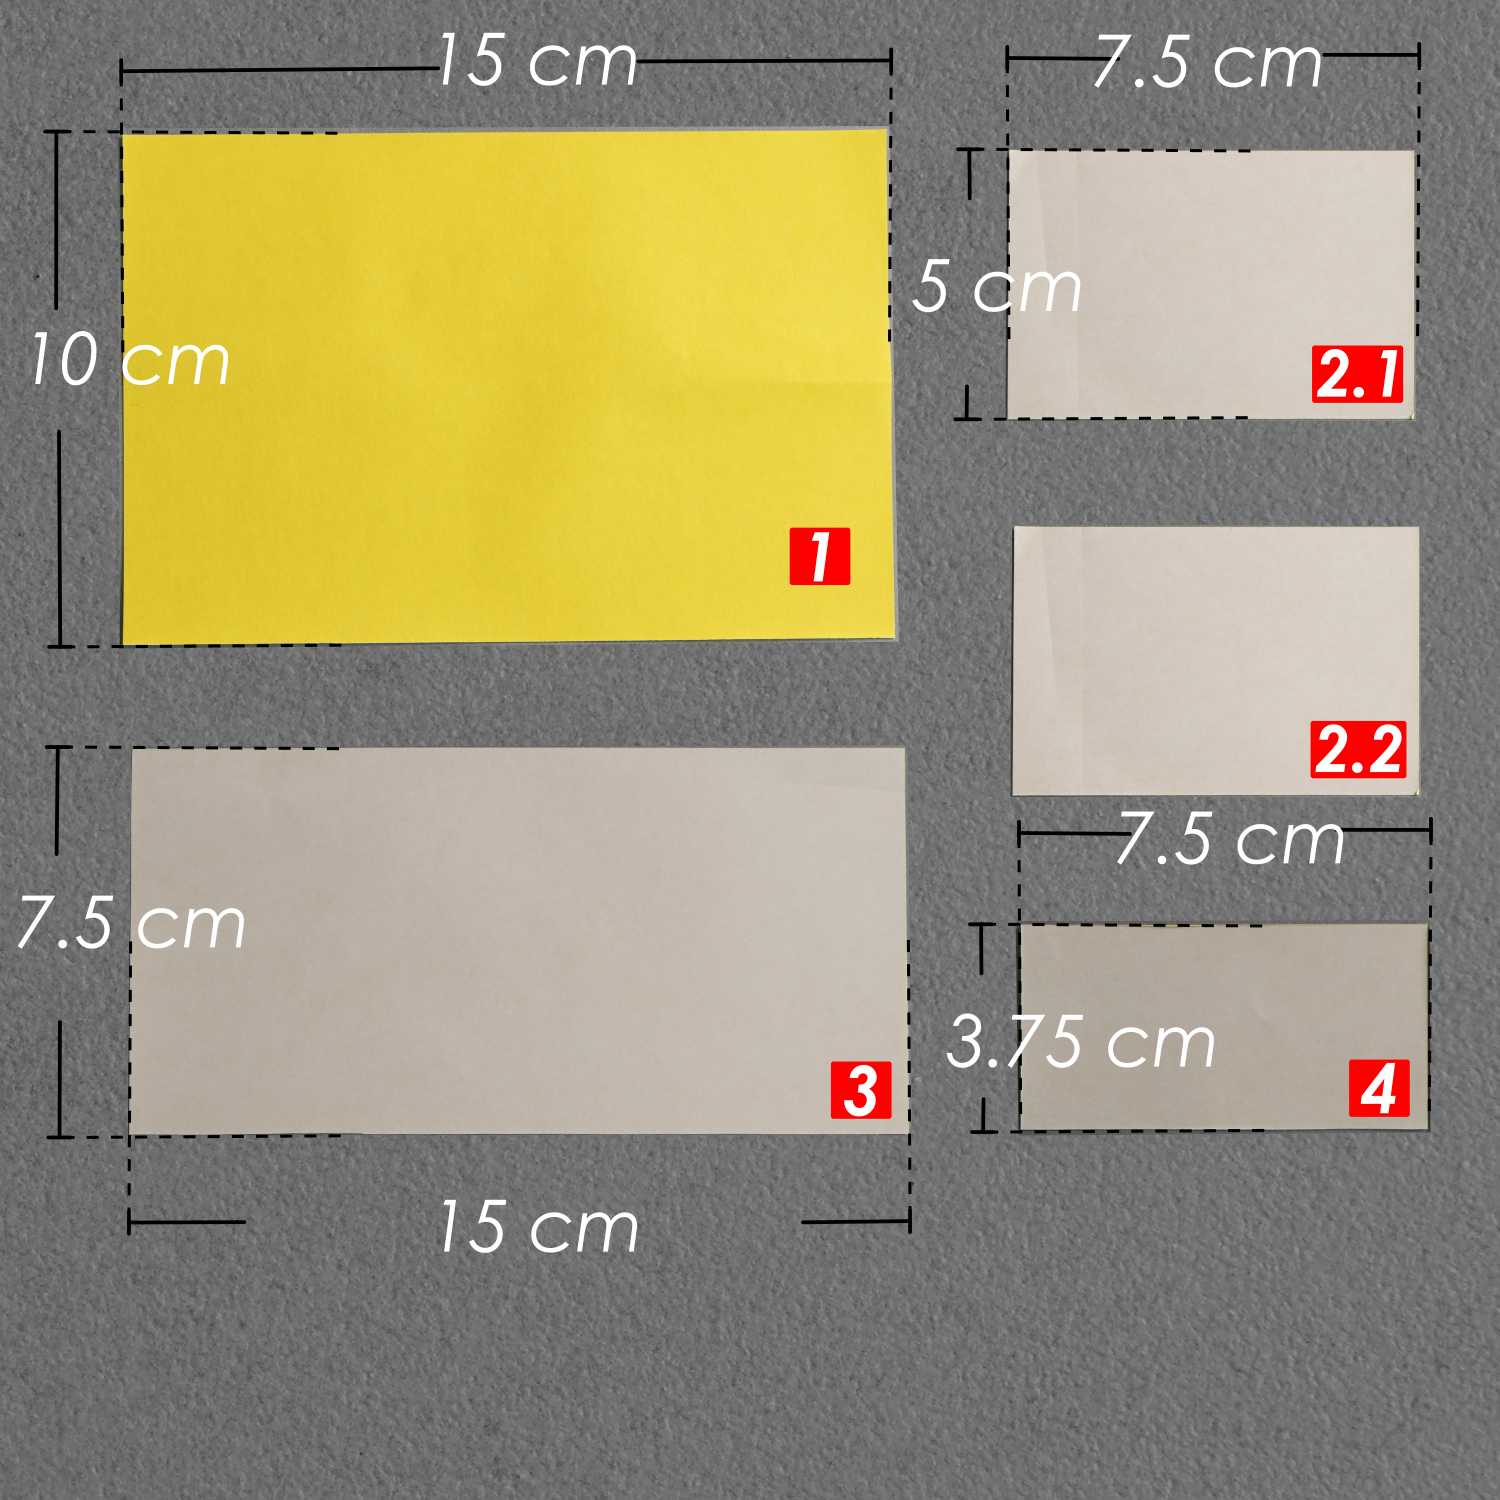
Here, I have listed the sizes of the 5 pieces of paper you need. I used two square pieces of paper to cut out these 5 pieces of paper to make this origami gun. Of course, you can also use any other size of paper to cut out the required size of paper and then use it for production.
If you don’t have a ruler, you can follow the steps that follow to fold and cut.
Step 2
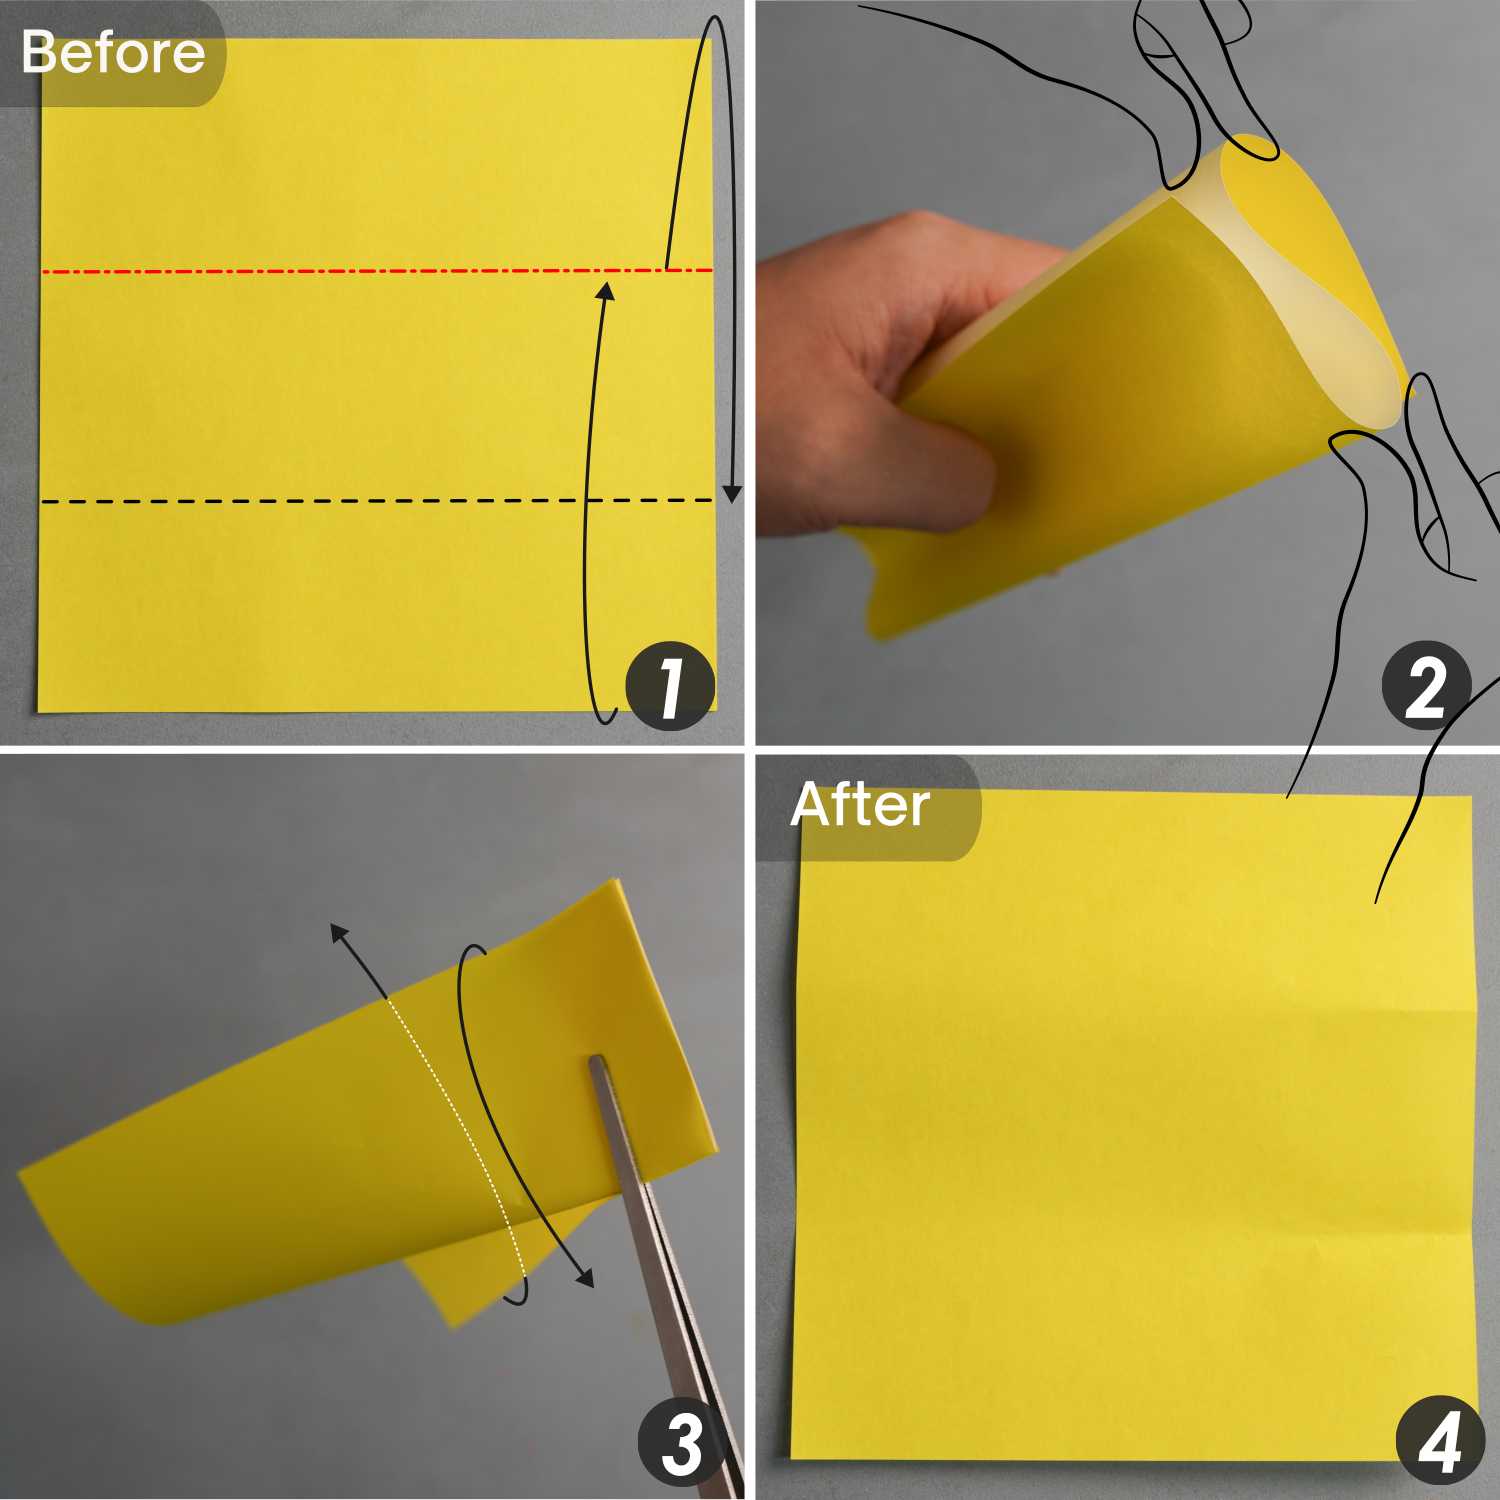
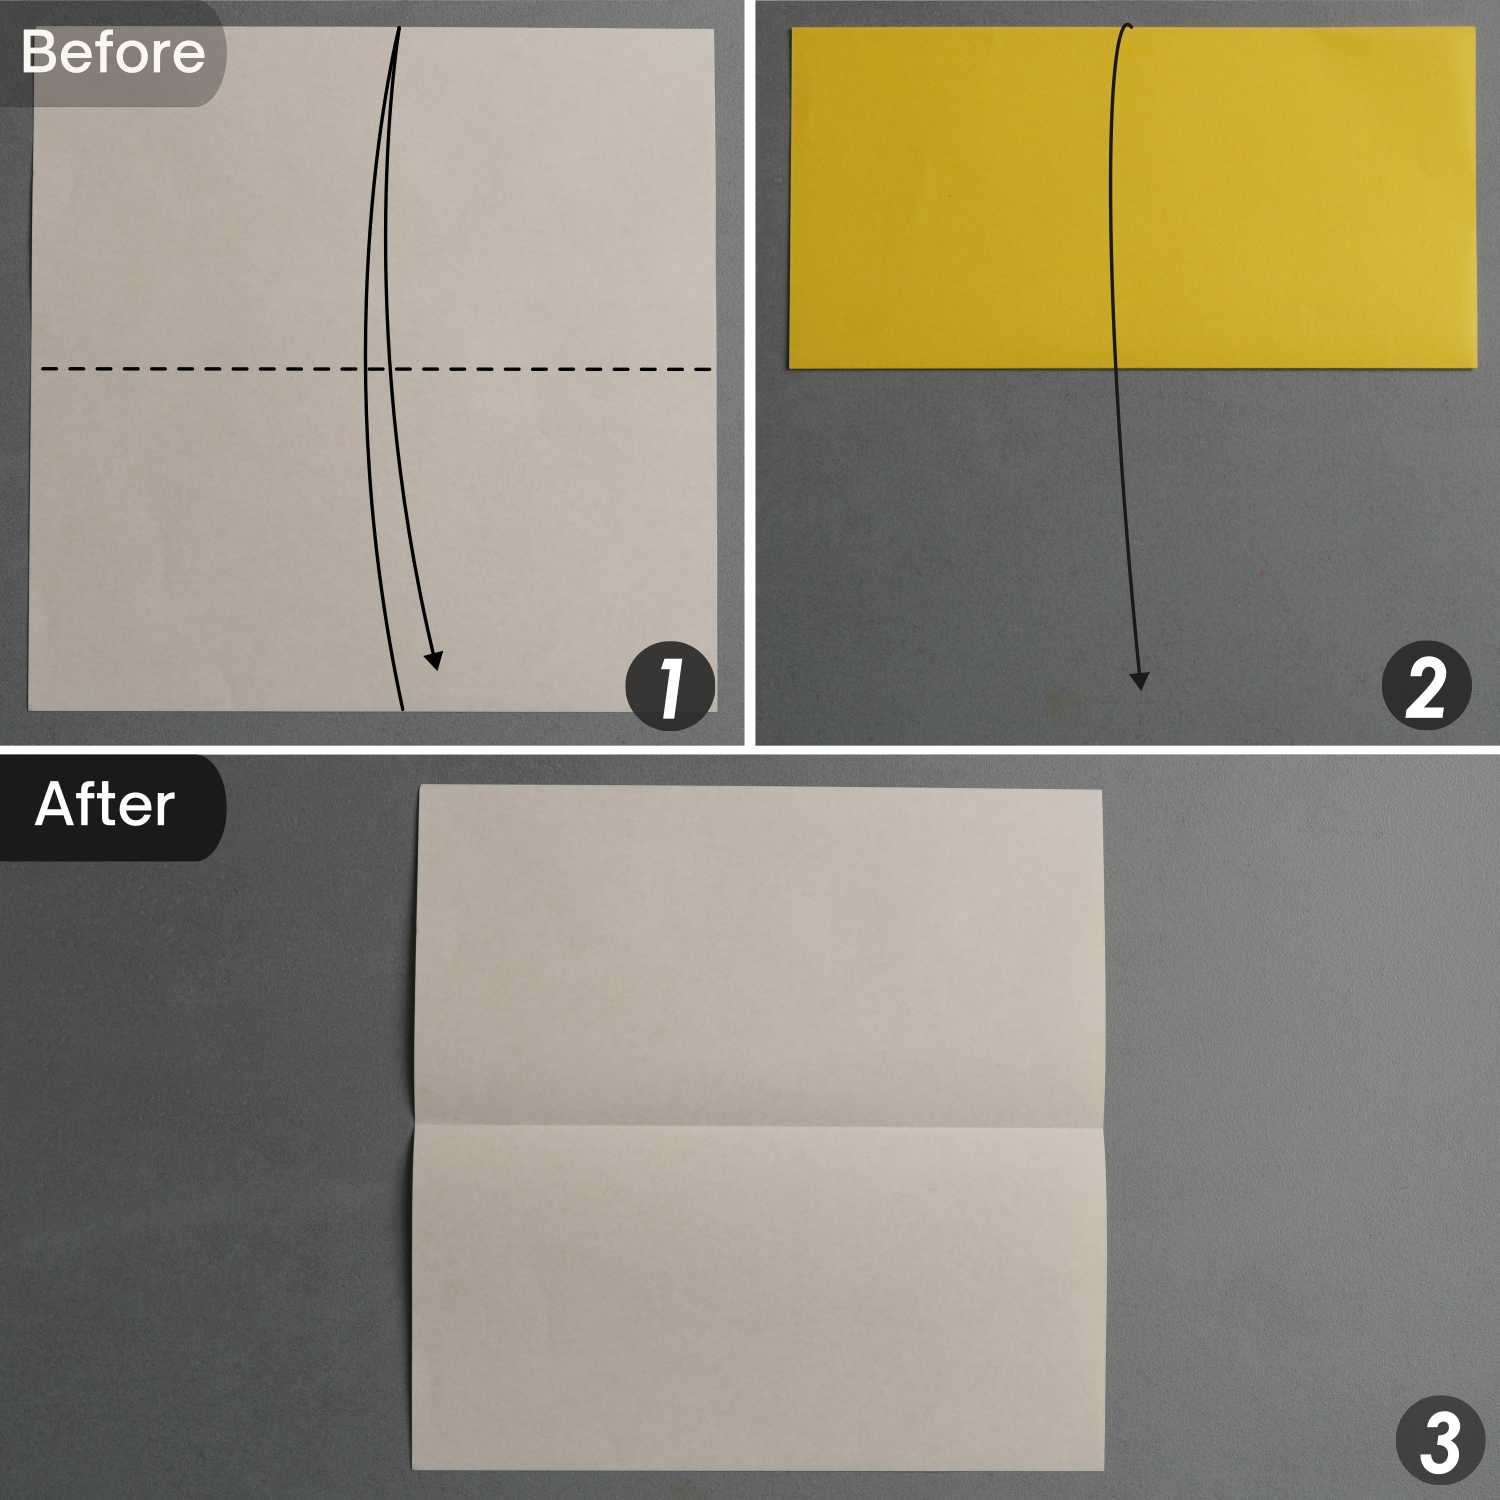
Take out one of the 15cm x 15cm pieces of paper. Hold it in your hand so that it bends in the same way as the second picture shows, like an “S”, then flatten this edge, creating two creases to divide this edge into three equal parts.
Step 3
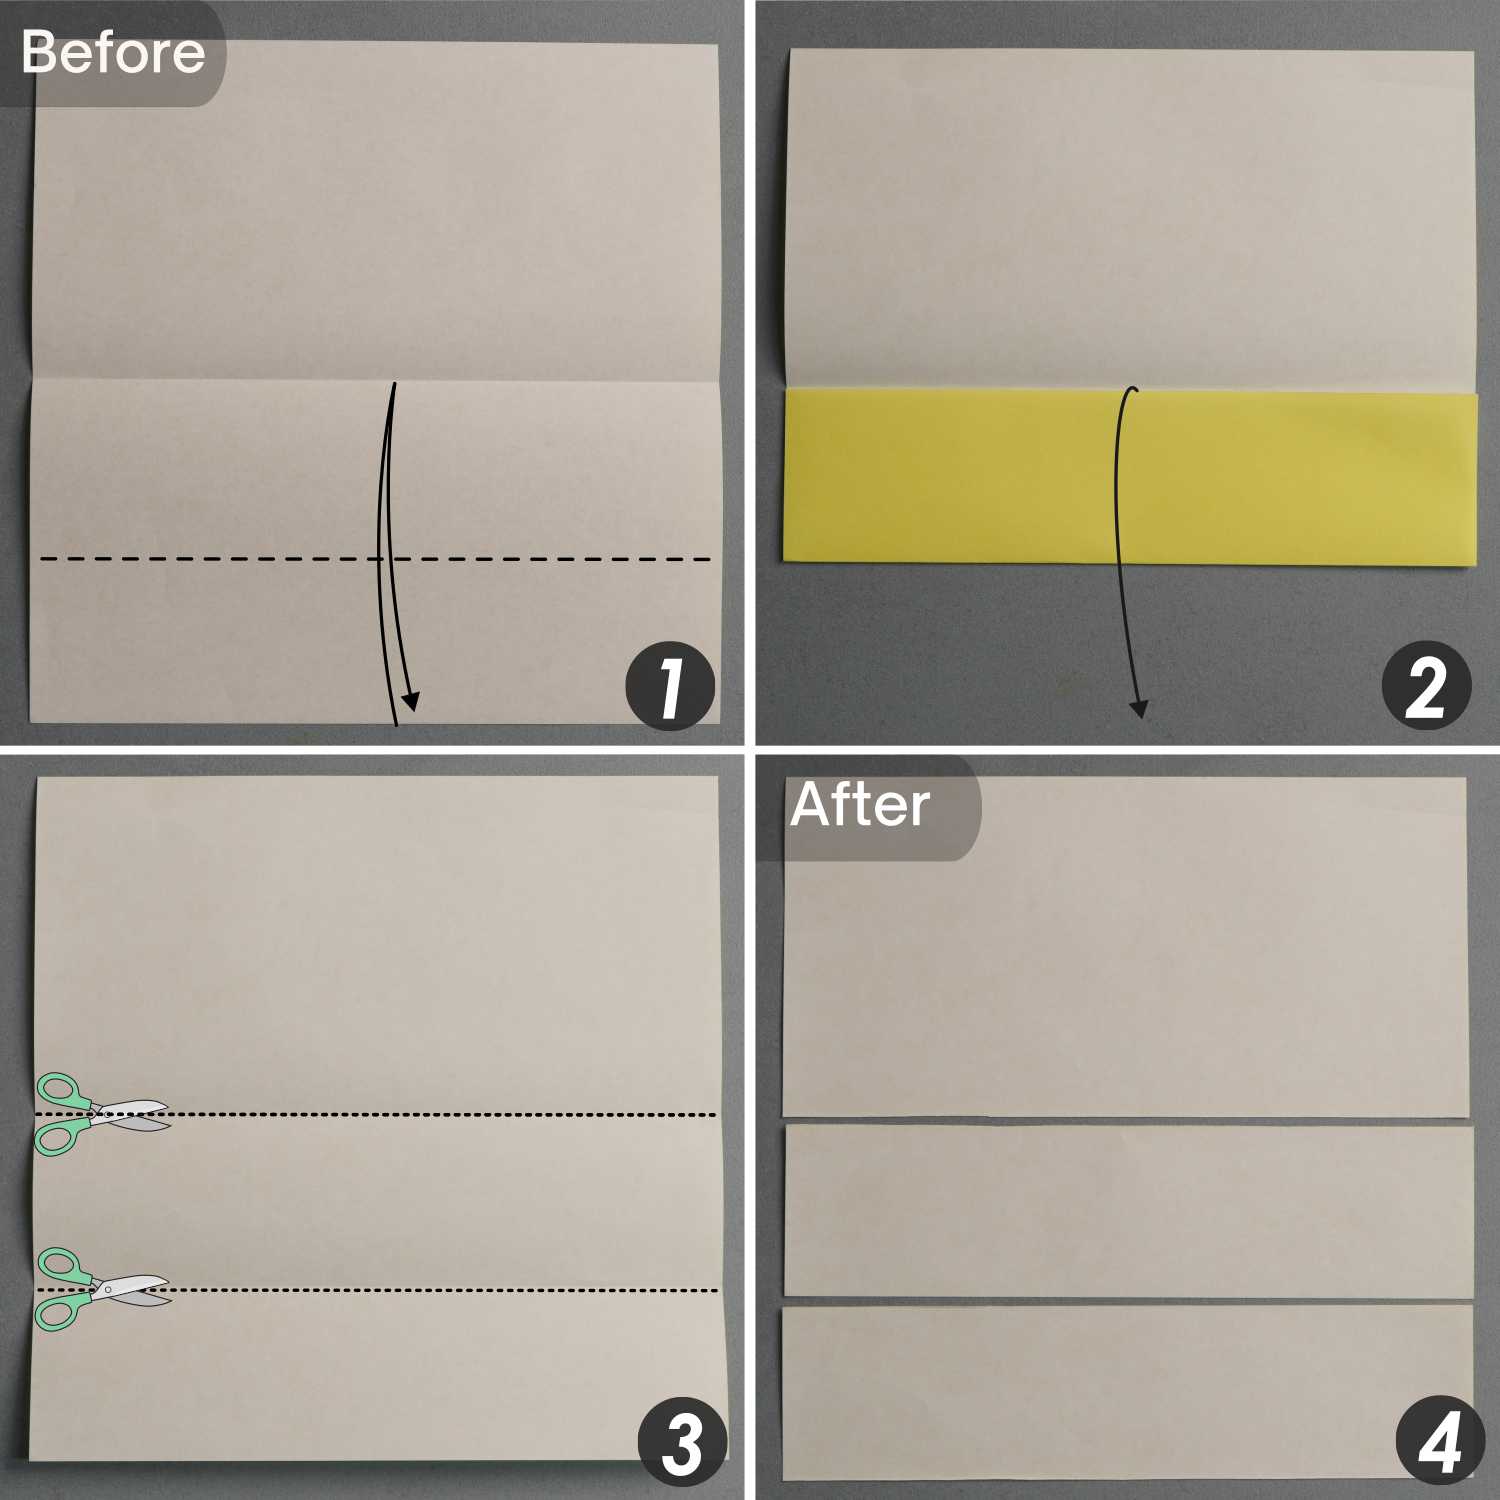
Fold up the bottom edge along the dotted line, which is the extending line from the crease you marked in the previous step. Crease it well and unfold it, then cut this paper along this crease to get two pieces of rectangular paper.
Step 4
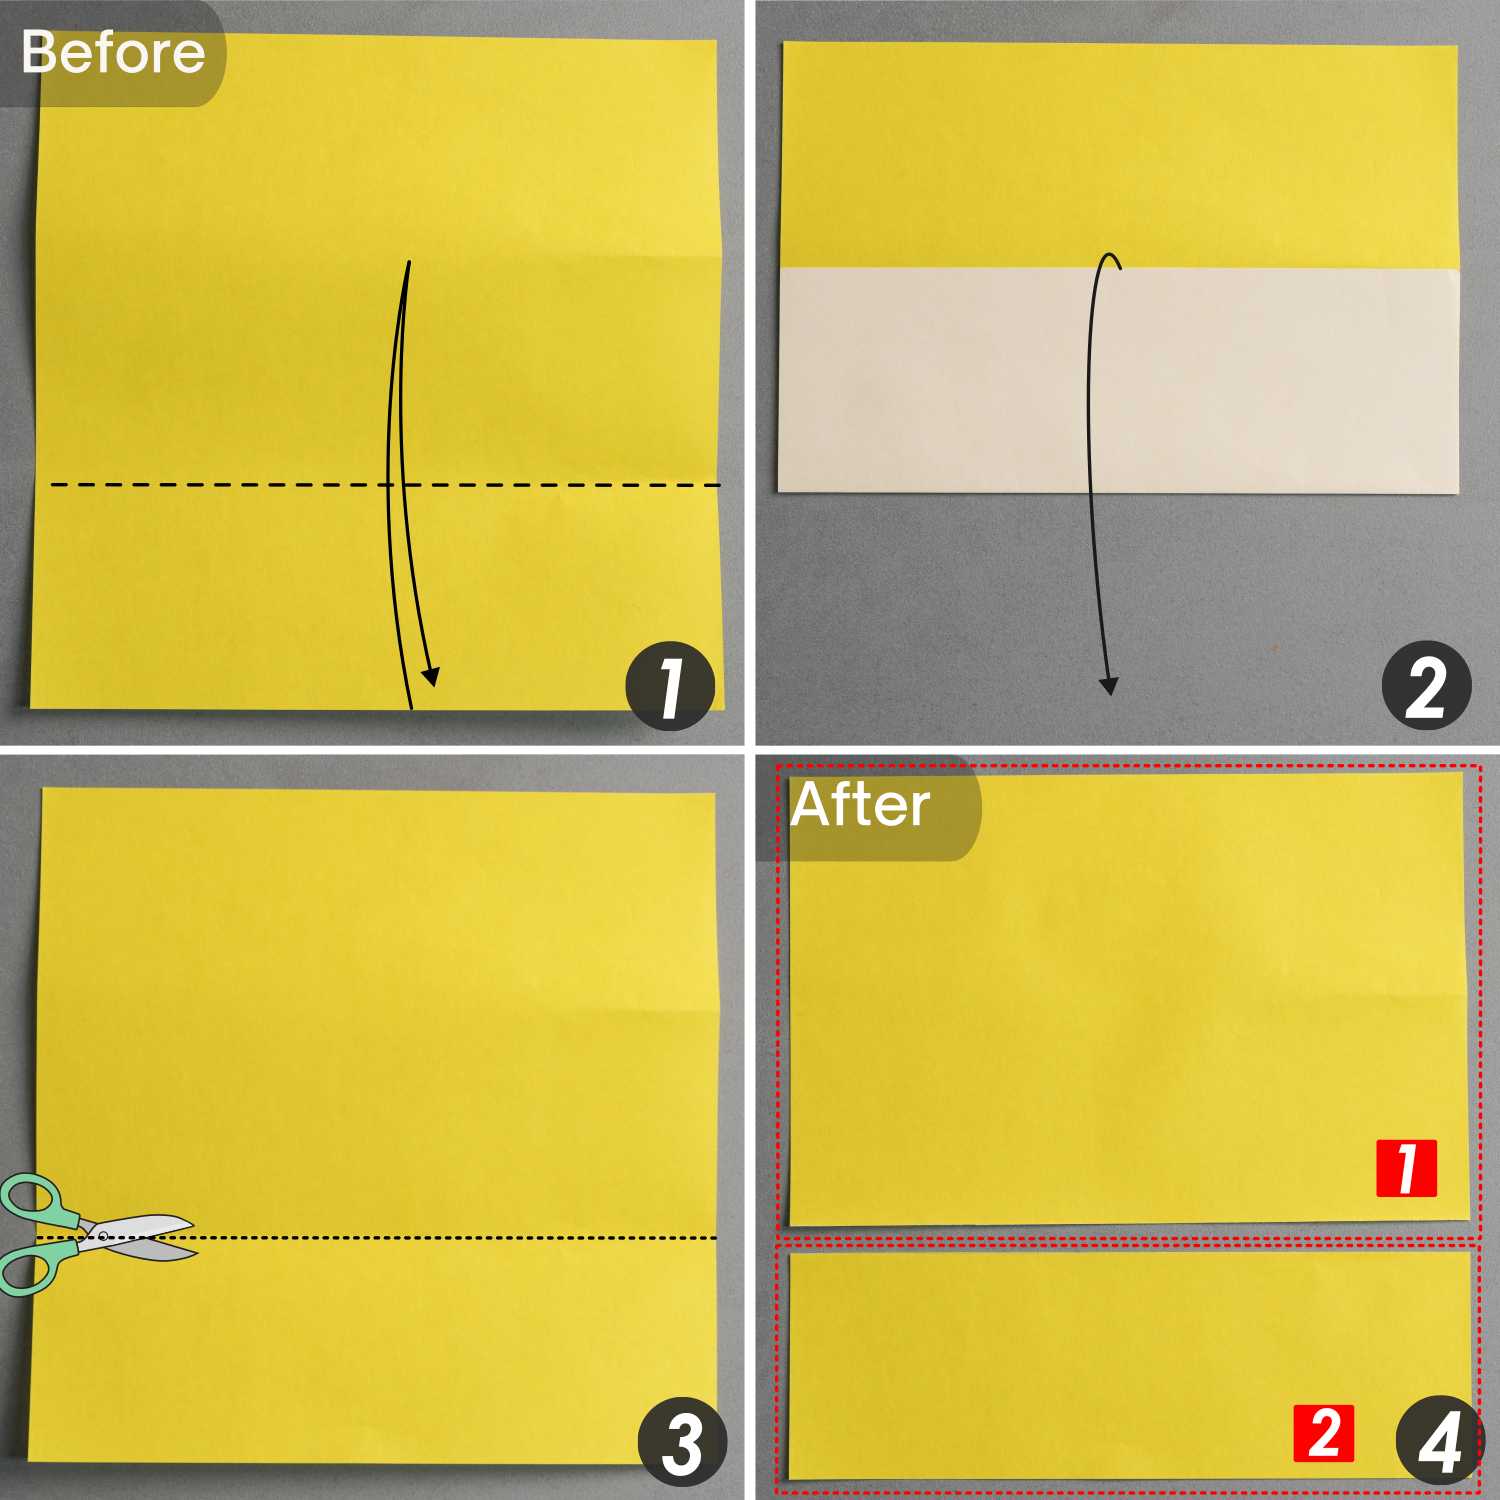
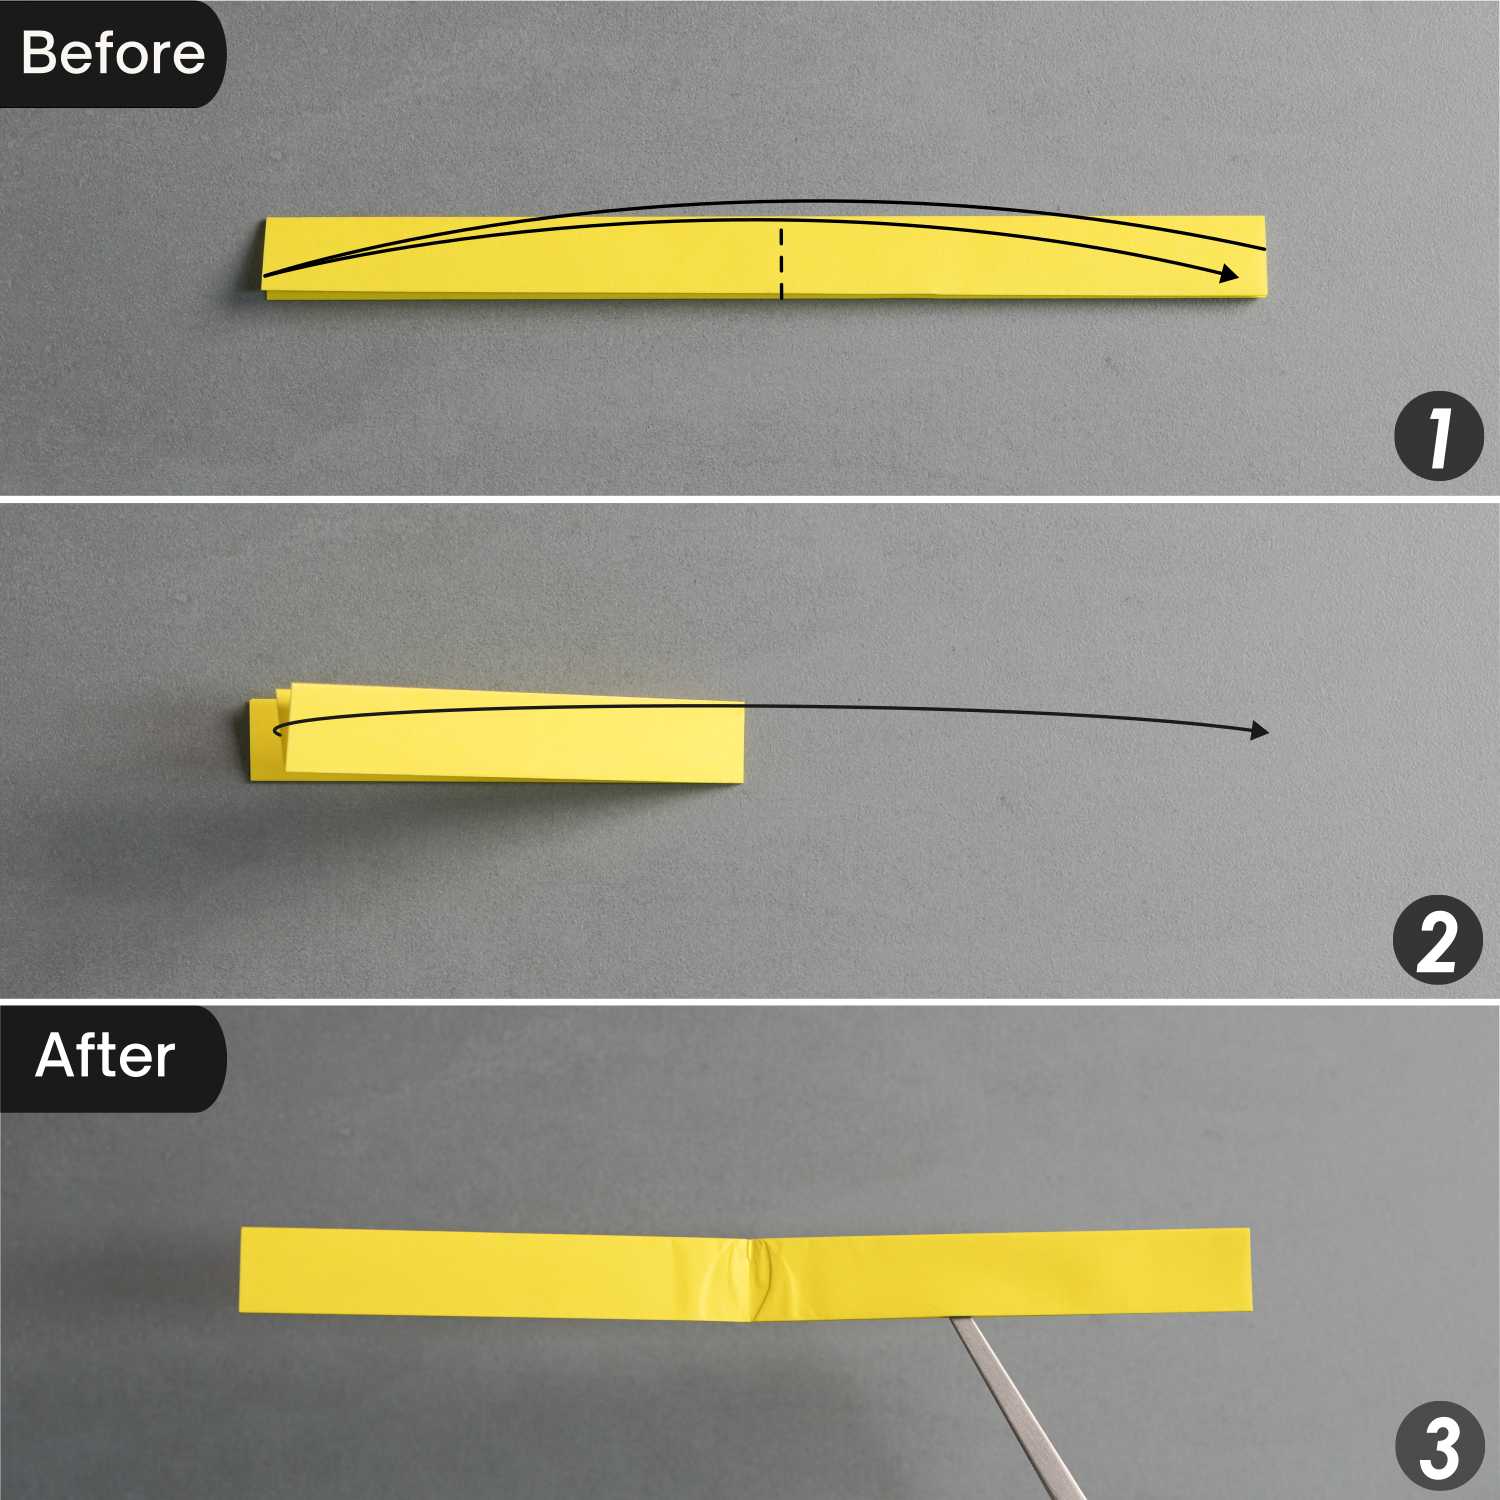
Take the paper marked number 1. Fold it in half horizontally, leaving a crease, and unfold it.

Step 5
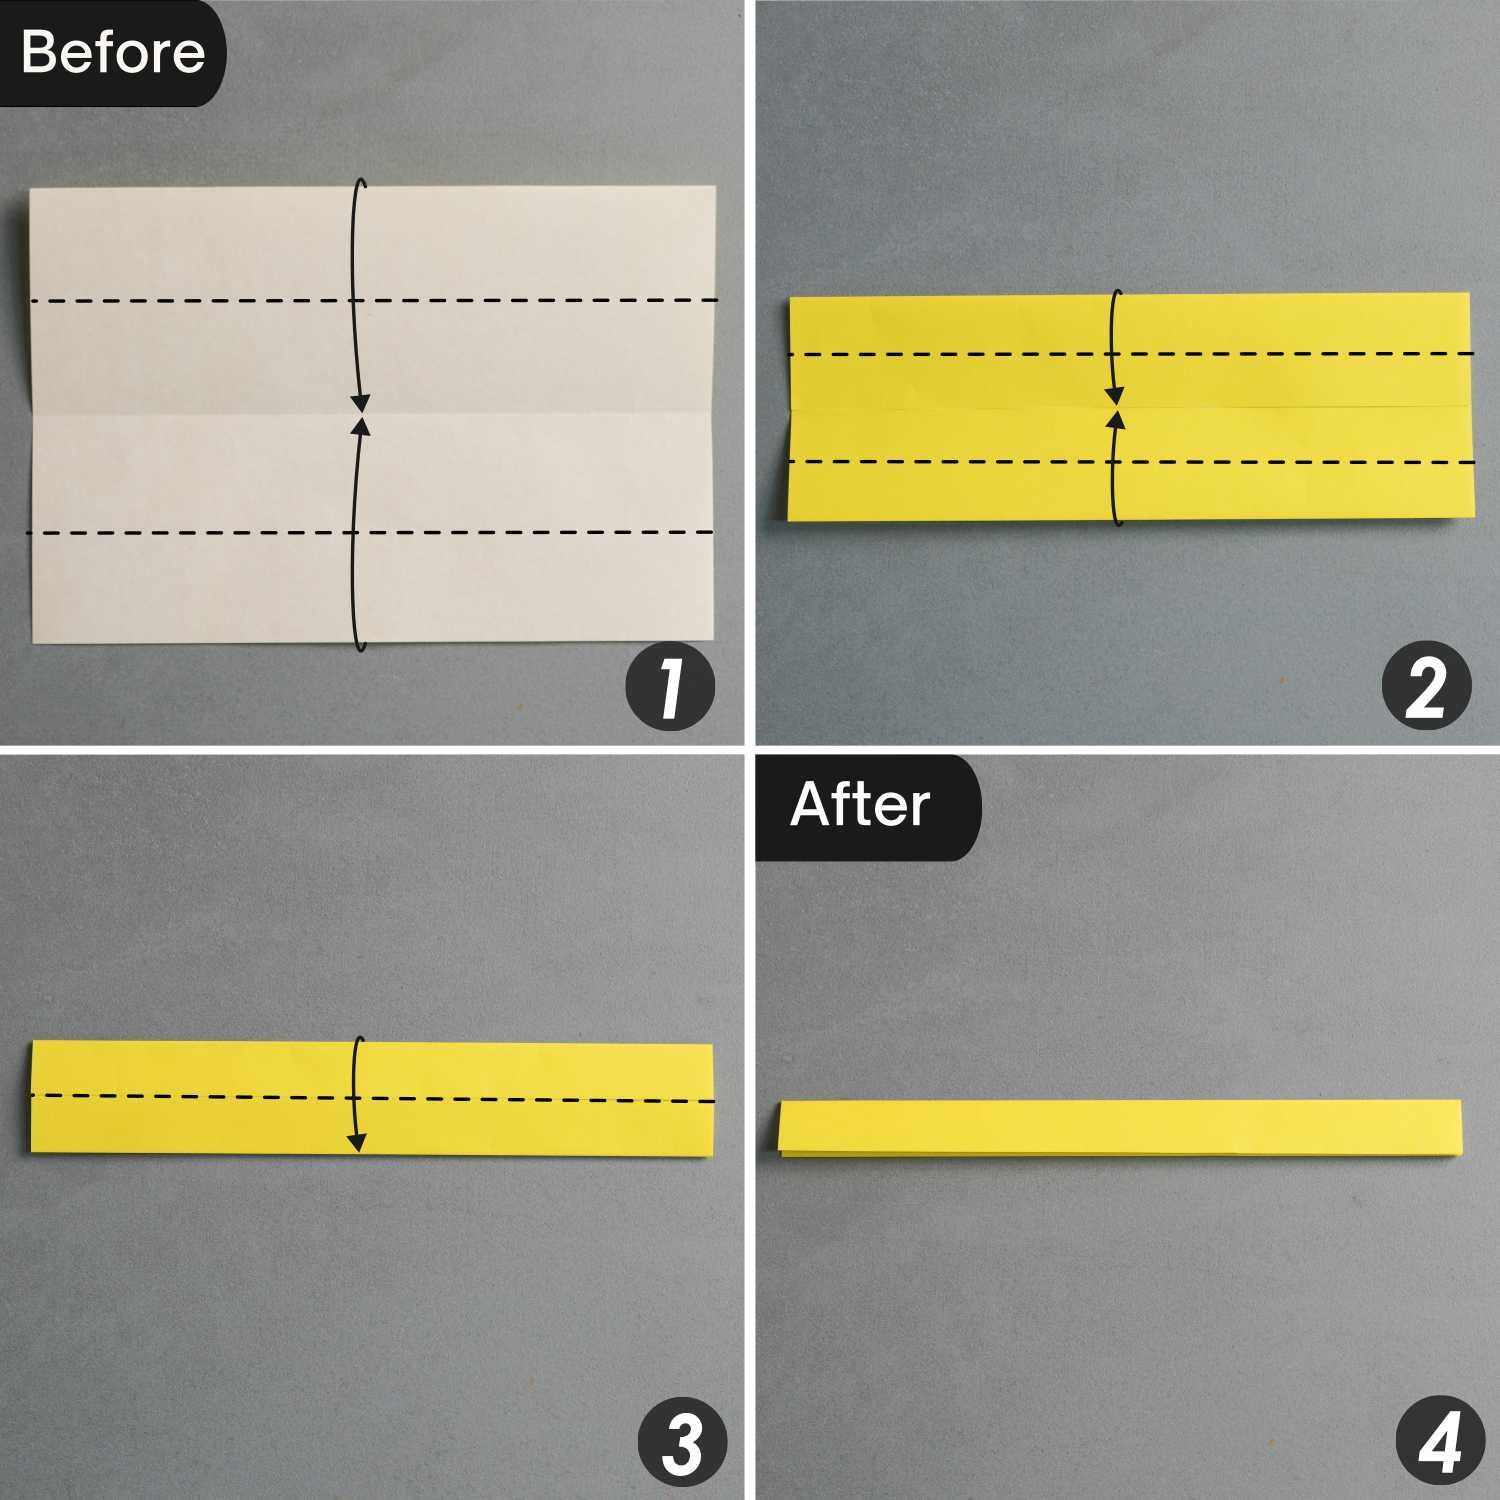
Fold the top and bottom edges to align with the middle horizontal crease, and repeat this one more time, then fold it in half horizontally from top to bottom.
Step 6
Fold the paper in half vertically, and unfold it.
Step 7
Fold the left and right edges to align with the middle vertical crease, leaving two creases, and unfold them.
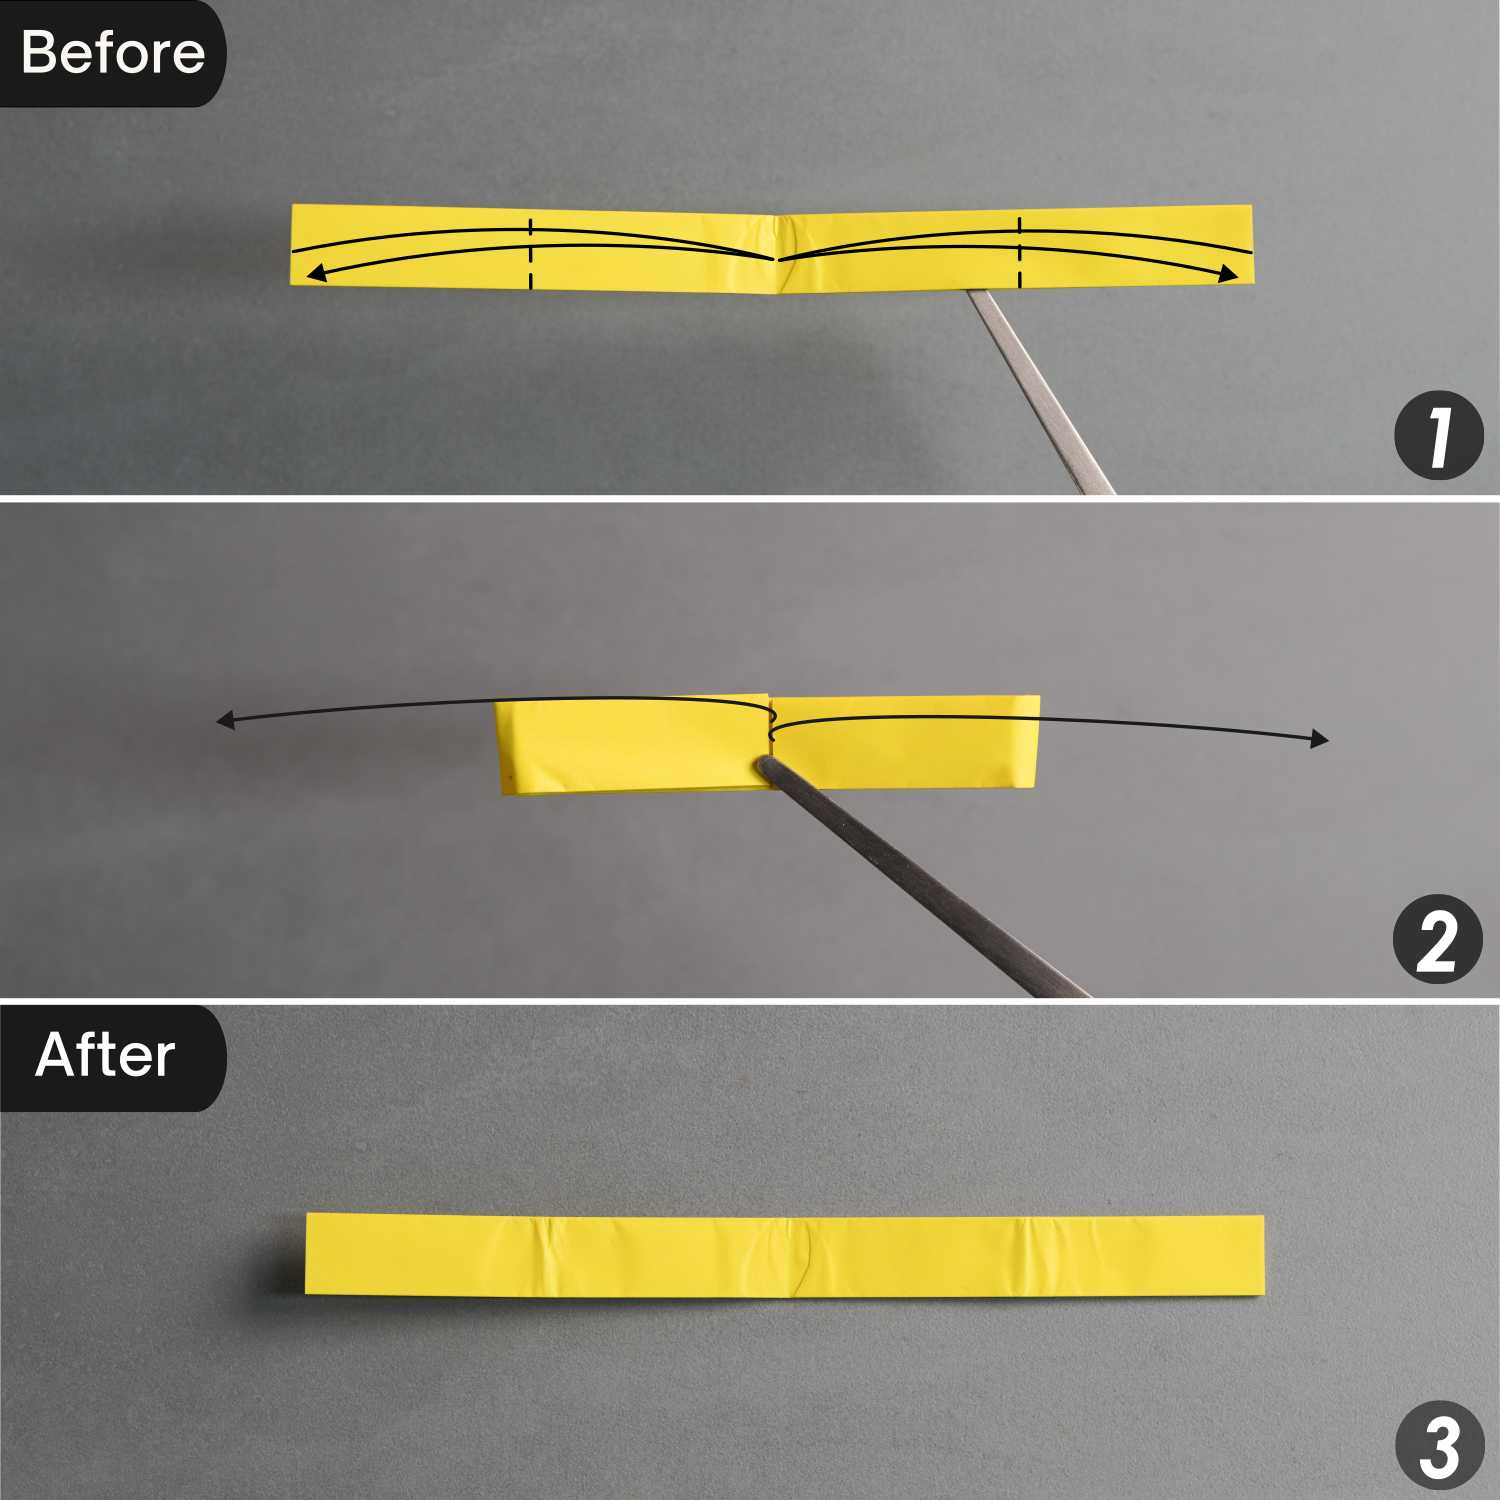
Step 8
Fold down the left and sections of the top edge to align with the vertical creases, then fold this paper in half vertically from right to left.
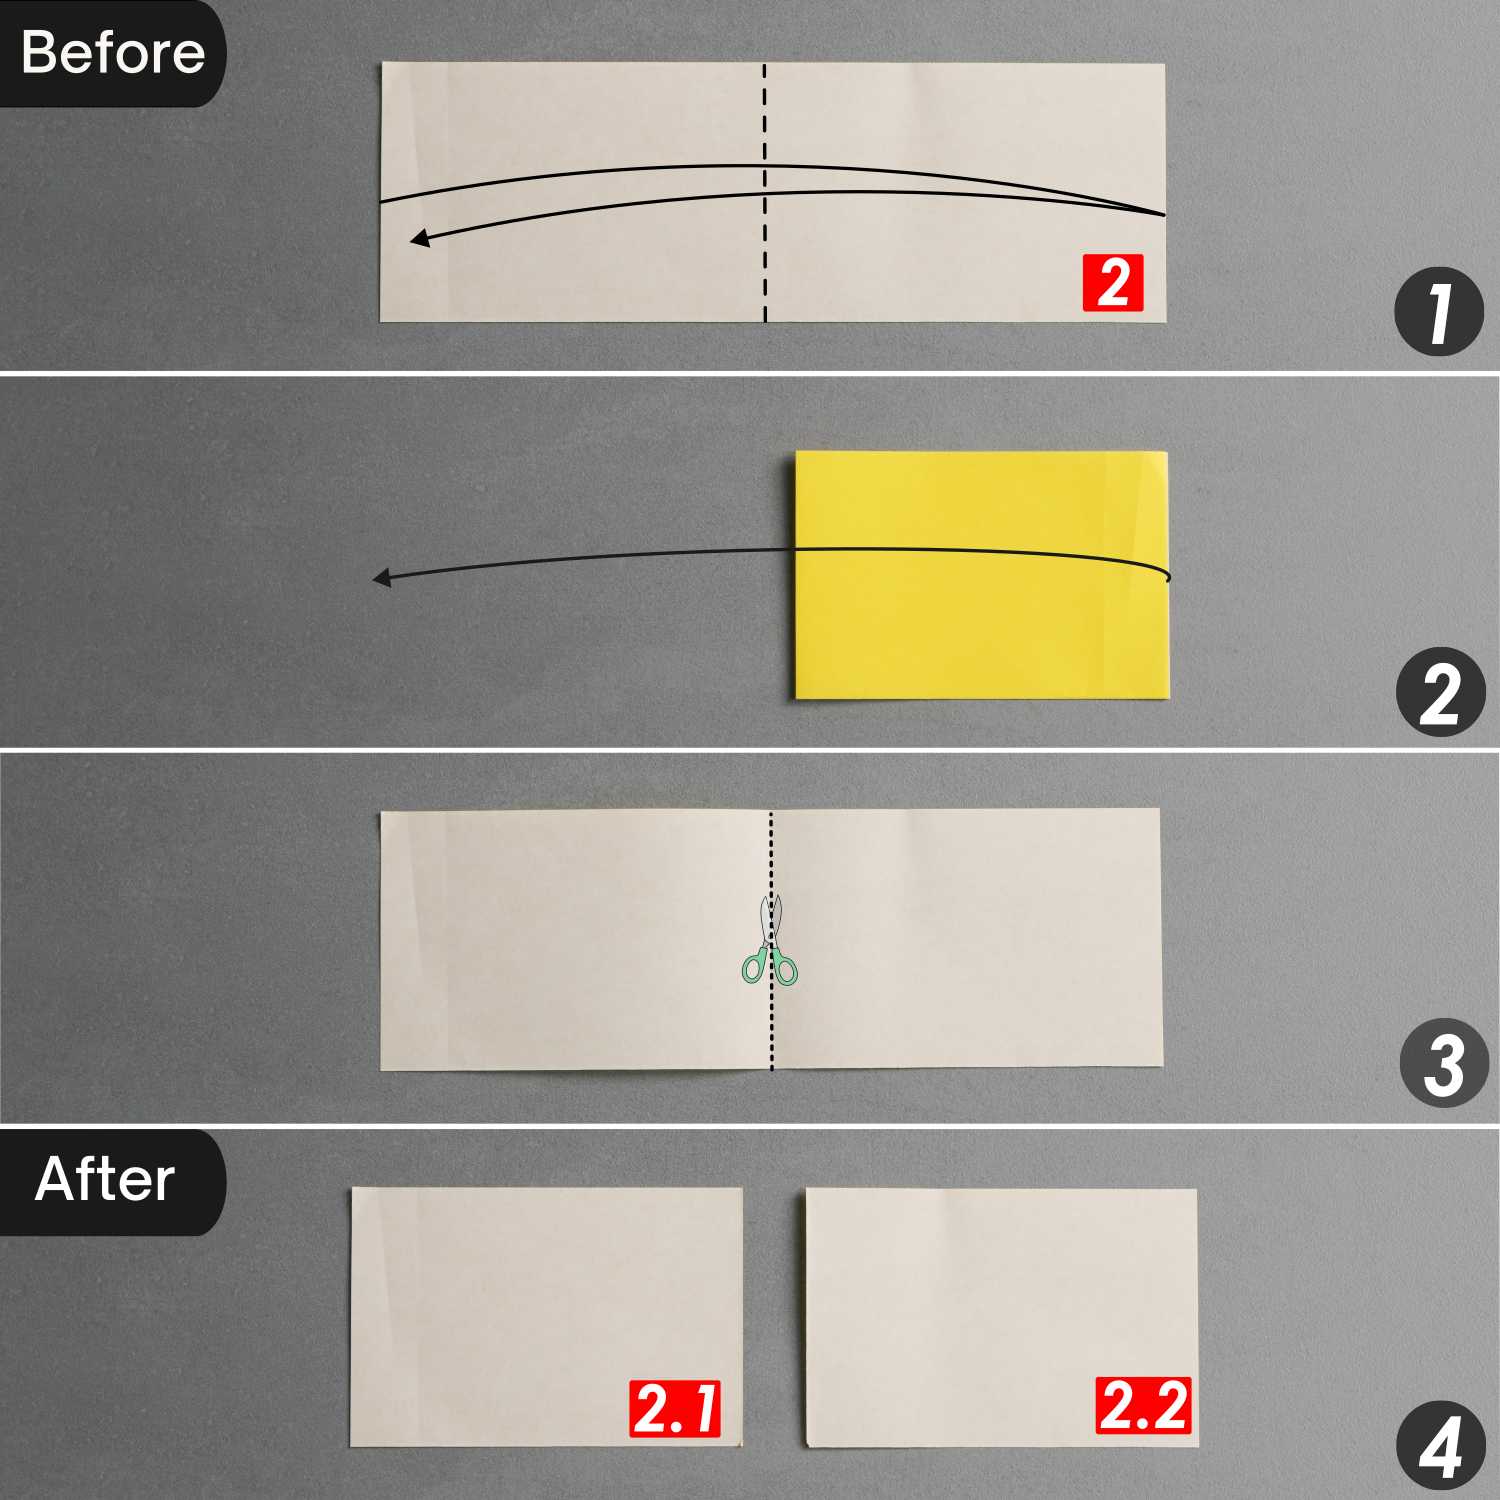
Step 9
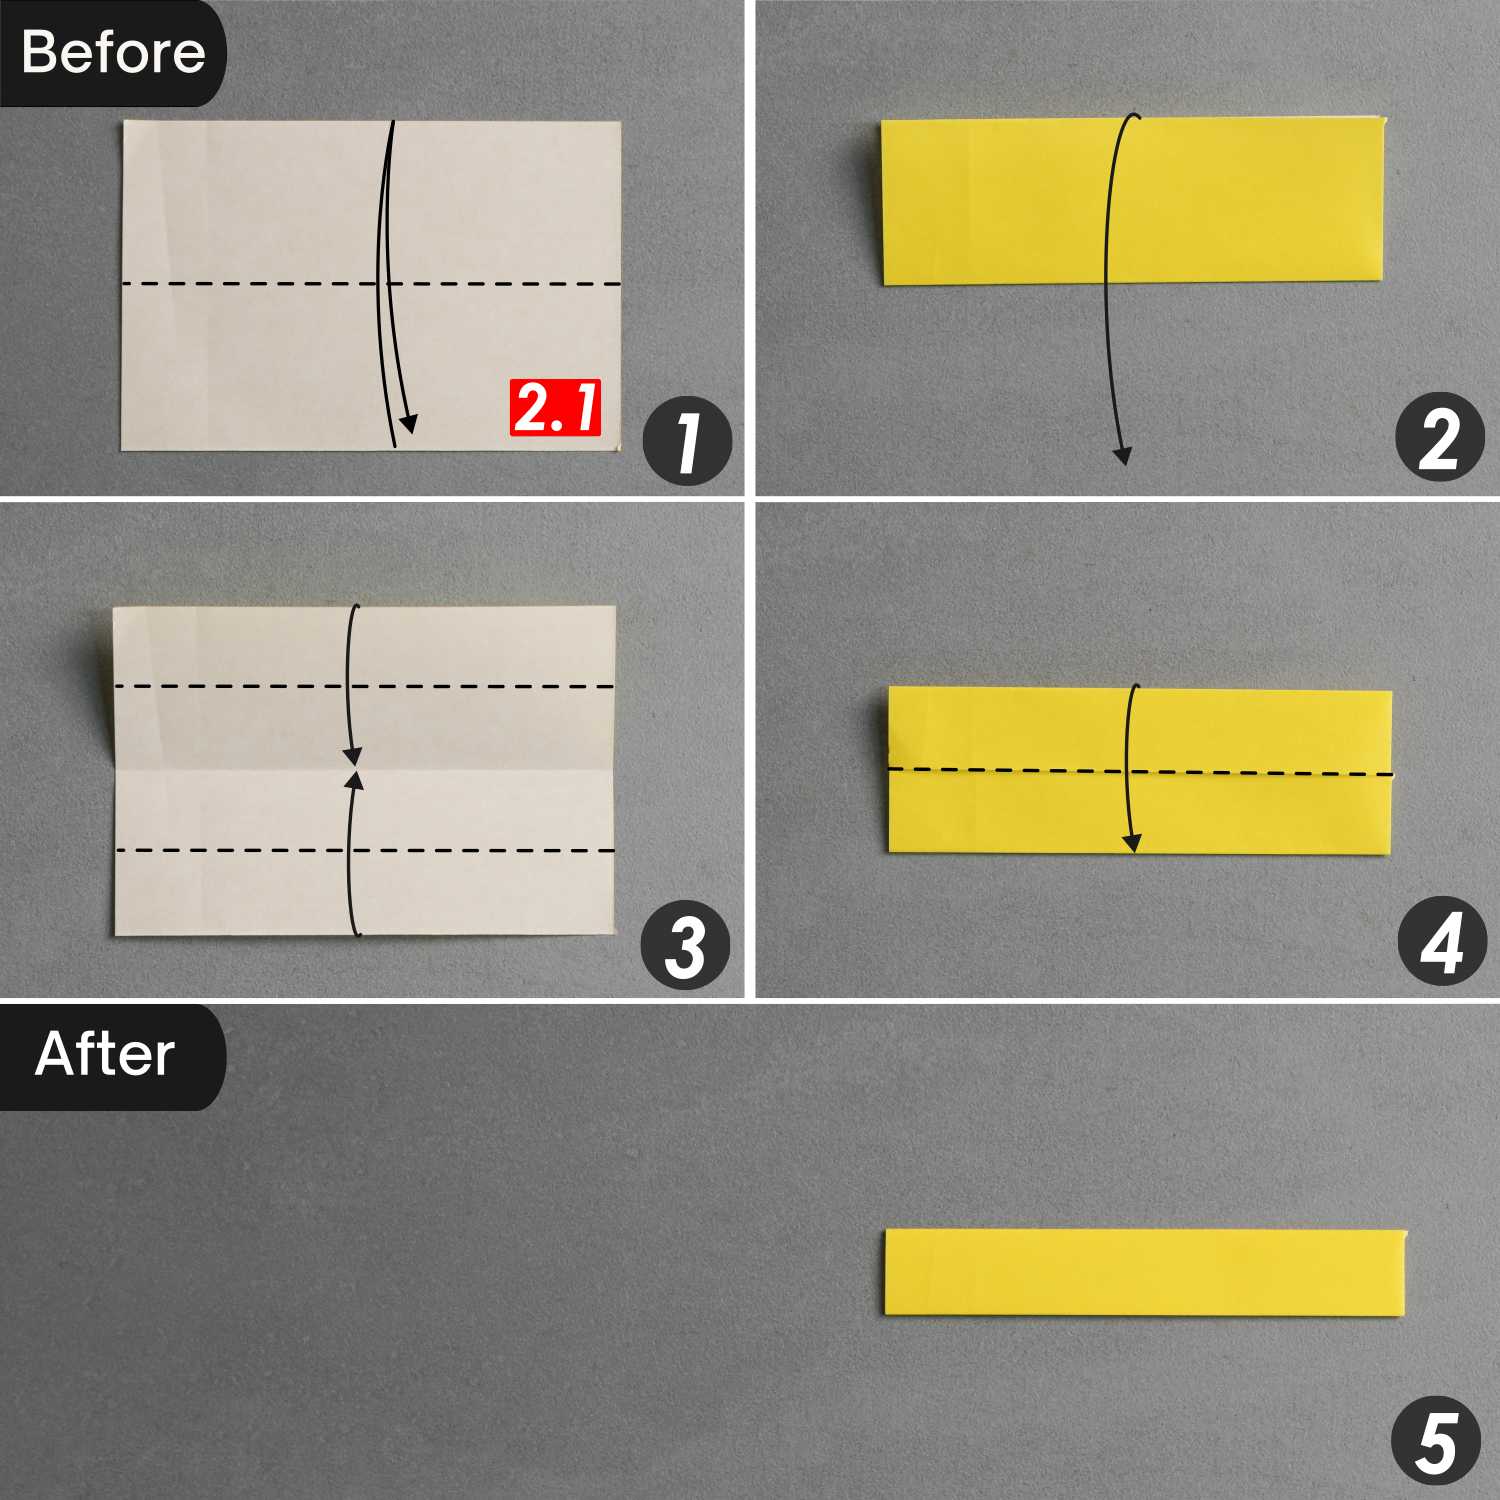
Take the paper marked number 2, fold it in half vertically, leaving a crease, and unfold it. Cut the paper along this crease to get two squares marked 2.1 and 2.2.
Step 10
Take the paper marked number 2.1, fold it in half horizontally, leaving a crease, and unfold it. Next, fold the top and bottom edges to align with the middle horizontal crease. Finally, fold the paper in half horizontally from top to bottom.
Step 11
Place the two units as shown in picture 1, then fold the bottom edge of the vertical unit upwards along the bottom edge of the horizontal part of the other unit. Then turn them over from left to right, and fold the top edge of the vertical unit downwards along the top edge of the horizontal part of the other unit. Finally, turn them over from left to right.
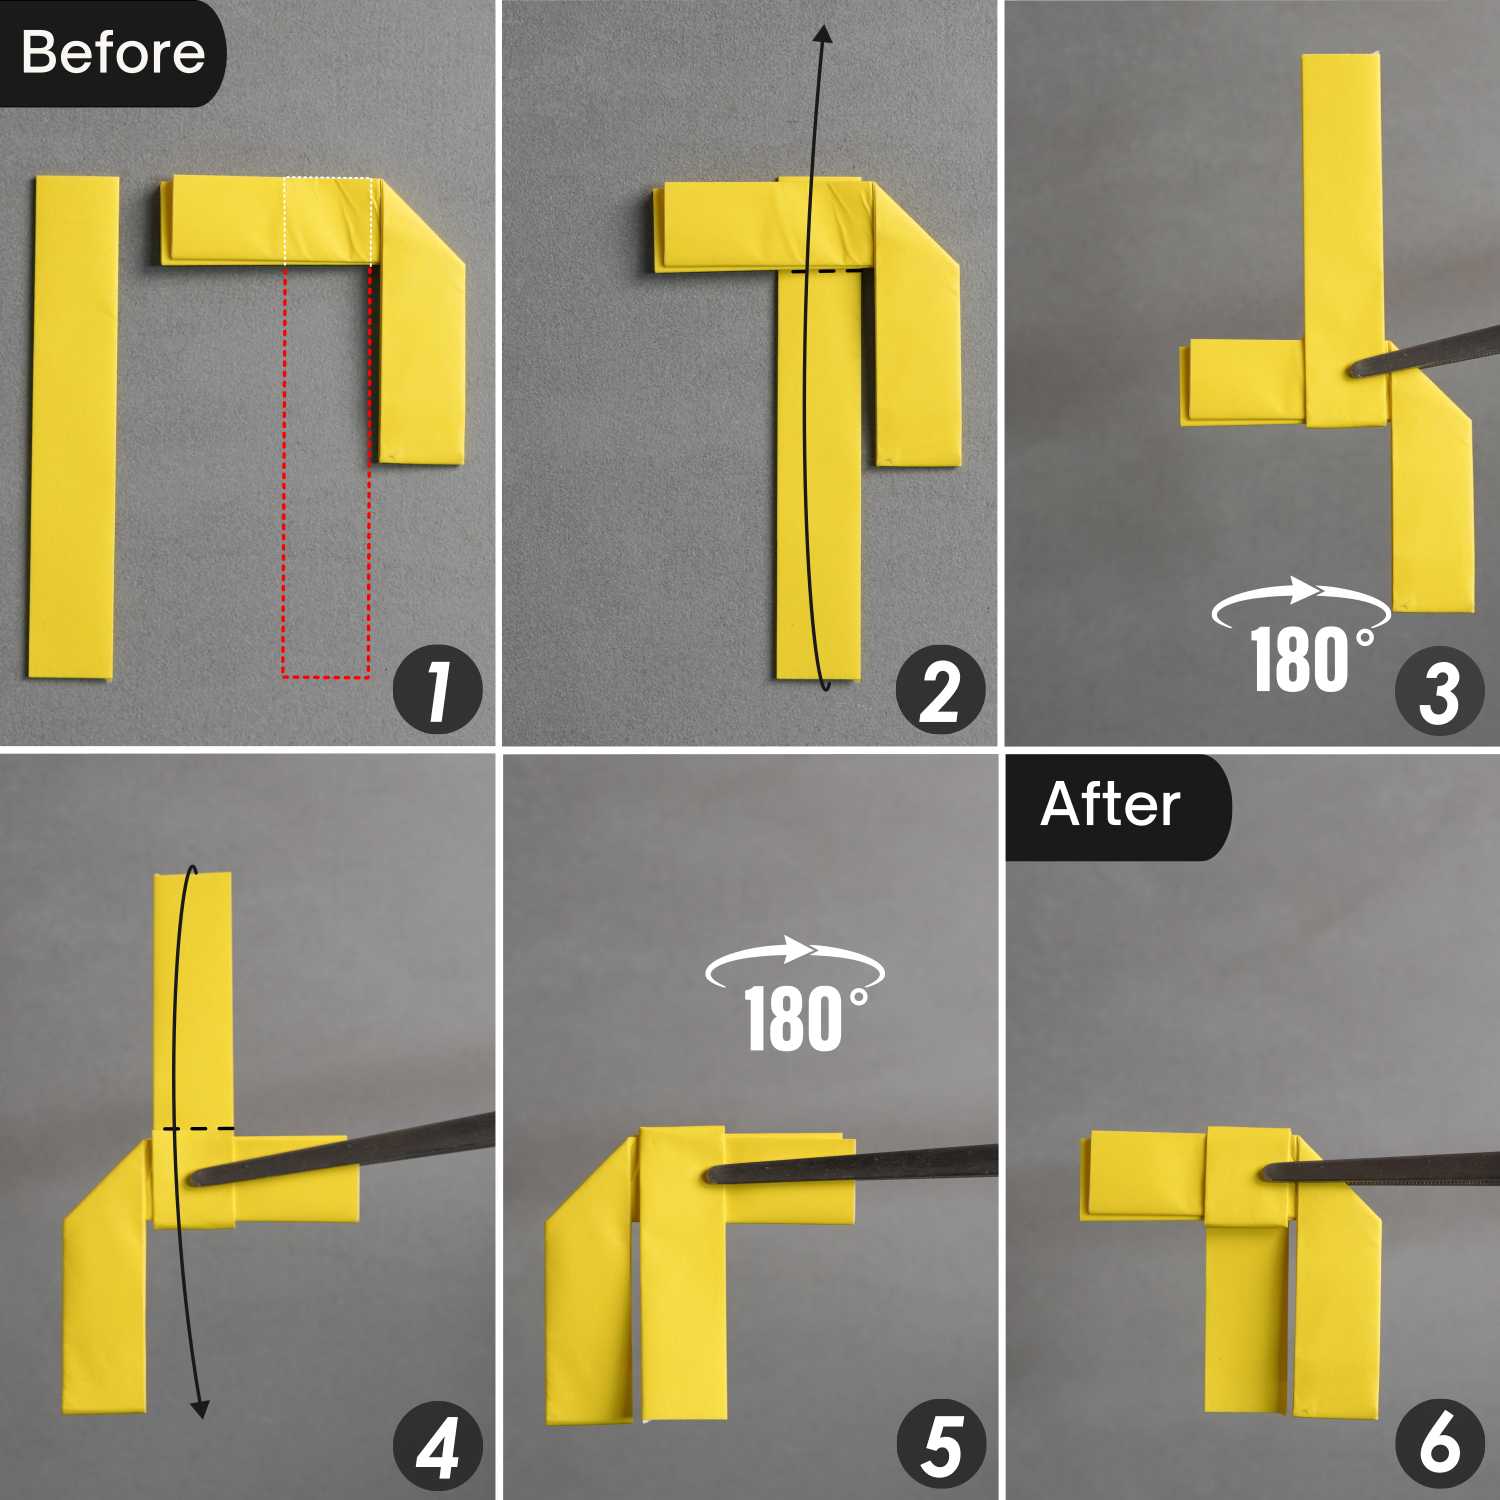
Fold the bottom edge of the vertical unit upwards along the bottom edge of the horizontal part of the other unit. Then, turn over this model from left to right, and finally, fold down the last section of the vertical paper and glue it to the other unit.
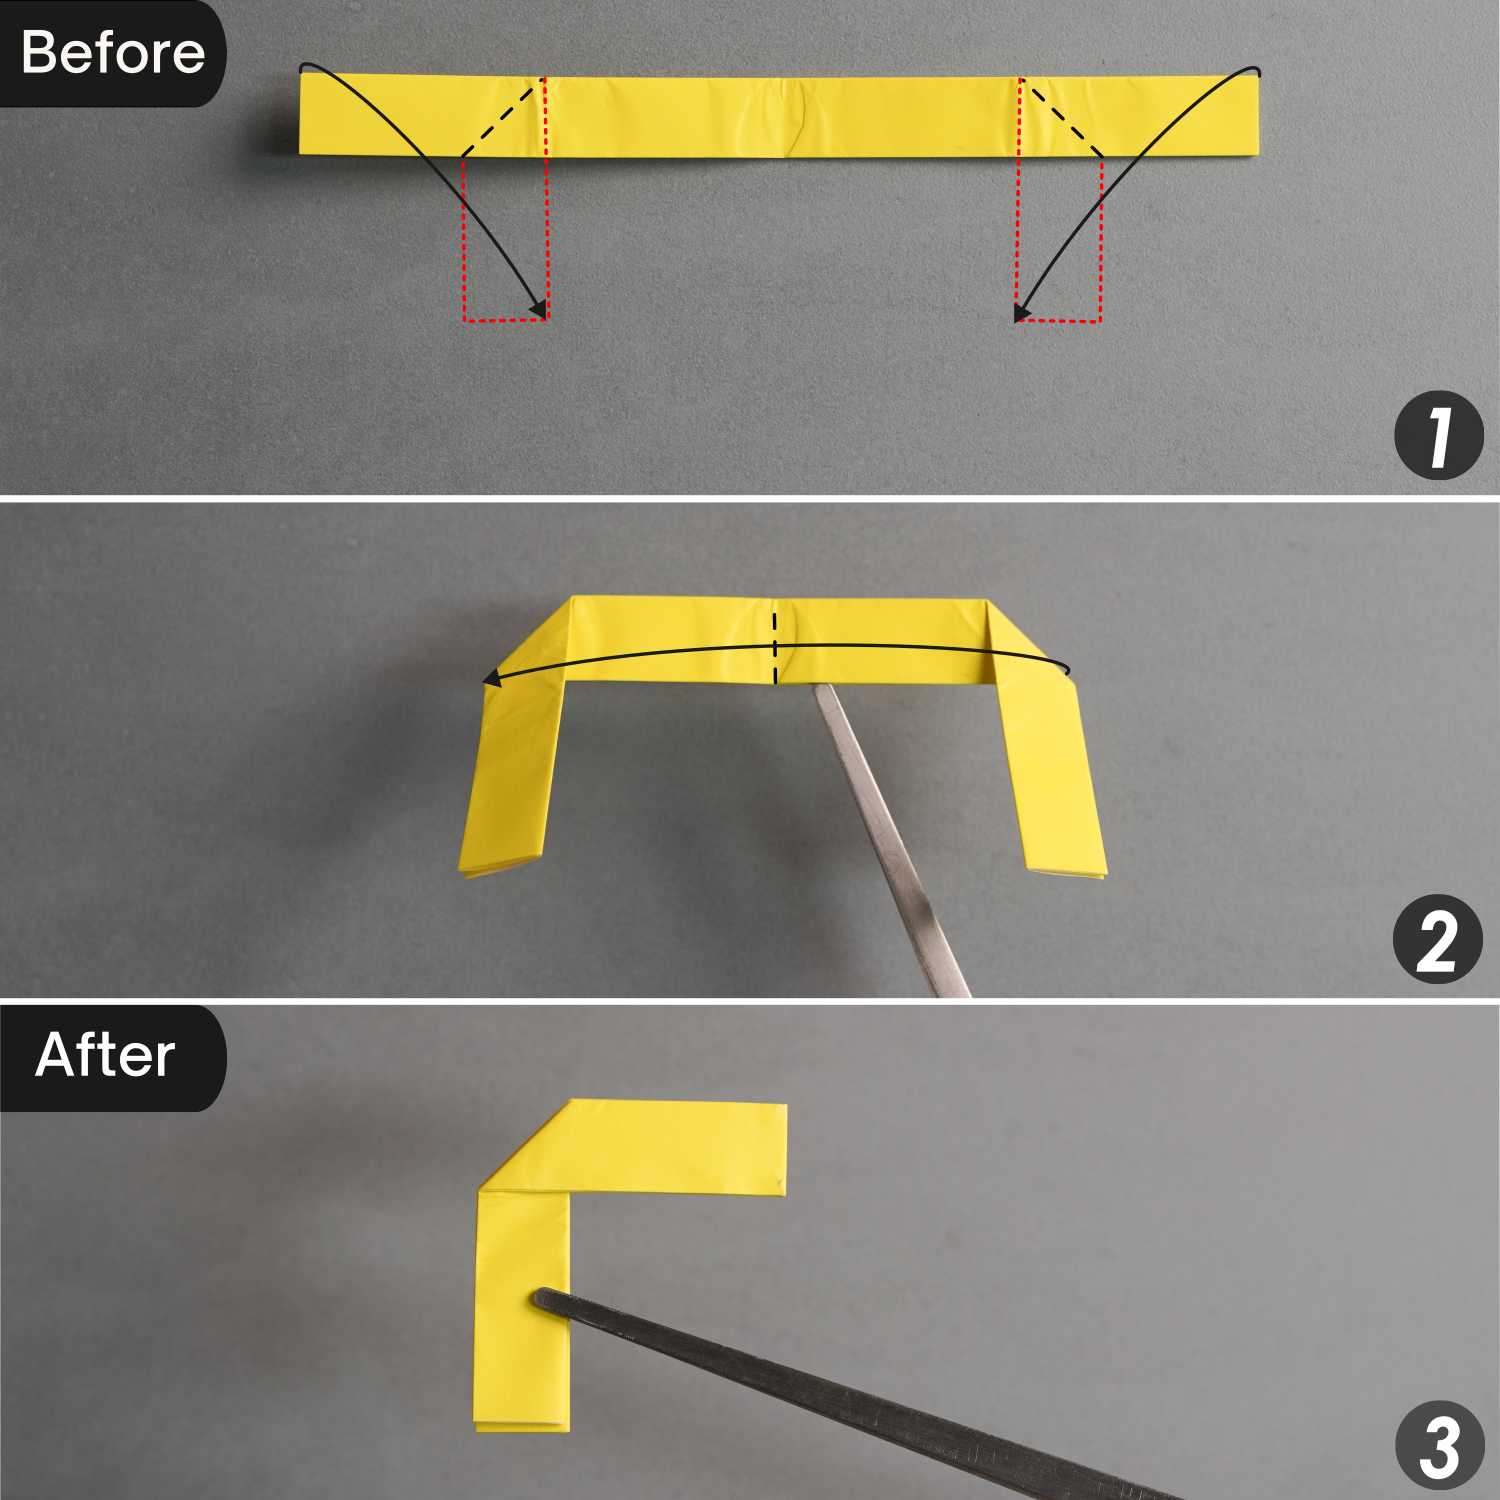
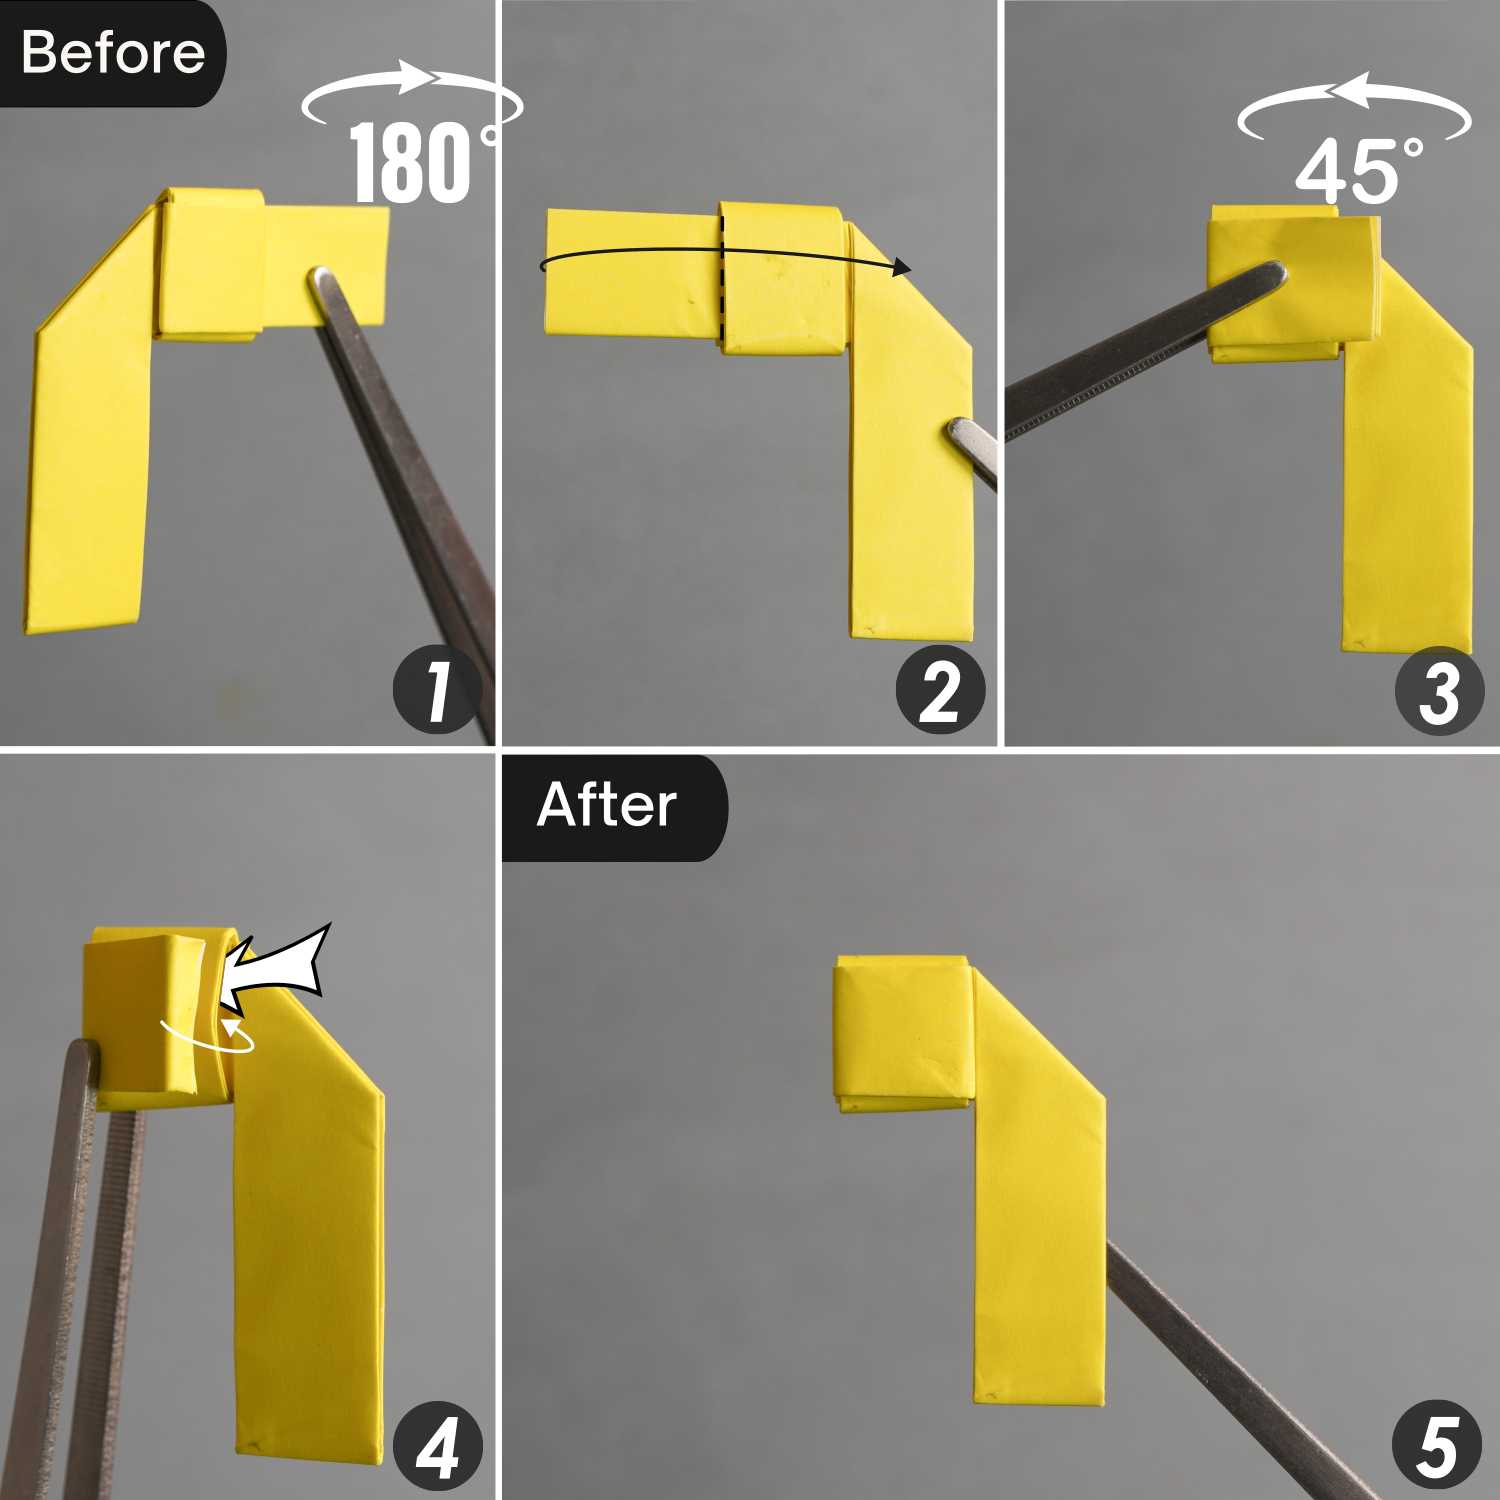
Step 12
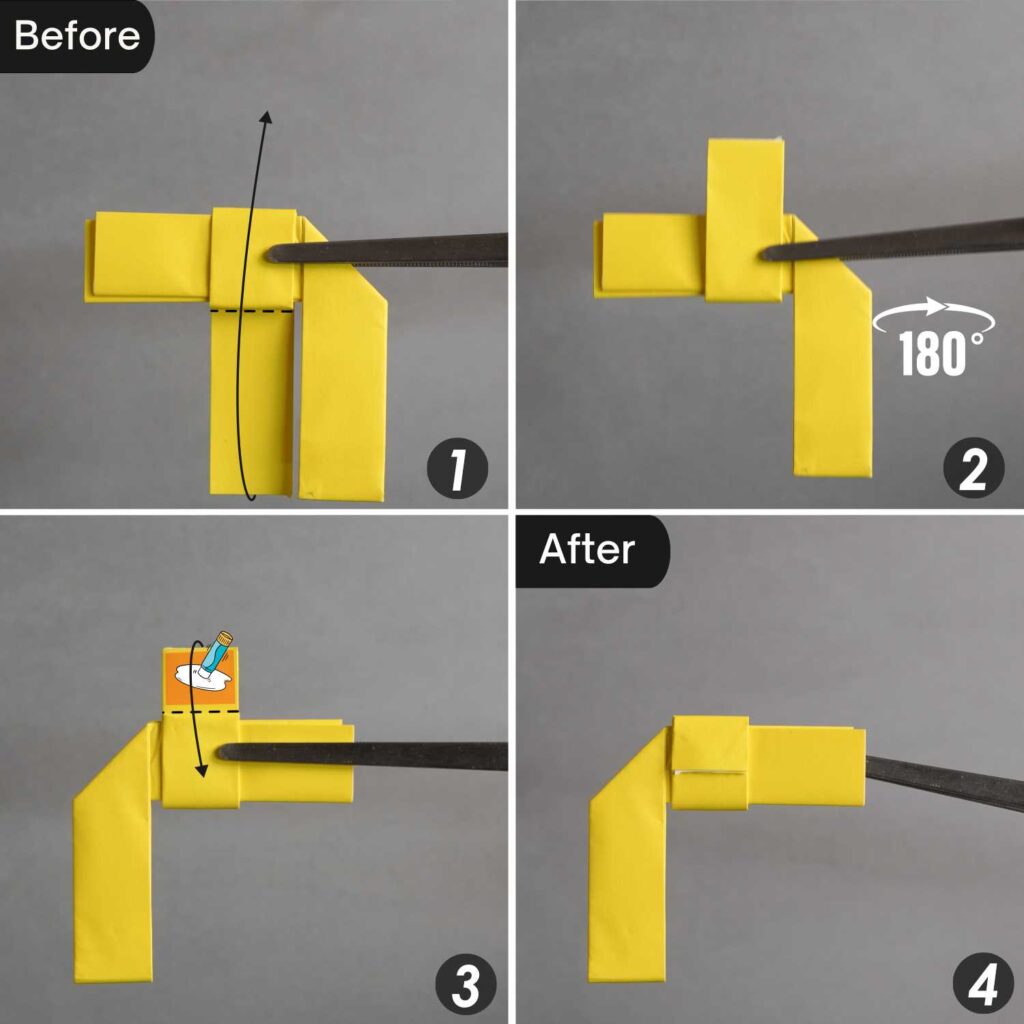
Fold the top layer of the right side to the left, then rotate the model 45 degrees from left to right to focus on this folded layer, and tuck it into the pocket underneath.
Step 13
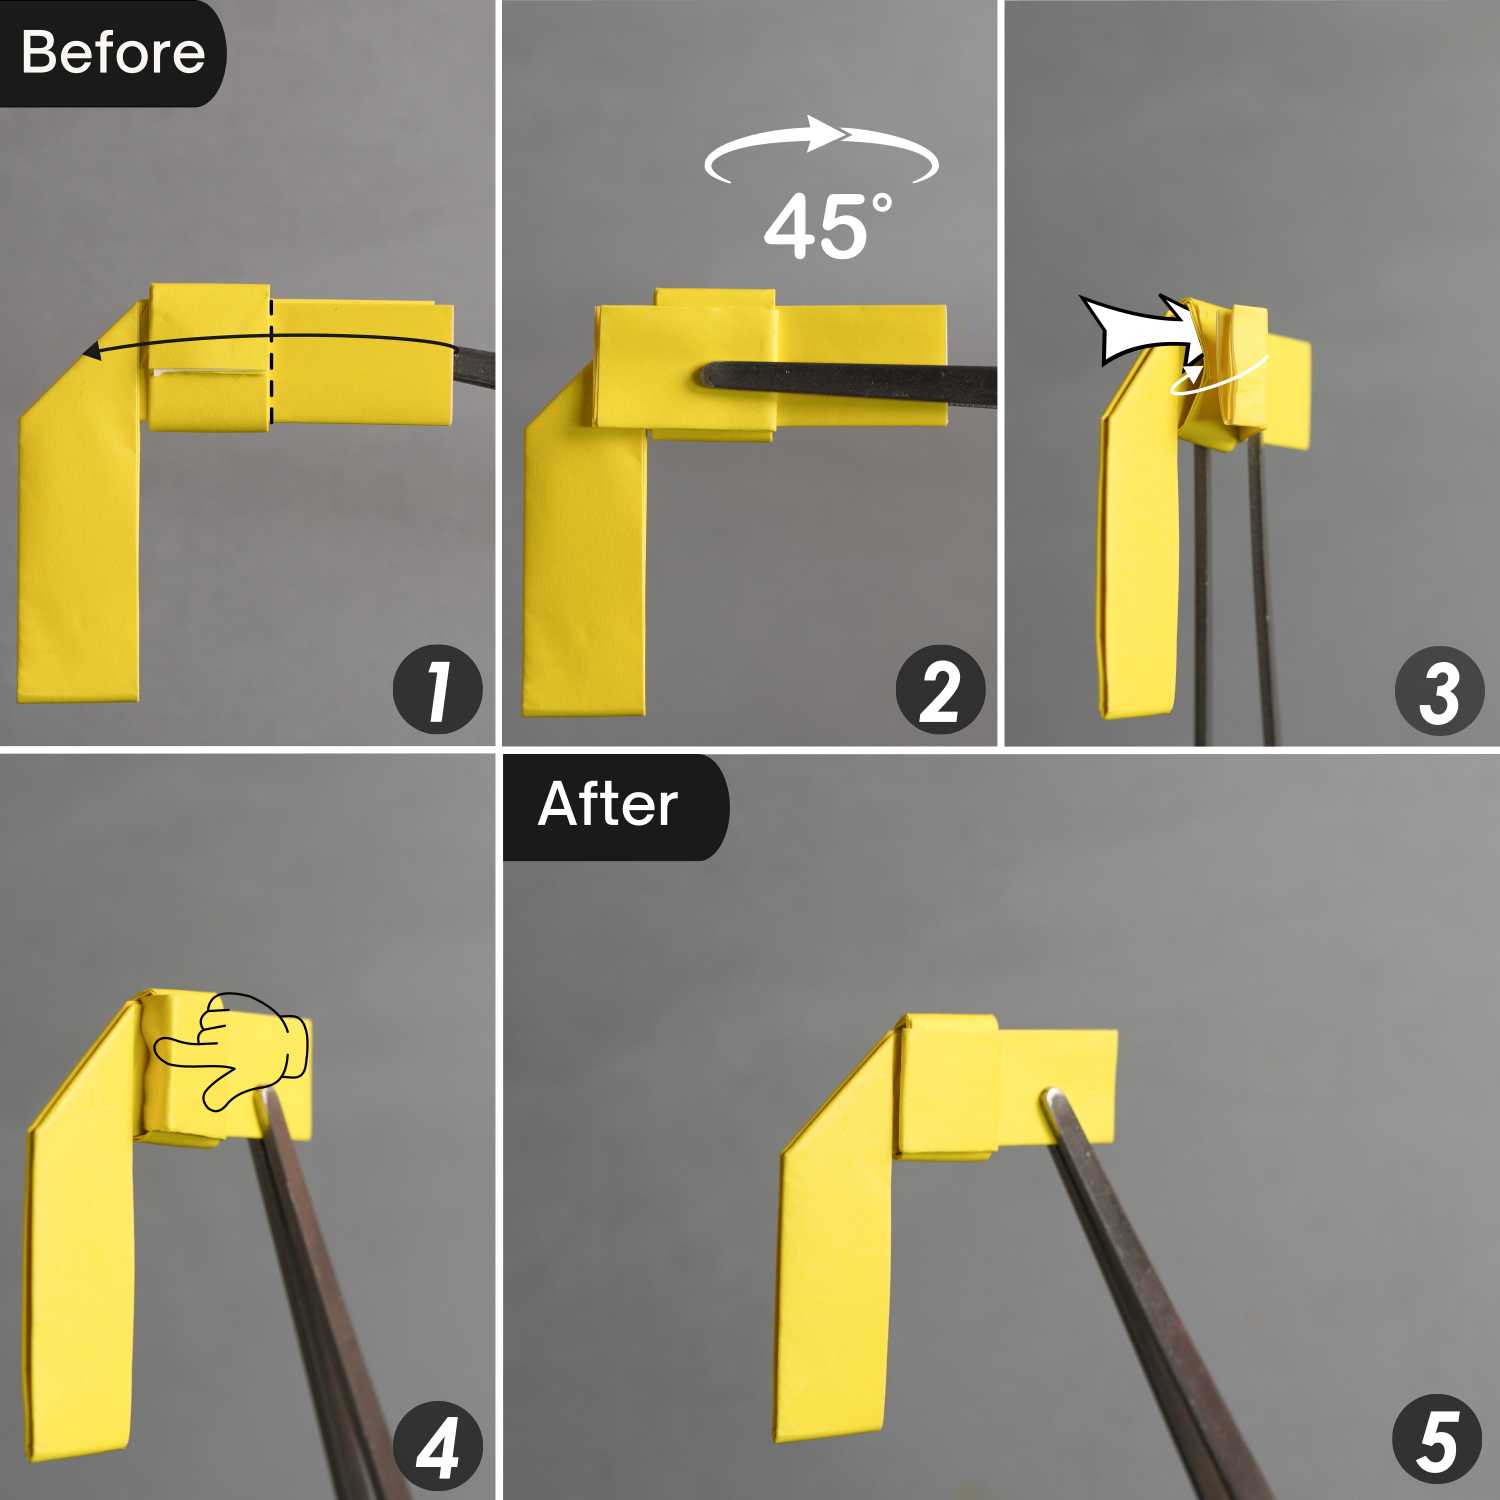
Rotate the paper 180 degrees from left to right.
Fold the top layer of the left side to the right, then rotate the model 45 degrees from right to left to focus on this folded layer, and tuck it into the pocket underneath.
Step 14
Take out another 15cm x 15cm piece of paper, fold it in half horizontally, leaving a crease, and unfold it.
Step 15
Fold the bottom edge to align with the middle horizontal crease and unfold it, then cut the paper along the creases you just made.
Step 16
Fold the bottom rectangular paper in half vertically, unfold it to form a crease, and cut along this crease. Finally, we need the paper marked with numbers 3 and 4.
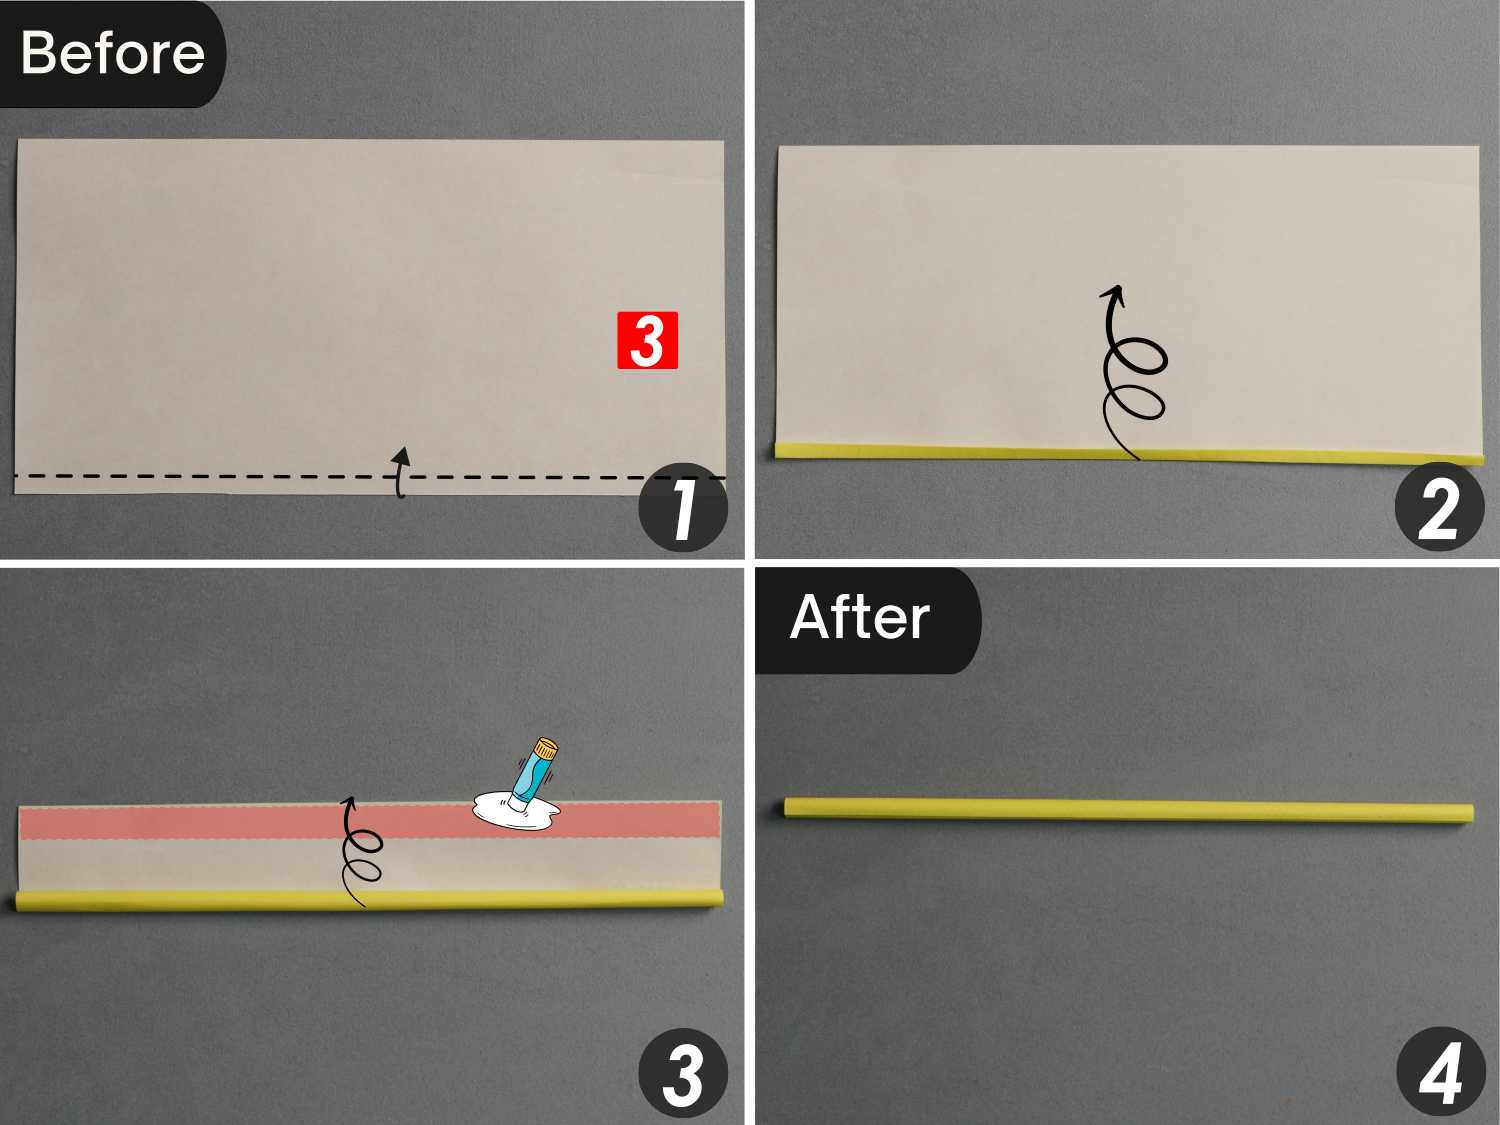
Step 17
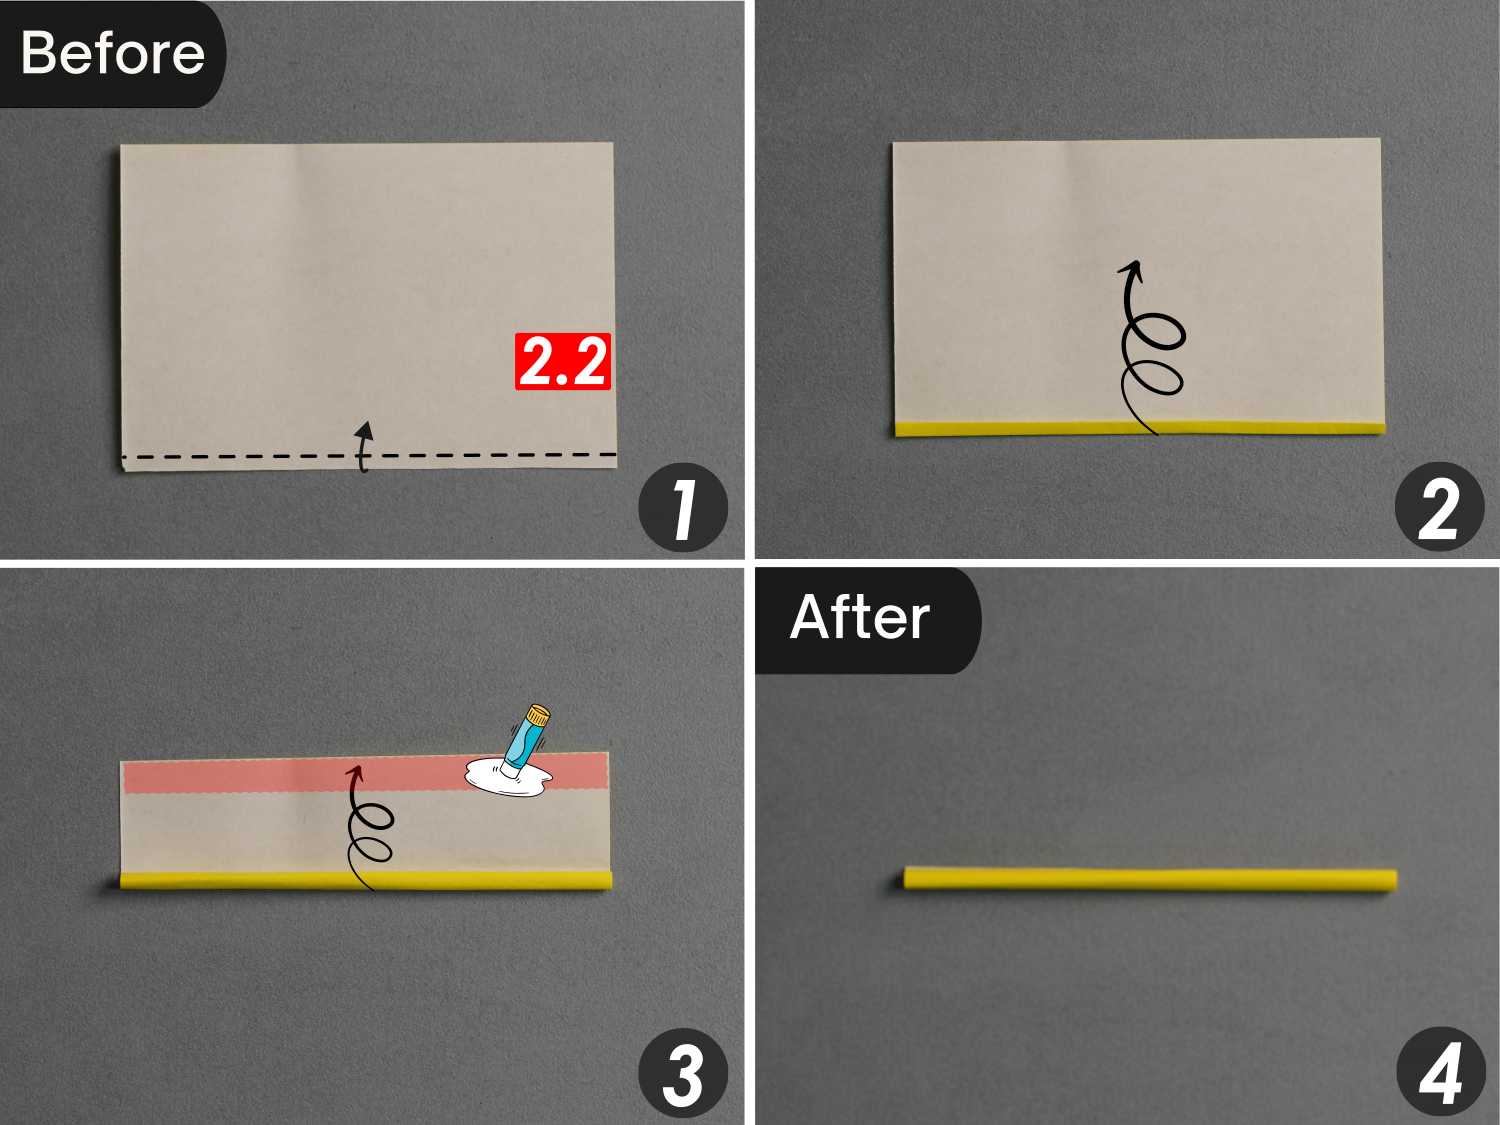
Fold up the number 3 paper’s bottom edge a little, then roll it up from the bottom side, apply glue to the top side to secure it well, and form a paper stick.
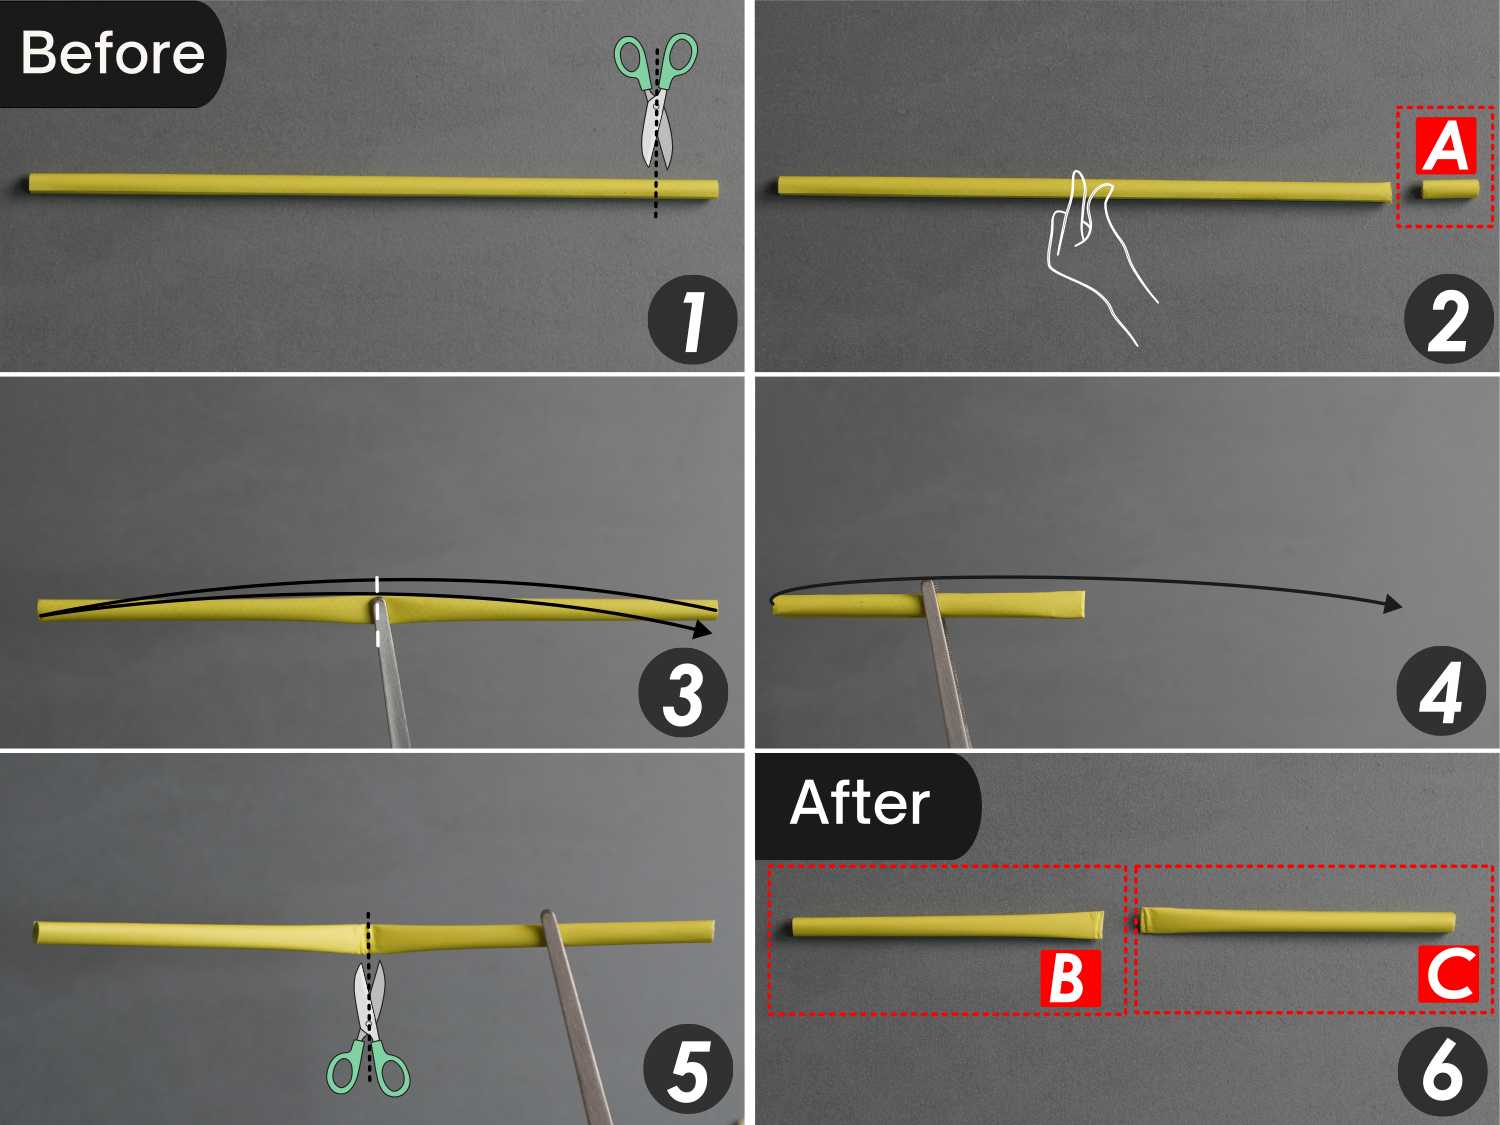
Step 18
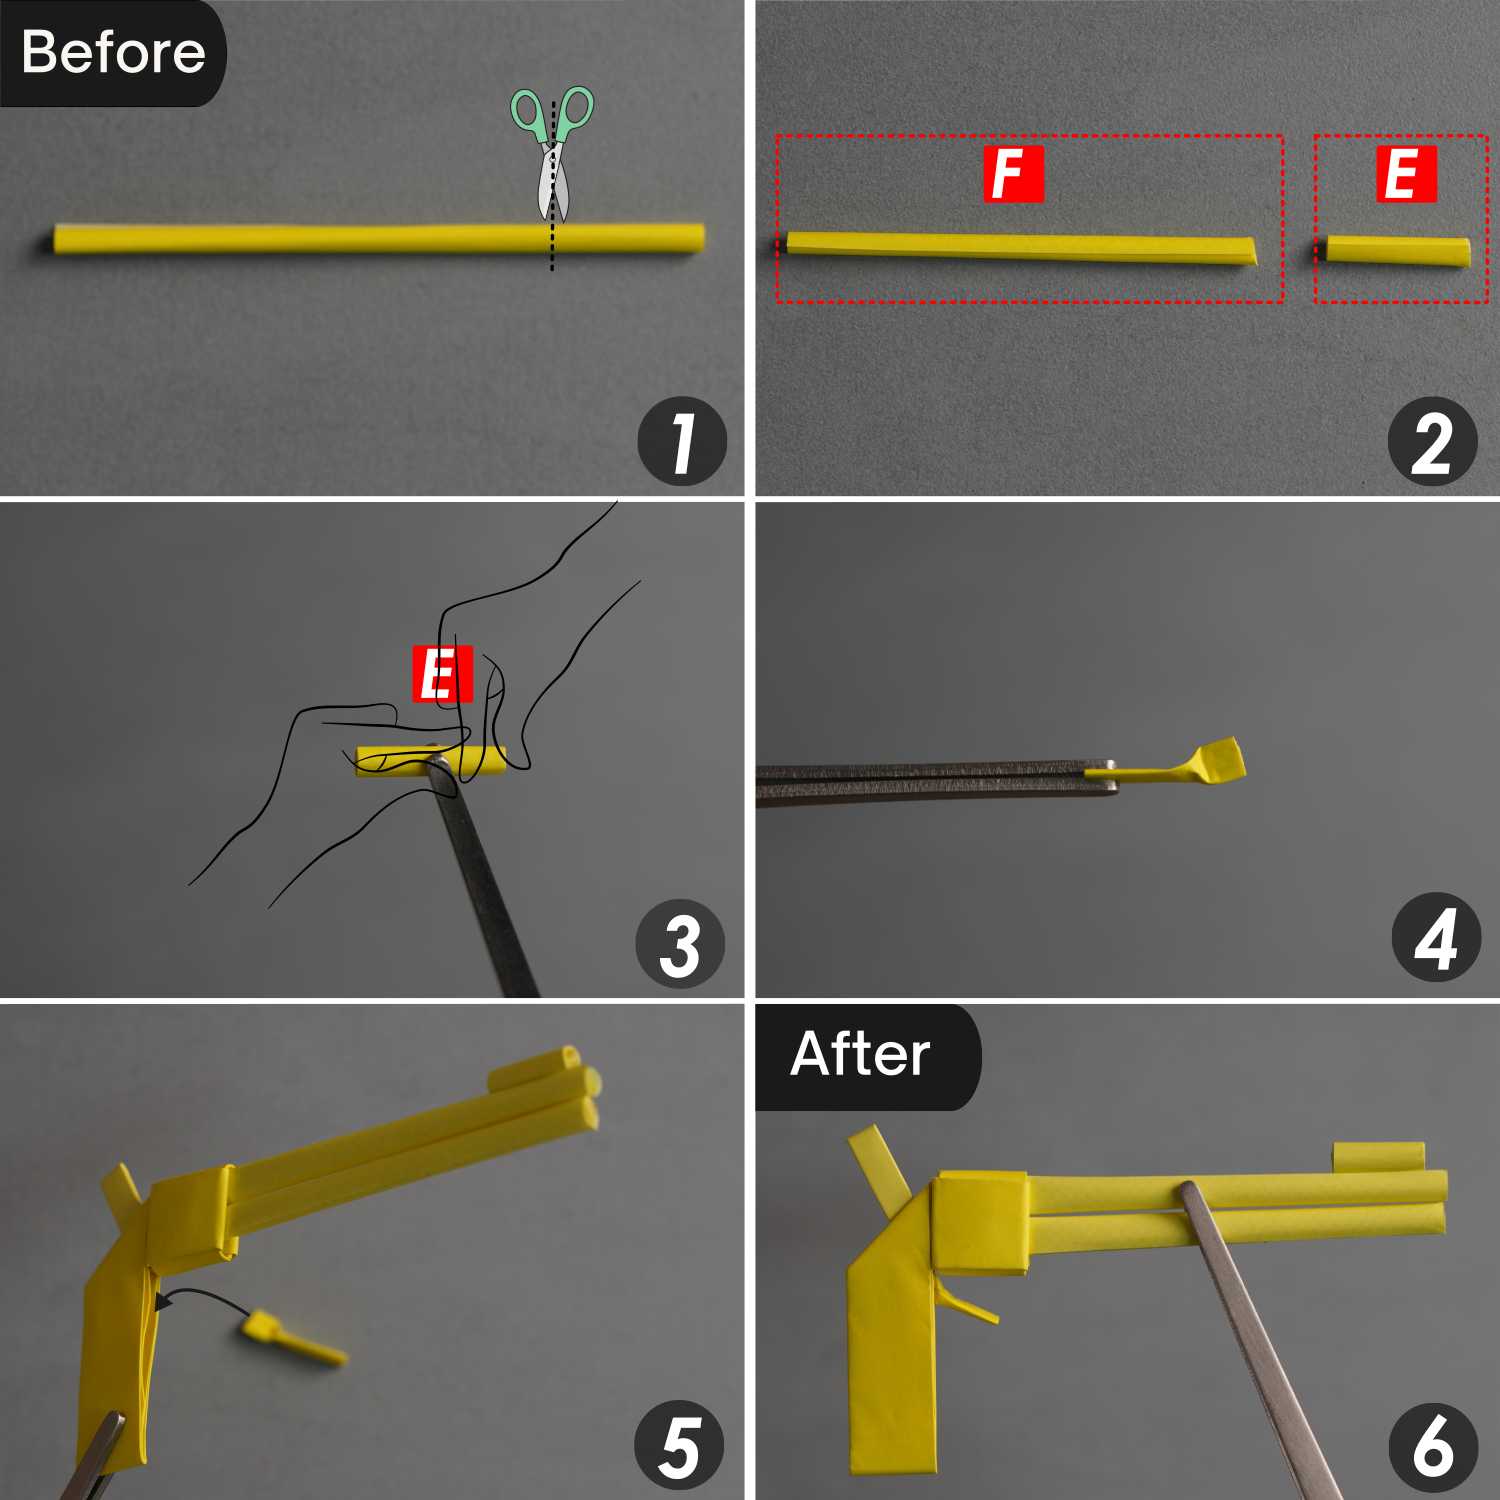
Cut off a small section of the right end of the paper stick and mark the cut section as the letter A. Then, fold the long paper stick in half and unfold it, then cut along the center line to get two sections of paper sticks of the same length, marked as B and C.
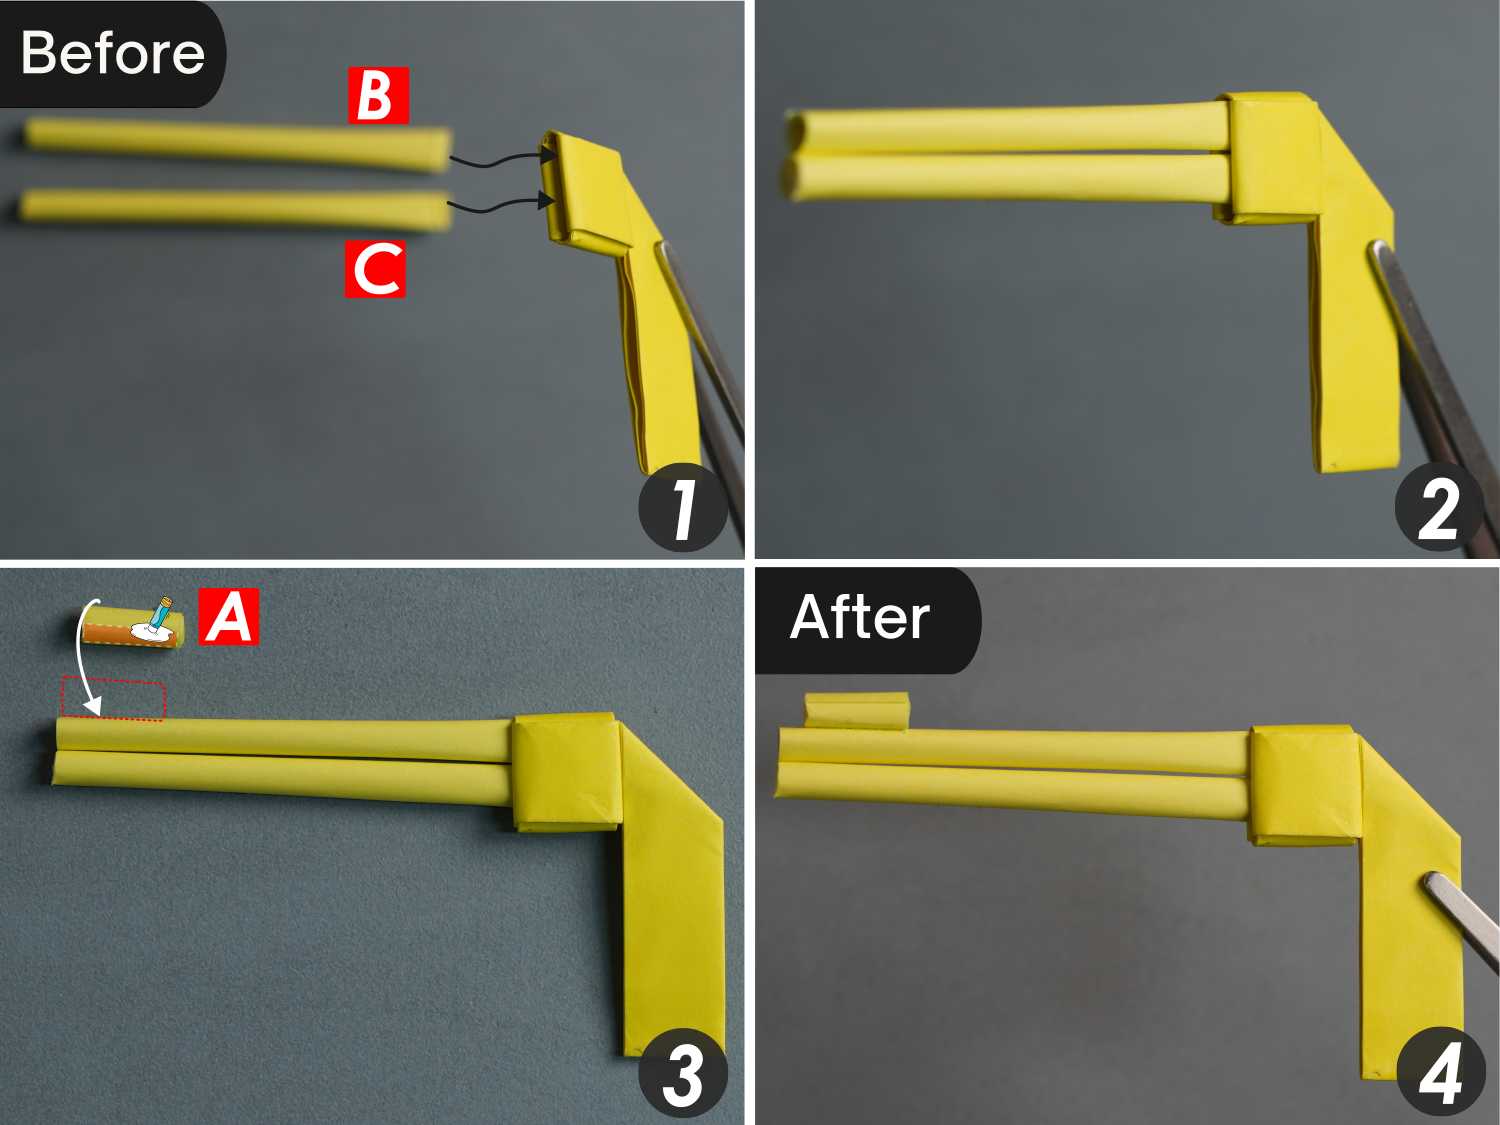
Step 19
Assemble paper sticks B and C, which are the barrel, with the gun body, and then glue paper stick A to the top of the end of the barrel.
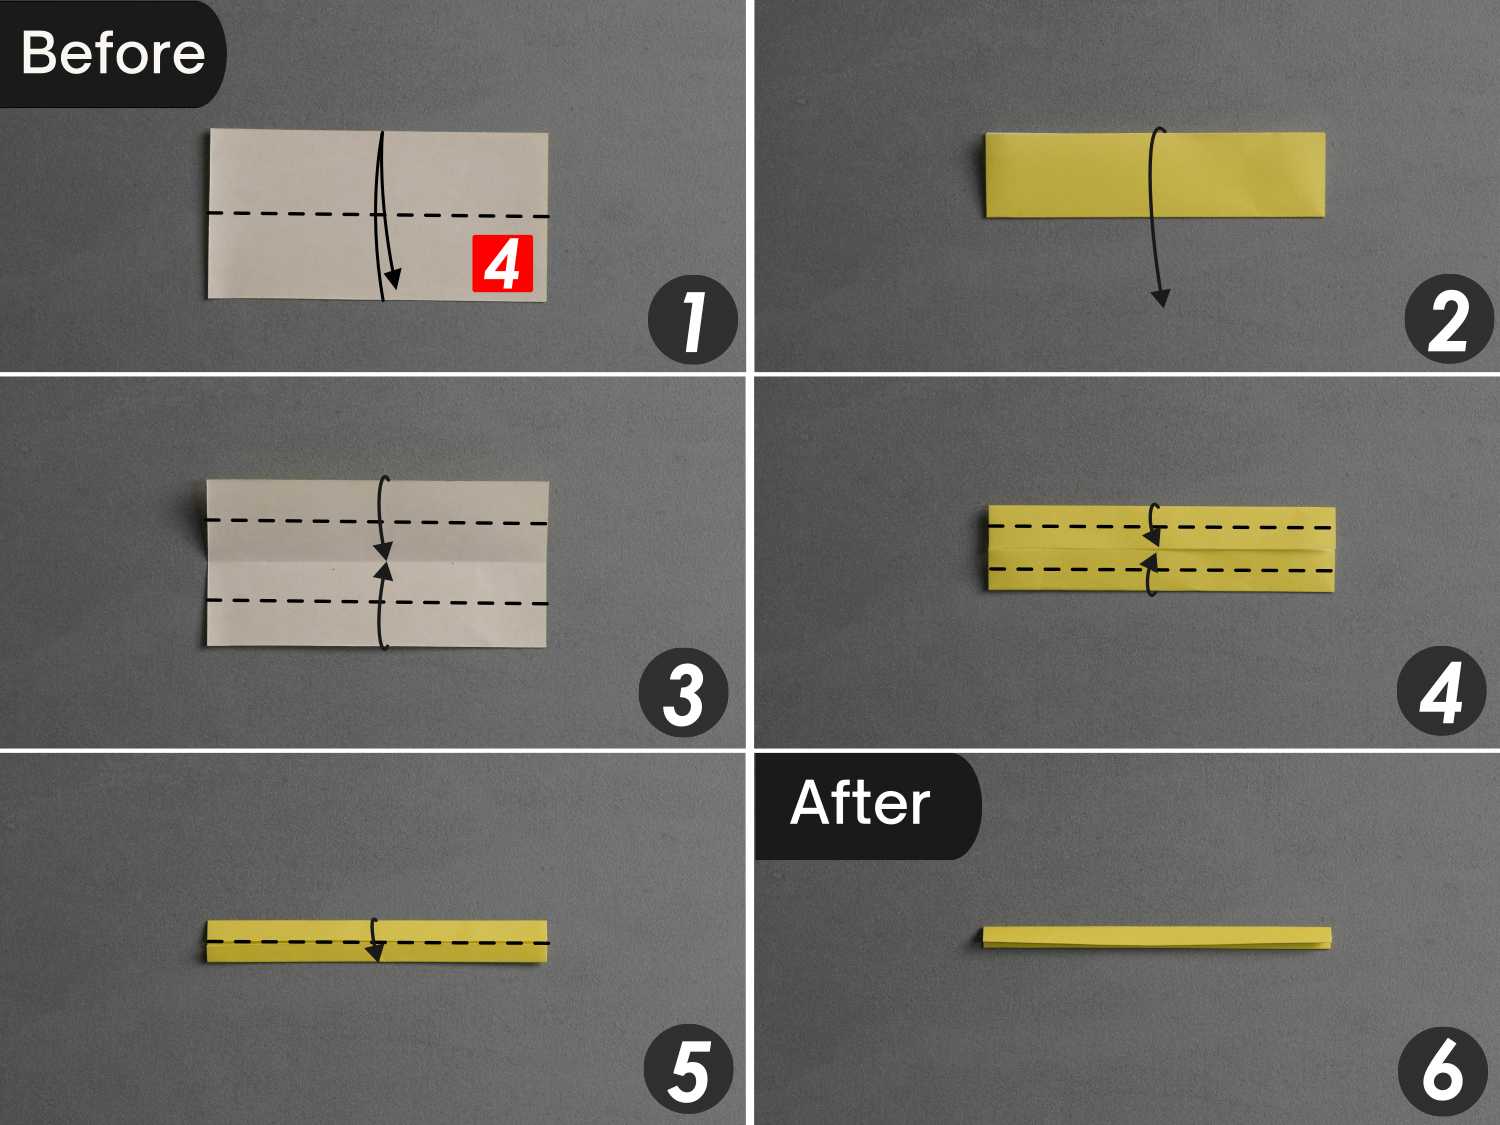
Step 20
Fold the paper marked number 4 in half horizontally, leaving a crease, and unfold it. Fold the top and bottom edges to align with the middle horizontal crease, and repeat this one more time. Finally, fold it in half horizontally from top to bottom.
Step 21
Cut this strip to the appropriate length and tuck it between the layers of the gun body to serve as a trigger.
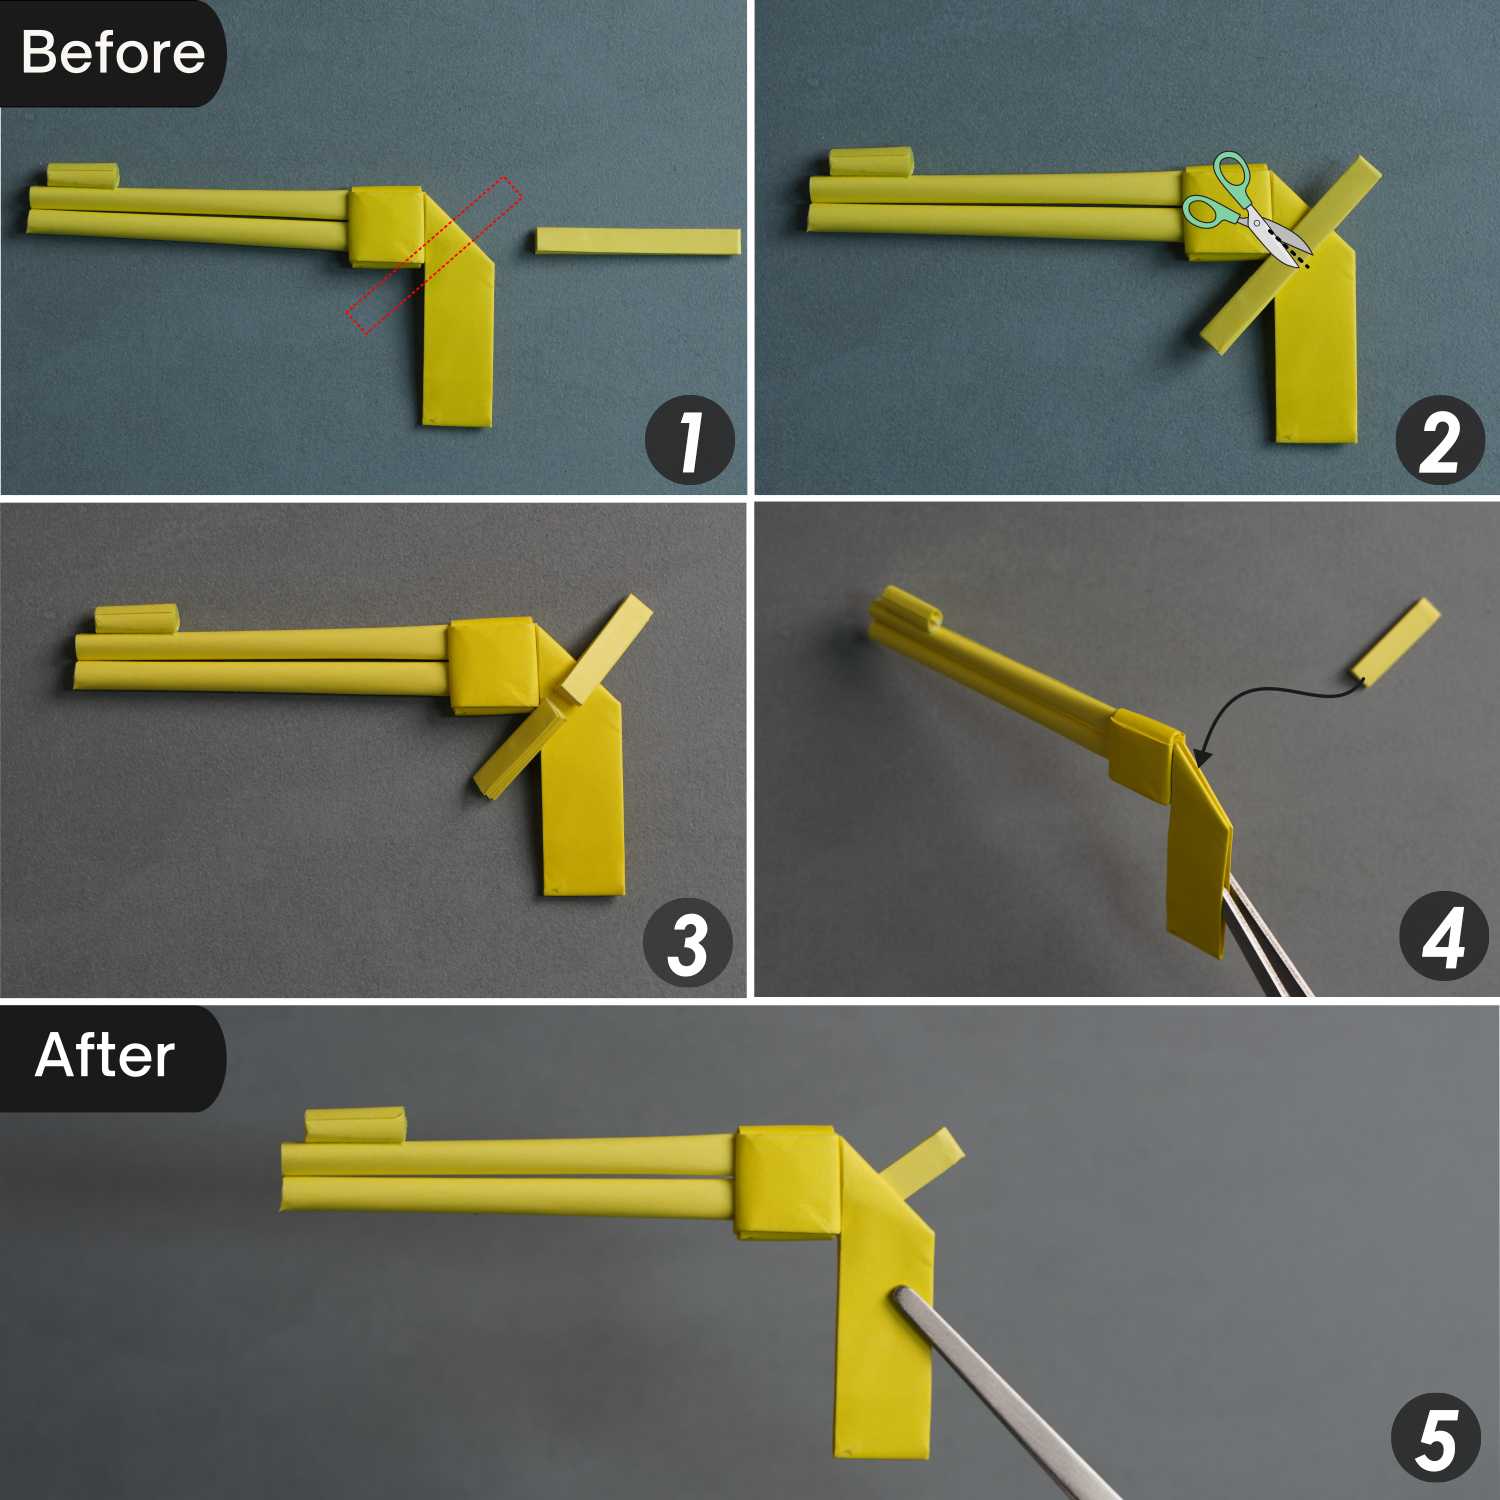
Step 22
Take out the number 2.2 paper, Fold up the bottom edge a little, then roll it up from the bottom side, apply glue to the top side to secure it well, and form a paper stick.
Step 23
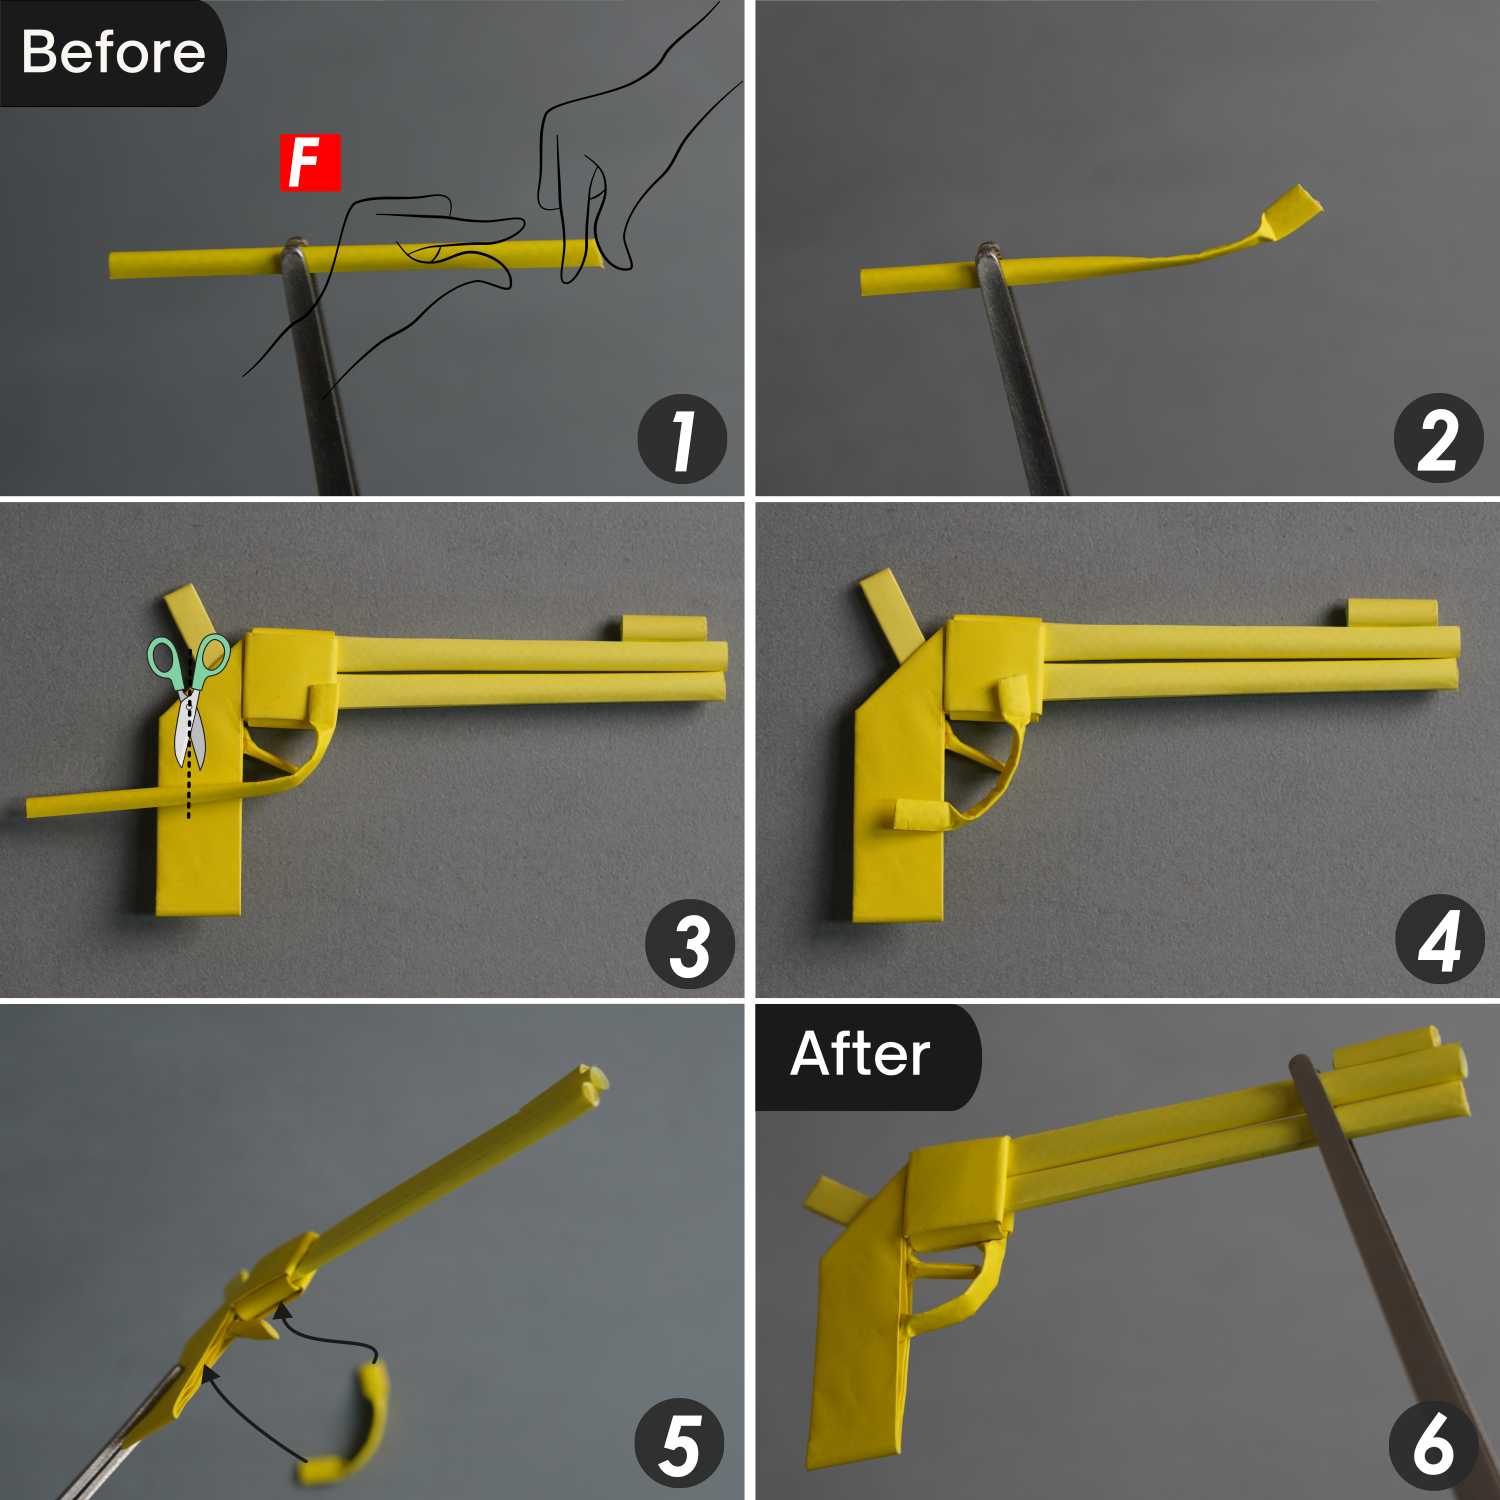
Cut off a small section of the right end of this paper stick and mark the short section as the letter E and the longer section as the letter F. Shape the section E into the shape shown in picture 4 and snap it into place where the gun body folds over.
Step 24
Pinch the f section into the shape shown in Figure 2, and then insert it into the folded part of the gun body.
Put one end of the paper stick in the square part of the gun body, and then cut it to the appropriate length so that both ends can be inserted into the gun body to get a trigger guard.
This safe origami toy can help you play a policeman or a cool killer, which is very suitable for your children or younger siblings to make.
In addition, you may need some original “weapons,” such as our origami sword, using some unique paper to make your sword cool and unique. Don’t miss out on our origami ninja star, a Japanese concealed weapon. It features a beautiful symmetrical four-pointed star design and is easy to make.

Origami Sword

Origami Ninja Star
What’s Next
That’s your origami gun! Now, you can explore our other easy and interesting origami ideas. Enjoy folding!


