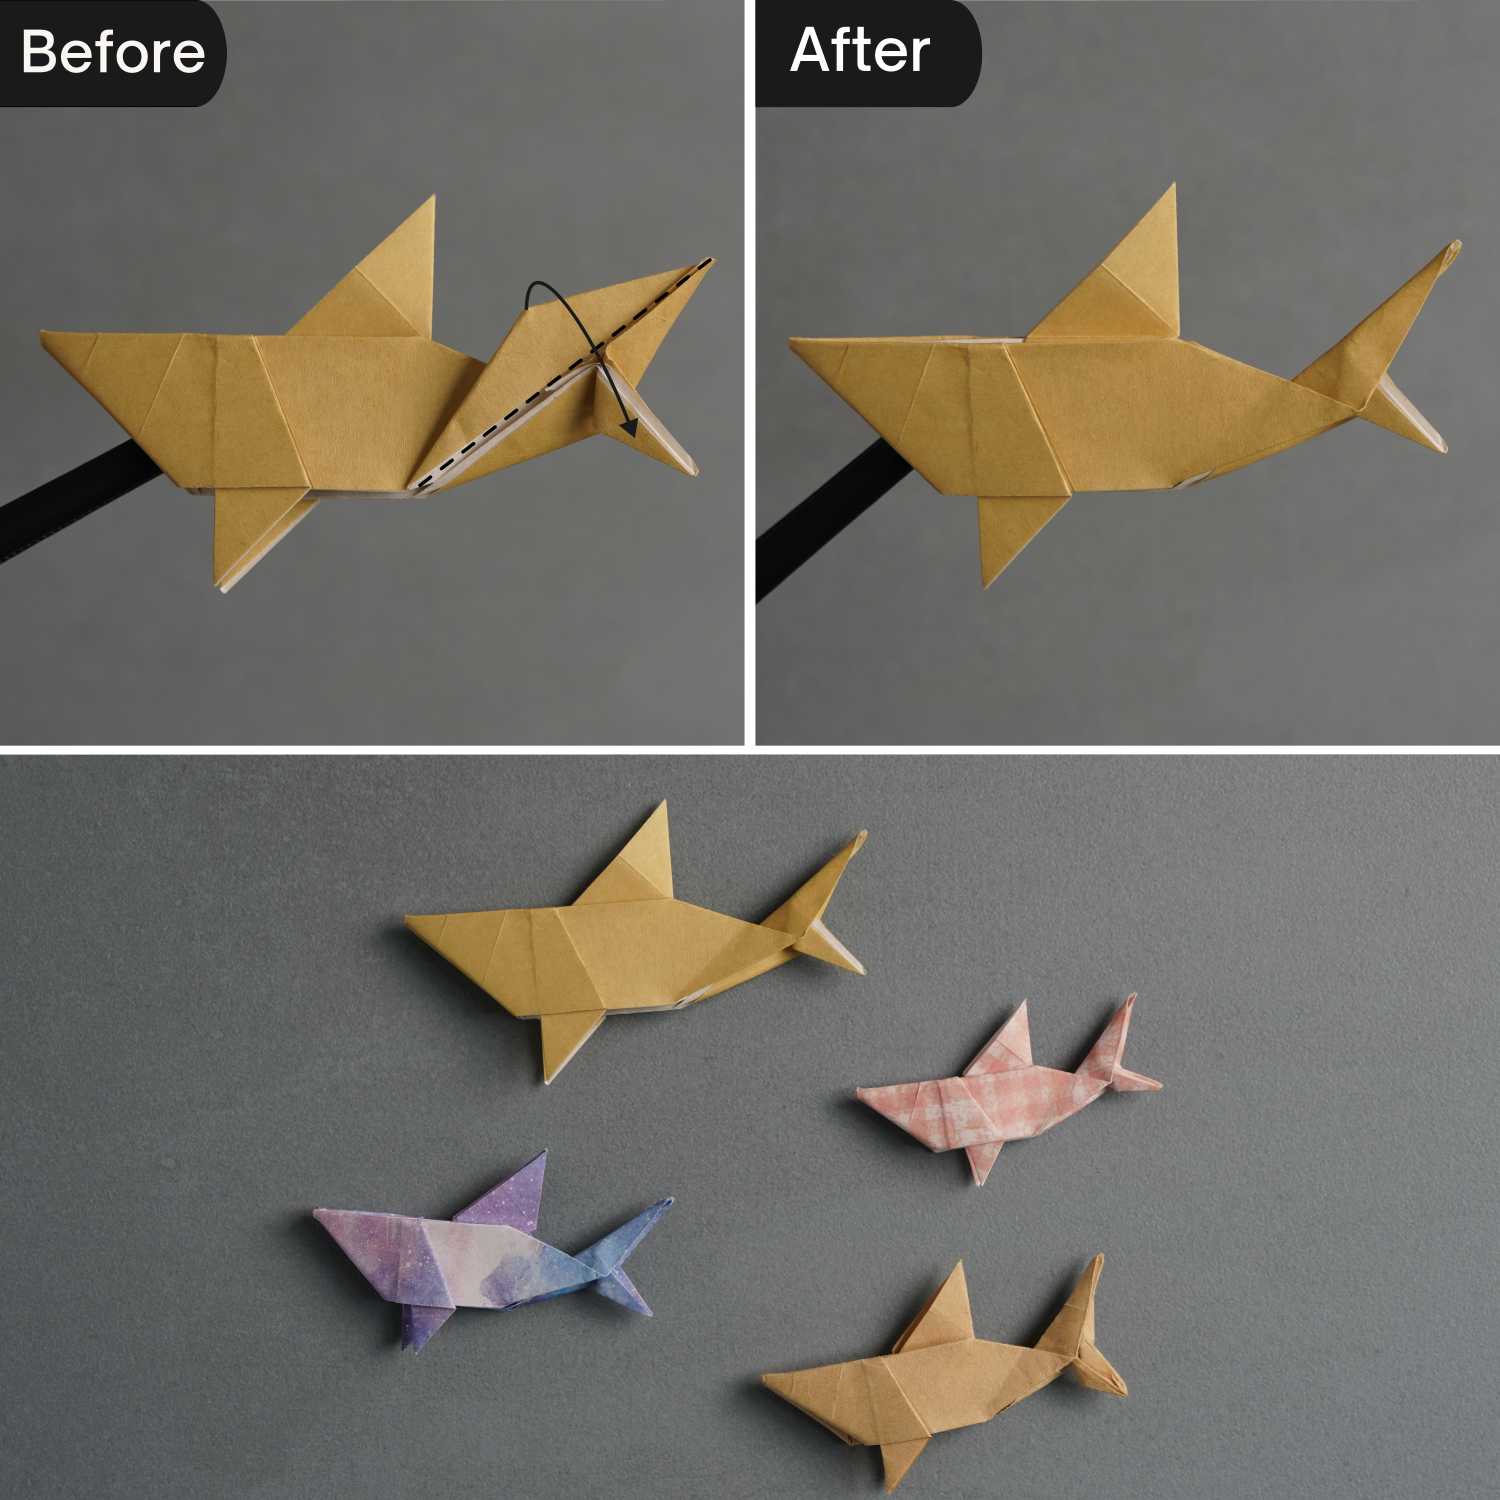
Easy Sticky Note Origami Shark
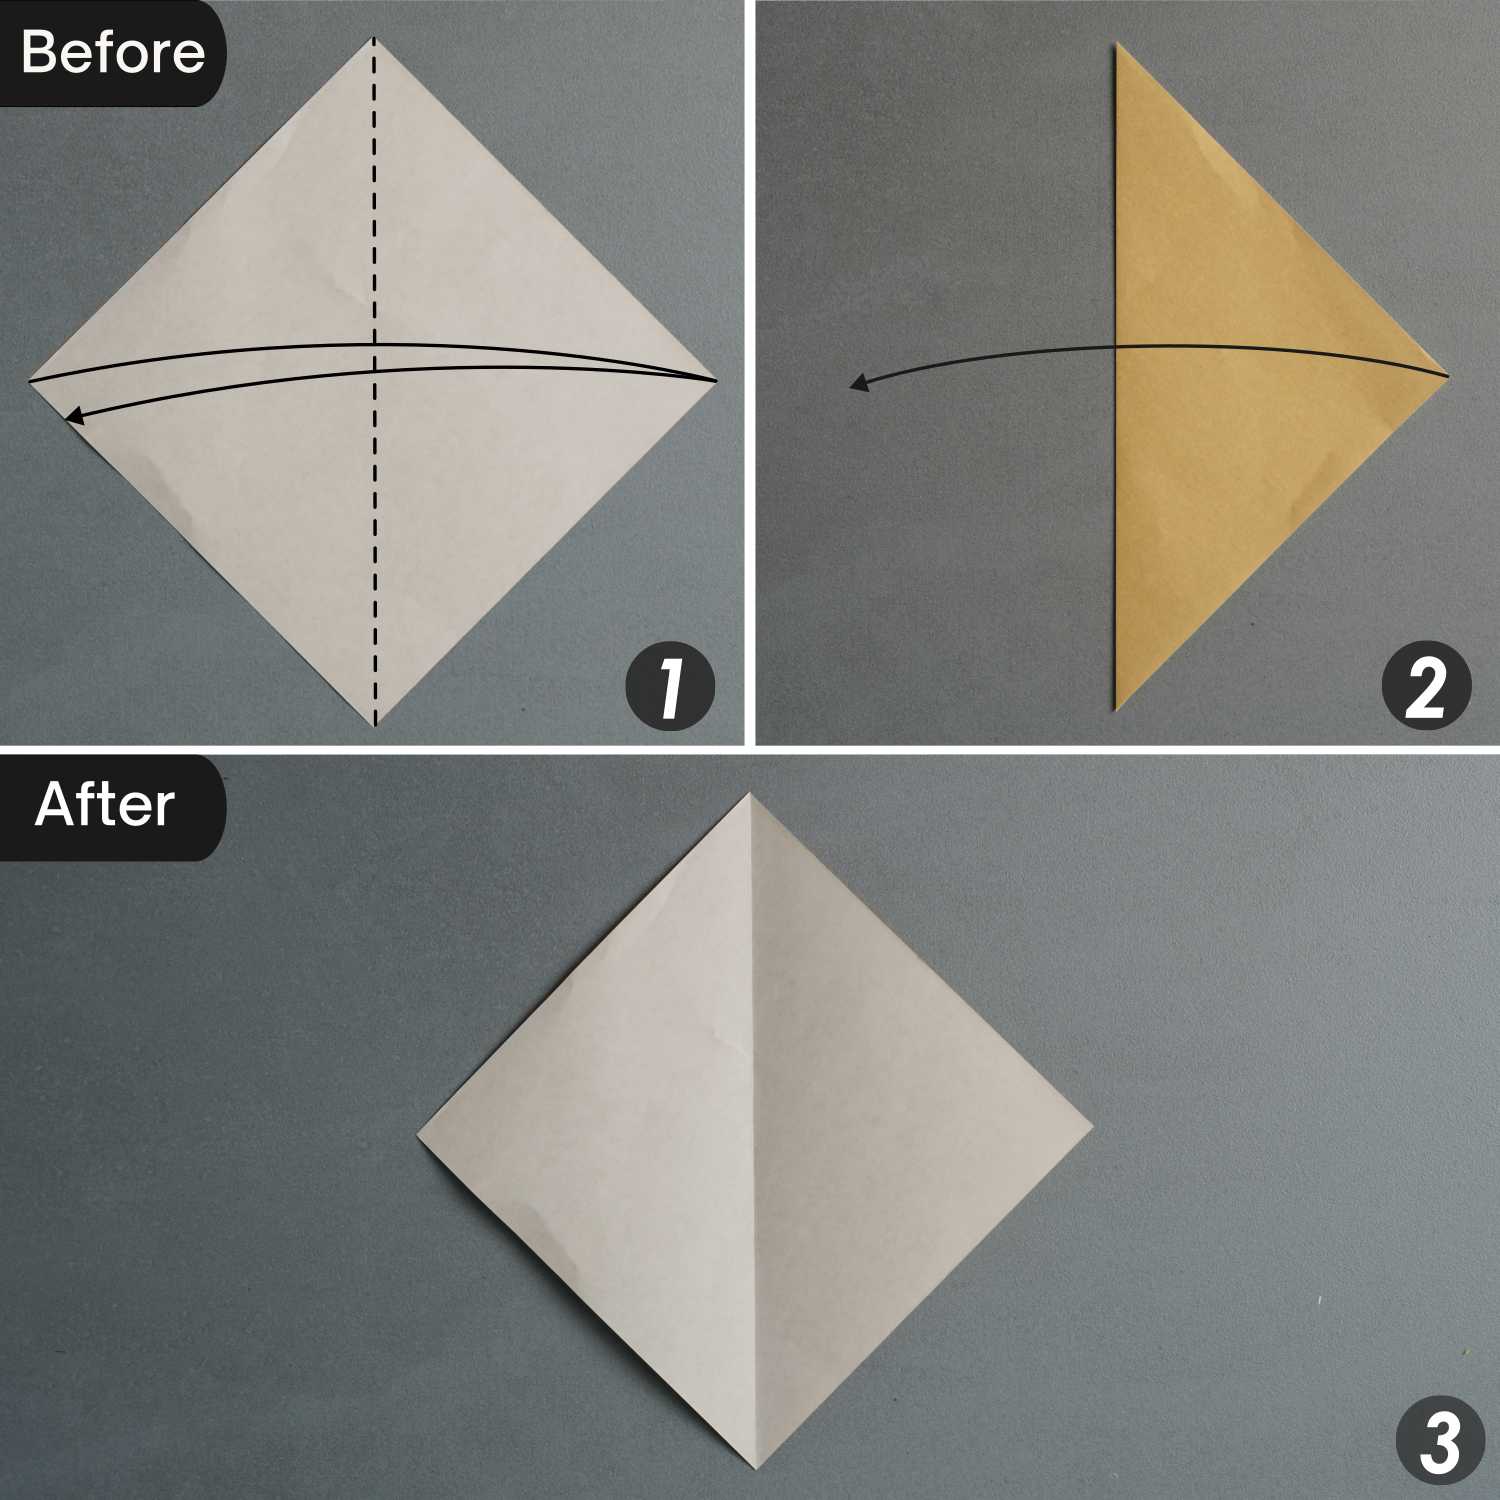
Step 1
Place the paper with the desired display side face down, fold it in half vertically, leaving a crease, and unfold it.
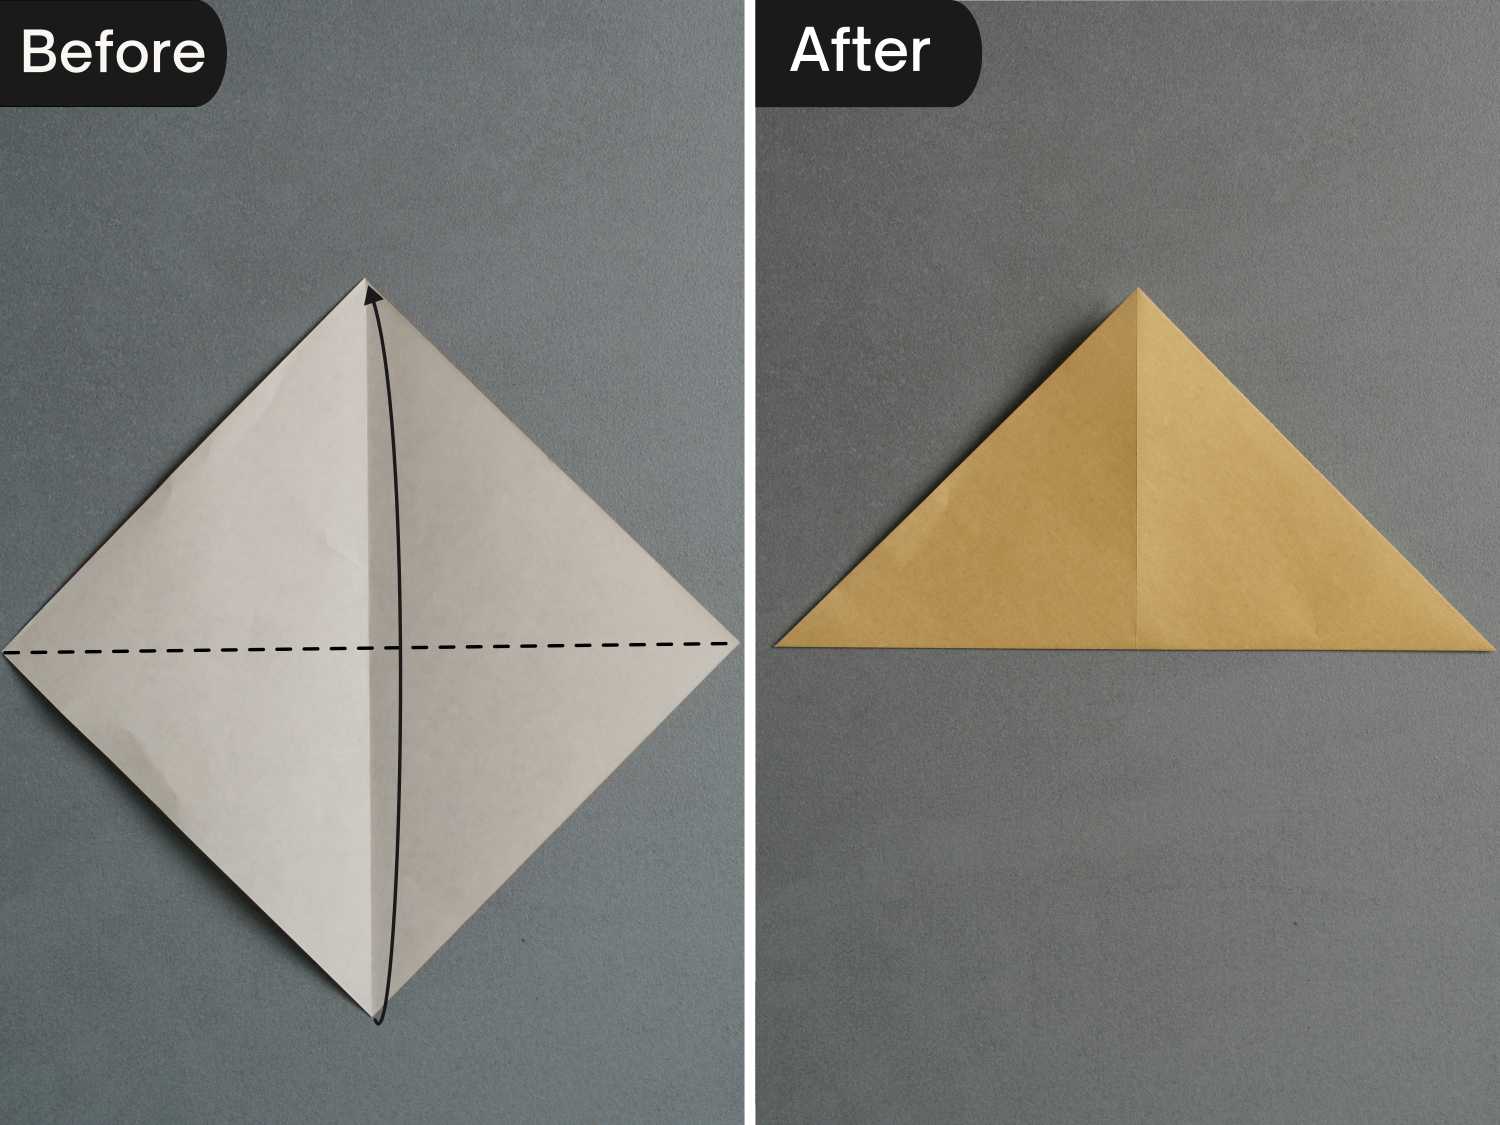
Step 2
Fold the paper in half horizontally from bottom to top.
Step 3
Fold the left edge of the top layer to align with the bottom edge, leaving a crease, and unfold it.
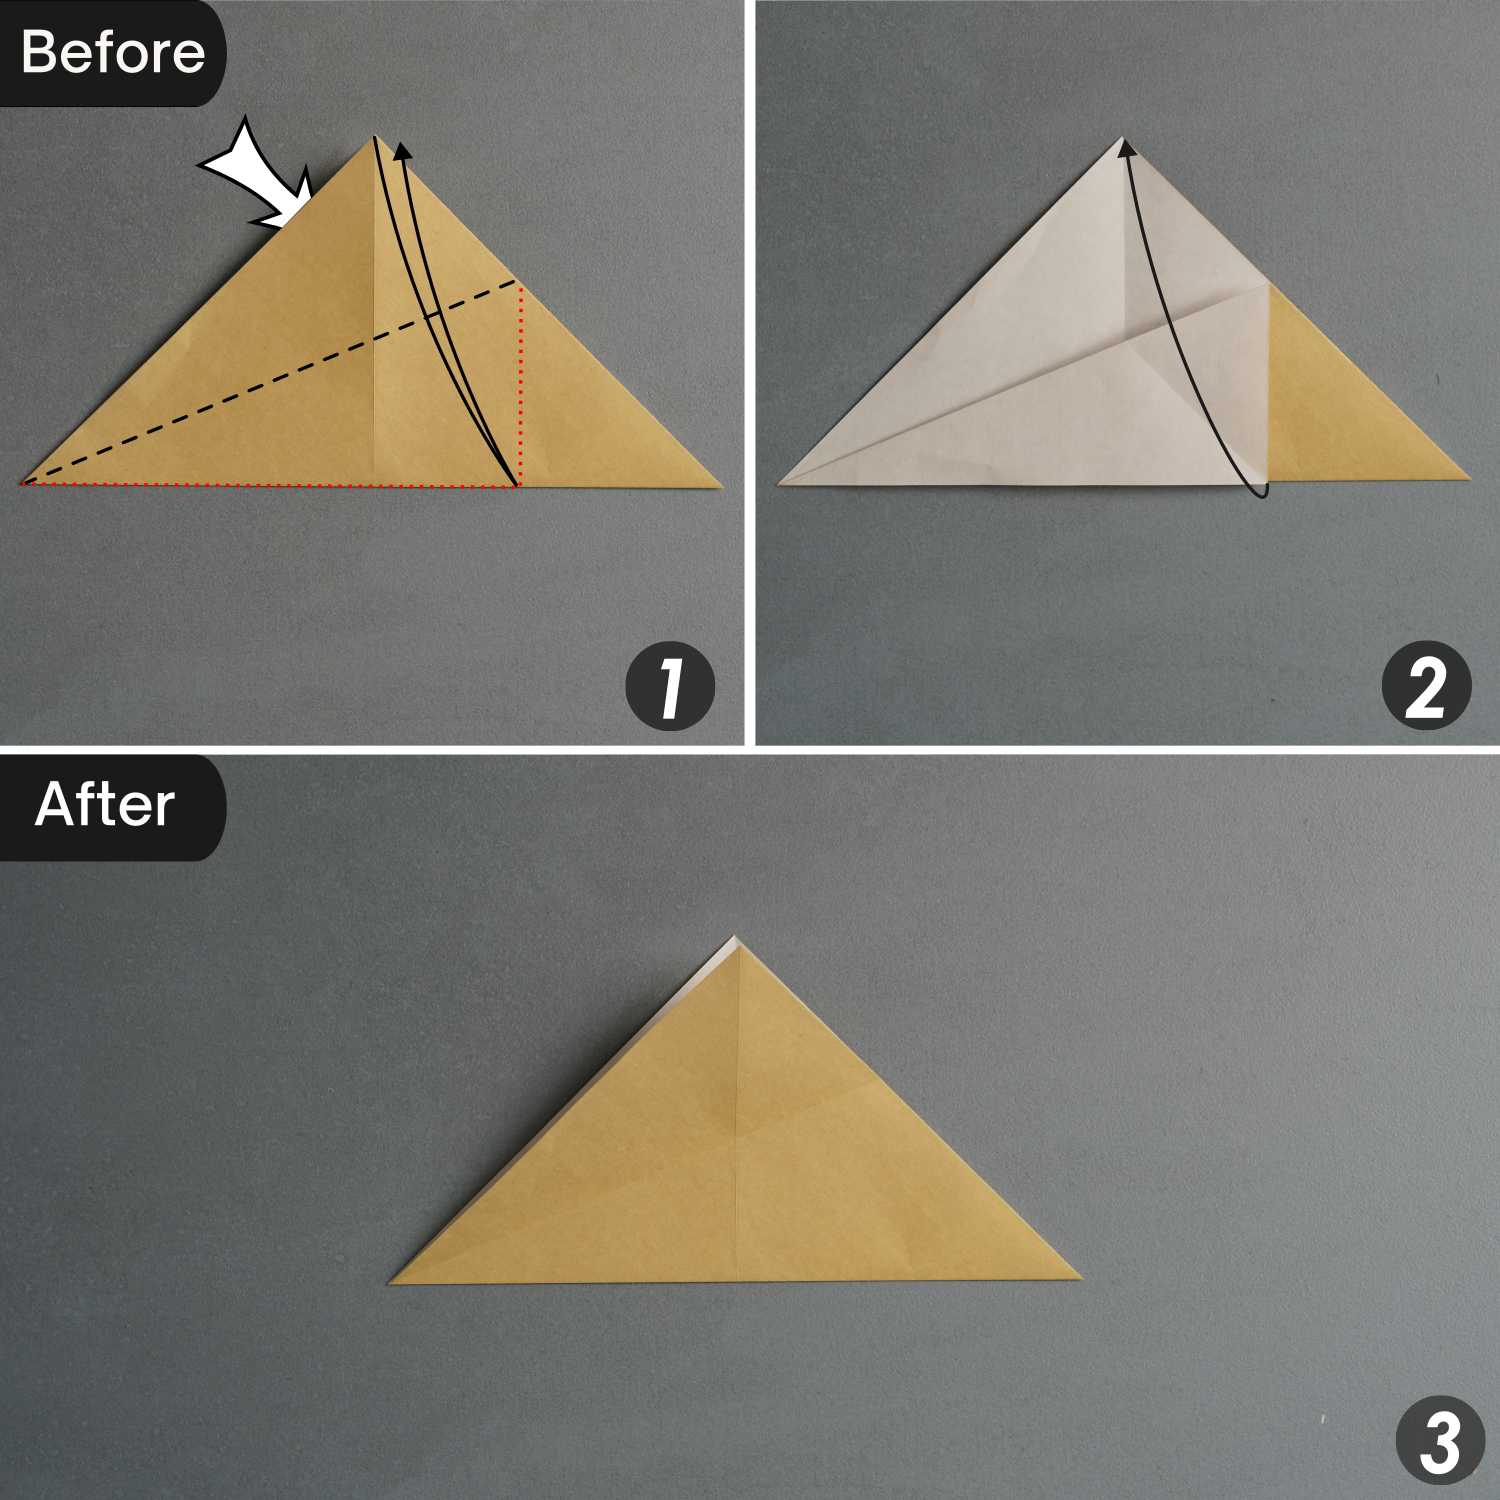
Step 4
Fold the bottom edge along the black dotted line, making the two red spots meet. Then, unfold the paper completely.
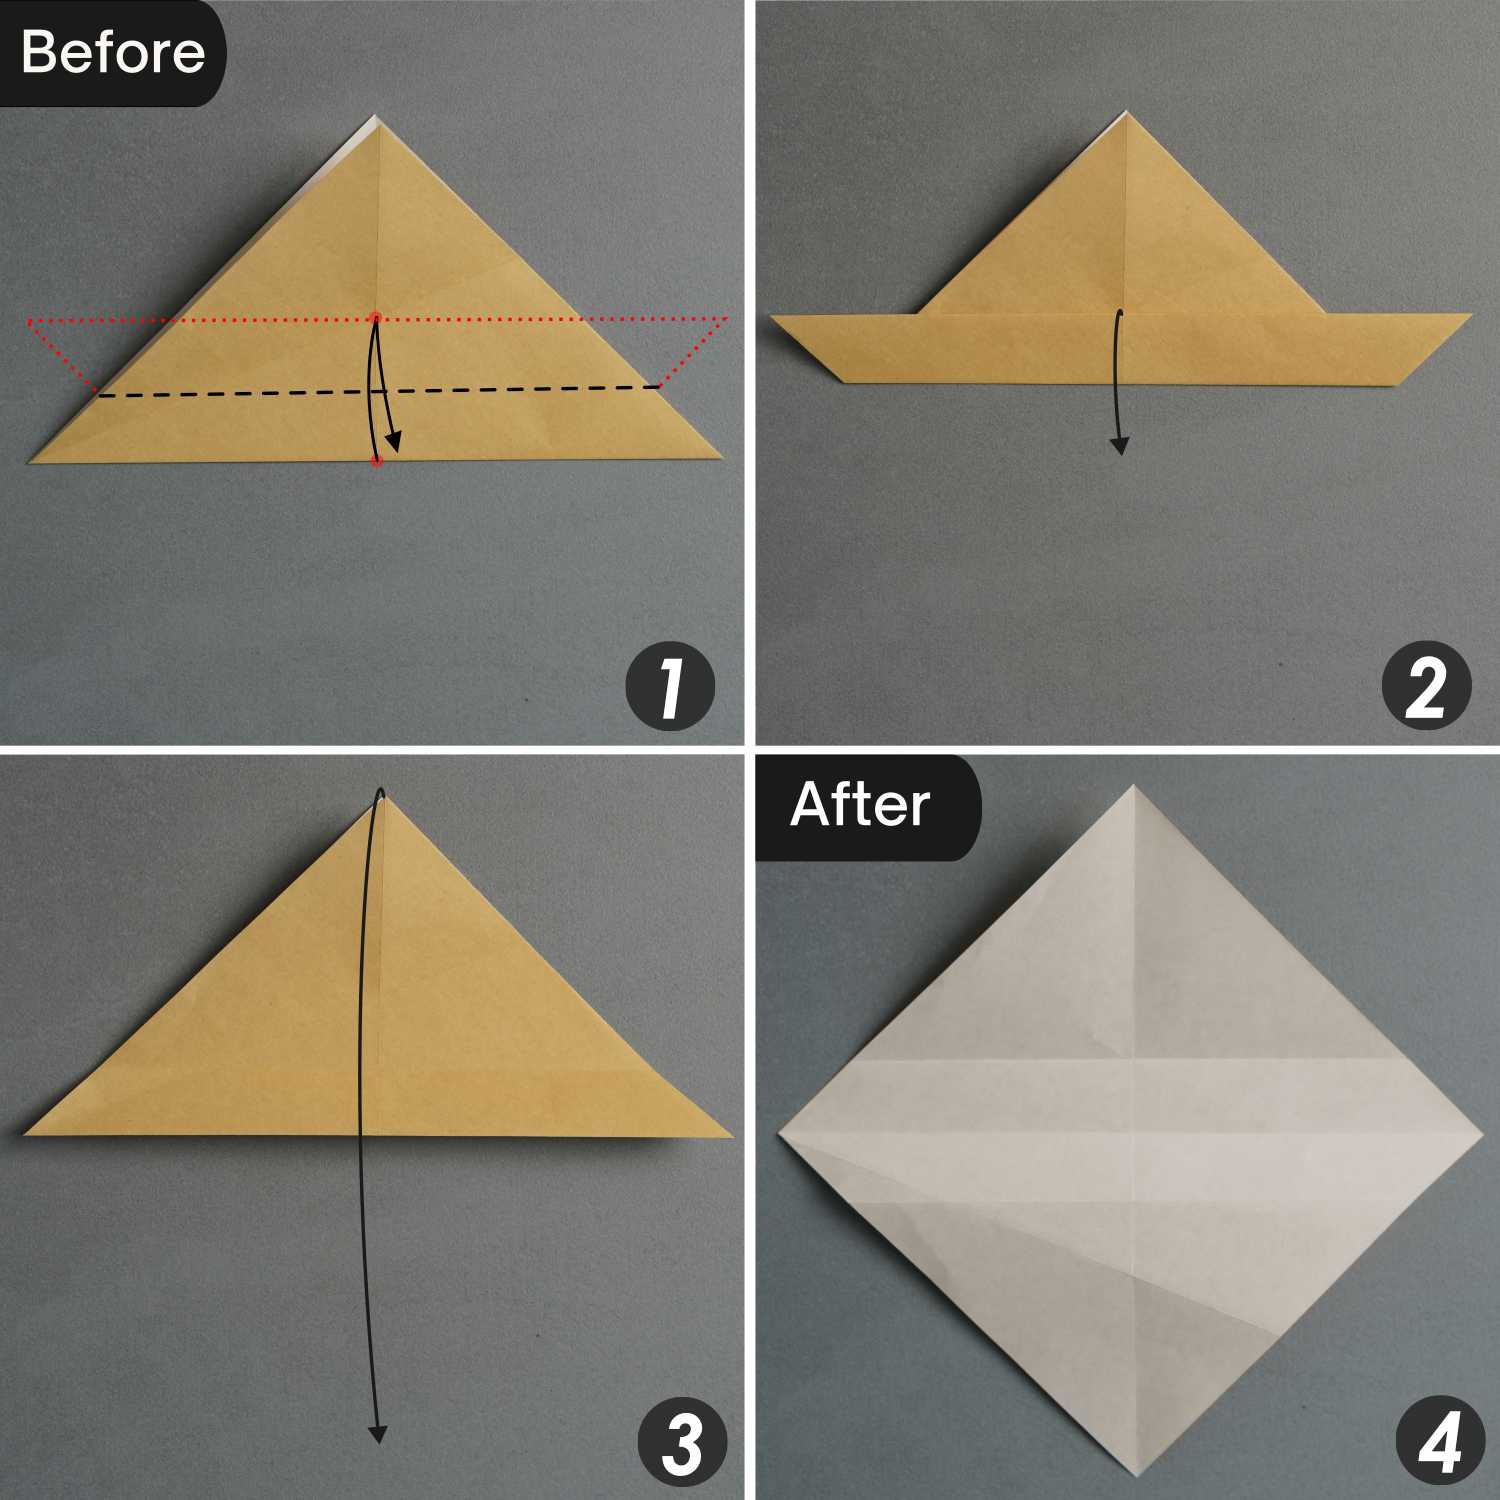
Step 5
Fold the top and bottom left edges to align with the horizontal creases you created in the previous step, and unfold them.
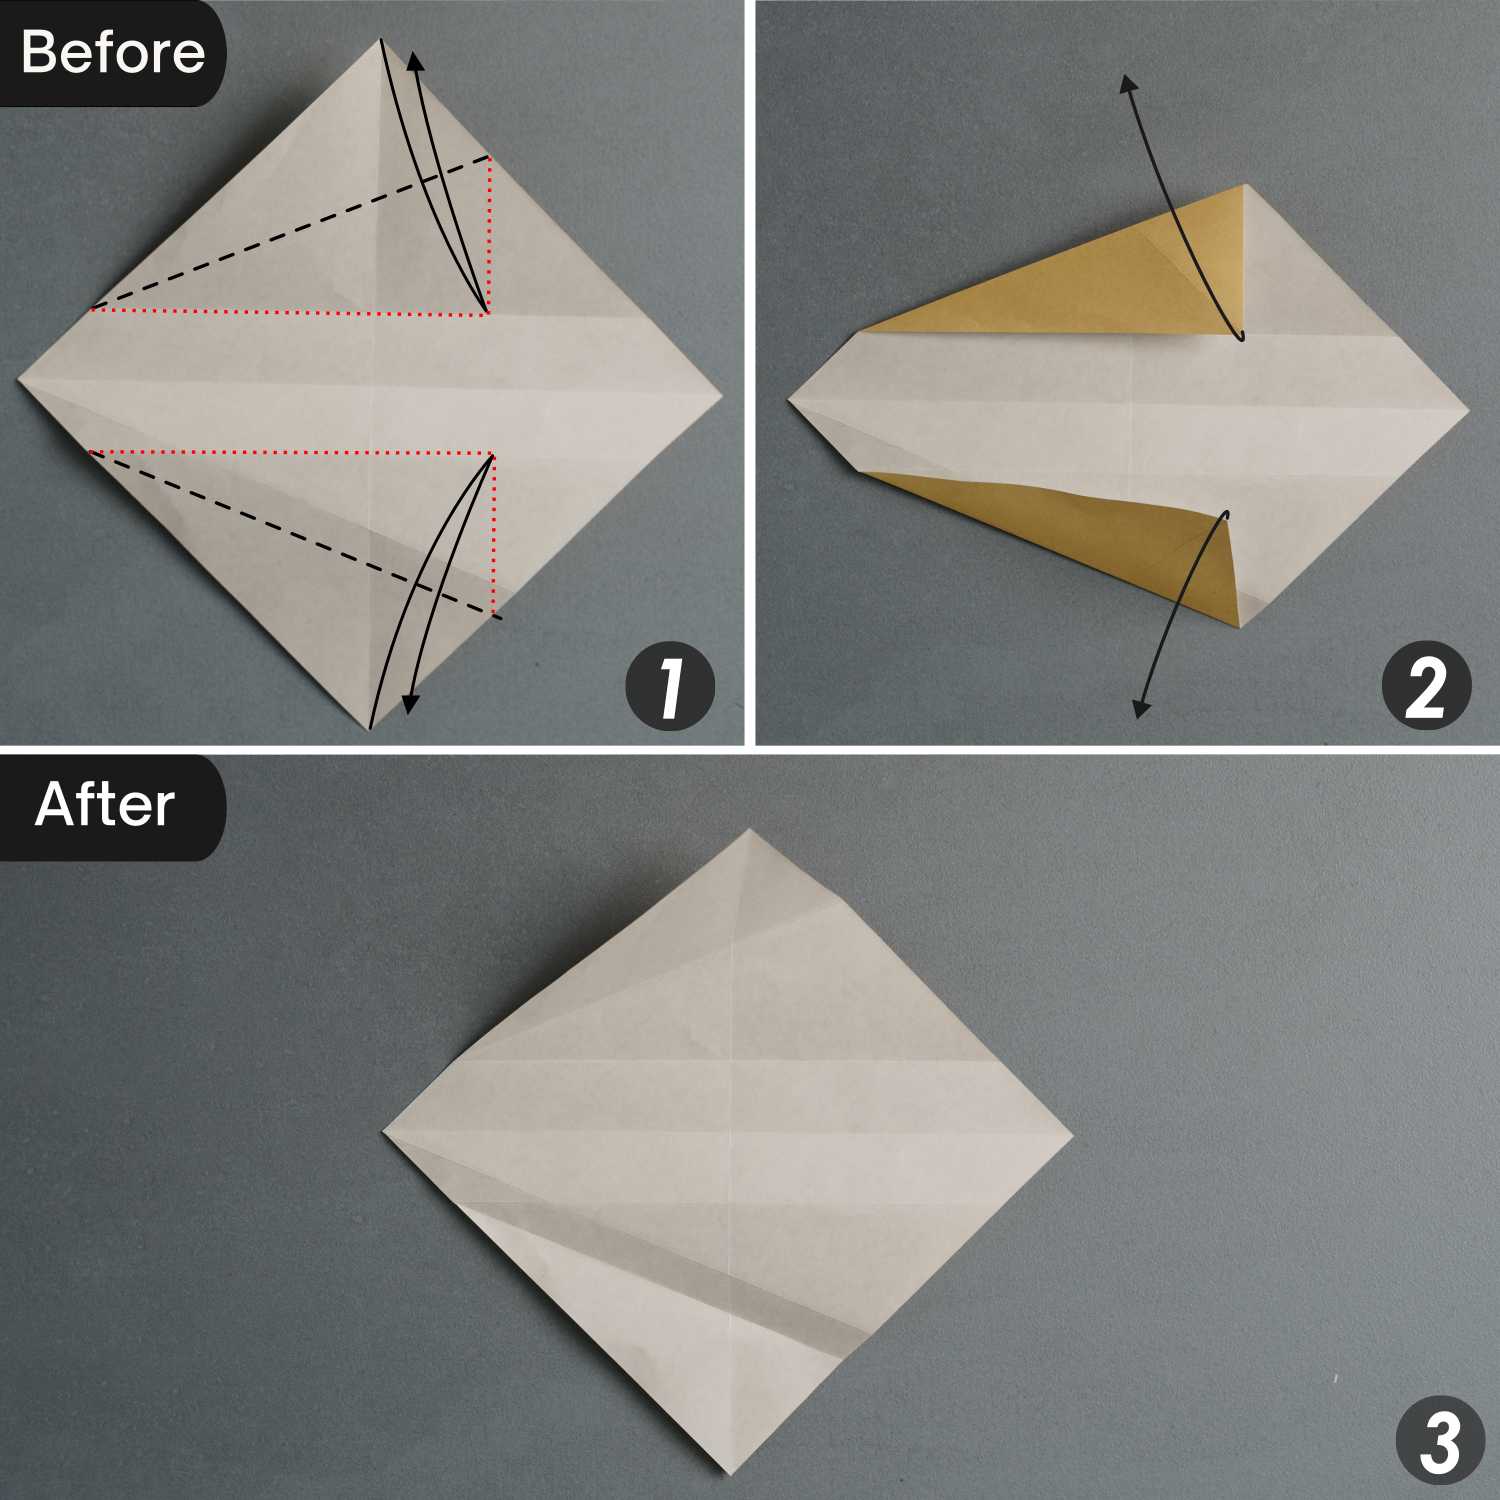
Step 6
Fold the top and bottom right edges to align with the horizontal creases, and unfold them.
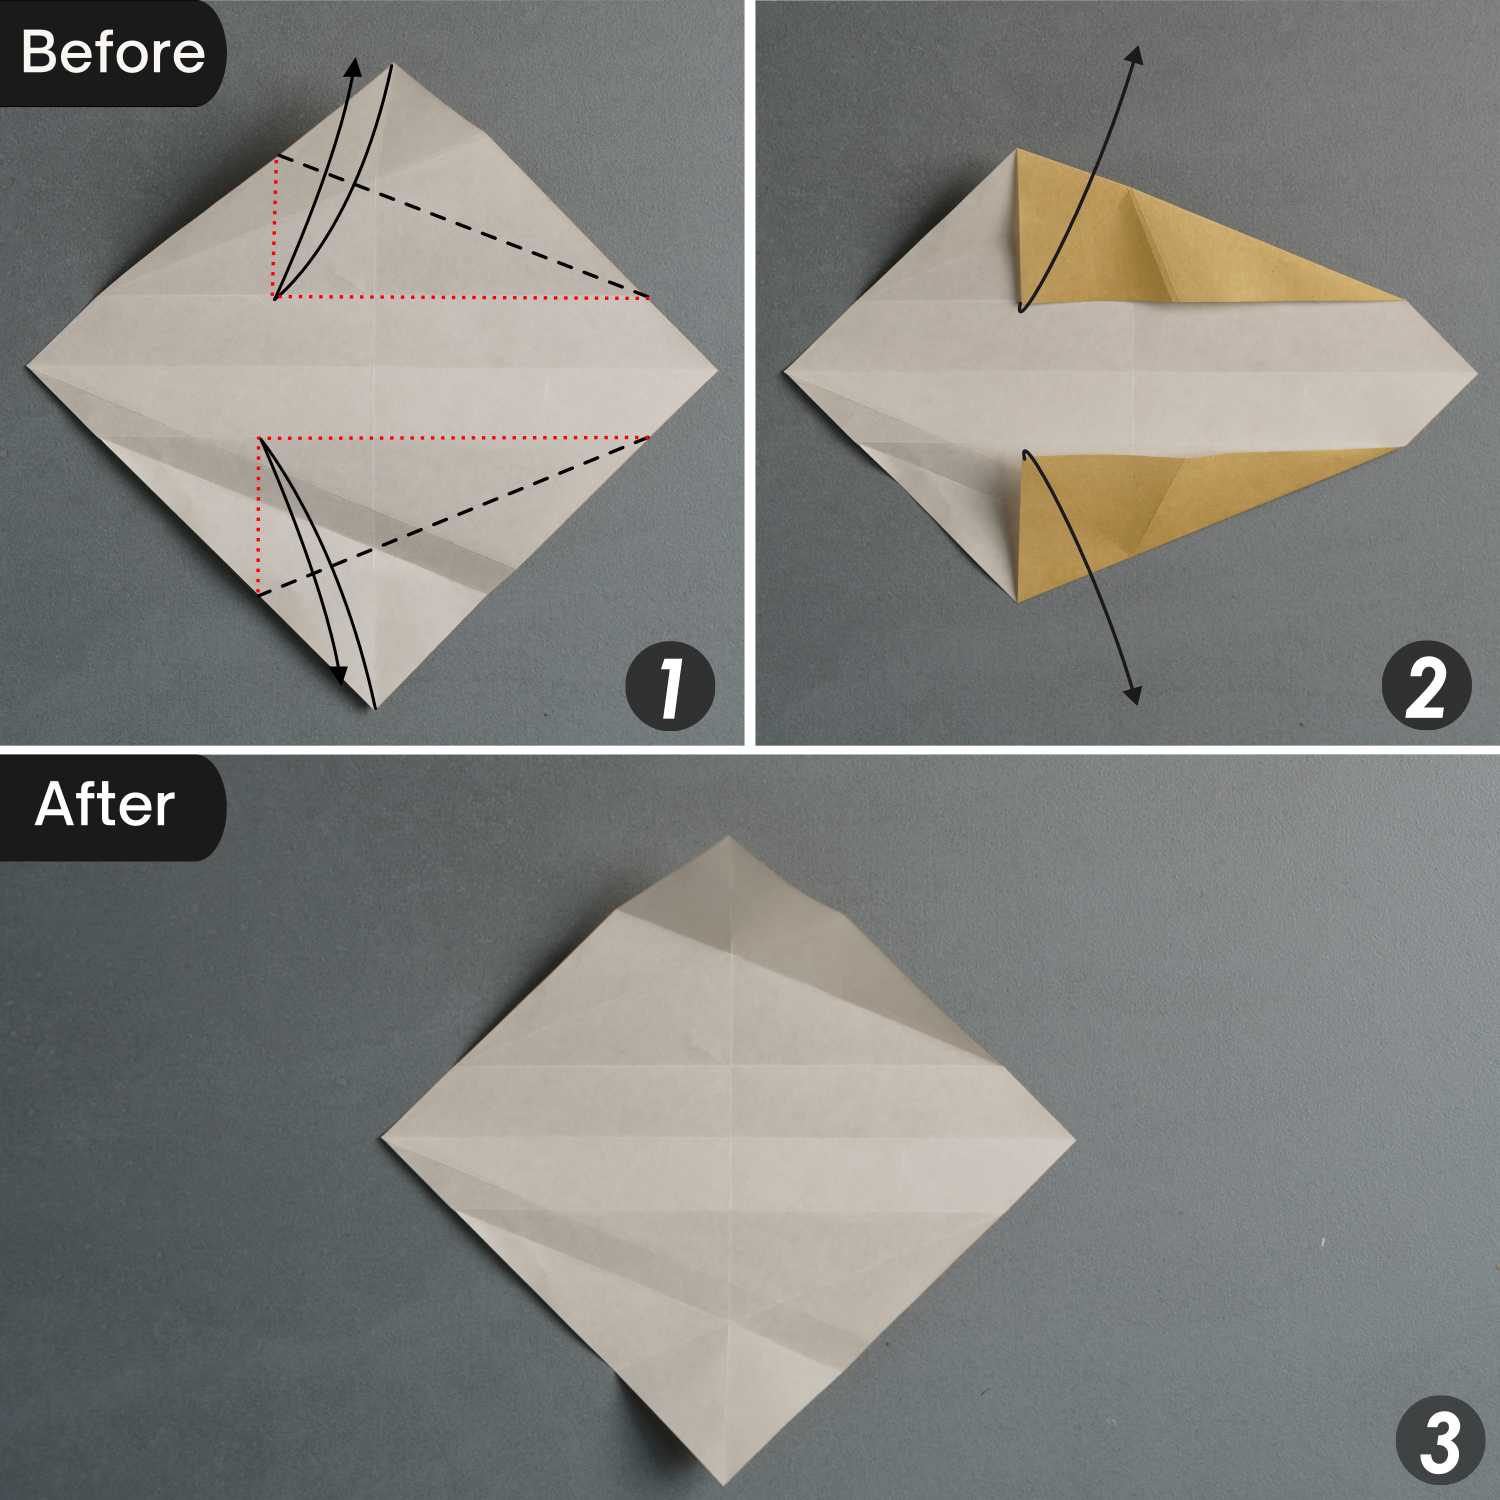
Step 7
Lift the four edges along the creases indicated by the black dotted lines to form a small flap on the top and bottom side, then, press the two flaps to the right side.
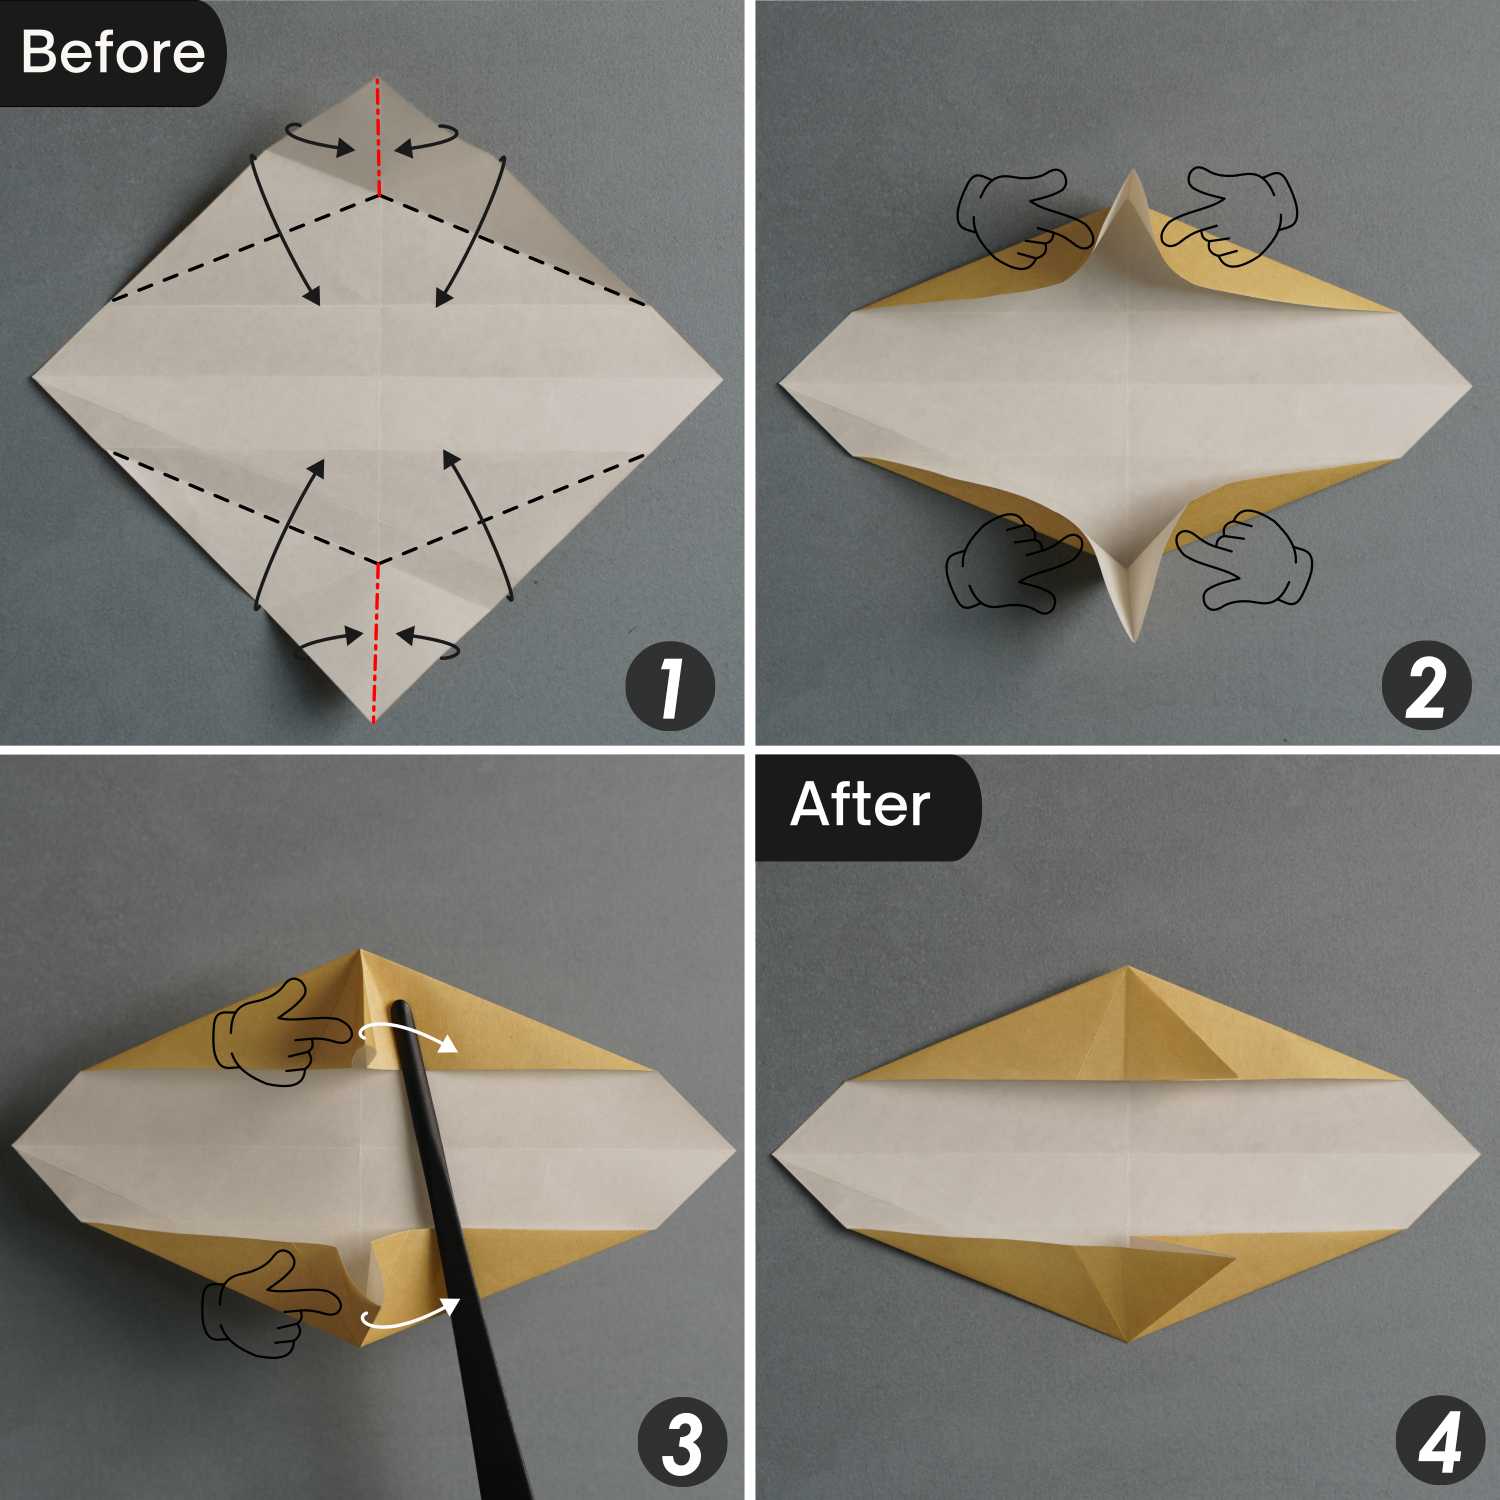
Step 8
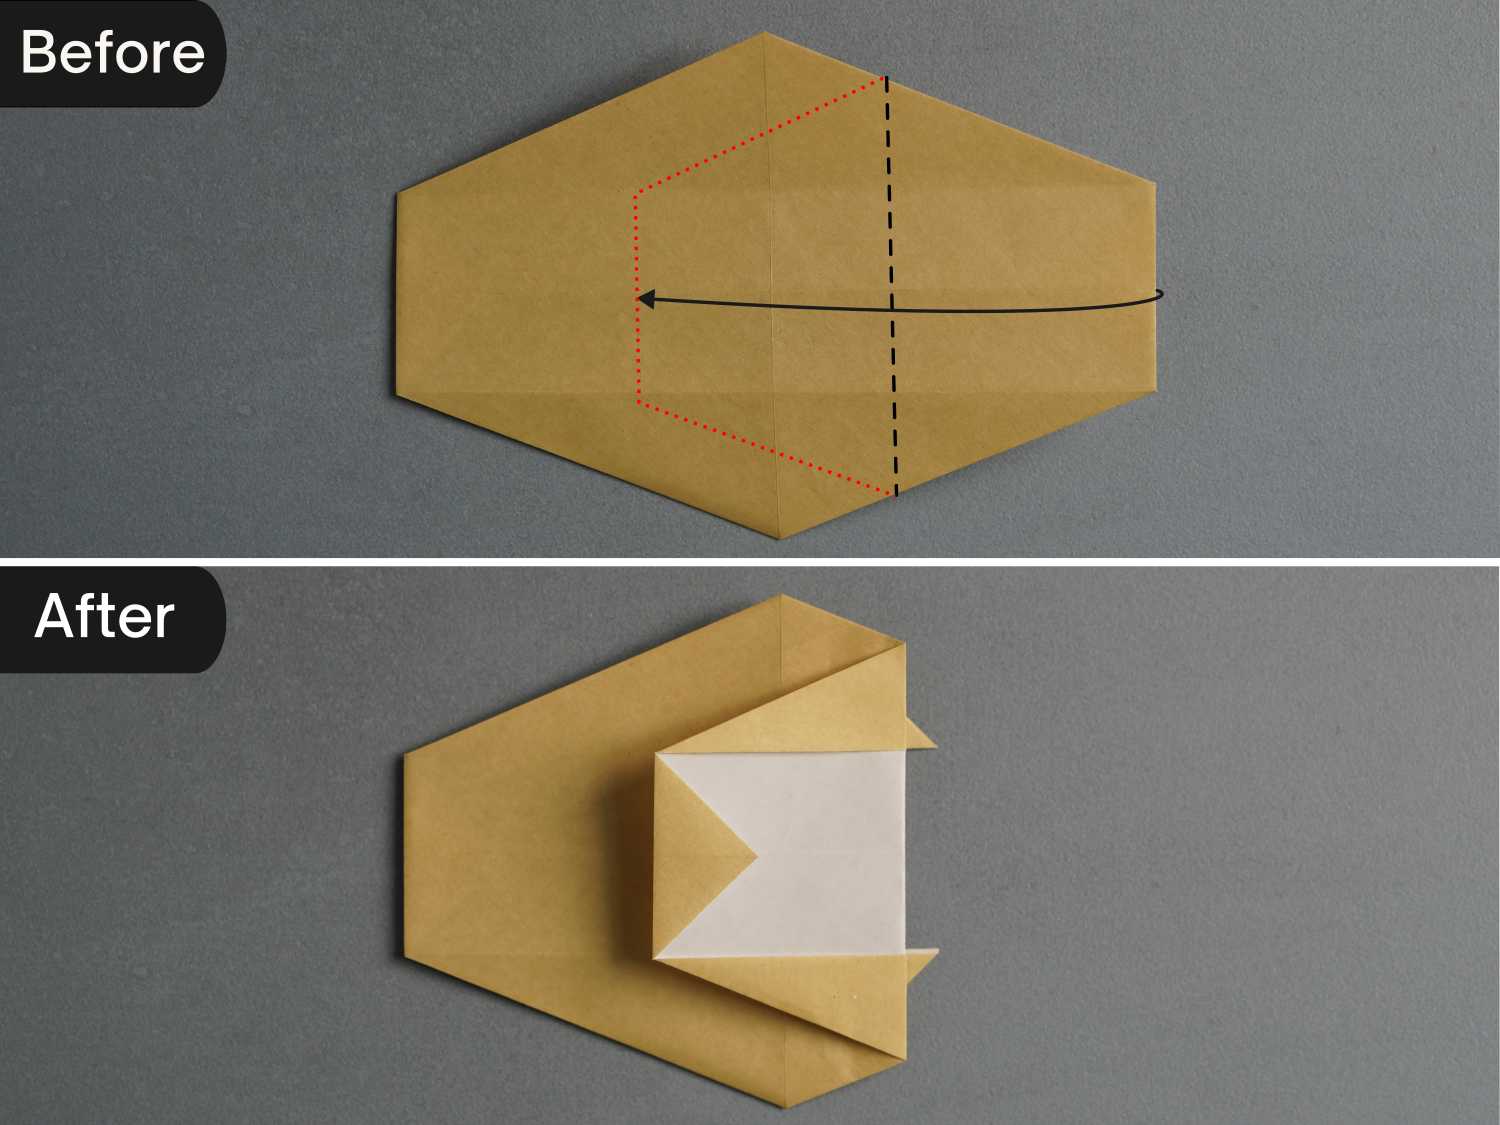
Fold the left and right corners along the dotted lines, then turn over the paper from front to back.

Step 9
Fold the right edge toward the left side along the black dotted line.
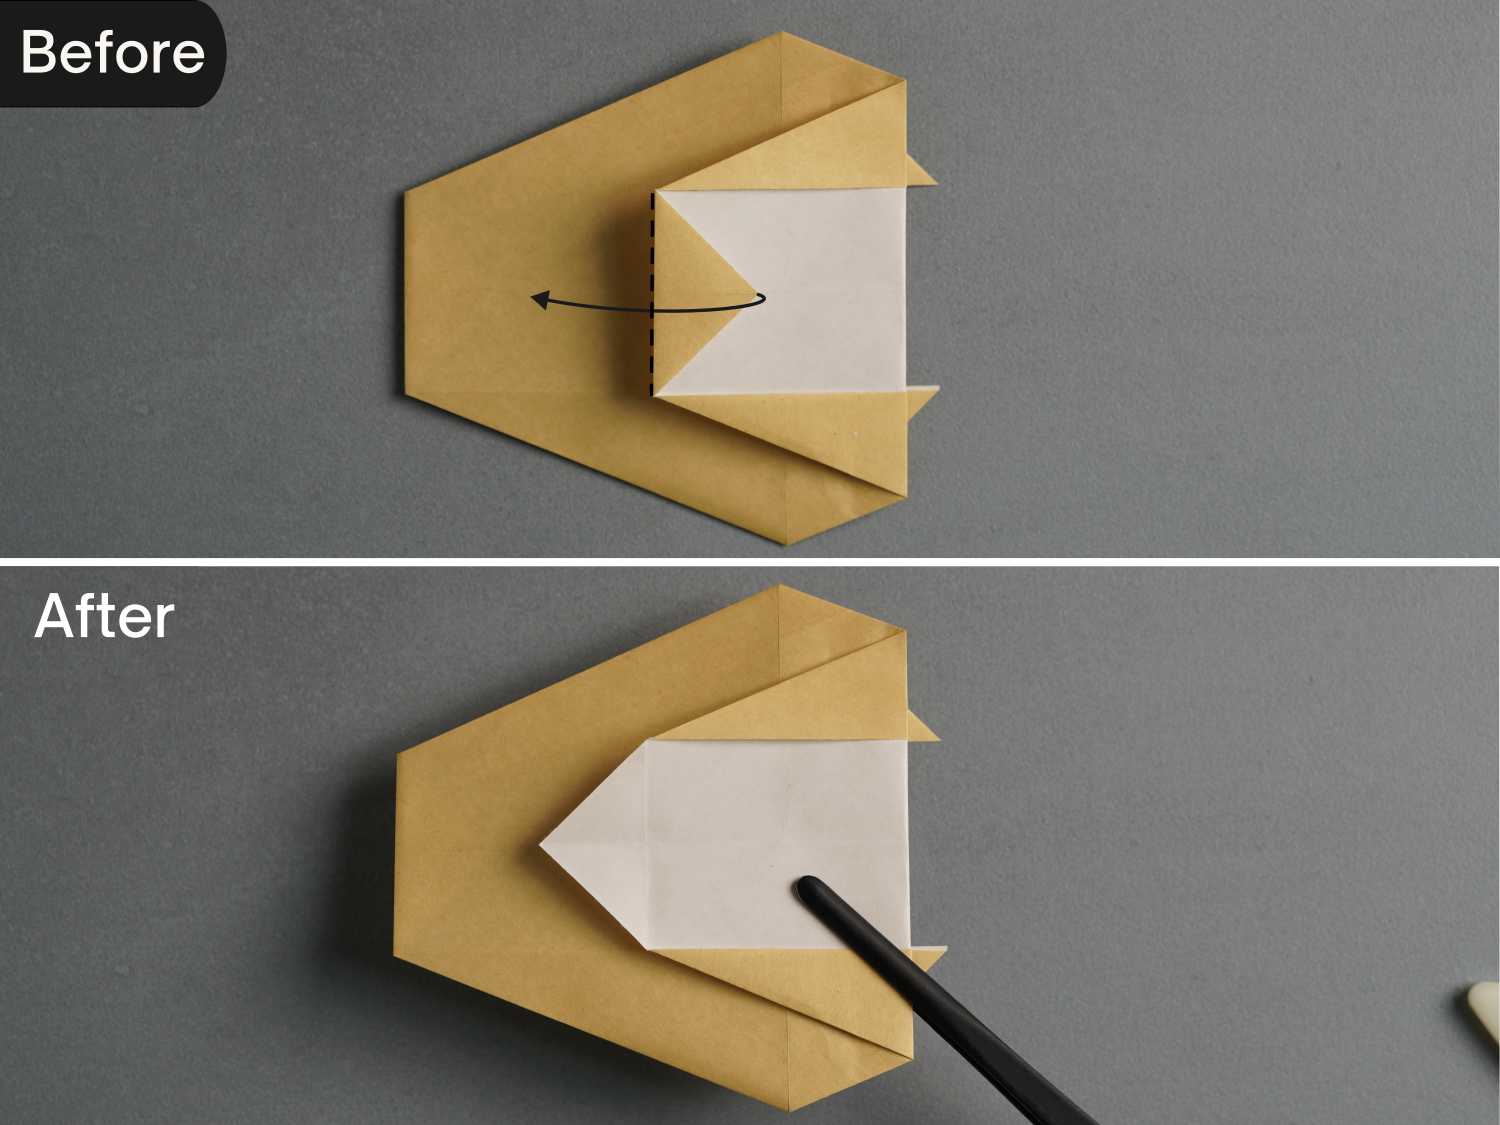
Step 10
Unfold the small triangle.
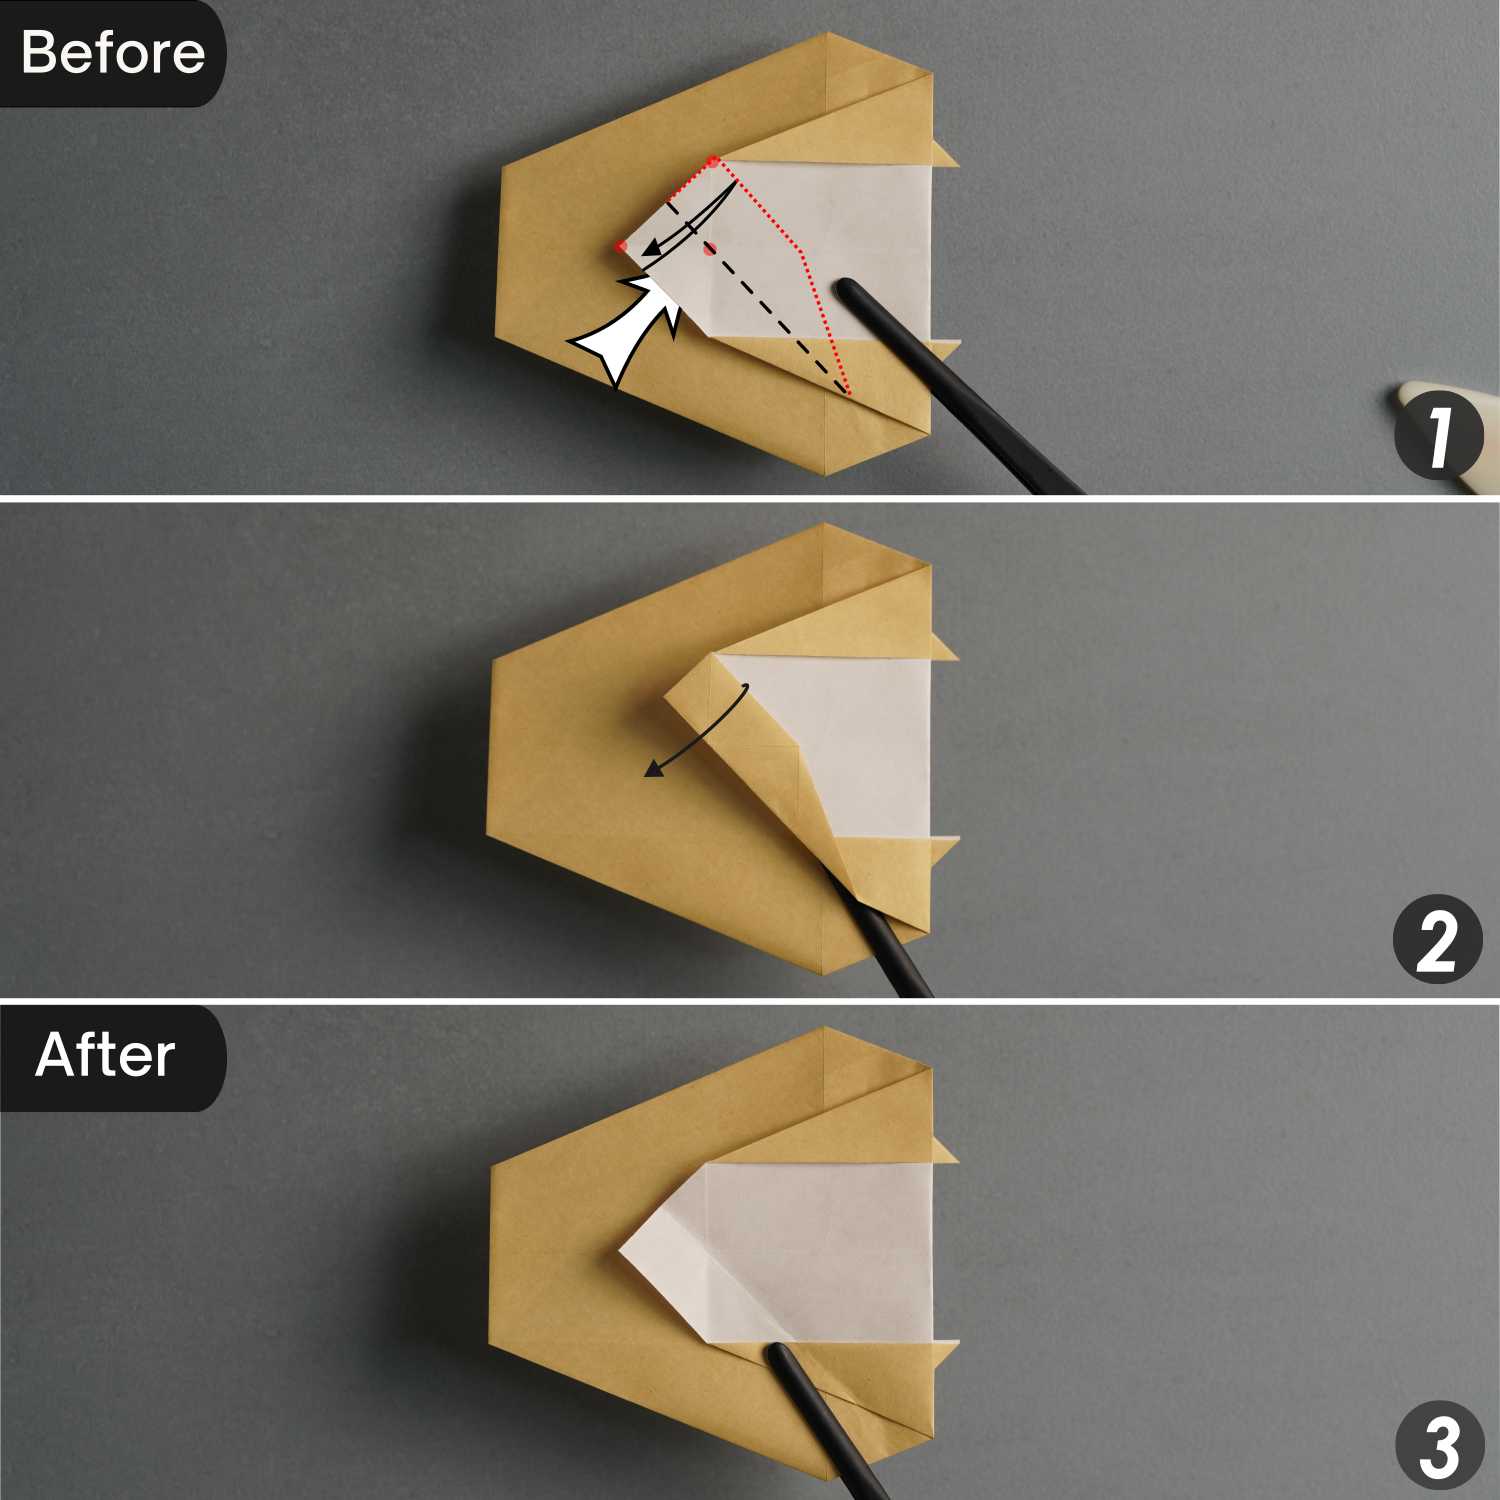
Step 11
Fold the top layer’s bottom left edge along the black dotted line extending from the intersection point shown by the red spot, formed by the creases. Leaving a crease, and unfold it.
Step 12
Repeat this foe the top side.
Fold the top layer’s top left edge along the black dotted line extending from the intersection point shown by the red spot, formed by the creases. Leaving a crease, and unfold it.
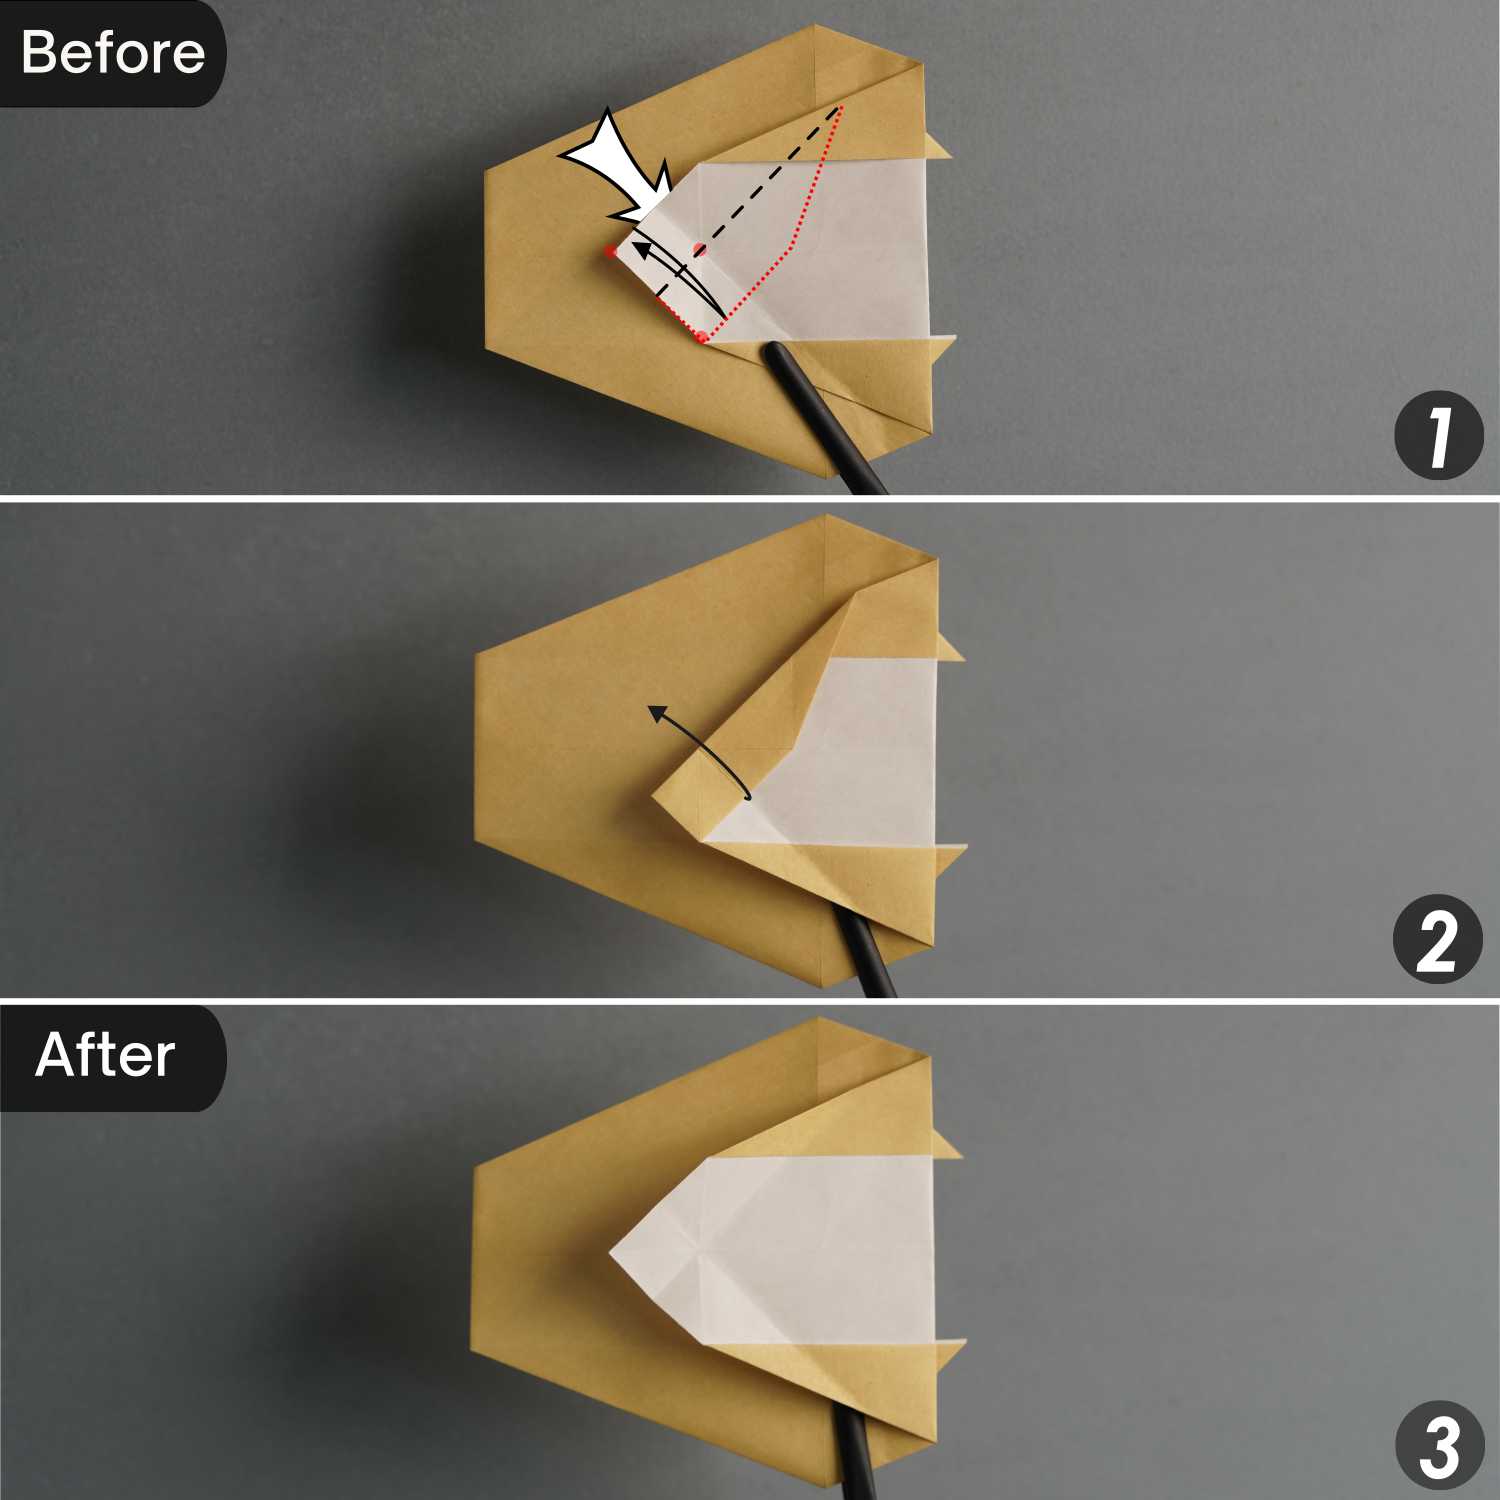
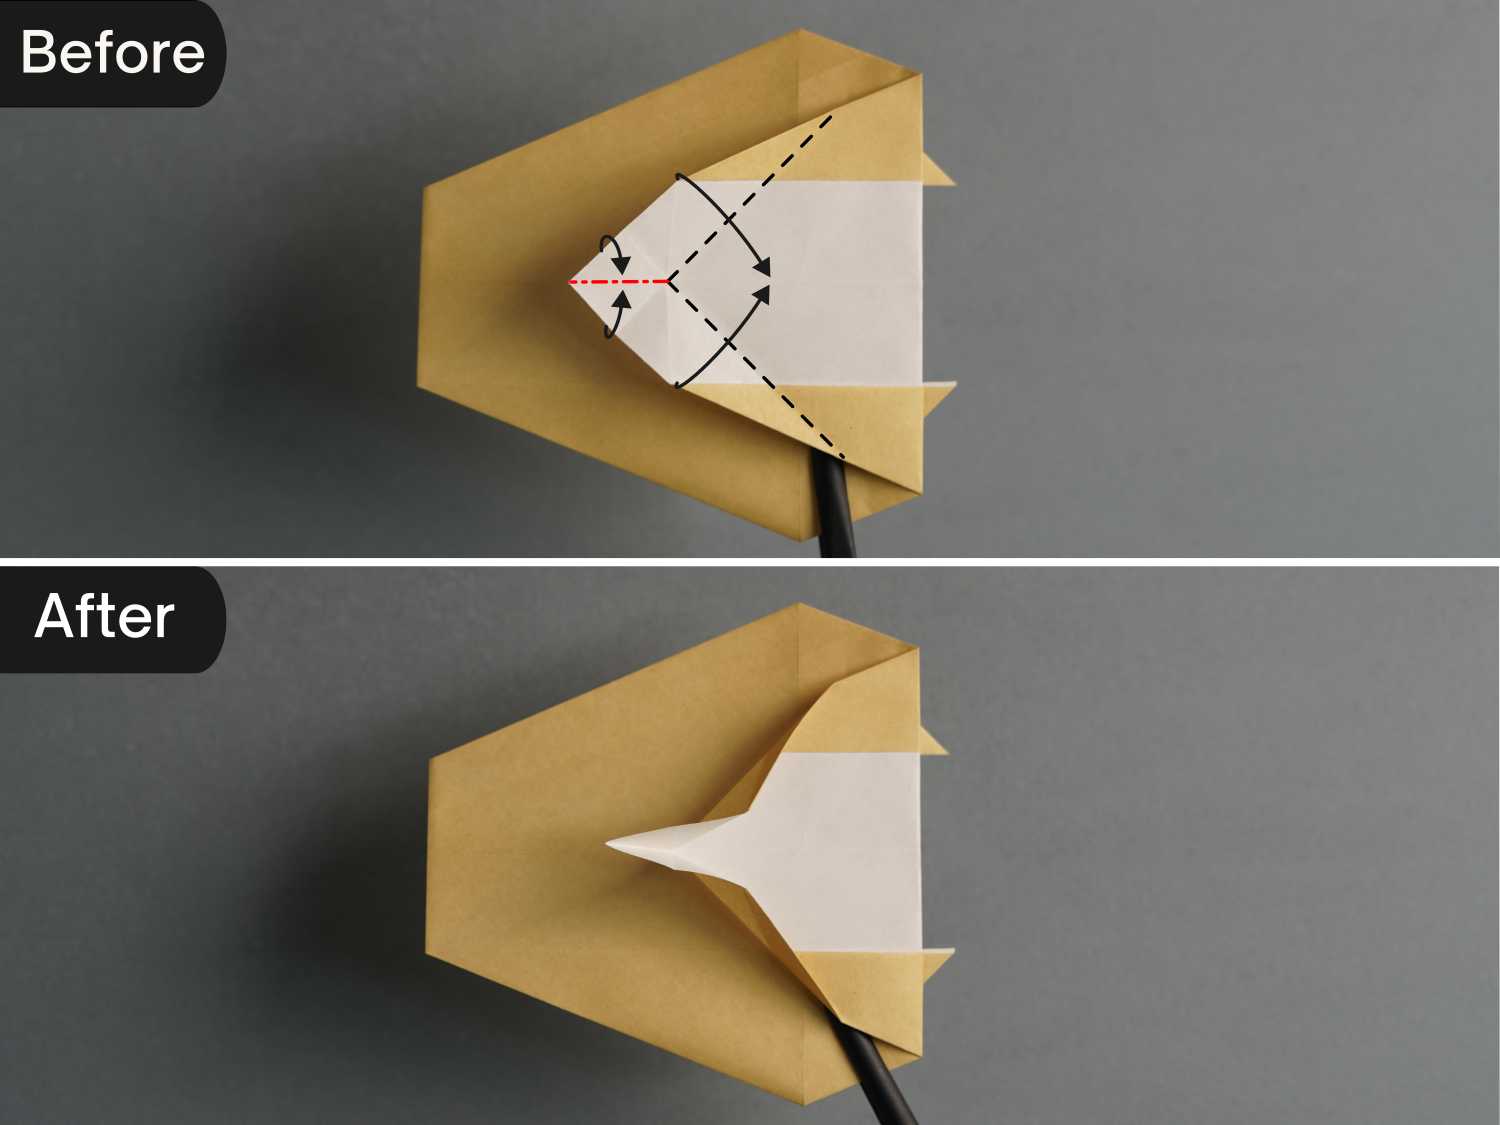
Step 13
Lift the top and bottom edges of the top layer along the existing creases to sharpen its left corner.
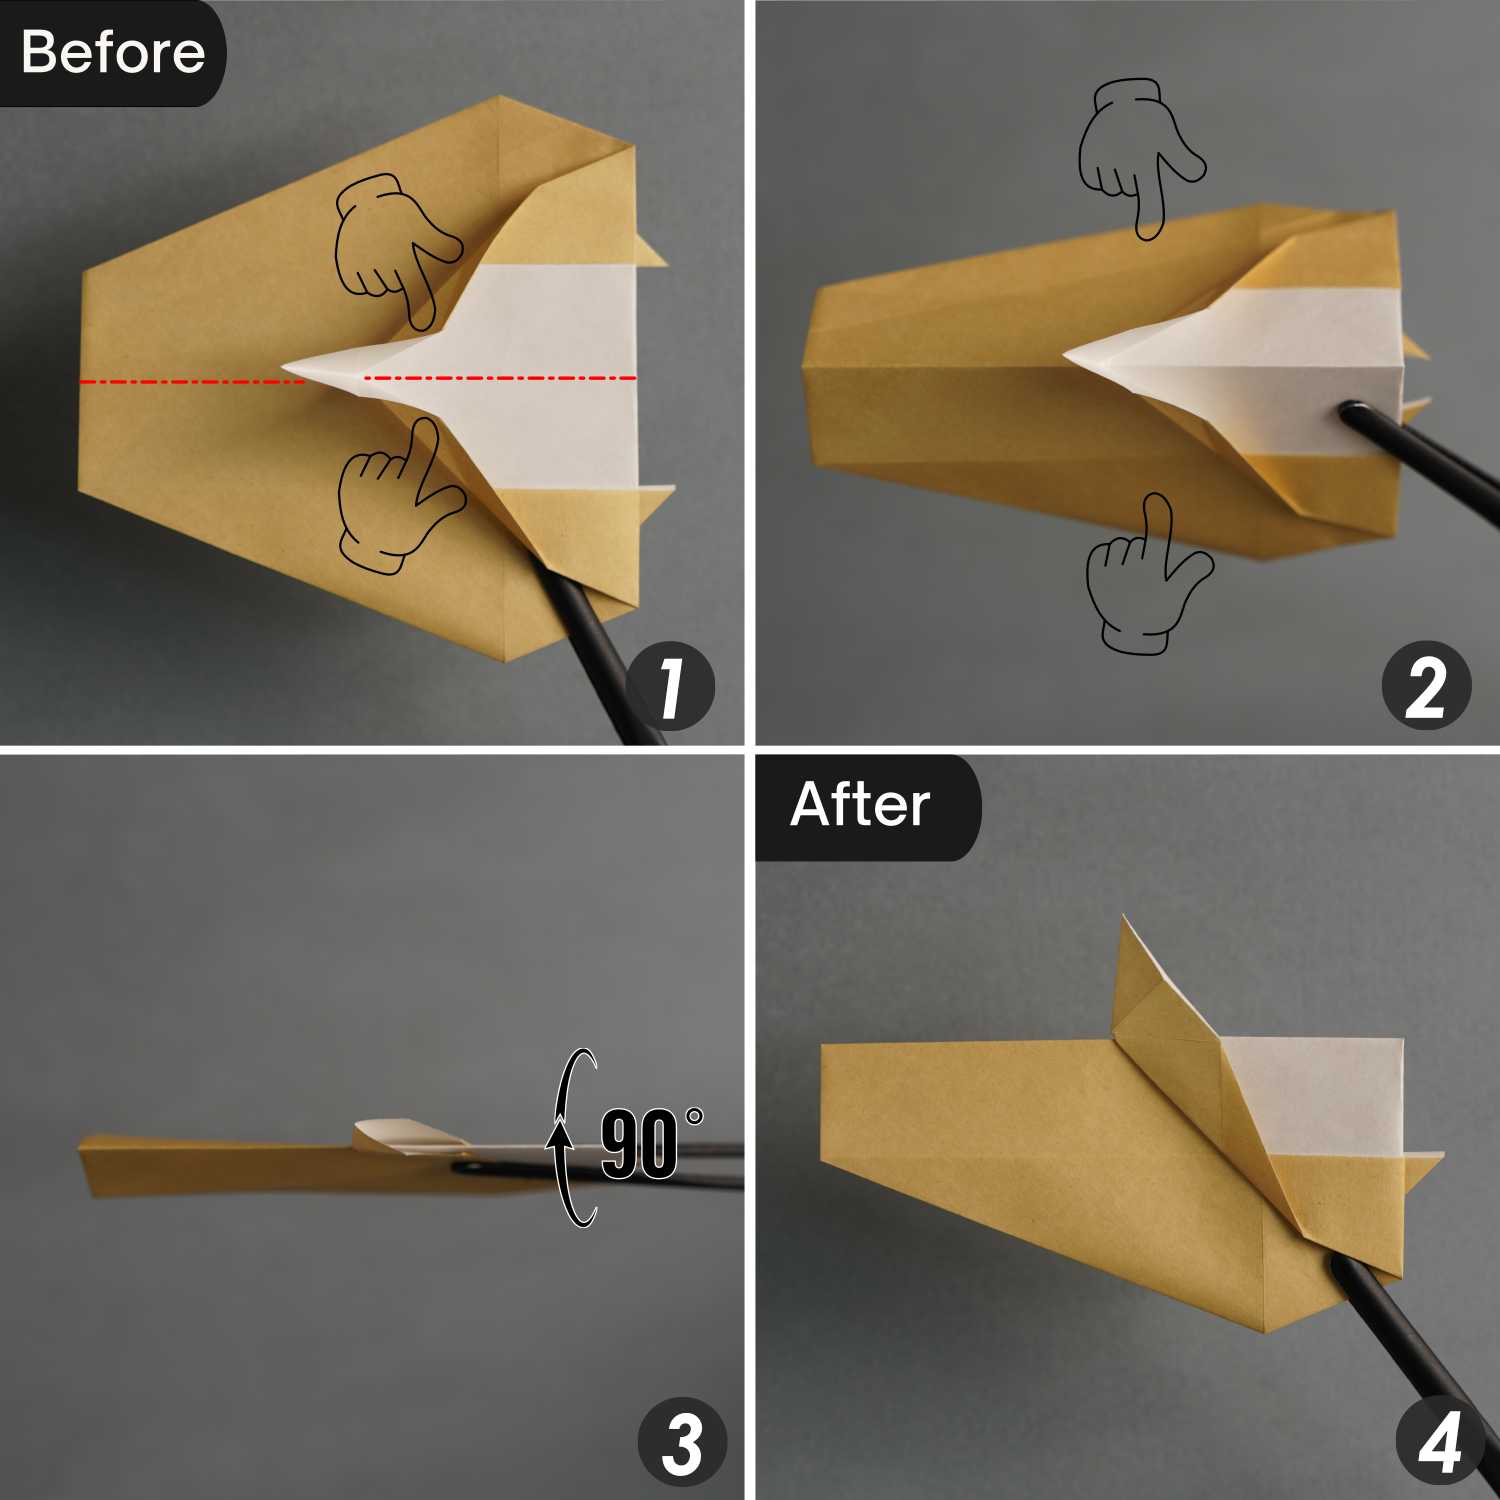
Step 14
Fold the paper in half horizontally backward, flatten the fold and rotate the paper 90 degrees from back to front.
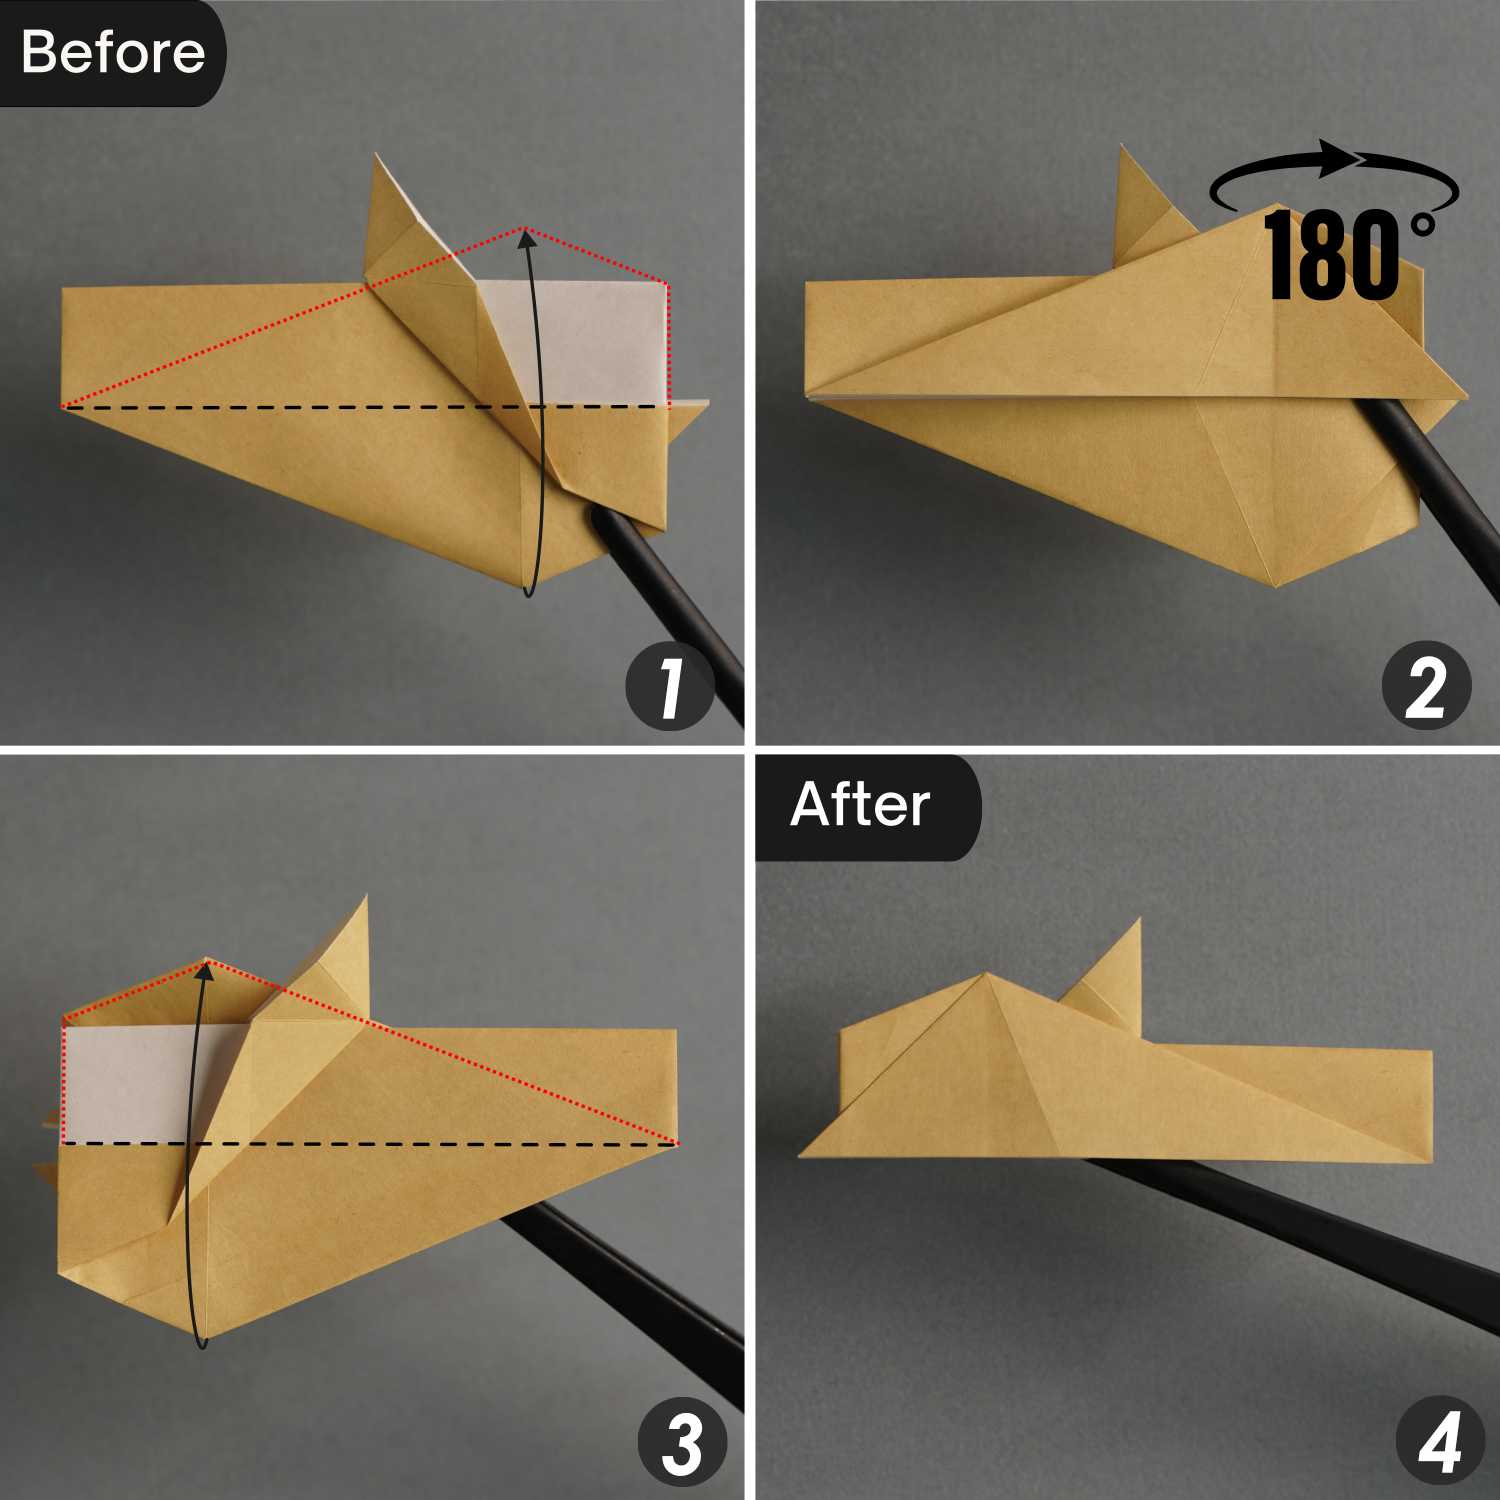
Step 15
Fold the bottom corner of the top layer along the horizontal crease, then flip the paper over from left to right, and fold up the bottom corner of the layer on this side along the horizontal crease.
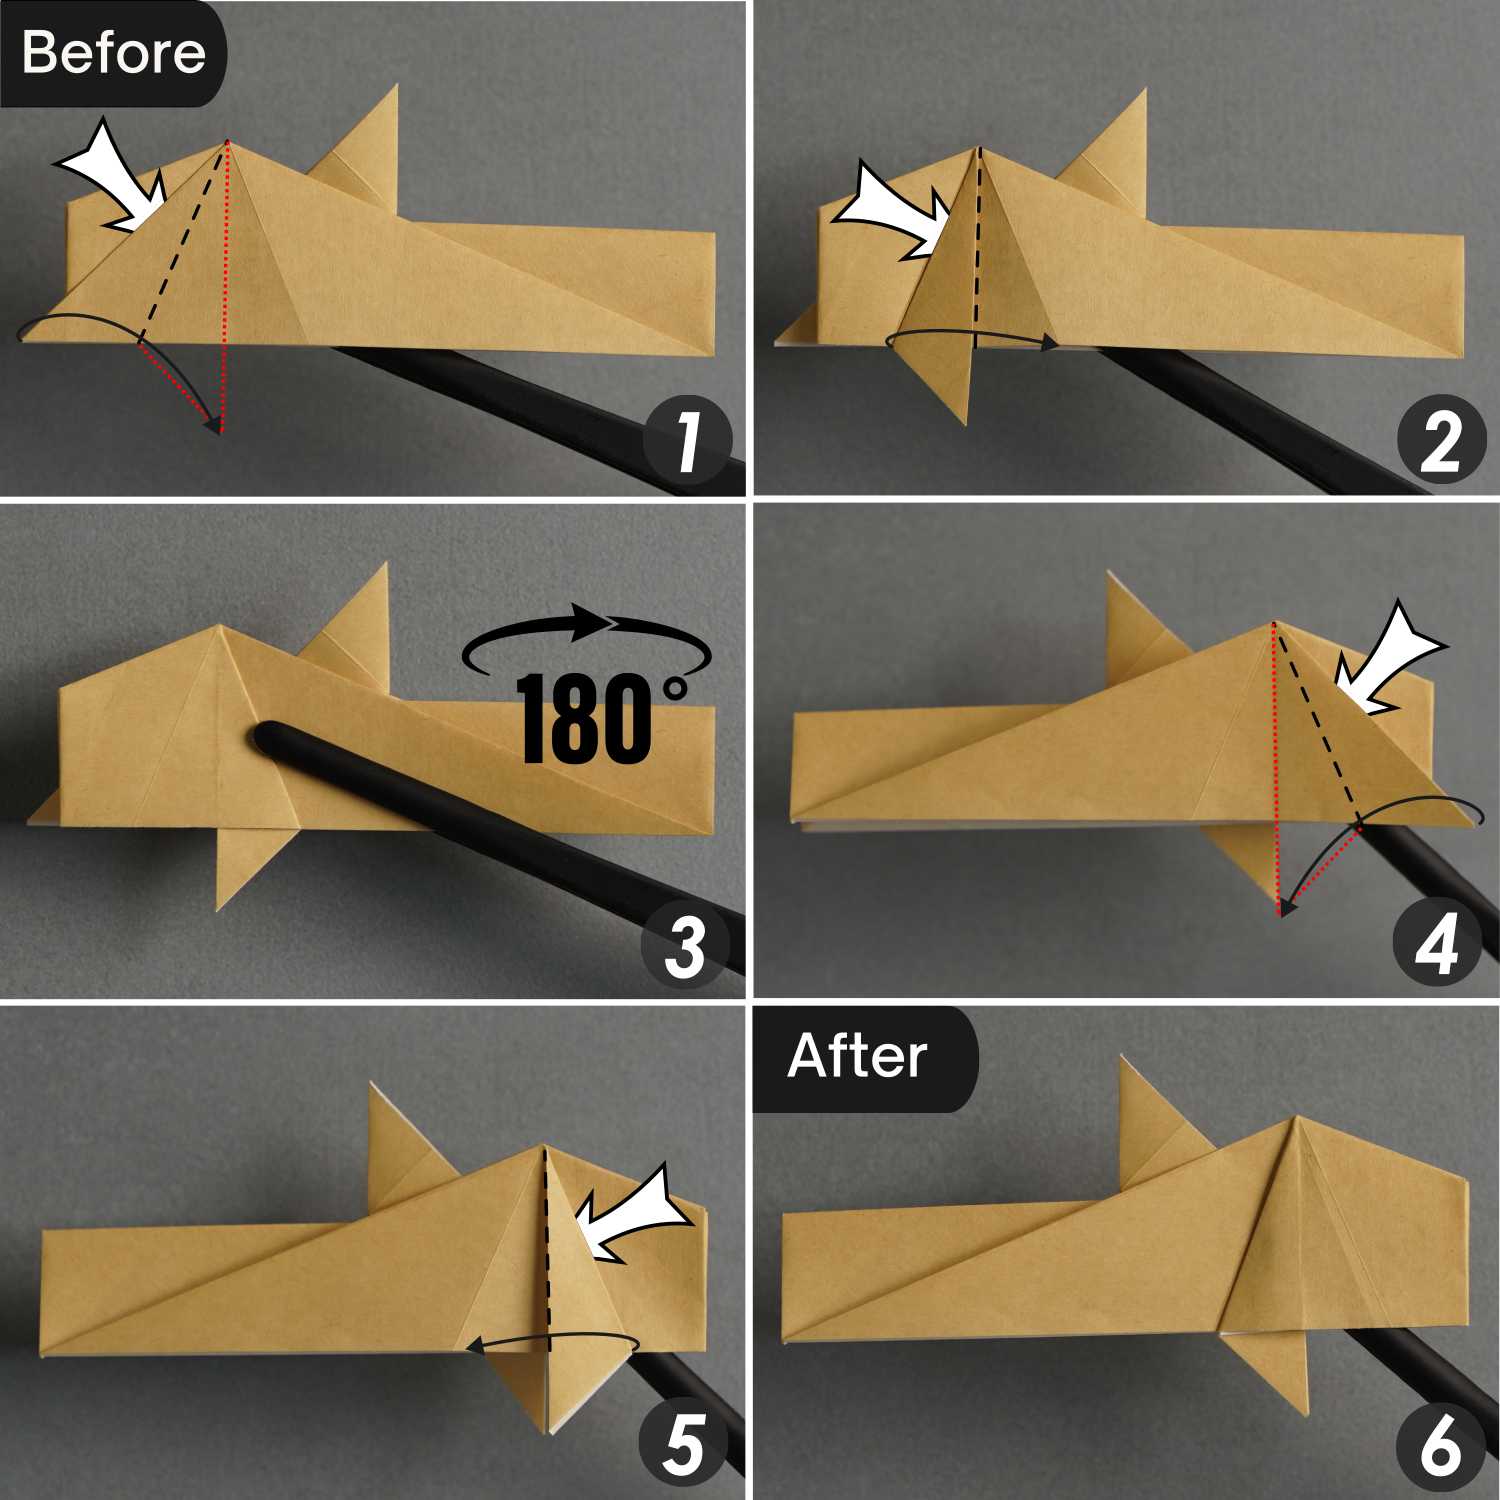
Step 16
Fold the left edge of the fin toward the right side along the black dotted line, then fold the whole fin to the right side.
Turn over the paper from left to right, and fold the right edge of the fin on this side toward the left side along the black dotted line, then fold this fin to the left side.
Step 17
Fold down the head part’s top corner of the top layer along the black dotted line, leaving a crease, and unfold it. Then turn over the paper from left to right, and repeat the steps on the other side.
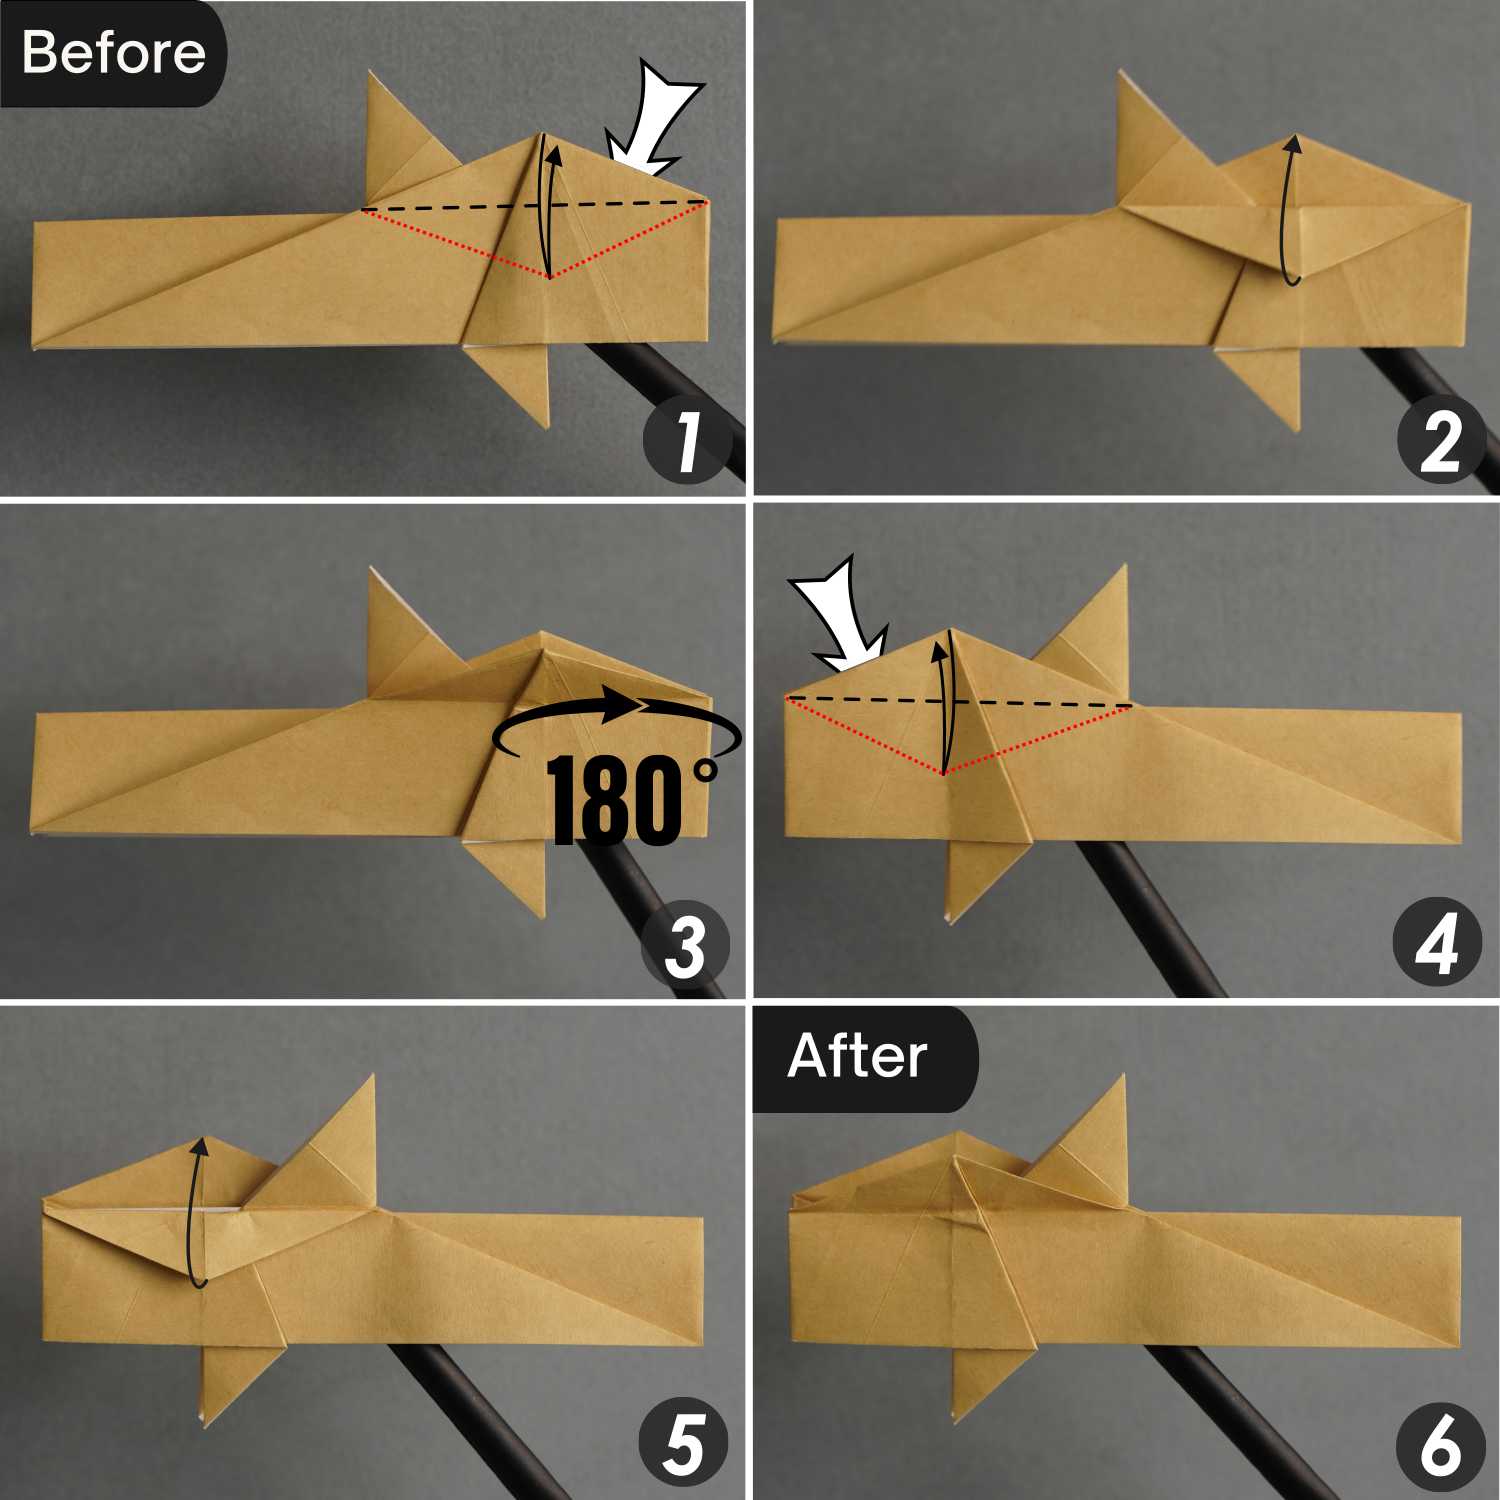
Step 18
Rotate the paper 90 degrees from front to back, slightly expand the paper, and then valley fold the two creases you made in the previous step. Flatten the fold and rotate the paper 90 degrees from back to front.
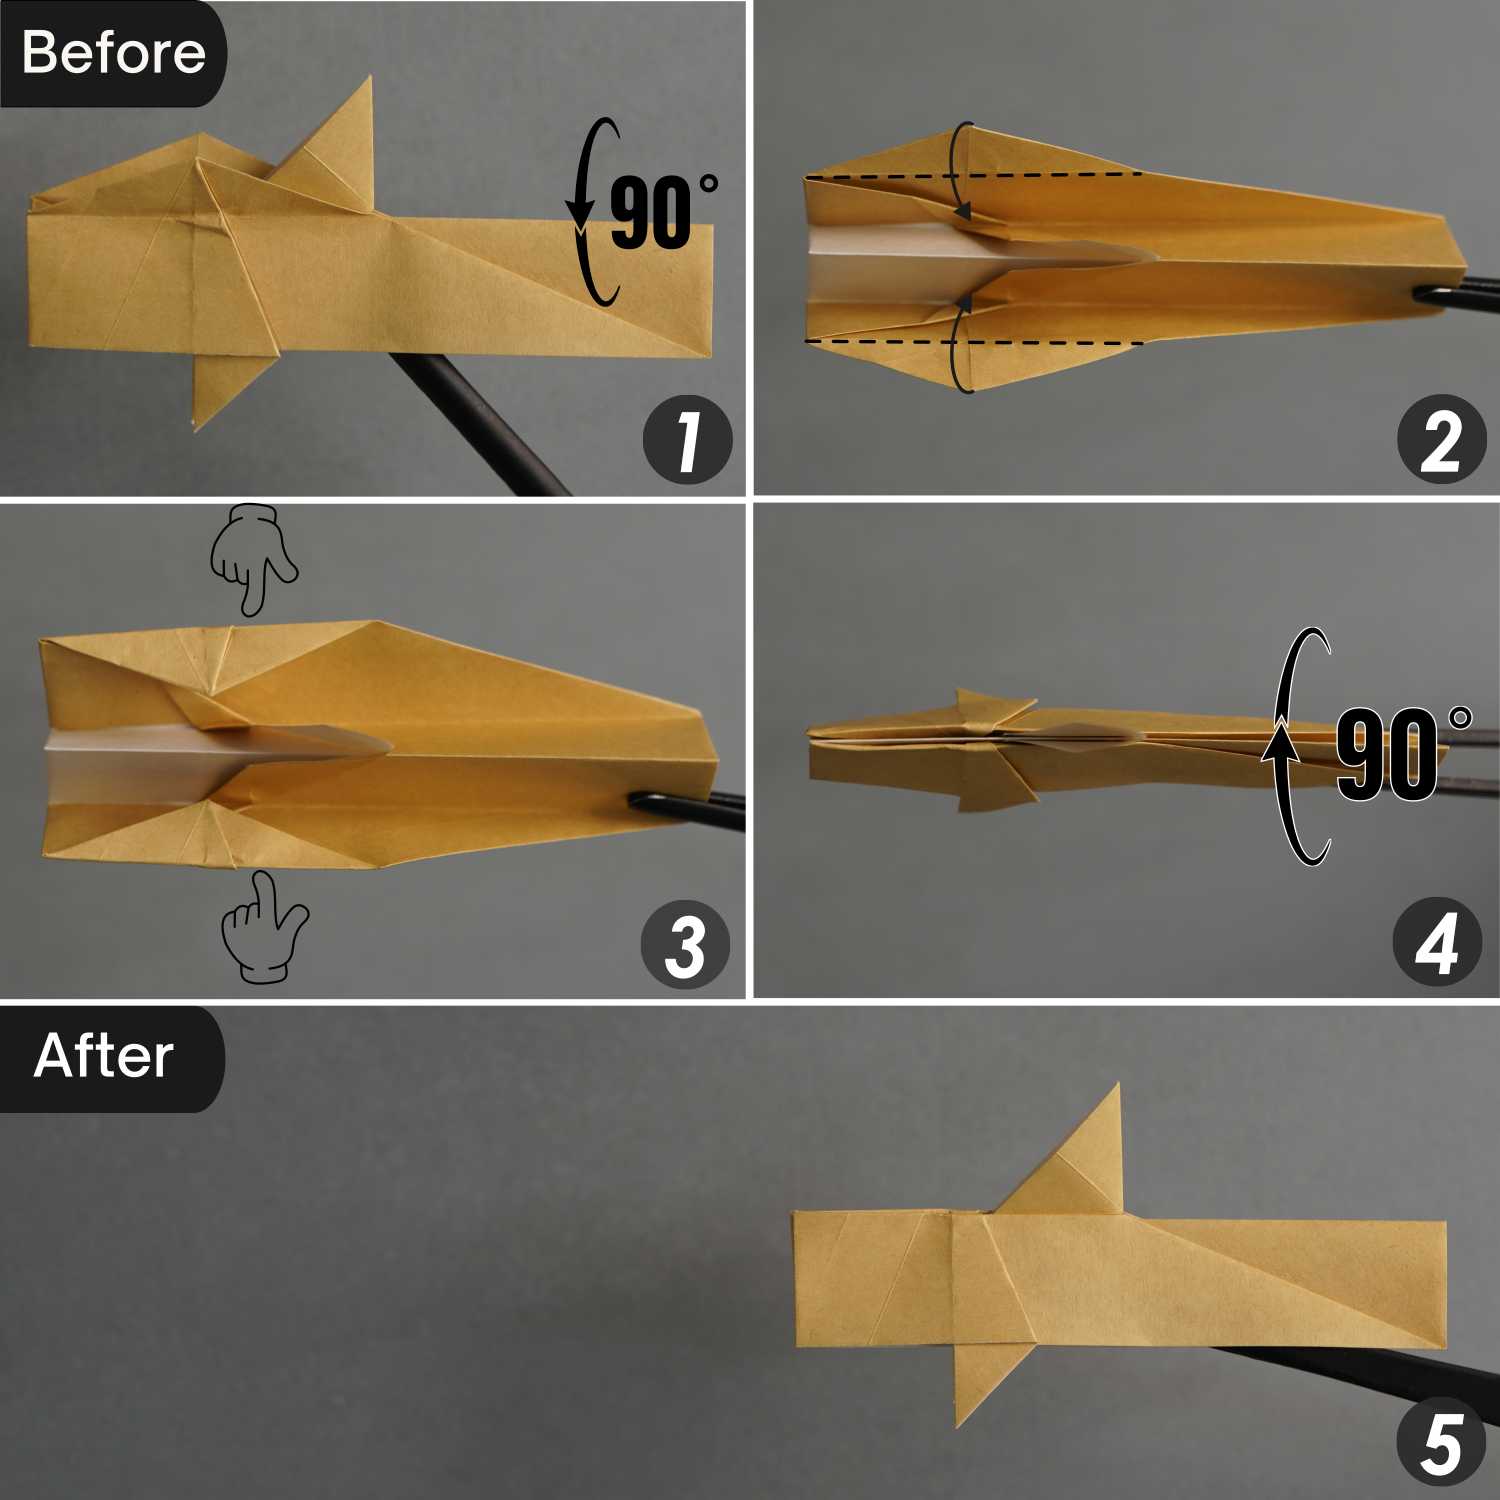
Step 19
Rotate the paper 90 degrees from front to back, and expand it [pictures 1 and 2]. Then, fold the top and bottom left corners diagonally along the dotted lines, and finally, fold the paper in half horizontally from top to bottom.
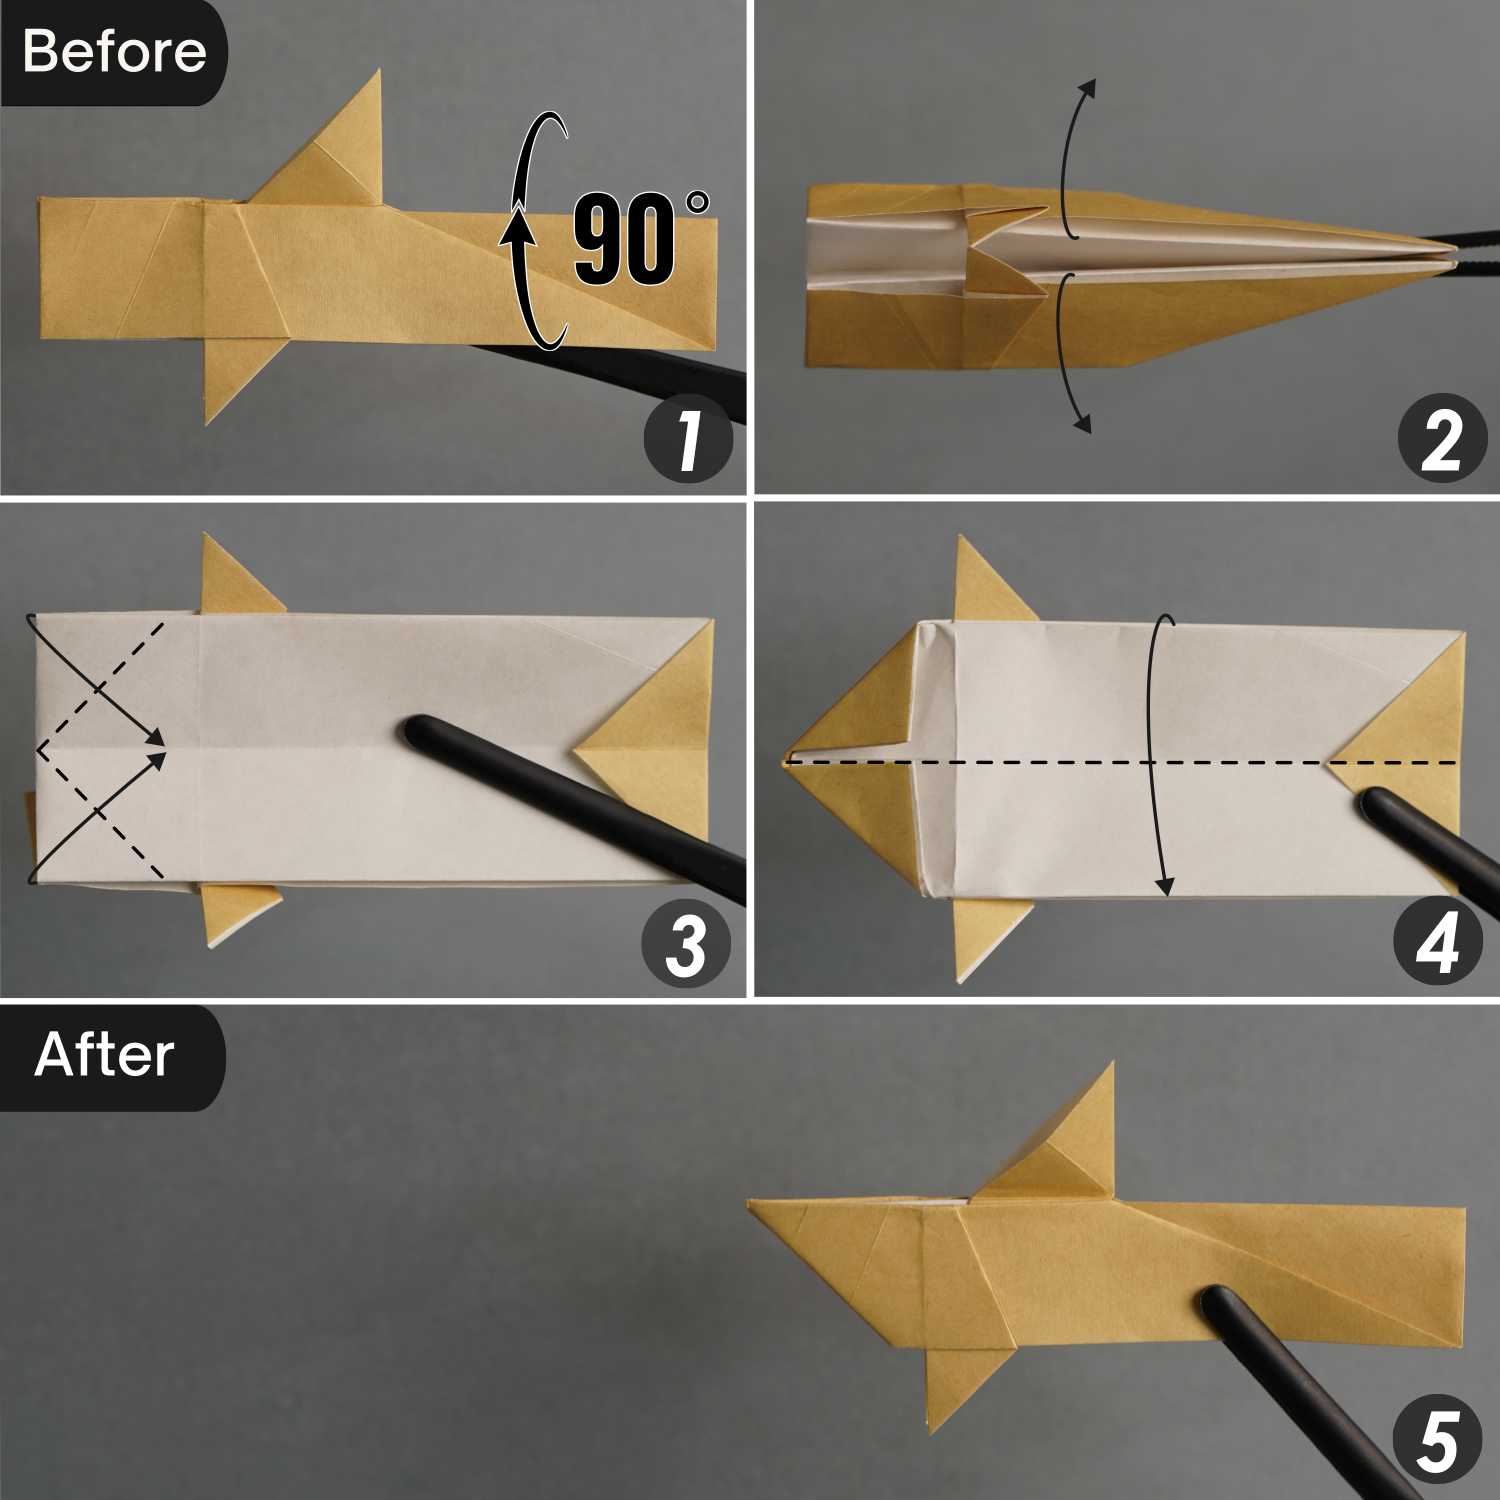
Step 20
Rotate the paper 90 degrees from front to back, and expand it, then make two mountain creases indicated by the red dotted lines, and valley fold the horizontal crease indicated by the black dotted line[pictures 1 and 2].
Flatten the fold, and rotate the paper 90 degrees from back to front to lay it flat. [pictures 3 to 5]
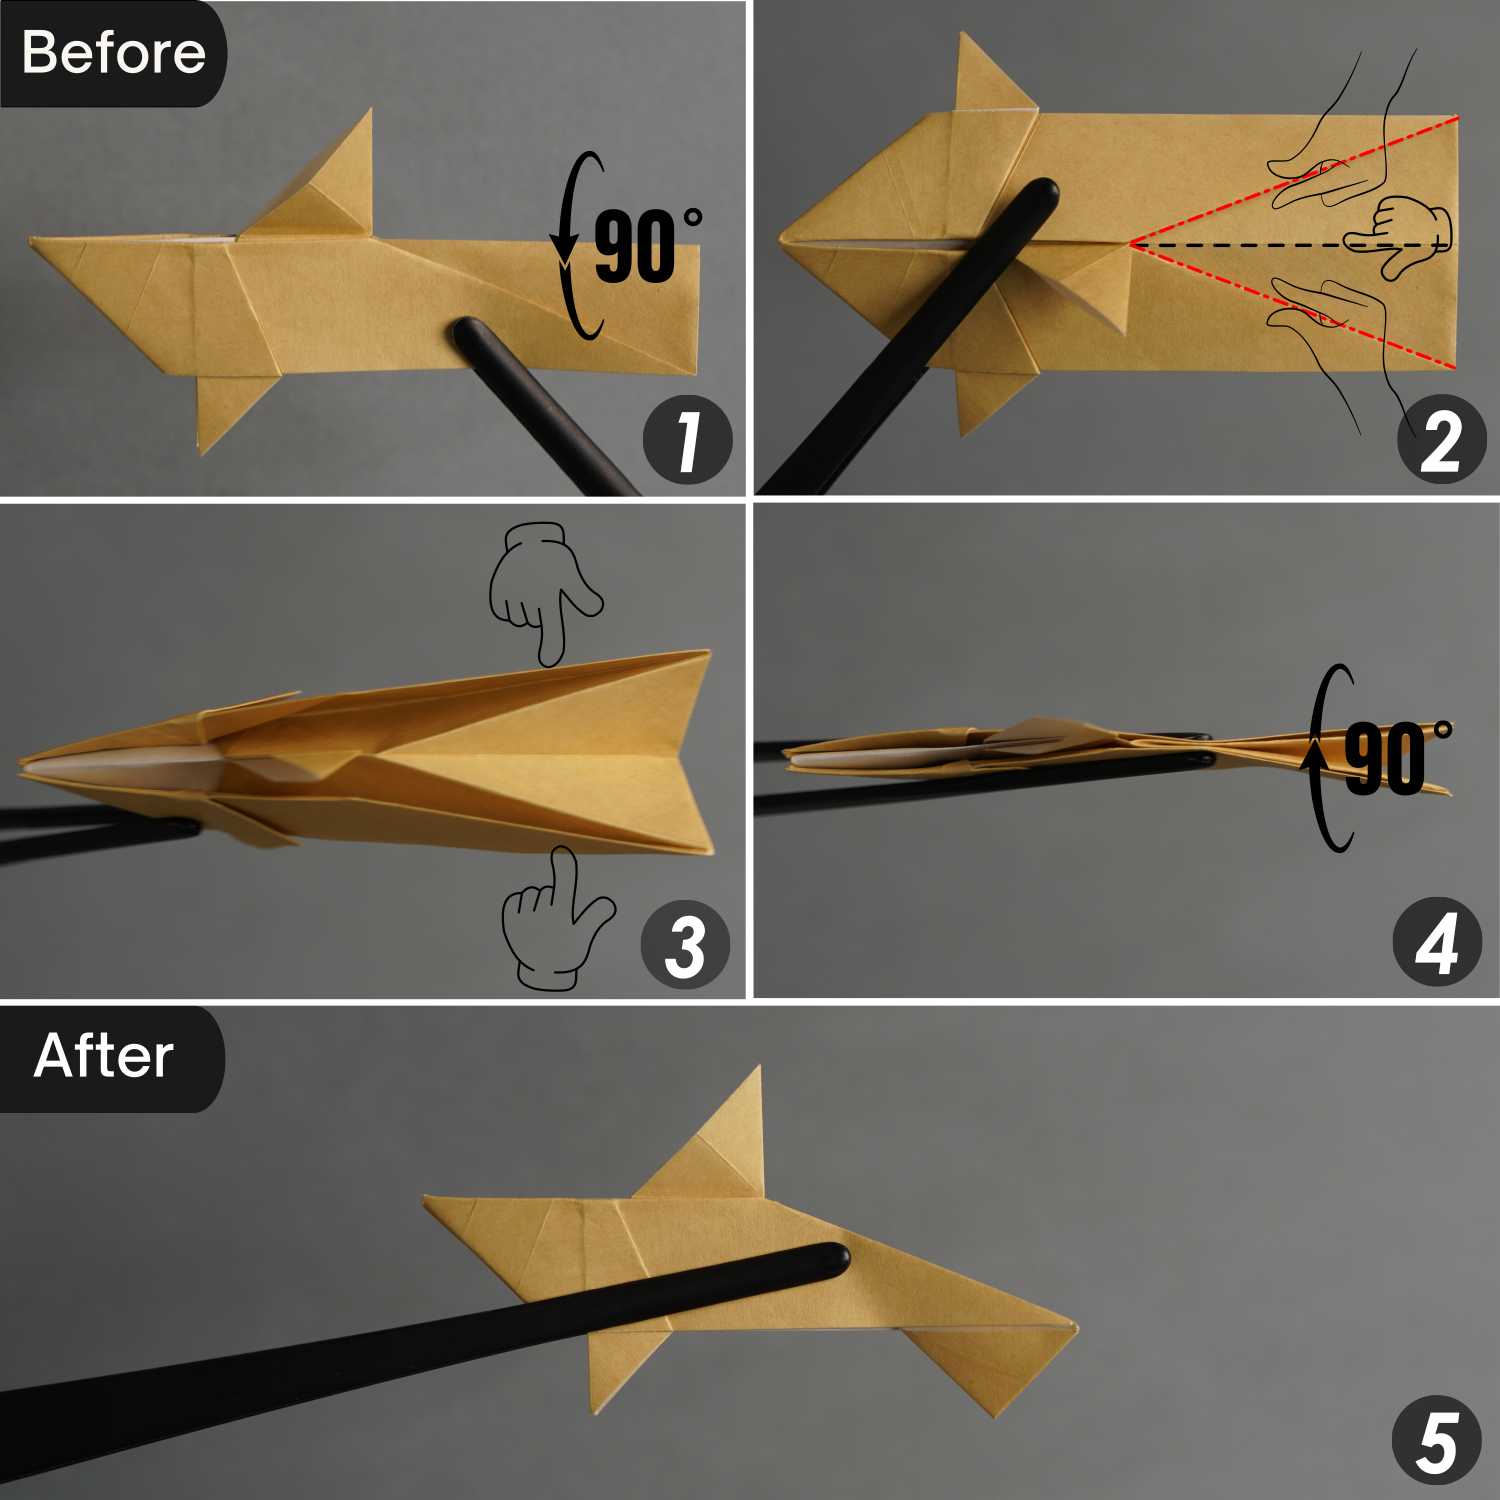
Step 21
Similar to the previous step, rotate the paper 90 degrees from back to front, and expand the caudal fin. Next, make two mountain creases indicated by the red dotted lines, and valley fold the horizontal crease indicated by the black dotted line [pictures 1 and 2].
Flatten the fold, and rotate the paper 90 degrees from front to back to lay it flat. [pictures 3 to 5]
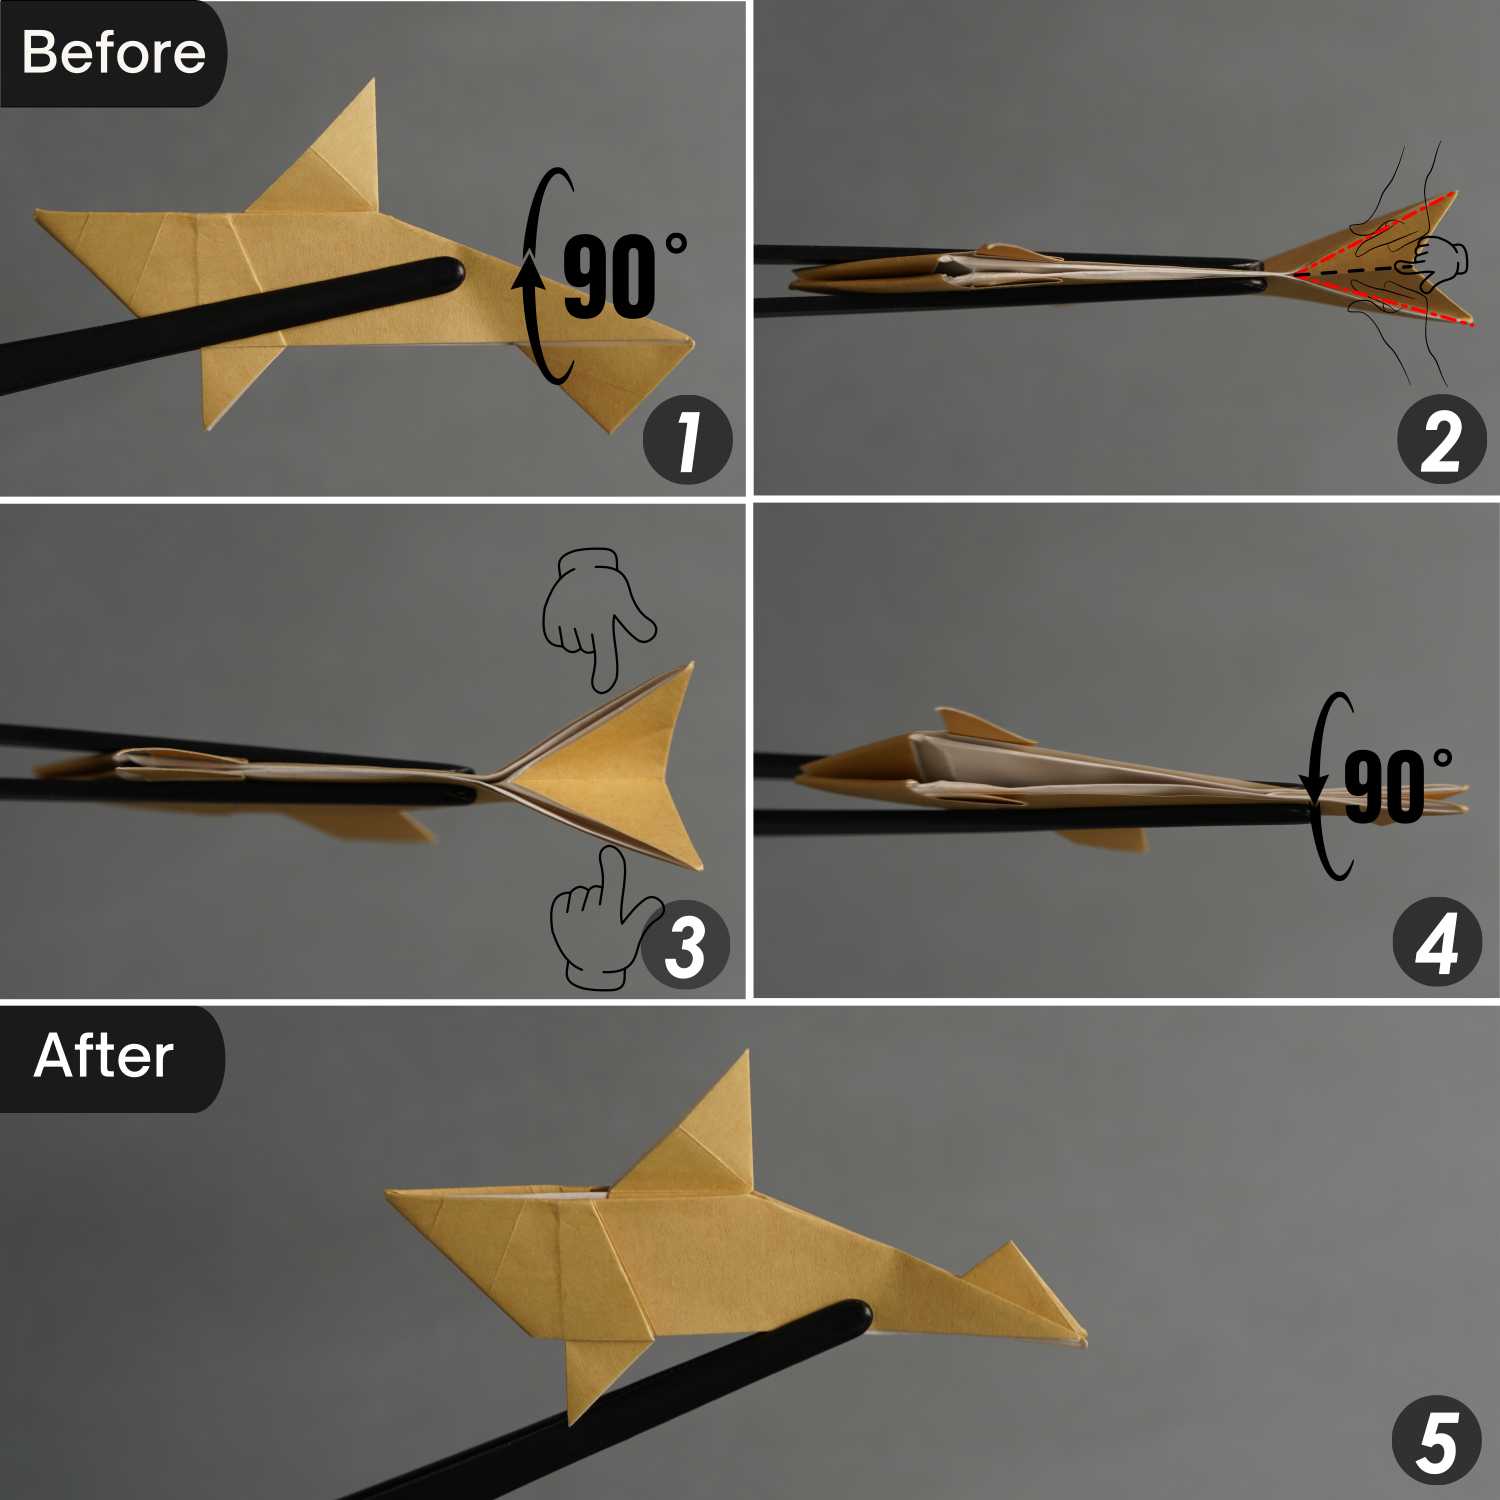
Step 22
The same as the previous step. Rotate the paper 90 degrees from front to back, and expand the caudal fin. Next, make two mountain creases indicated by the red dotted lines, and valley fold the horizontal crease indicated by the black dotted line [pictures 1 and 2].
Flatten the fold, and rotate the paper 90 degrees from back to front to lay it flat. [pictures 3 to 5]

Step 23
Lift the caudal fin part along the black dotted line, crease it very well, and unfold it.
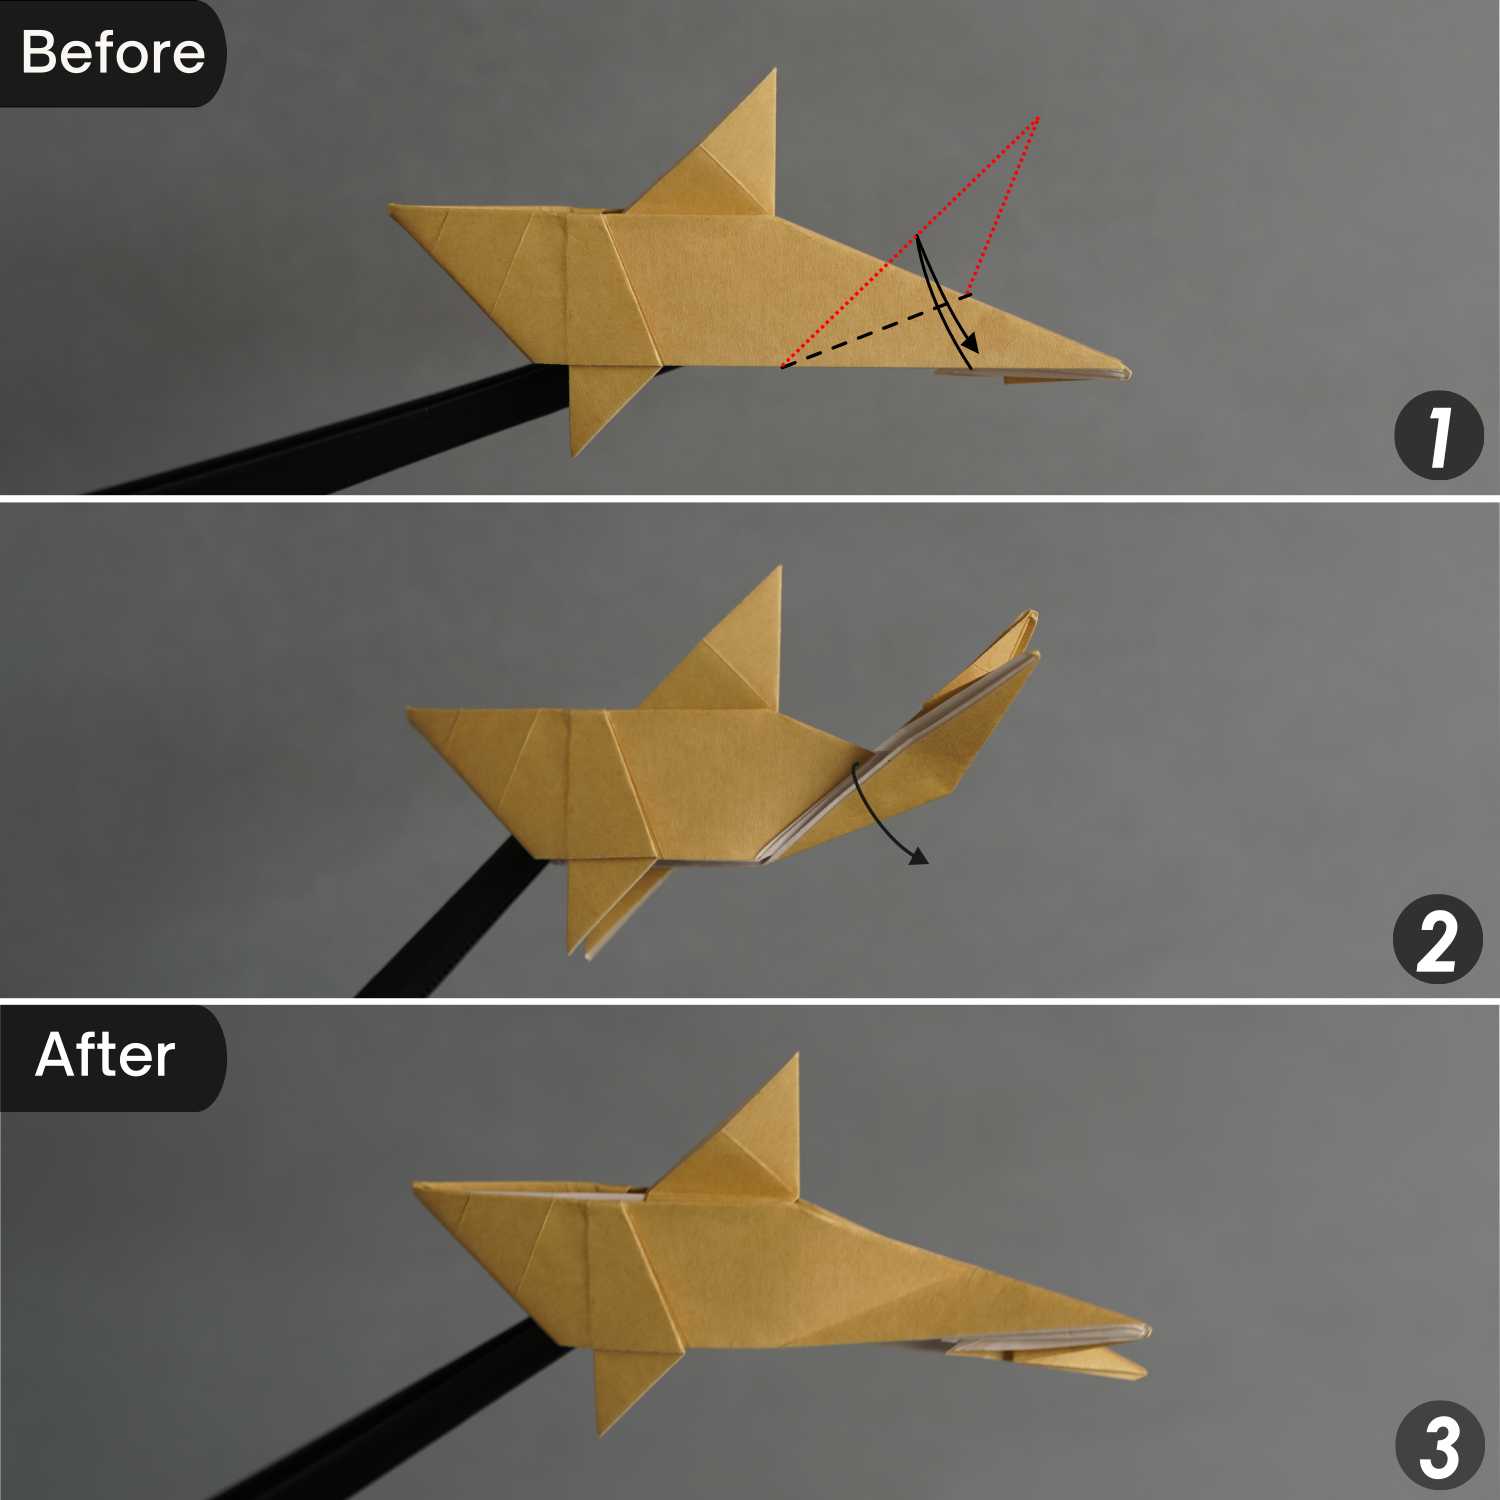
Step 24
Mountain fold the crease you made in the previous step if the upper layer [pictures 1 and 2], then take this mountain crease, and fold it to the left side along the black dotted line [picture 3]. Flatten the fold [pictures 4 and 5].
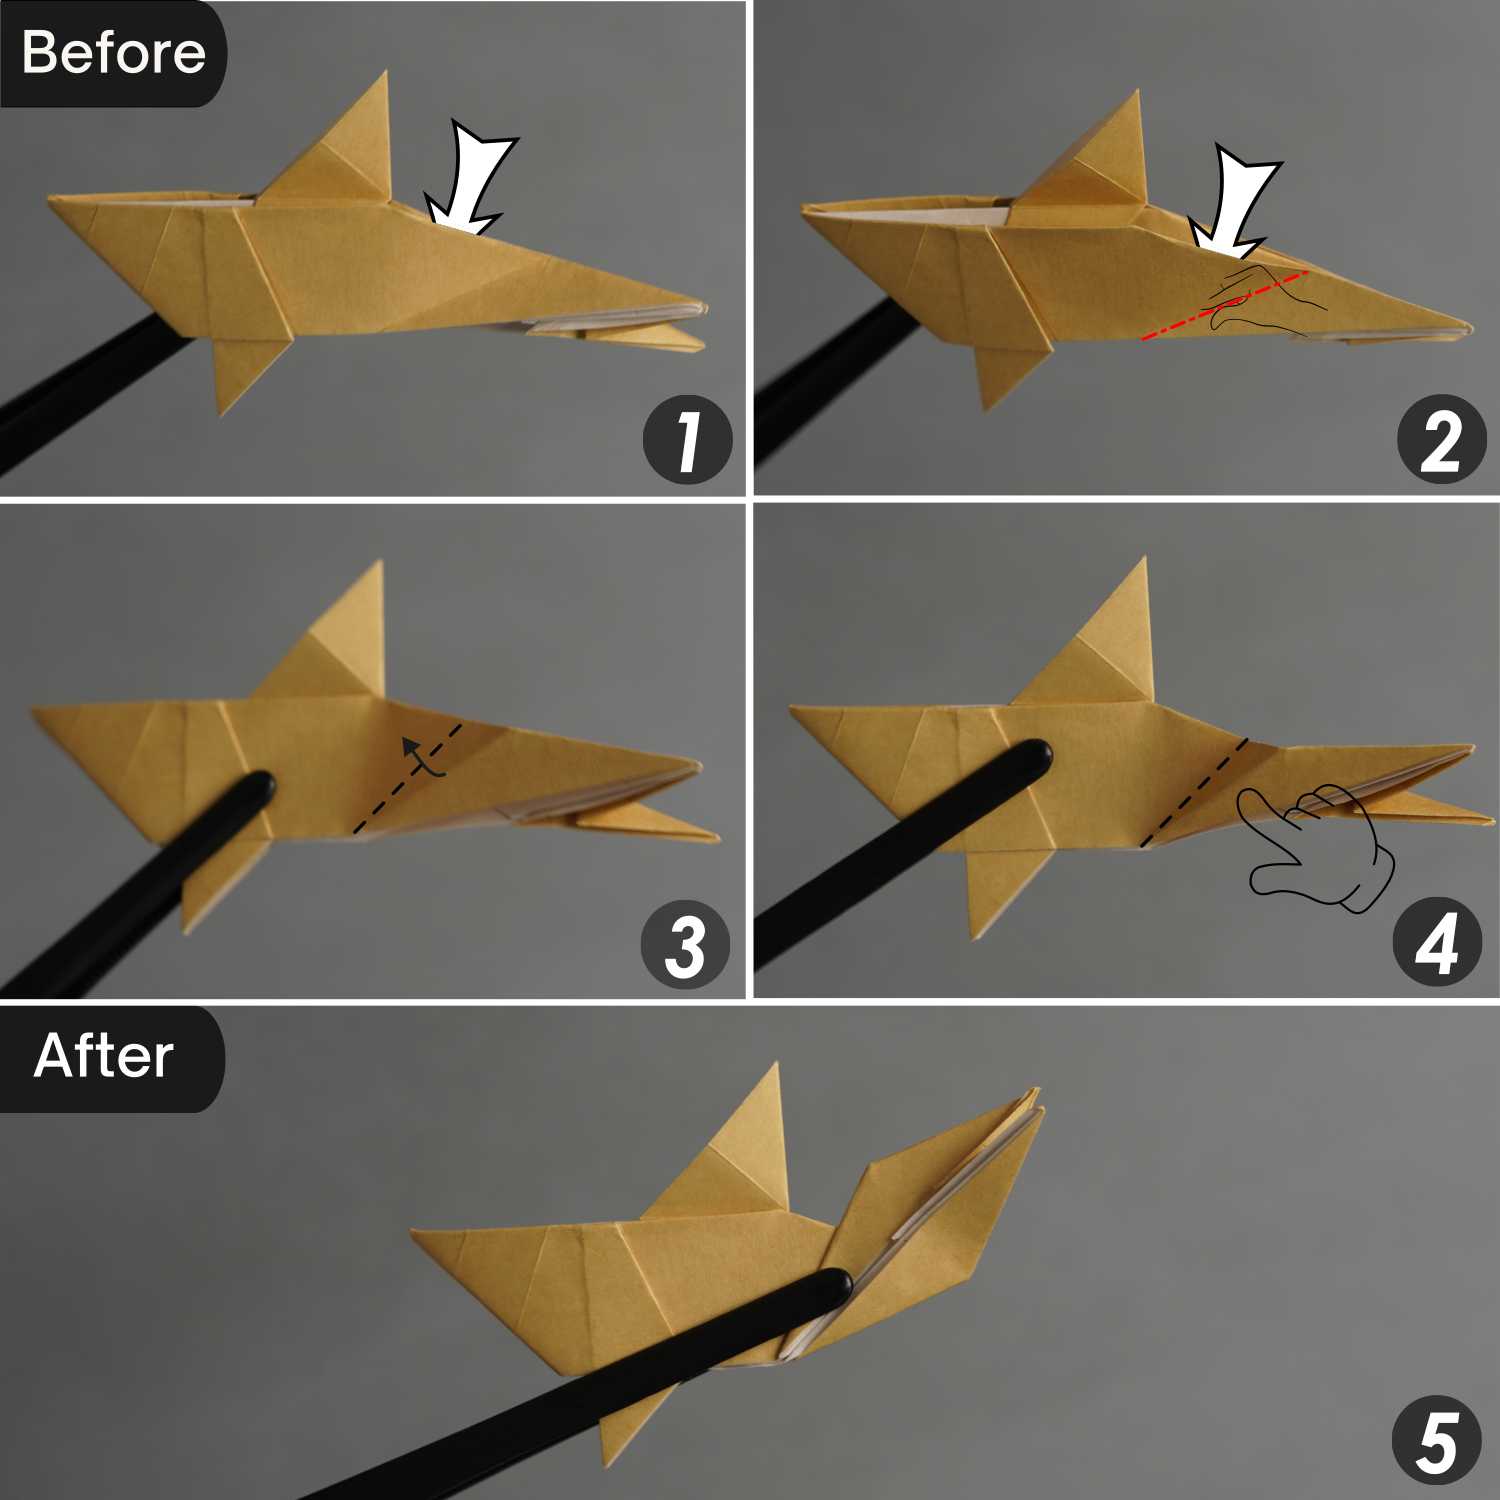
Step 25
Fold the tail fins of the right one toward the bottom left side, then to the right side.
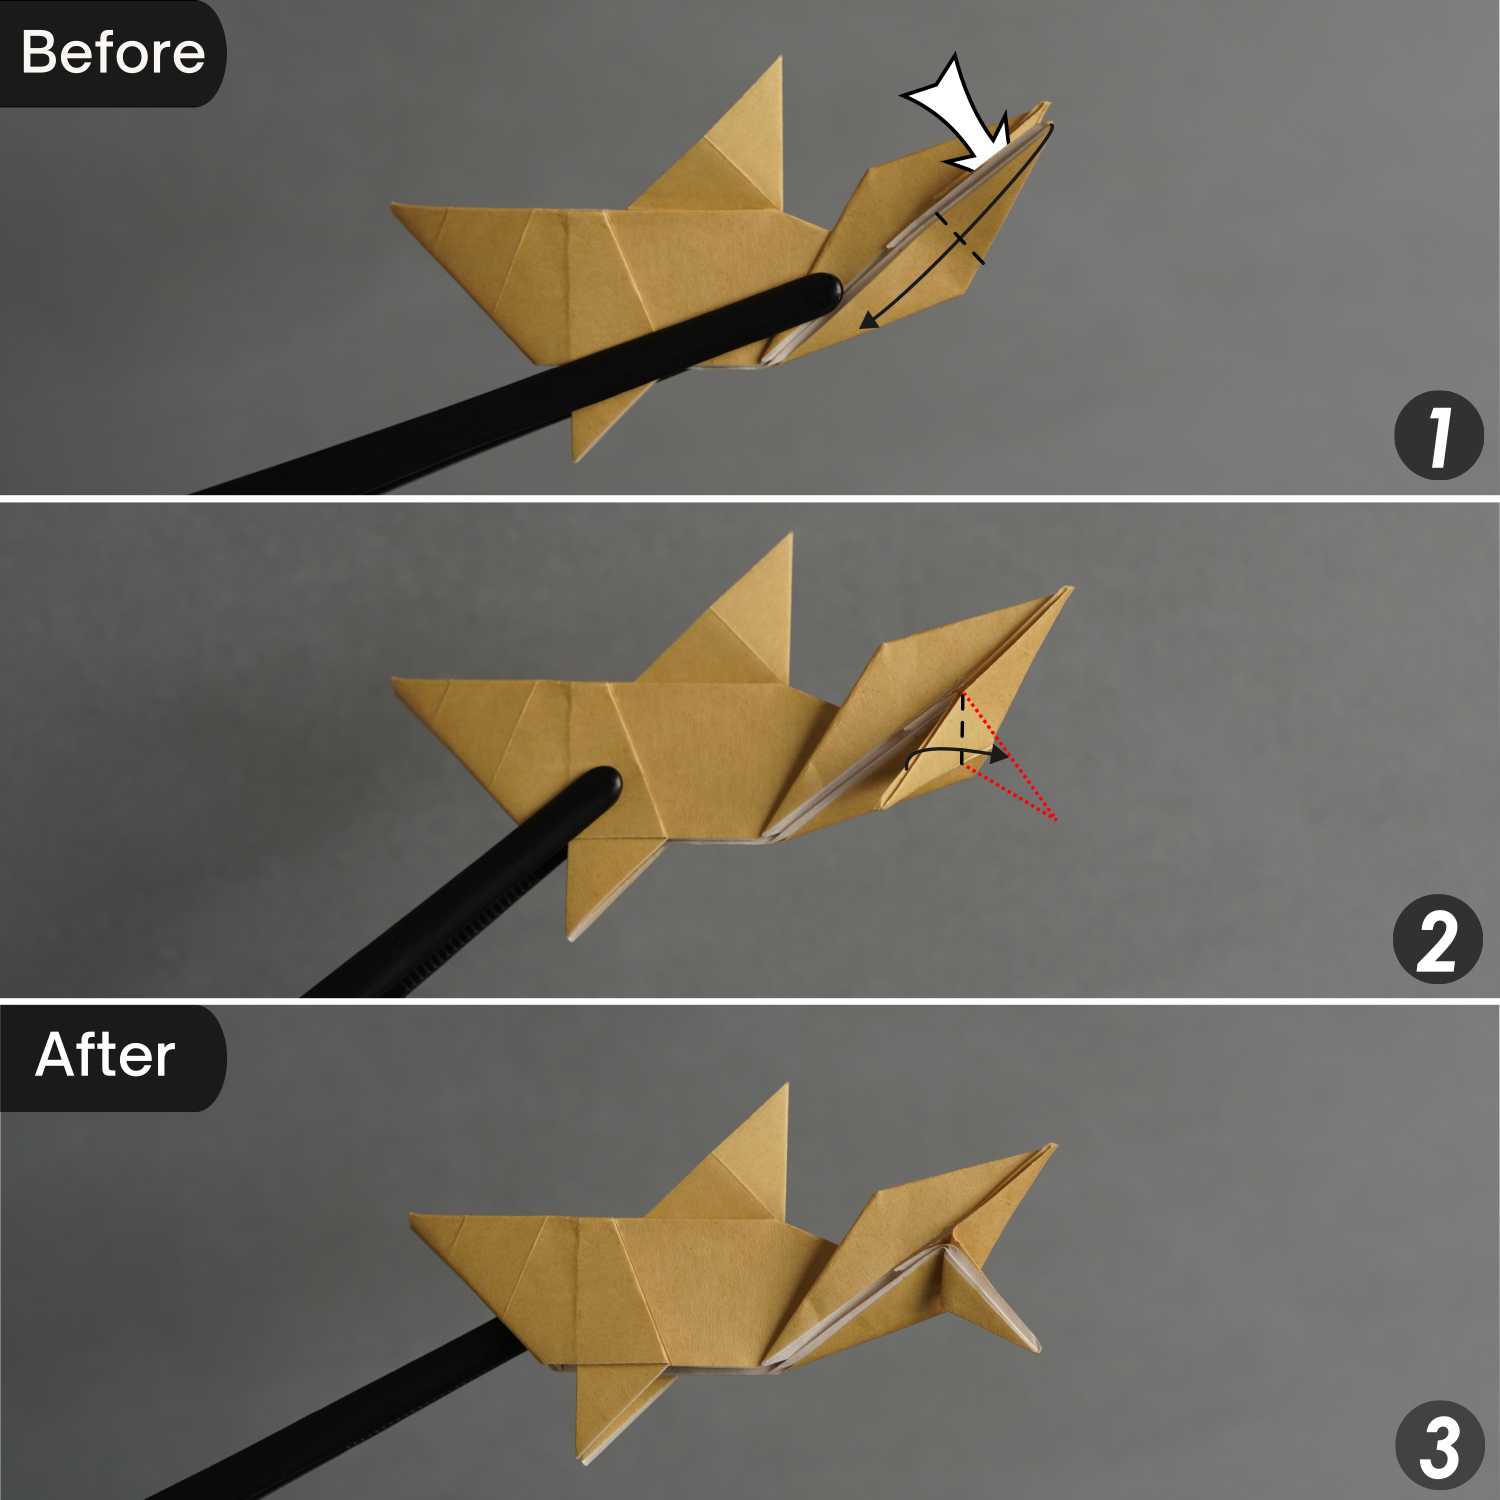
Step 26
Finally, fold the left layer of the tail fin part to the right side.
