Easy Sticky Note Origami Frog
Step 1
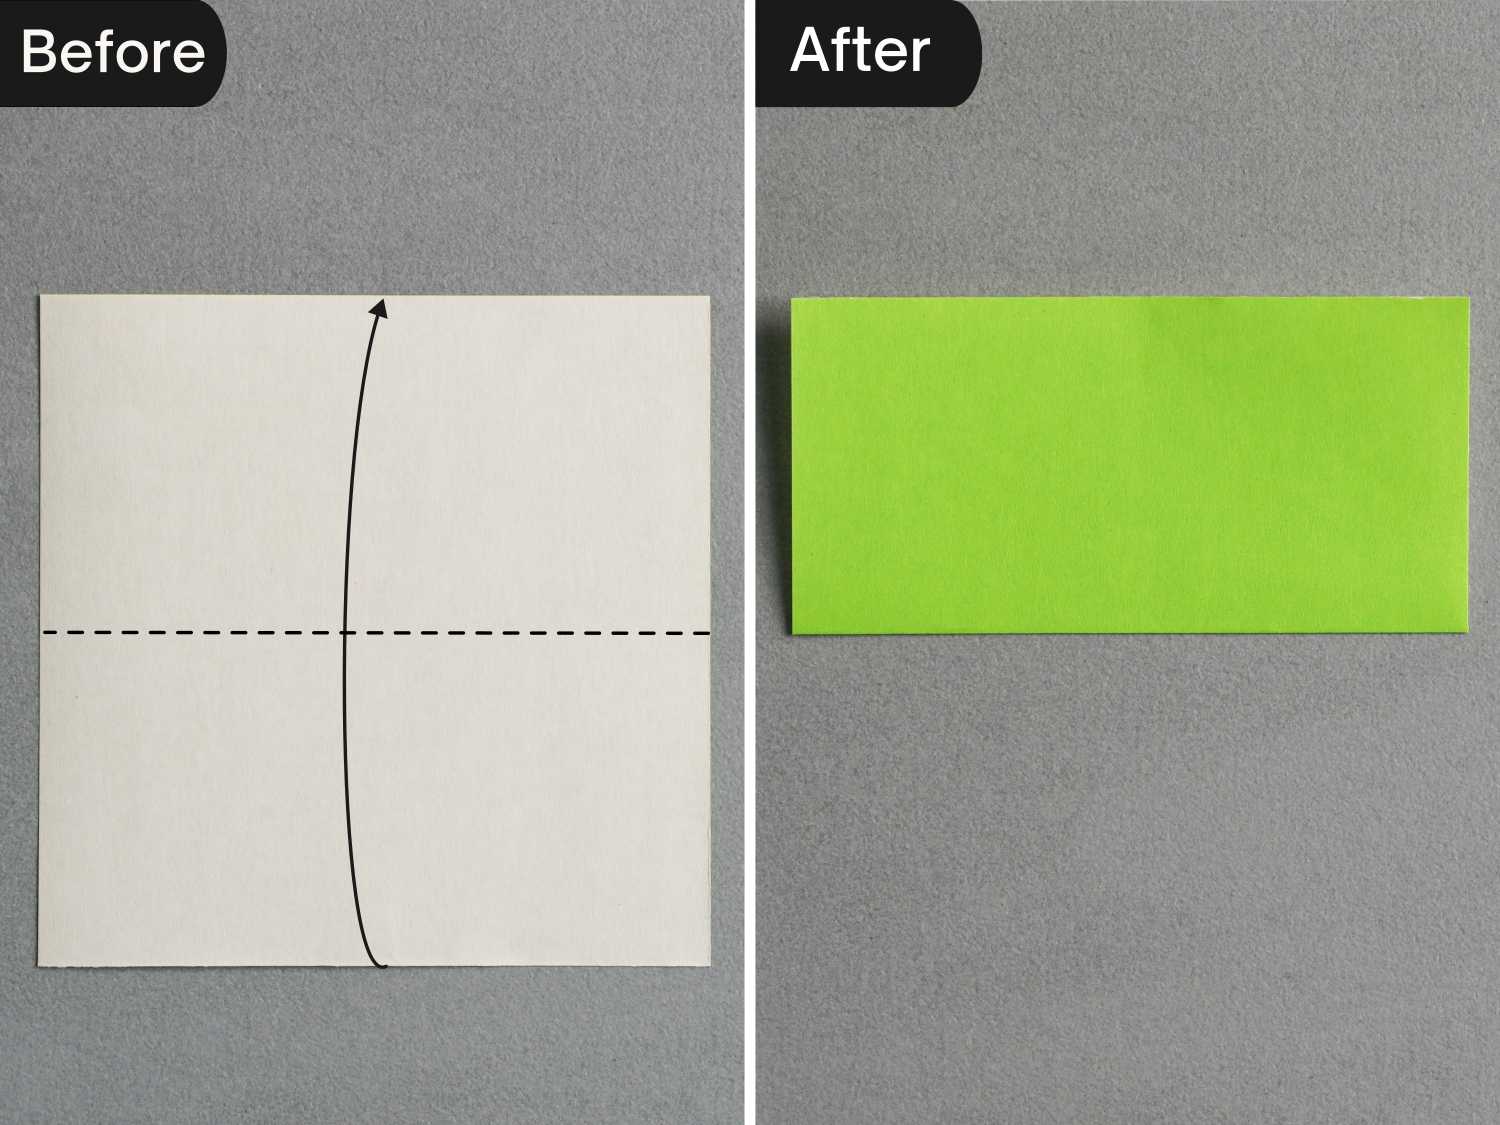
Place the paper with the desired display side face down to begin folding. Fold it in half horizontally from bottom to top.
Step 2
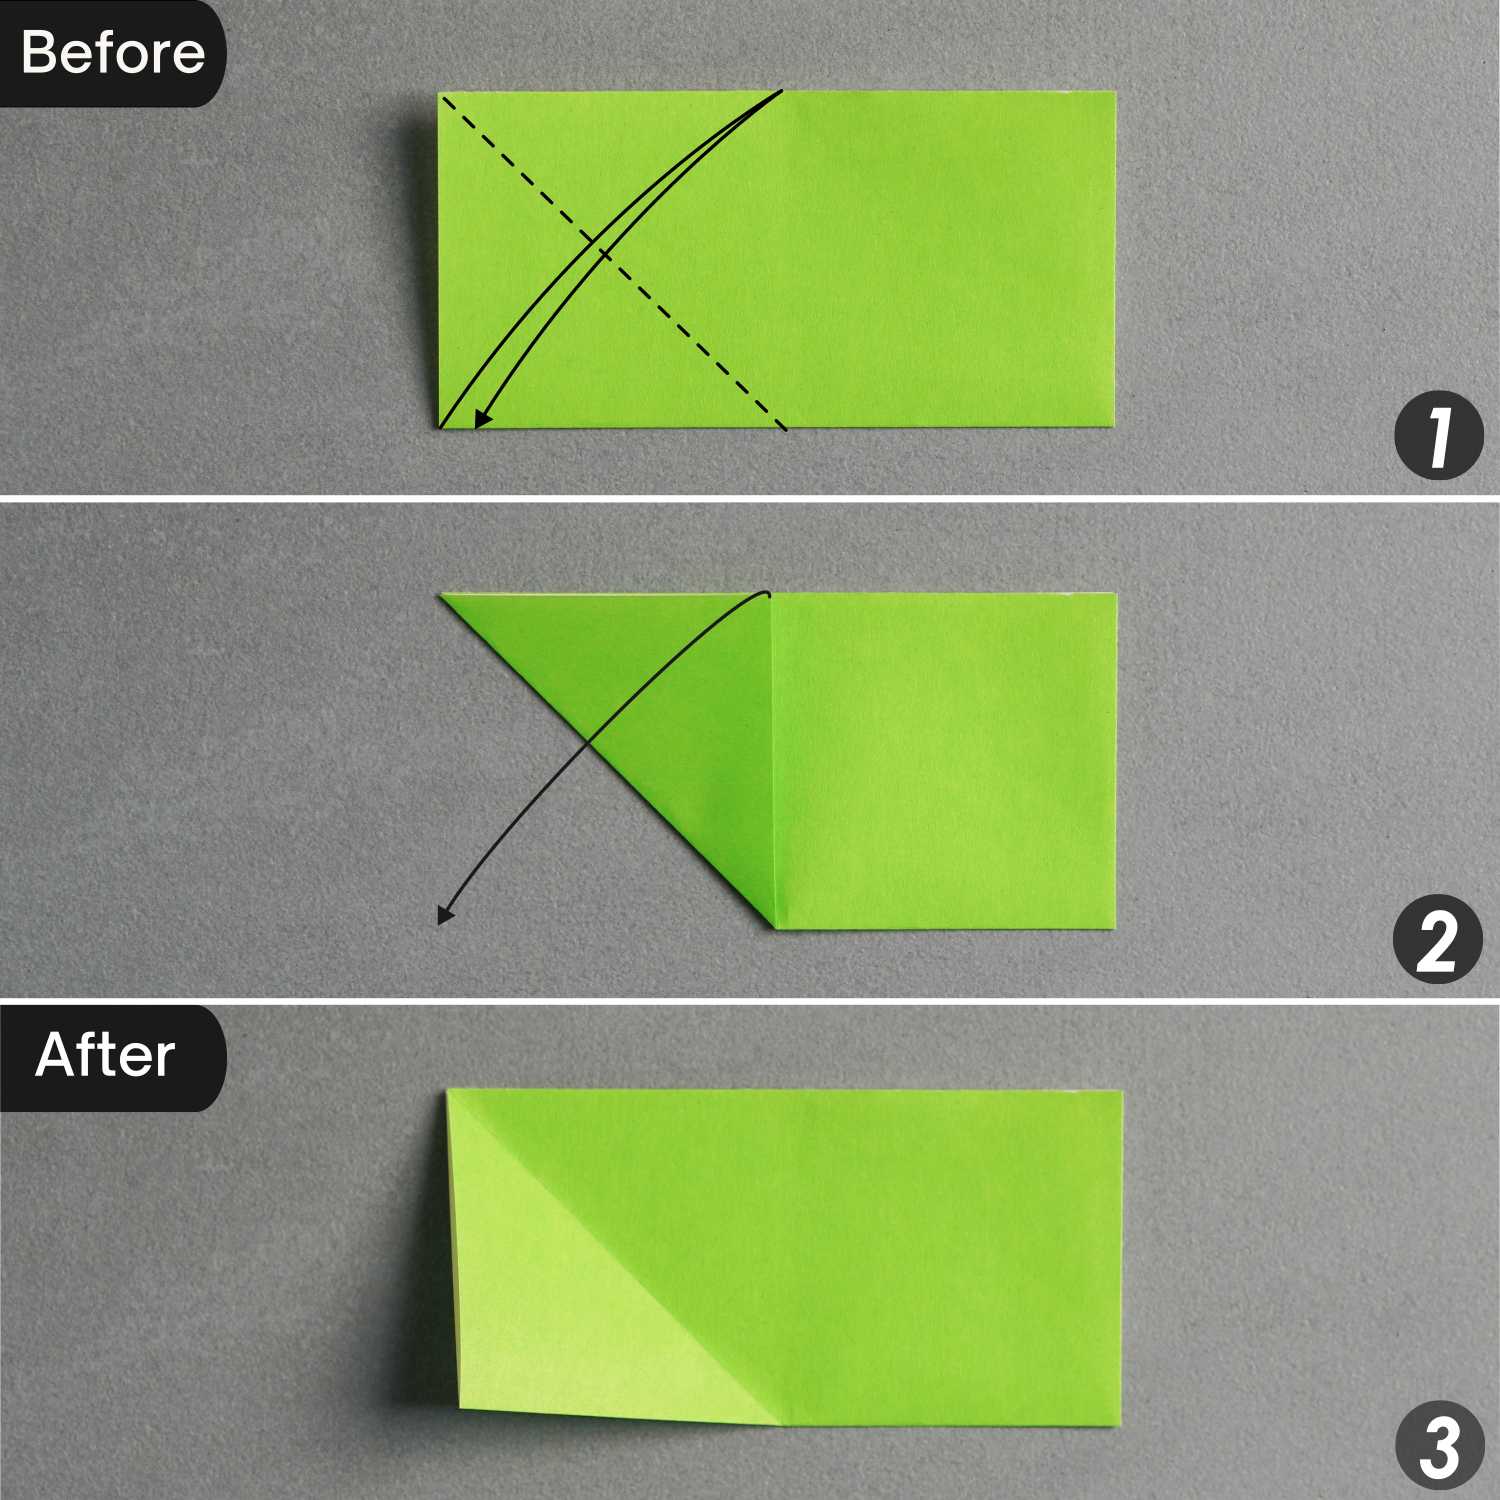
Fold the left edge to align with the top edge, leaving a crease, and unfold it.
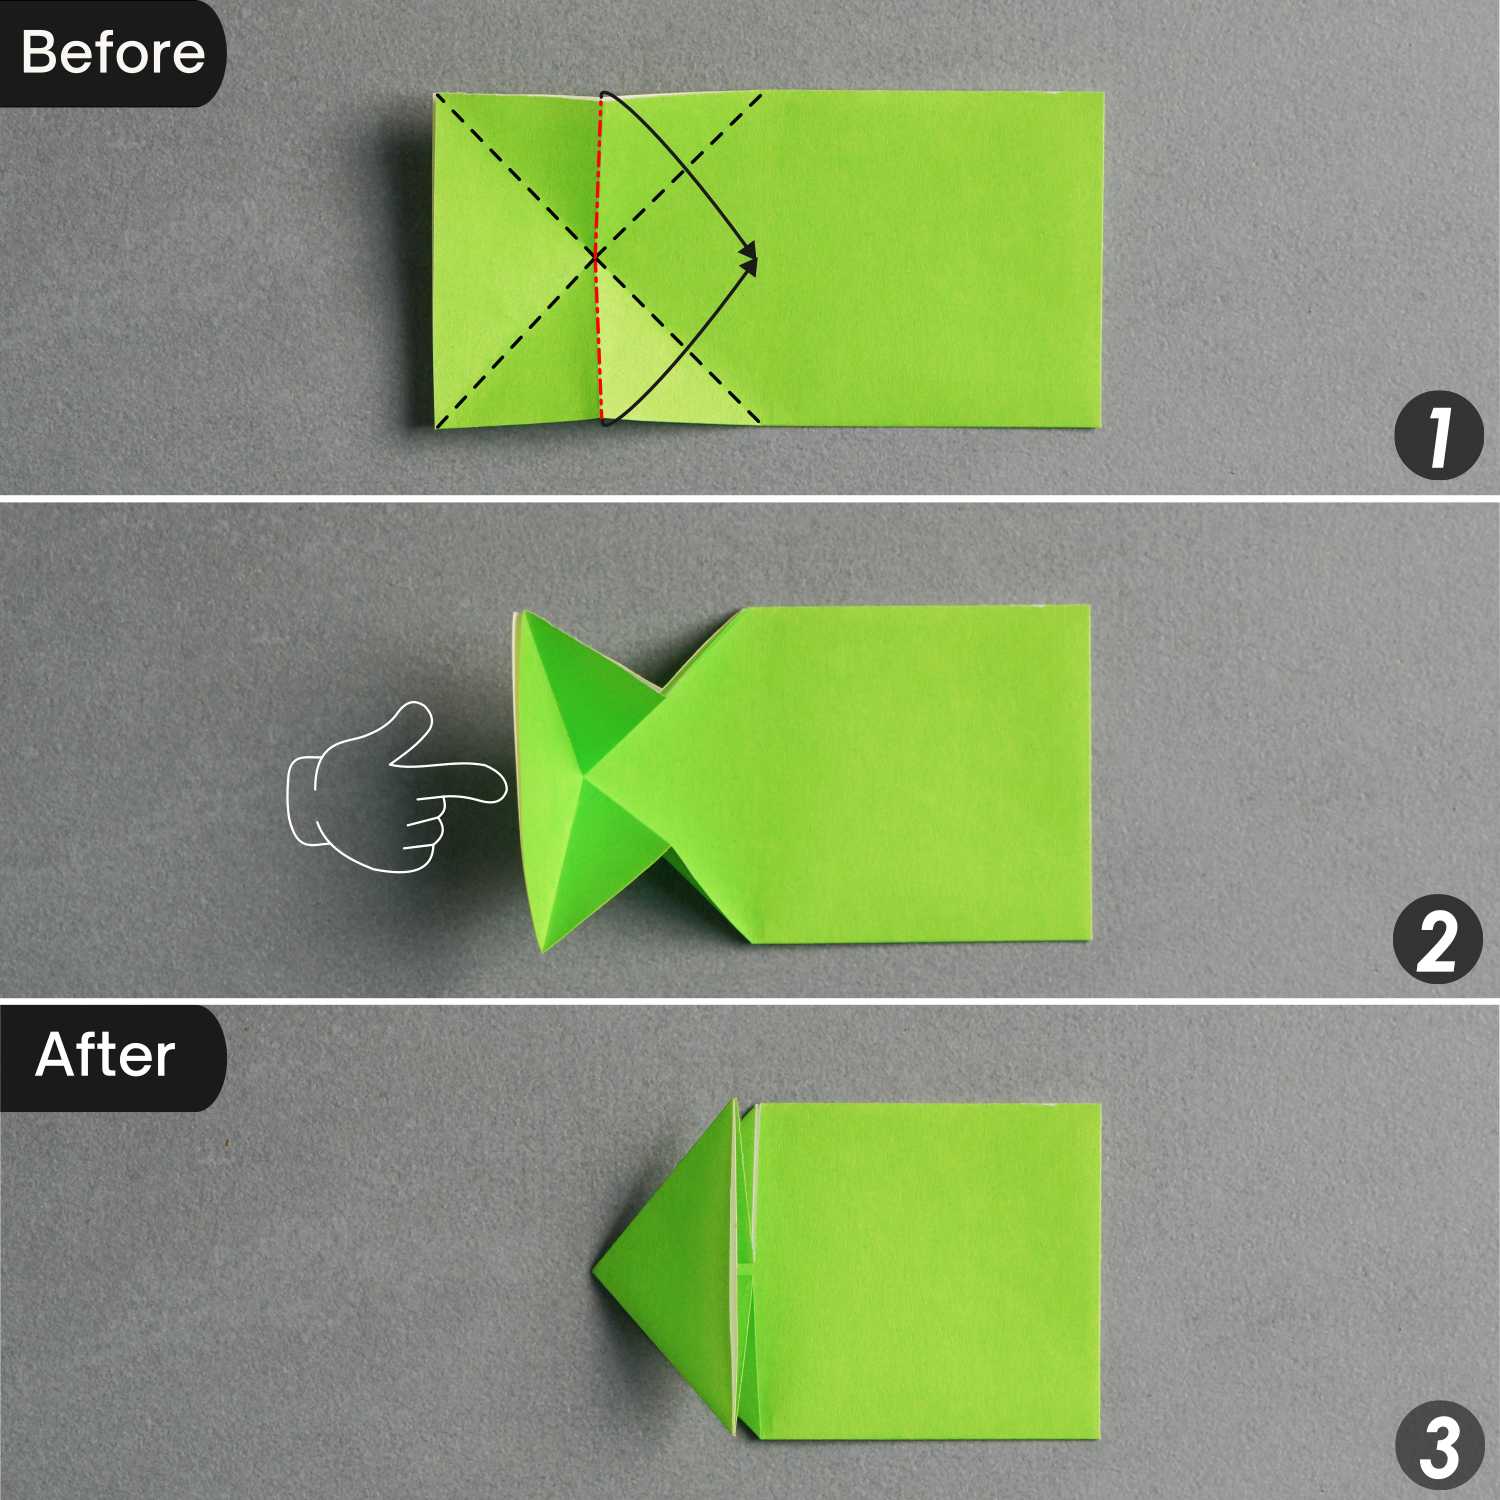
Step 3
Fold the left edge to align with the bottom edge, leaving a crease, and unfold it.
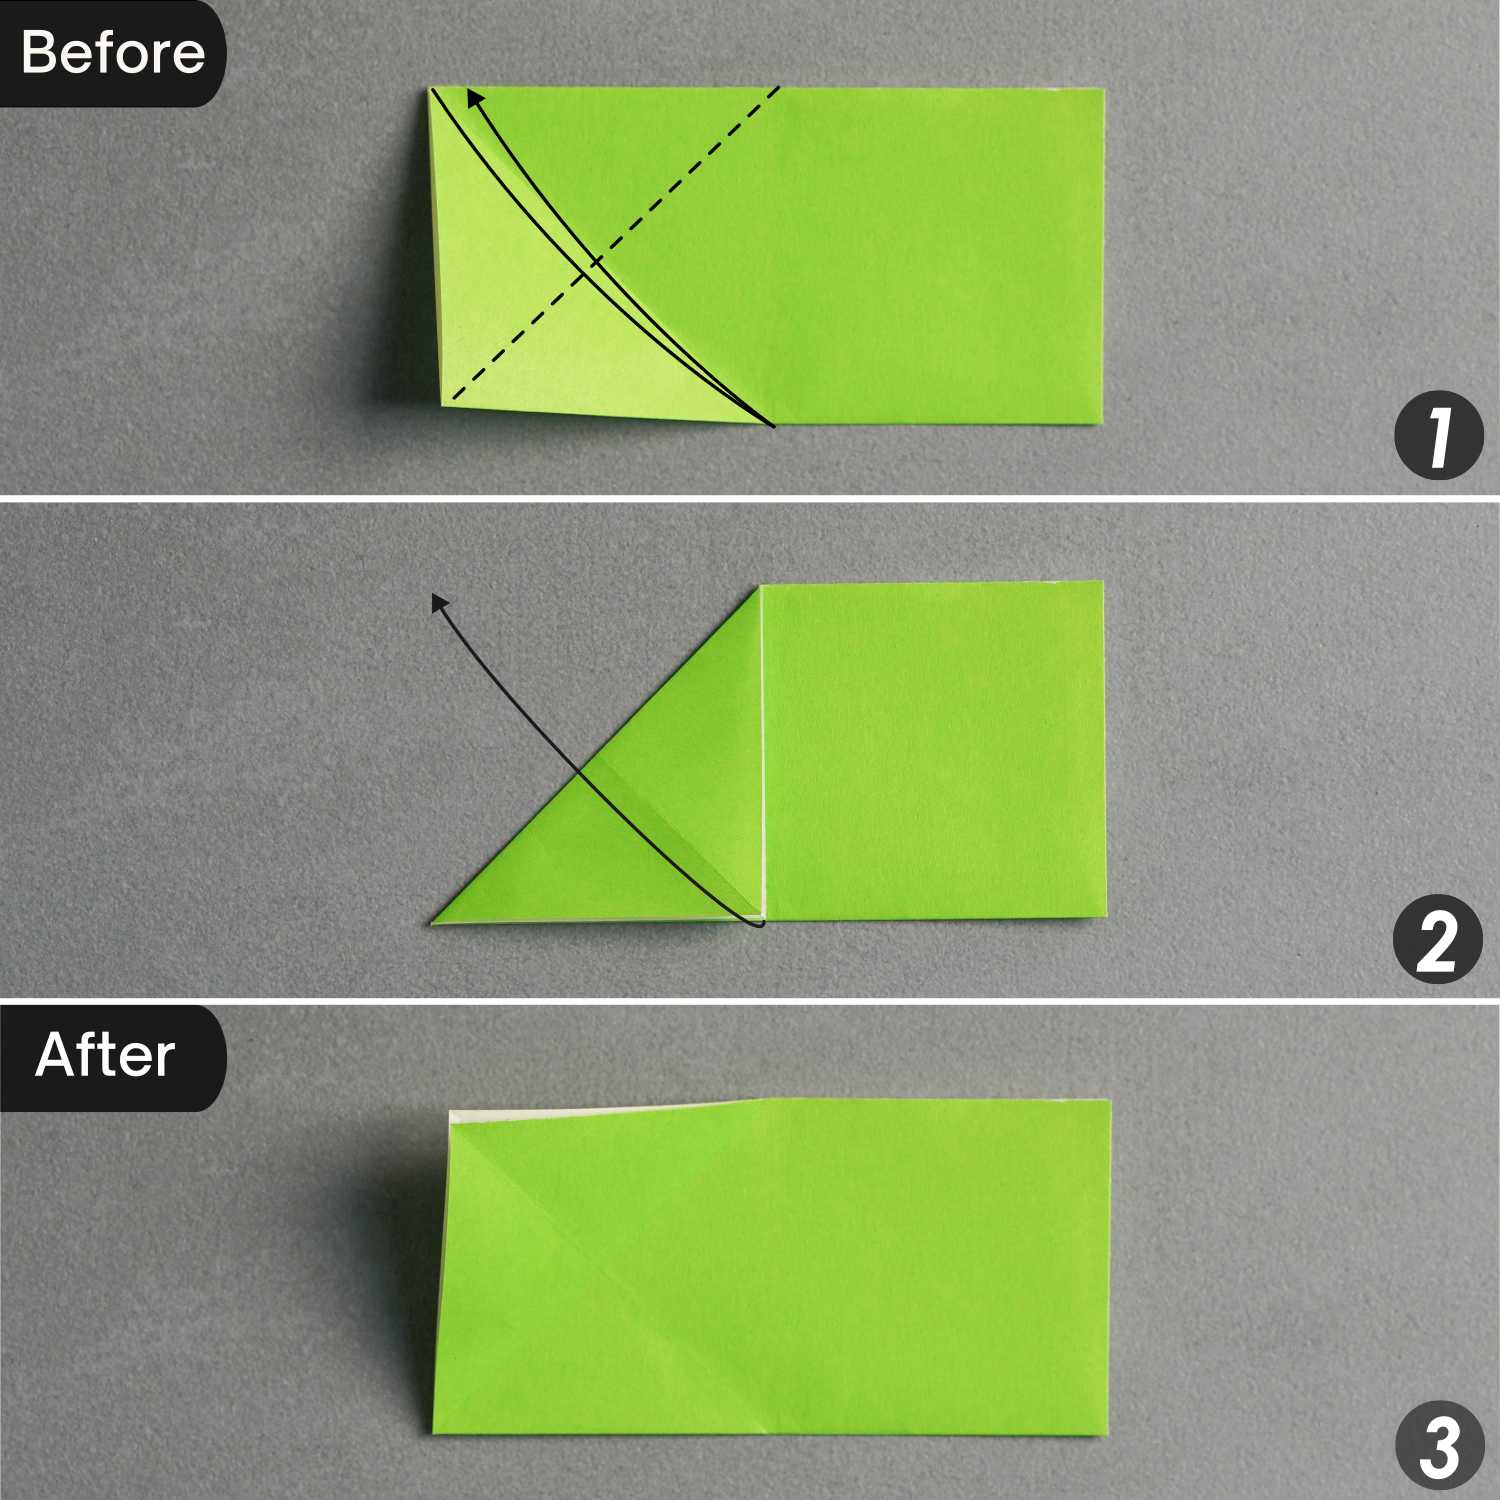
Step 4
Flip the paper from back to front.
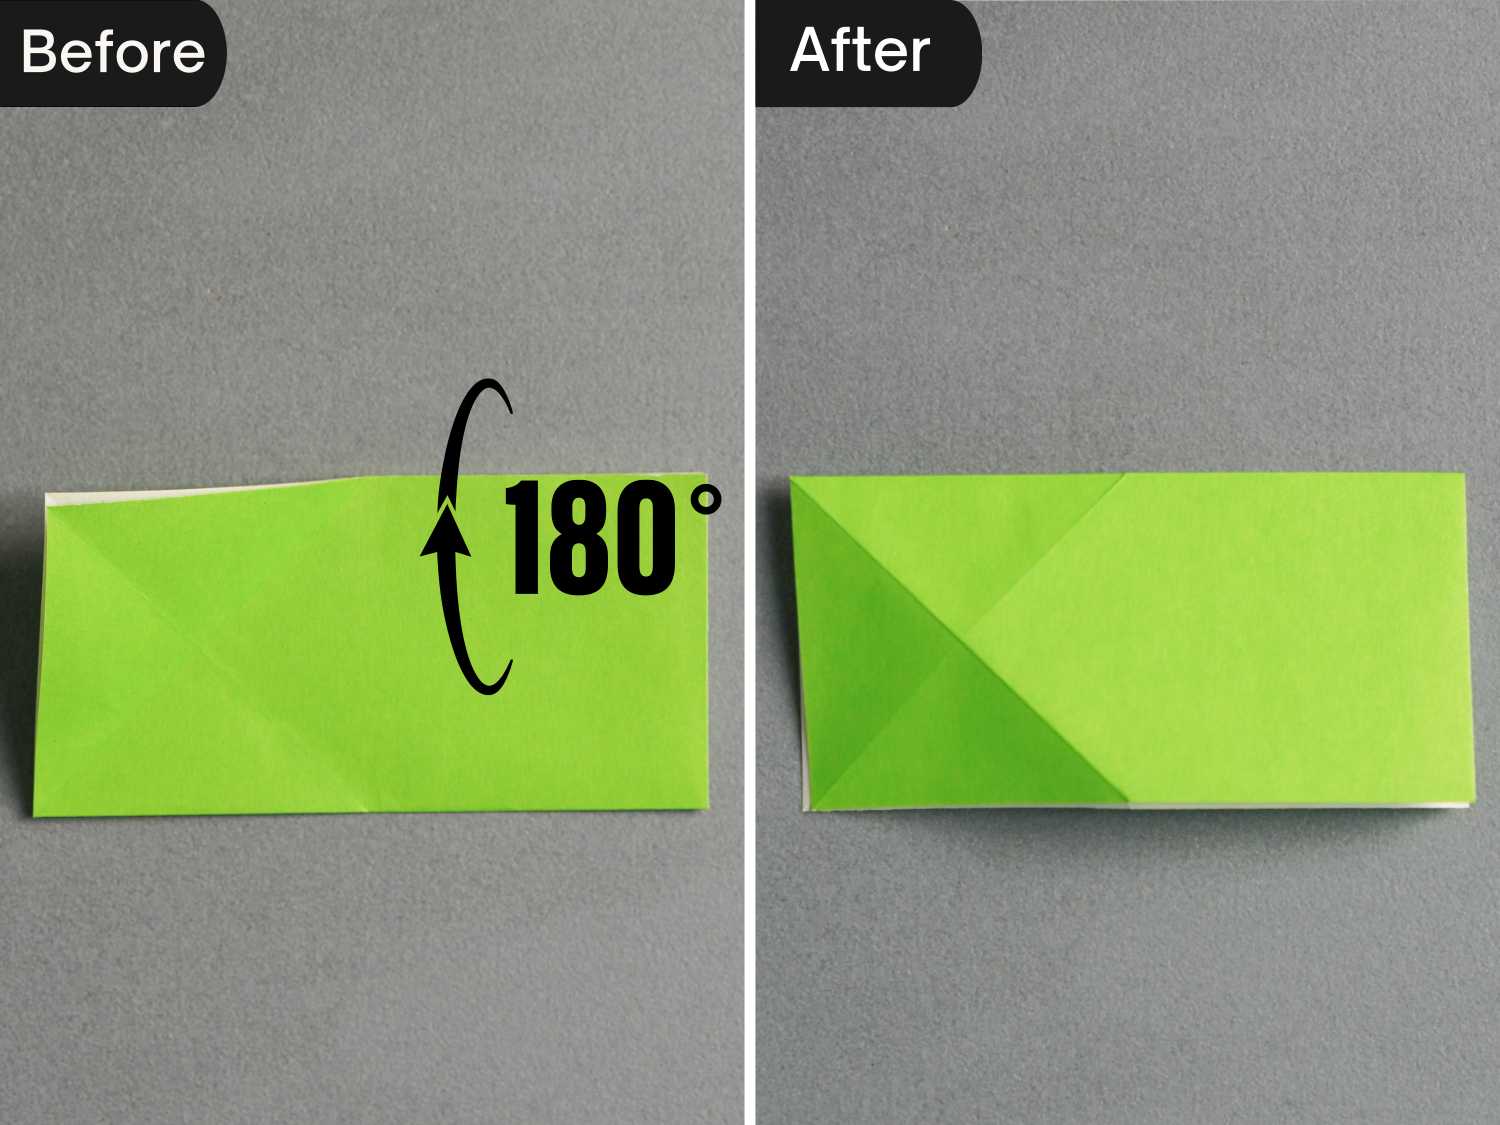
Step 5
Fold the left edge toward the right side along the dotted line, leaving a crease, and unfold it.
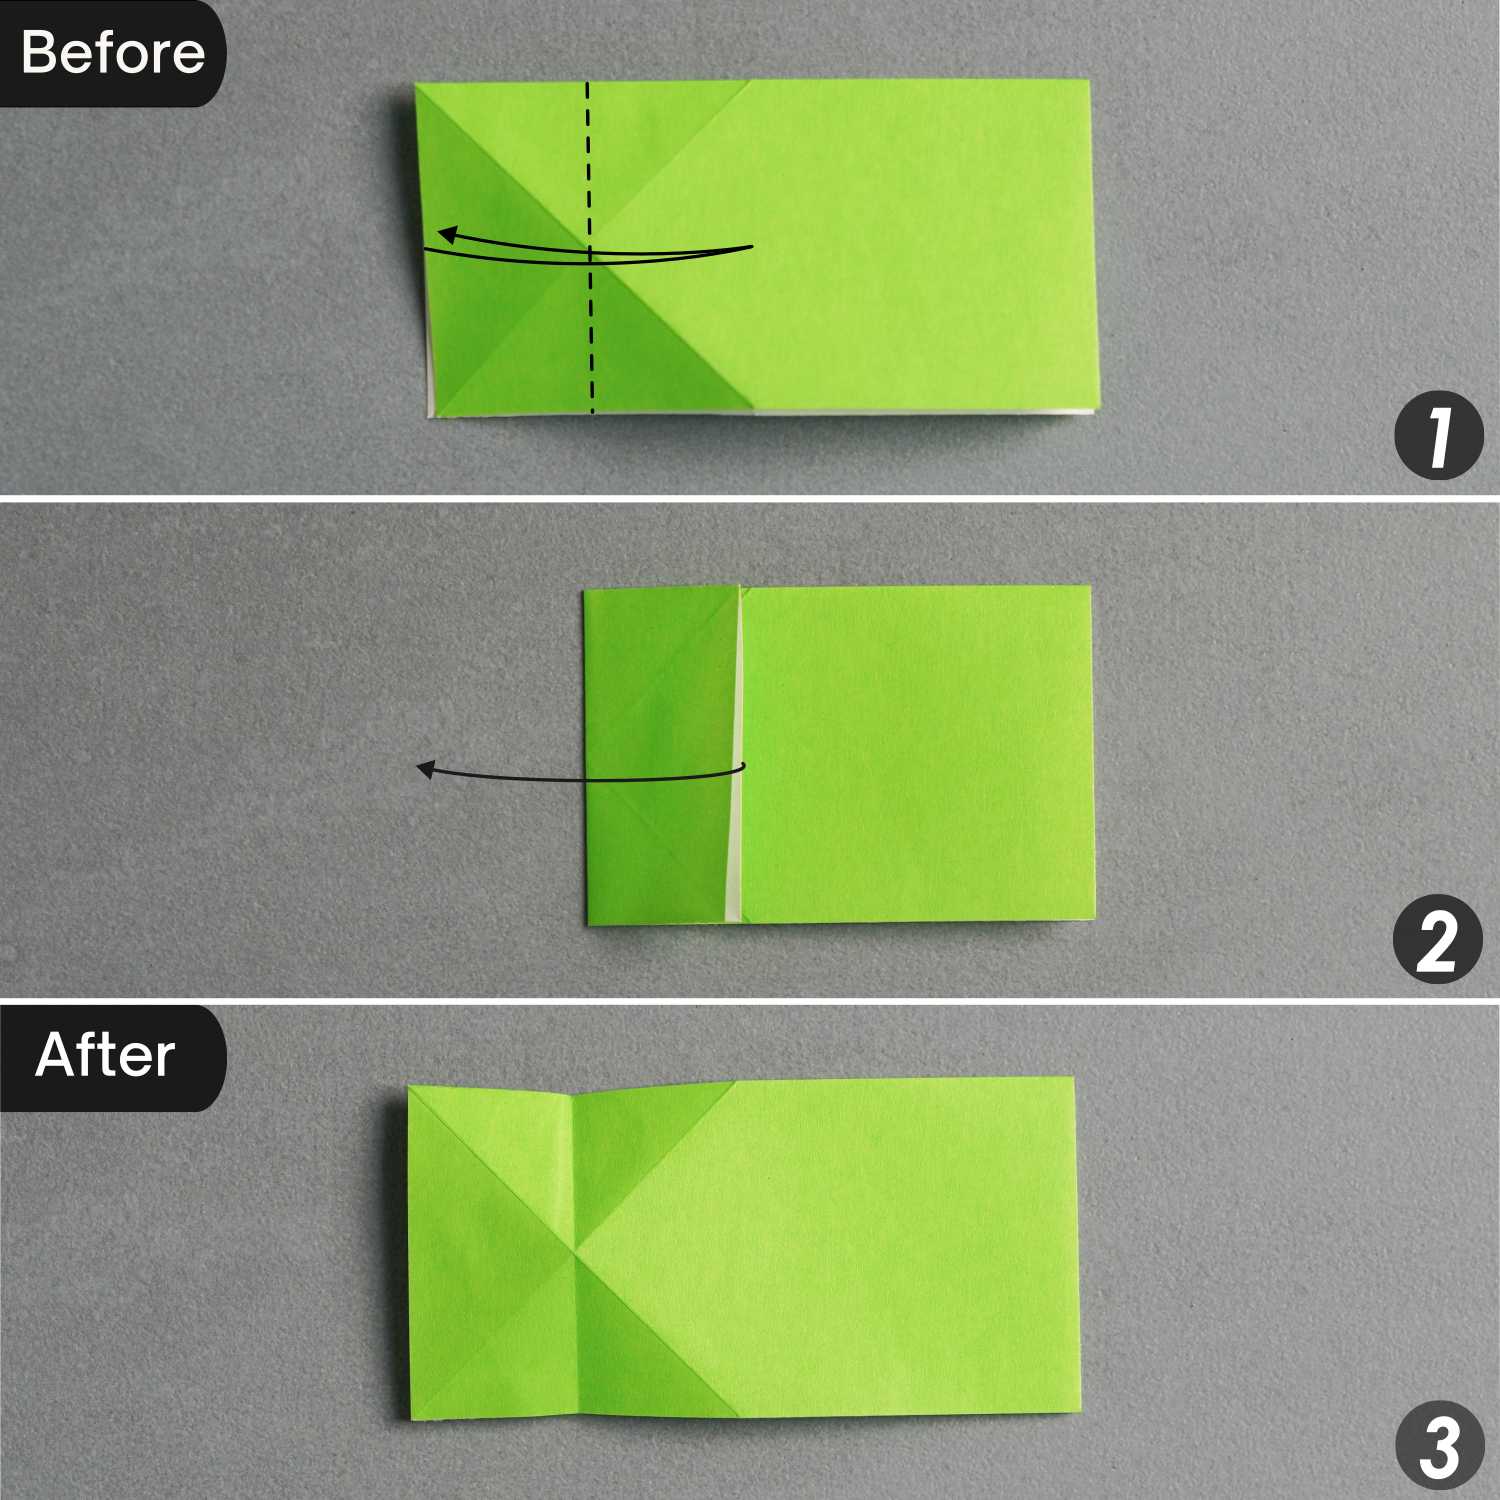
Step 6
Turn over the paper from back to front.
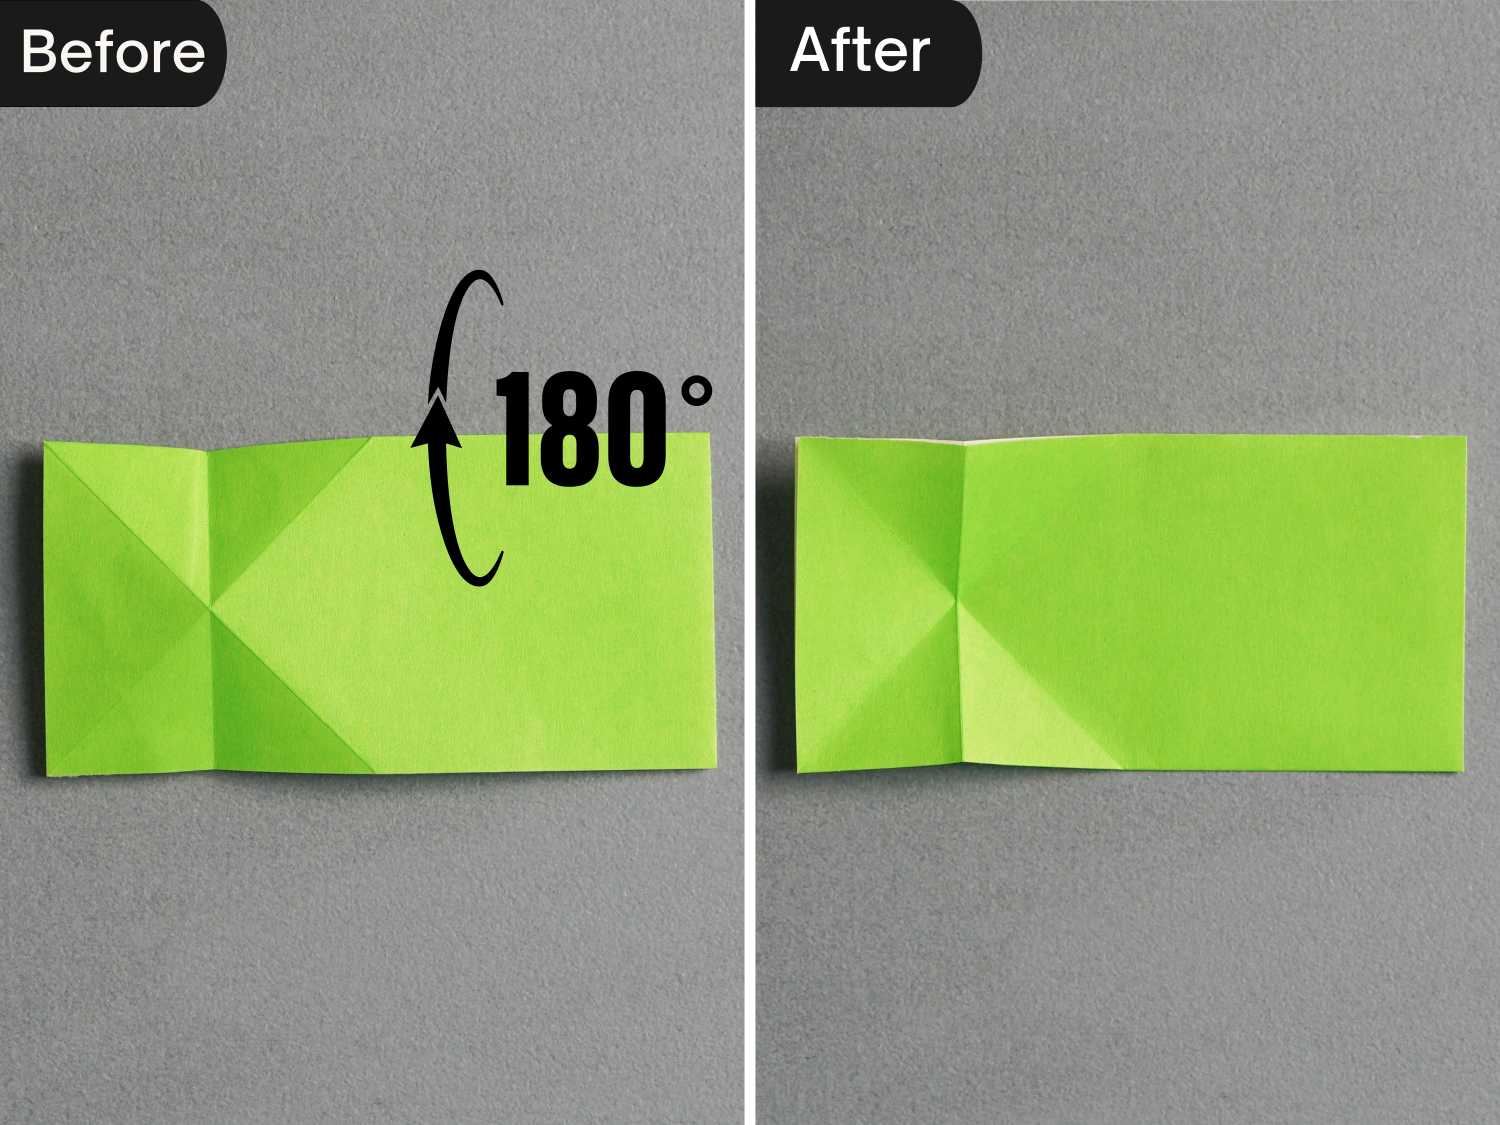
Step 7
Fold the left edge toward the right side along the existing creases to form a triangle on the left side.
Step 8
Rotate the paper 90 degrees clockwise.
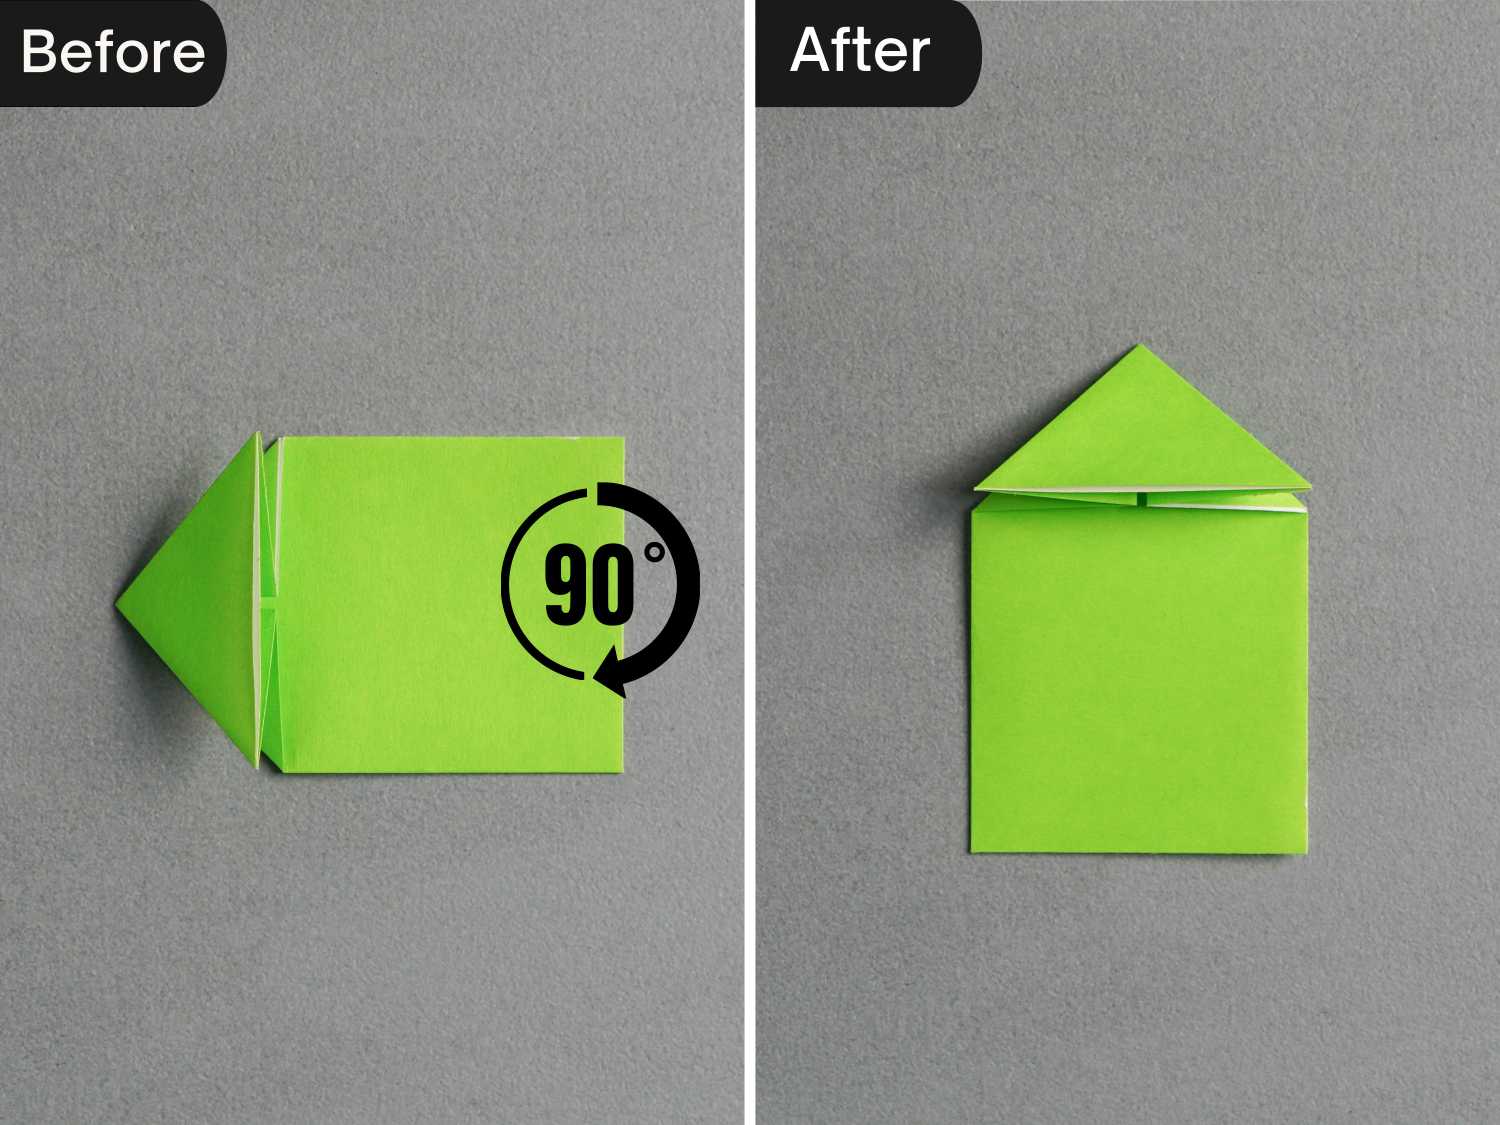
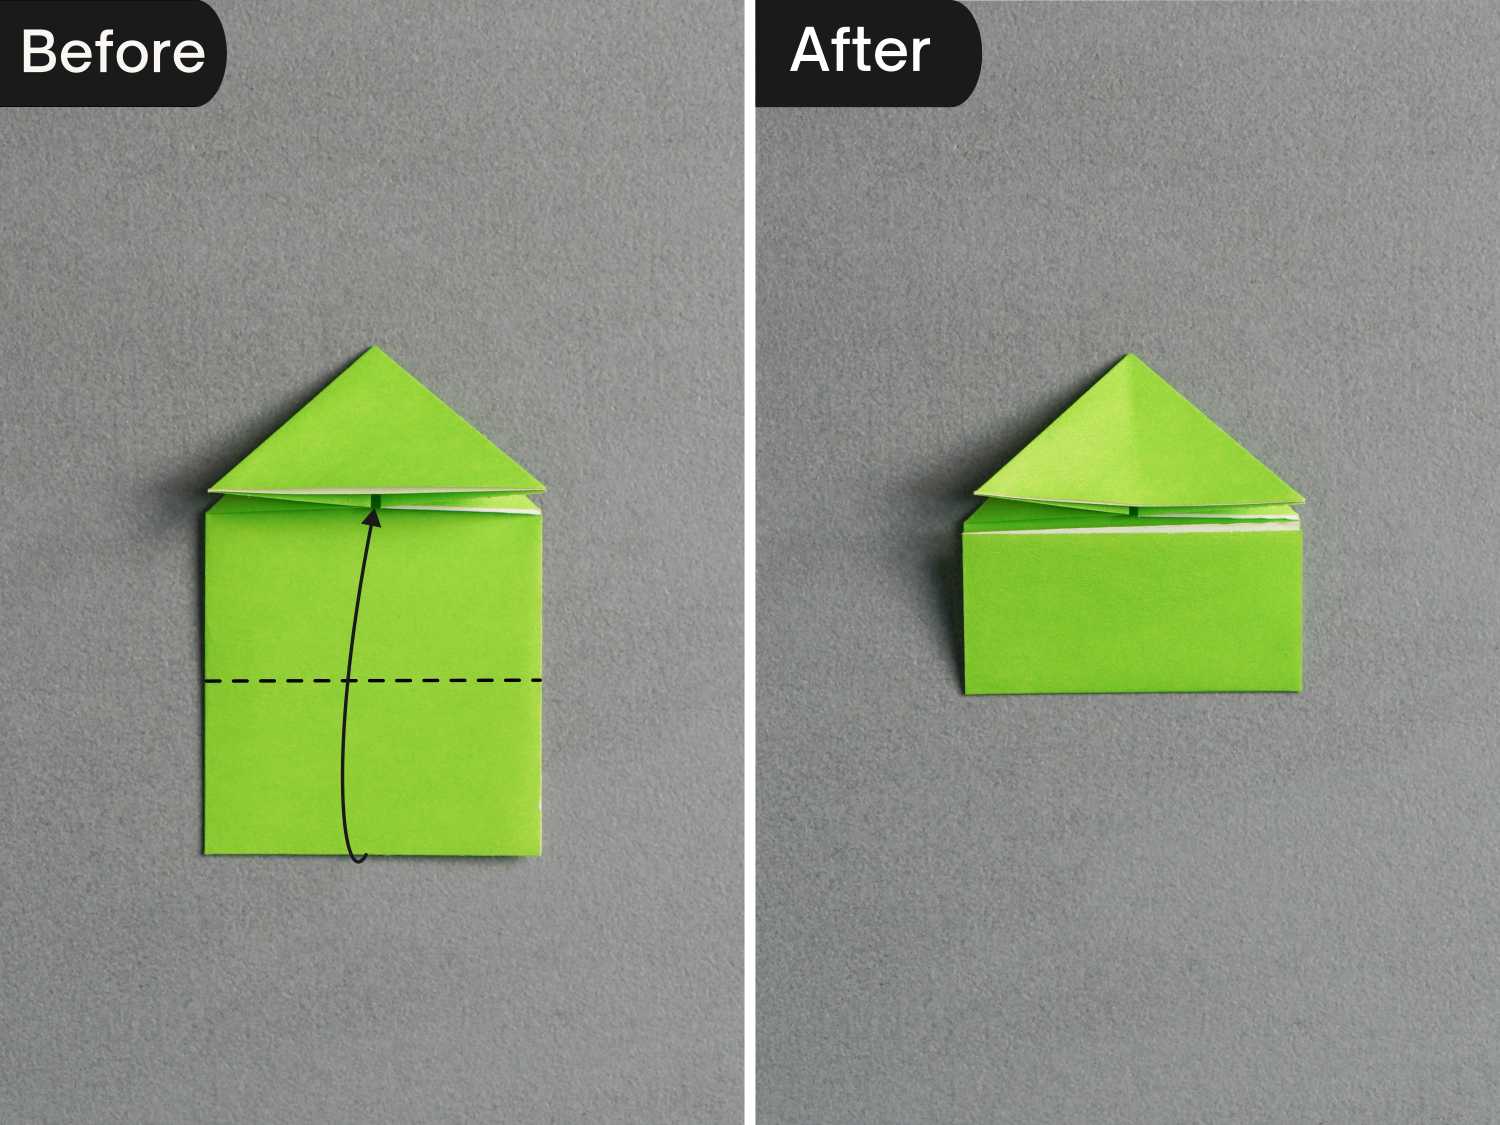
Step 9
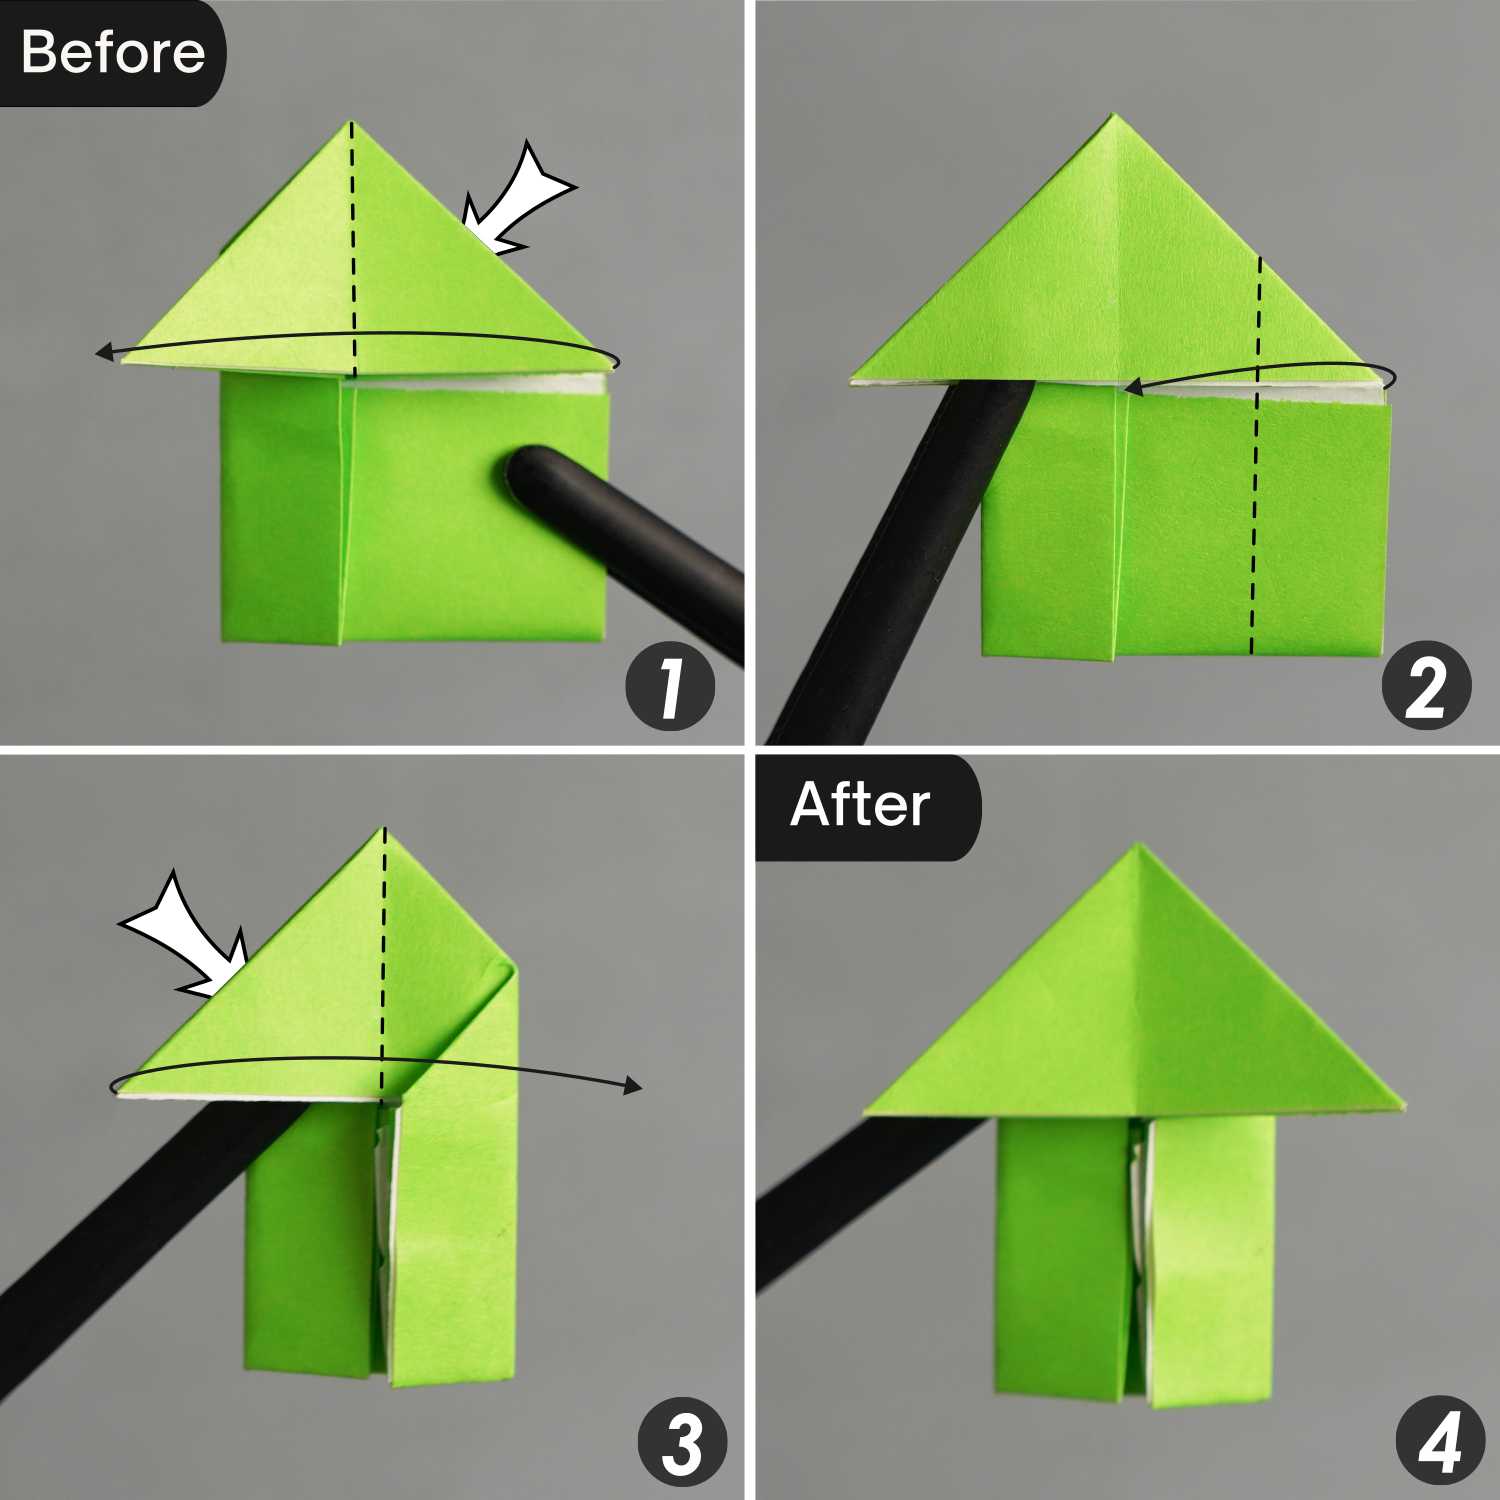
Fold the bottom edge to align with the top triangle’s bottom edge.
Step 10
Fold the left flap of the top triangle to the right side, then fold the left edge along the dotted line to align with the center vertical line, and finally, fold the flap of the top triangle back to the left side.
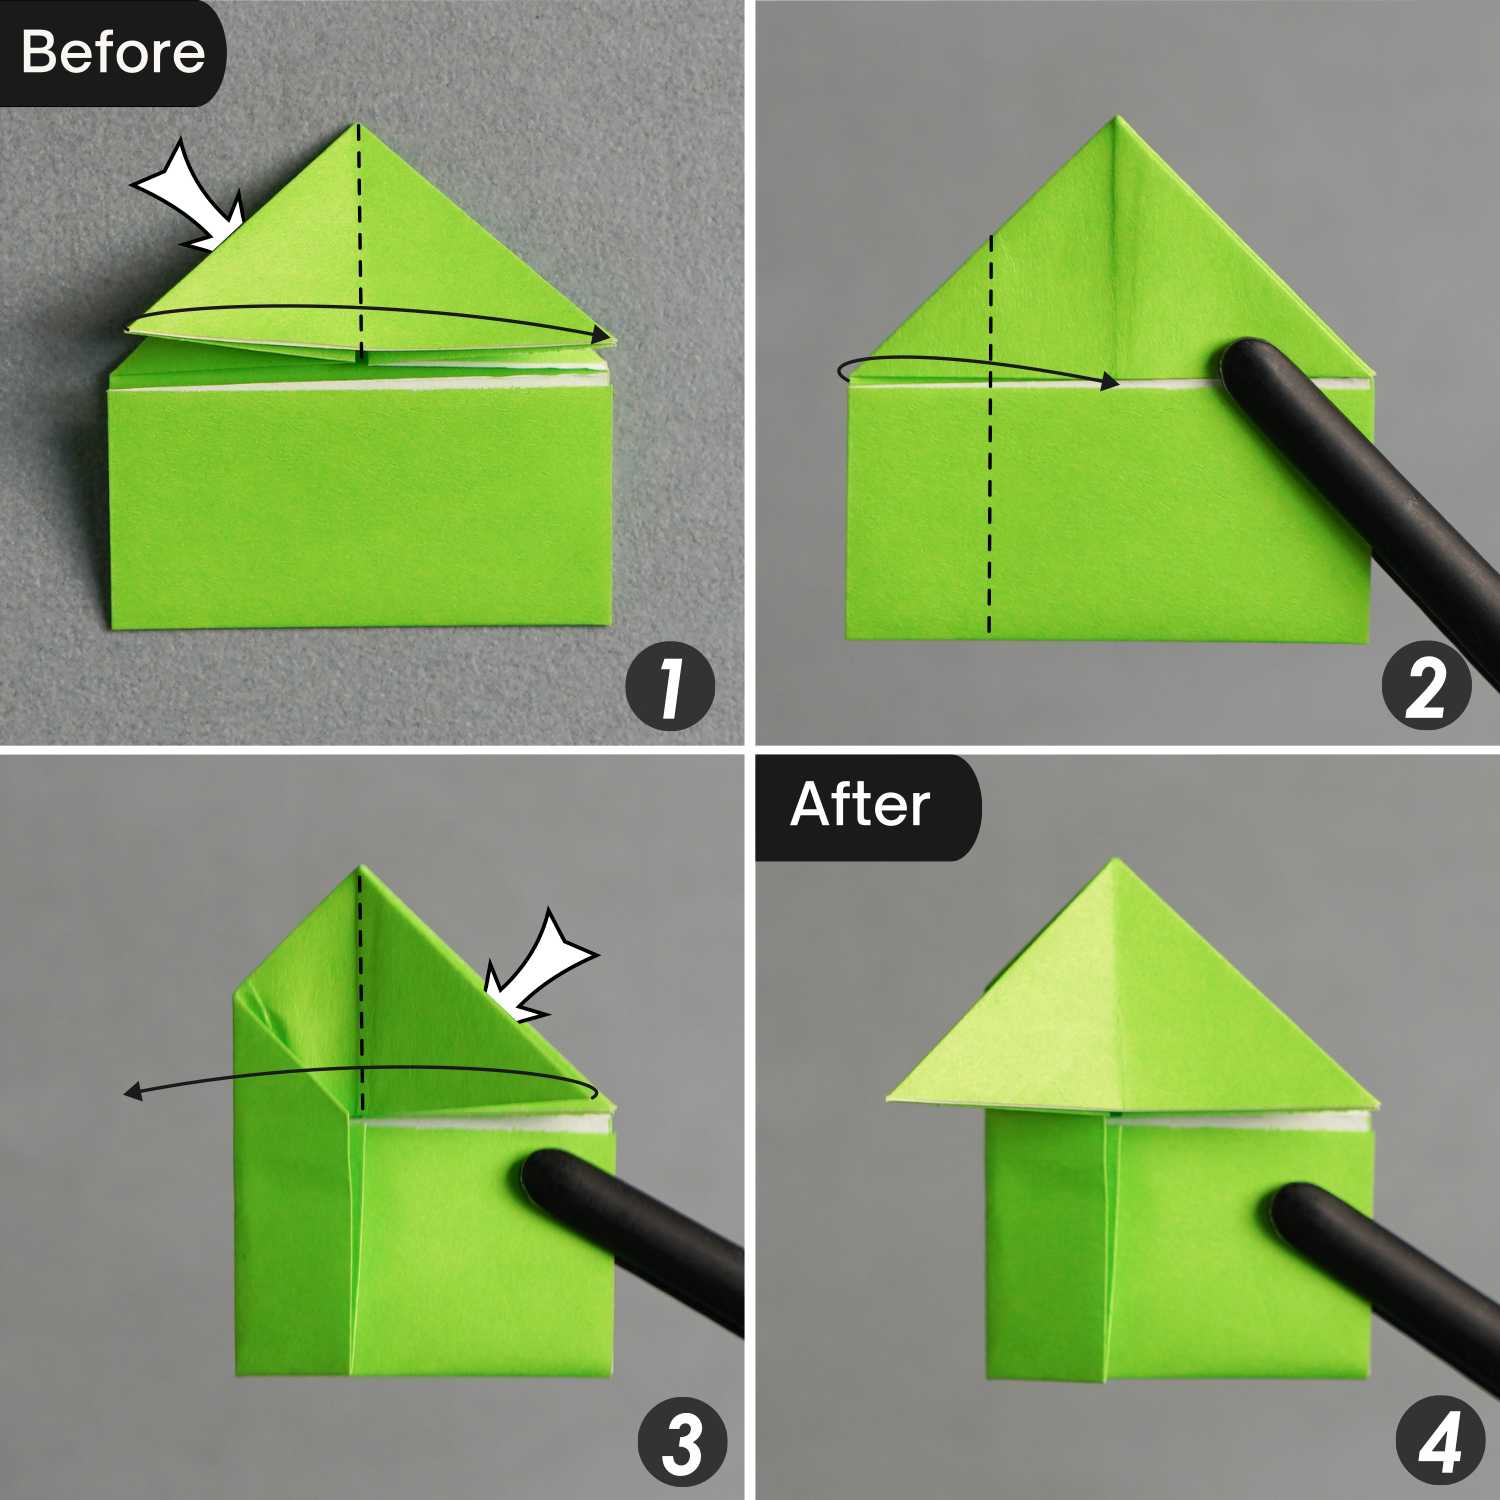
Step 11
Repeat this for the right side.
Fold the right flap of the top triangle to the left side, then fold the right edge along the dotted line to align with the center vertical line, and finally, fold the flap of the top triangle back to the right side. Now it looks like an arrow.
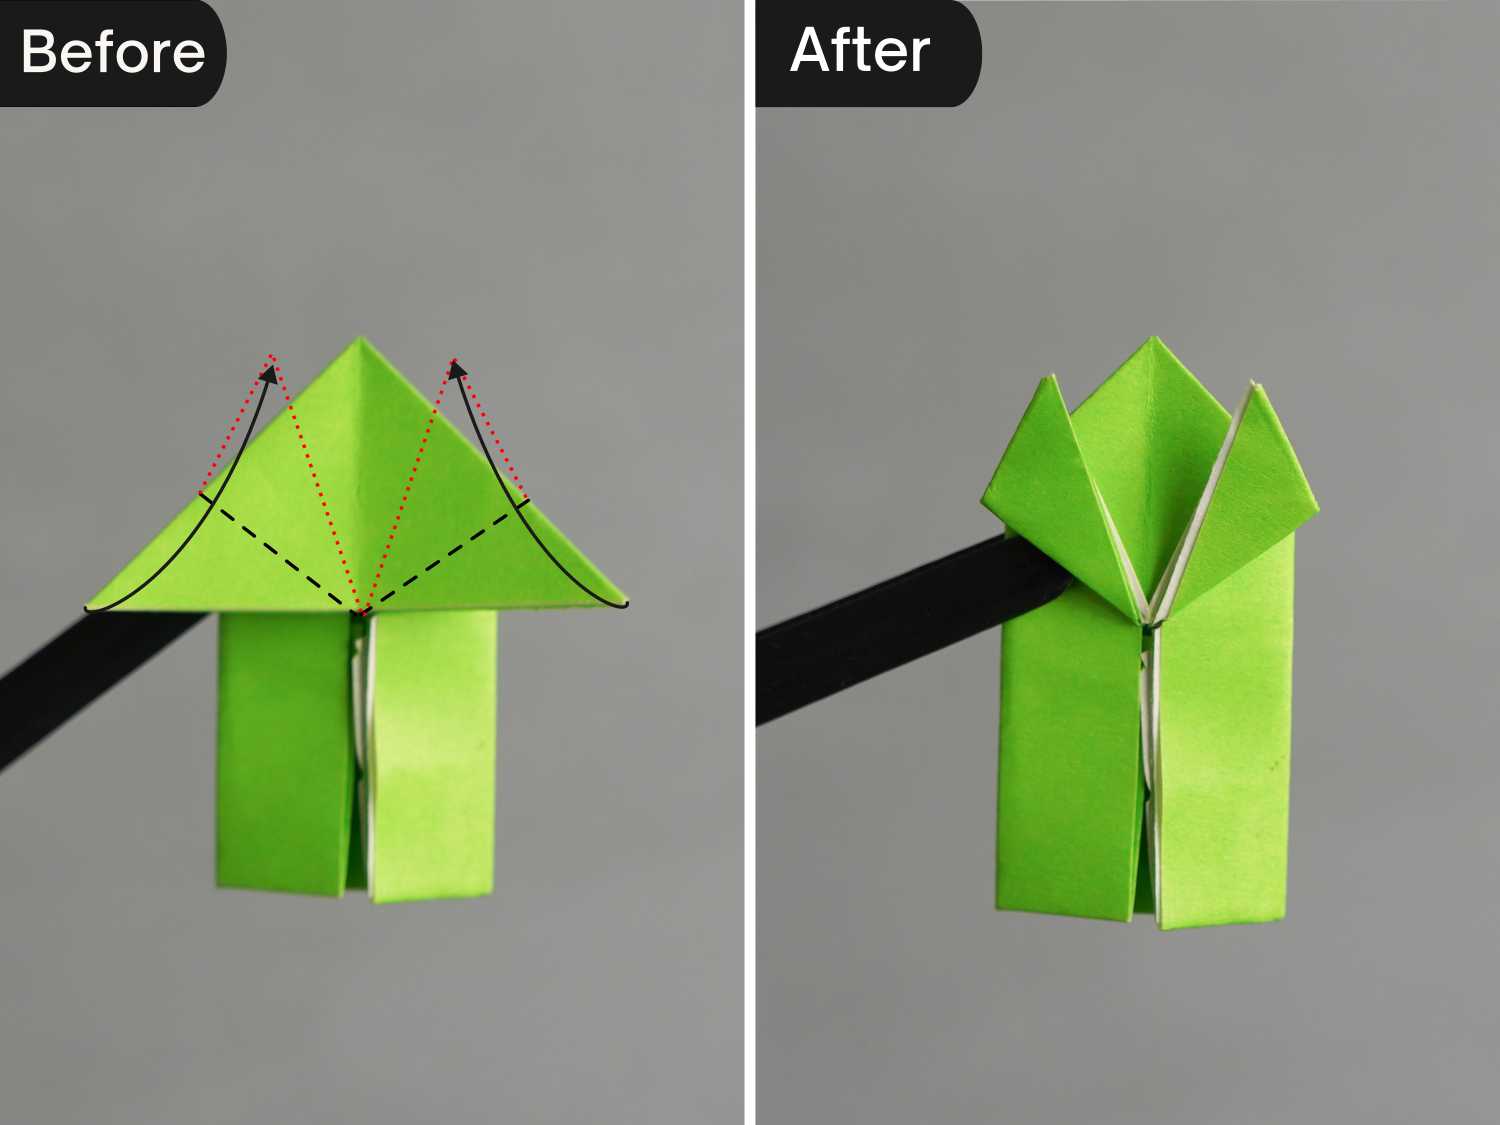
Step 12
Fold up the two bottom corners of the triangle along the black dotted lines.
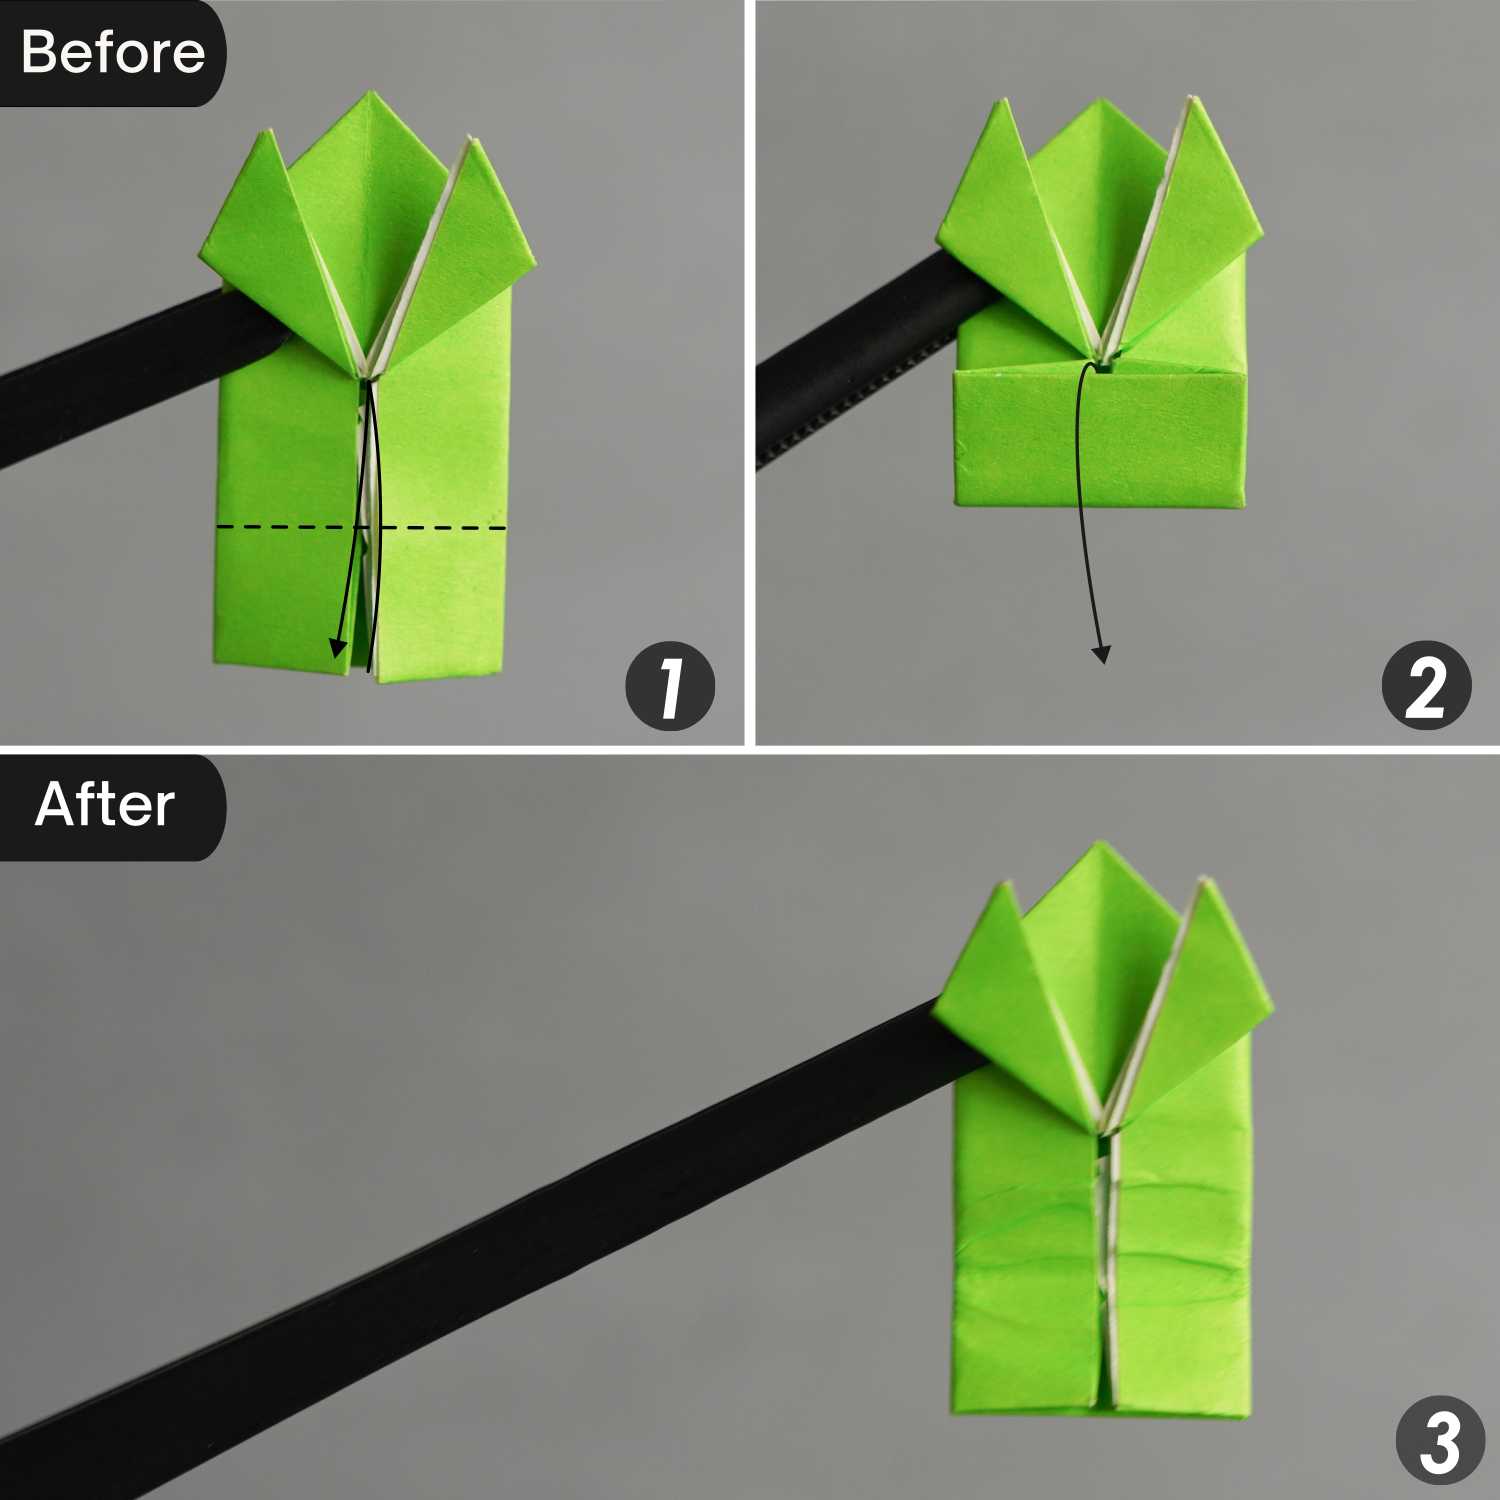
Step 13
Fold up the bottom edge along the dotted line, leaving a crease, and unfold it.
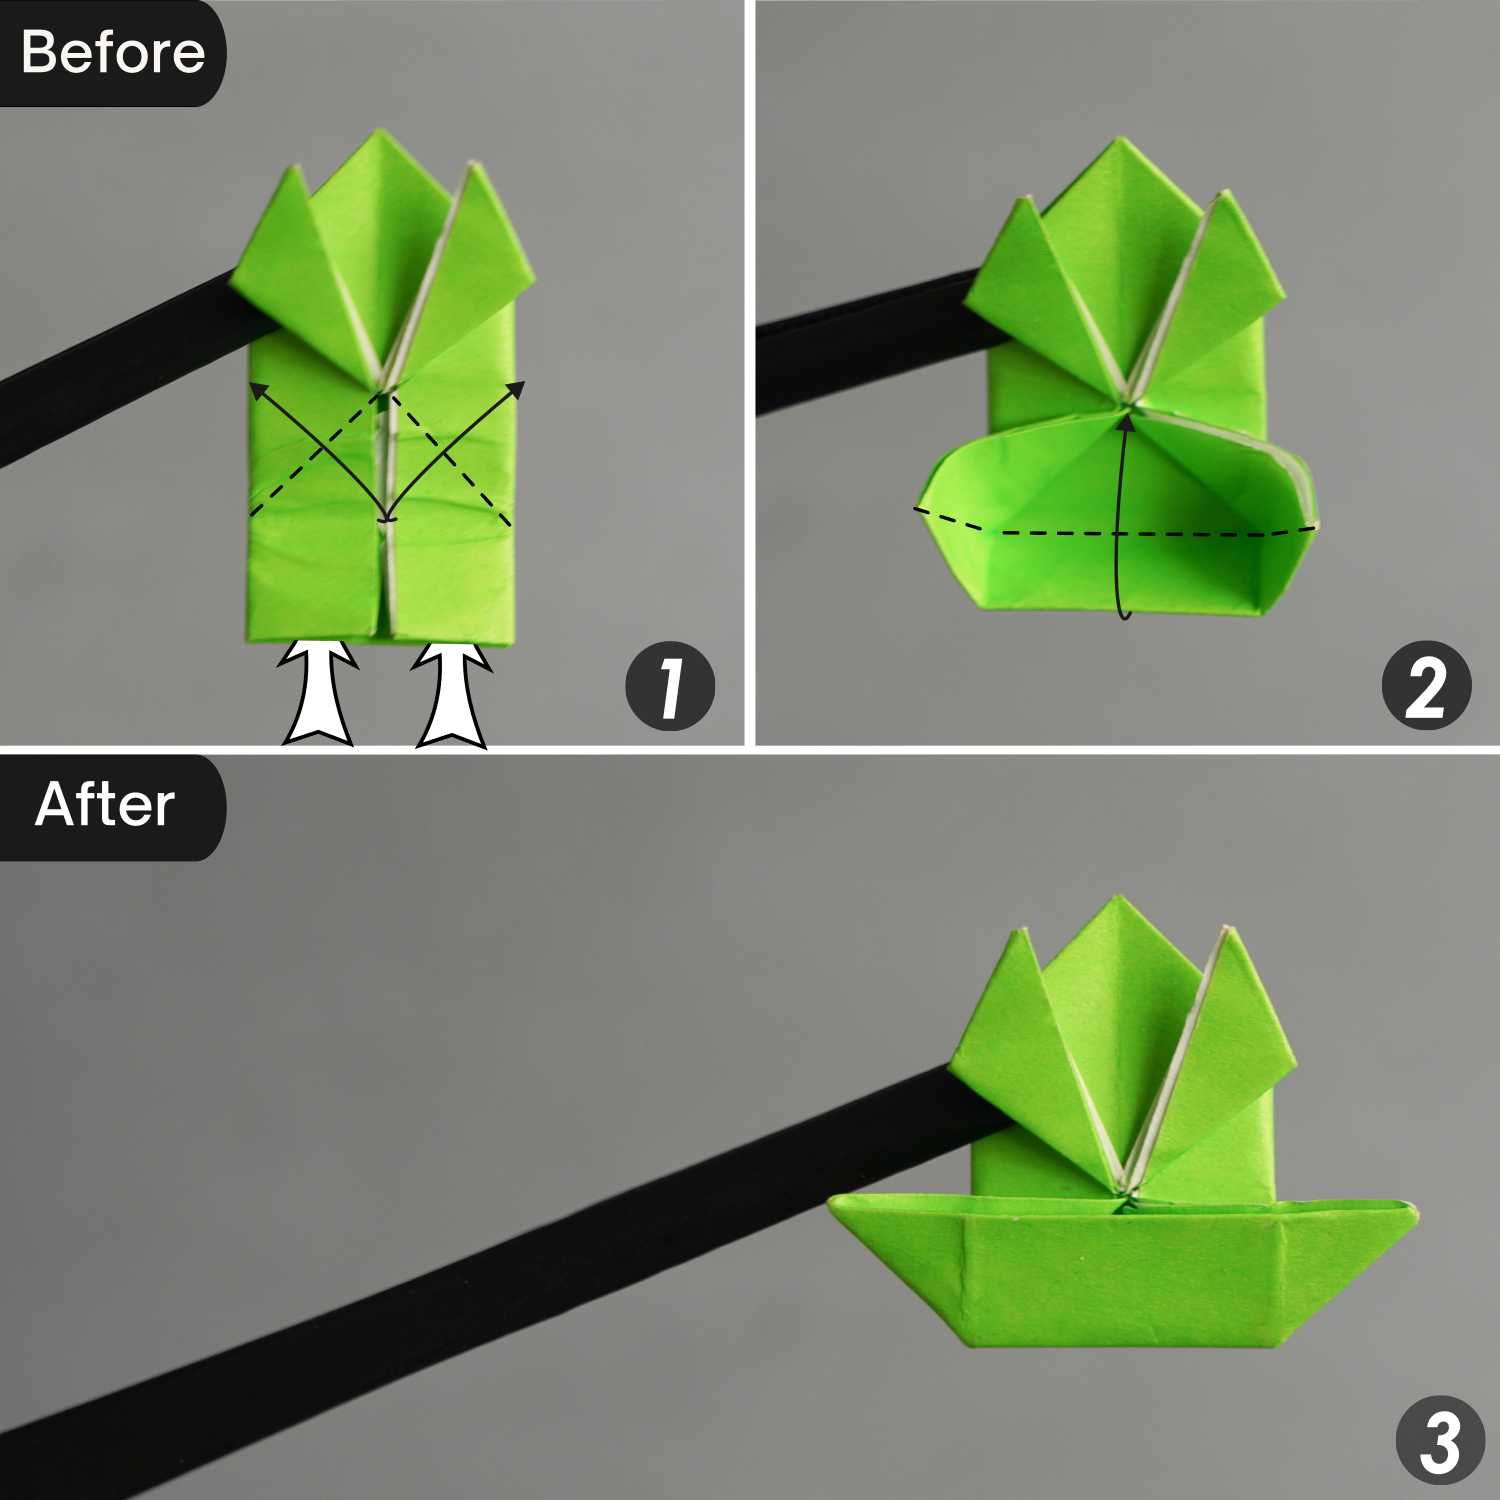
Step 14
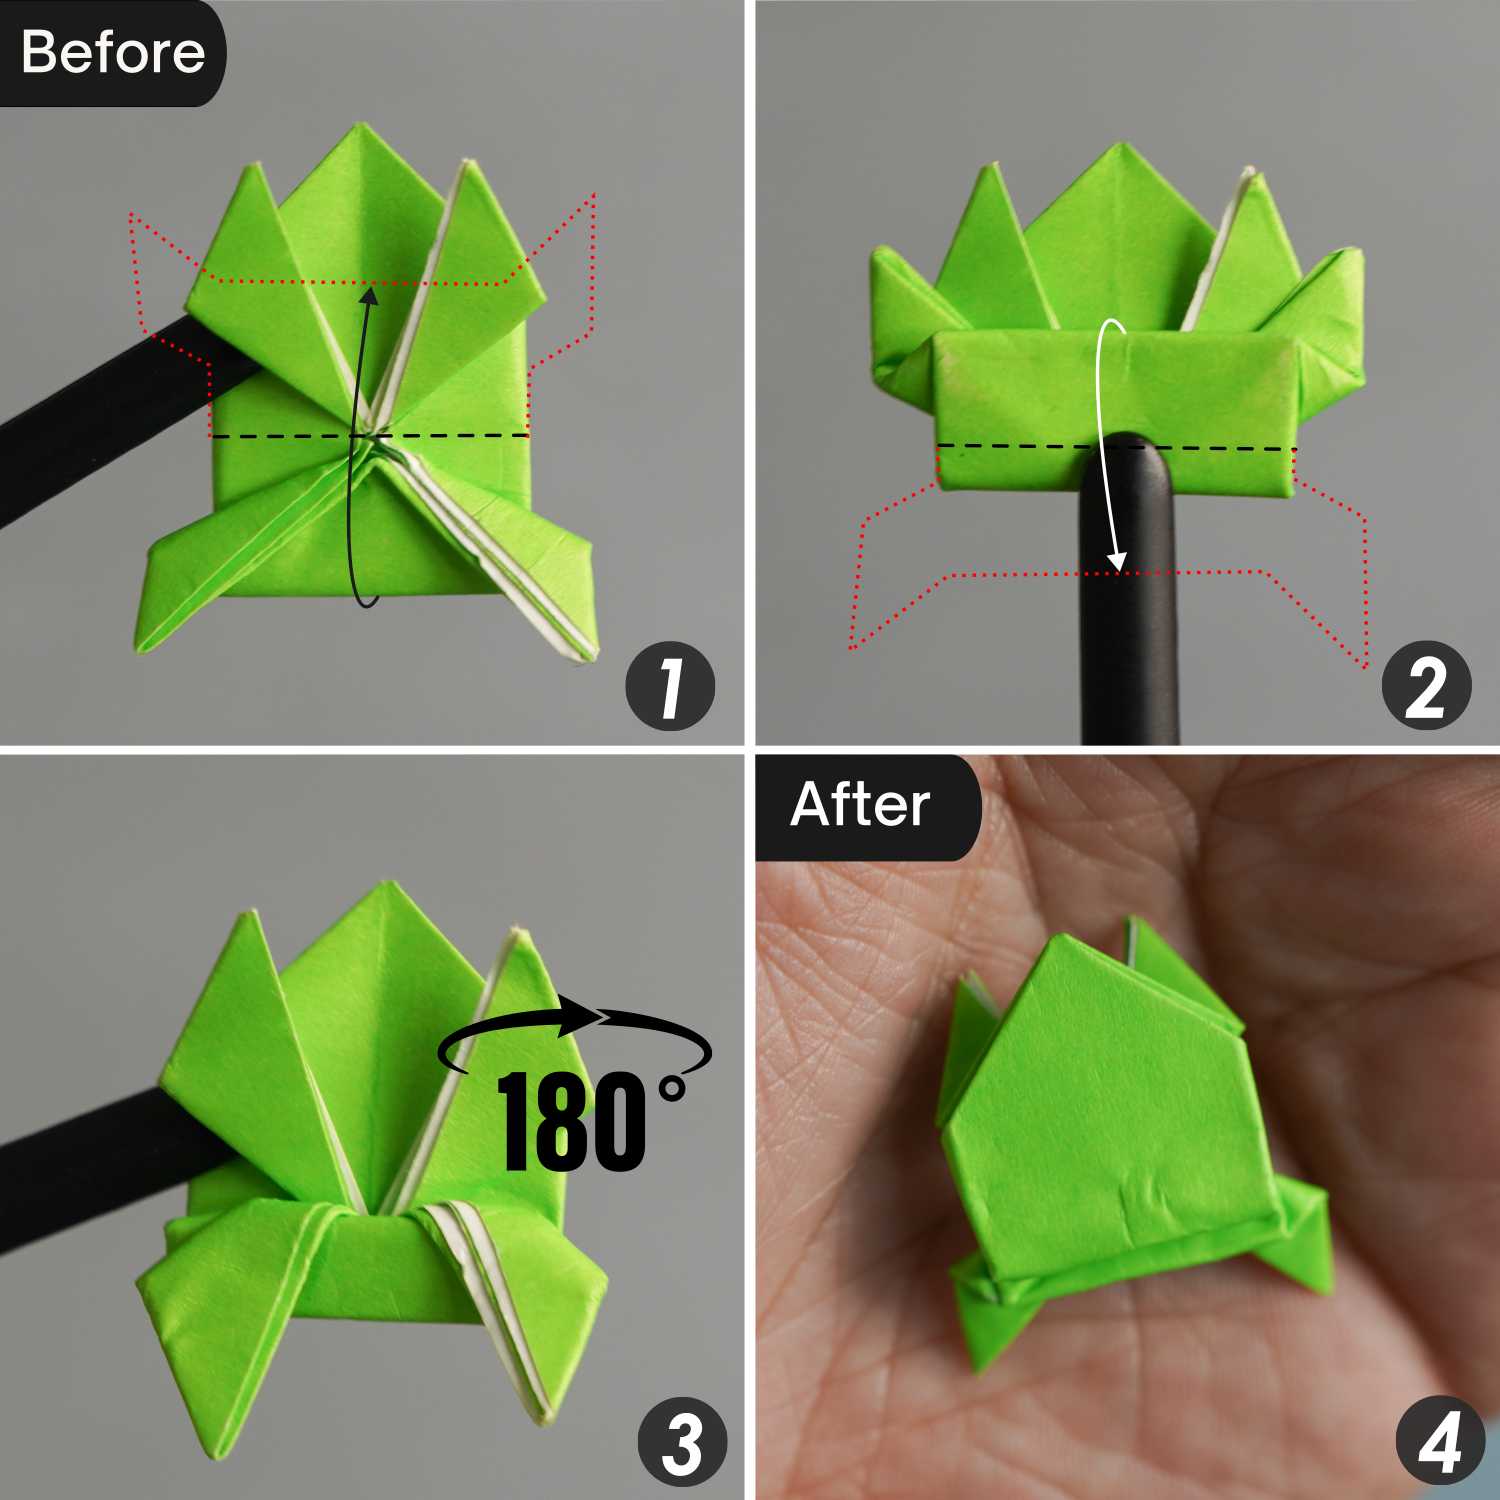
Lift the two layers to the sides along the dotted lines to open the bottom pocket, then fold up the bottom edge along the crease you made in the previous step.
Step 15
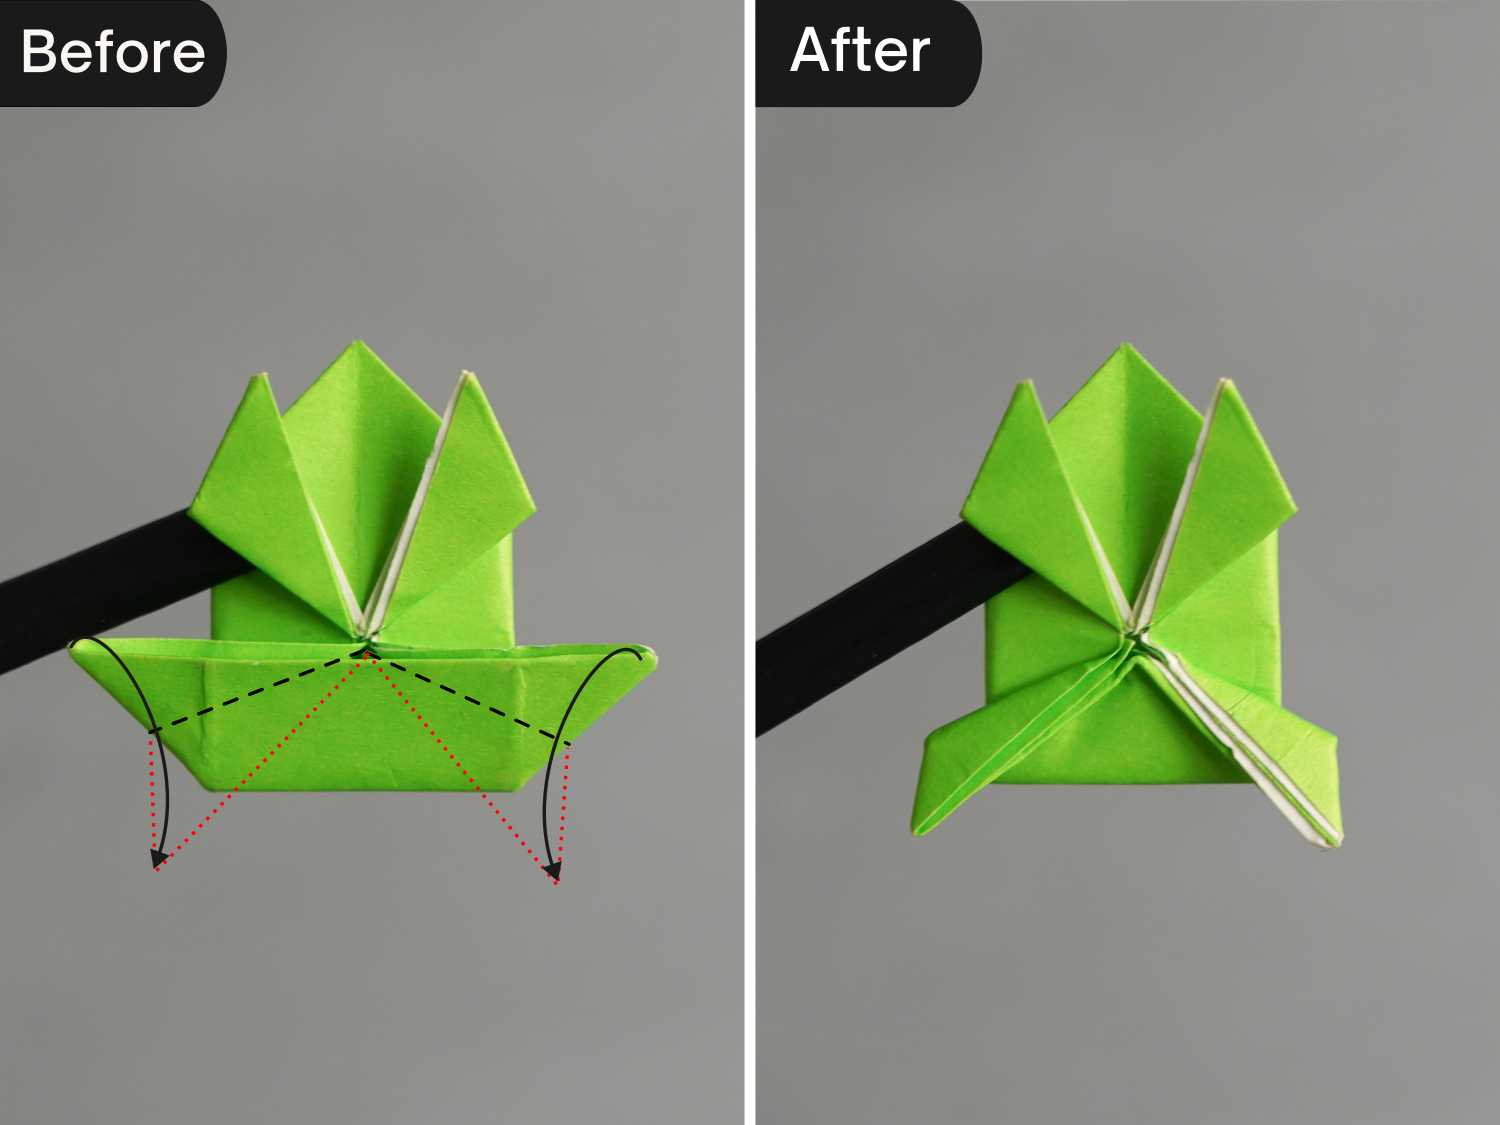
Fold down the top two corners of the bottom trapezoid along the black dotted lines.
Step 16
Fold up the bottom edge, then fold it back to the bottom side to create a zigzag shape on the bottom. Finally, flip the paper from left to right.