Origami Spinning Top with Two Pieces of Paper
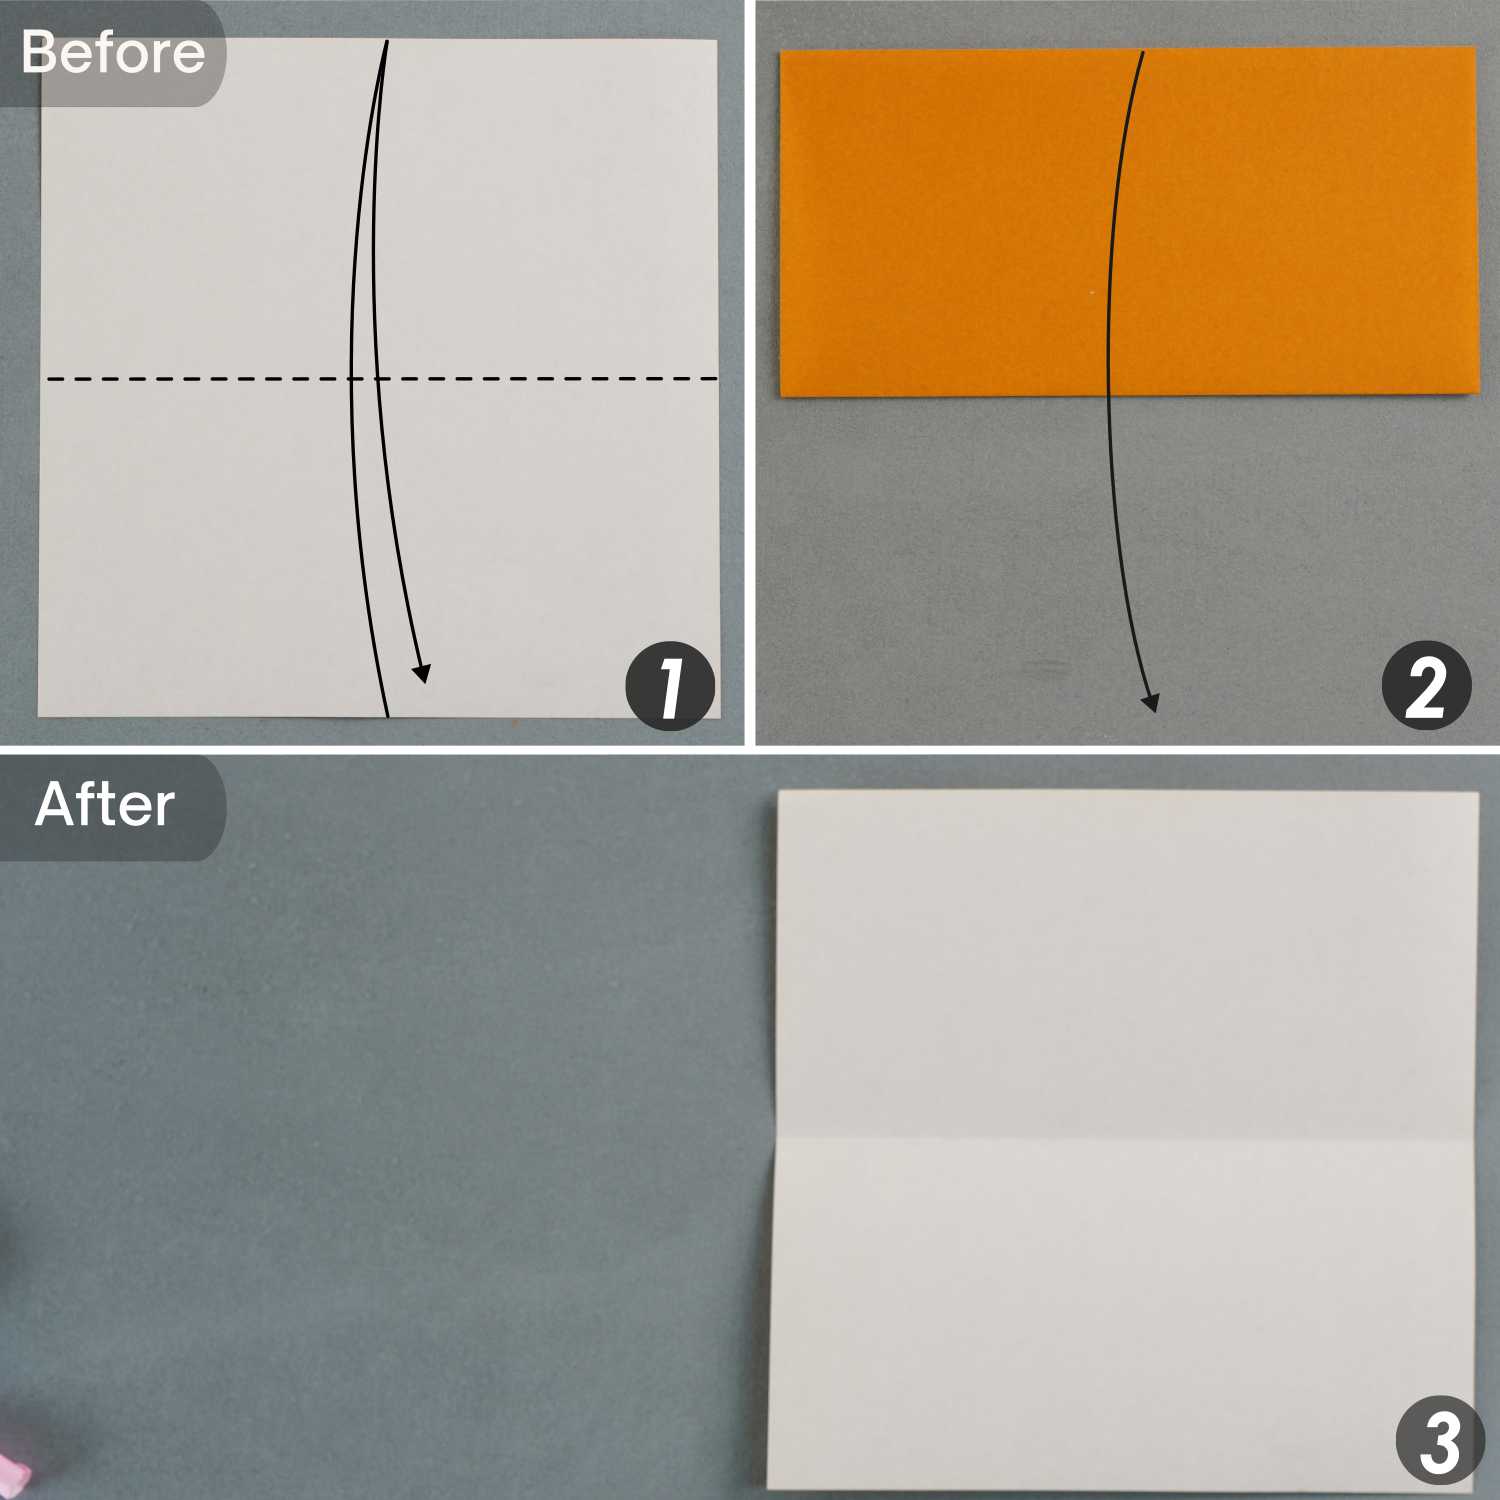
Step 1
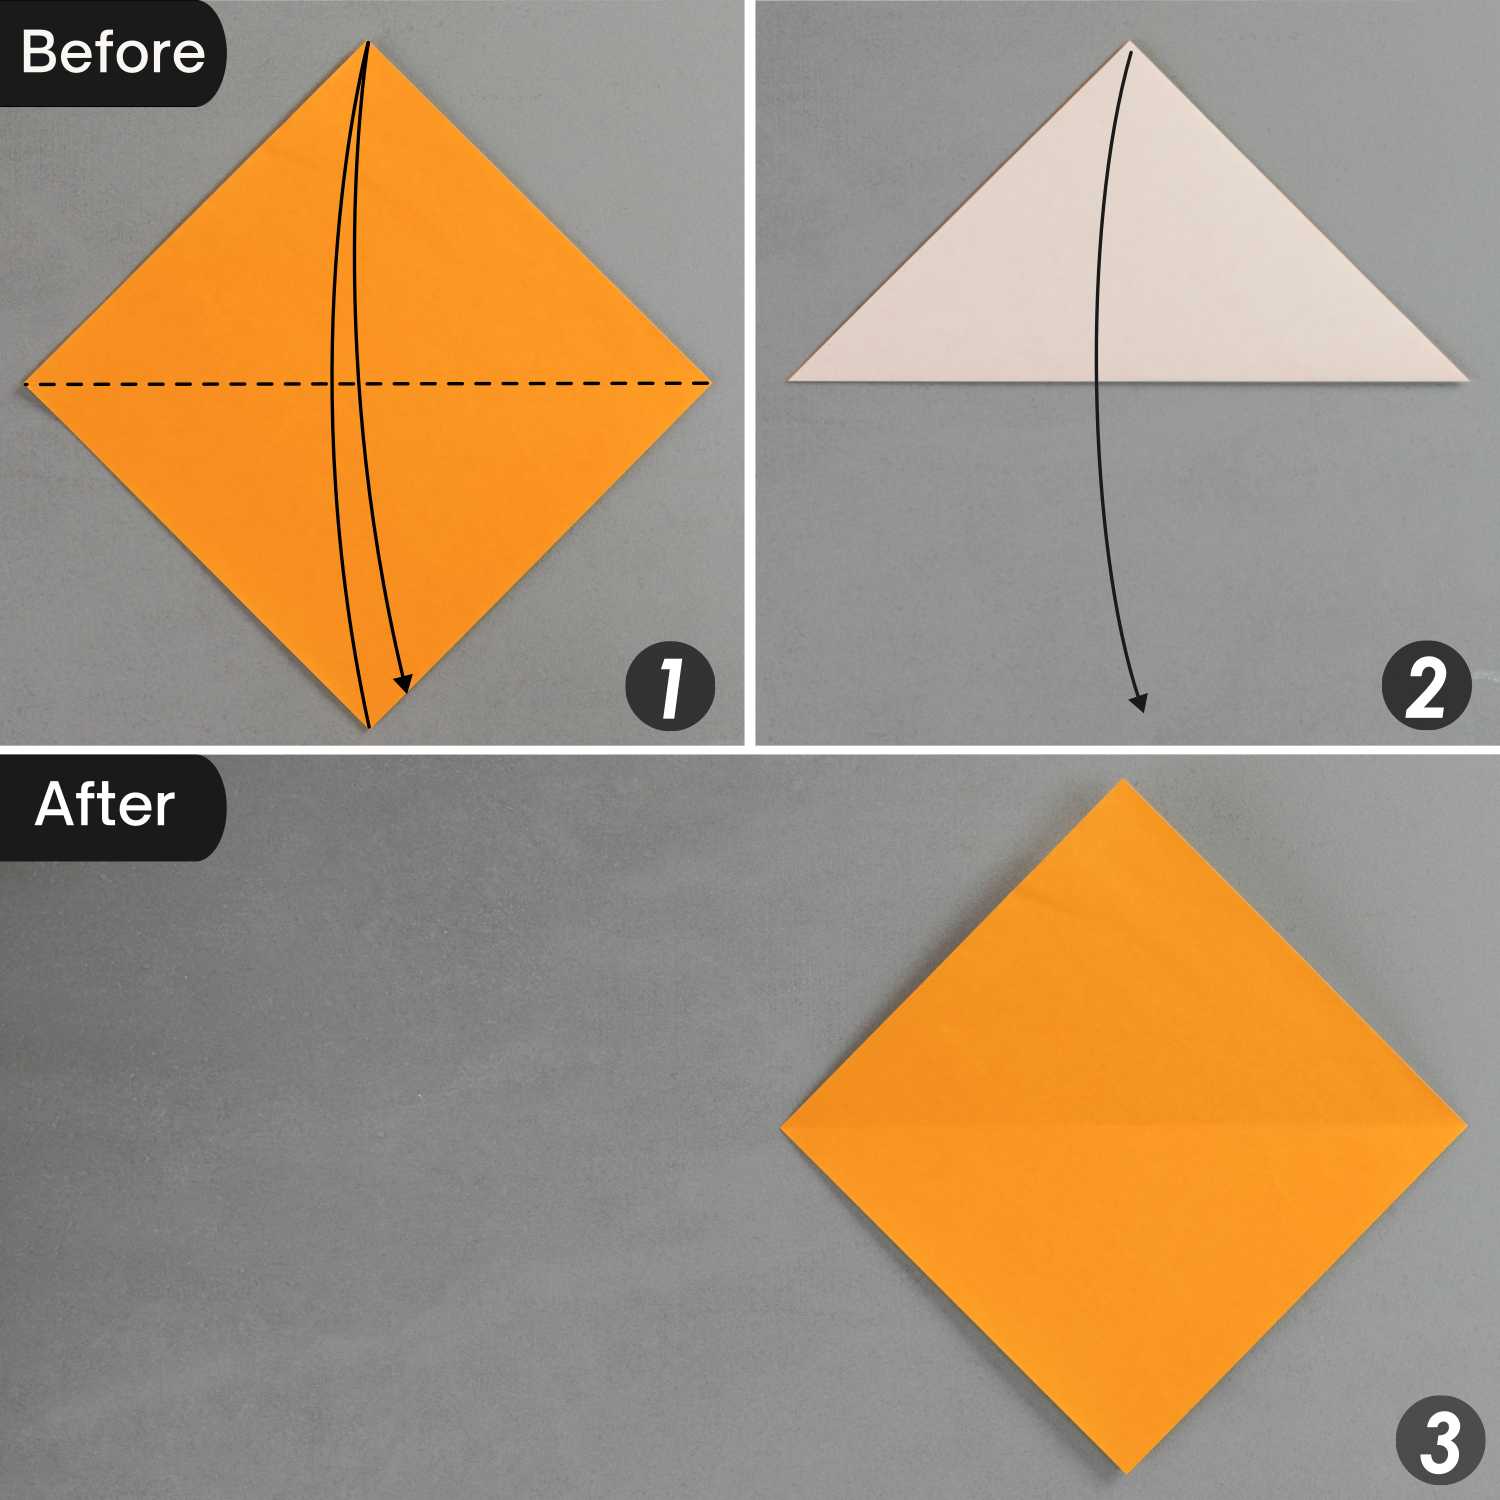
Place the paper with the desired display side face up, fold it in half horizontally, leaving a crease, and unfold it.
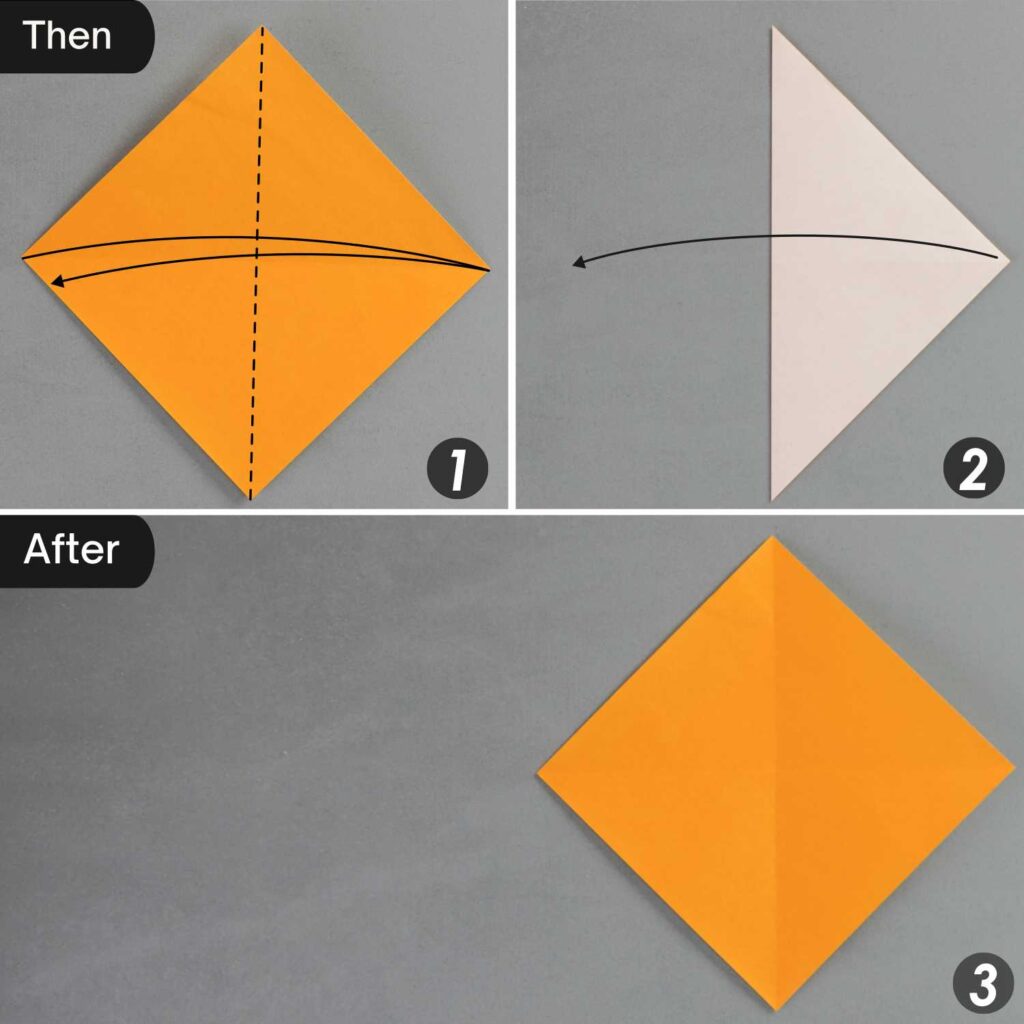
Fold it in half vertically, leaving a crease, and unfold it.
Step 2
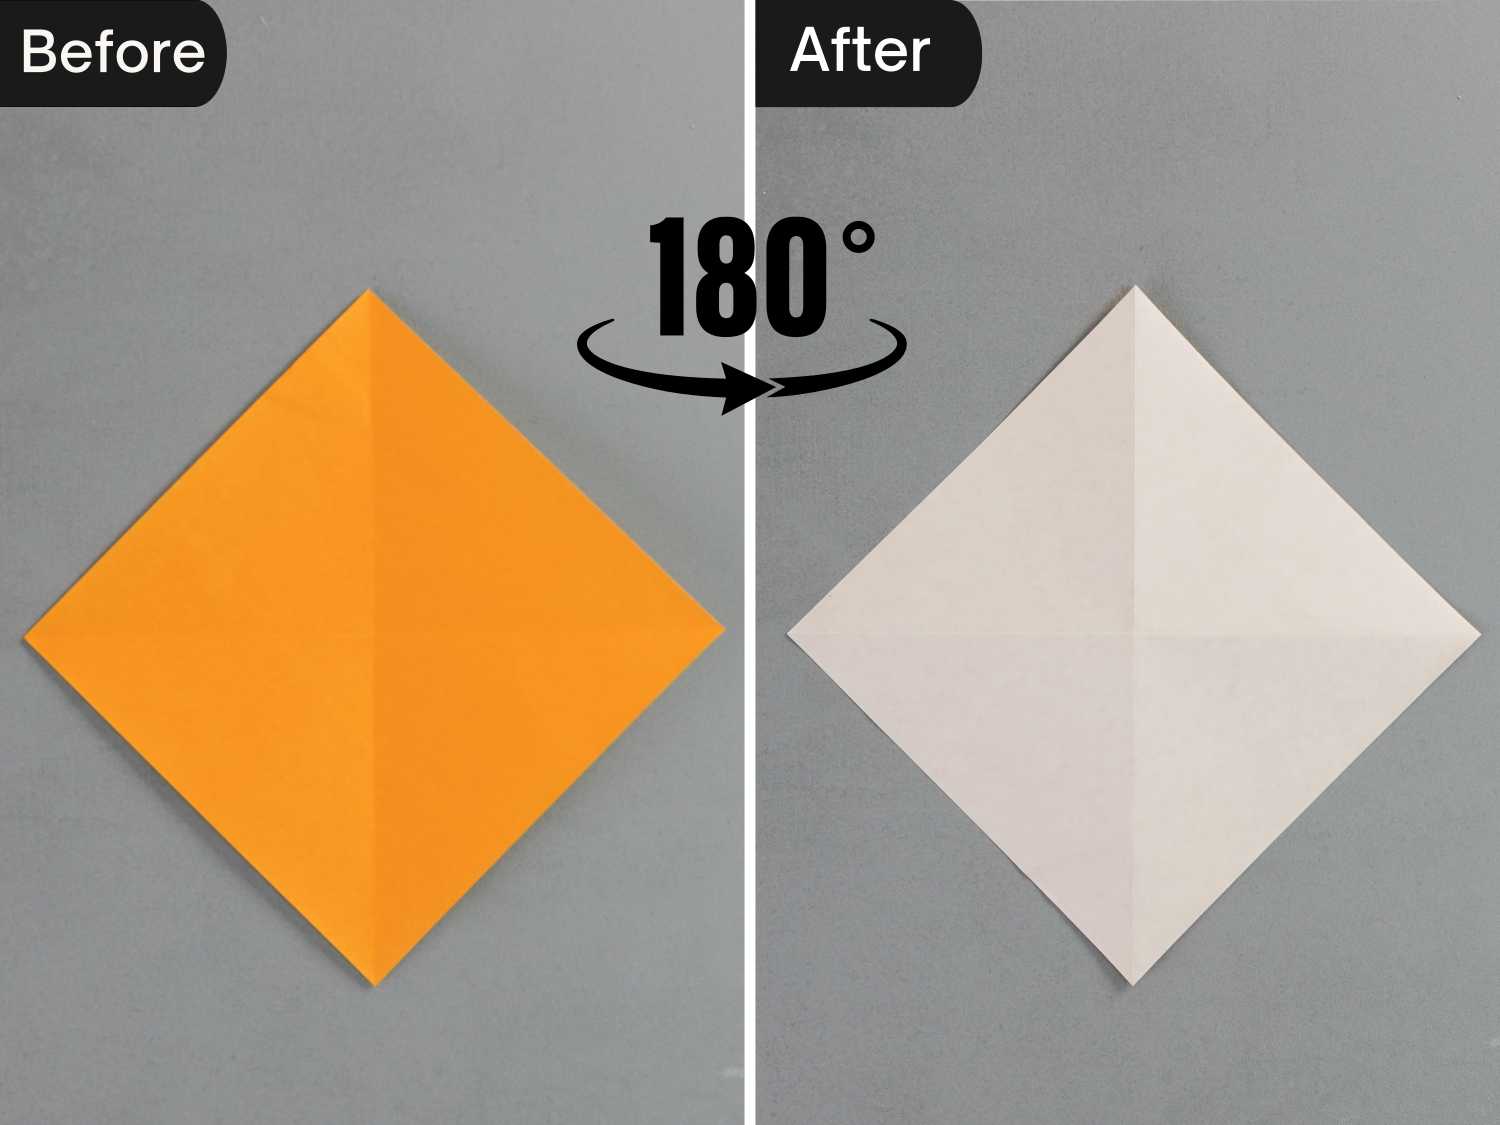
Flip the paper from left to right.
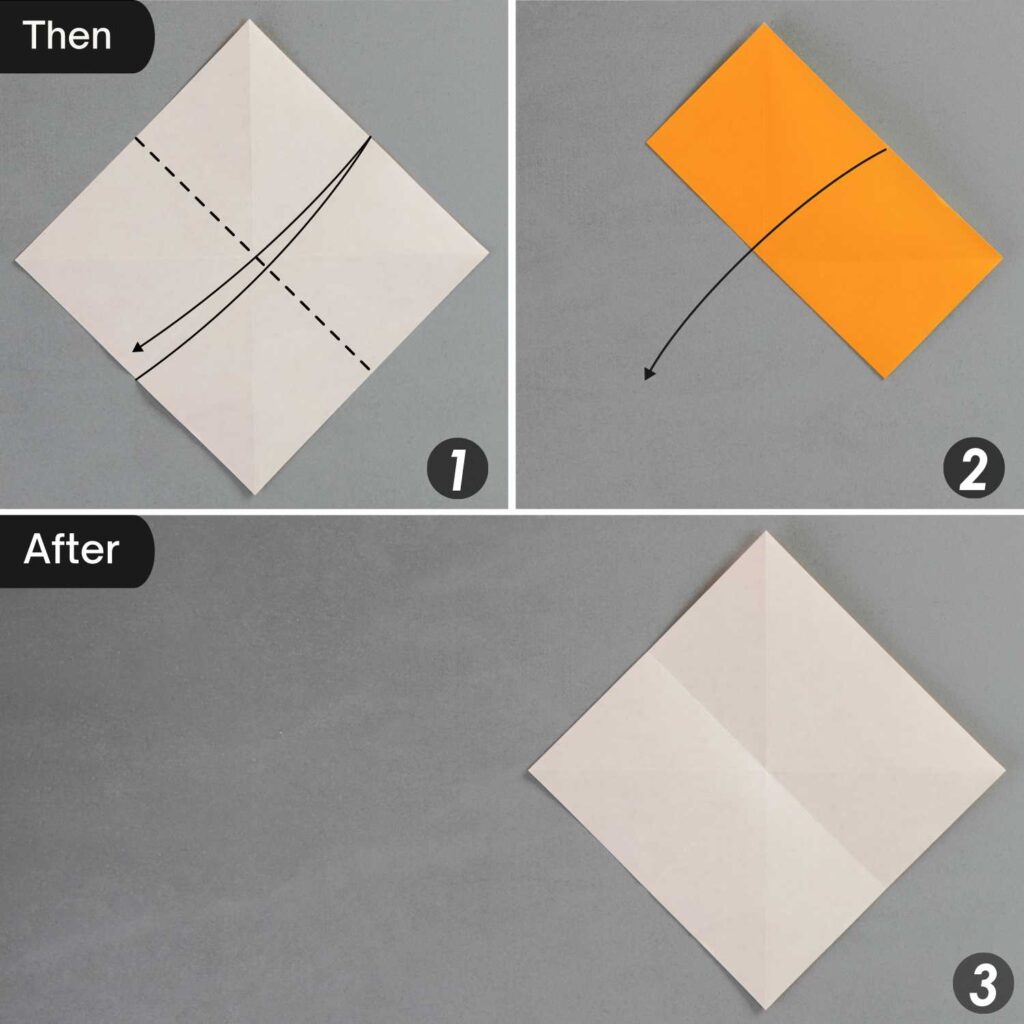
Step 3
Fold the bottom right edge to align with the top left edge, and unfold it.
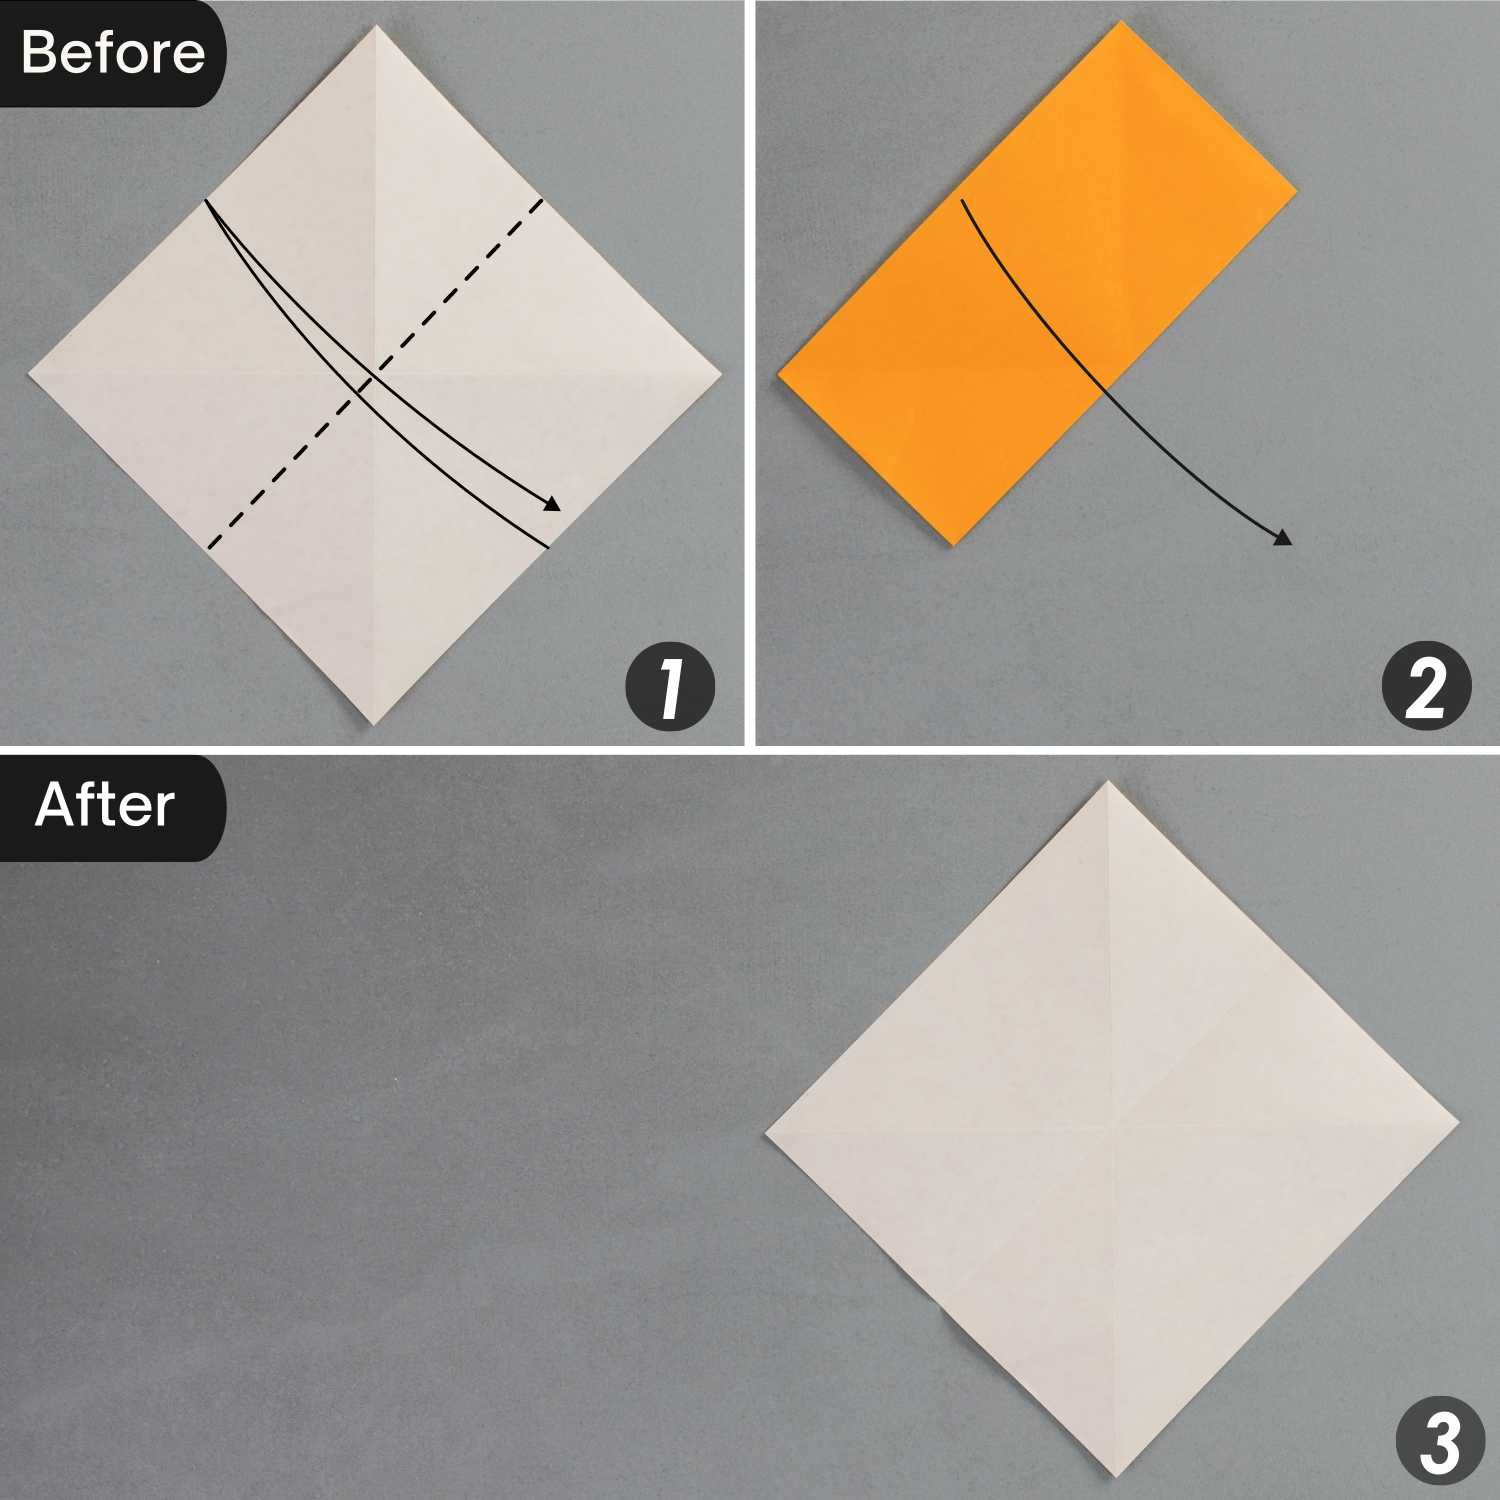
Fold the bottom left edge to align with the top right edge, and unfold it.
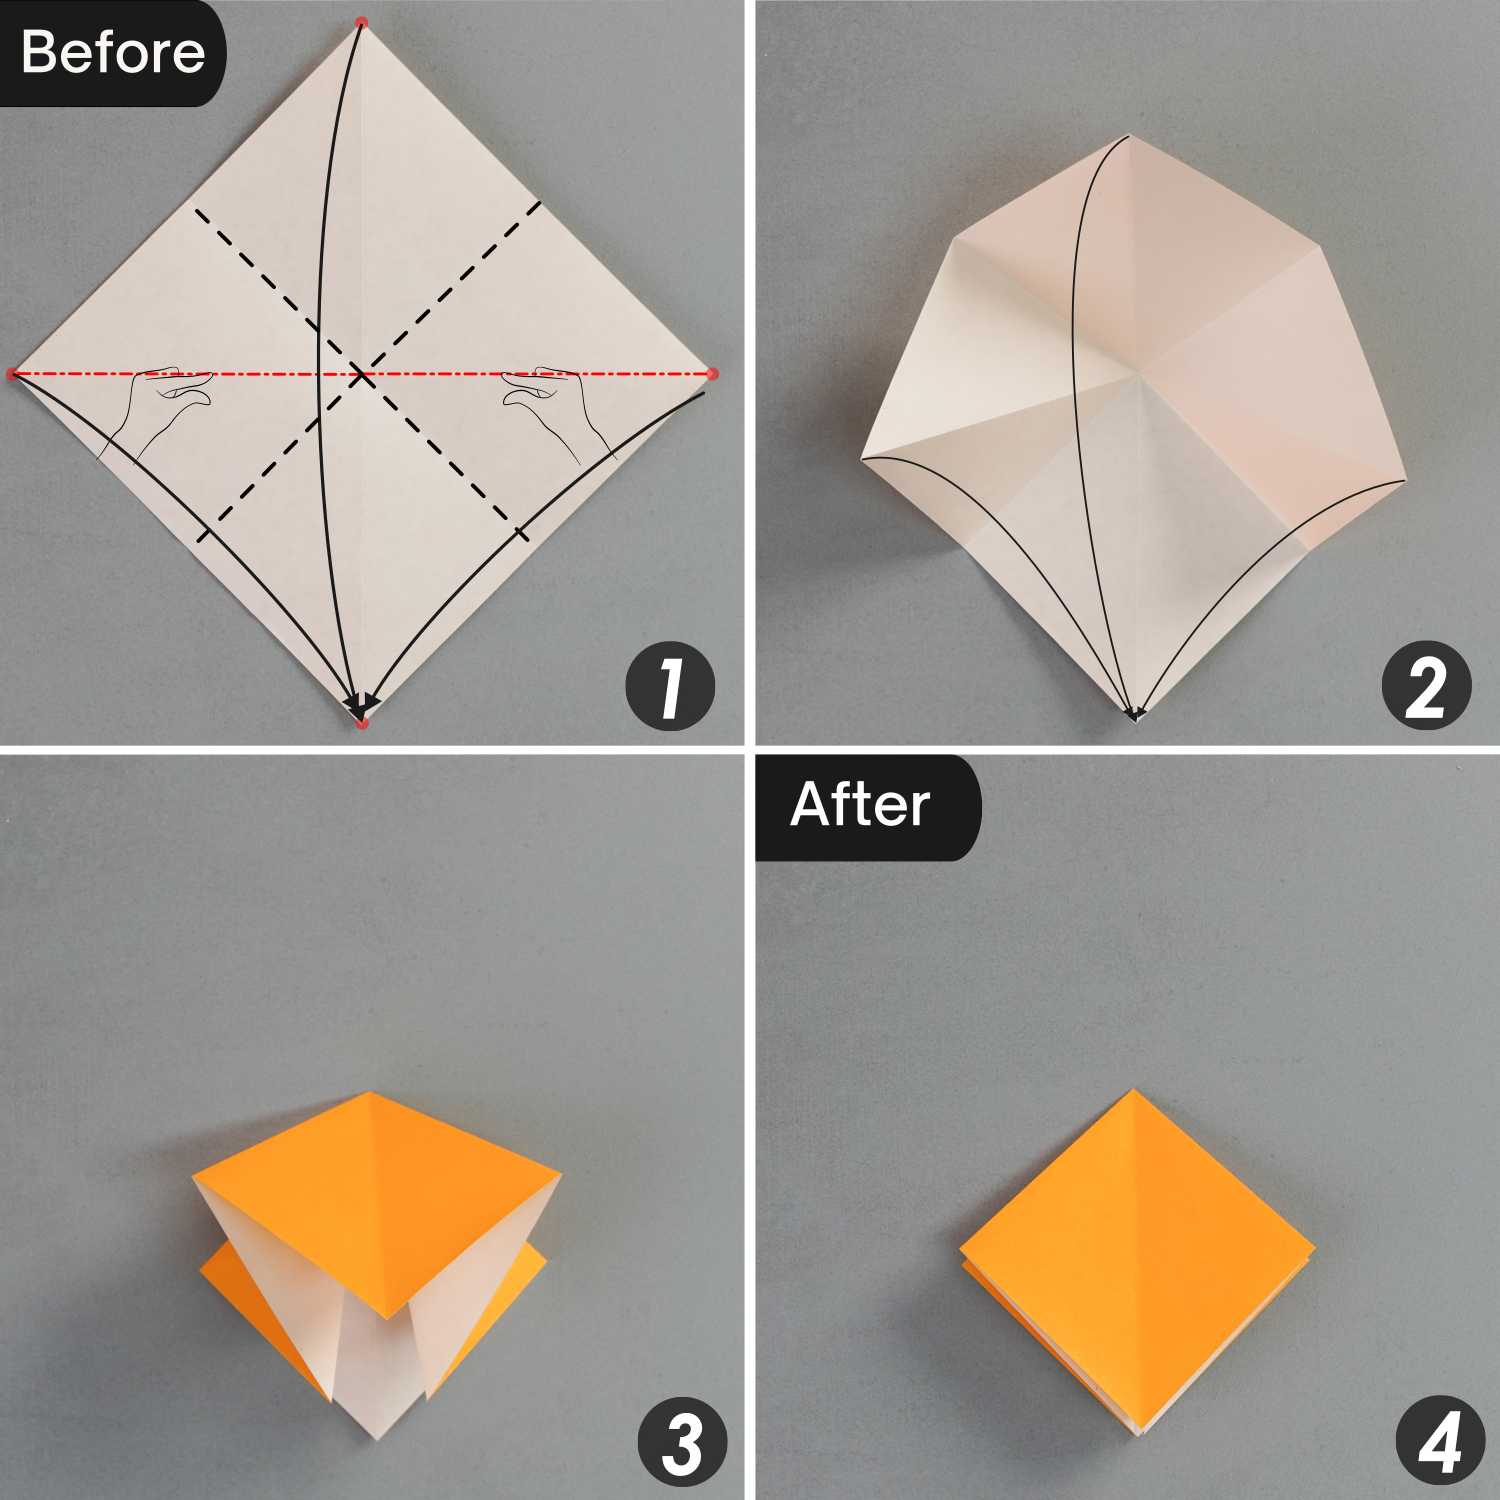
Step 4
Mountain fold the left and right creases, then push the left, right, and top point to meet the bottom point. Flatten the fold to get a small square.
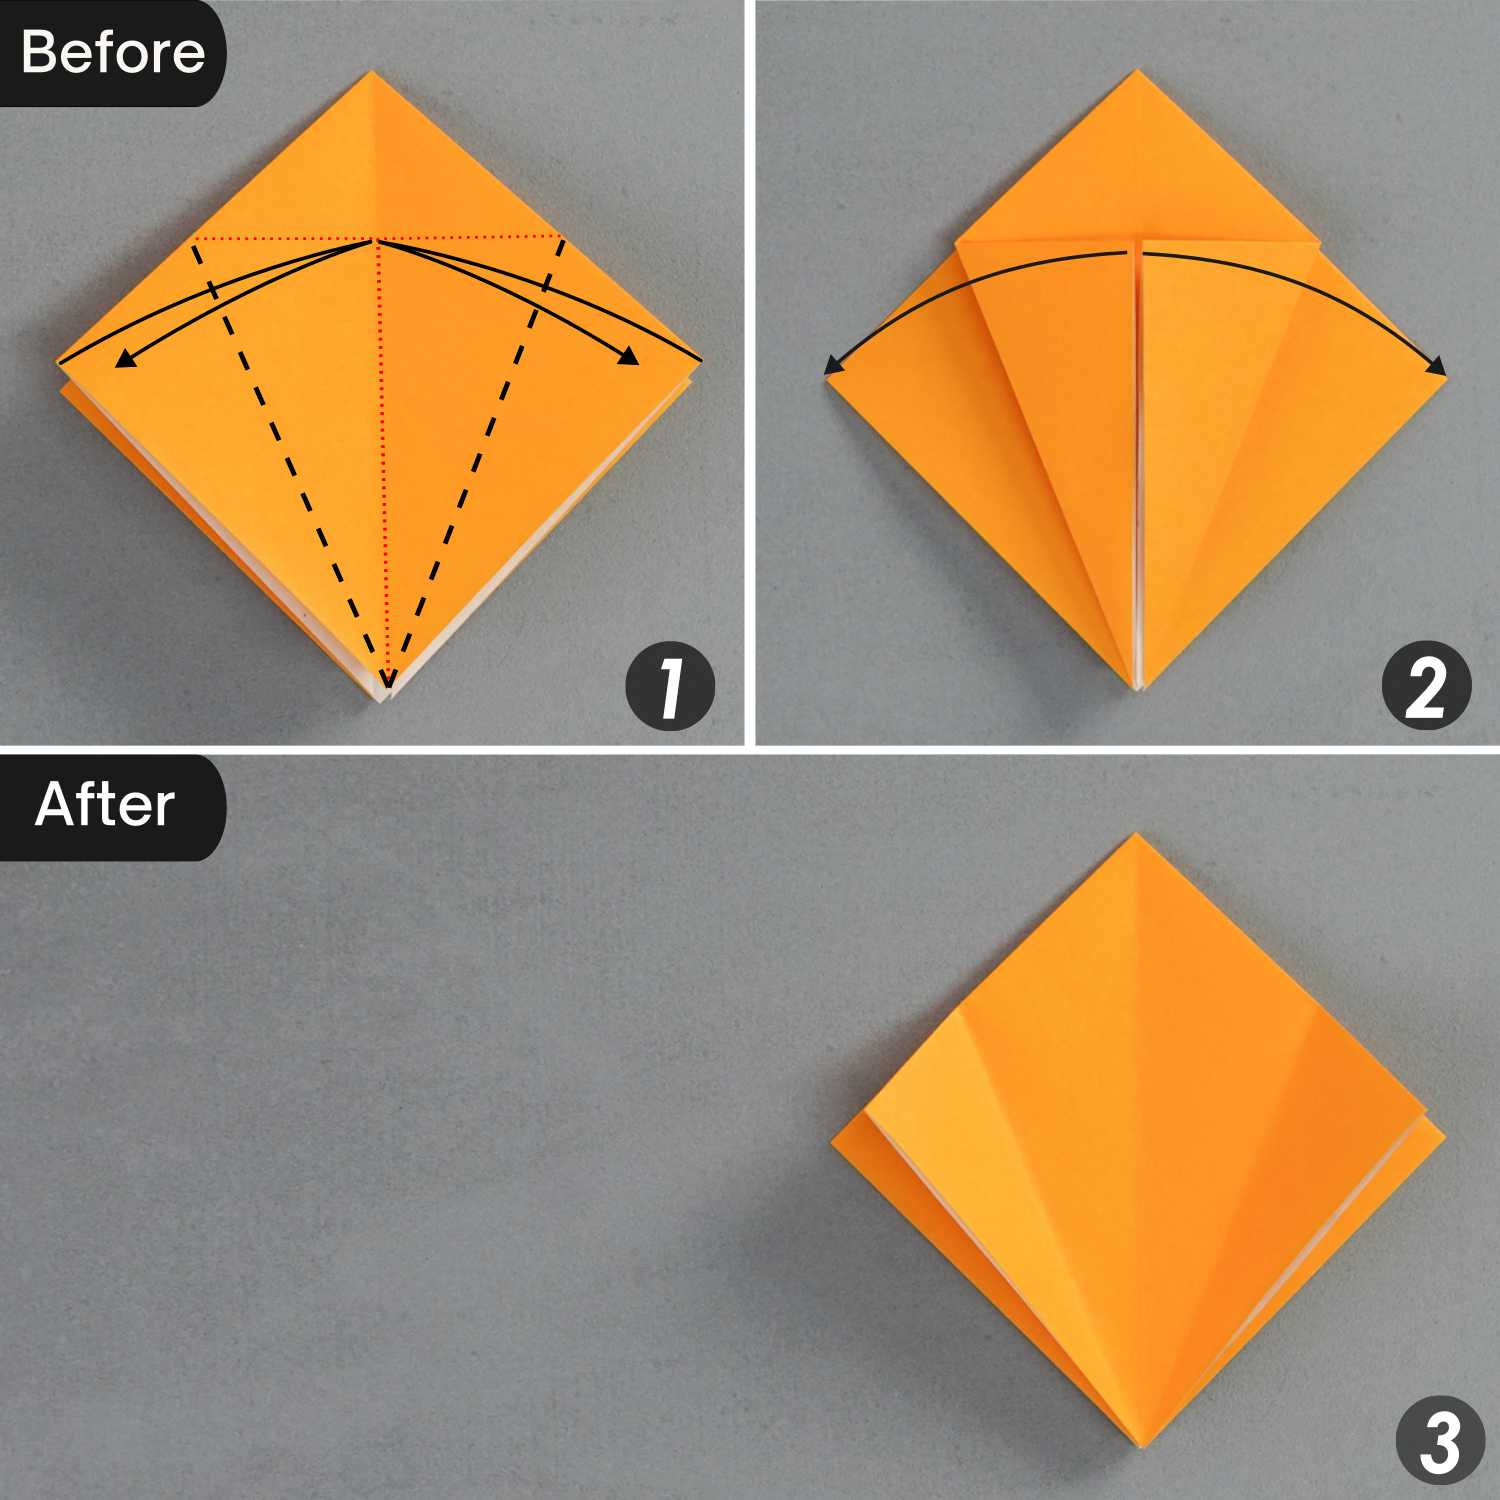
Step 5
Fold the bottom left and right edges of the top layer to align with the middle vertical crease, crease them well, and unfold them.
Step 6
Fold down the top point along the dotted line that connects two red spots, and unfold it.
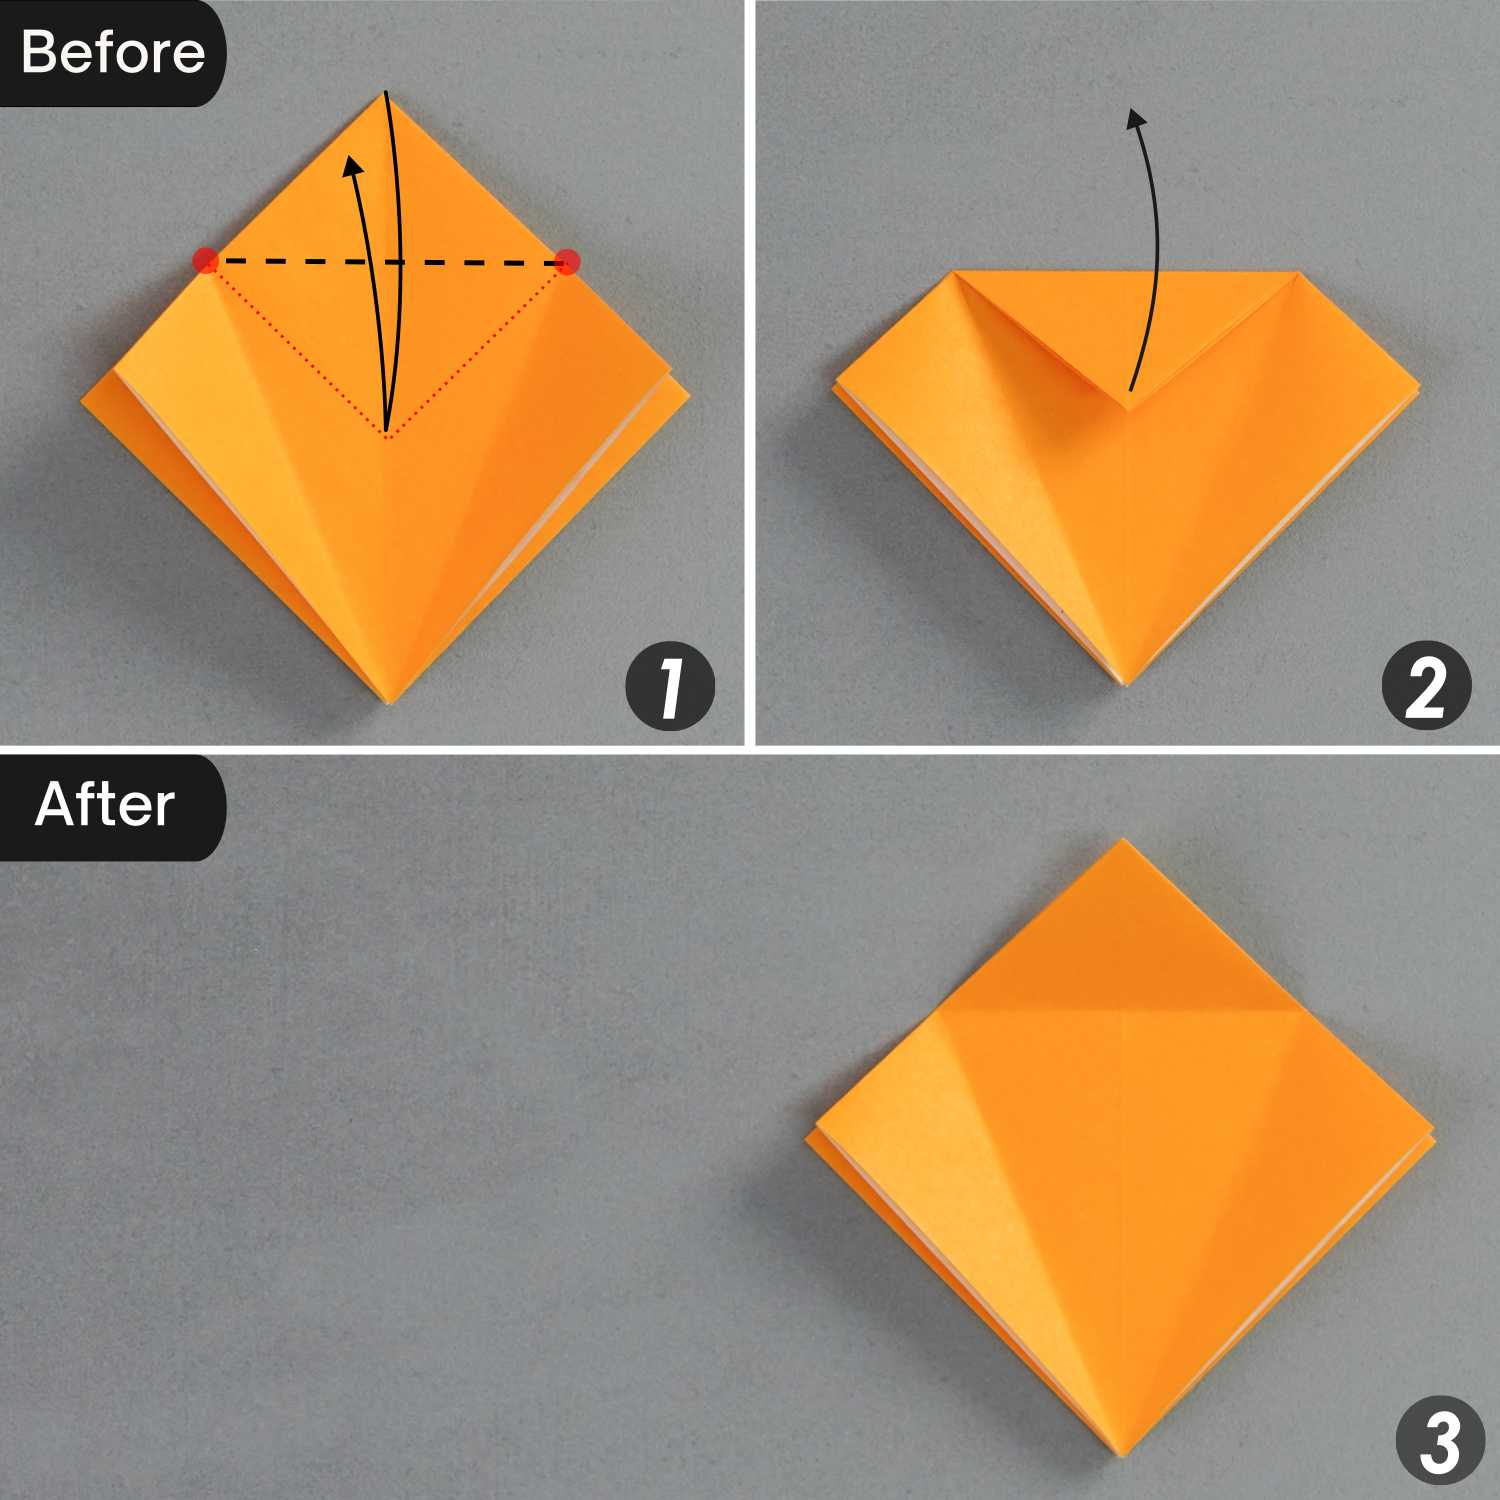
Step 7
Open the pocket based on the crease created by the previous step. Then lift up the top layer, and use your hands to flatten the pocket. Finally, fold down the top triangle.
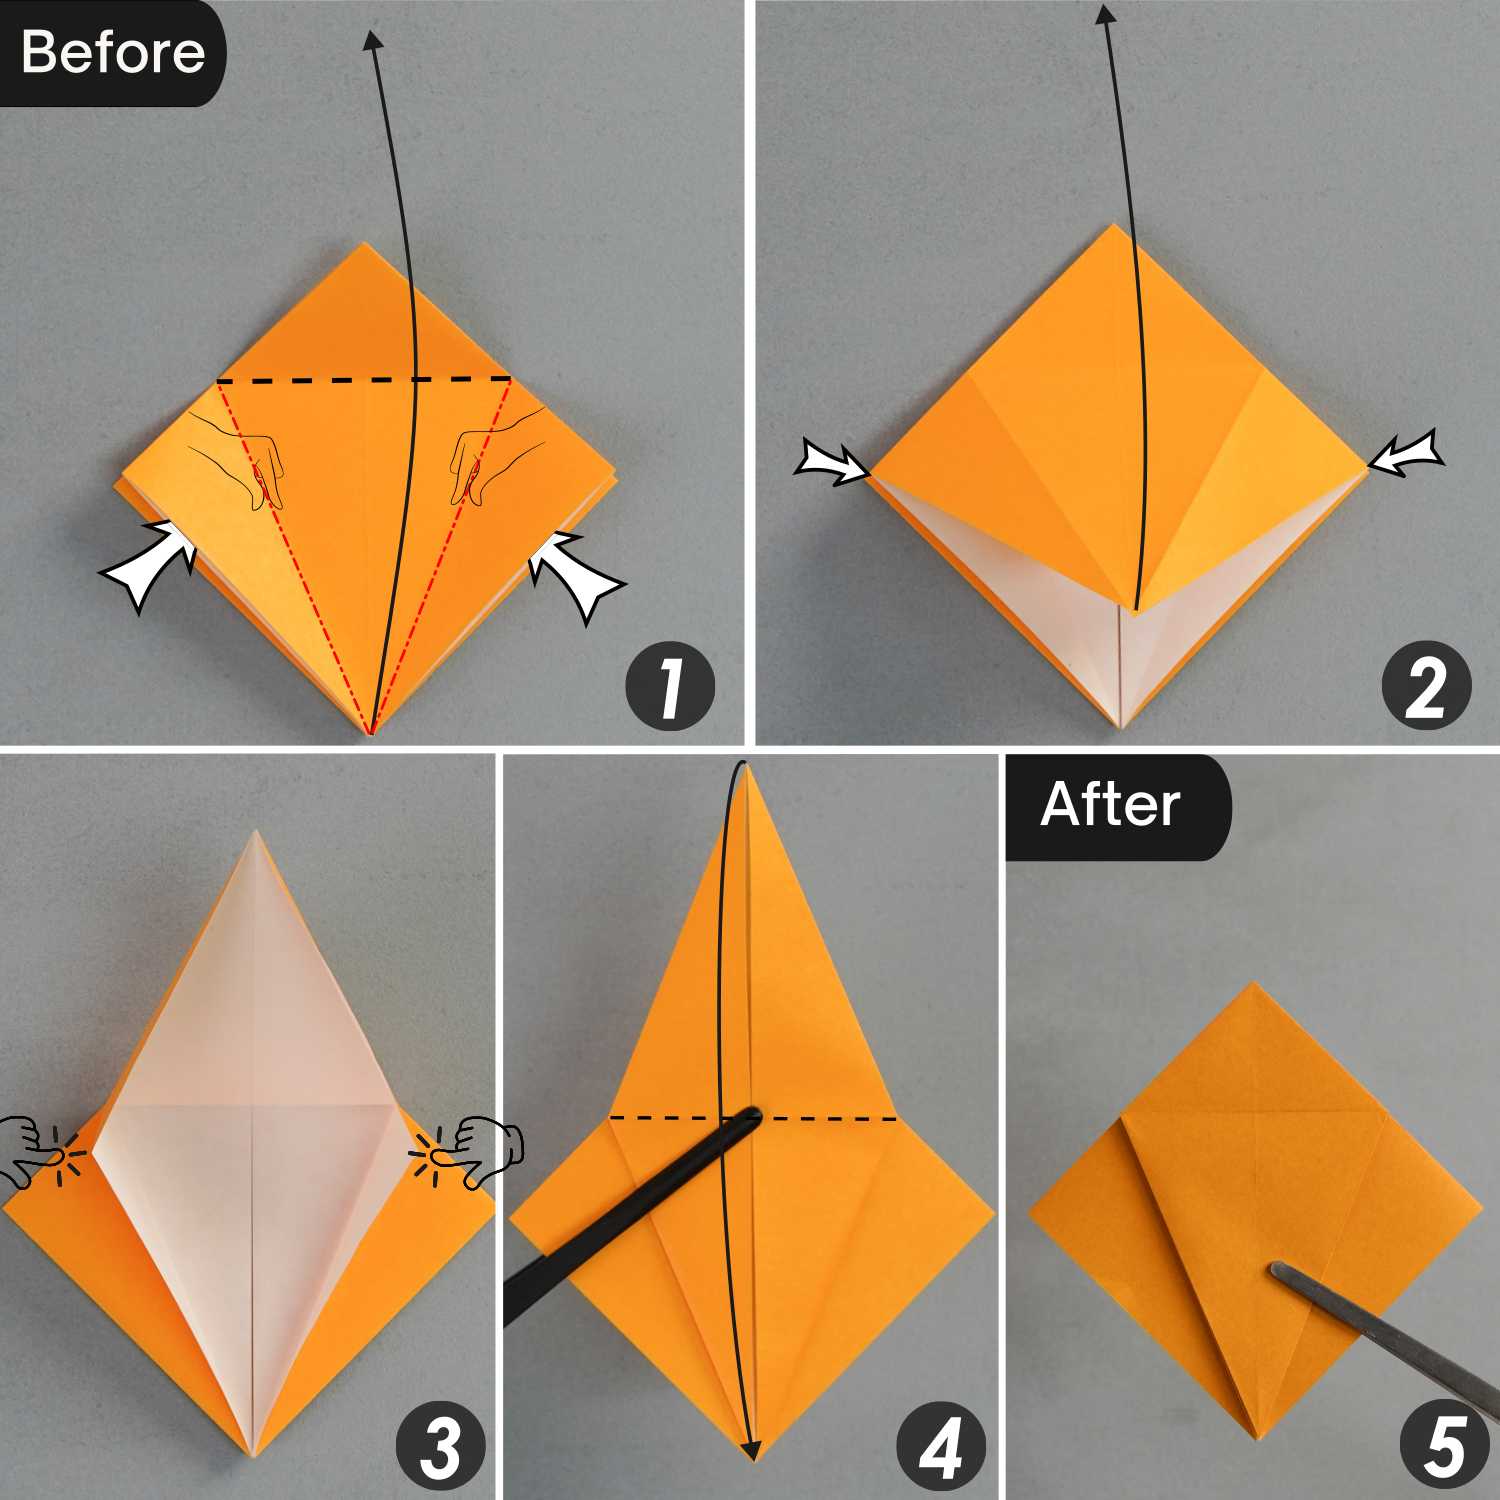
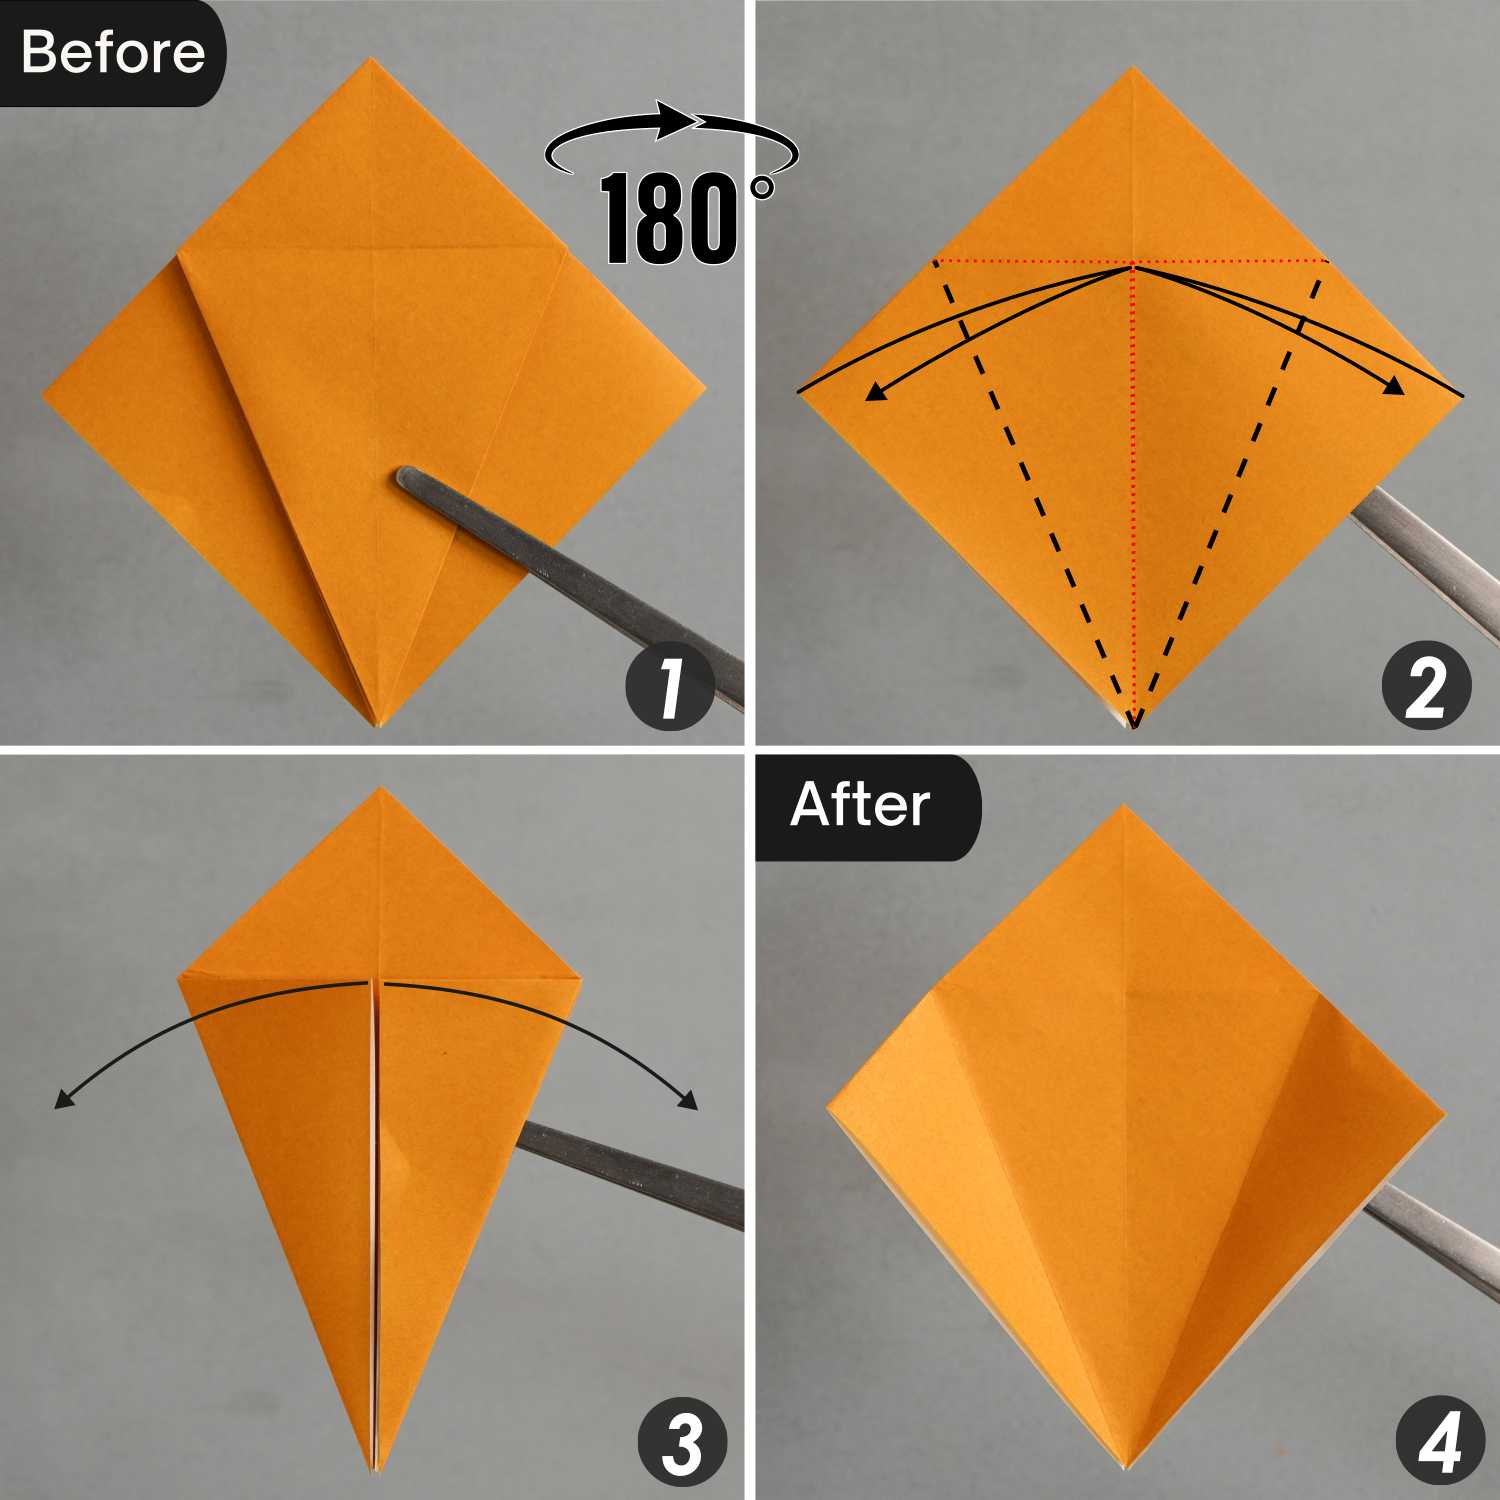
Step 8
Flip the paper over from left to right. Fold the bottom left and right edges to align with the middle vertical crease, crease them well, and unfold them.
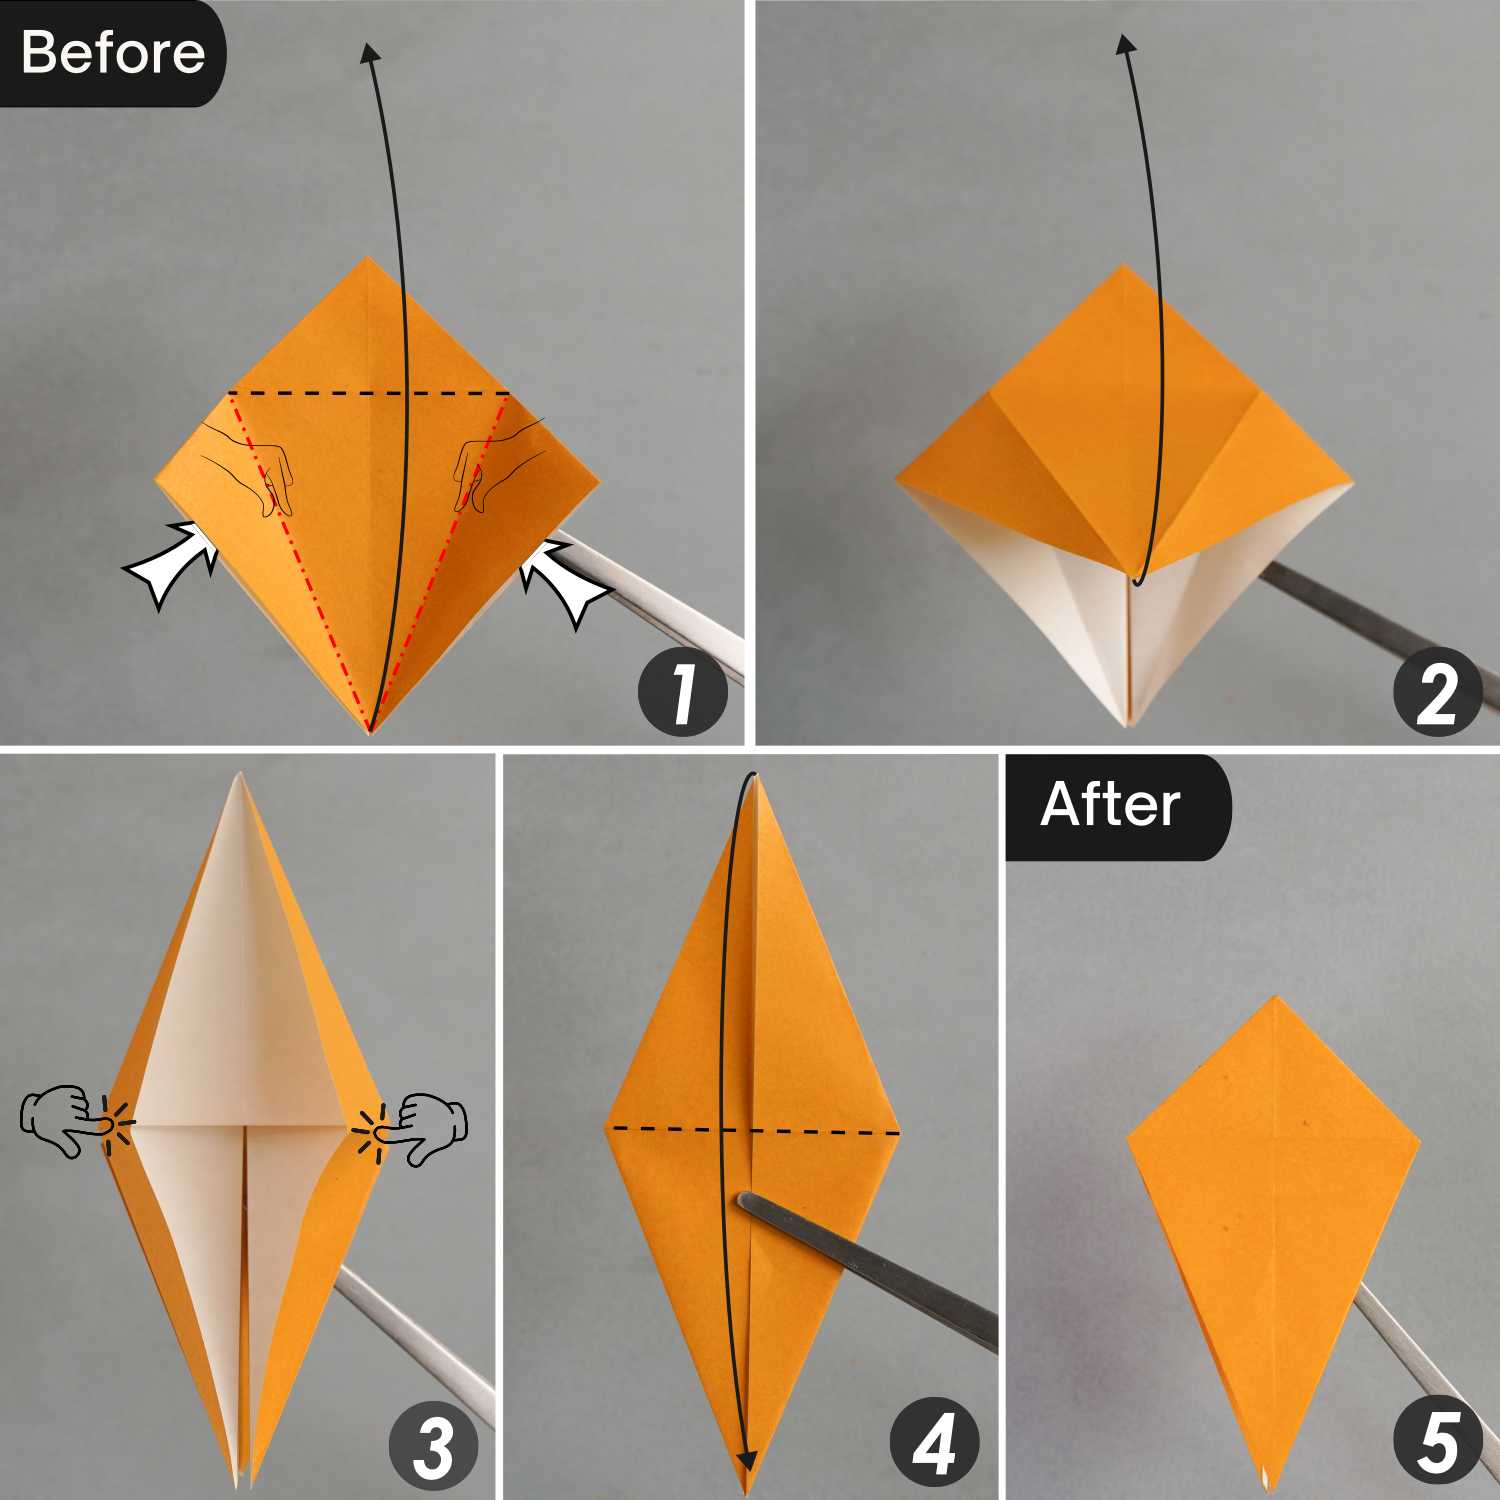
Step 9
Open the pocket based on the crease created by the previous step. Then lift up the top layer, and use your hands to flatten the pocket. Finally, fold down the top triangle.
Step 10
Rotate the paper 90 degrees from back to front, then slightly pull the top and bottom layers to the sides.
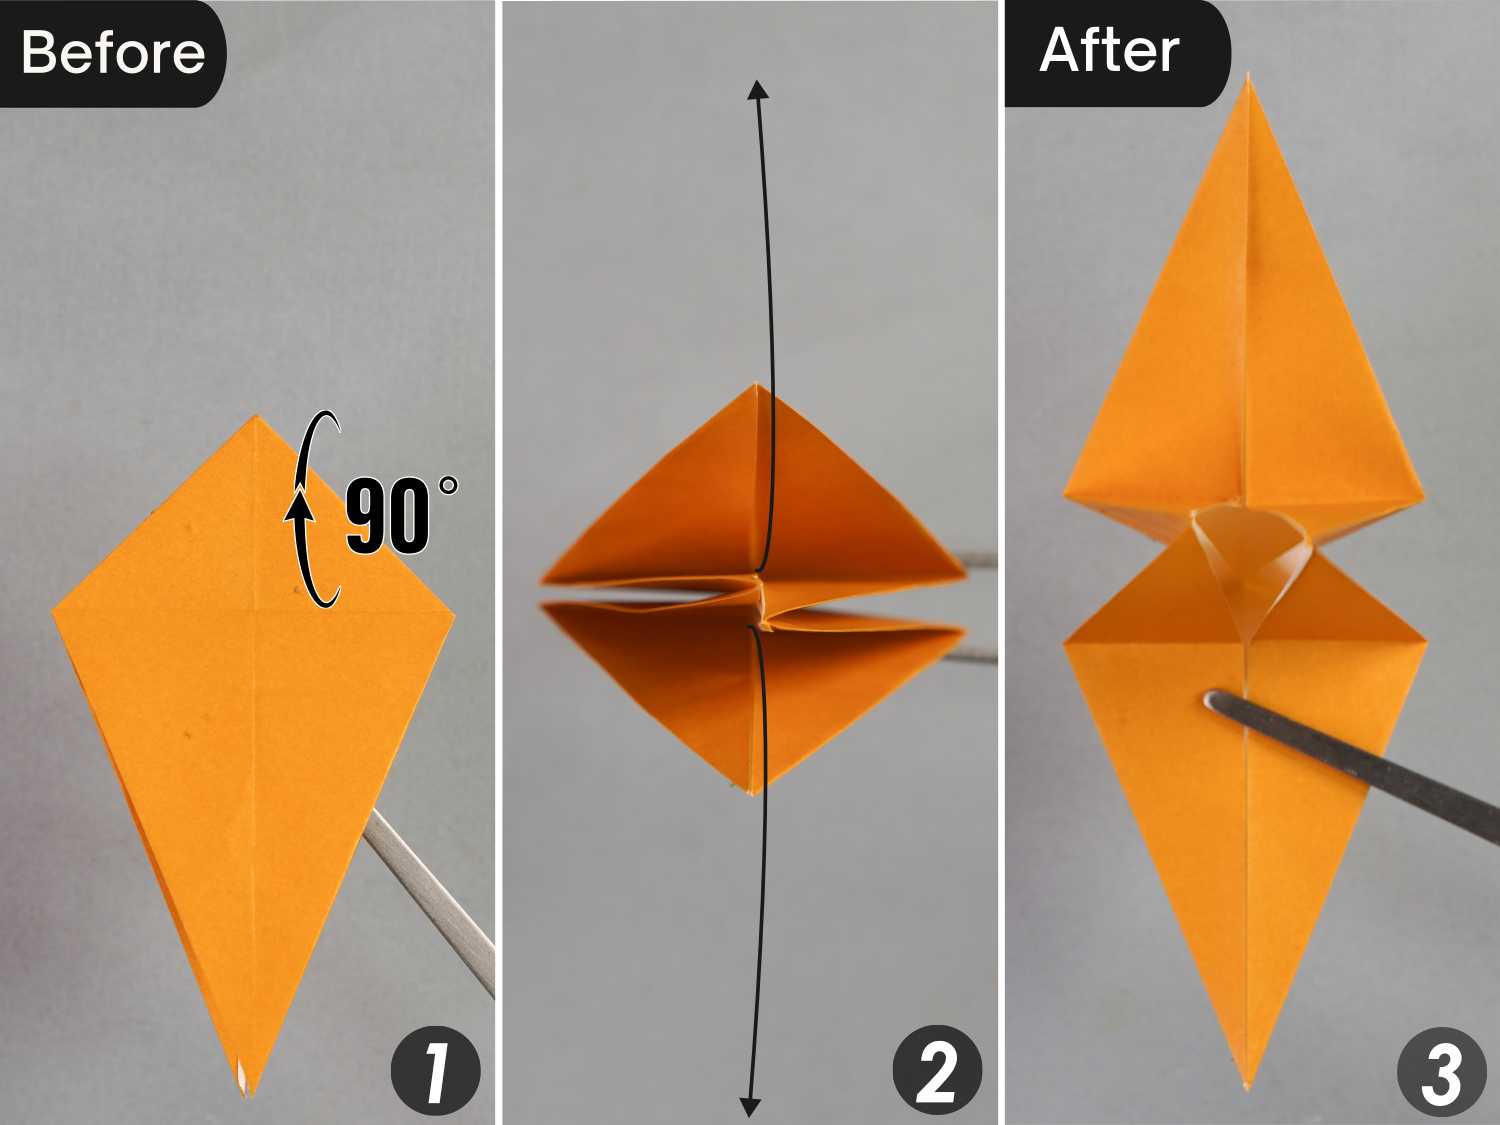
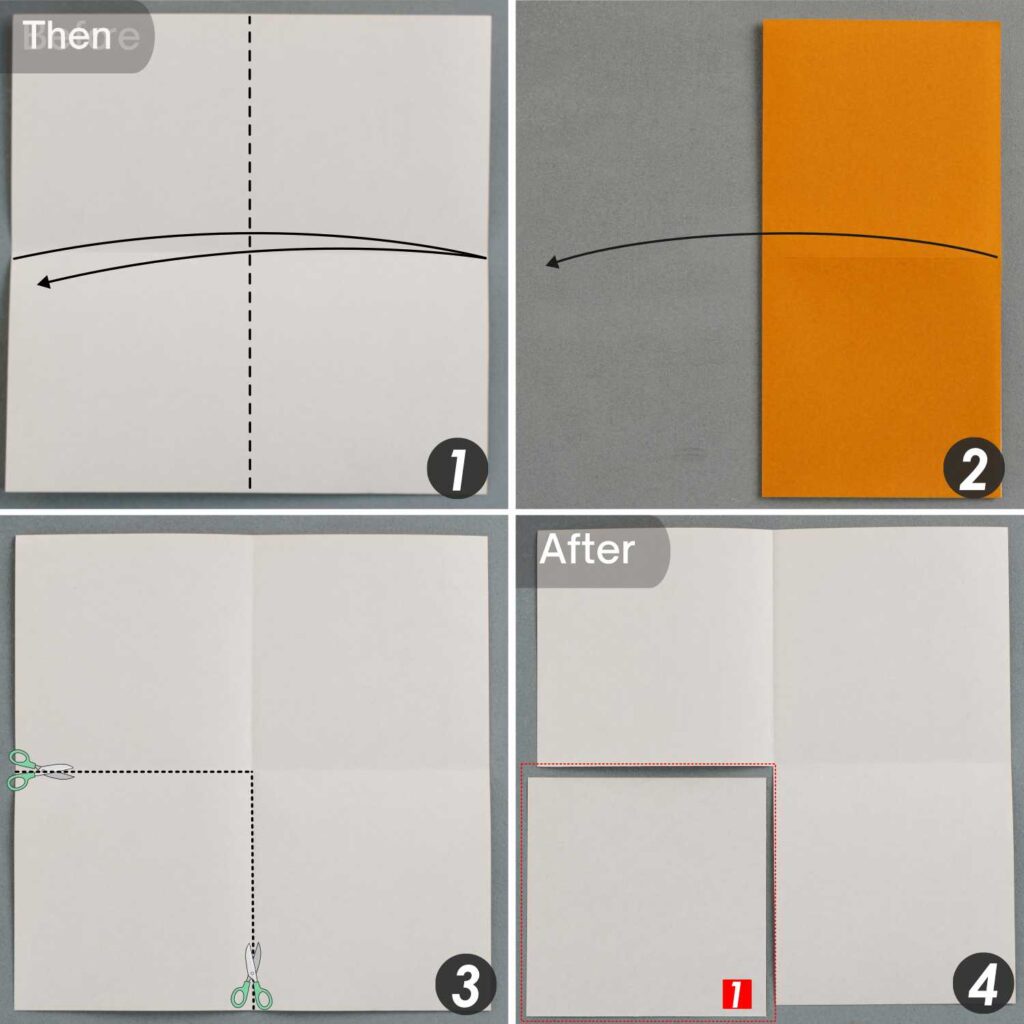
Step 11
Take out another piece of paper. Place it with the desired display side facing down, fold it in half horizontally, and unfold it.
Fold it in half vertically, leaving a crease, and unfold it. Cut the paper along the crease indicated by the dotted line, as shown in the third picture, to get a small square paper.
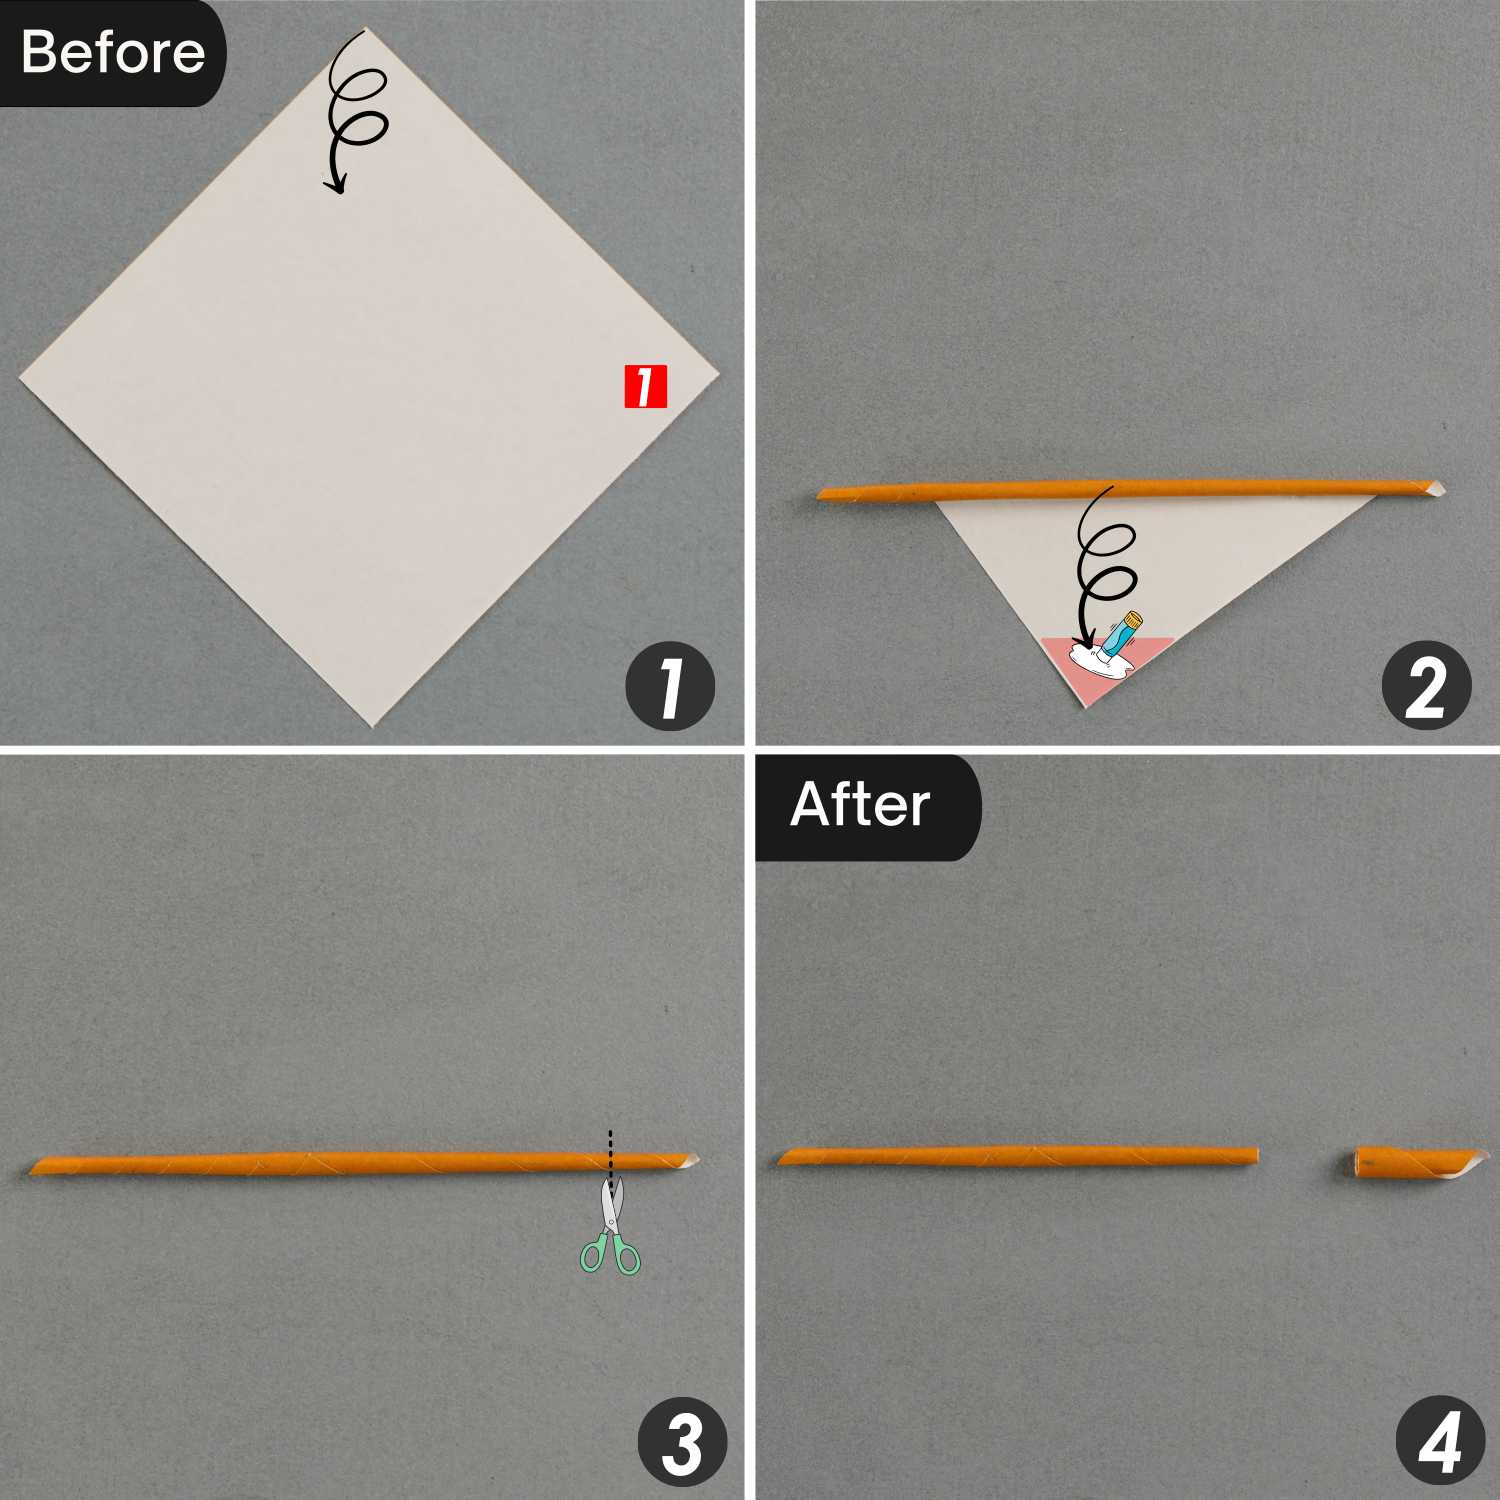
Step 12
Roll up this paper from the top point and apply glue at the bottom point to secure it well, get a paper stick and cut its right end a little.
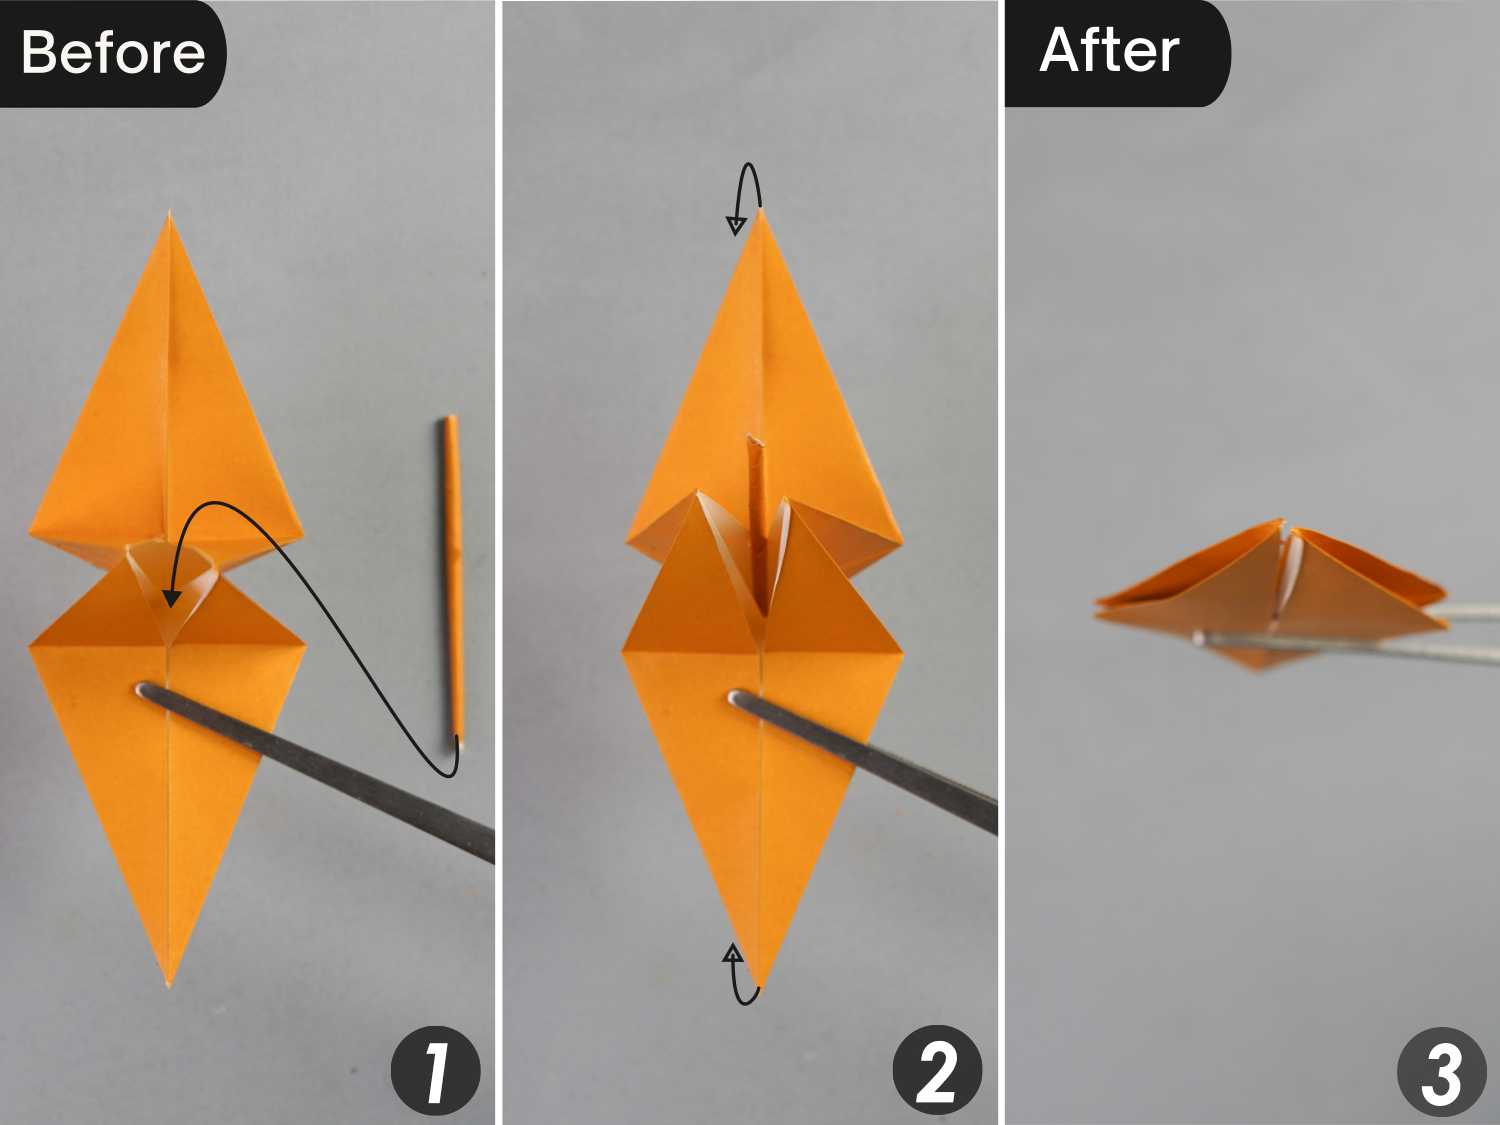
Step 13
Place the stick in the center of the folded paper and close the opening of the paper. Press down the flap on the top and bottom side.
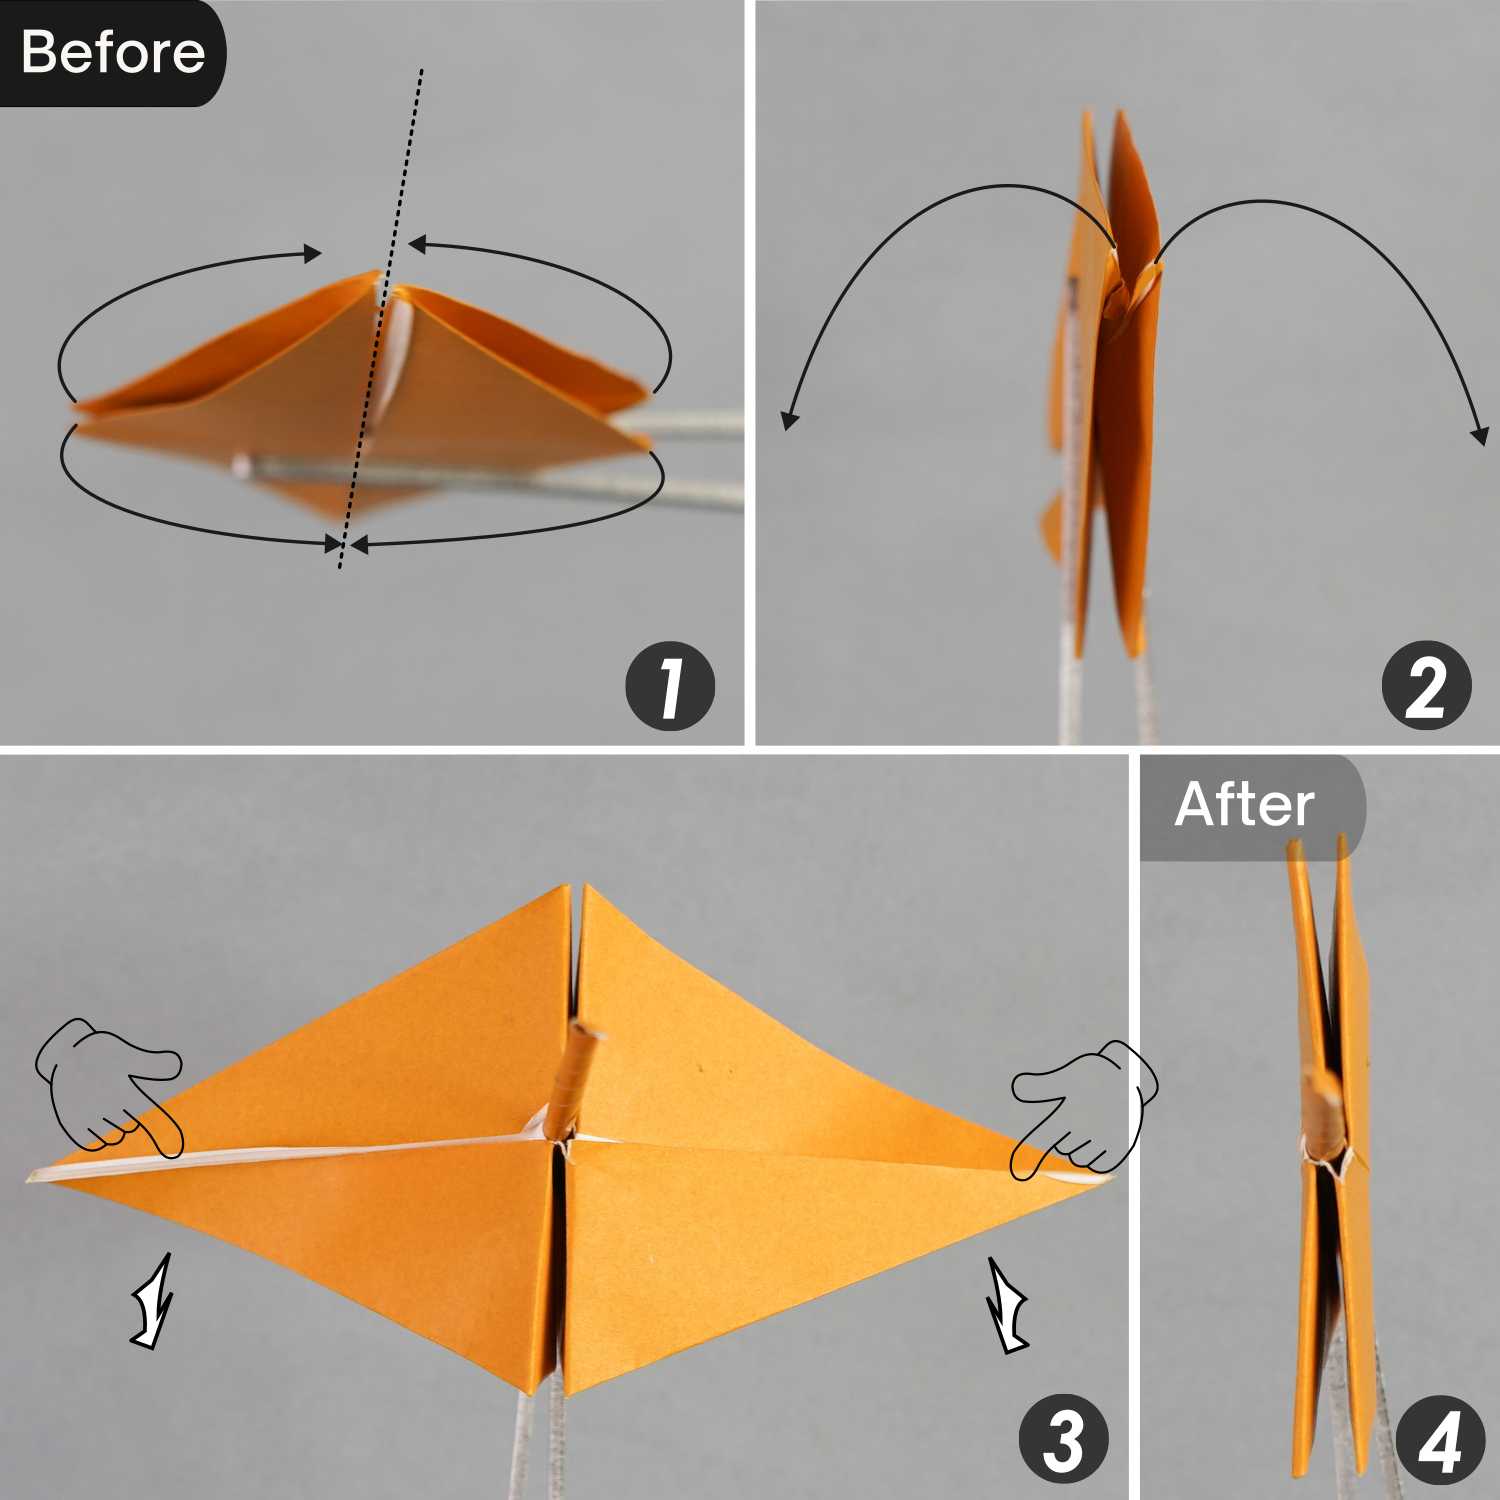
Step 14
Bring the two upper flaps together on the top side, and the two lower flaps together on the bottom side, then press down the flaps on the left and right side.
Step 15
Rotate the model 90 degrees counterclockwise, then 180 degrees from back to front.
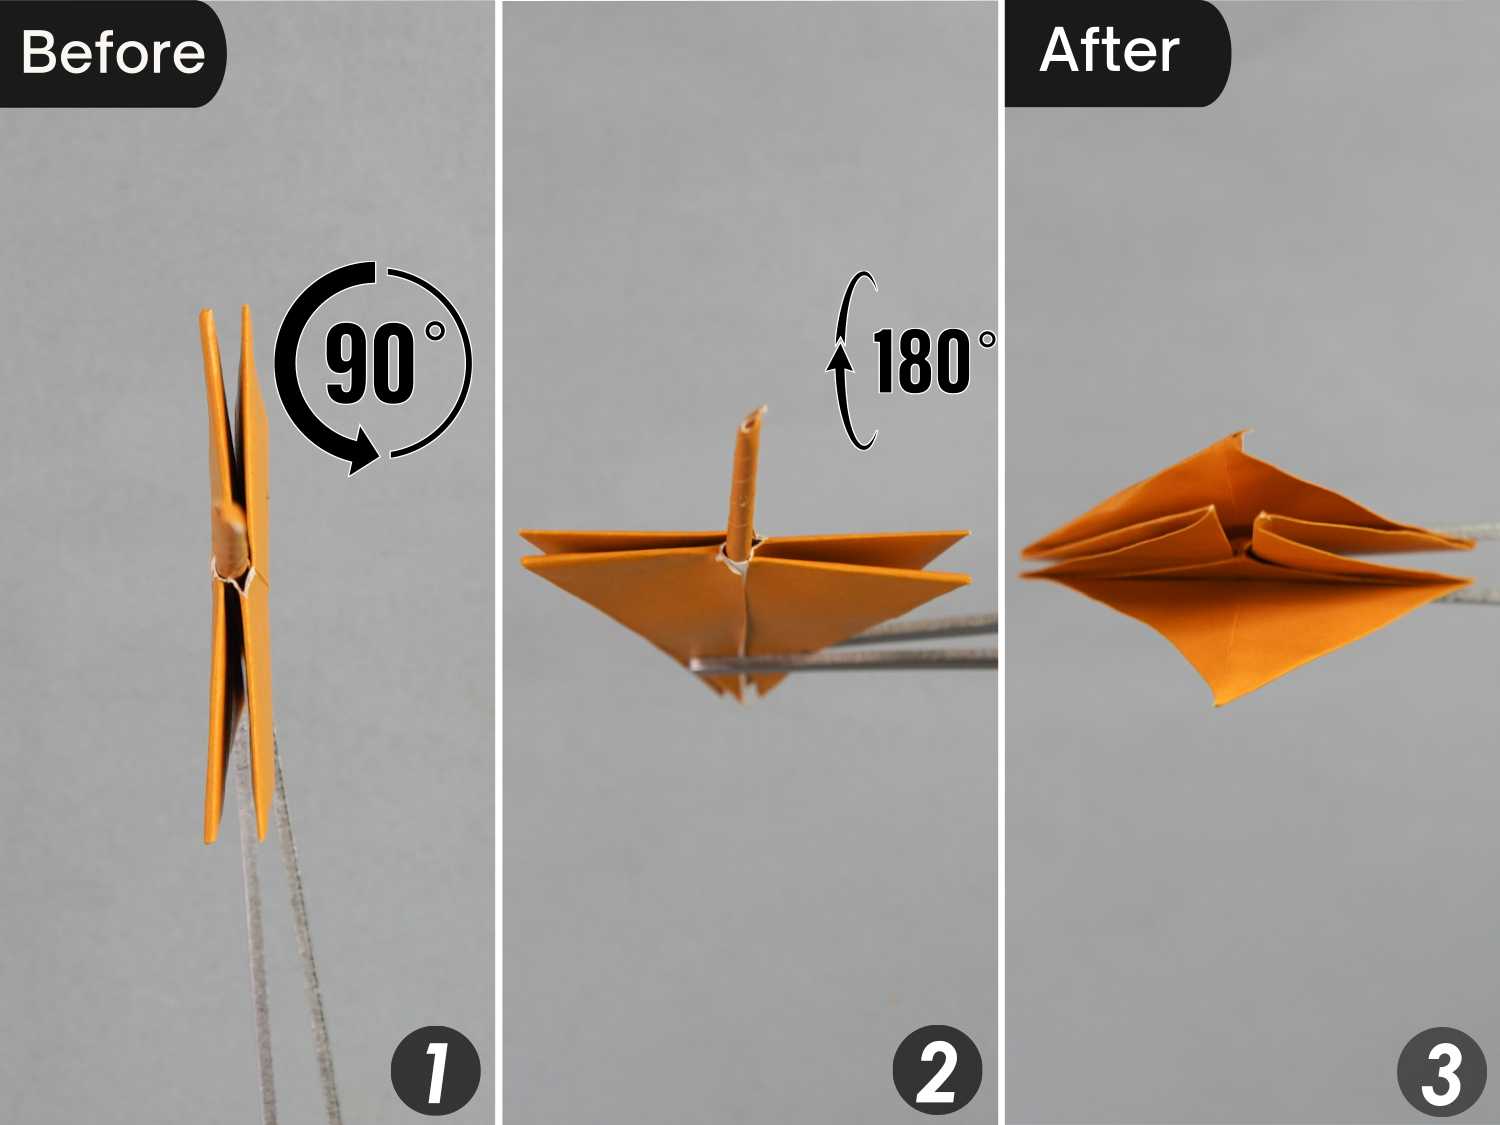
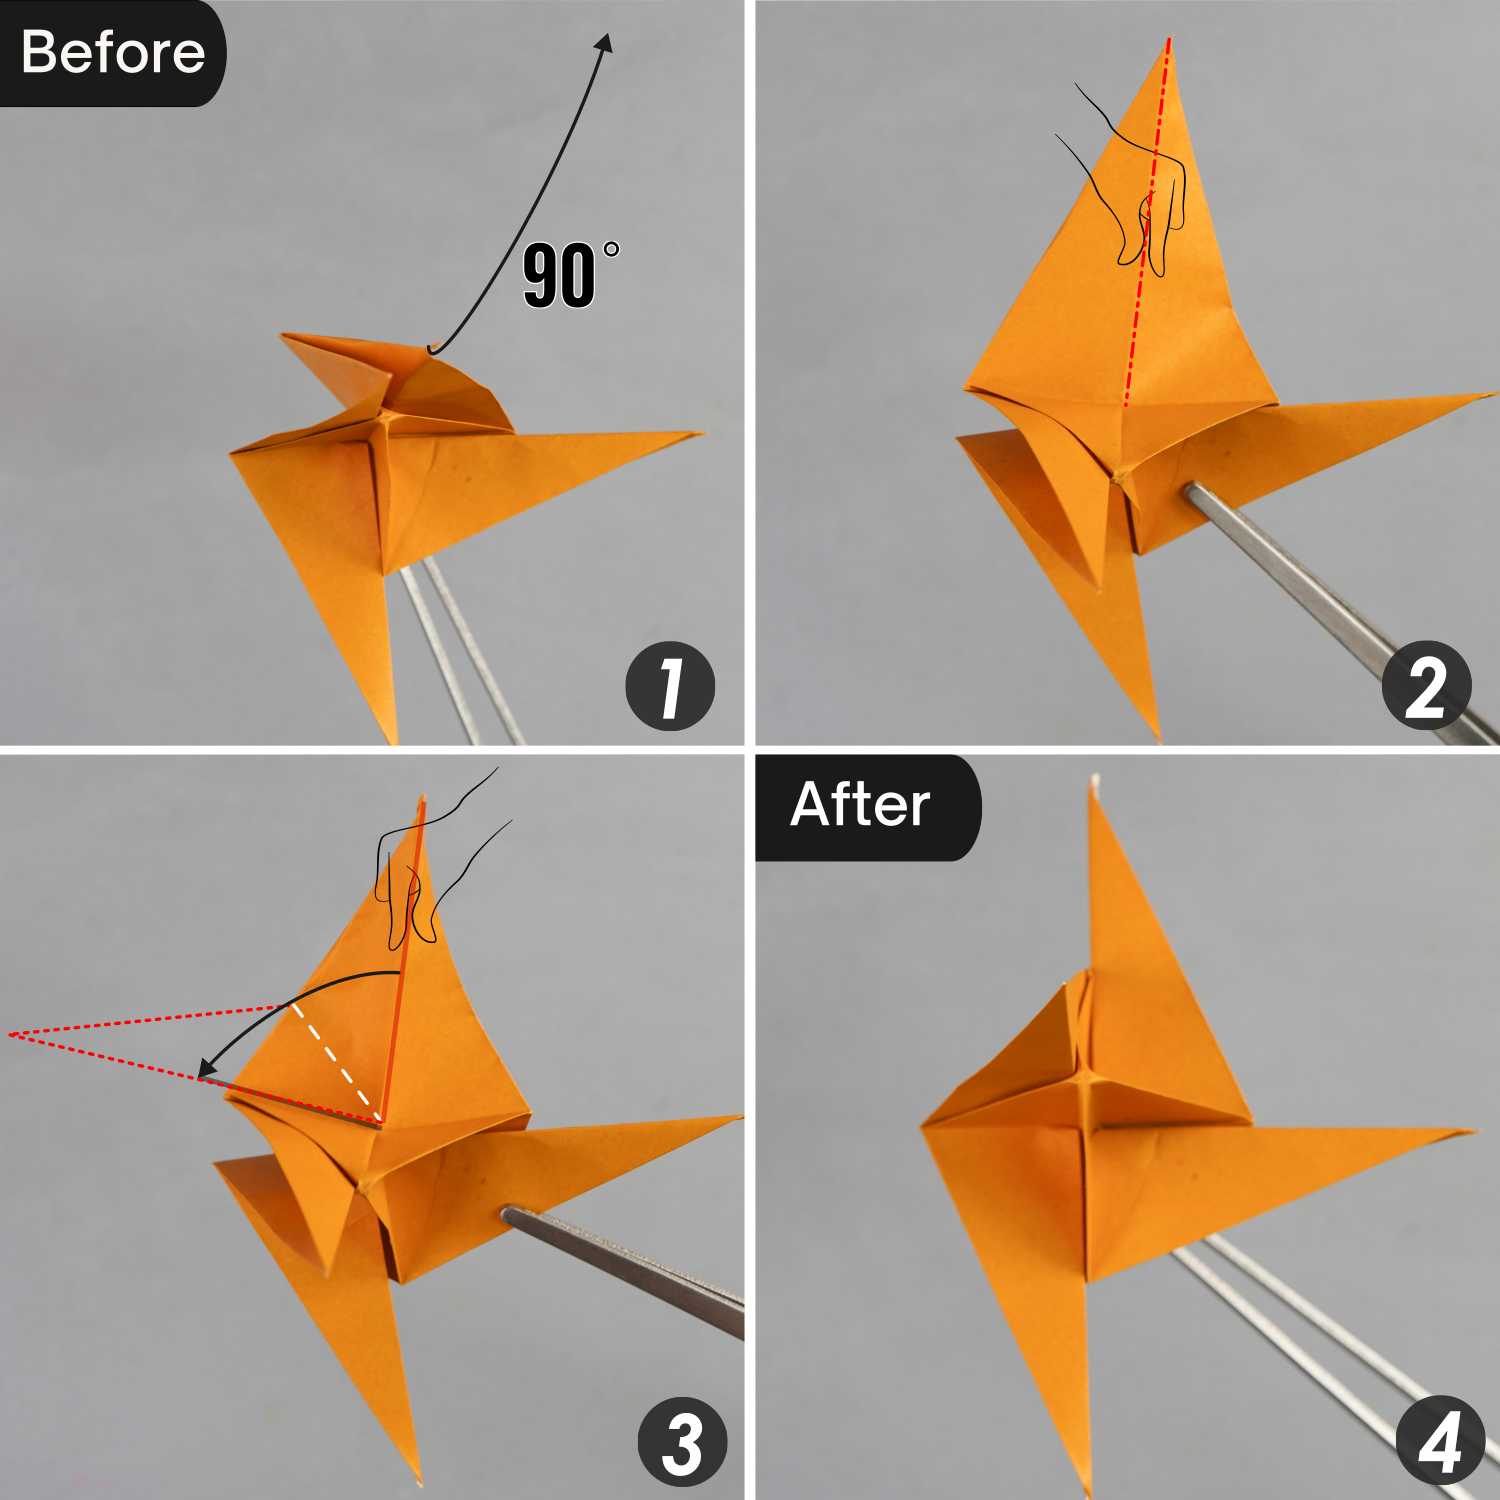
Step 16
Fold down this flap 90 degrees, then mountain fold its middle vertical crease. Fold this crease to the right side to align with the horizontal crease.
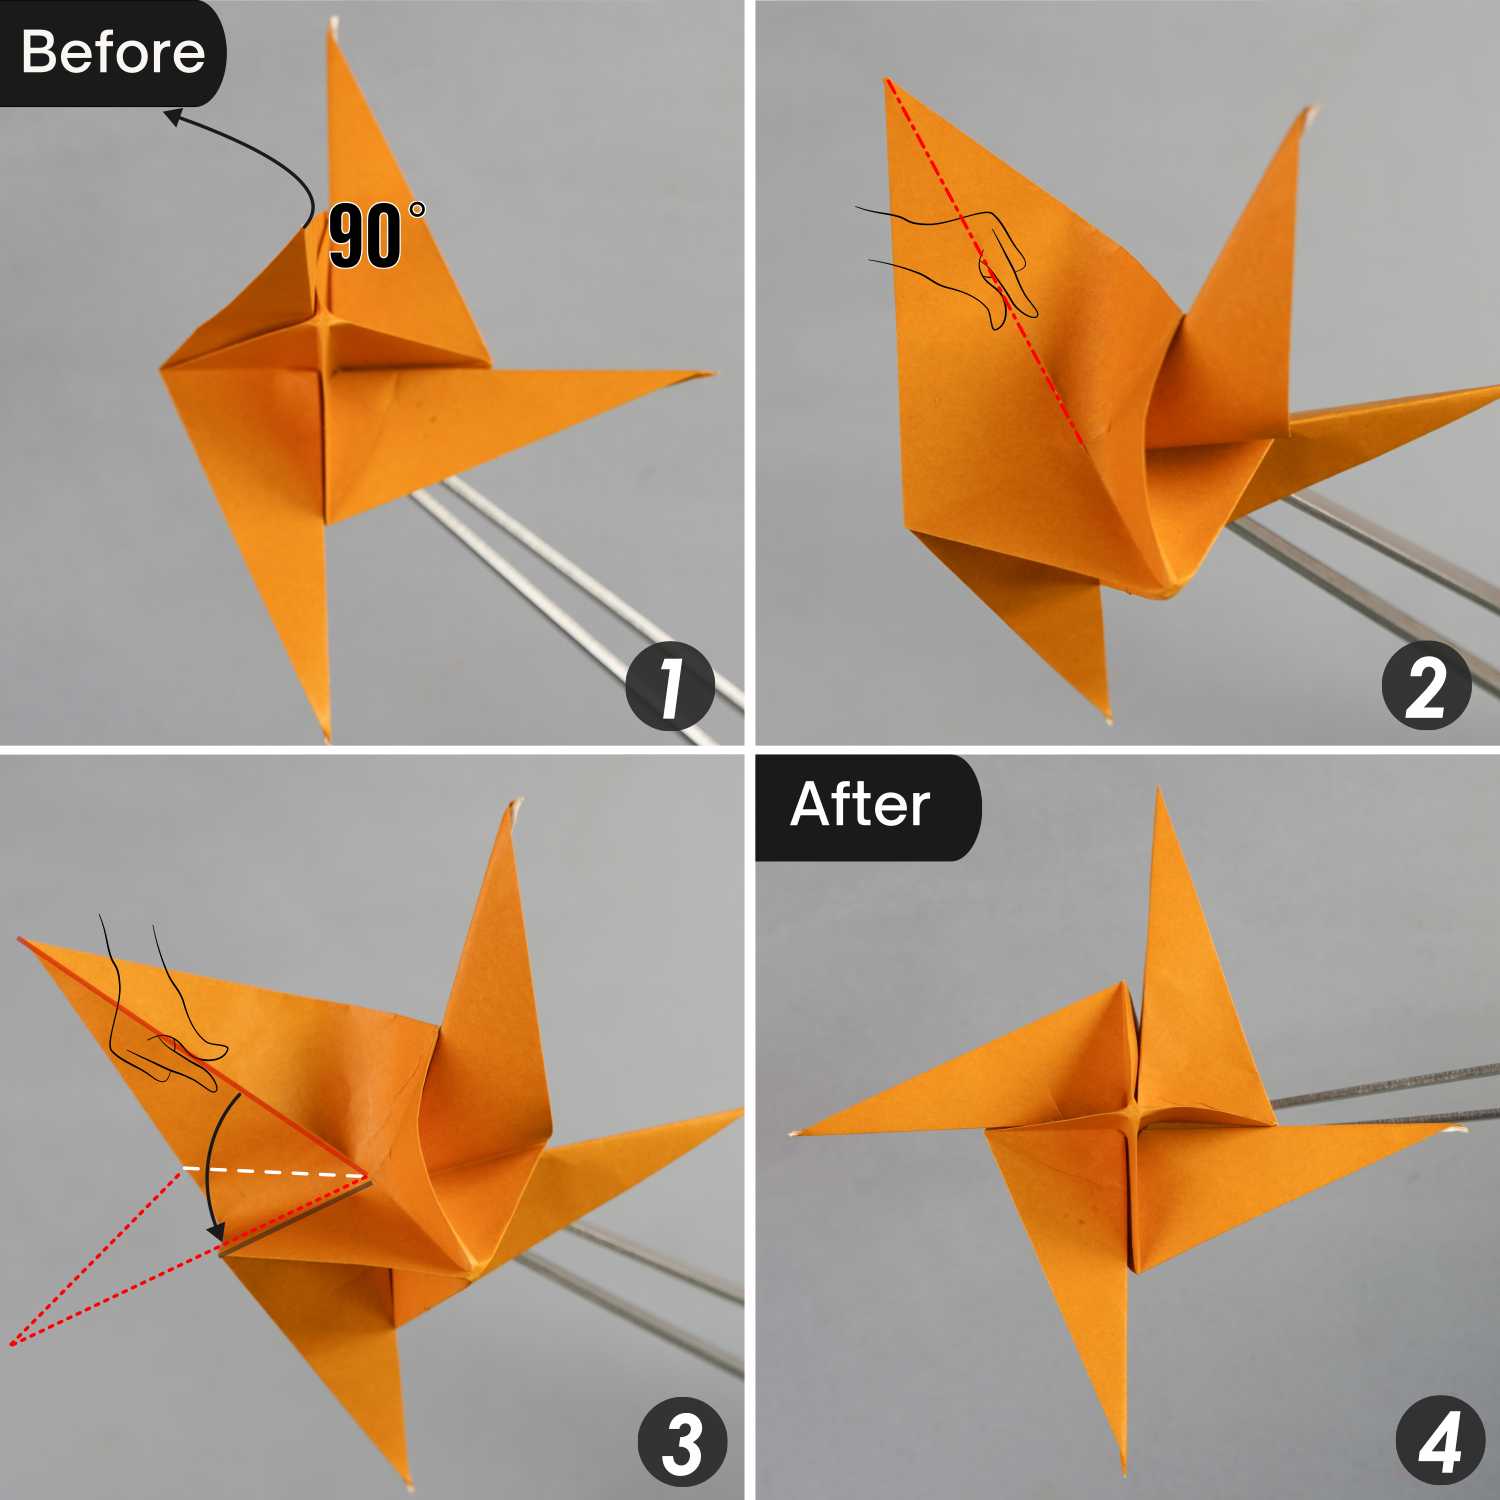
Step 17
Repeat this for the right flap, fold down this flap 90 degrees, then mountain fold its middle vertical crease. Fold this crease to align with the horizontal crease.

Step 18
Repeat this for the top flap, fold down this flap 90 degrees, then mountain fold its middle vertical crease. Fold this crease to align with the horizontal crease.
Step 19
Repeat this for the left flap, fold down this flap 90 degrees, then mountain fold its middle vertical crease. Fold this crease to align with the horizontal crease.
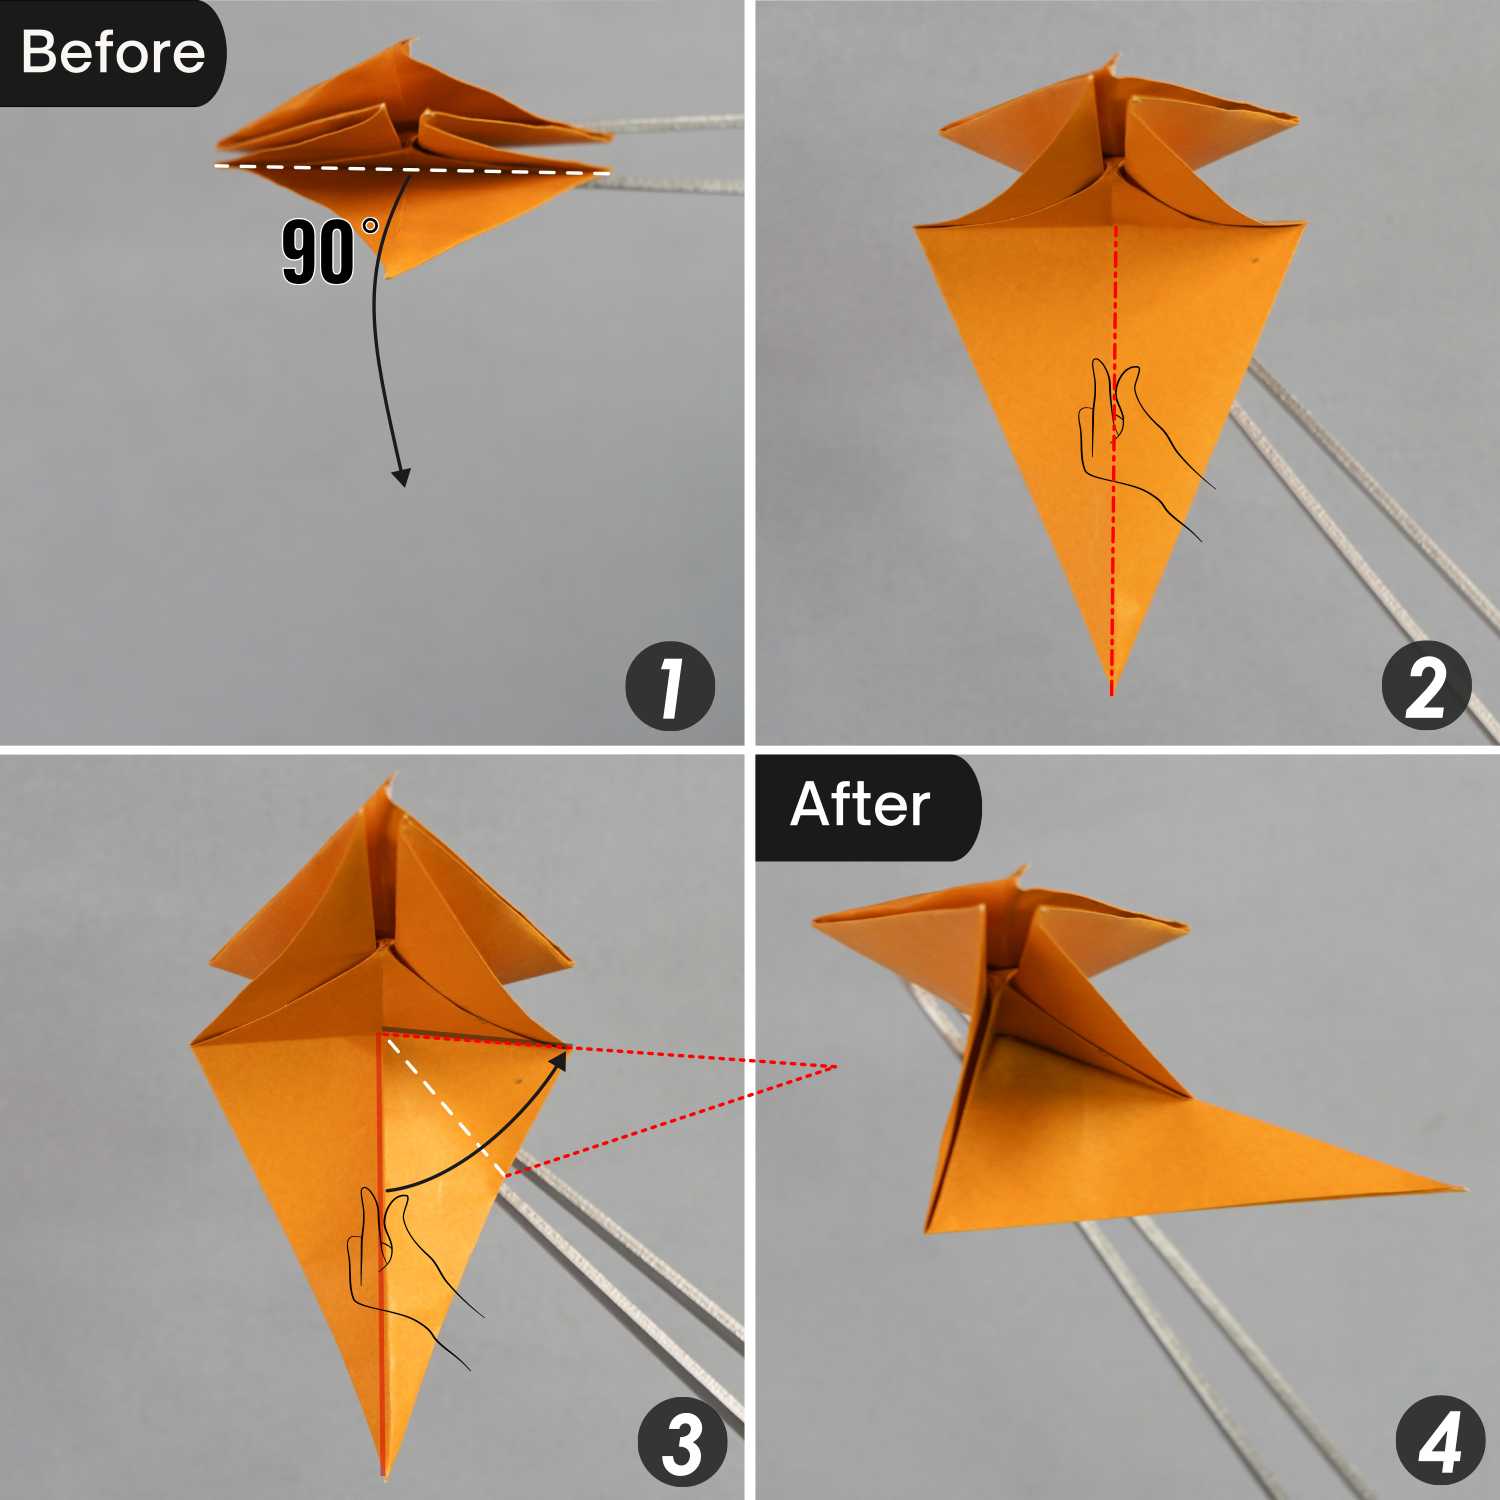
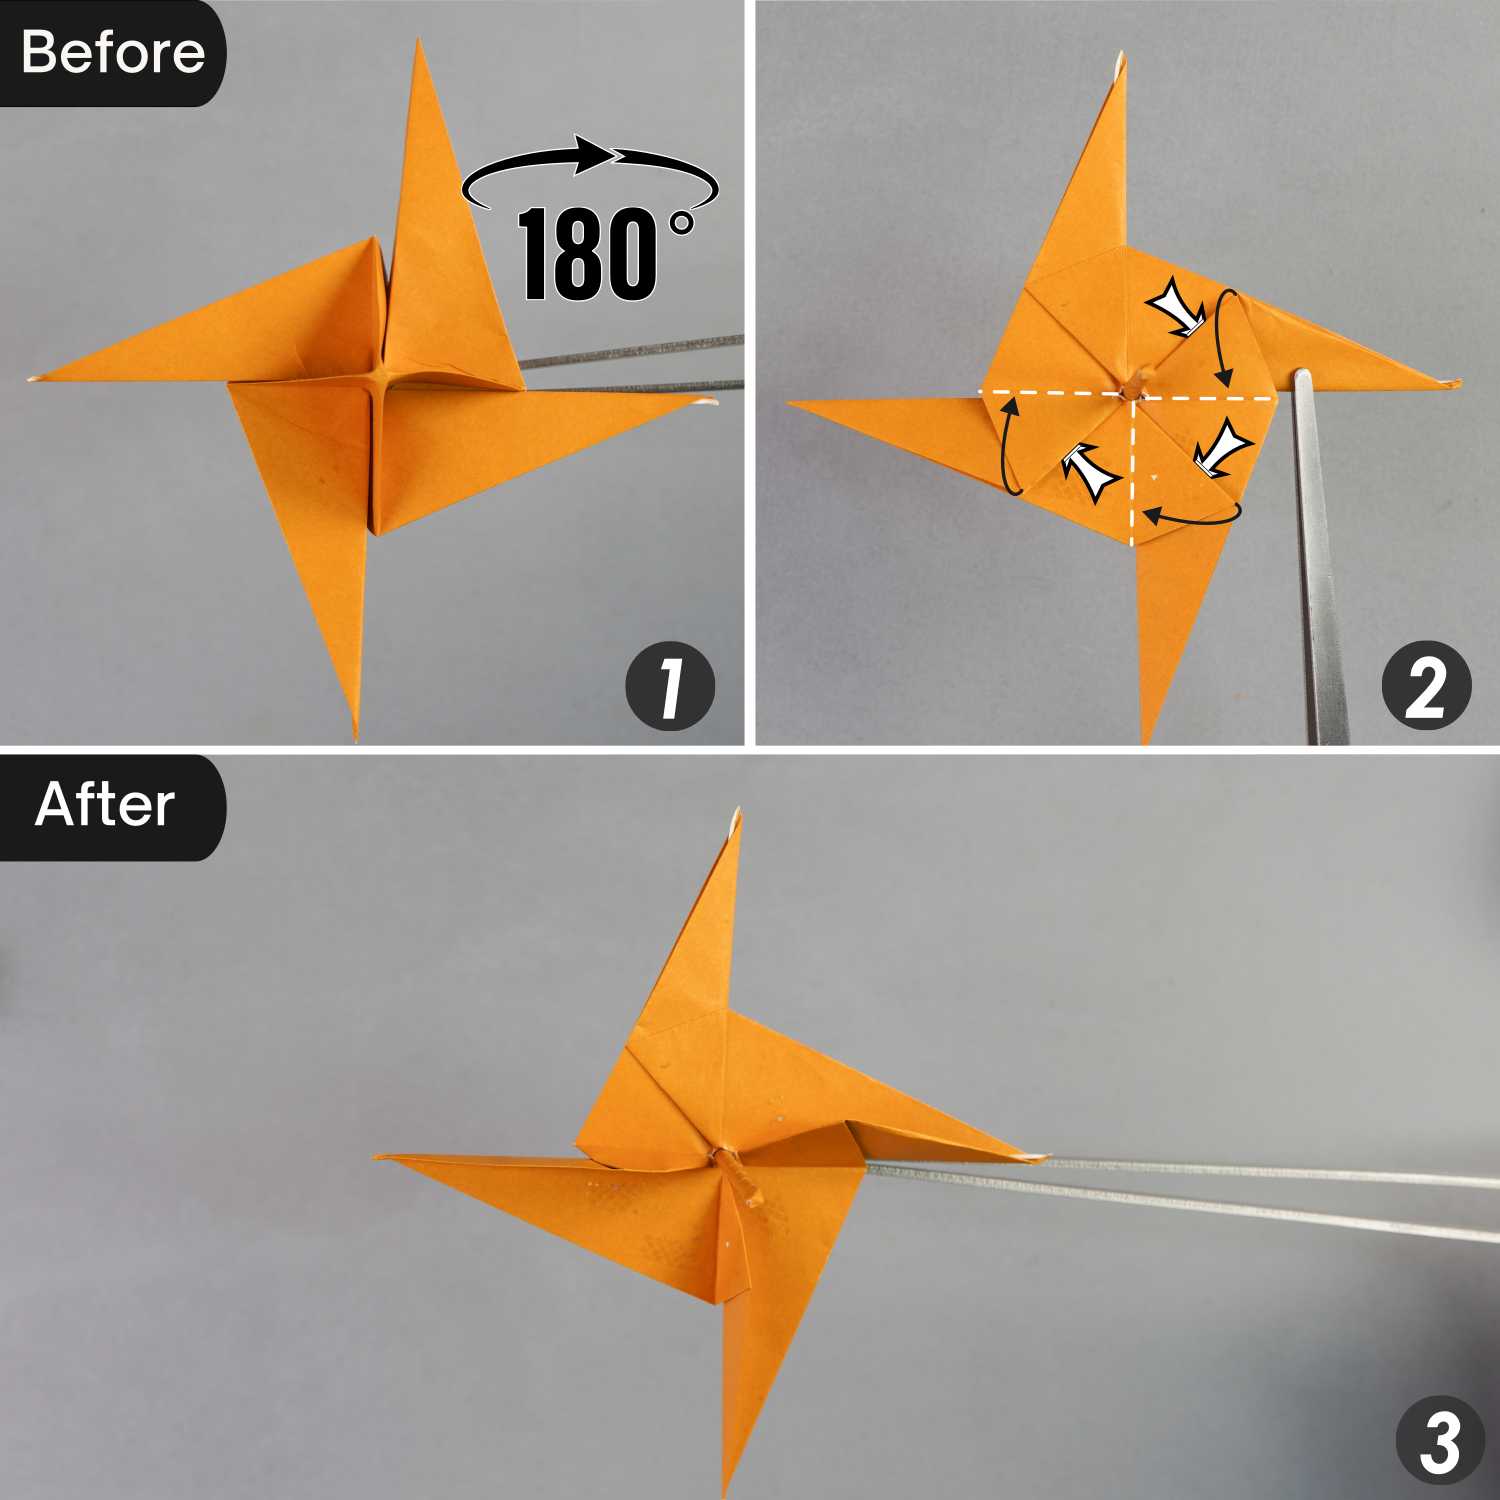
Step 20
Rotate this model 180 degrees from left to right, then lift these three flaps, as you can see in the second picture.
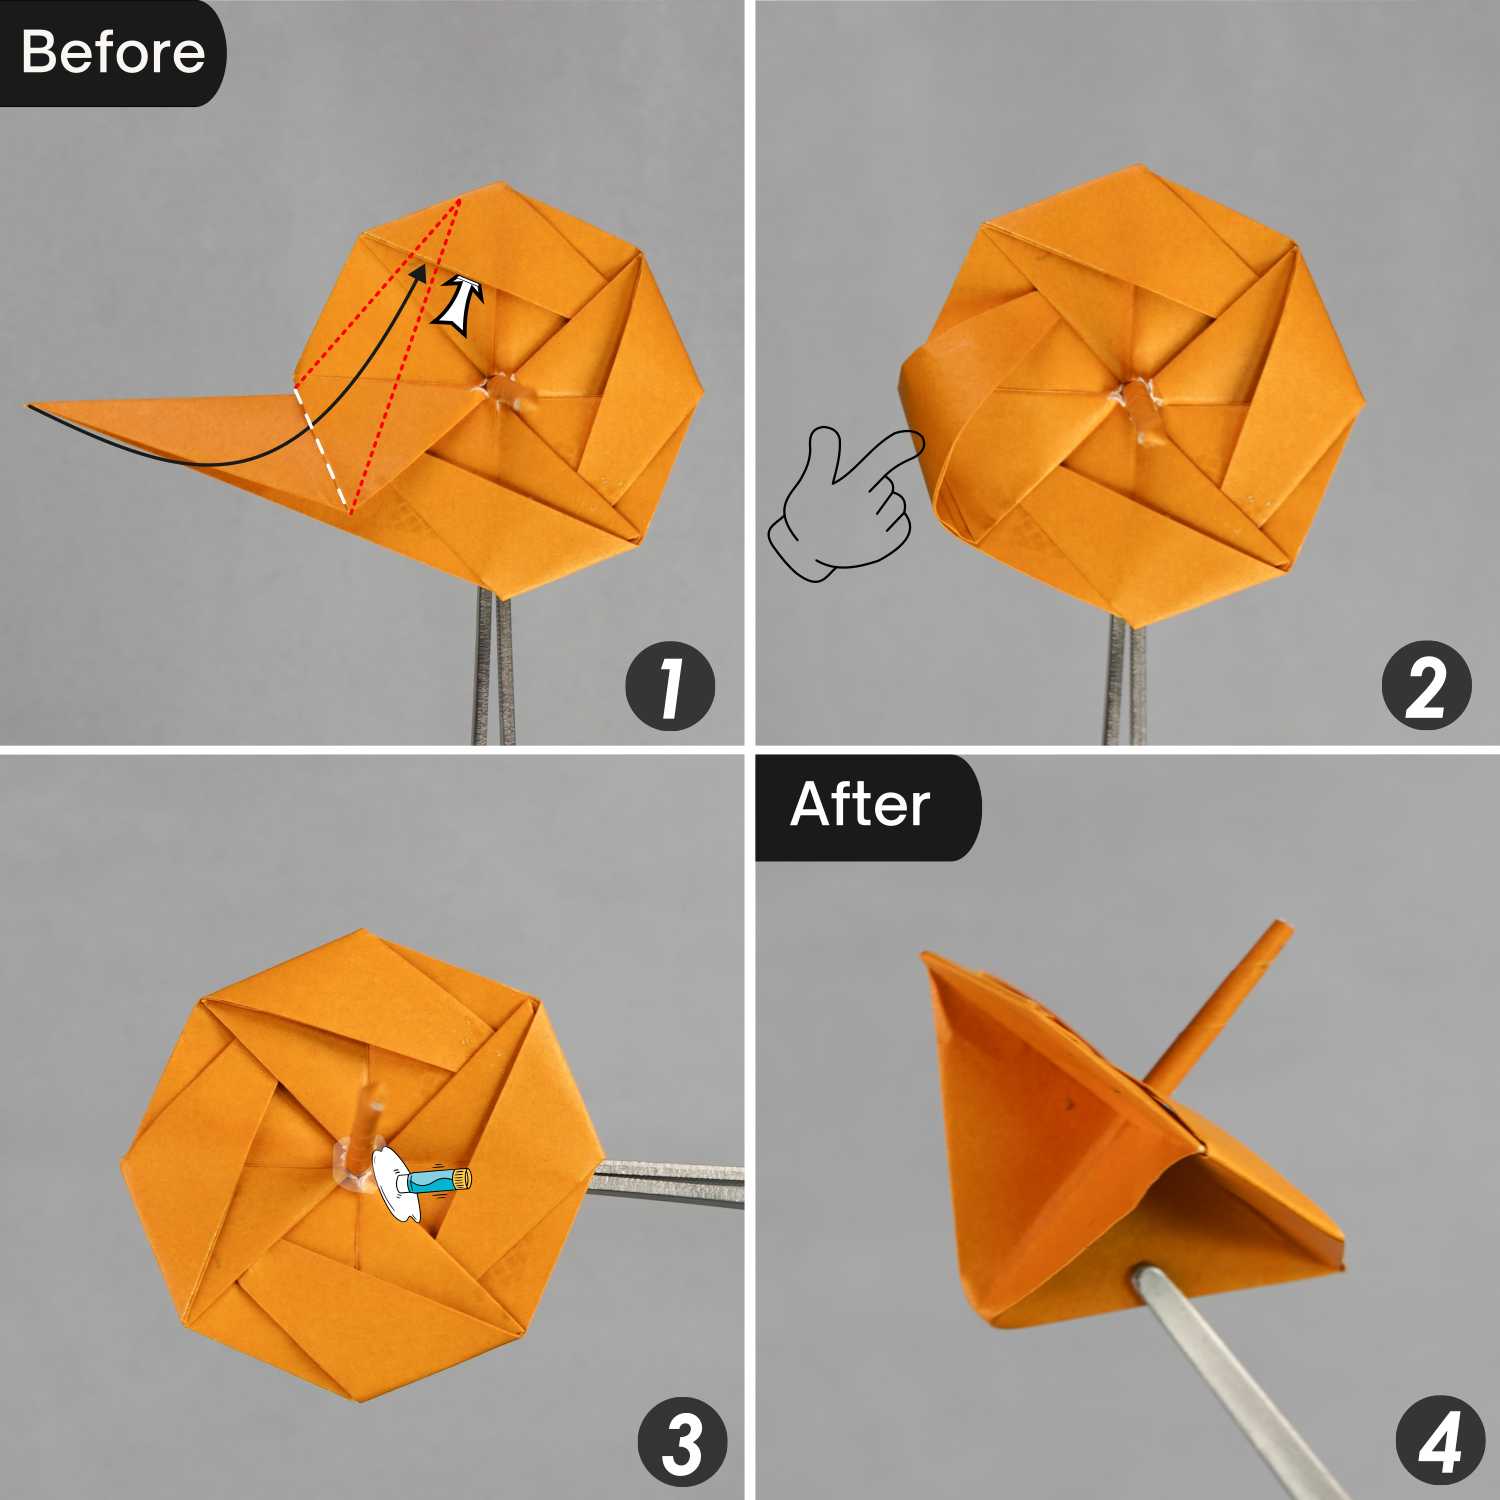
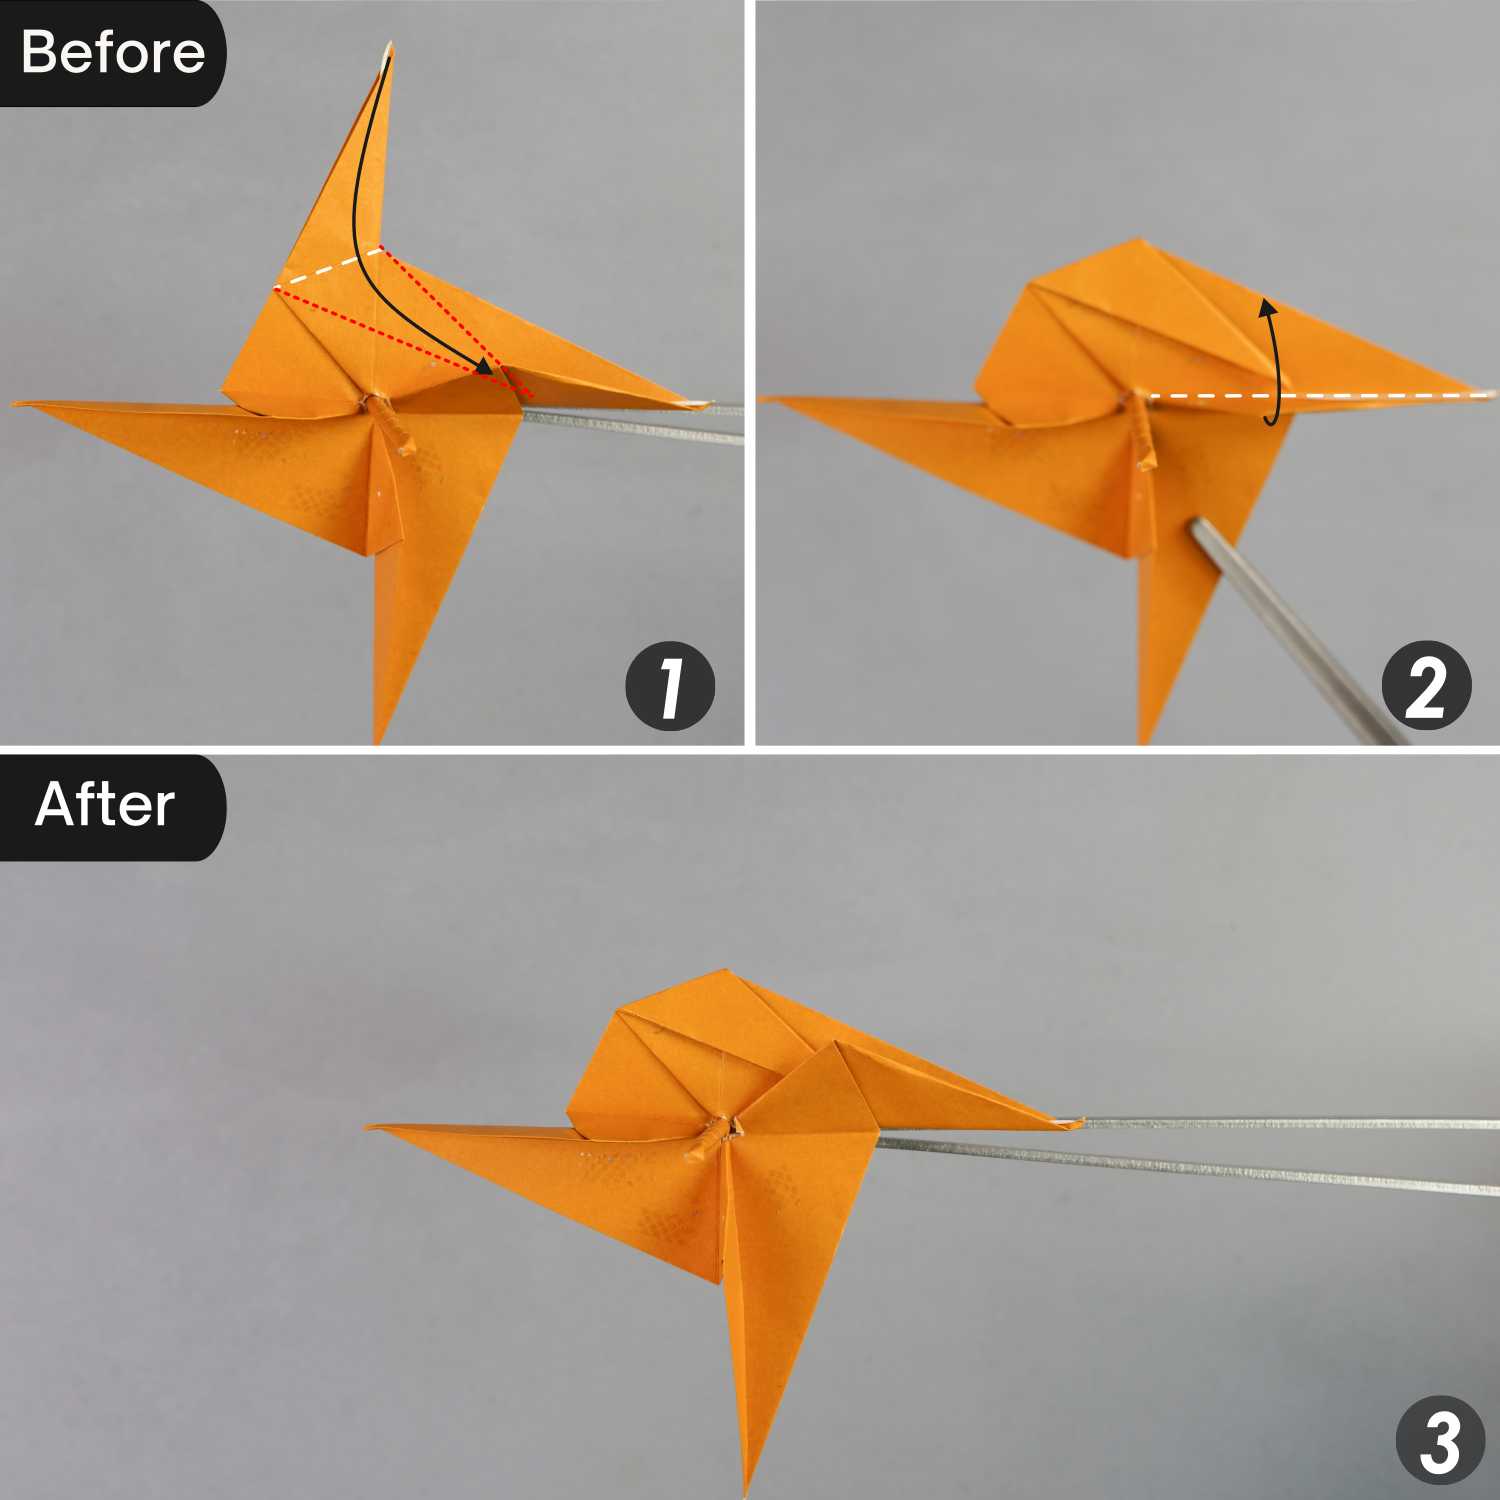
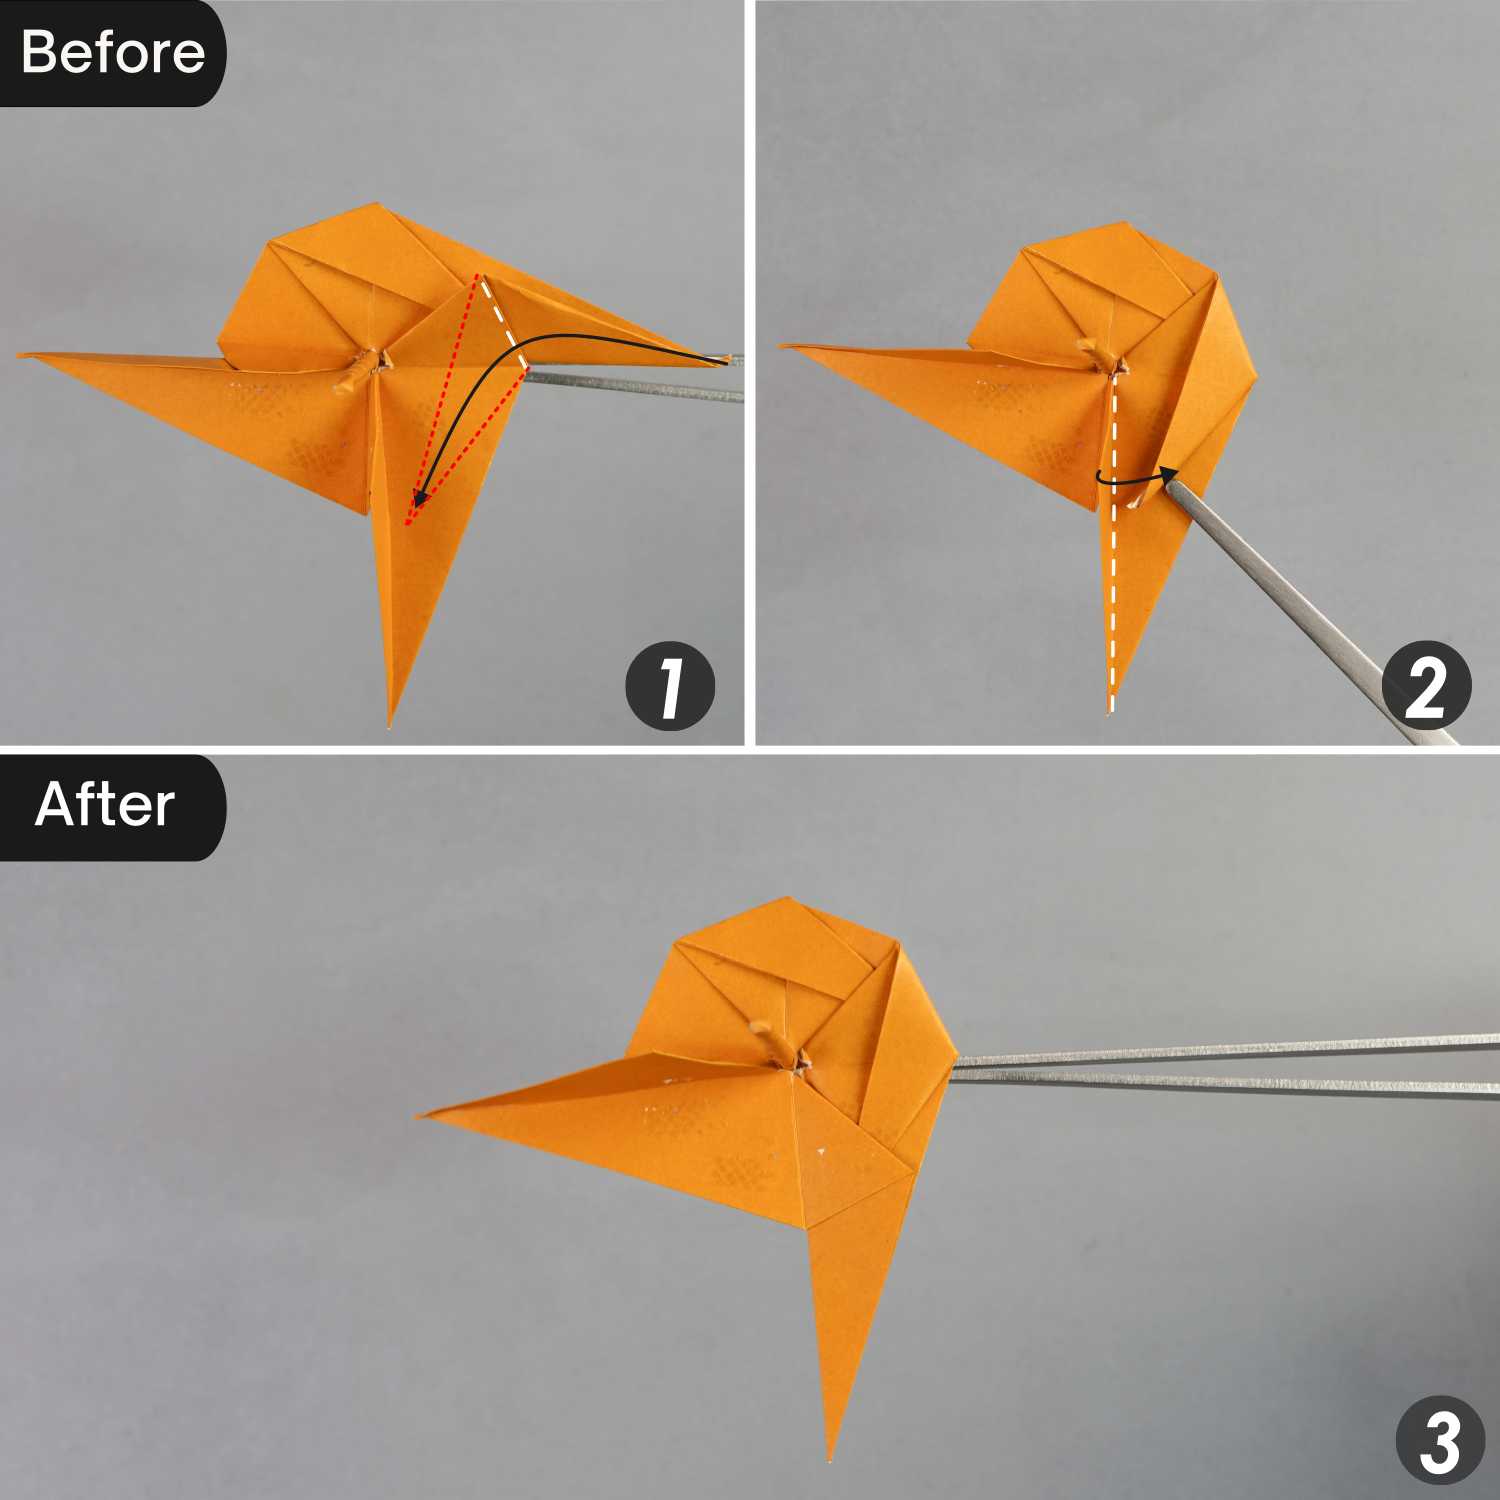
Step 21
Fold down the top triangle along the white dotted line, then press down the right flap.
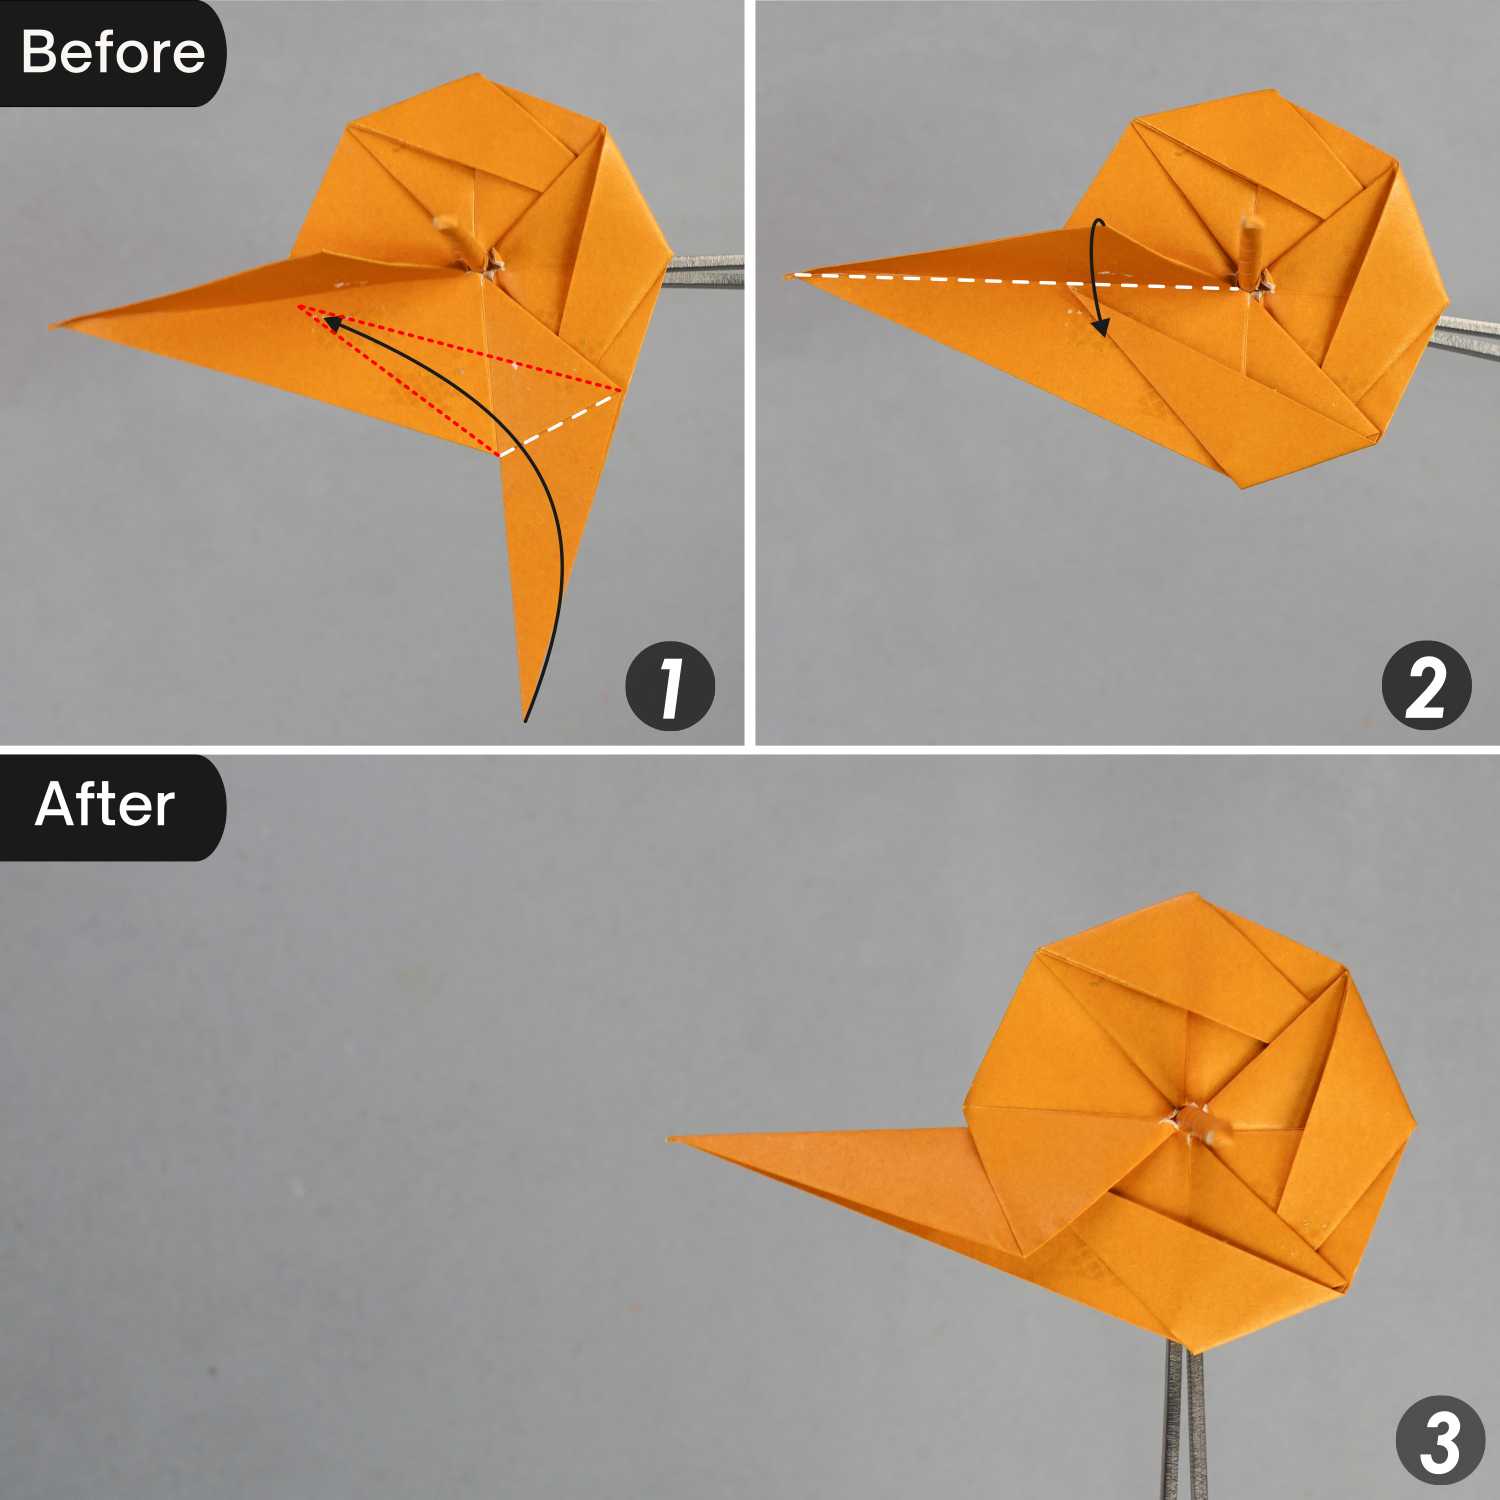
Step 22
Fold the right triangle along the white dotted line, then press down the bottom flap.
Step 23
Fold the bottom triangle along the white dotted line, then press down the left flap.
Step 24
Fold the left triangle along the white dotted line, and tuck it in the top pocket.
Apply glue to the paper stick and the spinning top to ensure they stick together firmly.
If the paper stick is too long, you can cut it shorter based on the situation to ensure the spinning top spins longer.