Origami gift card holder
Why not fancy up a gift card by whipping up one of these simple origami card holders?
All you need is a sheet of A4 paper! After every step, remember to check the fold is neat and then crease firmly. If you don’t have a creasing tool, you can use the back of your thumbnail. Ready?
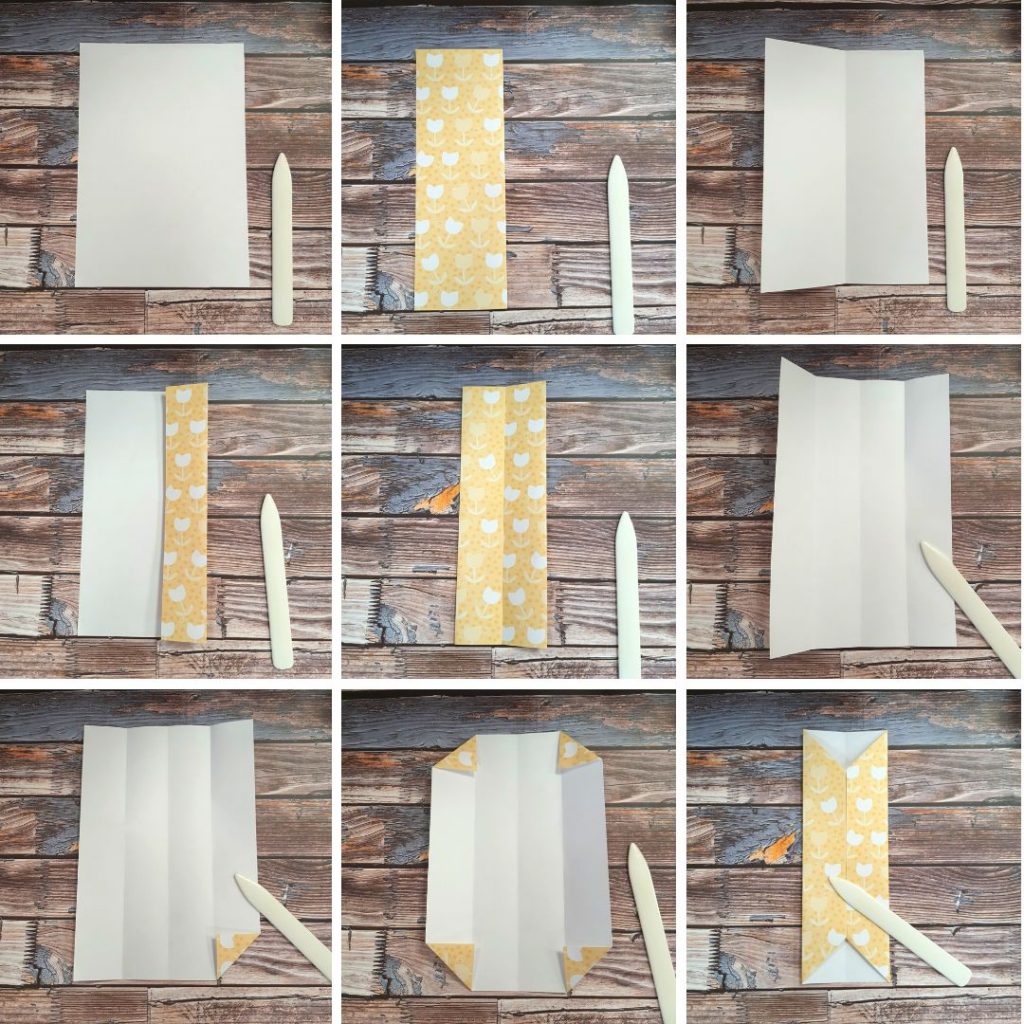
If you’re using paper with a pattern or colour on one side, start with the plain side facing you.
Fold in half (from side to side).
Crease and unfold.
One side at a time, fold the left and right edges in to meet the centre crease, then unfold.
Taking each corner in turn, fold in to meet the crease made in the previous step, until all 4 corners are folded.
Now fold in the left and right edges in to meet in the middle again.
Turn the model over.
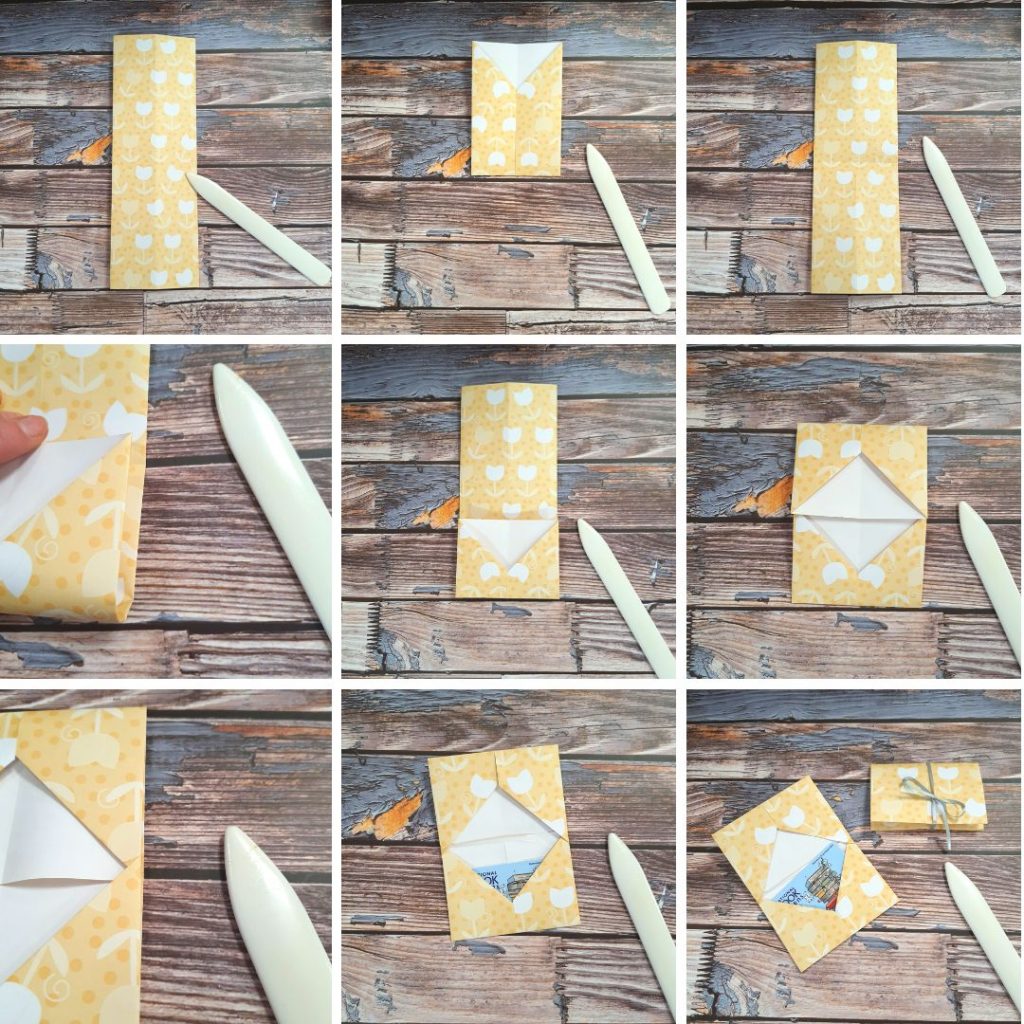
Fold in half, top to bottom – crease and unfold.
Take the bottom and fold up to just past the horizontal crease from the last step.
Next, do the same with the top – fold down so it overlaps slightly.
Now you should be able to tuck the top bit you’ve just folded down into the bottom bit…
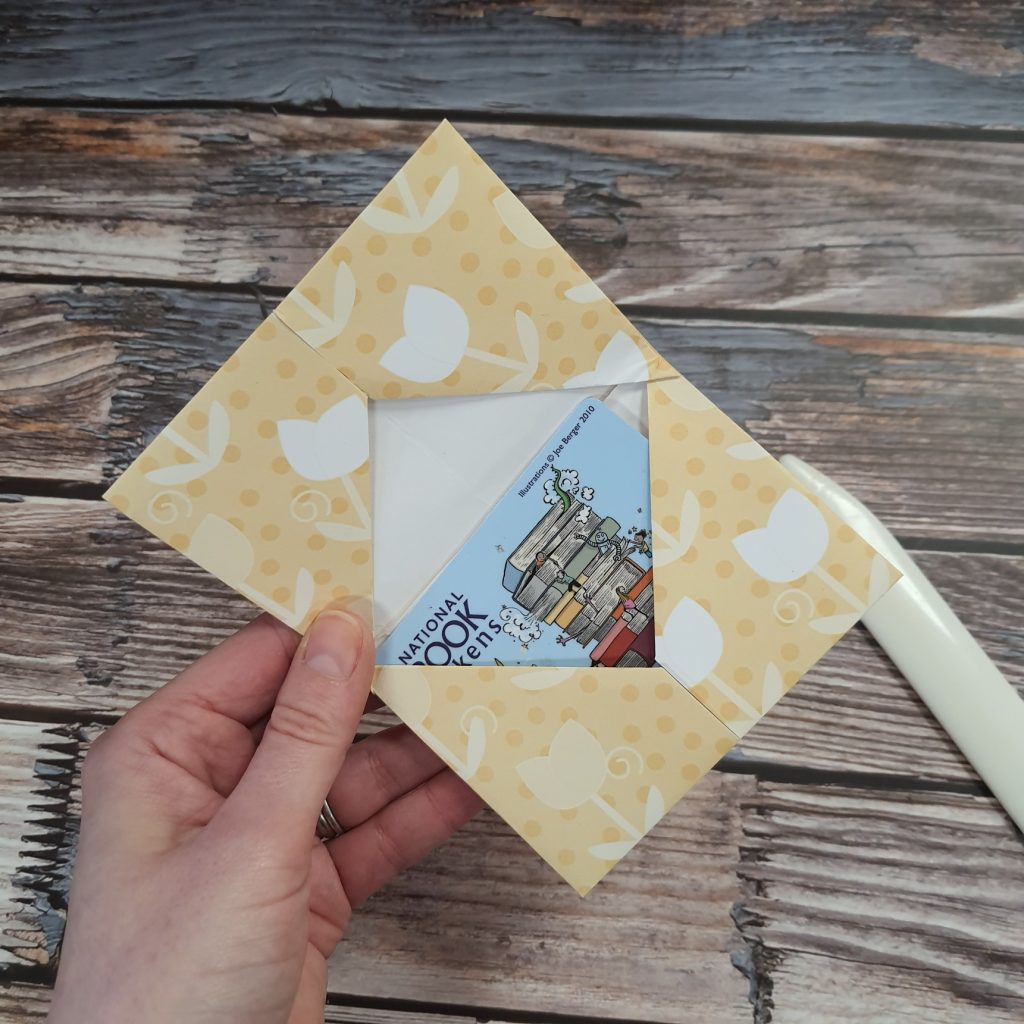
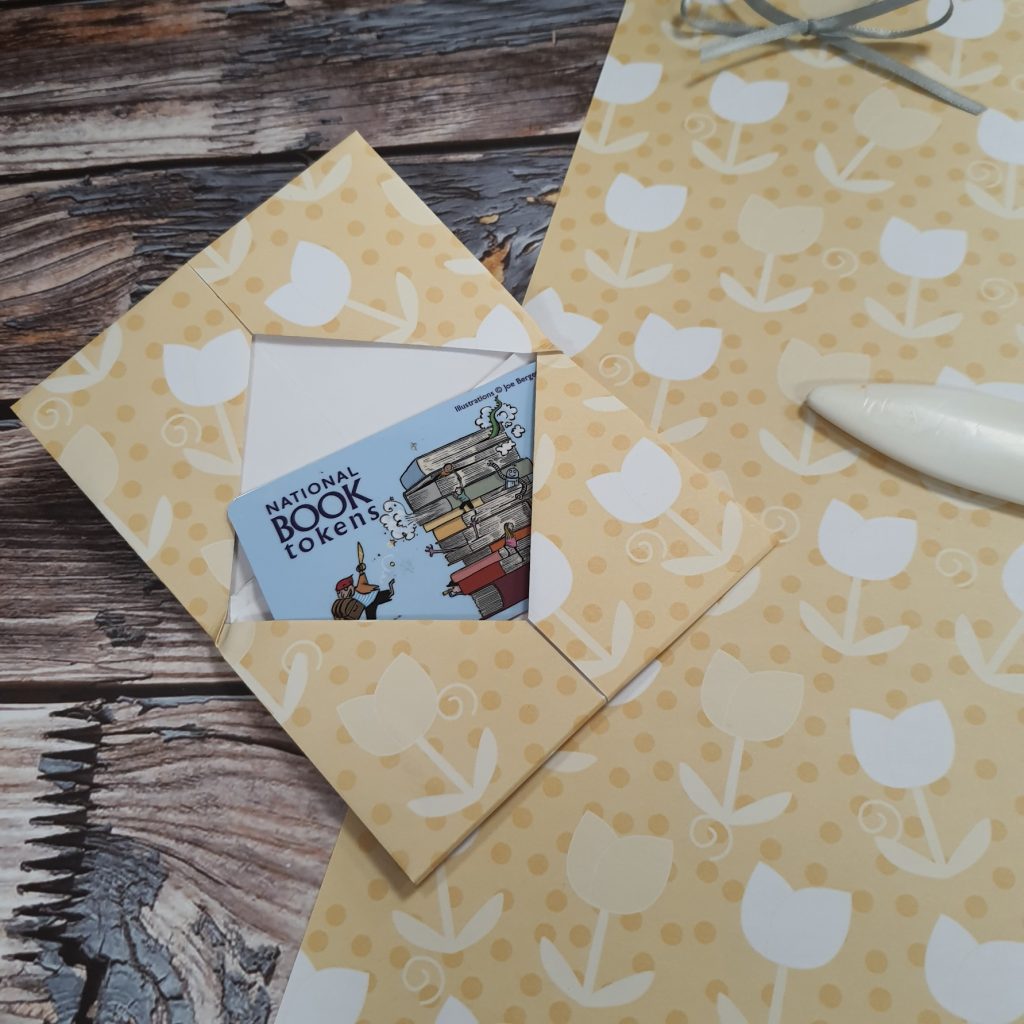
And we’re done! A standard gift card should fit into one of the pockets, then you can fold it in half ready for gifting – add a ribbon if you’re feeling extra fancy!