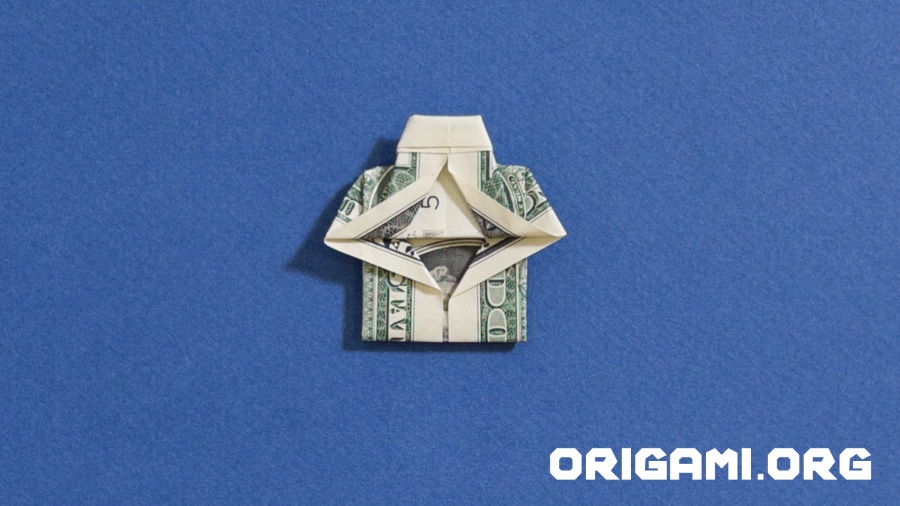
Origami Dollar Bill Shirt and Tie
In this post, we’re going to create an origami dollar bill shirt and tie! Not only is this a clever way to showcase your folding skills, but it’s also a delightful conversation starter that’ll make your dollars look dapper.
Origami, the art of paper folding, allows us to transform ordinary objects into works of art, and in this case, your dollar bills are about to get a fashionable makeover. It’s the perfect way to add a touch of creativity to your financial transactions!
In this step-by-step guide, we’ll walk you through the process of folding a miniature shirt and tie from a dollar bill, or any rectangular paper of your choice. Whether you’re an origami novice or a seasoned folder, our instructions are designed to be clear and accessible.
So, grab a dollar bill or a piece of rectangular paper, find a well-lit workspace, and let’s embark on this creative and whimsical journey. By the end, you’ll have a dollar bill shirt and tie that’s sure to impress and amuse. Let’s fold our way to financial fashion flair!
This is how to make the origami shirt and tie using a dollar bill! This is definitely one of the most enjoyable and impressive things to make.
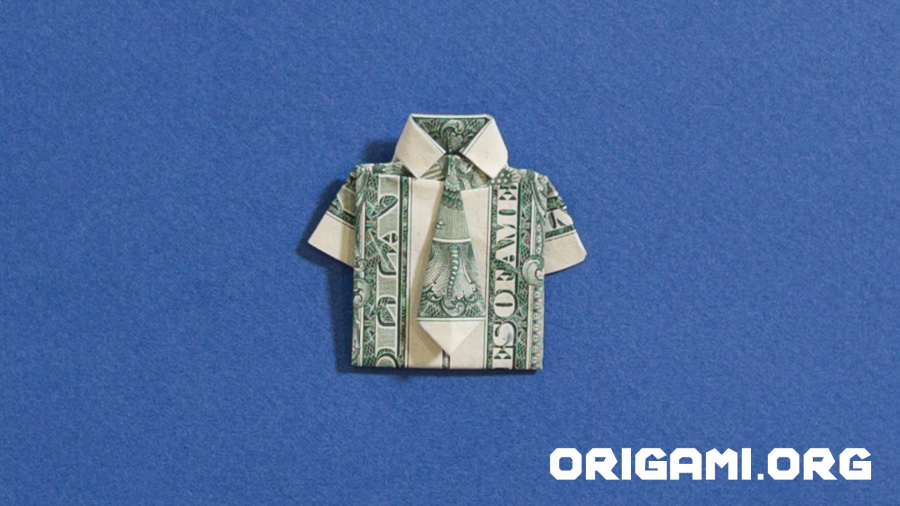
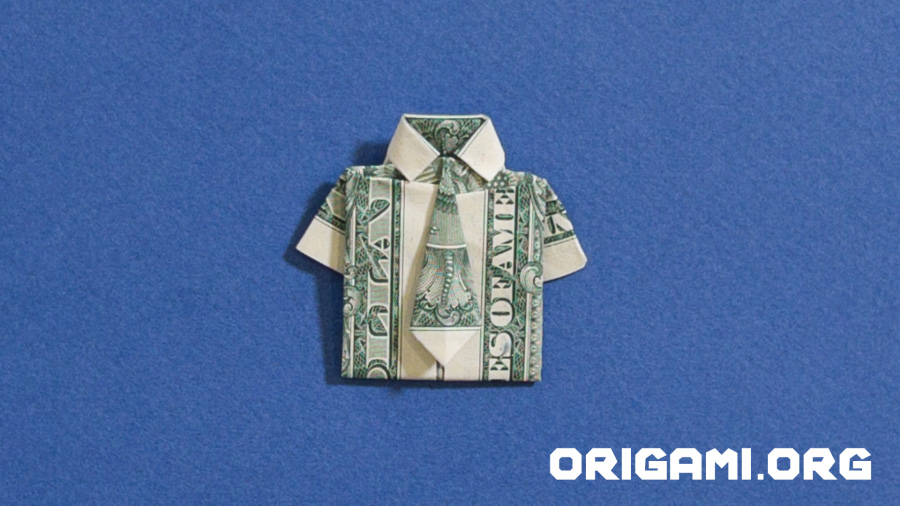
This is how your dollar bill origami shirt and tie will look when it’s finished!

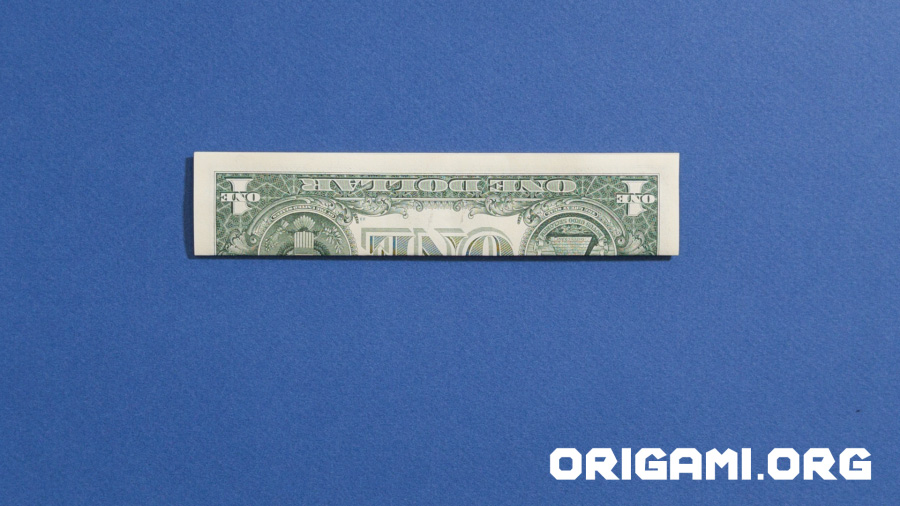
Step 1: Start with a nice crisp dollar bill (or order some
Step 2: Fold the dollar bill in half by taking the bottom edge up to the top edge.
Step 3: Unfold the dollar bill.
Step 4: Fold the bottom edge up to the half way line
Step 5: Fold the top edge down to the half way line now.
Step 6: Your dollar bill should now look like this
Step 7: Unfold the dollar bill
Step 8: Fold the top left corner down to the centre line like this.
Step 9: Now fold the bottom left corner up to the half way line.
Step 10: Fold the left hand corner over the yellow line, in towards the centre
Step 11: Your dollar bill should now look like this
Step 12: Fold the same corner back to where it was like this
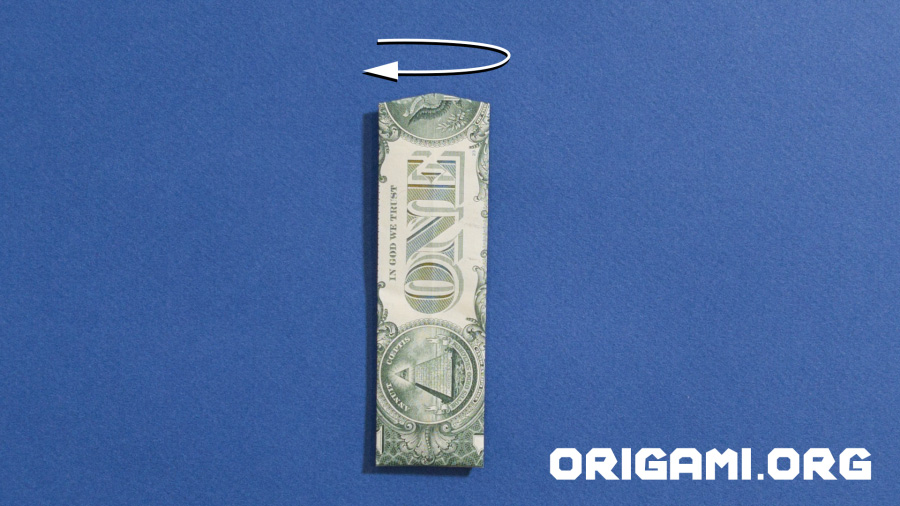
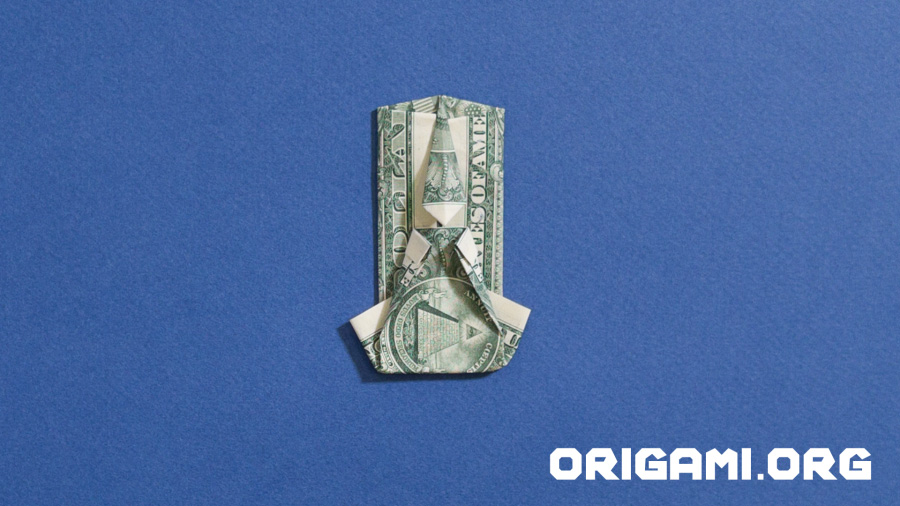
Step 13: Turn the dollar bill over and make the point face downwards
Step 17: Fold along the yellow lines to recreate the tie shape.
Step 18. Your dollar bill should now look like this.
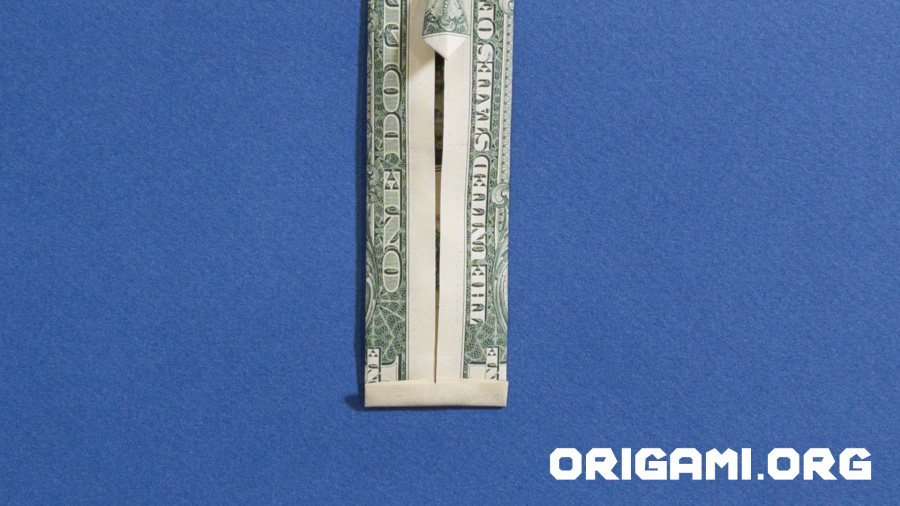
Step 19: Now fold the tip of the tie downwards, along the yellow line shown.
Step 20: Your dollar bill should now look like this.
Step 21: Fold the sides in towards the centre, along the yellow lines shown.
Step 22: Your dollar bill should now look like this.
see next steps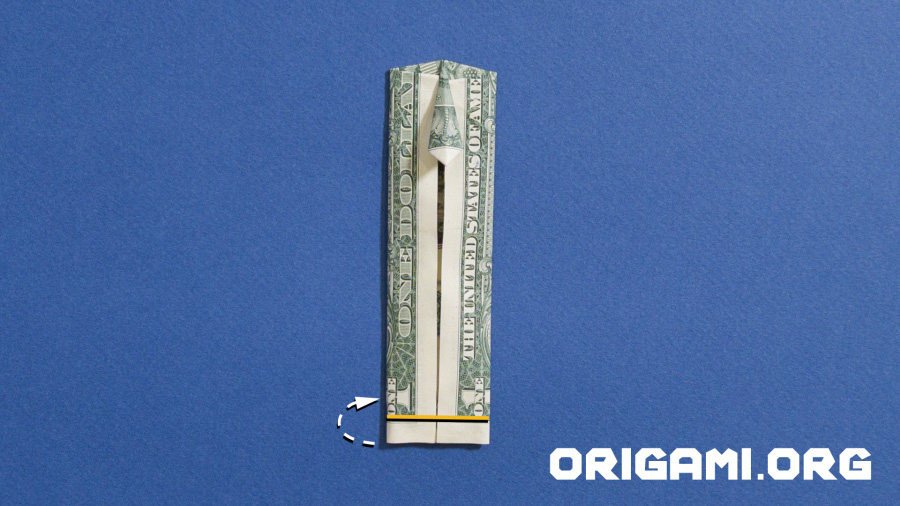
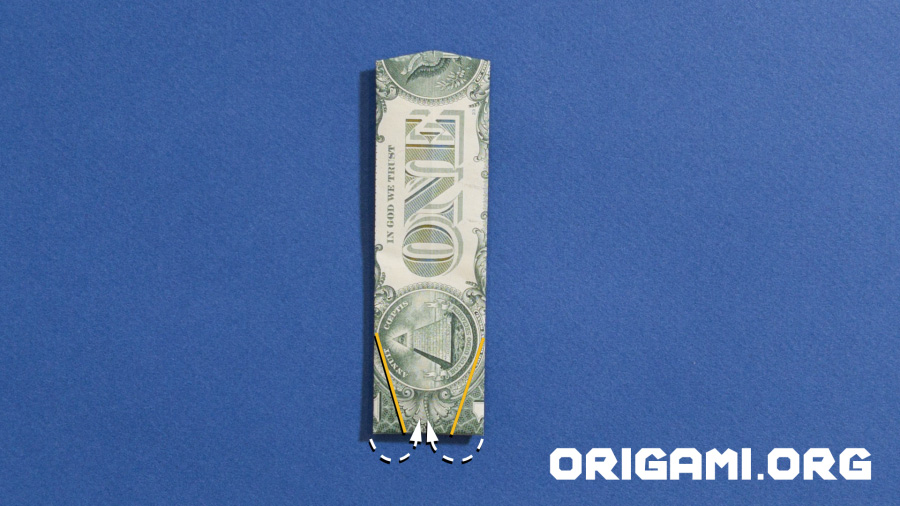
Step 23: Fold the bottom of the dollar bill upwards along the yellow line shown.
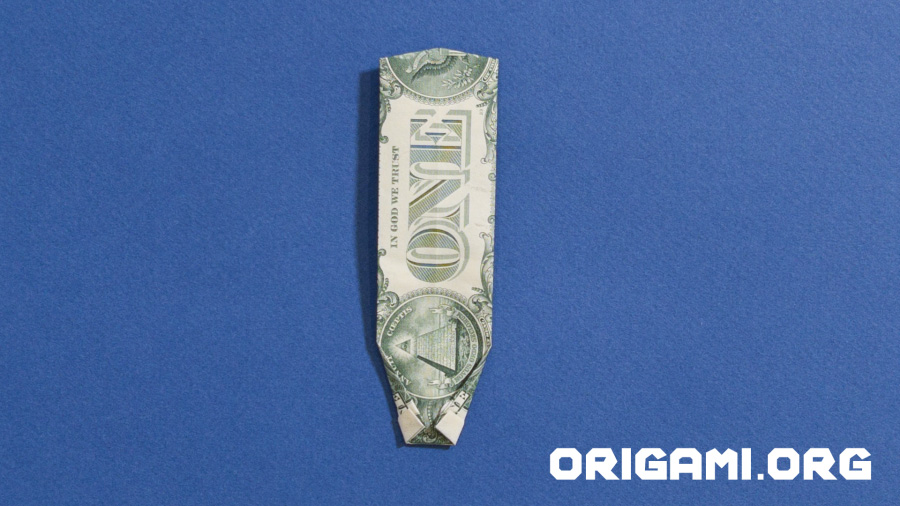
Step 24: The dollar bill should now look like this.
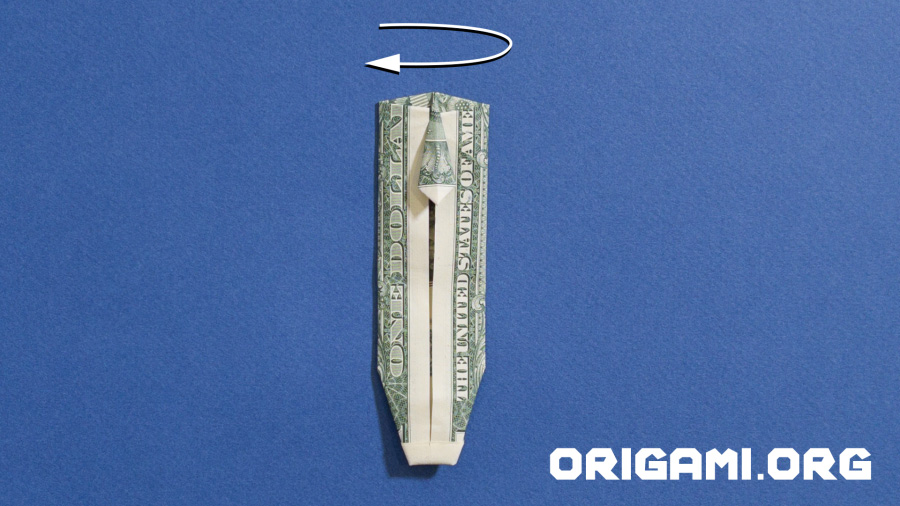
Step 25: Turn the dollar bill over.
Step 26: Fold the left and right corners in towards the centre along the yellow lines shown in the image.
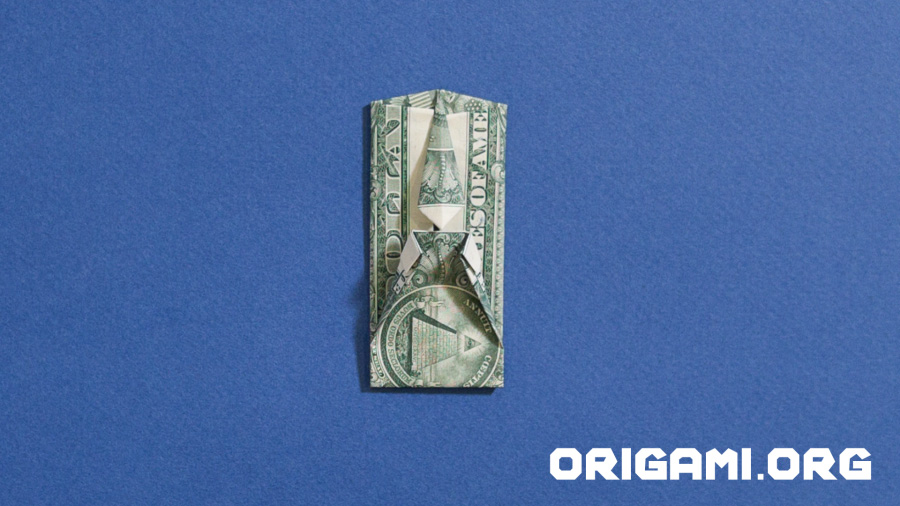
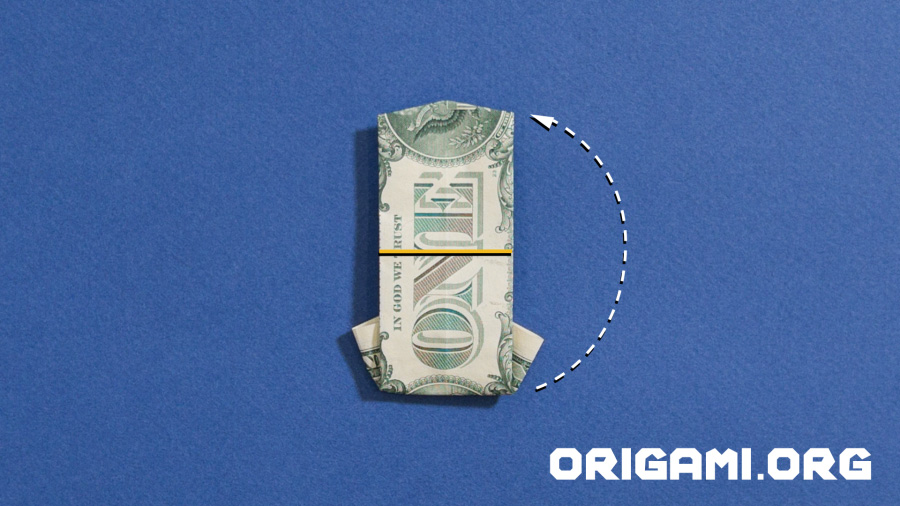
Step 27: The dollar bill should now look like this.
Step 28: Turn the dollar over.
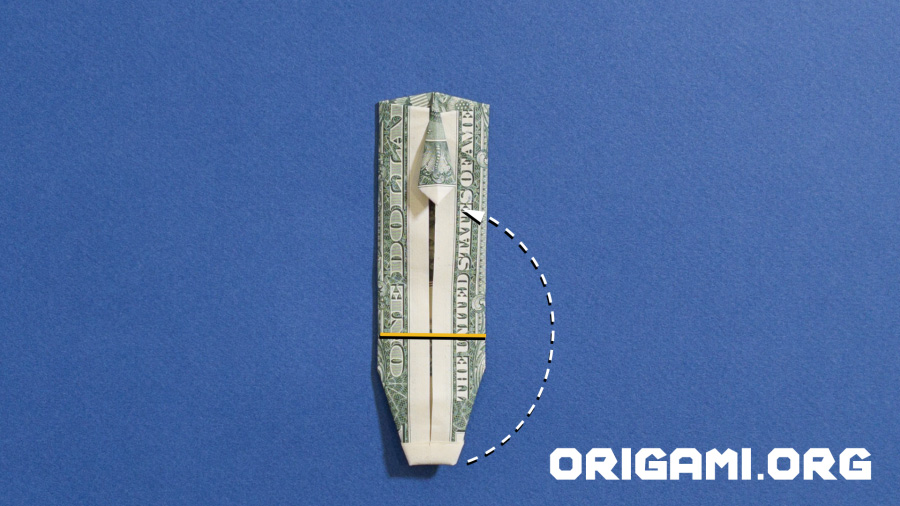
Step 29: Fold the bottom of the dollar bill upwards along the yellow line shown in the image.
Step 30: Fold the bottom of the the dollar bill upwards along the yellow line shown, so that the collar just touches the bottom tip of the tie.
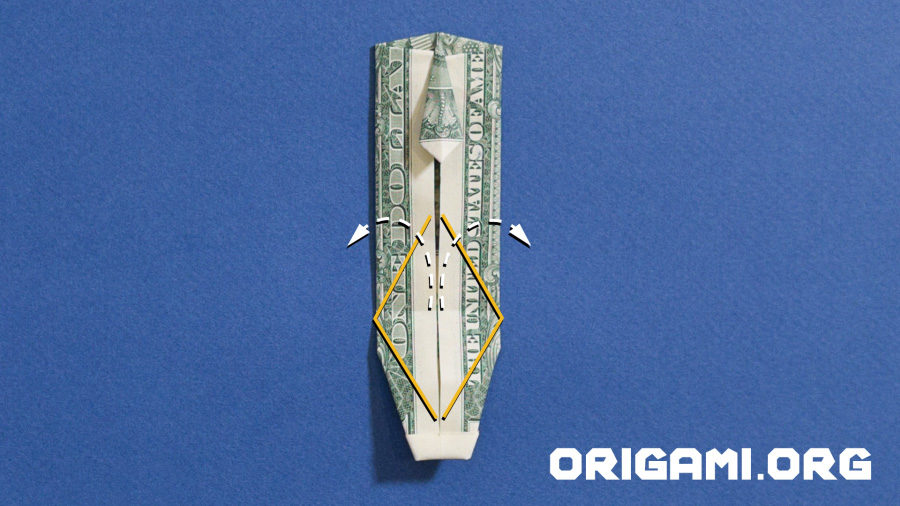
Step 31: Now fold it back down and open the centre fold where the two fold lines cross.
Step 32: Your dollar bill should look like this now. Note the diamond shape in the middle.
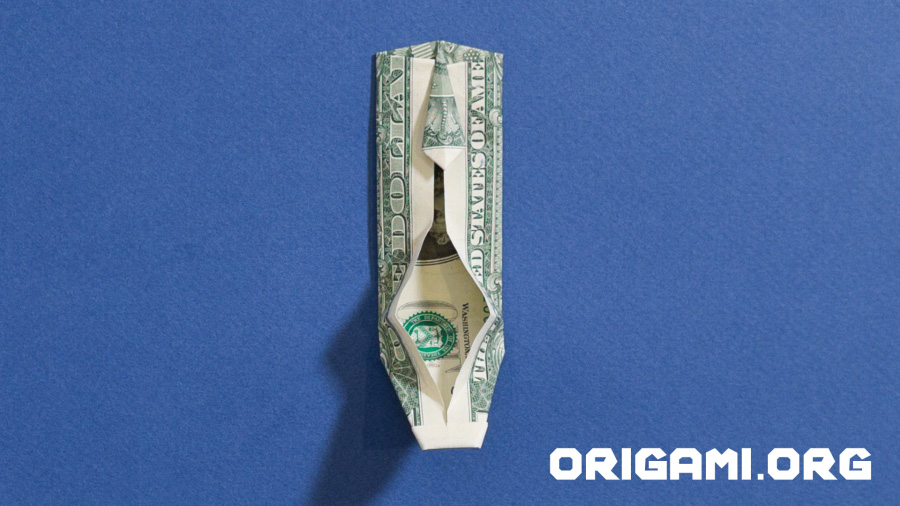
Step 33: Widen the diamond shape and fold the bottom edge up to the bottom of the tie.
see next steps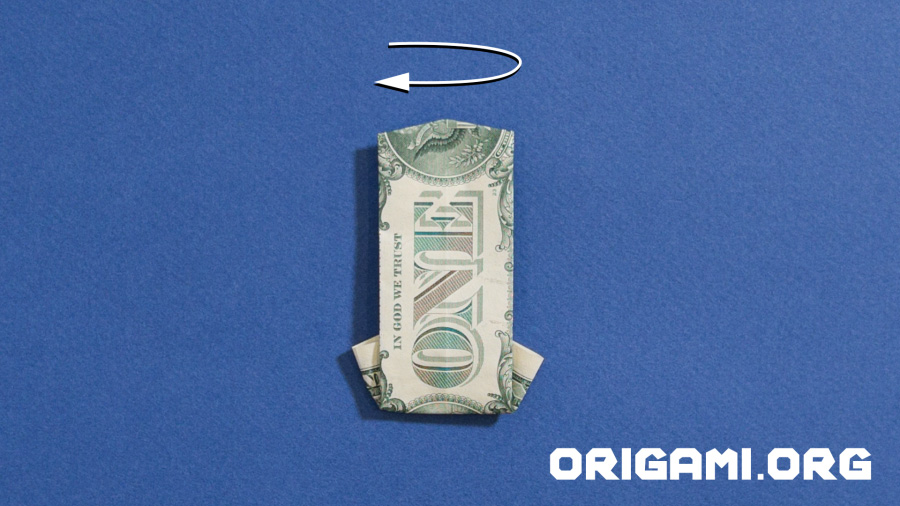
Step 34: Turn the dollar bill over.
Step 35: Fold the bottom edge up to the top along the yellow line shown.
Step 36: Your dollar bill should now look like this.
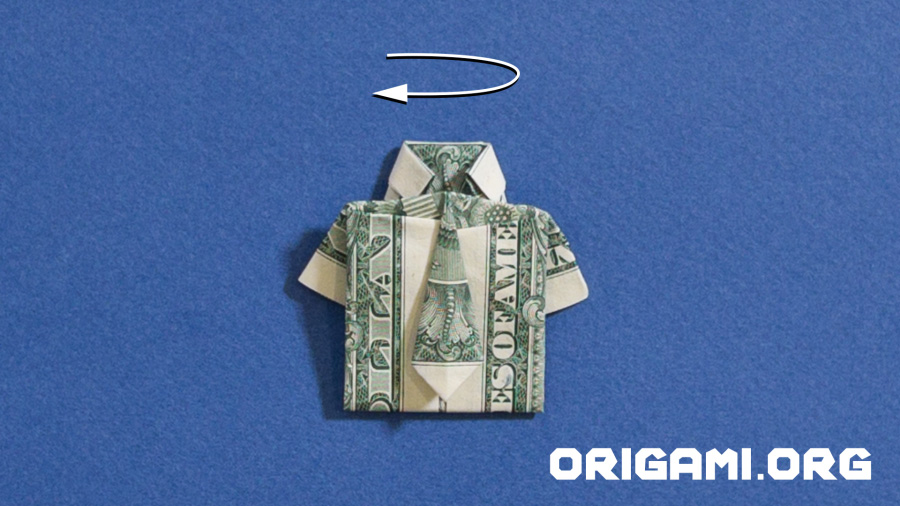
Step 37: Turn it over.
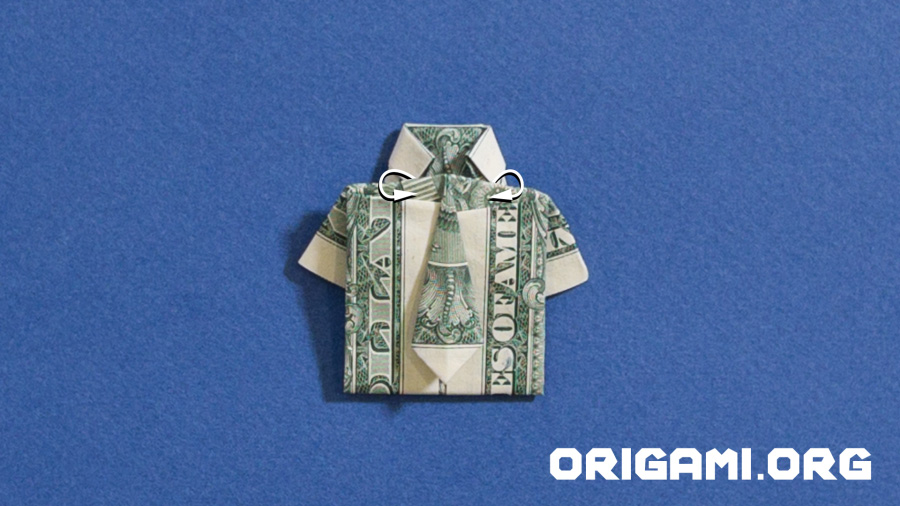
Step 38:
Step 39:


