Origami Jumping Frog
Difficulty: Easy
Welcome to the world of origami, where the art of paper folding meets the joy of play! In this set of instructions, we will guide you through the creation of a delightful origami jumping frog, a simple yet entertaining paper creation that can provide hours of amusement. Origami, which originated in Japan, is not only a fantastic way to exercise your creativity but also an excellent way to enhance your fine motor skills and patience.
The jumping frog is a classic origami model that is loved by people of all ages. With just a square piece of paper and a few precise folds, you’ll transform this static sheet into a spring-loaded amphibian ready to leap into action. As you fold, you’ll discover the magic of origami, where a flat surface can be transformed into a three-dimensional masterpiece with a series of precise maneuvers.
Whether you’re new to origami or an experienced folder, these step-by-step instructions will walk you through the process with clear and concise directions. So, grab a piece of paper and let’s embark on a folding adventure together! Get ready to fold, hop, and have a ribbit-ing good time with your very own origami jumping frog!
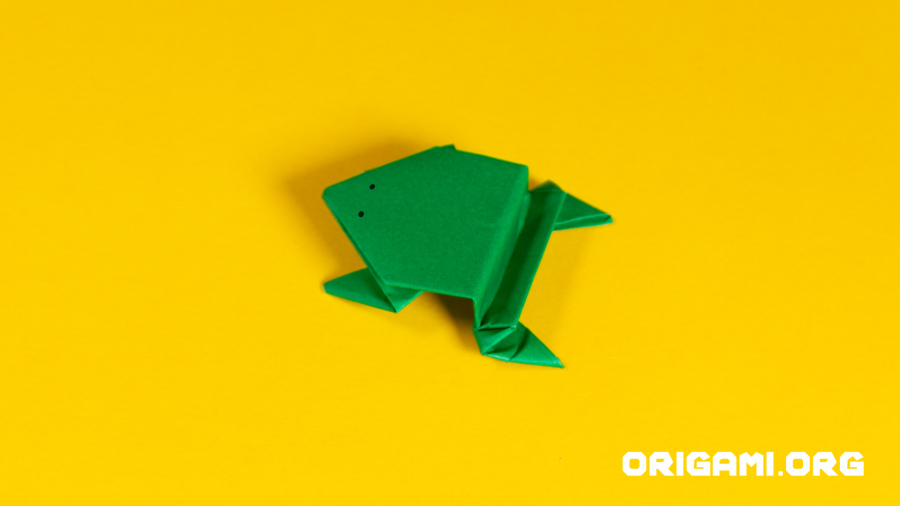
Just look at this cute origami frog that actually jumps! Make your very own amphibian by following our easy step by step instructions.

Step 1: Start with a square piece of origami paper in any frog colour you fancy!
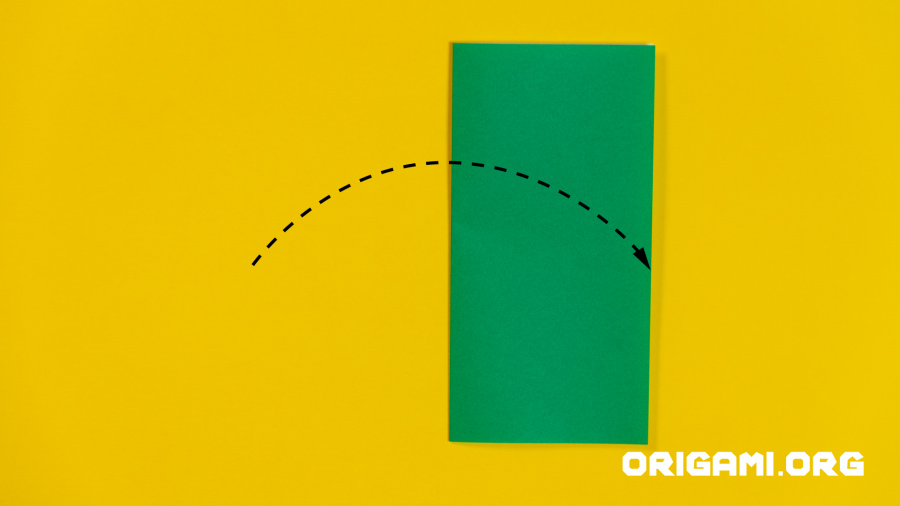
Step 2: Fold the paper in half vertically, bringing the left side over to meet the right side
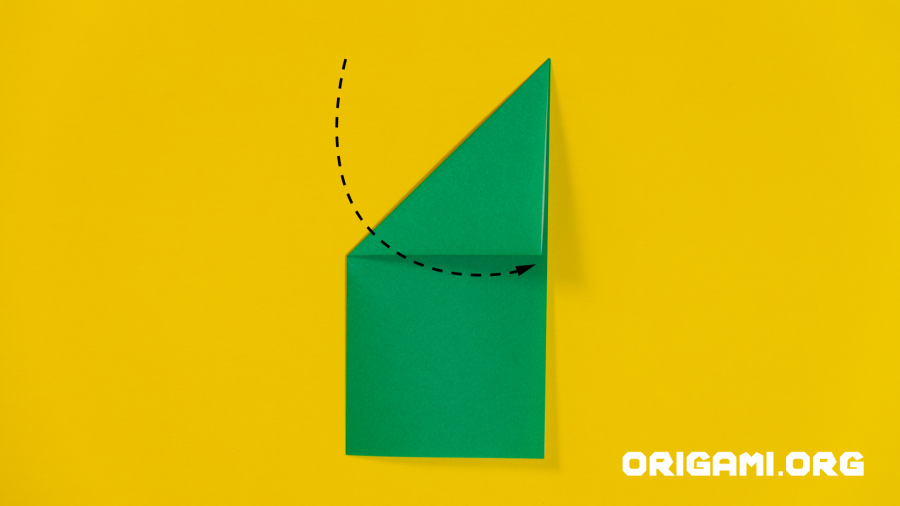
Step 3: Fold the top left corner down to meet the right side
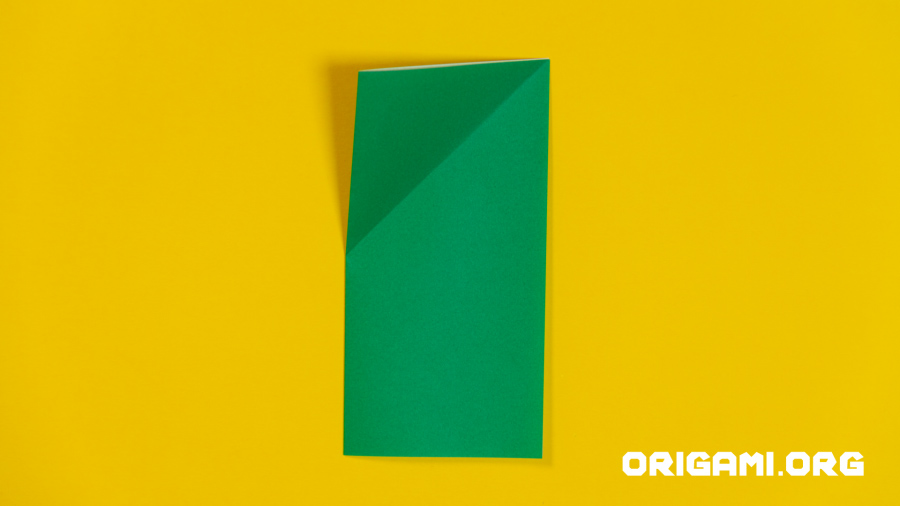
Step 4: Unfold the last crease

Step 5: Fold the top right corner down to meet the left side
Step 6: Unfold the last crease

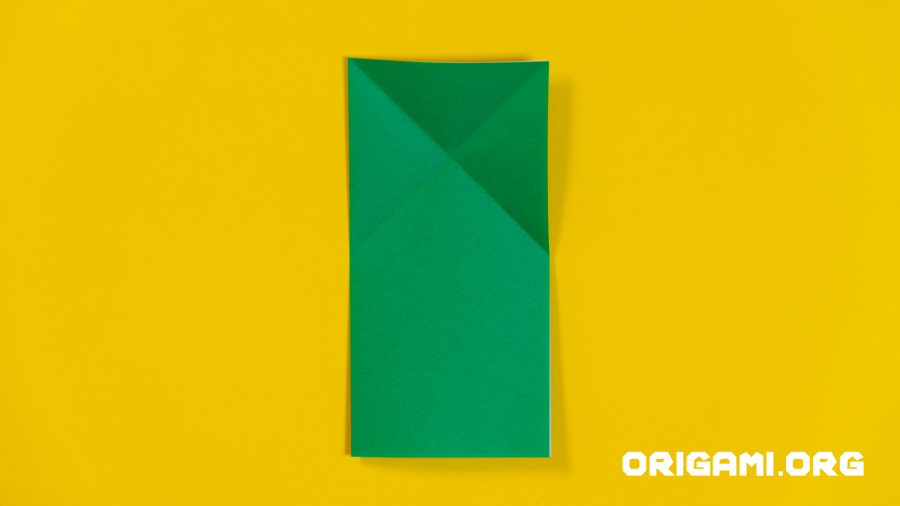
Step 7: Fold the top section backwards and fold where the crease lines cross over
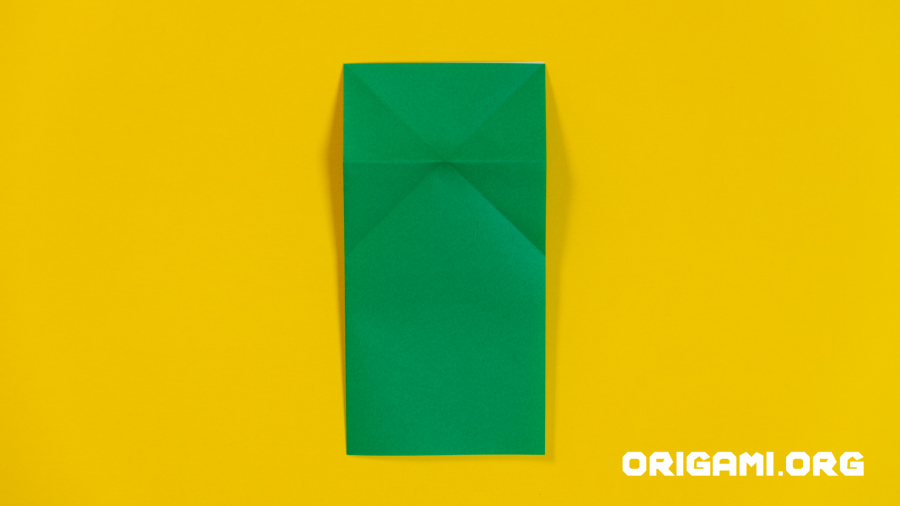
Step 8: Unfold the last crease
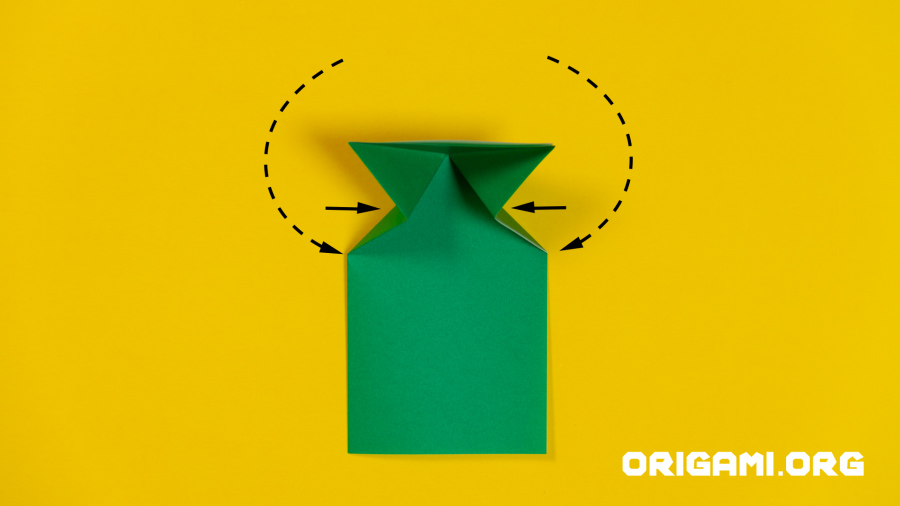
Step 9: Press the sides inwards where shown and the top should start folding downwards. Press down so the top forms a triangle shape

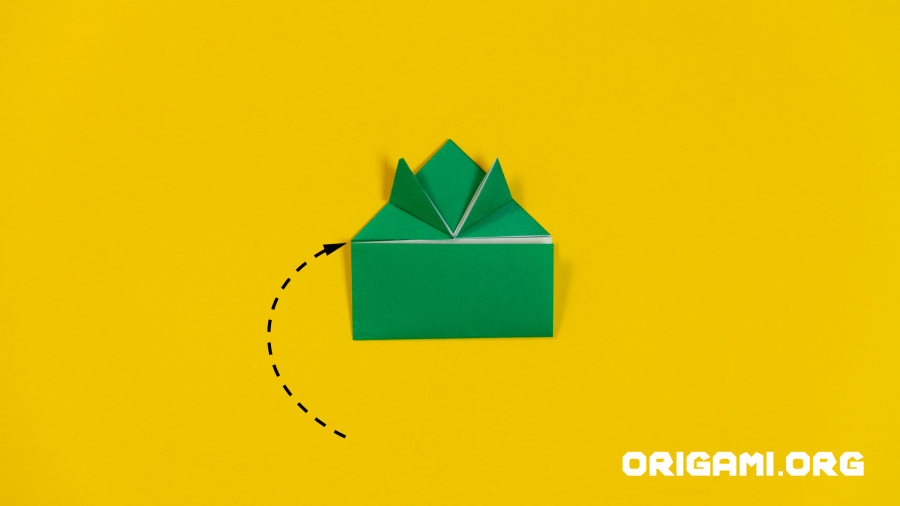
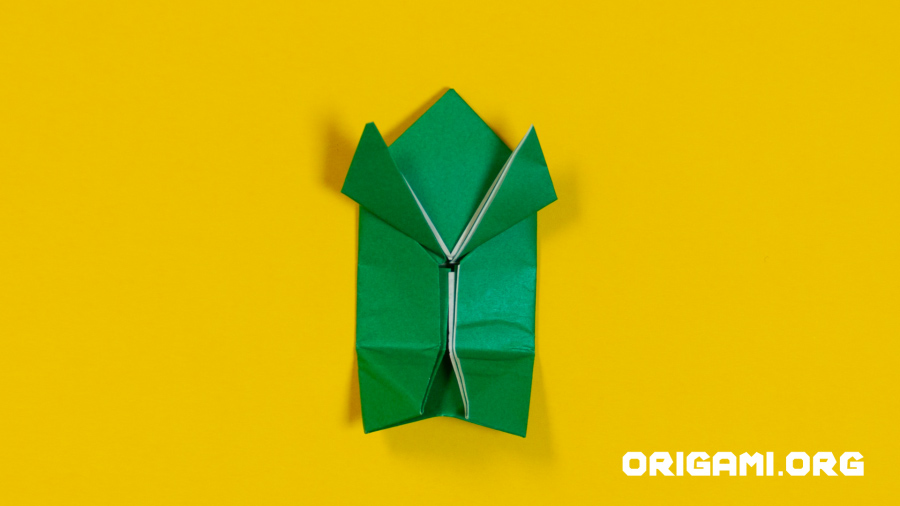
Step 10: Your paper should now look like this

Step 11: Fold the left and right corners of the triangle upwards until they meet the top point
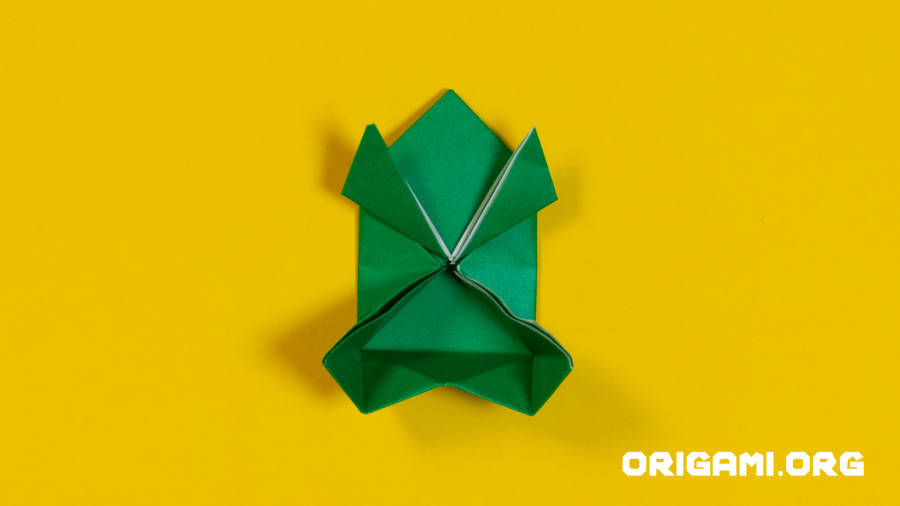
Step 12: Fold the bottom of the paper up to meet the bottom edge of the triangle
Step 13: Fold the left and right sides in to meet in the centre
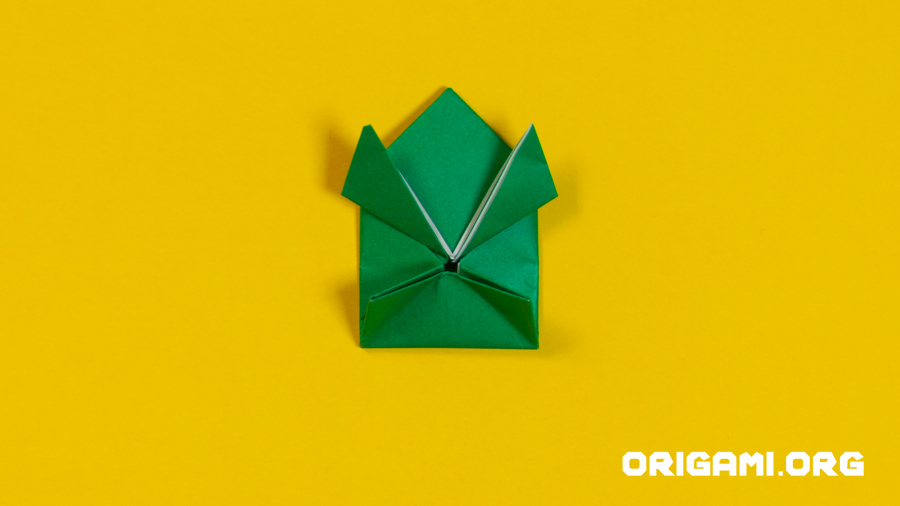
Step 14: Repeat step 12 by folding the bottom of the paper up to meet the bottom edge of the triangles
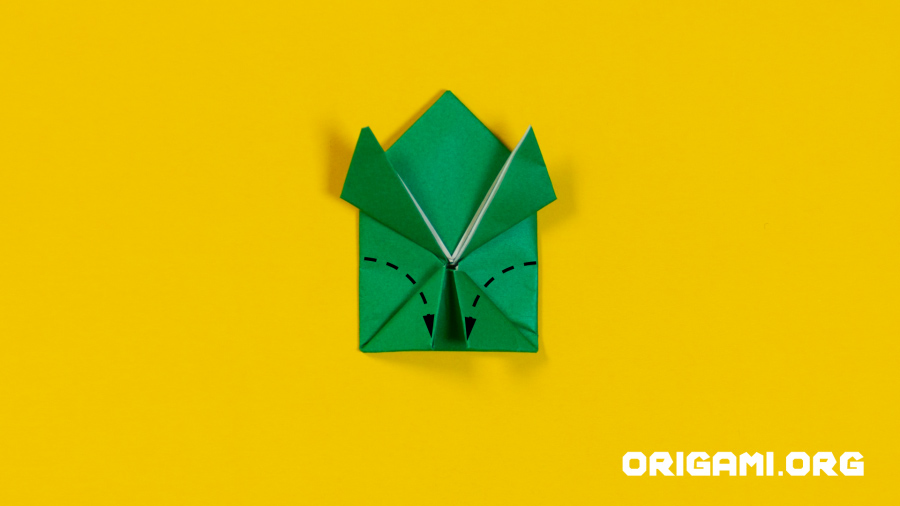
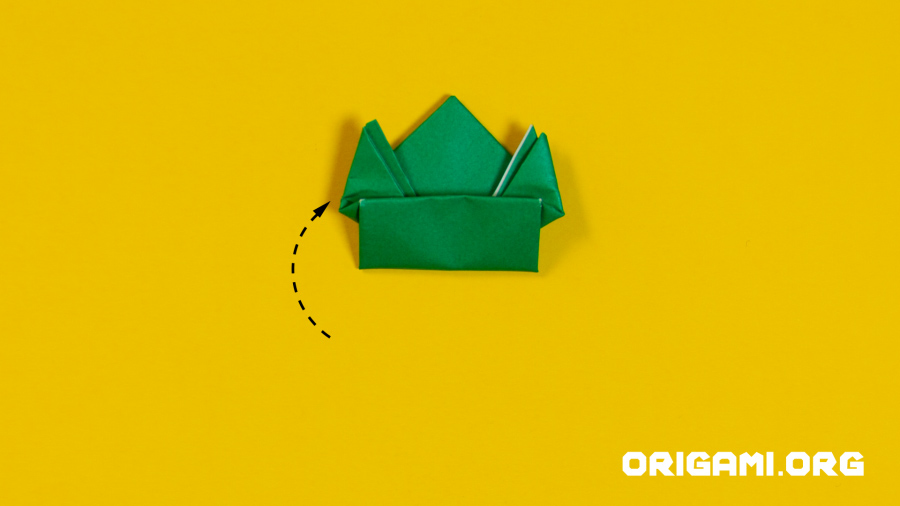
Step 15: Fold the left and right inner corners down to meet in the centre
Step 16: Unfold these new folds slightly
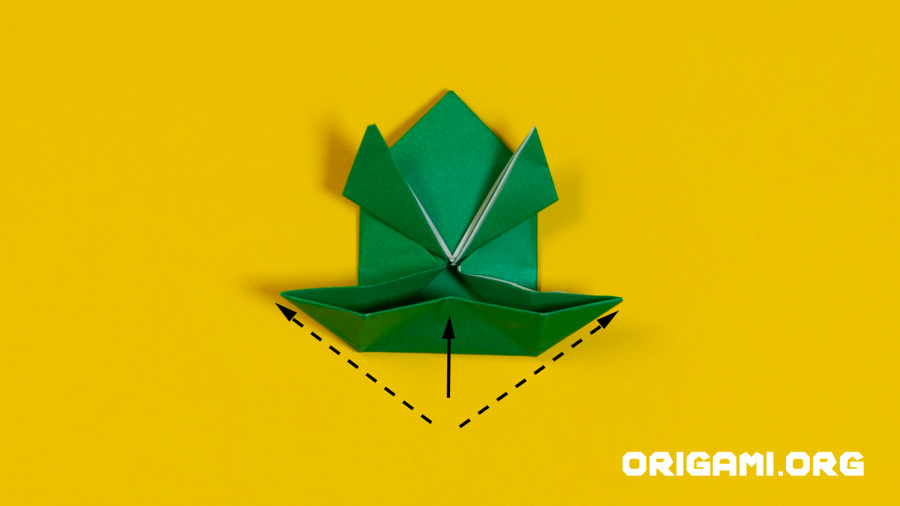
Step 17: Unfold the bottom folds
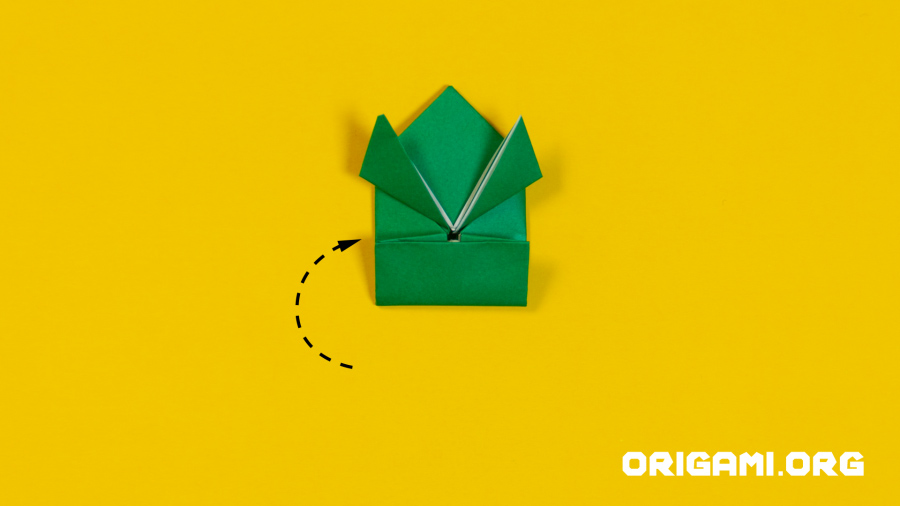
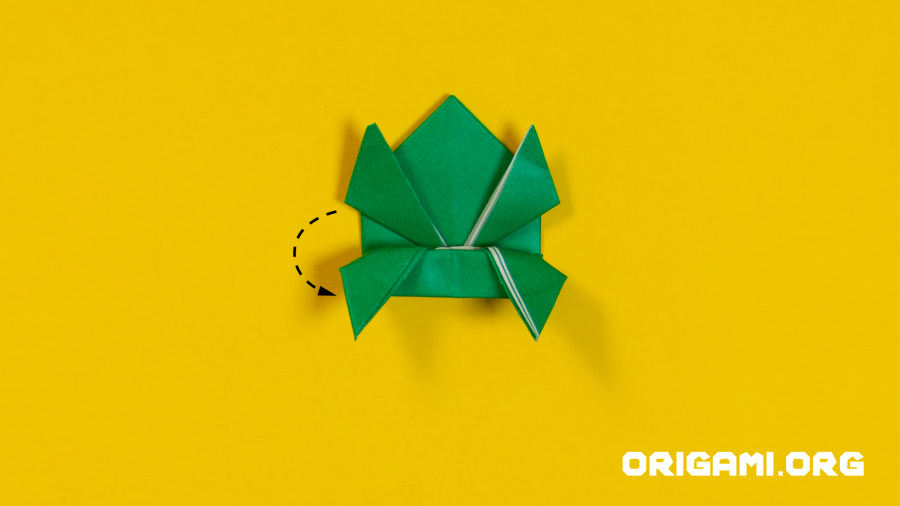
Step 18: Lift the top layer of paper upwards and outwards
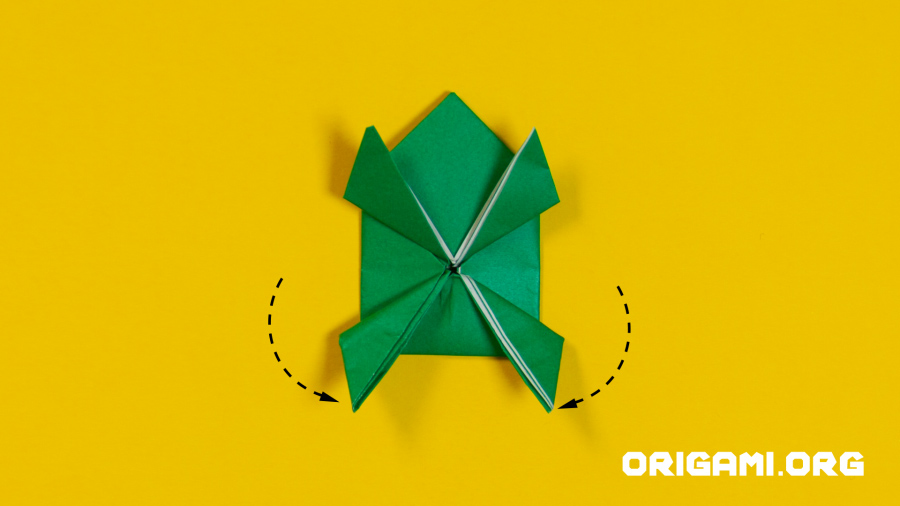
Step 19: Pull the left and right sides outwards whilst pushing the inside upwards
Step 20: Fold the left and right points downwards towards the centre
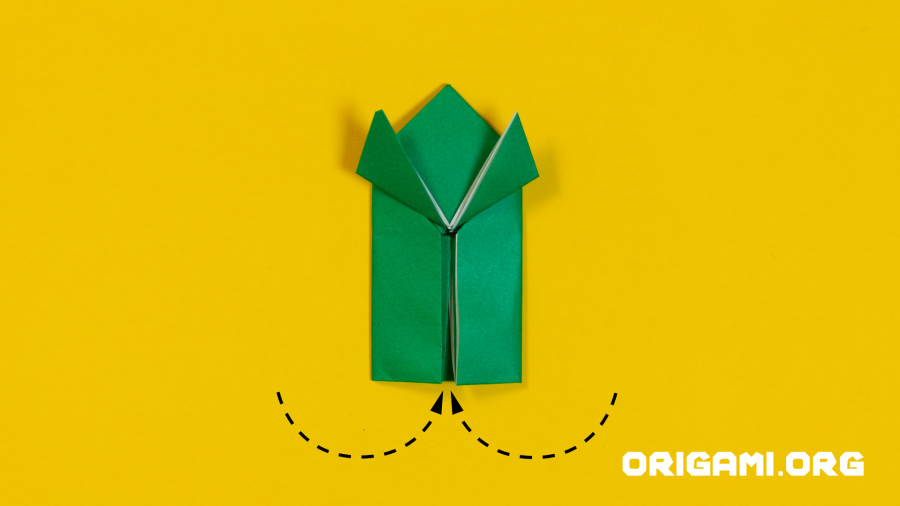
Step 21: Fold the bottom of the paper upwards
Step 22: Fold the bottom part back down on itself to create the frog’s back legs

Step 23: Turn your frog over and add some eyes!
To make your frog jump simply press down on it’s bottom and pull your finger slightly backwards, when you release your finger your frog will hop away!


