Origami Boat
Difficulty: Easy
Ahoy, aspiring paper crafters! Prepare to set sail on a creative journey as we delve into the delightful art of origami and embark on a nautical adventure with these instructions for making an origami boat.
Origami, a traditional Japanese art form, is a fascinating blend of simplicity and precision, where a single sheet of paper is transformed into intricate shapes through the magic of folding. In this guide, we’ll explore the joy of crafting an origami boat, a timeless symbol of exploration and adventure. Whether you’re new to origami or a seasoned paper-folding enthusiast, you’ll find this project both enjoyable and rewarding.
Origami boats are not just charming in their simplicity; they also carry a sense of wanderlust and curiosity. As you fold the paper and bring your boat to life, you’ll be reminded of the endless possibilities and journeys that await you.
These step-by-step instructions will provide you with a clear and easy-to-follow path to create your very own origami boat. Once completed, your miniature paper vessel can serve as a lovely decoration, a thoughtful gift, or a playful addition to your creative repertoire.
So, grab a square piece of paper, prepare to navigate the folds, and let’s sail away into the world of origami with the construction of a charming paper boat!
Not only does this origami boat look super cute, but it floats too! Why not have sailing races or see how much weight they can carry?
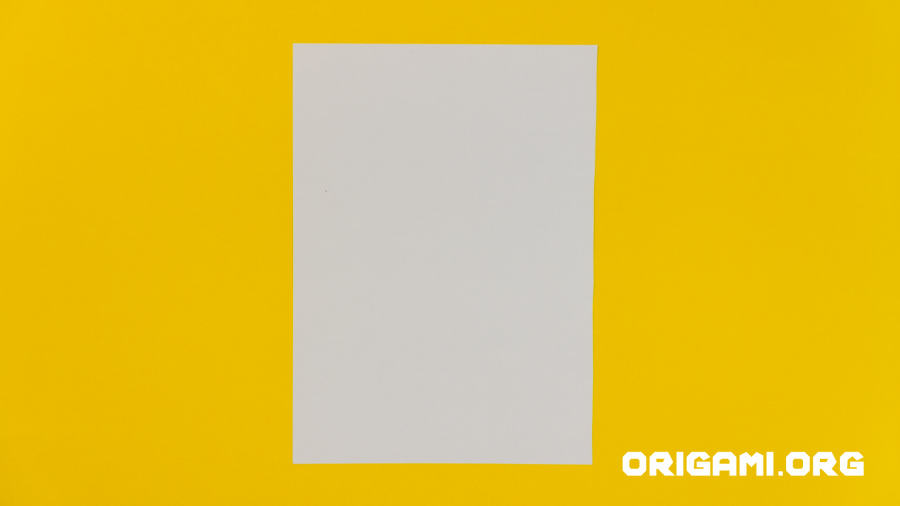
Step 1: Start with a rectangular piece of origami paper placed in portrait position. We’re using single sided paper which will result in a sail in a different colour to the hull.
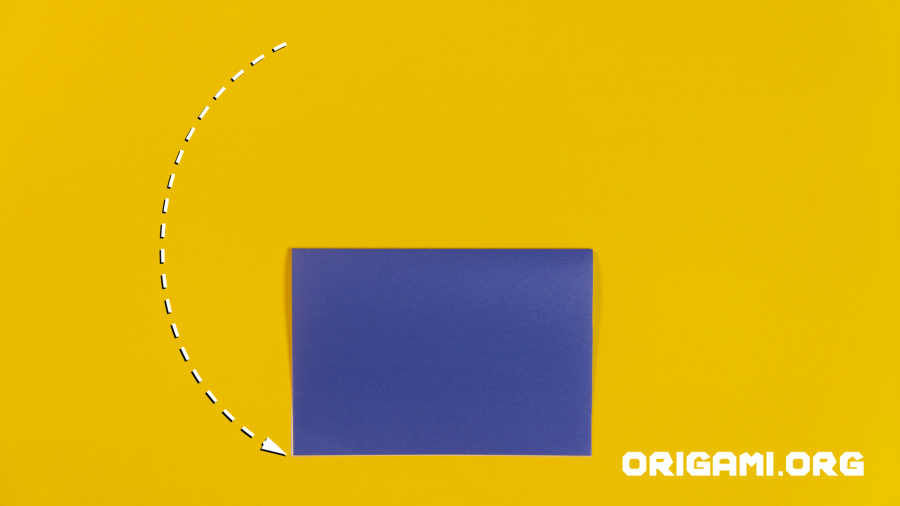
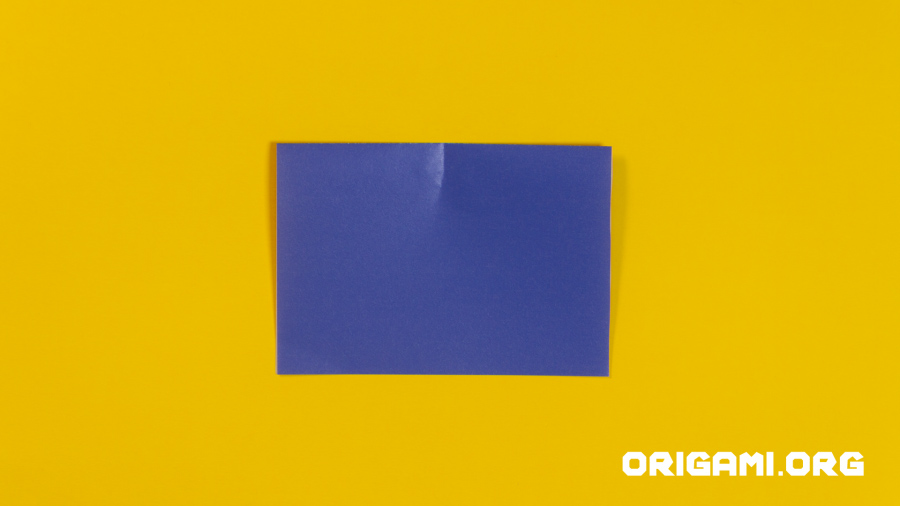
Step 2: Fold the paper in half horizontally, bringing the top down to meet the bottom

Step 3: Fold the paper in half vertically, bringing the left side over to meet the right. Make sure you only crease the very top section of this fold!
Step 4: Unfold the paper
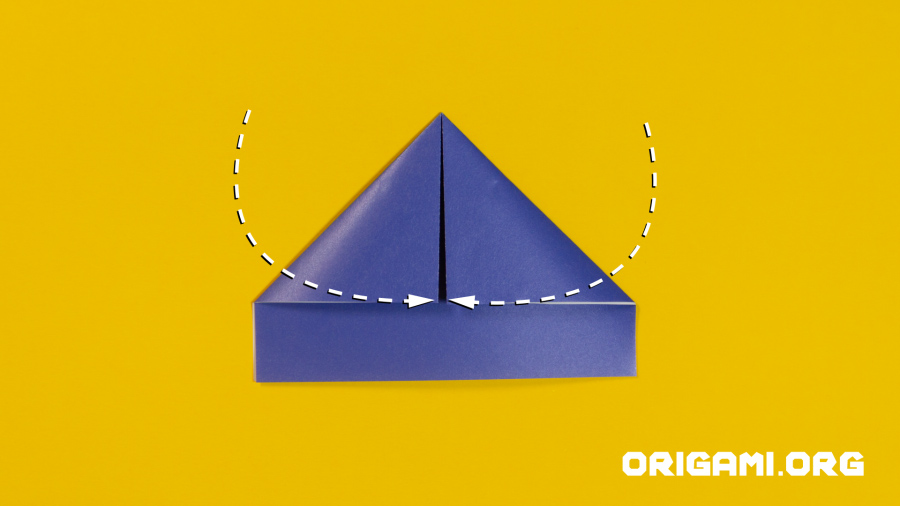
Step 5: Fold the two top coners down to meet in the centre
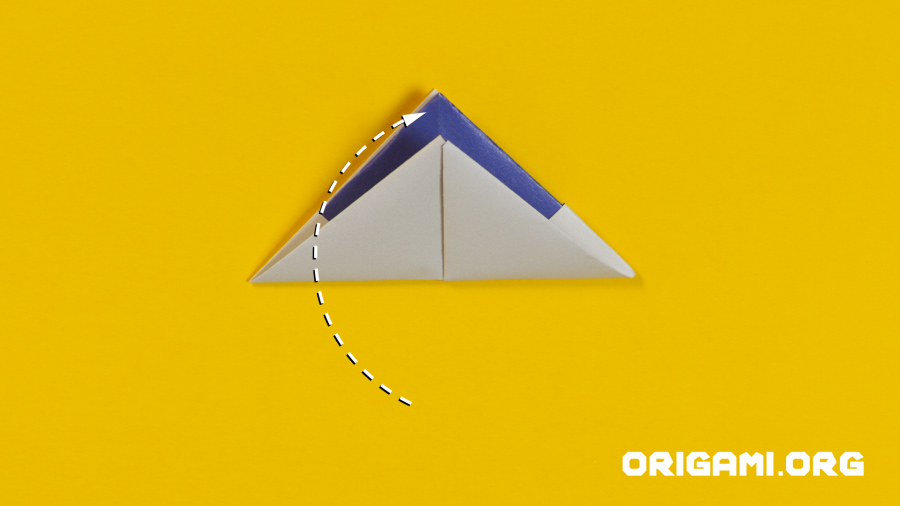
Step 6: Fold the top layer of paper upwards

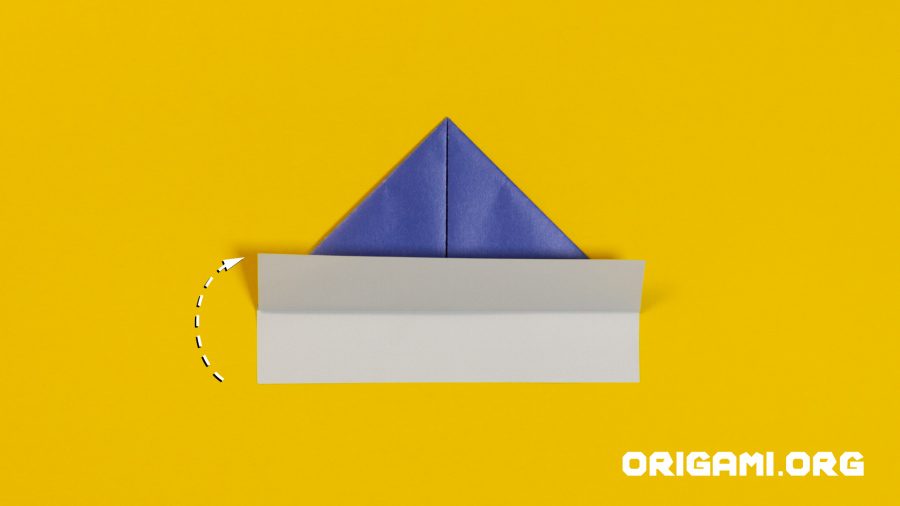
Step 7: Turn the boat around
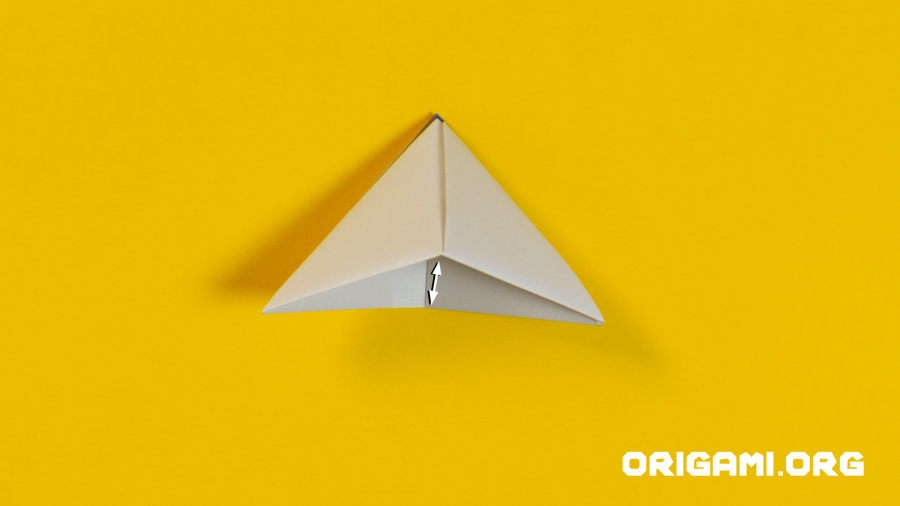
Step 8: Repeat step 6, folding the bottom layer of paper upwards
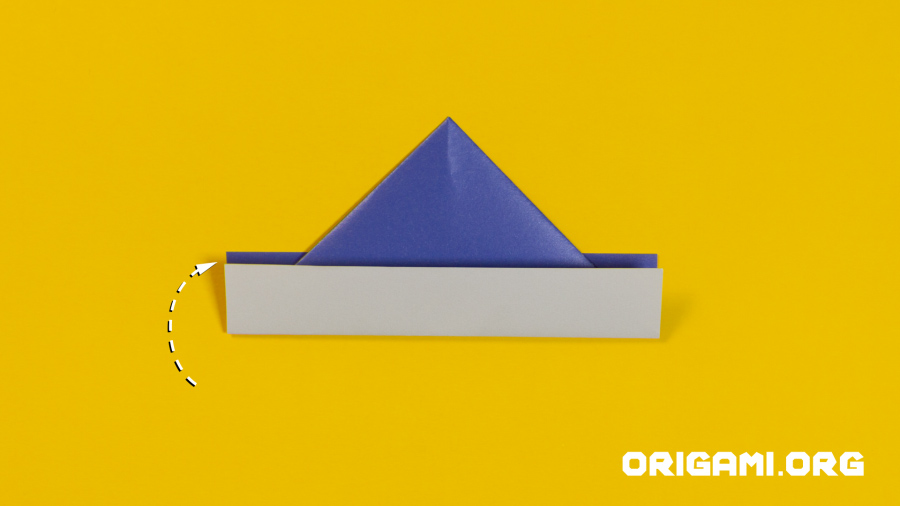
Step 9: Open up the inside of the boat
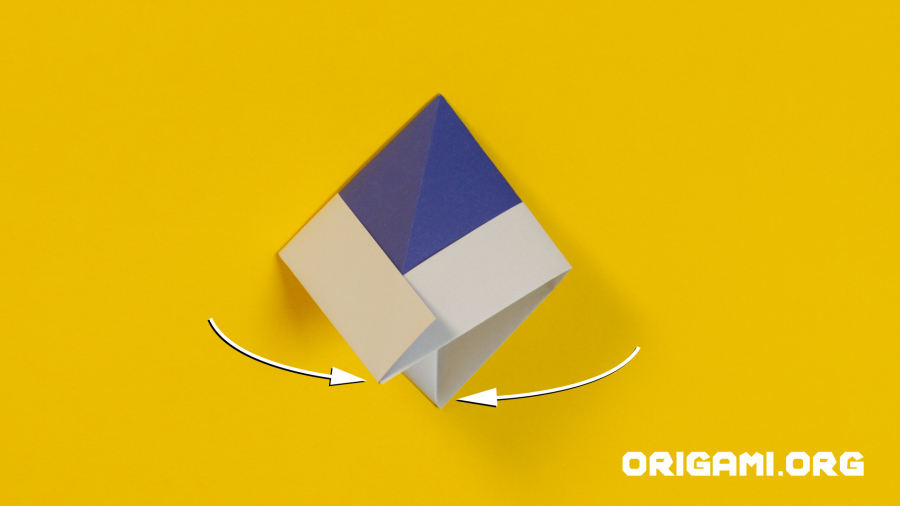
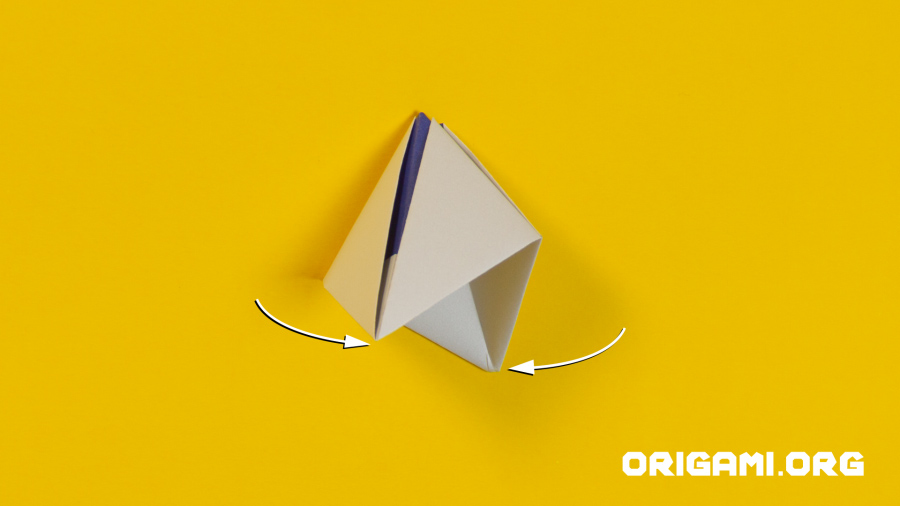
Step 10: As you widen the boat, ensure the ends fold underneath one another
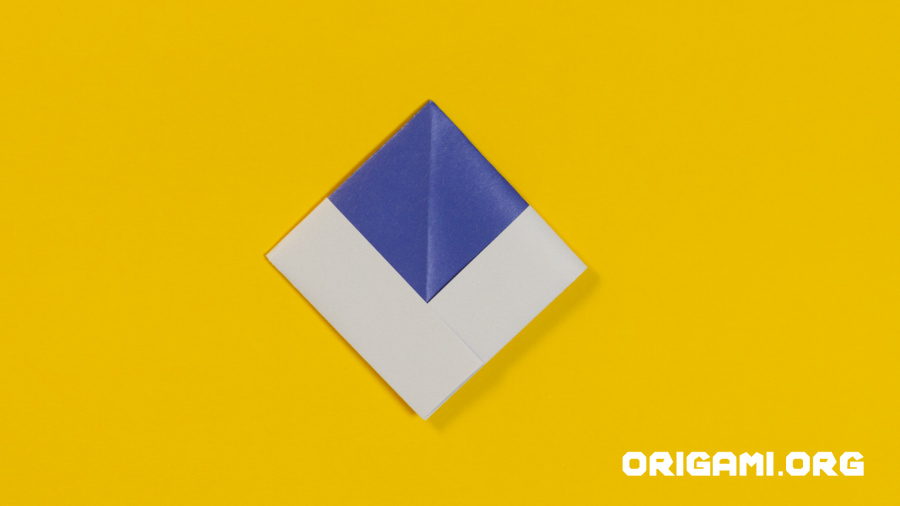
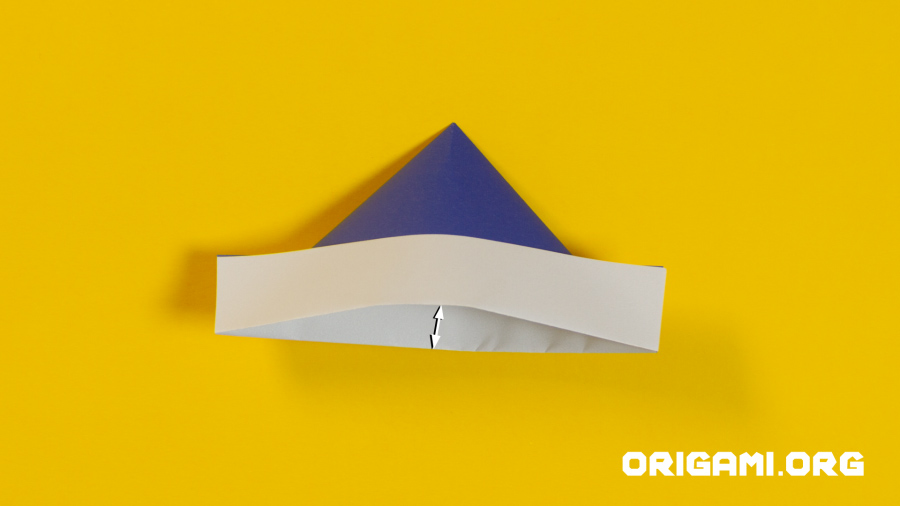
Step 11: Press down so your paper forms a diamond shape
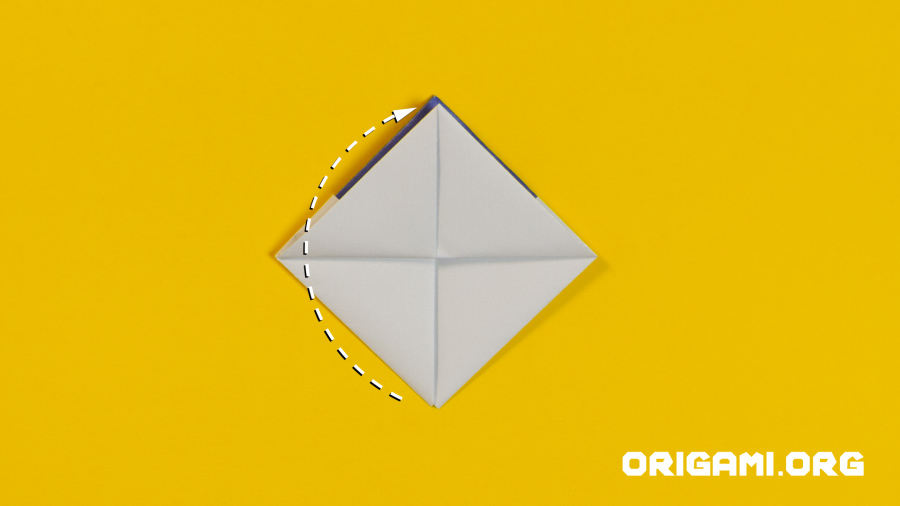
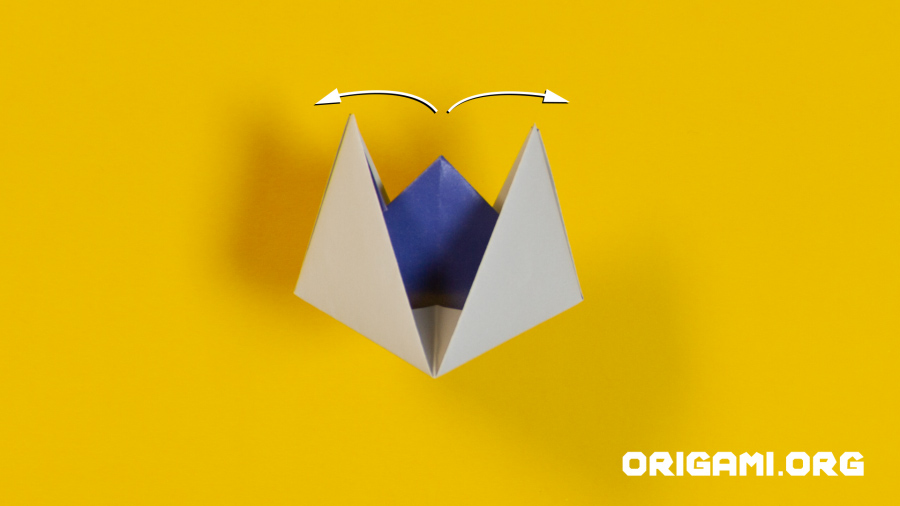
Step 12: Fold the top layer of paper upwards to meet the top point
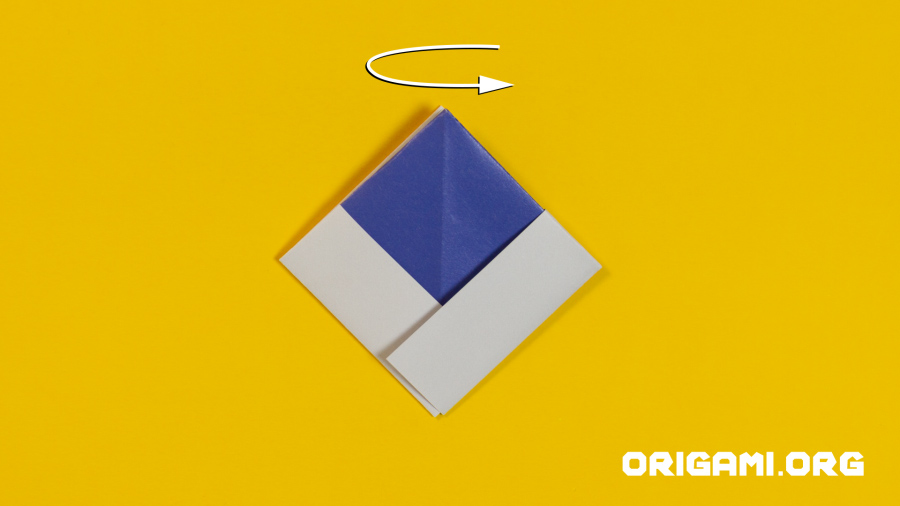
Step 13: Turn the paper around
Step 14: Repeat step 12 by folding the bottom layer of paper up to meet the top point
Step 15: Open up the inside of the boat
Step 16: As you open up the inside of the boat the two points will move together

Step 17: Press the two sides together so your boat looks like this
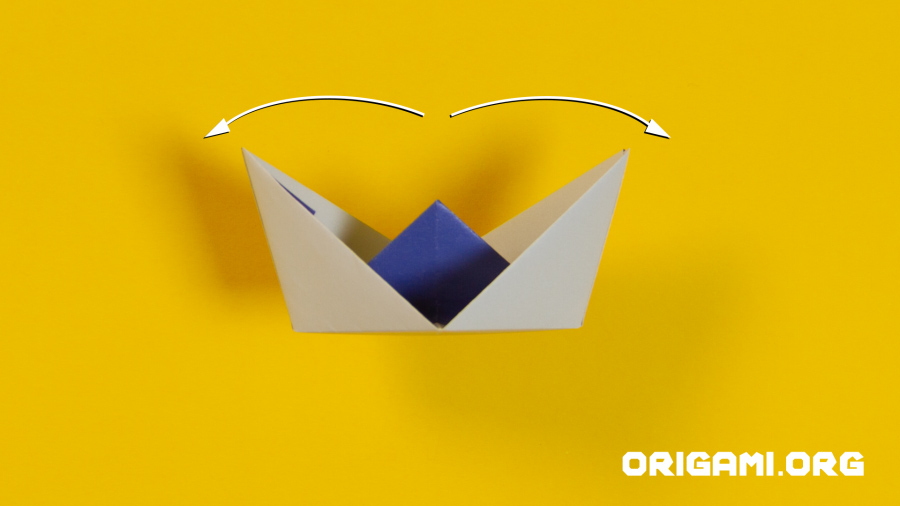
Step 18: Fold the top points away from each other and your boat will start unfolding!

Step 19: Keep unfolding!
Step 20: Your boat is starting to take shape now!
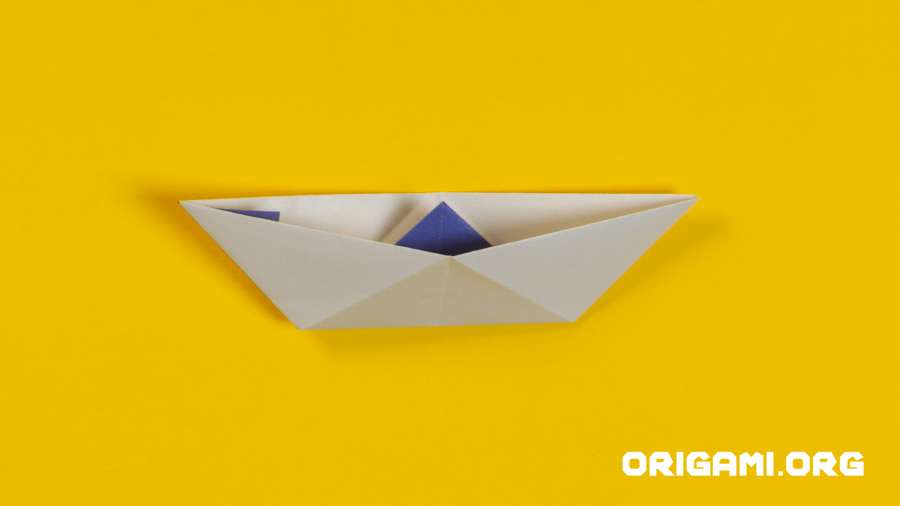
Step 21: Once fully unfolded your boat should look like this!
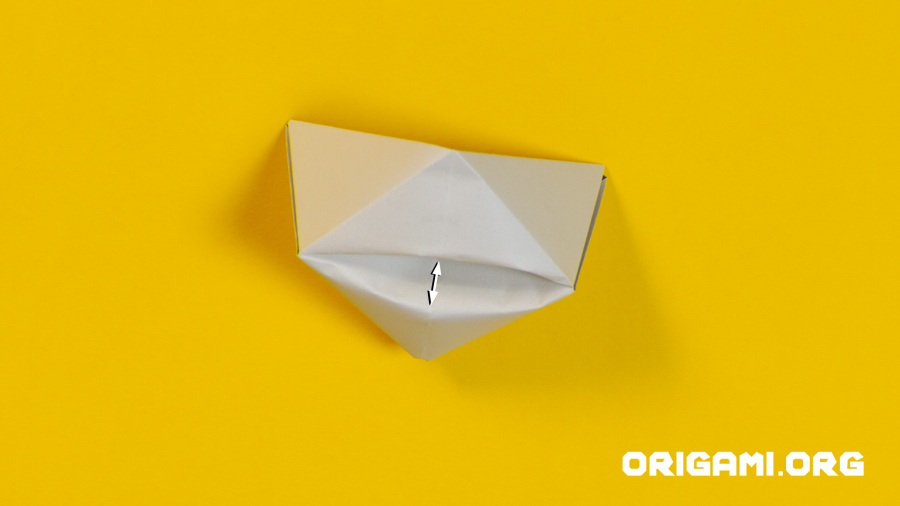
Step 22: Open up the underneath of your boat
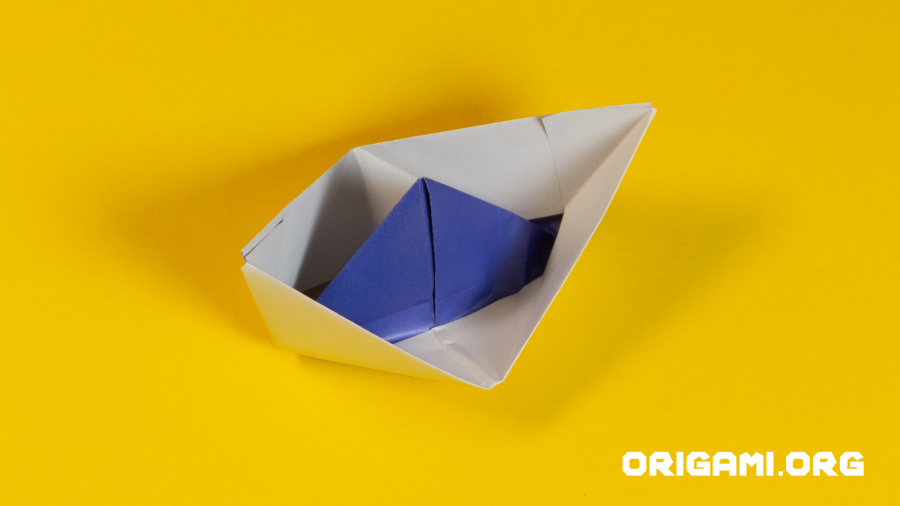
Turn your boat upright and it is now ready to set sail!


