Origami Yoda
These easy step-by-step instructions will show you how to make an origami Yoda – one of the most popular film characters in history. As you can see, this easy origami Yoda stands up by itself and is complete with robe. Don’t worry if you don’t get it right first time, after all…..
The greatest teacher, failure is.”
Yoda
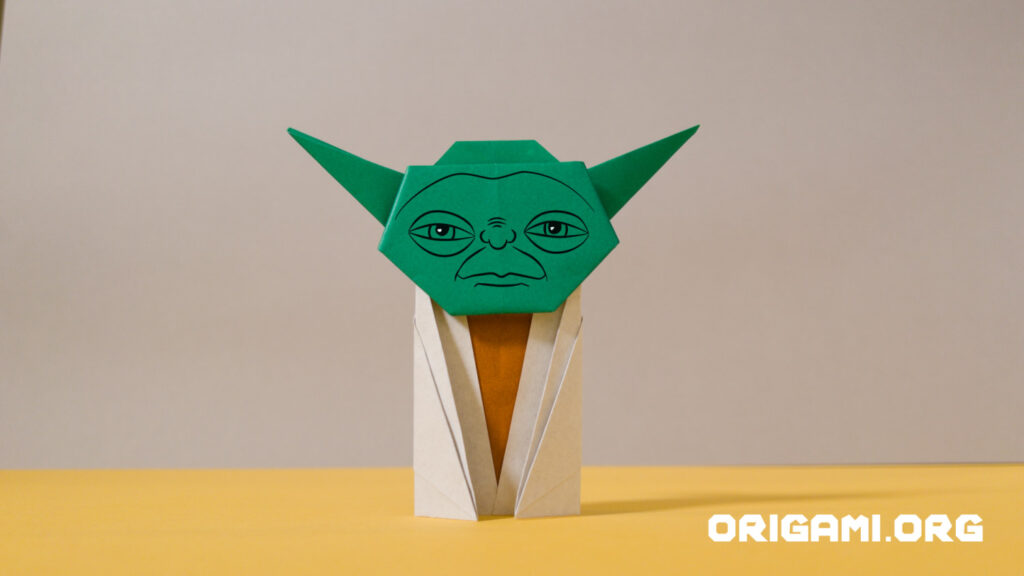
This is how your finished easy origami Yoda will look!
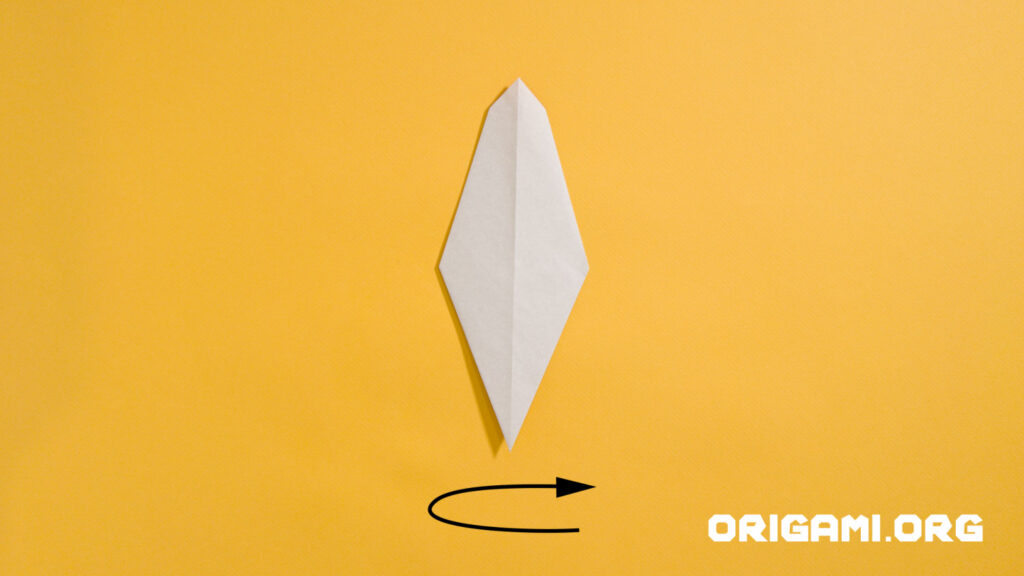
Step 1: Start with a square piece of origami paper.
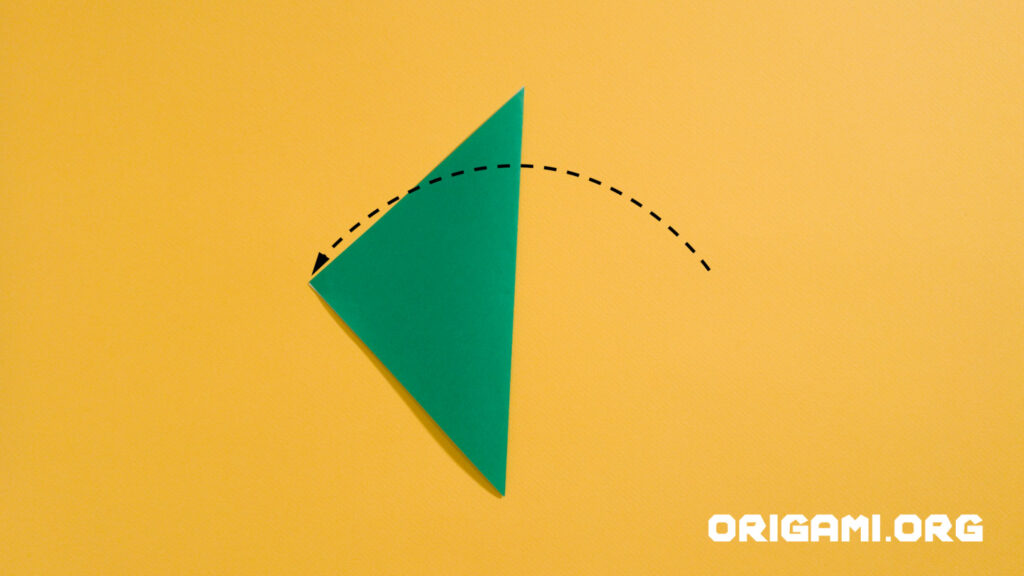
Step 2: Fold the right corner over to the left corner, creasing it firmly.
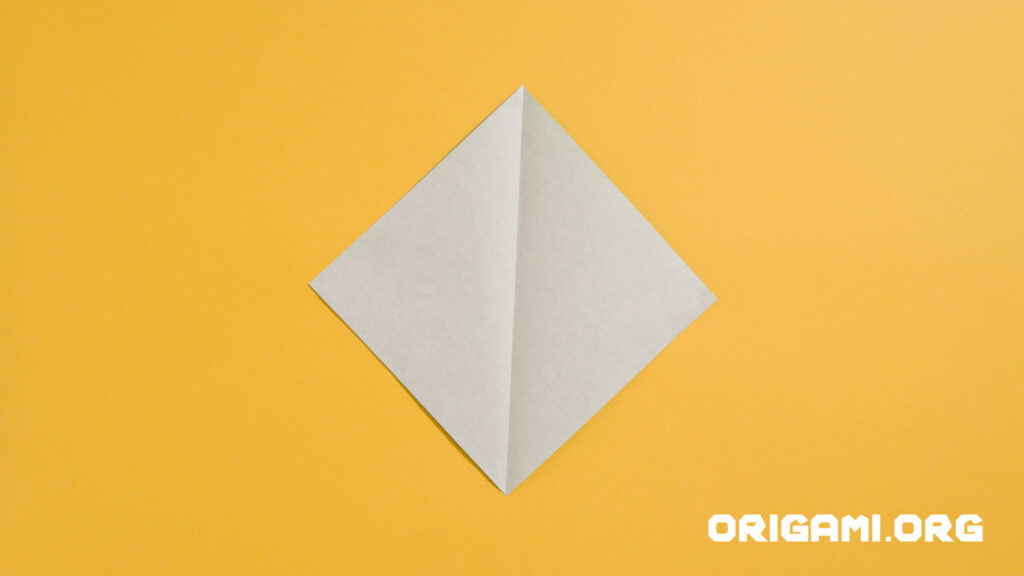
Step 3: Unfold the paper.

Step 4: Fold the bottom corner up to the top corner, again creasing the line firmly.

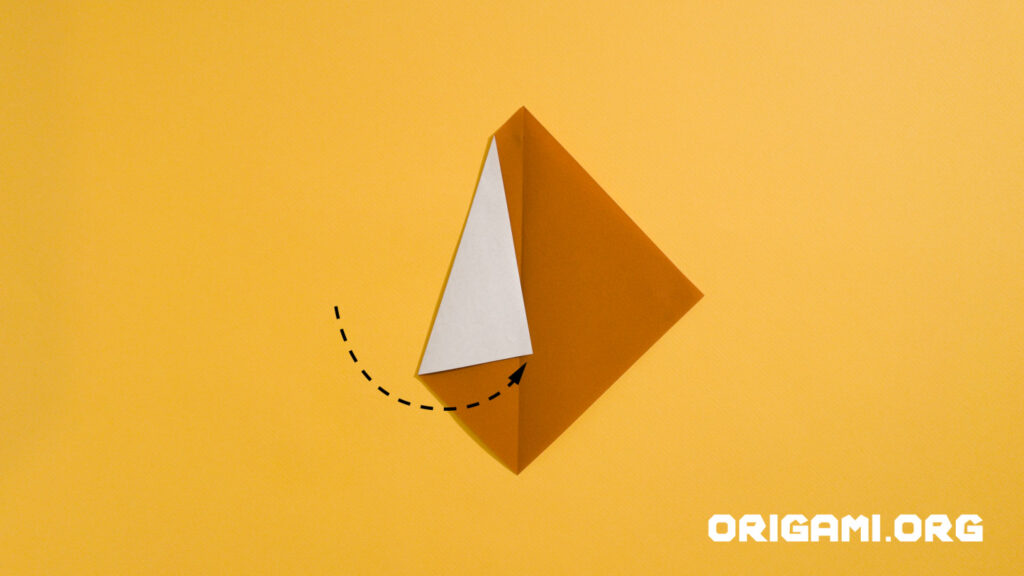
Step 5: Making sure you have both layers of the paper, fold the top corner down to the bottom edge.
Step 6: Take the top layer of the paper, and fold it up like this.
Step 7: Fold the top corner down just a little.
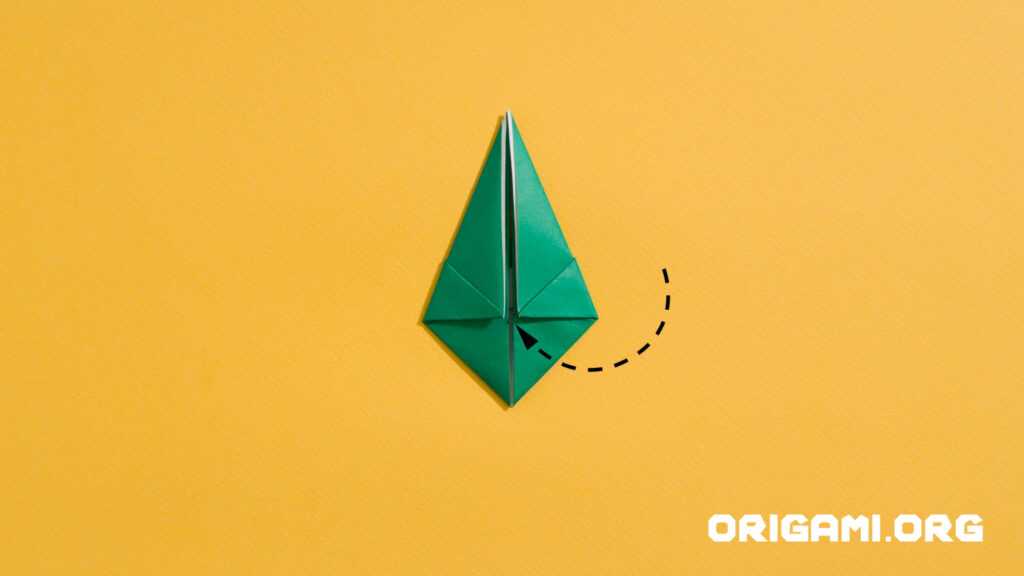
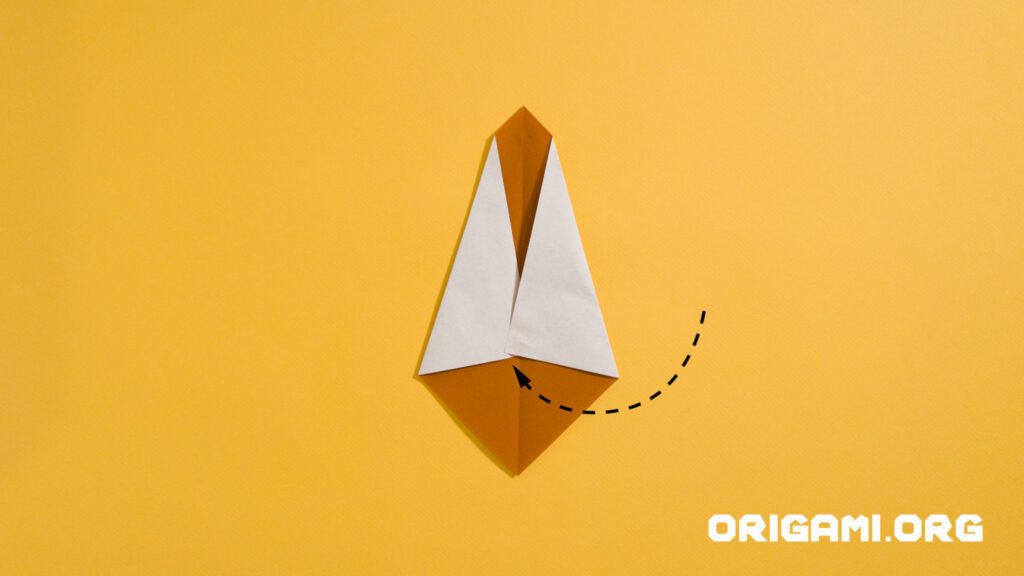
Step 8: Take the left hand corner and fold it up like this towards the centre, making an angle of 90 degrees.
Step 9: Then do the same with the right hand corner, making a square.
Step 10: Fold the top edge to the centre line
Step 11: Fold the right edge to the centre.
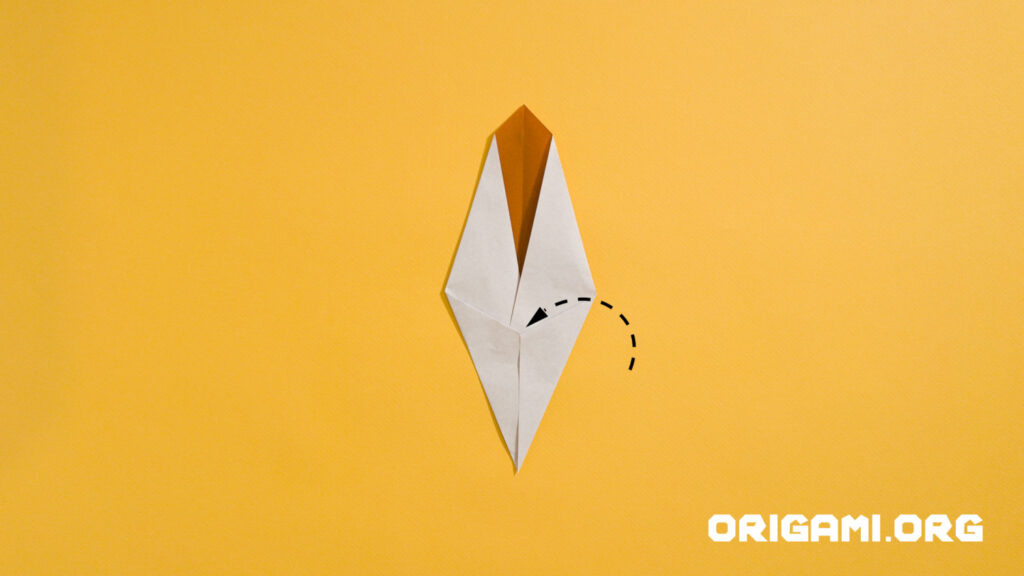
Step 12: Fold the top left corner down to the left hand side.
Step 13: Fold the top right corner down to the right hand side like this
see next steps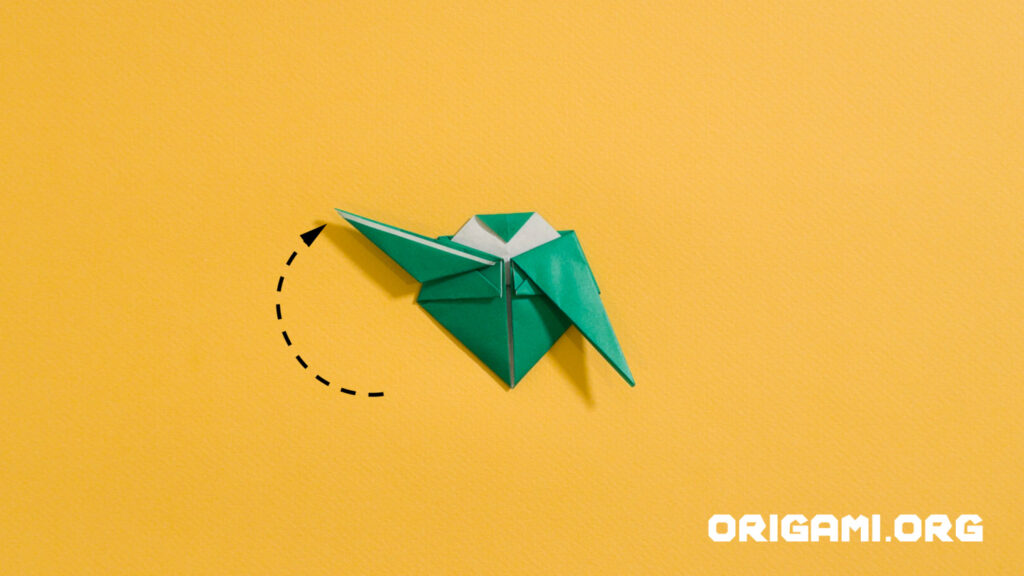
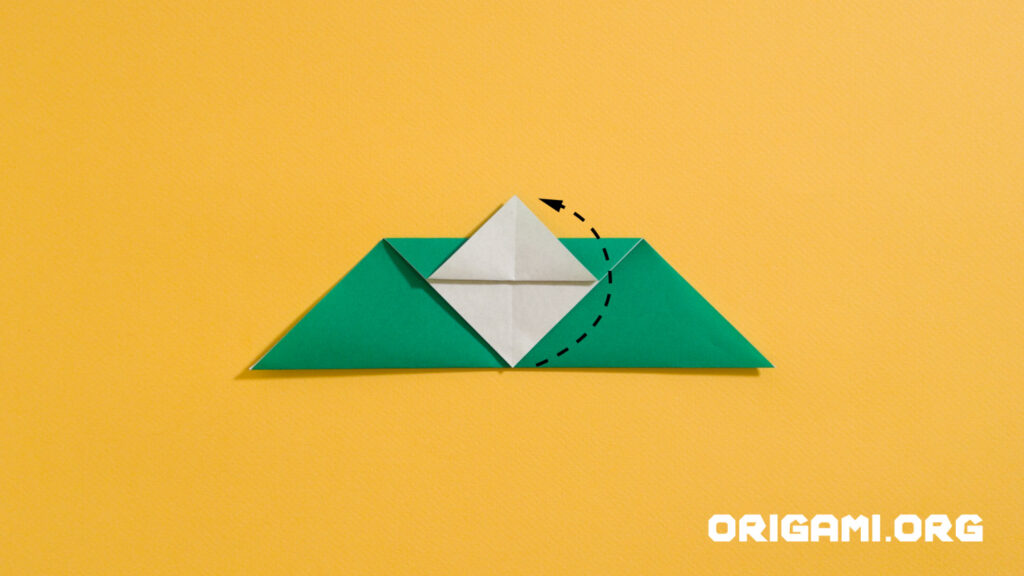
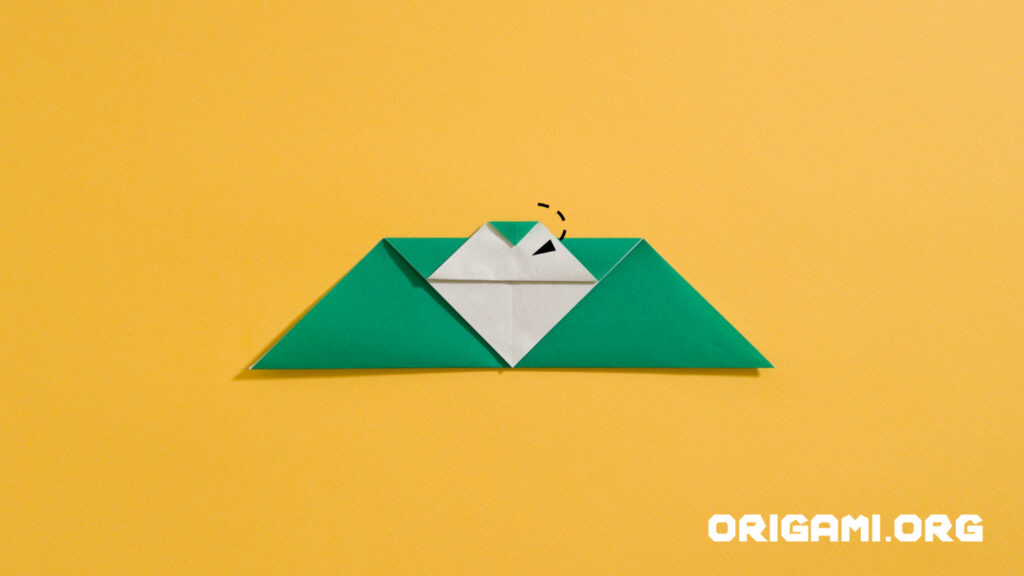
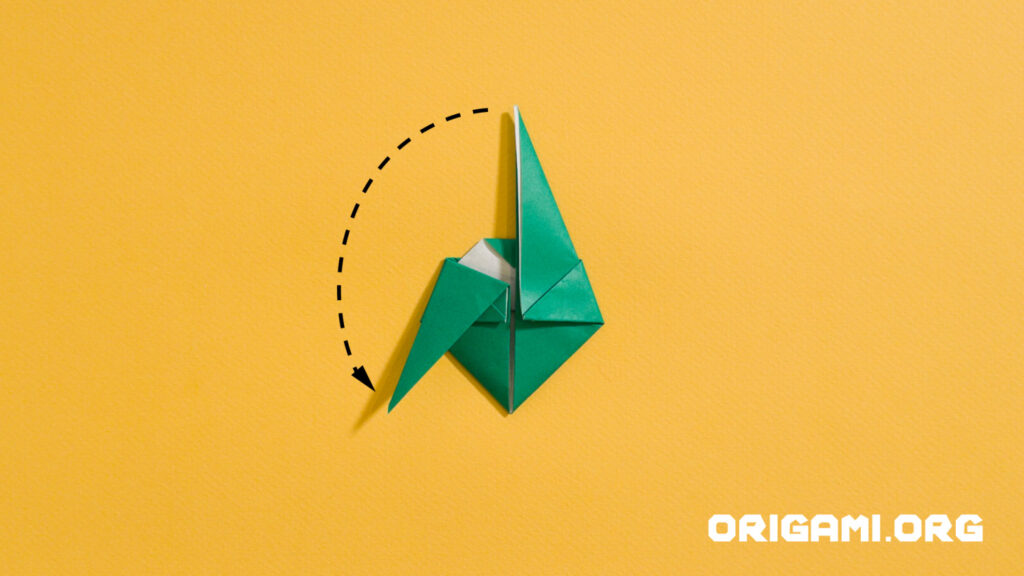
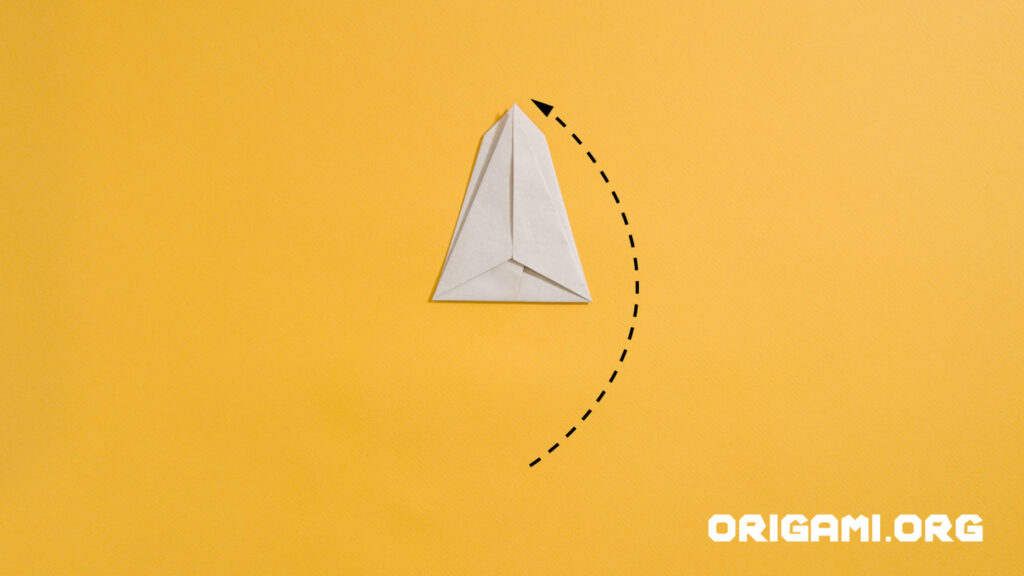
Step 14: Take the point from the left hand side and fold it upwards like this to make Yoda’s left ear.
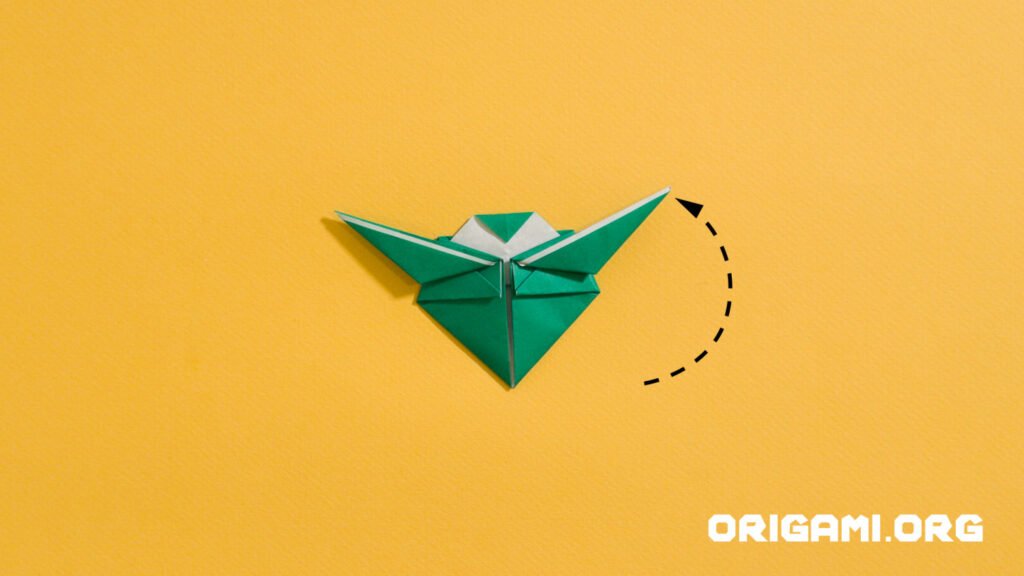
Step 15: And then do the same with the right hand side

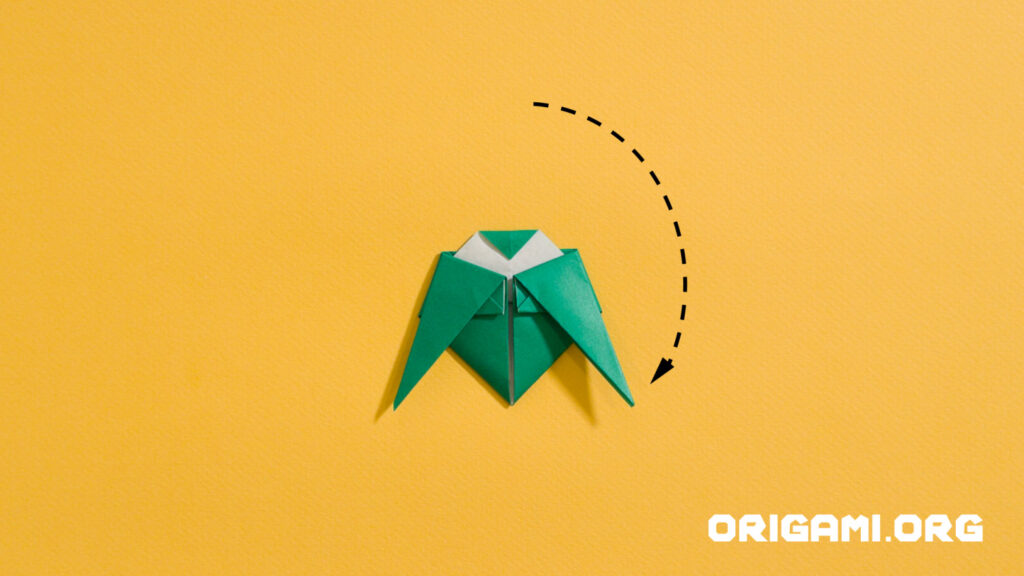
Step 16: Yoda doesn’t have a pointy chin! So fold up the point at the bottom just slightly to flatten it.
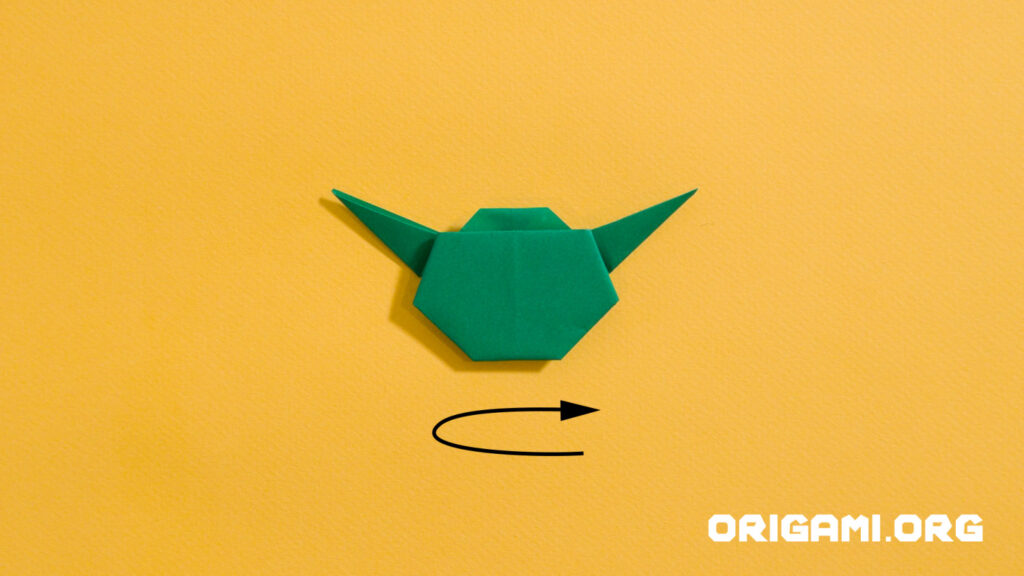
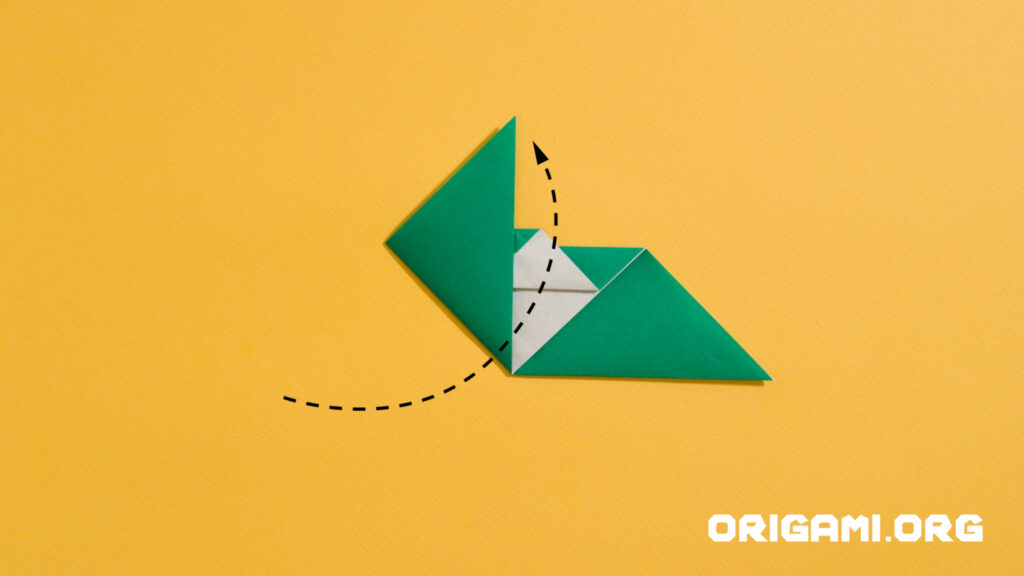
Step 17: Turn it over (or just use the Force if you’re a Jedi).
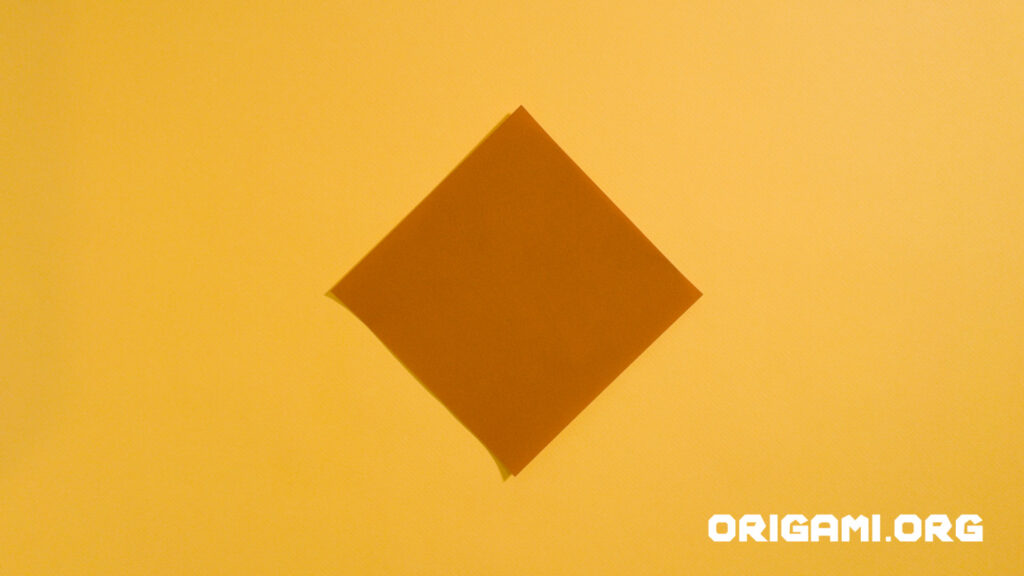
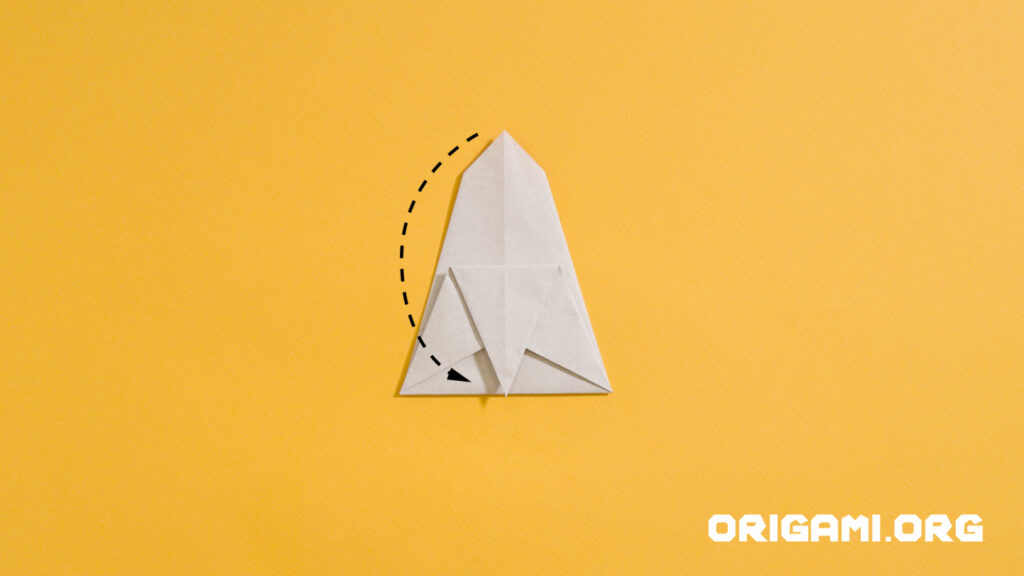
Step 18: Now for the robe (which also acts as the stand). Get another piece of square origami paper.

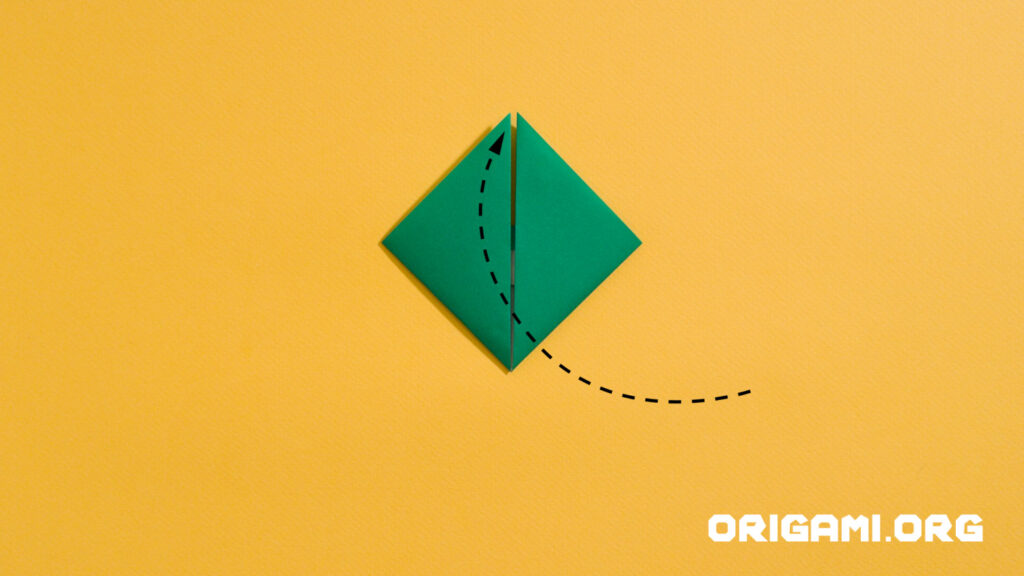
Step 19: Fold the right hand corner over to the left hand side, and crease firmly down the middle.
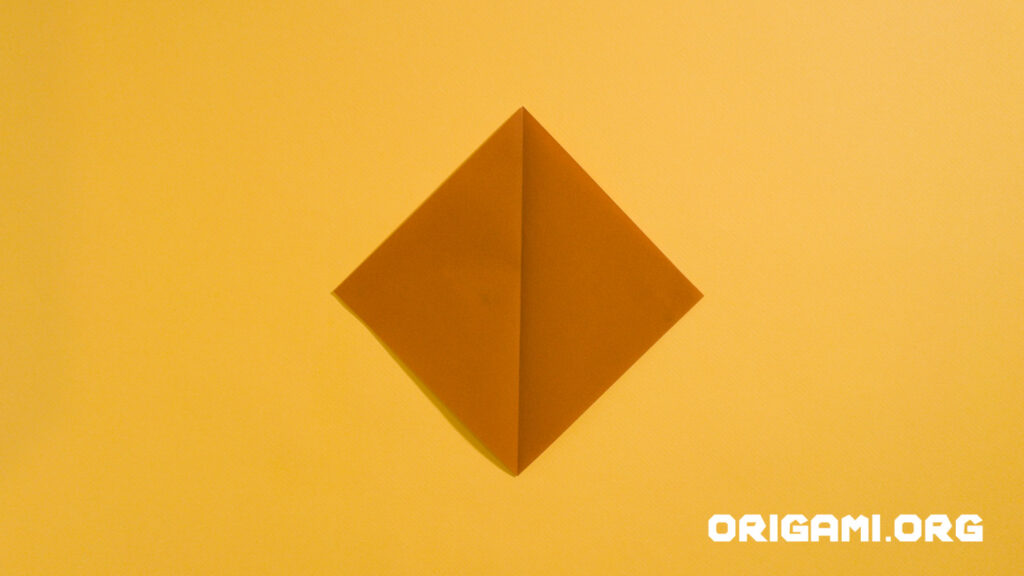
Step 20: Unfold the paper
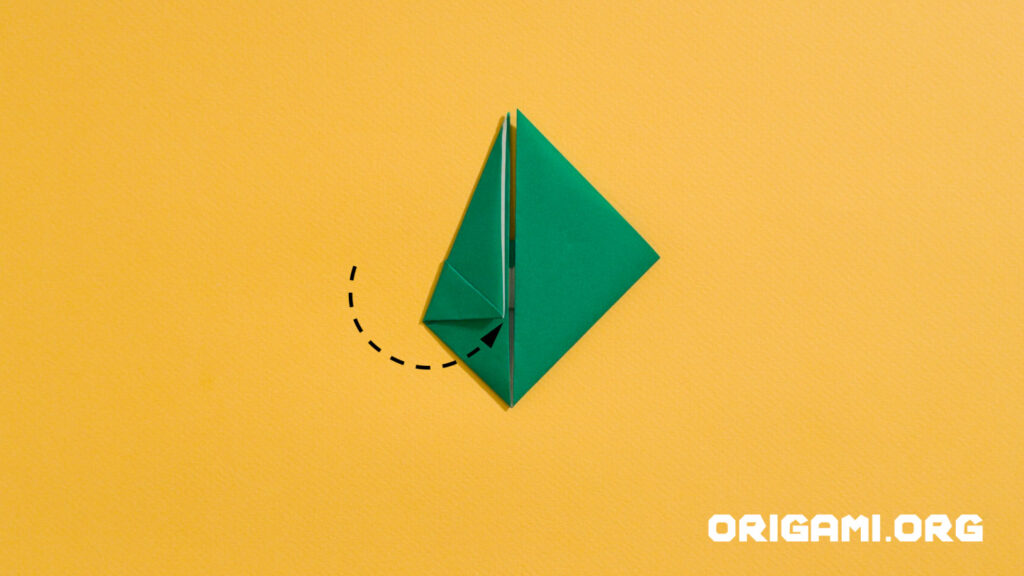
Step 21: Note the angle of the fold here. Take the left hand edge and fold it so that the corner is just over the centre line.
Step 22: Do the same with the right hand side.
see next steps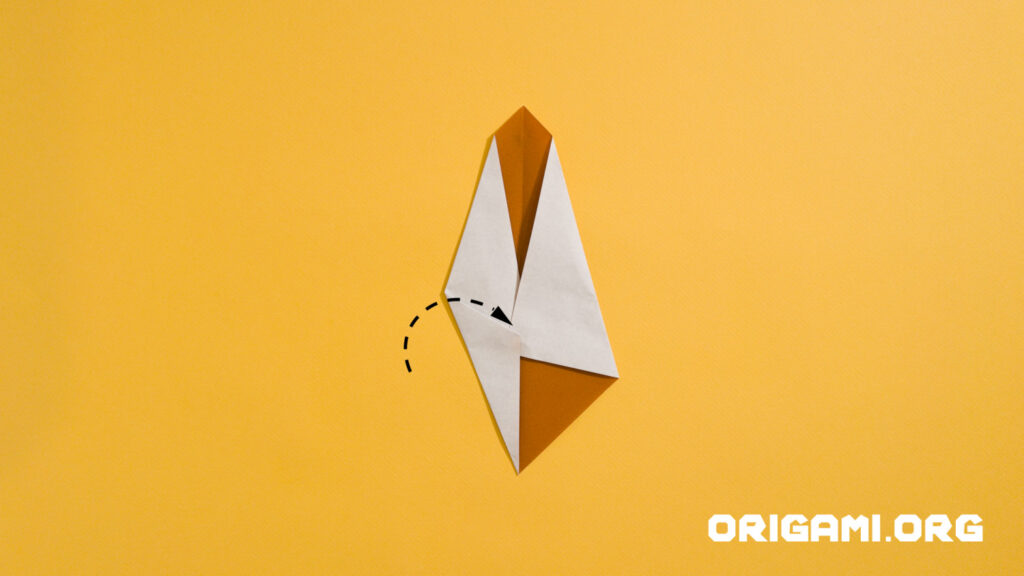
Step 23: Fold the left edge to the centre line
Step 24: Fold the right edge to the centre line
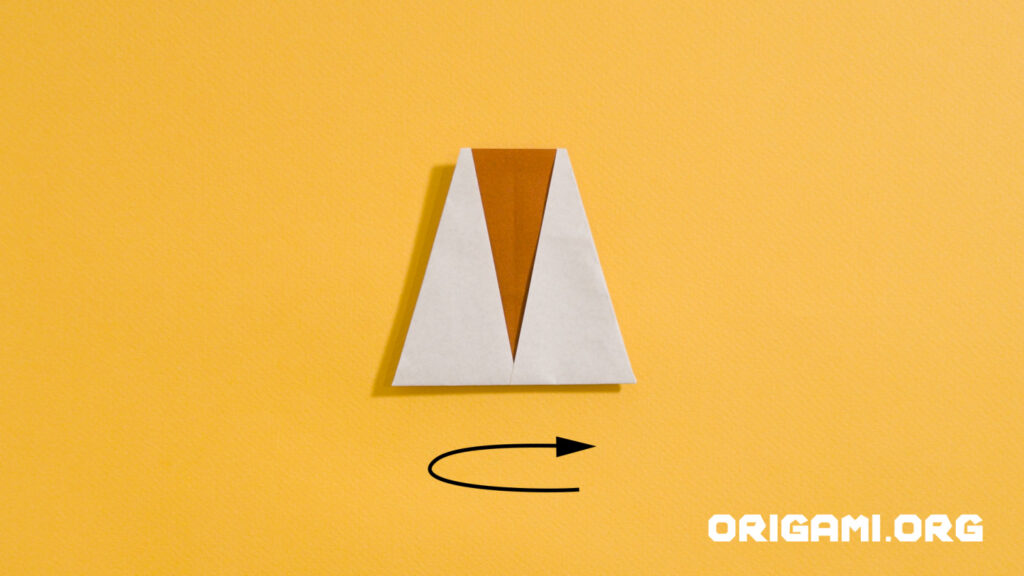
Step 25: Turn the paper over
Step 26: Fold the bottom corner up to the top corner
Step 27: Fold the top corner down to the bottom edge
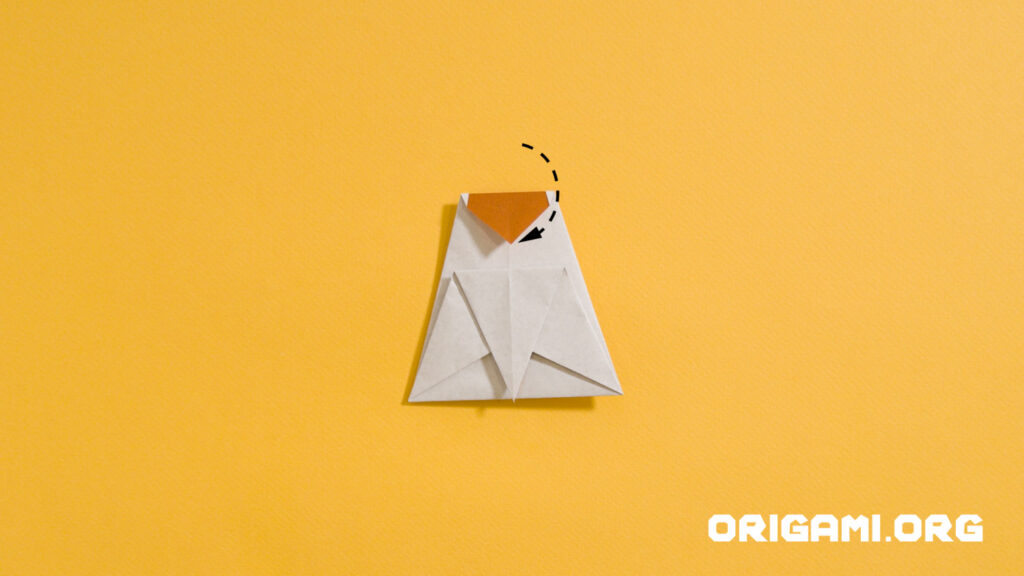
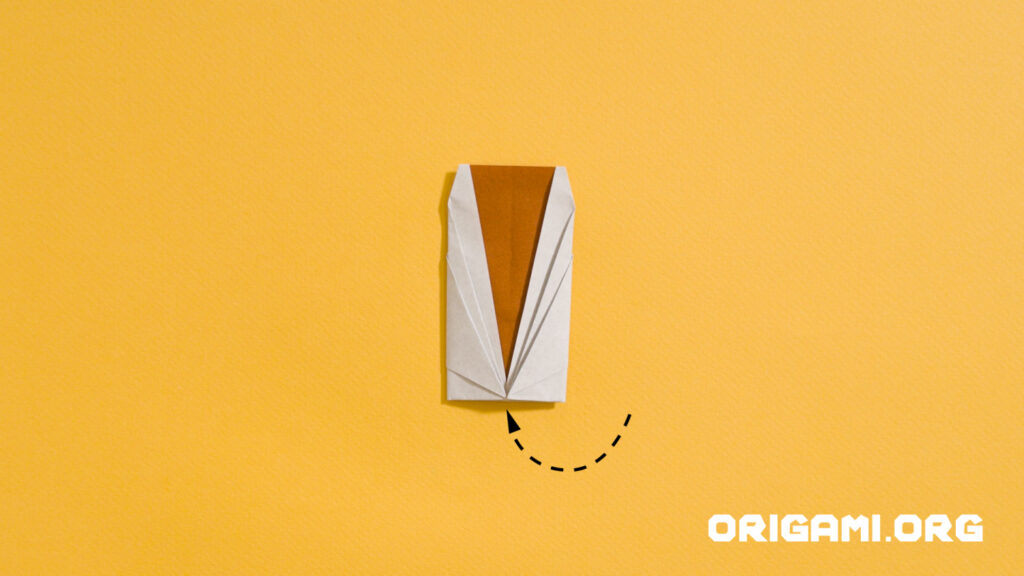
Step 28: Take the top corner and fold it over.
Step 29: Turn it over

Step 30: Fold the left corner in towards the centre line
Step 31: Fold the right corner in towards the centre line
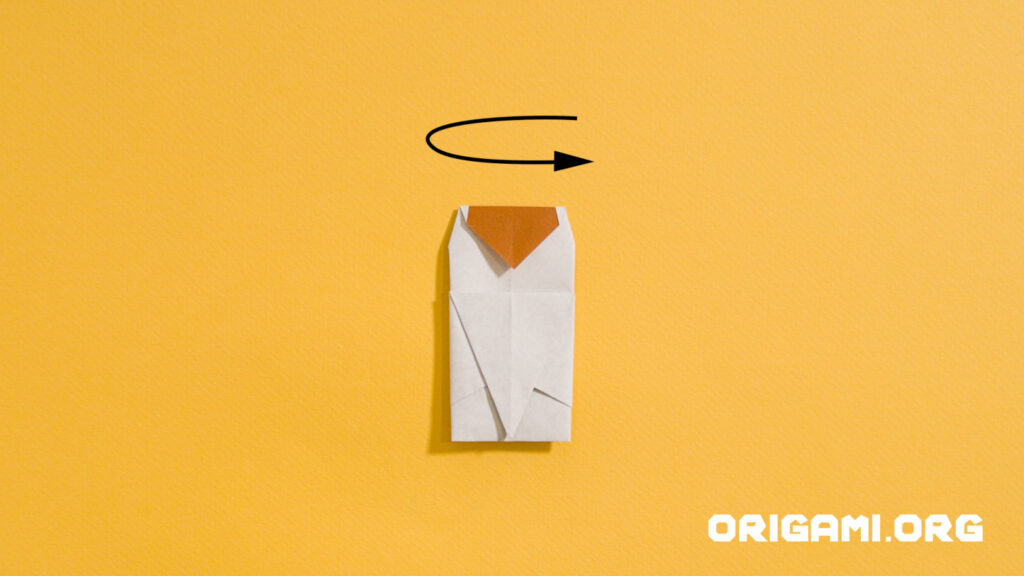
Step 32: Turn the paper over again.

Step 33: Make sure you have already drawn Yoda’s facial features, and then slide his head over the top of the robe.

Step 34: Turn the figure over and you’re done! May the force be with you.


