Origami Crane
Difficulty: Medium
The origami crane holds deep cultural and symbolic significance, particularly in Japanese tradition, but its message of hope and peace has resonated worldwide. Folded from a single sheet of paper, the crane is a symbol of patience, precision, and creativity. Its importance can be understood in several ways:
- Japanese Culture: In Japan, the crane (or “tsuru” in Japanese) is regarded as a mystical creature and is said to live for a thousand years. It is considered a symbol of longevity, good fortune, and happiness. Traditionally, it is believed that folding a thousand paper cranes can grant a wish, and it is often associated with celebrations and well-wishing for special occasions.
- Peace and Healing: The origami crane gained global recognition through Sadako Sasaki, a young survivor of the Hiroshima atomic bombing. She embarked on a mission to fold a thousand paper cranes while battling leukemia, believing it would grant her a wish for recovery. Her story inspired the Peace Memorial Park in Hiroshima and became a symbol of peace, hope, and the devastating consequences of nuclear warfare.
- Universal Message: Beyond its Japanese origins, the origami crane has become a universal symbol of hope and peace. It is often used in peace activism, memorial services, and as a gesture of solidarity during times of crisis or tragedy.
In essence, the origami crane serves as a reminder of the human capacity for resilience, healing, and the pursuit of a more peaceful world. Its enduring appeal lies in its ability to convey a simple yet profound message of optimism and unity across cultures and generations.
This is how to make an origami crane.
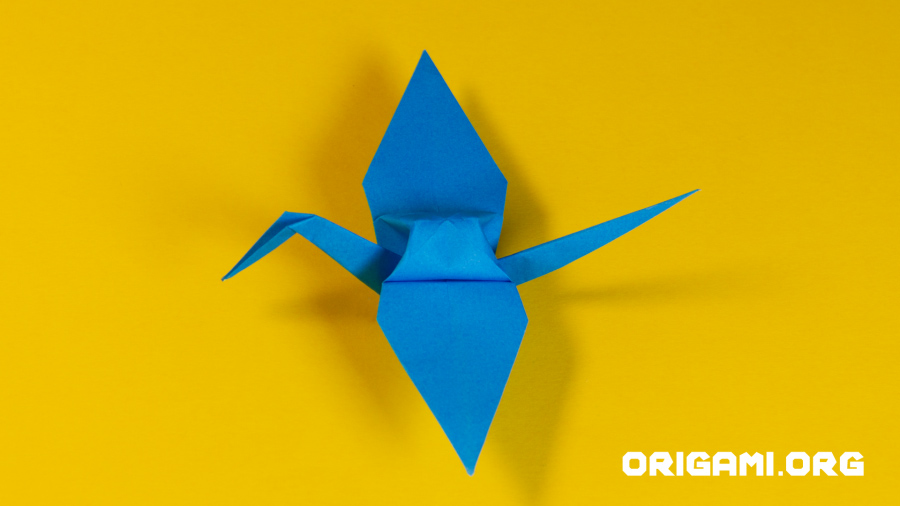
How beautiful is this origami crane?
One senbazuru legend (senbazuru literally means “one thousand cranes”) claims that if fold 1,000 origami cranes, your wish would come true. Will you create 1,000 cranes?
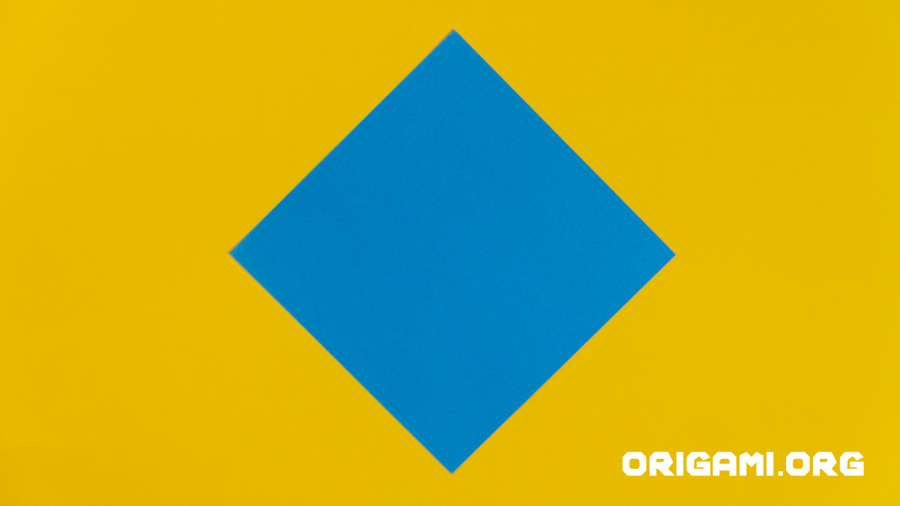
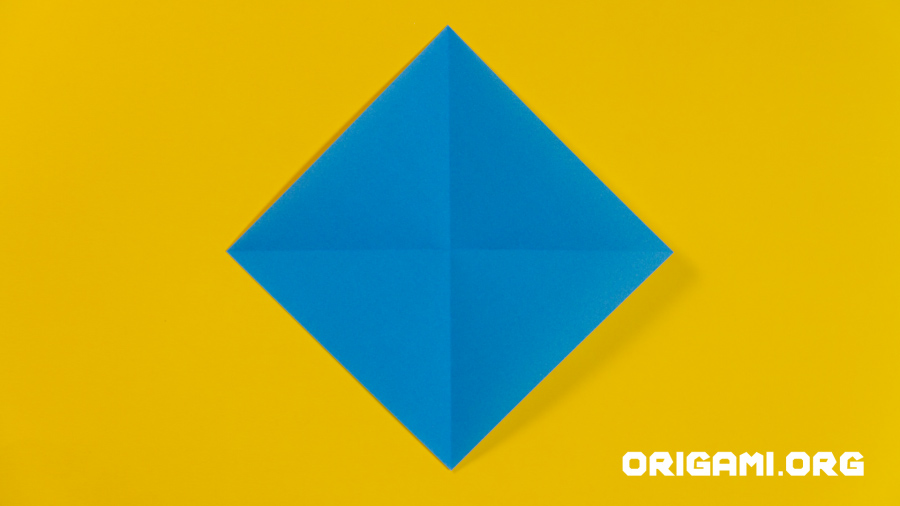
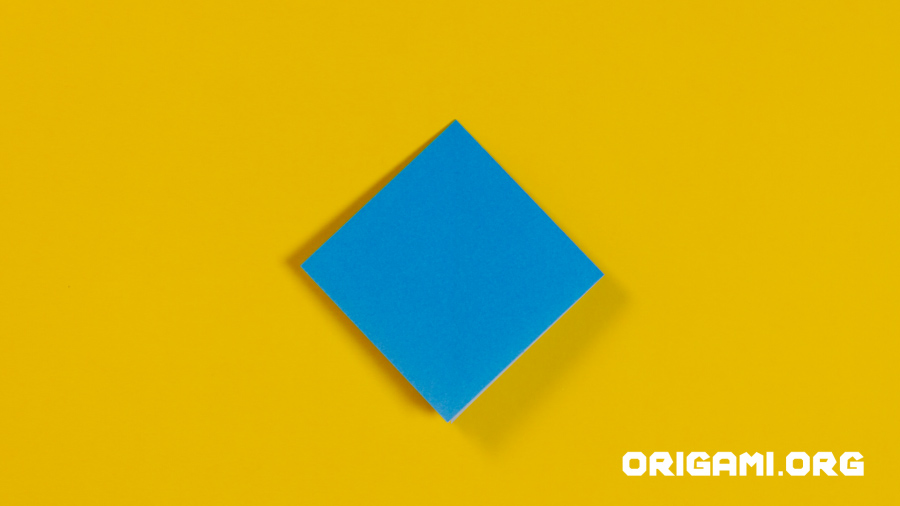
Step 1: Begin with your origami paper placed in a diamond shape
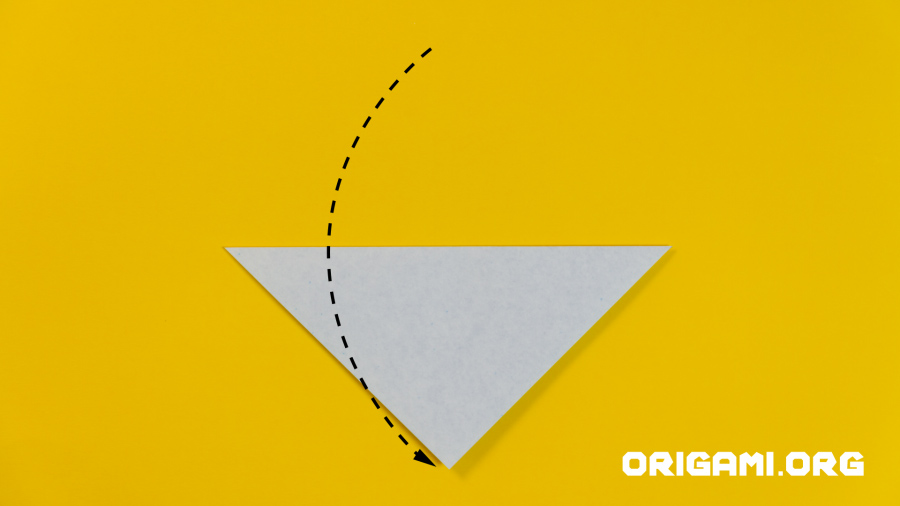
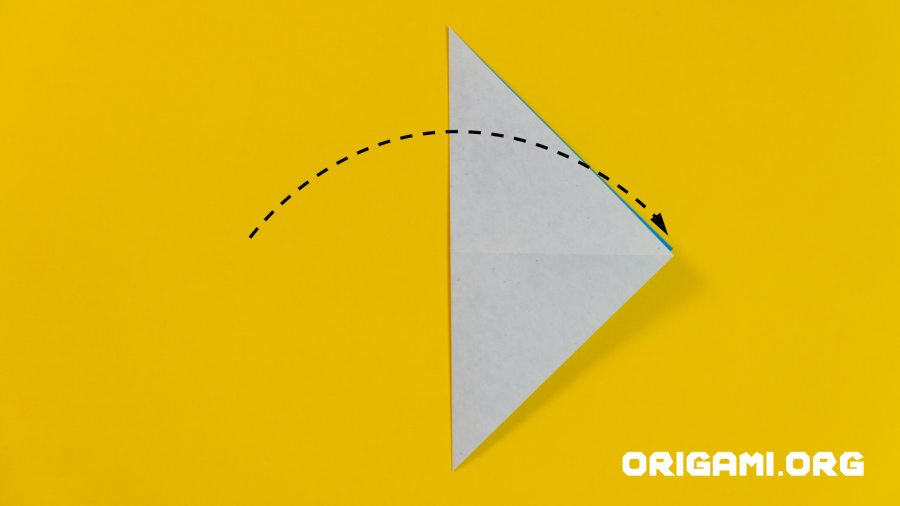
Step 2: Fold the top point down to meet the bottom point, creasing along the horizontal fold line
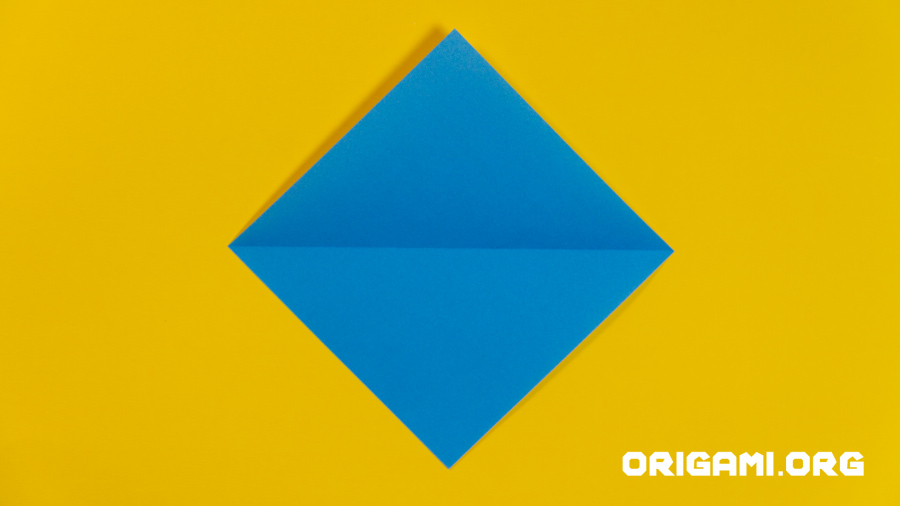
Step 3: Open up the paper
Step 4: Fold the left point over to meet the right point, creasing along the vertical fold line
Step 5: Open the paper up
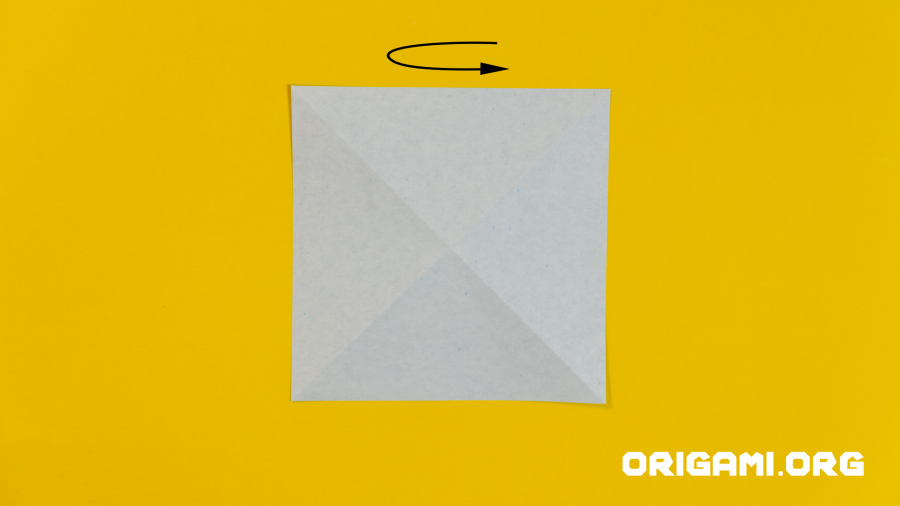
Step 6: Turn the paper over and place down in a square shape
Step 7: Fold the top edge down to meet the bottom edge, folding along the horizontal crease line
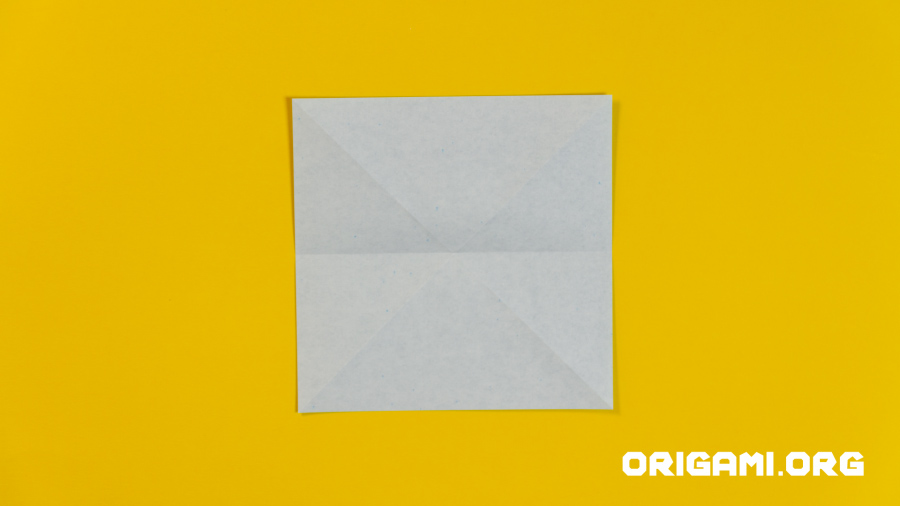
Step 8: Open the paper up
Step 9: Fold the left edge over to meet the right edge, folding along the vertical crease line
Step 10: Open the paper up
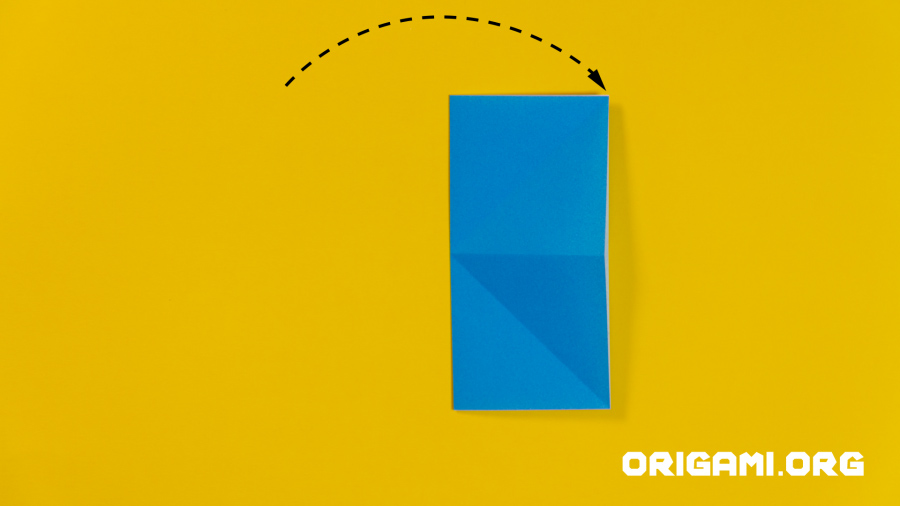
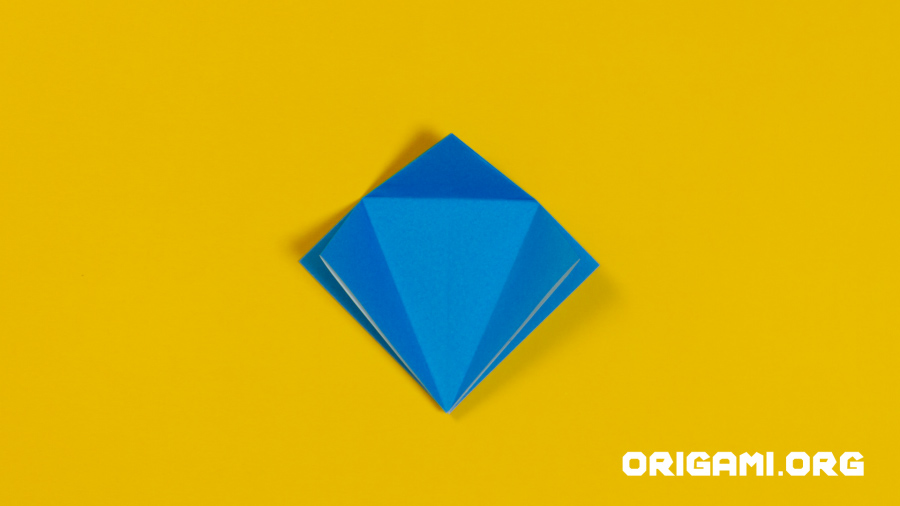
Step 11: Fold each corner up and over to the bottom left corner
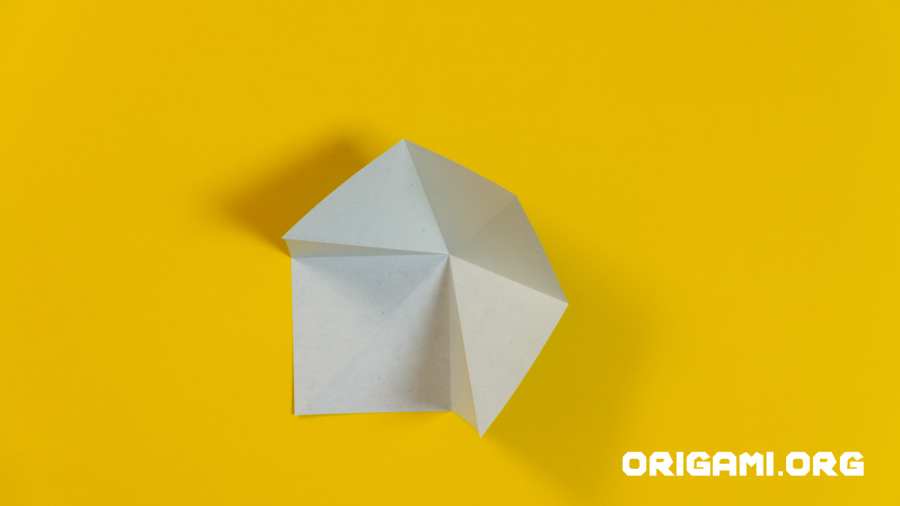
Step 12: As you fold, your paper should look like this
Step 13: Keep folding!

Step 14: Keep folding!

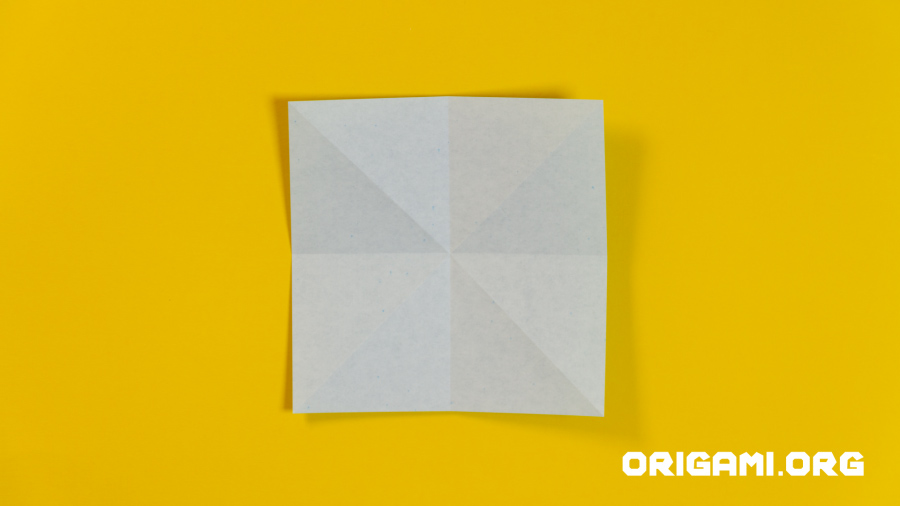
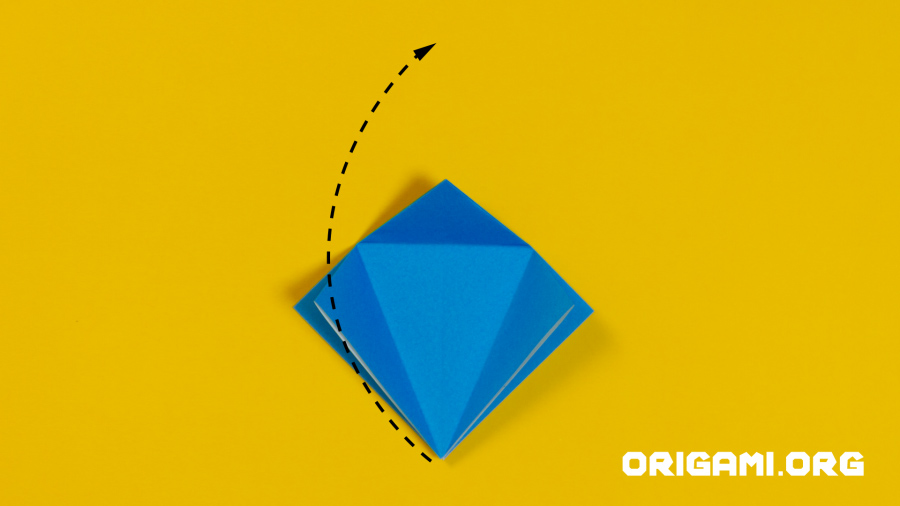
Step 15: Your paper should look like this just before you press down
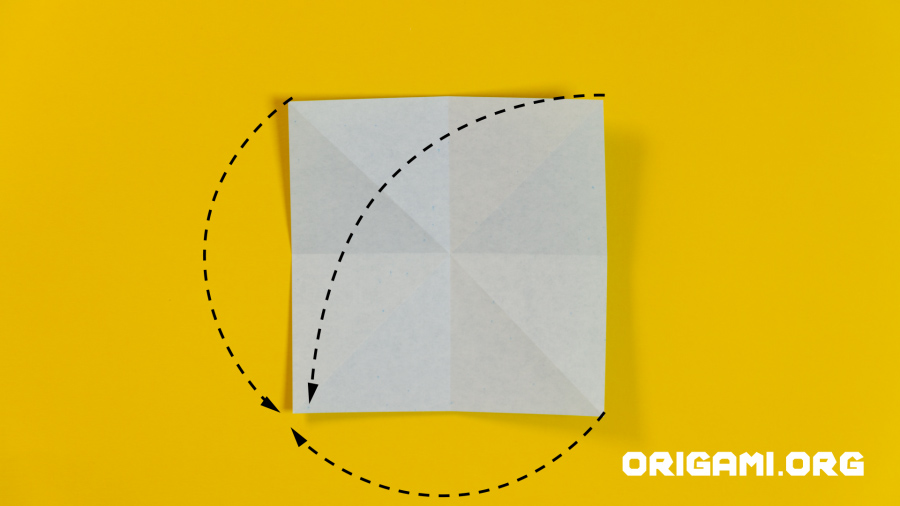
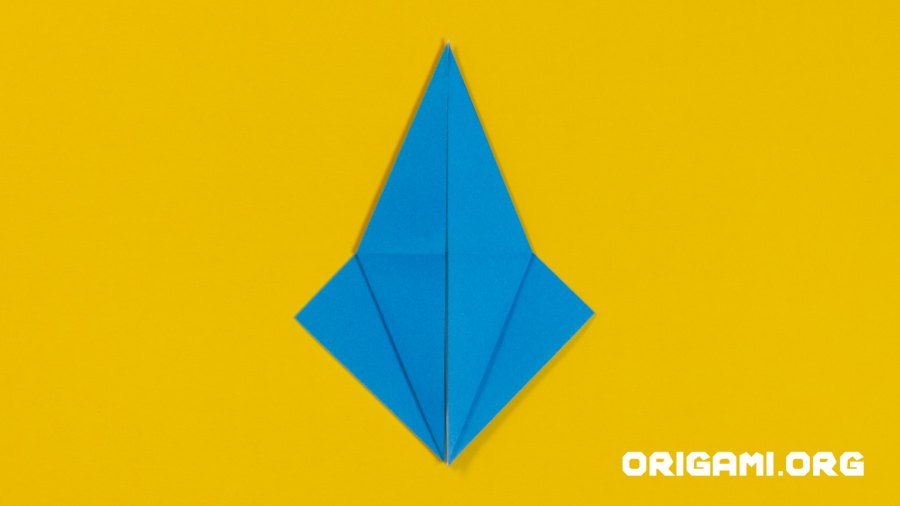
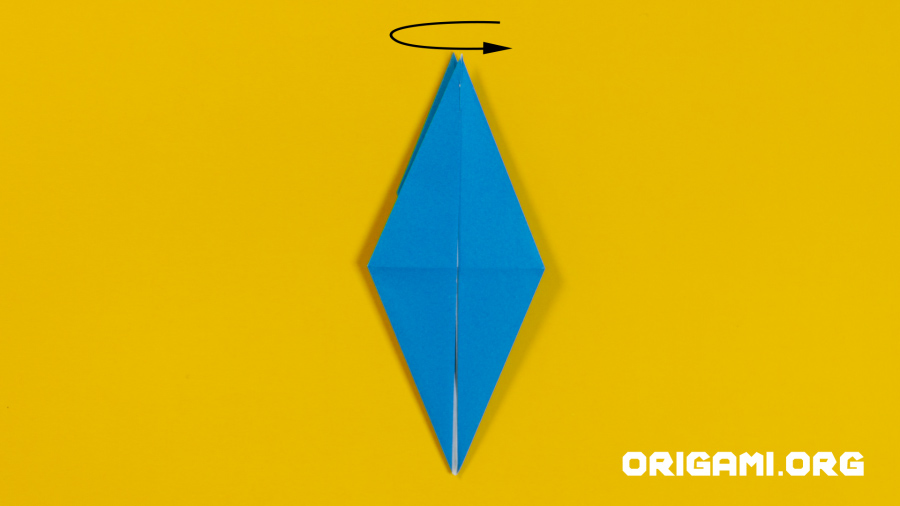
Step 16: Once you’ve pressed down your folds, turn your paper so it is placed in a diamond shape
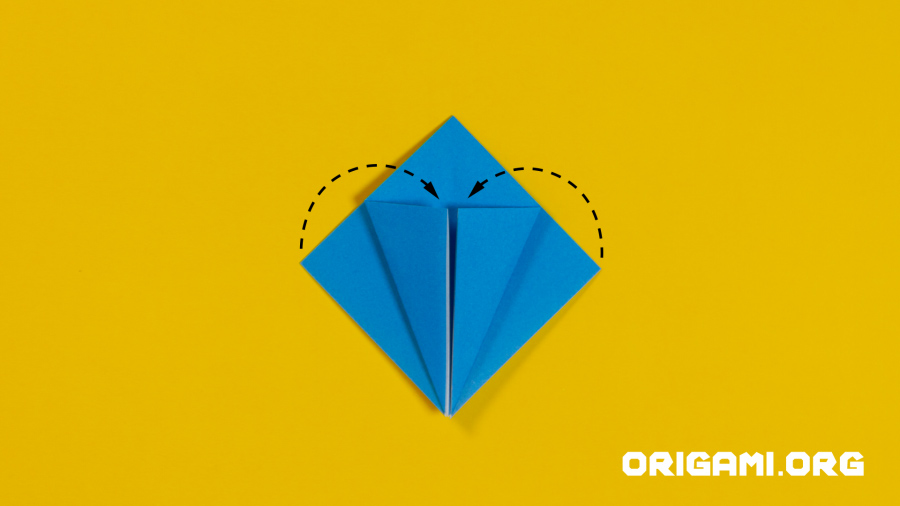
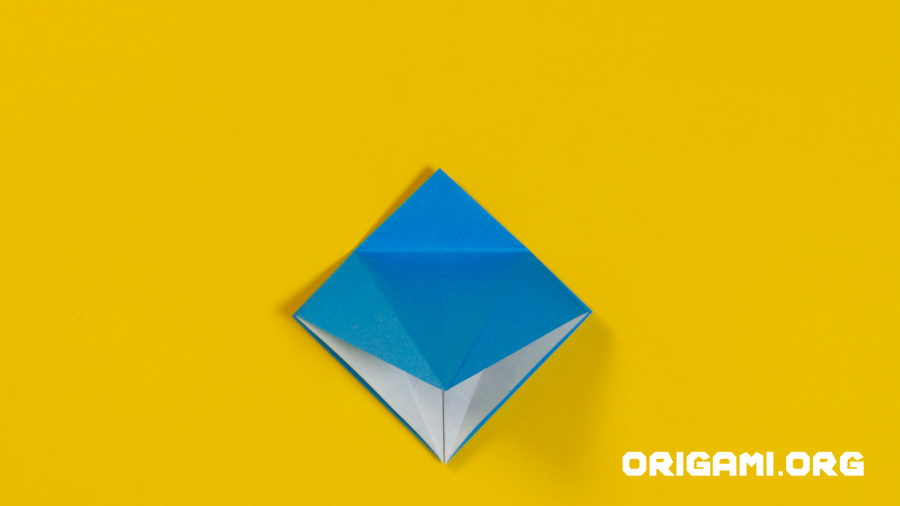
Step 17: Fold the left and right ‘wings’ in to meet the centre vertical crease line, take care only to fold the top layer of paper

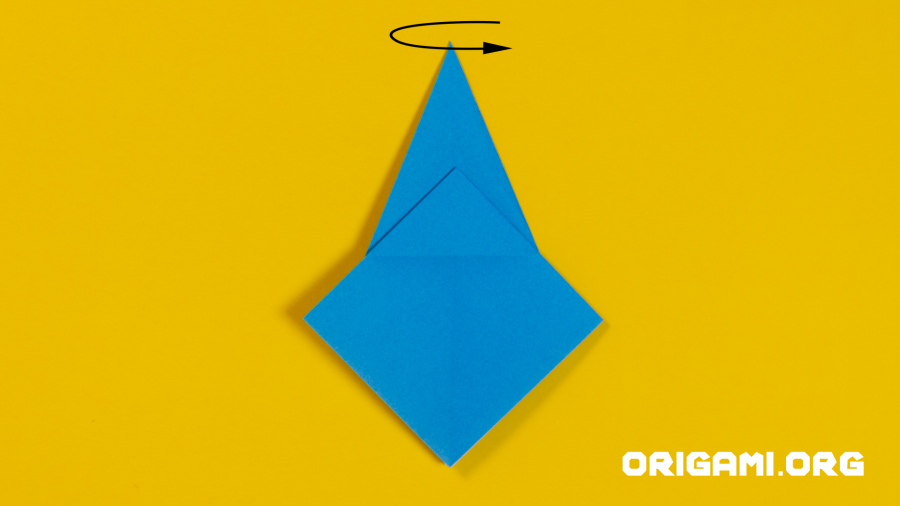
Step 18: Fold the tip of the paper down
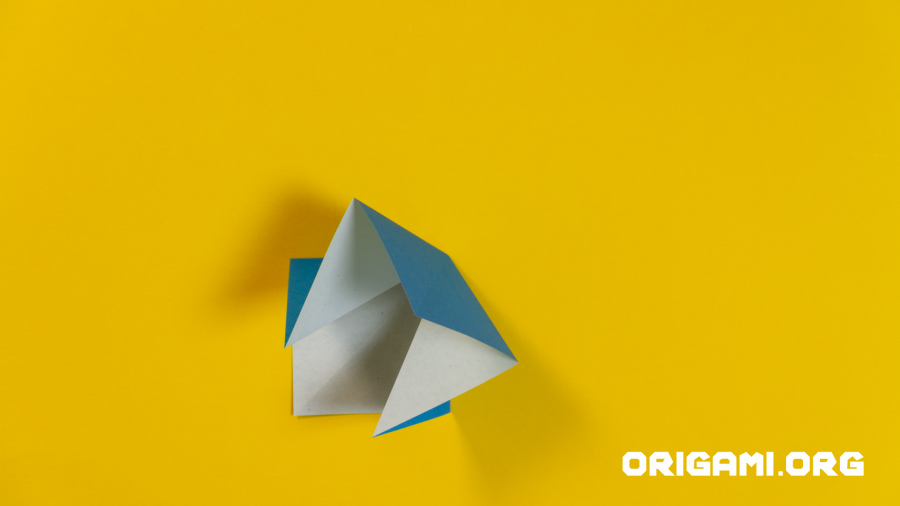
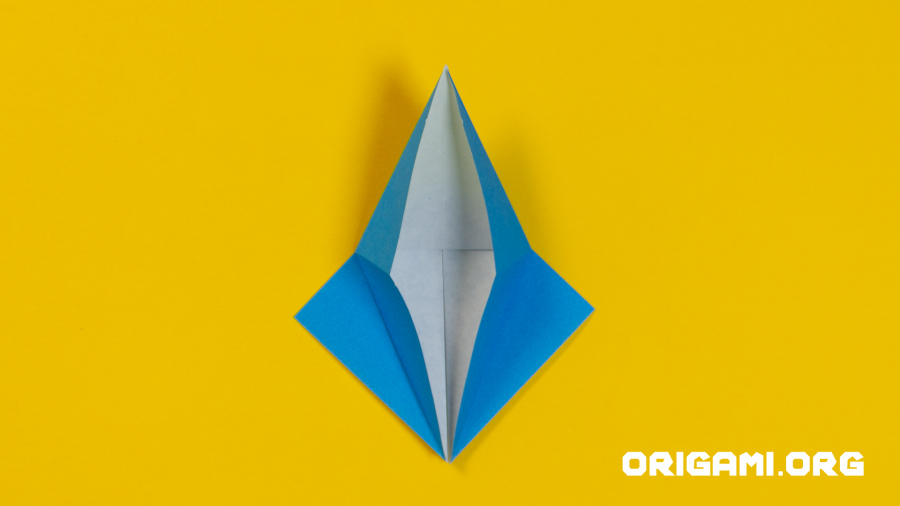
Step 19: Open up the folds so your paper looks like this
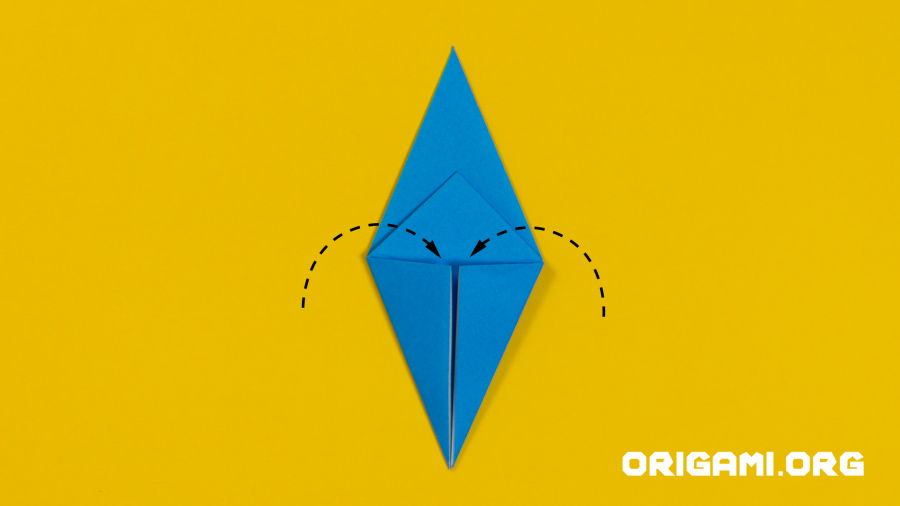
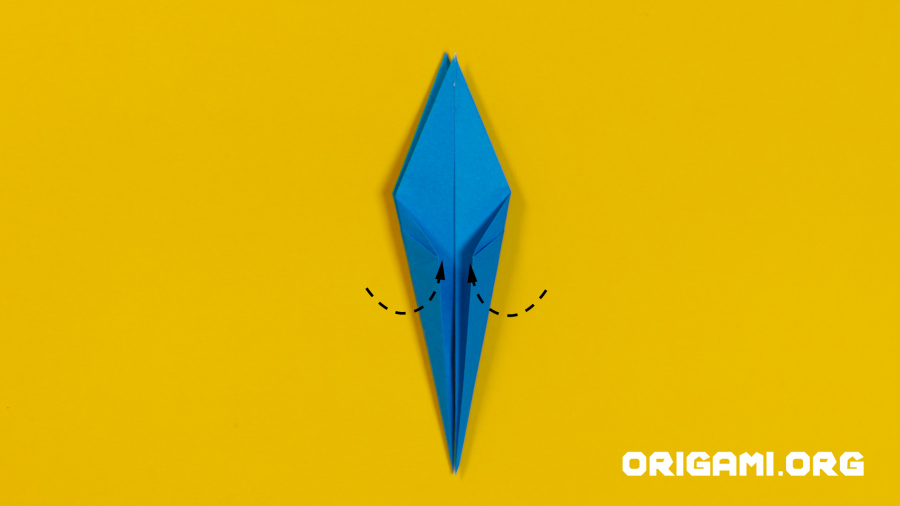
Step 20: Lift the bottom point upwards taking care only to raise the top layer of paper
Step 21: Keep lifting!
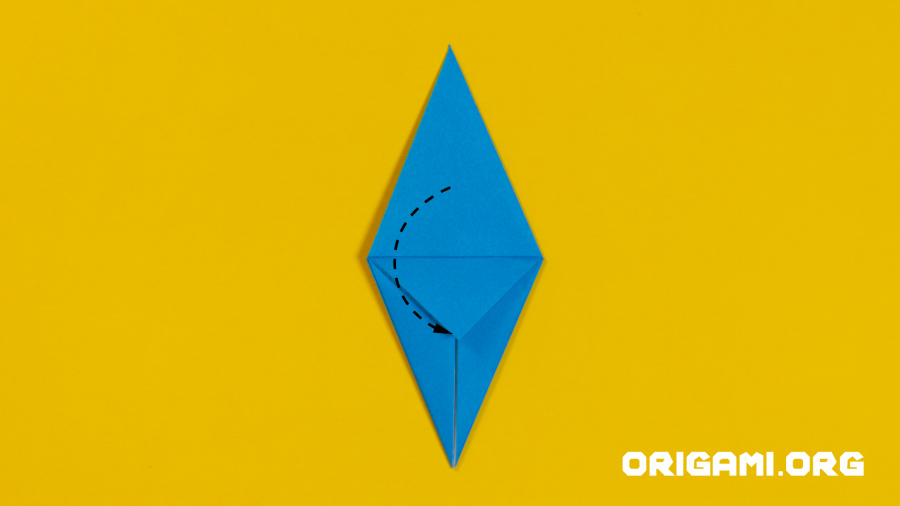
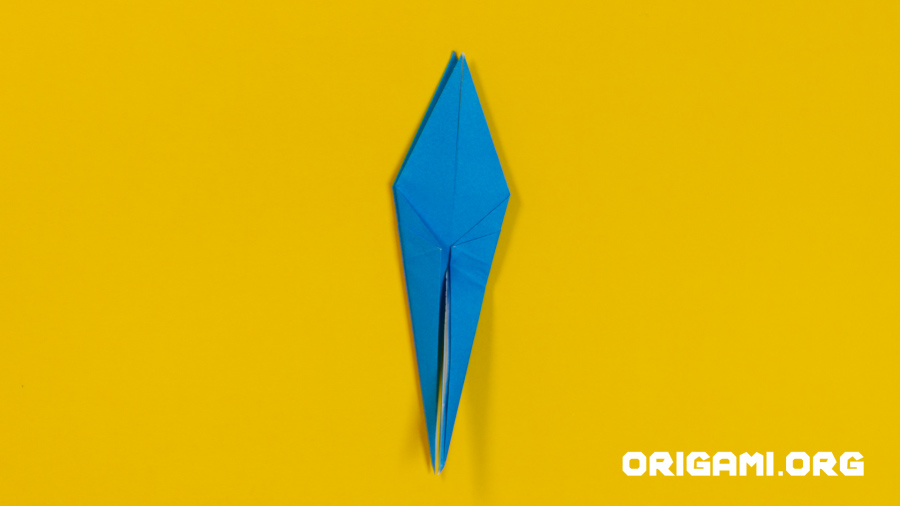
Step 22: Lift the point and the paper should look like this
Step 23: Press down flat
Step 24: Turn the paper over
Step 25: Fold the outer ‘wings’ inwards to meet the centre crease
Step 26: Fold the inner point downwards
Step 27: Open up the folds as shown
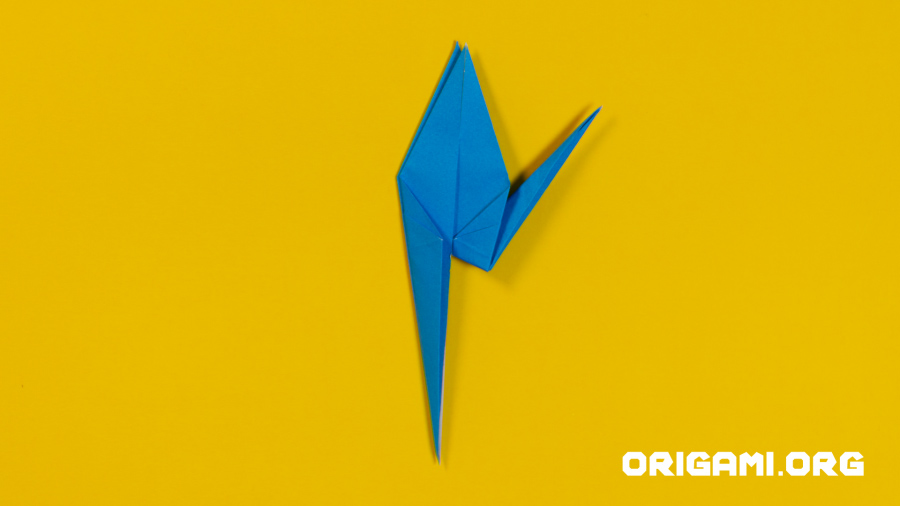
Step 28: Lift the top layer of paper at the bottom point upwards to meet the top point

Step 29: The paper should unfold as you raise the point upwards
Step 30: Press the fold down so your creation looks like this
Step 31: Fold the outer ‘wings’ inwards to meet the centre, taking care only to fold the top layer of paper.
Step 32: Turn the paper over
Step 33: Repeat step 31 by folding the outer ‘wings’ inwards to meet the centre

Step 34: Fold the bottom right point upwards and outwards, pressing down so it lines up with the diagonal crease lines
Step 35: Unfold this new crease

Step 36: Slightly open the bottom right point and reverse the centre crease so it folds inwards on itself. Fold it upwards and towards the right.
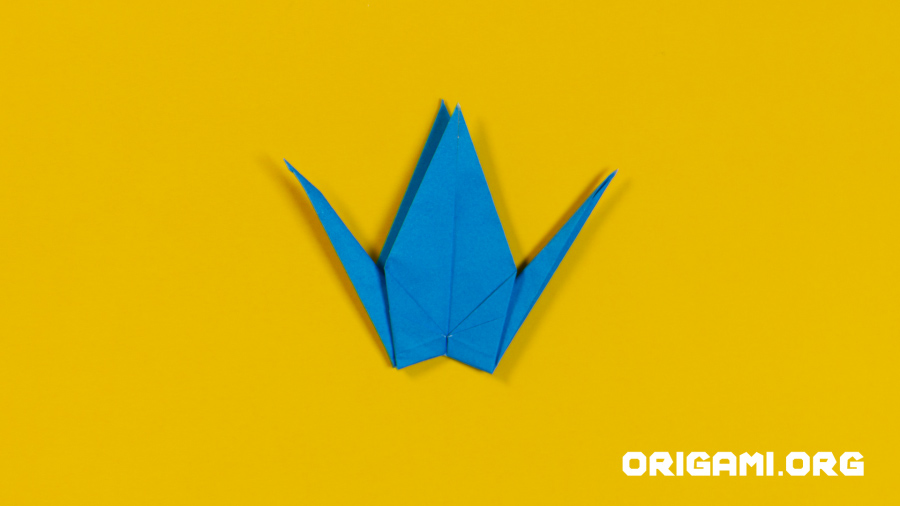
Step 37: Once pressed down your paper should look like this
Step 38: Repeat step 34, folding the bottom left point upwards and outwards, pressing down so it lines up with the diagonal crease lines
Step 39: Unfold this new crease

Step 40: Repeat step 36 by slightly opening the bottom left point and reverse the centre crease so it folds inwards on itself. Fold it upwards and towards the left.
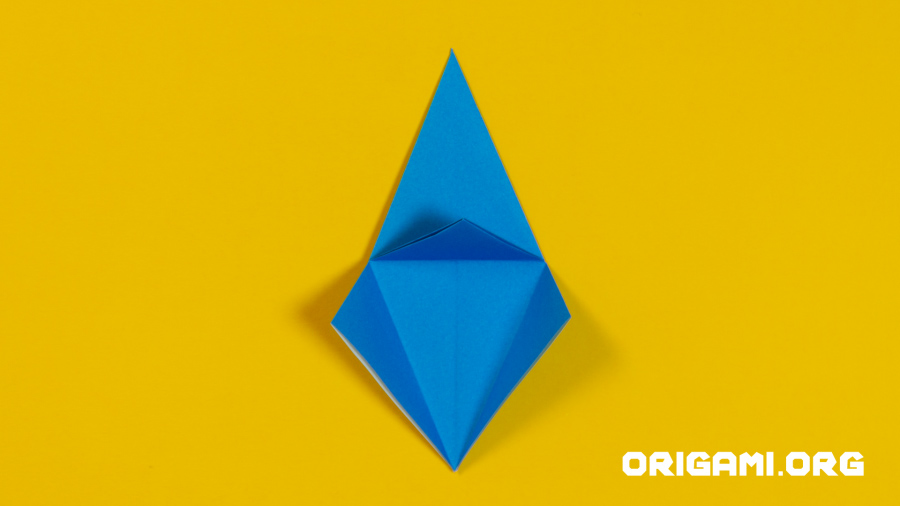
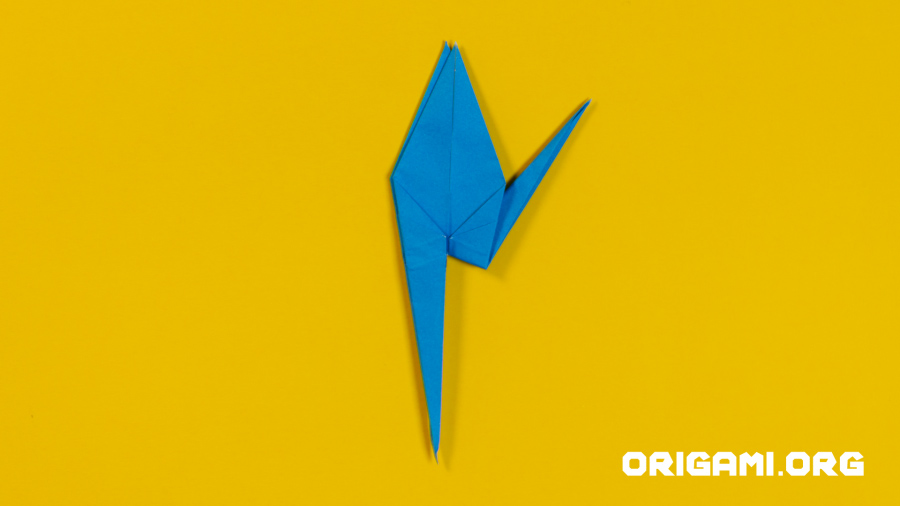
Step 41: When pressed down your crane should now look like this

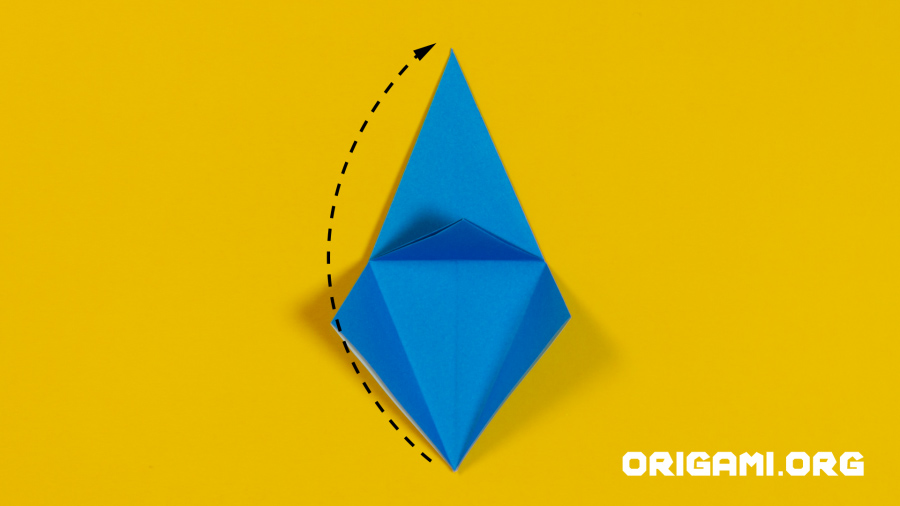
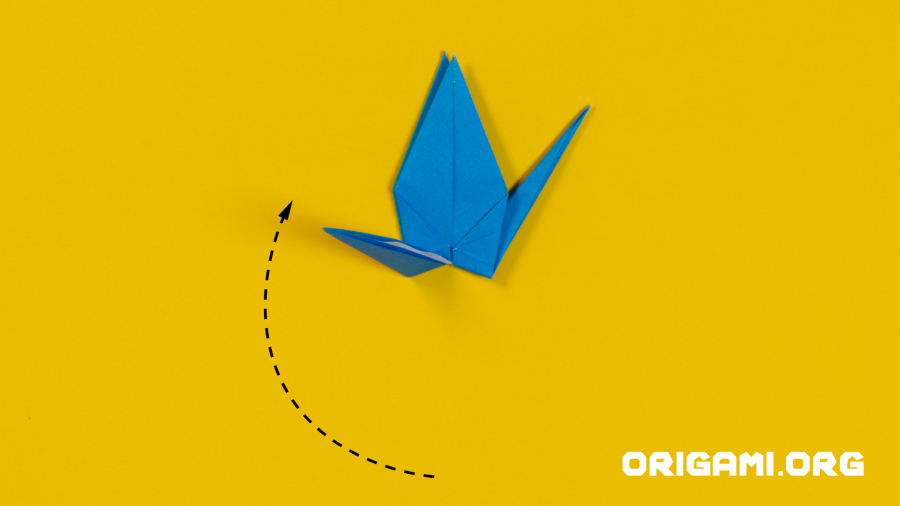
Step 42: Create the crane’s head by slightly opening the left point and reversing the centre crease so it folds inwards on itself. Fold the point downwards to create the head.
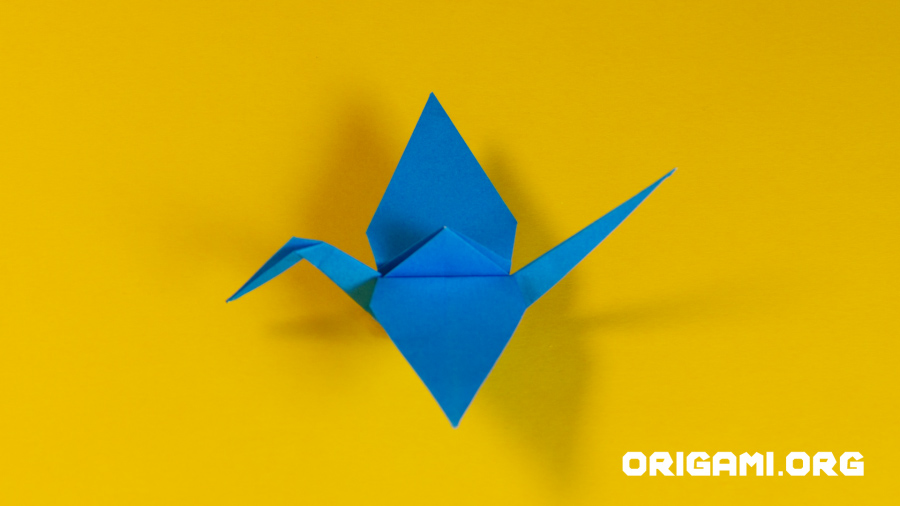
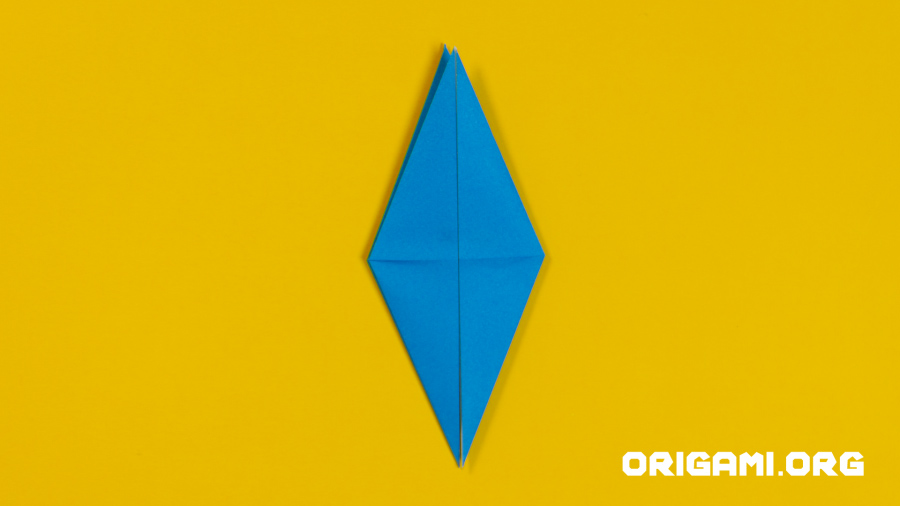
Step 43: Fold the crane’s wings downwards and crease in line with the bottom of the inner triangle

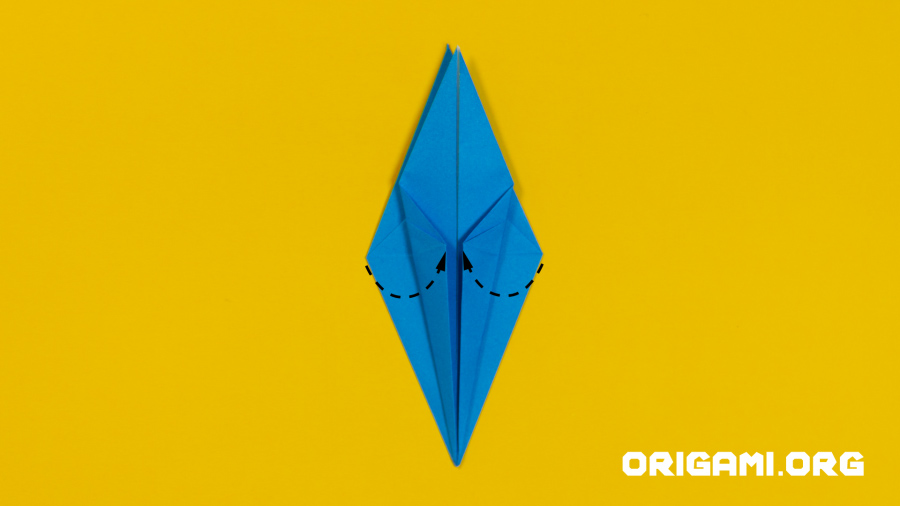
Step 44: Press the peak of the inner triangle down gently to widen the crane’s body.
You’ve completed your first origami crane (orizuru)!
How many more will you fold? In Japan, the individual cranes are often strung along a string so they can be hung from the ceiling. Why not make your cranes in lots of different colours and patterns of paper, so they become a bright and cheerful decoration?


