Origami Star Box
Difficulty: Medium
Welcome to the origami star box instruction page, where we will transform origami paper into a delightful and functional creation. This charming piece not only serves as a decorative item but also as a clever storage solution.
Origami, the traditional Japanese art of paper folding, is a captivating blend of precision and creativity. Crafting an origami star box is a rewarding and meditative process, perfect for both beginners and experienced paper artists.
In this step-by-step guide, we’ll take you through the process of creating your own origami star box, from selecting the right paper to mastering the intricate folds required for its unique shape. Whether you’re an origami enthusiast or a novice looking for a fun project, our instructions are designed to be clear and easy to follow.
So, gather your favorite paper and find a quiet, well-lit workspace. Get ready to fold and crease your way to a stunning origami star box that can serve as a decorative piece, a gift box, or a unique container for your treasures. Let’s dive into the world of paper folding and create something truly special!
Make your very own origami star box! What will you keep inside?
Use double-sided coloured paper in contrasting colours to really make your box look fantastic!
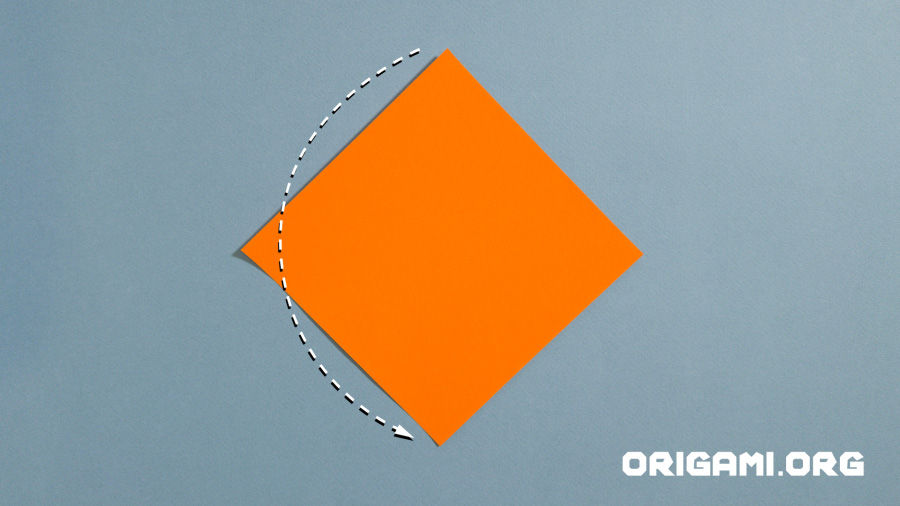
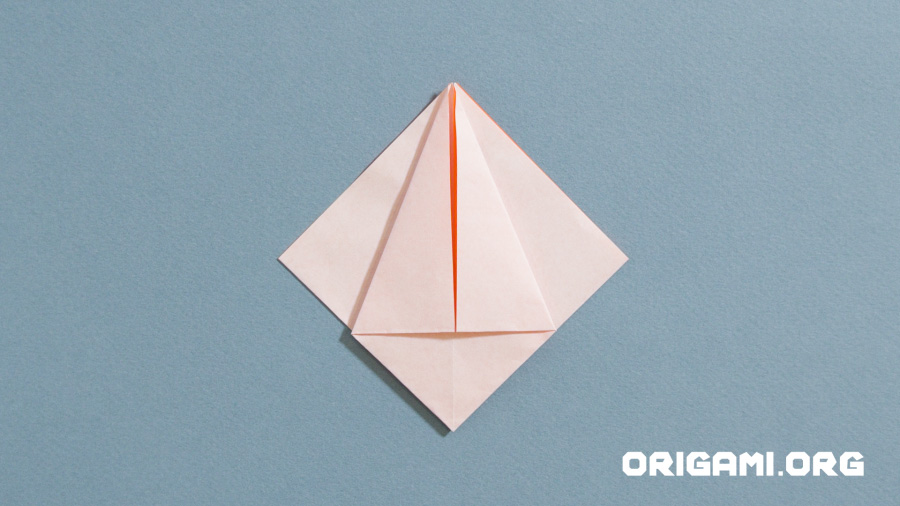
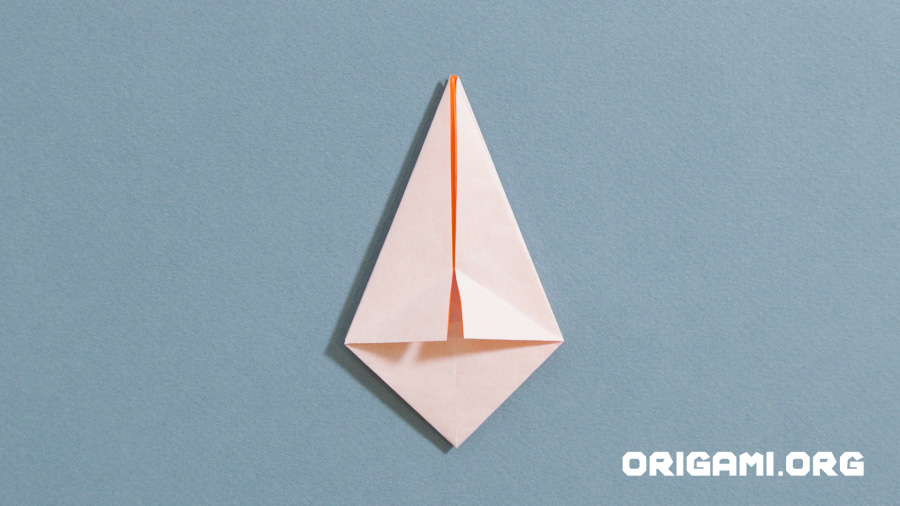
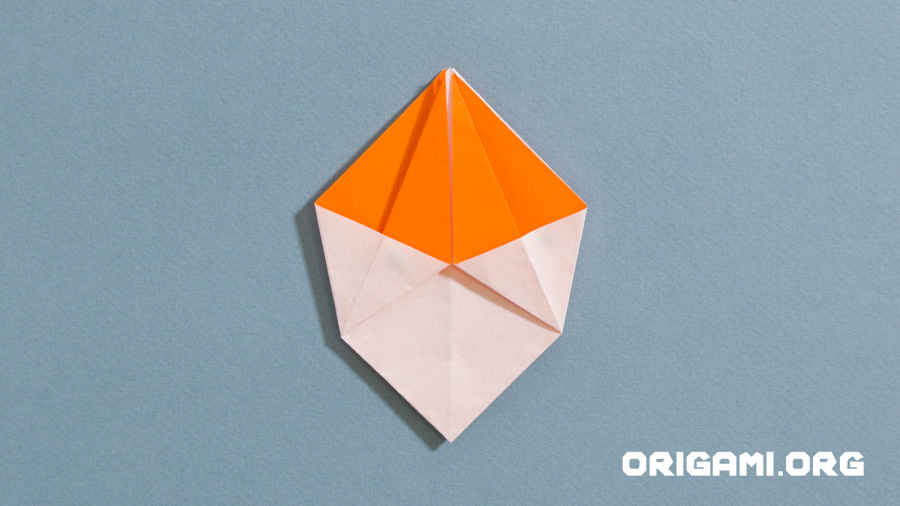
Step 1: Start with your square of paper like this. Fold the top point down to meet the bottom point

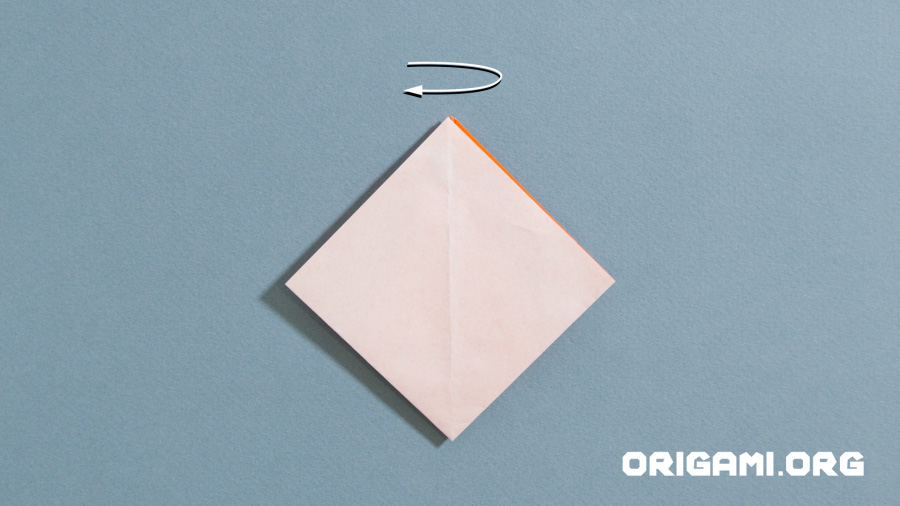
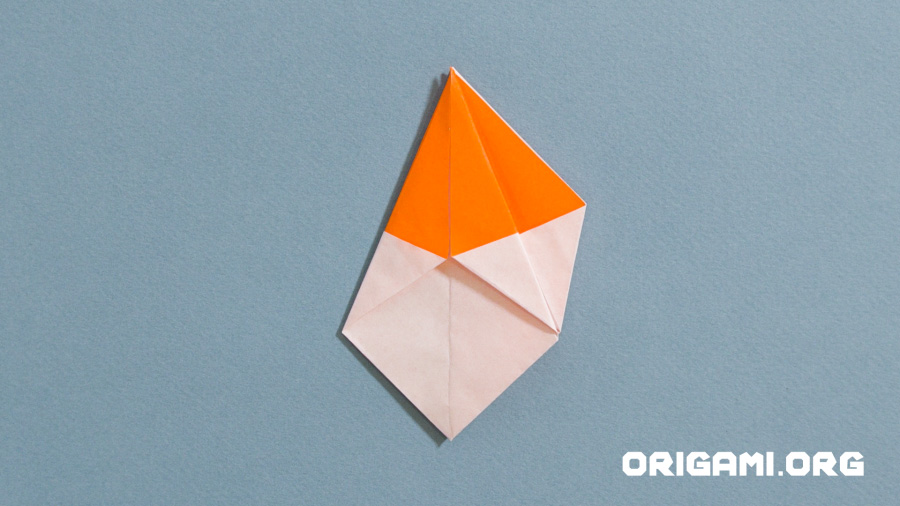
Step 2: When pressed down your paper will look like this
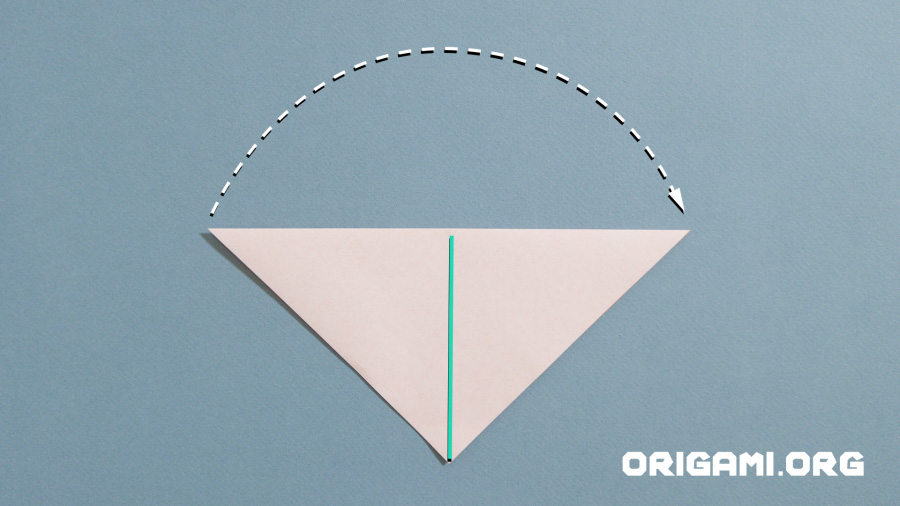
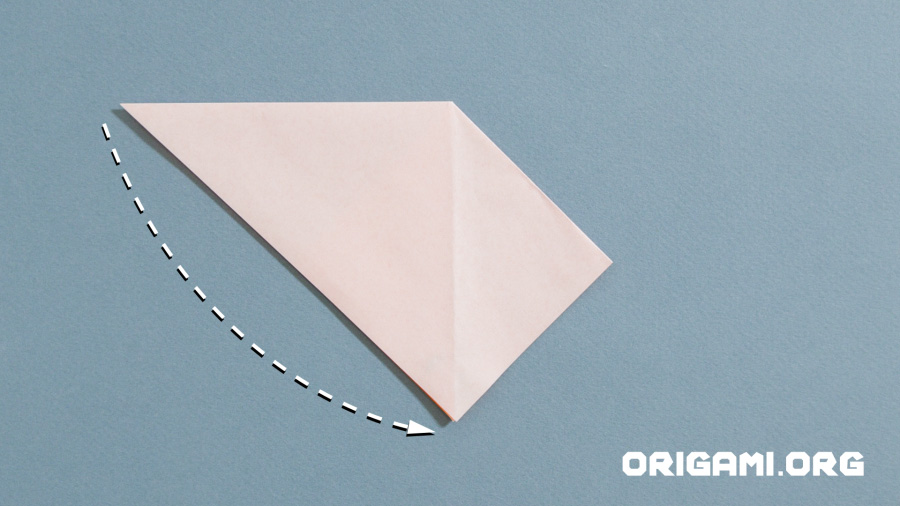
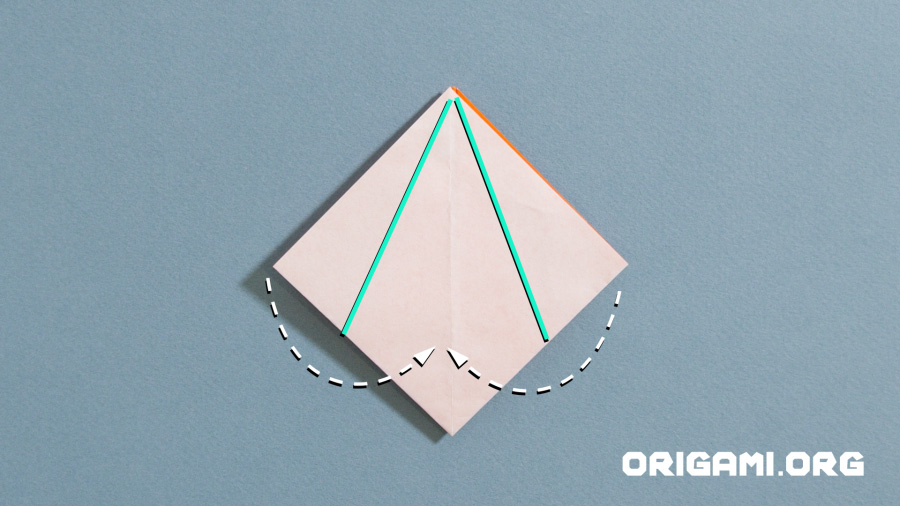
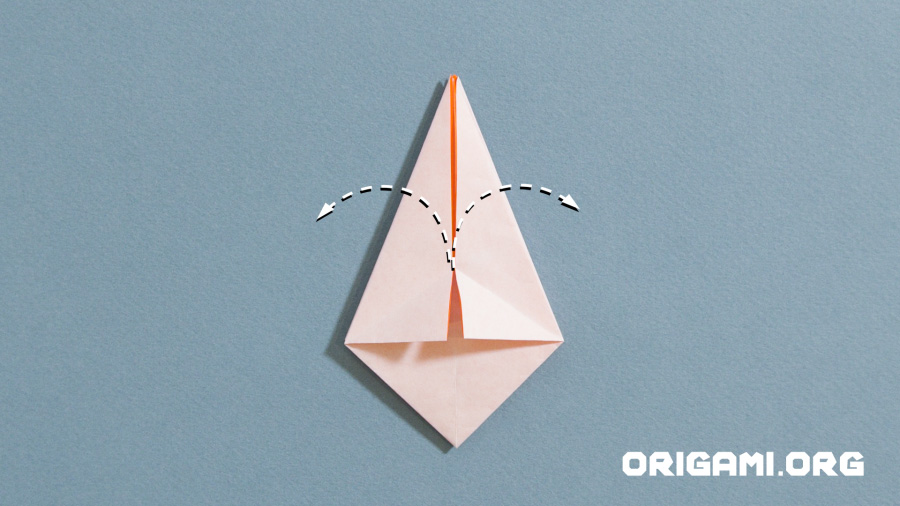
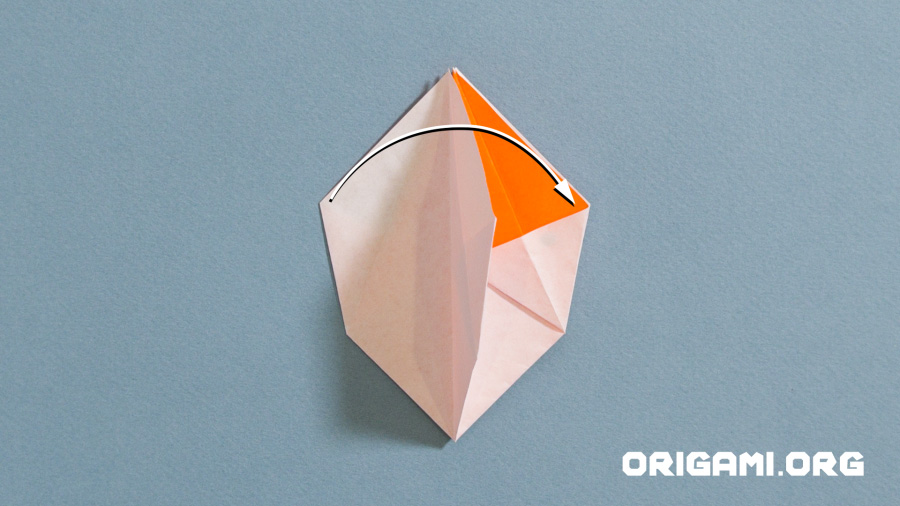
Step 3: Fold your paper in half where indicated in green, taking the left side over to the right side
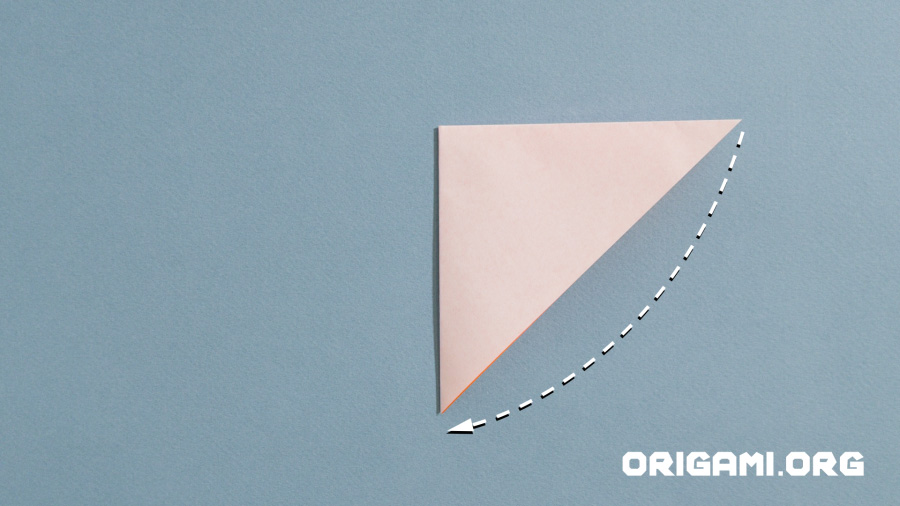
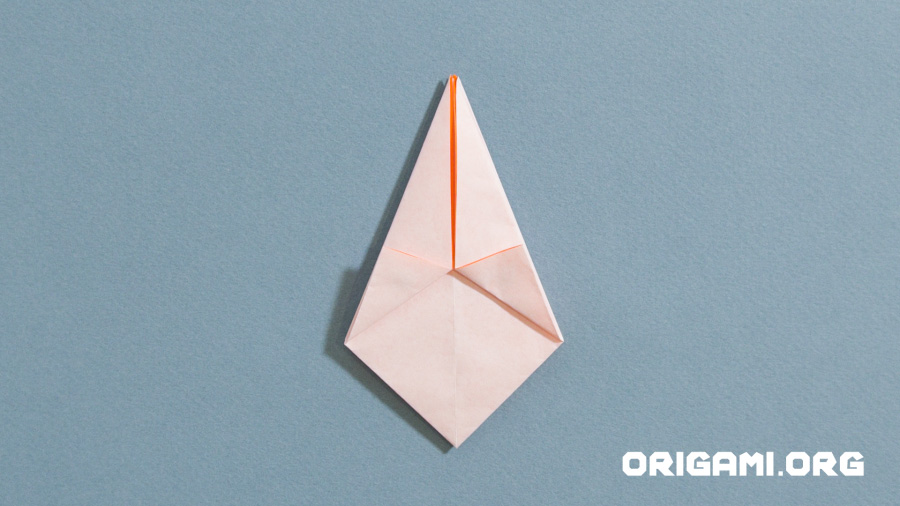
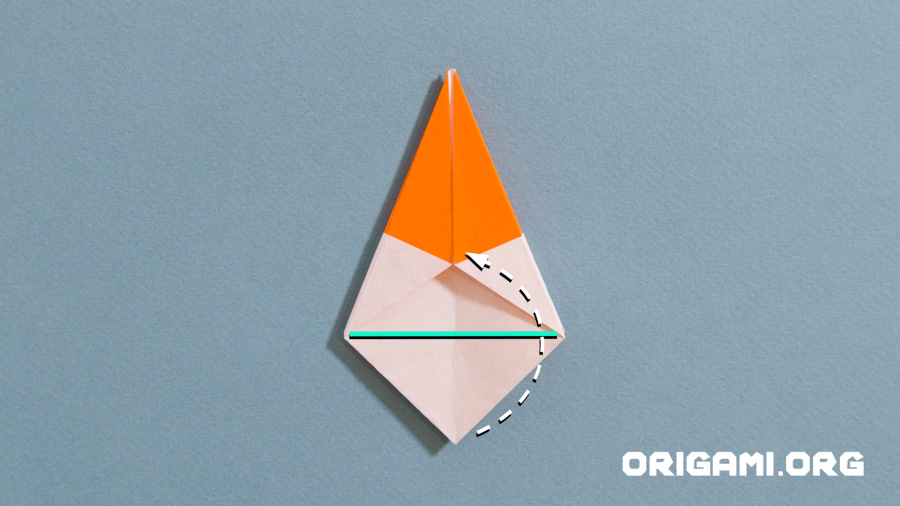
Step 4: Once folded your paper should look like this. Now fold the right corner down to the bottom corner. Take care only to take the top layer of paper!

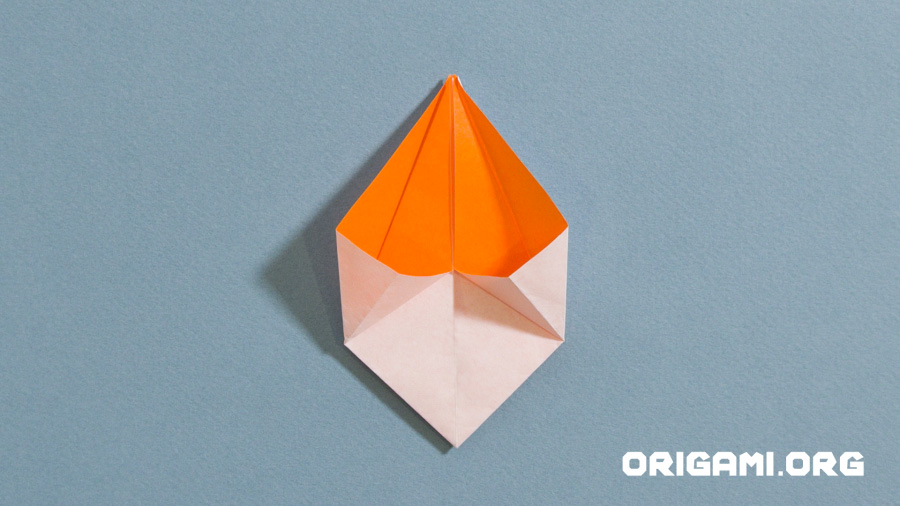
Step 5: As you fold the right corner down to the bottom corner, the paper should open up as shown
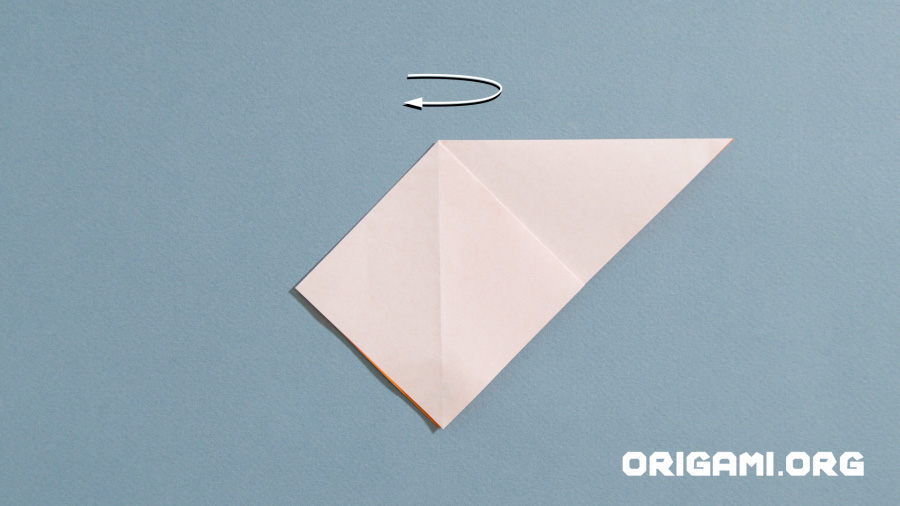
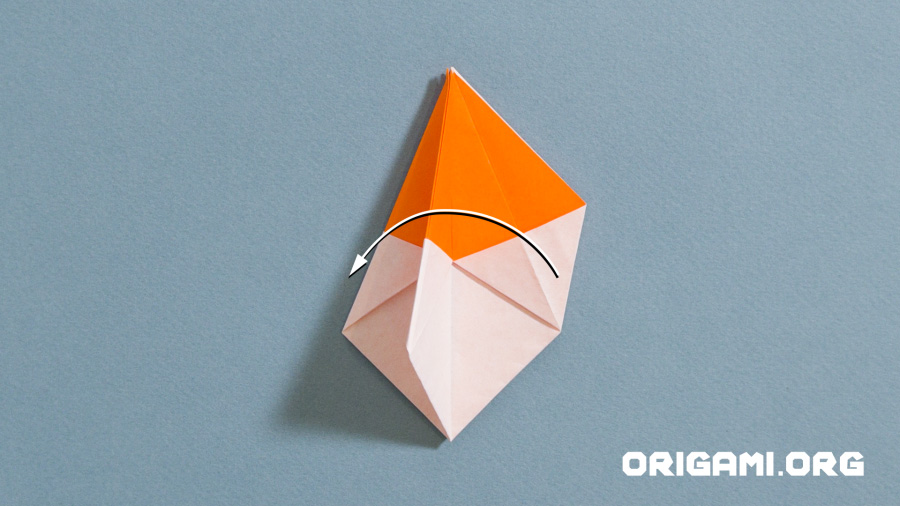
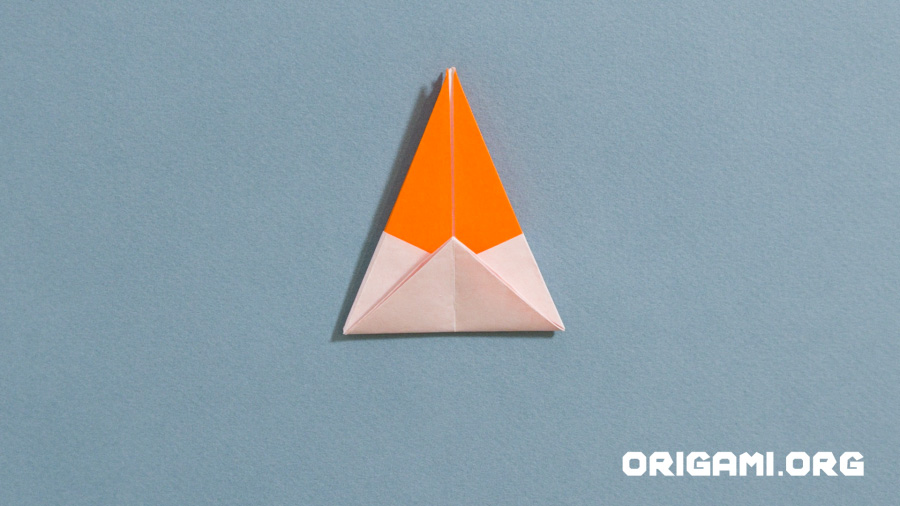
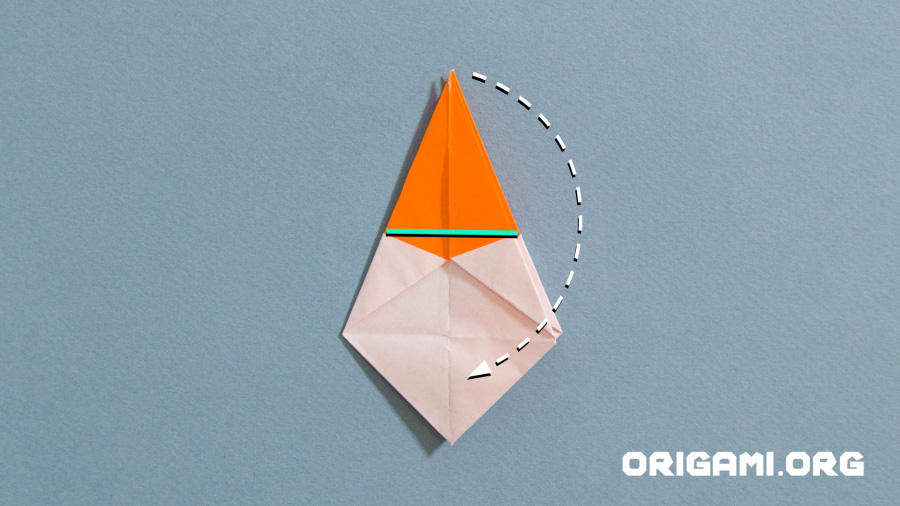
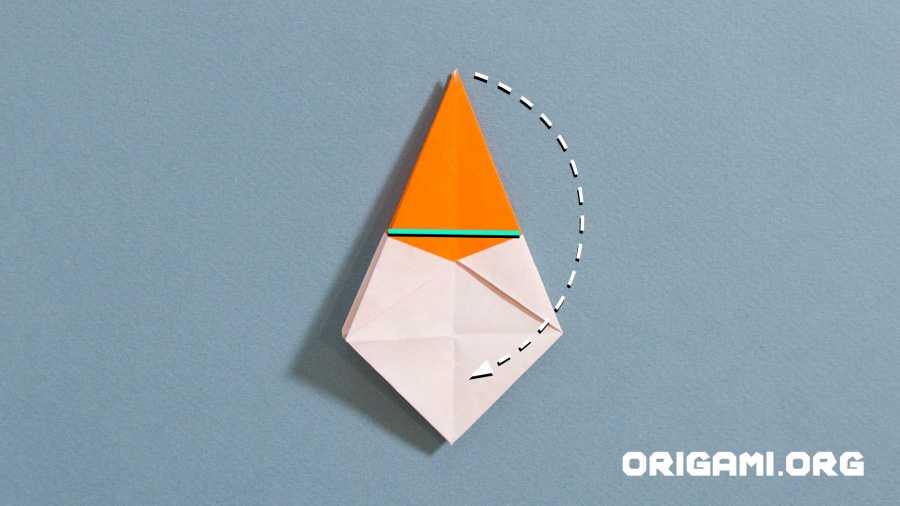
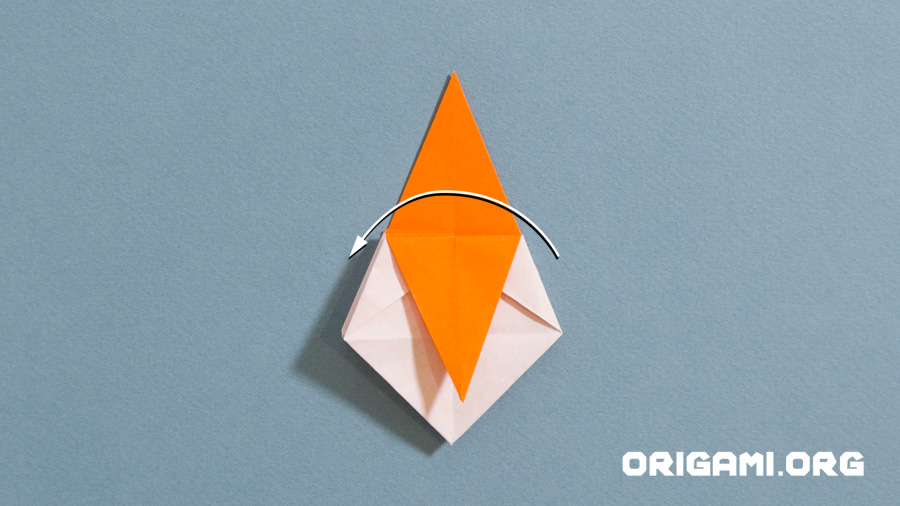
Step 6: Press the point and edges down to create this shape. Turn the shape over.
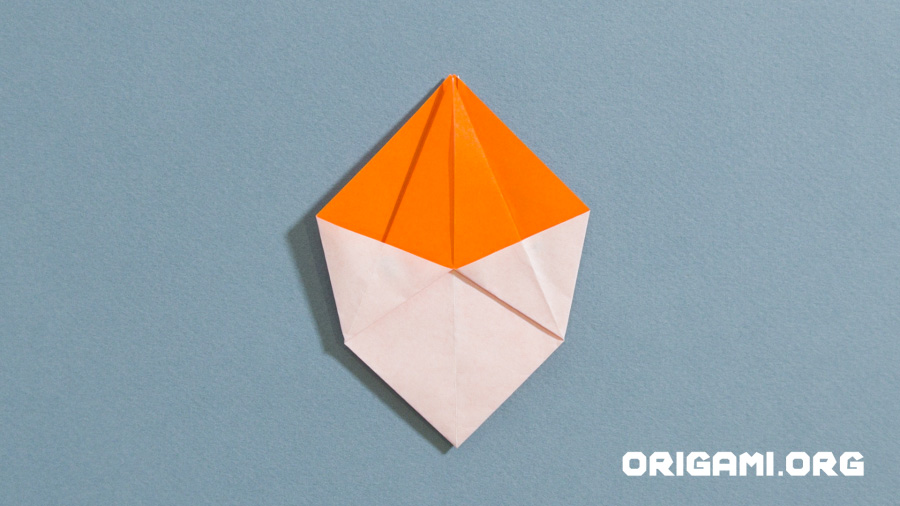
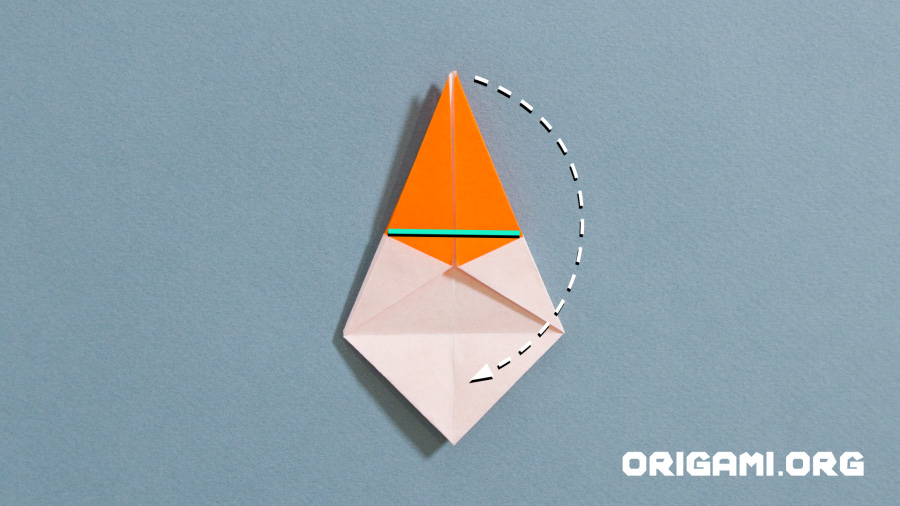
Step 7: Now your paper should look like this. Fold the left point down to the bottom point.
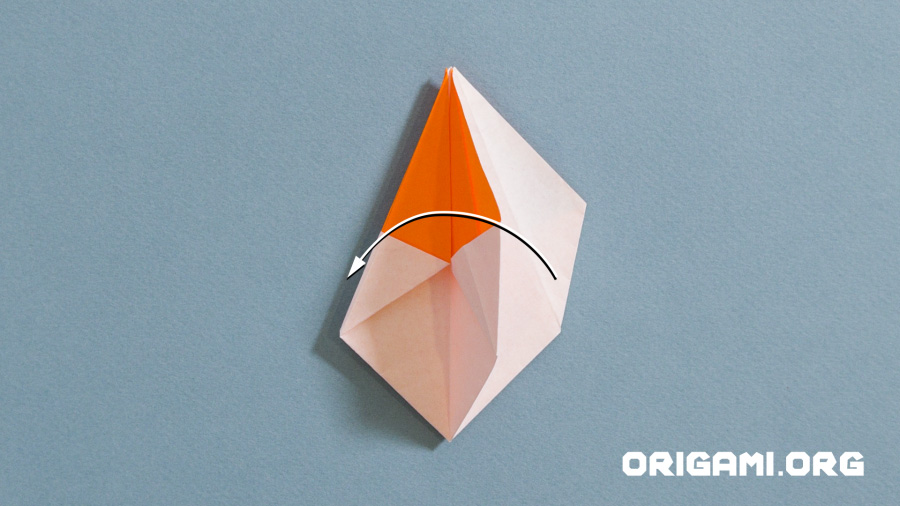
Step 8: As you fold the left corner down to the bottom corner, the paper should open up as shown
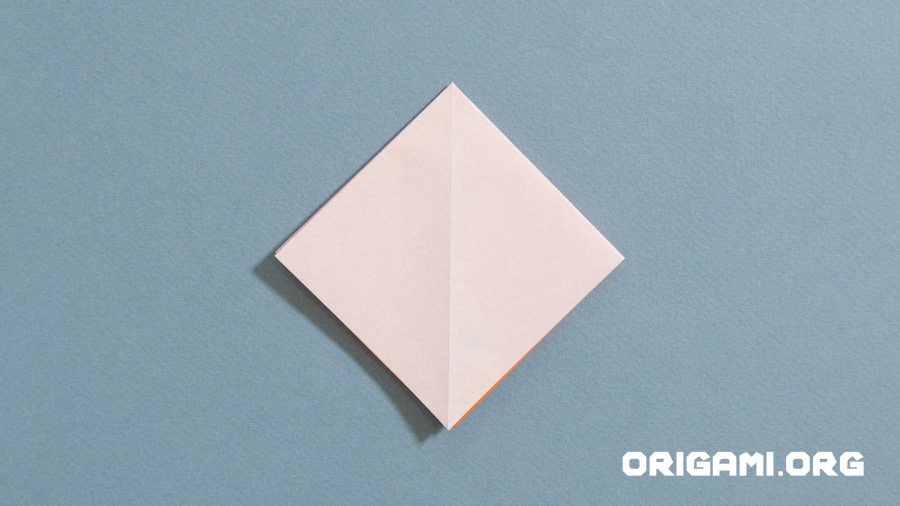
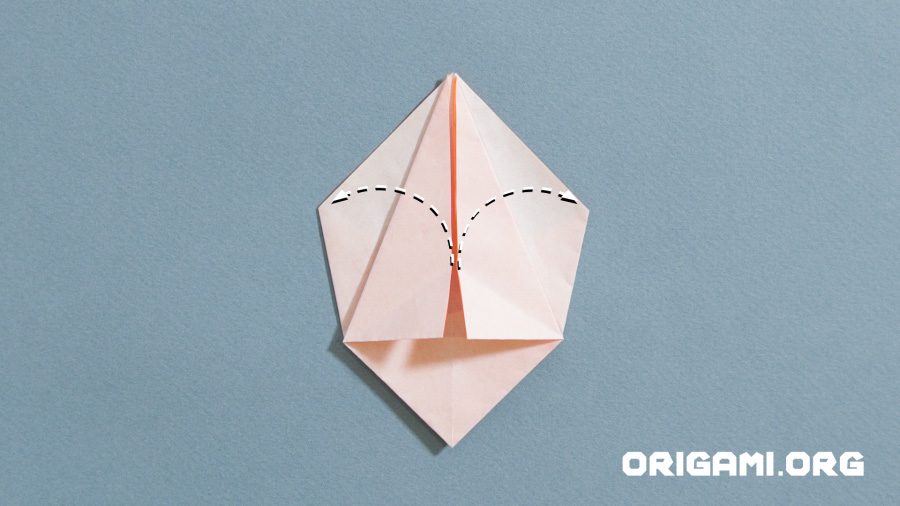
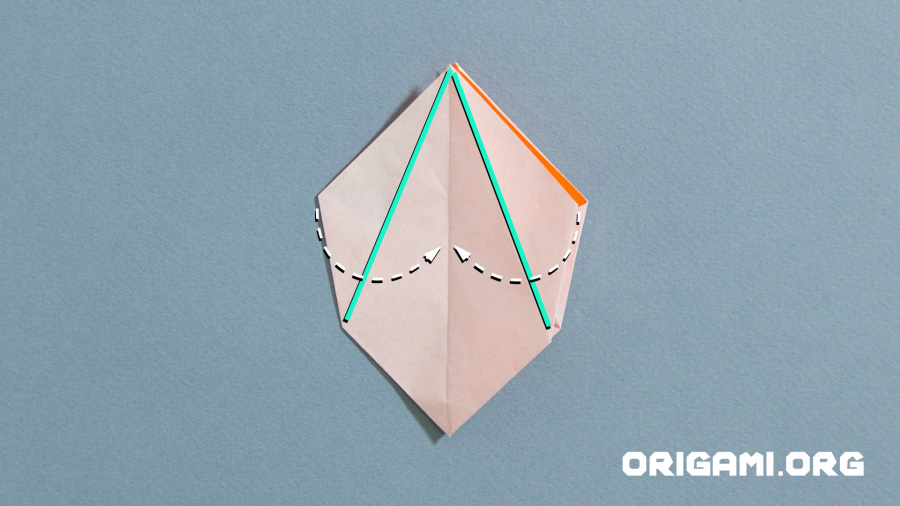
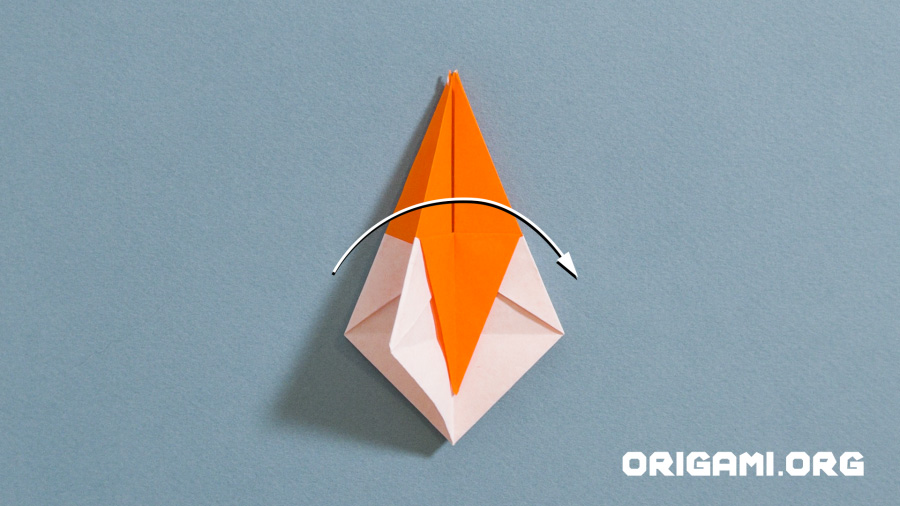
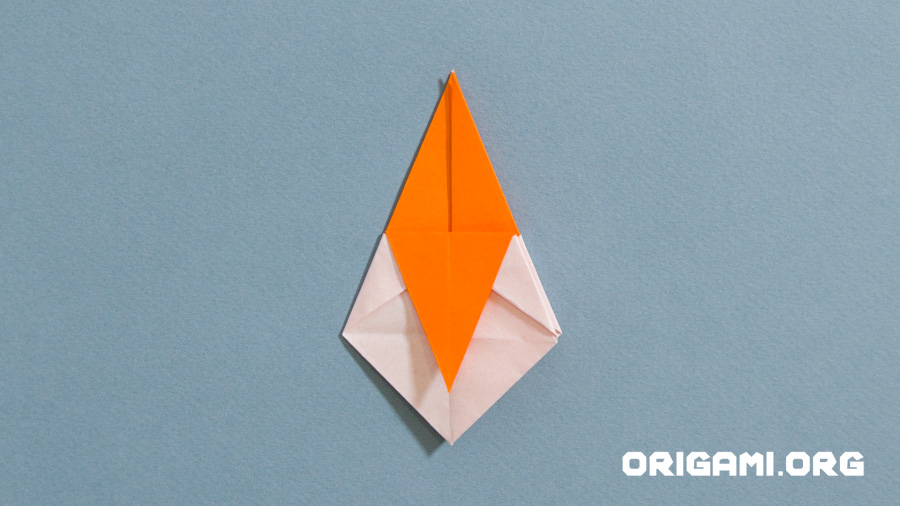
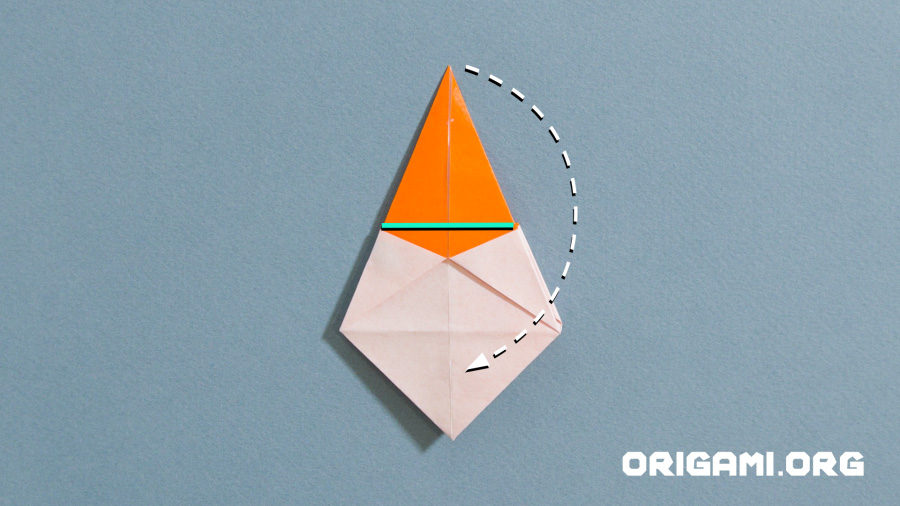
Step 9: Once pressed down your paper should now be shaped like a square
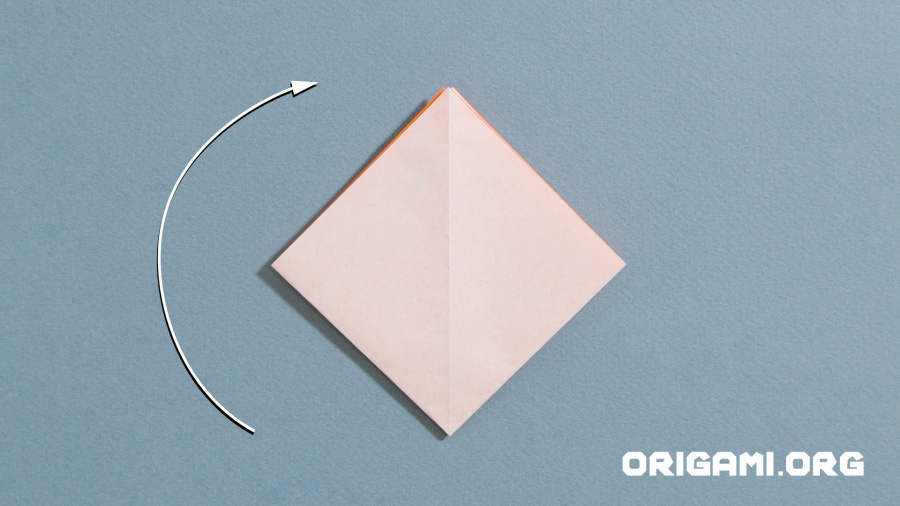
Step 10: Fold the right inner corner over to the left side and press down. Rotate the paper so the ‘open’ end is pointing north

Step 11: Fold the outer ‘wings’ inwards to meet the centre fold line, taking care to only take the top layer of paper
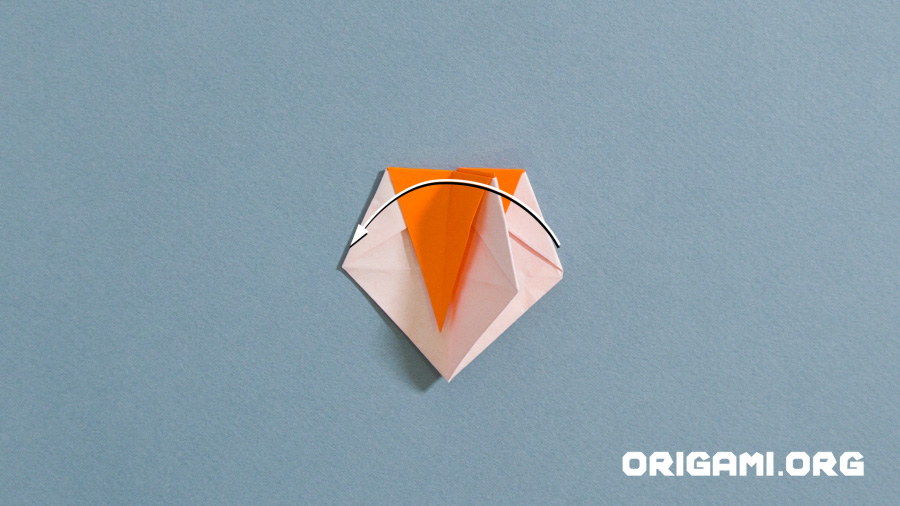
Step 12: When pressed down your paper should look like this
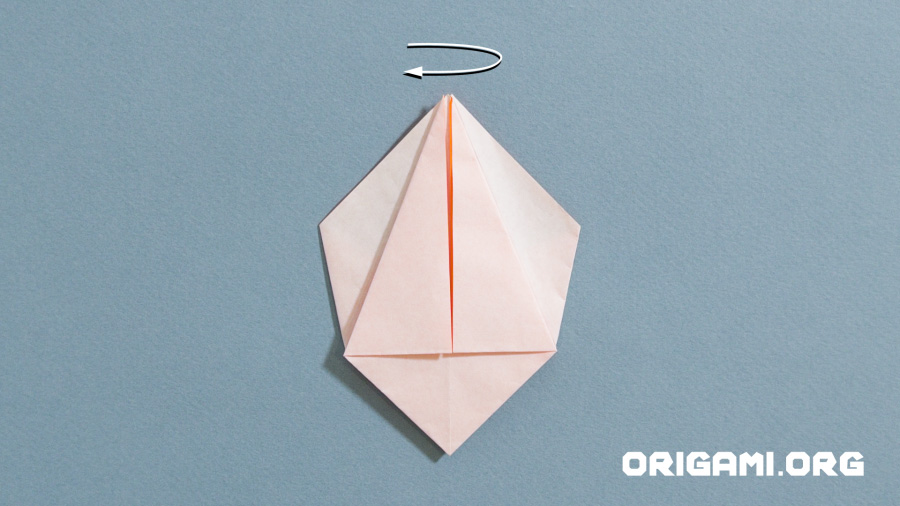
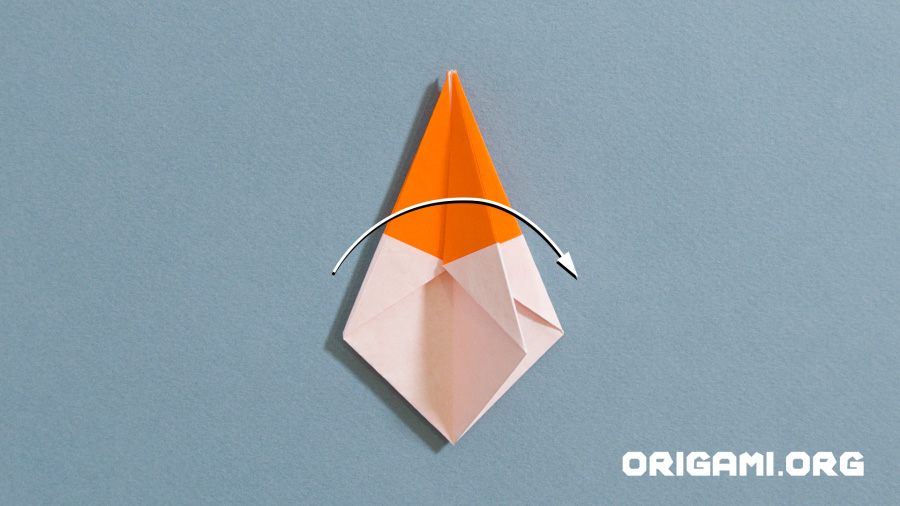
Step 13: Turn the paper over
Step 14: Repeat step 11, folding in the outer ‘wings’ to inwards to meet the centre fold line

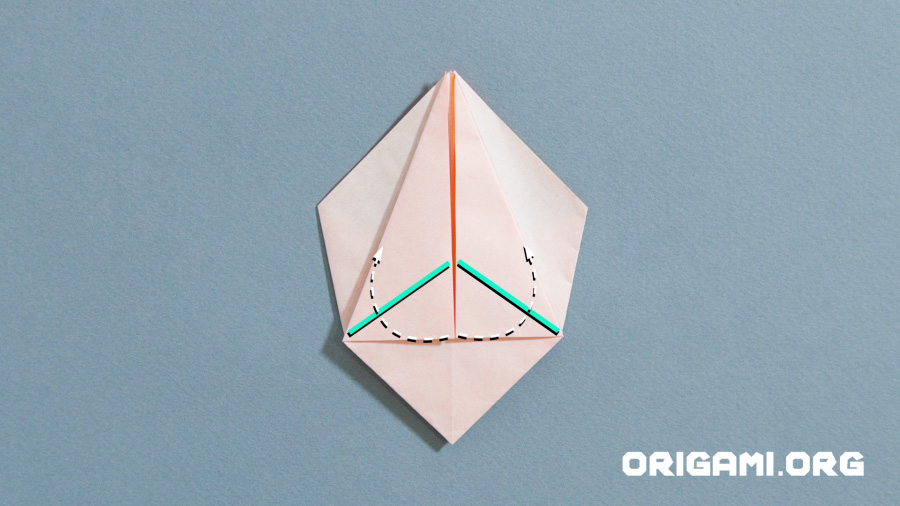
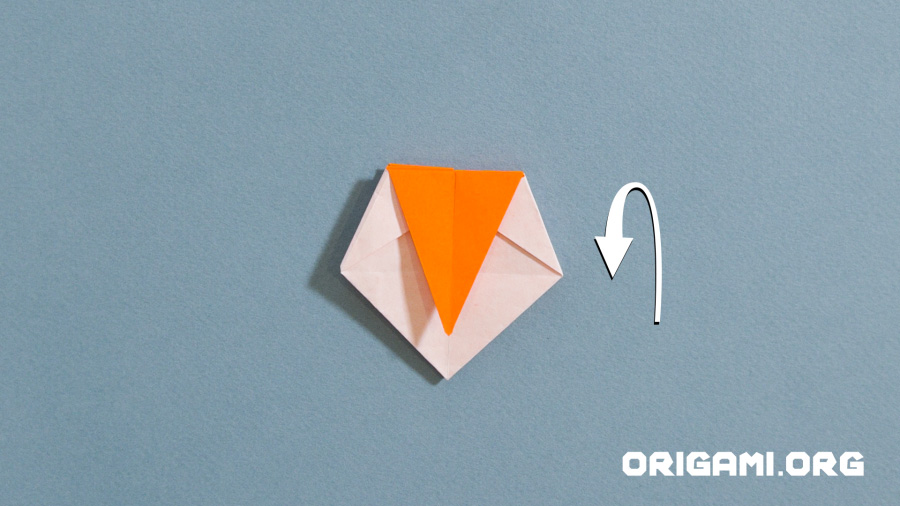
Step 15: Your paper should now look like this

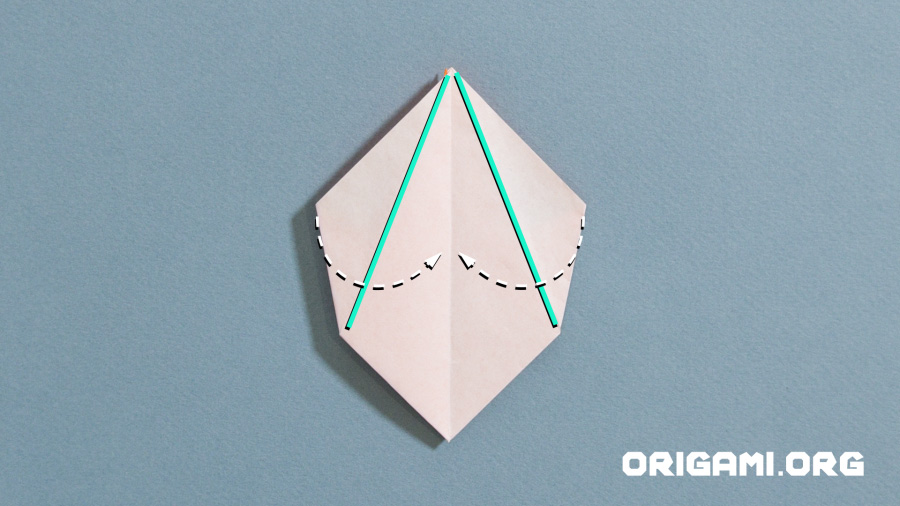
Step 16: Fold the inner corners upwards and outwards along the crease lines indicated in green
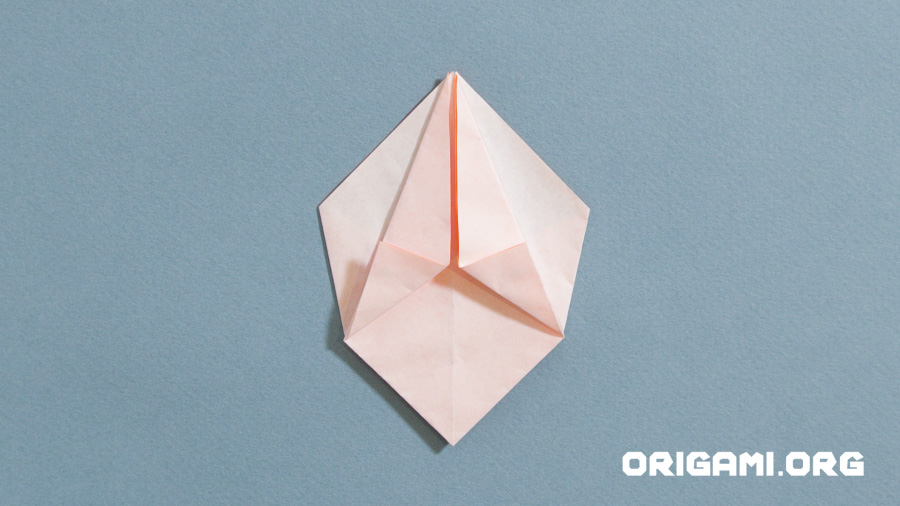
Step 17: Your paper should now look like this
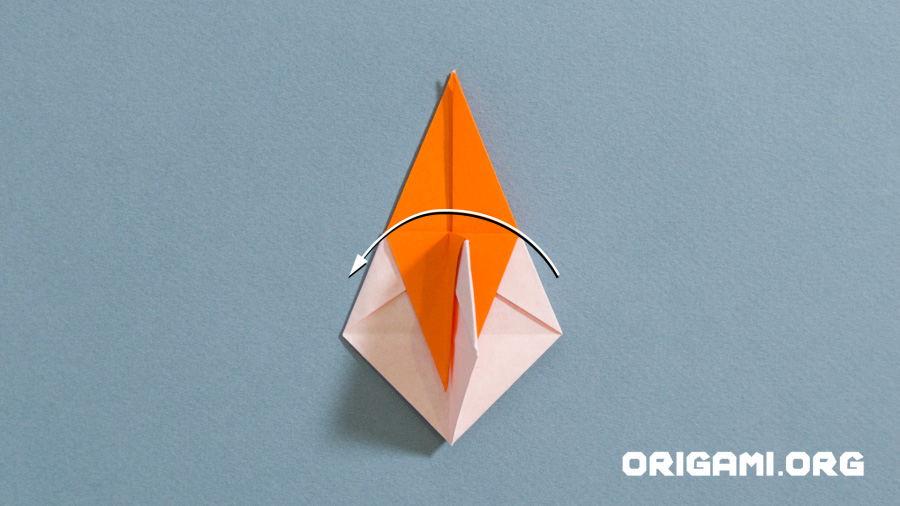
Step 18: Fold the new wings back down
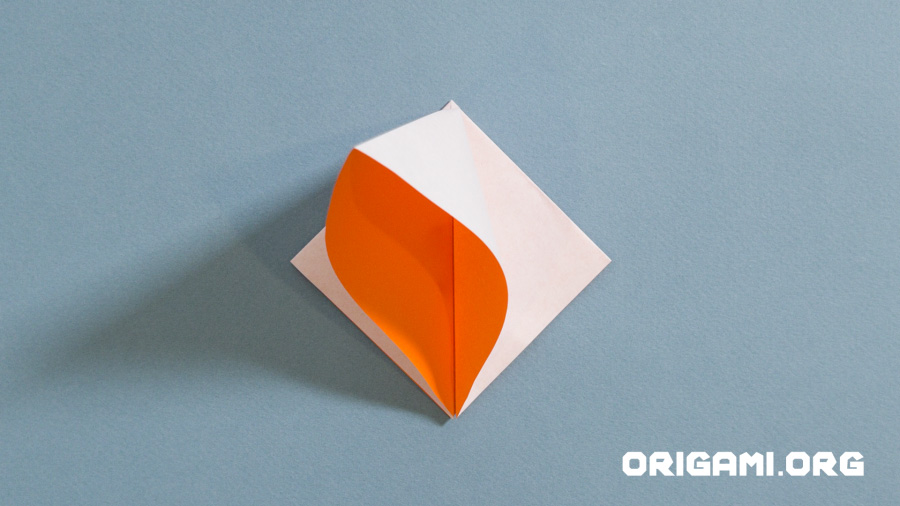
Step 19: Raise the inner wings outwards and open up their inners
Step 20: Once the inner wings are opened up your paper should look like this
Step 21: Press the wings down flat and your paper should now look like this
Step 22: Turn the paper over
Step 23: Fold the inner wings upwards creating the green crease lines
Step 24: Your paper should now look like this
Step 25: Fold the new wings back down and raise them outwards and open up their inners
Step 26: Press the wings down flat and your paper should now look like this
Step 27: Lift the left side of the paper up and over to the right side
Step 28: Fold the left and right sides in, creasing where indicated in green
Step 29: Press down and you paper should now look like this
Step 30: Lift the inner right hand wing up and over to the left side
Step 31: Lift the next right side layer up and over to the left side
Step 32: Press down so your paper looks like this. Fold the left and right sides in, creasing where indicated in green

Step 33: Press down and your paper should look like this
Step 34: Lift the inner left hand side over to the right
Step 35: Fold the bottom point upwards, creasing where indicated in green
Step 36: Your paper should now look like this

Step 37: Unfold this new crease
Step 38: Fold the top layer of paper downwards, creasing where indicated in green

Step 39: Your paper should now look like this
Step 40: Lift the inner left side up and over to the right
Step 41: Fold the top layer of paper downwards, creasing where indicated in green
Step 42: Your paper should now look like this
Step 43: Lift the two inner right sides up and over to the left
Step 44: Fold the top layer of paper downwards, creasing where indicated in green
Step 45: Turn the paper over
Step 46: Fold the top layer of paper downwards, creasing where indicated in green

Step 47: Your paper should now look like this
Step 48: Lift the top layer on the right side over to the left
Step 49: Stand your paper up so the point is at the bottom
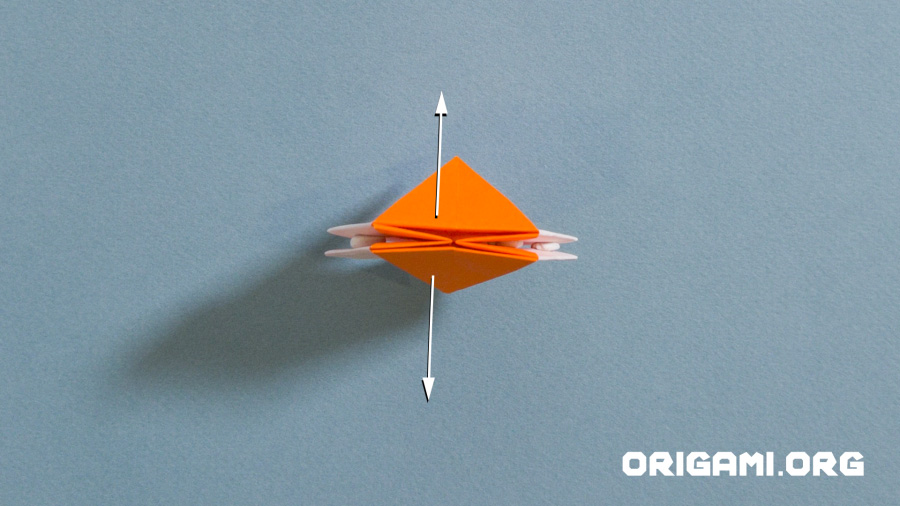
Step 50: Pull the north and south points outwards, followed by the left and right points
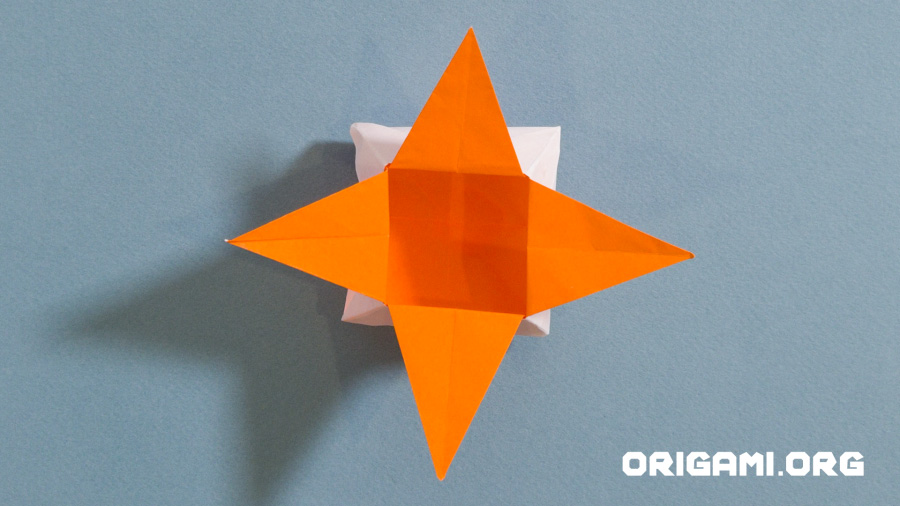
Step 51: Spread the bottom of the box outwards
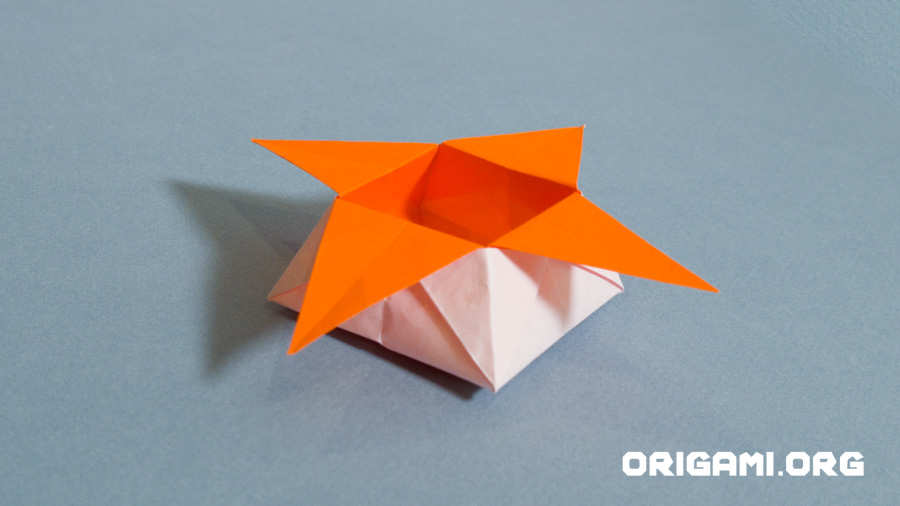
Your box is finished – how cool does it look?!


