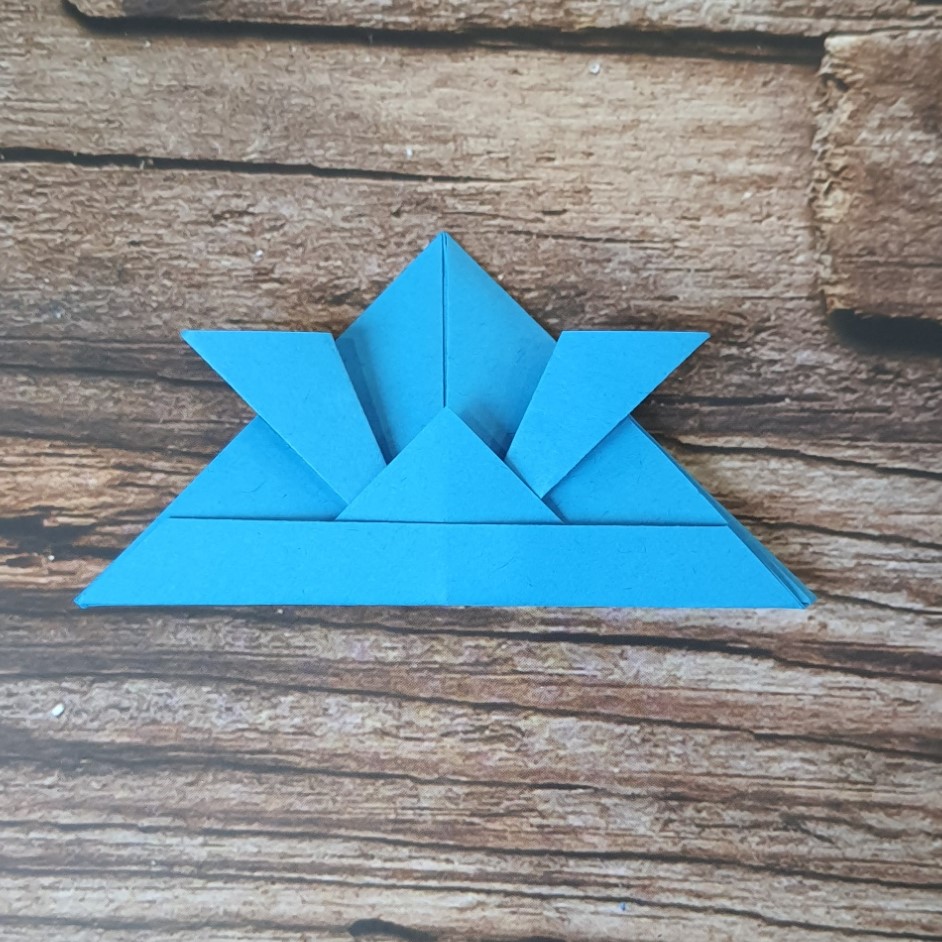
Origami Samurai helmet tutorial
The first origami I remember seeing was something my mum folded. She’d been going to Japanese classes in the evenings and brought me back a gold paper samurai helmet one time. I kept it for ages; in fact it’s probably still around somewhere.
It’s something that’s really simple and fun to fold – plus you can use them as page markers!Here’s a set of pictures to help you fold your own.
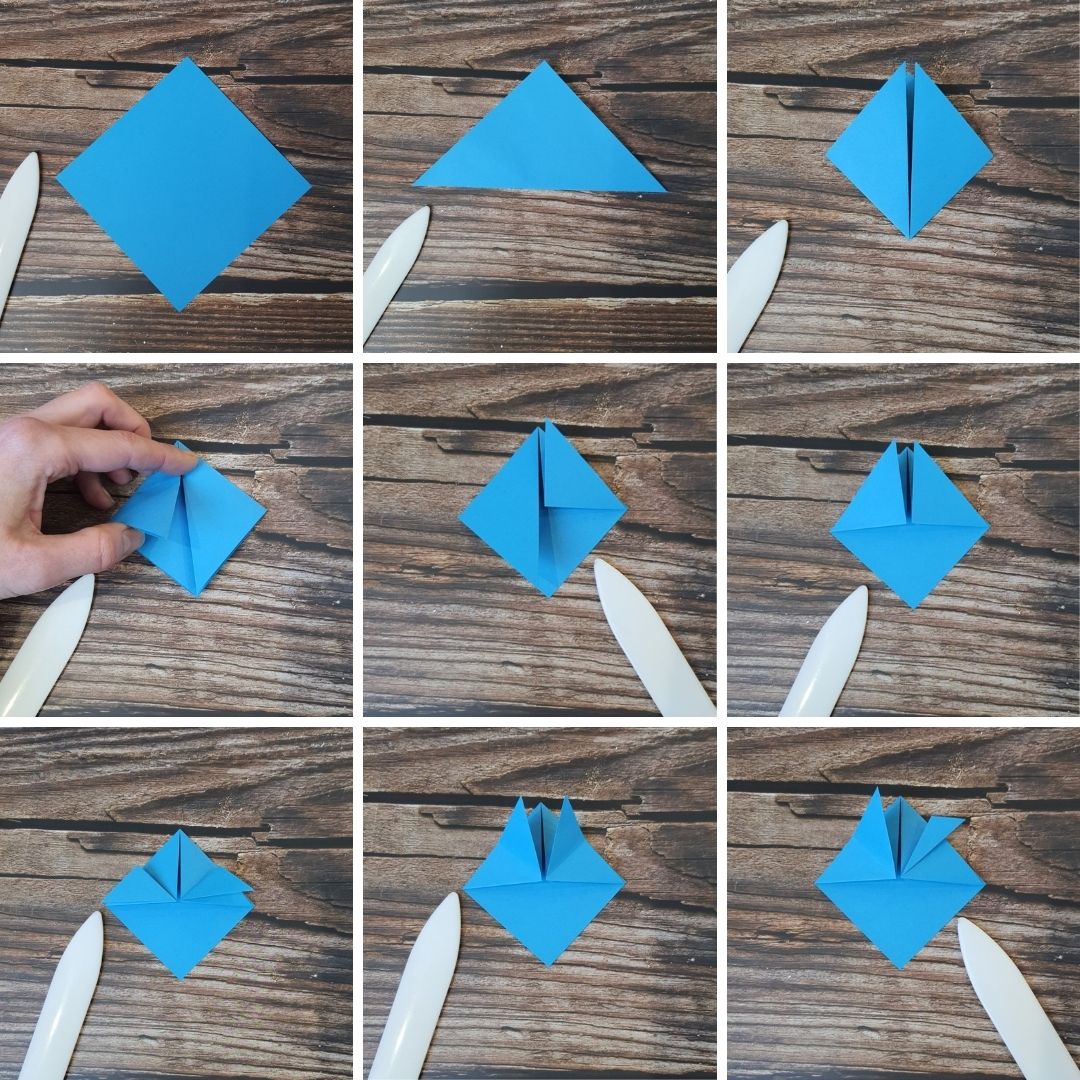
Start with a square of paper (main colour/pattern-side face down)
Fold in half bottom to top.
One at a time, bring the side points down to meet the bottom corner, creasing each one well after you’ve folded it.
Next, fold each of the top layers in half, taking the points you’ve just folded down up to meet the top.
Fold, crease and unfold each of these top layers in half (you’re making a guide line for the next fold.)
See the crease you made in the last step? Fold each of the top of the front layers so the edge lines up with the crease and smooth down firmly.
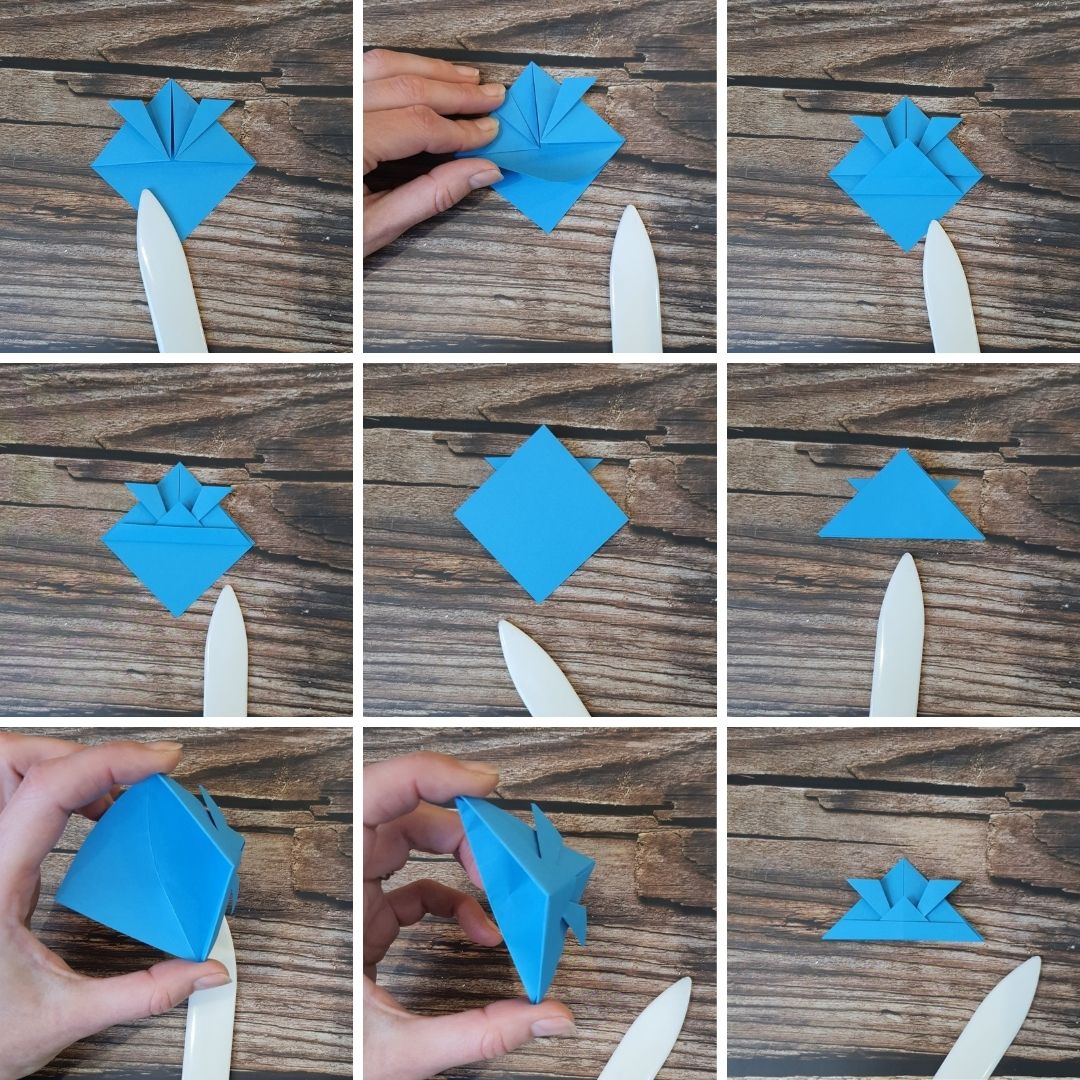
Now it’s taking shape! Nearly done! Going to the bottom corner, take the front layer only and fold it up.
Then fold the bottom of this layer upwards to form the base of the helmet. Crease these new folds well.
Last step! Take the remaining bottom layer, folding in half (taking the bottom corner up to the top) and pressing the fold firmly – then tuck this layer inside the helmet. Ta da!


